
Last Updated: June 25, 2026
Thank you for visiting! By the way… any links on this page that lead to products on Amazon and other stores/partners are affiliate links Aquarium Store Depot earns a commission if you make a purchase.
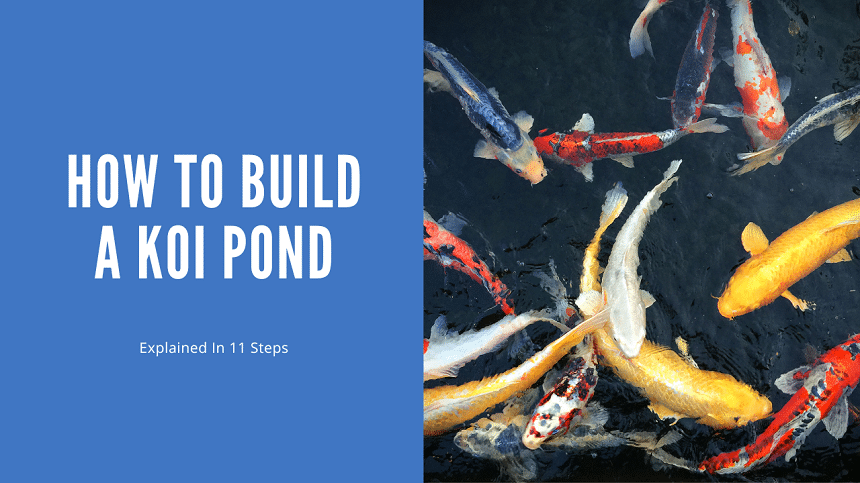
I’ve maintained koi ponds over the years but I’ve never built one myself. and my honest rule is I wouldn’t until I could do it right, which means going large. Undersized koi ponds are one of the most common mistakes in the hobby: koi grow big, produce enormous waste, and need serious filtration and water volume to stay healthy. The “small backyard pond” that looks charming in photos often becomes a maintenance nightmare within a season. That said, a properly built koi pond is genuinely one of the most rewarding projects in the hobby. it just requires planning, budget, and realistic expectations from the start. Here’s how to do it right in 11 steps.
Key Takeaways
- The easiest way to build your first koi pond is with a complete kit
- Bigger is always better, but anything larger than 1300 gallons will work for a few koi fish
- A sterile pond is an unhealthy pond, a natural water garden with live plants is great for high water quality and a healthy pond ecosystem
- Be sure to educate yourself on koi pond maintenance. These beautiful fish need ongoing care to stay healthy
Minimum Requirements
Koi are surprisingly hardy fish, but you’re going to need to stick within their parameters to keep them healthy in the long run. So what do koi need?
Space
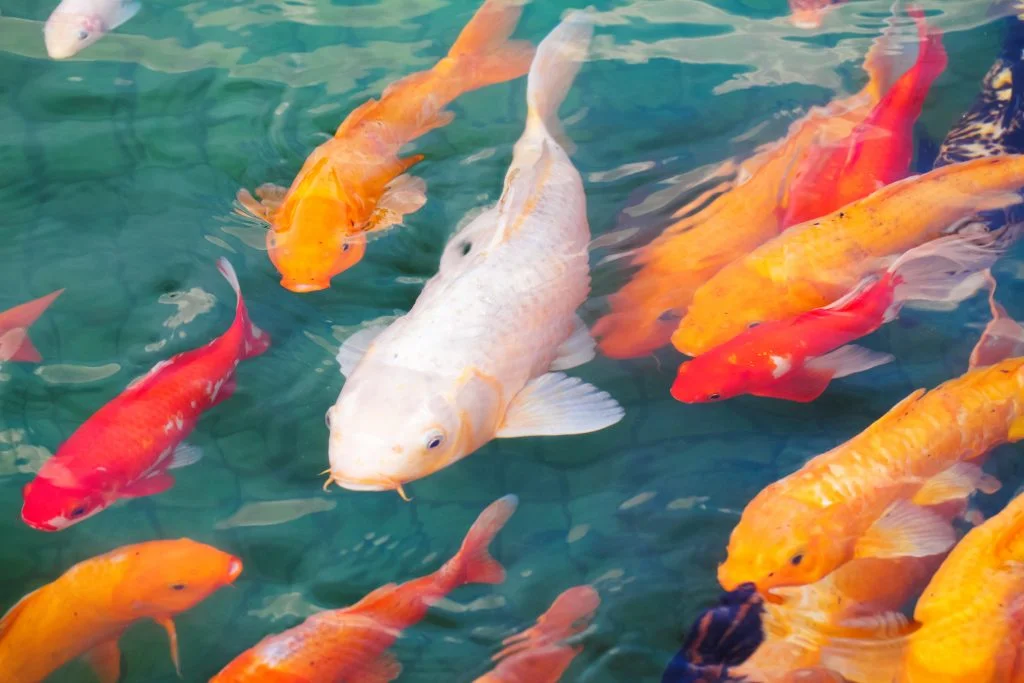
Koi carp grow to about 24 inches in a healthy pond, but some can reach lengths of 36 inches, and that means they need plenty of room! The smallest recommended koi pond should hold at least 1000 gallons and be at least 2 feet deep.
Of course, a deeper and larger pond is better for your fish and easier for you to maintain, but that extra thousand gallons often goes beyond budget and space.
If you are willing to put in the work to maintain your koi pond and take any necessary steps to protect your fish, then a smaller pond could be just right for you.
Water Temperature
Koi are cold water fish. They are most comfortable in water temperatures of between 65 and 75 degrees Fahrenheit, although they can survive anything between about 35 and 90 degrees.
Maintaining your water temperature in its preferred range throughout the year is pretty impractical in many areas, but you’ll have the best chance if you build your pond in a partially shaded area and dig it deep enough to maintain more stable temperatures.
If you live in a really hot, tropical climate, koi fish aren’t your best choice. These are cool water fish and they’re just not going to thrive in really warm water when oxygen levels drop.
You can keep koi in cold areas, and they can survive even if the top of their pond freezes over. However, you’re going to need to keep a hole in the ice to allow for gas exchange.
The Ecosystem Concept – Lessons from Nature
Ecosystems are complex systems where many different plants, animals, algae, bacteria, and other life forms all work together to keep a stable environment where each species can survive.
Creating a fully functioning ecosystem that needs zero maintenance is practically impossible in a space as small as a koi pond, but you can get pretty close if you use good filtration and grow live plants.
The Benefits of Plants
Live plants are a feature of the natural koi fish habitat. Aquatic plants create an attractive natural environment and help to shade and shelter your fish from predators and full sun.
Live aquatic plants also attract many harmless and beneficial insects that keep your pond healthy and make a great natural food source for your fish.
Plants are also great for soaking up nitrates and phosphates in the pond water and improving oxygenation. Unfortunately, koi can be pretty hard on plants, so secure the plants by growing them in baskets.
If you really want a clean modern looking pond without many live plants, consider building a second small pond with live plants as a filter pond(vegetable pond). If both sections are the same level, you can simply pump the water from one section to the other and let gravity equalize the depths.
How to Choose Your Koi Pond Build Site – Key Considerations
Planning a backyard koi pond that your fish will love is important, but you have to enjoy it too! Keep these points in mind when choosing a spot:
- Try to make your pond visible from your home, that way you can enjoy it even when the weather isn’t great. Placing it near your home also allows you to hear the water flowing if you have a waterfall setup.
- Your pond needs water and electricity. Make sure these are available nearby.
- Small pets and children can get in real trouble if they fall into a pond. Safety first!
Choosing a Shape
The final shape of your koi fish ponds mostly comes down to personal preference. Smooth rounded lines are more pleasing to the eye if you’re going for a natural look, and they also allow your pond fish to cruise around without swimming into corners.
Hardware and Materials
Unfortunately, setting up a great koi pond is a little more complicated than digging a pit, filling it with water, and throwing in some fish. You need some important equipment and materials to keep your pond water clean and your fish alive. Let’s look at the basics.
Liner
You’ll need to line the bottom of your pond to prevent the water soaking down into the ground, or mixing with fine substrates and turning muddy. The easiest and cheapest way to do this is to use a purpose-made pond liner.
EPDM pond liners are made from a flexible, fish-safe material that is not damaged by the sun and will not poison your fish. A 45 mil liner is recommended for a small koi pond. Before you line your koi pond, go ahead and add an underlayment layer to protect your pond liner from anything sharp that might damage it and cause leaks.
Pump
Your koi pond needs a pump to keep the water circulating. It will also suck water through your pond skimmer basket and push it through your biological filtration system.
Water flow keeps your pond oxygenated, cools it down, and prevents excessive algae growth. Your water pump is installed below the water level.
The simplest and easiest filter system for a DIY koi pond involves a waterfall feature and filter on one end of the pump, and a surface skimmer and submersible pump on the opposite end.
Basically, the pump creates suction that pulls leaves and other surface debris through the surface skimmer and sends clean water around the outside of the koi pond and up to the top of the waterfall. This water then flows through a filter before tumbling back into the pond and sends a current across to the skimmer on the other side to repeat the process.
Skimmer vs Bottom Drain
Leaves, dust, feathers, grass clippings, fish poop, and all sorts of other things collect and rot in koi ponds, so we need a way to remove them from the system. The favored method is to install a bottom drain (kind of like the drain of a bath tub) which allows you to suck up waste that settles on the bottom of the koi pond.
Installing a bottom drain is an excellent option, especially if you want to keep the bottom of your koi pond clean of silt. However, bottom drains are a little more complicated and require a few extra steps and costs to install.
One way of getting around this is to use a bottom pump that sits at the bottom of the koi pond and does basically the same job but without the extra plumbing and risks associated with putting a hole in your pond liner!
Another great option is to skip the bottom filtration altogether and run a surface skimmer. This creates a mechanical filter to trap most of the leaves and surface debris that land in your koi pond before it can sink to the bottom. However, you’ll still need to vacuum the bottom of your pond from time to time.
Complete Kits – The Easy DIY Route
So now you know a little more about the basics of koi needs, and what you need to set up a great backyard koi pond for a few fish. It’s time to start looking for equipment.

Editor’s Choice!
With premium Savio parts and a UV sterilizer, this pond kit has it all and will operate reliably for years!
Now, you can shop around and match up your hardware on your own, or you can go for an all-in-one kit. I’ve already covered some of my favorite, complete kits in this Koi pond kit guide, so check it out if you’re looking for a great setup in the 1300 to 1900-gallon range.
How to Build a Koi Pond – 11 Simple Steps
It’s time to get building, but where do you start? Read on for a basic breakdown for installing a simple backyard koi pond.
We’re discussing basic, affordable koi ponds here that you can do yourself or with the help of a friend or contractor. If you want to go all out and build a very large and complex setup, it’s going to be worth your while to hire a professional pond installer from the start.
1. Budgeting and Planning
Do your planning and budgeting before you dive in and dig up your yard. Sure, you can start the process and take it step by step, but it’s much smarter to get everything you need from the get-go.
You’ll also need to make sure you’re permitted to build a koi pond in the first place1. This is especially important if you don’t own the land!
2. Choose Your Location
So you’ve done your planning, and you’re going to build a pond. Congratulations!
A pond is a permanent build, which means you can’t move it around if you’re not happy with the location. Take your time to choose a great spot, and run through some of the important considerations mentioned earlier in this guide.
Top tips
- Choose a spot that you can see from your home
- The site should have an electrical outlet and faucet nearby
3. Mark it Out
Once you have chosen your site, it’s time to mark out your pond. Choose a shape that compliments your outdoor space and avoid sharp angles that create dead spots of water flow and restrict your fish’s swimming space.
Remember to include the location of your waterfall and your skimmer pump and housing during this step.
Top tips
- Choose a level site
- Use a soft garden hose pipe and brightly colored spray paint to mark out your site
4. Get Digging
Your pond needs to be at least 2 feet deep, but 3 or more feet is much better if you have any predators around or if you live in a very cold climate. I supplied a video from Plant Abundance that shows the digging process.
Digging out a pond is a serious job, so you’re going to need to be physically fit, have a few friends or family members to help, or hire some equipment.
Remember to dig a spot for your pump and skimmer housing at one end of the pond, and a shallow trench for the pvc flex pipe that runs from the pump to the waterfall. Keep the dirt handy for landscaping around the pond, it’s great for building up a waterfall and for building gentle slopes for your plants.
Top tips
- Contact your local utility company to find out about water and electricity lines before you start digging
- Think about where you’re going to put all the dirt before you start digging
- Dig terraces, not smooth slopes
- Take your time and stay hydrated if it’s warm out
5. Add Your Underlayment and Liner
Start by installing your underlayment and then move on to your pond liner. Make sure there are no sharp rocks, staples, nails, or anything else that could puncture your rubber liner.
Allow the liners to sit loosely, and place a few rounded boulders at key spots to keep everything in place. You’ll want to leave about a foot of excess liner over the edge of your pond to prevent leaks and create a neat finish.
Top tips
- Pond liner is tough stuff, but keep pick axes and other sharp heavy tools clear to prevent punctures
- Allow your liner to heat up in the sun a little, it will be much softer and easier to shape
6. Install Your Pump and Skimmer
Next it’s time to fit all your plumbing together. Use teflon tape and a little silicon to create watertight connections and use cement to attach hoses that don’t have threaded connectors. Refer to the instructions on your pond kit for attaching the pond liner to your waterfall box and your pump housing.
Your pump box should be sunk level with your pond. Compact the soil at the bottom of this hole before installing this housing and tamp the soil into place when you back-fill around the sides of the box. This will keep it level and prevent settling earth.
Top tips
- Hide your hardware with plants for a natural look, but make sure they are easily accessible for maintenance and cleaning
7. Create Your Waterfall
Use some of the excess soil you dug out of the pond to create a raised area on the opposite end of your pond. This will be your waterfall end where water flows in. Set your waterfall box in place and pack rocks to create a natural-looking slope leading up to the top of the box.
You may be tempted to create steep slopes to minimize space, but a gradual slope will look much more natural and make a great place to grow some beautiful plants.
Top tips
- Compact the ground before placing your waterfall box- you don’t want it to tilt or lean as it settles
- Use a level to make sure your waterfall outflow is level so that the water flows evenly over the lip
- Make sure the hose coming from the pump is connected to the waterfall box before you build up the rock walls!
8. Add Your Filtration System
Unless you have an absolutely enormous pond (lake), you’re going to need to keep your water filtered to maintain a healthy pond environment for your fish and avoid green water.
You already have the water flow provided by the pump and the mechanical filtration of the skimmer basket, now you need some biological filtration media to house a strong beneficial bacteria colony.
There are various biological filtration options for koi ponds, but spend a few extra dollars and choose a good quality product that fits neatly in your waterfall box. This media will support the nitrogen cycle and maintain a healthy pond environment for your koi fish.
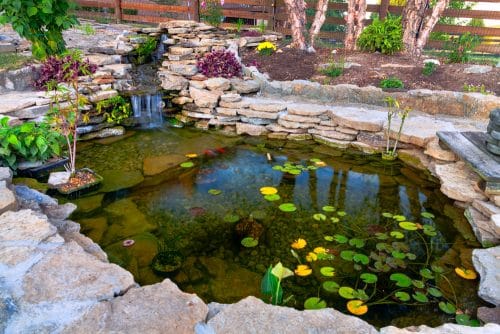
9. Add Rocks and Gravel
Once your koi fish pond has been dug, lined, and plumbed, it’s time to get those creative juices flowing and pack in some rocks to create a natural water feature. The terraces you dug into the slopes of your pond are going to come in handy now to create stable levels for stacking rocks.
Fill in the spaces between the rocks with gravel and rocky soil to create a natural look and hide the black liner below.
Top tips
- Be careful with heavy boulders! Steel-toed boots can help protect your feet, but any shoes are better than nothing
- Use rounded rocks to protect your pond liner from cuts and scratches
10. Add Plants
Ok, this step is optional, but we love aquatic plants here at AquariumStoreDepot, and so do your fish! Plant manageable, dry land plants around the perimeter of your pond in a natural and random pattern. Use plants to cover up the slopes leading up to your waterfall for a much more natural and attractive look.

Rember to grow some plants in the water too. Live plants give off oxygen to help create a naturally aerated pond. Floating plants like lily pads are also great because they protect your fish from sun exposure and predators.
Top tips
- Choose plants that resprout after the winter
- Do your research and avoid invasive plants that might escape into local waterways
11. Fill and Neaten
After you have covered the bottom of the entire pond and all your hardware is installed, fill the pond to its final level.
Your backyard oasis is really coming together now and it’s time to neaten up the edge of the pond. Fold the liner over and pack dirt and gravel to sure it up and cover the edge.
Lastly, clean up the area and grab a soda. Soak up the moment when you switch on the pump and watch the waterfall flow into your very own backyard koi pond!
Top tips
- Add a dechlorinator to make your water safe for your fish and use a beneficial bacteria starter to jump-start the nitrogen cycle in your koi pond.
FAQs
How deep should a koi pond be?
Koi ponds should be at least three feet deep. However, you can get away with two or two and a half feet if you provide loads of cover and protect your fish from predators.
How much does it cost to build your own koi pond?
Building your own backyard pond can cost less than a thousand dollars or completely empty your bank account, it all depends on the size and quality of your components. Look at spending a minimum of $1500 dollars to set up a simple kit-based koi pond for a few fish.
Can I build a koi pond myself?
Yes, you can build your own backyard pond. However, it’s important to be realistic about the scale and complexity of the koi fish pond you can build without professional help. Starting with a complete koi fish pond kit is usually the most effective way of building your first backyard pond.
Can koi fish survive in a pond?
Koi fish are the ideal ornamental fish for backyard ponds because they are both beautiful and hardy. They do not require a pond heater, but all koi ponds require good water flow and adequate pond filtration systems.
Final Thoughts
Each pond is different, from the equipment used, to the outdoor space where you install it, and the creative vision of the person building it. This guide should get you on the right track to building your first koi pond. Just remember, be safe, and have fun!
Are you setting up a DIY koi pond? Tell us about your project in the comments below!
- About the Author
- Latest Posts

I’m Mark Valderrama, founder of Aquarium Store Depot and a fishkeeper with over 25 years of hands-on experience. I started in the hobby at age 11, worked at local fish stores, and have kept freshwater tanks, ponds, and reef tanks ever since. I’ve been featured in two best-selling aquarium books on Amazon and built this site to share practical, experience-based fish keeping knowledge.
Leave a Reply