
Last Updated: March 24, 2026
Thank you for visiting! By the way… any links on this page that lead to products on Amazon and other stores/partners are affiliate links Aquarium Store Depot earns a commission if you make a purchase.
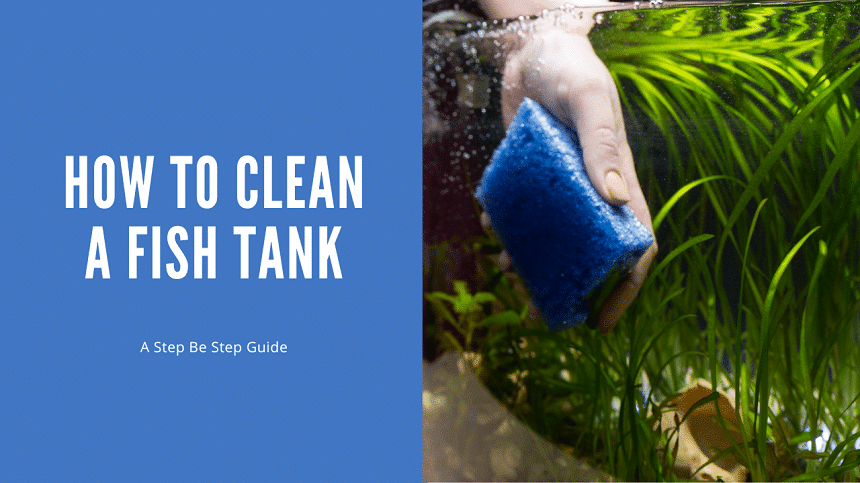
One thing I’ve told beginners for years: the biggest mistake in tank cleaning isn’t doing too little. it’s doing too much at once. I’ve seen people strip everything out, scrub every surface, and wonder why their fish are stressed or their cycle crashed afterward. A good clean preserves your beneficial bacteria while removing waste. After 25 years of running tanks, my routine is simple, consistent, and takes less time than most people think. Here’s the step-by-step process I actually use.
Key Takeaways
- Gather essential supplies and prepare your aquarium before cleaning.
- Always change water based off your major water chemistry parameters. Never do a water change to stay on a schedule
- Clean interior glass, decorations, substrate & filter media with the right materials. Replace old water & condition new water.
- Wipe down the exterior of the tank and reconnect equipment after cleaning
Essential Supplies
Before you begin, make sure to assemble all the required materials. Here is the list of items you will want:
- A gravel vacuum
- Algae scraper (make sure you purchase the correct one, whether glass or acrylic tanks)
- Water test kits
- Toothbrush (to clean rocks and plants)
- Pruning scissors (for planted tanks)
- Fine net
- Dechlorinator
- Paper towel, microfiber towel, or bath towesl for exterior glass cleaning
- Aquarium safe glass cleaner like Fritz glass cleaner or homemade
You don’t need to splurge on these items since many can be bought at reasonable prices at a local fish store, pet store, or online – so there are no excuses not to have what’s needed for success here! freshwater. For glass of glass construction, you can use a razor blade to clean off algae growth, just be careful around the silicon edges.
Preparing Your Aquarium
Once you are well prepared for the cleaning process, it’s time to begin. Make sure that all equipment such as filters and lights have been turned off so that they are unaffected by the changing water levels while performing the water change. Before reaching into your aquarium, make sure both of your hands and forearms are properly cleaned1. Use an aquarium safe soap when washing your hands. You can use these products as a guideline:
- Dr. Bronner’s unscented soap
- Plain Dawn dish soap
- Reef suds
This will prevent any harmful substances from entering the water.
Make sure your heater is unplugged during your water change so it does not try to heat your tank when dry. Last but not least, ensure that new and existing waters stay within similar temperatures since vast fluctuations may cause temperature shock on fish inside. Now that everything is set up just right, we can start our cleaning procedure!
Interior Glass And Decorations
Begin by wiping down the glass inside your fish tank with an algae pad. Take extra care to scrub off any persistent patches. Cleaning up this area first will help you avoid scattering additional algae when vacuuming the substrate afterward.
Next, attend to decorations as necessary, only once they look dirty and have a buildup of algae matter on them. To clean them within the tank, use a clean toothbrush and brush the decoration to remove the algae. You can also use a toothbrush to clean algae off of a plant’s leaves. Just apply more gentle pressure on live plants, so you do not accidentally damage the leaves.
If you decide to remove driftwood or rocks to clean them, use equal parts water and white vinegar mixed together. Rinse with your used tank water, and then you can safely add them back when done. Another method is boiling rock, which works best on granite and limestone rocks. Do not attempt to boil artificial decor, as they could melt.
Live Plants And Artificial Decor
Maintaining a healthy and attractive freshwater fish tank requires the regular cleaning of live plants as well as artificial decorations. To optimize your tank cleaning process, prune plants so that light can reach lower stems, promoting growth. Use aquascaping tools so you can be extra precise in your plant grooming. You can also prune stem plants and propagate them at this time if you want.

Look cool and get the job done right with these stainless steel aquascaping tools. For for fine detailing on your scape!
Clean leaves with a cloth sponge or toothbrush to remove algae build up. For stubborn algae on tank decorations, you can place the decor in a half solution of white vinegar and water overnight to remove it. Do not attempt to use a bleach solution artificial decor. While it can be done with the right process, I prefer not to detail it out for the sake of the safety of your aquatic pets.
How To Clean A Fish Tank – Maintaining The Substrate And Filter Media
Cleaning the substrate and filter media is important to keeping your fish tank healthy. First, vacuum out any waste, such as uneaten food or dead leaves.
Media should be cleaned out before vacuuming the substrate. Note there are filtration components that are permanent and others that are temporary and need to be changed out. Let’s differentiate them:
- Replaceable media (mechanical filter cartridges and chemical media)
- Reusable (sponges)
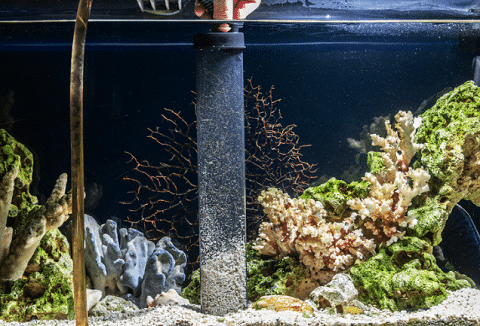
- Permanent (biological media such as bio balls or ceramic media)
For replacement media, you can replace them during a water change. Follow your manufacturer’s instructions regarding when to change out your cartridges, or consider changing them earlier if you run a heavily stocked tank.
For reusable media like sponges, pull some tank water out of the tank into a container so you can squeeze out the sponges. This will release any trapped debris, and using tank water will protect your beneficial bacteria. After squeezing them out several times, you should have removed most of the trapped debris. When done, place the sponge back into the filter and discard the old tank water. Sponges should generally be cleaned out once a month or twice a month for heavily stocked tanks.
For permanent media, cleaning out the media with old aquarium water once a quarter is helpful. This is optional, though. Several aquarium veterans are against cleaning them all together and letting the sludge build up over time. I clean mine out every 3-6 months. It’s entirely optional. Always use aquarium water when cleaning out your permanent media.
Vacuuming The Substrate
Using an aquarium gravel vacuum to keep your tank clean is great if you keep a substrate. Start by dipping the vacuum in the substrate to start siphoning it. If you have more course substrate, consider placing a sponge at the intake of the tube to prevent it from sucking up your gravel.
Continue siphoning gravel until you see clear water come out of the gravel. Aim for 25% to 50% water changes depending on how much water you need to change to regain your water quality parameters.
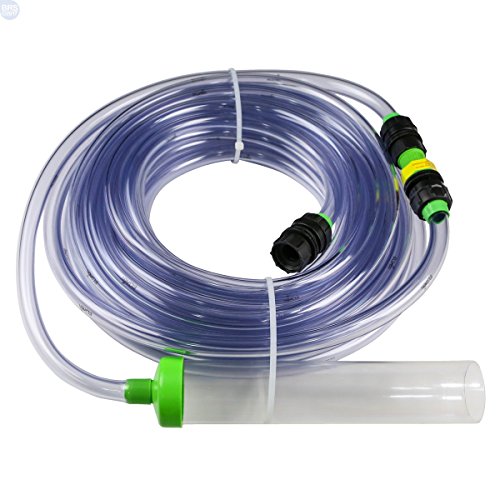
The Python is a mainstay in the fish hobby. Easily clean your aquarium by connecting this to your sink!
For fine substrates like sand, you will need to hover the vacuum about an inch from the sand bed and pinch your siphon to pull out the debris and fish waste on the sand. Do not try to put the siphon in the sand, as it will suck it up and may clog the siphon.
Replacing Filter Media

Remember that it is important to replace carbon media regularly at intervals no greater than two-to-six weeks so that the media doesn’t leech out the contaminants removed. Do not forget: tap water should never come into contact with filtration supplies since this can put your fish at risk of harm. Always use old tank water when rinsing any media to keep your fish safe from contaminants.
Water Replacement And Conditioning
Once the inside of your fish tank has been cleaned, changing and conditioning the new water is crucial. Using a conditioner helps eliminate hazardous chemicals while preserving your healthy aquarium habitat. A dechlorinator (AKA water conditioner) such as Seachem Prime should be used when filling up with tap water so that it is safe for your fish species in their new environment.

Seachem prime is a easy to use and affordable choice when it comes to remove chlorine and chloramines from your tap water. Highly recommended!
Water conditioning products are indispensable accessories that make sure chlorine or chloramine levels are neutralized prior to adding them into the tank.
Also note, if you use pure H20 water sources like distilled water or RODI water (also known as 0 TDS water), you will need to remineralize the water to make it aquarium safe. You will not need to use a conditioner for these water sources since they are already filtered for contaminants. For RO water, you will not need to mineralize in most cases. Water conditioned with reef salt for marine tanks will also not need to be remineralized as the salt mix already takes care of that. You can use a product like Seachem Equilibrium to remineralize your water.
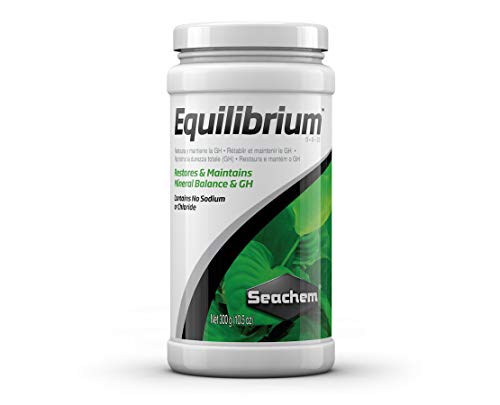
A great remineralizer for freshwater tanks. Best used with RO, RODI, and distilled water. Completely aquarium safe
Draining Old Water
When maintaining a healthy and clean environment for your fish, use a gravel vacuum or siphon to draw out 25-50% of the water in your tank. It is important that you do not use any synthetic detergents when cleaning as this could be toxic to fish.
Use a bucket solely used for your aquarium or siphon to a drain. For your new video, if you need to prepare it, prepare it in a clean bucket only meant for aquarium usage. The best brand known for aquariums are Brute trash cans as they are certified food safe. If you cannot find a Brute brand container, ensure that the container you use is food safe grade.
Part of conditioning water is making sure the water is around the same temperature. Use a heater if you need to, and measure the temperature with a thermometer before placing the new water in the aquarium.
Old water can be safely disposed of in the kitchen sink, in your garden, or in your street drain if you have a freshwater tank. Unmediciated used tank water is an excellent fertilizer for garden plants. For saltwater tanks, it’s best to dispose of the water in the sink or to an outside drain.
Adding New, Treated Water
It’s time to introduce fresh, dechlorinated water into your fish tank. There are a few ways to do this:
- Use a hose and a return pump to move the water into the display tank
- Use a pail to pour in the new water
I personally prefer the return pump method, and that makes a lot more sense to me because I’ve generally kept larger tanks for smaller tanks using a pail works. You will want to have some diffuser though so you can ensure that your decor and substrate are not disturbed. A colander works excellent for this. Again, ensure any items you use for your aquarium are ONLY used for aquariums. You don’t want to mix something like a colander with your own food prep and an aquarium.
Final Touches
Once the inside of your fish tank is neat and tidy, it’s time to focus on making the exterior dazzling. Use a paper towel with some white vinegar to wipe down all surfaces for streaks or marks. Do not apply household glass cleaners like Windex, as they could contain ammonia, which would be toxic for any aquatic species within your tank.
Attach filter systems securely along with lights and heaters, taking note that cords should remain untangled at all times. Once done, turn everything after the new water has been put in. Keep an eye on temperatures in case adjustments need to be made regarding heating levels after setup.
Reconnecting And Turning On Equipment
Once you have all the equipment hooked up, monitor your aquarium carefully to ensure everything works as intended and that the water temperature remains consistent. If anything looks or sounds out of place, investigate if air may be trapped in any part of the filtration system or if a piece of equipment is running dry.
With every detail taken care of, it’s time to admire your sparkling clean tank!
Frequently Asked Questions
How do you properly clean a fish tank?
To clean fish tanks properly, first make sure to turn off any equipment and unplug the filter. Then clean the inside tank glass and decorations with an appropriate acrylic-safe or glass scrub and use a gravel vacuum to get into the substrate crevices. Finally, rinse your filter media, refill the tank with new water, and turn on the equipment.
How often should you clean a fish tank?
For a clean and healthy environment for your freshwater aquarium, cleaning your fish tank when your parameters are off is the best method. Siphon out any uneaten food or debris from gravel, replace 25-50% of the water (depending on how your nitrates are) in the tank and ensure that filter functions as it should.
Do you remove fish when cleaning tank?
When cleaning the tank, it’s preferable to keep your fish in there, taking them out would cause needless worry and potential harm. You can perform maintenance without having to dispose of all the water. Hence you don’t have to remove your pet fish from their home.
What should I put my fish in when cleaning tank?
In most situations, you should keep your fish in your tank while you are cleaning it out. Only consider moving a fish if your tank is very small. However, if you have been reading our articles, you know that our minimum tank size is 5 gallons for a fish. Fish in a 5 gallon tank can be kept in the tank when cleaning the tank. Avoid moving fish around to mitigate any transfer stress.
Can I use tap water to clean my filter media?
Using tap water for cleaning your filter media is not advisable. The safest bet would be to utilize old tank water.
Closing Thoughts
By performing this step-by-step cleaning process, you have created a happy and healthy fish habitat. Take pride and sit back as you admire the now sparkling clean aquarium that will provide happiness and flourishing life to its inhabitants. Regular maintenance is key so those aquatic creatures can enjoy their underwater world fully! Congratulations on making it happen!
🐟 Want to learn more? This article is part of our complete Aquarium Care Guide. your ultimate resource for water chemistry, maintenance, feeding, disease prevention, and everything you need for a healthy tank.
- About the Author
- Latest Posts

I’m Mark Valderrama, founder of Aquarium Store Depot and a fishkeeper with over 25 years of hands-on experience. I started in the hobby at age 11, worked at local fish stores, and have kept freshwater tanks, ponds, and reef tanks ever since. I’ve been featured in two best-selling aquarium books on Amazon and built this site to share practical, experience-based fish keeping knowledge.
Leave a Reply