Tag: ReefKeeping

  • LED Aquarium Lighting for Reef Tanks: How to Choose the Right One

    LED Aquarium Lighting for Reef Tanks: How to Choose the Right One

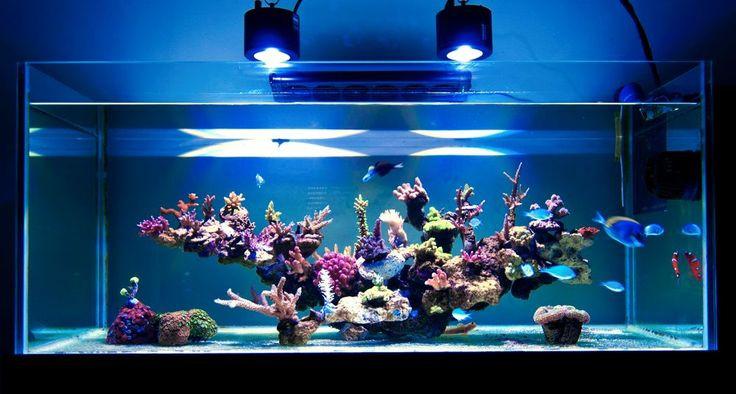
    Reef lighting is the single most impactful equipment decision in a coral system โ€” and the one I see hobbyists get most confused about. I’ve run multiple reef lighting setups in my 125-gallon over the years, from T5 fixtures to high-end LEDs, and the market has improved dramatically. Here’s how to choose what actually works for your corals.

    Reef lighting is the single most debated topic in the saltwater hobby โ€” and after running a 125-gallon reef and personally testing dozens of LED fixtures over the years, I can tell you that most of the confusion is unnecessary. The core mistake I see from new reefers is cranking intensity to 100% right away, which bleaches corals that need weeks to acclimate to new light. The second mistake is buying cheap LED fixtures that don’t deliver the blue-spectrum wavelengths corals actually use for photosynthesis โ€” they look “bright” but they’re not doing what your coral needs. Good reef LEDs come down to PAR output at your coral depth, spectrum quality (especially in the 420โ€“480nm blue range), and programmability for sunrise/sunset cycles. Here’s how to cut through the noise and choose the right one for your tank.

    There is a lot of confusion when it comes to LED lighting for reef tanks. They look great and provide a lot of benefits to your reef tank, they are pretty technologically advanced. However, a number of reefers have reported mixed results with LEDs and the specs on these fixtures are not exactly universal, unlike traditional T5 lighting. We created this article to assist in the LED selection and buying process. Our goal at the end of the article is you been given the knowledge to select the best LED system for your tank:

    Why LED Lighting?

    There are a ton of reasons why reefers consider LED lighting. The biggest reason is the fact that you will never need to buy replacement lights ever again because of their long lifespan. This saves a lot of money and cuts down on the most common maintenance issues with traditional T5 and Metal Halide lighting. They are the most energy-efficient lighting setups and will cut down on energy consumption in the home.

    LED lighting is also controllable and offers all sorts of customization to suit your individual tank needs. This means that you do not need to find different types of light bulbs to suit your tank as you can just adjust the spectrum either manually on the light fixture itself or through controller software via an app.

    The PAR and spectrum output on LED is also very consistent. When you use T5 or Metal Halides, the output of the bulbs will change over time requiring replacement. With T5 the best practice has typically been to replace half your T5s every 9-12 months. This is done in this fashion so that you always have fresh lights running in your tank, but does get pricey.

    LED light is also very low profile allowing for very attractive setups. They can be mounted on rails, suspended above the tank, mounted on the aquarium, etc.  They also offer a shimmer effect that compares with a Metal Halide setup.

    LED, while expensive upfront, is actually cheaper than traditional T5 and Metal Malide setups over the long run. Along with the cost savings in electricity, there is a significant cost saver over a 5-year period when considering bulb replacement costs.

    Cons of These Systems

    Looking at the list of the benefits of having a LED setup, it makes it seem like a no-brainer to select an LED setup over anything else. However, we need to discuss the disadvantages of LED systems.

    The biggest disadvantage to LEDs compared to T5 and Halides is the fact they are not exactly plug-and-play. This is likely the reason why some hobbyists have experienced mixed results with LEDs.  You have to keep into account intensity, spectrum, and positioning with LEDs to make sure they best fit your tank.

    This is where we need to take a step back from the fancy tech of LEDs and really focus on what matters – providing the proper light for our corals so they can thrive. It’s very easy to get caught up in the gadget and tech of LEDs or play with what looks the most visually appealing, but at the end of the day providing the proper light intensity and spectrum is the most important aspect.

    This is what can make LEDs complicated. Many reefers will not have knowledge of what proper PAR and spectrum levels are needed for their corals and have not really thought much about other factors like spacing or shadowing effects.  Many of us in the reefing community also do not have access to lighting tools that would tell us what our PAR is to efficiently measure our light intensity…we just use our eyes or our experience.  To help guide you on proper light selection, we need to define a few things for you – namely, what is PAR and what is Spectrum.

    So What is PAR and How Does It Relate To A Reef Tank?

    PAR, or Photosynthetically Active Radiation in our hobbyist terms is the number of particles of light that fall in a square meter over the course of one second that is in between the wavelengths of ~400nm to 600 nm.  NM stands for nanometer or billionths of a meter. Non-scientifically speaking it is the measurement of the total amount of visible light that shines on a square meter after one second.

    PAR is important to reef tanks because it is a measurement of how much usable light energy is available to your corals. It is one of the easiest ways for you to measure and gauge the exact amount of light your reef aquarium is receiving – which is extremely important when it comes to LED lighting.

    Why is this so important for LEDs? The main reason why is because LEDs are the most intensive lighting systems you can buy on the market. Several of the higher-end LEDs will outperform metal halides in PAR ratings and will need to turn down to avoid coral deaths. Knowing this, adjustments may be necessary for your light fixture and we have to understand that it is actually better to have too little light than too much light for a coral. Corals can be pretty adaptable and can survive months of too little light, which will give you time to adjust and provide the correct lighting for them.  However, too much light will cause a coral to pass away within days! It’s no wonder knowing this now that reefers can have mixed results with LEDs!

    Now that you know what PAR is, we need to explain what are acceptable PAR ranges for your aquarium. Keep in mind these are general recommendations. Particularly with SPS corals, the range can vary widely. Also, keep in mind that PAR ranges are higher at the top of the tank and lower at the bottom of the tank. What this would mean is if you got a LED fixture that produces around 300 PAR at the bottom of a tank, at the top of the tank you would likely be producing over 500 PAR.

    SPS – 150~300 PAR
    LPS/Softies – 25~100 PAR

    What is Spectrum And How Does It Relate To A Reef Tank?

    For our discussion about the spectrum, we are going to concentrate on the visible light spectrum. Visible light is a form of electromagnetic radiation and is defined as the wavelengths that are visible to the human eye. The wavelengths are measured in nanometers. These range from 400nm which is ultraviolet to 800nm which goes to infrared.  When it comes to reef tanks, we are concerned with the following colors:

    Blue (420-460nm) – Most important
    Green – Mostly visual – can increase algae growth
    Red – Removed by ocean water in the wild may be more harmful than helpful
    Light Spectrum
    There are a lot of theories when it comes to correct spectrum – but we lean on the spectrum specs of proven technologies like T-5’s. We will use an ATI bulb as an example as ATI bulbs are a benchmark when it comes to T-5’s. You can see the wavelength range of ATI’s Coral Plus lights below noting the 460 nm peak:
    ATI Spectrum Chart

    So What Makes a good LED Fixture?

    There are 5 things to consider when determining if a LED Fixture is of good quality:

    1. Longevity
    2. Build Quality
    3. PAR Output and Spread
    4. Spectrum
    5. Support and Part Availability

    The longevity of your LED Fixture to me is the most important factor in your decision-making. These units are not cheap and should outlast the tank that you are going to mount it on. You can look up reviews on-line and forum comments on the LED brand you are looking up to get the best gauge.

    Build Quality is another factor you will want to consider. Ask yourself questions like is the fixture built by a US based company and have they been around in the industry for years? The last thing you want is for a part to break and you have no support because the company is no longer around or their support is from another country like China and they won’t respond to your e-mails.

    PAR is the next consideration. Given the LED fixtures that we sell in our store, you will have no issue answering that question – what you likely will need to deal with is too much intensity on the highest-end models that we sell. The PAR spread is also another factor to keep in mind. Some of the models can have very intense lighting in the middle and the spread is less on the outside.  Other models have a fair even spread. In both cases, you will need to factor in spacing to solve get the proper PAR or adjust your intensity on the fixtures.

    Spectrum is important if your fixture is not adjustable. This is a critical question to answer if you purchase an LED fixture that does not publish its a spectrum or give you the option of adjusting the spectrum. Other higher-end models allow you to adjust the spectrum yourself to suit your needs, which may require you to adjust it. This can be a pro or even a con as adjustments can get complicated. You will want to look for a light fixture that peaks around the 460nm range, which has been the standard for top T5 lighting manufacturers for many years.

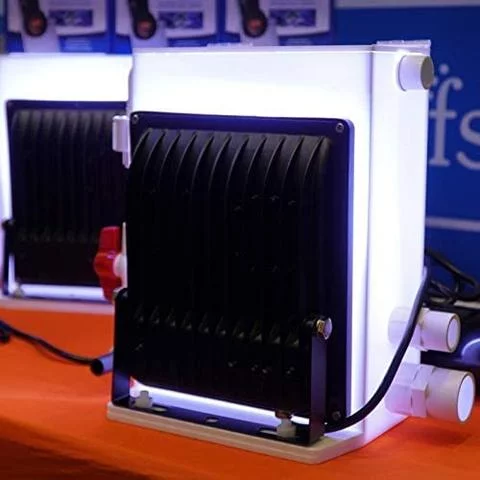
    This is where a manufacturer like a Kessil comes in with their simple adjustable features that ensure you always have the correct spectrum for your controls (Called the Kessil Logic), but allows you to remove harmful colors or reduce intensity. They also focused on more even spread than intensity which makes them more suitable for beginner and intermediate hobbyists..

    To help simplify the selection process for you, we provided the PAR & Stock Spectrum readings from our most popular LED lighting and our recommendations below.  All readings are at 100% intensity:

    MaxSpec Razor
    @ 6″: 220-193 PAR at top, 67 PAR at 24″ deep
    @ 12″: 128-116 PAR at top, 67 PAT at 24″ deep
    Peak Spectrum – 450nm
    Best for Mixed Reefs

    Kessil 360WE
    @ 6″: 189-181 PAR at top, 95 PAR at 24″ deep
    @ 12″: 104 PAR at top, 79 PAR at 24″ deep
    Peak Spectrum – 460nm
    Best for Mixed Reefs

    Kessil AP700
    @ 6″: 420-380 PAR at top, 176 PAR at 24″ deep
    @ 12″: 275 PAR at top, 188 PAR at 24″ deep
    Peak Spectrum – 460nm
    Best for Heavy SPS
    Works for Mixed Reefs if raised higher – Can light a 4′ mixed reef tank

    Our last factor is support and part availability.  If your fixture comes with moving parts like a fan, you may need to replace the part in the future. Ask yourself the following questions:

    • Does the manufacturer have quality support?
    • Is customer service US based and easily accessible?
    • Do they carry parts for earlier models?
    • How quickly can they supply parts to you?

    These are all factors you need to consider when purchasing an LED fixture. We have a post discussing the Best Reef LED systems on the market that goes in more detail about the best-LED lights available in the hobby today.

    Do I need a PAR Meter?

    The main issue with PAR Meters is that they are expensive.  If you are going for a heavy SPS tank or large mixed reef setup, it might be worthwhile to purchase one given a $200 investment could save you thousands of dollars in lost corals. We would recommend an Apogee PAR meter (Quick NoteThis post includes affiliate links for which I may make a small commission at no extra cost to you should you make a purchase) if you are looking for one.

    If you cannot afford one, it may be possible to get one from a hobbyist club or a fellow reefer. The best bet, however, is to just avoid the very high end of the LED market as they typically are too intense for most reefers’ needs and will likely need to be dialed back to work on your tank. Kessil with its simple-to-use adjustments even spread, and less intensity is best suited for those who want as plug-and-play LED fixtures as possible.  Even the AP700 is a strong consideration for SPS heavy tanks and its PAR testings have shown a very even distribution of PAR.  At the end of the day, we have to keep in mind that too much light will kill your corals much faster than too little light.

    We hope this will help you in your decision on selecting a fixture.  If you have any questions about your potential purchase, leave us a comment below.  If you already have an LED fixture, please leave us a comment and explain why you came to the decision of purchasing your fixture.

  • Algae Turf Scrubbers: How They Work and Whether They’re Worth It for Reef Tanks

    Algae Turf Scrubbers: How They Work and Whether They’re Worth It for Reef Tanks

    Algae turf scrubbers came up repeatedly in my conversations at reef trade shows โ€” hobbyists either swear by them or dismiss them entirely. I’ve looked closely at how they work, talked to reefers running them long-term, and compared the results against other nutrient export methods I’ve used in my own 125-gallon reef. My take is more nuanced than the enthusiasts or the skeptics: they work, under the right conditions, for the right systems.

    Algae turf scrubbers have been generating serious discussion in the reef hobby for years โ€” and I think the debate is worth having. The core idea is clever: instead of fighting algae everywhere in your display tank, you grow it intentionally in a dedicated chamber under light, let it export nutrients as it grows, then harvest it. I run a 125-gallon reef, and nutrient export is always one of the more challenging ongoing management problems. ATS is a legitimate tool in that toolkit, though I’d say it works best as part of a layered approach rather than a magic bullet. Here’s what you actually need to know about how it works.

    This development is a game changer folks. So now that I have hyped it up a bit, let me explain what exactly an Algae Turf Scrubber is.

    What is an Algae Turf Scrubber (ATS)?

    An Algae Turf Scrubber is a filtration device that uses light to grow algae. Okay so that sounds odd – why would you want to grow algae right? It’s unsightly in the tank and a pain to remove from the tank after all. Well, the thing is algae can remove all sorts of nasties in your tank – Ammonia, Nitrite, Nitrates, Phosphates, etc. They even act as chemical filtration and remove chemicals like copper from your tank! The problem is it looks ugly in your display tank.

    An algae scrubber purposely grows algae in your tank in a concentrated area so that it can do filtration for you. In fact, it has the ability to eliminate algae in your display tank since the area you grow your algae in will be so much more attractive for algae to thrive.

    How does it work?

    When Algae turf scrubbers were first around most of the hobby world who adopted them utilized Dr. Walter Adey’s dump tray style scrubber. The design relied primarily on the growth of red turf algae. This dump tray model had several drawbacks though. It was massive taking up a large amount of space. The dump trays would swing back and forth and be noisy. Many of these models were not operated correctly, which lead to some of the negative feedback you may likely hear from forums, stores, or other hobbyists.

    Dump Style Algae Turf Scrubber


    Enter the new Water Fall Style Algae Turf Scrubber Model

    After around 2008, a new bred of algae turf scrubbers was released. These models used a fixed screen that hangs on a waterfall-style water pipe and is illuminated by lights. These waterfall models excel at growing green hair algae and have a much smaller foot print then the dump tray models. This green hair alga is far superior to the red algae as it grows faster and has better nutrient export than the red algae grown in the dump tray models.

    These waterfall models have become very popular on hobbyist forums and there are multiple DIY applications for them along with success stories of hobbyists who have used them. Many of these DIY algae turf scrubber setups are so successful that they no longer use expensive equipment like protein skimmers, media reactors, bio-pellets, etc. They also reported incredible pod growth. The algae turf scrubbers would grow millions of baby pods, enough to feed Mandarin Gobies.

    DIY Algae Turf Scrubber

    These DIY models were wonderful. They were cheap to build, they produced great results, but something was missing. It was only available to DIYers! Not everyone in the hobby is a DIYer and the scrubber technology was patented for years so not a lot of ready-made products were available – until recently.

    The Birth of The Ready-Made That is For Sale

    With the patent expiring on the algae scrubber, products are now available to hobbyist for purchase. They are hard to find, but we have fortunately been working with a domestic manufacturer and have a Algae Turf Scrubber for sale. This unit from IceCap is one of the more affordable manufactured units on the market.

    I looked long and hard to find the right manufacturer who was developing a top-notch waterfall-style scrubber. The big difference between a DIY scrubber and a ready-made scrubber is the fact that the ready-made scrubbers are enclosed. They are made of top-quality acrylic and PVC. They easily connect with a pump and can be installed in sump. The lighting is powered by IP66 waterproof white light LEDs and adjustable spray bars for quiet operation.

    Algae Turf Scrubber

    These scrubbers growth incredibility rich green algae that should be cleaned out every 7 days. You can see examples of the harvest from these scrubbers below. We were blown away from the algae these models were producing!

    ATS Harvest
    ATS Harvest

    What do I do if I Already Have a Aquarium and Skimmer?

    Algae turf scrubbers are actually superior to protein skimmers because they do so much more. If you have a skimmer, I would recommend running both until you have pulled at least three full harvests of green algae from the algae turf scrubber. After that, try running the tank without the skimmer and monitor the results. As long as you are keeping up with the maintenance of the scrubber and regularly cleaning it, you will begin noticing that the tank is operating ideally without the skimmer.

    Eventually, you can make the decision to remove the skimmer completely or just run both. Running both is not necessary, but hobbyists like to run them as a backup. You will always pull with the skimmer using a scrubber, but that is because the skimmer and scrubber pull nutrients at different stages.

    A skimmer takes organics out of the water BEFORE they have time to break down into nitrates. They also remove some beneficial things such as coral food. They are plug and play, and very reliable, but they will not capture ALL of the nutrients.

    Algae Turf Scrubbers on the other hand remove nutrients AFTER they have already broken down. This ensures that all the little coral food particles float around in the water column so your corals get maximum exposure time to food. When you are ready to remove your skimmer – go sell it off and get what you really want- Corals and Fish!

    Why Don’t I Just Make One DIY?

    Because of the fact that Algae Turf Scrubbers were mostly available to DIYers, they were not plug-and play, took time to grow and dial in, and research was required to get the right amount of light and flow was needed to be successful. With a production model like ours, the vetting has been done and these models are just as plug-and-play as any protein skimmer. By purchasing a proven model, you ensure maximum success for your reef tank and avoid the frustration of having tweak your DIY to make sure it was done right.

    How Come I Have Never Heard Of These Before?

    For one thing, there was a patent on the design so there were not a lot of retail products out there. The second factor is more about our hobby. If you are a brand manufacturer, you are heavily invested in equipment like protein skimmers which sell for a lot of money. These scrubbers have the ability to make skimmers obsolete so there is a natural hesitation to adopt them. The third factor is retailers. We have a lot of inventory invested in equipment that we sell to customers.

    This is something I struggled with when looking at scrubbers, but after working with my manufacturer and seeing the results myself I feel that I have an obligation to the hobby to promote the scrubber and bring it to market. I have always run my store with the motto “We seek to simplify the hobby so the beginner can thrive.” The Algae Turf Scrubber IS simplification at its finest.  It’s natural, simple, and cheaper, and this innovation should be available to all hobbyists – not just DIYers.

    If you already have a tank, I ask you to try these Algae Turf Scrubbers out. If you are new to the hobby, we encourage you to set up your tank with an algae scrubber from the start and start it up after the tank’s cycle and initial algae boom. These models do not take up a lot of space and will save you money. I promise you will not be disappointed.

  • 5 Steps to Consider When Selecting a Saltwater Tank (From a 25-Year Hobbyist)

    Choosing your first saltwater tank is a decision I see beginners rush through โ€” and it sets up problems that are hard to undo. I’ve set up tanks ranging from a small 30-gallon FOWLR to my current 125-gallon SPS reef, and each taught me something about what really matters at the selection stage. Get this right and everything downstream gets easier. Here are the five questions I always walk first-timers through.

    Picking the right saltwater tank is a decision most beginners don’t give enough thought โ€” and it shapes every purchase that follows. After 25 years in this hobby, the best advice I can give before you buy anything is simple: slow down and plan. The tank itself is just the start of a series of decisions about equipment, livestock, maintenance, and budget. In this guide I walk through 5 key steps I’d take before selecting any saltwater aquarium โ€” working through these upfront prevents a lot of expensive course corrections later.

    Step 1 – Budget

    I’m not going to sugar coat it.  A fish tank in general is expensive and a saltwater tank is even more expensive.  If you put me on the spot without any research whatsoever and ask me “how much a saltwater tank setup will cost” my answer is “At least $1,000.”  Keep in mind, however, that a lot of the costs will be upfront investments in the tank, equipment, rock, stand, substrates, etc.  You can certainty spend less on a smaller setup and can cut cut with DIY work or used equipment, but I am going to assume that you are not a big DIYer.  Over time, as you get more advanced in this hobby, it is natural to begin DIY solutions, but beginners should generally stay away from DIY. Set your budget and continue your research from there.

    Step 2 โ€“ Determine How Big of a Tank You Can Keep/Afford

    After you determined your budget, itโ€™s time to determine how big of a tank you can keep. Tanks come in a variety of size, but there are four rules to keep in mind that will help with your selection:

    1. The more gallons, the more stability – bigger is better
    2. The longer the tank, the more room for fish to swim
    3. The wider the tank, the easier to aquascape
    4. The taller the tank, the harder for maintenance

    With these rules explained, tanks are usually divided by lengths.  The key lengths are 2, 3, 4, and 6 feet.  Most tank manufacturers do not produce 5 foot length tanks and if you find one, you may have a hard time getting a stand.  I recommend 3, 4, or 6 foot length tanks. 3 feet I feel is the best length for those on a budget or a beginner.  4 feet allows for a complete mixed reef setup and most lighting systems are designed for 4 foot aquariums.  6 feet in length is when you get to the territory of being able to house larger fish like tangs.

    Tank height is another consideration.  When you go over two feet in height, you will have additional room for fish to swim up and down instead of just side to side, but you will sacrifice ease of maintenance.  Saltwater tanks more than 2 feet in height will be out of reach for most hobbyist’s hands so you will have trouble cleaning algae.

    Step 3 โ€“ Where to Put your Tank

    Your aquarium is going to be a sizable investment and will easily become the showcase and talk of your home.  When friends and family visit your home, everyone is going to want to see your tank.  Because of this, you really want your aquarium in a place where you can enjoy it on a daily basis.  That being said, there are a few rules to follow when it comes to placement:

    1. Keep your tank out of direct sunlight – this will lead to spikes in temperature and algae outbreaks
    2. Think of the first floor of your home or basement before upstairs – any tank over 40 gallons in size is going to weigh a sizable amount.  Tank water is about 8 pounds per gallon and then you will have sand and rock as part of the mix.  If your tank will be directly placed on a floor that is part of the foundation, there are virtually no concerns with placement.
    3. Place your tank near an outlet – or get one installed by an electrician.  Your tank is going to be using power to run and so the closer the better.  Make sure it is on its own circuit if you plan on having a tank more than 40 gallons as a fully setup aquarium will draw a lot of power.
    4. Do not place your tank directly below a vent –  heating and A/C vents can drastically change the temperature of your aquarium.  Having a stable water temperature is critical to a healthy aquarium.  Placing your tank away from a vent will prevent this issue.
    5. If you are dead set on having an aquarium upstairs – hire a structural contractor to get advice if you are going to place a 40+ gallon tank upstairs. Better safe than sorry.  A couple hundred dollars could be worth tens and thousands of dollars of prevented repairs.
    6. Level the area – if your placement is a slightly off-level, get some shims to adjust.  If the location is way off level – consider another spot

    Flooring is another consideration to keep in mind.  The most ideal floor for a tank would be directly on a foundation or on top of tile.  Carpet can be risky because water spills will eventually build mold in the padding. Laminate can also be hit or miss, with only the higher quality laminates been ideal and sealing being key.  Hardwood floors are not ideal because the saltwater from your tank can eventually wrap the hardwood.   You can seal your hardwood, but it is at your risk.  If you have a spill, you will need to clean it up right away.  Having a wet/dry vacuum can be a lifesaver for such times.

    Step 4 โ€“ Standard, All in One, Reef Ready, or Custom Tank

    In the industry there are four types of tanks you find available for purchase:

    • Standard Aquariums – Usually found at general pet stores
    • Reef Ready Aquariums – Pre-drilled and ready for a sump
    • All-In-One Aquariums – Pre-designed for ease of use
    • Custom Built Aquariums – Very expensive, but showcase quality

    Standard aquariums are mass produced aquariums made with glass. They are of good quality and will come with black trim and rims to provide structural support.  The vast majority of these tanks will have tempered glass on the bottom of the tank, which will limit your drilling of tank if you chose to do so to the back of the aquarium.  Many hobbyists will purchase these tanks and customize them by drilling them and even painting the back of the tank.  Standard aquariums are the best choice for a budget conscious build.

    Reef Ready Aquariums are aquariums that are pre-drilled and will come with an overflow system.  An overflow system is designed to skim the water surface of your aquarium to pull dissolved organics and waste out of your tank.  These tanks are designed to work with a sump setup.  A reef ready aquarium is the best choice for flexibility and long-term investment.  They provide the best starting point for a hobbyist looking to build a complete system.  The main advantage from a reef ready system over a drilled standard tank is that the reef ready tanks are drilled at the bottom.  This allows you to setup a very clean and seamless look in the back of the tank without pipes sticking out.  Many of the new reef ready tanks coming out these days are coming equipped with innovative overflow systems as well.  If you want to start out on the best foot possible, a reef ready tank is the way to go.

    All-In-One Aquariums are a recent development in the industry.  They are tanks complete with overflows and even sumps to provide either a fully integrated system or as close to a plug and play solution as possible.  Some All-In-One will have a Sump in the back of the tank, which will eliminate plumbing that would be required in a sump setup.  All-In-One Aquariums can be more expensive then a fully setup Reef Ready Aquarium and can have limitations over a customized setup.  One of the biggest limitations is the equipment you can place in it.  For example, sometimes the protein skimmer chamber may be very small so you will be limited on the type of skimmer you can place or the sump that comes with the all-in-one may not have room for a refugium. If you are looking for ease of use and seamless look (as many of these tanks have wonderful aesthetics), an All-In-One Aquarium would be the choice for you.

    Jimmy Butler’s Custom Boom Box Aquarium as seen on “Tanked”

    Custom Built Aquariums are the most expensive setups.  You can obtain an extremely unique and world class look.  Custom tank makers are usually found locally as custom aquarium makers are very seasoned hobbyists or companies that create custom aquariums.  If you want the “Tanked” look, a custom built aquarium is where to look to.

    Step 5 – Glass vs. Acrylic


    Glass vs. acrylic is a common debate when it comes to tank selection.  Below is a table to show the strengths and weaknesses of glass and acrylic:

    CharacteristicGlass Acrylic
    WeightGlass is usually about 4 times heavier than acrylic and up to 10 times heavier on larger aquariumsLightweight and easier to move
    Breaking and CrackingWith a strong enough force – Glass will crack and leakVery impact resistant
    SupportGlass can support itself over distances so they can be placed in stands with an open top with little to no riskNeeds support throughout the length of the tank.  Stands are limited due to this.
    ClarityThe thicker the glass, the more noticeable the distortion.  Distortion can be mitigated in thicker glass by the use of low-iron glass.No distortion in clarity – superior to glass even against low-iron glass.
    ScratchingVery difficult to scratch.  You can even clean algae with a razor blade and be fine with glassProne to scratching.  Fish with strong jaws can directly scratch acrylic and you can even scratch the outside accidentally with jewelry.  The outside scratches, however, can be repaired with a repair kit.
    CostGenerally cheaper and mass-producedGenerally more expensive due to shipping

    Overall, I would recommend going with a glass aquarium as the pros outweigh the cons.  You might want to consider acrylic or even plywood though if you are considering a tank over 500 gallons due to the weight and clarity issues of glass.

    Closing Remarks

    I hope this guide was very useful to you.  Here at AquariumStoreDepot, we like to pass down knowledge to our customers.  A well informed customer is a successful hobbyist and will enjoy this hobby for years to come.  We would be happy to guide you on your journey to saltwater reefing!


    ๐Ÿ“˜ Want to learn more? This article is part of our complete Saltwater Fish & Reef Guide โ€” your ultimate resource for marine fish, coral care, reef setup, and more.

  • Saltwater Aquarium Selection Guide: How to Choose the Right Tank From the Start

    Saltwater Aquarium Selection Guide: How to Choose the Right Tank From the Start

    The saltwater aquarium you start with shapes everything that comes after โ€” your equipment choices, your livestock options, your maintenance routine. I’ve watched beginners pick tanks that were too small for their goals, or all-in-ones that couldn’t be upgraded, and they ended up restarting from scratch within a year. After setting up and advising on dozens of reef systems over 25 years, I have a clear picture of what actually matters when you’re making this choice.

    The saltwater aquarium you choose at the start determines nearly every other decision you’ll make โ€” what equipment fits, what fish you can keep, what your maintenance looks like long-term, and what your total budget needs to be. After 25 years in this hobby and helping countless people set up their first saltwater tanks, the advice I give most often contradicts what beginners expect: bigger tanks are more stable and more forgiving, not harder. The “start small” instinct usually leads to frustration. And the tank itself is just the beginning of the budget conversation. In this guide I walk through everything you need to consider when selecting a saltwater aquarium.

    Saltwater Aquarium

    Owning a successful aquarium depends greatly on the time of time spent planning and researching the setup for the fish and/or corals you choose to have.  There are a large number of choices when it comes to tank selection.  This article should provide you some in-depth detail on saltwater fish tank selection and what to look for when purchasing an aquarium.

    Saltwater Aquarium Budget

    I’m not going to sugarcoat it.  A fish tank in general is expensive and a saltwater tank is even more expensive.  If you put me on the spot without any research whatsoever and ask me “how much a saltwater tank setup will cost” my answer is “At least $1,000.”  Keep in mind, however, that a lot of the costs will be upfront investments in the tank, equipment, rock, stand, substrates, etc.  You can certainty spend less on a smaller setup and can cut cut with DIY work or used equipment, but I am going to assume that you are not a big DIYer.  Over time, as you get more advanced in this hobby, it is natural to begin DIY solutions, but beginners should generally stay away from DIY.  If you are going to DIY, I would suggest you join a local aquarium society.  There are plenty of very seasoned hobbyists in an aquarium society who will be more than willing to teach you the ropes or even offer to do DIY solutions for cheap (e.g. – drill your tank or build you a sump).  

    Aquarium SocietyAquarium Societies are Treasure Troves of Knowledge

    Saltwater Tank Size

    Tanks come in a variety of size, but there are four rules to keep in mind that will help with your selection:

    1. The more gallons, the more stability – bigger is better
    2. The longer the tank, the more room for fish to swim
    3. The wider the tank, the easier to aquascape
    4. The taller the tank, the harder for maintenance

    With these rules explained, tanks are usually divided by lengths.  The key lengths are 2, 3, 4, and 6 feet.  Most tank manufacturers do not produce 5 foot length tanks and if you find one, you may have a hard time getting a stand.  I recommend 3, 4, or 6 foot length tanks. 3 feet I feel is the best length for those on a budget or a beginner.  4 feet allows for a complete mixed reef setup and most lighting systems are designed for 4 foot aquariums.  6 feet in length is when you get to the territory of being able to house larger fish like tangs.

    40 Gallon BreederA beautiful 3 foot 40 Gallon Breeder tank

    Tank height is another consideration.  When you go over two feet in height, you will have additional room for fish to swim up and down instead of just side to side, but you will sacrifice ease of maintenance.  Saltwater tanks more than 2 feet in height will be out of reach for most hobbyist’s hands so you will have trouble cleaning algae.

    Tank Placement

    Your aquarium is going to be a sizable investment and will easily become the showcase and talk of your home.  When friends and family visit your home, everyone is going to want to see your tank.  Because of this, you really want your aquarium in a place where you can enjoy it on a daily basis.  That being said, there are a few rules to follow when it comes to placement:

    1. Keep your tank out of direct sunlight – this will lead to spikes in temperature and algae outbreaks
    2. Think of the first floor of your home or basement before upstairs – any tank over 40 gallons in size is going to weigh a sizable amount.  Tank water is about 8 pounds per gallon and then you will have sand and rock as part of the mix.  If your tank will be directly placed on a floor that is part of the foundation, there are virtually no concerns with placement.
    3. Place your tank near an outlet – or get one installed by an electrician.  Your tank is going to be using power to run and so the closer the better.  Make sure it is on its own circuit if you plan on having a tank of more than 40 gallons as a full-setup aquarium will draw a lot of power.
    4. Do not place your tank directly below a vent –  heating and A/C vents can drastically change the temperature of your aquarium.  Having a stable water temperature is critical to a healthy aquarium.  Placing your tank away from a vent will prevent this issue.
    5. If you are dead set on having an aquarium upstairs – hire a structural contractor to get advice if you are going to place a 40+ gallon tank upstairs. Better safe than sorry.  A couple of hundred dollars could be worth tens and thousands of dollars of prevented repairs.
    6. Level the area – if your placement is slightly off-level, get some shims to adjust.  If the location is way off-level – consider another spot
    Fish Tank Living RoomAn Aquarium is Best Placed Away from Direct Sunlight

    Flooring

    Flooring is another consideration to keep in mind.  The most ideal floor for a tank would be directly on a foundation or on top of the tile.  Carpet can be risky because water spills will eventually build mold in the padding. Laminate can also be hit or miss, with only the higher quality laminates being ideal and sealing being key.  Hardwood floors are not ideal because the saltwater from your tank can eventually wrap the hardwood.   You can seal your hardwood, but it is at your risk.  If you have a spill, you will need to clean it up right away.  Having a wet/dry vacuum can be a lifesaver for such times.

    Shape of Fish Tanks

    You will find multiple shapes if you go shopping for an aquarium.  We are going to focus on the four most popular on the market

    • Rectangle – Most flexible and ideal shape for fish, width can be an issue in long formats
    • Corner – Good for corner setups, but sacrifices on swimming space
    • Bowfront – Great for viewing, but more expensive than rectangle shaped
    • Cube – Great for coral aquascaping, but sacrifices length for larger fish

    Our recommendation is to go with a rectangular tank.  They offer the most flexibility, most economical, and most fish will prefer long over tall setups.

    Types of Tanks

    In the industry there are four types of tanks you find available for purchase:

    • Standard Aquariums – Usually found at general pet stores
    • Reef Ready Aquariums – Pre-drilled and ready for a sump
    • All-In-One Aquariums – Pre-designed for ease of use
    • Custom Built Aquariums – Very expensive, but showcase quality
    Standard AquariumStandard Glass Aquarium

    Standard aquariums are mass-produced aquariums made with glass. They are of good quality and will come with black trim and rims to provide structural support.  The vast majority of these tanks will have tempered glass on the bottom of the tank, which will limit your drilling of the tank if you chose to do so to the back of the aquarium.  Many hobbyists will purchase these tanks and customize them by drilling them and even painting the back of the tank.  Standard aquariums are the best choice for a budget-conscious build.

    Reef Ready Aquarium
    Reef Ready Tank

    Reef Ready Aquariums are aquariums that are pre-drilled and will come with an overflow system.  An overflow system is designed to skim the water surface of your aquarium to pull dissolved organics and waste out of your tank.  These tanks are designed to work with a sump setup.  A reef ready aquarium is the best choice for flexibility and long-term investment.  They provide the best starting point for a hobbyist looking to build a complete system.  The main advantage from a reef ready system over a drilled standard tank is that the reef ready tanks are drilled at the bottom.  This allows you to setup a very clean and seamless look in the back of the tank without pipes sticking out.  Many of the new reef ready tanks coming out these days are coming equipped with innovative overflow systems as well.  If you want to start out on the best foot possible, a reef ready tank is the way to go.

    Innovative Marine All-In-One Aquarium
    All-In-One Tank

    All-In-One Aquariums are a recent development in the industry.  They are tanks complete with overflows and even sumps to provide either a fully integrated system or as close to a plug-and-play solution as possible.  Some All-In-One will have a Sump in the back of the tank, which will eliminate plumbing that would be required in a sump setup.  All-In-One Aquariums can be more expensive then a full setup Reef Ready Aquarium and can have limitations over a customized setup.  One of the biggest limitations is the equipment you can place in it.  For example, sometimes the protein skimmer chamber may be very small so you will be limited on the type of skimmer you can place or the sump that comes with the all-in-one may not have room for a refugium.   If you are looking for ease of use and a seamless look (as many of these tanks have wonderful aesthetics), an All-In-One Aquarium would be the choice for you.

    Jimmy Butler Aquarium
    Jimmy Butler’s Custom Boom Box Tank as seen on “Tanked”

    Custom Built Aquariums are the most expensive setups.  You can obtain an extremely unique and world-class look.  Custom tank makers are usually found locally as custom aquarium makers are very seasoned hobbyists or companies that create custom aquariums.  If you want the “Tanked” look, a custom-built aquarium is where to look to.

    Glass vs. Acrylic Tanks

    Glass vs. acrylic is a common debate when it comes to tank selection.  Below is a table to show the strengths and weaknesses of glass and acrylic:

    CharacteristicGlass Acrylic
    WeightGlass is usually about 4 times heavier than acrylic and up to 10 times heavier on larger aquariumsLightweight and easier to move
    Breaking and CrackingWith a strong enough force – Glass will crack and leakVery impact resistant
    SupportGlass can support itself over distances so they can be placed in stands with an open top with little to no riskNeeds support throughout the length of the tank.  Stands are limited due to this.
    ClarityThe thicker the glass, the more noticeable the distortion.  Distortion can be mitigated in thicker glass by the use of low-iron glass.No distortion in clarity – superior to glass even against low-iron glass.
    ScratchingVery difficult to scratch.  You can even clean algae with a razor blade and be fine with glassProne to scratching.  Fish with strong jaws can directly scratch acrylic and you can even scratch the outside accidentally with jewelry.  The outside scratches, however, can be repaired with a repair kit.
    CostGenerally cheaper and mass-producedGenerally more expensive due to shipping

    Overall, I would recommend going with a glass aquarium as the pros outweigh the cons.  You might want to consider acrylic or even plywood though if you are considering a tank over 500 gallons due to the weight and clarity issues of glass.

    Drilling vs. Not Drilling a Tank

    A common consideration when one is deciding between a standard tank or reef-ready tank is drilling vs. not drilling.  There are many benefits to drilling your tank – the most beneficial being the inclusion of a sump.  When you drill your tank and install a sump, your setup becomes extremely flexible with equipment.  You will be able to purchase the best equipment, hide everything outside of the tank, be able to build a section for beneficial reef organisms (known as a refugium), install tank maintenance automation (auto water top-offs, controllers, and dosing pumps), and a separate work area for most of your maintenance outside of your display tank.  You miss out on all this flexibility when you do not drill and going from a not drilled to a drilled setup would require a hang-on overflow.  Hang-on overflows have usually been fail-prone, the main reason why we chose not to carry them.  The drilling decision is something made early on because of the large amount of work required to transition to a drilled setup.  Therefore, I feel that it is best to strongly consider a drilled setup from the start.

    Drilling Fish TankA Standard Tank Can be Drilled with Basic Power Tools

    Rimmed vs. Rimless Fish Tanks

    Rimmed tanks have been the tried and true traditional aquarium type for many years.  There has been a development of rimless tanks that have a very modern, aesthetically pleasing look.  Many higher-end aquariums you will come across will have rimless designs.  They are very beautiful aquariums, with main drawback being the price difference and water possibility leaking out when you clean algae near the top of the tank.  You can’t go wrong either way.

    Rimless TankRimless Tanks Have Great Aesthetics!

    Low-Iron vs. Traditional Glass Tanks

    These days, there are tanks you can purchase that have what the industry calls “low-iron” or “high-clarity” glass.  This is glass with low amounts of iron, which remove the green tint you may see from a standard tank.  It is a softer glass that will scratch easier than traditional glass (though still way more scratch resistant than acrylic).  Low-iron glass is more expensive than traditional glass, but some manufacturers will opt for just the front of the tank to be low-iron while the rest of the tank is traditional glass.  The most important place to have low-iron glass is on the front, so if you are considering the price, low-iron on the front of the tank only can achieve a good balance of cost and clarity.  Low-iron tanks also tend to come into play on larger tanks.  If you are considering a small tank (3 feet or less), the difference is likely going to be minimal between the two glass types. 

    Low Iron GlassLow-Iron on the Left, Traditional Glass on the Right

    Closing Remarks

    I hope this guide was very useful to you.  Here at AquariumStoreDepot, we like to pass down knowledge to our customers.  A well-informed customer is a successful hobbyist and will enjoy this hobby for years to come.  If you are past these steps and looking into what livestock might work with your tank, check our Top 10 Best Saltwater Fish for Any Reef Tank post.  We would be happy to guide you on your journey to saltwater reefing!


    ๐Ÿ“˜ Want to learn more? This article is part of our complete Saltwater Fish & Reef Guide โ€” your ultimate resource for marine fish, coral care, reef setup, and more.