I’ve set up saltwater tanks at almost every budget level — from a modest starter system to a full SPS-dominant 125-gallon reef — and the equipment decisions that hurt people most are almost never the big-ticket items. It’s the corners cut on lighting, skimming, or flow that quietly derail a tank over months. After 25 years of seeing what works and what fails, I know exactly where to spend and where the cheaper option is perfectly fine.
Saltwater aquarium equipment is where most new reefers get burned — not by making one expensive mistake, but by making five medium-sized ones chasing shiny gear they didn’t need. I’ve been setting up and tearing down reef tanks for over 25 years, I’ve personally tested hundreds of pieces of equipment, and I run a sponsor-free site, which means I can tell you what actually works without worrying about whose product I’m pushing. The reality is that for most of the gear categories in a reef tank — skimmers, return pumps, heaters, lighting — there’s a gold-standard option and a budget option that performs at 80-90% of the quality for half the price. This guide maps out both for every major equipment category so you can decide where to spend and where to save.
I won’t lie to you…
Saltwater Aquarium Equipment is Expensive!
With the added marketing efforts and push towards high tech and cool looking saltwater aquarium equipment, it’s easy to find equipment like LED lighting costing over $800 that just covers a 2×2 space. Where does this madness end! It’s easy to get scared away from forums, the LFS, and big equipment e-stores telling you the cheap stuff is junk and doesn’t last.
I’m here today to help guide you show you the gold standard in the industry and the cheaper alternative that can literally save you hundreds even thousands of dollars.
I will pull out no stops here and will throw out equipment I don’t even carry for the sake if saving you dollar bills. The way I see it, if I can supply you with alternatives for the high end saltwater aquarium equipment the more money you will have to enjoy the hobby! We will use a standard 4 foot 120 gallon reef tank equipment setup as our example.
RODI Systems
This is the heart of a larger tank setup. Lots of water top off and the ability to store water when you need it in a pinch is a really big deal when you are running a larger saltwater aquarium and reef tank.
Best RODI System
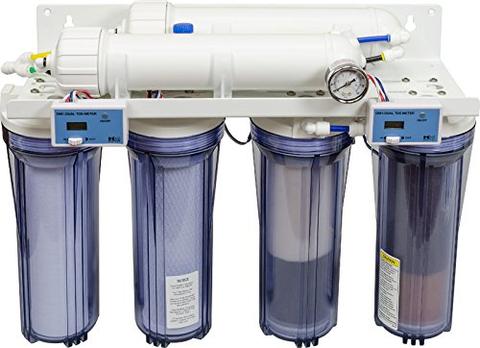
The SpectaPure MaxCap RODI System is the top of its class when it comes to a high end RODI system. With the best membrane rejection rate on the market and quality construction this is the unit to purchase if money is not an issue.
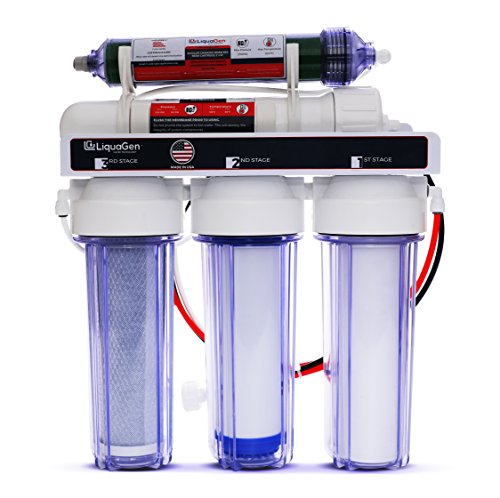
Cheap RODI System But Still Reef Worthy – LiquaGen 5 Stage RODI
The Spectra Pure RODI System commands a premium price tag of several hundred dollars. That’s not exactly cheap. There are two alternatives I will provide here. The first is a similar 5 stage RODI System from LiquaGen. This system is easily half the cost of a comparable Spectrapure system and will do the job for many reefers out there.
The RODI Unit for Budget and Nano Reefers – LiquaGen 4 Stage RODI
For those with smaller tanks the Aquatic Life Portable Aquarium RODI 4 stage systemis a great solution to free you having to get RODI water from your LFS or distilled water from the grocery store. Nearly half the price of the 5 stage, this unit should be able to fit the smaller budgets of small tank builds and nano reefers.
Ah yes Protein Skimmers, the heart of the vast majority of successful reef tanks. They have been a staple of many saltwater aquariums. Unfortunately, they tend to get VERY expensive at the highest end levels. Fear not though, I have you covered.
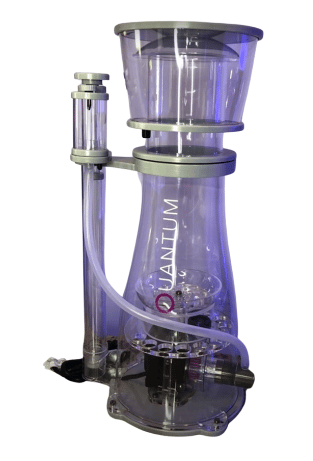
Best Protein Skimmer
The Nyos Quantum 120 Protein Skimmer is definitely one of the best protein skimmers on the market. Sure there are some skimmers at this 120 gallon reef tank example size that can command a higher value and we are not over sizing in this case, but the Nyos has been the go to of one big YouTubers like FishofHex
Bubble Magus Curve – The Go-To Cheap Protein Skimmer
The Bubble Magus Curve Series has been the go to for a cheap protein skimmer for many years in the hobby. Well trusted, reliable, and works very well. it will serve you well in your system. It should be around half the cost of an equivalently rated Nyos skimmer.
Let’s talk about return pumps. This is a central piece of any reef system using a sump. I would argue next to a heater, it is the one major component of a reef system that you cannot afford to fail. When selecting a return pump, reliability and durability are above any feature a manufacturer can offer in my opinion.
Abyzz DC Controllable Pumps – Best DC Return Pump
If money is no object, the Abyzz DC Controllable Pumps are top of mind of the best things out there. It is a DC pump that is backed by a 10-year warranty. This German made DC pump puts out no stops when it comes to quality and the price shows. For the 120 gallon tank we are using as an example, the A100 is the model we are going to select and at a massive $1,499.99 price tag, this DC pump will provide years of worry free operation.
Reef Octopus VarioS – Cheap Aquarium DC Return Pump
The Reef Octopus VarioS series DC pumps offer a solid cheaper solution for a DC return pump. While it does not have the 10 year warranty, the VarioS pump does offer a 2 year warranty and has been often called the best value among DC return pumps on the market. In today’s market of high tech reef toys, the Varios DC return pump really focuses on quality and they provide a good mix of quality and value. I would definitely consider these over a Jabeo return pump.
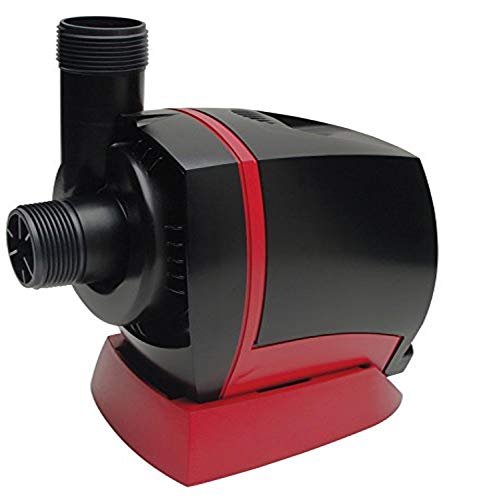
Fluval Sea SP4 — We Are Going Old School!
Yes you are reading this correctly, an AC return pump. Now why would I put a this Fluval Sea SP4 AC Return Pump as the best value for cheapest and highest quality return pump for your sump? Well various reasons actually:
An AC pump has less failure points than a DC pump with only the motor and impeller. A DC pump can additionally fail on the controller and the power supply – of which both tend to fail quite frequently
An AC pump handles head pressure better than a DC pump, which means it is more worry free if you are using manifolds or having to restrict flow
The Fluval Sea SP4 is built off the the same tried and true tech of return pumps that have run in the field for over 10 years – the Askoll Motor Block
The Fluval Sea SP4 is made in Italy – no cheap Chinese parts
The Fluval Sea SP4 is backed by a solid 3 year warranty. At its entry level price point you can buy several Fluval SP4s and still have enough money for other equipment over an Abyzz
And flow if you are wondering is easily controlled by a gateor ball valve on an AC return pump. There are other very solid very durable options like a Danner Magnum Pump or Eheim Hobby Pump, but the Danner tends to be loud and the Eheim Hobby Pump does not produce enough GPH for it to be applicable to our 120 gallon tank example. The Fluval Sea SP4 completely crushes it with quiet operation, a solid Italian made pump, proven durable AC technology, and good looks. Get one today and forgot about it for the next 10 years – Askoll built pumps are that good!
Our last core piece of equipment we are going to touch on is Reef Led Lighting. This is a section where you can spend $1,000s of thousands on top end of lighting, but I’m going to show you a few alternative so you don’t break the bank.
EcoTech Marine Radions – Best Reef Tank Lighting System
There is a reason why top coral sellers like World Wide Corals rely on EcoTech Marine Radion. They are incredibility flexible in functionality and well built units and with the diffuser upgrade are able to handle heavy SPS coral reef tanks. If money is no concern for you on this 120 gallon example 2 Radion XR30w units will do the job and handle any coral build and is considered by many the best lighting system for a reef tank.
EcoTech Marine Radions – Cheap LED Reef Tank Lighting System
Ah the Chinese black box. While other sellers try to scare you away from them, the Mars Aqua LED Reef Aquarium lighting system offers a quality light that is fully capable of growing corals in a mixed reef system and even heavy SPS reef tank. They are ETL rated, which is considered an equivalent of UL rated. Two of 165W models will work for most reefs and two 300W could be considered for a heavier SPS setup. They are easily hundreds of dollars less than a Radion.
Another additional option would be the Evergrow LED Reef Lighting System. Evergrow models are the same lighting manufacturer used by Reefbreeder’s older generation models that have been well received by the reefing community.
What Other Picks Do You Recommend?
Have another piece of saltwater aquarium equipment that you would recommend? Leave a comment below. We’ll follow up with a part 2 in the future that will go over other key equipment so you can continue to save money and still buy quality equipment.
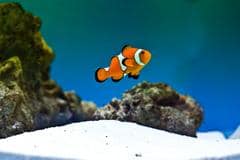
I skipped a quarantine tank when I first set up my reef — and I paid for it with a full-blown ich outbreak that took months to clear. It’s a lesson I only needed to learn once. Now a QT is non-negotiable for me before anything new goes into my display tank. The setup doesn’t have to be expensive or complicated, and I’ll show you exactly what I run and why it works.
The saltwater quarantine tank is the single most important thing most reef keepers skip — and the consequences usually show up when it’s too late. After 25 years in the saltwater hobby, I’ve seen this pattern more times than I can count: a new fish gets added directly to a display reef, introduces ich or marine velvet, and within weeks the whole tank is in crisis. Marine parasites are extremely common in the trade — assuming fish from even a reputable store are disease-free is a dangerous assumption. A proper quarantine tank lets you observe fish, treat them if needed, and protect everything you’ve built in your display. This guide covers everything you need to set one up and run it correctly.
Key Takeaways
Fish diseases are worse in saltwater fish with three being potential tank wipers – Marine Velvet, Brook, and Uroema
Probalaytic Quarantine is more common and accepted in marine fish vs freshwater fish
There are multiple methods you and use to quarantine fish – all with pros and cons
Why Do We Quarantine Our Fish?
I’m going to go off the cuff here and say that the primary reason for quarantine is recovery of your fish. Fish that you have picked up to from the local fish store or online have gone through a variety of channels to get to you. It is probably an understatement to say that if the fish has come to you and is wild caught it is within the top 25% of fish in the supply chain that made it out. Many fish die or get sick during capture and transplant.
Quarantining a fish allows the fish to destress and for you to have the fish adjust to your parameters, your food, and provides it a safe space for it to thrive away from more aggressive and established tank mates who can out compete it for food. Putting a fish directly into your display puts the fish in more stress and added stress events leads to our next reason for why we quarantine our fish.
Preventing Saltwater Fish Diseases Through Quarantine
A fish’s immune system should be able to fight off more infections and diseases, however the shock of transportation compromises your fish’s immune system leaving it vulnerable to any disease that gets shipped with it. Some of these diseases when they break out can be so deadly, they can wipe out your tank within days. So what are these deadly diseases? Well, I will tell you right now it’s not ich. Ich is child’s play compared to these three and they are becoming more and more common in the fish supply chain.
Three Deadly Fish Diseases
When you look up diseases, forum posts, or YouTube videos online you will come to MANY articles about ich. Ich this and Ich that. Now Ich is common and can kill your fish, but can be treated and in some cases your fish can simply recover from it. But these three diseases are 100% deadly, will wipe out your tank in days, and there are no known ways to treat these diseases with reef-safe medications (Sorry Kick Ich, Ich Attack, Ich Guard, Paraguard — this ain’t working on them).
Marine Velvet
It’s the most common saltwater fish disease of the Deadly Three. It looks like ich, but it is far more deadly. Sometimes it kills fish before they are even able to display symptoms. Marine Velvet MUST be treated in a quarantine tank/hospital tank and requires your main display to go fishless for 76 days to remove it from the display. It is probably the #2 reason for tank crashes in the hobby with heater failures being #1. The go-to treatments are Copper or Chloroquine Phosphate.
Uroema
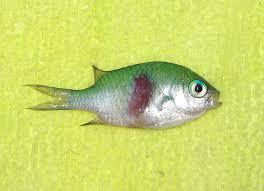
The least common of the deadly 3 but considered the worst and hardest to treat. Chromis and Anthias are unfortunately the most prone to this disease, but it can spread to other fish. This particular disease is resistant to Copper and Choloroquine Phosphate, requiring higher than traditional dosages. It can also go into the internals of the fish and damage it further requiring other medication like Metro to add in internal treatment. Uroema is also a free living parasite which means it can exist without fish present in the tank. Once a fish has Uroema one should assume that the disease exists in the system. Talk about scary!
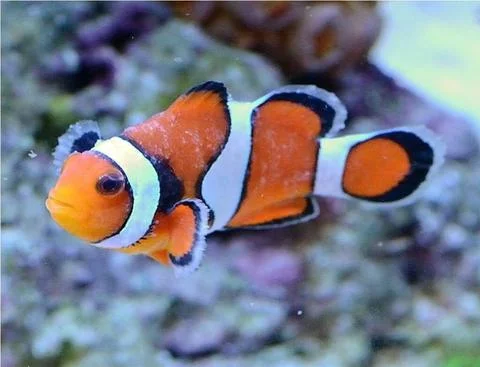
Brooklynella (AKA Clownfish Disease)
Brooklynella is a nasty disease that Clownfish and Anthias are unfortunately prone to. This is how it got it’s infamous nickname of Clownfish Disease. Brooklynella looks similar to velvet, which in my opinion is why it is safe safe to assume that your fish has either or when you observe it. Both Brooklynella and Marine Velvet can be treated with Copper and Chloroquine Phosphate. Further protection with Metro is recommended to protect the internals of the fish as Brooklynella can also go internal as well.
How To Isolate Fish –The Various Methods
So now we have discussed why we quarantine fish, now let’s discuss the types of QT and rate each one.
Deciding Not To Isolate
All the power to you if you want to go this route. The hobbyists most successful with this method have stellar local fish stores (LFS) around them that they have strong relationships. If the store can hold a fish for you for 2-4 weeks, you will have better success. However, finding a local fish store this stellar for most of us is a needle in a haystack. Personally, in my location I have had difficulty finding a good local fish store. Literally every fish I have purchase came with something and QT has saved me tons of headache and thousands of dollars in losses.
Hyposalinity
Hyposalinity has been around for ages in the hobby. It’s a tried and method that requires precision and constant monitoring. The reason why it doesn’t make my list of preferred methods is because it will not treat against the Deadly Three. This disqualifies this method for me.
Tank Transfer Method (TTM)
Tank Transfer Method or TTM is a very popular method among the forums and even by some online store who have suggested it as a reliable method. However, the supply chain has changed since those times. 3 years ago I would say TTM was great, but with the increased commercialization of the hobby I am seeing more and more of the deadly 3 appearing and cannot recommend this method any longer. Tank transfer method will not protect your fish against the deadly three. You can however do a hybrid TTM with medications like Copper and CP, which I will explain in Part 2.
Safety Stop
Now we are getting to methods that protect against the deadly three (Amazon Affiliate links ahead). Safety Stop is first up (Ruby Reef Rally can also be used if you cannot obtain Safety Stop). Safety Stop is a medicated dip of Formalin and Methylene Blue. Formalin is consider one of the hard drugs of the hobby, capable of wiping out various disease such as Marine Velvet, Brook, and Uroema.
Melev’s Reef has documented his process of how he added all his fish to his 400 Gallon tank with no quarantine over a 2 year period. That is proof that this method will work. Safety Stop will not prevent against internal parasite however and if your fish end up with a bacterial infection – there is no way to treat this in a display. This is why I recommend dipping your fish in Safety Stop before they go into Quarantine
Copper – (Using Chelated Copper AKA Copper Power)
Time to get into the good stuff! The next two method are ironclad and will protect against just about any disease in QT. The next two methods also have their uses depending on the fish you needing to QT. Chelated copper is considered more preferable over over type of copper because it is safe and has a higher therapeutic range. You have to maintain your levels throughout the process and I would recommend a precise tester like a Hanna Checker.
People are generally scared of copper due to the fears from Companies selling “Reef Safe” medication and those who want to do natural remedies. I will tell you right now that both Copper and ChloroquinePhosphate are veterinarian choices when it comes to treating external parasites. Would you rather listen to a licensed vet or a Company that wants to make money off you selling subpar medication?
*UPDATE* – We no longer support Copper Safe for Chelated Copper. Copper Power would be the safest and more consistent chelated copper on the market. Use together with a Hanna Checker Copper Tester. Copper Power is very difficult to find at a local fish store. It is best to purchase it off Amazon directly from the manufacturer, Enrich. Copper can also be combined with General Cure instead of Prazipro.
Here’s a video from my friend Aaron who goes over Copper Power treatment. You can use this Copper Power Calculator to determine the dosage you need:
Chloroquine Phosphate + General Cure (The Current Meta In Marine Fish Disease Treatment)
We have come to the pinnacle of Prophylactic treatments available in the hobby. Chloroquine Phosphate plus the combination of API General Cure is provides the simplest nearly full proof method of quarantine. Chloroquine Phosphate (or CP for short) is the preferred medication for Marine Velvet, Brooklynella, and Uroema. It is as close to a wonder drug as you can get currently. It is easy to administrator as long as you have a good digital scale to measure (these are easy obtained for cheap).
The main issue with Chloroquine Phosphate is that is it difficult to obtain outside of a Veterinarian’s prescription. If you are like me, you probably cannot obtain Chloroquine Phosphate from a Vet and have to go of the route of obtaining it from a supplier. Getting it from a supplier can be risky as you may not know the source and the purity of the substance. I obtain aquaculture grade Chloroquine Phosphate so you can always purchase it from me and I have certificate of analysis available so you know the purity and can adjust accordingly. Here is a link to a Chloroquine Phosphate Dosage Calculator.
Instructions for Setup
Setting up a quarantine tank is fairly easy to do, you just want to make sure you have the correct equipment and meds to get started. You will want to start off with a long tank. A 20 gallon or 29 gallon are ideal as you can use this larger quarantine tank to house multiple fish and get your QT done faster. A 10 gallon tank will also suffice, but more suited to 1 fish at a time quarantine. Petco’s dollar per gallon sale is the way to go to get these tanks as they are really cheap if you buy them on sale.
After that, you want a reliable power head for flow – at least 400 gph and some type of filtration. I prefer to use the best power filter, which is an aquaclear power filter as you can use multiple media in the filter and use carbon to remove medication. A sponge filter is also an ideal alternative for a budget conscious build.
A seachem ammonia badge is necessary to monitor your ammonia levels since many low priced test kits will not detect ammonia correctly once you start doing copper or chloroquine phosphate.
A heater (check out our best aquarium heaters post for recommendations) and a cheap thermometer round out the list of electronic equipment.
The last things are shelter and a cover. PVC fittings are ideal because they will not absorb medication and can provide tunnels for your fish. These can be purchased from any hardware store. A cover is an absolute must if you want to provide a fish from jumping. I prefer a glass cover for QT systems since I don’t have to worry about evaporation and can be custom cut in the back to ensure 100% coverage.
Getting a QT tank cycled up can be a tricky endeavor. If you are starting brand new, the best way to quickly cycle the QT tank is to throw in a few of the filter sponges in your dry or live rock tank when you start cycling your main tank. Once that tank cycles, the media in the tank will be full of bacteria and ready to go into your QT. If you started with dry rock, you have the advantage of starting disease free so you can freely throw in the sponges in the QT system to get started.
For live rock starts, if you follow the proper “cooking” method of no lights and a 5-8 week cure, that period of time going fishless should eliminate all harmful pathogens in the water column. Since you are going to use meds in your QT, the risk is pretty minimal so as long as you follow a 5-8 week fishless cure timeframe with liverock you will be ready to go with your QT system. The advantage you have with liverock is that the rock can self-sustain without fish indefinitely so you can take your time QTing. With dry rock, you will need to monitor your phosphates and nitrates to make sure you do not bottom out.
If you already have a tank setup, throw in the filter sponges in your sump for 2-3 weeks to get it full of bacteria. You do run the risk of introducing pathogens if you didn’t QT previously. Another method is to dose the sponges with bacteria-in-a-bottle products like biospiraand carefully monitor your ammonia levels from there.
The video above goes over the parts list and the complete 32-35 day flowchart for quarantine with CP and General Cure. Both the method I use and Aaron’s will work very well so use the method that works for you and with the medications you can obtain.
If you want to be in the know, subscribe to our YouTube Channel and sign up for updates to our blog. Stay Tuned!
📘 Want to learn more? This article is part of our complete Saltwater Fish & Reef Guide — your ultimate resource for marine fish, coral care, reef setup, and more.
Dinoflagellates are one of the most dreaded problems in the reef hobby — and I say that as someone who’s battled them firsthand in my 125-gallon reef. What makes dinos so frustrating is that they’re not fully understood and they require a multi-pronged approach to eliminate. I’ve worked through dino outbreaks myself and tested various strategies, and I can tell you the methods that actually move the needle. This guide covers everything from identification to long-term prevention.
Key Takeaways
Dinos are caused by a combination of a lack of biodiversity and lack of nutrients in a saltwater aquarium
Dinoflagellates can light without nutrients and off lighting. Sunlight and lighting will make things worse
There are several ways to get rid of Dinos, but the most tried and true is adding biodiversity and dosing nitrates and phosphates to maintain minimal levels for other algae to grow
What Are Dinoflagellates?
In the Wild
Dinoflagellates are protists, an organism that can function as a plant and an animal at the same time. Some dinoflagellates eat other protozoa; some generate energy through photosynthesis; some can do both. In the wild, there are about 1,700 different kinds of marine dinoflagellates and 200 freshwater kinds. They are important part of the food chain, providing nourishment for other sea creatures. In a natural environment, they’re a crucial member of the ecosystem.
In Your Tank
Unfortunately, dinoflagellates quickly become a nuisance in an aquarium environment.
Dinoflagellates quickly overrun the surface in your aquarium because there is no specific ecosystem for them to survive. Depending on the conditions, dinoflagellates can multiply up to a million cells in one milliliter of water in just a short period of time. The bigger the population, a higher chance that it will make the water toxic and can kill other life form inside your tank. So, it’s important to control dinoflagellate population as early as possible before it occupies every space inside your aquarium.
What Should I Look For?
It’s not like you’re going to go to the store and buy some dinos to dump into your tank; these pests are introduced to your tank accidentally. Your tank can get this from food, corals, rocks, and other aquatic plants. Dinos are very resilient because it can live without eating anything for a long time unlike any other life forms like algae.
Nutrients are present in your tank which gives energy to fishes and plants. Even if your tank lacks nutrients, dinos can still survive. It is possible for your tank to have dinos if the nitrates and phosphates level in your aquarium are close to zero. It is important to regularly check your tank before it becomes too late.
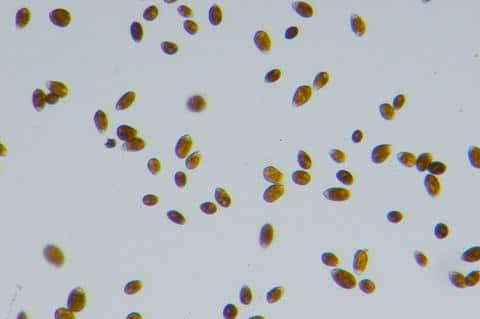
Identifying What Dinoflagellate You’re Dealing With
The best way to approach your dino problem is to first figure out what kind of dino has moved into your aquarium.
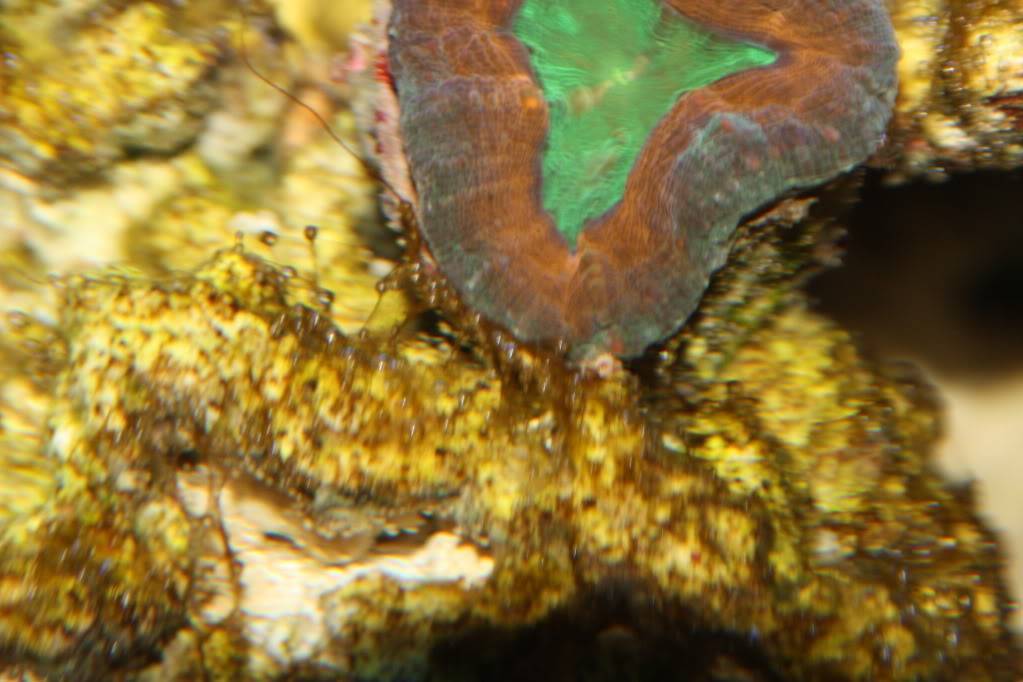
The most common dinoflagellate (or “dino” for short) to see in an aquarium is a slimy, stringy brown variety, commonly known as Brown Slime Algae. Most aquarium enthusiasts have dubbed it “the brown menace.” They’re not all brown, though. They also come in white, yellow, and various shades of green.
In more technical terms, there are four main dinoflagellates you’ll see in your aquarium1:
Ostreopsis
Prorocentrum
Amphidinium
Coolia
Some of the things all of these guys have in common is that they:
Are mucous-like (sometimes described as runny boogers)
Produce air bubbles
Trap air bubbles between the slime and the glass of the tank
Spread quickly, covering all surfaces with coral being a particular favorite
Here’s an easy test you can do to determine if you have algae or dinos:
Scoop some sludge and water out of your tank.
Put the sludgy water in a clear container with a lid.
Shake the container to break up all of the floating bits.
Filter the water either through paper towel or a filter sock into a second clear container.
Leave the second container of filtered water in a sunny location.
Monitor the water for changes, namely the reappearance of mucous-like strands.
Eventually, dinoflagellates will regroup after they’ve been filtered. Algae will remain separated. So, if the strands of goo show up, you know you have dinos!
How Do I Get Them Under Control?
Dinos aren’t necessarily a bad thing. When there aren’t too many of them, they’re part of the ecosystem. But if you provide an ultra low nutrient tank with no biodiversity, they’ll make themselves known quickly. The best way to tackle them varies on how bad your case is.
Dinos are a very resilient pest to control in the aquarium. You will never get rid of them completely since they are part of the ecosystem, but you have to control them with a multi-prong approach in order to keep them for showing themselves in your tank.
Manual Removal
The first step is removal. Others might think that they need to remove all the water and change it with a new one, but that is definitely wrong. Along the process of removing dinos, changing the water in your tank will make things worse. Dinos thrive in nutrient straved tanks and cleaning water will eliminate nutrients and allow Dinos to thrive further. It advisable that you remove the dinos manually with the use of filter sock instead of changing water.
You will need a very fine filter sock to do this (Quick Note – this post contains affiliate links. An affiliate link means I may earn advertising or referral fees if you make a purchase through my link). A 10 micron filter sock is fine enough to catch dinos in the water column.
Increasing Nitrates and Phosphates
Another way to get rid of dinos is by increasing the amount of nutrients in your tank. You should increase nitrates and phosphates to observable level. You may consider nitrates with NeoNiitro and NeoPhos from Brightwell Aquatics. Even a freshwater solution like SeaChem Flourish will work as well.
Remove Nutrient Reducing Media
You also need to remove nutrient reducing media like GFO. It is common for many tanks to have dino outbreak because of the presence of GFO. When you get rid of GFO’s, it is easier for you to increase the nutrient level in your tank and maintain it in the long run. Stop doing any type of nutrient decreasing dino. Examples are No-Pox and Vodka dosing.
Protect Your Invertebrates and Fish!
Along the process of dealing with dinos, having carbon present in your tank will help neutralize the toxins they release as they die off. This will protect your livestock.
Adjust pH
Adjust the pH of your tank. A pH of +8.4 is a good level for reef tanks to avoid dino blooms. The pH is something you can play with over time to determine what works best for your tank.
Kill The Lights
Control the lighting in your tank because the most common dinos derive their energy from photosynthesis, so killing the lights will also kill them. You can use a blackout curtain or cardboard with duct tape around the tank and on top of the tank. Blackouts should last at least 72 hours. Blackouts will usually not result in an eradication of dinos, but will qwell them done to the point where you can start utilizing other methods.
Use Hydrogen Peroxide
Add small doses of hydrogen peroxide to your tank. The general rule is 1 ml per 10 gallons of water. Regular 3% hydrogen peroxide is used.
Use A UV Sterilizer
Use a UV Sterilizer. Get a high quality and well sized UV Sterilizer and run it 24-7. The UV sterilizer will be most effective during the blackout period. This method works best when dealing with Ostreopsis. You can use a Jabeo UVas a cheap solution or an Aqua UV for a high-end solution.
Fauna Marin has developed a product called Dino X that is made to eliminate dinoflagellates in a reef tank. It is a very harsh treatment and should only be considered after all these methods are attempted and you increase biodiversity (see below on that). Fauna Marin requests that you not use carbon during the treatment program, which makes this risky to use since dinos will release toxins when they start to die. Remove as much as possible before attempting. Fauna Marin also recommends using a protein skimmer during the treatment option, so those with nano reef tanks or skimmerless setups may not be able to use this product.
Biodiversityis a major reason why new tanks get dinos when they hit low nutrient conditions. A biodiverse tank has multiple organisms that compete with dinos and keep them from thriving. When choosing the type of rock you are going to use, keep biodiversity in mind. You can choose between live rock and complete dry rock or a hybrid, but I would caution against going with a 100% dry rock and dry sand start.
Dry rock is devoid of biodiversity while in a live rock tank you don’t usually see dinos. It is hard for them to multiply because there too many competitors even in a low nutrient environment.
The problem will be the availability of the live rock because it is quite hard to find nowadays and is expensive to boot.
These days – Real Reef Live Rock is the best source for aquacultured live rock that has the right balance of biodiversity while still being free of pests. This is the best option for those who who not use a sand bed and going bare bottom yet want to free of the risk of pests.
You can obtain Live Rock from Florida that is Maricultured. If you are starting up a new tank and can cure, this is an excellent option. It is shipped directly to your door. The base is Oolite Limestone rock that has been left in the ocean for several years undisturbed. The foundation of live rock’s biodiversity is a key factor in preventing dino outbreaks. You will run the risk of a having a pest hitchhiker, but honestly in my experience these pests are less of a pain to deal with then dinos.
For those people who are not able to procure live rock or have a sand bed, the other option would be to introduce microfauna and bacteria through an aquaculture facility like Indo Pacific Sea Farms. They have been around for many years and their live sand activator and wondermud are just the ticket for increasing biodiversity.
Remove Overabundant Food Sources (AKA Your Invertebrates if an outbreak occurs)
Snails encourage dinoflagellates to settle in and make your tank their home. Well, they don’t actually do it when they’re alive: a dead snail is a feast for a population of dinoflagellate. Dinos will wreck havoc on an invert population. Anything that attempts to eat it can be poisoned to death and the toxins they release will kill most inverts including microfauna like pods! Make sure you’re removing any dead snails, fish, and corals from the tank.
Because it’s hard to tell if your snails are alive, the most foolproof way to prevent that is by removing the snails altogether. Once your dino problem is under control, they can be returned to the tank.
Balance Tank Nutrients
A couple of specific nutrient-related things you can monitor and manage in your tank are:
Magnesium: levels should be somewhere in the 1400-1600ppm range
pH levels (as mentioned above)
Bacteria: introducing new bacteria to your tank will deprive dinos of nutrients. Live Rock and Live Sand are your best friends to maintain biodiversity!!!
Nitrates – Work on getting these above 0 and maintaining it. A little bit of nitrates is good for your tank
Phosphates – Don’t let your phosphates hit 0
Don’t Create an Undernourished Environment
A tank that is starved for nutrition can cause a dino population to pop up too. Usually this situation comes about when you make some major change to the landscape or population of your tank, and the food shortage is abrupt. Dinos don’t actually need that much physical food to eat, especially since most are also photosynthetic. So, if other bacteria or phytoplankton in your tank die out from lack of nutrients, it removes the dinoflagellate’s primary competition and gives them room to thrive.
Wrapping Up
Quality equipment planning and setup is important for the overall health of your tank, whether it’s a 10 gallon aquarium or a 100-gallon aquarium. While there are several factors that help dinoflagellates take over, a poor setup and controlling parameters tops the list.
When dying, dinoflagellates release toxins into your water. So, it’s essential to purify the water consistently, both during and after your dinoflagellate infestation.
Here Is a Wrap Up To Close Down This Post:
Biodiversity Is Your Friend!
Don’t be scared to get live rock or add live sand activators in your tank
Having Nitrates and Phosphates Is Good!
Having Nitrates and Phosphates is good – our hobby has spent years demonizing this. This has lead to tank setups way overbuilt from the start and completely sterile start systems. This extreme approach has lead to more and more dino cases over time!
Dinos Require a Multi-Prong Approach
Dinos are tough to deal with. Use the recommended techniques mentioned in this post to fight them off and understand this is a intense battle.
Test Your Water Parameters!
Regularly test your water’s nutrients – nitrates & phosphate and understand the nutrient consumption on your tank. Modern reefs these days can strip nutrients completely clean and may require dosing of nitrates and phosphates to stay at a healthy level. Knowing your consumption puts you in control of your reef tank! Use a reliable quality test kit to monitor your levels and get in the habit of testing regulary.
However you choose to combat your dinoflagellates, know you’re not alone. Just about every modern aquarium enthusiast has done battle with the brown menace. There is hope: you just need to be consistent and patient in your approach killing them off.
📘 Want to learn more? This article is part of our complete Saltwater Fish & Reef Guide — your ultimate resource for marine fish, coral care, reef setup, and more.
Setting up a coral reef is one of the most rewarding things you can do in this hobby — and one of the most intimidating if you don’t know where to start. I set up my first reef tank years before there were good online resources, so I made a lot of expensive mistakes. My 125-gallon is the product of everything I’ve learned through trial, loss, and persistence. This guide is what I wish someone had handed me when I started.
Have you tried setting up a coral reef tank? Selecting your first corals can be overwhelming but there are certain important things to consider about this high maintenance hobby. Corals thrive best in larger reef tanks but they can also be kept in small aquariums. One of my most favorite items in the marine hobby is soft coral.
On a side note, soft corals are composed of soft tissues. Among the fastest growing flower animal, they lack skeletal structure. They have the widest range of brightest colors available in the hobby.
They can live in moderate lighting but more intense lighting makes them bring more intense coloration.They usually feed on suspended food particles.
Some corals can only tolerate high nutrient environment. Most of them need slow flowing water. Various types of corals are available in the market. They are categorized from easiest to hardest to care for:
Mushroom Corals – Many varieties available. Avoid Yumas though as they aren’t as hardy
Colt Coral – Hardy and tree like.
Toadstools – These very hardy soft corals come in brown, yellow, and pink colors.
Zoanthids -They are the most popular. They come in a wide variety of colors and sizes. They reproduce very quickly.
Corals are marvelous. Keeping them is fulfilling with proper maintenance and knowledge. Here are some corals that can be bad for beginners to buy:
Invasive corals: green star polyps, xenia, anthelia, yellow polyps, generic palys. They are fast growing corals and extremely hardy. They need to be isolated or on a separate rock not touching the rest of your corals to prevent them invading the other rock formation.
Goniopora – also known as Flower Pot Coral. This require intensive care and feeding.
Non-Photosynthetic coral (azooxanthelle) – Sea Fans, Chili Corals, Sun Corals, and Gorgonians require feeding three times a day. They have the most odd textures, shapes, and cryptic behaviors. Because of their demand, you need experience and advanced filtration systems to maintain the water parameters in good shape.
Important Thing to be Aware of When Packaging:
The stone where the coral is glued must be attached to a styrofoam before putting in the plastic bag with saltwater. This makes the coral protected even if the plastic bag is tossed around, especially during delivery or travel. When the bag turns over, the styrofoam floats and turns over leaving the coral unharmed. The styrofoam with rock and coral should always be in inverted position.
Introducing Them to Your New Tank:
Acclimation is also necessary for them to equilibrate the temperature. There are three steps to properly acclimate corals:
Let the plastic bag with coral floats above the water surface of your tank for 10-15 minutes. This enables the coral to adjust to your tank’s temperature and avoid stress.
Drip accumulate the corals by using an airline drip to allow them to adjust to your tank parameters.
Place them first on the ground rather than putting them on higher spots because the corals must adapt slowly.
Don’t go for dirty water, though corals can tolerate, eventually it leads to a disaster. Go for clean and nutrient-rich water to ensure their good health. Iodine supplement is also necessary. Seek recommendations from experts.
Drip and Quarantine Them:
Drip every corals you introduce to your system. If you are new to the hobby, a solution like CoralRX is pretty standard to use. As you get more experience, you can move on to Bayer, which is a surprisingly effective coral drip and superior to the standard drips sold by your LFS.
Any procedure that should be done is quartaining your corals. This is done to not only light accululate your corals, but to also prevent pests and diseases from entering your aquarium. Any coral you purchase runs the risk of bringing in all sorts of pests like flatworms, glass anemones, red bugs, and nudibranchs.
A coral QT is easier than you think. I personally follow the FishOfHex method as shown below in the video:
Must-Haves During Maintenance:
Eye goggles – This will protect your eyes from squirting of slime coming from accidental cutting through coral tissues.
Mouth and nose cover (mask) – Having this prevents your mouth to get in contact with toxin.This will also protect you inhaling the bad fumes.
Tight gloves – You need to always wear this during cleaning and touching the rocks.
Carbon – this absorbs the poison (toxin) in the water.
Avoiding Palytoxin Poisoning in a Reef Tank
Palytoxin is poisonous. The fumes that comes out from corals are toxic. Here’s how to avoid it in a reef aquarium:
Avoid the slime and wash your hands thoroughly after touching the coral.
Enough ventilation in the room is necessary.
Never boil live sea rocks or corals because this will release playtoxin in the air and poison not only you but the entire house!
Do not let the coral gets near to your mouth or eyes. Mucus (palytoxin) squirts which are dangerous. Avoid touching coral reef tank if you have open wound. When the mucus enters your bloodstream, you need to seek medical assistance.
Carbon is needed to remove the palytoxin in your tank.
Dispose the water contaminated with toxin and pieces of corals with concern to the proper place. Seek recommendation from experts how to properly get rid of them.
3 Ways Palytoxin Can Enter Your Body:
Direct contact: eyes, and mouth
Ingestion (eating)
Inhaling the fume
Reefs Explained
They are alive. Unlike plants that produce their own food, corals catch their food to survive. Coral larvae can swim then eventually attach to hard surfaces or rocks to form a reef. Corals belong to the class Anthozoa of phylum Cnidaria (flower animals).
These marine (saltwater) invertebrates are diverse underwater ecosystems that secrete calcium carbonate forming a structure. They have polyps (composed of thousands of tiny animals) that cluster in groups.
How Do They Die?
coral mining
pollution
blast fishing
overfishing
destructive fishing practices: using cyanide and dynamite
disease
global warming
outbreaks of predatory starfish
digging of canals
Primary Types:
Barrier – They border a shoreline but they are separated from land by water forming an open water, usually deep, between the shore and the reef.
Fringing – grows seaward forming borders along the surrounding islands and the shoreline
Atoll – oval or circular in shape. From being a fringing reef, they grow upward from a volcanic island that has sunk below the sea ground.
Interesting Facts:
Corals can live up to 900 years, growing as large as 6 feet (1.8 m) or more. Worms, fish, snails, and sea stars prey on corals. Coral is immobile and when it dies, the hard calcium structure remains and eventually a new coral will form. The process is repeated over and over and expands.
Overtime, the coral colonies that are being buried by sediments when they die turn into limestone. They become fossils on Earth.
What is a Polyp?
It does not have brain, tongue, nose, and ears but it has nerve net that goes from the mouth to the tentacles. Coral is the simplest animal to have dedicated reproductive system, muscular system, and nervous system.
Final Thoughts
Setting up an indoor coral reef is rewarding. The artificial marine ecosystem provides a stunning display. This hobby requires expertise to be successful and ensure the safety of your family. Know the pros and cons. Awareness is vital.
Avoid letting wastewater contaminate Earth’s bodies of water. Participate in campaigns against global warming. Coral reefs play an important role in sustaining our economy and the health of our oceans. Preserve coral reefs. Provide homes for millions of aquatic species.
📘 Want to learn more? This article is part of our complete Saltwater Fish & Reef Guide — your ultimate resource for marine fish, coral care, reef setup, and more.
Vermetid snails are one of those reef pests that sneak up on you — I’ve found them hitching in on live rock and coral frags more times than I can count. Once they establish and start casting their mucus webs, they can inhibit coral growth and become a genuine headache to manage. I’ve dealt with them in my 125-gallon and know which removal methods actually work without stressing your other inhabitants.
Vermetid snails are one of the more underrated nuisance pests in reef tanks — most reefers don’t even know they have them until corals start receding. I’ve dealt with these in my 125-gallon reef and learned the hard way that catching them early makes a huge difference. The mucus nets they cast out to feed can irritate and damage nearby corals, making control and removal critical for a healthy reef. Here’s what I’ve found works best after years of dealing with them.
This species of sea snails can be such a nuisance because vermetid snails are harmful to both corals and fish tank owners’ budget as our experts have often pointed out. The snails latch onto corals’ spongy and irregular surface, and they can stunt their skeletal development. What’s more, they can suck the life out of corals and kill them. Luckily, there are ways to fight them off!
What Are Vermetid Snails?
Classifying and describing vermetid snails can be difficult, as they belong to a superfamily of gastropods called Cerithioidea, which is divided into three main families. The type of vermetid snails, aka worm shells, that plague fish tanks belong to the Vermetidae taxonomic family, which includes several species. Still, the three families share similar traits.
What sets the Vermitidae apart from their cousins is that they prefer to latch onto irregular masses, such as sponges, and they dwell below the coastal zone while in the wild. What is more, even though they are technically gastropods, they do not have coiled shells like other marine species from the same class do.
When a vermetid snail is born, it immediately seeks to build a home. It then attaches to a hard surface and builds a calcified tube, aka its shell. These formations are very similar to those built by annelid tube worms, which makes vermetids’ identification difficult to the naked eye. Still, a seasoned aquarium owner will be able to tell the difference between the two species.
In addition, these little guys spend most of their life in the same place. This might make one wonder how they manage to feed? The answer is simple. They spew mucus nets out of the ends of their shells, which they use to catch nearby detritus and plankton.
Vermetid snails in an aquarium can harm corals. They usually impede coral growth and damage corals’ skeletal structure of LPS and SPS corals. Therefore, if you notice any of these snails in your reef tank, it’s time to take immediate action.
How to Remove Vermetid Snails from Aquariums
Unfortunately, removing vermetid snails from your aquarium can be quite challenging. Still, it is worth the effort if you want to protect your corals (and hard-earned cash you’ve spent on them). Gallery Aquatica TV has a few tips that I’ll go over below.
The Superglue Method
First, be careful if you are completely infected with snails. Killing a bunch of vermetid snails inside the reef tank with superglue is a fun way to have a nutrient spike. The superglue method involves sealing their exit from the tubes.This prevents the snail from exiting and starves it out. Once the worms die and start decaying, they create a nutrient imbalance in the water, which ups the water’s toxicity and creates a perfect environment for other fish tank nuisances like algae blooms.
The best way to remove the snails are to pull out the rock or infested corals so you can remove them manually and not have them decay in the tank.
The Nuke – Hydrocloric Acid Method
Many hobbyists have tried a direct approach to the issue. Identify the rocks or sponges that have vermetid snails nesting on them and remove them from the aquarium. Then, wash them thoroughly with a 10% to 20% solution of hydrochloric acid. While this works, it can be drastic and can kill of ton of beneficial bacteria. I would call this the nuclear option.
The acid will eat away snails and remove them completely from the rocks and sponges. If it takes too long for the snail to wash off, you can let the rocks soak in the hydrochloric acid solution for a couple of days. The rocks should be white and clean at the end.
Be very careful with this method as the substance is harmful to your skin. Wear gloves, a respirator, and eye protection when handling HCL. Using HCL is a post within itself, so I’m going to link a Reef2Reef article that goes into further detail.
Manual Removal – The Bone Cutter Method
If the vermetid snails are attached to your corals or frag plugs, one easy option is to pull the coral out of your display tank and pull the snail off of it using bone cutters. Make sure when you use the bone cutters that you cut off the base. The base is where the snail lives so cutting off the base ensures a complete removal.
Getting Violent – The Lancing Method
A more savage method is to use an ice pick to stab the base structure of the snail. This method is great to use if the snail is lodged in an area that is hard to get. Make sure that you remove the infected coral or rock before attempting this as it is a messy process that will result in a cut up snail. Stab the middle of the base with your ice pick and wipe it away from the rock to kill the snail.
You may unearth the snail from the structure using this method. If that happens, pull it off the rock and finish it off to ensure it doesn’t accidentally re-enter your aquarium.
The Bottom Line
Vermetid snails are common fish tank parasites that build their own calcified tubes. They reside inside the tubes their whole lives, and they cause great damage to corals.
I have outlined several methods that can be used to remove vermetid snails from safe to nuclear. Worse case to wipe them out, you will need to remove the rocks that they have attached themselves to from the tank, and thoroughly clean them with HCL. It is a most drastic method, but the other methods outlined in this post should be attempted first.
📘 Want to learn more? This article is part of our complete Saltwater Fish & Reef Guide — your ultimate resource for marine fish, coral care, reef setup, and more.
LPS corals were my entry point into keeping coral in my reef — they’re forgiving enough for beginners but rewarding enough that experienced hobbyists keep them long-term. I’ve kept hammers, torches, and frogspawn in my 125-gallon for years, and these large polyp stony corals have some of the best movement and personality in the hobby. If you’re just getting started with coral, this is exactly where I’d recommend beginning.
So you have seen the incredible tanks posted on forums, seen your friend’s tank, or just have been inspired by seeing ocean life and now looking to get your own. Reef tanks can be pretty intimating for a newcomer and we have written articles about tank selectionand easy saltwater fish to keep. But what about corals?
I wrote an article later on about soft corals, but I want to talk today about the LPS Coral. These corals are the big show stoppers in the tank with their colors and their varieties, but not all LPS corals are created equally. Some of these corals are difficult to keep, but we have a list of corals here that you can safely pick from if you are looking to get into coral keeping.
Before we get started, let’s talk about requirements of LPS corals. What makes corals “difficult” in the hobby is stability. Corals like stability. They don’t want temperature swings, they suffer from salinity changes, and hate high nitrates. The good thing is that technology and best practices from experienced hobbyist have made it easier to keep LPS corals than ever before.
A solid RODI system or buy RODI water from your fish store
Make your biological filter natural with dry rock or live rock – consider slowly removing “nitrate factories” such as bio-balls
Change your water on a set schedule at least twice a month. Use a quality reef salt mix.
Consider supplementation if you have a heavy LPS or SPS population – for many newcomers water changes will take care of this if you are a frequent water changer. We recommend two part from B-Ionic and dosing to your saltwater mix
The Easy LPS Corals for Beginners
Below is our list from the easiest to care LPS corals readily available in the market. While there could be many others on this list, we felt these were the best candidates based on their beauty, ease of care, and uniqueness. Feel free to comment if your favorite has been left off the list.
This is the one of the more aggressive corals on the list, but it is readily available and very popular. The main thing with the frogspawn is giving it adequate space as they are known to stretch 6″ beyond their base at night and will sting other corals nearby. They can be mixed with hammer corals as they both will not sting each other. There is also a variant called an Octospawn, which is less common, more expensive, and offers more color variety.
Hammers are a great beginner LPS coral that adds a lot of moment. It is relatively easy to care for with the major issue being its aggressiveness. Also note that the branching hammers are a lot easier to take care of over the wall types. They come in a lot of different colors with yellow and orange being the most expense. These are fairly easy to find online, but the more exotic hammers tend to be only sold through coral vendors while the cheaper variety tend to be found locally or through coral vendors selling on EBay.
Acans are great coral additions as long as you place them correctly. They need to placed a few inches away from other corals as they are known for attacking other corals by extending their stomachs out! They are widely available in many colors and patterns. Acan lords tend to be on the less aggressive side versus other Acans. Reds are the most common color but they come in many colors.
If you are looking for a coral like looks like an anemone, this is a great candidate. Well a Torch coral can pull off the look as well, some Torch corals can be pretty finicky, but most Ducan corals are pretty tough. This is a fairly easy LPS coral and a fun one to feed as it will readily consume food. They offer a lot of movement in the aquarium and can get quite large if you let them. They tend to also be fast growing and easy to frag.
Pagoda Cup Corals do vary in the amount of care they require. You will want to avoid such species with thin plates or convoluted shapes. Pagodas like the one picture above are the ones we are looking for. They make excellent additions to a reef tank being very peaceful and easy to keep. The only thing with these corals is that it growth fast.
This is a very hardy coral that will add color to the bottom of your tank. It prefers to live on a fine sandy substrate and known for being easy to care for.
A Blasto coral is a pretty tough LPS coral that adds a lot of color in the reef tank. While it can be more on the aggressive side, they make up for it with their variety of colors and more tend to be fairly affordable. It’s a pretty low risk LPS coral to start with and a joy to feed.
A hardy coral that can be placed anywhere in the aquarium. They are on the aggressive side so care must be taken when placing. They are plentiful in the wild and available from local fraggers and shops. The favia brain coral overall is a great coral for beginners.
An excellent LPS coral for a beginner. This is a hardy and peaceful coral with very short sweeper tentacles. They are a number of colors available and they are not overly expensive. They stay small enough to be good candidates for smaller tanks.
The number one LPS coral on our list hits all the checkmarks. A peaceful coral than can be placed anywhere in the aquarium and needs moderate flow and lighting. It’s short sweeper tentacles allow it to be placed in close proximity to other corals and it is a generally hard coral.
Candy Cane Key Stats:
Temperament: Peaceful
Lighting: Moderate
Water Flow: Medium
Placement: All
Feeding Instructions
Discussing LPS corals wouldn’t be complete without talking about feeding them. After all, feeding LPS corals is really what makes many reefers enjoy them being seeing them actively feed gives that anemone like appearance and behavior. The other great thing with being able to feed LPS corals is it is a great way to help a coral that is struggle or going south. In fact, some of these corals like Acans, do much better with feedings once or twice a week. So what is the best food for them?
We recommend feeding your LPS corals with Polyp Lab’s Reef Roids. Reef roids is readily accepted by LPS corals and it’s too small to be eaten by fish, which can be an issue in a reef tank once fish figure out that when corals are feed. Big meaty food like Mysis is great as well, but it is big enough for fish and shrimp to get a hold of and can cause some harassment when then shrimp or fish pull the food out of the coral’s mouth.
Just mix up the roids in a cup of tank water, use a turkey baster too grabbed the mixture, and directly feed the LPS corals while the pumps are off. Feeding 1 to 2 times a week and as always always test your water to make sure you aren’t spiking your phosphates and nitrate levels with too much food.
Closing Thoughts
We will note that your tank must be setup with a healthy system before you begin placing corals in your aquarium. All corals require careful observation while they are establishing in your tank. Check for signs of stress like lack of opening up, discoloration, or damage to other corals. Stay patient and make adjustments as necessary. Once you have your first set of corals established you will be on your way to a successful and enjoyable reefing experience!
📘 Want to learn more? This article is part of our complete Saltwater Fish & Reef Guide — your ultimate resource for marine fish, coral care, reef setup, and more.
Nutrient export is one of the most debated topics in reef keeping, and I’ve experimented with most of the major methods in my 125-gallon over the years — GFO reactors, biopellets, refugiums with chaeto, and algae scrubbers. Each has a real place depending on your system’s bioload and your maintenance preferences. This breakdown is based on what I’ve actually run, not just theory.
Algae scrubbers are finally starting to pick up mainstream acceptance in the Reefkeeping community! As someone who has advocated Algae Turf Scrubbers, for many years it great to see them more widely accepted. There is still a lot of skepticism in the industry though and many store still push other products and solution. I created this article below so you can see the differences between an Algae Scrubber (AKA Algae Turf Scrubber) and other solutions like there. There will be affiliate links in this article as a quick disclosure where I may make a commission should you make a purchase from the link at no charge to you. Let’s get started.
Algae Scrubber vs. Algae Blocker
Ah the Algae blocker. This is a very common solution you will hear about at your Local Fish Store (LFS) when a customer comes in with an algae problem. I think of these as the diet pill solution to nuisance algae in the industry.
What is a blocker?
An algae blocker is a chemical product that will work to remove nuisance algae in the aquarium. The most well known algae blocker is Boyd Enterprises Chem Clean who sells a Cyano blocker. The industry has gotten really good over the years and have created reef safe solutions that will remove algae, but will not harm inverts and corals.
Why is this better than the Blockers?
An algae blocker’s purpose is to quickly remove algae, but it is not an end all solution. They really are meant to wipe out nuisance algae after the long-term problem is treated – usually a poor water source or bad aquarium housekeeping. They become expensive to use long-term.
An Algae Scrubber on the other hand, is a natural solution to nuisance algae. The algae you grow in the scrubber sucks up the nutrients that feed other forms of algae, and the algae is keep in one spot where you can remove it. Scrubbers are always a long-term investment in the aquarium as they do not need ongoing filters or replacement parts.
Is The Reactor Different?
Algae reactors have been commercialized recently with the raise of Algae Scrubbers.
What is a reactor?
An algae reactor is a self container container that grows macro algae like cheato. They are pretty complex units, with a reactor chamber, pump, and lighting all functioning in the unit.
The biggest advantage to an algae reactor is ease of use and simplicity. While an Algae Reactor has a comprehensive unit, an algae scrubber has simple individual parts. This means that if one part breaks, it is easier to fix vs having to buy another unit.
Biopellets
Biopellets have been a solution for denitrification for years
What is a Biopellet Reactor?
Biopellets themselves are a polymer that is made up of bacteria. They are meant to be a supplement to the beneficial bacteria in your aquarium. The main draw is these biopellets will remove nitrates. They require a reactor so you can efficiently work the materiel and cultivate the bacteria.
What is better than Biopellets?
Biopellets can be tricky to dial in and can actually strip too many nutrients in your tank. Stability of the operation is there biggest issue. You also still need to address phosphates requiring another equipment solution. An algae scrubber handles both nitrates and phosphates and are easier to operate once they are broken in.
Cheato
Cheato was the first acceptance of using algae to control nutrients in an aquarium
What is Cheato?
Cheato is single celled macro algae that is simple to grow and easy to place in a sump. It is one of the easiest and simpliest ways to control nutrients in a tank
Which is better than Cheato?
The main advantage you will get from a scrubber is surface area growth. Scrubbers have the ability to grow more nutrient absorbing algae in a concentrated space then cheato. You need a lot of cheato to control nutrients and you need the space in your sump to do it. The major downfall is the risk of pests and disease from Cheato. Yes, that is correct Cheato can bring over a number of pests and diseases. Unless you Quarantine your Cheato (very few people do this) or you get your Cheato from a source that guarantees clean Cheato (like Algaebarn), it is always a risk. With an Algae Turf scrubber, you are growing your own algae from your own tank. You are in full control of what comes in and out through your introduction procedures with your fish, inverts, and corals.
But other than that cheato is and will always be a cheap and go solution for nutrient control. It is algae after all and a natural way of removing nutrients in the aquarium.
Denitrator
Denitrators were a solution to aquariums for many years until other products like Zeovit and Biopellets came about.
What is a Denitrator?
A denitrator is a piece of equipment that has been used in wastewater treatment plants and public aquariums for years. Denitrators are the solution to using a traditional media bag in the sump which is harder to manage optimally. A denitrator pieces the media in a chamber where the water can properly react to it resulting in consumption of nitrates.
Which is better than a Denitrator?
A denitrator system and a built algae scrubber equipment wise are around the same price. The main advantage you will get with an algae scrubber is you will not need to replace your media and the parts are easier to replace. The other advantage that an algae scrubber will have is that it will remove phosphates while the denitrator will only remove nitrates. You will need to invest in other equipment to control phosphates.
GFO (AKA Phosban)
GFO is a common media used in saltwater aquariums. Phosban is the big name brand that sells GFO.
What is GFO?
Granular Ferric Oxide or GFO is media that is used in an aquarium to remove phosphates. It is also used to remove heavy metals and other toxins in the aquarium. Generally, GFO is placed in a reactor for optimal use.
Which is better than GFO?
Investing in a GFO system will incurring recurring costs as the media will need to be replaced every 1-2 months. GFO also does not remove nitrates, meaning you will need another piece of equipment or solution to remove nitrates from your aquarium. An algae scrubber will remove both phosphates and nitrates and will not incur recurring costs.
Refugium
For reefers who have a sump, it is very common for them to have a flex space that is used to create a Refugium.
What is a Refugium?
A refugium is usually a section in a sump that is reserved to in order to provide a place for certain organisms to survive. In general, these would be organisms like copepods, macroalgae, and certain inverts.
Why is this better than a Refugium?
A refugium is also usually used to grow macroalgae for nutrient control and be a place to grow copepods. An Algae Scrubber is actually great at both. It grows algae like crazy and copepods thrive inside the mesh of the scrubber. It is very common when you clean an algae scrubber that you can remove hundreds of amphipod and copepods from the scrubber. No other piece of equipment does a better job at growing them. This allows you to do more in the flex space of your sump.
Zeovit
Zeovit is a nutrient free solution that is touted in the reef aquarium industry.
What is a Zeovit System?
Zeovit is a system that produces an ultra low nurtrient system. It utilizes bacteria to eliminate nutrients at the initial source – Ammonia.
Why is an this better than a Zeovit system?
Zeovit systems are pretty complicated to setup and expensive. It is not a cookie cutter system and every system is different. Dosage and product needed for your system will differ. An algae scrubber on the other hand, is all about simplicity. It is easy to setup, easy to clean, and easy to get results.
Zeovit is really a product of the saltwater aquarium industry, which loves to market the latest and and greatest high-tech toys and solutions to hobbyists. It is a great product, as long as you can dial it in, but overly complex.
Natural and Simple
An algae scrubber is natural and simple and nature is not a solution that is going to be outdated or obsolete. Always do your research regardless of what you end up purchasing. Let us know your experience with equipment or any questions in the comments.
🔧 Want to learn more? This article is part of our complete Aquarium Equipment & Gear Guide — your ultimate resource for filters, heaters, lights, pumps, tanks, and more.
Twenty-five years in the saltwater hobby has given me a long list of things I wish someone had told me earlier. I’ve made expensive mistakes, watched beautiful tanks crash, and learned from both my own experiences and from the thousands of people I’ve interacted with through this site and our YouTube channel. When I put this list together, I wasn’t going for generic advice you’ll find anywhere online. These are the specific insights that actually changed how I approach reef keeping — things that would have saved me real money, real frustration, and a lot of lost livestock if I’d known them at the start.
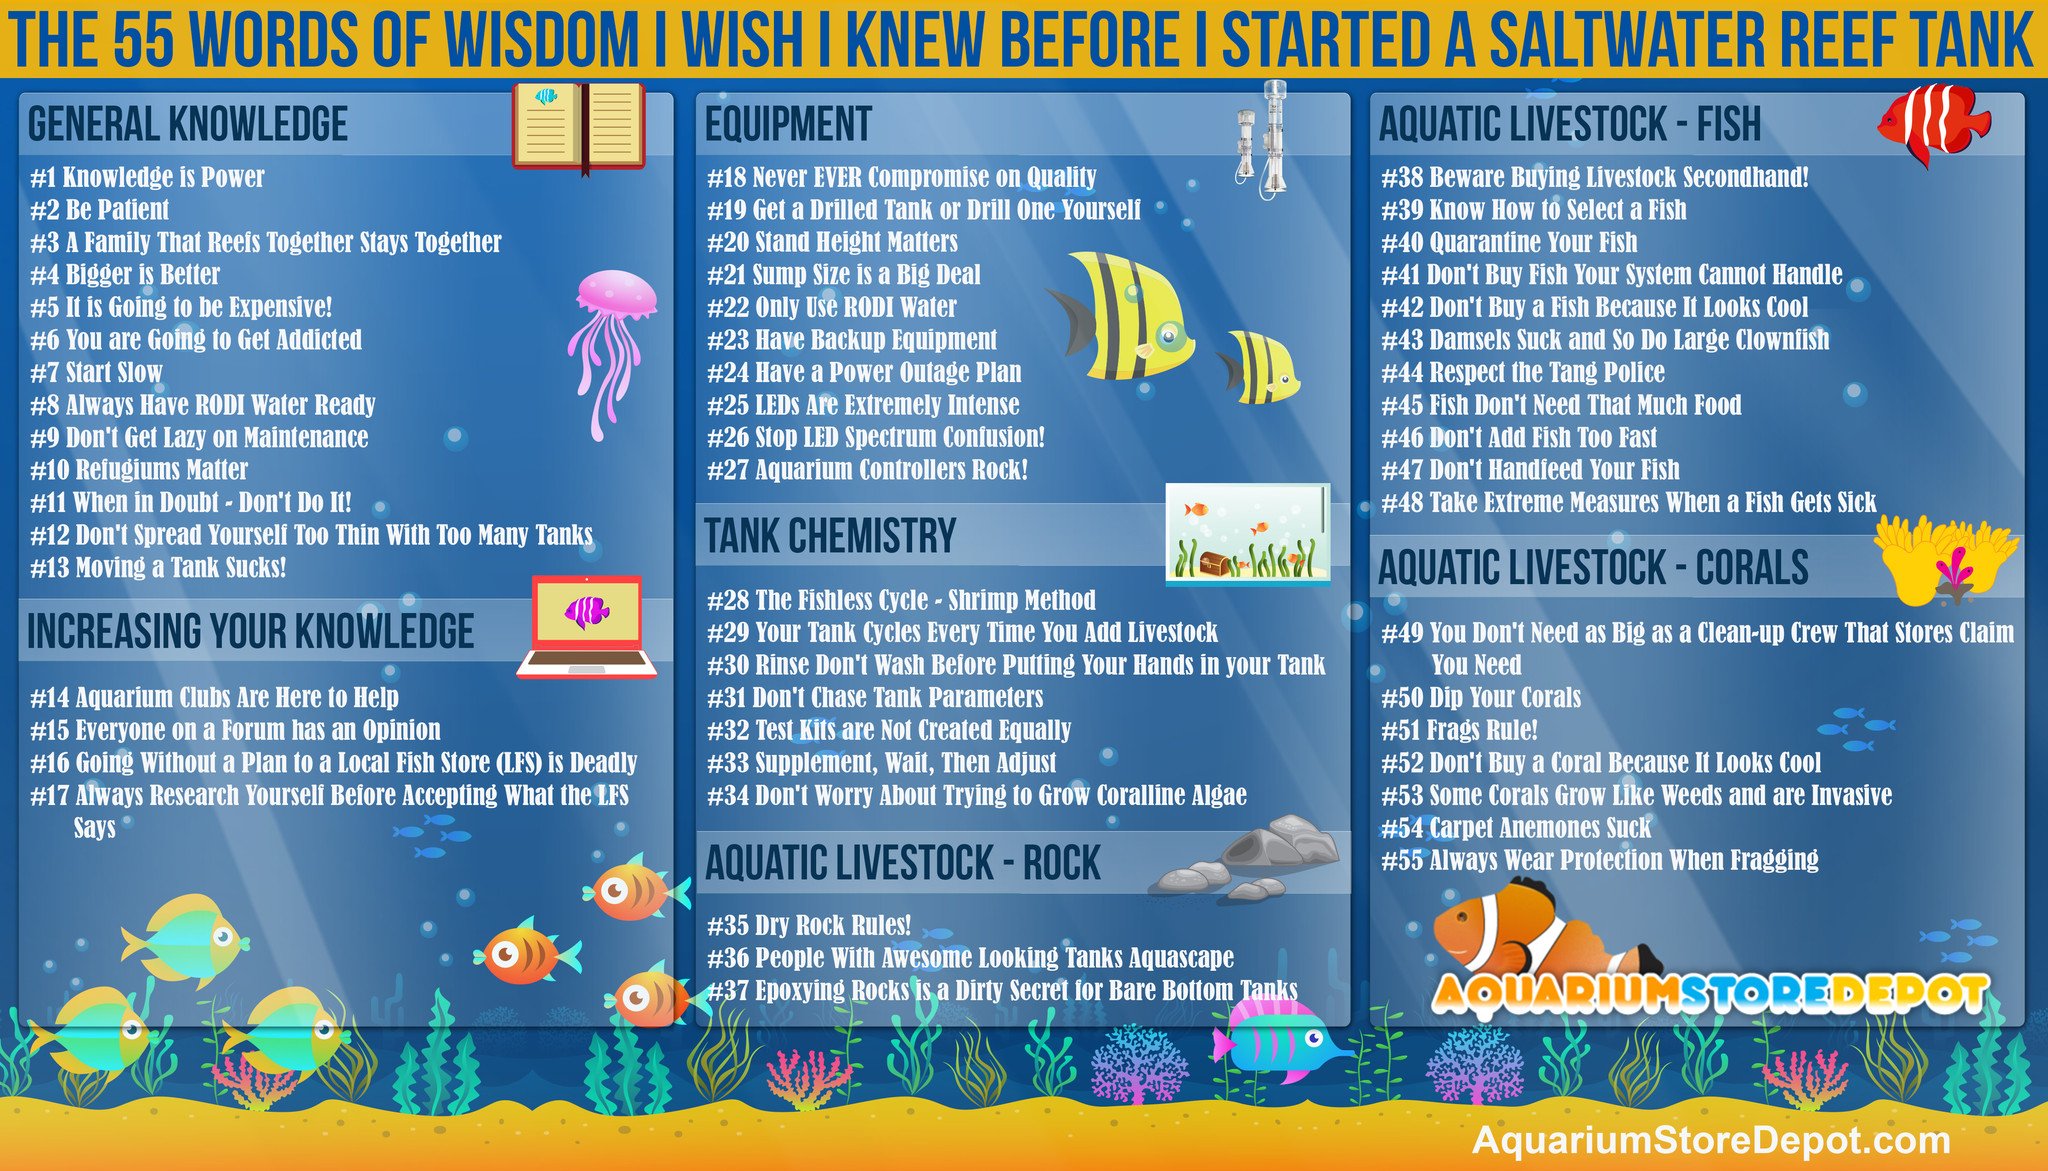
First, I would like to say thank you for reading this post. This is going to be a long point about the 55 words of wisdom I wish I knew before I started a saltwater reef tank. This is a list I have been thinking about for some time. Each one of these things can be a post on its own but I feel placing these all on a single post is a great reference to anyone starting out the hobby or wants reminders on general advice on reefing.
So without further ado here is the list on a nice infographic:
Saltwater Reef Tank – 55 Words of Wisdom I Wish I Knew Before I Started
So now that you have seen the list, here is the detailed breakdown of every word of wisdom below:
#1 Knowledge Is Power
Knowledge plays a huge role in this hobby. What you know will dictate how you will grow your tank and how you grow in the hobby. Taking the time to read books, visit blogs like this one, and getting to know other hobbyists empowers you as a consumer and aquarium owner. If there is anything you takeaway from this blog entry, it is that knowledge is king in this hobby. It will save you time, headache, money, and increase your passion.
#2 Be Patient
This is a very hard lesson to learn even for advanced hobbyist. For a new aquarium keeper, it is very easy to get excited about building your saltwater reef tank and make changes very quickly. As an advanced hobbyist, sometimes we are attracted to deals we see locally or on-line. Other times we try to push the limits of tried and true knowledge.
At the end of the day we need to keep in mind that we are maintaining a delicate ecosystem in our aquariums. Every time we add something or make changes the system needs time to adjust. This is another lesson that sometimes we as hobbyists learn the hard way.
#3 A Family That Reefs Together Stays Together
If you have a family or a significant other, I highly encourage you to get them involved in your saltwater reef tank. Our hobby tends to be a very isolated one where one person does everything and your significant other is wondering why you are spending so much time on your tank, not talking and spending time with them, and why everything is so expensive.
Get them involved! Teach them everything you know and explain the inner workings of the aquarium and habitat. In the end, you will have a significant other that at a minimum will understand how to care for your tank or at least tolerates your passion. You may get lucky and convert your spouse to a full-fledged reef fanatic.
If you have children, this is a wonderful opportunity to teach your children all sorts of great life skills – trade skills from DIY projects, chemistry and biology lessons, responsibility, and discipline. Working with children when it comes to aquariums is a big passion of mine. I actually wrote up an article on FamilyShare.com detailing out various activities you can participate with a child.
#4 The Bigger the Better
Bigger is better in this hobby. A bigger tank = more volume and more stability. A bigger sump = more flexible space, more volume, and more stability. A bigger protein skimmer = more bio-load capacity (up to a point of course). A bigger RODI unit with more gallons per day means you can get fresh water faster. The list goes on and on. Get the biggest tank and highest rated equipment you can afford or fit in your space. If you can’t afford it yet, wait (See words of wisdom #2 – Be Patient).
Larger tanks with bigger equipment are easier to have success with. Don’t start off with a nano or pico reef tank. These tanks are best for experienced hobbyist. Learn more about sumps by looking at our best aquarium sumps and refugiums post.
#5 It is Going to be Expensive!
A saltwater reef tank, even a nano tank can easily cost over $1000 to setup. You can cut some costs down by purchasing a cheap used tank or getting frags from friends, but the simple fact is that saltwater tanks are expensive. On average, you will spend at least 3 times more than a freshwater aquarium. It will go up even more if you shoot for a mixed reef, SPS heavy tank, or want a Rimless Aquarium. Along with setup costs there will maintenance cost.
Electricity, dosing, salt, and food will all need to be accounted for. At the end of the day, keeping a reef tank is expensive so if you are not willing to spend the amount of money to have a successful one, it is probably a better idea to try a less expensive option like a freshwater community tank or an African Cichlid tankwith less expensive equipment like power filters or canisters filters. See our post to see what the best power filters and best canister filters are.
#6 You Are Going to Get Addicted
Any successful reef keeper has a high chance of getting addicted to this hobby. You become a successful reef keeper and have a great tank. Then you think about upgrading your tank so you move on to a larger one. Then you wonder what to do with the old tank so you decide to keep it and create different type of tank with it. Or you get into corals then move onto fragging them. Then you turn that old tank into a frag tank. Then your clownfish start spawning and you want to raise the fry so you create a fry tank.
Successful reefkeeping requires passion. Passion can turn into addiction. #eatsleepreef is one of the largest reefkeeping hashtags on Instagram for a reason :).
#7 Start Slow
Start slow and do not rush (remember #2 Be Patient). Nothing good in your saltwater reef tank happens overnight. In contrast, mostly bad things in your aquarium will happen quickly and overnight. Behind every tank of the month and showcase display tank there is a whole lot of work, research, time, and care put into it.
#8 Always Have RODI Water Ready
RODI systems have a gallon per day rating. If you have a low gallon per day output on your RODI system, you may be waiting for hours if you need the water in an emergency. You never know when you will need to do an emergency water change or you forgot to fill up your auto-top off container, etc. Have some RODI water ready. You can also use distilled water as a substitute in a pinch.
The great thing about distilled water is that you can purchase it at grocery stores, which tend to be open late on nights and weekends. There are a number of cheaper RODI units available these days that work for reef tanks including those made by LiqaGen:
Keep up with your water changes and maintain all your equipment. Clean out your skimmer, change out your GFOand carbon, keep your water topped off, clean your glass, clean your pumps, have dosing supplies and salt handy so you do not forget. It is really easy to fall behind on maintenance once you stop building your reef up and your tank hits stability. Do not fall into lazy reefers syndrome.
If worse comes to worse – considering hiring a professional to maintain your tank. It’s not worth it getting lazy and losing everything you worked so hard for.
#10 Refugiums Matter
In general, the first chamber of a sump is for a high quality protein skimmer and the third chamber is for the return pump. This leaves the middle chamber. The refugium chamber of a sump is the most important part of your sump. It can not only be a refugium, which you can use macro algae like cheato to suck up nutrients, but it is also the flex space in your sump. Some hobbyists today use the refugium space to house an algae turf scrubber. The bigger it is the better.
#11 When in Doubt – Don’t Do It!
This hobby is all about knowledge and research. If you are about to purchase something whether it is equipment or livestock and you have doubts, do not buy it. So many unnecessary livestock losses and money wasted on unneeded products can be prevented by using this rule.
#12 Don’t Spread Yourself Too Thin With Too Many Aquariums
Recall #6 when I said you will get addicted. This is where things can go wrong. In our circle, we call this multiple tank syndrome. You purchase multiple tanks and try to run them all at the same time. Don’t spread yourself too thin. The more tanks you have the less time you have to maintain each one. It’s better to focus on only one tank and if you get the itch to start up another tank, consider upgrading your current tank to a larger one instead.
This hobby is very addicting, but do not try to make it take over your entire life. I know for some of you reading this – it is probably too late :).
#13 Moving an Aquarium Sucks!
Take your time and be set on your decision of your tank location. I cover what to look for when determining your tank location in an another blog post. Having to move a tank after you made your location decision can be fairly painful, but it is nowhere as painful if you are actually needing to move to a new apartment or home. There are so many steps and factors to consider when you are moving your tank. It describes it in detail could create a blog post as large as this article. It is a complex task and many things need to be setup ahead of time as the clock starts ticking once you pull your inhabitants out of the tank and into storage containers.
If you are moving locally, take your time and research this carefully and have as much prepped beforehand. If you are moving out of state, consider selling your livestock or getting a professional to help and make sure you have references.
#14 Aquarium Clubs Are Here to Help
There are a group of people who cheer for your success in this hobby every day. They are the aquarium clubs and societies located throughout the country. With frequent local meetups, frag swaps, sponsored events, and tank showcases it is the place to go to really build relationships with other hobbyists who share your passion. It is also a great place to be mentored and even a better place to find a reliable tank sitter or someone who can help you drill a tank.
Forums are a great place to build up your knowledge, but it is also a great place for bad information. Some forums users will answer a question on a forum trying to be helpful, but they may not know the answer and may just throw one out to be helpful. In the end, the bad advice may hurt the hobbyist listening to it.
So how do you differentiate between the good and bad advice on the forum? There are few things to look for: time on the forum, past posts, do they have pictures of their own tank on the forum, etc. Look at the forum member’s profile and check out their pictures. Most established forums tend to call out bad information. My biggest concern these days are with Facebook groups. I have personally noticed these groups tend to give out more faulty info then forums.
#16 Going Without Plan to a Local Fish Store (LFS) is Deadly
Walking into a local fish store without a plan could be the deadliest thing you can do to your tank. Local fish stores promote sales all the time and it is very tempting to overstretch yourself and buy too many fish and corals at once because they have a great deal going on. Walking in without a plan invites impulse buying and as we learned in tips #1 and #2 knowledge and patience is critical for success. Plan first then go to the store and stick to your plan!
#17 Always Research Yourself Before Accepting What the LFS Says
Not all local fish stores are created equal. While there are a lot less of them these days because of online stores like us, there are still a number of bad ones out there. They can give you some pretty bad advice. I’ve seen it all over the years from suggesting Chalice Corals are great for nano tanks, that a panther grouper will be just fine in a 40-gallon breeder, to not pricing corals then inflating the piece on an unsuspecting customer.
Until you find a local fish store that you trust – always maintain your skepticism and research yourself before accepting what they tell you.
#18 Never EVER Compromise on Quality
There is an old saying in the saltwater reef tank hobby. “Buy cheap – buy twice or three times, buy expensive – buy once.” This rule applies to practically any type of equipment you purchase. Buy cheap pumps, they break and you have to replace them with better ones.
Buy a cheap heater, they could explode and you have to replace everything. Buy a cheap protein skimmer barely enough to support your tank, and you’ll like need to upgrade to an oversized high quality more expensive one. Buy a cheap lighting fixture without PAR figures or Spectrum stated, end up buying a high quality light to replace it.
I’ve learned this lesson the hard way when I was young. If you are thinking about going cheaper, consider being patient and saving up (see words of wisdom #2 – Be Patient). I have compiled a load of aquarium equipment reviews on this site for you to look at that does a lot of the homework of research for you.
#19 Get a Drilled Aquarium or Drill It Yourself
Getting a drilled tank and learning about plumbing can be really intimidating for a newcomer. You might consider going sump less or with a hang-on back overflow. While you can certainly have a successful tank without a sump, you sacrifice a lot of flexibility and storage by skipping out on one. Hang-on back overflows are considered by many hobbyists unreliable do to them siphoning water out in the event of failure. Learn more about the best overflow boxes readily available to purchase.
There are three ways to approach the drill tank issue. You can either purchase a reef ready tank and have the hole pre-made for you. You can drill yourself, which is actually not as hard as you think (and a hobbyist friend may likely do it for you if you ask). Or you can go with an all-in-one aquarium and just have the sump built into the aquarium. Either way, my personal thought is you miss out on too many benefits without drilling a tank and not having a sump.
#20 Aquarium Stand Height Matters
Most aquarium stands that you can purchase from a local chain store at are going to be less than 30 inches in height. They are designed so you can watch your aquarium while sitting. If you are a taller person or looking into a more shallow aquarium (24 inches and below), it is a good idea to consider a taller stand. There is a reason why manufacturers who make custom and premium brand aquarium stands start with stand heights at 36 inches and above.
Aquariums are a conversion place and usually enjoyed standing up.
#21 Sump Size is a Big Deal
Going with the concept of bigger is better – bigger is better, especially down below in the sump. Not having a big enough sump causes two problems. The first is that it limits the equipment space available for you to add-on. Second, an undersized sump would not hold enough volume to prevent an overflow in the event of a power outage or pump failure. Overlooking sump size can literally cost you hundreds in home repairs. See our Best Aquarium Sump review post for our expert picks.
#22 Only Use RODI Water
If you want to have a successful reef tank, you need to have a source of high quality water. You will want water that have 0 total dissolved solids (TDS). This prevents any excessive nutrients and toxic chemicals from entering your tank. This is the healthiest water for your fish and prevents nuisance algae growth. The best way to get this water is to invest in an RODI system. Some stores will sell just an RO unit, but only a RODI unit have the stages to produce 0 TDS water.
You can purchase RODI water from your local fish or use distilled water in the short term, but long term – a quality RODI unit is an investment that will stay with you throughout your saltwater reef tank hobby journey.
#23 Have Backup Equipment
While I encourage everyone to purchase high-quality equipment, the fact is that our equipment will eventually break down. Equipment could break down overnight or during the weekend when the local fish is closed or before you can get it delivered from an online store. A tank can crash quickly if a critical piece of equipment fails and you cannot replace it fast enough. There are three pieces of equipment you will always want to have a backup for:
It is an understatement to say that bad thing can happen quickly during a power outage. It is one of the top three reasons for a tank wipe out and many of us including myself have been a victim of a tank wipe out because of a power outage. It is a helpless feeling to see your tank and inhabitants degrade quickly and die off – it is one of the worst feelings in the hobby.
Literally, in hours a reef tank can go down quickly especially if the temperature is hot outside. There are two investments you want to make for a power outage – short term and long term.
Short term would be a battery backup that you can purchase at an office supply store. Get the biggest one you are comfortable spending for. It needs to be powerful enough to power your heater, a pump, and a fan. These short term battery backups will last you a few hours. You want to aim for at last 1-3 hours of backup time.
A long term power outage is handled by a gas generator. A decent generator like a Champion Generator will cost you about $250 — this is a sound investment if you have a sizable amount invested in your tank. Many of us who have established 4 foot long tanks easily will have over $2000 invested in the tank.
#25 LEDs Are Extremely Intense
LEDs have made great strides in the industry and saved reefers a lot of money in electrical cost. However, the top quality LED reef lights are extremely intense. Under full power, they can easily cook corals and raise the temperature of smaller tanks. Sure, it is cool to tell your reefing friends that you have the latest and greatest Radions, but know what you are getting yourself into before you decide to purchase these powerful lights.
Know what your corals require and prepare to lower their intensity. You can check out my earlier blog post about the Best Reef LEDs for more info.
#26 Stop LED Spectrum Confusion!
LEDs offer a ton of customization to determine what spectrum you want to set for your tank. Unfortunately, the vast amount of customization can also be a downfall for those new to the hobby. Either go with lights like Kessil who have done the spectrum work for you or start out with tried and true spectrum outputs from manufacturers like ATI. You can more about spectrum in my earlier blog post regarding Reef LED Spectrum.
#27 Aquarium Controllers Rock!
Many hobbyists will tell you that an aquarium controller is the best investment they have ever made. Reefing is not the same after you setup a controller. It has checks to make sure your tank is operating correctly, automates a bunch of tasks for you, and is a way to monitor your aquarium when you are outside of the home. Not only that, but a controller is scale-able to any aquarium. Once you have one, you can keep it with you if you upgrade and the resell value of well-known controllers like Neptune hold up very well.
#28 The Fishless Cycle – Shrimp Method
Back in the old days, there were two known ways of cycling a tank. Either you would purchase a few very hardy fish like Damels or you would purchase live rock and cycle your tank during the curing process. The first method was very cruel and the remaining Damels would be hostile to any new additions. The second method was messy, smelly, and could lead to various reef tank pests that you would have to deal with.
These days, there is fishless cycling. Usually, this is done by putting food in the tank and adding bacteria supplements. The best method in my mind is Melevsreef’s shrimp method. The shrimp method involves purchasing a jumbo headless shrimp from a grocery store, placing it in the aquarium for 3 days, and removing it. The decaying matter from the shrimp will start your cycle and you just measure levels until you have no ammonia and nitrites. It is a the simplest, cheapest, and sure fire way of cycling a tank.
#29 Your Tank Cycles Every Time You Add Livestock
Your Saltwater Reef Tank is a delicate ecosystem with a bacteria population that can support its current inhabitants. Every time you add additional bioload to the tank the bacteria in your system needs time to establish the population needed to support them. These means that your tank goes through another cycle. While not as long as your original, this concept is a must to understand and one of the main reasons things can go downhill quickly if you add too much livestock at once.
#30 Rinse Don’t Wash Before Putting Your Hands in Your Aquarium
You are going to put your hands in the tank, you may think about washing your hands before doing so. Don’t do it. Conventional soaps contain antibacterial chemicals that can harm your tank. Instead, just rinse your hands and arms up to the length you feel that will be touched by your aquarium water. Just rinse them with fresh water and paper towel dry them. Aqua gloves work great as well.
#31 Don’t Chase Aquarium Parameters
We see the list from forums and online sites listing ideal parameters. Yes, you should try to maintain your parameters, but do not obsess over it. Let your tank fall into its groove. Dose the proper amount to get within range, not exact. Inspect your tank to see if everything is healthy and keep up with your maintenance. Everyone’s tank is different – just stay in range and don’t obsess.
#32 Aquarium Test Kits are Not Created Equally
Recall word of wisdom #18 about never compromising on quality. Test Kits are not created equally. Those cheap test kits from Petco are not going to do the job for a saltwater reef tank. Look for high grade saltwater test kits like Salifert, Red Sea, and Hanna.
#33 Supplement, Wait, Then Adjust
When you are initially getting started on a dosing schedule, start slow. It is better to supplement less then more or the recommended amount to start. Work your way up slowly and wait a week before making any adjustments to the schedule. Also, if you do not test for the supplement you are dosing – do not dose it.
#34 Don’t Worry About Trying to Grow Coralline Algae
This is common for newcomers to the hobby. You will get all amped up about growing that purple algae and buy stuff like purple up. Coralline algae is actually quite easy to grow once your tank stabilizes. All it needs is consistent calcium and alkalinity levels – which can be done by consistent water changes. Don’t buy that purple up, just get a good rock from a trusted reef keeper that you know, keep up with your maintenance, and let nature takes its course. After a few months, you’ll be wishing it wouldn’t grow on your aquarium glass.
#35 Dry Rock Rules!
Aquarium Dry Rock Rules! There are so many advantages to using dry rock instead of live rock. You can cut it and shape the rock, you can aquascape it freely, it has zero pests, it saves the wild reef, and it is cheaper. Get a piece of coralline encrusted rock from a friend when you are ready to introduced coralline or purchase a colored dry rock like Caribsea Reef Rock.
Do be careful about starting too sterile as this can result in dinoflagellates. You might want to consider getting some donation live rock from your aquarium club or a friend when you first cycle your tank.
#36 People With Awesome Looking Aquarium Scenes
It is not as simple as getting a bunch of rock and putting it into the tank to create a great looking scape. Several featured tank of the months on forums you see are masterfully aquascaped through a lot of planning. Rockwork is drilled, cut, epoxied, and chiseled. It is usually done with aquarium dry rock and the rockwork is laid out on card board to visualize the aquascape. It is an artwork in itself.
#37 Epoxying Rocks is a Dirty Secret for Bare Bottom Aquarium
You have likely seen several incredible looking bare bottom tanks or even tanks with floating rocks. How do they do it? Well, they epoxy their rocks down during the aquascaping process. The biggest risk in a bare bottom tank is the lack of cushion and rocks can damage the glass if it takes a hard enough tumble. With sand beds we have a little cushion and some reef hobbyists will use eggcrate for an additional safeguard.
With a barebottom tank there is no cushion so the best safeguard is to epoxy down the rocks to ensure they do not slide, slip, or fall.
#38 Beware Buying Livestock Secondhand!
You likely have seen it on craigslist. A killer deal on a fully setup saltwater reef tank with fish and coral included. Buyer beware! First off, moving a fully stock tanked is a ton of work as explained in words of wisdom #13. Second, if you purchase the rock every mistake that previous owner make is going to be inherited with your purchase. Third, you have no idea of the condition of the fish. Yes, they could look healthy but just like at the local fish store you never know.
All these fish should be quarantined before placing in a display tank. All this work and caution alone just makes me avoid them. Have the local fish store take their stuff or have a quarantine tank ready.
#39 Know How to Select a Fish
Knowing how to select a fish goes hand in hand with the next point below. Is thefish compatible with what you already have? How big will it get? Is it reef safe? What does it eat? Once you have that down it’s time to look for physical signs. Is the fish swimming well, does it have puffy lips, any white spots, are the fins intact, does it have any cuts, is the fish’s thick instead of thin.
The last thing to look for does it eat. Never buy a fish from a fish store unless you see it eat at the store. If it is not eating, you are going to have a hard time during the quarantine process keeping them healthy. Online stores can be difficult to purchase from because you never see the fish. You will want to research the store’s reputation from reviews and forums about the quality of the shipped livestock to get the best idea.
#40 Quarantine Your Fish
Not quarantining your fish is asking for trouble. It’s like playing Russian roulette. Anyone who has been in this hobby long enough and has not quarantined fish has likely losses lots of money from preventable diseases that could have been avoided from quarantining.
All it takes is one fish that you add in your tank with ich or marine velvet to infect your entire tank. After the tank has been wiped out, you then you have to wait several weeks for the disease to pass (or worse with marine velvet – several months). There are four tried and methods for quarantining fish that I have detailed out in my How To Quarantine Fish Series:
Hypersaliny Method
Copper Method
Chloroquine Phosphate Method
The Tank Transfer Method
Save yourself the future pain of loss and invest in a quarantine tank. You can prepare for one now if you have a tank already by placing a sponge in your sump.
#41 Don’t Buy a Fish Your System Cannot Handle
If you have a nano tank, do not go buying a Unicorn Tang. Yes, you may think to yourself now I will just get a bigger tank when they get larger, but the reality is things may change in your life in the next year or so where you may no longer be in the market for that upgrade. If you have a small tank, purchase fish that stay small.
If you have a reef tank, do not purchase butterfly fish. If you have small fish, do not buy a grouper or a lion fish. Do the research for the sake of your fish, wallet, and sanity. Sticking to what you know will work with what you have right now is what you need to be aiming.
#42 Don’t Buy a Saltwater Fish Because It Looks Cool
As a novice, we were all guilty at this at some point. Every now and then the local fish store will stock a rare fish or an exotic fish like a Moorish Idol. It’s hard to resist the urge, but don’t do it. Always research first and make sure you know what the fish needs. Also, don’t buy a fish because you see it as a character in a movie (I’m taking to you Finding Nemo and Finding Dory fans). Know what you are getting into.
#43 Damsels Suck and So Do Large Clownfish
Some of you may have gone to a local fish store already and heard from the rep that damsels are good starter fish because they are hardy. My advice – don’t do it. Most damsels suck. They are highly aggressive and will harass future inhabitants you want to introduce later on. They are also a huge pain to get out of the aquarium once they become problematic.
The same goes with large clownfish like Maroon Clownfish. Maroon clowns not only get large, but they are just as aggressive as damsels. Clownfish are part of the damsel family after all.
If you are thinking about adding a damsel, place check out my blog post about less aggressive damsels and how to add them properly.
#44 Respect the Tang Police
The Tang Police has a polarizing reputation in the saltwater aquarium community. For those of you who do not know, a Tang is one of the larger fish you can add to your aquarium. Most the most part, Tangs are the fish that catch many hobbyist eyes. They are active, herbivores, and wonderful fish to have. Given their size, they really should only be placed in tanks at minimum 4 feet in length for smaller tangs — and 6 feet for many others.
Some hobbyist think the tang police are overreaching, judgmental, and ruthless. Others think they are protecting the well being of these beautiful fish and protecting you from serious mistakes. My take is both sides have a point.
Part of being a successful reef aquarist is having patience and restraint, knowing the limits of your aquarium system and making the best decisions for your long-term success and the well-being of your animals. Make your own decision where you stand, but respect the tang police.
#45 Your Fish Don’t Need That Much Food
Fish are greedy – that’s a simple fact. They will greet every time and give you this sad little look begging you to feed them. Growing up as a kid with a reef tank, this was a daily struggle with my father who couldn’t help himself and feed the fish every time they gave him the little puppy dog eyes.
The fact of the matter is that fish do not need much food. You could only feed what your fish can consume quickly and completely. no extra food should be left at the bottom of the tank. Often for nutrient dense foods like pellets, a pinch is all that is needed. Reef tanks will also produce copepods, amphipods, and algae that many fish will eat. There is plenty of food to go around and overfeeding will just lead to excessive nutrients for algae growth that you do not want.
#46 Don’t Add Fish Too Fast
Recall point #2 about being patient. You can do a ton of damage to your tank by adding fish too fast. Adding too fast will throw off the balance in your bacteria cycle, overload your bioload, cause all sorts of algae blooms from the spike in nutrients, introduce disease due to the added stress, and worse cause a tank crash. Just remember – be patient and go slowly. Do not end up like this lady below:
#47 Don’t Hand Feed Your Fish
If you have fish like a trigger or an eel, just play it safe and don’t hand feed them. As cool as it is to have them eat out of your hand, it’s a very painful lesson when they bite your fingers. Eels have very poor slight and your finger can be mistaken for food. The most aggressive triggers like Clown Triggers should not be trusted for hand feedings. All full grown Clown Trigger jaw’s are powerful enough to bite off your finger. Be smart and use a feeding stick.
#48 Take Extreme Measures When a Fish Gets Sick
I have seen it happen way too many times. A fish gets sick and the aquarium owner tries to treat the display tank or they get one of those new age medications that is invert safe or they buy garlic or a cleaner wrasse. I say no to all of that. If a fish gets sick – EVERYTHING gets pulled out of the tank. Fish all go into quarantine and inverts are pulled into their own tank. All I leave in the tank are the rocks and the coral. I do not mess around with medications – I go straight with what works.
Copper or Chloroquine Phosphate for Ich and Marine Velvet. Treat the fish for at least six weeks. If a fish gets sick again, the clock resets. The time is needed to give the display tank time for the infection to starve itself out and time to remove the sickness from your fish. Any sickness a fish gets is potentially deadly to them. Therefore quick and decisive action is a must!
#49 You Don’t Need as Big as a Clean-up Crew That Stores Claim You Need
Your clean-up crew needs change as your tank gets mature and stocked. Clean up crew sellers will often sell you a full package of cleaners for your tank containing various snails, hermits, etc. My advice to you is do not purchase these packages. You actually do not need as much as they sell. In fact, most of these packages are large because there is a high likelihood that you will lose several of your members.
Most of the time, your tank is not ready for the amount of inverts these packages have and your crew will slowly starve itself out. Instead, just purchase 1 emerald crab and get a few reliable Trochus snails to start out and slowly increase from there. You can learn more about great clean up crew members in my previous post. You can also reduce the need for clean up members by using algae in your sump or a algae turf scrubber.
#50 Dip Your Corals
If you want to prevent coral pests from entering your tank from your coral purchases dipping your corals is a must. There are two ways to dip. You can purchase a specialized dip like Coral RX Coral Dip Pro or you can dip with Bayer Advanced Insect Killer. The Coral RX method is pretty well known and the Bayer method is more advanced.
Either one works great – just make sure you dip. If anything falls out of your corals consider quarantining or returning it. It is even better if you quarantine your corals regardless, but not everyone is willing to do this. You will regret not if you end up with an annoying pest like Asterina Starfish.
#51 Frags Rule!
If you want variety, cheaper corals, and want to experience your reef growing over time, then frags are the way to go. Frags are readily available either through a local store or club frag swaps. It is such a great way to start out and grow in the hobby. You can also make your own Frag Tank and sell or trade corals with others! They are also much easier to handle and place where you want in your aquascaping because of their size. Just remember to leave enough space for everyone to grow.
#52 Don’t Buy a Coral Because It Looks Cool
This is so tempting to do when you are at a local fish store looking at the newest additions or seeing a rare coral in the WYSIWYG section online store. Research first, know what parameters it needs, the lighting, the flow needed, how aggressive it is etc. Also, buy corals in baby steps. If you are not growing basic corals, do not buy the advanced ones. If you only have soft corals don’t go jumping into Acropora SPS corals until you have more experience.
#53 Some Corals Grow Like Weeds and are Invasive
This is a tough lesson some of us have learned when we purchased bullet proof corals. Corals like green star polyps, pulsing xenias, and mushrooms are known for their high reproduction rates. When they are happy, they have the ability to spread like crazy in your tank and can easily take over the entire tank like this picture above of these pulsing Xenias. If you are thinking about getting these types of corals, make sure you know what you are getting yourself into.
#54 Carpet Anemones Suck
Don’t get me wrong carpet anemones are pretty cool and look great in a tank, but they are known for being poor shippers. The ones that do survive shipping can turn out to be deadly additions to your tank. They get very large and have voracious appetites. Many hobbyists who have tried to keep them quickly find out their anemone is a death trap for fish and inverts.
Large fish are not even safe. Once an carpet anemone stings its victim, the tissue damage caused by the sting leaves virtually no chance for the victim to survive. The sting is extremely potent. Check out this video of a carpet anemone eating a blue powder tang as an example:
Carpet Anemones should only be attempted by an advanced aquarist if not just left in the wild.
I know many coral fragging tutorial videos do not show safety equipment, but keep in mind that many of these recordings are done by experts or people who have been cutting frags for a long time.The most common hazard is getting coral juices and chucks in your eyes, but a word of caution of you are fragging zoanthids. Zoanthids contain a toxic called palytoxin, which is considered to be one of the most toxic non-protein substances known.
Play it safe and wear razor proof nitrile gloves, eye protection, and a breathing mask. You can call me overly cautious if you like – but I believe in safety first.
Final Thoughts
Wow that was a long post wasn’t it :). Well, I hope you enjoyed reading this blog post and took away some words of wisdom. As always, please share and subscribe to our newsletter to gave more great articles like this and specials from our store. If you have any tips you would like to share, please leave us a comment below. Thanks for reading and see you next time!
📘 Want to learn more? This article is part of our complete Saltwater Fish & Reef Guide — your ultimate resource for marine fish, coral care, reef setup, and more.
I’ve been keeping saltwater fish for over 25 years, and one of the things that never gets old is the sheer beauty of reef fish. When I set up my 125-gallon reef, choosing fish that were both compatible and visually stunning was a real process — you want fish that pop against corals and make the tank come alive. After keeping and observing hundreds of species over the years, these are my picks for the most beautiful saltwater fish you can actually keep in a home aquarium.
The 10 Most Beautiful Saltwater Fish
10. Volitan Lionfish
Stats:
Minimum Tank Size – 120 Gallons
Max Size – 15″
Reef Safe: With Caution
Temperament – Semi-Aggressive
Price – Around $40
One of my personal favorites. The lionfish is generally known to the public due to news of their invasiveness, but in the aquarium hobby they make a great display fish. They are pretty friendly and very hardy in the aquarium – often to the point of getting bullied by some more active fish like triggers and large angelfish. They will eat just about any fish it can fit in its mouth so they are best with larger fish. They can be kept in reef tanks as they will not harm corals, but may eat inverts. For those with smaller tanks, you can look at dwarf zebra lionfish which only grows to about 6″ and requires a 50 gallon tank.
9. Marine Betta
Stats:
Minimum Tank Size – 55 Gallons
Max Size – 8″
Reef Safe: Yes
Temperament – Peaceful
Price – Around $80
The marine betta is a very unique and peaceful fish. They are known for being extremely hardy with stories of them surviving tank wipe outs caused by parasitic infections and recovering from wounds without getting bacterial infections. The key with the marine betta is acclimation. They are very shy when introduced and often will do poorly with very active tank mates. They are also quite large, so they need to be placed with larger tank mates or kept well fed to prevent them from eating smaller fish.
They are known for being reef safe and will not bother inverts as long as they are fed well. They are a nocturnal fish but will adjust to the home and be quite showy to their owner once established.
8. Harlequin Tusk
Stats:
Minimum Tank Size – 125 Gallons
Max Size – 10″
Reef Safe: With Caution
Temperament – Semi-Aggressive
Price – Usually over $90
This looker hails from the Indian Ocean and Australia. They are a great addition to a fish only with live rock setup as they will get also with many other active fish like tangs, triggers, and angelfish. They will not harm corals, but it has been known to eat snails, shrimp, and crabs. The Australian varieties tend to be more colorful and more expensive then the Indian Ocean tusks.
7. Emperor Angelfish
Stats:
Minimum Tank Size – 220 Gallons
Max Size – 15″
Reef Safe: With Caution
Temperament – Semi-Aggressive
Price – Around $80 for juvenile and over $150 for adults
The emperor angelfish is a very bold and large angelfish. It has striking colors with a signature blue-black mask that covers its eyes. They are an excellent addition to a fish only with live rock aquarium and have also been reported to be safe in SPS dominated tanks. It is a large fish with a lot of personality, often becoming the dominant fish in the tank. If you want to know more about angelfish compatibility with reef tanks, you can refer to this reef safe angel fish sheet published by Reef Central users.
6. Flame Angelfish
Stats:
Minimum Tank Size – 70 Gallons
Max Size – 4″
Reef Safe: with caution
Temperament – Semi-Aggressive
Price – around $50
Usually when one wants to add an angelfish, this is usually the fish that comes to mind. The flame angelfish is a flashy addition to any tank. In reef tanks, they will usually end up being the most aggressive fish and should be added last. They are also reef safe with caution as some of them will nip at soft and stony corals. Keeping them well fed is the best way to prevent this. They will usually nip at polyps and zoas first. They are great additions to fish only and fish only with live rock (FOWLR) setups.
5. Lyretail Anthias
Stats:
Minimum Tank Size – 125 Gallons
Max Size – 5″
Reef Safe: Yes
Temperament – Semi-Aggressive
Price – Around $30…more for males
The Lyretail Anthias is flashy looking and a social butterfly in a community tank. Males look like the picture above while females are orange in color. They do best in groups with one male to multiple females. They are known to change sexes if a male is lacking, with the most dominant female turning to a male. They are great fish for a reef tank.
4. Lineatus Fairy Wrasse
Stats:
Minimum Tank Size – 90 Gallons
Max Size – 5″
Reef Safe: Yes
Temperament – Peaceful
Price – Over $200
The lineatus fairy wrasse is a very peaceful and active fish that is usually not seen in aquariums. Often considered the most beautiful fish among wrasses, this fish is typically in high demand and seen under what you see is what you get (WYSIWYG) sections of online vendors or special ordered through local fish stores. They are great additions for either reef or fish only tanks.
3. Sargassum Triggerfish
Stats:
Minimum Tank Size – 125 Gallons
Max Size – 10″
Reef Safe: With Caution
Temperament – Semi-Aggressive
Price – About $150
The sargassum triggerfish is known as the most reef safe triggerfish that you can add to your aquarium. Triggerfish in general are a blast to have in an aquarium because they have great personalities and the sargassum triggerfish does not disappoint. They will swim laps around your tank all day and it will vocalize using a grunting sound. The sargassum triggerfish will become a conversation piece in the home.
2. Red Sea Purple Tang
Stats:
Minimum Tank Size – 125 Gallons
Max Size – 10″
Reef Safe: Yes
Temperament – Semi-Aggressive
Price – Around $200
One of the most prized tangs in the aquarium due to its coloration. It is a rewarding tang to have and becomes hardy once established. They are aggressive towards other zebrasoma tangs and generally one of the more aggressive tangs available. They are very active in the tank gazing all day and swimming at all levels of the tank. They are a must have for anyone with a large reef tank.
1. Designer Clownfish
Stats:
Minimum Tank Size – 20 Gallons
Max Size – 3″ to 6″ depending on species
Reef Safe: Yes
Temperament – Semi-Aggressive with Maroon varieties being most aggressive
Price – Varies some go for over $200
Designer clownfish are fish that are specially raised through selective breeding to produce unique looking strip and fin pattern combinations. If you are looking for a unique looking clownfish, you will definitely find one if you look at designer clownfish. Their prices can get pretty high, especially for newer varieties.
Not everyone is a fan of designer clownfish. Natural clownfish available in the industry are beautiful in their own right and would also make it at the top of this list due to their looks, ease of care, compact size, and temperament. You can’t miss with either type in an aquarium. They are one of the best reef safe fish to own.
Miss Any of Your Favorite Fish? Let Us Known In the Comments Below!
What are some of your favorite fish? Let us known in the comments below. Thanks for reading.
📘 Want to learn more? This article is part of our complete Saltwater Fish & Reef Guide — your ultimate resource for marine fish, coral care, reef setup, and more.
Emerald crabs are one of my go-to recommendations for reef keepers dealing with bubble algae — they’re one of the few cleanup crew members that will actually go after valonia and related species rather than ignore it. I’ve kept them in my 125-gallon reef and they earn their spot. That said, like any crab, they come with caveats you should know before adding them to a mature reef.
The emerald crab is one of the most underrated members of the saltwater cleanup crew — and one of the best solutions for bubble algae (Valonia) that most other cleanup members won’t touch. After 25 years in the saltwater hobby and maintaining a reef tank, I’ve used emerald crabs to handle Valonia outbreaks that would otherwise require manual removal. They’re hardy, widely available, and generally reef-safe. One honest note from experience: large, well-fed emerald crabs are mostly benign, but very large, underfed individuals can become opportunistic and have been known to bother small corals or disturb sleeping fish. Keep them fed and keep population in check. Everything you need to know is in this guide.
As we saw in our previous post, the Emerald Crab was rated the #1 algae eater in a saltwater aquarium. I wanted to dive in deeper in this post about this crab and why this crab is a great addition to your saltwater tank. I’m going to break this post down Q A style for simplicity:
Species Overview
Scientific Name
Mithraculus sculptus
Common Names
Emerald Crab, Green Crab, Mithraculus Crab
Family
Majidae
Origin
Caribbean and Gulf of Mexico
Diet
Omnivore
Care Level
Easy
Temperaturement
Semi-aggressive
Minimum Tank Size
20 Gallons
Max Size
1.5 – 2 inches
Temperature Range
76 – 82 degrees F
pH Range
8.0 – 8.4
Salinity
1.025 or 35 PPT
Reef Safe
Yes
Available As Tank Bred
No
Filtration/Water Flow
Moderate
Water Type
Saltwater
Breeding
Egg-layer
Difficulty to Breed
Difficult to breed
Compatibility
Species-only tank or community tank
Where Do Emerald Crabs Come From?
Emerald crabs hail from the Caribbean Sea to the Gulf of Mexico1. They are nocturnal and will hide in caves and rock during most of the day. While primarily a scavenger of uneaten food, it is well known in aquariums to eat algae.
What Are They Compatible With?
Emerald crabs are compatible with just about every fish or invert you can place in the tank. Generally, as long as you food sources (waste, algae,and food from an established tank), they should not bother any fish, inverts, or coral in the tank. If they are starving, they may go after snails, smaller fish, and even polyps. As long as the crab is well-fed, they shouldn’t pose a threat to the other inhabitants in the tank. In most cases I have seen of them eating other animals, it was due to lack of food, poor water quality (which lead to drying inverts and fish), or overstocking.
In a mature tank, normally what we need to look out for are fish that might actually try to eat them. Avoid placing them with predatory fish such as hawkfish, triggers, puffers that are known for preying on them.
Bubble algae is mainly the algae it is known for eating and they usually end up on a reefer’s shopping list the first time they have a bubble algae outbreak and they are recommended on a forum or Facebook group.
What Do They Eat?
Crabs are scavengers and omnivorous. They will happily eat leftover meaty food and clear nuisance algae like bubble algae in the aquarium. You may want to consider supplemental feed if the emerald crab is new to your tank or you do not have enough algae for it to eat in the tank. Dried nori and and pellet foods are good choices for feeding. Nori, in particular is quite a show as you can hand feed it to them and they go nuts when feeding off it.
Will They Really Rid My Tank of Hair/Bubble Algae?
Yes and no actually. Yes, they will eat bubble & hair algae, but if your tank is infested with a large outbreak you should not rely on an emerald crab being able to remove all of it. You should consider manually removing what you can, reducing nutrients, and then having the emerald crab control and eliminate the leftover. You should also purchase from a store that can attest to the fact that they will eat bubble algae. There are some on-line stores that will guarantee this.
Is My Pet Dead?
This is a common question for newbies when their crab molts for the first time. Like shrimps, these emerald crabs will shed their exoskeleton as they grow leaving behind a what looks like a dead crab. Often times, the emerald crab will appear back out of hiding after a few days…sometimes a week. Either way, it is best to remove the molt or suspected dead tank as you see it to prevent any nutrient build up.
How Many Should I Get For My Tank?
They do not get too large – maxing out around 2 1/2″ and generally you will only need one or two in a tank. The general guidance has been one emerald tank for every 30 gallons, but this will depend on your rockwork setup and abundance of food in the tank. Overpopulating emerald crabs could lead to aggression among the crabs.
FAQs
Are they Aggressive?
Yes, they can be aggressive. However, the aggression is usually from the male. Emerald crabs get a really bad rap in the saltwater aquarium hobby because of aggressive males. If you know how to select a female crab, you generally should have less issues with them over the males.
Will They Consume Corals?
Generally, an Emerald Crab will not consume corals. They will eat dead or dying matter, which is why they can be mistaken for eating corals. They are merely eating a coral that is already damaged or dead.
Do They Eat Diatoms?
There have been reports from reef keepers that Emerald Crabs do in fact eat diatoms. They are a good member of a clean up crew when it comes to diatoms!
Any Other Questions? Leave Us A Comment Below!
What experiences have you had with this crab? Please leave your comments below or any questions you have.
📘 Want to learn more? This article is part of our complete Saltwater Fish & Reef Guide — your ultimate resource for marine fish, coral care, reef setup, and more.
In this post I’m going to highlight the Pulsing Xenia – one of the most unique soft corals available, but also a coral that needs to have a warning label for anyone looking to put one in their tank.
Species Overview
Pulsing Xenia goes by its scientific name Xenia elongata. It has study stalks covered with a crown of featherly polyps. The polyps open and and close in a pulsing motion which is where it gets its name from. As they grow, they group into colonies and spread into mats across the rockwork.
Scientific Name
Heteroxenia fuscescens
Common Name (Species)
Pulsing Xenia
Family
Xeniidae
Origin
Indo Pacific
Coral Type
Soft Coral
Diet
Nutrients via water absorption
Care Level
Easy
Activity
Active
Lifespan
Usually to 10 years
Temperment
Peaceful
Placement
All Areas
Minimum Tank Size
Any
Temperature Range
73 – 81 Degrees F
pH Range
8.1 – 8.4
Salinty
1.023 – 1.025
Lighting
Low to Moderate
Flow Rate
Medium to Strong Flow
Water Type
Saltwater
Breeding
Splitting or spreading across tank
Colors
Grey, Pink, Tan White
Dosing Required
No
Compatibility
All Corals
Pulsing Xenia in the Aquarium
Xenias tend to vary in hardiness. Some aquarists cannot keep them alive while others grow them so well that they become invasive in the tank. Usually this is because one’s tank actually may be too specialized for xenia. A SPS heavy tank would be a tank where Xenia would not grow as fast as SPS tank setups have as low phosphates and nitrates as possible while soft coral tanks have some phosphates and nitrates above trace amounts.
Usually a beginner reef tank has higher nutrient levels – which will make Xenia grow faster as they absorb these. The best chance for success would be to purchase a specimen that is aquacultured. They are easily found as aquacultured either from a local store, online, or even from local aquarists trimming them or wanting to get rid of them.
But what if you are visiting this post and actually want to get rid of them? Yes, that is the issue with these corals. They can grow so fast that they can overtake a tank. To illustrate, let me show you an example case from TRex from the reef2reef forum.
TRex’s tank was a 65 gallon reef tank that had a single pulsing xenia placed in. Within a year, the pulsing xenia had grown, reproduced, and completely taken over the tank:
Before:
After:
A picture says a thousand words doesn’t it?
Factors to Consider When Deciding on Purchasing
If the pictures above have not discouraged you, let’s talk about factors when purchasing a pulsing xenia. They are pretty corals no doubt and in a species only tank they are actually pretty breathtaking with the non-stop pulsing and movement in the tank. Here are some things to consider to prevent an invasion.
Place Them On An Island
Place the xenia on its own rock away from others. You will want to place them at least 4 or 5 inches away from any other rock. Any type of grow that appears on another rock should be removed immediately. Removal can be done by gently pulled out by walking a fingernail around the base of the coral to slowly loosen it. If you are planning to have them in your tank long-term, you will need to be prepare to trim them down as they grow to keep them contained.
Put Them in The Sump
Xenia feed off of Nitrate in the tank as they grow and would have uses in a refugium. The key is to regularly remove the growth so they can grow again and consume more nitrates. A Xenia refugium also serves as an excellent sanctuary for fry as they provide limitless hiding places. Here is a video from Troy V showing off his Xenia Refugium.
Consider a species only tank
A Xenia only tank is actually pretty breathtaking, though I personally would never consider one in a large display tank. If you have a smaller tank, it’s definitely something you can consider and would provide an easy to care coral. They actually are very compatible with clownfish as they readily host them.
Consider Having Nature Take Its Place By Placing More Aggressive Corals Near Them.
I have seen this as a last measure for reefers who have had their aquarium taken over, but do not want to break down their tank or remove rocks. Aggressive LPS corals like hammer, torch, and frogspawnsexcel at clearing the way with their sweeper tentacles. Any of these corals with etch out their own space and clear out anything within 4 or 5 inches from it. Anemones will also do the trick.
Let’s Hear Your Stories
Have a story or have pictures you would like to share about pulsing xenia growing in your tank or maybe you have a xenia tank of your own? Share in the comments below.
I started in this hobby on a tight budget, and I still remember hunting Craigslist and local fish store sales for deals on tanks. Getting a good price on a fish tank is absolutely possible — I’ve helped friends score quality setups for a fraction of retail — but you need to know what to look for and what red flags to avoid. These five tips are exactly what I’d tell anyone walking into the used tank market today.
Fish tanks are expensive. It can be very discouraging for a newcomer wants to get involved in something like a saltwater tank and then finds out how expensive the hobby is to get started. Is there such thing as cheap fish tanks? There definitely is if you know where to look and are patient to wait for good deal. Today’s post breaks down 5 tips to get you the best deal on cheap fish tanks.
How To Get The Cheap Fish Tanks (And 5 Tips)
1. The dollar per gallon sales
A few times every year, the chain pet stores, namely Petco, have a dollar per gallon sale. These dollar per gallon sales have tanks from 10, 20, 29, 40, and 55 gallon tanks all selling for $1 per gallon. You might actually get lucky in your area and have 75 gallon tanks available for $1 per gallon. These tanks are made by Aqueon, which is a quality aquarium manufacturer that has been around for years. You need to be aware of when these stores have their sales, but luckily there is one site that publishes the dates of these sales.
While you will get the tank itself for cheap, you may still be spending quite a lot of money on suitable equipment. For those looking for a cheap fish tank that has most or all of your equipment need. There is a better option.
2. Buy Used
Buying used is the best way to acquire cheap fish tanks. There are three sources I’m going to list here and explain why they are great way to get a tank
Craigslist can be a cheap fish tank goldmine. You will want to search for “fish”, “aquarium”, and “tank” and then look at all the recent listings. Craigslist is a real-time classified so check often. With Craigslist, the larger the tank, the better the deal as many of these people selling are looking to off load their aquarium as soon as possible. Here are a few examples of craiglist listings that I found looking around:
180 gallon 6 foot long aquarium complete reef setup with lacquer stand and canopy – $750
120 gallon 6 foot long reef ready aquarium with canopy and stand – $450
46 gallon bowfront tank with canopy and stand – $99
Aquarium clubs are another great resource. The advantage with aquarium clubs is that you will usually get a high quality setup that is complete and well taken care of. You would need to check on the forums of these clubs to see if there are any tanks anyone is selling. You can check out our list of aquarium clubs to see a list of clubs in the US that are close to you.
Friends and family are potentially an avenue to get a free tank. A lot of the time these aquariums are sitting in an attic in a garage. Friends and family are usually happy to have you take their tanks. This was actually how I started out in the hobby many years ago from a 65 gallon aquarium that was sitting in an uncle’s garage unused. Nothing beats a free fish tank. You never know what is out there unless you ask around.
3. Know What Questions to Ask and What to Look Out For
Buying a used fish tank requires a some due diligence on your part to ensure you purchase a good tank. Here are a few questions to ask and what to inspect.
Questions to ask:
Ask for dimensions and references dimensions with this calculator – It is common for Craigslist posters to post the incorrect tank volume
Ask what the aquarium was used for and what it housed – do not purchase a tank used to house rodents or reptiles as these tanks may not be watertight or have damage to their seals
Has the tank been drilled – watch for glass patches if they have been covered up
Ask for a leak test – if the seller balks consider walking from the deal as most sellers should not mind this request
Where has the tank been stored? Tanks stored in a hot garage or outside are red flags as the heat can affect the silicone and cause leaks down the road.
What to inspect:
What does the glass look like? Is it scratched, cloudy? How bad is the damage?
Check for cracks – obvious cracks are easy to see but check for hairline cracks as well. These can go unnoticed and can hold water, but spell long-term disaster
If glass, check the silicone seals – look for beads that are solid and pliable
If drilled, inspect the drill sites for cracks
Bring a flashlight with you – this will allow you to inspect cracks and scratches more easily
Look at the stand for signs of warping, cracks, or mold damage. Scratches or peeled finish is fine as you can refinish the tank.
For acrylic tanks, inspect the bracing and for visible signs of bowing.
4. Don’t Purchase the Livestock
Often times you will see a listing where the seller is trying to sell a complete setup with fish, coral/plants, live rock, etc included. I would advise against purchasing the livestock unless you are experienced with handling an aquarium move. Moving an aquarium, especially a large aquarium is one of the most stressful activities you can undertake in the hobby. If the seller has a rare fish or coral that you want, consider purchasing it separately and quarantining it until your tank is established. I would not factor in the price of livestock on a listing. Try to negotiate with the seller to purchase only the equipment.
Often times, the seller can give the livestock to a local fish store or advanced hobbyist who has the means to handle the move. If you chose to purchase livestock, the safest livestock to purchase would be live rock (Amazon Affiliate links ahead). Live rock can be stored in a black stock tank with cheap power heads and an aquarium heater(food grade buckets work for smaller live rock purchases). Corals can be safe to purchase as well, but given the availability of frags these days, I would recommend just getting frags from a local reefer when your tank is ready.
When purchasing live rock. The best way to move it in a display tank is to “cook” the live rock. Melev’s Reef has a great video explaining the process. The reason why we want to do this is to reset the live rock. This prevents all the pests that and the nuisance algae from entering your display tank. This also effectively quarantines the live rock from parasites if you cook it long enough (6-8 weeks while switching out containers every transfer like in the video).
5. Prices Are Negotiable
Prices for listing are often not firm – especially on craigslist. If you find a listing that is new and listed under the title of a moving sale or “must sell quickly” jump on it right away. The newer the listing, the better the chance you will have at negotiating a better price. Many of people who list on Craigslist just want to get the aquarium out of their hands as soon as possible versus getting the best price for it.
Even if they have a price listed, ask the seller what they would take for it to get it off their hands that day. You would be surprised how often you will get a lower number than what it is originally listed for. The worst thing that can happen is they say no and you just wait another week for a good listing to pop up. People exit the hobby all the time and good deals are literally a dime a dozen especially if you live in a big city.
Negotiating off an aquarium club listing is harder to do because often times the seller is willing to wait it out or knows the value of the equipment they are selling. For these listings, it may be better to consider purchasing separate components of the setup as these sellers are more open to doing this. This is a really great way on getting quality equipment. The best equipment to buy used would be:
If you purchased a used tank setup, it will likely not be cleaned and you will need to get it ready to be used. The best cleaners to use on an aquarium and equipment would be distilled white vinegar that you can pick up cheap at a store like Target.This should be able to get most of the equipment looking like new after an overnight bath in the solution. It should be able to handle most used aquariums. I’m going to suggest some products below. Please note, affiliate links will be included for which I may make a small commission at no extra cost to you should you make a purchase)
For aquarium stands, it’s going to be depend on the condition of the stand. If it is in good condition, a simpler cleaner like Feed N Wax should make it looks like new again.For stands that are not in good shape, you may want to consider refinishing the cabinet with an oil based primer and paint. We recommended Kilz Oil-Based Primers and Java Gel Stain for refinishing projects. You can seal stain with Spar Urethane.
Choosing New – Cheap Aquarium Packages
While searching for a used tank can save you money, sometimes buying new makes more sense. Below are two examples for freshwater appropriate starter kits that are smaller and will get you started on your way.
Tetra 20 Gallon Aquarium Kit – Starter kit for the freshwater beginner
Tetra glass tanks are made in the USA and this 20 gallon starter kitcomes with several things to get you started. It has an LED hood, a UL rated heater, and Tetra Whisper filter, one boxwood plant mat, and four artificial plants to get you started. The 20 gallon tank has good dimensions being 24″ in length and 16″ in height and should serve a good beginner freshwater tank. The nice addition is Tetra’s aquarium app, which provides guidance, recommendations, and reminders to help you succeed! While the whisper filter isn’t the best powerfilter out there, it is a reasonable filter for a beginner and can be upgraded later.
Aqueon’s 20 gallon kit has a higher end power filter with Aqueon’s Quietflow 10, but it is a little undersized for the package. The heater is a plug and play preset heater configured to 78 degrees. You get to choose your plants and rocks with this kit as it does not come with either.
Easy to Find if You Are Patient – Tell Us Your Story
Tell us your story below in the comments about how you purchased a cheap fish tank. We also know that not all listings will include the equipment you want or need so after you purchase a used tank you can come check out our aquarium supplies for new equipment from top-quality brands. Let us know your thoughts and stories in the comment below.
If you want ideas of what tank you can build, check this out too. You can also check out our video above from our YouTube Channel. If you enjoy it, please be sure to subscribe! See you next time :).