
After 25 years in this hobby, I still get excited by freshwater species that most people overlook. The assumption that you need a saltwater tank for exotic fish is flat-out wrong. some of the most unusual, beautiful animals I’ve kept have been freshwater. These are the ten I’d recommend to anyone ready to go beyond the basics.
Most people assume you need a saltwater tank to keep truly exotic fish. I’d push back on that hard. In 25+ years I’ve come across freshwater species that stop people cold when they see them for the first time. The issue is that many of these fish are genuinely challenging: some are hyper-aggressive, some need massive tanks, and a few are outright scary to feed. That’s part of what makes them interesting. Here are my top 10 picks that I’ve either kept personally or studied closely enough to give you real guidance on.
10 Most Exotic Freshwater Fish
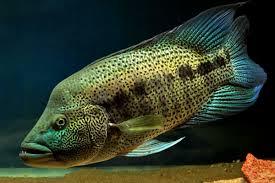
1. Wolf Cichlid
Stats:
- Minimum Tank Size – 75 gallons
- Max Size – Around 28 inches
- Temperament – VERY Aggressive
- Lifespan – 30 years
- Price – $20
A relatively plain-looking fish as an adult so you may be wondering why this Cichlid makes our most exotic freshwater fish list. Well, it’s because this fish is hyper-aggressive. It is easily the most aggressive cichlid you can buy and arguably the most aggressive freshwater fish commonly available.
They are a total handful, they are usually best kept alone in a tank as they will harass any other fish in the aquarium and they are scary to feed. Just look at this video by Mbuna Marcus of his Wolf Cichlid. Several times in this video his Wolf Cichlid went right for his fingers while eating and splashes water over his floors! These fish do not mess around!
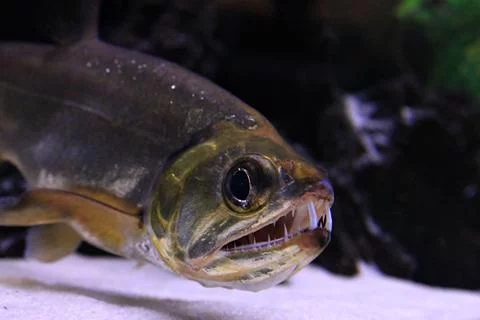
9. Vampire Tetra
Stats:
- Minimum Tank Size – 75 gallons
- Max Size – Around 12 inches
- Temperament – Aggressive
- Lifespan – 2 years in captivity
- Price – $75+
This is one crazy-looking exotic freshwater fish. They have giant front teeth which are where the name vampire comes from. They are very aggressive fish that require expert-level maintenance. Most of these fish usually will not live very long in captivity, unfortunately. They usually only eat live fish and will rarely accept frozen foods. They are best suited for a species-only aquarium with most aquarists who keep them only having a single fish in the tank.
8. Red Texas Cichlid

Stats:
- Minimum Tank Size – 75 gallons
- Max Size – Around 12 inches
- Temperament – Aggressive
- Lifespan – Around 5-10 years
- Price – Usually around $150-200 at 6 inches
This hybrid cichlid was created by breeding a Texas Cichlid and a Flowerhorn Cichlid. They are difficult to find and usually available seasonally from breeders. They command a high price tag since they are hard to find.
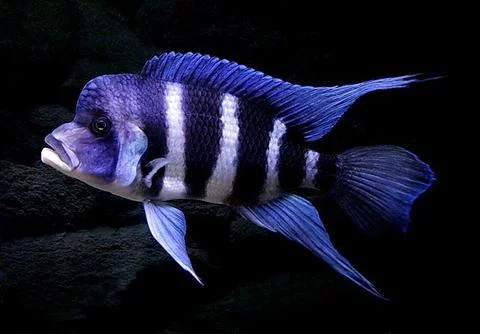
7. African Cichlids
Stats:
- Minimum Tank Size – 40 gallons
- Max Size – Up to 24 inches though usually 6-7 inches
- Temperament – Semi-Aggressive to Aggressive
- Lifespan – Around 5-10 years
- Most Expensive – Showcase African Varieties usually $120+
There are so many African cichlid types we could list here. Since many of them are often confused as saltwater fish by many people who see them for the first time, I felt that it was best to include most of the African lake cichlids in one group. There are some Africans that you can get for cheap like assorted Mbunas from a local fish store. However, there are specific varieties of Africans that can command prices over $100. If you are interested in learning more about African Cichlid tanks and care, please be sure to check our earlier blog post.
6. Flowerhorn Cichlid
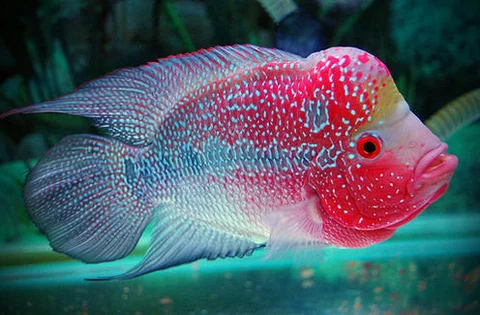
Stats:
- Minimum Tank Size – 70 gallons
- Max Size – 15 inches
- Temperament – Aggressive
- Lifespan – Around 7 years
- Most Expensive – Breeder Showcase Varieties $500+
A very beautiful exotic freshwater fish that originates from Malaysia. In Asia, they are considered a bringer of good luck. Flowerhorn Cichlids come in a variety of colors including reds, blues, pinks, yellows, and oranges. They are an aggressive Cichlid species and prefer large tanks all to themselves.
5. Pleco
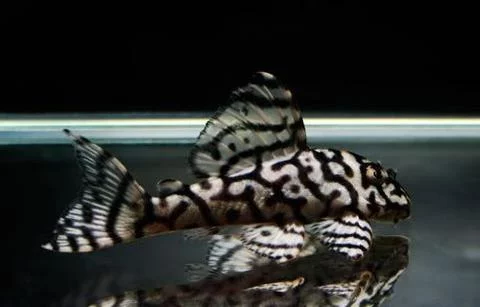
Stats:
- Minimum Tank Size – 70 gallons
- Max Size – 18 inches
- Temperament – Peaceful
- Lifespan – Around 20 years
- Most Expensive – L250 Pleco $10,000+
While most hobbyists will think a Pleco is a common freshwater fish, they really are a unique exotic freshwater fish. Many varieties like Snowball, Zebra, Golden Nugget and Royal Plecos are examples on how exotic-looking Plecos can be. There are common plecos which can get fairly large typically around 12-18 inches in length and there are smaller varieties like Bristle Nose Plecos which are suitable for smaller aquariums.
The most expensive Pleco to date was the L250 Pleco sold back in 2004 for over $10,000 in Japan; however, most Plecos do not sell anywhere near that. There are several types of Plecos that will sell for over $100 though.
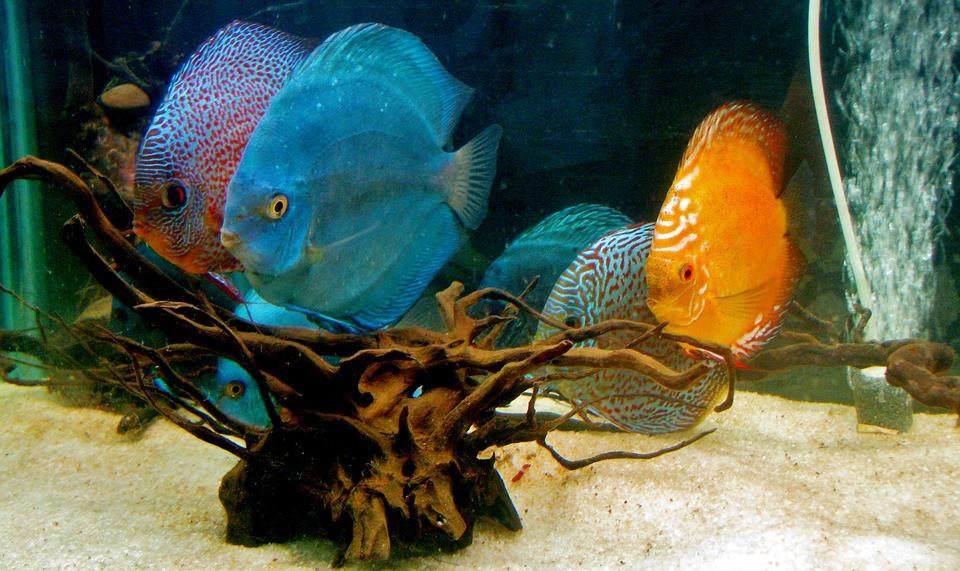
4. Discus

Stats:
- Minimum Tank Size – 75 gallons
- Max Size – 8 – 10 inches
- Temperament – Peaceful
- Lifespan – Around 10 years
- Most Expensive – Mated Pair Discus $1,000+
When one thinks of exotic freshwater fish, this is usually the fish most people think of. They can be expensive, have a variety of colors, are very delicate, and require excellent water parameters. Discus belong to the Cichlid genus and originate from South America. They are very social with members of their own species. They will also breed in the aquarium, which has created an industry of cichlid breeders where some top strains will sell for several hundred to thousands of dollars.
They are considered very challenging where they even intimate advanced aquarium keepers! If you are considering Discus and are new to keeping them, starting with an easier to keep discus breeder varieties like Stendker Discus or purchasing only domestically breed discuss will increase your chances to succeed.
3. Freshwater Stingrays
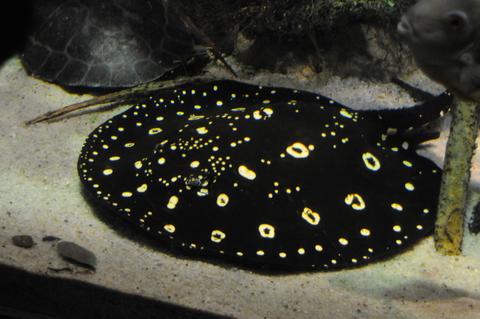
Stats:
- Minimum Tank Size – 180 gallons
- Max Size – Up to 3 feet
- Temperament – Semi-Aggressive
- Lifespan – Around 10 years
- Most Expensive – Polka Dot Stingray $100,000
When most of us think about stingrays, we think about the saltwater variety. There are freshwater varieties that originate from the Amazon. Beautiful, bold, and unique looking they are difficult to resist if you have a big enough aquarium. This exotic fresh fish is also venomous. While there are no known cases of a freshwater stingray causing a human fatality, they have been cases where the sting has caused numbness at the wound site several years later!
The rarest stingrays also command high price tags. One such stingray at the Taiwan Expo featured a Polka Dot Stingray with an asking price of $100,000!
2. Arowana
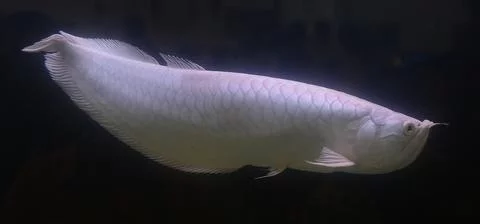
Stats:
- Minimum Tank Size – 125 gallons
- Max Size – 3 Feet
- Temperament – Aggressive
- Lifespan – Up to 50 years
- Most Expensive – Platinum Arowana $300,000
An extremely popular freshwater fish due to its prehistoric cosmetic appearance, the Arowana is well known exotic freshwater fish. They are known for jumping as high as 6 feet in the air for prey in the wild and have been known to jump out of aquariums. They get very large and are usually housed in an aquarium at least 125 gallons or larger. A common Arowana can be purchased for around $50 to a few hundred dollars.
However, certain Arowanas can fetch extreme price tags. Prized Arowana like the Platinum Arowana can sell for over $300,000!. These Arowanas are considered so valuable that they have microchips implanted into them before they reach sexual maturity to help identify and authenticate it.
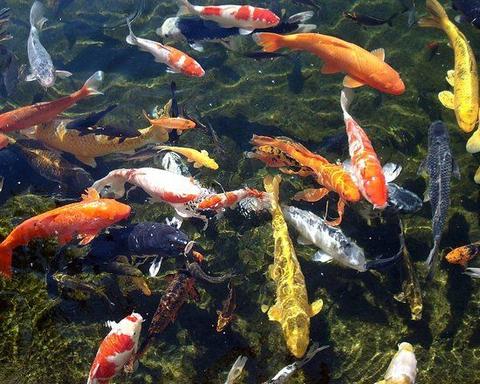
1. Japanese Koi
Stats:
- Minimum Tank Size – 1000 gallons
- Max Size – 3 Feet
- Temperament – Peaceful
- Lifespan – Around to 30 years
- Most Expensive – Golden Carp $2,000,000+
In Japanese culture, the Koi fish is celebrated as a noble creature. It is said that Japanese Koi are able to climb large waterfalls bravely, which symbolizes that incredible achievement is possible with hard work. It is also said in Koi lore that if a Koi fish is caught, it will lie on the cutting board awaiting its death without fear, similar to the Samurai warriors. There are also legends stating that if a Koi climbed the waterfall on the Yellow River, it would be transformed to a Koi Dragon.
With such great history, lore, long life spans, and respect for these fish, there is no question for this fish to be #1 on our most exotic freshwater fish list. In fact, the most expensive koi on the list demands a staggering price tag of over $2,000,000! You can see the prized fish in the video below:
What Has Been Your Experience With These Exotic Freshwater Fish?
Have you kept any of these fish on this list? If so, share your experiences in the comments below. We would love you hear about your experiences.


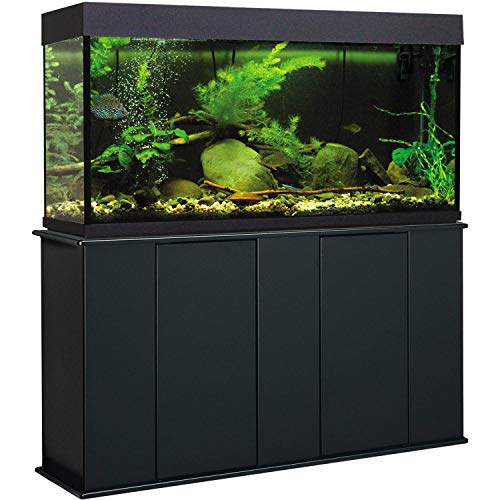


 Metal Stands are Typically Used for Large Custom Aquariums
 The basic principle of the design is two box frames connected by four legs. The legs are made of several pieces of 2X4’s to assist in construction and seething the stand in plywood for strength and cosmetics. The bottom frame transmits the load of the tank into the floor. Covering the sides of the stand with plywood will help to stiffen the stand against twisting and shifting. Doors could then be mounted to the legs as desired. The design can also be modified to include flooring at the bottom of the tank.
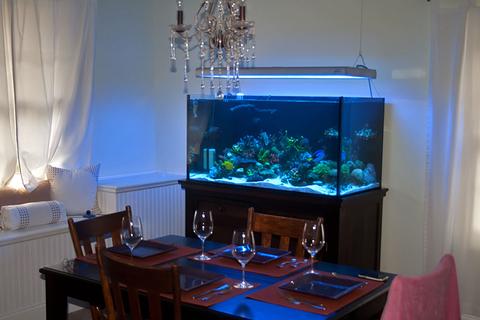 Top-Less Setups are More Common Now with Rimless Aquariums
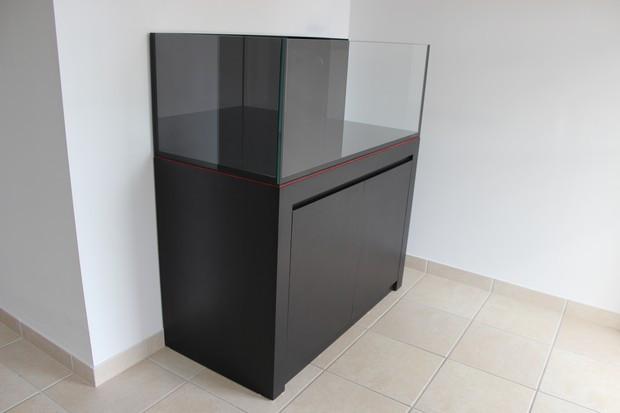

 Aquarium Societies are Treasure Troves of Knowledge
 A beautiful 3 foot 40 Gallon Breeder tank
 An Aquarium is Best Placed Away from Direct Sunlight
 Standard Glass Aquarium


 A Standard Tank Can be Drilled with Basic Power Tools
 Rimless Tanks Have Great Aesthetics!
 Low-Iron on the Left, Traditional Glass on the Right