Bristle worms are one of those reef tank discoveries that tends to freak people out the first time they see one. I remember the first time I spotted one in my 125-gallon reef and wasn’t sure what I was looking at. After years of reef keeping, my view is clear: most bristle worms are your friends, not your enemies. They’re detritivores doing cleanup work you’d otherwise have to do yourself, and removing them all is usually a mistake.
Bristle worms are one of those reef tank surprises that almost every reefer encounters sooner or later. The first time I spotted one under the rocks at night, I wasn’t sure whether to panic or leave it alone. After 25 years in the hobby, I’ve come to appreciate that these guys are often more beneficial than harmful, but there are exceptions. This guide covers everything you need to know about identifying bristle worms in your tank and deciding whether to remove them.
Expert Take (Mark Valderrama, AquariumStoreDepot)
In my experience, the reefers who panic and try to eliminate every bristle worm they find end up with dirtier tanks. These worms do real cleanup work in the substrate and inside live rock where you can’t reach. The ones you actually need to worry about are fireworms and bobbit worms. Regular bristle worms? Leave them alone. They’re earning their keep.
ASD Difficulty: Nuisance Classification
Regular bristle worms require no management. Fireworms and eunicid worms should be removed on sight. Learn to tell the difference and you’ll save yourself a lot of unnecessary work.
What People Get Wrong
Most reefers see a bristle worm for the first time and immediately want every single one gone. This is the wrong call. The vast majority of bristle worms found in home reef tanks are harmless detritivores that actively benefit your system. They clean up uneaten food, dead matter, and detritus from areas you can’t access. Removing them doesn’t make your tank cleaner. It actually makes your bioload management harder.
The second mistake is misidentifying any worm as a fireworm. True fireworms are fairly distinctive when you know what to look for: they’re thick, brightly colored, with puffy white bristles that look almost fluffy. A standard bristle worm is pink to reddish, flattened, and has clear or white bristles along its sides. These are very different animals.
The worm you genuinely need to worry about is the bobbit worm. That one you remove immediately.
The Hard Rule
Never reach into your tank with bare hands if you have any worms visible. Bristle worm bristles embed in skin and are painful to remove. Fireworm bristles are worse. Always use tongs, gloves, or a trap when handling live rock where worms may be hiding. This isn’t optional advice. It’s the one thing every experienced reefer learns the hard way.
What Are Bristle Worms?
Bristle worms are one of the most common ‘pests’ to come across in reef aquariums, though many hobbyists see them as essential cleanup crew members.
Scientifically, bristle worms are members of the Polychaeta class. With over 10,000 species under this taxonomic categorization, most members have segmented bodies with parapodia that grow chaetae made from chitin. In simple terms, these worms grow bristles on the sides of their body, though some species lack them.
Polychaetes have perfectly adapted to a variety of aquatic environments with some being found in the coldest regions of the ocean and some in the hottest, like the Pompeii worm (Alvinella pompejana) that can be found at extreme pressures and temperatures around hydrothermal vents. These worms use their bristles as protection from predators and to sometimes help circulate water in and out of tubes. These bristles may be venomous for further protection.
In the wild, these worms greatly help with the decomposition of organic matter. However, they can also take part in commensalism relationships where the worm benefits but does not harm the other organism, as well as parasitism where the worm benefits and harms the other organism.
Almost unbelievably, bobbit worms (Eunice aphroditois) can grow to be almost 10 feet (3 meters) long with other species of Polychaete growing to all sizes under that. Luckily, bristle worm species in the aquarium hobby usually stay under 4 inches (10 cm) and are much tamer than their wild counterparts.
Bristle Worms in the Aquarium
When you first see a bristle worm in your fish tank, you may feel the sudden urge to tear down your tank and heavily sanitize. Yes, these creatures can be scary to see at first, especially if you’re not familiar with their existence.
For the most part, bristle worms are not visible in the aquarium and will stay hidden. There are a few times you might see your bristle worms emerge though:
- During feedings. Bristle worms are scavengers and are quickly alerted to any food that becomes available in the water column. If you ever want to check the health of your bristle worm population, simply add some fish food to the tank and watch as they slither out of their cracks and crevices.
- During saltwater tank maintenance. If using a filter sock or other sponge media, you are bound to catch some bristle worms. For the most part, you can leave them alone. However, you will want to be careful during maintenance periods when handling that media as you can hit them with your hand. Aquarium gloves prevent most bristle worm encounters from happening.
- During decomposition. As mentioned before, bristle worms are excellent members of the reef tank cleanup crew. They are attracted to decaying matter and will be one of the first on the scene to take advantage of uneaten food or a dead fish or invertebrate.
- During the night. Bristle worms are largely nocturnal and will become most active and present when the tank lights are out.
Bristle worm populations directly correlate to the abundance of food in the tank. More available food equals larger populations of bristle worms and vice versa.
While there isn’t ever a thing as having too many bristle worms in your reef tank, they can definitely start to become unsightly over time. Some more aggressive types of bristle worms might even start to steal food from fish and corals if food supplies become limited.
It should be noted that there have been some claims of bristle worms injuring or killing fish. Though these claims are few and far between, it’s not impossible.
If keeping sand-dwelling fish, like gobies, it is also possible for your fish to get pricked by a bristle worm. Bristle worm-hungry fish, like wrasses, may get stabbed around their mouths while eating. These injuries will eventually heal and there is usually no reason to worry, however, keep an eye out for any signs of infection.
How Do They Enter the Aquarium?
Bristle worms enter the aquarium just as any other hitchhiker does: through objects moved between tanks.
One of the most common ways to introduce a bristle worm into the aquarium is through live rock. These worms have the incredible capability to burrow themselves into the deepest parts of live rock where they can’t be reached.
In the same way, bristle worms can come in on frag plugs and skeletons of coral (like LPS corals) as well as substrate or filter media that was previously used in another saltwater tank. Though less likely, some bristle worm species reproduce by releasing eggs and sperm into the water column that eventually become free-swimming larvae. Both eggs and larvae could possibly be transferred via water.
Once in the aquarium, your bristle worms will continue to reproduce in relationship to the amount of food available. Some species may also reproduce asexually.
What Do They Do in the Aquarium?
Besides looking somewhat scary, what do bristle worms actually do, and are they worth keeping in your reef tank?
The short answer is yes. Bristle worms are one of the most beneficial hitchhikers that can be introduced into your tank as long as they are the right kind. These worms are natural detritivores that clean up the various waste and detritus that are created in the aquarium. Some species can be omnivorous.
For the most part, bristle worms stay in the substrate or in the live rock. Like terrestrial worms in the soil, they can help aerate substrate in order to prevent nitrate buildup. Shuffling the substrate can also help prevent algae from forming on the surface and make vacuuming easier. Inside of the live rock, bristle worms can clean hard-to-reach places and help prevent dead zones from collecting waste.
Overall, bristle worms are a helpful, abundant, and often free member of the tank cleanup crew that does not need to be removed or monitored. However, if you’re dealing with anything other than your typical bristle worm, there might be some cause for concern.
Types
Though all bristle worms might look the same, they’re usually lumped into two categories in the aquarium hobby: good (harmless) and bad (harmful).
With so many species and so many still unknown, it can be very difficult or even impossible to assign an exact scientific name to the type you have. It is very likely that you end up with more than one species in your reef tank anyway, so a broader categorization is better.
The Good Guys

Most bristle worms are beneficial and look the same. They are typically light red to pink. There is usually a darker section of their body which is food being digested. These worms have clear or white bristles on either side of their flat body and usually stay under 3 to 4 inches (7.6 to 10 cm) long.
The Bad Guys
In general, bad bristle worms are any that deviate from this ‘common’ bristle worm appearance. This can mean deeper intensities of pinks and reds, striping, or differences in size. Some hobbyists remove any worms they see that have breached the 4 inch (10 cm) mark, though this does not necessarily mean that they are a harmful species.
The bigger concern with larger bristle worms is that they can start to produce significant amounts of bioload and possibly eat or injure fish and invertebrates. Most of all, they are an unsightly member of the tank system.
On the other hand, there are a few species of bristle worm that are known to be harmful through and through. This includes members from the Eunicidae family and fireworms.
Eunicid Worms
Eunicids are pretty easy to identify. These dark red or black worms are considerably larger and rounder than common bristles, with some growing in excess of 10 inches (25 cm), like the bobbit worm.
Their most defining feature is their antennae which surround their feeding structure. These can usually clearly be seen poking out from rockwork or the substrate. Otherwise, they have thinner and more separated bristles than regular bristle worms.
Though some reef tank owners allow smaller eunicid worms to keep their tanks clean, larger individuals have been known to go after fish and corals. As a result, many hobbyists try to remove them as soon as possible.
Fireworms

When researching saltwater aquarium bristle worms, one of the first things that will come up is a fireworm. These worms are considered one of the worst hitchhikers that could enter your system as they have highly irritable bristles that can cause severe pain and discomfort. It is strongly believed that some species of fireworm are venomous.
These worms are named after their bright white bristles that are sometimes puffy-looking and deliver a fiery sting. Fireworms are usually thicker, longer, and much more ornate than regular bristle worms. They can feature dark reds and browns. If your bristle worm looks dangerous, it is probably a fireworm.
There are over 120 different species of fireworm, though they’re not incredibly common to come across in the reef aquarium. One of the most common species to come across is the bearded fireworm (Hermodice carunculata).
Though these worms can inflict serious pain, they are not deadly to humans or fish. If you suspect that you have a fireworm in your tank, use thick gloves and remove it from your tank immediately.
What Happens If You’re Stung By A Fireworm?
Fireworm stings aren’t very common, but if you happen to get stung by one, you’ll want to know what to do.
Fireworm stings are painful and you’ll know right away that something has happened. Though in an aquarium, there are many things that could possibly hurt you, so closer examination is needed.
First, look at the affected area. Most times, you’ll be able to see the bristles in the skin. These bristles should first be removed with tweezers or adhesive tape. Isopropyl alcohol and vinegar may be applied to the area. The isopropyl alcohol will help prevent infection while the vinegar will dissolve any remaining bristles. Ibuprofen may be taken for the pain.
Common symptoms of a fireworm sting are localized burning sensations, bumpy skin, irritation, and blotchiness. In extreme cases, the person may experience dizziness and nausea, and medical assistance is recommended.
If mild symptoms continue, hydrocortisone may be applied over the following days. If infection starts, seek medical attention and start a course of antibiotics.
Bobbit Worm (The Nightmare)
The scariest bristle worm that you will ever come across would be the bobbit worm. They are known as the nightmare of saltwater fish tanks. These predators can grow as long as 10 feet (3 meters) and will readily eat fish in your aquarium. They often will be hidden for a long time and the aquarist will wonder why their fish keep disappearing. They will hitchhike on live rock and are considered one of the major pests you can get from live rock. Want to be scared? Check out this video below by Smithsonian Channel.
Reality Of Living With Bristle Worms
Here’s the honest picture from 25 years in this hobby: bristle worms show up in almost every reef tank that uses live rock, and that’s fine. They’re part of a healthy benthic ecosystem. The reefers who try to wage war on all bristle worms end up spending time on removal that doesn’t help the tank at all.
What you actually need to do is identify what you have. Turn on a flashlight at night when the main lights are off and look at the substrate and behind rocks. Regular bristle worms are pink, flat, and move away from light quickly. Fireworms are thick, have bright puffy bristles, and look distinctly different. Bobbit worms rarely show themselves but you’ll see pits in the sand where they ambush prey.
If you have regular bristle worms, leave them. If you have fireworms or anything resembling a bobbit worm, remove it immediately and start trapping.
How to Get Rid of Worms
If you really can’t stand the look of bristle worms, or you’ve confirmed you have harmful species, then you’ll want to get them out of your tank as soon as possible.
Luckily, there are a few ways to get rid of bristle worms safely and with little to no additional work. Here are some of the best options for eliminating or controlling bristle worm populations.
Traps
There are many bristle worm traps commercially available that are specifically made for catching bristle worms. Simply place this trap in your tank with some food loaded and you should catch a good amount of worms at a time. These traps are designed so that the bristle worms can easily enter but cannot exit.
There are also some DIY alternatives. One of the methods for making a bristle worm trap is by using a bottle or a piece of PVC piping. If using piping, make sure that both sides are sealed.
First, cut form-fitting holes along the sides of the bottle or pipe. Angle straws or another cylindrical plastic tube pointing down towards the sand bed. You may create as many of these entryways as you want. Place some food inside, submerge overnight, and remove the bristle worms the following morning.
Manual Removal
In addition to traps, you may try manually removing bristle worms from your aquarium. This is much more time-consuming but can deal with any stragglers that might refuse to go in a trap.
Basically, use tongs to remove any bristle worms you see at any given moment. These worms are surprisingly fast and will react to changes in light, like the shadow from an incoming hand, so make sure to be fast with your movements.
Some hobbyists even lure bristle worms out by attaching food to the end of the tongs and picking up any that make their way out. There is no wrong way to catch them, though it is recommended to wear protective gloves if working up close to them.
Natural Predators
If you have a large enough aquarium and want to add another fish or invertebrate but also want to get rid of your bristle worm problem, there are also a few livestock options.
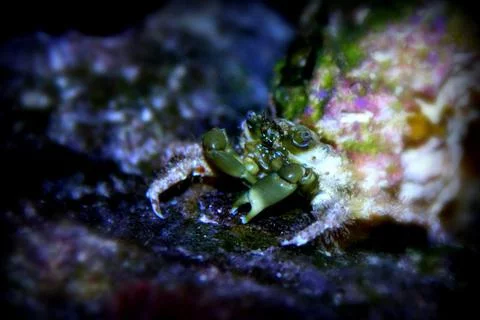
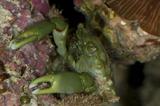
Arrow Crabs (Stenorhynchus seticornis)
Arrow crabs are one of the best invertebrate solutions for controlling bristle worm populations. These crabs can be scavengers or active predators and will gladly eat any bristle worm they come across.
However, these crabs aren’t 100% reef-safe. They have been known to pick at corals and even other slow invertebrates and fish. They will not take care of any algae in the tank and heavily rely on meatier foods for sustenance.
If wanting to keep an arrow crab in the aquarium, then tank mates should be considered carefully. There should be nothing that your crab could accidentally eat and there should be nothing that could accidentally eat your crab.
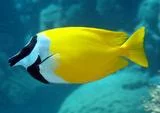
Wrasses
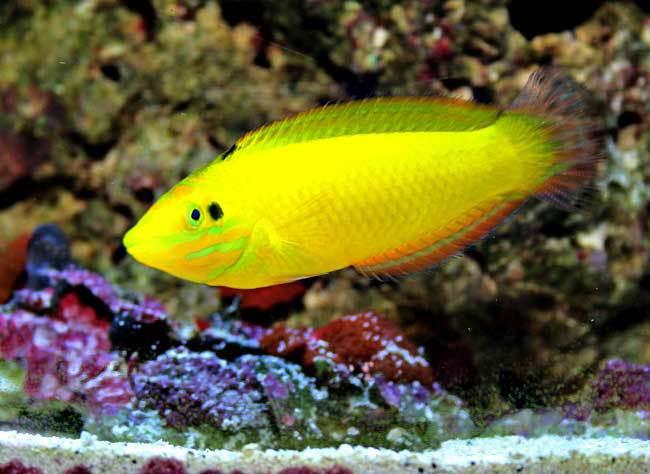
Wrasses are one of the best fish to add to your aquarium if you’re having a bristle worm explosion. These fish are active and colorful and have a big appetite for worms.
Wrasses can differ in size and behavior, so it’s important to check if your fish is compatible with your setup before adding it to your tank. Here are some of the best wrasse species to get rid of your bristle worm problem:
- Six Line Wrasse (Pseudocheilinus hexataenia) – maximum size of 3 inches (7.6 cm); minimum tank size of 55 gallons (208 liters)
- Pink-streaked wrasse (Pseudocheilinops ataenia) – maximum size of 2.5 inches (6.4 cm); minimum tank size of 15 gallons (57 liters)
- Red coris wrasse (Coris gaimard) – maximum size of 15 inches (38 cm); minimum tank size of 125 gallons (473 liters)
- Melanurus wrasse (Halichoeres melanurus) – maximum size of 4.5 inches (11.4 cm); minimum tank size of 50 gallons (189 liters)
- Yellow coris wrasse (Halichoeres chrysus) – maximum size of 4.5 inches (11.4 cm); minimum tank size of 50 gallons (189 liters)
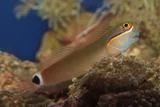
Apart from wrasses, there are a few other fish species that could help control bristle worm populations in your aquarium. Some of these options include goatfish (Mullidae family), butterflyfish (Chaetodontidae family), and gobies (Gobiidae family).
What To Do With Unwanted Worms
If you’ve chosen to use a trap or manually remove your bristle worms, you’ll find yourself wondering what to do with them. There are three options for dealing with unwanted bristle worms:
- Sell or give them away to another hobbyist. Believe it or not, bristle worms are in high demand. They’re one of the best cleanup crew members and some hobbyists haven’t been fortunate enough to have them come in on their rock. Ask local hobbyists and fish stores if they’re interested in taking them off your hands.
- Put them in your sump. If you have sump filtration, underneath the tank is the perfect spot for your worms. They will continue to clean just as well, but out of sight from your main display. It is very possible that some will make their way back up through the plumbing, but this can be controlled with a natural predator or regular removal.
- Dispose of them. If you have no other option, humanely killing the bristle worms is the best method of disposal. You can place them in freshwater, hydrogen peroxide, or a coral dip that specifically targets invertebrates.
Should You Remove Bristle Worms?
Leave them alone if:
- They are pink to reddish, flat, and under 4 inches (10 cm)
- Your tank is generally clean and the population is manageable
- You don’t have sand-dwelling fish that frequently get pricked
- You want a natural cleanup crew working in places you can’t reach
Remove them if:
- You have confirmed fireworms (puffy white bristles, thick body)
- You have eunicid worms or anything resembling a bobbit worm
- The population has become so large that worms are visible in the main display during the day
- Worms are stealing food from fish or coral
- Individual worms have grown beyond 6 inches (15 cm)
Where To Buy Cleanup Crew Alternatives
If you’re building out a reef cleanup crew and want bristle worm predators or replacements:
- Flip Aquatics – carries a selection of reef-safe cleanup crew and wrasse species
- Dan’s Fish – another reliable source for saltwater cleanup crew livestock
Closing Thoughts
While bristle worms might not be the prettiest aspect of your saltwater aquarium, they are one of the best live rock hitchhikers that can come on coral frags. Like other hitchhikers, there are good and bad species, though the bad ones are relatively easy to remove by hand or with a natural predator. If handling, always use proper safety equipment.
Otherwise, bristle worm populations will sustain themselves based on the amount of food available in the aquarium. Smaller ones will typically not affect fish or corals, though larger ones should be removed in order to prevent possible injury. The default answer for most reefers should be: leave the regular ones alone and learn to identify the harmful exceptions.
Want to learn more? This article is part of our complete Saltwater Fish & Reef Guide – your ultimate resource for marine fish, coral care, reef setup, and more.