Generic selectors

Exact matches only

Search in title

Search in content

Post Type Selectors

Tag: Planted Tank

  • Planaria In Aquariums: How I Identify and Get Rid of Them

    Planaria In Aquariums: How I Identify and Get Rid of Them

    Planaria are flatworms that eat shrimp fry, snail eggs, and anything small enough to catch. They are a sign of overfeeding and they spread fast in shrimp tanks.

    Planaria in a shrimp tank is a breeding colony killer. Treat it immediately.

    Planaria in a shrimp tank is a breeding colony killer. Treat it immediately.

    What Are They?

    Planaria are commonly known as flatworms. These animals belong to the Turbellaria class and the larger phylum of Platyhelminthes1. They is found in a variety of ecosystems, including freshwater, brackish water, marine, and even in humid terrestrial settings. There, they play an important role in the ecosystem and can even be used as a bioindicator for the conditions of the environment. Though Planaria are abundant, they are actually quite sensitive to poor environmental conditions.

    In addition, species of Planaria exhibit regeneration. These incredible animals are able to regenerate a new independent flatworm from just 1/200th of a piece; if split in two, the head piece will develop a tail while the tail piece will develop a head. Planaria also share some genetic similarities with humans, making flatworm bioindication and regeneration a hot topic of scientific study and application.

    Because flatworms are so small and elusive, it’s impossible to know how many species exist, though rough estimates are about 4,500 unique worms. One thing is for sure though, they have happily made their way into the home aquarium.

    What Do They Look Like?

    If you have a planted tank or reef setup, you probably have aquarium worms in your aquarium whether you like it or not. While most species of Planaria flatworms are harmless, the good ones are difficult to tell apart from the bad ones. This is why it’s recommended to remove and treat for planarian flatworm if you find one in your aquarium regardless.

    First, you need to know what one of these small worms looks like.

    Planaria Worm Under Microscope

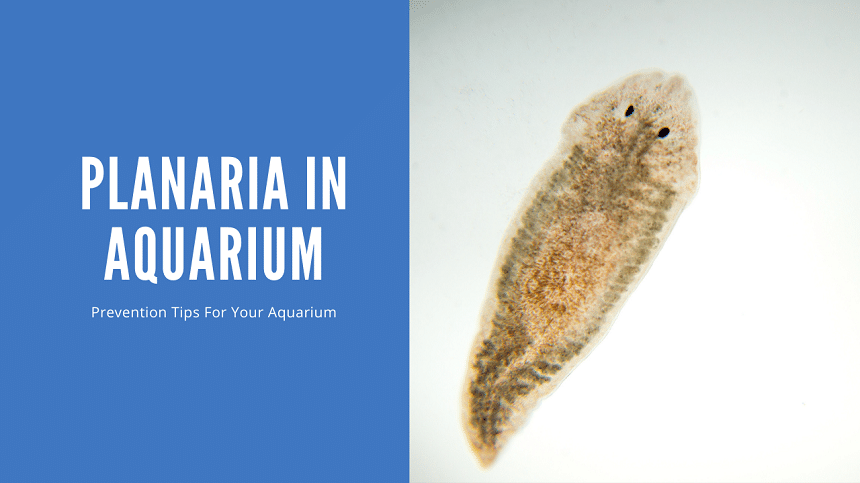
    Planaria flatworms are named after their flat bodies. These animals are dorsoventrally compressed, meaning they have flattened bodies from both the under and upper sides. One of their main characteristics is their triangular head, which has two observable eyespots.

    Flatworms are very small and stay well under half an inch in length. There are a few types of planaria worm found in the aquarium:

    • Light Planaria, sometimes called white Planaria or white worms, are species from the Procotyla genus. They are freshwater worms from North America and Russia. They are very light and creamy in color, though they might have bursts of darker color across their bodies.
    • Dark Planaria are often Dugesia species, which are much more widespread throughout the world and are found in freshwater ecosystems.
    • Red flatworms (Convolutriloba spp.) are one of the most common marine Planaria worms to come across. They reproduce quickly and can quickly suffocate corals. When killed, these rust-colored worms also release a toxin that can become dangerous to other aquarium inhabitants. Interestingly, red flatworms are largely photosynthetic.

    Keep in mind that Planaria flatworms are only a few millimeters in length, making them incredibly difficult to accurately identify. Planaria flatworms are not the only worm in the aquarium though, and lots of other aquatic worms are beneficial to our systems.

    It is easy to confuse Planaria worms with detritus worms that live in the substrate, cleaning up leftover food and providing oxygenation. Detritus worms will stay in the substrate or along the bottom of the aquarium and have a long and thin rounded body. This is much different from the flattened appearance of a flatworm.

    Planaria In Aquarium? How Do They Get In

    Planarian worms are hitchhikers just like any other creature that has unknowingly made its way into your aquarium. They show up in your aquarium one day, fully established.

    Like other hitchhikers, Planaria flatworms enter the aquarium through direct transfer of rock, media, substrate, plants, or other aquarium decorations. It is also possible that Planaria eggs are transferred on these objects which will then hatch in the new aquarium. On rare occasions, Planarian worms and eggs may be transferred with the aquarium water.

    Like many other pests, Planaria populations will largely depend on the overall resource availability of the fish tank; population numbers may increase and decrease depending on water quality and feeding frequencies. While it’s normal to find one or two Planaria flatworms every now and then, you might find yourself facing an infestation.

    No matter how many worms you observe in your aquarium, it is always recommended to remove them as soon as possible. This is mainly to prevent an infestation but also because it is hard to know if the type of flatworm you have is harmful to your system or not. It is better to prevent a problem before it happens than to clean up the mess.

    Are They Harmful To Fish?

    But how harmful are Planaria worm species? Will they kill your fish and invertebrates overnight or wait until you least expect it to strike?

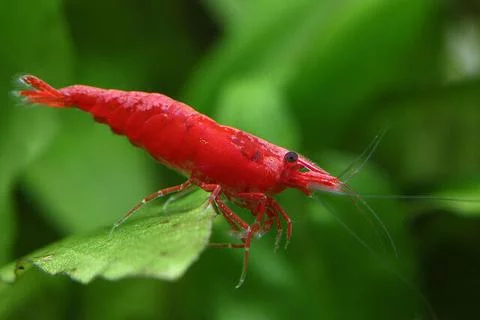
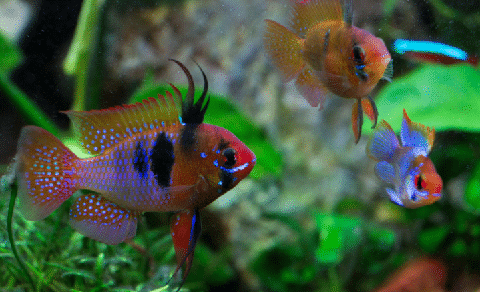
    No, it is very unlikely for Planaria to affect your fish and larger invertebrates, like shrimp and snails (and also crabs); at the same time, Planaria have been known to attack and kill shrimp (see video above). While some species of Planaria are parasitic, they are rarely seen in the home aquarium. Instead, most fish tank Planaria species are free-living, burrowing into the rocks and substrate.

    These free-living Planaria worms can become problems, especially for corals. One of the most common pests is the red Planaria worm, which reproduces quickly and suffocates corals. However, there are other types of flatworm that target specific species of coral, like the Acropora eating flatworms (AEFW).

    These flatworms, Amakusaplana acroporae, are nearly impossible to see before it’s too late. AEFW flatworms feast on the coral’s flesh and then lay their eggs around the base of the skeleton. These Planaria worms are nearly the exact same color as the Acropora they eat, making them blend in and camouflage an already bare coral skeleton.

    On the other hand, a controlled Planaria population is beneficial for the home aquarium. These worms are excellent members of the cleanup crew and are a high-protein source of food for many fish species, especially wrasses. With careful feeding and regulation, these pests is put to good use.

    How To Get Rid of Worms

    The problem is that by the time you find one Planaria swimming across the front of your aquarium glass, you already have a problem. Remember, these worms reproduce quickly and one can quickly lead into a full Planaria infestation.

    Because these worms are so small, removal is difficult. Luckily, there are a few methods to get rid of Planaria worms through manual removal, chemical treatment, or the addition of new aquarium inhabitants.

    Manual Removal Of Flatworms

    Manually removing flatworms is like treating any other pest and requires determination and consistency.

    However, it’s important to keep in mind that some Planaria worms are capable of releasing toxins into the aquarium upon death, which should be avoided as much as possible. For extra precaution, make sure to run activated carbon filter media.

    Otherwise, these worms is carefully removed from the aquarium over the course of a few weeks.

    Aquarium Vacuuming

    Remove worms as you see them. If you find one crawling along the aquarium glass, carefully use a net or other container to get it out of the fish tank. This might seem simple enough, but it’s also worth taking a few extra minutes during a water change to suck up any flatworms that you see on corals, rocks, or plants with an aquarium vacuum.

    Some species, like the red flatworm, are easier to remove than others. After safely removing them from the tank water, they may be disposed of through specialized coral dips, boiling water, or other proven household chemicals.

    At the same time, feedings should be decreased. As mentioned before, a blossoming Planarian worm population is often directly linked to food availability. By limiting food temporarily while also undergoing population control, eliminating flatworms becomes a whole lot easier.

    Flatworm Traps

    Because hobbyists regularly struggle with flatworm infestation scares, tools have been developed to make the solution as easy as possible. One of these tools is a planaria trap.

    These traps come in many shapes and designs and may even be DIY’d. The main goal is to draw as many worms as possible by using extra smelly bait and leftover food. The Planaria trap is designed to allow the flatworms to enter but not to leave, letting hobbyists leave their aquariums alone to catch worms for them.

    The problem with the Planaria trap is that it can attract other smaller invertebrates and cleanup crew, like adult shrimp and other worms. Though the trap won’t kill them immediately, it makes predation easier while also stressing out the animals.

    The other problem with using a Planaria trap is that progress is slow and indefinite. These traps will not get rid of a Planaria infestation. Instead, they can regularly be used for population control.

    Chemical Treatment

    If your Planaria infestation is literally out of your hands, then you need to turn to a more immediate solution. However, chemical treatment should be a last resort as products designed only for Planaria worms is difficult to find and dose. Luckily, there are a few products that only affect Planaria, though they might originally be meant for other animals.

    The best chemical treatments for eliminating Planaria are:

    • Praziquantel. This treatment is safe for most fish species, though wrasses is more susceptible to negative side effects. It may kill fan and bristle worms but should not affect other invertebrates in fish tanks.
    • Salifert’s Flatworm Exit. This chemical is one of the safest for all reef organisms, but will be ineffective at normal doses. This makes it so that you need to overdose on the product, which can lead to a mass die-off of worms that then release too many toxins that affect the whole tank.
    • Levamisole hydrochloride. Products that have this active ingredient are Levisol, Fenbendazole, Safe-Guard, and Paracur. These chemical treatments offer wide coverage and will kill most invertebrates in the aquarium and should be used as a last resort.
    • Interceptor. A canine dewormer that is used for reef tanks to eliminate flatworm infections
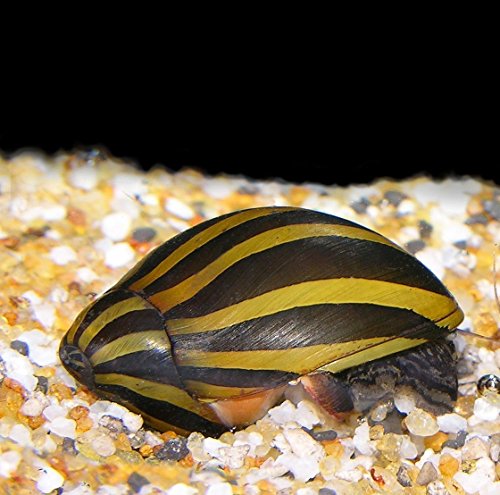
    • No Planaria. This is a shrimp-safe treatment that works for heavy infestations. Make sure to remove beneficial aquarium snails and chemical media when using this product. The active ingredient is Betel nut palm extract. This is a natural treatment that is effective against planaria in the aquarium.
    No Planaria

    A shrimp safe treatment that works to eliminate Planaria from your aquarium. Great for battling infestions

    Buy On Amazon

    While these chemicals is extremely effective, most do not treat for Planaria eggs. This is why it’s recommended to quarantine all new live rock (for saltwater tanks), plants, substrate, and filter media that is being transferred from one aquarium to another.

    New Fish And Invertebrates

    One of the best things about having Planaria worms in your aquarium is having an excuse to buy new fish and invertebrates. Like any other solution for pests, new aquarium inhabitants should not be purchased for a temporary solution. Fish and invertebrates should be given what they need for an indefinite time period.

    That being said, there are a few natural predators that eat Planaria in Freshwater tanks.

    Freshwater Angelfish

    • Scientific Name: Pterophyllum spp.
    • Minimum Tank Size: 30 gallons
    • Maximum Size: 6 inches
    • Aggression: Semi-Aggressive

    Freshwater angelfish are big, colorful fish that can work up an appetite. These fish are largely categorized as omnivores but can go into a frenzied state when live, meaty foods are introduced into the aquarium.

    This is used to the benefit of the hobbyist as freshwater angelfish are likely to go after flatworms to supplement their diet. Though these fish aren’t the most proactive hunters, they can certainly help keep worm populations under control.

    Once flatworm populations run low, angelfish can then sustain themselves on other foods instead.

    Gouramis

    • Scientific Name: Trichogaster spp.
    • Minimum Tank Size: 10-40 gallons
    • Maximum Size: 6 inches
    • Aggression: Semi-aggressive

    Gouramis and angelfish have very similar diets and are just as capable of controlling a flatworm population in the fish tank. These colorful fish species will gladly eat any flatworms they come across, and won’t need to be supplemented in the future.

    Again, gouramis will not eliminate the problem completely but will help keep numbers down.

    Tiger Barbs

    • Scientific Name: Puntius tetrazona
    • Minimum Tank Size: 30 gallons
    • Maximum Size: 3 inches
    • Aggression: Semi-Aggressive

    In a school, tiger barb behavior has sometimes been equated to that of a hungry pack of piranhas, and they definitely have the predatory instincts to prove it!

    Like angelfish, tiger barbs go into a frenzy when food is present. They are largely omnivores but will prefer a more meat-based diet, making them the perfect candidate to eat Planaria worms. The only problem is their over-aggression, which limits tank mate options.
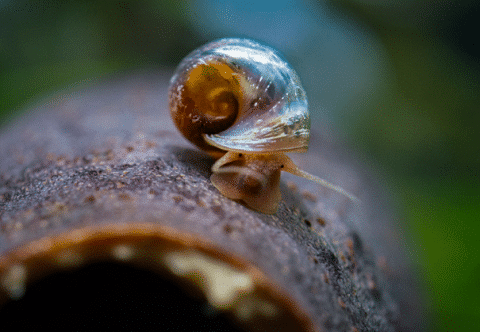
    Assassin Snails

    • Scientific Name: Clea helena
    • Minimum Tank Size: 30 gallons
    • Maximum Size: 3 inches

    If you’re pressed on space or just can’t add another fish to your aquarium, then an assassin snail is what you’re looking for. However, these snails won’t go after flatworms on their own and they might need some encouragement; all the while, it’s likely that your assassin snail will attack any other snails in the aquarium.

    In order to get your assassin snail to target flatworms, it’s recommended to feed the tank less. This will make your snail hungrier and possibly more interested in the prey that is already available.

    It should be noted that this is not a guaranteed method but can help hobbyists keep up with manual removal.

    Saltwater solutions

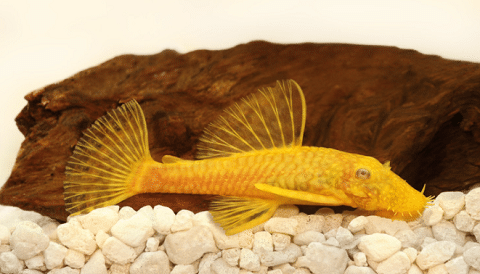
    In general, wrasses and blue velvet nudibranchs (Chelidonura variants) are the best biological solutions to get rid of Planaria worms. The six line wrasse (Pseudocheilinus hexataenia), melanurus wrasse (Halichoeres melanurus), yellow coris, and canary wrasse (Halichoeres chrysus) are especially known for their flatworm-eliminating powers.

    Planaria worms are great food for fish and most species of wrasse won’t turn down a free meal. Unfortunately, wrasses are active fish that need more space than the blue velvet nudibranch. They also prefer a substrate that they can burrow into at night.

    Other Options

    Hobbyists have also tried some species of dragonet and blenny, but both these fish seem to be more interested in other food in the aquarium first.

    Some hobbyists have even tried peppermint shrimp (Lysmata wurdemanni) that are successful Aiptasia hunters. However, they’re just as likely to move on to other foods first than to fully control Planaria worm populations in the aquarium.

    Quarantine And Prevention

    The best way to prevent a Planaria worm outbreak is by stopping them from entering your freshwater or saltwater aquarium in the first place. This is done by quarantining new live rocks, plants, filter media, and other aquarium decorations. Preventative dips may also be used for faster results.

    With any new addition to the aquarium, a quarantine period should be allowed. This should last about 2-4 weeks to allow worms to emerge and for any eggs to hatch. At this point, the problem is contained and is freely treated with any of the methods mentioned before: manual removal, chemical treatment, or added fish and invertebrates.

    The benefit of quarantine is that you don’t need to worry about sensitive fish or invertebrates that would otherwise be affected by the most effective chemical treatment options. You also don’t need to worry about nuking your tank with dead Planaria!

    The quicker method (for saltwater tanks) is rinsing new objects and media in a coral dip or other homemade solution. There are many coral dips that will treat a variety of pests, including flatworms.

    An alum dip is especially popular for dipping and treating freshwater live plants.

    While these dips are largely effective, some worms have grown immune to their effects. Planarian eggs may also not be affected and need to be manually removed.

    Final Thoughts

    Planaria flatworms aren’t something you want to see in your aquarium, but they’re not the most destructive or overwhelming pest. Luckily there are a few methods to get rid of Planaria worms, including manual removal, chemical treatments, and new aquarium additions.

    As with any pest, prevention is the best way for eliminating flatworms altogether.


    🐟 Want to learn more? This article is part of our complete Aquarium Care Guide. Your ultimate resource for water chemistry, maintenance, feeding, disease prevention, and everything you need for a healthy tank.

  • 10 Best Red Aquarium Plants – Care Tips From a Planted Tank Keeper

    10 Best Red Aquarium Plants – Care Tips From a Planted Tank Keeper

    Red aquarium plants have always been one of my favorite ways to add contrast and depth to a planted tank. When I set up my 65-gallon community planted tank, I made sure to include reds throughout to create that pop against the greens. The challenge with red plants is that they demand more light and often stronger nutrients than green plants, and I’ve learned through trial and error exactly what they need to thrive. This guide covers my top picks and the key things you need to know to actually keep them vibrant. not just alive.

    Why Grow Red Aquarium Plants?

    We got a video for you from our YouTube Channel you can check out all about Red Plants. We go into more detail in the blog post below. Sub to our YouTube channel for more content as we post new videos every week.

    If you’ve ever seen an aquascape aquarium with bright and colorful red plants in it, you’ll know what all the fuss is about. Of course, bright green plants are beautiful too, but there’s something special about dramatic rosy foliage that really catches the eye.

    Growing healthy red plants can be a little bit challenging for beginners, but with the right equipment and know-how, it is a fascinating side of the planted tank hobby that any aquarist can succeed at!

    10 Best Red Aquarium Plants

    In a hurry? Check out red plants sold at Buce Plant!

    Here we go folks, it’s time to introduce 10 amazing red aquarium plants that you can use in your own aquascape! For each plant, I’ll be providing important information like:

    • The plant’s average size
    • The recommended placement in the tank
    • pH
    • Care level
    • Light requirements
    • CO2 requirement
    • Method for propagating new plants

    1. Ludwigia natans ‘Super Red’

    • Size: 6-20 inches
    • Tank Placement: Mid ground, Background
    • Origin: North America
    • pH: 6-7
    • Care level: Easy
    • Lighting: Medium
    • CO2 requirement: No, recommended
    • Propagation: Rooted cuttings

    Ludwigia natans ‘Super Red’ is a great plant to start out with. This fast-growing stem plant for freshwater aquariums is an easy plant to care for but will develop its best color with proper lighting and CO2 injection.

    It is a tall, narrow plant when grown singly, but being soft and delicate, it shows great movement when a few stems are planted together in groups.

    2. Alternanthera reineckii ‘Mini’

    Alternanthera Reineckii

    A challenging, but rewarding red aquarium plant. Grows in all placements

    Click For Best Price Buy On Glass Aqua
    • Size: 3-12 inches
    • Tank Placement: Foreground, Mid ground, Background
    • Origin: South America
    • pH: 5-7
    • Care level: Moderate
    • Lighting: Medium-High
    • CO2 requirement: Yes
    • Propagation: Rooted cuttings

    Alternanthera reineckii is a very popular aquarium plant that is commonly referred to as AR for short. It is a beautiful but fragile plant that is available in many amazing varieties. AR ‘Mini’ is a relatively compact and slow-growing stem plant with amazing color.

    Being a slow-growing plant, it can be prone to algae growth on its broad leaf surfaces. Give this plant stable water parameters and regular tank maintenance and it will provide you with incredible foliage and color.

    3. Alternanthera reineckii ‘Rosanervig’

    • Size: 4-12 inches
    • Tank Placement: Mid ground, Background
    • Origin: South & Central America
    • pH: 6.5-7.5
    • Care level: Moderate
    • Lighting: Medium-high
    • CO2 requirement: Yes
    • Propagation: Rooted cuttings

    AR ‘Rosanervig’ is a taller variety that makes a great midground plant for larger aquariums. It can even be used as an effective background in small tanks. This gorgeous plant has reddish-green foliage with brilliant pink veins.

    4. Rotala rotundifolia ‘Red’

    • Size: 8+ inches
    • Tank Placement: Background
    • Origin: Southeast Asia
    • pH: 6.5-7.5
    • Care level: Easy
    • Lighting: High
    • CO2 requirement: Yes
    • Propagation: Rooted cuttings

    Rotala rotundifolia ‘Red’is an easy-to-grow stem plant that can add amazing color to your aquarium. This fast-growing aquatic plant produces its best colors when nitrogen is limited in the tank. It is easy to trim and propagate, which makes it an excellent choice for aquascaping.

    5. Rotala macrandra ‘Mini’

    • Size: 8-11 inches
    • Tank Placement: Background, Mid ground
    • Origin: India
    • pH: 5-7.5
    • Care level: Advanced
    • Lighting: High
    • CO2 requirement: Yes
    • Propagation: Root cut side shoots in substrate

    Rotala macranda ‘Mini’ is a spectacular but challenging aquatic plant for more experienced aquarists. These stem plants grow quickly with the right care, but need intense lighting and the correct nutrient balance to thrive.

    This plant also needs limited nitrates to develop its red coloration, just like the previous species. Furthermore, it also needs acidic, soft water and increased carbon dioxide (CO2) levels. Are you ready for the challenge of growing this striking plant?

    6. Nymphaea zenkeri – Tiger Lotus

    • Size: 4-30 inches
    • Tank Placement: Floating plant, midground
    • Origin: Africa
    • pH: 6-7.5
    • Care level: Easy
    • Lighting: Moderate
    • CO2 requirement: Recommended
    • Propagation: Root side shoots

    The red tiger lotus (video source from Tropica) is a bold aquatic aquarium plant that can be used as a centerpiece plant for the mid-ground. This hardy plant species is almost a combination of a stem plant and a floating plant in that it grow its root system in the substrate while producing large, flat, floating leaves on the water surface.

    The Red tiger lotus plant is easy to grow but will show its best red color if provided with high-intensity lighting system, additional carbon dioxide, and enough nutrients.

    7. Ludwigia peruensis

    • Size: 18 inches
    • Tank Placement: Midground, Background
    • Origin: North America
    • pH: 6.5-7.5
    • Care level: Moderate
    • Lighting: High
    • CO2 requirement: Yes
    • Propagation: Rooted cuttings

    This Ludwigia species is very popular for its two-tone foliage. Each amazing leaf is green above and red below. It makes a fine background plant for small aquariums or can be used in the midground of larger tanks.

    8. Alternanthera Lilacina

    • Size: 4-12+ inches
    • Tank Placement: Midground, Background
    • Origin: South America
    • pH: 6.5-7.5
    • Care level: Easy-Moderate
    • Lighting: Medium-high
    • CO2 requirement: Yes
    • Propagation: Rooted cuttings

    This colorful AR variety is popular for its deep red stems and pink to red young growth. The undersides of the leaves are often a striking purple color.

    It is a pretty undemanding plant that has a moderate growth rate under bright lighting. This is an excellent plant for dutch style planted aquarium, providing intense color.

    9. Alternanthera reineckii ‘Rosaefolia Mini’

    • Size: 8 inches
    • Tank Placement: Midground
    • Origin: South America
    • pH: 5-7
    • Care level: Moderate
    • Lighting: Medium-High
    • CO2 requirement: Yes
    • Propagation: Rooted cuttings

    AR ‘Roseafolia Mini’ is a small plant that has a big presence in any planted fish tank. Its stems and foliage can be seen in a variety of reddish hues from pink, through red, to purple with intense lighting.

    This versatile plant is a great size for the midground of most aquaria, and can even be trimmed down to create a lush red carpet effect in a large aquarium.

    10. Phyllanthus fluitans – Red Root Floater

    • Size: 1 inch
    • Tank Placement: Floating plant
    • Origin: South America
    • pH: 6.5-7.5
    • Care level: Easy
    • Lighting: Medium-High
    • CO2 requirement: No
    • Propagation: Side-shoot division

    Unlike the other plants in this list, the red root floater is not rooted in the substrate. In fact, these stunning plants float at the water’s surface just like water lilies. Their tiny roots trail down into the water creating an enchanting underwater scene.

    As the name suggests, these popular floating aquarium plants are best known for their bright red roots. The leaves themselves will also be a beautiful red shade if grown under bright light.

    Tank setup

    Now that you’ve learned about ten great plants that you can grow in your fish tank, let’s take a closer look at what you’ll need to grow healthy red aquarium plants.

    Substrate

    You should select a nutrient rich substrate for most popular aquatic plants that are rooted. The exceptions, of course, are floating plants like the red root floater and some epiphytes.

    Aquasoils are a soil-based nutrient rich substrate designed specifically for planted tanks. There are many great options on the market, including popular varieties like:

    Editor’s Choice!
    ADA Aqua Soil

    The Best Planted Tank Substrate

    The world’s standard in active substrates for planted tanks. Created by brand that founded modern aquascaping

    Buy On Amazon

    Lighting

    Providing strong enough light intensity is the number one requirement for vibrant red aquarium plants. Many plants will grow quite happily in low light but remain green or just lack that wow factor that we want from the red plant species.

    It is important to remember that light intensity diminishes quickly with depth. This means that low-growing plants will be getting a lot less light than taller plants. For this reason, deeper aquariums will also need stronger lighting, even if they hold the same volume of water.

    A PAR level of about 100 umols measured at the bottom of the tank is a good value to aim for. This will bring out great color in most of the red aquatic plants

    The Light Spectrum

    When considering the needs of an aquatic plant, not just any bright light will do.

    Lighting that is turned up in the blue and red spectrum is ideal, but only so much as to maintain a natural and visually pleasing look. The red spectrum not only makes red aquarium plants appear redder but also helps them develop their color.

    Editor’s Choice
    Twinstar LED

    The Best LED for Planted Tanks

    Twinstar nails the spectrum, has the proper spread and comes with a sleek design. Perfect for aquascapers

    Buy On Buce Plant Buy On Glass Aqua

    Filtration

    When selecting a filtration system, opt for a model that provides a good flow and a high water turnover. A turnover rate of 5 times the volume of your aquarium per hour is a good place to start.

    You can use an internal power filter or a hang-on back design to filter your aquarium, but external filters are best for creating beautiful display tanks. This is because canister filters are housed outside of the aquarium, so you won’t have to hide any hardware. OASE makes the best canister filters on the market. They are the top choice for planted aquarium owners today.

    How To Grow These Tank Plants

    Maintaining healthy aquatic plants of any color requires an understanding of the basics of plant care. Put simply, plants need:

    • Light
    • Water
    • Carbon dioxide
    • Nutrients

    That’s not all that aquatic plants need, however. You should also provide the following:

    • A suitable rich substrate
    • The correct temperature range
    • Suitable parameters like water hardness and pH
    • Healthy water flow
    • Good plant spacing and trimming

    With this in mind, let’s take a look at the specifics you need to know for growing red plants in particular.

    Growing With CO2 Supplementation

    Carbon dioxide is absolutely necessary for healthy plant growth, and red plants species are no exception. Although this gas is present in all aquariums, you will need to provide an increased concentration to really see your plants flourish.

    The fact is, your aquarium plants simply can’t make use of bright light without elevated CO2 levels. In fact, intense light without CO2 will probably just grow you a whole lot of algae!

    CO2 Injection Systems

    CO2 supplementation might be the secret ingredient for amazing plant growth, but this gas has a dark side too. It is lethal in high concentrations (above 30ppm), which is a huge problem if you keep any fish or live animals in your aquarium.

    Fortunately, there are some amazing products and systems available to the modern hobbyist that make running CO2 safely pretty simple. An example of a great CO2 system includes the following components:

    • Pressurized CO2 canister
    • Co2 regulator
    • Diffuser
    • Bubble counter
    • Drop checker and solution
    • Timer
    The Ultimate CO2 Kit
    CO2Art Pro Elite Series Bundle

    Use Offer Code ASD10%Off

    The highest end offering by CO2Art. This package includes everything you need to perform consistent and the highest quality CO2 injection in the industry!

    Click For Best Price

    Using this kind of setup, you can set your injection system to provide dissolved carbon dioxide levels between 15 and 30ppm exactly when the plants need it.

    Since plants need light to use CO2, you’ll want to set your timer to fire up an hour or two before the lights go on, and then switch off at the same time as the lights go out.

    Maintaining Good Water Quality

    Creating an amazing underwater garden requires regular maintenance. Here’s what you’ll need to do to keep your red plants healthy and looking great:

    • Vacuum your gravel and carpet plants with a gravel vacuum to remove physical waste and uneaten fish food
    • Keep your glass clean with an algae scraper
    • Trim plants that are growing too large and shading out other plants. Use a sharp pair of aquascaping scissors for this task
    • Remove all trimmings and dead plant material from the tank
    • Rinse out your filter media or replace cartridges when necessary
    • Perform a weekly water changes. Start with about 25%, but measure your nitrate levels to fine-tune your routine

    Testing

    A good test kit is an essential tool for maintaining a healthy aquarium and one of the best purchases you will ever make. A test kit allows you to determine whether your tank is cycled, measure the parameters of your tap water, and monitor the nitrate levels in your aquarium.

    Supplements And Feeding

    Your aquarium plants require regular feeding of aquarium fertilizers to keep up with the demands of growth under high light and increased CO2 levels.

    A product like APT Zero from the 2Hr Aquarist is an ideal all-in-one solution for amazing growth for a planted fish tank. This formula lacks nitrate, which is great for keeping nitrogen levels down and boosting red colors while minimizing algae growth.

    Nitrogen Limitation

    Many red plants look their best and develop their most intense coloration in a low nitrogen environment. That’s why reducing the nitrates in the water through regular water changes can be so important.

    This technique does not work for all red plants, however, but species like Rotala rotundifolia certainly do respond best to low nitrate levels. It is not realistic to maintain zero nitrates in the long term, especially if you keep fish. Of course, plants need some nitrogen to grow, so a prolonged absence of this important element will stunt and even kill plants.

    It is feasible to aim for nitrate levels below 5ppm, however, especially as a temporary method to bring out the best colors for a photo shoot for example.

    Pests and other problems

    The most common issues with red plants are poor color, and we know this is often a result of incorrect light, CO2 supplementation, and nutrient levels. Let’s take a look at some of the problems you may encounter.

    Unwelcome Guests

    Pests like snails and planaria are often introduced to aquariums as stow-aways on new aquarium plants. These animals don’t typically affect the plants themselves, but can be a major headache for other reasons. The best way to avoid introducing these pests is to grow tissue culture plants that are produced in sterile conditions.

    Hungry Herbivores

    Some common aquarium fish will feast on your red plants too. The following species are the usual suspects:

    Instability And Melting

    Aquarium plants can die back pretty alarmingly when they are moved into different environments. This phenomenon is known as melting, and it is very common.

    Often, the plants you buy were grown emersed (out of water), and being submerged underwater is a huge shock. The plant responds by getting rid of its old air-loving leaves and replacing them with new ones that are ready for life underwater. Most plants will bounce back pretty quickly, and all you need to do is remove all the dead, brown or dying leaves before it rots in your fish tank.

    Another potential cause for melt is unstable parameters and poor water quality. Keeping up with regular aquarium maintenance is the best way to avoid this problem.

    Algae

    Algae often thrive under the intense lighting needed to create a vibrant red aquarium plant. Balancing your light, nutrients, and carbon dioxide (CO2) is the best way to manage this problem, but there are some other options too.

    One of the best ways to combat algae is to have plenty of healthy, fast-growing plants to outcompete this common aquarium villain. If your planted aquarium is still young and growing, there are some other options too.

    Algae-eating aquarium animals can do an awesome job of keeping your tank clean, and what’s more, they are amazing creatures in their own right! Fish like Otocinclus catfish, and inverts like Amano shrimp and nerite snails are the first species that come to mind, but check out my article on aquarium algae eaters for even more great options.

    If you prefer to keep plants only, there are some great products available for managing the algae in your tank. The APT Fix algae treatment is ideal for spot treating any algae in the tank before it can grow into a headache.

    Great For Planted Tanks!
    APT Fix

    Use Coupon Code ASDComplete

    APT Fix is a spot dosage treatment that works great for planted tanks. Effective and easy to use. Won’t hurt plants or livestock

    Click For Best Price

    Where To Buy

    Your local fish store is always worth checking out for aquarium plants. Always make certain, however, that the plants are correctly labeled.

    For the most part, the best place to shop for a wide variety of red plants is online. Buceplant.com is one of the most trusted online aquarium plant retailers, and they stock an amazing range of the best red aquarium plants for your fish tank.

    FAQs

    Do you need CO2 for these types of Tank plants?

    Not all red aquarium plants need injected CO2 to grow in the home aquarium. However, all of them will benefit from increased carbon dioxide, with faster and more robust growth.

    Do they need more light?

    Yes, most red aquarium plants need high lighting to look their best. There are always exceptions, but most species will require high, or at least moderate light to look their best.

    How do you keep these a vibrant color?

    To keep red aquarium plants red you will need to provide them sufficient light, nutrients, and carbon dioxide. Some plants also respond to very low nitrate levels by turning red.

    What does red-light do for Tank greenery?

    Red light can make red plants look even redder. The red part of the light spectrum helps plants grow tall and even is also known to stimulate flowering. On the other hand, too much red light can look unnatural, and even cause increased algae growth.

    Do they need iron?

    Red aquatic plants certainly need iron to grow healthy. Iron is one of the trace elements that all plants need, however, and it does not increase the red color in plants.

    Final Thoughts

    Red aquatic plants are often that X-factor that makes a good aquascape greatSure, they are an eye catching plant and can be a little needier than a green plant, but the results are worth it!

    Do you love red plants as much as I do? If so, share your favorite red plant below. Happy aquascaping!


    🌿 Want to learn more? This article is part of our complete Planted Tank & Aquascaping Guide. your ultimate resource for aquarium plants, aquascaping styles, substrates, and more.

  • 7 Best Plants For Goldfish Tanks – Species That Actually Survive

    7 Best Plants For Goldfish Tanks – Species That Actually Survive


    Goldfish eat plants. That’s not a possibility. That’s a guarantee. If you drop most aquarium plants into a goldfish tank, you’re not setting up a planted tank; you’re setting up a buffet. The honest question isn’t “will goldfish eat my plants?” It’s “which plants can actually survive them?”

    After 25 years in this hobby, I’ve watched more plants get shredded in goldfish tanks than I care to count. Here’s what actually works, and why most of what you read about goldfish plants gets it wrong.

    Expert Take | Mark Valderrama, AquariumStoreDepot

    In 25+ years keeping goldfish and managing fish stores, I’ve seen this scenario play out dozens of times: someone buys a gorgeous planted tank setup, adds goldfish, and within a week the plants are either eaten down to stems or uprooted and floating. Java fern and anubias are the two I’d bet on surviving. Goldfish don’t like the texture of those thick, rubbery leaves. Floating plants are the other big winner because goldfish can graze on them without destroying them completely, and they grow back fast. One thing most guides skip: goldfish prefer cooler water, 65-72°F (18-22°C), and most tropical plants struggle at those temps. That alone eliminates half the plants people try.

    Why Planting a Goldfish Tank Is Harder Than It Looks

    There are three things working against you when you try to plant a goldfish tank, and you need to understand all three before you spend money on plants.

    Temperature

    Goldfish prefer 65-72°F (18-22°C). That’s significantly cooler than the 75-80°F (24-27°C) most tropical aquarium plants need. Vallisneria, stem plants, many crypts. They’ll survive but grow slowly, or not at all. You need plants that are either coldwater species or at least tolerant of cooler conditions. This eliminates more options than most people realize.

    Plant Placement

    Goldfish dig. They’ll uproot anything planted in substrate, given enough time and motivation. Rooted plants in gravel or sand are a losing battle in most goldfish setups. The plants that work are either floating, attached to hardscape (rocks, driftwood), or bulb plants with roots heavy enough to resist disturbance. If it goes in the substrate, plan for it to come out.

    High Nutrient Loads

    Goldfish are messy. A pair of fancy goldfish in a 40-gallon produces more waste than a full community of tropical fish. Nitrates climb fast. That’s actually good news for plants (the nutrients are there), but it also means fast-growing species can take over quickly. You want plants that absorb nutrients well without becoming an uncontrollable problem.

    They Will Eat Most Plants

    Goldfish aren’t picky. Soft-leafed plants like hornwort, cabomba, and most stem plants will be grazed to nothing. The plants that survive do so because goldfish find them unpalatable (tough leaves, bitter compounds) or because they grow fast enough to outpace the damage. Elodea/anacharis falls into the second category: goldfish will eat it, but it grows back faster than they can consume it. That’s not a solution for everyone, but it works.

    How We Selected These Goldfish Plants

    1. Palatability: less appetizing to goldfish than typical soft-leafed plants
    2. Temperature tolerance: thrives in the cooler water goldfish prefer (65-72°F / 18-22°C)
    3. Hardiness: survives some nibbling without dying
    4. Root security: either floats, attaches to hardscape, or has roots goldfish can’t easily pull up
    5. Growth rate: fast enough to outpace minor goldfish damage

    Should You Try Live Plants in a Goldfish Tank?

    This is the question most plant guides won’t answer directly. Here’s my honest take.

    Live Plants in a Goldfish Tank: Worth It?

    Try It If

    • You’re willing to accept some plant loss
    • Fancy goldfish (slower, less aggressive nibbling than comets)
    • Floating plants specifically, and much harder for goldfish to eat
    • Large tank (55+ gallons) with room for plants to establish

    Skip It If

    • Comet goldfish: relentless plant destroyers
    • relentless plant destroyers
    • You’re on a budget and can’t afford to replace plants
    • Small tank where plants have no room to establish
    • You want a neat, manicured aquascape. Goldfish will ruin it

    What People Get Wrong About Goldfish and Plants

    The biggest mistake: walking into a fish store, picking out beautiful, delicate plants like ludwigia or rotala, and expecting goldfish to leave them alone. They won’t. Soft-stemmed, fine-leafed plants are the equivalent of a salad bar to goldfish. They’ll strip them in days. The second mistake is planting anything in substrate and expecting it to stay put. Goldfish will uproot rooted plants repeatedly until the plant gives up. If you’ve tried plants in a goldfish tank and failed, this is almost certainly what happened.

    The other thing most guides miss: they recommend plants without factoring in temperature. A lot of popular aquarium plants need 75°F (24°C) or warmer to thrive. Goldfish tanks run cooler. Growth stalls. Plants look rough. People assume the goldfish ate them when really they just slowly declined from thermal stress.

    Hard Rule: If you can’t accept that goldfish may eat it, buy silk. Silk plants are the honest answer for goldfish keepers who want greenery without the battle. Just make sure they’re soft enough not to shred your goldfish’s fins.

    The 7 Best Plants For Goldfish

    These are the plants I’d actually put money on in a goldfish tank. Not the ones that might survive: the ones that consistently do.

    1. Java Fern

    Mark’s Top Pick for Goldfish Tanks

    Java fern attached to a rock or piece of driftwood is my number one recommendation for goldfish tanks. The leaves are thick and fibrous, and goldfish mouth them but don’t eat them. It doesn’t go in the substrate, so there’s nothing to uproot. It grows in low light, handles cooler temps fine, and I’ve seen it survive in goldfish tanks where every other plant was destroyed. If I had to bet on one plant surviving a goldfish tank long-term, this is it.

    Editor’s Choice
    Java Fern

    Editor’s Choice

    Hardy, easy to care for, and requires only basic lighting to grow. This is the perfect aquarium plant for beginners!

    Buy On Buce Plant Buy On Glass Aqua
    • Scientific Name: Microsorum pteropus
    • Skill Level: Beginner
    • Size: 13.5 inches (34.3 cm)
    • Lighting: Low to high (40-200 PAR)
    • Tank Placement: Mid to background
    • Growth Rate: Slow to moderate
    • CO2 Requirement: Low

    Java fern is the most goldfish-proof live plant I know. The leaves are thick and fibrous, not the soft, tender growth goldfish prefer. Goldfish will mouth java fern, but they almost never actually eat it. Attach it to a rock or piece of driftwood with fishing line or a rubber band, and it takes root on its own over time. No substrate needed. No CO2 needed. Low light is fine.

    Java fern actually rots if you bury the rhizome in substrate, so the goldfish uprooting problem doesn’t apply here. It grows where it attaches. This is exactly the kind of plant a goldfish tank needs: one that doesn’t depend on the substrate, doesn’t need coddling, and doesn’t taste good to goldfish.

    2. Java Moss

    • Scientific Name: Taxiphyllum barbieri
    • Skill Level: Beginner
    • Size: 3-10 inches (7.6-25.4 cm)
    • Lighting: Low to high (40-200 PAR)
    • Tank Placement: Foreground to midground
    • Growth Rate: Slow to moderate
    • CO2 Requirement: Low to medium

    Java moss survives goldfish the same way a lawn survives being mowed: by growing back fast. Goldfish will pick at it. They’ll pull chunks loose and rearrange it around the tank. But java moss has rhizoids instead of roots, sticking to any surface it contacts, and it keeps growing. Most goldfish keepers who fail with java moss made the mistake of not giving it enough to attach to.

    Tie it to a piece of driftwood or a rock. Let it establish. Java moss in low light, cool water, high nutrients. That’s a combination where this plant actually thrives, not just survives. It won’t win a beauty contest in a goldfish tank, but it’ll still be there in six months when everything else has been eaten.

    3. Anubias

    Best Value
    Anubias Barteri

    Best Value

    A forgiving low light aquarium plant that will not be eaten by most fish

    Click For Best Price Buy On Amazon
    • Scientific Name: Anubias species
    • Skill Level: Beginner
    • Size: 4-15.7 inches (10-40 cm) depending on species
    • Lighting: Low to high (40-200 PAR) depending on species
    • Tank Placement: Foreground to background depending on species
    • Growth Rate: Slow
    • CO2 Requirement: Low

    Anubias is the other plant I’d put alongside java fern as a genuine goldfish-tank survivor. The leaves are thick and slightly bitter. Goldfish learn quickly that they don’t taste right and mostly leave them alone. Like java fern, anubias attaches to hardscape rather than growing in substrate, so the uprooting problem doesn’t apply.

    The one weakness of anubias: it’s slow. Very slow. That means algae can colonize the leaves before the plant has a chance to grow past it. In a high-nutrient goldfish tank, algae management on anubias leaves is an ongoing task. A nerite snail or two in the tank helps a lot. Keep the rhizome out of the substrate. Bury it and it rots.

    4. Marimo Moss Ball

    Budget Option
    Marimo Moss Ball

    Budget Option

    A cheap and easy to care for aquarium plant. Thrives in low light and very low maintenance

    Click For Best Price
    • Scientific Name: Aegagropila linnaei
    • Skill Level: Beginner
    • Size: 2.3-12 inches (5.8-30.5 cm)
    • Lighting: Low to moderate (40-125 PAR)
    • Tank Placement: Foreground to midground
    • Growth Rate: Very slow
    • CO2 Requirement: Low

    The marimo moss ball is technically algae, not a plant, but it earns its spot on this list. Most goldfish will investigate it, mouth it a bit, and then leave it alone. The dense, compact structure doesn’t offer the soft, chewable texture goldfish are looking for. It also performs double duty in a goldfish tank: nitrate absorption is real, and it harbors beneficial bacteria that help keep the tank stable.

    Rotate it occasionally to keep it round. Rinse it gently during water changes. That’s the extent of the maintenance. In a goldfish tank with high nutrients and lower light, marimo actually performs better than in many planted community setups.

    5. Crinum calamistratum (African Onion Plant)

    Crinum Calamistratumn

    A bulb plant that does well against plant eaters due to its odd shape and hard leaves

    Click For Best Price
    • Scientific Name: Crinum calamistratum
    • Skill Level: Beginner to intermediate
    • Size: 36-48 inches (91.4-122 cm)
    • Lighting: Moderate to high (100-200 PAR)
    • Tank Placement: Background
    • Growth Rate: Slow
    • CO2 Requirement: Low

    Crinum calamistratum, the African onion plant, is one of the most underrated options for goldfish tanks. The leaves are long, curling, and waxy, nothing like the soft, broad leaves goldfish prefer to eat. Goldfish generally ignore it. The bulb anchors it firmly enough that goldfish can’t easily uproot it, though a determined fish in a smaller tank might manage eventually.

    This plant gets big (up to 4 feet / 122 cm), so it’s a background plant only, and only in tanks 40 gallons or larger. If you want something different from the usual java fern and anubias combination, this is worth trying. Needs moderate to high light, which is one reason it’s less commonly used.

    6. Water Sprite

    Water Sprite

    Readily available and easy to grow. This fast growing plant will soak up nutrients and thrive in low light

    Click For Best Price Buy On Amazon
    • Scientific Name: Ceratopteris thalictroides
    • Skill Level: Beginner to intermediate
    • Size: 6-11.8 inches (15-30 cm)
    • Lighting: Moderate to high (100-200 PAR)
    • Tank Placement: Midground, background, or floating
    • Growth Rate: Fast
    • CO2 Requirement: Low

    Water sprite works on a different principle from java fern and anubias. Goldfish will eat it. That’s fine. It grows fast enough to keep up. Use it floating rather than planted in substrate. Floating water sprite grows significantly faster than rooted water sprite because it gets maximum light at the surface. In a goldfish tank with high nutrients and good light, it can grow several inches per week.

    Water sprite also does a solid job processing nitrates, which is genuinely helpful in a goldfish tank. Think of it as a sacrificial plant that earns its spot by pulling nutrients out of the water while it’s being gradually consumed. Replace as needed.

    7. Elodea (Anacharis)

    • Scientific Name: Elodea species
    • Skill Level: Beginner
    • Size: 4-36 inches (10.2-91.4 cm) depending on species
    • Lighting: Moderate to very high (100-250 PAR)
    • Tank Placement: Background or floating
    • Growth Rate: Very fast
    • CO2 Requirement: Low to high

    Elodea is the “let them eat it” plant. Goldfish love it. The stems are soft and palatable, and goldfish will graze on it constantly. The reason it works isn’t because goldfish won’t eat it. They will. It works because it grows faster than goldfish can consume it, especially when floated at the surface with good light exposure.

    Use elodea as a supplemental food source and a nitrate sponge. It’s not a display plant. It’s utility planting. Float bunches of it, let the goldfish graze, trim or replace stems as needed. In a large goldfish tank with good light, elodea becomes a self-replenishing food supply. Just watch that it doesn’t take over. In ideal conditions it grows aggressively.

    What Most Goldfish Plant Guides Get Wrong

    • Recommending tropical plants that need 75-80°F (24-27°C). Goldfish tanks run 65-72°F (18-22°C) and many tropical plants stall or decline at those temperatures
    • Not being honest that goldfish will eat most plants given the chance. The list of plants they won’t touch is much shorter than most guides admit
    • Skipping floating plants, which are the easiest win in a goldfish tank. Goldfish can graze on them without wiping them out, and they grow back faster than rooted options
    • Recommending delicate plants for comet goldfish. Comets are fast, aggressive grazers that will shred anything soft within days

    Live Plant Alternatives

    Not willing to fight the goldfish-plant battle? Fair enough. Here’s what actually works as an alternative.

    Silk Plants

    If you can’t find a goldfish-proof plant, silk plants are the honest answer. They look decent, goldfish can’t destroy them, and they won’t shred the fins of fancy goldfish the way plastic plants can. The plastic plants with sharp edges are a real problem for goldfish with flowing fins. Stick with silk.

    The tradeoff: silk plants contribute nothing to water quality. In a goldfish tank, that matters. Without live plants absorbing nitrates, you need more frequent water changes. That’s the deal.

    Great For Delicate Fins!
    Marina Naturals Plants

    Silk plants that are designed to be gentle on fish with fancy fins like Bettas and Fancy Goldfish

    Buy On Amazon

    Bare Tanks and Hardscape

    Some goldfish keepers go fully bare-bottom with only rocks and driftwood. It’s a legitimate approach. Easier to clean, nothing to uproot, and goldfish don’t care. You can still grow anubias or java fern attached to the driftwood (they don’t need substrate). A good piece of driftwood with anubias attached looks sharp and requires zero ongoing plant care beyond occasional algae wipe-downs.

    Live Plants vs. Fake Plants: What’s Actually Better for Goldfish?

    This isn’t a close call in most goldfish setups. Live plants win on water quality. Nitrate absorption and oxygen production are real benefits in a tank that produces as much waste as a goldfish tank does. The trade-off is maintenance and plant losses.

    Live Plants

    Pros

    • Removes nitrates from the water
    • Provides oxygen
    • Entertainment and enrichment for goldfish
    • Contributes to a healthier diet (goldfish that graze on plants are healthier)
    • Looks natural

    Cons

    • Most rooted plants will be uprooted repeatedly
    • Soft-leafed species will be eaten quickly
    • Slow-growing plants can be destroyed before they recover

    Fake Plants

    Pros

    • Goldfish can’t destroy them
    • No plant maintenance
    • Provide shelter and visual interest

    Cons

    • Zero water quality benefit: nitrates keep climbing
    • Plastic plants with sharp edges are a fin injury risk for fancy goldfish
    • Algae builds up on them the same as live plants, without the self-cleaning growth of real plants

    FAQ

    Do goldfish eat all aquarium plants?

    Goldfish will eat most soft-leafed aquarium plants. The ones that survive are those with thick, tough, or unpalatable leaves (java fern, anubias), those that grow faster than goldfish can eat them (elodea, water sprite), or those with a structure goldfish don’t find appealing (marimo moss balls). No plant is completely safe. Some are just more likely to survive than others.

    Do goldfish need plants in their tank?

    No, goldfish don’t require plants to survive. But live plants genuinely help in a goldfish tank: they absorb nitrates (a constant problem with messy goldfish), release oxygen, and provide enrichment. If you can make it work with the right plant species, your tank maintenance schedule gets easier. Without plants, expect more frequent water changes.

    What are the best plants for a goldfish tank?

    Java fern is my top pick: thick leaves goldfish won’t eat, attaches to hardscape, no substrate needed. Anubias is a close second for the same reasons. Floating plants like water sprite and elodea work because they grow faster than goldfish can consume them. Marimo moss balls are the easiest option with almost no maintenance. Avoid soft-stemmed tropical plants.

    Can comet goldfish be kept with live plants?

    It’s very difficult. Comets are faster and more aggressive feeders than fancy goldfish. They’ll destroy most plants quickly. If you want to try, stick to floating plants only. They’re the hardest for comets to completely wipe out. Anything rooted or attached to hardscape is fair game. Most comet goldfish keepers end up with silk plants or bare hardscape setups for good reason.

    What temperature do goldfish plants need?

    Goldfish prefer 65-72°F (18-22°C), which is cooler than most tropical aquarium plants need. Java fern, anubias, java moss, marimo moss balls, elodea, and water sprite all tolerate or prefer cooler temperatures. Avoid plants labeled as “tropical” or those that need a heater to thrive. They’ll struggle in a proper goldfish setup.

    Final Thoughts

    Here’s the reality of goldfish and plants: you’re not creating a planted aquarium in the traditional sense. You’re finding a few species tough enough, fast-growing enough, or unpalatable enough to coexist with fish that treat everything green as a potential meal. That’s a different mindset than planted tank keeping, and accepting it upfront saves a lot of frustration and money.

    Java fern attached to a rock. A clump of anubias on driftwood. Some floating water sprite or elodea for the goldfish to graze on. That’s a realistic planted goldfish tank. It won’t look like an Iwagumi layout, and it’s not supposed to.

    Goldfish don’t live in your planted tank. They live in theirs. Build it around what they are, not what you wish they were.


    📘 Want to learn more? This article is part of our complete Freshwater Fish Guide. Your ultimate resource for freshwater species, care tips, tank setup, and more.


    🌿 Want to learn more? This article is part of our complete Planted Tank & Aquascaping Guide. Your ultimate resource for aquarium plants, aquascaping styles, substrates, and more.

  • 12 Best Algae Eaters for Freshwater Tanks – What Actually Works

    12 Best Algae Eaters for Freshwater Tanks – What Actually Works

    Every aquarium gets algae. That’s not the problem. The problem is expecting the wrong animal to solve it, or adding algae eaters before your tank is ready for them. After 25 years in the hobby and time running fish stores, I can tell you the mistakes here are predictable and expensive: hobbyists buy a common pleco for a 20-gallon, or stock a dozen otos into a brand-new tank, and then wonder why nothing is working. This guide cuts through the generic advice and tells you what actually works, for which algae, and in which tanks.

    An algae eater cannot replace maintenance. It supplements it.

    Expert Take | Mark Valderrama, AquariumStoreDepot

    I’ve kept bristlenose plecos in almost every tank I’ve set up over the years, and they’re my first call for most community tanks. Nerite snails are my go-to for planted tanks where I don’t want any biological pressure on plants. Amano shrimp I’ve used extensively in high-tech planted setups where I needed something relentless on hair and brush algae. What I’ve learned from 25 years and from managing fish stores is this: match the animal to the algae type and the tank size, and you’ll get results. Pick randomly and you’ll just have more mouths to feed.

    What Is Algae?

    Algae are aquatic organisms that photosynthesize using light, water, nutrients, and carbon dioxide. They grow in every aquarium, and that’s not inherently a bad thing. In small amounts, algae is a normal part of a healthy ecosystem. But when it takes over, it’s telling you something is out of balance.

    You can’t eliminate algae from a tank. You can control it. Understanding what type you’re dealing with determines which animal can actually help.

    Know Your Algae: Common Types

    If you have a freshwater aquarium, you’ve likely seen several types of algae already. Here’s what causes them and which algae eaters target each type.

    True Types

    These are the common algae types you’ll actually deal with. Most respond to a combination of husbandry adjustments and the right biological control.

    Green Water

    Green Water in Aquarium

    Green water is caused by free-floating phytoplankton in the water column. It turns the water pea-soup green. The fish are usually fine, but visibility tanks down to zero quickly. An aquarium UV sterilizer clears it faster than any algae eater. No animal eats suspended algae cells. This one is purely a husbandry fix.

    Green Spot Algae (GSA)

    Green Spot Algae GSA

    Small, circular green patches on glass and hardscape. Hard to remove once established. Caused by low phosphates or CO2 in planted aquariums. Nerite snails are one of the few animals that will actually graze on green spot algae consistently.

    Green Dust Algae

    Green Dust Algae (GDA)

    A soft, even green film on the glass. Easy to wipe off. It typically appears after major tank changes like rearranging hardscape or removing plants, and clears up on its own within a few weeks. Most soft algae eaters will graze on it willingly.

    Green Fuzz (Oedogonium)

    Filamentous algae that develops in tanks with a nutrient imbalance. In fish-only tanks it usually means too many nutrients; in planted tanks, not enough. Amano shrimp work on early outbreaks.

    Green Beard / Green Brush Algae (GBA)

    Green Brush Algae

    Common in both planted and fish-only tanks. Doesn’t look terrible, but it signals a poor balance of nutrients and light. Root cause fix first, then add biological control.

    Black Brush Algae / Black Beard Algae (BBA)

    This is the one hobbyists dread. BBA is tough to remove and almost nothing eats it reliably. Siamese algae eaters and Amano shrimp will make a dent on early-stage black beard algae, but if it’s established, you’re scrubbing. Spot dosing with APT Fix is more effective than adding more animals.

    Blanket Weed (Cladophora)

    Cladophora Algae

    Dense, mat-forming algae that covers surfaces including live plants. Amano shrimp and cherry shrimp will help, but they won’t eliminate an established outbreak. High nutrient levels are the root cause.

    Green Thread Algae

    Filamentous algae common in cycling tanks. In mature tanks, it signals an imbalance of light, CO2, and nutrients. Many algae eaters will graze on it, but fixing the cause stops it from coming back.

    Water Silk (Spirogyra)

    Spirogyra in Aquarium

    Slippery, fast-spreading filamentous algae. Happens when light and nutrients are out of balance, especially in planted tanks with poor plant growth. Easier to prevent than cure. Amano shrimp help on early growth.

    Hair Algae (Rhizoclonium)

    Hair Algae in Aquarium

    Hair algae grows in long, fine strands, often rooted into aquatic plants. Amano shrimp are relentless on it. Many other algae eaters will pick at it. Low water flow and nutrient imbalances drive outbreaks.

    Staghorn Algae (Compsopogon sp.)

    Gray, branching algae that looks like deer antlers. Grows on hardscape and plant leaves. Signs of a nutrient imbalance or CO2 deficiency. Siamese algae eaters will graze on it in early stages.

    Other Types and Related Issues

    These are conditions sometimes mistaken for algae. Worth knowing the difference because algae eaters won’t help with most of them.

    Brown Algae (Diatoms)

    Freshwater Diatoms

    Diatoms are the brown film that coats everything in a new tank a few weeks after setup. It’s normal, temporary, and goes away on its own as the tank matures. Otocinclus catfish and nerite snails love diatoms. If it’s persisting in a mature tank, check your silicate levels.

    Blue-Green Algae (Cyanobacteria)

    Blue-green algae is actually a cyanobacteria, not true algae. It forms slick, smelly patches on substrate, glass, or plants. No algae eater eats it. It’s a water quality and flow problem. Fix the tank, don’t buy animals.

    Surface Scum

    Surface Scum in Aquarium

    Biofilm or protein buildup at the water surface. Mollies will actually skim at the surface and help, which is more than most algae eaters can say. A surface skimmer is the definitive fix.

    Cloudy Water

    Cloudy Water in an Aquarium

    Cloudy water in a new tank is a bacterial bloom: normal, temporary, harmless. In a mature tank, it means overfeeding, overstocking, or an inadequate filtration system. No algae eater helps here.

    Stained Water (Tannins)

    Tannins

    Yellow or brown water is tannins leaching from driftwood. Not algae, not harmful, and not something algae eaters address. It clears on its own in a few weeks, or faster if you pre-boil the wood.

    White Fungus

    Biofilm on new driftwood

    White cottony fungus on new driftwood is harmless biofilm. Some fish and shrimp will pick at it, and it clears up in days or weeks. Fungus on dead fish or rotting food is different: remove those immediately.

    12 Best Algae Eaters for Freshwater Tanks

    Now that you know what you’re dealing with, here are the animals that will actually help. For each species, I’m including the algae types they target, size, tank requirements, and temperament so you can match them to your tank.

    • The type of algae they eat
    • Their scientific name
    • Difficulty Level
    • Temperament
    • Adult Size
    • Minimum Tank Size
    • Origin
    • Temperature
    • pH
    • Whether they’re safe for planted tanks

    Check out the video from our YouTube channel for a visual overview, then see the full details below.

    How We Ranked These Algae Eaters

    1. Actual algae consumption effectiveness (species-specific, not generalist “they eat algae”)
    2. Compatibility with community freshwater tanks
    3. Tank size requirements relative to what most hobbyists are running
    4. Availability at LFS and online suppliers
    5. Longevity and feeding sustainability when algae runs low

    Add Algae Eaters If…

    Good Fit

    • Your tank is fully cycled and stable
    • You have soft green algae, diatoms, or hair algae you can’t keep up with manually
    • You want a biological clean-up crew alongside regular maintenance
    • Your tank is large enough for the species you’re choosing (check the specs below)

    Skip If

    • Your tank isn’t cycled yet (algae eaters will die or stress out in new tank syndrome)
    • You’re expecting them to replace water changes and glass cleaning
    • You have black beard algae or blue-green algae (wrong tool for the job)
    • Your tank is already at capacity for your filter’s bioload

    1. Amano Shrimp

    • Target Algae: Hair algae, string algae, brush algae, soft green algae
    • Scientific Name: Caridina multidentata
    • Difficulty Level: Easy
    • Temperament: Peaceful
    • Adult Size: 2 inches (5 cm)
    • Minimum Tank Size: 5 gallons (19 L)
    • Origin: Japan
    • Temperature: 65-78°F (18-26°C)
    • pH: 6.5-8
    • Planted Tanks: Yes

    Named after planted tank pioneer Takashi Amano for good reason: these are the most effective algae-eating shrimp in the hobby. Amano shrimp work almost constantly, grazing hair algae, string algae, and soft green growth with a persistence that no fish matches. I’ve used them in high-tech planted tanks where hair algae would take over within days, and a group of 10 Amanos kept it under control long-term.

    Amano shrimps are peaceful and fit tanks too small for algae-eating fish. Keep a group of at least 5, not 1 or 2. A single Amano shrimp barely makes a dent. Ten of them in a planted 20-gallon is a different story entirely.

    Mark’s Top Pick

    For most freshwater community tanks, the Bristlenose Pleco is my first call as an algae-eating fish. It stays manageable at 5 inches (13 cm), handles most soft green algae and diatoms, won’t destroy your plants, and I’ve kept dozens of them over the years without a single compatibility issue. For planted nano tanks where you can’t fit a pleco, the Amano shrimp in groups of 8 or more is the answer. If you can only pick one algae eater for a community tank under 40 gallons (151 L), make it a Bristlenose.

    2. Otocinclus Catfish

    Octocinclus Fish
    • Target Algae: Soft green algae, diatoms, green dust algae
    • Scientific Name: Otocinclus spp.
    • Difficulty Level: Moderate (sensitive to water quality)
    • Temperament: Peaceful
    • Adult Size: 2 inches (5 cm)
    • Minimum Tank Size: 10 gallons (38 L)
    • Origin: South America
    • Temperature: 72-79°F (22-26°C)
    • pH: 6-7.5
    • Planted Tanks: Yes

    The best nano algae-eating fish in the hobby, full stop. Otos are 100% safe with shrimp, peaceful with every community fish, and remarkably effective at grazing diatoms and soft green algae off glass and plant leaves. The catch: they’re sensitive to water quality, and wild-caught specimens don’t always survive the transport and acclimation process well. Buy from reputable suppliers, acclimate slowly, and add them to a mature, established tank. A group of 6 in a 20-gallon (76 L) planted tank keeps the glass cleaner than anything else that size.

    3. Mollies

    Black Molly
    • Target Algae: Surface scum, hair algae, green fuzz
    • Scientific Name: Poecilia spp.
    • Difficulty Level: Easy
    • Temperament: Peaceful
    • Adult Size: up to 4.5 inches (11 cm)
    • Minimum Tank Size: 10 gallons (38 L)
    • Origin: North and South America
    • Temperature: 72-78°F (22-26°C)
    • pH: 7.5-8.5
    • Planted Tanks: Yes

    Mollies are not dedicated algae eaters, but they fill a gap that nothing else covers well: surface scum. They skim the water surface constantly, picking at biofilm and hair algae near the waterline. If your tank gets a protein film on top, a pair of mollies handles it better than any specialized algae eater. Think of them as supplemental clean-up crew, not your primary solution.

    4. Horned Nerite Snail

    • Target Algae: Green spot algae, green dust algae, diatoms
    • Scientific Name: Clithon corona
    • Difficulty Level: Easy
    • Temperament: Peaceful
    • Adult Size: 1 inch (2.5 cm)
    • Minimum Tank Size: 5 gallons (19 L)
    • Origin: Southeast Asia
    • Temperature: 72-82°F (22-28°C)
    • pH: 7-8.2
    • Planted Tanks: Yes

    Horned Nerite snails are one of the few animals that genuinely scrape green spot algae off glass. Most algae eaters won’t touch it. Nerite snails won’t reproduce in freshwater (they lay eggs but they don’t hatch), won’t eat your plants, and won’t overpopulate. Their unique horned shells also make them an interesting visual addition.

    5. Zebra Nerite Snail

    • Target Algae: Green spot algae, green dust algae, diatoms
    • Scientific Name: Neritina natalensis
    • Difficulty Level: Easy
    • Temperament: Peaceful
    • Adult Size: 1 inch (2.5 cm)
    • Minimum Tank Size: 5 gallons (19 L)
    • Origin: Southern and Eastern Africa
    • Temperature: 65-85°F (18-29°C)
    • pH: 6.5-8.5
    • Planted Tanks: Yes

    Zebra nerite snails are the most widely available nerite variety and one of the best choices for nano tanks. They live for years, don’t reproduce in freshwater, and don’t touch live plants. The one thing they will do is lay small white eggs on glass and hardscape. The eggs don’t hatch and don’t come off easily: just something to know before you buy. Keep harder water to protect their shells.

    6. Tiger Nerite Snail

    • Target Algae: Green spot algae, green dust algae, diatoms
    • Scientific Name: Vittina semiconica
    • Difficulty Level: Easy
    • Temperament: Peaceful
    • Adult Size: 1.5 inches (4 cm)
    • Minimum Tank Size: 5 gallons (19 L)
    • Origin: Indonesia
    • Temperature: 65-85°F (18-29°C)
    • pH: 6.5-8.5
    • Planted Tanks: Yes

    Tiger nerite snails have the same excellent algae-grazing behavior as the zebra variety, with black patterning on a golden orange shell instead of stripes. Same care requirements, same plant safety, same no-reproduction-in-freshwater benefit. If you’re choosing between nerite varieties, this is purely an aesthetic decision.

    7. Mystery Snail

    Mystery Snail
    • Target Algae: Hair algae, soft green algae, decaying plant material
    • Scientific Name: Pomacea bridgesii
    • Difficulty Level: Easy
    • Temperament: Peaceful
    • Adult Size: 2 inches (5 cm)
    • Minimum Tank Size: 5 gallons (19 L)
    • Origin: Bolivia, Brazil, Paraguay, Peru
    • Temperature: 68-82°F (20-28°C)
    • pH: 7.6-8.4
    • Planted Tanks: Yes

    Mystery snails are the big, visible clean-up crew option. They eat hair algae, graze on decaying plant material, and clean up uneaten food. They don’t eat live plants, which is a common concern with large snails. Mystery snails can reproduce in freshwater, but they’re manageable: they lay clutches above the waterline, so you can remove eggs easily before they hatch if you don’t want a population explosion.

    8. Siamese Algae Eater

    Siamese Algae Eater
    • Target Algae: Filamentous green algae, black brush algae (BBA)
    • Scientific Name: Crossocheilus langei
    • Difficulty Level: Easy
    • Temperament: Peaceful
    • Adult Size: 7 inches (18 cm)
    • Minimum Tank Size: 30 gallons (114 L)
    • Origin: Southeast Asia
    • Temperature: 68-79°F (20-26°C)
    • pH: 6-7.5
    • Planted Tanks: Yes

    The Siamese algae eater is one of the few fish that will actually graze on black brush algae, and for that reason alone it earns a spot on this list. Be careful when buying: the very similar-looking Chinese algae eater grows much larger and becomes territorial and aggressive as it matures. The flying fox is another lookalike. Learn to ID the real Siamese algae eater before you buy.

    9. Freshwater Goby (Stiphodon)

    • Target Algae: Soft green algae, diatoms, blue-green algae, black brush algae
    • Scientific Name: Stiphodon spp.
    • Difficulty Level: Easy
    • Temperament: Peaceful
    • Adult Size: 2 inches (5 cm)
    • Minimum Tank Size: 10 gallons (38 L)
    • Origin: Southeast Asia
    • Temperature: 72-75°F (22-24°C)
    • pH: 6.5-7.5
    • Planted Tanks: Yes

    Stiphodon gobies are underrated. They’re visually striking (especially the cobalt blue varieties), genuinely effective algae grazers on glass and hardscape, and peaceful with most community fish. Keep them out of tanks with large predators. They need a mature tank with established algae growth to stay healthy long-term.

    10. Bristlenose Pleco

    Bristle Nose Pleco
    • Target Algae: Soft green algae, green spot algae, diatoms, white fungus on driftwood
    • Scientific Name: Ancistrus spp.
    • Difficulty Level: Easy
    • Temperament: Peaceful with fish, territorial with other plecos
    • Adult Size: 5 inches (13 cm)
    • Minimum Tank Size: 30 gallons (114 L)
    • Origin: South America
    • Temperature: 73-81°F (23-27°C)
    • pH: 5.8-7.2
    • Planted Tanks: Yes

    Bristlenose plecos are workhorses. They graze constantly, handle most soft green algae and green spot algae reliably, won’t destroy your plants, and stay at a manageable 5 inches (13 cm) unlike the common pleco that outgrows almost every home aquarium. Keep only one: adults are territorial with each other. Give them a cave or two, supplement with algae wafers when the tank is clean, and they’ll reward you with decades of service.

    11. Glass Shrimp (Ghost Shrimp)

    • Target Algae: Hair algae, biofilm, soft algae
    • Scientific Name: Palaemonetes spp.
    • Difficulty Level: Easy
    • Temperament: Peaceful
    • Adult Size: 1.5 inches (4 cm)
    • Minimum Tank Size: 5 gallons (19 L)
    • Origin: North America
    • Temperature: 65-82°F (18-28°C)
    • pH: 7-8
    • Planted Tanks: Yes

    Ghost shrimp won’t be your primary algae solution, but they’re one of the best value clean-up crew options available. They graze biofilm and pick at hair algae, eat uneaten food, and cost almost nothing. They’re also fascinating to watch, since the transparent body lets you see everything they’re doing internally. Keep them away from any fish large enough to treat them as a snack.

    12. Cherry Shrimp

    Beginner Friendly
    Cherry Shrimp

    Great red color and very hardy. Cherry shrimp are the best beginner shrimp for shrimp tanks

    Click For Best Price Buy In Bulk
    • Target Algae: Soft green algae, diatoms, biofilm
    • Scientific Name: Neocaridina heteropoda
    • Difficulty Level: Easy
    • Temperament: Peaceful
    • Adult Size: 1.5 inches (4 cm)
    • Minimum Tank Size: 5 gallons (19 L)
    • Origin: Taiwan
    • Temperature: 65-85°F (18-29°C)
    • pH: 6.5-8
    • Planted Tanks: Yes

    Cherry shrimp graze on biofilm and soft algae constantly, and their bright red color makes them a visual asset rather than just a utility animal. They work best in tanks where the fish won’t eat them: nano fish, peaceful community tanks, and shrimp-only setups. Cherry shrimp will breed in freshwater, so a population self-sustains over time. For a 10-gallon (38 L) planted tank with nano fish, they’re ideal.

    When To Introduce Them

    Your aquarium must be fully cycled before adding algae eaters. This is the rule beginners break most often. New tanks go through ammonia and nitrite spikes that are fine for the cycle but lethal for sensitive species like otocinclus. The algae that grows during cycling will self-correct as the tank matures. Adding animals too early solves nothing and kills livestock.

    Also watch your numbers. If you stock too many algae eaters and they clean the tank too thoroughly, there’s nothing left for them to eat. You’ll need to supplement with spirulina wafers, blanched zucchini, or algae wafers to keep them fed.

    Nano Tanks

    Nano tanks (under 10 gallons / 38 L) are too small for most algae-eating fish. Your biological control options here are invertebrates: snails and shrimp. Good options include:

    What To Feed Them

    This is the part most guides skip. Algae eaters need supplemental feeding, especially in clean or established tanks where natural algae is limited. If your bristlenose or otos run out of algae, they’ll starve. Feed them regularly:

    • Spirulina tablets
    • Algae wafers
    • Blanched zucchini or cucumber
    • Algae grown on pebbles (pull a rock from a separate container with algae on it)
    Great For Bottom Feeders!
    Hikari Algae Wafers

    Algae wafers are a great way to directly feed your bottom feeding fish. They are especially effective for larger fish like plecos

    Buy On Amazon Buy On Petco

    Species like mollies are part-time algae eaters that need a regular food supply regardless. Reducing how much you feed other fish encourages them to graze more, but they still need a consistent diet.

    What To Do If You Still Have Algae

    Algae eaters are one part of algae management, not the whole solution. If outbreaks keep coming back after adding animals, the tank is still out of balance. Here are the adjustments that actually work:

    1. Grow Live Plants

    Fast-growing plants like Vallisneria out-compete algae for nutrients. Healthy plant growth starves algae of what it needs to spread.

    2. Avoid Introducing It To Your Tank

    Algae hitchhikes in on plants. Tissue culture plants from sources like Buceplant.com are grown under sterile conditions and arrive algae-free.

    3. Reduce Lighting

    Algae thrives under excessive light. Cut your photoperiod to 8-10 hours, or reduce intensity if you don’t have a planted tank requiring high light. For high-tech planted tanks, the balance is light, CO2, and fertilizers: if any leg of that triangle is off, algae wins.

    4. Feed Less

    Uneaten food is algae fuel. Feed only what your fish consume in two to three minutes. If there’s food left on the substrate after that, you’re overfeeding.

    5. Use a Targeted Treatment

    For persistent BBA, hair algae, or fuzz algae in a planted tank, APT Fix is my recommendation for spot dosing. It’s safe for plants and livestock and effective on the algae types that biological control struggles with.

    Great For Planted Tanks!
    APT Fix

    Use Coupon Code ASDComplete

    APT Fix is a spot dosage treatment that works great for planted tanks. Effective and easy to use. Won’t hurt plants or livestock

    Click For Best Price

    6. Don’t Overstock

    More fish means more waste, more nutrients in the water, and more algae. Keep stocking below your filter’s capacity, not at or above it.

    7. Upgrade Your Filtration

    Persistent water quality issues often trace back to under-filtration. A quality canister filter sized for your tank is one of the best long-term investments you can make for algae management.

    8. Regular Maintenance

    Algae eaters supplement maintenance. They don’t replace it. Weekly water changes, gravel vacuuming, and glass cleaning are still required. Use a test kit to monitor water parameters regularly.

    Where To Buy Them

    Most of the species on this list are available through reputable online retailers. I recommend checking Flip Aquatics first. Their livestock is well-cared for and they stock most of the algae eaters and invertebrates listed here. For shrimp in particular, healthy stock from a good source makes a real difference in long-term survival.

    What Most Algae Eater Lists Get Wrong

    • Recommending the common pleco (Pterygoplichthys) for average home tanks. These fish hit 18 inches (46 cm) or more and belong in large public displays, not a 55-gallon living room tank. The bristlenose pleco is the right call for most hobbyists.
    • Overstating how much work algae eaters do. They help. They don’t clean the tank for you. If your maintenance habits are poor, adding a pleco and a handful of nerites won’t fix the underlying problem.
    • Ignoring the feeding requirement. When algae is gone, your animals still need food. Articles that don’t mention supplemental feeding are setting people up to starve their algae eaters.
    • Treating all algae as the same. A nerite snail does nothing for BBA. An otocinclus does nothing for hair algae in the water column. Match the animal to the algae type or you’ve wasted money.

    FAQs

    Do snails eat algae?

    Most aquarium snails eat algae and leftover fish food. Nerite snails (horned, zebra, tiger) are the best choices because they won’t reproduce in freshwater and won’t eat live plants. Mystery snails and rabbit snails are also good options. Malaysian trumpet snails and ramshorn snails eat algae too, but they breed out of control in most community tanks.

    What fish keeps a freshwater tank the cleanest?

    For most freshwater community tanks, the bristlenose pleco and otocinclus catfish are the most effective algae-eating fish. Bristlenose plecos handle green spot algae and harder growth; otos handle soft green algae and diatoms with exceptional precision. Siamese algae eaters are the go-to for black brush algae. No single fish handles all algae types equally well.

    Should I use algae-removing products or live algae eaters?

    Both have a place. Biological control through live algae eaters is sustainable and works continuously. Chemical treatments like APT Fix are better for targeted outbreaks of tough algae like BBA where animals aren’t effective. For ongoing management, algae eaters plus good husbandry beats any product long-term.

    Why does my fish tank keep turning green?

    Green water (not green glass algae) is caused by free-floating algae cells in the water column, usually triggered by too much light or a nutrient spike. A UV sterilizer clears it. For green growth on glass and surfaces, the most common causes are too much light, too many nutrients from overfeeding, or insufficient plant competition. Algae eaters help with the surface growth, but fixing the root cause stops it from coming back.

    How big do algae eaters get?

    It varies dramatically by species. Shrimp and snails stay under 2 inches (5 cm). Otocinclus catfish reach about 2 inches (5 cm). Bristlenose plecos reach about 5 inches (13 cm). Siamese algae eaters reach 7 inches (18 cm). The common pleco sold in pet stores can reach 18 inches (46 cm) or more and is not appropriate for most home aquariums. Always research the maximum size before buying.

    Final Thoughts

    The right algae eater for your tank depends on three things: which algae you have, what size tank you’re running, and what fish you’re already keeping. Get those three right and biological algae control works well. Pick randomly, skip the cycling, or expect them to replace maintenance, and you’ll be disappointed. After 25 years I’ve found that the hobbyists who struggle most with algae are the ones who added animals before fixing the underlying cause. The animals work best as the last piece of a balanced tank, not the first attempt to solve a problem.

    Choose the right animal for the right algae, and the tank takes care of itself.


    📘 Want to learn more? This article is part of our complete Freshwater Fish Guide, your ultimate resource for freshwater species, care tips, tank setup, and more.


    🌿 Want to learn more? This article is part of our complete Planted Tank & Aquascaping Guide, your ultimate resource for aquarium plants, aquascaping styles, substrates, and more.


    🐟 Want to learn more? This article is part of our complete Aquarium Care Guide, your ultimate resource for water chemistry, maintenance, feeding, disease prevention, and everything you need for a healthy tank.

  • Estimative Index (EI) – What It Is and How To Use It in Your Planted Tank

    Estimative Index (EI) – What It Is and How To Use It in Your Planted Tank

    The Estimative Index is one of those fertilization methods that completely changed how I think about dosing planted tanks. Developed by Tom Barr, EI takes the guesswork out of fertilization by overdosing nutrients slightly each week and doing a large water change to reset. it’s elegant in its simplicity and brutally effective in practice. I’ve run EI in my own high-tech tanks and found it far more reliable than trying to dial in exact dosing for each individual nutrient. If you’re running CO2 and serious about plant growth, this method is worth understanding.

    What Is The Estimative Index Method?

    The Estimative Index (EI) was developed by Tom Barr in the mid-1990s1. The index (dosing rates) was developed through experimentation and the beauty of the system is that it is proportional to aquarium water volume, so you can apply the index to any planted aquarium size.

    This technique provides an excellent general starting point, but it can also be customized to suit the characteristics of your setup. Essentially, this method of plant fertilizing involves overdosing all the nutrients your plants need on a consistent basis and then performing large weekly water changes to reset the parameters.

    By doing this you will not need to test nutrient values because your values will stay in a relatively stable range, week after week.

    Benefits of This Method

    Planted Aquarium EI

    The system is designed to remove the need to rely on a test kit, which can be inaccurate anyway unless you have expensive calibrated equipment. In a nutshell, the goal of the system is to provide your plants with complete nutrition, at repeatable and consistent levels.

    The EI system works on the assumption that algae growth is not triggered by high nutrient levels, but more often from an imbalance of CO2. This may sound like an odd statement until you consider that one of the best ways to out-compete algae growth is to have vigorous competition from healthy aquatic plants.

    Supplying more nutrients prevents the development of plant deficiencies so naturally, it makes sense to boost your plant performance as much as possible.

    Who Is it For?

    The Estimative Index method is especially useful for high-light tanks that are heavily planted. This applies in particular to high-tech setups that have stable levels of CO2 from injection systems that match the lighting period of the tank.

    Without the high energy conditions created by high lighting and added CO2, increased nutrient levels will not be as effective. Still, it is possible to use the principles of EI in low light tanks, but the strength and frequency of the dosing will need to be decreased

    EI is not necessary for aquarists who just keep a few low-light plants in their fish tanks and are happy with the results they achieve. Instead, this is a system for growers with a high light tank that want to get the most out of their plants. That means achieving the fastest growth and the best color, all while seriously reducing algae growth.

    Although this system does have some pretty substantial start-up costs, the raw materials will last a long time, saving you plenty of money in the long run when compared with dosing liquid fertilizers at similar concentrations.

    EI And Fish Safety

    The method appears to be perfectly safe for fish since nitrates are kept around the standard 20ppm mark and CO2 levels are maintained at or below the safe level of 30ppm. Performing large, regular water changes is very important, however, to reset the tank to reduce excess nutrient levels and manage the ammonia introduced by decaying plant parts and fish waste.

    Dosing

    EI Index Dosing

    The reason why the EI dosing levels are so scaleable is that they are proportional to water volume, rather than measured in a set value like milligrams or ounces. The dosages are described in parts per million(ppm) per week and are estimated to cover the maximum potential nutrient uptake rates for aquarium plants.

    I understand this might be getting a little complicated at this point, so read on for a breakdown of exactly what these terms mean.

    How Is PPM Calculated?

    Ppm is a simple way of describing a concentration. For example, 1 milligram of a powder mixed with 1 liter of aquarium water creates a concentration of 1 part per million, pretty simple right?

    What Is Nutrient Uptake?

    Nutrient uptake is a very important concept to understand when discussing the EI Method. Nutrient uptake is simply the amount of nutrients a plant can take out(uptake) from the aquarium water column in a defined period.

    Let’s take a look at an example to help explain this concept:

    You have one healthy aquarium plant in your tank and you dose a certain nutrient to a concentration of 20 ppm. The next day, you measure the concentration of the same nutrient and find that the concentration has dropped to 15ppm.

    You are now able to calculate the plant’s nutrient uptake rate and it can be described as 5 ppm per day. Since ppm is a ratio, this measured nutrient uptake rate will apply to your plant in your specific tank size.

    What Affects Nutrient Uptake Rate?

    • Different plant species have different potential growth rates. Fast-growing stem plants have a much higher nutrient uptake rate than slow-growing epiphytes for example.
    • As light intensity increases, photosynthesis increases, placing more demand on the plant’s nutrient stores to produce sugars.
    • As with light, carbon dioxide availability is essential for the process of photosynthesis to occur. Both must be in balance, and therefore, high light will create an increased demand for CO2.
    • Plant mass and size- The larger a plant, the greater its nutrient uptake potential will be.

    The Goal Of EI Nutrient Dosing

    The goal of EI nutrient dosing is to guarantee that your plants are never deficient in any of the nutrients that they need. In other words, the plant’s maximum nutrient uptake levels are always available in the aquarium water.

    The recommended dose concentrations are designed to match the maximum amount that plants can potentially use in a very high light planted aquarium. This doesn’t mean that they will necessarily use all of these nutrients in the water column, it just means that there is no benefit in adding any more.

    Another great benefit of EI dosing is the prevention of algae blooms. If you dose consistently, your healthy plants will out-compete algae, now that’s a win-win!

    Recommended Dosage Rates

    The ideal nutrient levels that you will try to maintain in the water column when using the EI method are as follows:

    • Carbon Dioxide (CO2): 20-30ppm per week
    • Nitrate (NO3): 20 ppm per week
    • Potassium (K): 10-30 ppm per week
    • Phosphate (PO4): 1-2 ppm per week
    • Magnesium (Mg): 10 ppm per week
    • Iron (Fe): 0.5 ppm per week

    These uptake rates were measured under the maximum level of light intensity that plants can use for photosynthesis. What this means is that whether you have moderate light, or high-intensity lighting, the dose rates above will always provide enough nutrients to your plants.

    The fact that your planted aquarium probably has a lower intensity of light and your plant’s actual nutrient uptake rate is lower does not matter.

    What You Need To Use This Method

    A major difference between using regular liquid solutions and root tabs, and using the EI method is the consistency of the nutrients. In this case, you will be using each nutrient in its pure dry powdered form. It is up to you to mix them up or dose them individually at the right concentrations.

    Purchasing the chemicals is pretty expensive, particularly because you will need a few of them to get started properly. If you do the math though, and you’re serious about maintaining a heavily planted aquarium, you’ll actually be saving a lot of money in the long run.

    Macro-nutrients For Plant Growth

    Magnesium Sulfate

    Macronutrients are the substances needed by plants in relatively high concentrations. Here’s what they are called and what they do for your plants:

    • Potassium Nitrate

    This compound is a source of Potassium and nitrogen for your plants. Nitrogen is vital for chlorophyll production and photosynthesis. It promotes the health and growth of the above-ground parts of the plant.

    Potassium is essential for the transport of substances within the plant as well as for the process of photosynthesis. It maintains a plant’s resilience and strengthens it at a cellular level.

    • Potassium Phosphate

    Phosphorus is vital for healthy root development in plants and helps plants to store energy. It is also necessary for successful photosynthesis and to promote vigor and resilience in plants.

    • Magnesium Sulfate

    Magnesium and sulfur are secondary macronutrients which means that they are needed in lower quantities than nitrogen, phosphorus, and potassium(NPK). They are still essential in the planted aquarium for healthy growth though.

    Magnesium is the most important component of chlorophyll, and without it, photosynthesis would not be possible. Sulfur is also necessary for chlorophyll formation and allows plants to make use of nitrogen.

    Magnesium sulfate is an optional macro for the EI method, but is useful if you have very soft water as it can be effective in boosting GH. It is also a good idea to dose magnesium sulfate if you use reverse osmosis(RO) water.

    Micro-nutrients For Plant Growth

    Micronutrients are trace elements that are also essential for healthy plants but needed in much smaller amounts than macronutrients. The most important trace elements are:

    • Iron
    • Zinc
    • Manganese
    • Molybdenum
    • Copper

    You can use Plantex CSM+B as your source of trace elements or use a liquid product like Seachem Flourish.

    Seachem Flourish Trace

    A great aquarium fertilizer for getting essential trace elements into your planted tank. Readily available in stores

    Buy On Amazon

    Dosing Equipment

    Apart from a collection of dry fertilizer powders, you need very little equipment to use the EI method. The dry fertilizers themselves will need to be measured pretty accurately. A set of small measuring spoons and a scale will come in handy for this, although you can get by using just a teaspoon.

    You can dose the dry fertilizers directly into the water column, or if you prefer, you can also mix them into a liquid solution. If you prefer to make liquid solutions, some small bottles and a funnel will come in handy. For large aquarium, it could make sense to investing in a dosing system.

    Aquarium Lighting

    The dosage values that are recommended for the EI method were developed for plants grown under very high light. While you will get the best results in high light tanks, you don’t need to have extremely high light.

    Low light tanks, however, will not benefit from this system if you are adding way more nutrients than the plants can use due to limited photosynthesis potential.

    CO2 Injection

    To achieve optimum plant growth by using the EI method, you will need to run a carbon dioxide injection system in your tank. You should aim for a CO2 concentration of no more than 30ppm to ensure the safety of your livestock.

    The most reliable way to achieve stable levels is to use pressurized CO2 with a drop checker and a bubble counter. A diffuser will be necessary to make this vital gas easily available to your plants.

    CO2 is only used by your plants during photosynthesis, and this means that your system should only run while your lights are on. It does take a little while for the gas to build up to optimum levels though, so the best thing to do is run your pressurized injection system on a separate timer that starts up about 2 hours before the lights go on, and then shuts off when the lights go out.

    Filtration For The Planted Aquarium

    In a planted aquarium with high light and excess nutrients in the water column, excellent filtration becomes very important. This is because the filter is not only necessary for processing uneaten fish food and fish waste as in a traditional fish tank.

    In such a high-energy planted aquarium, the plant material can also be a source of ammonia. Wet/dry filters and canister filters tend to be the best options for this type of setup. OASE Biomasters are great filters to consider.

    Water Hardness

    For the EI system to be effective, you will need a carbonate hardness of at least 3-5 °KH and a general hardness of about the same. This usually is not a problem if using tap water, but if you use reverse osmosis(RO) water in your tanks, or your area has naturally soft water, you will need to remineralize the water.

    How To Dose With This Method

    One of the major differences between the EI method and other feeding routines is the high frequency of application. This is a hands-on approach that requires you to dose daily and dose consistently.

    If you cannot commit to dose daily, 2-3 times a week is also acceptable though. The idea is that your plants do much better with a constant supply of nutrients, rather than the occasional boost.

    A typical EI routine consists of dosing macro-nutrients, and micro-nutrients (trace elements) on alternate days for 6 days, then performing a water change on the 7th day.

    As an example, an EI schedule could look like this:

    • Monday: Dose macronutrients
    • Tuesday: Dose micronutrients (trace elements)
    • Wednesday: Dose macros
    • Thursday: Dose micros
    • Friday: Dose macros
    • Saturday: Dose Micros
    • Sunday: Perform 50% water change and dose a GH booster if using reverse osmosis (RO) water

    It is important to dose your macros and micros on separate days because when added together, the chemicals can interact in ways that make them unusable for your plants.

    Water Changes

    The usual advice is to perform a 50% weekly water change but you can also increase this up to 75% if you prefer. In a healthy and very large tank, you can even decrease your water changes to twice or even once a month. Ideally though, you want to follow a routine that is repeatable and reliably shows results.

    How To Perform A Water Change

    For aquarists, water changes are just a fact of life. A 50% weekly water change might sound a little extreme, but they are necessary to ‘reset’ your nutrient concentrations. Under the high energy growth conditions associated with high lighting and CO2 injection, high levels of ammonia (and therefore nitrates) are produced.

    When performing your weekly water change, be sure to turn off your equipment like filters and heaters. You can use this opportunity to vacuum the substrate and carpet plants to remove any physical waste in the tank. This is also a great time to trim your plants and siphon out all the trimmings so that they do not rot in your tank.

    When the time comes to refill, try to make sure that the water you add to the tank is as close as possible to the temperature of the water still in the tank. This will minimize any temperature shock on your livestock. You should also condition your tap water to neutralize any harmful chemicals it might contain.

    EI vs PPS

    Now that you know what the EI system is and what it is used for, you may be wondering if there are other systems that can be used. You might have heard of another popular fertilizing technique called the Perpetual Preservation System, but the two are really very different.

    While the EI method intentionally overdoses by providing the maximum possible amount of nutrients that a plant can use, the PPS system attempts to dial in the numbers and limit any excess nutrients in the water column.

    Essentially, EI is designed to maximize plant growth and accepts that major water changes will be necessary to reset the water parameters and maintain a consistent nutrient level.

    PPS is not an attempt to create maximum plant growth, but rather to establish a system that is self-sustaining and does not require water changes.

    EI Aquarium Calculator

    While it is possible to calculate your dosages yourself, it is much easier to use this dedicated online EI calculator. Go ahead and play around with this calculator to help you understand the sort of amounts of each nutrient you will need to add on a daily and weekly basis for your aquarium size.

    FAQs

    What is EI?

    Estimated Index is a fertilization system developed by Tom Barr in the 1990s that is designed to promote maximum plant growth in aquarium plants. The idea is to provide the maximum nutrient levels that the plants can potentially use, and maintain these levels continuously.

    How do I use dry fertilizer in my aquarium?

    Once you have measured the amount of dry fertilizer that you need to dose for the day, you can simply dissolve it in some tank water and then add it to your planted aquarium. You can even add the powder directly to the water.

    What is a perpetual preservation system?

    The perpetual preservation system(PPS) is a fertilizing system for the planted aquarium that attempts to minimize excess nutrients in the water column and make it possible to maintain a healthy tank that does not need water changes.

    What are macronutrients in aquarium plants?

    Macronutrients are the nutrients like nitrogen, phosphorus, and potassium that plants need in the largest amounts.

    Final Thoughts

    If you’re looking for the ultimate manual control over the plant growth in your aquarium, while preventing the dreaded algae bloom, the EI system is just what you’re looking for. This is a very hands-on method that is not suited to the casual aquarist or someone looking for a low-maintenance aquarium.

    If you have the time and the passion and want to grow your fully planted tank to its full potential, this is definitely a great solution for you!


    🌿 Want to learn more? This article is part of our complete Planted Tank & Aquascaping Guide. your ultimate resource for aquarium plants, aquascaping styles, substrates, and more.

  • Aquascape Aquarium – What It Is and How To Get Started (Full Guide)

    Aquascape Aquarium – What It Is and How To Get Started (Full Guide)

    Aquascaping is one of the most creatively rewarding things you can do in this hobby. it’s where fishkeeping meets art. I’ve been setting up planted tanks for over 25 years, and I still find the aquascaping side endlessly compelling. Whether you want a lush Nature Aquarium layout, a minimal Iwagumi, or a dramatic Dutch style, the fundamentals are the same: understanding how to work with hardscape, plants, light, and flow to create something that looks like a slice of nature. This guide is your starting point for getting into aquascaping the right way.

    What Is An Aquascape Aquarium?

    Aquascaping is an art, a passion, and a science all rolled into one fascinating pastime. Essentially aquascaping is a form of gardening and fishkeeping, in 3 dimensions, all within the four walls of the aquarium!

    It involves designing beautiful and aesthetically pleasing environments that mimic natural landscapes. The hobby has come a long way, and innovative pioneers have constantly experimented and worked towards the goal of more beautiful and awe-inspiring planted aquariums.

    Why Start Aquascaping?

    Aquascaping is a challenging and rewarding activity that many of us find completely addictive. There are no limits to how far you can go with this hobby.

    Many people start fishkeeping and move on to aquascaping. It calls for creativity and an artistic eye, as well as an understanding of biology.

    Aquascaping is a really absorbing hobby. You will learn through trial and error. It helps you to destress and forget all about life’s challenges, providing real serenity and relaxation.

    Amazingly, aquascaping also provides a connection with nature, even if your tank is in the living room of your apartment, high above the ground in a busy city. These are the reasons we aquascape!

    The History

    No discussion on the topic of aquascaping would be complete without explaining how it all started. For this, we have to pay tribute to the most important contributor to the hobby, Mr. Takashi Amano from Japan1.

    Takashi is legendary for popularizing the nature-style aquarium and making the hobby accessible with his books on aquascaping, and by displaying his tanks. He was a pioneer in our history and brought the zen like nature to aquascapes that you see today. He created incredible scapes. You can see an example of these scapes at the ADA Museum in Japan. Above is a video of Takashi and the ADA Museum (Video Source).

    He founded ADA (Aqua Design Amano) way back in 1984 and the innovative, high-quality products they developed are still produced and extremely popular in the hobby today.

    Design Concepts

    Designing the layout of your aquascape is all about following clues from nature, harnessing your creativity, and finding what suits your own eye. There are a few proven tips that help to create a space with a truly aesthetic appeal, however.

    I’ll run you through a brief introduction on some of these techniques that you can incorporate into your planning process.

    The Rule of Thirds

    The rule of thirds is a visual technique used in composing paintings, photography, and other art forms. Here’s a pro tip, it works amazing for aquascaping too!

    It works on the principle that the human eye finds features in a scene that are located slightly off-center the most appealing. The focal point positions that really catch our attention are combinations of the upper and lower, and left and right thirds of the scene. Here is a video below by Julian Discovers explaining the concept.

    Video Source

    If you have a smartphone, the grid mode in the camera settings is very useful for finding these areas of interest. Where the lines of the grid intersect is where you should create a focal point with things like dominant hardscape features, or interesting specimen plants.

    The Golden Ratio

    If you’re interested in the rule of thirds and want to look deeper into this visual technique, you need to understand the golden ratio. The golden ratio, or Fibonacci spiral, is a mathematical concept that can be expressed as 1:1.618. Here is a video below by Mark Denny explaining how the golden ratio works in photography.

    The rule of thirds is roughly based on this ratio. In a scene that follows this ratio, the form follows a smooth curve, similar to a rolling wave on the ocean, with the focal point being in the center of the wave, located near one of the intersections of the grid described above.

    Use Of Depth

    The aquascape is a 3-dimensional space, which means it is possible to create a sense of depth in the tank. A simple and effective way to enhance the feeling of depth is to slope the substrate from the front to the back.

    By sloping the bottom of the tank, and planting creatively, it is possible to make the tank look almost infinitely deep. Using low-growing aquarium plants in the front of the tank and progressing to taller plants in the middle ground and then tall plants in the background is another very effective way to create a sense of depth.

    Styles

    Although there are no rules or limits to the type of aquascapes you can create, there are a few popular freshwater aquascaping styles that are proven winners. If you’re new to aquascaping, basing your tank on one of these styles is a great way to start.

    Let’s take a quick look at these styles:

    • Dutch Aquarium
    • Jungle Style
    • Biotope
    • Nature Aquarium
    • Iwagumi
    • Ryoboku

    The Dutch Style

    Dutch Aquascape

    The Dutch aquarium is a very ordered style that appeals to more formal aquatic gardeners. Dutch-style aquascapes are all about the plants. This planted aquarium design focuses on the beauty of the plants and their arrangement, rather than trying to recreate nature.

    Hardscape features are less important in this aquascape style and often are not very visible at all. Dutch tanks are very heavily planted, with the different species arranged and grouped carefully to contrast and complement each other with different textures, colors, and shapes.

    The Biotope

    Video Source

    Biotope aquascapes are basically a way of recreating a scene from nature as accurately as possible. This could be a local pond or river bank near your house or a few square feet of the mighty Amazon river!

    Biotopes don’t only look like a tiny portion of a wild aquatic scene, they should also have the same kind of substrates, species of plants, and fish that would be found there.

    Some examples of popular biotopes include:

    • Hillstream
    • Amazon River
    • West African
    • Malaysian
    • Blackwater

    Jungle Style

    This type of aquascape is styled in the wild and chaotic manner of the jungle. It’s a lively design that needs plenty of planning but involves less maintenance in the long run since the plants are allowed the freedom to grow out in their natural way.

    Jungle-style aquascapes are full, busy tanks with tall, large-leaved plants and limited visible hardscape, mostly in the form of driftwood.

    The Nature Style

    Nature Style Aquarium Example

    The nature aquarium is the style popularized by Takashi Amano. It does not seek to mirror a natural scene quite as accurately as a biotope aquascape but rather to create a harmonious underwater world that is visually pleasing to the human eye.

    A key concept in the nature aquarium is the principle of Wabi-Sabi, which translates from Japanese as ‘perfection in imperfection’. The nature style aims to create an aesthetically pleasing aquascape that lies somewhere between the order of the Dutch-style planted tank and the untamed appearance of the Jungle aquascape.

    Iwagumi And Ryoboku

    The Iwagumi and Ryoboku style aquascapes are minimalist designs that have plenty of open space and place the most emphasis on the hardscape. In the case of the Iwagumi aquascape, the hardscape is made up of a carefully arranged rock formation.

    Usually, an odd number of main stones and smaller stones are used and each has its own significance and name. Carpeting plants are the most important plant component used in Iwagumi style aquascapes.

    The Ryoboku is similar to the Iwagumi style but uses wooden elements like driftwood as the central focus that the aquascape is built around.

    How To Set Up

    Aquascaping is a long-term hobby, and the most important part of setting up an aquascape is planning! Try not to be tempted to rush the planning and jump into setting up too quickly.

    When it comes to aquascaping, the planning process is actually fascinating and loads of fun, so take your time with it!

    Let’s take a look at the basic elements of any aquascaped aquarium:

    The Tank

    Many aquascape aquariums will use a rimless tank these days. These tanks have low iron aquarium glass that has better clarity than traditional glass. In an aquarium where looks are everything, a well designed rimless tank really helps with the look. Standard braced tanks can look old fashioned and tuned down with the hue on the glass. If you are getting really serious about aquascaping, consider a rimless with iron low glass. UNS aquariums is one of the best out there.

    Editor’s Choice!
    UNS Ultra Clear Tanks

    Editor’s Choice!

    A world class rimless aquarium. Available in many sizes and shipped direct to your door

    Click For Best Price

    Hardscape

    The hardscape is the cornerstone of any beautiful aquascape. It is the foundation and the backbone of your layout, so make sure you spend plenty of time experimenting with different materials and arrangements.

    As the name suggests, the hardscape is made out of hard materials. These are usually either wood or rock. You can also use aquarium ornaments as part of your aquascape, but be careful to keep the tank looking as natural as possible for a really great aquascape.

    You can collect your own materials, but not just any rocks or wood will work in an aquarium. To start out, I would suggest using these materials:

    • Dragon stone
    • Lava rock
    • Seiryu stone
    • Petrified wood
    • Spider wood
    • Pacific wood
    • Amazon wood

    Online retailers can stock an awesome range of hardscape materials that you can check out. One of the bigger frustrations for me personally is the lack of aquascaping specialized stores in the US. Online is the way to go!

    Editor’s Choice!
    Ohko Dragon Stone

    Editor’s Choice

    Ohko is the premier aquascaping rock today. Granite based with amazing shapes and selection

    Buy on Buce Plant Buy on Glass Aqua

    Substrate

    The substrate is another essential part of any aquascape. For the purpose of this article, the term substrate means the gravel/soil/sand at the bottom of the tank.

    Now, not all substrates are suitable for aquascaping, and the different varieties have different properties and uses. You should definitely avoid unnatural-looking substrates like multi-colored gravel, as this will not be aesthetically pleasing.

    The most simple way to categorize aquascape substrates would be between materials that contain nutrients and those that don’t. Let’s take a closer look at what this means:

    Active Soils

    Active soils are usually clay-based and contain the essential nutrients that plants need to grow. They can be expensive, but I would definitely recommend going this route if you want to be successful from the start. There are many great products on the market, including:

    Editor’s Choice!
    ADA Aqua Soil

    The Best Planted Tank Substrate

    The world’s standard in active substrates for planted tanks. Created by brand that founded modern aquascaping

    Buy On Amazon

    Inert Substrates

    Inert substrates are materials that do not interact with the water by changing the pH or releasing minerals and nutrients. Plants will not get any nutrients from this kind of substrate so dosing a fertilizer, or using root tabs will be very important.

    Sand and gravel with varying grain sizes are the best examples of inert substrates. One of the best ways to use inert substrates is as a cap over the top of active soils. You can also use them as a decorative layer. Sand is a really good aesthetic enhancer in aquascapes to create trails and contrast.

    Great For Bottom Feeders
    Fine Natural Sand

    Natural sand is excellent for bottom feeder fish to forage around in.

    Click For Best Price Buy On Amazon

    Lighting

    Lighting in the aquascape serves two different functions. It makes the viewing experience better, and most importantly, it allows your plants to photosynthesize. The needs of your plants are definitely the first priority when choosing aquarium lighting.

    Not just any kind of light will work, so make sure you set up lighting specifically designed for growing aquatic plants. It needs to have the right strength and frequency for the size of your tank and the kinds of plants you want to grow. I find the Serene RGB as the most beginner friendly LED light on the market. You can grow just about anything with it and the price is very reasonable.

    Best Value
    Serene RGB Pro LED

    Current USA’s offering into aquascaping is an incredible value. Spectrum, spread, easy to program and great PAR output.

    Click For Best Price Buy On Amazon

    A good tip for beginners is to choose lighting that covers the minimum needs of your plants, rather than going overboard with very high lighting. Remember, with too much light, algae can easily get out of control, but without enough light, your plants will not grow to their full potential.

    Your lights will need to run on a timer that comes on automatically at the same time each day. Aquarists usually run 6-10 hours of light, with 8 hours being pretty ideal.

    The Importance of CO2

    CO2 (carbon dioxide) is the gas that plants use during photosynthesis. Without this gas, your plants simply can’t live and grow.

    CO2 is all around us and occurs naturally in your aquarium water. The natural concentration is enough for some plants to grow, but pretty much all plants will benefit from increased levels, and many types of plants won’t grow well at all without running a pressurized CO2 system.

    Pretty much all of the incredible and jaw-dropping aquascapes you will see run with injected CO2. Unfortunately, pressurized CO2 systems are expensive, but if you want to get serious about the hobby, start out in the right way with this investment. If are are shopping for an option, you can’t go wrong with CO2art. Check out my offer code ASD10%Off for an extra discount.

    The Ultimate CO2 Kit
    CO2Art Pro Elite Series Bundle

    Use Offer Code ASD10%Off

    The highest end offering by CO2Art. This package includes everything you need to perform consistent and the highest quality CO2 injection in the industry!

    Click For Best Price

    These systems allow you to run a stable and measured level of carbon dioxide. Levels of up to 30 ppm will promote incredible plant health and growth, while not affecting your fish and other livestock.

    That being said, there are many aquatic plants that you can grow without running CO2 in your tank, so with some careful planning and research, you can easily start out with a low-tech fish tank.

    Filtration

    Good filtration is hugely important in any aquarium. Planted aquascapes need very good filtration because both fish waste and rotting plant material can foul the water and cause dangerous ammonia spikes. There are a few different types of filters available in the hobby, and just about any style can be used.

    The best filter types for aquascapes are external filters because you really want to minimize the amount of hardware visible in the aquarium. The most popular styles are external hang-on back (HOB) filters and canister filters.

    Canister filters tend to be more expensive but allow the aquarist much greater control over the filter media selection, and most importantly, they can be kept out of sight in the cabinet below the aquarium.

    Plants

    Live plants are what really make an aquascape. Sure, you can create some beautiful hardscape layouts, but healthy plants are what bring the scene to life.

    Pretty much any kind of aquarium plant can be used in the aquascape. The texture of the foliage can have a big impact on the feel of the aquascape though. A nano aquarium with only large leaf plants can look even smaller than it is, so these plants should ideally be used in a larger aquarium.

    Small plants with fine leaves can be used to create a space that feels a lot larger, especially when the hardscape and substrate are arranged in ways that enhance this perception.

    There are an amazing variety of plants available in the hobby and I recommend a solid online retailer like BucePlant for buying new plants because they offer such a comprehensive range of healthy, high-quality stock.

    Let’s take a look at some of the most important types of plants for aquascapers.

    Stem Plants

    Stem plants are usually taller, fast-growing plants that take nutrients from the substrate and the water column. Stem plants are a very important component of Dutch aquascapes and usually work well as background plants. Some great examples include:

    Epiphytes And Mosses

    Epiphytes are plants that do not grow rooted in the substrate but are grown attached to the hardscape instead. Epiphytes tend to be slow-growing, and are great plants to start out with as they can be very easy to maintain.

    Mosses also grow attached to hardscape. Mosses like Java moss can also be left to float around the tank, although floating plants can look a little untidy in a carefully scaped aquarium.

    These kinds of plants work excellent in nature and jungle-style aquascapes. Great examples of this type of plant include:

    Grass/Carpet Plants

    Plants that cover the bottom of the tank like a lawn are usually known as carpeting plants in the hobby. These plants are characteristic of Iwagumi and Ryoboku style aquascapes, although they are also used in the foreground of Dutch aquascapes and nature aquariums.

    Growing an amazing carpet usually requires good light and CO2 injection. Some popular examples of these plants include:

    Fertilization

    All aquatic plants need nutrients to grow. Because aquariums are basically closed systems (apart from the fish food that you add) you will need to supply nutrients and trace elements to your plants in order for them to grow. These are added via aquarium fertilizers.

    Aquarium plants fall into two broad categories. They can be either root feeders, which gather the nutrients they need from the substrate or water column feeders that get everything they need from the water. Many plants species can also gather nutrients in both of these ways.

    Root feeders require an active aquarium soil to grow well. They can also be grown in inert substrates, but only if you use root tabs to provide nutrients to the root zone.

    Active aquarium soils don’t last forever either, and will eventually be completely leached out of nutrients. This kind of substrate is great at reabsorbing nutrients though so inserting a few root tabs will revive them.

    Water column feeders rely on the nutrients suspended in the water to feed. Fish food and waste do actually supply some of what these plants need, but you will also need to dose a high-quality aquarium fertilizer supplement like APT Complete to keep them growing at their best.

    Editor’s Choice!
    APT Complete

    Editor’s Choice

    Made by an aquascaper for aquascapers. This is the best all around aquarium plant fertilizer on the market. Marco and micronutrients in one bottle!

    Use Coupon Code ASDComplete for 10% off your order!

    Click For Best Price Buy On Amazon

    Dosage will depend on the product you use but generally, feeding at least once a day to once a week is recommended. When starting out, it’s best to follow the directions on the bottle and gauge from there. There are more advanced methods like the estimative index you can look into as you get more experience.

    Fish Selection

    Although fish are usually not the main attraction in amazing aquascapes, they will complete the package and add a sense of liveliness and activity to your underwater garden. Many aquascapers choose small fish which improves the sense of scale in the aquarium, making the scape look bigger.

    Choosing fish species that prefer cooler water of around 74°F is recommended when starting out because higher temperatures tend to cause faster algae growth. The fish you choose to stock must, of course, be suited to the same parameters as the plants you grow. The best fish for most aquascapes are going to be nano fish. If you are in the market for nano fish, check out Flipaquatics for a great selection of fish for your aquascape, they quarantine all their livestock.

    Some popular species include:

    It is also a good idea to stock some species that can help with natural algae control like:

    Vegetarian or destructive fish should obviously be avoided because you don’t want your fish to rearrange your aquascape! The following species generally do not work well in aquascapes:

    Maintenance

    A lot of planning and work goes into setting up an amazing aquascape, but it doesn’t end there. Tank maintenance is hugely important to keep your carefully created aquascape looking amazing.

    Without going into too much detail, The following maintenance procedures should all be part of your regular schedule:

    • Water Changes- Aim for a 50% water change every week to start out. Make sure you dechlorinate the water before adding it to your tank. If you have water that is hard, you might want to considering buffering or investing in an RO system.
    • Glass Cleaning- Use an algae scraper or an old credit card to clean your glass. Be careful not to get any sand between the scraper and the glass as this will scratch the tank.
    • Plant Trimming- Trim your plants carefully with aquascaping scissors and remove all of the trimmings with a small fish net or siphon them out.
    • Test Water Parameters- Use a liquid test kit to monitor your water parameters.
    • Fertilizing- Feed your plants regularly to keep them healthy and growing.

    FAQS

    What is the meaning of it?

    Aquascaping involves creating and maintaining a living underwater environment. You can think of the word as a combination of aqua (water) and landscape.

    What plants are good for it?

    Almost all aquarium plants have a place in one aquascaping style or another. It really depends on your vision for the aquarium. Check out my care guides for more information on some of the best plants for planted tanks. I also have articles on beginner plants and low light plants.

    What is the function?

    Aquascaping has many functions. It is an incredible hobby that creates beauty in any space and provides a healthy living environment for the fish. Many aquascapers find the connection with nature that this hobby provides very fulfilling.

    How do you care for it?

    Aquascaping is not only about the creative process and the actual putting together of the aquarium. Maintenance is also a huge part of this hobby. Maintenance includes feeding and trimming the plants, keeping the tank and hardscape clean, and managing the water quality in the aquarium.

    Final Thoughts

    Aquascaping is one of the most fascinating and absorbing hobbies out there. If you’re only just beginning your aquascaping journey, the information in this article will get you started in the right direction towards creating your very own beautiful underwater world. Have fun and feel free to ask any questions or comment below!


    🌿 Want to learn more? This article is part of our complete Planted Tank & Aquascaping Guide. your ultimate resource for aquarium plants, aquascaping styles, substrates, and more.

  • Vallisneria Care – A Complete Guide

    Vallisneria Care – A Complete Guide

    Vallisneria is one of those plants I always keep in my larger tanks. It grows fast, reaches impressive height, and creates a natural background that smaller plants can’t match. I’ve used it in community setups and it does well without CO2 injection, which makes it accessible for hobbyists who aren’t running a high-tech system. The runners it produces mean one plant quickly becomes many, and it fills in beautifully over time.

    If you like plants that grow fast and look great, Vallisneria deserves your attention. These plants look fantastic in the background, and sometimes even the midground of planted tanks. If they have one weakness, it is that they grow a little too fast and too big for some tanks.

    Read on to learn about Vallisneria care, and find out if this is the right plant for you!

    Expert Take (Mark Valderrama, AquariumStoreDepot)

    Vallisneria gets labeled “easy” all the time, and honestly, that’s accurate. But easy doesn’t mean hands-off. Val is one of the most vigorous growers in freshwater, and in a 40-gallon tank, you will be trimming runners every single week. Beginners love it right up until it takes over the entire back wall and starts shading out everything else. Use it in tanks 55 gallons or larger and give it room to do what it does. It’s worth it.

    I’ve grown Jungle Val in tanks where it touches the surface at 60 inches and still sends out runners. That’s impressive. Just go in knowing you’ll be managing it, not ignoring it.

    ASD Difficulty Rating: 1 out of 5

    One of the easiest background plants in the hobby. Suitable for beginners, low-tech tanks, and tanks with fish that eat most other plants.

    What People Get Wrong About Vallisneria

    The biggest misconception is that Vallisneria is purely a set-it-and-forget-it plant. It grows so readily that people assume it manages itself. It doesn’t. Val is a root feeder that depletes nutrients fast, it sends runners constantly, and it shades out everything beneath it when leaves reach the surface. The other mistake I see constantly: planting it too deep. Cover the crown of the plant and it rots. The crown needs to stay above the substrate surface. Period.

    A second common error is using Vallisneria in tanks with soft, acidic water. This plant prefers harder, more alkaline conditions (pH 6.5 to 8.5, GH 4 to 18). In soft water below pH 6.5, the leaves yellow and melt within weeks. It survives but never thrives.

    Hard Rule

    Never cover the crown of a Vallisneria plant with substrate. The crown is the junction where the leaves emerge from the root mass. Bury it and the plant rots from the bottom up. Plant shallow, expose the crown, and let the roots settle on their own.

    Species Overview

    Scientific NameVallisneria spiralis, V. americana, V. nana
    Common NamesVal, Eelgrass, Tape Grass, Jungle Val
    FamilyHydrocharitaceae
    OriginAfrica, North America, South America, Asia, Australia, Europe
    Skill LevelEasy
    LightingLow to High, 40 to 200 PAR (Umols)
    Tank PlacementBackground
    Flow RateModerate to High
    Temperature Range59 to 86°F (15 to 30°C)
    Height12 to 72+ inches (30 to 183+ cm)
    pH Range6.5 to 8.5
    PropagationRunners from main plant
    Growth RateFast
    Feed TypeRoot Feeder
    CO2 RequirementOptional

    Origins And Habitat

    The Vallisneria plant takes its name from Italian scientist Antonio Vallisneri from the 18th century1. They are really widespread aquatic plants, and one species or another can be found growing on every continent of the world except Antarctica.

    These are fully aquatic plants that cannot be grown emersed. In nature, they grow in a wide range of habitats, from still waters to fast-flowing river environments and at depths of as much as 20 feet (6 m).

    Like many other aquatic species, Vallisneria plants have been spread to many different parts of the world. Always take care to not let your aquarium plant trimmings get into local waterways.

    What Does Vallisneria Look Like?

    Vallisneria Plant

    Vals are tall rosette aquatic plants that have a very grass-like appearance. The leaf margins have small spines, and the shape of the leaves is pretty variable, being either straight, twisted, or spiraled.

    The leaf width also varies and can be strap-like up to an inch (2.5 cm) across or very narrow, almost like Hairgrass (Eleocharis). Vallisneria leaves are light green and grow upwards, reaching as long as 7 feet (2.1 m) in some types.

    These plants grow from green runners or stolons, which they send out over the top of the substrate before sending out roots. When they grow out of the water they will have flowering and seed production.

    Placement And Lighting

    Vallisneria is most often grown as a background plant. Another interesting way to use this plant in the aquascape is to grow it on one end of a long planted tank, with the current pushing the leaf tips towards the center of the aquarium.

    Smaller forms with twisted and spiral leaves can be very effective if grown in bunches in the mid-ground of aquariums. An important factor to consider before adding this plant to any aquascape is just how fast it can spread.

    If you’re looking for a low-maintenance aquascape that doesn’t need any trimming, Vallisneria might not be the plant for you. These plants have a habit of sending runners out and popping up all over the place.

    It is one of the best aquatic plants for really tall tanks, however, and jungle vals, in particular, are one of the few good options available. If you like the idea of a densely planted aquarium, this one is for you.

    Vallisneria plants don’t need especially strong planted tank lighting. They will grow best under moderate to high lighting.

    Corkscrew Vallisneria in particular tends to prefer brighter light than other forms. Although they can be grown under the same moderate lighting, stronger light will encourage better leaf color and twisting in this form.

    What Are Good Tank Mates?

    The leaves of Vallisneria spiralis and the other vals are hard and difficult to digest. This makes them pretty unattractive to hungry herbivorous fish.

    This is great news because it means they are one of the few plants that can be kept with plant-eaters.

    Good Tank Mates

    Guppy Fish

    Vals make great tank mates for most tropical and cool water freshwater fish, including African cichlids, which is great because these fish can be pretty destructive when kept with many other aquarium plants. Some other great options include:

    Fish Species To Avoid

    Although goldfish are known to feed on this plant, vals are fast-growing and can probably keep up with the demand. This is still a plant that should be used with caution in goldfish tanks though. Avoid fish that prefer lower pH like:

    Feeding and Fertilization

    Vallisneria plants are root feeders which means they gain almost all the nutrients they need to live and grow from the substrate. Vals are not particularly heavy feeders and do well with just the excess nutrients from fish waste and food in the system.

    For improved plant growth, however, using root tabs as an aquarium fertilizer is advised, especially if you are growing your vals in an inert material like aquarium sand or gravel. They also do better with an iron-rich fertilizer.

    How Much And How Often To Feed

    Seachem Flourish or Tropical Tabs root tabs are a great, long-lasting source of nutrition for your plants that only need to be replaced after 3 or 4 months in most situations.

    These dry tablets should be spaced at a distance of 4 to 6 inches (10 to 15 cm) from each other for the evenest spread, but you can also place them near the root zones of each plant.

    CO2 Injection

    Vals don’t need added carbon dioxide injection for good plant growth in the aquarium but they will definitely look and grow better in a high-tech setup. If you do run CO2 in your tank, just make sure to keep your levels to 30 ppm or less for the safety of your livestock.

    It is best to have the system switch off at the same time as your lights since your Vallisnerias won’t be able to use the CO2 in the absence of light.

    Types

    There are a few different species of Vallisneria available in the aquarium hobby, but telling them apart to a species level can be very tricky. This is mostly because the plants can grow in different forms depending on the water conditions they are in.

    • Vallisneria americana is a common species in the hobby, that tends to be larger and have straighter leaves.
    • Vallisneria spiralis is a great species for small to medium size aquariums because it usually grows to about 20 inches (50 cm) or so in height.
    • Vallisneria nana is an Australian species that grows slightly less vigorously than the others. It is popular for its very narrow leaves, which give it the appearance of a taller hairgrass.
    • Jungle Val, also known as ‘Gigantea’, is actually a form of V. americana and is known for its extra-long leaves that can grow to over an inch (2.5 cm) across. This is a great plant for aquarists with large, tall aquariums.

    Care

    Vallisneria spiralis and the other vals are very easy aquatic plants to care for if they are planted in a suitable environment. In fact, happy vals grow shoots and spread so fast that they can really keep the aquarist busy, especially if they are trying to keep it in just one part of the aquarium.

    One important piece of equipment that you’re going to want to invest in is a decent pair of aquascaping scissors for trimming and removing unwanted stolons from the plant. Although you can get by with just one pair, a straight set is most useful for cutting the runners while a curved pair will work best for trimming the leaf blades.

    Fortunately, these scissors can be picked up pretty cheap and often come as part of neat aquascaping combo kits. When it comes to Vallisneria, they are undemanding in care, but can be demanding for maintenance due to their growth.

    Planted Tank Parameters

    Vallisneria is a pretty easy-going plant that does well in a variety of parameters. They do prefer harder alkaline water and can even survive in slightly brackish conditions. A GH of 4 to 18 and a pH of 6.5 to 8.5 is ideal. In terms of water temperature, anything between 59 and 86°F (15 to 30°C) is acceptable. Due to their wide range, they do not need an aquarium heater. You only need one if you have tropical fish like a Betta Fish.

    Water Quality

    Vallisneria is not a plant that is particularly sensitive to water quality. Nevertheless, the aquarist should always strive to maintain a healthy aquatic environment by performing regular partial water changes and routine aquarium maintenance.

    Filtration

    You do not need any particular type of filter to successfully grow Vallisneria in your aquarium. Power filters that create good water movement are a good choice, however, because these aquatic plants do well in a bit of current.

    Whichever type of filter you choose, a good rule of thumb is to select a model that can process the total volume of your aquarium 4 to 6 times every hour.

    Flow

    Depending on the species, Vallisneria can grow in anything from still water to surprisingly strong-flowing rivers. This makes them adaptable to just about any flow conditions that you might have.

    Vallisneria looks great with a bit of movement and a tall Jungle Val with its leaves all bent over in the same direction at the top of the tank can make for a very attractive and interesting display. You can distribute flow really well with the use of a Lily Pipe. This will give the plant more natural movement in the planted aquarium.

    Aquarium Maintenance

    Aquarium maintenance is a crucial side of keeping a healthy planted aquarium. Apart from performing your regular water change, you should also keep your substrate vacuumed and your glass clean of algae.

    A common mistake that beginners make is to clean out their filters or replace the filter media cartridges too often. While it may seem like a great idea to keep your filter sponge squeaky clean, the fact is that your filter is home to vast numbers of pretty sensitive bacteria.

    These bacteria are absolutely vital for converting harmful chemicals in the water into safe ones. For this reason, rinse out your filter media rather than replacing it when it becomes clogged up.

    Use the old water from a water change to rinse the sponge because chemicals in tap water can kill the bacteria.

    Testing Water Conditions

    The best way to know if you have a healthy colony of beneficial bacteria in your filter and if you’re performing frequent and big enough water changes, is to test your water regularly with test kits.

    Keep a close eye on your levels of ammonia and nitrites in particular because these are the most dangerous for your fish and animals.

    Apart from these biological parameters, your test kit should be used to measure your parameters before stocking new plants or fish. Test kits are inexpensive but a very valuable addition to your aquarium equipment.

    How To Set Up Your Aquarium Tank

    Vallisneria is a large aquarium plant that grows from a well-developed root system. Use a sandy substrate of 3 or 4 inches (7.5 to 10 cm) deep. Plain, washed gravel or aquarium sand works well, or you can use special enriched aquarium soils for improved growth.

    Vals look amazing when they grow tall and sweep over the surface of the tank, but they will shade out any other plants growing below, and leaves that grow out of the water and dry out die. For this reason, Vallisneria (especially Jungle Val) is best grown in tall tanks.

    Although the smaller types like spiralis and tortifolia can be grown in smaller tanks, 15 gallons (57 L) or so is probably the bottom limit in terms of tank size. Any smaller and the leaves are likely to grow too long and the plants can easily take over the floor space.

    Here is a great video by TheGreenMachine on how to prep Vallisneria for planting.

    How To Propagate

    Vallisneria is such an easy plant to propagate that it tends to propagate itself without any help at all!

    Vallisneria sends out long stolons that grow new plantlets, before continuing their journey across the top of the substrate and repeating the process. You can let nature take its course or cut the stolons and replant the daughter plants where you like.

    Vals grow roots fast, and if you have a capped substrate, or a dirted tank, pulling the plantlets out can get pretty messy. For this reason, you should time it to pull them out once they have a few good roots, but before they grow too large.

    Health And Disease

    Signs Of Health

    Healthy Vallisneria has a bright green color and leaves that are firm but flexible. They will produce fast-growing runners and a strong root system.

    Signs Of Ill Health

    Vallisneria leaves that are yellow, brown, or transparent are in poor health.

    Common Health Issues And Treatment

    One common problem that first-time Vallisneria growers have is planting them too deep. Covering the crown of the plant with soil or gravel will result in rotting and melting. The best way to solve this problem is to gently lift the plant up until its crown is exposed and allow it time to recover.

    If your light and nutrients are out of balance, hair algae can grow from the leaves of your Vallisneria plant. Although you will have to address the cause of the algae problem, you can trim off the affected leaves with your aquascaping scissors.

    Apart from the usual melt that many aquatic plants go through when first adjusting to the new water parameters in your aquarium, trimming can also cause this common problem.

    There is always a chance that trimmed leaves will die back, but your best chance of avoiding this is to use a sharp pair of scissors. Dull blades tend to tear, rather than slice, and this causes significant damage that the plants may not be able to repair.

    Plant Pests

    Sometimes when you bring a new Vallisneria home, you get more than you bargained for. Aquatic invertebrates like worms and aquarium snails can be very common in the facilities where the plants are grown and will often hide amongst the leaves of your plant, before making themselves at home in your tank.

    Inspect new live plants carefully and remove any eggs or invertebrates that you find before planting them in your tank.

    Reality of Keeping Vallisneria

    Here’s what life with val actually looks like: fast growth is the defining characteristic of this plant, and it shapes everything about the maintenance schedule. In an established tank with decent lighting and a nutritious substrate, val can push out a new runner every few days. Each runner produces a daughter plant that anchors itself and starts the cycle again. Within a few months you’ll have a dense wall of green across the entire background, which looks spectacular but also means monthly trimming sessions to keep it from overrunning smaller plants.

    The leaves themselves billow and sway in current, which creates a very natural, river-like movement in the tank. Fish genuinely use the cover. Livebearers and shy tetras will retreat into the val wall when stressed. It functions as a natural hiding space without taking up any of the foreground or midground.

    One practical note from experience: Jungle Val in a 75-gallon (284 L) or larger tank with moderate light and root tabs will run along the entire substrate in six months. That’s not an exaggeration. Keep a pair of sharp aquascaping scissors in the stand and expect to spend five to ten minutes every week managing it.

    Should You Get Vallisneria?

    Good fit if:

    • You have a tank 30 gallons (114 L) or larger and want fast background coverage
    • You keep African cichlids or other plant-destroying fish that won’t touch val
    • You want a low-tech plant that doesn’t need CO2 or special substrates
    • You prefer harder, alkaline water conditions (pH 7.0 to 8.5)
    • You want a plant that actively helps control nitrates

    Avoid if:

    • Your tank is under 20 gallons (76 L), val will take over fast
    • You run soft, acidic water below pH 6.5, it won’t thrive
    • You want a low-maintenance, no-trim planted tank, this isn’t that plant
    • You keep silver dollars, Buenos Aires tetras, or other dedicated plant-eaters

    Where To Buy

    Vals are very common plants in the freshwater aquarium trade and are usually very affordable. You should have no problem picking up a few plants at your local fishkeeping shop or pet store. For reliably labeled, healthy specimens, I recommend ordering from a trusted online source.

    My top picks for purchasing Vallisneria online:

    • BucePlant: My go-to source for aquarium plants online. Great selection of tissue cultures, healthy specimens, and reliable shipping.

    FAQS

    Are they easy to grow?

    Vallisneria is a very easy freshwater plant to grow which is why it is so popular with both beginners and more advanced growers. Vallisneria can actually be too easy to grow sometimes, and it will keep you quite busy to keep it from taking over.

    Does it need fertilizer?

    Vallisneria is a root feeder that picks up most of its nutrients from the substrate. In a fish tank with decent fish load, it will often grow fine without additional fertilization. If you’re growing in inert sand or gravel, root tabs every 3 to 4 months will noticeably improve growth rate and leaf color.

    Does it need CO2?

    Vallisneria spiralis, like the other Vallisneria species, does not need CO2 to grow well but it will certainly be appreciated by these aquarium plants and improve their rate of growth.

    How do I grow it in my aquarium?

    To grow Vallisneria, simply set the plant’s roots in the substrate with the crown exposed above the surface. A 3-inch (7.5 cm) layer of sand, gravel, or aquarium soil is recommended. Vallisneria is a fast-growing plant once it becomes established in the aquarium. The plants might go through a period of melt that could last a few days or weeks before bouncing back and starting to grow at their usual speed.

    Why are my Vallisneria leaves yellowing?

    Yellowing leaves on val almost always point to one of three things: iron deficiency, water that is too soft and acidic, or insufficient light. Try adding an iron supplement, check your pH (target 7.0 to 8.0 for best results), and make sure the plant is getting at least moderate lighting for several hours a day.

    Closing Thoughts

    Vallisneria is a really fun plant to grow because of its growth rate and ease of propagation. It’s a great-looking plant that greens up the environment really quickly, creating an underwater jungle that your fish and animals will thrive in.

    If you’re looking for a tall, fast-growing background plant, look no further. Got any questions? Leave a comment below and join the conversation!


    🌿 Want to learn more? This article is part of our complete Planted Tank & Aquascaping Guide — your ultimate resource for aquarium plants, aquascaping styles, substrates, and more.

  • Anacharis Care – A Complete Guide

    Anacharis Care – A Complete Guide

    Anacharis is one of the plants I recommend to beginners more than almost anything else, and I keep it in my own tanks as well. It grows fast, helps control nitrates, provides cover for fry and shy fish, and asks for very little in return. I’ve grown it floating and planted, and it thrives both ways. It’s genuinely one of the most versatile aquarium plants available.

    Anacharis (Egeria densa) is a fast-growing plant that grows easily in medium to large home aquariums as well as outdoor ponds. These lush and tall aquatic plants do well in a range of water parameters, light strengths, and temperatures, making them an ideal choice for beginners who are new to the hobby.

    Read this article to learn everything you need to know about growing, propagating, and caring for the Anacharis plant in your freshwater aquarium.

    Expert Take (Mark Valderrama, AquariumStoreDepot)

    Anacharis is the plant I tell every single beginner to start with. It’s cheap, it’s fast, it helps cycle tanks, and it actually shows you whether your water conditions are healthy. Happy anacharis is dark green and bushy. Struggling anacharis goes pale, sparse, and leggy. It’s a built-in water quality indicator you can actually see.

    The one thing I see beginners mess up: they buy a bundle from a local shop, it arrives stressed and sparse, they plant it, it melts, and they conclude the plant doesn’t work. Float it first. Let it acclimate for a week or two floating at the surface, then plant it once you see new growth. That step alone prevents most of the failure I see with this plant.

    ASD Difficulty Rating: 1 out of 5

    Among the easiest aquarium plants available. Thrives floating or planted, with or without CO2. Excellent first plant for any beginner.

    What People Get Wrong About Anacharis

    The biggest mistake is treating anacharis like a tropical plant that needs warm water. It doesn’t. This plant actually prefers temperatures of 50 to 77°F (10 to 25°C) and grows most vigorously in cooler water. Put it in a tropical tank running 80°F (27°C) and it will survive but grow more slowly and look less dense. It’s not a great match for discus or other high-temperature setups.

    The second common error is buying low-quality local shop specimens without inspecting them. Anacharis at most pet stores gets treated like feeder goldfish: it sits in dim, crowded tanks, gets picked apart, and is often stressed and unhealthy before you even bring it home. Buying online from a quality plant retailer almost always gives you a better starting specimen. If you do buy locally, look for dark green, bushy stems with tight leaf spacing. Pale, sparse stems mean the plant has been in poor light for too long.

    Hard Rule

    Never plant anacharis in high-flow areas of the tank. This plant is adapted to still and slow-moving water. Strong current damages the fragile stems, strips leaves, and clogs your filter intake with debris within days. Place it in the low-flow zone and direct your filter output toward the surface or away from the planting area.

    Species Overview

    Scientific NameEgeria densa, Elodea densa
    Common NamesAnacharis, Elodea, Giant Elodea, Brazilian Elodea, Brazilian Water Weed, Large-flowered Waterweed, Pondweed
    FamilyHydrocharitaceae
    OriginSouth America: Brazil, Uruguay, Argentina. Introduced widely.
    Skill LevelEasy
    LightingModerate to High, 100 to 250 PAR (Umols)
    Tank PlacementBackground or Floating
    Flow RateLow
    Temperature Range50 to 77°F (10 to 25°C)
    HeightTo over 6 feet (1.8 m)
    pH Range7.0 to 8.0
    PropagationCuttings
    Growth RateFast
    Feed TypeColumn Feeder
    CO2 RequirementNo

    Origins And Habitat

    The Anacharis plant, Egeria densa, is a South American species that naturally grows wild in Brazil, Uruguay, and Argentina1. It has been spread to many countries around the world, including the United States, Mexico, Chile, parts of East Africa, Europe, Japan, Australia, and New Zealand.

    Egeria densa grows in slow-moving or still water in lakes, ponds, and rivers. It is a fully aquatic plant that can be found in pretty deep water, especially if it has good clarity.

    What Do They Look Like?

    What Does Anacharis Look Like

    Anacharis is a tall aquatic stem plant that can reach over 6 feet (1.8 m) tall in nature. It can grow both from the substrate or as a floating plant.

    The Anacharis plant consists of long, upright sturdy green stems, with narrow leaves arranged in whorls. Both the stems and leaves of this aquarium plant have green coloration.

    Anacharis plants grown in ideal conditions and parameters will be dark green, while those that aren’t quite as happy tend to be lighter, with bright green leaves.

    Each leaf measures about an inch (2.5 cm) in length and about 1/8th of an inch (3 mm) across. The leaf blades are very finely toothed along their edges. Anacharis stems are pretty fragile and typically about 1/8th of an inch (3 mm) in diameter.

    The Anacharis plant typically has two different types of roots. Both kinds of roots have a white coloration.

    Anacharis plants have roots that grow from the bottoms of the stem and into the substrate, as well as longer roots that grow into the water from along the stem. The longer roots that grow from the stem are used for absorbing nutrients from the water column.

    Anacharis Care Guide

    The Anacharis plant gets pretty tall and is best suited as a background plant in the aquarium. Another effective way to position taller plants is to start them on one end of the aquascape, using shorter and shorter plants towards the middle.

    Alternatively, you can simply float this plant in the aquarium. This is a great option if you aren’t too worried about aquascaping and rather wish to provide hiding spaces in a breeding tank.

    Whatever your use, bear in mind that Anacharis has a very fast growth rate, and can grow very tall. This makes it a good plant for a larger size tank.

    Anacharis grows best in moderate to strong light. Aim for a PAR rate of about 100 to 150 for the best growth rate.

    Plants grown under this light will have a dark green color and a shorter growth form, with more branches from the stem. In low light, these plants tend to grow tall and sparse with light green leaves that are widely spaced along the stem.

    What Are Good Tank Mates?

    Anacharis has some great benefits for the fish in your aquarium. This plant increases the available oxygen content of the environment when growing well in good tank conditions. It also provides dense shelter for fish at all levels of the aquarium.

    Small fry and inverts like shrimps can find great hiding places within the dense stems and leaves of Anacharis to stay safe from predators.

    Good Tank Mates

    Anacharis is an ideal tank mate for most cool and tropical freshwater fish. Ideally, fish species that enjoy the same water parameters and have the same tank requirements should be selected.

    Livestock that prefer harder, slightly alkaline water below about 77°F (25°C) should be kept with this plant. A couple of great options include:

    Fish Species To Avoid

    Plant-eating fish will feed on the Anacharis plant so it is best to avoid fish like goldfish and cichlids. If, however, you don’t mind the plants taking some damage and want to provide your fish with another natural food source, this fast-growing plant is a viable option.

    It can be a bit of a balancing act to grow enough of this plant depending on how heavily stocked your aquarium is though.

    Feeding And Fertilization

    Anacharis is primarily a column feeder, although they do also extract some nutrients from the substrate. This makes them great plants for fish tanks because they act as water purifiers by helping to soak up excess nutrients in the aquarium from fish waste.

    In a well-stocked aquarium, Anacharis will get most or all of the nutrients it needs in this way, but in a plant-only aquarium, or if growing this plant under strong light and with added CO2, fertilizing with a proper aquarium fertilizer is recommended. If you are looking for a great all-in-one fertilizer, check out APT Complete.

    Editor’s Choice!
    APT Complete

    Editor’s Choice

    Made by an aquascaper for aquascapers. This is the best all around aquarium plant fertilizer on the market. Marco and micronutrients in one bottle!

    Use Coupon Code ASDComplete for 10% off your order!

    Click For Best Price Buy On Amazon

    How Much And How Often To Feed Them

    If you are growing Anacharis under strong lighting and with added CO2, a weekly dose (after your regular water change) of a balanced liquid fertilizer will be more than sufficient for this plant. Follow the instructions on the specific product you are dosing for best results.

    CO2 Injection

    Many aquarists are able to grow Anacharis without CO2 injection in the home aquarium, so if you have a low-tech setup, this is still a plant you can grow.

    Anacharis will definitely appreciate injected CO2 though and will have a faster growth rate, with darker green leaves and denser stem growth under such conditions. When considering whether to start using CO2 in your planted aquarium, remember this rule:

    Aquatic plants have 3 important requirements for healthy growth:

    • Carbon Dioxide
    • Light
    • Nutrients

    It is important to provide all three in balance. This means that if you provide a lot of light for example, without providing nutrients and CO2, your plants will not be able to use that light for growth, and the imbalance will probably result in excessive algae growth or some other issues. If you are looking for a quality CO2 system, CO2 Art is the best in the business.

    Best Value
    CO2 Art Pro-Elite

    Best Value

    A budget friendly version of the SE series. This has the quality of CO2 art with a great price. Highly recommended!

    Click For Best Price

    How Much CO2 Do You Need?

    Any increase in available CO2 will benefit your Anacharis plant in a well-balanced system. CO2 in high concentrations can be deadly to the fish and other livestock in your aquarium, however, so keep your levels below 30 ppm.

    Since plants can only use carbon dioxide during the day, set your CO2 system on a timer that shuts off at the same time as your lights.

    Having your CO2 injection system start up about 2 hours before the lights come on will give the CO2 time to build up to optimal levels before the lights switch on again.

    Care and Instructions

    Anacharis is an easy aquarium plant to care for. Trimming and pruning the Anacharis plant might keep you pretty busy if you are growing it in a small tank, however. If you want a quick video, here is a good one from The PlantGuy. I’ll go into more detail below:

    Let’s take a closer look at some of the keys to Anacharis care:

    Planted Aquarium Parameters

    The Anacharis plant is best suited for medium to large aquariums because it will quickly outgrow nano tanks. A 15-gallon (57 L) tank is probably about the minimum size if you want to plant Anacharis.

    These plants grow best in cooler water tanks with fairly hard water, although they can be grown in tropical aquariums. A temperature of between 50 and 77°F (10 to 25°C) is recommended for growing this plant in the home aquarium, although they are able to overwinter in lower temperatures in outdoor ponds.

    Water Quality

    Maintaining good water quality and healthy water conditions is the most important key to success in keeping all aquarium plants and animals.

    A good filter is vital for healthy water conditions but you will also need to roll up your sleeves and perform partial water changes on a regular basis.

    Provided your aquarium is not overstocked, a weekly water change of about 25% is usually a good routine to have. The frequency and volume of your changes are going to vary though, depending on your tank size, filter capacity, and livestock.

    Filtration

    Providing good filtration is key to maintaining safe and healthy aquarium water and providing good care to your plants and animals. Good Anacharis care doesn’t rely on any specific type of filter though.

    One important consideration with a fast-growing and somewhat fragile species like Anacharis is that it can clog filters. A good way to prevent this is to use a filter with a pre-filter sponge over its intake that keeps larger particles from being sucked in.

    If you do find your filter media becoming clogged with stems and leaves, be sure to use your tank water to rinse out the sponges. Using regular tap water can kill off the beneficial bacteria in the sponge, resulting in a dangerous water condition.

    Flow

    The Anacharis plant is more adapted to stillwater and gently flowing river systems without strong currents. It is best to grow these plants in aquariums with lower flow rates or position the plant in an area of the tank without strong flow. Some of the best ways to protect these plants are:

    • Grow them in a position far from your filter’s outflow
    • Direct your filter’s outflow upwards towards the water surface
    • Use a piece of driftwood or another hardscape feature in front of the outflow of the filter to break up the current and shelter the plant
    • Use a filter that is an appropriate strength for the volume of your aquarium

    Aquarium Maintenance

    Apart from performing regular water changes in your aquarium, take care to keep the surface of the substrate clean by removing uneaten food, fish waste, and other substances with your gravel vacuum.

    You will also need to clean the glass of your aquarium from time to time as algae develop. Use your algae scraper for this task just before a water change and the loosened algae can then be siphoned out of the tank.

    Testing Water Conditions

    Testing your water conditions is the best way to know about what’s going on in your aquarium to a finer level. Even though the water in your tank may look crystal clear, the levels of ammonia and nitrites should be monitored regularly, especially if you keep fish.

    Use your liquid test kit to monitor:

    Another important water parameter to keep an eye on is water temperature. Use a thermometer to confirm that your heater is maintaining your aquarium at the right temperature.

    How To Set Up Your Aquarium Tank

    Anacharis is a pretty easy-going plant that doesn’t require a whole lot of extra care and preparation before being added to the tank. To highlight this point, this plant can be grown in a bare tank by simply floating it in the aquarium.

    If you prefer to grow this plant rooted, you will first need to lay down a layer of a substrate of your choice. If Anacharis is the only plant you’re going to grow in the tank, aquarium soil will not be needed and you can use sand or gravel instead.

    Whichever type of substrate you choose to use, a layer of about 2 inches (5 cm) deep will be ideal for the growth of healthy roots.

    How To Propagate

    Anacharis is one of the easiest aquarium plants for beginners to propagate in the home aquarium. Simply take stem cuttings from a healthy, mature specimen and plant them in the substrate.

    4-inch (10 cm) long cuttings are a good size for propagating new plants. Always take care to plant Anacharis cuttings right side up though.

    A method that can be very effective is to float the cuttings in the aquarium until they have developed a root system. Then anchor them at the bottom with a weight, and without pushing them into the substrate.

    Although this method does take a little more patience, it causes the Anacharis plant to develop roots and send them into the substrate by itself. The benefit of this is that the plants don’t melt in the substrate while rooting.

    Health And Disease

    Anacharis plants are not usually prone to health issues, but there are a few things to look out for. Let’s take a closer look at health issues in Anacharis:

    Signs Of Health

    A healthy looking plant has a dark green coloration with plenty of leaves whorled around each stem.

    Signs Of Ill Health

    Anacharis that has been grown in unfavorable conditions will usually be tall and thin, with weak stems and few leaves growing widely spaced along the stems.

    Common Health Issues And Treatment

    Melt is a common problem with many new aquarium plants. In the case of Anacharis, melting plants become very soft and are easily sucked up by your filter.

    It is best to remove melting Anacharis stems before it gets to this stage. Fortunately, these plants typically bounce back quickly.

    Although the Anacharis plant is great for suppressing blue-green algae in the tank water, hair algae on the stems and leaves can become a problem in aquariums that have lighting and nutrient levels that are out of balance.

    The best way to stop the growth of hair algae is to reduce the lighting period. Lowering the strength of the lighting, and using CO2 can also be helpful.

    Plant Pests

    Pests like snails (such as apple snails) and worms can often find their way into your aquarium by hiding in the roots, stems, and leaves of new plants. To reduce the risk of introducing these pests, rinse your plants off carefully before adding them to your tank.

    A 1-minute or less dip in a very mild bleach solution of 1 part bleach to 20 parts water can also help by killing off these organisms. If you do dip the plants in bleach, just be sure to rinse them off carefully with dechlorinated water before adding them to your tank.

    Reality of Keeping Anacharis

    Anacharis is one of those plants that looks great when it’s happy and tells you clearly when it’s not. Happy anacharis in a well-lit, properly stocked tank is bushy, dark green, and grows visibly each week. It produces oxygen bubbles during strong light periods (called pearling), which is genuinely impressive to watch. The nitrate absorption is real: in my tanks with moderate fish loads, anacharis noticeably slows nitrate buildup between water changes.

    The maintenance reality is mostly about managing growth and preventing filter clogs. This plant grows fast. In a 30-gallon (114 L) tank with moderate light, expect to trim it every two to three weeks. Trimmings float to the surface, get sucked toward filter intakes, and create a mess if you don’t remove them promptly. Keep a net handy during trimming sessions.

    Temperature matters more with anacharis than with most beginner plants. In my warm tropical setups at 80°F (27°C), it survives but grows leggy and pale compared to tanks running 72 to 75°F (22 to 24°C). If your tank is running warm for discus or rams, choose a different background plant.

    Should You Get Anacharis?

    Good fit if:

    • You’re a beginner who wants a foolproof, fast-growing plant
    • You keep cool to moderate-temperature fish: goldfish, tetras, rasboras, corydoras
    • You want a plant that helps control nitrates between water changes
    • You’re setting up a breeding tank and need floating plant cover fast
    • You don’t want to invest in CO2 or specialized substrates

    Avoid if:

    • Your tank runs consistently above 78°F (26°C), growth suffers at tropical temperatures
    • You keep goldfish or large cichlids that eat plants, they’ll devour it
    • You have strong flow from your filter, the fragile stems break apart
    • You want a compact plant that stays put, anacharis grows fast and needs regular management

    Where To Buy

    Anacharis plants are common and popular. They are usually very affordable and usually sold in bundles tied together with rubber bands. For the best specimens, ordering online gives you a significant quality advantage over local shop stock.

    Recommended sources for Anacharis:

    • BucePlant: My go-to source for aquarium plants online. Great selection of tissue cultures, healthy specimens, and reliable shipping.

    FAQS

    Do they need CO2?

    Anacharis can be grown in low-tech aquariums without CO2. If you do have a CO2 injection system, don’t worry, you can still grow Egeria densa. CO2 will improve growth rate and color but is not required.

    Is this the same as hornwort?

    Although the two plants look pretty similar to one another, Anacharis (Egeria densa) is a different species to Hornwort (Ceratophyllum demersum). The two plants do have very similar care requirements though.

    Do goldfish eat them?

    Goldfish love Anacharis and will happily munch on this plant. This is great for the fish but not so great for your carefully planned aquascape, so think carefully before stocking the two together.

    How fast do they grow?

    Anacharis grows fast. In the right conditions, these plants grow like a weed, quite easily growing over a foot (30 cm) a month. Of course, plants grown in poor conditions or outside of their preferred parameters might not grow at all.

    Is Anacharis good for ponds?

    Anacharis is a great plant for ponds. Ponds are a much less controlled environment than aquariums, however, so be careful to avoid letting this plant get into waterways outside of its natural range where they can become invasive.

    Closing Thoughts

    Anacharis is a great plant for beginners looking for a tall, fast-growing species that will produce plenty of beautiful green stems in their aquarium. Just remember that these plants do need at least moderate lighting and do not enjoy a very high water temperature to grow at their best.

    Have you had experience with Anacharis? If so, leave a comment below, share, and join the conversation. Thanks for reading and see you next time!

  • Java Fern Care – A Complete Guide

    Java Fern Care – A Complete Guide

    Java fern is one of the plants I recommend to every single beginner, and it’s been in my tanks on and off for years. It thrives in low-light conditions, doesn’t need CO2, and grows attached to rocks or driftwood rather than planted in substrate, which makes it incredibly versatile. If you’ve struggled with plants before, java fern is the one that will restore your confidence.

    If you’re new to the world of planted tanks and looking for an easy plant to get started, this one is for you. The Java Fern, Microsorum pteropus, is a hardy plant that grows slowly and needs very little maintenance. Java Fern care can be a snap yet it is interesting enough to be valued in professional aquascapes.

    This is one of the most popular aquarium plants for freshwater aquariums because it is so easy and fun to grow. Read on to learn everything you need to know about caring for and growing the Java Fern.

    Expert Take (Mark Valderrama, AquariumStoreDepot)

    Java fern is the most forgiving plant in the hobby. I’ve seen it survive conditions that would kill most other plants: dim lighting, neglect, high bioloads, even cichlid tanks where everything else gets shredded. The only way most people actually fail with it is by burying the rhizome in the substrate. That single mistake causes it to rot and melt within a week or two, and beginners conclude the plant is difficult. It isn’t. Attach it to hardscape and leave it alone.

    One thing I appreciate that most care articles don’t mention: java fern actually looks better as it ages. A well-established, multi-year plant on a piece of driftwood develops a dense, layered look that young plants can’t replicate. It gets better with time, not worse.

    ASD Difficulty Rating: 1 out of 5

    The easiest aquarium plant for beginners, full stop. Works in low light, no CO2, no special substrate, and tolerates most fish including goldfish and cichlids.

    What People Get Wrong About Java Fern

    The number one mistake is burying the rhizome. The rhizome is the thick green horizontal stem that the leaves and roots grow from. Bury it in sand or gravel and it rots. Every time. This is the single most common reason java ferns fail for beginners, and it is completely avoidable. The rhizome must stay exposed and attached to a surface, not buried underground.

    The second misconception is about the black spots on the undersides of the leaves. Many beginners panic when they see dark spots appearing on the leaf undersides and conclude the plant is sick or diseased. Those spots are sori: reproductive structures that produce spores. They are a sign of a healthy, mature plant. You want to see them.

    The third error is using too much light. Java fern is a shade plant from tropical rainforests. Too much light causes brown spots and leaf burn. If you see brown patches spreading across the leaves and your light is strong, move the plant to a shadier position in the tank.

    Hard Rule

    Never bury the java fern rhizome in substrate. The rhizome must stay fully exposed and attached to hardscape. Anchor it to driftwood or rock with thread, fishing line, or gel superglue until the roots take hold. Once buried, the rhizome rots and the plant dies. This is not negotiable.

    A Brief Overview Of Java Fern

    Scientific NameMicrosorum pteropus / Leptochilus pteropus
    Common NamesJava Fern
    FamilyPolypodiaceae
    OriginWidely distributed in Southeast Asia
    Skill LevelEasy
    LightingLow to Moderate, 40 to 125 PAR (Umols)
    Tank PlacementMidground and Background
    Flow RateLow to Moderate
    Temperature Range64 to 82°F (18 to 28°C)
    Height10 to 12 inches (25 to 30 cm)
    pH Range6.0 to 8.0
    PropagationDivision / Adventitious Plantlets
    Growth RateSlow
    Feed TypeColumn Feeder
    CO2 RequirementNo

    Origins And Habitat

    Java Ferns are Asian plants from tropical countries like Malaysia, Thailand, India, and China in the Southeast of the continent.

    In nature, the Java Fern is most likely to be found growing on rocks or tree trunks in the forest rather than underwater. It is an amphibious plant though, which means it does just as well submerged as emersed.

    As an aquatic plant, Java Ferns grow well in a wide range of habitats, like fast-flowing mountain streams, lowland marshes, and even some brackish environments.

    What Does Java Fern Look Like?

    What Does Java Fern Look Like

    Java Fern, Microsorum pteropus (picture source), is an all-green plant that can vary quite a lot in shape depending on which variety you have. Java Ferns have dark brown or dark green roots and have leaves that are medium to deep green with a leathery texture and short stalks.

    In the planted tank, Java Ferns that are grown under strong light often develop more dark green foliage than those in dimly lit aquariums. The leaves of this plant usually have a very upright growth form.

    Leaf shapes vary a lot depending on the variety (more on that later in the article), but in the regular Java Fern, the leaves are long and narrow, ending in a sharp point.

    The leaves have interesting dark veins in a very square, regular pattern. They also have interesting little structures on their undersides. These are called sori and they are perfectly normal and healthy reproductive structures that contain spores.

    Java ferns grow from a rhizome which is a stem-like structure that usually grows horizontally. In the Java Fern, the rhizome is a deep green color.

    Placement And Lighting

    Java Fern is an epiphytic plant, which means that, unlike other plants that root themselves in the soil, this amphibious and aquatic plant grows by attaching itself to other plants or objects.

    This means that it should not be planted in the substrate of the aquarium. Instead, you should grow Java Fern attached to the hardscape. Rocks, driftwood, or even ornaments are the best options.

    Java Fern is a fairly large aquarium plant that is best placed in the midground or background of the aquascape. It depends on the size of your tank of course, but full-grown Java Ferns can make an interesting background plant in smaller tanks.

    This plant works great for nature-style aquascapes. It is ideal for Southeast Asian biotopes because that is where these interesting plants can be found in the wild.

    Java fern is a plant of shady tropical rain forests, which means it doesn’t really enjoy long periods of bright sunshine. In fact, growing this plant under too much light can cause burning and damage to the leaves.

    Any low to medium strength aquarium light of 6500k or higher will do fine for the Java Fern. LED or fluorescent lights are the best light sources to use.

    What Are Good Tank Mates For This Plant?

    Fortunately for such a leafy plant, Java Fern foliage contains some chemicals that taste bad for plant-eating fish. This means they are one of the few safe options for keeping with almost all tropical fish.

    Even the usual suspects like goldfish and cichlids that damage most aquatic plants can be kept with Java Ferns, although keeping aggressive fish with any plant species is risky.

    Good Tank Mates

    You can keep just about any freshwater aquarium fish with Java Ferns. Here’s a short list of some great options:

    Java fern also happens to be one of the plants that goldfish will not eat to death.

    Fish Species To Avoid

    Although Java Ferns can be kept with African Cichlids, these plants are not always immune to damage from these aggressive fish. Mature plants are usually just fine but young growth and young plants might still take some damage. Large predator fish and aggressive New World Cichlid Types should also be avoided as their destructive habits can damage and destroy plants.

    Feeding This Fern (Fertilization)

    Java Fern is a slow-growing aquarium plant that is able to thrive in low nutrient conditions. This means that additional feeding is not usually absolutely essential for Java Fern care.

    Of course, all aquatic plants need some nutrients to grow, and this plant is no exception. If you keep fish in your aquarium, the nutrients from fish waste and food will provide most of what the plant needs to grow. If you are using CO2 or dealing with lots of plants, aquarium fertilizing should be considered.

    Feeding can be helpful for increasing the growth rate of the plant, just keep in mind that excess nutrients in the system can quickly turn into an algae problem.

    A quality supplement like Seachem Flourish or APT Complete that has a good variety of micro-nutrients will provide everything that the plant doesn’t get from the fish and fish food. Flourish is good for lightly planted tanks and APT is excellent for an aquascaping setup like a nature scape using Java Fern.

    Editor’s Choice!
    APT Complete

    Editor’s Choice

    Made by an aquascaper for aquascapers. This is the best all around aquarium plant fertilizer on the market. Marco and micronutrients in one bottle!

    Use Coupon Code ASDComplete for 10% off your order!

    Click For Best Price Buy On Amazon

    How Much And How Often To Feed

    The precise dosage you need for your aquarium will vary depending on many factors, including:

    • The size of your tank
    • How many plants you have
    • Whether you keep fish
    • Your light intensity
    • Whether you are injecting CO2

    It is best to follow the instructions of the specific product you use. As an example, Seachem Flourish can be dosed at 1 capful per 60 gallons (227 L) of water, every 5 days or so.

    CO2 Injection

    CO2 injection isn’t really necessary for healthy Java Fern growth. The plants will appreciate added CO2 though, as will any other plants you keep in your aquarium.

    If you want to run CO2 in your tank, you will need to provide at least moderate lighting for the plants to be able to benefit from it. It is very important to regulate the amount of this gas you add to the system.

    Without going into too much detail, the key to success with carbon dioxide injection is to keep the levels below 30 ppm, because above that your livestock will struggle to get enough oxygen from the water.

    Plants can only use CO2 while your lights are on, so this gas should only be injected during your light period. It takes about 2 hours or so for the CO2 levels to rise in the water though so have your system start up about 2 hours before the lights go on. If you are looking for a CO2 system, CO2Art provides excellent regulators and bundles.

    Best Value
    CO2 Art Pro-Elite

    Best Value

    A budget friendly version of the SE series. This has the quality of CO2 art with a great price. Highly recommended!

    Click For Best Price

    Types

    There are many great varieties of Java Fern, each with its own unique look. All of them are easy to care for and have basically the same needs. Let’s take a brief look at some of the most popular types available in the hobby.

    • Windelov Java Fern: This popular variety has a really interesting leaf shape with finely branched leaf tips. On closer inspection, you’ll see that the end of each leaf is split into 3. A group of these planted together creates an interesting dense effect.
    • Trident Java Fern: The leaves of this variety have a really interesting, narrow, and branching form. This creates a more complex but sparse effect in the aquascape.
    • Narrow-leaf Java Fern: As its name suggests, this form has a narrow leaf shape. Another interesting characteristic of Narrow-leaf Java Fern is the tight, upright branching form these plants tend to take.
    • Needle-leaf Java Fern: This highly sought-after form has even thinner leaves than the Narrow-leaf variety. Needle-leaf Java Ferns look amazing when planted in groups in the midground of the aquascape.

    Care

    Java Ferns are very easy aquarium plants to care for. If you’re new to the planted aquarium hobby, this species is a great place to start! Let’s take a look at some of the most important keys to success when growing Java Fern plants.

    Planted Tank Parameters

    One of the great things about these aquatic plants is their adaptability to a wide range of different water parameters. They do prefer soft acidic water but will do just fine in slightly alkaline conditions too.

    They can grow in soft to hard water and carbonate hardness between 2 and 15 dKH. Water temperatures between about 64 and 82°F (18 to 28°C) are best for this popular aquarium plant. They are well adapted for cold water and heated tropical aquariums.

    Water Quality

    Maintaining good water quality is the number one goal of any aquarist. In a healthy environment, your plants and animals have the best chance to grow and thrive. The best ways to maintain good water quality are:

    • Stocking your aquarium correctly
    • Not over-feeding your fish
    • Not using too much fertilizer
    • Adequate filtration
    • Doing regular partial water changes
    • Adding livestock to a cycled aquarium

    Water changes can make all the difference when it comes to maintaining good water quality. As a general rule, the smaller your aquarium is, the more often you should do water changes.

    The volume of water you change will also vary, and that follows the same general rule. This is especially true for aquariums stocked with a lot of fish and animals.

    Filtration

    Filtration isn’t only important for keeping your planted tank looking great. It is also really important for keeping the water in your aquarium safe for your plants and animals.

    Aquarium filters remove solid waste particles, chemical impurities, and convert harmful toxins from fish waste into safe compounds. You can use just about any type of filter in your aquarium with Java Ferns. Power filters, sponge filters, canister filters, or even under-gravel filters will work fine.

    If you don’t know which size filter to buy, a good general rule is to choose a model that can process the total volume of water in your tank 4 to 6 times every hour. For example, if you have a 10-gallon (38 L) aquarium, a filter with a flow rate of 40 to 60 gallons per hour would be ideal.

    Flow

    If you look at the natural environments where Java Ferns live, you’ll find that they occur everywhere from dry land, to partially submerged, to the middle of strongly flowing streams in the height of the rainy season.

    This wide range of tolerances means you can grow Java ferns in just about any flow rate. The narrow and needle-leaf varieties can look very interesting with a bit of water movement.

    Trimming

    Java Ferns are slow-growing plants that really do not need to be trimmed very often. If you want to remove some unhealthy leaves or reduce the size of the plant, this can be done quite easily with your aquascaping scissors.

    The important thing to remember is that these plants can’t be trimmed like grass where part of the leaf can be removed. You’ll need to remove the whole leaf by cutting the stalk close to the rhizome.

    Always use a sharp pair of scissors for pruning and trimming your aquarium plants. Blunt scissors tend to tear more than they cut, and this can cause some damage to the plants that might cause melting or disease.

    Aquarium Maintenance

    Aquarium maintenance is very important for keeping a healthy aquarium that looks great. Let’s take a quick look at a few aquarium maintenance tips to keep your tank in great shape.

    The most important chores are keeping up with your regular water changes and cleaning the glass and the bottom of your tank. You may as well do all these things on the same day so pick a day each week that works for you and make it part of your regular schedule.

    Use a gravel vacuum to siphon water out of your tank and into a bucket. Suck up water from the bottom of your tank to pick up any solid waste that has settled on the substrate. Clean any algae that have grown on the walls of your tank with an algae scraper.

    Always use a water conditioner when adding fresh water to your aquarium after a water change. This will neutralize some of the harmful chemicals found in tap water and make it safe for your livestock.

    You can use the old water that you have taken out to rinse out your filter media. Never use straight tap water for this because the chemicals can harm the good bacteria that live inside your filter sponges.

    Testing Water Conditions

    The best way to know if your aquarium maintenance schedule is sufficient is to test your water regularly. You can do this with liquid test kits from your local pet store. Simply dip the strip into your aquarium water and compare the color changes with the parameter chart.

    You should test the water you are going to use in your tanks before you add any plants or animals to see what your natural parameters are. After that, test the water before each water change to see if you are doing frequent enough maintenance.

    How To Set Up Your Aquarium Tank

    Java Fern in Nature Scape

    The great thing about java fern is that it really doesn’t need much to grow well. In fact, you could drop this plant into a bare glass aquarium and it would grow just fine as long as it gets a little light and some nutrients.

    Although they are slow-growing, Java Ferns get pretty big, producing a number of large leaves. For this reason, it’s best to use a tank size of at least 10 gallons (38 L).

    Make sure you have some hardscape features that you can attach the plants to because this is the best and most attractive way to grow Java Ferns.

    How To Attach These Plants to Aquarium Decor

    Although you can simply let these plants drift around in the tank, most aquarists grow Java Fern attached to a nice piece of driftwood or rock. You can also get creative and attach these plants to an aquarium rock like dragonstone.

    You can attach these plants using quite a few different methods. The best ways are:

    • With rubber bands
    • With cotton thread (thin black or brown thread works great)
    • With fishing line
    • With superglue (gel works the best)
    • By wedging the rhizome into a hole or crack

    Here’s a great video from AquatikGuru that shows how to attach Java Fern using superglue.

    In time, the roots will take hold of the object and you can remove the fishing wire, or whatever it is that you have used to anchor the Java Fern. Remember, however, that the smoother the object, the longer it will take for the plant to get a good grip.

    For those of you looking to attach your Java Fern to aquarium driftwood, here is a good video from Fishaholic. Check it out!

    How To Propagate

    Java Fern is one of the easiest and most satisfying aquarium plants to propagate. It is quite an amazing process to watch in the home aquarium!

    Tiny Java Ferns, or adventitious plantlets as they are correctly known, will develop at the ends of mature leaves. These plantlets will develop their own tiny leaves and come complete with a root system as well. In time, they break off to find a new place to settle, but you can also break them off yourself if you’re a little impatient.

    Just be sure to wait until the Java Fern plantlets have a few leaves and roots first before you remove them from the parent plant.

    An easy way to propagate new plants is to divide the rhizome. The rhizome is the thick, stem-like structure that the leaf stalks and roots grow from. For the best results, always cut a section that has some roots, and preferably, some leaves as well.

    Health And Disease

    Java ferns are usually very trouble-free aquarium plants. They can have a few issues though so let’s take a closer look at some of the warning signs to look out for and how to treat some common problems.

    Signs Of Good Health

    Healthy Java Ferns have a strong root system that grows from a well-developed rhizome. They are very firm plants when healthy, with tough leathery leaves and hard roots.

    The edges of the leaves should be complete, without tears or chunks missing and the leaves should be all green, without any yellow, brown, or clear patches.

    Signs Of Poor Health

    Although producing new plantlets at the leaf tips is normal for this plant, it isn’t always a sign of good health. When Java Ferns are under stress, they make new plantlets, in case the parent plant does not survive.

    If you have a Java plant with discolored leaves with loads of plantlets developing, it could be a sign that the plant is in poor health.

    The good news of course is that you’ll be able to start over with the new plantlets, but you’ll want to figure out what’s causing the stress.

    Common Health Issues And Treatment

    One of the most common health issues that we see with Java Ferns is when people mistakenly bury the rhizome in the substrate. This causes rotting and if this is the case in your tank, go ahead and lift it out of the substrate carefully.

    Remove any dead or dying growth and simply allow the whole plant to drift freely in the tank until you’re ready to attach it to something.

    Melt

    Like other aquatic plants, this species often needs to go through a period of adjustment when first added to your aquarium. The new conditions and water parameters can be quite a shock, so Java Fern melt can be a common issue.

    These are tough and hardy plants though so they will usually pull through just fine. Be sure to remove any dead or dying leaves from your tank before they spoil and affect your water quality.

    Java Ferns that are grown under very bright light can take some damage to the leaves. This often shows up as brown spots or patches.

    Nitrogen Deficiency

    Nitrogen deficiencies in an aquatic plant usually show up as yellowing leaves that start at the tips, spreading towards the base. Affected leaves will also begin to turn translucent in bad cases.

    This isn’t usually a serious problem in Java Ferns but it can happen in tanks that are not properly cycled. A lack of nitrates in the tank can also result in another common problem, blue-green algae growth.

    Algae

    As expected with any slow-growing plant with large leaves, algae can be a bit of an issue, especially if you run your lights for a long time and provide a lot of nutrients. The best fix for any algae problem is always to figure out the cause and try to make some adjustments to the system. Possible solutions include:

    • Decrease your photoperiod (hours of lighting)
    • Decrease your light strength
    • Use less fertilizer
    • Perform more frequent or larger water changes
    • Avoid overfeeding your fish
    • Introduce algae eaters (Otos, Amano shrimps, Nerite snails, etc.)
    • Add a fast-growing new plant (Watersprite, Vallisneria, etc.) to compete with the algae

    Plant Pests

    Often, when you bring a new Java Fern home to plant in your tank, there can be some snail eggs or other pests hiding within the plant that just can’t wait to start their new life in your fish tank. If you wish to prevent that from happening, it’s best to sterilize the plant before you introduce it to your aquarium.

    You can sterilize your Java Fern by dipping it in 20 parts water mixed with one part bleach. Let the plant soak for 2 minutes or less and then rinse it off carefully with dechlorinated water before putting it in your aquarium.

    Sometimes these plants are also available as tissue cultures, which is a really safe bet. These plants are grown in a completely pest-free environment, so you don’t need to bother with chemical or quarantine treatments.

    Reality of Keeping Java Fern

    Java fern is genuinely one of the easiest plants in the hobby, and part of what makes it so good is that it improves with age. A healthy java fern that’s been attached to the same piece of driftwood for two or three years develops a lush, dense look that new plants can’t replicate. The rhizome expands, new leaves multiply, and the whole structure becomes a focal point of the tank rather than just a background element. That’s unusual for aquarium plants. Most beginner plants look best when they’re new and bushy. Java fern looks best after years of neglect.

    The maintenance requirement is genuinely minimal. Once attached and established, you’re looking at occasionally removing old yellowing leaves (cut the leaf stalk near the rhizome, don’t pull) and checking periodically that the rhizome hasn’t been disturbed by fish or cleaning activity. That’s about it. No trimming schedules, no CO2 monitoring, no substrate fertilization. Just light and clean water.

    One real-world note on growth rate: java fern is slow. Don’t expect the tank to fill in within a few weeks. Under low to moderate light without CO2, a new leaf takes two to four weeks to fully develop. That patience is worth it, but set realistic expectations going in.

    Should You Get Java Fern?

    Good fit if:

    • You’re a beginner who wants a genuinely foolproof plant that won’t die on you
    • You have fish that destroy most plants: goldfish, cichlids, silver dollars
    • You want a midground or background plant that works in low light
    • You prefer a low-maintenance setup without CO2 or specialized substrates
    • You’re building a nature scape or Southeast Asian biotope aquarium

    Avoid if:

    • You want fast fill-in coverage, java fern grows slowly
    • You’re running a bright, high-tech setup, it doesn’t need it and can burn in strong light
    • You keep very large, destructive cichlids that physically tear up hardscape

    Where To Buy

    Java Ferns are usually a very easy plant to find because they are easy to propagate and easy to keep. You can usually find Java Fern at most local aquarium stores and online pet stores.

    If you want one of the more interesting varieties or a tissue culture plant, consider purchasing online from a specialty retailer for a better selection. My recommended sources:

    • BucePlant: My go-to source for aquarium plants online. Great selection of tissue cultures, healthy specimens, and reliable shipping.

    FAQS

    Why are my plants dying?

    There are many possible reasons why your Java fern might not be doing as well as it should. The most common reasons are:

    • There is too much, or not enough light
    • The rhizome is planted in the substrate (the most common cause)
    • There are not enough nutrients in the water
    • The water temperature is too high

    How much light do they need?

    Java Ferns are great low-light plants, but they can also be grown under moderate light intensities. Aim for about 60 to 125 PAR of light and provide your plants with a photoperiod of 6 to 10 hours per day.

    Can they grow out of water?

    Java Ferns can grow very well partially submerged or emersed (out of water). The secret to growing them this way is to keep them in a very high humidity environment. In nature, they grow outside of the water in tropical rainforest habitats. This means you’ll want to grow them in something like a paludarium to keep them moist enough outside of the water.

    Do they need fertilizer?

    Java Ferns don’t necessarily need fertilizer if kept in a tank with fish and other livestock. They will, however, grow faster and healthier with access to the nutrients they need in the right concentrations. Applying small doses of a balanced liquid fertilizer like Seachem Flourish can help keep your plants healthy and allow them to grow faster if they have good light and added CO2.

    How do you plant them?

    The secret to growing Java Fern plants is to attach them to driftwood or rocks in your aquarium, rather than planting them in the substrate. These plants grow from a rhizome that should never be covered in sand or gravel. Use super glue, thread, fishing line, or zip ties to attach the rhizome to your hardscape until it has anchored itself with roots. Once it is secure, you can remove the thread or leave it where it is.

    Closing Thoughts

    The Java Fern, Microsorum pteropus, is one of the best beginner species for the planted aquarium. These plants can be grown in just about any freshwater aquarium and are usually very trouble-free.

    Planting Java fern in your aquarium could be the start of a wonderful new side to your aquarium hobby. So what are you waiting for? Order one of these beautiful plants today and get growing!


    🌿 Want to learn more? This article is part of our complete Planted Tank & Aquascaping Guide — your ultimate resource for aquarium plants, aquascaping styles, substrates, and more.

  • Cryptocoryne Wendtii Care – A How To Guide

    Cryptocoryne Wendtii Care – A How To Guide

    Cryptocoryne wendtii is one of the plants I keep coming back to in my planted tanks, and for good reason. it’s tough, beautiful, and works across a wide range of conditions. I’ve grown it in low-tech tanks with no CO2 and in high-tech setups, and it adapts well either way. The varied leaf colors depending on conditions make it one of the more interesting crypts to experiment with.

    Cryptocoryne wendtii is one of the best low-maintenance aquarium plants in the aquarium hobby. But what are proper Cryptocoryne Wendtii Care routines. This blog post is all about keeping them healthy and happy!

    They are a hardy and adaptable species that come in a wide variety of shapes and colors. These crypts do well under a range of lighting and with or without CO2, making them a great choice for both beginners and more advanced aquarists. Read on to learn more about growing and caring for these popular aquatic plants.

    ASD Difficulty Rating: Easy – Beginner Plant

    Cryptocoryne wendtii is a low-light, slow-growing plant that adapts to a wide range of conditions. It can melt when first planted (crypt melt), but recovers and grows back stronger. One of the best beginner plants.

    A Brief Overview

    Scientific Name Cryptocoryne wendtii
    Common Names Wendt’s water trumpet, Wendt’s cryptocoryne, Wendt’s crypt, Sri Lanka Cryptocorynes
    Family Araceae
    Origin Sri Lanka, Asia
    Skill Level Easy
    Lighting low-high, 50-200 PAR (Umols)
    Tank Placement Foreground, Midground & Background
    Flow Rate Low, Moderate
    Temperature Range 68. 82 F
    Height 4 – 14 inches
    pH Range 6.8. 7.2
    Propagation Runners, Division
    Growth Rate Slow, Moderate
    Feed Type Root Feeder
    CO2 Requirement No

    Origins And Habitat

    Cryptocoryne wendtii is an aquatic plant that is native to the northern, western, and central parts of Sri Lanka in Asia. This species has also become established in Florida in the United States. In nature, they grow along shady streams and rivers, either fully submerged or on the banks.

    What Does It Look Like?

    What Does Cryptoryne Wendtii Look Like

    This aquarium plant has an attractive, rosette growth form. They are pretty variable in size and shape depending on location, variety, and lighting.

    The texture of the leaves varies from flattened to undulating margins and there are many different color variations. The leaves can be anything from deep green, through olive to brown. Some varieties even have white, golden yellow, pink, or red hues as well.

    These aquarium plants can grow from 4 inches to over a foot tall. The leaves are often held pretty flat over the substrate or the plants can develop a more upright shape.

    Cryptocoryne wendtii develops a large system of roots but they are not visible above the substrate.

    Placement And Lighting

    Cryptocoryne wendtii looks great in the aquascape, and how you place it will depend on which type you have and the dimensions of your aquarium. In a small tank, this species can take the place of stem plants and be used as a background plant. In a large setup, the smaller green varieties look great in the foreground.

    These crypts look great when planted in groups and some of the more interesting forms such as Cryptocoryne wendtii ‘Gecko’ make a wonderful focal point in the midground.

    They are a popular choice for Dutch-style planted tanks as well as nature aquariums and are especially well suited to tropical Asian and Sri Lanka biotopes.

    Crypt Wendtii is an adaptable aquarium plant that grows well under low light and even high light. LED lights or fluorescent bulbs are both suitable. Just be sure to use a fluorescent bulb of the correct spectrum for healthy plant growth.

    Under stronger light, these aquarium plants will tend to take a more compact growth form and display better color.

    What Are Good Tank Mates?

    Cryptocoryne wendtii can be kept with most peaceful and non-vegetarian freshwater fish species and invertebrates. Just make sure that all the plant and animal species you add to your tank do well in the same parameters before bringing them home.

    Blue Ram Cichlid in Planted Tank

    Good Tank Mates

    Some good tank mates for Cryptocoryne wendtii include:

    Fish Species To Avoid

    Once planted, crypts do not like being uprooted and disturbed so avoid keeping large cichlid types like Oscars that shift the substrate as this may dislodge and damage the plants.

    These aquarium plants have been kept successfully with goldfish. Even though they are considered one of the better plants to keep with these fish, goldfish are notorious for damaging plants.

    Every new crypt owner panics when the leaves melt. That is normal. Crypt melt is not death. It is the plant adjusting. The ones who pull the plant out and throw it away are the ones who fail.

    Feeding (Fertilization)

    Crypts are root feeders, which means they will get most of the nutrients they need from a good-quality aquarium substrate. If you grow them in an inert medium like sand or washed gravel, however, you will need to feed these plants with root tabs.

    How Much And How Often To Feed

    Root tabs are capsules of slow-release aquarium fertilizers that are buried in the substrate at the root zone. Crypts are generally slow-growers that don’t need a huge amount of nutrients and therefore your root tabs will probably last a few months before you need to replace them. It is always best to follow the instructions of the specific product you’re using for best results though.

    Apart from supplying nutrients directly to the roots, these plants will also benefit from liquid water column fertilizers like APT Complete from time to time. A great time to dose these supplements is after your weekly water change.

    Editor’s Choice!


    APT Complete

    Editor’s Choice

    Made by an aquascaper for aquascapers. This is the best all around aquarium plant fertilizer on the market. Marco and micronutrients in one bottle!

    Use Coupon Code ASDComplete for 10% off your order!


    Click For Best Price


    Buy On Amazon

    CO2 Injection

    Co2 injection is not required for growing this hardy plant species. However, if you already run a planted aquarium with CO2, you can grow this plant in the same system and they will definitely benefit from it.

    A useful alternative to CO2 injection that could benefit these aquarium plants is a regular dose of a liquid carbon supplement like Seachem Excel.

    Types

    There are many great varieties of this popular plant with different color variations, leaf size, and texture of the leaves.

    • Cryptocoryne wendtii ‘Green’ – This small variety reaches a very manageable size making it a great choice for smaller tanks. The green leaves often grow outwards, virtually flat on the ground, although the plant may reach about 6 inches tall and wide.
    • Cryptocoryne wendtii ‘Brown’ – This popular form reaches about the same size as ‘green’ but features brown or mottled brown foliage with attractive wavy edges.
    • Cryptocoryne wendtii ‘Pink’- This striking form produces bold pink foliage and makes a very interesting specimen. This type will show better color under good light and with added CO2.
    • Cryptocoryne wendtii ‘Gecko’ – This very attractive form has bright foliage with wavy margins and red-brown markings.
    • Cryptocoryne wendtii ‘Florida Sunset’ – This colorful crypt features highly variable foliage that can be marked in pink, white or golden hues. Grow this form under stronger light to bring out its best colors.

    Care

    This crypt is a low-maintenance plant that is easy to grow and care for. The most important key to success is maintaining a stable environment. Let’s take a brief look at how to achieve this in the planted aquarium.

    Planted Tank Parameters

    This plant is adaptable to quite a wide variety of parameters. Like other crypts, they do very well in hard water, but can also be grown in soft water.

    This species prefers neutral water pH but will grow fine in weakly acidic to alkaline parameters. They can be grown in water temperatures between 68 and 82°F, making them ideal plants for both cool water and tropical freshwater fish tanks.

    Water Quality

    This plant prefers good water quality, with stable parameters. Regular partial water changes are one of the most effective and important ways to maintain good water quality. Source water is also a consideration. Hard water can be problematic for plants like crypt wendtii. If you have have really hard source water, you may want to consider an RO system.

    The frequency and volume of your water changes will vary depending on the size and on how heavily stocked your aquarium is. In lightly stocked aquariums with good filtration, a 15-20% water change every week is recommended. Planted tanks with aquascapes tend to lean on changes of up to 50% due to keep their tanks purposely overdosed with fertilizers.

    Filtration 

    Adequate filtration is another vital part of maintaining good water quality in planted aquariums. Contrary to popular belief, filters not only clean the water of physical particles but are also essential for the process of biological filtration.

    During this process, beneficial bacteria convert harmful chemicals from fish waste and food into less harmful compounds. Take care to keep your bacteria colonies safe by not cleaning your filter media with anything other than tank water and never completely replacing all your filter media at the same time.

    In a planted tank setup, plants like cypts will produce more ammonia then fish due to leaf droppings. It is essential to invest in a high quality filtration unit like a canister filter too keep your aquarium from having algae outbreaks.

    Flow

    Since this plant is most adapted to slow-flowing rivers and streams, they will do best in aquariums with low to moderate flow. In the aquarium setting the aquarist can use hardscape features like rocks, driftwood, or ornaments to break up the water flow if needed.

    Aquarium Maintenance

    Aquarium maintenance is a vital part of the hobby and something all aquarists need to keep up with to keep their tanks looking their best and their plants and animals in great health.

    Testing Water Conditions

    Regular testing of your water conditions is an important part of monitoring the health of your aquarium. Fortunately, this is pretty easy with a liquid or strip test kit

    Use your test kit to keep an eye on values like ammonia, nitrites, and nitrates, as well as pH and hardness. A thermometer is also essential to monitor the performance of your heater.

    How To Set Up Your Aquarium

    These popular aquarium plants are hardy and adaptable, which means they will do well in most freshwater aquarium setups. Depending on the variety, these crypts can even be kept in small aquariums of just a few gallons.

    Keep in mind that the smaller your setup, the more difficult it is to maintain stable water conditions as parameters can shift pretty quickly.

    The key is to provide enough open space and substrate at the bottom of the tank to allow them to develop a strong set of roots. It is best to provide 2-3 inches of aquarium soil, sand, or gravel.

    How To Propagate

    Cryptocoryne wendtii is quite easy to propagate, although they are a fairly slow-growing plant. Healthy, mature specimens will send out runners that can be removed and replanted. Here is a great video from Otter Creek Aquatics that shows how to propagate Cryptocoryne Wendtii.

    Crypts don’t particularly enjoy being moved though so it is best to wait until the plantlets have grown a few leaves and roots before replanting as this gives them the best chance at surviving the move.

    Health And Disease

    Signs Of Good Health

    The foliage of healthy Cryptocoryne wendtii plants will vary in color and texture depending on the variety but a fairly dull color is quite normal. The leaves should be firm in texture and the plant should have a robust and healthy root system.

    Signs Of Poor Health

    Look out for plants that have melting or decaying foliage. In the early stages, this will appear as discolored growth that may become somewhat translucent before beginning to decay.

    Leaves that have holes or look like they have been partially eaten might be suffering from a nutrient deficiency.  

    Common Health Issues And Treatment

    One of the most common problems seen in this plant is the dreaded crypt melt. In reality, this is nothing to be too concerned about and happens after planting many different aquatic plant species and common when a new plant is introduced.

    Melt usually happens when plants are grown in new environments. The conditions in the home aquarium are usually very different from the farms where these plants are grown and they need to go through a period of adjustment in order to adapt to the new environment.

    During this time, crypts often lose leaves. Go ahead and remove any dead or dying leaves before they decay in your aquarium because this can affect water quality.

    If the conditions in your aquarium are suitable, they will recover and you should see new growth being produced. They are pretty slow-growing plants of course, but your patience should be rewarded.

    Plant Pests

    Ramshorn Snail

    Pests like snails and parasites are often accidentally introduced to home aquariums when adding new plants. Quarantining or sterilizing new plants with a very mild solution of bleach is one useful technique to avoid this.

    Dipping new plants in a solution of 1 part bleach to 20 parts water can be very effective, just be sure to limit the exposure to 2 minutes or less and then rinse off the plant thoroughly in clean water treated with a dechlorinator.

    An easier way to avoid introducing pests is to start off with tissue culture specimens that are farmed under special, pest-free lab conditions.

    Where To Buy

    This very popular aquarium plant is not difficult to find at pet stores and online fish stores. Trusted online retailers like Buceplant stock a range of different varieties as well as pest-free tissue culture specimens at great prices.

    Low Tech Plant!


    Cryptocoryne Wendtii

    A great low tech plant for multiple aquascape types and setups. Forgiving and hardy, the Cyrptocoryne Wendtii is a great introduction to rooted plants!


    Buy Tissue Culture


    Buy Potted

    FAQS

    How do you grow them?

    Cryptocoryne wendtii is easily grown by planting the roots into a suitable substrate like aquarium soil, or sand or gravel enriched with fertilizer capsules.

    How fast do they grow?

    These are naturally slow-growing plants, that may grow at a faster rate with good quality lighting and CO2 injection.

    Do they need substrate?

    Crypts grow from a well-developed root structure and should be planted in the substrate. Some aquarists have had good success by growing these plants attached to driftwood although this is not usually recommended.

    Do they need to be planted?

    These cryptocorynes need to be planted in the substrate in order to grow well. Trimming the roots before planting them in the substrate can make the task a lot easier. Use your aquascaping tweezers to push the roots into the substrate and take care to keep the plant’s crown clear and exposed.

    Hard Rule

    Cryptocoryne wendtii will melt when first introduced to a tank – this is normal crypt melt, not plant death. Do not pull it out. Leave the roots in place, trim the melted leaves, and new growth will emerge within 2-3 weeks.

    Closing Thoughts

    Cryptocoryne wendtii is one plant that all aquarists should consider growing. This undemanding and low-maintenance species has many different aquascaping uses and will thrive under most lighting conditions. Have you ever tried it in your aquarium? If not, leave us a comment below to tell us how this plant looks with your setup!


    🌿 Want to learn more? This article is part of our complete Planted Tank & Aquascaping Guide. your ultimate resource for aquarium plants, aquascaping styles, substrates, and more.

  • Java Moss Care – A How To Guide

    Java Moss Care – A How To Guide

    This plant will grow in almost anything. But if you want it to actually look good, you need to understand what it wants. The gap between alive and thriving is lighting, nutrients, and consistency.

    Any plant stays alive. Making it look good takes understanding.

    Java moss is a hardy, low-maintenance plant that is grown in just about any type of aquatic environment. If you’re looking to add some diversity to your tank, or you have a new tank and want to fill it with plants from the start, this article has everything you need! Read on for an informative guide on Java Moss care. We will cover everything from proper environment, conditions, trimming, and more! Check it out!

    ASD Difficulty Rating: Easy – Beginner Plant

    Java moss (Taxiphyllum barbieri) is one of the most forgiving aquarium plants. It tolerates low light, a wide pH range, and requires no CO2 or fertilizer. Ideal for breeding tanks, shrimp tanks, and beginners.

    Species Overview

    Scientific Name Taxiphyllum barbieri
    Common Names Java moss
    Family Hypnaceae
    Origin Southeast Asia
    Skill Level Easy
    Lighting Low-High, 40-200 PAR (Umols)
    Tank Placement Foreground, Midground, Attached, Floating, Carpet
    Flow Rate Moderate
    Temperature Range 64-86°F
    Height Up to 4 inches
    pH Range 5.0. 8.0
    Propagation Division
    Growth Rate Moderate
    Feed Type Column Feeder
    CO2 Requirement No, but recommended

    Origins And Habitat

    Java moss is native to Southeast Asia where it grows in a variety of moist habitats, both above and below the water. This aquatic plant grows on river banks, attached to rocks, wood, and tree trunks.

    What Does It Look Like?

     Java moss is an all-green creeping moss that forms a tangled mass of delicate stems. The stems hold branches that reach nearly an inch in length. You can see videos and clips from it from our YouTube video above.

    The branches are covered in tiny, hollow leaves. Interestingly, Java moss that is grown emersed develops much larger leaves than those grown submerged. The shade of green and the density of the plant varies depending on the strength of the lighting where the plant is growing.

    Java moss does not have true roots and gathers all its nutrients through its leaves and stems in the water column. They do, however, have fine red-brown structures known as rhizoids that work like roots to attach the plant to solid structures.

    Java Moss Care Guide

    Java moss works really well in a variety of aquascapes. This moss adds amazing textures and accents to nature aquariums, especially if grown on hardscape features like driftwood.

    Java moss is one of the most versatile plants in the hobby. The secret to its versatility? Rhizoids.

    These ‘roots’ don’t absorb nutrients but have the function of anchoring the plant. Java moss does not grow from the substrate will anchor itself to just about any solid object with a bit of texture.

    That being said, these plants don’t need to be attached to anything to grow well, and can simply be left to float in the tank. Let’s take a closer look at some of the uses for Java moss in the aquarium.

    Attached To Hardscape

    One of the most popular placements in the planted tank is on hardscape features like driftwood, rocks, or even aquarium decor. Attaching the moss to your hardscape takes a little effort, but it’s really not that difficult.

    Simply tie a clump of Java moss to the object using thread or fishing line. After some time, the moss will attach itself to the object with its roots/rhizoids and the fishing line is removed carefully.

    Java Moss on Driftwood

    Moss Tree

    As strange as it may sound, Java moss makes for a fantastic underwater tree for aquarists. Clumps of moss attached to the ends of an upright branching piece of aquarium driftwood with fishing line can look truly incredible.

    Take your time in selecting a great piece of driftwood because this will make all the difference to the finishing java moss trees. You can find great pieces at aquarium shops or from online stores.

    It is best to use a clear, fine fishing line or a neutral colored thread for a more natural look. The thread or fishing line is carefully removed once the roots of the moss have attached themselves firmly to the driftwood.

    Carpet Or Wall

    Another innovative and interesting way to use this plant is to create a Java moss carpet or moss wall. Java moss is probably your most realistic option for growing carpets in a low-light tank. How to attach the moss to the wall or bottom of the tank takes a little planning, however.

    The secret is to sandwich the moss between two pieces of mesh. Stainless steel or plastic mesh works fine, and if you find that the ‘sandwich’ isn’t staying put on the substrate at the bottom of the tank, put a few stones or aquarium weights between the mesh but under the Java moss to weigh it down.

    The mesh is cut to a shape of your choice to keep the Java moss carpet contained in the area you want it.

    A Java moss wall is made in much the same way as a carpet, except you can use suction cups to attach it to the glass. This technique works really well for creating a natural backdrop in the tank, and that way, you can’t see the suction cups.

    Floating

    The easiest way to use Java moss is simply to toss it in your aquarium and let it grow. Java moss as a floating plant has some pros and cons though.

    On the one hand, floating Java moss is great for providing structure to bare breeding tanks without substrate and creates a safe haven for small fish, fry, and shrimps.

    Java moss can look a little untidy though and if left to drift, there’s a chance it’ll find its way up to the intake of your aquarium filter and cause you some problems.

    Floating Moss Ball

    A more complicated, but very interesting way to grow java moss is to create floating moss ball. You can do this by attaching the moss to a floating object like a wine bottle cork with thread.

    If you attach some clear fishing line to the floating moss ball and anchor it to the bottom of the tank, you can keep your moss ball in place in the midwater.

    Lighting

    Java moss isn’t very particular about lighting. It really doesn’t need much of it, but then, all aquarium plants need light to grow.

    Providing good light will result in brighter, more compact but faster-growing Java moss, but there is a catch. Strong light that isn’t perfectly balanced with nutrients and CO2 could easily result in a clump of algae-covered Java moss in your aquarium.

    What Are Good Tank Mates?

    Java moss is one of the best plants for breeder tanks because it creates a safe environment for small invertebrates and fish eggs and fry. For a very simple set-up, a big bunch of java moss grown as a floating plant in a bare tank works great.

    It’s not only baby fish that enjoy Java moss though. Any small or shy species will enjoy sheltering in a clump of moss.

    The massive surface area of this plant also provides a great area for livestock to forage on biofilm and micro-organisms. Java moss also oxygenates the water in your tank, which is great for your livestock.

    Good Tank Mates

    Just about any tropical or cool water freshwater fish that is not vegetarian is kept with Java moss. Just be sure that the fish enjoys the same parameters as the Java moss.

    Fortunately for aquarists, it is possible to grow Java moss under such a wide range of parameters that compatibility isn’t a problem.

    Some great fish to keep with Java moss include:

    Fish Species To Avoid

    Goldfish and cichlids will have no problem eating your Java moss, or just tearing it up and spreading tiny pieces off this plant all over your tank in the process. If they do not eat your java moss, they can also uproot with their foraging and digging habits.

    Java Moss grows in almost any condition. That is exactly why it takes over tanks when you stop trimming it. Easy does not mean zero maintenance.

    To be on the safe side, avoid keeping any plant-eating fish like silver dollars or plecos as well. Siamese algae eaters are also reported to eat Java moss on occasion, especially the new growth.

    Feeding (Fertilization)

     Java moss is not a very heavy feeder. Speaking, Java moss will not require additional fertilizers, especially if you keep fish in the tank.

    In low light tanks, in particular, the moss will not be able to use excess nutrients and feeding is likely to result in a hair algae problem. In tanks with medium to strong lighting, however, a light application of liquid fertilizer is helpful. If you are planning a mass planted aquascape that included Java Moss, you should consider investing in a quality liquid fertilizer like APT Complete.

    Editor’s Choice!


    APT Complete

    Editor’s Choice

    Made by an aquascaper for aquascapers. This is the best all around aquarium plant fertilizer on the market. Marco and micronutrients in one bottle!

    Use Coupon Code ASDComplete for 10% off your order!


    Click For Best Price


    Buy On Amazon

    CO2 Injection

    The Java moss plant does not need injected CO2 to thrive and grows very well in low-tech aquariums. The amount of carbon dioxide naturally available to plants in the aquarium is sufficient to keep this plant healthy.

    That being said, all plants require CO2 to live and photosynthesize, and added CO2 will improve the growth of Java moss if used correctly.

    How Much CO2 Do You Need?

    If you do run CO2 in your tank, and you keep fish or other aquatic animals, it is important to ensure that your levels never exceed 30 ppm. Above this level, CO2 causes suffocation in your livestock and will result in losses.

    How long Should You Run CO2?

    When you start up your CO2 injection, it takes about 2 hours for the gas to reach optimum levels in the aquarium. Therefore, it is best to start adding CO2 before your lights start up.

    Since plants can’t use carbon dioxide in the absence of light, It is best to shut off your CO2 at the same time as your lights go off, or a little before.

    , you should run your lights for about 8-10 hours per day, which means you should run carbon dioxide for 10-12 hours per day for the best result.

    Types

    Java moss (Taxiphyllum barbieri) is pretty variable in appearance, depending on the water condition in the aquarium. There are a few similar species of moss in the hobby, however. Although they are different species, with different care requirements, they are very similar-looking plants.

    Similar Species

    • Christmas mossVesicularia montagnei
    • Singapore moss – Vesicularia dubyana
    • Weeping moss – Vesicularia ferriei
    • Taiwan moss – Taxiphyllum alternans
    • Peacock moss – Taxiphyllum sp. ‘Peacock’
    • Stringy moss – Leptodictyum riparium
    • Phoenix moss – Fissidens fontanus

    Care

    Java moss care is very easy, provided you grow it in suitable conditions. This plant is trimmed heavily using a pair of aquascaping scissors, but this is quite a messy business.

    The trimmings tend to drift around and look pretty unsightly. Sometimes trimmings will settle somewhere and begin to grow there, making this plant quite difficult to contain if you’re not careful.

    One way to avoid this problem is to ask a friend to vacuum up the Java moss trimmings as you cut them so that they cant drift around. If you can’t find someone willing to stick their hands into your fish tank, you can try multi-tasking. Some people even get creative and attach their aquascaping scissors to the end of the vacuum intake. Here is a great video on java moss trimming by AlanScaping.

    It is wise to switch off your filter while trimming to prevent leaves and branches from getting sucked up. Filters with pre-filter sponges over their intakes are also very handy for planted tanks.

    Vacuuming your Java moss as part of your normal cleaning and maintenance routine is a good idea to remove any detritus that could settle in the moss and result in changes to water quality.

    Java moss carpets made with mesh or moss attached to driftwood can also be removed from the tank and rinsed off using water removed during a water change.

    Planted Tank Parameters

    Java moss isn’t very picky about water parameters. When it comes to pH, Java moss grows fine from 5 through 8 and does well in hard or soft water.

    It is grown over a pretty wide range of temperatures, from 64 right up to 86°F. They do show a preference for slightly cooler conditions, however, and tend to grow best in aquariums from 70-75 °F.

    Water Quality

    Java moss actually helps to improve water quality by soaking up excess nutrients from fish food and waste. This doesn’t mean you don’t have to stay on top of your water quality, however, because nutrient-rich conditions tend to favor algae growth.

    One of the most effective ways for aquarists to maintain good water quality is to perform regular partial water changes. This is important because often your filter alone can’t keep the water safe and harmful chemicals can build up over time.

    Get into the routine of doing a water change regularly every week or two, and always remember to use a water conditioner to make tap water safe for your moss and livestock.

    Filtration

    One of the downsides of Java moss is the tiny leaves and branches getting sucked up into aquarium filters and clogging up the filter media. This is especially likely after trimming your Java moss, or if your plants grow unattached in your tank. Lots of filter maintenance should be done and broken pieces of moss should be removed immediately to prevent excess ammonia production and algae growth. Consider a quality power filter for smaller aquarium or a canister filter for larger setups.

    Flow

     Java moss grows best in tanks with good flow. Not too powerful, but enough to keep water circulating through the plants to provide fresh water to the inner stems and prevent waste from settling on the plants.

    Aquarium Maintenance

    Aquarium maintenance is an essential part of the hobby and is also an important part of growing vibrant and healthy Java moss. Let’s take a closer look at how to maintain your aquarium.

    Testing Water Conditions

    Even though Java moss can grow in a pretty wide range of conditions, it’s always a good idea to test your water regularly. This is pretty quick and easy to do using a simple test kit from your local aquarium store and will help you keep an eye on the health of your aquarium.

    The best time to test is before adding any plants to your aquarium, and then just before each water change. In this way, you’ll know the parameters of your local water, and whether you’re performing water changes often enough.

    How To Set Up Your Tank

     Java moss has no specific tank requirements really. It is such a versatile plant that it can grow in most aquariums, provided your parameters are compatible with its needs. Your choice of substrate is not really important at all.

    If you don’t have any sort of prefilter over the intake of the filter in the tank, consider buying a model that does or you can rig your own if you’re handy. Just be sure that whatever you use does not restrict the flow too much because this will put some strain on the motor and reduce the effectiveness of your filter.

    Java moss is great for just about any tank size, from nano tanks of just a few gallons and up. This moss will spread to dominate a very small tank though so you’ll need to stay on top of trimming.

    How To Propagate

    The Java moss plant is one of the easiest live aquatic plants to propagate. Simply divide the plant by cutting or tearing a few stems off a clump and attach them to the hardscape or allow them to float.

    Health And Disease

    Signs Of Good Health

    Healthy Java moss plants should have a vibrant green coloration and be soft but not fall apart too easily. Out of the water, this plant will be very limp but should have great texture underwater.

    Signs Of Poor Health

    Avoid Java moss that is turning yellow or brown. Adding unhealthy Java moss to your tank that is already brown and falling apart is a bad idea and will probably just result in a mess.

    Common Health Issues And Treatment

    Algae

    One of the most common health issues with Java moss is your carpet getting covered in algae. One way to treat this problem is to dose the affected plant with a weak solution of hydrogen peroxide. Hydrogen peroxide works wonders for killing algae, but it can also kill your fish, inverts if not used carefully.

    A rule to live by when it comes to using chemicals in your fish tank is: use as little as possible to get the job done. Remember, if you haven’t used enough, you can always try again next week, but if you use too much, the results is devastating.

    As with all algae growth issues, it is far more effective to focus on the cause of the problem rather than treating it with chemicals. The most common causes are:

    • Light that is too powerful and/or on for too long each day
    • An imbalance of light, nutrients, and carbon dioxide in the system
    Java Moss and Shrimp

    Algae eating animals is very helpful for algae control in general as well. It must be noted that not all algae eaters will feed on every variety of algae. Some examples of algae eaters include:

    Of course, before adding any algae eater to your tank, make sure your tank is big enough and set up correctly for that species.

    Melt

    It is very common for aquatic plants to ‘melt’ when first introduced to your tank. This happens because the conditions in your tank are different from what the plant has been used to, and it needs to go through an adjustment period.

    While adjusting, Parts of the plant will change color, eventually dying and rotting away. It is better to cut away any dying foliage and remove them from your tank, rather than leaving them to rot and affect your water quality.

    Nutrient Deficiencies

    Java moss does not need much in the way of nutrients, but if you do find your plants are losing color, you may want to try dosing a fertilizer with iron and macronutrients.

    Use fertilizers in moderation though, too much can cause algae problems.

    Plant Pests

    Because of the dense and tangled nature of Java moss, it’s very easy for unwanted pests and parasites to hitch a ride from the farm where they were grown, or your local aquarium store, and into your tank.  

    To prevent this, rinse the plant out with water from your fish tank when you get it home. Never use straight tap water for this because it can contain harmful chemicals that will damage your moss.

    A very weak solution of 20 parts water to one part bleach makes a great pest-killing dip. Dip your moss in the solution for about a minute and then rinse it out carefully and thoroughly in water with a dechlorinator before adding the moss to your aquarium.

    Where To Buy

    Java moss is a very popular in the aquarium trade is widely available. You can pick up this plant pretty cheaply from your local aquarium store. Apart from physically visiting pet stores, a more convenient option is to order your aquarium plants online. The link in the box below will take you to retailers who sell quality Java moss. Check it out!

    FAQS

    Is it good for aquariums?

    Java moss is a great plant for aquariums. It provides a safe refuge for fry and small animals while oxygenating the water and soaking up excess nutrients in the water column.

    How fast does it grow?

    Java moss have a slow to moderate growth rate. The growing speed does vary a lot depending on the conditions in the tank, however. It is possible to speed up Java moss growth with better lighting and CO2 injection and fertilizers, provided you keep everything in balance to avoid algae problems.

    How do you keep this type of moss alive?

    Java moss is a very easy aquarium plant to keep alive. It is tough and adaptable and it thrives in most freshwater aquariums. Make sure your tank setup and parameters match this plant’s needs and you should have no problem.

    Can brown moss turn green again?

    Fully brown Java moss is dead and should be removed from your tank before it breaks apart and rots. Naturally, you want to give your plant the benefit of the doubt of course, and if there are any healthy green branches, they may well pull through and regrow.

    A safe option is to remove the dying moss from your tank and see if you can grow it in a separate container filled with your tank water, that way if it doesn’t bounce back, you won’t have to worry about it spoiling in your tank.

    Hard Rule

    Java moss grows fastest in cooler water (68-75 degrees F/20-24 degrees C) with moderate light. In tropical tanks above 80 degrees F (27 degrees C) it grows slowly and develops algae issues. Keep temperatures moderate.

    Closing Thoughts

    Java moss is a really fun and versatile plant that is great for all planted tank enthusiasts, from beginners all the way to professional aquarists.

    Making Java moss grow is as simple as dropping some in the aquarium or as interesting as making moss trees and walls with suction cups. This is definitely one plant that everyone should consider growing.


    🌿 Want to learn more? This article is part of our complete Planted Tank & Aquascaping Guide. Your ultimate resource for aquarium plants, aquascaping styles, substrates, and more.

  • Amazon Sword Care – A How To Guide

    Amazon Sword Care – A How To Guide

    This plant will grow in almost anything. But if you want it to actually look good, you need to understand what it wants. The gap between alive and thriving is lighting, nutrients, and consistency.

    Any plant stays alive. Making it look good takes understanding.

    The Amazon sword is one of the best-known and most popular aquarium plants in the hobby. Amazon Sword Care is great stepping stone for beginners to more advanced plants and looks good in any tank. One of the Amazon sword’s best selling points is its ease of care. These plants thrive in low-tech setups and ask very little of the aquarist in terms of maintenance.

    Most planted tank owners who have an Amazon Sword plant know that they need to be trimmed and shaped. But what else should you do for them? This blog post will tell you all about how to care for your Amazon Swords, from trimming to fertilizing. Don’t worry! It’s a lot easier than it sounds 😁

    ASD Difficulty Rating: Easy – Beginner Plant

    Amazon sword plants (Echinodorus bleheri) are large, forgiving background plants that grow in low to high light setups. They do best in nutrient-rich substrate and benefit from root tabs. A beginner staple.

    A Brief Overview Of The Amazon Sword

    Scientific Name Echinodorus amazonicus/ Echinodorus bleheri/ Echinodorus grisebachii
    Common Names Amazon sword
    Family Alismataceae
    Origin Brazil, South America
    Skill Level Easy
    Lighting low-high, 40-250 PAR (Umols)
    Tank Placement Mid ground or Background Plant
    Flow Rate Low
    Temperature Range 72. 82 F
    Height 4. 20 inches
    pH Range 6.5 – 7.5
    Propagation Transplant adventitious shoots
    Growth Rate Moderate
    Feed Type Root Feeder
    CO2 Requirement No

    Origins And Habitat

    The Amazon sword plant originates from the Amazon basin in the tropical South American rainforests of Brazil. There they grow in slow-flowing or still waters to a depth of 2-3 feet.

    What Does This Plant Look Like?

    How Does Amazon Sword Look Like

     The Amazon sword is a medium to large freshwater aquarium plant. They have an upright growth form with many leaves growing from a very short stem. The large leaves are held singly on upright leaf stalks. It is classified as a rosette plant1.

    Each leaf has a prominent mid-vein and secondary veins that run more or less parallel with the margin.

    When grown emersed, these plants tend to grow shorter, with smaller and wider leaf blades. Submerged plants in the aquarium have leaves that can measure as much as 16 inches long and 4-8 inches across.

    The leaves are thin but firm and have a deep and dark green color with pointed tips. Amazon swords grow from a well-developed root system. The roots grow by spreading widely in the substrate

    Placement And Lighting

     It is best to plant your Amazon sword plant in the midground or background of a freshwater aquarium. These aquatic plants will grow pretty large so keep this in mind when planning your aquascape.

    In nature, the Amazon sword plant grows in environments with fluctuating water depth so light intensity does vary with seasons and weather conditions. This makes them pretty adaptable to a range of light intensities.

    Amazon swords don’t necessarily need powerful plant lighting but will grow well under a variety of light conditions. Ideally, you want to aim for about 2-3 watts per gallon.

    If you do plan on growing this plant in low light, make sure it is planted in an open area of the tank with good exposure.

    Amazon swords work great in nature aquariums and can also be used as an accent or specimen plant. They are perfect for amazon biotopes.

    What Are Good Tank Mates?

    The Amazon sword plant is a great addition to most nature aquariums and works well with the majority of smaller community fish species.

    When considering new livestock for your aquarium, remember that every species needs to be adapted to the same conditions and parameters.

    Most tropical freshwater aquarium fish that enjoy the same water parameters as the amazon sword will make great tank mates.

    Good Tank Mates

    These plants are often used in South American cichlid and discus tanks. Being a tropical South American plant, they are an obvious choice for Amazon biotopes. Ideal freshwater fish for this style of nature aquarium include:

    Some aquarists keep Amazon sword plants successfully in their goldfish tanks. While this is possible, the temperature preferences of both the goldfish and the plant should be considered.

    Amazon Swords grow enormous. A plant that fits in your hand at the store will dominate a 55 gallon tank within months. Buy one knowing it will take over.

    Goldfish will also feed on the plants to an extent, but fortunately, Amazon swords are robust and produce new leaves quite regularly.

    Fish Species To Avoid

    It is no surprise that freshwater fish like plecos, goldfish, and silver dollars will be very quick to feed on your amazon swords.

    Large fish like Oscars that tend to disturb plants while they feed or for territorial reasons should also be avoided, particularly if the plant is rooted in a loose substrate like sand. African cichlids are also problematic as they will dig out the plant.

    The Amazon sword plant will also be on the menu for ramshorn and bladder snails, but these inverts will only eat leaves that are already unhealthy or decaying.

    Feeding (Fertilization)

     In smaller aquariums, you probably want to avoid growing Amazon swords in a nutrient-rich substrate. By growing them in a low nutrient environment, it will be much easier to keep them to a manageable size.

    For optimum growth, however, regular feeding will definitely be appreciated.

    How Much And How Often To Feed

    Amazon swords are root feeders first and foremost, so provided they are grown in good aquarium soil, feeding will not be strictly needed. If grown in an inert substrate like sand or gravel though, you’ll want to use aquarium fertilizers suited for rooted plants like root tabs.

    Root tabs offer a long-lasting output but their performance does vary so follow the instructions on the product you have and keep an eye on your plant’s performance.

    Even well-balanced aquarium soils will eventually leach out and then supplementing with root tabs is a great option.

    Root-feeding aquatic plants can also benefit from column fertilizers since there are a few important nutrients that root tabs often lack. These are the macro-nutrients of nitrogen, phosphorous, and potassium. Tropica Root Tabs are the best in the business when it comes to a complete and reasonably priced root tab product.

    Providing macro supplements after each weekly water change is recommended for the most vigorous growth and Amazon swords will also benefit from a regular iron supplement.

    CO2 Injection

    The amazon sword plant grows just fine without CO2 injection. Maintaining a healthy aquatic plant is all about balance though, so in some cases, CO2 will be helpful.

    A plant that is grown under strong lighting, for example, may well develop problems with algae growth on the leaf surfaces if not provided with extra carbon dioxide. A CO2 system is a good investment if you are planning a mass planted tank or amazon biotope setup.

    Types

    There are plenty of different Echinodorus plants available in the aquarium trade. Things often get a little confused in the hobby and the true identity of your plant isn’t always that certain.

    There are 3 plant species that are often called Amazon swords. Some say they are all the same, while others argue that each deserves its own name.

    These species are:

    • Echinodorus amazonicus
    • Echinodorus bleheri
    • Echinodorus grisebachii  

    Care

    The Amazon sword plant is pretty easy to care for and needs little maintenance once it is established in the home aquarium. Amazon swords do not need much in the way of trimming or pruning.

    You might want to trim some shoots if the plant is taking up too much room in your fish tank, but it is better to make sure your tank is large enough to accommodate this plant before you bring it home.

    If you do trim them, be sure to remove the leaf and stalk completely. Leaves that are cut in half will not survive.

    Like all plants, Amazon swords do have their preferences, so let’s take a closer look at their needs.

    Planted Tank Parameters

    Amazon swords are ideal aquatic plants for tropical aquariums but they can also be grown in slightly cooler water. Their ideal water temperature is anywhere between 72-82 degrees Fahrenheit. You will want to plan a heater if you are keeping fish that like warmer water like Betta Fish or Discus Fish.

    Amazon swords do best in a pretty narrow pH level range and will grow best in water of Ph 6.5-7.5. Water hardness in the range of 8-12°dGH is recommended.

    Water Quality

    Amazon swords are not particularly sensitive to water quality and like most aquarium plants, will improve water quality to an extent by taking up excess nutrients in the system.

    The most important factors for maintaining good water quality in the planted aquarium are:

    • Performing regular partial water changes 
    • Using a water conditioner when adding new water
    • Cycling your tank before introducing fish
    • Stocking your fish tank with appropriate numbers and sizes of livestock
    • Not overfeeding your fish
    • Using adequate filtration
    • Protecting the beneficial bacteria in your filter media

    Filter

    A quality filter is one of the most important pieces of hardware in the aquarium. This is especially true in planted tanks.

    Amazon swords certainly do their bit in improving water quality in the aquarium, but cannot be considered a substitute for a good filter. Amazon swords have large leaves that can get sucked up against the intake of your filter so bear this in mind when choosing where to plant one. These large leaves can potentially be an ammonia producing factory if they break off and are left unattended. Filtration with lot of biological filtration is recommended. For large scapes, consider a quality canister filter.

    Flow

    The Amazon sword plant does not mind a bit of flow in the water. They are most suited to freshwater tanks with a low to moderate current, however.

    Although this plant is able to survive the stronger currents it experiences in nature during the rainy season, the Amazon sword is not adapted to grow in powerful rivers and will not thrive in those conditions.  

    Aquarium Maintenance

    Maintenance isn’t the most fun side of our hobby, but it is probably the most important. Your Amazon sword plant, like all your other plants and livestock, will look and live far better in a well-maintained tank.

    Testing Water Conditions

    Testing water conditions is an essential part of your regular maintenance routine. This is done quite easily with a test kit from your local pet shop.

    It is best to test your water before bringing an Amazon sword plant home to be sure your water parameters meet their needs.

    Concentrations of nitrates, nitrites, and ammonia can increase in time, especially in heavily stocked or uncycled aquariums. Be sure to test your water just before and just after a water change to get a feel for how stable your water conditions are.

    How To Set Up Your Aquarium Tank

    One very important factor to success when growing the Amazon sword is providing enough substrate depth for the extensive plant roots to develop fully. Aim to provide 2 or 3 inches of substrate for this plant.

    They are naturally adapted to grow in the fertile soils of the Amazon river basin and will therefore appreciate a rich aquarium soil.

    That being said, aquarists with smaller aquariums can also grow this plant in a sand substrate or fine aquarium gravel as this will result in slower growth and a more manageable plant at the end of the day.

    Considering the size that Amazon swords can reach in good conditions, 20 gallon tanks are the minimum recommended size. They can, however, be grown in smaller aquariums but they are likely to dominate something like a 10 gallon aquarium and limit the swimming space for your fish.

    How To Propagate

    Propagating new Amazon swords is very easy if you have a strong, established plant. The secret is to provide the parent plant with a healthy environment and a little time.

    The Amazon sword plant will produce a runner from its crown that extends along the surface of the substrate for a few inches to produce plantlets or daughter plants.

    This happens quite naturally and the plantlets will grow out in their position or they is moved. Wait for the plantlet to develop strong plant roots of its own and some healthy leaves before severing it from the parent plant.

    The plantlets can then be moved and replanted in the substrate as you wish, but be advised that these new plantlets will be more sensitive than mature Amazon swords.

    Health And Disease

    Signs Of Good Health

    Healthy Amazon sword plants will be all green in color and produce new leaves regularly. The plant will have an upright growth form and have leaves that are not dull or see-through.

    The leaves will grow to full size and be free of algae growth. Mature established plants will send out runners that produce daughter plants.

    Signs Of Poor Health

    Amazon sword leaves that are translucent or turn yellow or brown are occasionally noticed. This is often a sign of a mineral deficiency in the water.

    If you notice this problem, try supplementing your plants with iron and macros like nitrogen, potassium, and phosphorous. Any discolored or dying leaves should be removed to prevent ammonia production.

    This problem should not be confused with melt that often happens soon after planting. Here an article from the University of Florida that goes over common fungal issues.

    Common Health Issues And Treatment

    Melt

    Often, many leaves will die off after first planting a new aquarium plant in your tank. This is a common problem that is known as melting.

    It happens for a few reasons but it can happen to even the healthiest Amazon swords, even in ideal water parameters. Melt happens as a result of shock from being set in different conditions to what the plant has been grown or kept in.

    Aquarium plants are often farmed emersed. Once submerged under the water, the existing leaves may not survive this radical change, but this doesn’t mean the entire plant is in trouble., the plant will produce new growth that is adapted to the new conditions.

    It is important to remove melting leaves from your aquarium before they decay and break up in the water. Rotting leaves are not only unsightly, but they can also affect your water quality.

    Even in healthy, established specimens, diseased or unhealthy leaves should be removed. By doing this you can limit the spread of infections to other leaves.

    Algae Growth

    Algae growth on the leaves of your plants is a common but frustrating problem. The most common causes for this issue are:

    • Lighting that is too strong
    • The lighting period is too long
    • The water nutrient levels are too high
    • The nutrient levels and CO2 are too low for the lighting provided

    Unfortunately, removing the algae growth will not solve the problem until the root cause is found and fixed.

    Plant Pests

    Ramshorn Snail

    Some keepers report that the Amazon sword plant is susceptible to damage by some pests such as ramshorn and bladder snails. It is more likely that these snails are feeding on unhealthy, decaying leaves rather than healthy plants, however.

    Snails love aquarium plants because they offer great places to hide and forage. Often, when bringing a new aquarium plant home, you may have a few snails hiding between the leaves that you weren’t aware of.

    If you don’t already have snails in your tank and don’t want to introduce them now, it’s worth carefully inspecting and washing off new Amazon swords before adding them to your aquarium.

    Another, more extreme, but very effective method is to dip your Amazon swords in bleach. This is a risky procedure though because bleach is a harmful chemical for both plants and animals.

    To do this safely, it’s important to use a very mild mixture of bleach and water. 1 part bleach to 20 parts water is a good strength for killing pests without damaging plants.

    Even at this weak level though, prolonged exposure to the bleach will harm your plants so dip them for no longer than 2 minutes and then rinse them off carefully before planting out in your tank.

    Where To Buy These Plants

    Amazon sword plants are one of the most popular aquatic plants in the hobby and not difficult to find at most outlets that sell fish and aquarium plants. If you prefer the convenience of online shopping, Buceplant offers quality tissue culture amazon swords as well as regular farmed plants. This plant is widely cultivated so it should be regularly available.


    Amazon Sword

    A classic background aquarium plant. Grows large and will be a centerpiece in your aquarium


    Click For Best Price


    Buy On Amazon

    FAQS

    Do they need to be planted?

    This species must be planted to grow well in the home aquarium. Suitable aquarium substrates include aqua soils or sand and gravel that are enriched with root tabs.

    Can they grow out of water?

    Amazon swords is grown emersed or partially submerged. In nature, these plants grow only partially underwater and produce flowers that are visited by butterflies!

    In a small, open-topped freshwater tank, Amazon swords may grow large enough to break the surface of the water.

    Do these plants need fertilizer?

    Amazon sword plants will need fertilizer if not grown in a plant substrate with good nutrient content. Using slow-release root tabs is an excellent way of feeding them if you have an inert aquarium substrate like sand or aquarium gravel.

    Can they grow in low light?

    Amazon swords is grown in low-light setups which makes them a great choice for beginners with low-tech setups. In nature, this plant is found growing in both sunny and shady positions which means they are pretty adaptable to lighting in general.

    Do they need soil?

    Planting Amazon swords in soil often brings the best results. That being said, you can also plant Amazon swords in sand or aquarium gravel. If you do go the sand or gravel route, don’t forget to enrich the soil with plant food in the form of root tabs.

    Hard Rule

    Amazon swords need nutrients in the substrate – they are heavy root feeders. Add root tabs near the roots every 3-4 months or the plant will slowly starve even with liquid fertilization.

    Closing Thoughts

    Whether you’re just starting out with a new aquarium, or you feel like you have space for just one more species in your planted tank, the Amazon sword definitely deserves your attention. The combination of low-tech needs, low maintenance, and really great looks makes this one plant we definitely recommend.

    Have you tried planting an amazon sword? What other plants do you like? Leave us a comment below!


    🌿 Want to learn more? This article is part of our complete Planted Tank & Aquascaping Guide. Your ultimate resource for aquarium plants, aquascaping styles, substrates, and more.