Author: Mark Valderrama

  • The 10 Best Aquarium Wavemakers Of 2026 โ€“ Tested and Reviewed

    The 10 Best Aquarium Wavemakers Of 2026 โ€“ Tested and Reviewed

    Flow is one of the most underrated factors in reef keeping, and wavemakers are where I see beginners and experienced hobbyists alike make expensive mistakes. I’ve run powerheads and wavemakers in my 125-gallon reef across several brands, and the difference in coral polyp extension and detritus suspension is very real. Getting the right flow pattern matters as much as the GPH rating. Here’s what I’ve found works best.

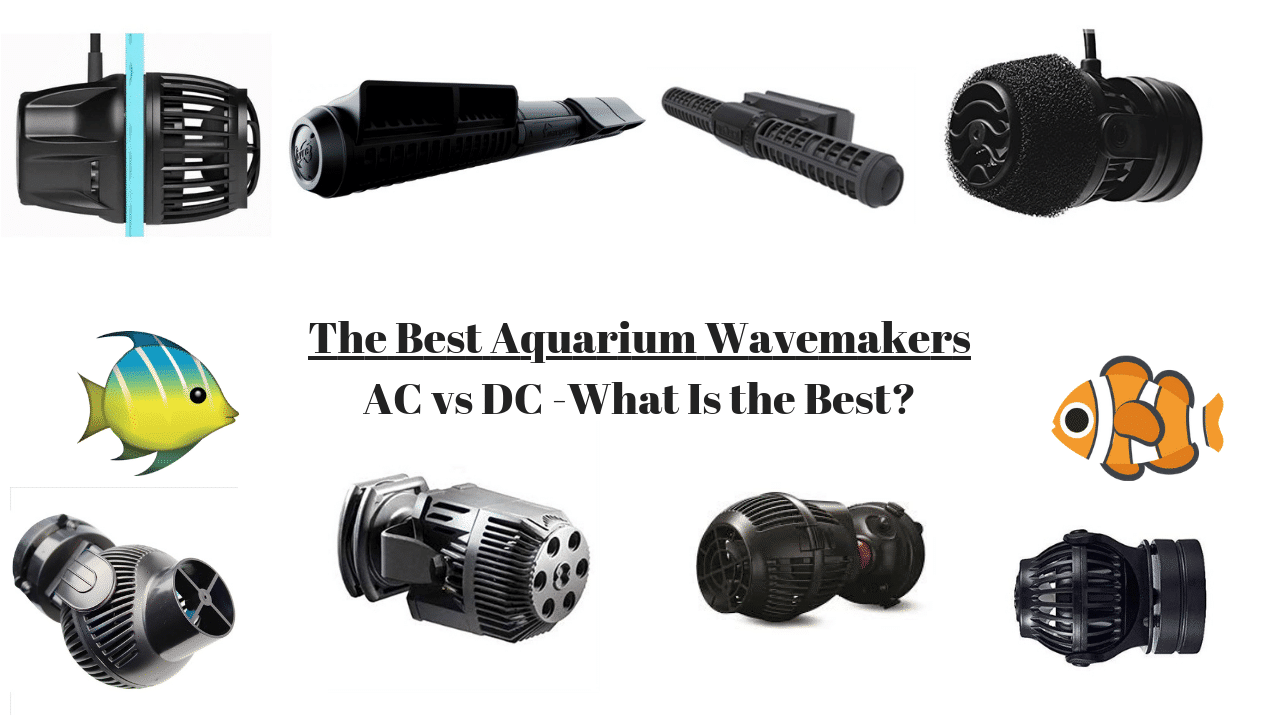
    Are you struggling with finding a quality aquarium wavemaker?

    In this blog, we share the best wavemaker offerings, from no wire in tank products to gyres. Even some that can run off your phone!

    With over 25 years of experience in the aquarium hobby, I’ve assisted countless clients, hobbyists, and readers like you in overcoming their water flow woes. I’ve personally tested these products in real world scenarios to determine the best aquarium wavemaker on the market.

    The Top Picks

    Editor’s Choice!
    Eco Tech MP
    • DC
    • No Wires In Tank
    • App Powered
    Best Value
    IceCap Gyre
    • Sold brand
    • Reasonable price for a gyre
    • DC Powered
    Budget Option
    Jebeo SOW
    • Cheap
    • Powerful

    I have listed a lot of wave maker choices that fit multiple budgets and needs, but you may be wondering what we suggest. Since everyone needs are different, we have the following recommendations based on the criteria below:

    The Candidates – A Quick Comparison

    All these wave makers meet several of the factors I was desiring (more on that further in the article), but not all (as a wave maker that does meet these all would be expensive!). I’ll go through each aquarium wave maker listed below and provide you with the in-depth details below.

    PictureNamePower TypeLink
    Editor’s Choice!
    Ecotech MP Series Wavemakers
    Ecotech MP Series Wavemakers

    DC

    Click For Best Price
    Best Value
    IceCap Gyre Series
    IceCap Gyre Series

    DC

    Click For Best PriceBuy On Amazon
    Budget Option
    Jabeo SOW Series Wavemakers
    Jabeo SOW Series Wavemakers

    DC

    Buy On Amazon
    Current USA EFlux Wavemakers Current USA EFlux Wavemakers

    DC

    Click For Best PriceBuy On Amazon
    Hydor Koralia Wavemakers Hydor Koralia Wavemakers

    AC

    Click For Best PriceBuy On Amazon
    Fluval Sea CP Series Wavemakers Fluval Sea CP Series Wavemakers

    AC

    Buy On Amazon
    Maxspect Gyre XF Series Maxspect Gyre XF Series

    DC

    Click For Best PriceBuy On Amazon
    Sicce Voyager Wavemakers Sicce Voyager Wavemakers

    AC

    Click For Best Price
    Sun Sun JVP Series Wavemakers Sun Sun JVP Series Wavemakers

    AC

    Buy On Amazon
    Tunze Nanostream Tunze Nanostream

    AC

    Click For Best priceBuy On Amazon

    The 10 Best Aquarium Wavemaker Reviews (2023 Update)

    Let’s go into full depth about why these wave makers made the list!

    1. EcoTech MP – The Choice For Professional Installers
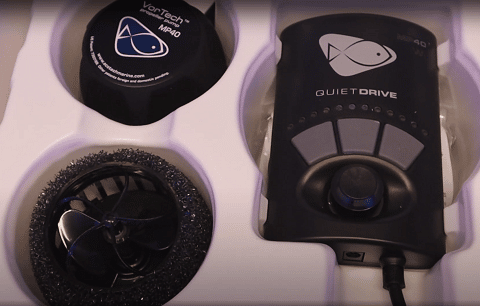
    Editor’s Choice!
    Ecotech Vortech

    The Best Aquarium Wavemaker

    The professional’s choice for wavemakers. Keeps wires out of your display tank and loaded with features

    Click For Best Price

    If you are looking to do a professional looking aquarium setup whether fresh or saltwater, the EcoTech MP Series Wavemakers are the wave makers to look for. EcoTech’s patented mag drive technology supplies power to the wave maker outside of the aquarium. This means that this is the ONLY wave maker on the market that has the wire outside of the fish tank. This is an amazing feature for someone looking to have an extremely clean and professional looking aquarium with no wires in the aquarium.

    EcoTech Ppwer Wire

    It’s not just the wire, but the features of the MP Wave maker that makes this a great buy. The wave maker is loaded with various wave making settings and pairs easily with a controller or independently off EcoTech’s new Mobius system. EcoTech also sells their own power outage supply solution that will power the MP Series for several days in the event of a power outage. That’s one comprehensive package!

    You can have all this for one hefty price. Next to the MaxSpect Gyre, this is one of the most expensive wave makers on the list. EcoTech also snubs you with a 1 year warranty. Really something this expensive should have a 2 to 3 year warranty.

    Given its unique features however, it not hard to see what many professional installers and custom aquarium makers turn to this when it comes to making a showstopping fish tank.

    Pros

    • Wire is outside of the aquarium – ideal for professional level setups
    • Lots of control with Reef Link or Aquarium Controller
    • Has it’s own power outage solution available

    Cons

    • Very expensive!
    • Only a 1 year warranty

    Best For: Saltwater Aquariums and high end freshwater systems

    2. IceCap Gyre – Great Value!

    Best Value
    IceCap Gyre

    Best Value

    Breakthrough technology at a reasonable price. The IceCap Gyre is a great deal!

    Click For Best Price Buy On Amazon

    The IceCap Gyre is the first gyre pump on the list. What is a gyre you say? A gyre is a water pump that is based on crossflow technology. Compared to traditional powerheads or wave makers, a gyre pump provides superior wave generating performance.

    Crossflow Gyre Movement

    The result of a gyre is that there are virtually no dead spots, evenly distributed water flow in the aquarium, and water moves back and forth to create full circulation or a “gyre.”

    The Ice Cap gyre is an entry level model. It starts off at a pretty reasonable price given that the icecap 2K model and easily handle a 36″ fish tank. It comes with a controller and there is an IceCap battery backup system that works well with it so you have a ready made solution for a power outage ready to go.

    The main disadvantage of a gyre over an aquarium wave maker is they require more maintenance to keep in optimal running shape. They are pretty big as well compared to a tiny wave maker. They are louder than some of the wave maker on the list. If noise isn’t an issue, this is a value water circulation system that is worth a look. See full review.

    Pros

    • Great innovative technology that eliminates dead spots
    • Great value as even a 2K gyre can handle a 36″ long fish tank
    • Readily available power back up solution available

    Cons

    • Big and bulky
    • Requires more maintenance
    • Louder than other wave makers on this list

    Best For: Saltwater Aquariums

    3. Jebao SOW Series Flow Pump – Value Priced and Silent

    The Jebao SOW Wave Maker Flow Pump is the newest model DC wavemaker from Jebao. There are various other models from Jebao so I have listed the most recent edition. The main feature of the SOW Flow Pump is the Sine Wave technology. What is the Sine Wave technology? Sine Wave makes the DC converter more stable and as a result the pump generates less noise. This new model from Jabeo truly competes with the name brand wave makers on the list with a nearly unbeatable price and dead silent operation.

    The controller has a lot of wave maker options and a feed mode. Jabeo also sells a ready made battery backup so you are good to go with a complete battery backup solution.

    The main disadvantage with these Jabeo pumps is their reputation. The past models are not the most reliable with pumps burning out early and the controllers often failing. If you can purchase the unit with an extended warranty, it’s highly recommended that you do that. The silver lining is these wave makers are fairly cheap for a DC wavemaker so some hobbyist do consider these disposable.

    Pros

    • Sine Wave tech makes these VERY quiet
    • Lots of features on the controller
    • Great price

    Cons

    • Jabeo reputation

    Best For: Saltwater Aquariums

    4. Current USA eFlux – Integrates With Loop LED and Dead Silent!

    Super Quiet!
    CURRENT USA eFlux

    The quietest wavemaker on the list. Simple to use and works well with all Current USA products

    Click For Best Price Buy On Amazon

    We start off this list with a great entry by Current USA and their EFlux Wavemakers. The Current USA EFlux comes in several options from a flow rate of 660 gallons per hour all the way up to a flow rate of 2100 gallons per hour. The main feature here is that they are part of Current’s Loop system, which are integrated with each other. It works seamlessly with the Current USA’s Best Reef LED offering – the Loop LEDs.

    I have personally used this system and can attest to their extremely quiet operation. My experience with Current USA has also been top notch with them going out of their way on warranty claims. The price isn’t that bad either! You can either purchase the EFlux with the controller or in the EFlux accessory wave pump package which comes without a controller.

    So what is there not to like? Well, the wave maker options are pretty limited. It only comes with 3 wave maker modes, stream, pulse, and gyre. Gyre can only be used if you pair it with another EFlux wave maker and the manifold will only support 3 wave makers so this can be a problem for larger fish tanks or high water flow setups. Overall, this is a great first entry on the list!

    Pros

    • Integrates with Current USA Loop LED for an all in one controller
    • Current USA’s customer service is top notch
    • VERY Quiet

    Cons

    • Limited wave maker options
    • Gyre mode only works with 2 pumps synced together
    • Manifold only supports 3 wave makers

    Best For: Saltwater Aquariums

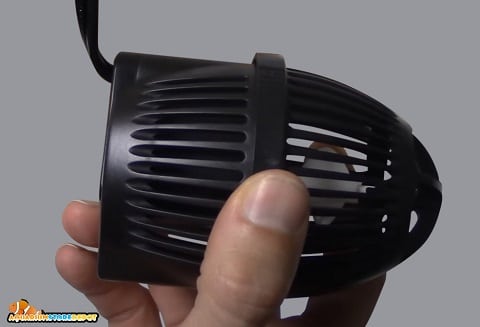
    5. Hydor Koralia – Great Choice, Reliable and Cheap

    Hydor Koralia

    The original wavemaker. AC powered and extremely reliable. A favorite among nano and old school reefers

    Buy On Amazon Click For Best Price

    The Hydor Koralia Wavemaker was and still is a very popular wave maker. It was the original wave maker on the market that brought about many of these other units. It is a trusted wave maker by many old school reefkeepers. It has only become less popular with the explosion of DC powered wave makers and all their controllable features. It is still very much considered as a nano aquarium circulation pump.

    The Hydor Koralia wave maker uses proven AC technology. It’s really a plug and forget system with how long the model has been around. It has the ability to adjust 180 degrees, which beats out many competitor wave makers that can only adjust up and down. This is a great option if you are planning to place a wave maker in the corner of an aquarium.

    Because it’s not a DC wave maker, it lacks a lot of the controllable features of them. However, Hydor also had one of the first wave maker controller accessories. If you purchase their wavemaker controller, you will have the control you want with the AC reliability. My only complaint if you purchase the wave maker and the controller is that is louder than some DC wave makers like the Current USA. I usually deal with noise levels being a major factor for installs. It’s the main reason I do not use them for residential installs.

    Pros

    • Attractive price
    • Proven AC technology
    • 180 degree adjust-ability

    Cons

    • Not controllable on its own
    • Louder than some DC pumps

    Best For: Freshwater/Saltwater Aquariums

    6. Fluval Sea CP – Hagen Finally Gets Serious About The Marine Hobby

    Fluval Sea CP

    Hagen’s entry into the wavemaker sequence is a sold one. Built on reliable AC technology

    Buy On Amazon

    Hagen, the parent company of Fluval has been a big name brand in the freshwater industry for decades. When they got serious about saltwater aquarium keeping with their new Fluval Sea brand, the industry started listening. The Fluval Sea CP Wavemakers are Fluval’s first serious dive into a competent wavemaker that works for saltwater tanks. It has the trusted European engineering that we all know and love from Hagen and the great prices that go with Hagen’s extremely vast network of distribution.

    This is also the first AC powered wavemaker on the list. AC powered wavemakers in general can be more reliable than DC powered aquarium wavemakers because the technology has been well established and there are less failure points to consider when you just plug a wavemaker in without a power supply or controller.

    The main thing I will shame Hagen for is using a suction cup. A magnet suction cup base would have been well appreciated. As with most AC wavemakers, there are no adjustable functions or modes, so you will have to purchase a separate wavemaker accessory to get adjustability with it.

    Pros

    • Hagen brand name
    • Great price
    • AC powered = proven reliable technology

    Cons

    • Uses a regular suction cup instead of a magnet suction cup base
    • Bulky
    • Not adjustable or controllable (unless you purchase a wavemaker controller)

    Best For: Freshwater/Saltwater Aquariums

    7. Maxspect Gyre XF Series – The Advanced Gyre for Advanced Reefers

    Maxspect Gyre XF

    The top of the line Gyre unit from Maxspect. Offers the best in cutting edge wavemaking technology

    Click For Best Price Buy On Amazon

    The Maxspect Gyre XF Series is the newest 3rd generation Gyre. This new generation gyre has been re-engineered so there are less parts and more intuitive assembly for easier maintenance. The most noticeable upgrade to these new gyres have detachable water flow directors that allow you to place the pump closer to the surface of the aquarium. These gyres still work with the CV6 controller from CoralVue so if you are looking to upgrade your previous version you don’t have to purchase another controller.

    This is a gyre loaded with features, which is expected from a premium level product. It commands a premium level price tag. It’s worth the money if you are building a high end system.

    Pros

    • Great features
    • Can be mounted higher than other gyres
    • The quietest gyre on the market

    Cons

    • Expensive
    • Still large and bulky compared to wavemakers

    Best For: Saltwater Aquariums

    8. Sicce Voyager – Italian Made Reliability

    Sicce Voyager

    Italian engineered and designed. Sicce delivers in their wavemaker debut

    Click For Best Price

    Sicce is best known for their protein skimmer pumps. Their skimmer pumps are the gold industry in the saltwater aquarium community. These Sicce Voyager Wavemakers are made of the same engineering quality of the famous skimmer pumps.

    The Italian made pump results is an extremely reliable pump that will last years in your aquarium. It also has the added advantage of being AC powered pump, which makes it will lack the failure points of a controller or power supply. Sicce also sells a Wave Surfer accessory, which will give you the added control-ability that you would get with a DC aquarium wave maker.

    Because you are working with a high quality Italian maker, there is an added cost for this pump. It is the most expensive AC wavemaker on the list, but you can assure yourself that you will get years of reliable service with this wavemaker. Outside of that, I personally think they look a little ugly and bulky, but I believe most people will see past that.

    Pros

    • Italian made quality and engineer
    • AC powered = more reliability
    • Sicce makes their own aquarium wave maker accessory for extra controllability

    Cons

    • Bulky and ugly looking
    • Expensive for an AC wavemaker

    Best For: Freshwater/Saltwater Aquariums

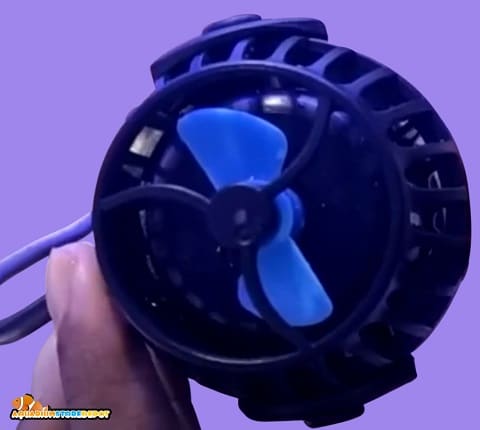
    9. SunSun JVP – Cheap, cheap, and CHEAP! The cheapest choice for those on a budget!

    Sun Sun JVP

    A very cheap and serviceable wavemaker. Great for quarantine tanks and budgets

    Buy On Amazon

    If you are looking for a wave maker that is dirt cheap, the SunSun JVP Wavemakers are what you are looking for. Easily the cheapest aquarium wave maker on the list. The SunSun JVP wake maker is so cheap, I have no clue how the manufacturer even makes money on these when you add in shipping costs. Regardless, these are powerful and cheap wavemakers and are well suited for those on tight budgets.

    These are offered in a few GPH (gallons per hour) options, and several packages you will see online will actually come with 2 units, which is great knowing that you should expect these units not to last. The pumps are so cheap, you can nearly disregard the durability concerns. I still wouldn’t personally use them on my display tanks, but I do use them for my mixing stations and when making water changes. Their value really can’t be beat.

    Pros

    • Insanely cheap
    • Powerful flow rate with lots of GPH (gallons per hour) options

    Cons

    • Chinese quality = expect them not to last
    • Loud compared to other wavemakers on this list
    • Suction cup instead of magnet

    Best For: Mixing stations and budget aquariums

    10. Tunze Nanostreams – The Most Reliable On The Market.

    Tunze NanoStream

    The most reliable wavemaker on the list. Known for lasting many years

    Click For Best Price Buy On Amazon

    Would you like to purchase an aquarium wave maker and never worry about it for the next 10 years? That is how anything Tunze designed is made and these Tunze Nanostreams are no exception. With the explosion of cheap Chinese made pumps flooding our aquarium industry, Tunze has quietly designed the most reliable and functional wavemaker on the market. The design is so well made, they haven’t even bothered to release a new generation model in ages!

    Tunze is simply the Eheim of the saltwater industry. Well known for creating products that last the test of time. They just do not market a lot, but anyone with years in the industry can attest to their name brand quality.

    This particular model comes equipped with it’s own controller that provides a good amount of functionality. The wavemaker itself can rotate a full 180 degrees just like the Hydor. If you want to go with DC power, Tunze sells a DC Nanostream Version as well that is even more powerful and feature rich. It’s really too bad that EcoTech has that patent on their mag drive tech because Tunze’s reliability is way better.

    That really is my only gripe with these pumps. They look old because they haven’t been updated in ages and the wire is inside the aquarium. They are big and bulky and easily show in your aquarium. Tunze does sell a rock mount accessory, but it doesn’t mean much as you still have to figure out what to do with the wire inside the fish tank.

    This is the most reliable pump maker period. If you want a pump to last forever, get a Tunze. You will thank me later.

    Pros

    • Incredible reliability
    • Highly adjustable control
    • 360 adjustability
    • AC or DC powered versions available

    Cons

    • Big and bulky looking
    • Expensive

    Best For: Saltwater Aquariums

    Factors to Consider When Buying (Our Criteria)

    It can be overwhelming to find the right aquarium wave maker for you. I have compiled a list of the best ones in the market using the following criteria:

    • Price – Some wavemakers are extremely cheap while others are very expensive.
    • Warranty – A manufacturer that makes a reliable wave maker backs up their aquarium wave makers with a solid warranty.
    • Durability – What are the field tested stories of these units. Have they been running for years or do they break every 6 months. If they break easily, are they cheap enough for you to consider disposable?
    • Safety – This is not so much of a concern with AC powered wave makers, but DC powered wave makers have their own power supply. You will want to make sure the power supply has a water tight seal at the connect point and that the unit has either a ETL or UL rated. ETL or UL rating ensures that your insurance covers an accident that may occur.

    How To Install

    Wave makers are extremely easy to install. Depending on whether you have a suction cup model or a magnetically attached model the install with differ slightly. With suction cups, you simple stick them to the aquarium glass/acrylic. They may have a knob or tab you can use to add in additional suction power, but that is really all there is to it.

    For magnets, it’s even easier as you stick the dry side magnet on the outside of the aquarium and put the wet side magnet on the inside of the fish tank. Once the wet and dry end do their thing, all you need to do to adjust the height of the wave maker is to hold the dry and wet side as you move the wave maker to the position you desire.

    Now choosing the best location for your aquarium wave maker is a bit of a complex topic. I’m going to focus on saltwater aquariums since water flow matters so much for corals. Here is a wonderful video from Current USA explaining the best position and flow to use with corals in a reef aquarium:

    Benefits of Use

    You may have seen traditional powerheads at your local fish store or pet chain store, so let’s talk about why you should consider a wave maker over a powerhead.

    Natural Water Flow

    An aquarium wavemaker produces a more natural looking flow pattern that replicates nature. A traditional powerhead is a sharper and fixed stream of flow that can be disruptive to fish or corals. It’s easier to get good water movement at the waterline with a wavemaker, which will work to eliminate surface scum that can accumulate at the top of the waterline.

    Ideal for Corals and Invertebrates In Your Saltwater Tank

    Corals in a reef tank demand variable as well as consistent flow. Some of them demand a rather high amount of flow that you are only going to get with a wave maker. You can easily purchase wave makers that can produce a flow rate of over 2,500 gallons per hour of flow with various settings. These settings are made to replicate nature and make your corals thrive. Invertebrates such as anemones will also benefit from the flow from these wave makers.

    Eliminates Dead Spots

    Wavemakers like Gyres are ideal for removing dead spots due to their design of covering all levels of the fish tank. You can also achieve this with multiple wavemakers. In freshwater, this ensures that oxygen is evenly distributed in the fish tank. In saltwater, this ensures constant flow and prevents detritus and cyanobacteria from growing in dead spots.

    Ideal Power Outage Solutions for Larger Tanks

    We do not like talking about it, but being prepared for a power outage is a big deal as it is one of the major reasons for a tank crash. In larger fish tanks, battery powered air pumps will not get the job done completely. This is where a DC powered wavemaker comes into play. Because they use so little power, they can be hooked to uninterrupted power supplies (UPS) and run for several hours. Some manufacturers actually make their power outage solutions, allowing the unit to run for several days!

    Different Types

    If you are new to the hobby, you may be confused what are the different types of pumps and why they so different. There are actually 4 types of aquarium pumps in the hobby and not all are suited for wavemaking:

    • Filtration Pumps – These are the pumps you will usually see on power filters. They are designed to create a high water pressure stream and have an impeller to resist back pressure. It has a higher energy consumption demand. As a stand alone pump, it is not suited for wavemaking
    • Circulation Pumps – Also known as return pumps or an aquarium flow pump. These pumps are made to pump water from one area to another. For example, from a sump to a main display tank. They are made to be placed on the bottom of a sump or externally depending on the model. They are not right for wavemaking
    • Powerheads – These are the traditional powerheads of old. These are what us old timers used to use. They produce a narrow, high pressure water flow. They sometimes come with diffusers to soften the water blast and they are not suited to be controlled with a wavemaker controller that would turn it on and off. They are also notorious for sucking up small fish because of their design. Some powerheads like the MJ1200 are extremely reliable units.

    AC vs DC – Knowing the Differences

    Before we go over all the wavemakers, I should explain the differences between AC and DC Wavemakers. AC wavemakers are based on old technology and are really plug and play. The big name brands like Fluval and Hydor, built their AC wavemakers on high quality and proven parts and engineering. This means AC wavemakers are extremely reliable and less prone to failure. On the budget side of things, AC wavemakers are going to be cheaper than DC wavemakers. For large fish tanks, they will be louder and they will consume more energy. They may not be ideal as a power outage solution because of the power needed to run them.

    DC Wavemakers are the new technology on the block. They offer decreased energy consumption, which is a big deal for larger fish tanks and reef tanks that require a ton of flow. They can produce more gallons per hour than most AC wavemakers and for the most part they can be more silent – to the point of being dead quiet. They have the ability to be programmed with controllers and many come with their own. These controllers provide a ton of customizable options for aquarists.

    However, with all this new tech comes reliability issues. Many DC wavemakers unfortunately are made and built in China. This can provide several quality control issues, especially with budget DC wavemakers. DC Wavemakers have three failure points vs. one for an AC wavemaker. With DC wavemakers you have the controller, powersupply, and motor all as failure points. With AC wavemakers, all you have to worry about is the motor giving out.

    What Do You Feel Are the Ideal Units?

    I hope after this article you are able to see why wavemakers are superior to powerheads and what are the best wavemakers available. There is a best aquarium wave maker for everyone depending on your wants and budget. All of these can work for freshwater aquariums all the way up to reef tanks.  Please let us know in the comments your thoughts about which wavemakers have worked for you. Thanks for reading.


    ๐Ÿ”ง Want to learn more? This article is part of our complete Aquarium Equipment & Gear Guide. your ultimate resource for filters, heaters, lights, pumps, tanks, and more.

  • Best RODI Systems โ€“ 2026 Reviews ๐Ÿ… (What’s Best for your Saltwater Tank)

    Best RODI Systems โ€“ 2026 Reviews ๐Ÿ… (What’s Best for your Saltwater Tank)

    An RODI unit was one of the best investments I made for my reef. tap water was the silent cause of my early nuisance algae problems, and switching to 0 TDS RO/DI water made a measurable difference within weeks. I’ve used several systems over the years and know what matters: membrane quality, DI resin capacity, and GPD output relative to your tank’s evaporation rate. Here’s what I recommend after years of making top-off water for a 125-gallon reef.

    For those of us who who are going into reef keeping, a Reverse Osmosis Deionization (or RODI System) is essential for successfully keeping sensitive corals and inverts. Many of us start out with smaller tanks and purchasing RODI or fresh saltwater from our local fish store. While this will work for a time, once you get into larger tanks an RODI system is essential for success because you need more water to replace your evaporated water in your display tank and you will be conducting larger water changes. After a while, purchasing fresh saltwater will become expensive and risky in the event of an emergency.

    Today’s post is all about awareness and providing options that work for a reef keeper. I will go through what is important to know when purchasing an RODI system, and go through several RODI systems that work for aquariums. Let’s get started :).

    Why Do I Need A RODI System?

    The main reason why a RODI water is so essential in a reef tank is because the water from our tap is loaded with impurities that will cause tons of nuisance algae blooms even when treated with water conditioners that you may be familiar with in freshwater systems.  

    The main measure we use in the hobby for contaminants in tap water is total dissolved solids or TDS. TDS is a measurement that comprises of inorganic salts and organic matter that are dissolved in the water you are using. A high amount of TDS in your source water will means that you are directly feeding nurtients that algae loves, which means you will have a never ending battle of nuisance algae.

    The gold standard for reef tanks is 0 TDS. Most tap water is going to produce anywhere from 150 – 400 TDS (yes it varies A LOT depending on where you live). Using a Reverse Osmosis system alone will likely get you down to 10-20 TDS, which much better but still is not acceptable for a reef tank.

    This is why you will need a multi-stage RODI unit that has a proper deionization stage that will get you all the way down to 0 TDS. It is also very common for your local fish store to sell fresh saltwater with TDS of 3-5, which can cause some issues. Knowing that the local fish stores often time will not sell true 0 TDS water is the primarily reason why I just purchase a quality RODI unit for my aquariums.

    The Best RODI System for Aquarium, Reef Tanks

    Now that I explained why an RODI system is so essential, let’s talk about what are the best RODI systems. I have used a number of brands and models over the years and installed several of these systems for clients. The list here are a collection of brands and models I would trust and I have included models from multiple price ranges and needs.

    In a hurry? I recommend SpectraPure MaxCap RODI Systems!

    PictureNameBest ForLink
    Editor’s Choice!
    SpectraPure MaxPure RO/DI System
    SpectraPure MaxPure RO/DI System
    • 5 Stages
    • Large Reef Tanks
    Click For Best PriceBuy On Amazon
    Best Value
    LiquaGen 5-Stage Reverse Osmosis/Deionization Unit
    LiquaGen 5-Stage Reverse Osmosis/Deionization Unit
    • 5 Stages
    • Display tanks over 55G
    Buy On Amazon
    Budget Option
    Aquatic Life RO Buddie
    Aquatic Life RO Buddie
    • 4 Stages
    • Nano Reefs & Apartments/Condos
    Buy On ChewyBuy On Amazon
    AquaFX Barracuda RO/DI Aquarium Filter AquaFX Barracuda RO/DI Aquarium Filter
    • 4 Stages
    • Display tanks over 55G
    Buy On Amazon
    Kleanwater RODI Kleanwater RODI
    • 4 Stages
    • Display tanks over 55G
    Click For Best Price
    Spectrapure MaxCap RODI Spectrapure MaxCap RODI
    • 4 Stages
    • Display tanks over 55G
    Click For Best PriceBuy On Amazon
    LiquaGen 0 TDS Aquarium Reef RODI Premium LiquaGen 0 TDS Aquarium Reef RODI Premium
    • 6 Stages
    • Large Reef Tanks and bad source water
    Buy On Amazon
    Fountainhead Water Systems RO/DI Dual DI 75 GPD System Fountainhead Water Systems RO/DI Dual DI 75 GPD System
    • 6 Stages
    • Large Reef Tanks and bad source water
    Buy On Amazon
    Ice Cap Smart 4 Stage 100GPD RO/DI Ice Cap Smart 4 Stage 100GPD RO/DI
    • 4 Stages
    • Large Reef Tanks
    Buy On Amazon

    Our 2023 Reviews

    Let’s dive into further detail and see what these units made the cut

    1. SpectraPure MaxPure 180 GPD

    Editor’s Choice
    SpectraPure MaxCap

    The Best RODI Unit

    With industry leading membranes and a 2:1 waste ratio rate, this is the best overall RODI system you can buy

    Click For Best Price Buy On Amazon

    For those of you with larger tanks and with demanding tanks, the SpectraPure 5 Stage 180GPD MaxCap line offers the pinnacle of RODI filtration. This unit is equipped with two 99% rejection rate RO membranes. That’s two of the best membranes in the industry. This 5 stage unit is also equipped with pressure gauges, dual TDS meters, and an upgraded DI resin.

    The resin for this unit is two part. The first part is their Mega MaxCap DI and the finishing stage is the Enduro DI. Together, you get DI resin that has 4 times the capacity of typical competitor mixed bed DI cartridges. This unit runs so efficient you get a 2:1 waste ratio rate which will outperform nearly all RODI units on this list that will only produce a 3:1 waste ratio. This means you will save a little bit on water as well!

    You would think that a con would be that this isn’t a 6 stage unit, but this RODI filter simply doesn’t need it as it runs that well. The only con here is you have to pay for the performance since as these command a premium price.

    Great for: Large Reef Tanks 

    Pros
    • The membrane!
    • 4x more effective than most DI out there
    • 180 GPD
    Cons
    • Price

    2. LiquaGen 5 Stage Unit – With All The Necessities 

    Best Value
    LiquaGen – 5-Stage RODI

    Best Value

    A complete 5 stage RODI unit without the excessive price

    Buy On Amazon

    Not on our list is a 5 stage RODI system from LiquaGen that offers all the main features I kept putting cons for others on this list. This system has everything you will need to make 0 TDS water. It comes with a flush valve to extend the life of your membranes, a pressure gauge to ensure you water pressure is ideal, and a TDS meter so you know when you change your DI Resin.

    This unit does command a higher price tag compared to the other budget models on this list, but it has everything you need. There is an option on the product page to go without the TDS meter and pressure gauge for a big discount, but having everything pre-installed is a time saver.

    The unit only comes with a garden hose adapter. You may need to purchase additional accessories for a under the sink install. This is the best performance for dollar on the list

    Great For: Large Reef Tanks

    Pros
    • Has everything you need for 0 TDS water
    • Universal chambers and membrane fittings
    • Flush valve!
    Cons
    • Price
    • Only comes with a garden hose adapter

    3. Aquatic Life RO Buddie – The Choice for College Students, Nano Reefers, and Apartment Residents

    Budget Option
    Aquatic Life RO Buddie

    Budget Option

    Compact and great for smaller tanks. This is the best unit if you live in an apartment or dorm

    Buy On Petco Buy On Amazon

    For those of you with small tanks, college students, and those who live in apartments, the Aquatic Life RO Buddie is the perfect choice for you! This unit comes in 50, 100, and 150 gallon per day options and all three options are very well priced. It is a compact unit that can easily be moved wherever you need without having to worry about permanently installing it someplace. 

    Because it is a mobile RODI system, it is a bare bones unit. There is no pressure gauge, no TDS meter, and no flush valve. It also only comes with a garden hose adapter. Filters are also not universal so you’ll have to purchase Aquatic Life filter replacements.

    Great for: Nano Tanks, college students, and apartment residents

    Pros
    • Great Price!
    • Compact and mobile
    • Multiple GPD options 
    Cons
    • Missing gauges and valves
    • Only offers a garden hose adapter
    • Filters are not universal

    4. AquaFX Barracuda – A Brand Name on a Budget

    AquaFX Barracuda

    A solid 100 gallon per day unit made by a manufacturer dedicated to building quality units for saltwater tanks

    Buy On Amazon

    AquaFX is a long-standing manufacturer of RODI units for aquariums so the name brand is there. The main attraction is the simple build of the RODI unit and the 100 gallons per day (100 GPD) rating. Usually with budget units, you will have a GPD rating of 75 or less so this is a nice touch and you have the comfort of purchasing a unit that is from a maker that specializes in aquarium equipment.

    With a budget unit, you usually have a few components missing however. The unit does not come with a TDS meter, so you either have to purchase a TDS meter or you will need to eye ball your RODI chamber for when the color starts changing. A flush valve is not included. A flush helps extend the life of the RO membrane and knowing how pricey these are to replace, getting the most life out of it is something you will want to maximize. There is also only a garden hose included in this package.

    Great For: Display Tanks Over 55 Gallons

    Pros
    • Name brand
    • 100 GPD rating
    • Simple
    Cons
    • No flush valve
    • Only a garden hose adapter is included
    • No TDS Meter included

    5. Kleanwater – From A Trusted Retailer

    Kleanwater RODI

    Sold by a trusted retailer in Marine Depot, this 4 stage unit has all the essentials to make and maintain 0 TDS water

    Click For Best Price

    The Kleanwater RODI is a very well priced RODI unit that can fulfill the needs of most reefers. It is a 4 stage RODI unit equipped with a pressure gauge and a TDS meter, which ensures you will always have 0 TDS water.

    This is a very well priced unit, but it is missing a flush valve that would extend the life of the RO membrane. Other than that, it would be the perfect 4 stage unit

    Because this unit is made by Marine Depot, they offer a 15% discount on replacement filters for as long as you own the unit. Depending on how long you plan to stay in the hobby, that can save you a lot of money over time.

    Great For: Display Tanks Over 55 Gallons

    Pros
    • Good price
    • 15% off filters for life!
    • Brand name
    Cons
    • No flush valve

    6. SpectraPure MaxCap – Name Brand and The Highest Quality Membranes Available!

    SpectraPure MaxCap

    A stellar 4 stage RODI unit by Spectrapure. Best membranes in the industry

    Click For Best Price Buy On Amazon

    Spectrapure is the name of choice when it comes to Reef Aquarium RODI units. This Company out of Arizona has been producing high-end RODI units with the best components in the market for many years now. So what makes them so great?

    The main thing that SpectraPure offers is their membranes. Their membranes are far and above the best on the market with a 99% rejection rate that sets the industry standard for contaminate removal and membrane longevity. There is no RODI maker on the the market for in this industry that can offer this level of filtration.

    SpectraPure’s primary 4 stage offering is the SpectraPure MaxCap RODI. Rated at 90 gallons per day, this unit has enough of a production rate to handle most reef systems. What you are getting with this brand is higher quality filtration stages. The membrane is the best in class and the maxcap carbon cartridge and silica buster DI are great features of the system. The maxcap systems are excellent for long life and insane pure water. Other brands will try to stuff other features or stages into their units, but this 4 stage unit has high end components that will easily compete with 5 and 6 stage units.

    It’s a pricey system, but if you want the brand in the business, Spectrapure is where you need to go.

    Great for: Large Reef Tanks

    Pros
    • Best RO membrane on the market
    • Stellar reputation in the industry
    • Outperform cheaper made 5 and 6 stage units
    Cons
    • Price
    • No TDS Meter
    • No flush valve

    7. LiquaGen 0 TDS 6 Stage – The Most Comprehensive 6 Stage Unit On The List!

    LiquaGen Premium RODI Unit

    6 stages 150 gallons per day and all accessories included. Best for high demand reef tanks

    Click For Best Price

    Looking for better than a 5 stage unit? This 6 stage RODI package from LiquaGen delivers! This is a complete 6 stage RODI system that includes a flush valve, pressure gauge, and TDS meter. Those are basic features that you get with this unit. It gets better though! This package comes with a booster pump that drives the gallons per day production to 150 gallons per day. That is the highest GPD rating on the list! This is the ultimate in filtration for those with high demand tanks, large reef tanks, and high TDS water.

    The cons here? Well, you get what you pay for. It has a premium price tag attached to it. It like all LiquaGen filters, only comes with a garden hose adapter

    Great For: Large Reef Tanks and bad source water

    Pros
    • Booster pump included
    • 6 stage RODI with all the essential features
    • 150 gallons per day!
    Cons
    • Expensive
    • Only a garden hose is included for install

    8. Fountainhead Water Systems – A Well Balanced, Comprehensive Offering!

    US Made!
    Fountain Head RODI

    Made In The USA!

    A well priced 6 stage unit. One of the best values on the internet

    Buy On Amazon

    The Fountainhead Water Systems RO/DI System is a comprehensive unit that offers a 6 stage filtration for a great price! This unit is loaded with all the necessary stages of a great 6 stage setup. Foundationhead water systems is not an aquarium specialized filtration, but a water filtration company that sells filtration units for homes. This unit is a variant that works that for reef tanks. They are an American based company there systems are American Made.

    The are two flaws that I see with this unit, but both are easy to upgrade. A pressure valve and TDS meter is not included. If you upgrade your purchase with these two accessories, this is a perfect 6 stage unit for a incredible price! 

    Great For: Large Reef Tanks and bad source water

    Pros
    • Great price!
    • 6 stage system with universal RODI cartridges
    • Multiple install option accessories included
    Cons
    • No Pressure Valve Include
    • No TDS Meter included

    9. IceCap Smart 4 Stage – A High End Unit Made for Reefers

    IceCap Smart 4 Stage RODI

    A high end system desiged for reef tank owners

    Buy On Amazon

    The IceCap 4 Stage RODI unit is a high end RODI system made for reefers. The main feature this system has smart controller that offers an impressive range of features. The main feature is a timer mode, that prevents you from overflowing your wash room in the event you forget to turn off your unit. A booster pump is included, which is a substantial feature if you have a low water pressure residence. It has a 3 point TDS meter which measures before the filter, after the membrane stage, and after the DI stage. It’s easily the most accurate and high system on this list.

    It also commands a premium level price. This is the most expensive RODI system on the list and it’s only a 4 stage not a 6 stage unit. You get what you pay for though!

    Great for: Large Reef Tanks

    Pros
    • High performance parts – Dow Filmtec Membrane
    • Smart controller features – made for reefers
    • Auto membrane flush feature included
    Cons
    • Expensive!
    • Only a 4 stage unit
    • Requires electricity to operate

    Our Recommendations

    Best Value
    LiquaGen 5-Stage RODI

    Excellent Value!

    Budget Option
    Aquatic Life RO Buddie

    Cheap and Compact

    There are a number of choices here, but I’m going to close this out with my top three:

    What is the top choice for an Aquarium?

    I determined based on multiple factors that the SpectraPure MaxPure series the best in the industry. But how did I determine that?

    When it comes to RO/DI systems, there are A LOT of choices and the prices can get insane. You do not have to purchase the most expensive RO/DI unit out there. What you need to purchase is one that works for you. With that, it’s important you know what components make the best RO/DI systems.

    Multi-Stage Units

    This is the first must of any system. You will want an RO/DI unit that works through at minimum a 4 stage process. I’ll explain the process as illustrated by AquaFX below:

    RODI System Stages

    Most multistage systems will start with a sediment filter and carbon block as the first two stages of the system. A sediment filter removes silts and other large particulate matter that would clog the later stages and dirty up your water. The carbon block then removes organics with with chlorine and chloramines, which would damage the RO membrane.

    The water is then moved to the RO membrane. This is the workhorse of the RODI system. Most RODI systems will remove 95% of impurities out of the tap water. These impurities would include things like salt, bacteria, heavy metals, and other organics that would be harmful to your livestock. Some membranes like Spectrapures, are even a higher quality and can remove up to 99% or impurities, but 95% is the typical standard.

    You get to the final stage which is the deionization stage. this cartridge will remove the last of the impurities of the water giving you that 0 TDS gold standard source water that we as reefers look for.

    This is your standard 4 stage RODI unit. There are others that will go 5 or 6 stages. Personally, the main upgrade I would be looking for would be multiple DI stages for stable 0 TDS as the the DI stage gets exhausted. A 6 stage system flowchart is shown below so you can see how these higher end systems work.

    6 Stage RODI Stages

    How To Setup

    The most annoying thing I always found when purchasing these expensive units is the lack of instructions on how to go about installing one. Most people are likely going to install this unit in their wash room, so the best example to go off of is a video by Taylor Nicole Dean as she shows how to install this RODI system using a garden hose adapter.

    Here’s an another video of a garage install from Reefbum. They installed an Spectrapure MaxCap Unit:

    How Much Water Pressure Is Necessary?

    RODI Water Pressure Meter

    In some homes, your water pressure may be too low for an RODI system to function properly. The RO water pressure gauge on your RODI unit will let you know if you have drops in water pressure. The main thing you want to watch out for is if your water pressure is below 50 PSI. RODI system work optimally at around 60 PSI. If your water line is pushes only say 30 PSI, you may want to consider an RO booster pump or checking your filter lines for clogs.

    Maintaining Your Unit

    Each stage of your RODI filters need to replaced in order to keep your system in optimial operation. If the system is not maintained regularly, the RODI system can produce less water and TDS could actually leak through the system. The great thing about RODI systems is they last for forever, being one of the most reliable systems and mainstays in your tank operations.

    Sediment Prefilter

    The ROD sediment prefilter needs to be replaced every six months or sooner for areas with higher TDS water (over 400).

    Carbon Cartridges

    With a used cartridge, your membrane will end up doing more work and may even develop bacterial growth in the chamber. This should be replaced every six months.

    Reverse Osmosis Membranes

    Spectrapure Membranes

    The workhorse of the system, this is the most important thing to change in your RODI unit aside from the DI resin. Usually these will need to be replaced every 9-12 months, but sometimes can go longer with a flush kit being used and cleaner source water. The best way to gauge this is to see what TDS is come out of the membrane stage. If you are getting a much higher number than what you are used to seeing, it may be time to replace the membrane. Dow Filmtec membranes and Spectrapure RO membranes are the best in the business. Just check with your RODI manufacturer to ensure they fit if you go with them.

    Deionization Cartridge

    The final stage of your system is the easiest to gauge when you need to change. This is because most resin you purchase will change color over time. You can also read your TDS meter and consider changing your DI resin once your TDS meter is reading 1-2 TDS. It will depend on your source water and rejection rate as to how long these will last. There are several DI resin available on Amazon with Lanxess DI Resin being the most consistent with reviews and they also ship fastest. SpectraPure Resin is considered the best in the business, but it’s most preferred to order them directly from them for the best price.

    Closing Thoughts

    I hope this blog post helps with deciding what RODI system works best for your needs and budget. Every unit I listed here serves a purpose for every tank setup and budget. You will not be disappointed with any of the filters on this list. These systems will delivery quality 0 TDS water and will offer years of service. I look forward to hearing about your success in the hobby with these excellent units. If you are shopping around for more equipment, check out our Best Protein Skimmer Reviews post so you can pick out a quality skimmer for your system. Thanks for reading.


    ๐Ÿ”ง Want to learn more? This article is part of our complete Aquarium Equipment & Gear Guide. your ultimate resource for filters, heaters, lights, pumps, tanks, and more.

  • Saltwater Aquarium Equipment Guide: Where to Spend and Where to Save

    Saltwater Aquarium Equipment Guide: Where to Spend and Where to Save

    I’ve set up saltwater aquarium equipment and tanks at almost every budget level. from a modest starter system to a full SPS-dominant 125-gallon reef. and the equipment decisions that hurt people most are almost never the big-ticket items. It’s the corners cut on lighting, skimming, or flow that quietly derail a tank over months. After 25 years of seeing what works and what fails, I know exactly where to spend and where the cheaper option is perfectly fine.

    Saltwater aquarium equipment is where most new reefers get burned. not by making one expensive mistake, but by making five medium-sized ones chasing shiny gear they didn’t need. I’ve been setting up and tearing down reef tanks for over 25 years, I’ve personally tested hundreds of pieces of equipment, and I run a sponsor-free site, which means I can tell you what actually works without worrying about whose product I’m pushing. The reality is that for most of the gear categories in a reef tank. skimmers, return pumps, heaters, lighting. there’s a gold-standard option and a budget option that performs at 80-90% of the quality for half the price. This guide maps out both for every major equipment category so you can decide where to spend and where to save.

    I won’t lie to you…

    Saltwater Aquarium Equipment is Expensive!

    With the added marketing efforts and push towards high tech and cool looking saltwater aquarium equipment, it’s easy to find equipment like LED lighting costing over $800 that just covers a 2×2 space. Where does this madness end! It’s easy to get scared away from forums, the LFS, and big equipment e-stores telling you the cheap stuff is junk and doesn’t last.

    I’m here today to help guide you show you the gold standard in the industry and the cheaper alternative that can literally save you hundreds even thousands of dollars.

    I will pull out no stops here and will throw out equipment I don’t even carry for the sake if saving you dollar bills. The way I see it, if I can supply you with alternatives for the high end saltwater aquarium equipment the more money you will have to enjoy the hobby! We will use a standard 4 foot 120 gallon reef tank equipment setup as our example.

    RODI Systems

    This is the heart of a larger tank setup. Lots of water top off and the ability to store water when you need it in a pinch is a really big deal when you are running a larger saltwater aquarium and reef tank.

    Best RODI System

    The SpectaPure MaxCap RODI System is the top of its class when it comes to a high end RODI system. With the best membrane rejection rate on the market and quality construction this is the unit to purchase if money is not an issue.

    Editor’s Choice
    SpectraPure MaxCap

    The Best RODI Unit

    With industry leading membranes and a 2:1 waste ratio rate, this is the best overall RODI system you can buy

    Click For Best Price Buy On Amazon

    Cheap RODI System But Still Reef Worthy – LiquaGen 5 Stage RODI

    The Spectra Pure RODI System commands a premium price tag of several hundred dollars. That’s not exactly cheap. There are two alternatives I will provide here. The first is a similar 5 stage RODI System from LiquaGen. This system is easily half the cost of a comparable Spectrapure system and will do the job for many reefers out there.

    Best Value
    LiquaGen – 5-Stage RODI

    Best Value

    A complete 5 stage RODI unit without the excessive price

    Buy On Amazon

    The RODI Unit for Budget and Nano Reefers – LiquaGen 4 Stage RODI

    For those with smaller tanks the Aquatic Life Portable Aquarium RODI 4 stage system is a great solution to free you having to get RODI water from your LFS or distilled water from the grocery store. Nearly half the price of the 5 stage, this unit should be able to fit the smaller budgets of small tank builds and nano reefers.

    Budget Option
    Aquatic Life RO Buddie

    Budget Option

    Compact and great for smaller tanks. This is the best unit if you live in an apartment or dorm

    Buy On Petco Buy On Amazon

    Protein Skimmers 

    Ah yes Protein Skimmers, the heart of the vast majority of successful reef tanks. They have been a staple of many saltwater aquariums. Unfortunately, they tend to get VERY expensive at the highest end levels. Fear not though, I have you covered.

    Best Protein Skimmer 

    The Nyos Quantum 120 Protein Skimmer is definitely one of the best protein skimmers on the market. Sure there are some skimmers at this 120 gallon reef tank example size that can command a higher value and we are not over sizing in this case, but the Nyos has been the go to of one big YouTubers like FishofHex

    Editor’s Choice!
    NYOS QUANTUM

    The Best Protein Skimmer

    German made, super silent, and world class performance. This is the pinnacle of skimmer technology today!

    Click For Best Price Buy On Amazon

    Bubble Magus Curve – The Go-To Cheap Protein Skimmer

    The Bubble Magus Curve Series has been the go to for a cheap protein skimmer for many years in the hobby. Well trusted, reliable, and works very well. it will serve you well in your system. It should be around half the cost of an equivalently rated Nyos skimmer.

    Budget Option
    Bubble Magus Curve

    Budget Option

    Great skimmer for a great price

    Click For Best Price Buy On Amazon

    Return Pumps 

    Let’s talk about return pumps. This is a central piece of any reef system using a sump. I would argue next to a heater, it is the one major component of a reef system that you cannot afford to fail. When selecting a return pump, reliability and durability are above any feature a manufacturer can offer in my opinion.

    Abyzz DC Controllable Pumps – Best DC Return Pump

    If money is no object, the Abyzz DC Controllable Pumps are top of mind of the best things out there. It is a DC pump that is backed by a 10-year warranty. This German made DC pump puts out no stops when it comes to quality and the price shows. For the 120 gallon tank we are using as an example, the A100 is the model we are going to select and at a massive $1,499.99 price tag, this DC pump will provide years of worry free operation.

    Abyzz Pumps

    Reef Octopus VarioSCheap Aquarium DC Return Pump

    The Reef Octopus VarioS series DC pumps offer a solid cheaper solution for a DC return pump. While it does not have the 10 year warranty, the VarioS pump does offer a 2 year warranty and has been often called the best value among DC return pumps on the market. In today’s market of high tech reef toys, the Varios DC return pump really focuses on quality and they provide a good mix of quality and value. I would definitely consider these over a Jabeo return pump.

    Reef Octopus VarioS DC Return Pumps

    Fluval Sea SP4 — We Are Going Old School! 

    Yes you are reading this correctly, an AC return pump. Now why would I put a this Fluval Sea SP4 AC Return Pump as the best value for cheapest and highest quality return pump for your sump? Well various reasons actually:

    • An AC pump has less failure points than a DC pump with only the motor and impeller. A DC pump can additionally fail on the controller and the power supply – of which both tend to fail quite frequently
    • An AC pump handles head pressure better than a DC pump, which means it is more worry free if you are using manifolds or having to restrict flow
    • The Fluval Sea SP4 is built off the the same tried and true tech of return pumps that have run in the field for over 10 years – the Askoll Motor Block
    • The Fluval Sea SP4 is made in Italy – no cheap Chinese parts
    • The Fluval Sea SP4 is backed by a solid 3 year warranty. At its entry level price point you can buy several Fluval SP4s and still have enough money for other equipment over an Abyzz

    And flow if you are wondering is easily controlled by a gate or ball valve on an AC return pump. There are other very solid very durable options like a Danner Magnum Pump or Eheim Hobby Pump, but the Danner tends to be loud and the Eheim Hobby Pump does not produce enough GPH for it to be applicable to our 120 gallon tank example. The Fluval Sea SP4 completely crushes it with quiet operation, a solid Italian made pump, proven durable AC technology, and good looks. Get one today and forgot about it for the next 10 years – Askoll built pumps are that good!

    Fluval Sea SP

    Designed with the reliable Askoll motor, these Italian made AC return pumps are a great pickup

    Buy On Amazon

    Reef LED Lighting

    Our last core piece of equipment we are going to touch on is Reef Led Lighting. This is a section where you can spend $1,000s of thousands on top end of lighting, but I’m going to show you a few alternative so you don’t break the bank.

    EcoTech Marine Radions Best Reef Tank Lighting System

    There is a reason why top coral sellers like World Wide Corals rely on EcoTech Marine Radion. They are incredibility flexible in functionality and well built units and with the diffuser upgrade are able to handle heavy SPS coral reef tanks. If money is no concern for you on this 120 gallon example 2 Radion XR30w units will do the job and handle any coral build and is considered by many the best lighting system for a reef tank.

    Used by World Wide Corals
    EcoTech Radion G5

    Editor’s Choice

    The newest Radion G5 is a massive update to the prior generation. It’s the light of choice for pro level reefers.

    Click For Best Price

    EcoTech Marine Radions Cheap LED Reef Tank Lighting System

    Ah the Chinese black box. While other sellers try to scare you away from them, the Mars Aqua LED Reef Aquarium lighting system offers a quality light that is fully capable of growing corals in a mixed reef system and even heavy SPS reef tank. They are ETL rated, which is considered an equivalent of UL rated. Two of 165W models will work for most reefs and two 300W could be considered for a heavier SPS setup. They are easily hundreds of dollars less than a Radion.

    Another additional option would be the Evergrow LED Reef Lighting System. Evergrow models are the same lighting manufacturer used by Reefbreeder’s older generation models that have been well received by the reefing community.

    What Other Picks Do You Recommend?

    Have another piece of saltwater aquarium equipment that you would recommend? Leave a comment below. We’ll follow up with a part 2 in the future that will go over other key equipment so you can continue to save money and still buy quality equipment.

    References

  • Saltwater Quarantine Tank Guide: The Setup Most Reef Keepers Skip (And Regret)

    Saltwater Quarantine Tank Guide: The Setup Most Reef Keepers Skip (And Regret)

    I skipped a quarantine tank when I first set up my reef. and I paid for it with a full-blown ich outbreak that took months to clear. It’s a lesson I only needed to learn once. Now a QT is non-negotiable for me before anything new goes into my display tank. The setup doesn’t have to be expensive or complicated, and I’ll show you exactly what I run and why it works.

    The saltwater quarantine tank is the single most important thing most reef keepers skip. and the consequences usually show up when it’s too late. After 25 years in the saltwater hobby, I’ve seen this pattern more times than I can count: a new fish gets added directly to a display reef, introduces ich or marine velvet, and within weeks the whole tank is in crisis. Marine parasites are extremely common in the trade. assuming fish from even a reputable store are disease-free is a dangerous assumption. A proper quarantine tank lets you observe fish, treat them if needed, and protect everything you’ve built in your display. This guide covers everything you need to set one up and run it correctly.

    Key Takeaways

    • Fish diseases are worse in saltwater fish with three being potential tank wipers – Marine Velvet, Brook, and Uroema
    • Probalaytic Quarantine is more common and accepted in marine fish vs freshwater fish
    • There are multiple methods you and use to quarantine fish – all with pros and cons

    Why Do We Quarantine Our Fish?

    I’m going to go off the cuff here and say that the primary reason for quarantine is recovery of your fish. Fish that you have picked up to from the local fish store or online have gone through a variety of channels to get to you. It is probably an understatement to say that if the fish has come to you and is wild caught it is within the top 25% of fish in the supply chain that made it out. Many fish die or get sick during capture and transplant.

    The Ornamental Fish Trade Supply Chain

    Quarantining a fish allows the fish to destress and for you to have the fish adjust to your parameters, your food, and provides it a safe space for it to thrive away from more aggressive and established tank mates who can out compete it for food. Putting a fish directly into your display puts the fish in more stress and added stress events leads to our next reason for why we quarantine our fish.

    Preventing Saltwater Fish Diseases Through Quarantine

    A fish’s immune system should be able to fight off more infections and diseases, however the shock of transportation compromises your fish’s immune system leaving it vulnerable to any disease that gets shipped with it. Some of these diseases when they break out can be so deadly, they can wipe out your tank within days. So what are these deadly diseases? Well, I will tell you right now it’s not ich. Ich is child’s play compared to these three and they are becoming more and more common in the fish supply chain.

    Three Deadly Fish Diseases

    When you look up diseases, forum posts, or YouTube videos online you will come to MANY articles about ich. Ich this and Ich that. Now Ich is common and can kill your fish, but can be treated and in some cases your fish can simply recover from it. But these three diseases are 100% deadly, will wipe out your tank in days, and there are no known ways to treat these diseases with reef-safe medications (Sorry Kick Ich, Ich Attack, Ich Guard, Paraguard — this ain’t working on them).

    Marine Velvet 

    Marine Velvet

    It’s the most common saltwater fish disease of the Deadly Three. It looks like ich, but it is far more deadly. Sometimes it kills fish before they are even able to display symptoms. Marine Velvet MUST be treated in a quarantine tank/hospital tank and requires your main display to go fishless for 76 days to remove it from the display. It is probably the #2 reason for tank crashes in the hobby with heater failures being #1. The go-to treatments are Copper or Chloroquine Phosphate.

    Uroema

    Uromea Marinum

    The least common of the deadly 3 but considered the worst and hardest to treat. Chromis and Anthias are unfortunately the most prone to this disease, but it can spread to other fish. This particular disease is resistant to Copper and Choloroquine Phosphate, requiring higher than traditional dosages. It can also go into the internals of the fish and damage it further requiring other medication like Metro to add in internal treatment. Uroema is also a free living parasite which means it can exist without fish present in the tank. Once a fish has Uroema one should assume that the disease exists in the system. Talk about scary!

    Brooklynella (AKA Clownfish Disease)

    Brooklynella Clownfish Disease

    Brooklynella is a nasty disease that Clownfish and Anthias are unfortunately prone to. This is how it got it’s infamous nickname of Clownfish Disease. Brooklynella looks similar to velvet, which in my opinion is why it is safe safe to assume that your fish has either or when you observe it. Both Brooklynella and Marine Velvet can be treated with Copper and Chloroquine Phosphate. Further protection with Metro is recommended to protect the internals of the fish as Brooklynella can also go internal as well.

    How To Isolate Fish – The Various Methods

    So now we have discussed why we quarantine fish, now let’s discuss the types of QT and rate each one.

    Deciding Not To Isolate

    No QT Tank

    All the power to you if you want to go this route. The hobbyists most successful with this method have stellar local fish stores (LFS) around them that they have strong relationships. If the store can hold a fish for you for 2-4 weeks, you will have better success. However, finding a local fish store this stellar for most of us is a needle in a haystack. Personally, in my location I have had difficulty finding a good local fish store. Literally every fish I have purchase came with something and QT has saved me tons of headache and thousands of dollars in losses.

    Hyposalinity

    Hyposalinity

    Hyposalinity has been around for ages in the hobby. It’s a tried and method that requires precision and constant monitoring. The reason why it doesn’t make my list of preferred methods is because it will not treat against the Deadly Three. This disqualifies this method for me.

    Tank Transfer Method (TTM)

    Tank Transfer Method

    Tank Transfer Method or TTM is a very popular method among the forums and even by some online store who have suggested it as a reliable method. However, the supply chain has changed since those times. 3 years ago I would say TTM was great, but with the increased commercialization of the hobby I am seeing more and more of the deadly 3 appearing and cannot recommend this method any longer. Tank transfer method will not protect your fish against the deadly three. You can however do a hybrid TTM with medications like Copper and CP, which I will explain in Part 2.

    Safety Stop

    Safety Stop

    Now we are getting to methods that protect against the deadly three (Amazon Affiliate links ahead). Safety Stop is first up (Ruby Reef Rally can also be used if you cannot obtain Safety Stop). Safety Stop is a medicated dip of Formalin and Methylene Blue. Formalin is consider one of the hard drugs of the hobby, capable of wiping out various disease such as Marine Velvet, Brook, and Uroema.

    Melev’s Reef has documented his process of how he added all his fish to his 400 Gallon tank with no quarantine over a 2 year period. That is proof that this method will work. Safety Stop will not prevent against internal parasite however and if your fish end up with a bacterial infection – there is no way to treat this in a display. This is why I recommend dipping your fish in Safety Stop before they go into Quarantine

    Copper – (Using Chelated Copper AKA Copper Power)

    Chelated Copper Coppersafe

    Time to get into the good stuff! The next two method are ironclad and will protect against just about any disease in QT. The next two methods also have their uses depending on the fish you needing to QT. Chelated copper is considered more preferable over over type of copper because it is safe and has a higher therapeutic range. You have to maintain your levels throughout the process and I would recommend a precise tester like a Hanna Checker.

    People are generally scared of copper due to the fears from Companies selling “Reef Safe” medication and those who want to do natural remedies. I will tell you right now that both Copper and Chloroquine Phosphate are veterinarian choices when it comes to treating external parasites. Would you rather listen to a licensed vet or a Company that wants to make money off you selling subpar medication?

    *UPDATE* – We no longer support Copper Safe for Chelated Copper. Copper Power would be the safest and more consistent chelated copper on the market. Use together with a Hanna Checker Copper Tester. Copper Power is very difficult to find at a local fish store. It is best to purchase it off Amazon directly from the manufacturer, Enrich. Copper can also be combined with General Cure instead of Prazipro.

    My Pick
    Copper Power

    The Most Available Velvet Mediciation

    Copper Power is Chelated Copper that is more stable than Cupermine and easier to use

    Buy On Amazon

    Here’s a video from my friend Aaron who goes over Copper Power treatment. You can use this Copper Power Calculator to determine the dosage you need:

    Chloroquine Phosphate + General Cure (The Current Meta In Marine Fish Disease Treatment)

    Chloroquine Phosphate

    We have come to the pinnacle of Prophylactic treatments available in the hobby. Chloroquine Phosphate plus the combination of API General Cure is provides the simplest nearly full proof method of quarantine. Chloroquine Phosphate (or CP for short) is the preferred medication for Marine Velvet, Brooklynella, and Uroema. It is as close to a wonder drug as you can get currently. It is easy to administrator as long as you have a good digital scale to measure (these are easy obtained for cheap).

    The main issue with Chloroquine Phosphate is that is it difficult to obtain outside of a Veterinarian’s prescription. If you are like me, you probably cannot obtain Chloroquine Phosphate from a Vet and have to go of the route of obtaining it from a supplier. Getting it from a supplier can be risky as you may not know the source and the purity of the substance. I obtain aquaculture grade Chloroquine Phosphate so you can always purchase it from me and I have certificate of analysis available so you know the purity and can adjust accordingly. Here is a link to a Chloroquine Phosphate Dosage Calculator.

    Instructions for Setup

    Setting up a quarantine tank is fairly easy to do, you just want to make sure you have the correct equipment and meds to get started. You will want to start off with a long tank. A 20 gallon or 29 gallon are ideal as you can use this larger quarantine tank to house multiple fish and get your QT done faster. A 10 gallon tank will also suffice, but more suited to 1 fish at a time quarantine. Petco’s dollar per gallon sale is the way to go to get these tanks as they are really cheap if you buy them on sale.

    After that, you want a reliable power head for flow – at least 400 gph and some type of filtration. I prefer to use the best power filter, which is an aquaclear power filter as you can use multiple media in the filter and use carbon to remove medication. A sponge filter is also an ideal alternative for a budget conscious build.

    A seachem ammonia badge is necessary to monitor your ammonia levels since many low priced test kits will not detect ammonia correctly once you start doing copper or chloroquine phosphate.

    A heater (check out our best aquarium heaters post for recommendations) and a cheap thermometer round out the list of electronic equipment.

    The last things are shelter and a cover. PVC fittings are ideal because they will not absorb medication and can provide tunnels for your fish. These can be purchased from any hardware store. A cover is an absolute must if you want to provide a fish from jumping. I prefer a glass cover for QT systems since I don’t have to worry about evaporation and can be custom cut in the back to ensure 100% coverage.

    Getting a QT tank cycled up can be a tricky endeavor. If you are starting brand new, the best way to quickly cycle the QT tank is to throw in a few of the filter sponges in your dry or live rock tank when you start cycling your main tank. Once that tank cycles, the media in the tank will be full of bacteria and ready to go into your QT. If you started with dry rock, you have the advantage of starting disease free so you can freely throw in the sponges in the QT system to get started.

    For live rock starts, if you follow the proper “cooking” method of no lights and a 5-8 week cure, that period of time going fishless should eliminate all harmful pathogens in the water column. Since you are going to use meds in your QT, the risk is pretty minimal so as long as you follow a 5-8 week fishless cure timeframe with liverock you will be ready to go with your QT system. The advantage you have with liverock is that the rock can self-sustain without fish indefinitely so you can take your time QTing. With dry rock, you will need to monitor your phosphates and nitrates to make sure you do not bottom out.

    If you already have a tank setup, throw in the filter sponges in your sump for 2-3 weeks to get it full of bacteria. You do run the risk of introducing pathogens if you didn’t QT previously. Another method is to dose the sponges with bacteria-in-a-bottle products like biospira and carefully monitor your ammonia levels from there.

    The video above goes over the parts list and the complete 32-35 day flowchart for quarantine with CP and General Cure. Both the method I use and Aaron’s will work very well so use the method that works for you and with the medications you can obtain.

    If you want to be in the know, subscribe to our YouTube Channel and sign up for updates to our blog. Stay Tuned!


    ๐Ÿ“˜ Want to learn more? This article is part of our complete Saltwater Fish & Reef Guide. your ultimate resource for marine fish, coral care, reef setup, and more.

  • How to Get Rid of Dinoflagellates in Reef Tanks โ€“ Control & Removal Guide

    How to Get Rid of Dinoflagellates in Reef Tanks โ€“ Control & Removal Guide

    Dinoflagellates are one of the most dreaded problems in the reef hobby. and I say that as someone who’s battled them firsthand in my 125-gallon reef. What makes dinos so frustrating is that they’re not fully understood and they require a multi-pronged approach to eliminate. I’ve worked through dino outbreaks myself and tested various strategies, and I can tell you the methods that actually move the needle. This guide covers everything from identification to long-term prevention.

    Key Takeaways

    • Dinos are caused by a combination of a lack of biodiversity and lack of nutrients in a saltwater aquarium
    • Dinoflagellates can light without nutrients and off lighting. Sunlight and lighting will make things worse
    • There are several ways to get rid of Dinos, but the most tried and true is adding biodiversity and dosing nitrates and phosphates to maintain minimal levels for other algae to grow

    What Are Dinoflagellates?

    In the Wild

    Dinoflagellates are protists, an organism that can function as a plant and an animal at the same time. Some dinoflagellates eat other protozoa; some generate energy through photosynthesis; some can do both. In the wild, there are about 1,700 different kinds of marine dinoflagellates and 200 freshwater kinds. They are important part of the food chain, providing nourishment for other sea creatures. In a natural environment, they’re a crucial member of the ecosystem. 

    In Your Tank

    Unfortunately, dinoflagellates quickly become a nuisance in an aquarium environment. 

    Dinoflagellates quickly overrun the surface in your aquarium because there is no specific ecosystem for them to survive. Depending on the conditions, dinoflagellates can multiply up to a million cells in one milliliter of water in just a short period of time. The bigger the population, a higher chance that it will make the water toxic and can kill other life form inside your tank. So, it’s important to control dinoflagellate population as early as possible before it occupies every space inside your aquarium. 

    What Should I Look For?

    It’s not like you’re going to go to the store and buy some dinos to dump into your tank; these pests are introduced to your tank accidentally. Your tank can get this from food, corals, rocks, and other aquatic plants. Dinos are very resilient because it can live without eating anything for a long time unlike any other life forms like algae.

    Nutrients are present in your tank which gives energy to fishes and plants. Even if your tank lacks nutrients, dinos can still survive. It is possible for your tank to have dinos if the nitrates and phosphates level in your aquarium are close to zero. It is important to regularly check your tank before it becomes too late. 

    Identifying What Dinoflagellate You’re Dealing With

    The best way to approach your dino problem is to first figure out what kind of dino has moved into your aquarium. 

    The most common dinoflagellate (or “dino” for short) to see in an aquarium is a slimy, stringy brown variety, commonly known as Brown Slime Algae. Most aquarium enthusiasts have dubbed it “the brown menace.” They’re not all brown, though. They also come in white, yellow, and various shades of green. 

    In more technical terms, there are four main dinoflagellates you’ll see in your aquarium1

    Ostreopsis

    Ostreopsis Dinoflagellate

    Prorocentrum

    Prorocentrum Dinoflagellates

    Amphidinium

    Amiphidium Dinoflagellates

    Coolia

    Coolia Dinoflagellates

    Some of the things all of these guys have in common is that they: 

    • Are mucous-like (sometimes described as runny boogers)
    • Produce air bubbles
    • Trap air bubbles between the slime and the glass of the tank
    • Spread quickly, covering all surfaces with coral being a particular favorite

    Here’s an easy test you can do to determine if you have algae or dinos: 

    • Scoop some sludge and water out of your tank.
    • Put the sludgy water in a clear container with a lid.
    • Shake the container to break up all of the floating bits.
    • Filter the water either through paper towel or a filter sock into a second clear container.
    • Leave the second container of filtered water in a sunny location.
    • Monitor the water for changes, namely the reappearance of mucous-like strands.

    Eventually, dinoflagellates will regroup after they’ve been filtered. Algae will remain separated. So, if the strands of goo show up, you know you have dinos! 

    How Do I Get Them Under Control?

    Dinos aren’t necessarily a bad thing. When there aren’t too many of them, they’re part of the ecosystem. But if you provide an ultra low nutrient tank with no biodiversity, they’ll make themselves known quickly. The best way to tackle them varies on how bad your case is. 

    Dinos are a very resilient pest to control in the aquarium. You will never get rid of them completely since they are part of the ecosystem, but you have to control them with a multi-prong approach in order to keep them for showing themselves in your tank.

    Manual Removal

    The first step is removal. Others might think that they need to remove all the water and change it with a new one, but that is definitely wrong. Along the process of removing dinos, changing the water in your tank will make things worse. Dinos thrive in nutrient straved tanks and cleaning water will eliminate nutrients and allow Dinos to thrive further. It advisable that you remove the dinos manually with the use of filter sock instead of changing water.

    You will need a very fine filter sock to do this (Quick Note – this post contains affiliate links. An affiliate link means I may earn advertising or referral fees if you make a purchase through my link). A 10 micron filter sock is fine enough to catch dinos in the water column.

    Increasing Nitrates and Phosphates

    • Another way to get rid of dinos is by increasing the amount of nutrients in your tank. You should increase nitrates and phosphates to observable level. You may consider nitrates with NeoNiitro and NeoPhos from Brightwell Aquatics. Even a freshwater solution like SeaChem Flourish will work as well.

    Remove Nutrient Reducing Media

    You also need to remove nutrient reducing media like GFO. It is common for many tanks to have dino outbreak because of the presence of GFO. When you get rid of GFOโ€™s, it is easier for you to increase the nutrient level in your tank and maintain it in the long run. Stop doing any type of nutrient decreasing dino. Examples are No-Pox and Vodka dosing.

    Protect Your Invertebrates and Fish!

    Along the process of dealing with dinos, having carbon present in your tank will help neutralize the toxins they release as they die off. This will protect your livestock.

    Adjust pH

    Adjust the pH of your tank. A pH of +8.4 is a good level for reef tanks to avoid dino blooms. The pH is something you can play with over time to determine what works best for your tank.

    Kill The Lights

    Control the lighting in your tank because the most common dinos derive their energy from photosynthesis, so killing the lights will also kill them. You can use a blackout curtain or cardboard with duct tape around the tank and on top of the tank. Blackouts should last at least 72 hours. Blackouts will usually not result in an eradication of dinos, but will qwell them done to the point where you can start utilizing other methods.

    Use Hydrogen Peroxide

    Add small doses of hydrogen peroxide to your tank. The general rule is 1 ml per 10 gallons of water.  Regular 3% hydrogen peroxide is used.

    Use A UV Sterilizer

    Use a UV Sterilizer. Get a high quality and well sized UV Sterilizer and run it 24-7. The UV sterilizer will be most effective during the blackout period. This method works best when dealing with Ostreopsis. You can use a Jabeo UV as a cheap solution or an Aqua UV for a high-end solution.

    The Nuclear Option – Use Dino X

    Fauna Marin has developed a product called Dino X that is made to eliminate dinoflagellates in a reef tank. It is a very harsh treatment and should only be considered after all these methods are attempted and you increase biodiversity (see below on that). Fauna Marin requests that you not use carbon during the treatment program, which makes this risky to use since dinos will release toxins when they start to die. Remove as much as possible before attempting. Fauna Marin also recommends using a protein skimmer during the treatment option, so those with nano reef tanks or skimmerless setups may not be able to use this product.

    Fauna Marin Dino X

    Fauna Marin’s Dino X is the only solution designed to work against Dinos that is readily available

    Click For Best Price Buy On Amazon

    How Can I Prevent Them in the First Place?

    My Take After Years Fighting Dinos โ€” Biodiversity Is Everything

    I wrote this article years ago when there was almost no information available on dinoflagellates in reef tanks โ€” the hobby was just starting to piece together what caused outbreaks and why standard algae treatments didn’t work. What I’ve learned since then, and what I’d emphasize above everything else on this page: biodiversity is the root issue, and modern reef setups are working against you from day one. Ultra-pure RO water, dry rock, sterile substrate โ€” we’ve engineered the microbial competition completely out of the system. Dinos thrive in that vacuum.

    The most underrated solution I see people skip: get rock from an established tank. A piece from a reef club member’s system, a seeded rock from your LFS, even a chunk from your own mature display โ€” that rock carries an entire community of microorganisms that dry rock simply doesn’t have. Combine that with live sand from a quality source (I link to the Florida maricultured option below) and you’re stacking biodiversity from two angles before dinos ever get a foothold.

    And here’s the nutrient piece people consistently get wrong: you need nitrates and phosphates measurably above zero. Not trace levels โ€” actually above 0 on a test kit. Reef tanks chasing “pristine” ultra-low nutrients are the tanks that get dino outbreaks. Dose NeoNitro and NeoPhos (or equivalent) until your tests show something above the floor. That shift in nutrient baseline, combined with solid biodiversity, is the one-two punch that controls dinos long-term.

    Biodiversity is a major reason why new tanks get dinos when they hit low nutrient conditions. A biodiverse tank has multiple organisms that compete with dinos and keep them from thriving. When choosing the type of rock you are going to use, keep biodiversity in mind. You can choose between live rock and complete dry rock or a hybrid, but I would caution against going with a 100% dry rock and dry sand start.

    Dry rock is devoid of biodiversity while in a live rock tank you donโ€™t usually see dinos. It is hard for them to multiply because there too many competitors even in a low nutrient environment.

    The problem will be the availability of the live rock because it is quite hard to find nowadays and is expensive to boot. 

    These days – Real Reef Live Rock is the best source for aquacultured live rock that has the right balance of biodiversity while still being free of pests. This is the best option for those who who not use a sand bed and going bare bottom yet want to free of the risk of pests. 

    Real Reef Rock

    This is the best aquacultured rock you can find in stores and online

    Buy On Amazon Click For Best Price

    You can obtain Live Rock from Florida that is Maricultured. If you are starting up a new tank and can cure, this is an excellent option. It is shipped directly to your door. The base is Oolite Limestone rock that has been left in the ocean for several years undisturbed. The foundation of live rock’s biodiversity is a key factor in preventing dino outbreaks. You will run the risk of a having a pest hitchhiker, but honestly in my experience these pests are less of a pain to deal with then dinos.

    Ocean Direct
    Maricultures Florida Live Rock

    An old school solution. Once cured, Dinos tend not to be an issue because of the great biodiversity contained in this rock.

    Click For Best Price

    For those people who are not able to procure live rock or have a sand bed, the other option would be to introduce microfauna and bacteria through an aquaculture facility like Indo Pacific Sea Farms. They have been around for many years and their live sand activator and wondermud are just the ticket for increasing biodiversity.

    Remove Overabundant Food Sources (AKA Your Invertebrates if an outbreak occurs)

    Snails encourage dinoflagellates to settle in and make your tank their home. Well, they don’t actually do it when they’re alive: a dead snail is a feast for a population of dinoflagellate. Dinos will wreck havoc on an invert population. Anything that attempts to eat it can be poisoned to death and the toxins they release will kill most inverts including microfauna like pods! Make sure you’re removing any dead snails, fish, and corals from the tank.

    Because it’s hard to tell if your snails are alive, the most foolproof way to prevent that is by removing the snails altogether. Once your dino problem is under control, they can be returned to the tank. 

    Balance Tank Nutrients

    A couple of specific nutrient-related things you can monitor and manage in your tank are:

    • Magnesium: levels should be somewhere in the 1400-1600ppm range
    • pH levels (as mentioned above)
    • Bacteria: introducing new bacteria to your tank will deprive dinos of nutrients. Live Rock and Live Sand are your best friends to maintain biodiversity!!!
    • Nitrates – Work on getting these above 0 and maintaining it. A little bit of nitrates is good for your tank
    • Phosphates – Don’t let your phosphates hit 0 

    Don’t Create an Undernourished Environment

    A tank that is starved for nutrition can cause a dino population to pop up too. Usually this situation comes about when you make some major change to the landscape or population of your tank, and the food shortage is abrupt. Dinos don’t actually need that much physical food to eat, especially since most are also photosynthetic. So, if other bacteria or phytoplankton in your tank die out from lack of nutrients, it removes the dinoflagellate’s primary competition and gives them room to thrive.

    ASD Dino Outbreak Severity Scale

    One of the hardest parts of dealing with dinoflagellates is knowing how aggressively to respond. Not every outbreak is the same. After going through multiple dino cycles in reef systems, I built this scale to help hobbyists calibrate their response โ€” rather than immediately jumping to nuclear options like Dino X:

    Level 1 โ€” Early Stage (thin rust-colored film, appears mostly at lights-off, disappears by morning): Your tank is borderline. Start with nutrients first โ€” raise nitrates above 2 ppm, phosphates above 0.05 ppm. Manual removal + target water flow. Do NOT panic. 80% of Level 1 outbreaks resolve with nutrient adjustment alone.

    Level 2 โ€” Established (consistent coverage on sand/rocks, bubbles visible, doesn’t fully disappear overnight): Add biodiversity intervention: pods, chaeto, live rock from an established system. Blackout 3 days combined with nutrient dosing. Reassess after 1 week.

    Level 3 โ€” Heavy Infestation (corals covered, spreading rapidly, water quality affected): Multi-pronged approach required. Manual removal daily + UV sterilizer running + aggressive biodiversity seeding + possible H2O2 spot treatment. Only escalate to Dino X if Levels 1-3 fail after 3 weeks.

    Level 4 โ€” Tank Crash Risk (livestock dying, dinos across entire system): Emergency protocol โ€” Dino X as directed, full blackout, reassess livestock survival. Consider a full restart with cured rock if biodiversity has been completely eliminated.

    ASD principle: The severity scale exists because most hobbyists jump to Level 4 response on a Level 1 outbreak. Hydrogen peroxide and Dino X both nuke the microbial biodiversity you need to prevent dinos from coming back. Use the least aggressive intervention that works โ€” and give it time.

    Wrapping Up

    Quality equipment planning and setup is important for the overall health of your tank, whether it’s a 10 gallon aquarium or a 100-gallon aquarium. While there are several factors that help dinoflagellates take over, a poor setup and controlling parameters tops the list.

    When dying, dinoflagellates release toxins into your water. So, it’s essential to purify the water consistently, both during and after your dinoflagellate infestation.

    Here Is a Wrap Up To Close Down This Post: 

    Biodiversity Is Your Friend!

    Don’t be scared to get live rock or add live sand activators in your tank

    Having Nitrates and Phosphates Is Good!

    Having Nitrates and Phosphates is good – our hobby has spent years demonizing this. This has lead to tank setups way overbuilt from the start and completely sterile start systems. This extreme approach has lead to more and more dino cases over time!

    Dinos Require a Multi-Prong Approach

    Dinos are tough to deal with. Use the recommended techniques mentioned in this post to fight them off and understand this is a intense battle.

    Test Your Water Parameters!

    Regularly test your water’s nutrients – nitrates & phosphate and understand the nutrient consumption on your tank. Modern reefs these days can strip nutrients completely clean and may require dosing of nitrates and phosphates to stay at a healthy level. Knowing your consumption puts you in control of your reef tank! Use a reliable quality test kit to monitor your levels and get in the habit of testing regulary.  

    However you choose to combat your dinoflagellates, know you’re not alone. Just about every modern aquarium enthusiast has done battle with the brown menace. There is hope: you just need to be consistent and patient in your approach killing them off.


    ๐Ÿ“˜ Want to learn more? This article is part of our complete Saltwater Fish & Reef Guide. your ultimate resource for marine fish, coral care, reef setup, and more.

  • Royal Gramma – How To Take Care Of Your Purple and Yellow Fish

    Royal Gramma – How To Take Care Of Your Purple and Yellow Fish

    The Royal Gramma is the best beginner saltwater fish nobody talks about. Hardy, colorful, peaceful in most setups, and priced reasonably.

    Royal grammas are the underrated starter fish of the saltwater hobby. They deserve more attention.

    The Royal Gramma is one of the few saltwater fish that is hardy enough for beginners and interesting enough that experienced reefers still keep them. That combination is rare.

    Are you planning on adding a Royal Gramma Basslet to your reef tank? This fish is striking with its purple and yellow body, but it’s important to learn how to take care of them before adding one to your tank. In this blog post, we’ll discuss the requirements for keeping a Royal Gramma healthy and happy in your saltwater aquarium.

    About the Royal Gramma

    The Royal Gramma has been a mainstay in many reef tanks for many years. Its scientific name is Gramma loreto. It is also known as the Fairy Basslet. It hails from the Caribbean. This fish really packs it all. They work in most saltwater aquariums due to their compact size, they are very hardy, and very peaceful. 

    Species Overview

    Below are the main stats and facts for the Royal Gramma fish:

    Scientific Name Gramma Loreto
    Common Name (Species) Royal Gramma
    Family Grammatidae
    Origin Florida, South America, West Atlantic Ocean
    Diet Carnivore
    Care Level Easy
    Activity Active
    Lifespan At least 5 years
    Temperment Semi-aggressive
    Tank Level All Areas
    Size 3 inches
    Minimum Tank Size 30 Gallons
    Temperature Range 73. 81 Degrees F
    pH Range 8.1. 8.4
    Filtration/Flow Rate All
    Water Type Saltwater
    Breeding Egg-layers, Difficult to breed
    Compatibility Semi-Aggressive tanks
    Ok, For Reef Tanks? Yes
    Ok, For Inverts? Mostly Yes

    What Does This Fish Look Like?

    Royall Gramma Fish

    The main attraction with the Royal Gramma Basslet are their colors. There really are few fish that really have this assortment of vibrant colors at this size. The front half of its body is purple with black strips across the eyes and the back half is yellow. They are a lone species in a saltwater aquarium because they are known to be aggressive to any fish that looks similar to it and males Royal Gramma will fight among themselves. If there is a lone male in the tank, it is possible for the group to form a harem, but it is difficult to sex them. Due to their size and temperament, they make good candidates for nano reef tanks.

    If you are looking at trying to have a pair or harem, the best way to attempt this would be to buy 2 immature royal grammas ensuring that one is slightly bigger then the other. What hopefully will happen is the larger fish will become the male. This has also been attempted with a group of immature grammas where the top two in the pecking order are kept and paired up. The remaining Royal Grammas are then returned to the fish store or traded to other hobbyists.

    Tank Requirements

    Royal gramma are very versatile fish. They is small in both small tanks and large tanks. Ideally, you want them in no small then a 30 gallon saltwater aquarium. This gives them enough room to feel comfortable and will not make them hyper aggressive – a common issue with any territorial fish when placed in an aquarium that is too small.

    One of the more amusing characteristics of this species is its propensity to orient itself with its belly toward any nearby hard surface, whether it happens to be the floor, wall, or ceiling of its cave. So, itโ€™s not unusual. Or any cause for alarm. To see a royal gramma specimen positioned completely upside down or on its side within its rocky refuge. While it looks odd, it’s just your gramma being a gramma.

    Grammas are known jumpers. Jumping is caused by stress and Royal Grammas are really good about handling stress. They are not as risky as say a firefish, but it would not hurt to have a cover on your tank for preventative measures. Many reef tanks owners like to use a mesh cover instead of a hard glass lid to have the benefit of gas exchange.

    These fish do well with lots of hiding places. You will want a setup with lots of rocks and caves. They tend to jump in and out of caves. They will not be out of the open as much as say clownfish. They are very hardy fish. They may hide when first introduced and some are just skittish in nature. The more hiding places you have for them the better. They do best in fish only with live rock or reef tank environments.

    Temperament

    Royal gramma’s temperament can either be described as reclusive or bold depending on the personality of the fish. In an aquarium, you will see them darting from cave to cave. They will stick to the rocks and will not be seen in the open unless they are feeding (video source).

    They tend to be territorial fish and will try to chase away any fish that tries to come into their caves, but most fish will have a more aggressive temperature. They will not try to pick a fight with another fish (unless it looks like them). Their aggression is to just to defend their territory, but they will yield to a more aggressive fish. Fish like Angelfish and Clownfish will pick them a little, but the conflict will resolve itself once the more dominant fish asserts its position in the tank.

    They will get along with virtually all fish in a reef tank. Your main concern with Royal Grammas is a fish is too aggressive or try to eat it given its small size. You will also want to avoid any fish that looks like it – like fire fish.

    Diet

    They will eat nearly any type of food offered to them and do not get large with the max size being around 3″. They are an aggressive eater often dashing in and out to grab food. You don’t need to worry about it getting enough food in the tank as they compete for food well. They prefer meaty foods. With most saltwater fish, frozen food is going to be the best choice for diet. Frozen food is unfortunately hard to find online due to shipping costs. I would recommend you shop at your specialty fish store to get frozen food for your Royal Gramma fish. 

    The best frozen food for this fairy basslet are going to be LRS Food’s Reef Frenzy nano. You will only be able to pick this up at specialty fish stores. The next choice would be common frozen food you can find at a general pet store. Mysis shrimp would be the best choice for a staple. You can use Selcon to add vitamins to your frozen mysis shrimp to add more nutritional value to your Royal Gramma’s diet.


    Selcon

    A vitamin enhancer that works great in freeze dried and frozen foods. A great choice to boost nutrition in brine shrimp, mysis, and blackworms


    Buy On Amazon


    Click For Best Price

    Tank Mates

    Gramma loreto is more bark than bite in the aquarium. They will try to assert themselves, but will often times be settled down by more aggressive tankmates like clownfish, angelfish, and tangs. Given that a Royal Gramma is on the lower end of the semi-aggressive scale, they are best near the beginning of your livestock additions since they will not harass most saltwater fish to death.

    They are incompatible with other similar looking fish like firefish. Any large predatory fish that can fit them in their mouths like lionfish are completely off limits.  

    Are They Reef Safe?

    I am different from other bloggers and live fish sellers in that I separate what is “reef safe” into two categories. Reef safe for corals and reef safe for inverts. This allows you to make an informed decision of what you would like in your saltwater reef tank.

    A Royal Gramma Basslet in your reef tank will be a model citizen. They are just about as reef safe as you can get. They are both reef safe for corals and for inverts. I have personally never heard of them ever bothering corals or nipping at them. They do not dig or disturb rock work or substrates.

    Regarding inverts, the Royal Gramma is very well behaved. They get along with nearly any type of invertebrate in the aquarium. Gramma loreto is a perfect fish for any reef aquarium.

    Are They Available As Tank Bred?

    Unfortunately, it is difficult to find a Royal Gramma that is tank bred. This is primarily due to the availability of wild Grammas near the United States and being relatively cheap to import. Grammas are abundant and cheap to purchase at any online or local fish store. Successfully breeding Royal Grammas is also difficult. While they are easy to get to spawn, it is difficult to rear and grow out the larvae and juveniles.

    Outside of the US, there are efforts to tank breed them. One such location is Australia. In Australia, it is not uncommon for a Royal Gramma fish to cost as much as $120 compared to less than $20 in the US. Reef Keepers reported that successful breeding programs are underway with captive Grammas likely to be available this year. As Royal Gramma care for fry improve, I would expect us to see tank breed fish come into the supply chain at some point in the future.

    FAQs

    Is This Fish Reef Safe?

    Yes – a Royal Gramma is one of the most reef safe fish you put in your aquarium. They will not eat corals and will leave more inverts like shrimp and crabs alone. They will adapt to virtually any community reef tank.

    How Long Does it Live?

    , you can expect your Royal Gramma to live over 5 years. There have been reports with other advanced reefers who have kept Royal Grammas for over 10 years! The better the environment and diet for your fish, the longer it will potentially live. This is very much true in saltwater fish as many have lived well beyond their expected life cycles in captive environments such as public aquariums.

    Are They Jumpers?

    Yes, Royal Grammas are at risk for jumping out of a tank. The best way to prevent them from jumping is to cover your aquarium either with a lid or a mesh net. The mesh is preferable as it will still allow for gas exchange and will not harm your fish as much as a glass lid in the event of an attempted jump.

    Are They Hardy?

    Yes, a Royal Gramma is one of the most hardy saltwater fish you can purchase in the hobby. While they are not available as tank bred at the moment, they are far more hardier than many wild caught counterparts in the hobby. Their small size also make them ideal for beginners.

    Are They Peaceful?

    The Royal Gramma, like more saltwater fish are semi-aggressive and territorial. They will defend their territory and try to attack fish who look like them. That being said, they are one of the least aggressive semi-aggressive fish you can purchase. Most fish like Clownfish, Tangs, and Angelfish will beat them out on aggression. Grammas will mellow out in the presence of these fish. You can say their bark is bigger than their bite!

    Do You Have Experience With These Fish?

    Let us know your experience with the Royal Gramma Basslet in the comments below. We love hearing everyone’s personal experience and tank stories.

  • Setting Up an Indoor Coral Reef for Beginners

    Setting Up an Indoor Coral Reef for Beginners

    Setting up a coral reef is one of the most rewarding things you can do in this hobby. and one of the most intimidating if you don’t know where to start. I set up my first reef tank years before there were good online resources, so I made a lot of expensive mistakes. My 125-gallon is the product of everything I’ve learned through trial, loss, and persistence. This guide is what I wish someone had handed me when I started.

    Have you tried setting up a coral reef tank?  Selecting your first corals can be overwhelming but there are certain important things to consider about this high maintenance hobby. Corals thrive best in larger reef tanks but they can also be kept in small aquariums. One of my most favorite items in the marine hobby is soft coral. 

    On a side note, soft corals are composed of soft tissues. Among the fastest growing flower animal, they lack skeletal structure. They have the widest range of brightest colors available in the hobby.

    They can live in moderate lighting but more intense lighting makes them bring more intense coloration.They usually feed on suspended food particles.

    Types

    Some corals can only tolerate high nutrient environment. Most of them need slow flowing water. Various types of corals are available in the market. They are categorized from easiest to hardest to care for:

    • Soft Coral – one of the favorites
    • LPS Coral – large polyp stony
    • SPS Coral – small polyp stony
    • NPS Coral – non-photosynthetic corals 

    Best Soft Corals for Beginners

    Ricordea Mushroom
    1. Mushroom Corals – Many varieties available. Avoid Yumas though as they aren’t as hardy
    2. Colt Coral – Hardy and tree like.
    3. Toadstools – These very hardy soft corals come in brown, yellow, and pink colors.
    4. Zoanthids -They are the most popular. They come in a wide variety of colors and sizes. They reproduce very quickly.

    Corals are marvelous. Keeping them is fulfilling with proper maintenance and knowledge. Here are some corals that can be bad for beginners to buy:

    1. Invasive corals: green star polyps, xenia, anthelia, yellow polyps, generic palys. They are fast growing corals and extremely hardy. They need to be isolated or on a separate rock not touching the rest of your corals to prevent them invading the other rock formation.
    2. Goniopora – also known as Flower Pot Coral. This require intensive care and feeding.
    3. Non-Photosynthetic coral (azooxanthelle) – Sea Fans, Chili Corals, Sun Corals, and Gorgonians require feeding three times a day. They have the most odd textures, shapes, and cryptic behaviors. Because of their demand, you need experience and advanced filtration systems to maintain the water parameters in good shape.

    Important Thing to be Aware of When Packaging:

    The stone where the coral is glued must be attached to a styrofoam before putting in the plastic bag with saltwater. This makes the coral protected even if the plastic bag is tossed around, especially during delivery or travel. When the bag turns over, the styrofoam floats and turns over leaving the coral unharmed. The styrofoam with rock and coral should always be in inverted position.

    Introducing Them to Your New Tank:

    Acclimation is also necessary for them to equilibrate the temperature. There are three steps to properly acclimate corals:

    • Let the plastic bag with coral floats above the water surface of your tank for 10-15 minutes. This enables the coral to adjust to your tank’s temperature and avoid stress.
    • Drip accumulate the corals by using an airline drip to allow them to adjust to your tank parameters.
    • Place them first on the ground rather than putting them on higher spots because the corals must adapt slowly. 

    Don’t go for dirty water, though corals can tolerate, eventually it leads to a disaster. Go for clean and nutrient-rich water to ensure their good health. Iodine supplement is also necessary. Seek recommendations from experts.

    Drip and Quarantine Them:

    Drip  every corals you introduce to your system. If you are new to the hobby, a solution like CoralRX is pretty standard to use. As you get more experience, you can move on to Bayer, which is a surprisingly effective coral drip and superior to the standard drips sold by your LFS.

    Any procedure that should be done is quartaining your corals. This is done to not only light accululate your corals, but to also prevent pests and diseases from entering your aquarium. Any coral you purchase runs the risk of bringing in all sorts of pests like flatworms, glass anemones, red bugs, and nudibranchs.

    A coral QT is easier than you think. I personally follow the FishOfHex method as shown below in the video:

    Must-Haves During Maintenance:

    • Eye goggles – This will protect your eyes from squirting of slime coming from accidental cutting through coral tissues.
    • Mouth and nose cover (mask) – Having this prevents your mouth to get in contact with toxin.This will also protect you inhaling the bad fumes.
    • Tight gloves – You need to always wear this during cleaning and touching the rocks.
    • Carbon – this absorbs the poison (toxin) in the water.

    Avoiding Palytoxin Poisoning in a Reef Tank

    Palytoxin is poisonous. The fumes that comes out from corals are toxic. Here’s how to avoid it in a reef aquarium:

    • Avoid the slime and wash your hands thoroughly after touching the coral.
    • Enough ventilation in the room is necessary.
    • Never boil live sea rocks or corals because this will release playtoxin in the air and poison not only you but the entire house!
    • Do not let the coral gets near to your mouth or eyes. Mucus (palytoxin) squirts which are dangerous. Avoid touching coral reef tank if you have open wound. When the mucus enters your bloodstream, you need to seek medical assistance.
    • Carbon is needed to remove the palytoxin in your tank.
    • Dispose the water contaminated with toxin and pieces of corals with concern to the proper place. Seek recommendation from experts how to properly get rid of them.

    3 Ways Palytoxin Can Enter Your Body:

    • Direct contact: eyes, and mouth
    • Ingestion (eating)
    • Inhaling the fume

    Reefs Explained

    They are alive. Unlike plants that produce their own food, corals catch their food to survive. Coral larvae can swim then eventually attach to hard surfaces or rocks to form a reef. Corals belong to the class Anthozoa of phylum Cnidaria (flower animals). 

    These marine (saltwater) invertebrates are diverse underwater ecosystems that secrete calcium carbonate forming a structure. They have polyps (composed of thousands of tiny animals) that cluster in groups. 

    How Do They Die?

    • coral mining
    • pollution
    • blast fishing
    • overfishing
    • destructive fishing practices: using cyanide and dynamite
    • disease
    • global warming
    • outbreaks of predatory starfish
    • digging of canals

    Primary Types:

    • Barrier – They border a shoreline but they are separated from land by water forming an open water, usually deep, between the shore and the reef.
    • Fringing – grows seaward forming borders along the surrounding islands and the shoreline
    • Atoll – oval or circular in shape. From being a fringing reef, they grow upward from a volcanic island that has sunk below the sea ground.

    Interesting Facts:

    Corals can live up to 900 years, growing as large as 6 feet (1.8 m) or more. Worms, fish, snails, and sea stars prey on corals. Coral is immobile and when it dies, the hard calcium structure remains and eventually a new coral will form. The process is repeated over and over and expands. 

    Overtime, the coral colonies that are being buried by sediments when they die turn into limestone. They become fossils on Earth. 

    What is a Polyp?

    It does not have brain, tongue, nose, and ears but it has nerve net that goes from the mouth to the tentacles. Coral is the simplest animal to have dedicated reproductive system, muscular system, and nervous system.

    Final Thoughts

    Setting up an indoor coral reef is rewarding. The artificial marine ecosystem provides a stunning display. This hobby requires expertise to be successful and ensure the safety of your family. Know the pros and cons. Awareness is vital. 

    Avoid letting wastewater contaminate Earthโ€™s bodies of water. Participate in campaigns against global warming. Coral reefs play an important role in sustaining our economy and the health of our oceans. Preserve coral reefs. Provide homes for millions of aquatic species.


    ๐Ÿ“˜ Want to learn more? This article is part of our complete Saltwater Fish & Reef Guide. your ultimate resource for marine fish, coral care, reef setup, and more.

    References

  • Vermetid Snail Control and Removal โ€“ Reef Tank Guide

    Vermetid Snail Control and Removal โ€“ Reef Tank Guide

    Vermetid snails shoot mucus nets across your coral and irritate everything nearby. They are real pests that reduce coral growth and spread aggressively. Removal is tedious but necessary if you want your corals to thrive.

    Vermetid snails are one of the few reef pests worth actively removing. They do real damage.

    Vermetid snails are one of the more underrated nuisance pests in reef tanks. Most reefers don’t even know they have them until corals start receding. I’ve dealt with these in my 125-gallon reef and learned the hard way that catching them early makes a huge difference. The mucus nets they cast out to feed can irritate and damage nearby corals, making control and removal critical for a healthy reef. Here’s what I’ve found works best after years of dealing with them.

    This species of sea snails is such a nuisance because vermetid snails are harmful to both corals and fish tank ownersโ€™ budget as our experts have often pointed out. The snails latch onto coralsโ€™ spongy and irregular surface, and they can stunt their skeletal development. Whatโ€™s more, they can suck the life out of corals and kill them. Luckily, there are ways to fight them off!

    What Are Vermetid Snails?

    Classifying and describing vermetid snails is difficult, as they belong to a superfamily of gastropods called Cerithioidea, which is divided into three main families. The type of vermetid snails, aka worm shells, that plague fish tanks belong to the Vermetidae taxonomic family, which includes several species. Still, the three families share similar traits.

    What sets the Vermitidae apart from their cousins is that they prefer to latch onto irregular masses, such as sponges, and they dwell below the coastal zone while in the wild. What is more, even though they are technically gastropods, they do not have coiled shells like other marine species from the same class do.

    When a vermetid snail is born, it immediately seeks to build a home. It then attaches to a hard surface and builds a calcified tube, aka its shell. These formations are very similar to those built by annelid tube worms, which makes vermetidsโ€™ identification difficult to the naked eye. Still, a seasoned aquarium owner will be able to tell the difference between the two species.

    In addition, these little guys spend most of their life in the same place. This might make one wonder how they manage to feed? The answer is simple. They spew mucus nets out of the ends of their shells, which they use to catch nearby detritus and plankton.

    Vermetid snails in an aquarium can harm corals. They impede coral growth and damage coralsโ€™ skeletal structure of LPS and SPS corals. Therefore, if you notice any of these snails in your reef tank, itโ€™s time to take immediate action.

    How to Remove Vermetid Snails from Aquariums

    Unfortunately, removing vermetid snails from your aquarium is quite challenging. Still, it is worth the effort if you want to protect your corals (and hard-earned cash youโ€™ve spent on them). Gallery Aquatica TV has a few tips that I’ll go over below.

    The Superglue Method

    First, be careful if you are completely infected with snails. Killing a bunch of vermetid snails inside the reef tank with superglue is a fun way to have a nutrient spike. The superglue method involves sealing their exit from the tubes.This prevents the snail from exiting and starves it out. Once the worms die and start decaying, they create a nutrient imbalance in the water, which ups the waterโ€™s toxicity and creates a perfect environment for other fish tank nuisances like algae blooms.

    The best way to remove the snails are to pull out the rock or infested corals so you can remove them manually and not have them decay in the tank.

    The Nuke – Hydrocloric Acid Method

    Many hobbyists have tried a direct approach to the issue. Identify the rocks or sponges that have vermetid snails nesting on them and remove them from the aquarium. Then, wash them thoroughly with a 10% to 20% solution of hydrochloric acid. While this works, it is drastic and can kill of ton of beneficial bacteria. I would call this the nuclear option.

    The acid will eat away snails and remove them completely from the rocks and sponges. If it takes too long for the snail to wash off, you can let the rocks soak in the hydrochloric acid solution for a couple of days. The rocks should be white and clean at the end.

    Be very careful with this method as the substance is harmful to your skin. Wear gloves, a respirator, and eye protection when handling HCL. Using HCL is a post within itself, so I’m going to link a Reef2Reef article that goes into further detail.

    Manual Removal – The Bone Cutter Method

    If the vermetid snails are attached to your corals or frag plugs, one easy option is to pull the coral out of your display tank and pull the snail off of it using bone cutters. Make sure when you use the bone cutters that you cut off the base. The base is where the snail lives so cutting off the base ensures a complete removal.

    Vermtid Snail Removal

    Getting Violent – The Lancing Method

    A more savage method is to use an ice pick to stab the base structure of the snail. This method is great to use if the snail is lodged in an area that is hard to get. Make sure that you remove the infected coral or rock before attempting this as it is a messy process that will result in a cut up snail. Stab the middle of the base with your ice pick and wipe it away from the rock to kill the snail.

    You may unearth the snail from the structure using this method. If that happens, pull it off the rock and finish it off to ensure it doesn’t accidentally re-enter your aquarium.

    The Bottom Line

    Vermetid snails are common fish tank parasites that build their own calcified tubes. They reside inside the tubes their whole lives, and they cause great damage to corals.

    I have outlined several methods that is used to remove vermetid snails from safe to nuclear. Worse case to wipe them out, you will need to remove the rocks that they have attached themselves to from the tank, and thoroughly clean them with HCL. It is a most drastic method, but the other methods outlined in this post should be attempted first.


    ๐Ÿ“˜ Want to learn more? This article is part of our complete Saltwater Fish & Reef Guide. Your ultimate resource for marine fish, coral care, reef setup, and more.

  • LPS Coral – 10 Easy to Care Corals for Beginners (Updated)

    LPS Coral – 10 Easy to Care Corals for Beginners (Updated)

    LPS corals were my entry point into keeping coral in my reef. They’re forgiving enough for beginners but rewarding enough that experienced hobbyists keep them long-term. I’ve kept hammers, torches, and frogspawn in my 125-gallon for years, and these large polyp stony corals have some of the best movement and personality in the hobby. If you’re just getting started with coral, this is exactly where I’d recommend beginning.

    So you have seen the incredible tanks posted on forums, seen your friend’s tank, or just have been inspired by seeing ocean life and now looking to get your own. Reef tanks is pretty intimating for a newcomer and we have written articles about tank selection and easy saltwater fish to keep. But what about corals?

    I wrote an article later on about soft corals, but I want to talk today about the LPS Coral. These corals are the big show stoppers in the tank with their colors and their varieties, but not all LPS corals are created equally. Some of these corals are difficult to keep, but we have a list of corals here that you can safely pick from if you are looking to get into coral keeping.

    Before we get started, let’s talk about requirements of LPS corals. What makes corals “difficult” in the hobby is stability. Corals like stability. They don’t want temperature swings, they suffer from salinity changes, and hate high nitrates. The good thing is that technology and best practices from experienced hobbyist have made it easier to keep LPS corals than ever before.

    • A solid RODI system or buy RODI water from your fish store
    • Make your biological filter natural with dry rock or live rock – consider slowly removing “nitrate factories” such as bio-balls
    • Get a serious protein skimmer to filter your tank
    • Get a qualityย reef light that has proven PAR and spectrum for your corals
    • Monitor your nutrient levels with test kits
    • Change your water on a set schedule at least twice a month. Use a quality reef salt mix.
    • Consider supplementation if you have a heavy LPS or SPS population – for many newcomers water changes will take care of this if you are a frequent water changer. We recommend two part from B-Ionicย and dosing to your saltwater mix

    The Easy LPS Corals for Beginners

    Below is our list from the easiest to care LPS corals readily available in the market. While there is many others on this list, we felt these were the best candidates based on their beauty, ease of care, and uniqueness. Feel free to comment if your favorite has been left off the list.

    LPS corals are the entry point to keeping coral. They tolerate mistakes that SPS corals punish. If you cannot keep LPS alive, you are not ready for anything harder.

    Picture Name Best For Link
    Editor’s Choice!

    Frogspawn

    Frogspawn

    Middle to Top

    Click For Best PriceBuy On eBay
    Hammer Coral Hammer Coral

    Bottom to Middle

    Click For Best PriceBuy On eBay
    Acan Coral Acan Coral

    Bottom to Middle

    Click For Best PriceBuy On eBay
    Duncan Coral Duncan Coral

    Bottom to Middle

    Click For Best PriceBuy On eBay
    Pagoda Cup Coral Pagoda Cup Coral

    Bottom to Middle

    Click For Best PriceBuy On eBay
    Tongue Coral Tongue Coral

    Bottom

    Click For Best PriceBuy On eBay
    Blasto Coral Blasto Coral

    Bottom to Middle

    Click For Best PriceBuy On eBay
    Brain Coral Brain Coral

    All

    Click For Best PriceBuy On eBay
    Trumpet Coral Trumpet Coral

    Bottom to Middle

    Buy On eBay
    Candy Cane Coral Candy Cane Coral

    All

    Buy On eBay

    The 10 Best LPS Corals For Beginners

    Let’s go into detail and see why each LPS Coral is great for beginners.

    #1 Frogspawn

    Best LPS Coral


    Frogspawn

    Editor’s Choice

    A readily available, hardy, and beautiful LPS coral. Great for beginners and forgiving


    Shop WYSIWYG


    Click For Best Price

    This is the one of the more aggressive corals on the list, but it is readily available and very popular. The main thing with the frogspawn is giving it adequate space as they are known to stretch 6″ beyond their base at night and will sting other corals nearby. They is mixed with hammer corals as they both will not sting each other. There is also a variant called an Octospawn, which is less common, more expensive, and offers more color variety.

    Key Frogspawn Stats:

    • Temperament: Aggressive
    • Lighting: Moderate
    • Water Flow: Moderate
    • Placement: Middle to Top

    #2 Hammer

    Anemone Look-Alike


    Hammer Coral

    A great anemone lookalike coral. Easy to care for. Look for branching types vs wall type


    Click For Best Price


    Buy On EBay

    Hammers are a great beginner LPS coral that adds a lot of moment. It is relatively easy to care for with the major issue being its aggressiveness. Also note that the branching hammers are a lot easier to take care of over the wall types. They come in a lot of different colors with yellow and orange being the most expense. These are fairly easy to find online, but the more exotic hammers tend to be only sold through coral vendors while the cheaper variety tend to be found locally or through coral vendors selling on EBay.

    Key Hammer Stats:

    • Temperament: Aggressive
    • Lighting: Moderate
    • Water Flow:ย Low to Medium
    • Placement:ย Bottom to Mid

    #3 Acan Brain

    Multiple Colors Available!


    Acans

    The best LPS coral if you are looking for a variety of colors. Easy to care for and fun to feed


    Click For Best Price


    Buy On EBay

    Acans are great coral additions as long as you place them correctly. They need to placed a few inches away from other corals as they are known for attacking other corals by extending their stomachs out! They are widely available in many colors and patterns. Acan lords tend to be on the less aggressive side versus other Acans. Reds are the most common color but they come in many colors.

    Key Acan Stats:

    • Temperament:ย Aggressive
    • Lighting: Moderate
    • Water Flow: Medium
    • Placement: Bottom to Middle

    #4 Duncan

    Easy To Propagate


    Duncan Coral

    A quick growing and easy to care for LPS coral. Known for being easy to frag


    Click For Best Price


    Buy On EBay

    If you are looking for a coral like looks like an anemone, this is a great candidate. Well a Torch coral can pull off the look as well, some Torch corals is pretty finicky, but most Ducan corals are pretty tough. This is a fairly easy LPS coral and a fun one to feed as it will readily consume food. They offer a lot of movement in the aquarium and can get quite large if you let them. They tend to also be fast growing and easy to frag.

    Duncan Key Stats:

    • Temperament:ย Peaceful
    • Lighting:ย Low to Moderate
    • Water Flow: Low to Moderate
    • Placement: Bottom to Middle

    #5 Pagoda Cup


    Pagoda Cup Coral

    One of the most peaceful LPS corals that you can buy. Easy to keep and a fast grower


    Click For Best Price


    Buy On EBay

    Pagoda Cup Corals do vary in the amount of care they require. You will want to avoid such species with thin plates or convoluted shapes. Pagodas like the one picture above are the ones we are looking for. They make excellent additions to a reef tank being very peaceful and easy to keep. The only thing with these corals is that it growth fast.

    Pagoda Cup Key Stats:

    • Temperament: Peaceful
    • Lighting: Moderate
    • Water Flow: Medium
    • Placement: Bottom to Middle

    #6 Tongue (Fungia Repanda)


    Tongue Coral

    A unique looking coral that is best placed at the bottom of your reef tank. Easy to care for


    Click For Best Price


    Buy On EBay

    This is a very hardy coral that will add color to the bottom of your tank. It prefers to live on a fine sandy substrate and known for being easy to care for.

    Tongue Key Stats:

    • Temperament:ย Semi-Aggressive
    • Lighting: Moderate
    • Water Flow:Low to Medium
    • Placement: Bottom

    #7 Blasto


    Blasto Coral

    An affordable and easy to care for LPS coral. They are a great way to get reds in your reef tank


    Shop WYSIWYG


    Buy On EBay

    A Blasto coral is a pretty tough LPS coral that adds a lot of color in the reef tank. While it is more on the aggressive side, they make up for it with their variety of colors and more tend to be fairly affordable. It’s a pretty low risk LPS coral to start with and a joy to feed.

    Blasto Key Stats:

    • Temperament:ย Aggressive
    • Lighting:ย Low
    • Water Flow:ย Moderate
    • Placement: Bottom to middle

    #8 Brain – Favia Species


    Brain Coral

    A hardy coral that can be placed anywhere in the reef aquarium


    Click For Best Price


    Buy On EBay

    A hardy coral that is placed anywhere in the aquarium. They are on the aggressive side so care must be taken when placing. They are plentiful in the wild and available from local fraggers and shops. The favia brain coral overall is a great coral for beginners.

    Brain Key Stats:

    • Temperament:ย Aggressive
    • Lighting: Moderate
    • Water Flow: Low
    • Placement:ย All

    #9 Trumpet


    Trumpet Coral

    A hardy and peaceful LPS coral. Comes in multiple colors and reasonably priced. Also great for small tanks


    Buy On eBay

    An excellent LPS coral for a beginner. This is a hardy and peaceful coral with very short sweeper tentacles.  They are a number of colors available and they are not overly expensive. They stay small enough to be good candidates for smaller tanks.

    Trumpet Key Stats:

    • Temperament:ย Peaceful
    • Lighting: Moderate
    • Water Flow: Low
    • Placement:ย Bottom to Middle

    #10 Candy Cane


    Candy Cane Coral

    A peaceful and easy to care for LPS coral. It is one of the best choices for beginners


    Buy On eBay

    The number one LPS coral on our list hits all the checkmarks. A peaceful coral than is placed anywhere in the aquarium and needs moderate flow and lighting. It’s short sweeper tentacles allow it to be placed in close proximity to other corals and it is a hard coral.

    Candy Cane Key Stats:

    • Temperament:ย Peaceful
    • Lighting: Moderate
    • Water Flow: Medium
    • Placement:ย All

    Feeding Instructions

    Discussing LPS corals wouldn’t be complete without talking about feeding them. After all, feeding LPS corals is really what makes many reefers enjoy them being seeing them actively feed gives that anemone like appearance and behavior. The other great thing with being able to feed LPS corals is it is a great way to help a coral that is struggle or going south. In fact, some of these corals like Acans, do much better with feedings once or twice a week. So what is the best food for them?

    We recommend feeding your LPS corals with Polyp Lab’s Reef Roids. Reef roids is readily accepted by LPS corals and it’s too small to be eaten by fish, which is an issue in a reef tank once fish figure out that when corals are feed. Big meaty food like Mysis is great as well, but it is big enough for fish and shrimp to get a hold of and can cause some harassment when then shrimp or fish pull the food out of the coral’s mouth.

    Just mix up the roids in a cup of tank water, use a turkey baster too grabbed the mixture, and directly feed the LPS corals while the pumps are off. Feeding 1 to 2 times a week and as always always test your water to make sure you aren’t spiking your phosphates and nitrate levels with too much food.

    Closing Thoughts

    We will note that your tank must be setup with a healthy system before you begin placing corals in your aquarium. All corals require careful observation while they are establishing in your tank. Check for signs of stress like lack of opening up, discoloration, or damage to other corals. Stay patient and make adjustments as necessary. Once you have your first set of corals established you will be on your way to a successful and enjoyable reefing experience!


    ๐Ÿ“˜ Want to learn more? This article is part of our complete Saltwater Fish & Reef Guide. Your ultimate resource for marine fish, coral care, reef setup, and more.

  • Jaguar Cichlid – Everything You Need To Know About Care

    Jaguar Cichlid – Everything You Need To Know About Care

    Jaguar cichlids are one of the most aggressive freshwater fish you can keep. They will eat anything that fits in their mouth, attack fish twice their size, and outgrow most tanks within a year. I have seen experienced keepers underestimate this fish and pay for it with dead tank mates and cracked heaters. If you are not ready for a dedicated predator tank, this is not your fish.

    Having a pet is one of the best things, especially if that pet is a fish. A Jaguar Cichlid is a silent, beautiful fish, and some of them are great for pest control. Although it will seem like fish are easy to care for, there are a lot of species which require a lot of attention as well as special food or tanks.

    In this article, we are going to talk about an interesting fish species: the jaguar cichlid. Here you can find out everything you need to know about these species including its compatibility with other fish. Itโ€™s good to know that jaguar cichlids canโ€™t be put in a tank with Tetra or Angel Fish. They are large and aggressive fish. They are known as “tank busters” among predator enthusiasts as they can crack smaller tanks with their aggressive antics.  

    An Overview on the Jaguar Cichlid

    Scientific NameParachromis managuensis
    Common NamesManaguense cichlid, managua cichlid, guaptoe tigre, Aztec cichlid
    FamilyCichlidae
    OriginCentral America
    DietCarnivore
    Care LevelModerate
    ActivityModerate
    Lifespan15 years
    TemperamentAggressive
    Tank LevelMiddle or bottom half
    Minimum Tank Size70 gallon
    Water Temperature Range73ยฐ- 82ยฐF (23ยฐ- 28ยฐC)
    Water Hardness10 to 15 dGH
    pH Range7.0. 8.2
    Filtration/Water FlowModerate to strong
    Water TypeFreshwater
    BreedingEgg-layer
    Difficulty to BreedModerate
    CompatibilityAggressive tanks only
    OK, for Planted Tanks?No, will dig up and damage most plants

    General Information about the Jaguar Cichlid

    The Jaguar Cichlid, scientifically known as parachromis managuesis (and also known as the Managuense cichlid), is a large species of Cichlid. They are originally from Central America and is found from Costa Rica to Honduras. Unlike most fish tropical fish, this species is bigger, and it can grow to up to 24 inches! These are highly predatory fish, and this is why it is difficult to find the right tank mate. The jaguar cichlid is very valuable for it’s looks. It is one of the more beautiful, larger, and aggressive Cichlids from Central America that you can purchase.

    The Reality of Keeping Jaguar Cichlid

    Size is the first reality check. Jaguar Cichlid grows fast and grows large. A tank that fits today will not fit in six months.

    Aggression is not optional. This fish is territorial by nature. Tank mates are selected around this fact or they become food.

    Filtration needs are extreme. Large predatory cichlids produce massive waste loads. Underfilter this tank and water quality crashes fast.

    Biggest Mistake New Jaguar Cichlid Owners Make

    Putting Jaguar Cichlid in a tank that is too small. This fish grows fast and gets aggressive in tight spaces. Start with the final tank size from day one or do not start at all.

    Expert Take

    Jaguar Cichlid is a commitment fish. Start with a 70 gallon minimum, run heavy filtration, and stock only tank mates that hold their own. Half measures do not work with predatory cichlids.

    Size and Looks

    The Managuense jaguar cichlid is a big, elongated freshwater fish. Itโ€™s flat from sides and it has an oval body. Its appearance shows that itโ€™s a raptorial feeder which has adapted to aggressive assaults. These fish have different sizes when they live in captivity. For instance, a wild jaguar cichlid can reach 60 cm and it can weigh about 7 kg. Here is a video by Mrlilchilly1 showing a full grown Jaguar Cichlid in action.

    Unlike the ones living in the wild, jaguar cichlids that lives in captivity grow to about 35 cm in length. The Parachromis managuensis females can only reach 30 cm and they weigh about 3 kg. These are some of the biggest fish which is put in a tank and kept as a pet.

    The color of the Jaguar Cichlid is silvery with spots of brown and black. Its color pattern resembles the one of a jaguar, as its name states. An interesting fact about their color pattern is that itโ€™s almost impossible to find two jaguar cichlids with the same body spots. This species also presents a big head with a large mouth and big lips. They have pharyngeal teeth which help them hunt.

    Male vs. Female Differences

    A male Jaguar Cichlid is larger and will have more vertical broken bars when young. These bars will disappear once the male reaches maturity. A female Parachromis managuesis on the other hand, will have thinner vertical bars and will have a more pronounced dark bars and have more reddish coloration on their gill covers. Juvenile fish are readily available at fish stores and online. These Cichlids get more expensive and harder to find the larger they are.

    Having Them in a tank

    Parachromis managuensis

    There are some important things to keep in mind when you want to purchase a jaguar cichlid as a pet. For instance, these fish canโ€™t share a tank with a lot of species. In order to accommodate the cichlid and the other tankmates, you need to have a tank with aggressive fish. Also, you need to have large fish so that they wonโ€™t get hurt or eaten by the jaguar cichlid.

    Itโ€™s best to pair the jaguar cichlid with other cichlids like the Red Devil, Texas, or the Midas cichlid. These species are territorial to aggressive which means they are able to hold their own. Aggressiveness is best handled by additional tank space. Keeping your aggressive fish full will also curb aggressive. Hungry and cramped fish will get aggressive with their tank mates fighting for valuable territory. These large predatory fish mentioned will also enjoy the same foods. You will not have to worry about feeding them separately. Be sure to spread out food among each fish’s establish territory to avoid bricking and to ensure everyone gets fed. 

    Another important thing to consider before purchasing Parachromis managuensis is the tank. In this case, you will need an aquarium tank with a capacity of at least 100 gallons of water. The decorations of the tank should be big and bulky like rocks. Donโ€™t put plants in their tank because this Cichlid will destroy them in no time. A good starter tank for a fish this size is a 125 gallon tank. This is a 6 foot long tank with enough width and depth to support a Cichlid of this size and still have room for other inhabitants.

    You will need to put a substrate for the bottom of the tank that is made of large grained gravel and add some middle-sized grains. Maintain the water in the tank at a temperature of 24-25 C. Also, the pH of the water should be around 7 for optimal results.

    Breeding

    The jaguar cichlids have been bred in tanks for a long time. However, there are a few rules to follow when it comes to this species. The best way to help them breed is to make sure that you put 2 or 3 pairs of jaguar cichlids together in a tank when they are juvenile. If you try to put a new female or a new male when you have adult fish. You will risk losing these additions due to the jaguar cichlid’s territorial nature. This is a bigger risk if you your fish is actively breeding. 

    If you have an actively breeding couple, consider moving them to a different tank so that the breeding process goes smoothly. This tank should have at least 50 gallons (or 200 liters of water). Cichlids in general are great parents and are a joy to watch their fry raising process. It is a real threat to share this experience with your family.

    Feeding

    As we mentioned earlier, this freshwater fish is a carnivore and a raptorial which means they enjoy various types of live fish. They can also eat cut up fish or crayfish and dry foods. The jaguar cichlid prefers food like earthworms, crickets and tadpoles. Remember to feed them only once a day because they eat too much. Frozen food is also a good food staple to provide, through can get expensive given how much these fish need to eat at their adult size. Also, experts recommend a fasting the jaguar cichlid once a week.

    These fish can also eat small reptiles, larva, or goldfish. However, itโ€™s strictly prohibited to give these species warm-blooded meat like beef, pork or poultry. This type of meat has a lot of fat and it can affect the health of your cichlid.

    Care

    While it is a bit hard to find the right tankmates for this big and aggressive fish, itโ€™s quite easy to care for them. These are hardy fish that will tolerate a variety of conditions.

    Saying that however, one of the most important things is to keep the tank water clean. Large tanks are necessary for these big species. Apart from the large tank you will need to have canister filter or a sump filter to help you clean the water.

    Remember to change about 30% of the water in the tank once or twice a week. Due to the fact that the aquariums are closed systems the phosphates and nitrates tend to build up in time. This makes the water hardness increase. Despite the fact that this species is aggressive, they are very sensitive to pH instability. If you oversize your filtration you may be able to get away with less water changes, but also monitor your nutrient levels with proper aquarium test kits.

    Itโ€™s also recommended to use external tank equipment that can clean the water. Because of their large size and aggressive style, the jaguar cichlid can damage any internal filter or heater. Titanium heaters are recommended when you house fish as large and aggressive as these. Titanium heaters can take a beating and not crack or break. You should also avoid any decorations that can easily be moved or tossed around. Apart from these minor problems, jaguar cichlids are easy to care for.

    Diseases that Affect Them

    Unfortunately, fish are prone to infections and disease, especially predatory fish like the cichlid. Infections are common with predatory fish due to fighting as wounded can get infect. For parasites, one of the most common diseases is Ich. This is treated by simply raising the temperature to 86 degrees Fahrenheit for about 3 days. In case this doesnโ€™t work, you will need to treat the pet with copper. Remember to be careful when you add a new decoration or a new fish to the tank because it is infected with disease. Stress from aggression can also bring about disease if the fish is carrying the disease. Stress will compromises a fish’s immune system, which will lead to an outbreak.

    FAQs

    How Aggressive are they?

    Jaguar cichlids are very aggressive fish. They are territorial and will attempt to eat any fish they can fit in their mouths. Because of their territorial nature, they will attempt to fight any fish that comes near their territory. Due to their size and most aquariums sizes, this will mean they will fight any fish you place in your tank.

    How Big Do They Get?

    Jaguar cichlids can get up to 24 inches in length, but most will end up around 16-18 inches. Males will typically be larger than the females and they will get more aggressive as they get older and more established in a tank.

    What Fish Can Go With A This Type of Fish?

    The best tank mate for a Jaguar cichlid is another Jaguar cichlid — as a breeding pair. Note that a bonded pair will be very aggressive, especially once they start breeding. Other species you can consider if you have the space would be large cichlids like Red Devils, Green Terrors, and Oscars. You can also consider large catfish.

    Can They Live With an Oscar?

    Yes, they can be compatible if you have the space for them to work out their territory issues. It is best to attempt this pairing when you have more experience. If you are attempting to house them together, consider a single Jaguar with an Oscar. Preferably, try a female Jaguar over a male when pairing.

    Conclusion

    A jaguar cichlid does not share a tank. It owns it.

    These are some of the most important things you should know about this amazing freshwater species. If you want to purchase a jaguar cichlid as a pet you need to be careful with the tank capacity and the pH of the water. Apart from that just feed them once a day with worms or dry food and they will be fine. Also, donโ€™t put them in tanks with smaller fish because the jaguar can kill or eat them.

    Got any additional questions about the Jaguar cichlid? If so, leave a comment below and let’s start a conversation!. Let us know what aggressive fish you have been able to pair with this monster fish!


    ๐Ÿ“˜ Want to learn more? This article is part of our complete Freshwater Fish Guide. Your ultimate resource for freshwater species, care tips, tank setup, and more.

  • How to Set up an African Cichlid Tank: A Guide for Beginner Aquarists

    How to Set up an African Cichlid Tank: A Guide for Beginner Aquarists

    An African Cichlid Tank in my opinion has always been an underrated aquarium. Usually many hobby or pet owners will look to freshwater community or saltwater tanks, but an African Cichlid tank offer the great balance of the ease of freshwater tank along with the vivid colors of a saltwater aquarium.  One of the biggest differentiating factors, especially with Mbuna Cichlids is how incredibly active they are.  An African Cichlid tank is a great choice for a beginner and for those who like the color of saltwater fish, but may not feel ready for the cost and additional upkeep of a saltwater aquarium. In today’s blog post, I will provide an overview on:

    • What are African Cichlids?
    • Care Requirements 
    • Plants in an African Cichlid tank

    What are African Cichlids?

    Cichlids are a diverse group of freshwater fish from the biological family Cichlidae.  There are over a thousand official species and some scientist in the field believe there may be thousands more!  They are also known as secondary freshwater fish because their distant relatives originated from the ocean.  Cichlids are split into two groups: Central and South American Cichlids or New World Cichlids and African Cichlids.

    African Cichlids come from three lakes in Africa – Lake Malawi, Lake Tanganyika, and Lake Victoria.  The most popular of these cichlids placed in African cichlid tanks come from Lake Malawi.  

    Lake Malawi

    Lake Malawi Cichlids are rock-dwellers and should live in a rock environment.  They are split into several species – Mbuna, Haps, and Peacocks.  Mbuna are the most active and aggressive of the three.  They are very colorful with the dominant male being the most colorful.  Aggression is typically curbed by overstocking, frequent feeding, and by not putting in fish groups with similar coloring.

    Haps are moderately aggressive fish with some Haps being very large. For some Haps, at least a 75 gallon tank would be needed to house them long-term.  They are piscivores, which means they prey on small fish – particularly smaller Cichlids.  Because of this, it is not a good idea to house these fish with anything small enough for it to swallow.

    Peacocks are the most peaceful of the three species.  They are most suited for a  community type of aquarium.  They are not compatible with Mbunas due to Mbunas more aggressive nature.  There are examples of success in mixed african cichlid tanks, but even if successful, the Peacock typically will not grow as fast, will end up being less colorful, and may not live as long.

    Mbuna Cichlid

    Lake Tanganyika

    Lake Tangayika Cichlids are broken down into three groups – shell dwelling lamprologus like Lemon Cichlids, rock dwelling cichlids like Calvus, and large cichlids like Frontosa.

    Shell dwelling Cichlids have a good number of positive features going for them.  They are small in size, peaceful behavior, hardy, breed easily, and are easy to keep.  Rock Dwelling Cichlids like Calvus are solitary hunters with slender large jaws used to suck smaller prey out from rock crevices.  Frontosas are the feature fish when it comes to Lake Tanganyika cichlids. They are usually known for being kept alone in an African cichlid tank, but have been known to be kept with large Tanganyika fish like Calvus and Compressiceps.

    Frontosa Cichlid

    Lake Victoria

    Lake Victoria Cichlids are the least known and popular of the three lake Cichlids.  There is a lack of hobbyist literature available which makes Victorian cichlids sometimes difficult to identify.  They are in general naturally aggressive fish.  Some can mix with Mbuna and Peacock cichlids.  Some of the most popular fish are Pundamilia Nyererei, the Zebra Obliquidens, and the Kyoga Flameback.  A lot of secondary research should be done with this species of fish given the lack of information in the hobby.      

    Lake Victoria Cichlid

    Care Requirements of Their Tank

    We are going to start going over care requirements. Check out our video below from our YouTube Channel. We go into more detail below so follow along.

    Tank Size

    When it comes to any freshwater fish species and aquarium setup, bigger is always better. You will have more water volume to make your tank stable and more room to curb aggression.  However, not everyone wants a massive tank.  Cichlids do get large and are territorial.  

    The minimum for most African cichlid species is going to be 55 gallons.  Longer tanks are better than tall as many cichlids are mid-level or bottom-level swimmers.  Always go for a wide vs taller aquarium.  

    Water Requirements

    All African Cichlids should be kept in water with a pH of 7.5-9.0, a water hardness from 10-20 dH, and a water temperature between 77-82ยฐF.

    The actual ranges of the African Rift Lakes are:

    Lake Tanganyika. 7.8-9.0

    Lake Malawi.  7.4-8.4

    Lake Victoria. 7.2-8.6 

    Since all African Cichlids appreciate this higher pH, these are one of the few freshwater species whose aquariums may be decorated with marine coral, sand, and rock which will push the pH and buffer the water.  In some instances it may be necessary to buffer water to reach these higher pH levels.  There are various Cichlid Buffer additives available in stores that can be used or Cichlid Salts.

    Filtration Requirements

    A Cichlid aquarium needs to be well filtered.  Overfiltration is actually encouraged in an african cichlid tank as it is typical to purposely overstock them to curb aggression among tank mates.  In addition, Cichlids are messy eaters and even messier excreters.  Aeration is also very important since Cichlids require well oxygenated water.

    Because of the added demands of African Cichlids, dual filtration is recommend.  Dual canister filtration is commonplace for African Cichlid keepers.  In larger tanks, an overflow + sump + wet/dry setup is used to handle the bioload and flow requirements of the tank.  Your goal is to have 8-10 times gallon per hour flow filtered per hour.  So for a 55 gallon tank, you are looking at a goal of 550 filtered gallons per hour from your filtration system.

    You can be fine with less filtered per hour if you have a high capacity canister like a BioMaster Thermo or Eheim Professionals, but you may need to supplement flow with powerheads to keep the flow strong in the tank in order to prevent dead spots within the tank.

    Rock Work

    Rock work is an important consideration and will vary depending on what species of African Cichlids you decide on.  For Mbunas and other rock dwelling Africans, you will want to have rocks with lots of holes and cevices.  Rocks will cover most of the bottom of the tank for these types of fish.  Texas Holey Rock and lava rock are two good examples of such rock. For Haps and Peacocks and other open swimmers, there should be more open water to mimic their environment.  Other rocks that you can consider would be slate, limestone, and even ocean rock. Making sure your rock is more smooth should be considered as rough rock can hurt your African cichlids.  

    Texas Holey Rock

    Substrates

    All Cichlid tanks should have a sand substrate in an african cichlid tank.  This most closely mimics their natural environment.  Many Cichlids naturally feed by grazing through the sand, others cleanse their gills, while others dive into it or build nests.  Some hobbyists have been known to acquire substrates from golf courses, pool shops, or home improvement stores. These can save you money when building an african cichlid tank, but do some research before placing in your tank to ensure you have an aquarium safe substrate.

    Within the aquarium industry, there are substrates available that will work with Cichlids, particularly aragonite sand used in marine tanks and Tahitian Moon Sand.

    Great For African Cichlids
    Carib Sea Aragamax Sand

    Boosts pH

    Aragamax is great for African setups as it keeps pH and hardness levels stable

    Buy On Amazon Click For Best Price

    Diet

    Diet for your African Cichlids will depend on the type of Cichlids you have. Africans can cross all the food groups (herbivore, carnivorous, omnivores, and micro predators) so it is critical that you know what group your fish belongs to.  Spirulina is a general good food to fish all fish since it has outstanding nutritional quality and is made up of 65-70% protein.

    Supplemental foods for herbivore fish would be peas, romaine lettuce, and spinach.  For fish carnivorous fish, brine shrimp, shrimp pellets, and krill would be good meat supplements.  Fish with yellow, orange, or red will need to be feed foods with lots of pigment so keep their colors optimal.  

    A stocked Cichlids tank need to be feed frequently, but not overfeed.  Maintaining this balance will curb aggression.  The recommended would be 3-4 times a day but only what they can eat within 20 seconds or less.  Overstocking and overfeeding are the primary reason why we recommended extra filtration for the tank back in the filtration section.  Overfeeding can lead to excessive nitrates or bloat for your herbivores.  Feed frequent, but do not overfeed.  A well feed Cichlid is a less aggressive Cichlid. 

    Food Recommendations

    Below are several recommended staple Cichlid foods

    New Life Spectrum Formula Pellets – The Benchmark in the Industry

    New Life has been doing top notch fish food for years with scientific research behind each of their formulated foods. You can’t go wrong with them and their color enhancing Cichlid pellet food.

    Great For Cichlids
    New Life Spectrum Cichlid Formula

    New life is scientifically backed and designed exclusivity for Cichlids

    Buy On Amazon

    Cobalt Aquatics Probiotic Enhanced Flake Food – The Best Flake Food

    Cobalt Aquatics has really made some moves in the industry with probiotic enhanced foods. This flake food offered by them is arguably the best African Cichlid flake food available on the market. It’s a works great in combination with New Life’s pellet food.

    Best Flake Formula
    Cobalt Aquatics Cichlid Flakes

    With probiotics and specially formulated for Cichlids, this is bar none the best flake formula available for your Africans

    Buy On Amazon Buy On Chewy

    Hikari Cichlid Excel Pellets – Specially Formula for Plant-Eating Types

    Cichlids eat a good amount of greens. The Hikari Cichlid Excel Pellets by Hikari focuses on spirulina with vitamins and materials to provide a highly nutritious pellet. Combining this pellet food with the other two, you should everything you need to provide a quality diet to your African Cichlid community.  

    For Added Variety
    Hikari Cichlid Excel

    A spirulina based pellet food. Loaded with vitamin and materials. Combine with the other two foods

    Buy On Amazon

    In the Tank

    Live plants can be kept successfully with African Cichlids.  You may have heard from others, from forums, or your local fish store that you cannot but it is very possible to keep plants.  There are a few things to keep in mind if you want to attempt to keep plants with African Cichlids.  First, not all plants will be able to tolerate the high pH of an African cichlid tank.  Second, not every plant will be compatible with the different types of African Cichlids available.

    Specialized freshwater lighting systems will need to be considered if you choose to have plants in your African cichlid tank. While lighting requirements will vary for different plants, the proper spectrum of light needs to be provided to them.  You will need lights that emit in the blue and red end of the light spectrum.  These are wavelengths of 450 and 680 nm.  Check out my post for planted LED systems, to see systems with the proper wavelengths.

    Wavelengths

    Plants have tighter requirements to prevent algae outbreaks as well.  Regular water changes to keep nitrates below 50 ppm and the use of bristlenose plecos will help with algae.  Keep in mind; however, that plecos will eat soft plants.

    You have to purchase the right african cichlids for your tank to ensure success with plants. You will have the greatest success with non plant eating african cichlids like peacocks and the hardest time with Mbunas.  

    The final factor is dealing with the digging of cichlids.  Plants can be uproots with the digging activities so plants need to be fastened to prevent uprooting.  Java fern should be tied to rock with fishing line and other plants should be potted or wedged in between rocks.  

    Planted Cichlid Tank

    Where to Purchase?

    Getting them at your local fish store would be the first step. I would highly recommend that you join a aquarium club to learn more about the quality local fish stores near you. Some people, however, do not live near a quality local fish store. In those cases, pushing African Cichlids online would be the best way to obtain them. There are a few out there that are worthwhile:

    Worldwide Tropicals
    Seller on Amazon who sells various African Cichlid livestock 

    Mike’s Cichlids
    Family owned breeding facility that specializes in high quality Cichlids

    Imperial Tropicals
    WYSIWYG African Cichlids

    Additional Reading and Resources

    As African Cichlids keeping has been around for many year, there are a wealth of resources and even books for you to enjoy and read. Here are several I would recommend and you learn more about them. All are easily found on Amazon:

    Closing Thoughts


    African cichlids are highly rewarding fish to keep. We hope this article was useful in planning your African Cichlid tank.   If you liked this post, check out the recap video from our YouTube Channel below. Subscribe if you like it. I hope to see you again.


    ๐Ÿ“˜ Want to learn more? This article is part of our complete Freshwater Fish Guide. your ultimate resource for freshwater species, care tips, tank setup, and more.

  • Algae Scrubber Vs The World (Algae Reactor, Biopellets, GFO, Cheato, Fuges)

    Algae Scrubber Vs The World (Algae Reactor, Biopellets, GFO, Cheato, Fuges)

    Nutrient export is one of the most debated topics in reef keeping, and I’ve experimented with most of the major methods in my 125-gallon over the years. GFO reactors, biopellets, refugiums with chaeto, and algae scrubbers. Each has a real place depending on your system’s bioload and your maintenance preferences. This breakdown is based on what I’ve actually run, not just theory.

    Algae scrubbers are finally starting to pick up mainstream acceptance in the Reefkeeping community! As someone who has advocated Algae Turf Scrubbers, for many years it great to see them more widely accepted. There is still a lot of skepticism in the industry though and many store still push other products and solution. I created this article below so you can see the differences between an Algae Scrubber (AKA Algae Turf Scrubber) and other solutions like there. There will be affiliate links in this article as a quick disclosure where I may make a commission should you make a purchase from the link at no charge to you. Let’s get started.

    Algae Scrubber vs. Algae Blocker

    Ah the Algae blocker. This is a very common solution you will hear about at your Local Fish Store (LFS) when a customer comes in with an algae problem. I think of these as the diet pill solution to nuisance algae in the industry. 

    What is a blocker?

    Algae Blocker

    An algae blocker is a chemical product that will work to remove nuisance algae in the aquarium. The most well known algae blocker is Boyd Enterprises Chem Clean who sells a Cyano blocker. The industry has gotten really good over the years and have created reef safe solutions that will remove algae, but will not harm inverts and corals.

    Why is this better than the Blockers?

    An algae blocker’s purpose is to quickly remove algae, but it is not an end all solution. They really are meant to wipe out nuisance algae after the long-term problem is treated – usually a poor water source or bad aquarium housekeeping. They become expensive to use long-term. 

    An Algae Scrubber on the other hand, is a natural solution to nuisance algae. The algae you grow in the scrubber sucks up the nutrients that feed other forms of algae, and the algae is keep in one spot where you can remove it. Scrubbers are always a long-term investment in the aquarium as they do not need ongoing filters or replacement parts.

    Is The Reactor Different?

    Algae reactors have been commercialized recently with the raise of Algae Scrubbers. 

    What is a reactor?

    Algae Reactor

    An algae reactor is a self container container that grows macro algae like cheato. They are pretty complex units, with a reactor chamber, pump, and lighting all functioning in the unit.

    The biggest advantage to an algae reactor is ease of use and simplicity. While an Algae Reactor has a comprehensive unit, an algae scrubber has simple individual parts. This means that if one part breaks, it is easier to fix vs having to buy another unit.

    Biopellets

    Biopellets have been a solution for denitrification for years

    What is a Biopellet Reactor?

    Biopellet Reactor

    Biopellets themselves are a polymer that is made up of bacteria. They are meant to be a supplement to the beneficial bacteria in your aquarium. The main draw is these biopellets will remove nitrates. They require a reactor so you can efficiently work the materiel and cultivate the bacteria.

    What is better than Biopellets?

    Biopellets can be tricky to dial in and can actually strip too many nutrients in your tank. Stability of the operation is there biggest issue. You also still need to address phosphates requiring another equipment solution. An algae scrubber handles both nitrates and phosphates and are easier to operate once they are broken in.

    Cheato

    Cheato was the first acceptance of using algae to control nutrients in an aquarium

    What is Cheato?

    Cheato

    Cheato is single celled macro algae that is simple to grow and easy to place in a sump. It is one of the easiest and simpliest ways to control nutrients in a tank

    Which is better than Cheato?

    The main advantage you will get from a scrubber is surface area growth. Scrubbers have the ability to grow more nutrient absorbing algae in a concentrated space then cheato. You need a lot of cheato to control nutrients and you need the space in your sump to do it. The major downfall is the risk of pests and disease from Cheato. Yes, that is correct Cheato can bring over a number of pests and diseases. Unless you Quarantine your Cheato (very few people do this) or you get your Cheato from a source that guarantees clean Cheato (like Algaebarn), it is always a risk. With an Algae Turf scrubber, you are growing your own algae from your own tank. You are in full control of what comes in and out through your introduction procedures with your fish, inverts, and corals.

    But other than that cheato is and will always be a cheap and go solution for nutrient control. It is algae after all and a natural way of removing nutrients in the aquarium.

    Denitrator

    Denitrators were a solution to aquariums for many years until other products like Zeovit and Biopellets came about.

    What is a Denitrator?

    Denitrator

    A denitrator is a piece of equipment that has been used in wastewater treatment plants and public aquariums for years. Denitrators are the solution to using a traditional media bag in the sump which is harder to manage optimally. A denitrator pieces the media in a chamber where the water can properly react to it resulting in consumption of nitrates.

    Which is better than a Denitrator?

    A denitrator system and a built algae scrubber equipment wise are around the same price. The main advantage you will get with an algae scrubber is you will not need to replace your media and the parts are easier to replace. The other advantage that an algae scrubber will have is that it will remove phosphates while the denitrator will only remove nitrates. You will need to invest in other equipment to control phosphates.

    GFO (AKA Phosban)

    GFO is a common media used in saltwater aquariums. Phosban is the big name brand that sells GFO.

    What is GFO?

    GFO Media Reactor

    Granular Ferric Oxide or GFO is media that is used in an aquarium to remove phosphates. It is also used to remove heavy metals and other toxins in the aquarium. Generally, GFO is placed in a reactor for optimal use. 

    Which is better than GFO?

    Investing in a GFO system will incurring recurring costs as the media will need to be replaced every 1-2 months. GFO also does not remove nitrates, meaning you will need another piece of equipment or solution to remove nitrates from your aquarium. An algae scrubber will remove both phosphates and nitrates and will not incur recurring costs.

    Refugium

    For reefers who have a sump, it is very common for them to have a flex space that is used to create a Refugium.

    What is a Refugium?

    Refugium Sump

    A refugium is usually a section in a sump that is reserved to in order to provide a place for certain organisms to survive. In general, these would be organisms like copepods, macroalgae, and certain inverts.

    Why is this better than a Refugium?

    A refugium is also usually used to grow macroalgae for nutrient control and be a place to grow copepods. An Algae Scrubber is actually great at both. It grows algae like crazy and copepods thrive inside the mesh of the scrubber. It is very common when you clean an algae scrubber that you can remove hundreds of amphipod and copepods from the scrubber. No other piece of equipment does a better job at growing them. This allows you to do more in the flex space of your sump. 

    Zeovit

    Zeovit is a nutrient free solution that is touted in the reef aquarium industry.

    What is a Zeovit System?

    Zeovit System

    Zeovit is a system that produces an ultra low nurtrient system. It utilizes bacteria to eliminate nutrients at the initial source –  Ammonia. 

    Why is an this better than a Zeovit system?

    Zeovit systems are pretty complicated to setup and expensive. It is not a cookie cutter system and every system is different. Dosage and product needed for your system will differ. An algae scrubber on the other hand, is all about simplicity. It is easy to setup, easy to clean, and easy to get results.

    Zeovit is really a product of the saltwater aquarium industry, which loves to market the latest and and greatest high-tech toys and solutions to hobbyists. It is a great product, as long as you can dial it in, but overly complex. 

    Natural and Simple

    An algae scrubber is natural and simple and nature is not a solution that is going to be outdated or obsolete. Always do your research regardless of what you end up purchasing. Let us know your experience with equipment or any questions in the comments.


    ๐Ÿ”ง Want to learn more? This article is part of our complete Aquarium Equipment & Gear Guide. your ultimate resource for filters, heaters, lights, pumps, tanks, and more.