Substrate is the single most underrated decision in planted tank setup. Every planted tank failure I’ve seen over 25 years traces back to it: wrong substrate type, wrong depth, wrong product for the plants chosen. And unlike a bad filter or a broken heater, a substrate mistake is almost impossible to fix without tearing the tank down completely.
Get the substrate wrong and nothing above it will thrive. Not the lighting, not the CO2, not the fertilizers. The foundation is everything.
I’ve used inert gravels, active volcanic soils, capped dirt setups, and everything in between. After 25 years and more planted tanks than I can count, I can tell you exactly which substrates perform and which ones waste your time and money. This guide covers what I actually recommend, what I’ve seen beginners get catastrophically wrong, and how to match substrate to your specific setup.
Expert Take | Mark Valderrama, AquariumStoreDepot
My go-to recommendation for most planted tanks is Fluval Stratum. It’s volcanic soil, it buffers pH into the slightly acidic range that most tropical plants love, and it doesn’t trigger the brutal ammonia spike you get with fresh ADA Amazonia. For serious aquascapers or anyone running high-demand plants like glosso or HC Cuba, I still point them to ADA Amazonia, but you need to be ready for the 6-8 week establishment period. The biggest mistake I see over and over: beginners buying plain pea gravel at the chain pet store, planting Amazon Swords in it, and wondering why the plants melt two months later. Inert gravel with root feeders is a setup for frustration. Don’t do it.
With over 25 years of experience in the aquarium hobby, I’ve assisted countless clients, hobbyists, and readers in building successful planted tanks. I’ve personally tested these substrates in real setups across multiple tank sizes and plant communities.
Top Picks
For those in a hurry: ADA Amazonia is the world benchmark for active planted substrates, and nothing else on this list touches it for serious aquascaping. Fluval Stratum is my everyday recommendation for most hobbyists: effective, forgiving, and half the price. The CaribSea Eco Complete hits the best balance of price and nutrient availability for budget-conscious beginners.
What People Get Wrong About Planted Tank Substrate
The most common mistake I see is straightforward: people buy plain aquarium gravel, plant Amazon Swords and crypts in it, and then blame everything except the substrate when the plants melt. Plain gravel is inert. It provides zero nutrition for root-feeding plants. The plants look okay for a few weeks because they’re living off stored energy. Then they crash.
The second mistake is the opposite: buying an active soil like ADA Amazonia without understanding what you’re signing up for. Fresh active soil dumps ammonia into the water column. If you just add fish and skip the proper cycling and water change schedule during establishment, you’ll lose fish and get algae explosions that take months to control.
The fix is simple: match the substrate to the plants, and match the plants to your experience level.
The Biggest Mistake Planted Tank Owners Make
Buying cheap inert substrate for a root-feeding plant setup is the fastest way to a failed tank. I’ve seen it dozens of times at the stores I’ve managed. Someone buys a 20-gallon, fills it with colored aquarium gravel, plants six Amazon Swords, and asks why the leaves are yellowing and dying six weeks later. The answer is always the same: the roots have nothing to feed on.
Inert gravel doesn’t absorb or retain nutrients. Without root tabs, root-feeding plants in plain gravel will slowly starve regardless of how good your liquid fertilizer routine is. The bigger the plant, the faster it starves.
The Hard Rule: if you’re serious about a planted tank, the substrate is not where you save money. This is the one area where investing up front saves you from a complete teardown later.
How We Ranked These Planted Tank Substrates
- Nutrient content: does it provide root-zone nutrition plants need, or is it inert
- Longevity: how long before nutrients deplete and supplementation becomes necessary
- Particle size: appropriate for plant root systems (not too coarse, not so fine it compacts)
- pH impact: does it buffer acidic/neutral or is it inert
- Aesthetics: looks natural and appropriate for most freshwater planted tank styles
Do You Need Specialized Planted Substrate?
Yes, Get It If
- Keeping root-feeding plants (swords, crypts, stem plants)
- Setting up a high-tech planted tank with CO2
- Want to minimize liquid fertilizer dosing
- Building a shrimp tank (buffering substrate helps caridina shrimp)
Plain Substrate Is Fine If
- Keeping only epiphytic plants (anubias, java fern, don’t use substrate at all)
- Low-tech tank with minimal plant species
- Budget is very tight and you’ll supplement with liquid fertilizers consistently
- Goldfish or cichlid tank where plants are secondary
Our Candidates
Here are the substrates I reviewed and tested for this guide.
| Picture | Name | Features | Link |
|---|---|---|---|
Editor’s Choice  | ADA Aqua Soil Amazonia |
| Buy On Amazon |
Best Value 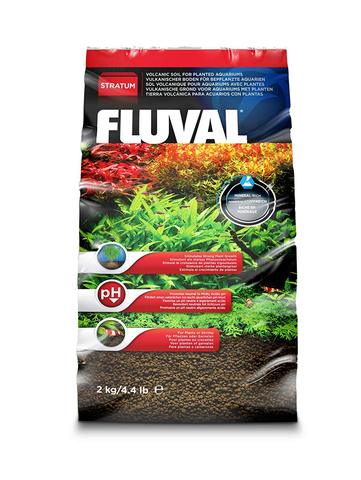 | Fluval Stratum |
| Buy On ChewyBuy On Amazon |
Budget Option  | CaribSea Eco Complete |
| Buy On ChewyBuy On Amazon |
 | Tropica Aquarium Soil |
| Click For Best PriceBuy On Amazon |
 | Mr. Aqua Aquarium Soil |
| Buy On Amazon |
 | ADA Aqua Soil Amazonia Light |
| Buy On Amazon |
 | Seachem Flourite |
| Buy On Amazon |
The Top 7 Best Substrates for Planted Tanks
Let’s go over each substrate and why it made the list.
1. ADA Aqua Soil Amazonia: The World Standard

The Best Planted Tank Substrate
The world’s standard in active substrates for planted tanks. Created by the brand that founded modern aquascaping.
Mark’s Top Pick
ADA Amazonia is the best active planted substrate on the market, full stop. The plant growth I’ve seen from it is in a different league from anything else I’ve tested. Yes, it’s expensive, and yes, you’ll deal with an ammonia spike and cloudy water for several weeks on setup. For a serious aquascape with demanding foreground plants and stem plants, that tradeoff is worth it. For a casual community tank with easy plants, it’s overkill. Know what you’re building before you spend the money.
ADA Amazonia is recognized by expert aquascapers worldwide. It lowers hardness and pH into the mildly acidic range preferred by most tropical fish and plants. The substrate is dense with nutrients, including ammonia and phosphate, which feed plants through the root zone.
The tradeoff is significant: a newly set up ADA tank will experience high ammonia, cloudy water, and algae blooms during the 6-8 week establishment period. Daily or every-other-day water changes are necessary during this phase. Many experienced aquascapers use a dry start to get plants established before flooding the tank, which dramatically reduces algae pressure. ADA also breaks down over 12-18 months and requires replenishment or capping. When you do replace it, the disturbed substrate releases another ammonia surge, so plan carefully.
This is a substrate for people who take planted tanks seriously. It’s not the right call for a beginner’s first tank.
Pros and Cons
- Unmatched nutrient density for root-feeding plants
- Proven results with top aquascapers globally
- Designed for demanding, expert-level plant species
- Releases ammonia heavily during initial weeks
- Expensive
- 6-8 week establishment period with water changes required
- Breaks down in 12-18 months
2. Fluval Stratum: Best Value for Most Hobbyists
Best Value
A beginner-friendly alternative to ADA Soil. Also excellent for shrimp tanks.
Fluval Stratum is made from volcanic soil and is my everyday recommendation for hobbyists who want active substrate performance without ADA’s aggressive establishment phase. It buffers pH into the slightly acidic range that most tropical plants prefer, establishes beneficial bacteria colonies quickly due to its porous structure, and doesn’t discolor the water significantly when first added.
One practical warning: don’t place heavy rocks or driftwood directly on Fluval Stratum. The granules crush under pressure and broken-down particles lose their porous structure. Also keep the siphon well above substrate level during water changes; it’s lightweight and easy to accidentally vacuum out.
Fluval Stratum is significantly cheaper than ADA and more widely available in stores. For a beginner’s first planted tank or a shrimp setup, it’s the call I make every time.
Pros and Cons
- Natural volcanic base with high CEC value
- Works well in smaller tanks and shrimp setups
- Much gentler ammonia release than ADA Amazonia
- Lightweight: easy to siphon away during maintenance
- Granules crush under weight from rocks or driftwood
3. CaribSea Eco Complete: Best Budget Option
Budget Option
A beginner-friendly substrate with nutrient content and beneficial bacteria built in.
CaribSea Eco Complete is packed with liquid fertilizer held within its structure for easy plant absorption. It’s inert in terms of pH impact, so it won’t shift your water chemistry long-term, which is a genuine advantage for tanks where you want more control over parameters. It comes pre-loaded with a beneficial bacteria colony, which shortens the nitrogen cycle when establishing a new tank. The iron content also makes it better suited for red-colored plants than most other substrates on this list.
The main limitations: it’s lightweight, which makes anchoring larger root-feeding plants difficult, and its particle shape isn’t great for bottom dwellers. For budget-conscious beginners starting their first planted tank, it’s the most accessible entry point that still provides real nutrient support.
Pros and Cons
- Pre-loaded with beneficial bacteria
- Inert: won’t shift pH or hardness
- No rinsing required
- Good iron content for red plants
- Lightweight: struggles to anchor large root feeders
- Particle shape not ideal for bottom-dwelling fish
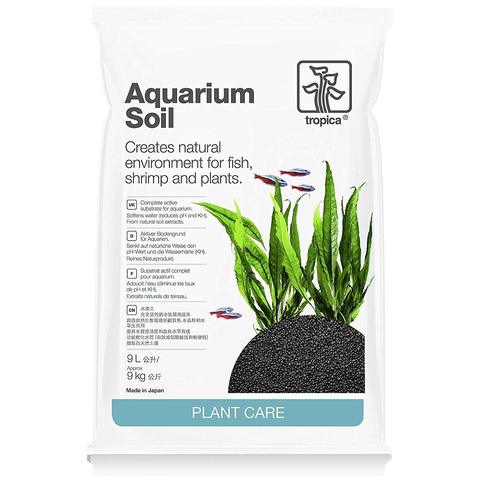
4. Tropica Aquarium Soil: The European Standard
A top-grade planted tank substrate from Europe. More natural-looking than ADA Soil and lower ammonia release.
Tropica Aquarium Soil is Europe’s equivalent to ADA Amazonia. It’s active, nutrient-rich, and lowers pH and hardness like most soils on this list, but with a notably less aggressive ammonia release than standard ADA Amazonia. The non-uniform grain size also gives it a more natural, less manufactured look in the tank. If you’re looking for ADA-level performance with a somewhat easier establishment period, Tropica is worth the search. The main challenge is availability, since it’s harder to find in North American stores than the other substrates here.
Pros and Cons
- Lower ammonia release than ADA Amazonia
- Natural, non-uniform grain variety and shape
- Lowers pH and hardness for tropical plants
- Expensive
- Hard to find in North American stores
5. Mr. Aqua Aquarium Soil: ADA Performance at a Lower Price

An active soil that performs like ADA at a lower price point, with better porosity for shrimp tanks.
Mr. Aqua Aquarium Soil is an active soil that performs similarly to ADA Amazonia but with less ammonia intensity and a more porous granular structure. The higher porosity improves water exchange through the substrate and makes it particularly well-suited for shrimp tanks. Like most active soils on this list, it lowers pH and softens water.
I recommend Mr. Aqua to hobbyists who want the benefits of a quality active soil without the ADA price tag and without the full aggression of ADA’s ammonia cycle. The main inconvenience is availability: you generally need to order online rather than finding it locally.
Pros and Cons
- Cheaper than ADA with a more porous structure
- Lowers pH and softens water
- Lower ammonia release: easier cycling period
- Harder to find in local stores
6. ADA Aqua Soil Amazonia Light: The Beginner-Friendly ADA Option

An ADA substrate designed with beginners in mind. More forgiving, but still pro-grade quality.
ADA Amazonia Light is ADA’s answer for hobbyists who want the brand’s quality without the full intensity of the standard formula. It carries significantly lower nutrient concentration, which means a shorter, less severe establishment period and fewer algae spikes when plants are getting started. It still lowers pH and hardness into the ideal range for most tropical plants. If you’ve been intimidated by the standard ADA’s required water change regimen, this is the version to start with.
Pros and Cons
- ADA quality with a shorter, gentler establishment period
- Lowers pH and hardness for tropical plants
- Good choice for first-time ADA users
- Expensive for what is a reduced-nutrient product
- Still requires 4-6 weeks of establishment monitoring
7. Seachem Flourite: Reliable Clay-Based Substrate
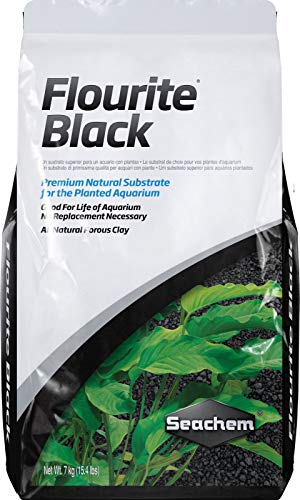
A clay-based substrate that never breaks down. Readily available and parameter-neutral.
Seachem Flourite is a clay-based substrate that never needs replacing. Unlike active soils that break down over 12-18 months, Flourite is permanent. It comes in several colors and grain types and doesn’t alter tank chemistry, giving you full control over water parameters through supplementation.
Flourite isn’t nutrient-loaded the way active soils are. That means no establishment period, no ammonia spikes, no algae surge in week one. The flip side: root-feeding plants need regular root tabs to thrive long-term. It’s also worth noting that Flourite is dusty when first opened and needs thorough rinsing before use. It’s not ideal for corydoras or other bottom dwellers because of its sharp particle edges. Choose Flourite if you want a long-term, low-maintenance substrate and you’re comfortable managing plant nutrition through root tabs and liquid fertilizers.
Pros and Cons
- Multiple colors and grain types available
- Never breaks down: permanent substrate
- Readily available in stores
- No establishment period or ammonia spike
- Dusty: requires thorough rinsing before use
- Not nutrient-loaded: root tabs needed for demanding plants
- Not suitable for bottom dwellers due to sharp particle edges
What Is Planted Tank Substrate?
Substrate is the material that covers the bottom of your aquarium. In a planted tank, it serves as the physical anchor for plants and, in the case of active or nutrient-rich substrates, as the primary food source for root-feeding species. It also houses beneficial bacteria colonies as part of your tank’s biological filtration.
Not all plants use substrate the same way. Most aquatic plants are water column feeders, meaning they absorb nutrients from the water directly through their leaves and stems. Plants like Java Fern, Anubias, and Java Moss don’t even root in substrate at all. Root-feeding plants are a different story. Amazon Swords, Vallisneria, crypts, and most carpeting plants pull a substantial portion of their nutrition from the root zone. For these, substrate quality directly determines plant health.
Why Substrate Choice Matters More Than You Think
Active planted substrates work by releasing nutrients from organic matter as it breaks down in the substrate layer. Your plants consume those nutrients through their roots. But there’s a catch: if you buy a rich active substrate and plant only water column feeders, the nutrients still release into the water column. The only things that will consume those elevated nutrients are algae. Lots of algae.
This is why matching substrate to plant type is the first decision in any planted tank build. Most substrates stay nutrient-rich for 12-18 months before needing replenishment via root tabs or supplemental dosing. Plan for this from the start and your long-term maintenance routine becomes much simpler.
If you’re focused on water column feeders, substrate choice opens up considerably. You can use almost any substrate that appeals aesthetically and focus fertilization entirely on liquid column dosing. Anubias, Java Fern, and Java Moss don’t care what’s in the gravel below them.
Types of Planted Tank Substrate

Clay-Based
Clay-based substrates like Seachem Flourite are inert and permanent. They don’t alter water chemistry and never need replacing. The tradeoff is that they provide no root-zone nutrition on their own. Root-feeding plants in clay substrate need root tabs to thrive. Best suited for long-term setups where you want total parameter control.
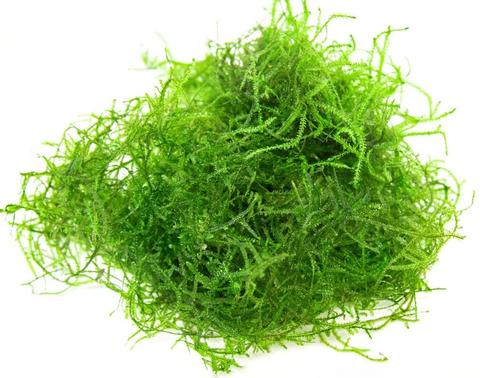
Sand
Sand is another inert option. The key factor to watch is particle size: too fine and the substrate compacts, choking plant roots and creating anaerobic pockets. Coarse sand at 1-2mm particle size works well for plants; ultra-fine sand does not. Sand is a good choice for tanks with corydoras, as it’s soft on their barbels.
Gravel-Based
Standard aquarium gravel is inert and provides zero nutrition. It’s fine for fish-only tanks or setups composed entirely of column-feeding plants. For root feeders, gravel requires consistent root tab supplementation to prevent plant starvation. We have a video covering plants that do well in gravel from our YouTube channel below:
Active/Mineral Soils
These are the nutrient-rich substrates: ADA Amazonia, Fluval Stratum, Mr. Aqua, Tropica Soil. They contain organic material that breaks down and releases nutrients into the root zone. Most lower pH and soften water. Most require an establishment period during which ammonia levels spike and algae pressure is high. They’re the right tool for serious planted tanks with root-feeding plant communities.
pH-Boosting Substrates
Substrates like crushed coral raise pH and maintain alkalinity. These are relevant for African Cichlid setups and hard-water species. They don’t belong in a planted tank setup where most plant species prefer neutral to slightly acidic water.
Key Factors When Choosing Planted Tank Substrate
Grain Size

Grain size is critical for root-feeding plants. Too coarse and roots can’t penetrate or absorb nutrients efficiently. Too fine and the substrate compacts, cutting off oxygen to the root zone and creating anaerobic pockets that harm plant roots and produce hydrogen sulfide. The sweet spot for planted tanks is 1-3mm, with 2mm being ideal for most species.
Material
Avoid substrates containing limestone, crushed coral, or calcium carbonate, as these raise hardness and pH. Most plants prefer neutral to slightly acidic water. The products on this list are all appropriate choices that eliminate the guesswork.
CEC Value (Cation Exchange Capacity)
CEC measures how effectively a substrate binds and retains nutrients for plant use. Higher CEC means more nutrients held in the root zone rather than leaching into the water column. This is why volcanic soils like Fluval Stratum and ADA Amazonia outperform plain gravel even when liquid fertilizers are added to inert substrate.
Weight and Longevity
Plants with delicate or fine root systems need a substrate that won’t crush those roots under its own weight. Consider your plant species before choosing a heavier substrate. And think about longevity: active soils deplete nutrients over 12-18 months. Clay-based substrates like Flourite last indefinitely but require supplementation from the start. Build your maintenance plan around whichever type you choose.
Going the DIY Route
Some experienced hobbyists use garden topsoil as a base, capped with coarse sand or a commercial substrate to save money. It can work, and I’ve seen tanks built this way do well. But it’s genuinely not beginner territory. Garden soils vary enormously in composition, and there’s no way to predict exactly how your water parameters will shift until the tank is running. Ammonia from topsoil can be extreme. Cycling times extend significantly. If something goes wrong, diagnosing the cause is much harder when your substrate is an unknown variable.
For first-time planted tank owners, stay with a commercial substrate from this list. The predictability alone is worth the price difference.
What Most Planted Substrate Reviews Get Wrong
- Not distinguishing between inert substrate (which needs heavy liquid fertilizing from day one) vs. nutrient-rich active substrate: treating them as interchangeable leads to plant failures that are entirely predictable.
- Not warning about new tank syndrome with active soils: ADA Amazonia and similar products release significant ammonia as they break in. Fish added too early will suffer or die.
- Recommending the same substrate for shrimp tanks and planted community tanks without noting pH buffering differences: caridina shrimp need acidic, soft water; neo shrimp are more flexible. The substrate needs to match the shrimp species, not just the plants.
- Not mentioning longevity: active substrates deplete nutrients in 12-18 months and then require capping with root tabs or substrate replacement. This is a significant cost and effort commitment that reviews almost never address upfront.
Frequently Asked Questions
I get a number of questions from readers about planted aquarium setups. Below are the ones that come up most often.
How Deep Should My Aquarium Soil Be?
For a sloped aquascape like an Iwagumi layout, the standard recommendation is 3 inches (7.5 cm) in the front and 5 inches (12.5 cm) in the back. In practice, 2 inches (5 cm) in front and 4 inches (10 cm) in back works fine for most plant species. Unless you’re keeping large root feeders like Amazon Swords, you don’t need more than 4 inches (10 cm) at the deepest point.
For column-feeding plant setups, substrate depth matters much less. A shallow layer that just covers the bottom is sufficient and makes the tank easier to clean and maintain.
Closing Thoughts
Substrate is the decision most hobbyists underinvest in and the one they can’t easily undo. Every planted tank I’ve built over 25 years, the tanks that thrived had substrate dialed in first. The ones that struggled almost always had the wrong substrate for the plants in them.
Here’s the short version: if you’re keeping root feeders, get an active soil. Fluval Stratum for most people, ADA Amazonia if you’re serious about aquascaping and willing to manage the establishment phase. If you’re keeping column feeders only, any inert substrate works and you can focus your fertilization effort on liquid dosing. Don’t use plain gravel for root feeders and wonder why your plants are melting.
The substrate doesn’t care how good the light is. If the roots have nothing to feed on, the plant dies. Build from the bottom up.
🌿 Want to learn more? This article is part of our complete Planted Tank & Aquascaping Guide, your ultimate resource for aquarium plants, aquascaping styles, substrates, and more.
![The 21+ Best Low Light Aquarium Plants – [Reviewed and Tested]](https://aquariumstoredepot.com/wp-content/uploads/Best_Low_Light_Aquarium_Plants-1.png)


![The 7 Best Koi Pond Kits Of 2026 [Tested & Reviewed]](https://aquariumstoredepot.com/wp-content/uploads/Best_Koi_Pond_Kits_69d0bc17-6b2b-486a-8ee8-426579aacee3-1.png)


![The 5 Best Aquarium Chillers of 2026 [Tested & Reviewed]](https://aquariumstoredepot.com/wp-content/uploads/Best_Aquarium_Chillers_Reviews-1.png)