The return pump is the heart of any sump-based system. it determines flow rate, heat input, noise level, and reliability for everything downstream. I’ve run various return pumps on my 125-gallon reef over the years, and the Sicce Syncra SDC caught my attention because of its DC motor and controller. Here’s my in-depth take on whether it delivers for serious reef setups.
Looking for the very best Aquarium Return Pump available for your tank today? Well, this is the very post you have been looking for as the Sicce Syncra SDC has solved may of the issues that have plagued DC pumps since they were first introduced in the hobby.
As you may have read in my Best Aquarium Return Pump round up article. DC pumps are cursed with multiple issues. The main thing are the failure points and the quality control of the manufacturing. So what happens when we combine one of the most reliable and high quality Italian manufacturers in our industry and DC pump technology? It sounds like a dream combination doesn’t it? It sounds like Sicce may have solved the very issue that has frustrated most us with DC pumps since they were released – reliability!
As a reminder for my viewers, this post will contain affiliate links. An affiliate link means I may earn advertising or referral fees if you make a purchase through my link. I’ve had the pleasure of working with some great partners in the industry and highly recommended working with these links as they happily help hobbyists and content creators support their work. With that disclose away let’s get started! Let’s find out what makes The Sicce Syncra SDC stand out from the crowd!
My Sicce Syncra SDC Review will be fairly structured. I’m going to be reviewing the following for this product:
I’ll start off by giving a quick disclaimer. I’m absolutely unashamedly bias to Sicce pumps. In the 15+ years I have been involved with this hobby, I have been very loyal to them. They have never done me wrong. This DC return pump is an absolute dream. Let’s discuss the crazy amount of features included with this pump:
You may have seen these features in other DC pumps, the main difference here is that Sicce delivers all if this with a FREE controller app that runs on your smartphone. There is no additional accessory to purchase (calling you out EcoTech), The app can actually run multiple Sicce pumps. In fact, it will run any Sicce related product that has wifi enabled. This is an amazing feature that Sicce has added. It’s simply the best in the industry that I have seen from an return pump.
The Syncra SDC is offered in 3 models all built with energy efficiency in mind. The pump meets the needs of advanced recirculating applications and are equipped with integrated intelligence systems.
Craftsmanship
Italian design and manufacturing. That’s the best way to start this section of the review. It’s not a secret in our industry that German and Italian engineering are highly valued. They are known for their quality, effectiveness, and reliability. With the large number of Chinese manufactured DC pumps these days, something that has the original high quality of the Germans and Italians is increasingly rare. It’s one of the biggest things I’ve been with the DC transition as many AC pumps are still made with German and Italian manufacturing and engineering.
The Syncra SDC is no exception. It is 100% designed and produced in Italy. The design if the pump is no frill and functional based. I actually prefer this over the cool looking DC pumps I have seen with blue and red colors. I just want the pump to work for ages. I could care less about the fancy colors of something I only see when I pop open my cabinet.
The biggest proof of craftsmenship by Sicce is their offer of a 5 year warranty. That blows away EVERY competitor on the market at it’s price point. It’s not even close. Ecotech and CoralVue can’t even sniff a 5 year warranty on their pumps. There are only two groups of competitors that will come close to a 5 year warranty. That would be going with an AC return pump or moving up to Abyzz DC pumps that have 10 year warranties. The Abyzz pump however is 3 times the price!
Ease Of Use
The Syncra SDC install is similiar with any DC pump out there that will involve plumbing.I won’t really cover that here since that is a whole separate discussion. However, what I will talk about how easy to use and install their Contrall App is. The video below walks you through the process. I found the install process pretty painless and the fact that you can get notifications on your phone is pretty amazing given this is all included in your purchase of the return pump.
Value for Money
The Sicce Syncra SDC is no doubt an expensive DC return pump. However, let’s talk about the value. It’s priced at the levels of a EcoTech and VarioS. This puts it at the higher end of the market. It is also the only pump that offers a 5 year warranty. If I’m going to invest over $200 on a return pump – I better get a long-term warranty. I’ve heard too many stories of EcoTech pumps failing prematurely.
I’m old school in that I believe a return pump is a purchase and forgot about it for the next 10 years. Sicce is the ONLY DC return pump in this price range that offers this assurance. As such, it’s the only DC pump I recommend for high end builds. It is the one DC pump that truly combines the energy efficiency of DC pumps with the reliability of AC pumps.
Product Support
Given Sicce is headquartered in Italy, they can be sometimes hard to reach. However, in my experience their customer support is responsive, just not in your desired timezone. I do like their registration process and there are plenty of videos online they provide that show how to operate their products. When you register your product, you create a registered customer login where you can login your tickets and get support. It’s a rather easy to use portal.
Price
The biggest con in this product review. They are one of the more expensive DC Pumps on the market. They also have the best reputation for their durability. There prices are more expensive then the Reef Octopus Varios, but on Par with EcoTechs. Given the superior warranty and durability history with Sicce products in general, I feel they are priced competitively. For those at lower budgets, you can’t do wrong with a traditional Sicce AC pump.
Closing Thoughts
The SDC Pumps are available in various sizes. The models are shown below:
Model
Watts
GPH
SDC 6.0
10 – 40 Watts
530 – 1430 GPH
SDC 7.0
20 – 65 Watts
800 – 1900 GPH
SDC 9.0
30 – 90 Watts
800 – 2500 GPH
There is a model for all aquariums. This is the best Aquarium DC Return Pump on the market today without a doubt. Well deserving of my Editor’s Choice badge. You can see the ratings below from me. As I’m open to all reviews, you can leave your own in the comments section and discuss your experience with this return pump. If you have any questions, please leave them in the comments below. Thanks for reading!
A quality CO2 regulator is one of the most important investments in a planted tank. it determines whether your CO2 injection is stable, consistent, and safe for your fish. I’ve tested several regulators over the years and the CO2Art Pro-Elite stands out for specific reasons I’ll break down here. This is my honest review after hands-on use.
Looking for the very best CO2 regulator available for planted tanks today? Well you are in a treat today as I review the CO2 Art Pro-Elite Series CO2 Regulator. I had the pleasure of taking to the CO2Art people about their product and got the full scope on their latest CO2 regulator. If you are a serious aquascaper, or looking to be one, this is the product review for you!
As a reminder for my viewers, this post will contain affiliate links. An affiliate link means I may earn advertising or referral fees if you make a purchase through my link. With that disclose away let’s get started! Let’s find out what makes CO2Art’s regulator stand out from the crowd!
My reviews are fairly structured. I’m going to be reviewing the following for this product:
This is a world class CO2 regulator. It is designed for aquarium safety and precision. The unit can handle systems from nano systems all the way up to 1000 gallons. It is a dual stage regulator. This next gen model now comes with a fully customized solenoid block with a high precision needle value and bubble counter. The System is powered via DC with a power adapter that accepts universal voltage from 100V – 240V. It’s a nice plus from CO2 that they will offer you the plugs for your country and it is a product that is available in both the UK and US.
Having a dual stage regulator is a great idea for planted tanks because it allows you to directly control the consistently of the pressure of the CO2 system. This is a huge advantage compared to single gauge systems that will run into issues with pressure consistency as the CO2 tank empties. The gauges are very easy to read and the brand dial are nice features they have added to this new generation model. The prior generator had plainer looking gauges and the dial looked more standard like what you would see on a CO2 regulator at a bar.
The bubble counter and the needle valve on this regulator are top notch. The needle valve is extremely precise. It doesn’t take a ton of them to bed down. It is fast and accurate from the start!
Craftsmanship
Let’s talk about the craftsmenship of CO2 products and why they are amazing buys. They are top German quality, reliability built regulators. These are not your budget build short-term warranty regulators that you will find on Amazon. CO2Art backs up this top of the line model with a 10 year warranty. The stainless steel finish is great and the power adapter does a good job of getting too hot in your aquarium cabinet. Nothing in this regulator package looks cheap. No corners were cut with this regulator. Amazing work by the CO2Art team.
Ease Of Use (Installation)
Installing the CO2Art Pro Series is fairly simple with the YouTube videos that CO2 Art suppliers on their YouTube channel and with their offer of tech support to their customers. They have no problems getting on on customer support ticket to walk you through the process.
If you are lost on the install – CO2Art offers their instruction manual online here.
Value For the Money
The price for these units are not cheap. This top of the line model is up there with similar top end models. What makes their value stand out though is the warranty and customer support behind the product. There is also a wonderful combo package that CO2Art offers that gets you everything you need. This to me makes this Regulator the best value on the market.
This package comes with the following:
Pro Series CO2Art Regulator
Aluminum Aquarium CO2 bubble Counter
CO2 Art Inline Diffusor
Aquarium CO2 Drop Checker
CO2 Resistant Tubing
All of these comes together at an excellent price price and backed by a 10 year warranty. Want a better discount? Try my discount code ASD10%Off at checkout.
Legendary Customer Support
The biggest differentiating standpoint from CO2Art and every other CO2 regulator seller is their customer support. The customer support is top notch and CO2 offers lifetime technical support for all their customers. The CO2Art team patiently answers all your questions and concerns about install and setup. They will also happily ship this product to multiple countries – US, Canada, UK, Signapore, etc the CO2 will ship internationally. The support team offers you a support portal with online instructions, articles and FAQS. I love their support and they have always been there for me to answer any questions I had.
Price
This is the biggest knock on the Pro-Elite Series CO2 Regulator. It is premium priced and may be too expensive for some. CO2Art does offer a more budget friendly version in the Pro-Series Model. You can also purchase the product off Klarna’s pay later program, which will break up the purchase in 4 installments.
Closing Thoughts
This is the best CO2 Regulator you can buy today. It has it all. The features, the quality, the customer service, and warranty. You can see the ratings below from me. The product gets my editor’s choice rating. Since I’m open to all reviews, you can leave your own reviews below. This provides the community with an unfiltered source of reviews. If you have any questions, please leave them in the comments below. Thanks for reading!
I’m really frustrated and tired of the news about Chloroquine Phosphate. There is so much bad information about Chloroquine Phosphate it has gotten to the point where it’s affecting my business. I’ve been in the marine fish keeping industry for over 20 years. I’ve used this substance on marine fish in quarantine for ages. I’ve been quietly speaking its praises to my fellow hobby club and group members. It’s been my secret weapon for years in battling the most deadly marine fish diseases over the years.
It is a sad day for me today. Today, I had to take down my Choloroquine Phosphate product from my store. I can no longer sell it, and it all started with a generic announcement that became a bad news story. I tried to dispense with the myth that it was a cure for COVID. I was even on the news to talk about it. I was verbally abused by prospective customers through live chat and the phone because I refused to sell the product to them after they openly admitted to me that they were planning to use it for human consumption. I was threatened 3 times by my merchant provider to take off my product from my store or face losing my merchant account and getting my site completely shut down.
Today enough is enough, the product is getting de-listed. But I’m not simply going away. I redirected my old product to this page to educate folks on what Choloquine Phosphate REALLYis, why it’s an amazing product FOR FISH, and my story as to why I ultimately ended up pulling it from my store. So sit down, relax, and enjoy my story. It’s going to be a doozy!
What Is It?
Chloroquine Phosphate, is an antiprotozoal drug used by marine and aquarium hobbyists to treat fish suffering from Cryptocaryon (Marine Ich), Marine Velvet, Brooke, and Uroema.
Chloroquine Phosphate is so well regarded in the marine hobby that it was covered by Advanced Aquarist as a wonder drug. It became the drug of choice for many public aquariums including the Georgia Aquarium. It has been widely used by hobbyists in the early days of the marine aquarium hobby and used in the aquaculture industry since the 70s and 80s.
It is typically unavailable to the majority of the reefing community due to it normally being available through a Veterinarian via a prescription. As you can imagine, it can be very difficult to obtain a prescription for this wonderful medication as there are not many fish vets available who know about the medication or would be willing to prescribe it.
How I Got Started With It
I started the reefing hobby in the late 90s and was a member of the local aquarium club in my area at the time. I was introduced to the process of quarantining marine fish after having several issues with Marine Velvet. Chloroquine Phosphate became an amazing medication. The biggest advantage to it versus copper was that it would work with zero ramp up. This was a huge development because Marine Velvet and Brooke work very quickly against a marine fish. Within 24-48 hours, most fish will die from getting overwhelmed from these diseases.
Chloroquine Phosphate was simply amazing. I never lost a battle with Marine Velvet using this medication. Back then, it was easy to obtain this medication without a prescription because there was this amazing product from Aquatronics called Marex. Marex had just enough pure Cholorquine Phosphate to be effective and also was inexpensive. It was also available without a vet’s prescription. It was my go to until Aquatronics went out of business in the early 2000s.
I have been a promoter of this medication for many years, so much that I have a blog post on how to quarantine fish that details how to use the product. You can see my video below.
How I Got Started With Selling
After Aquatonics went out of business, I was frustrated on how I couldn’t get this medication. The vets around me had no clue what I was talking about and I was hearing more and more that vets weren’t prescribing it anymore. You had to go to a vet who either specialized in marine fish or koi ponds to get the medication. There simply weren’t that many vets around who specialized in fish. So where could I get this medication so I could have a chance against the deadly 3 (Marine Velvet, Brooke, Uroema)?
This is when I found out about Fish Pharmacies. They sold medications to public aquariums and aquaculture facilities who needed the medication to cure their livestock. I was amazed that I could get this medication from them, but the amount they sell you in bulk was quite a lot. You would have to purchase a kilogram at a time while most marine fish keepers would maybe need 50-100 grams max in their medication drawers to get what they need.
I had my stash of Cholorquine Phosphate for my incoming fish for my reef tank. I heard so much on the reefing forums of people racking their brains trying to fight off Marine Velvet with Seachem Copper. It was sad to see so many people fail. Copper is tricky to use while Cholorquine was a one-time medication then you just replace with more medication as you change water. Super easy!
As I heard more and more about people losing fish to marine velvet, I started to sell Cholorquine Phosphate on this site. I had a certificate of analysis showing 99.9% purity of the product. I was the only seller on the web that had such a certificate at the time.
As the availability of Cholorquine Phosphate became more scarce, I started to obtain the medication through labs that would sell to universities. Since I had a commercial license, I was able to procure the product. I was rocking and rolling selling to customers who were saving marine fish life everyday with this wonder fish medication. It was really rewarding getting the emails thanking me for selling them the medication.
COVID-19 And “Chloroquine”
COVID-19 has been a mess for everyone. My own business was affected not just with the general downturn of the economy, but the affect on prices on livestock in the marine hobby. Price for fish and corals skyrocketed 2 -3 x times their usual price as imports closed up and supply became restricted. My fish medication product also became part of the news cycle when the President of the US announced that the U.S. Food and Drug Administration (FDA) had approved the use of hydroxychloroquine against COVID-19.
Unfortunately, the President and most of the media shortened the name of the drug to Chloroquine. In came all the new articles talking about Chloroquine and how it would aid in the fight against COVID-19. Search results exploded for everything Chloroquine. Everyone wanted their hands on it.
It became very easy to confuse the abbreviation Chloroquine with Chloroquine Phosphate. The price of this well loved fish medication exploded overnight. Once an affordable medication, Chloroquine Phosphate was all of a sudden selling for over $400 for only 10 grams. People wanted to use it for human consumption.
At @Storyful, we found an interesting phenomenon: sales of a version of chloroquine phosphate used in fish tanks – yes, fish tanks – have skyrocketed in recent weeks. Jars of the drug not intended for human consumption have gone from $10 to over $400 or higher this month. pic.twitter.com/vAe5dzwUBa
I started getting messaged on my live chat from people asking me if they could use this medication on humans. I told them that it is a fish medication and it is not for human consumption. I got several angry messages in my live chat when I refused to sell them batches of the medication as they openly said they were going to use it on loved ones affected by the virus.
My Interview With NBC News
This was starting to get crazy. I was contacted by a BBC journalist who wanted to talk about the product I sold in my store. They had told me that a man had died ingesting this medication in Arizona. I was horrified and concerned for the public health. I was also cringing when I read the article and it mentioned that the product was a fish tank cleaner (it’s a medication not a fish tank cleaner). They asked me if I was interested in being interviewed on TV about my experience. I was happy to do so. I wanted to dispel the myths about this medication. I spent about 2 hours in meetings with BBC and then my interview was displayed on NBC News.
I felt much better getting the word out. I had chosen to place the medication product as out of stock in my store when I first heard of the FDA announcement. I had a feeling that it would get confused. I was planning to keep it out of stock until this COVID-19 mess was behind us. I wasn’t ready about what was going to happen next…
Shopify Threatens To Shut Down My Store
A couple of weeks passed since my interview with NBC. I was getting ramped up on some new content I was writing and went to check my email. I got a notice from Shopify that my product was removed from my store. The product was marked as high risk due to it being related to the Coronavirus. They sent me a notice stating that there was a risk that I was price gouging and had to provide proof that this wasn’t the case. They wanted to me to provide proof of my historical price of the product and also prove that a major retailer sold the product near the price I sold mine for. I was surprised that my store was threatened to be shut down thinking I was price gouging. I never increased my prices and had positive reviews for my product. I explained myself to Shopify and got everything lifted.
A few days later after my product went offline, it was pulled again for the same reason. I responded to the risk department with all my past communication. I took it further and gave them the interview link to my talk with NBCNews. They apologized and I was listed again. I was told all was good after that.
Shopify Labels My Product As A Pharmaceutical
A few weeks past. My site was getting a curiously high amount of traffic since my interview. Likely due to folks landing on my product page and seeing my product in the search results. Things were looking pretty good for me. I was having a great month despite the lockdown orders and my biggest challenge was supply chain restrictions. I woke up one morning and received another letter from Shopify.
This letter was a bit different. I was having my payments held because Shopify’s risk department had labeled my product a Pharmaceutical. Looking at the terms of service, the fish medication product I sold was being placed under regulated or illegal products or services. This labeled my product as no different than cannabis dispensaries, tobacco sales, age restricted goods or services, weapons, etc. I was floored.
I tried to explain the situation to the risk department. They said my best course of action would be to find another merchant supplier who would be willing to work with my product. This put me in a tough spot. I had my payments withheld during this time and no merchant services provider that was referred to me was answering emails or picking up the phone due to staff reductions related to COVID-19. I was a rock in a hard place.
Since I couldn’t get anyone on the phone and there was risk that this could happen again, I decided to remove my product permanently from my store. I felt bad for my past customers who came to rely on this product to save their sick fish. There wasn’t much else I could do.
What It Isn’t
Now that you know the story and why I won’t relist my product. Let’s talk about what Choloroquine Phosphate isn’t.
It Is Not Fish Tank Cleaner
I have no idea where the news got this information from. It is not used to clean fish tanks. While it does have anti-algae properties, its primary purpose is as a antiprotozoal medication. I said this in my talks with BBC, but for some reason it never showed up in the news article or the interview.
It Is Not A Medication for COVID-19
It was hydroxychloroquine that was approved by the U.S. Food and Drug Administration. They are two completely different drugs. Cholorquine Phosphate is used for humans to treat malaria. The brand name for the drug is called Aralen. Is not the same thing that I sold. My product was the substance in it’s purest form. The drug designed for humans is not pure Choloroquine Phosphate. This is likely why that poor man in Arizona died ingesting it. He had likely overdosed on the drug.
The Food and Drug Administration (FDA) Warns Against Using It
On March 27, 2020, the FDA sent an public health letter to stakeholders warning to not use use Chloroquine Phosphate intended for fish as treatment for COVID-19 in humans. The FDA closed the letter with the following:
People should not take any form of chloroquine unless it has been prescribed by a licensed public health care provider and is obtained through a legitimate source.
You can find the full letter here. Amazingly enough, the letter itself did not receive much news coverage.
What It Is
Let’s talk about what this medication is for fish. It is
Superior to and more gentle on fish than copper
A 10 Gram bottle treats 250 gallons at a 40mg/gallon dosage
Chloroquine Phophate (CP) is the drug of choice for diseases like Ich (Cryptocaryon irritans), Marine Velvet Disease (Amyloodinium), Brooklynella hostilis, & Uronema marinum
One time medication – only replace medication in the event of a water change
Chloroquine Phosphate acts as an algaecide eliminating algae in the quarantine tank.
How to Use It On Fish
Since my product got taken down, I’m going to use the how to use instructions that were on my product page for anyone who attempts to use this on their fish.
For Quarantine (Prophylactic) Treatment – Typical dosage for quarantine is 40mg/Gallon
When dosing Chloroquine Phosphate, treat water with a pre-dissolved solution using a cup of tank water
For Ich – 30 day active treatment
For Velvet – 14 day active treatment
For active infection – up to 60mg/gallon
For Uroema – up to 80mg/gallon
Highly recommended that you use a digital scale to measure your dosage to ensure accuracy
Keep medication in a cool, dark, and dry pace. Chloroquine Phosphate is heat and light sensitive
If a water change is performed, Chloroquine Phosphate will need to be re-dosed for the amount of water changed. You do not need to dose Chloroquine for top off water.
Additional Warnings about Using It On Fish
Here are the additional notes and warnings that were on my product page that I’m displaying for anyone looking into this medication.
NOT RECOMMENDED FOR PIPEFISH, PUPPERS, LIONFISH, SEAHORSES, WRASSES, ANTHIAS, & BLUE HIPPO TANGS!
Not reef safe – Chloroquine Phosphate is meant to be used in a quarantine for prophylactic treatment or in a hospital tank for active infections.
No one ships Chloroquine Phosphate next day If you have an infected fish and you need treatment now I highly recommended going to your LFS and obtaining Copper. Most of the diseases Chloroquine phosphate treats are extremely deadly and can kill a fish overnight
Closing Thoughts
I’m sad to no longer offering this life saving treatment for what I call the deadly 3 marine fish diseases. Hopefully COVID-19 gets past us sooner than later and we can all return to normal. I hope clinical trials go well with the vaccine being developed. Maybe we will see Chloroquine Phosphate offered again as a treatment for marine fish diseases in the future. Right now, the supply chain is on hold due to concerns that people will use it for human consumption. Stay safe. My thoughts are with you all. We will all come out of this stronger. Take care and thank you for reading.
📘 Want to learn more? This article is part of our complete Saltwater Fish & Reef Guide. your ultimate resource for marine fish, coral care, reef setup, and more.
A dedicated shrimp tank is different from a fish tank in almost every way. No copper-based medications. No aggressive tankmates. No sudden parameter swings.
A shrimp tank is not a fish tank with shrimp in it. Build it for the shrimp or watch them die.
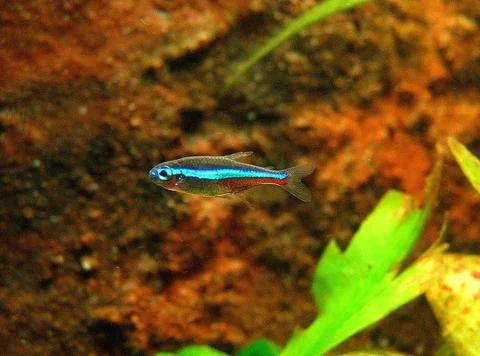
Freshwater Shrimp tanks are getting very popular these days. Shrimp with their small size, active nature, and appealing personality has increased in popularity, especially with nano or smaller tanks. Shrimp tanks have some special considerations though to be successful. They is intimating at first because they is more delicate than fish and require a bit more planning than first.
That is not to say they are difficult to keep. In fact, most shrimp are relatively easy to keep, they just require proper planning. That’s what this article is for – to get you on the right track. In this article, I will discuss everything you need to know to get started right.
Key Takeaways
A sponge filter is the go-to for most shrimp tank keepers
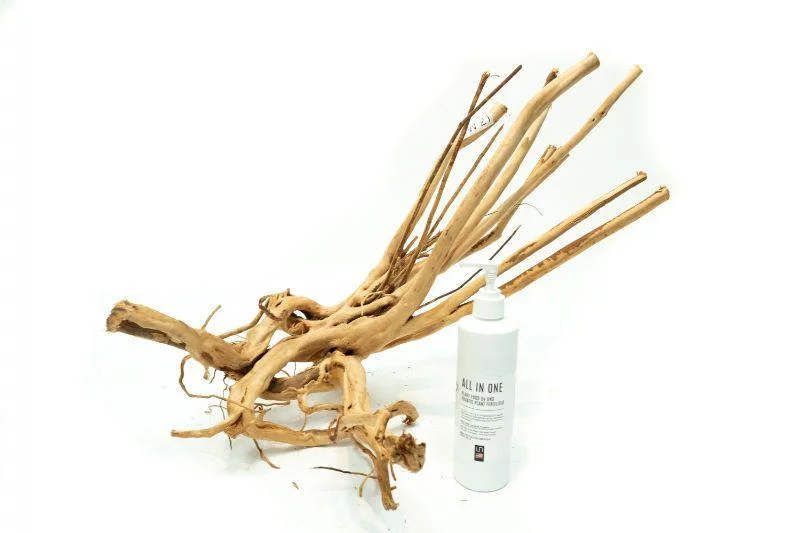
If you are going the planted tank route, you must ensure your substrate and fertilizers do not contain copper as it could kill your shrimp
TDS meters are beneficial to determine if your source water is okay. Consider RO or RODI + mineralizing if your TDS is too high
Tank mates are tricky as many fish will prey on shrimp. If they don’t prey on the adult shrimp, they will likely eat the baby shrimp
Freshwater Shrimp Tank Equipment – Getting The Proper Equipment
Below is a video from our YouTube Channel all about how to setup a freshwater shrimp tank. We go over more details in our blog post below. If you like our content, be sure to subscribe.
The first step is figuring out what we need exactly to get started. Let’s start with the biggest consideration – the tank itself.
Tank Size
Bigger is better and more stable. Although shrimp can technically survive in a very small aquarium, the water is prone to fluctuations in parameters and temperatures. This can lead to premature death of shrimp. Shrimp do not like a lot of parameter fluctuations in their tank. In addition, healthy freshwater shrimp will actively breed, meaning you want a bigger tank to support the offspring.
There is also a drawback with going too big. Too big with how small the shrimp are will make your aquarium look underwhelming. Due to this, I would recommend not going larger than 40 gallons with 20 – 29 gallons being an ideal sweet spot to start. A 2 foot long tank will be the cheapest overall to setup.
If you are looking for a cheap used tank, you will need to do some extra diligence when shopping around. Any used tank that has been treated with copper is going to be a major problem with freshwater shrimp. Copper will leech from the silicon seems in a used aquarium and will kill off new additions to your tank. It is critical that you purchase a used tank that has never been treated with copper to ensure long-term success.
Freshwater Shrimp filtration gets a little more complicated with shrimp as you have to account for shrimp fry then the general small nature of Shrimp. A filter can easily suck up shrimp babies and even adults. It is easy to modify your filters to prevent this though., shrimps tanks go with one of the following:
We do not consider Canister Filters with freshwater shrimp. It’s just overkill for this application. Internal filters could work, but the sponge filter is just a great choice to use if you are going internal. If you are going with a Hang On Back Filter, you can’t go wrong with an Hagen Aquaclear Filter.
Sponge Filter – Cheap, easy, and not dangerous to shrimp out of the box. Many shrimp breeders use these in their tanks because they are so easy to use and they work!
Hang On Back (HOB) Filter – Also known as power filters. These are excellent choices, but you have to modify your intake to prevent any accidents. I would suggest you place a sponge pre-filter on your intake in order to prevent any losses.
Heating
An Aquarium Heater is a controversial subject among shrimp keepers, especially those who keep Neocaridina Shrimp, which can live in cooler water. Ideally, you will want your freshwater shrimp in water temperatures of 70 – 79 degrees Fahrenheit though many breeders will say that a heater is not exactly needed with Neocardina shrimp as long as your area does not get too cold during the winter. For heaters, I would recommend Eheim Jagers.
Substrate
With Aquarium Substrate, we have to consider either going with an inert or active substrate. An inert substrate will not affect our water parameters, but will require more supplementation to maintain plants. An active substrate is more suited for shrimp that need softer water, like Caridina shrimp. You will also have more success with active substrate growing rooted plants as nutrients will be available through the substrate. If you are going with an active substrate, consider going with ADA Aquasoil or Fluval Stratum, which is designed for freshwater shrimp.
If we are looking at shrimp that like KH, like Neocaridina shrimp, you may want to consider an inert substrate. I would recommend CaribSea EcoComplete if you are looking for an inert substrate.
If you go with an active soil, keep in mind that your cycle time will be longer. Active soil will produce a lot of ammonia when new and freshwater shrimp are very sensitive to ammonia spikes. Be patient with your cycle and introduce your shrimp when parameters have stabilized.
If you are going with an active substrate, you can consider carpet plants like Monte Carlo. Duckweed and Rotalas do a very good job at protecting your shrimp from high nitrate spikes as they tend to explode in growth when nutrients are high. Also stay on top of your pruning and leaf clean up to prevent decaying matter build up in your aquarium.
Lighting
Freshwater Shrimp and lighting is pretty simple. You can use any decent Planted Tank LED system and you should be able to house the main plants listed. For the best features, I would recommend the Serene RGB Pro LED light if it’s in your budget.
Ammonia, Nitrite are very important to measure when you get started with your tank. As you tank matures, you will mostly worry about your nitrate levels. PH, GH, and KH need to be regularly tested in order to ensure they stay stable with your desired shrimp.
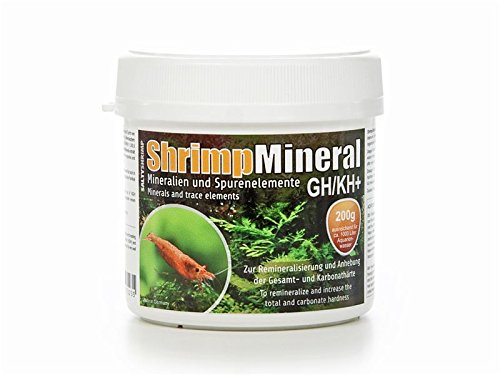
TDS is a new parameter to test when it comes to shrimp keeping. TDS is a measure of total dissolved solids in water. Too much TDS can affect the health of your shrimp and some shrimp are so sensitive, it is more ideal to use water from an RODI System and then re-materialize the water with a supplement like Shrimp Mineral. Below is a chart that lists out the range of TDS levels for specific types of shrimp:
TDS Meters are readily available online and do a great job at getting accurate readings for you. Make sure when you are testing for TDS, that you test your other parameters as well. Everything affects TDS so just measuring TDA alone is not sufficient! Check out our posts on Aquarium Test Kits for more recommendations on test kits. For KH and HG tests, an API Test Kit should work for most shrimp keepers.
Parameters for Neocaridina are as follows:
pH: 6.5 – 7.5
KH: 1-4
GH: 6-8
TDS – 80-200
Water Temp: 65 – 73 F
Parameters for Caridina shrimp are as follows:
pH: 6.2 – 6.6
KH: 2-6
GH: 4-8
TDS: 80-100
Water Temp: 70 – 73 F
Keep in mind these are general guidelines. Caridina and their bee varieties can have various ideal parameters so you will want to do your research accordingly!
How To Set Up
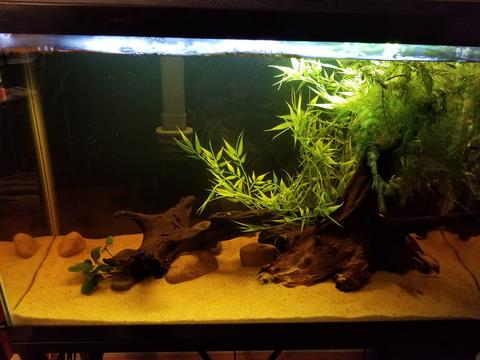
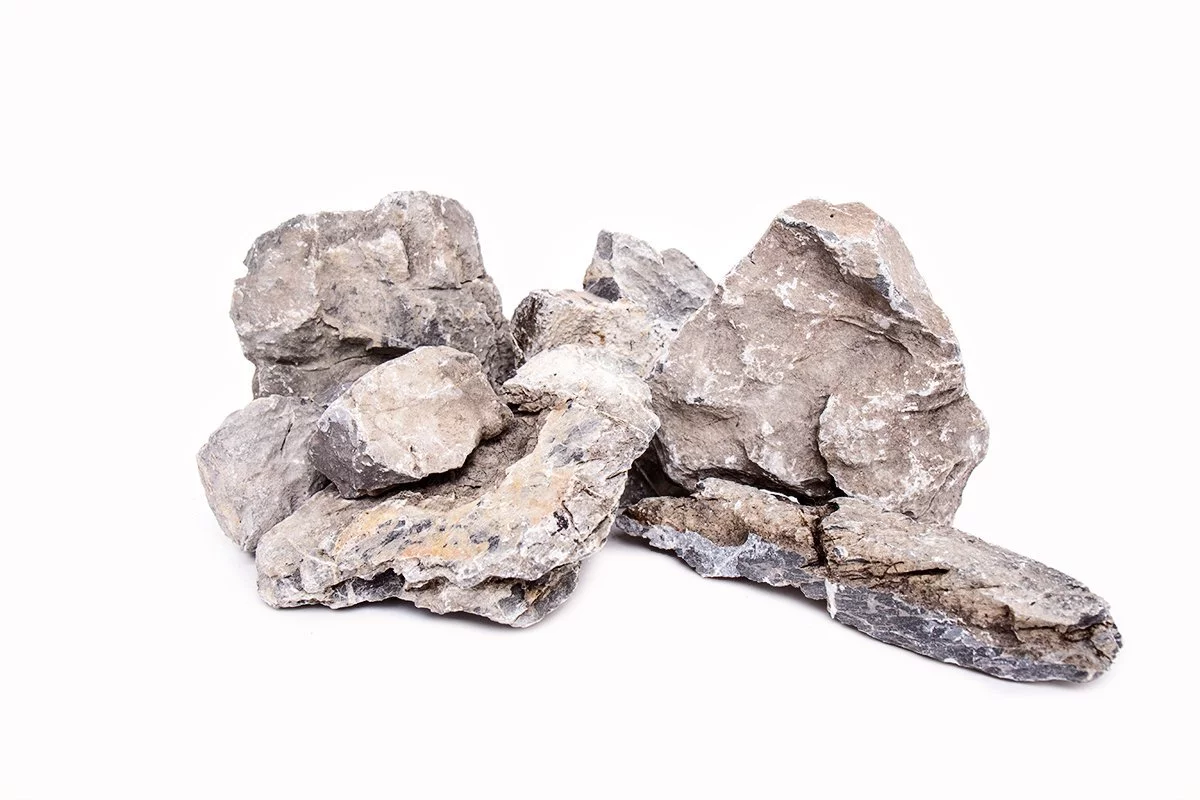
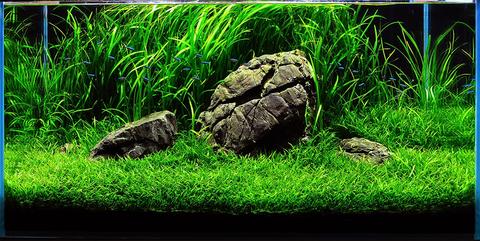
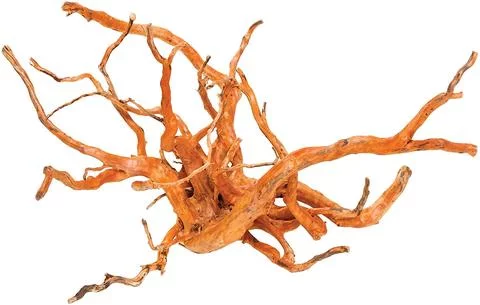
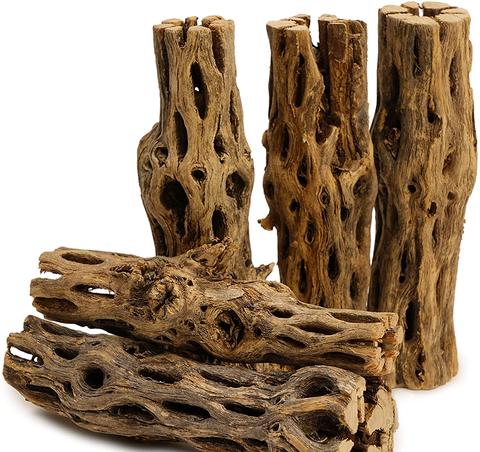
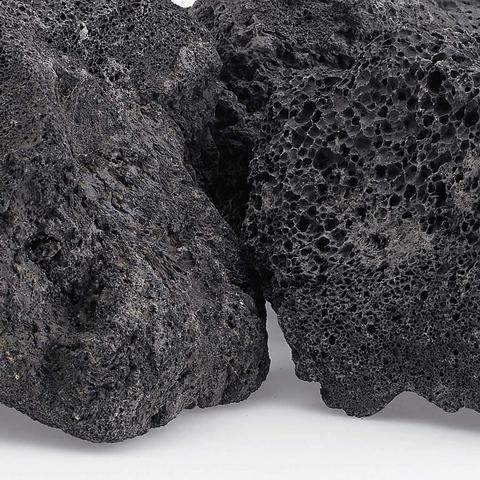
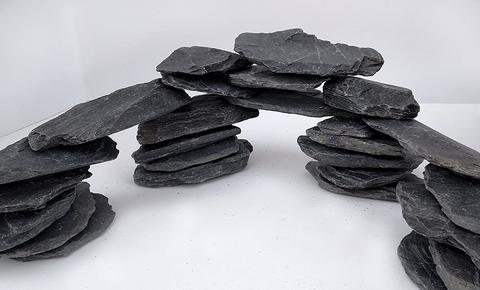
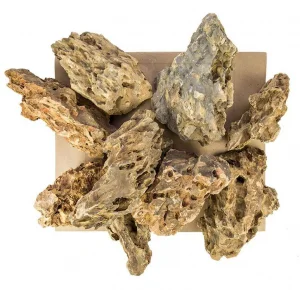
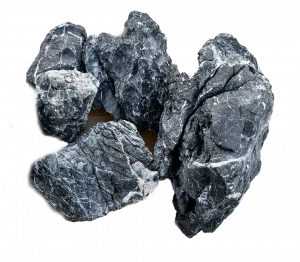
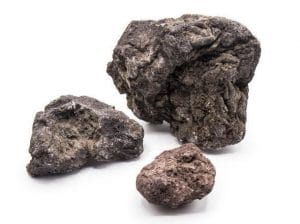
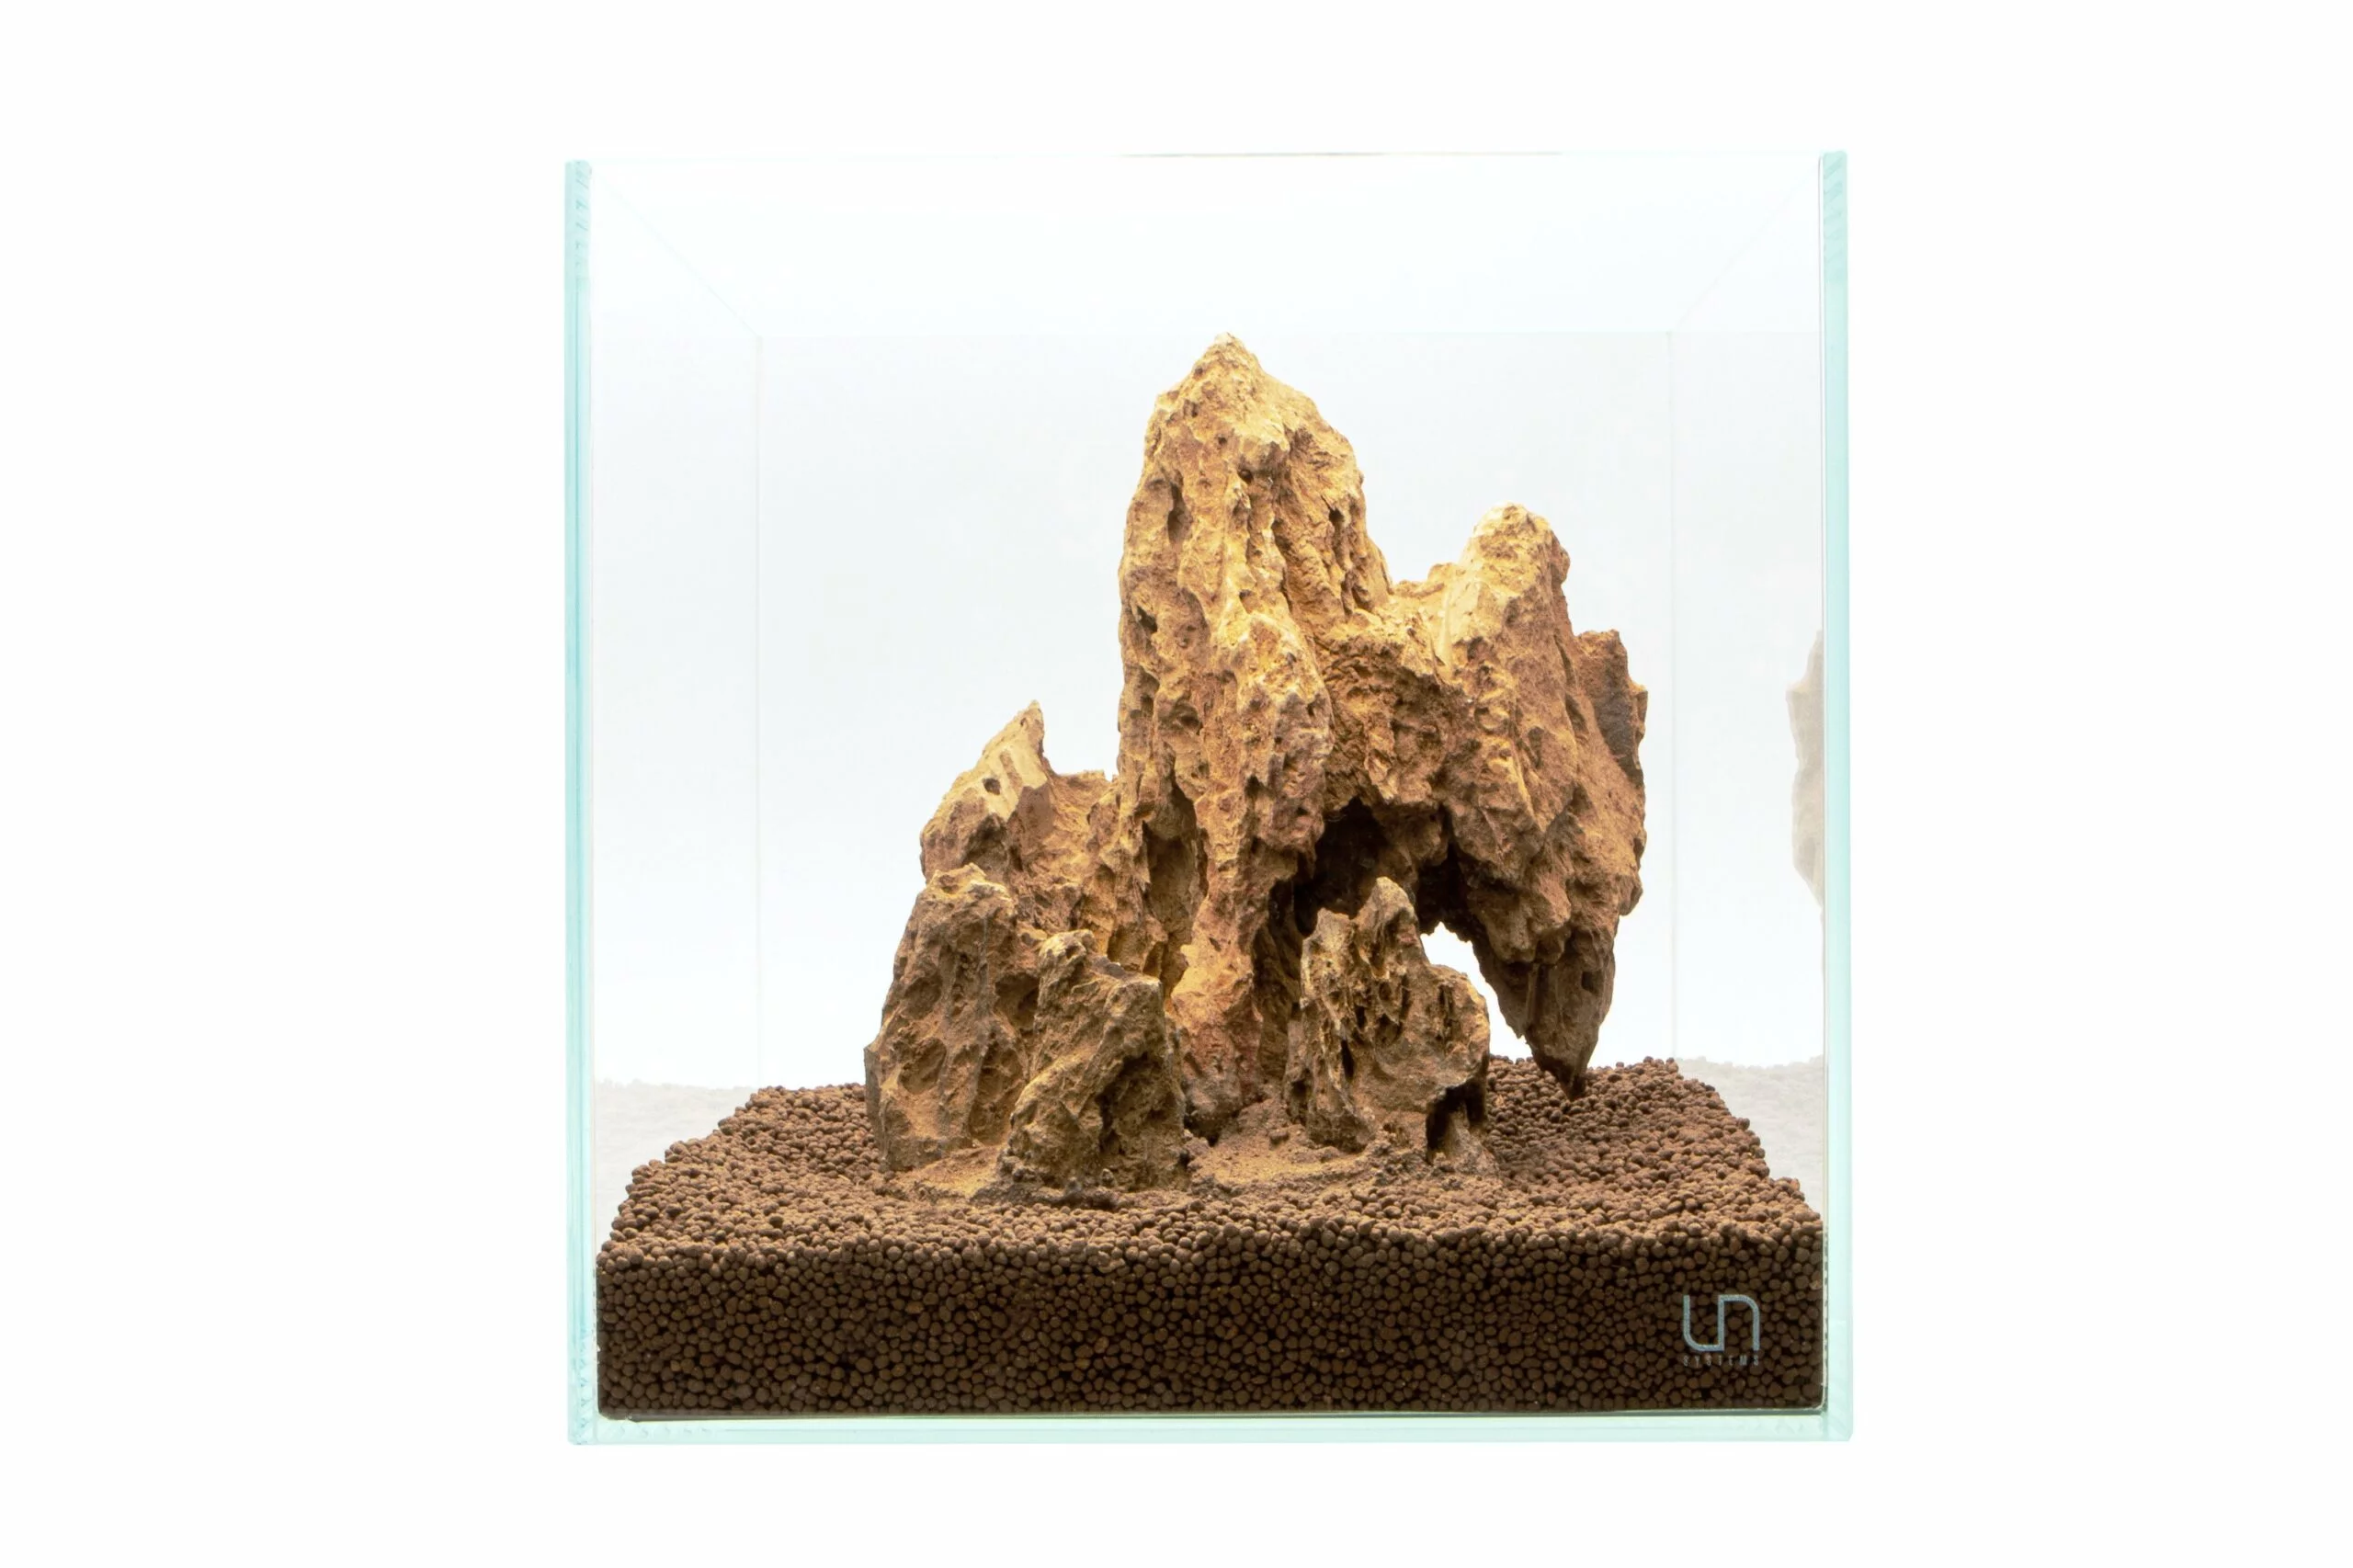
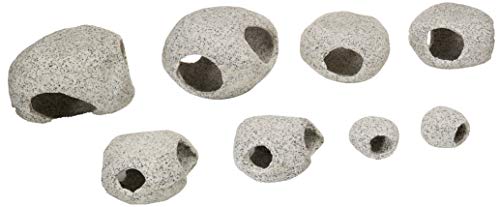
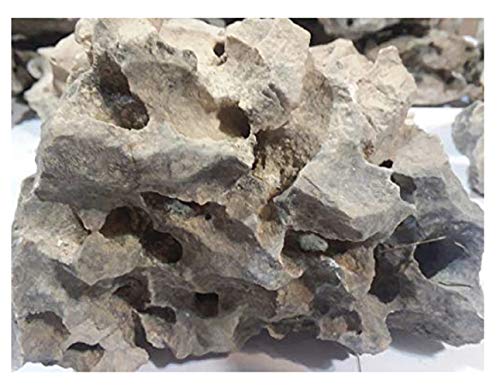
I’m going to borrow a video from my good friend Aaron from Aaron’s Aquatics. This video shows an example setup and the start up process. Aquascaping for Shrimp Tanks are best using the Iwagumi styleaquascape. This is because the large rocks create mountain that are still smooth for shrimp to venture around on. Cholla wood is also great to use for shrimp. Aaron’s video also has a few other recommendations like Catappa Leaves.
Species – Choosing The Right Ones
So you heard me earlier in this post talk about Neocaridina and Caridina shrimp. I’m going to focus on these two types of shrimp in this post.
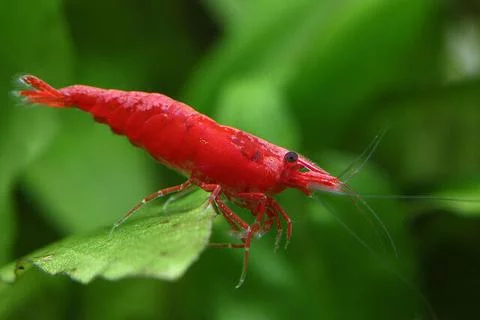
Neocaridina shrimp are going to be hardier than Cardina shrimp. They are a hardwater species and like KH, which means them best for an inert substrate. If the Neocardina shrimp, the Cherry Shrimp is the most beginner friendly and has the most variety.
Cherry Shrimp have grades that are easy to follow with Red Cherry being the lowest grade and Painted Fire Red being the highest. Their grades are as follows:
Cherry
Sakura
Fire Red
Painted Fire Red
Each grade is more rare and more expensive than the other. Cherry shrimp will breed and grow quickly.
Other examples include Yellow, Blue Dream, and Green. All come from the Neocardina Davidi species. You can get multiple colors, but be aware that over time they will cross bred and you will have hybrids. A variety only tank is more ideal to keep consistent colors.
Caridina shrimp are a soft water, more delicate species of shrimp. They tend to be imported from other countries making them larger when shipped and more prone to die off for a variety of reasons that I will explain later. Caradia shrimp and bring in some exotic colors and adapt better to active soils like ADA Aquasoil because they prefer softer water and tend to fit better in a professional level planted tank because the plants one will go for will demand softer water. Caradina shrimp are highly sensitive to parameter fluctuations and the reason why shrimp tend to get labeled as hard to keep in our industry. One common Caradina shrimp is an Amano shrimp.
There is another type of shrimp that is available called Sulawesi shrimp. These are exotic shrimp that imported. They have high mortality rates when shipping and are an advanced care shrimp to keep.
Here is a simple chart below on Neocardina and Caradina shrimp varieties:
When purchasing freshwater aquarium shrimp, sourcing becomes a major component in your success. With shrimp, you have two sources, importing shrimp and homebred shrimp.
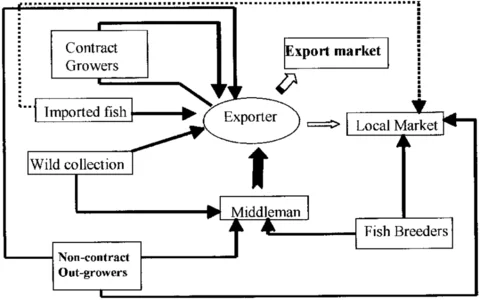
Importing shrimp is what you will find at your local fish stores. If you haven’t seen my Quarantine post, you may not be familiar with the sourcing cycle of imported livestock in our hobby. It is below for your reference:
Imported livestock in general are going to go through multiple distributions to get to your home. This increases stress and the likelihood for diseases. Imported shrimp will also be larger in size, meaning they will have a harder time adapting to captivity. It is common for imported shrimp to experience die off when shipping (picture reference from the University of Florida).
Homebred shrimp on the other hand are going to be hardier in general. They are used being in captivity and tend to be less prone to diseases. Homebred shrimp can also have issues as well if your breeder is not experienced or they are only a generation or two removed from being imported. In general, it’s going to be better to get your shrimp homebred from a local breeder in your area as they will use the similar source water as you (e.g. – tap water). Check your local aquarium societies and social media groups for sources of homebred shrimp.
For those who do not have a local breeder available, I would highly recommend Buceplant. They sell a variety of Neocardina shrimp that would all be excellent choices for your shrimp tank.
Pests – Dealing With Them
Freshwater aquarium shrimp have pests that we need to deal with. Most will come from freshwater plants we purchase. The main pests are:
Planaria is a type of flatworm that will attack and eat shrimp. You can use a Planaria Trap or a No Planaria medication to eradicate the problem.
Hydra is a small aquatic vertebrae. They will sting and poison your shrimp killing them. They can also be treated with No Planaria medication.
Scuds are especially dangerous for newborn shrimp. It is another hitchhiker from live plants. Manual removal is best for these. The reproduce very fast. Another option is to use Bettas or Killifish as they they will happily eat the scuds. Betta are a wildcard for shrimp tanks. Some people go the nuclear route, remove as many shrimp as they can, drop the Betta in and let it eat all the scuds over time. Once the scuds have been eaten the Betta is removed and the shrimp is reintroduced.
Dragonfly Nymphs are nasty predators. They will kill and eat your shrimp and will hunt non-stop. Manual removal is your best bet. There are other options you can do, but they will harm your shrimp.
The best way to deal with pests is prevention though. Consider dipping your plants in a bleach solution (19 parts water to 1 parts bleach) and rising with Primeconditioned water before introducing them into your aquarium or consider quarantining your live plant additions. See the video below from LifeWithPets on how to do a bleach dip for your live plants:
Compatible Tank Mates
You may not be interested in shrimp only tanks, so this list of fish will help with picking ones that will work with your shrimp. One thing you will need to keep in mind is if you add fish, it is going to be very likely that the shrimp babies will get eaten so don’t expect to breed shrimp with fish. There are very few fish that will not eat a baby shrimp if given a chance. You can increase your chances of success by choosing a larger species of shrimp like an Amano. Here is a limited selection of small fish that may work in a shrimp tank:
You need a mix of natural and prepared food to be successful with shrimp tanks. The main natural food we are looking to have available is biofilm. Biofilm is the structure bacteria build to support themselves and grow on surfaces. Shrimp will eat this in the aquarium. Biofilm can grow on your sponger filter, leave litter, mosses, and rocks. The more surface you have available the better for your shrimp. You can also provide “permanent food” like Cholla Wood.
The next is prepared food. Powered Shrimp Baby Food by GlasGarten is a great choice to sustain shrimp babies. For adult shrimp, commercial shrimp food is available for purchase and will do the trick.
It is also a good idea to use a Feeding Tray when feeding your shrimp. This will prevent excess food getting lost in your substrate and keeping the rest of your aquarium clean from food debris. It’s also a nice way to observe your fish.
Tank Maintenance
Shrimp in general are more prone to parameter changes than fish. Staying on top of maintenance is a big deal with shrimp tanks. Many shrimp tanks are also smaller tanks, which make them more susceptible to parameter changes.
Water Quality
Shrimp are sensitive to ammonia, nitrite, and higher levels of nitrate. Weekly water changes are especially important with shrimp tanks. Another factor to consider with shrimp tanks is water top off. When water evaporates, parameters can change. Evaporation just pulls out water, but leaves your trace minerals in. You will want to added pure replacement water. This would be something like RODI water or distilled water to replace your evaporated water. You can use an Auto Top Of System to make things easier.
Shrimp Tank Maintenance Tasks
Additional tasks aside from water changes and top off water would be once a month filter cleaning. Make sure when you clean your filter media that you use your pulled tank water and squeeze the foam or sponges. This will clean out the debris, but will maintain the bacterial colonies in the media. Sponges should last a very long time and shouldn’t need to be replaced. Don’t replace a sponge unless you absolutely have to, and be very careful if you do because of the bacterial colony loss. It’s better to seed a sponge beforehand if you have to replace a sponge.
Another key thing to note about shrimp tank is you need to be very careful when you put your hands in your aquarium. Shrimp are very sensitive to toxins. Detergents, chemicals on plants, flea treatments from pets, flea shampoo, and cleaners are prone a risk for your shrimp. Always make sure you wash your hands before putting your hands in your tank. Reef Safe Soap is your friend and a recommended purchase if you are going to handle a shrimp tank.
Problems – Why They Die
There a number of challenges one can come across with a Shrimp Tank. I’ll try to cover several of them in this post.
Parameter Swings
Shrimp are sensitive to water parameter swings. Having proper tests kits and a TDS meter are you friend. Get in the habit of regularly testing your water on a weekly basis.
Uncycled Tanks
Shrimp are very sensitive to ammonia in the aquarium and with their prolific breeding, they can add on to your bioload overtime. If you are using active substrate like ADA Aquasoil, keep in mind that the substrate will generate ammonia when it is first introduced. You will want to give an active soil like this a good two months before introducing shrimp.
Molting Issues
A common aliment in beginner shrimp tanks. This indicates a lack of iodine in the tank. Most staple food and powered food will serve this function. Fertilizer that is made for shrimp tanks will also include iodine to help support the shrimp’s molting process. Additional items to add if needed would be montmorillonite material powder that you can readily purchase online.
Too Many Males
If you have a shrimp tank with too many males to females, this will present a problem to your population. Males in abundance will overwhelm, stress out, and harass females to the point of death. If you are seeing your females are dropping fast, consider removing a portion of your male population to balance out your numbers. I have provide examples of a female and male shrimp to show you the visual differences. The male is longer while the female has an expanded abdomen section.
Aquarium Heaters
Heater failure is pretty common in our hobby. A failed heater can lead to many shrimp deaths. Heaters will fail on the on position, which will overheat your tank. Consider an Aquarium Heater Controller to prevent a catastrophic event.
Pests
As we mentioned earlier, pests are a major problem in shrimp tanks. Consider using a bleach dip to prevent nuisance pests in your tank.
Toxins
Toxins – especially copper are especially deadly to shrimp. Make sure if you are using fertilizer that your fertilizer is shrimp safe meaning that there isn’t copper in the mix or purchase a fertilizer specially designed for shrimp. Check our our Aquarium Plant Fertilizer post for recommended products.
Poor Source Water
Let’s talk about your source water. In general for freshwater tanks, you is okay using tap water that is treated with a Dechlorinator. If you are going to keep harder to keep shrimp like Caridina shrimp, you will probably need to go with better source water.
Shrimp are very sensitive to copper levels and high nurtients, things that is present in tap water. You will want to look at your city’s water reports to see what is in your water. RODI water is 99% pure H20 for your aquarium and ideal for sensitive species of shrimp. If you use tap water with Caridina shrimp, it’s possible to get quick die off of your shrimp. If you are using RODI water, you will need to remineralize the water when making water changes. You will want to use a remineralizer supplement in order to get the proper elements in your water changes so your shrimp can stay health.
Having baby shrimp dying in large numbers can indicate an inadequate source of biofilm for the babies. Focus on building this up in your tank with more rocks, mosses, leave litter, and consider using powdered food to keep them fed.
Life Span
Shrimp don’t actually live very long. Most shrimp will live 6-12 months in an aquarium, but they breed a lot. This is also why having a single variety of shrimp is a big deal because generations pass quickly and within a couple of years you will have hybrid shrimps in your tank from the new generations.
Closing Thoughts
Freshwater shrimp tanks are loaded with personality and if bigger shrimp are selected, they is manageable for a beginner. Shrimp tanks are a niche in our hobby with challenge levels for everyone and it is really exciting to have an actively breeding tank.
They can really be a lot of fun to keep and with their smaller sizes, your wallet will thank you versus going for a much larger tank :). If you have any questions, please leave a comment below. Thank you for reading.
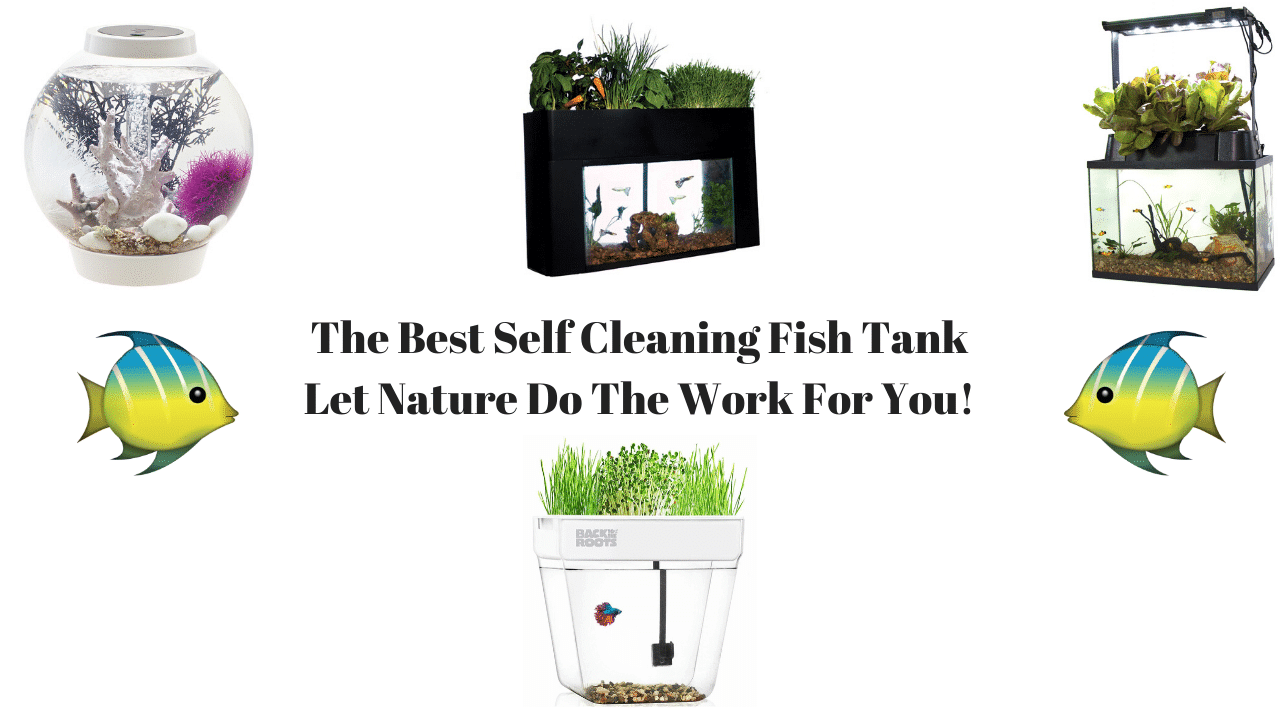
Let me be blunt: no fish tank truly cleans itself. That’s marketing language, and after 25 years in this hobby I’m tired of seeing people get burned by it. What “self-cleaning” actually means is that certain tank designs reduce manual maintenance through smarter filtration, aquaponic biology, or bottom-draining systems. The best ones genuinely cut your workload. The worst ones are all-in-one tanks wearing clever branding. Water changes are still non-negotiable. Not one tank on this list eliminates them. But the right design can cut your maintenance time significantly, and a few of these go further by putting living plants to work as your biological filter.
I’ve handled every type of setup on this list through my stores and my own tanks. Here’s what actually delivers versus what just sounds good on a product page.
EXPERT TAKE | MARK VALDERRAMA
The aquaponics-style tanks on this list are the only ones that come close to genuinely self-sustaining. The plants do real biological filtration work when stocked correctly. Pure filtration-only “self-cleaning” tanks reduce effort, but you’re still doing water changes every 1 to 2 weeks. Know what you’re buying before you spend the money. If your goal is zero maintenance, no tank exists for that. If your goal is significantly less maintenance, an aquaponic setup at the right fish load can get you there.
What People Get Wrong About Self-Cleaning Tanks
Most buyers assume “self-cleaning” means set it up, add fish, and walk away. That assumption leads directly to dead fish within a month. These tanks still require you to cycle them before adding livestock, monitor water parameters, and top off water lost to evaporation. The aquaponic systems also need you to manage plant health, trim roots, and occasionally replant. “Self-cleaning” is a maintenance reduction, not an elimination. The people who get the most out of these tanks are the ones who go in with that understanding from day one.
The Biggest Mistake Buyers Make
Overstocking. The self-cleaning mechanism in aquaponic tanks is the plants processing fish waste. That system has a capacity limit. Put too many fish in, and the waste load overwhelms the plants, ammonia spikes, and your fish die. The 10-gallon AquaSprouts kit supports 2 to 3 small fish comfortably. The 3-gallon Back to Roots supports one small fish. People see “self-cleaning” and figure they can add more fish because the tank handles it. It doesn’t work that way.
BUY OR SKIP?
Buy if: You want to significantly reduce (not eliminate) maintenance, you’re interested in aquaponics, or you want a beginner-friendly setup for a child that limits the most tedious upkeep tasks.
Skip if: You expect zero work, you want to keep a large collection of tropical fish, or you already have experience and want a serious aquarium. A standard tank with good filtration will serve you better and give you more fish-keeping flexibility.
What Makes a Good Self-Cleaning Fish Tank (My Criteria)
Does the self-cleaning mechanism actually work, or is it marketing?
Is the filtration sized properly for the tank volume?
Is the build quality solid enough to last more than a year?
Does it give you enough capacity to house fish humanely?
Is the price honest for what you’re getting?
WHY THIS RANKING
I ranked these tanks on four factors: how genuinely effective the self-cleaning mechanism is, whether the tank size supports fish humanely, build quality and longevity, and price-to-value. Aquaponic systems score higher on the genuine self-cleaning scale because the biology is real. Pure filtration-based “self-cleaning” systems score lower because they’re just good filters in prettier packages. Novelty tanks score last because they’re too small for fish welfare.
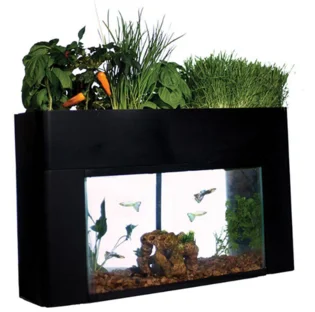
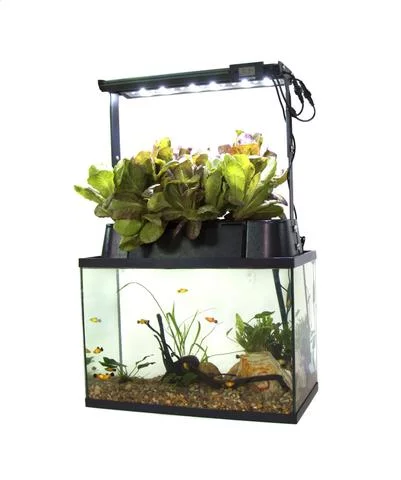
The AquaSprouts Garden is the real deal when it comes to self-cleaning tanks. The concept is simple: fish waste feeds the plants in the grow bed above, the plants clean the water, and that water cycles back down. It’s actual aquaponics, not marketing spin. The 10-gallon capacity gives you enough space for a small school of fish and a grow bed large enough to produce herbs, lettuce, or leafy greens year-round.
The custom-molded grow bed fits neatly over a standard 10-gallon tank. The included light bar extends to accommodate taller plants, which removes the dependency on natural light placement. The water pump pushes dirty tank water up to the clay pebble grow media, the plants process the nutrients, and aerated clean water drains back down. When it’s running right, you’re doing occasional water top-offs and plant maintenance, not weekly gravel vacuuming.
One honest note: the 10-gallon tank is not included. You’ll need to purchase one separately. That’s the main surprise buyers encounter. The kit also costs more than most beginner tanks. It’s made in the USA and worth the price, but set your budget accordingly.
Pros
Genuine aquaponic biology, not just clever filtration
Grows vegetables year-round
Extensible light bar, no window placement required
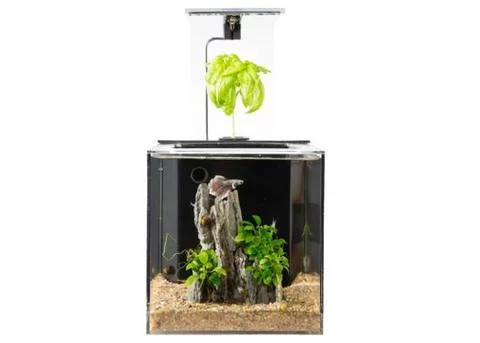
If the AquaSprouts price stops you, the Back to the Roots Water Garden is the smart alternative. Same aquaponic biology, smaller scale. At 3 gallons, it supports one small fish comfortably. The kit comes with everything you need to start, and the fish waste feeds the plants above on the same cycle. It doesn’t have a light bar, so you’ll need to place it near a window or clip on a grow light. That’s the main limitation at this price point.
This tank works best as a desk or counter setup. One betta, one plant tray, manageable maintenance. If you want to grow full vegetables, move up to the AquaSprouts. But for the entry-level price, the Back to Roots delivers real aquaponic function that most “self-cleaning” tanks don’t come close to matching.
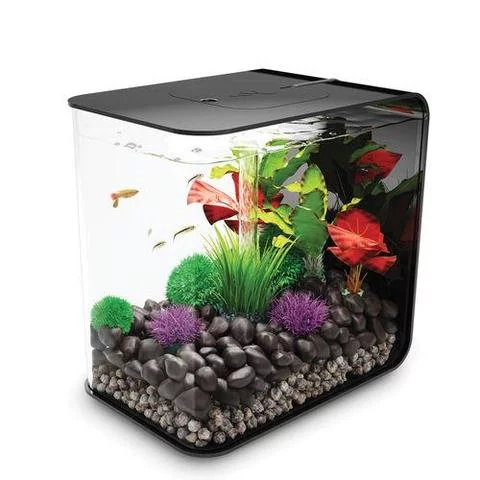
I’m not a fan of fish bowls. The biOrb Classic by OASE is one of the few exceptions I’ll make. OASE builds serious filtration equipment, and they brought that engineering discipline to this small tank. The bottom-up filtration design pulls dirty water to the bottom and pushes filtered water out the top, which is how professionally designed commercial pond systems work. At 4 gallons, it’s appropriately sized for a betta or a small group of nano fish.
This isn’t aquaponic self-cleaning. The biology here is purely filtration-based. But the filtration is genuinely well-designed for the size. With the right low-light plant setup, the biOrb can get close to a planted self-sustaining system. Without plants, you’re still doing water changes, just less frequently than with a cheaper comparable tank.
Pros
OASE engineering, best filtration design at this size
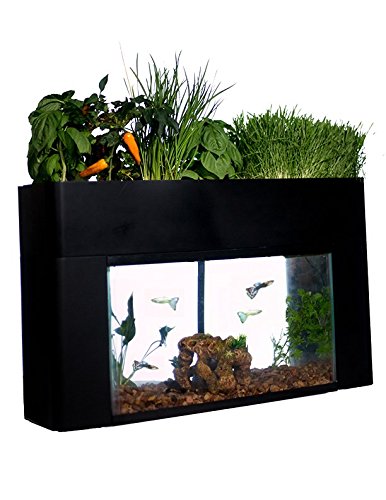
The EcoLife Aquaponics Indoor Garden System is the heavy hitter on this list. It supports a 20-gallon aquarium, giving you enough capacity for a real fish community, not just one or two fish. The included LED grow light is a natural spectrum fixture, so it complements your living space instead of blasting that purple-pink grow light glow across the room. At 20 gallons, this is the only aquaponic kit on the list where goldfish are a realistic option, though goldfish grow large and add substantial bioload over time.
The price is the sticking point. It’s the most expensive kit on this list by a significant margin. For that reason I don’t put it at the top overall. But if budget isn’t the constraint and you want maximum aquaponic capacity, this is the setup to buy.
The biOrb Flow is the same bottom-up filtration system as the Classic, scaled up to 8 gallons and built with acrylic instead of glass. Acrylic gives you better optical clarity than most low-iron glass tanks and makes the tank lightweight enough to move without the structural risk of glass. At 8 gallons, you have meaningful room for a small community: a trio of nano fish, or a betta with some shrimp.
Like the Classic, this is a filtration-based system, not aquaponics. You’re still doing water changes. The selling point is ease: clean setup, quality filtration, and durable build from OASE. Choose the Flow over the Classic when you want more swimming space. Choose the Classic when counter space is the limiting factor.
The EcoQube has the right idea and the wrong execution. The filtration box in the rear compartment keeps equipment clean and gives you the clearest front viewing panel of anything on this list. The grow area handles one plant, which limits the aquaponic effect significantly. At 1 gallon, the tank is technically too small for most fish. I don’t recommend any betta in a 1-gallon tank long-term, regardless of what the marketing suggests. If the makers scale this to 3 to 5 gallons in a future version, it becomes a serious contender. For now, it’s a proof of concept.
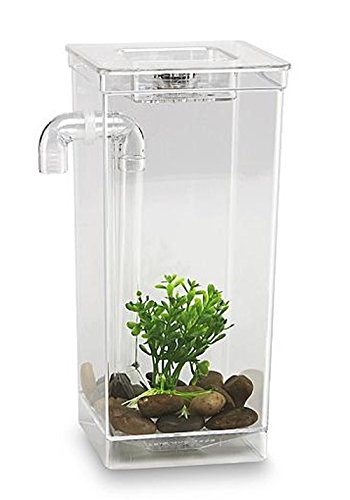
The My Fun Fish Tank uses gravity to drain dirty water when you add fresh water. The mechanism is clever. The size is the problem: half a gallon is not appropriate for keeping fish. I include it here to say clearly: don’t put fish in it. Ghost shrimp at most. It’s a novelty item. If the same gravity-drain mechanism were applied to a 3-gallon tank, it would genuinely challenge the biOrb for the budget spot. But as built, it’s too small to recommend for fish.
Pros
Genuinely clever gravity drain mechanism
Very affordable
Cons
Half a gallon: too small for fish welfare
Drain mechanism prone to clogging
Novelty item, not a real aquarium
MARK’S TOP PICK
The AquaSprouts Garden is the clear winner. It’s the only tank on this list where the self-cleaning mechanism is real and scalable: plants doing actual biological filtration at 10 gallons. The Back to Roots Water Garden is the best value if you want the same aquaponic concept at a lower price and smaller scale. If you want a pure filtration-based low-maintenance tank without the aquaponics, the biOrb Classic delivers the best-engineered filtration system in its class.
My Recommendation
The best self-cleaning fish tank is the AquaSprouts Garden. At 10 gallons with real aquaponic biology, it’s the only tank where nature is doing meaningful work for you. The Back to Roots is the best budget option when you want aquaponics at a smaller scale. The biOrb Classic wins the pure filtration category for people who just want the best low-maintenance small tank without the plant element.
Should You Buy a Self-Cleaning Fish Tank?
Good fit if:
You want to significantly reduce (not eliminate) cleaning time
You’re interested in aquaponics and growing herbs or greens
You want a beginner or child-friendly setup that limits the most tedious maintenance tasks
You have limited time and want a compact system that handles itself between water changes
Avoid if:
You expect zero maintenance (that tank doesn’t exist)
You want to keep more than a few fish or larger species
You already have fish-keeping experience and want a serious aquarium setup
Your primary goal is a visually impressive display tank
Another Approach: The Low-Tech Planted Tank
There’s another path worth knowing about that doesn’t involve any of these kits. A heavily planted low-tech tank with a light fish load can run for months between water changes. The plants absorb the nitrates, the bacteria handle ammonia, and a modest fish population stays within what the biology can process. I’ve achieved similar results in my own reef tank over the years. In freshwater, the main challenge is fertilization: heavily planted tanks need nutrients, and those often come from water changes. It takes more experience to balance than a kit, but it’s worth considering if you already have some fish-keeping background and want a naturalistic solution rather than an off-the-shelf kit.
WHAT MOST PEOPLE MISS
The self-cleaning tanks that advertise “no water changes ever” are missing one key variable: fish accumulate dissolved solids (TDS) in their water that plants and filters don’t remove. Even the best-running aquaponic system benefits from a 10 to 20% water change every few weeks to reset TDS levels. The tanks on this list reduce your maintenance load significantly. None of them truly eliminate it. Build that expectation in from day one and you’ll get years of satisfaction from these setups. Don’t, and you’ll be disappointed inside of a month.
Frequently Asked Questions
Do self-cleaning fish tanks actually work?
Yes, but not in the way most people expect. Aquaponic models genuinely reduce maintenance because live plants process fish waste as nutrients. Filtration-based models reduce the frequency and effort of cleaning but don’t eliminate water changes. No tank on the market maintains itself completely without any human involvement.
What fish work best in self-cleaning tanks?
Small, low-bioload fish are best: bettas, guppies, endlers, small tetras like neons or embers, and nano species like chili rasboras. Avoid goldfish in small aquaponic kits (they produce too much waste) and any fish that requires warm tropical temperatures if the tank doesn’t have a heater.
How often do you still need to do water changes?
With a properly stocked aquaponic system, every 2 to 4 weeks for a small top-off or partial change. With filtration-only self-cleaning tanks like the biOrb, every 1 to 2 weeks. Neither eliminates water changes entirely.
Can you put a betta in a self-cleaning tank?
Yes, but only in tanks 3 gallons or larger. The Back to Roots Water Garden at 3 gallons is the minimum viable size for a betta. The EcoQubeC at 1 gallon is too small for long-term betta health regardless of its self-cleaning claims.
Are aquaponic tanks hard to set up?
The kits on this list are designed to be beginner-friendly. You still need to cycle the tank before adding fish (2 to 4 weeks), and you’ll need to learn basic plant care. But compared to a full planted aquarium, these systems are significantly more approachable.
Closing Thoughts
Self-cleaning fish tanks are worth the investment if you understand what you’re actually buying. An aquaponic kit like the AquaSprouts Garden genuinely delivers on the promise: living plants doing real biological work to reduce your maintenance load. The biOrb series delivers best-in-class filtration for people who want a low-maintenance tank without the plant element. Skip the half-gallon novelty items entirely. A tank that’s too small for fish isn’t low-maintenance, it’s a fish welfare problem waiting to happen.
If you’re ready to get started, check availability at Flip Aquatics for live plants and livestock to stock your new setup, or browse Dan’s Fish for quality fish suited to smaller tanks. Both are reliable sources I recommend without hesitation.
Aquarium Hobbyist Clubs and Societies: The Complete Directory
Table of Contents
Local aquarium hobbyist clubs and societies are one of the most underrated resources in this hobby, and I say that after 25+ years of keeping fish. The knowledge inside a good local club. from breeders who’ve been at it for decades, to members willing to share cuttings, fry, or equipment at cost. is genuinely hard to find anywhere else. I’ve made some of my best hobby connections through club events and auctions. If you haven’t looked into your local club yet, I strongly encourage it. Below is a comprehensive list of aquarium hobbyist clubs and societies organized by region to help you find one near you.
Aquarium hobbyist clubs and societies can provide incredible learning experiences with the vast number of hobbyist veterans willing to help you out. Many are closer to you can you think. We encourage anyone who keeps freshwater or saltwater aquariums to join an aquarium club. They can provide many learning opportunities, mentorships, and a great way to make new friends. The tank tours alone are worth stopping by!
Since many of these clubs do not market themselves, Aquarium Store Depot has provided a list so that you can find the closest one to you. There are aquarium clubs popping up throughout the States all the time so if you have one that we have not listed, please e-mail us at info@aquariumstoredepot.com or contact us and we will get the list updated:
One underappreciated benefit of joining local clubs is access to a mentorship network. Most experienced hobbyists in these groups are genuinely happy to answer questions, do tank visits, or help troubleshoot a problem. You also get early access to members-only auctions, where locally bred fish, home-grown plants, and coral frags often go for a fraction of what you’d pay online. For beginners especially, this community knowledge base shortens the learning curve dramatically and makes the hobby far more enjoyable from day one.
What to Expect From Aquarium Hobbyist Clubs
Most aquarium hobbyist clubs operate on a simple model: members pay a small annual fee to fund events, speakers, and a shared library of books and equipment. Monthly meetings typically include a program segment (a speaker or demonstration), a Q&A, and an auction where members bring in frags, fry, cuttings, or equipment to sell or trade. This is one of the best ways to get rare or locally bred species that you’d never find at a big box store.
Freshwater aquarium hobbyist clubs tend to focus on planted tanks, cichlids, bettas, native fish, and general community fish. Marine and reef aquarium hobbyist clubs (often called reef clubs or SCMAS) center on coral propagation, SPS and LPS care, equipment reviews, and tank tours. Many clubs now have hybrid memberships that welcome both freshwater and saltwater hobbyists.
Whether you’re new to the hobby or decades in, aquarium hobbyist clubs and societies remain one of the most underrated resources in fishkeeping. Most aquarium hobbyist clubs host monthly meetings, livestock auctions, and equipment swaps where you can find rare species at a fraction of retail prices. Many aquarium hobbyist clubs also maintain active online communities if in-person attendance isn’t possible. If you’ve been considering joining, this grand list of aquarium hobbyist clubs and societies is a great place to start.
Join local aquarium hobbyist clubs to meet fellow fishkeepers.
High nitrates are one of the most common problems I see in freshwater tanks, and one of the most misunderstood. In 25 years of keeping fish and managing aquarium stores, the question I’ve heard more than almost any other is: “What do I add to get my nitrates down?” The honest answer most people don’t want to hear: you probably don’t need to add anything. You need to fix what’s causing them.
Most “nitrate removers” are band-aids. The real answer is water changes, stocking discipline, and biological filtration. But some products do work in specific situations, and knowing which ones are worth it can save you a lot of money and frustration.
https://youtu.be/E0YnjkKaGn8
What People Get Wrong About Nitrate Removers
The misconception is that nitrate remover products are a substitute for addressing root causes. They’re not. If you have 80 ppm nitrates because you’re overstocked and doing monthly water changes, dropping a chemical pad in your filter will temporarily reduce the number but won’t stop the source. You’ll be replacing that pad every few weeks forever while your fish are still stressed from the chronic nitrate load.
The second mistake: treating nitrate management as a chemistry problem instead of a biology problem. Nitrates are a waste product of the nitrogen cycle. The only permanent solutions are the same ones nature uses: dilution (water changes), uptake (live plants), or conversion (anaerobic bacteria in specialized media). Everything else is temporary.
The Biggest Mistake Freshwater Keepers Make
Overstocking and then trying to chemical-fix their way out of it. I’ve watched hobbyists spend more on nitrate-removing filter media over a year than they would have spent doing proper weekly water changes. The media needs to be replaced, the problem never goes away, and the fish are still living in water quality that’s chronically below ideal. If your nitrates are consistently above 40 ppm between water changes, look at your stocking level before you look at your product options.
EXPERT TAKE | MARK VALDERRAMA
After 25 years in this hobby, here’s my honest take on nitrate removers: Biohome Ultimate is the only product on this list I’d call a genuine long-term solution for a heavily stocked fish-only tank. It’s expensive and takes time to establish, but once it’s running, the results are real and lasting. For everything else, you’re managing symptoms. Seachem Purigen is my go-to for a quick, reliable intervention, and the Acurel pad has saved more than a few tanks I’ve seen in stores where the owner needed fast results with a canister filter. But none of these replace fundamentals: stock appropriately, change water regularly, and let your biological filtration do what it’s designed to do.
Understanding the Nitrogen Cycle First
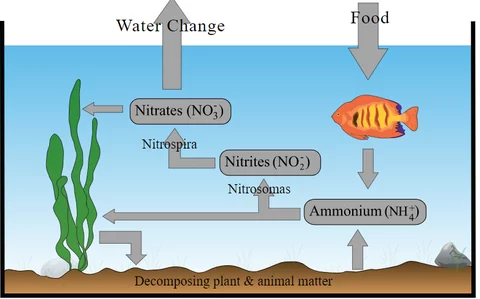
Before we get into products, here’s why you have a nitrate problem. The nitration cycle runs through 5 stages:
Nitrogen enters the system through fish food
Ammonia is produced through fish waste and decaying material
Nitrosomonas bacteria convert ammonia to nitrite
Nitrobacter bacteria convert nitrite to nitrate
Plants use nitrates and ammonium as fertilizer
Most freshwater tanks are missing step five. No live plants, no nitrate consumption. The standard filter media that comes with most power filters handles steps 3 and 4 through biological colonization, but filter manufacturers don’t typically include media designed to address step 5, because it’s more expensive and not everyone wants it.
Ways to Remove Nitrates
1. Water Changes
Water changes are the foundation. They dilute nitrates and replace trace elements. If you’re doing them consistently, most hobbyists can keep nitrates under control without any additional products. The goal is to not be a slave to the water change bucket, but realistically, a 20-25% change every 1-2 weeks is the baseline for a healthy freshwater community tank.
2. Live Plants
A well-planted tank is a natural nitrate sink. Dense planting can genuinely eliminate nitrate buildup in lightly stocked tanks. This doesn’t work for everyone: goldfish destroy plants, aggressive cichlids uproot them, and some hobbyists simply don’t want to manage plant growth. But if you can do it, a planted tank is the most elegant nitrate solution available.
3. Reduce Stocking
Sometimes the tank is just overstocked. The 1-inch-per-gallon rule is outdated and unreliable; it doesn’t account for bioload differences between species. Goldfish, large cichlids, and messy eaters produce far more waste per inch than neon tetras. If your biological filtration is maxed out, no product will solve that sustainably.
4. Dedicated Nitrate-Removing Filter Media
This is where the products below come in. Nitrate-removing media works through either chemical/resin absorption (disposable) or biological means (permanent media that grows anaerobic bacteria). Both approaches work, but they work differently and suit different tank setups. Know what you’re buying before you add it to your filter.
The Candidates
Every product here has been selected based on field experience and safety for freshwater use. All are safe for fish and plants when used as directed.
In a hurry? I recommend Biohome for a permanent solution and Seachem Purigen for a disposable solution.
These products are ranked on effectiveness for freshwater applications, long-term value (permanent vs. disposable cost over time), ease of use in common filter types (power filters, canister filters), and how well they address the specific type of nitrate problem most freshwater keepers face. Products that require specific filter configurations or offer only temporary relief are ranked accordingly.
The Top 10 Best Nitrate Removers (2026 Reviews)
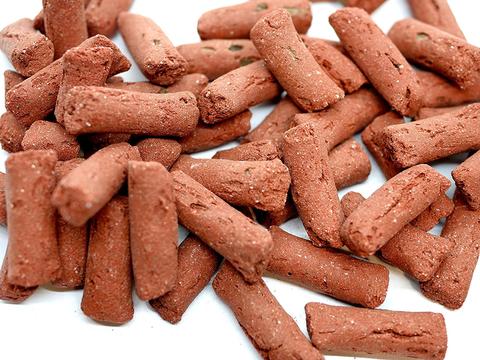
1. Biohome Ultimate Filter Media: The Best Permanent Solution
Biohome Ultimate is the best biological filtration media you can buy, and in my opinion it’s the most effective long-term nitrate solution for freshwater tanks. It handles ammonia, nitrite, and nitrate, all three stages of the nitrogen cycle, in one permanent media. Biohome was originally developed by PondGuru, a pond care YouTuber who needed a solution for high-nutrient pond water. It translates extremely well to freshwater aquariums.
Because it’s biologically based, it takes time to establish. Don’t expect results in the first week. You’re waiting for anaerobic bacteria to colonize the inner pores of the media, which can take 4-8 weeks in a new setup. Once it’s running, you’re done. You add it to your filter and leave it there. No replacements, no recharging.
The drawback is cost and quantity. You need 2-4 lbs for a mid-sized tank, and it’s not cheap. Here’s Bio-Home’s own dosing guide:
Environment
Amount of Biohome Required
Avg Community Tropical Tank
1 kg/26 gal (100 lt)
Avg Cold Water Tank
1-1.5 kg/26 gal (100 lt)
Predator Tank
1.5-2 kg/26 gal (100 lt)
Large Cichlid Tank
1.5-2 kg/26 gal (100 lt)
Malawi/Tanganyikan Tank
1.5-2 kg/26 gal (100 lt)
Avg Mixed Fish Pond
1 kg/52 gal (200 lt)
Avg Koi Pond
1 kg/39 gal (150 lt)
If you want to stop being a slave to constant water changes, this is worth every penny. It’s the investment you make once instead of buying disposable media repeatedly.
Pros: Permanent, biological, handles full nitrogen cycle, mini version fits power filters
Cons: Expensive upfront, requires 4-8 weeks to establish
Seachem Purigen is the fast-acting option I recommend for hobbyists who need results now. It uses a synthetic resin that removes organic compounds, and its color changes from white to dark brown as it depletes. That color indicator is genuinely useful: you know exactly when to replace or recharge without guessing.
Recharging uses an unscented bleach solution, which actually destroys the organics instead of just releasing them back (API’s salt recharge approach has risk of leaching organics back over time). Purigen’s recharge process is more thorough.
It’s affordable, available everywhere, and fits in power filters without modification. For a fast intervention on a tank with elevated nitrates, this is my default recommendation.
Pros: Fast acting, color indicator, rechargeable, fits power filters
Cons: Recharge process takes attention, not a permanent fix for chronic issues
3. EA Premium Nitrate Reducer Pad: Best Budget Canister Filter Option
The EA Premium Nitrate Reducer is an infused filter pad that works immediately, no break-in period. It’s my budget recommendation for canister filter owners. Place it in the chemical media stage after your mechanical filtration. Rinse it before use or it’ll cloud your water. It can be cut to fit different filter sizes.
Pros: Cheap, works instantly, can be cut to size
Cons: Dusty (rinse first), hard to find locally, may not fit small power filters
4. Acurel LLC Nitrate Reducing Pad: Proven Field Results
Acurel’s Nitrate Reducing Pad has been a reliable option for years. It’s a 10×18 inch pad you cut to fit. I’ve personally seen this pad drop nitrates in a 180-gallon African cichlid tank from 60-80 ppm down to under 20 ppm. It works best in a canister filter’s chemical media chamber. The limitation is power filters: you need enough pad surface area to be effective, and most power filters can’t accommodate enough of it.
Pros: Proven large-tank results, cuttable size, fast acting
Cons: Not effective in small power filters, harder to find locally
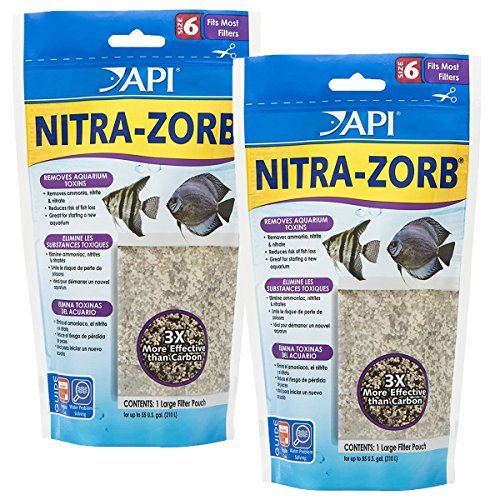
5. API Nitra-Zorb: Best All-In-One Resin for Canister Filters
API Nitra-Zorb is a resin-based media that handles ammonia, nitrite, and nitrate and replaces carbon in canister filters. It’s rechargeable with an aquarium salt solution, which makes it reusable. One caution: the salt-based recharge only replaces ionic compounds, it doesn’t destroy larger organic compounds the way Purigen’s bleach recharge does. Over time there’s a risk of organics leaching back, though in practice most users replace it often enough that this isn’t an issue.
Pros: Handles full nitrogen cycle, replaces carbon, rechargeable
Cons: Bag is large (designed for canister filters), can interfere with established beneficial bacteria colonies
6. Boxtech Aquarium Media: MarinePure-Style Ceramic for Freshwater
Saltwater keepers know MarinePure as a top biological filtration option. BoxTech applies the same principle in a 3×3 block sized for canister filters. It’s a permanent solution that grows anaerobic bacteria to convert nitrates. No replacement needed once established, but like Biohome, it requires weeks to colonize before showing results.
Pros: Permanent, large surface area for bacteria, good fit for canister filters
Cons: Won’t fit most power filters, needs establishment period
7. Dr. Tim’s Aquatics NP-Active Pearls: Marine Biologist Designed
Dr. Tim Hovanec is a marine biologist who made his reputation on nitrification research. These NP-Active Pearls are designed to reduce both nitrates and phosphates through controlled biological activity. The pearls feed beneficial bacteria that consume both compounds. They work well in reactors and high-flow filter areas. For freshwater applications, they’re a solid biological nitrate reducer, though the setup is slightly more involved than a simple media pad or biological block.
Pros: Designed by actual marine biologist, reduces both nitrates and phosphates, biological approach
Cons: Works best in reactors, more complex setup than alternatives
8. IceCap Turf Scrubber: The Best Passive Nitrate Export System
The IceCap Turf Scrubber grows algae under an LED light. You harvest the algae regularly, and with it you’re physically exporting the nitrates and phosphates the algae has consumed. It’s a genuinely elegant biological solution for hobbyists who want to reduce maintenance frequency. It works in freshwater and saltwater. The tradeoff is that it’s another piece of equipment to maintain and it requires space.
Pros: Natural nitrate export, permanent, works for both freshwater and saltwater
Cons: Requires additional space and regular algae harvesting
9. Seachem Denitrate: Biological Media for Low-Flow Areas
Seachem Denitrate is a porous biological media specifically designed to support anaerobic bacteria that convert nitrates. It works best in areas of very low water flow, such as deep canister filter beds or static sumps, where oxygen is limited enough for anaerobic bacteria to thrive. It’s a permanent solution that takes time to establish but requires no ongoing replacement.
Pros: Permanent, specifically designed for anaerobic bacterial growth
Cons: Requires low-flow placement, takes time to establish
Seachem Matrix is pumice-based biological media with high internal porosity. The outer surface supports aerobic bacteria for ammonia and nitrite conversion, while the inner pores, where oxygen is depleted, allow anaerobic bacteria that consume nitrates. It’s a well-engineered permanent solution that works across both stages of the nitrogen cycle in one product, similar in concept to Biohome but at a different price point.
Pros: Dual aerobic/anaerobic bacteria support, permanent, good surface area
Cons: Requires time to fully colonize, results vary with flow rate and placement
BUY OR SKIP?
Buy a nitrate remover if: Your nitrates consistently hit 40+ ppm between water changes, you have a heavily stocked fish-only tank without live plants, or you’re keeping sensitive species (discus, German blue rams, wild-caught cichlids) where parameter stability is critical. Skip the products if: Your problem is overstocking or water change neglect, in which case no product will substitute for fixing the root cause. And if your tank has healthy live plant coverage and light stocking, you likely don’t need additional intervention at all.
MARK’S TOP PICK
For a permanent solution: Biohome Ultimate Filter Media. It’s the most complete biological answer and once established, it genuinely reduces dependence on water changes. For a quick fix: Seachem Purigen. It works fast, the color indicator removes the guesswork, and it fits in power filters. These two cover the most common scenarios I see in freshwater tanks.
WHAT MOST PEOPLE MISS
The IceCap Turf Scrubber is almost never mentioned in freshwater nitrate discussions because it’s associated with reef tanks. That’s a missed opportunity. A freshwater turf scrubber exports nitrates and phosphates at the same time through algae harvesting, requires no media replacement, and scales with your system size. For a heavily stocked community tank where you want to reduce water change frequency, it’s one of the most efficient long-term solutions available. Most freshwater hobbyists never consider it.
Should You Buy a Nitrate Remover?
Good fit if:
You keep sensitive species that need nitrates consistently below 20 ppm
Your tank is heavily stocked and water changes alone aren’t keeping up
You want to extend intervals between water changes without sacrificing water quality
You have a canister filter and want to add a dedicated nitrate removal stage
Avoid if:
You’re hoping a product will substitute for water changes entirely
Your problem is chronic overstocking (reduce stocking first)
You have a well-planted tank with appropriate stocking levels (plants are already handling it)
FAQs
What Is a Safe Nitrate Level for Freshwater Fish?
Most freshwater community fish tolerate nitrates up to 40 ppm without visible stress. For sensitive species like discus, German blue rams, and wild-caught cichlids, keep it under 20 ppm. Goldfish are surprisingly tolerant and can handle higher levels, though consistently high nitrates shorten lifespan over time.
How Fast Does Seachem Purigen Work?
Purigen works within 24-48 hours for noticeable reduction. It’s not instantaneous, but it’s the fastest-acting option on this list other than a large water change. Monitor with a test kit after 48 hours to see your results.
Can Live Plants Replace a Nitrate Remover?
In a well-planted tank with appropriate stocking, yes. Dense planting with fast-growing species like hornwort, water wisteria, or stem plants can consume nitrates as fast as a lightly stocked tank produces them. In heavily stocked tanks or fish-only setups, plants alone won’t be enough.
Will a Nitrate Remover Work in a Power Filter?
It depends on the product. Seachem Purigen and the EA Premium Pad work in power filters. Biohome Mini version fits some power filters. Larger products like API Nitra-Zorb and the Acurel pad are designed for canister filters and often won’t fit in standard HOB units.
How Long Does It Take for Biohome to Start Working?
Biohome needs 4-8 weeks to fully establish anaerobic bacteria in a new setup. In a mature tank with existing bacteria, colonization can be faster. Don’t evaluate it before the 6-week mark. The wait is frustrating but the long-term results are worth it.
Closing Thoughts
Here’s the bottom line on nitrate management: the products on this list work, but they work best as part of a proper husbandry routine, not as a replacement for one. Biohome Ultimate is the best permanent solution for a seriously stocked freshwater tank. Seachem Purigen is the best quick intervention. For budget canister filter users, the Acurel pad delivers real results. And the IceCap Turf Scrubber is the overlooked option most freshwater keepers never consider.
Start with your fundamentals: stock appropriately, change water consistently, and let your biological filtration do its job. Then layer in one of these products where it makes sense for your specific setup.
For healthy livestock to stock your freshwater tank, check out Flip Aquatics and Dan’s Fish. Both carry quality freshwater fish that arrive healthy.
Want to learn more? This article is part of our complete Aquarium Equipment & Gear Guide, your ultimate resource for filters, heaters, lights, pumps, tanks, and more.
Hello again fellow readers. Over the past few years, I have gone through a full dive into the freshwater aquarium hobby. As many of my friends and hobbyists know, I started in the hobby straight into saltwater aquariums and then into reef tanks. A couple of years ago, I posted a big piece of content titled words of wisdom I wish I knew before I started. As I got more into the freshwater side of the hobby, I thought to myself I should do the same with freshwater aquariums.
Today’s post is going to be a long. Each one of these points can be a post on its own. My purpose is to place all these words of wisdom into a single post so you can reference it to anyone starting out in the freshwater aquarium hobby. I got a video below as well you can check out from our YouTube Channel.
Key Takeaways
Education is the number one factor to have success. Research and trust authoritative blogs and experts in the field
Don’t cheap out on your setup, invest in quality equipment
Be careful with your livestock choices
Be patient with your setup and keep calm when things go wrong
Maintain your aquarium and avoid getting multiple fish tanks
Freshwater Aquarium Words Of Wisdom – What I Wish I Knew Before I Started
#1 – Educate Yourself
The freshwater hobby is very broad. I would say it is about 3-4 times more broad than the saltwater aquarium hobby. A saltwater hobbyist goes to corals at the ultimate goal while a freshwater aquarist can have many goals. You can go with a large predator tank, a planted tank, a small betta fish tank, or even a pond. This means that the hobby is always evolving. There are new breakthroughs every day and new subsets of the hobby. Such as in life, dedicate yourself to never stop learning about this hobby if you are passionate about it. Seek blogs like this one, videos, authoritative figures, etc.
#2 – Patience Is Your Virtue
Read the image above and understand what it comes. Freshwater aquariums is all about doing everything you can to set yourself for success then letting go. You have to be patient about the results after you have taking the actions or setup the proper routines. Impatience will wreck you in this hobby.
#3 – Know The Nitrogen Cycle
The nitrogen cycle is the cornerstone piece of knowledge you must have to succeed in the fish hobby. The nitrogen cycle is a 5 stage process:
Nitrogen is introduced with fish food
Ammonia is excreted either by fish or decaying material
Nitrosomas bacteria convert Ammonia to Nitrite
Nitrobactor bacteria converts Nitrite to Nitrate
Plants use Nitrates and Ammonium as fertilizer
Your aquarium is a closed biosystem. Your biosystem needs to have a balance of enough bacteria to keep levels in check. Knowing your balance will keep you from overstocking and overwhelming your biosystem. You can check out the video below by Girl Talks Fish for a more detailed explanation.
It is important to know that most stock filtration equipment will not offer you a full nitrogen cycle out of the box. There are two ways to resolve this. Either get live plants or invest in the best nitrate removers for freshwater aquariums. I recommend Biohome Ultimate for permanent solution or Purigenas a disposable solution.
#4 – Involve Your Family
Freshwater Aquariums offer a greater opportunity to get your family or loved ones involved in your hobby. The hobby is easier to understand and perform compared to saltwater aquariums and anyone with proper guidance and training can have fun and get involved. Do not isolate yourself in your hobby or passion. Invite your children if you have them or your loved one into your hobby. You can have reliable tank sitters when you are away and not panic when things go wrong and you are not present to fix them. A family that keeps fish together, stays together.
#5 – Watch Out For Multiple Tank Syndrome
Freshwater aquariums are more approachable and far easier to get lost in multiple tank syndrome than with saltwater tanks. For one, it’s way easier to handle water changes and multiple tanks since the you do not need a RODI system for the vast majority of setups. The other thing is that the freshwater hobby is so broad. It’s better to have specialty tanks then to attempt mixed community aquariums not to mention the various aquascaping styles with planted tanks.
Avoid stretching yourself too thin as well as your wallet. Take your time to enjoy your current aquarium and learn from it. When you are ready for the next steps, consider an upgrade and not an additional fish tank.
#6 – Join A Local Club
A local aquarium club or society can be transformation in journey in this hobby. You can meet many people of different backgrounds and experience. One of the biggest benefits to joining a club is the mentorships you can obtain if you are looking for advanced techniques and freshwater fish keeping methods. You can check out a list of local aquarium clubs in our prior blog post.
#7 – Don’t Take LFS Advice at Full Value
There is a higher likelihood that you will get a knowledgeable employee at a local fish store (AKA LFS) when it comes to freshwater aquariums. However, remember that the freshwater hobby is vast. It’s very possible that the employee can be an expert on say Discus Tanks and be completely clueless on how to dry start an Iwagumi aquascape. Always do your research, be prepared, and have a plan before you walk into your local fish store.
#8 – Everyone On A Forum Has An Opinion
There are many great forums online that you can join to learn more about the hobby. Be careful of bad information and people trying to give you an answer to help but may not know the best answer.
When it comes to freshwater aquariums I would look at social proof. Is the person giving you advice have the type of tank that you want? Does this person have proven knowledge in the hobby.
To provide you a good example, there are many blogs on the internet about tank equipment. Some of them are written with bad advice to sell you a product rather than educate you. Others I would have serious doubts if author bio on the bottom is a real person.
This blog and site was founded by me, Mark Valderrama. I have been featured on NBCNews, Slate, Buzzfeed, and Huffington post regarding care about our hobby. I am the peer adviser of two books written about aquariums, Freshwater Aquariums for Dummies 3rd edition and Saltwater Aquariums for Dummies 3rd edition. I have owned both freshwater fish and saltwater aquariums.
There are many influencers in the freshwater space, more so than the reefing hobby. Many are true experts in the field versus entertainers. Take your time to do your due diligence.
#9 – Don’t Overstock
The general rule you hear in the freshwater hobby is the 1 inch of fish per gallon. I cringe when I hear this rule, because it’s way too broad. Some freshwater fish, like goldfish, are big and bulky, and are hard on a bioload. Other fish, like Cichlids, are territorial and need shelter and space. The 1 inch of fish per gallon is okay for schooling fish like Tetras, but it fails on just about everything else. Too many fish can also lead to poor quality water and a cloudy fish tank.
If you want to look up stocking levels, I would highly suggest using AqAdvisor as a tool. It will provide a comprehensive calculation for your stock, and allow you to plan correctly for your aquarium.
#10 – Betta Fish Do Not Belong In A Bowl
You see Betta all the time at local pet stores in bowls. You also probably see a bunch of Betta Fish Tank sets available at the same said stores. I will tell you right now that this is not healthy long-term for a Betta. Bettas are best served in at least a 5 gallon aquarium. Give your pet Betta a better life by giving it an environment that it would enjoy. Check out our Betta Fish Care guide for more info on these wonderful fish.
#11 – Goldfish Do Not Belong In A Bowl
This is another soapbox moment for me. Goldfish get large and need a lot of space to get to their full size. A goldfish bowl is not healthy for them long term. They are also freshwater fish that are very hard on a bioload since they eat so much and produce a ton of waste. Treat your pet goldfish to a proper aquarium setup so they can reach their full size and potential. Check out our Goldfish Tank care guide for more info on these popular fish.
#12 – Leave Large Aggressive Fish For The Vets
You may walk into this hobby wanting to get large aggressive freshwater fish. After all, many like Arowanas, Oscars, Jewel Cichlids, and Jack Dempsey are very beautiful large fish. The problem with these fish are multiple. They get very large and require very large aquariums. This means you have to invest a lot in getting the proper sized tank for them. They are very aggressive and so you have to be very careful who you house with them. Some of these fish are so aggressive that they have no issues with trying to go after your hands when feeding them! Worse yet, some of these fish are large and powerful enough to crack aquariums that are too small for them. The wolf cichlid is notorious for their super aggressive nature as an example.
Large fish also require a ton of food. Due to their aggression, they are known for getting wounds from fighting or just thrashing about in your tank. These wounds can lead to infections. Keep large aggressive fish for the experts or those with the budgets you can handle them.
#13 – Filtration Matters
It can be really tempting to just buy a cheap filter to get you started on your freshwater aquarium. The hobby makes it very easy to get into with entry level filters or cheap filters made in China. The problem is not all filters are created the same and as your tank matures, you need better filtration. I would recommend at minimum an Aquarium Power Filter for most freshwater aquarium setups and a Canister Filter for planted tanks. Save the sponge filters for specialized tanks like Freshwater Shrimp Tanks or fry raising. There are very good brand names in the freshwater hobby make quality equipment like Hagen and Eheim. Their equipment is built to last for many years.
#14 – Start Bigger Than Necessary
If you are starting out in the hobby, the best advice is to buy the biggest tank for your setup that you can afford. The bigger the tank, the more stability you would have. If you are going for a smaller aquarium like a 5 gallon or 10 gallon aquarium, I would suggest going with an all in one aquarium so you have everything setup and ready to go for you. The main issue with smaller tanks is it is hard to grow with them and often times you outgrow the tank quickly or get overzealous and overpopulate the tank.
Keeping a successful aquarium means you are in tune with your tank and its water quality parameters. You want to get in the habit of regularly testing your water so you can spot changes in your biosystem before its too late. Not all test kits are created equal. See our post on the Best Freshwater Aquarium Test Kits for our picks. Don’t have time to read that post? No problem, I would recommend the API Freshwater Master Test Kit for most freshwater setups.
If you have an aquarium substrate, a gravel vacuum is a critical tool. A quality gravel vacuum can pull out all sorts of junk out of your substrate. There are lots of waste that accumulates in your gravel bed and without vacuuming you run of having waste decay and cause nutrient spikes down the road. The best gravel vacuum in my experience is the Python gravelvacuum. It connects directly to your sink and is very convenient to use.
#17 – Set A Maintenance Schedule
Setting a maintenance schedule and sticking to it is a long-term habit in our hobby. There are a lot of things to consider when keeping a fish tank, so it’s best to write things down as set reminders for yourself in order to keep up with your tank. Here are suggestions I would have of maintenance tasks to keep track of:
Daily
Dose fertilizer
Check bubble counter and drop checker color
Check water level – top off if needed
Observe your fish for any obvious signs of disease or stress
Weekly
Water change 15-20%
Check all your equipment to ensure working order
Clean glass, hardscape, and plant leaves
Trim your live plants if you have them
Check CO2 canister – refill as needed
Test your water
Monthly
Clean out your filters – wash down after cleaning with aquarium water
Clean pipes and strainers
Some setups are easier to maintain then others. You can always look into a self cleaning fish tank, if you want something less maintenance heavy. Most will be powered by natural filtration.
#18 – Have Backup Equipment
The harsh reality of our aquarium equipment is that they are subjected to being in hard conditions being underwater with our livestock. Eventually, equipment does break and they can be expensive to replace. The unfortunate fact is our equipment tends to go down at the worst times. The best way to prevent a disaster is to have a back up plan. Having back up equipment is the best step we can make. Here is backup equipment we want to have in for our freshwater aquarium.
Fish Tank Power outages are one of the most common cause of tank crashes in our hobby. It is a really helpless feeling when the power is out and you watch all your livestock slowly die because you have no backup plan. Don’t let this be you! Be proactive and develop a plan of action when it happens (because it will!).
As we have learned in our Best CO2 System for Planted Aquarium post, the golden ticket to fast grow in plants is CO2. 50% of your plants dry mass is carbon. A live plant will use 10 times more carbon than any other macro or micro nutrient. Knowing these fact, many hobbyists are still intimated by CO2. Sometimes it’s the cost to setup and other times it’s being intimated by the complexity.
CO2 systems are much easier to setup and dial than you think. One you have one setup and running, it’s mostly just reading your drop checker and adjusting your inject levels to stay within level. Many hobbyists I talked to post install usually tell me they wish they did it earlier. Take the plunge and get some killer growth in your plants!
#21 – No CO2? Go Low Tech!
Is a CO2 setup out of your budget? If so, pivoting to a low tech planted tank is a great alternative. A low tech tank is a freshwater aquarium with live plants that do not use CO2 injection. Building a thriving low tech tank requires proper selection of live plants. You want to work with plants that do well under low light, will generally feed in the water column, and are hardy. Check out our best low light aquarium plants and best beginner aquarium plants post for a full list of plants that are ideal for low tech. For those who don’t have the time to read, my go to for low tech are Java Fern and Anubias.
We learned in our Best Aquarium Plant Fertilizers post that fertilization is one of the 3 cornerstones of planted tank success. Unfortunately, we also learned that fertilizers are not all created equal. The most popular fertilizers sold in planted tanks are usually designed for low tech planted tanks. Those with full planted tanks or high need better fertilizers. In addition, many fertilizers do not have guaranteed analysis info and hide behind their brand names. We swear by APT Complete for our fertilization needs.
#23 – Red Plants Are Harder To Grow Than Green Plants
Red plants are typically harder to care for than green plants. This is due to their stronger light requirements, more specific spectrum requirements, and nitrate needs.
They generally should be avoided by beginners. If you want to try out a red plants, consider an easier to care for species like Cyptocoryne ‘flamingo’ or Red Amazon Swords.
We learned in our Best LED Lights for Planted Tanks post that lighting is one of the 3 cornerstones of planted tank success. Lighting is broken down into three elements that we need to know are adequate in the lighting fixture we purchase:
Spectrum
PAR
Spread
We learned that there is an ideal plant spectrum and that different plants have different PAR requirements. Shading can also be problematic with taller plants so spread is a major factor in our decision for our fixture.
The Serene Pro RGB LED we feel is the best comprehensive planted tank light in the industry. It excels in all 3 elements and will work with most planted tank setups.
#25 – Dip Your Plants
Dipping your plants should be something all planted aquarium owners should do before introducing plants in their aquarium. Plants can introduce pests and disease such as snails and parasites like ich and planaria. By using this method by Lifewithpets above, you can eliminate pest hitchikers from your plants. For parasites, you can consider a quarantine period for your plants in a separate tank. You can do even better by select lab grown plants, which tend to be pest and disease free for extra safety.
Proper Aquascaping tools are amazing when it comes to maintaining your planted tank. Curve scissors make it easy to cut down ground cover and smaller plants while prune shares will cut your taller plants. The tweezers are great for moving plants around and handling new arrivals. The substrate spatula is excellent for keeping your substrate tidy and even. I can’t imagine handling a planted tank without one. It’s a must purchase in my mind if you are serious about keeping a planted tank.
In our best aquarium substrate for planted tank post, we talked about active vs inactive substrates. Active substrates are ones that alter our water chemistry and break down over time. As this substrate breaks down, they fertilize our aquarium plants. This means active substrate amazing for rooted plants and ground cover. They are also preferred for dry starts as you can grow some plants in the substrate before you flood your tank. This results in healthy plant growth from the start, a short/nearly instant cycle, and less algae problems.
In contrast, an inactive substrate will not alter your water chemistry. It will not breakdown. However, some inactive substrates are designed to absorb nutrients and still work well for rooted plants. If you are going with a traditional gravel bed, you may want to consider column feeding live plants since it will be more difficult to support root plants in gravel.
#28 – Driftwood Can Leach Tannins
In our Best Driftwood for Aquariumspost, we talked about tannins and how to prevent your aquarium for getting that unappealing tea color. The best two ways to prevent this are:
Select a driftwood with a low tannin count
Prep your driftwood properly
We learned from our post that Manzanita, Spider wood, and Tiger wood have a low amount of tannins and are the preferred driftwood types to work with.
Prepping your driftwood will also save you a world of headache getting that tea color out. Boil your driftwood until the tea color is gone and use carbon media to get rid of any discoloration that comes from the leftover tannins.
In our best rocks for freshwater aquarium post, we learned that not all rocks are safe for aquariums. Some rocks can alter our water chemistry. Some like limestone will raise the pH and hardness, which is great for an African Cichlid Tank, but bad for the majority of tropical freshwater fish. Other rocks, like the ones you can pick up at your local river could contain harmful chemicals or bacteria that can wipe our your tank.The preferred rock for freshwater aquarium is granite and there are many types of available in our hobby. I would recommend Seiryu Rock for most aquarium projects.
#30 – Learn To Aquascape
Learning the types of freshwater aquascape styles and how to design them will take your tanks to the next level. If you want to have stunning award winning looking tanks, it all starts with learning how to aquascape. Start by learning the various type of styles and design concepts like the rule of two thirds and tension vs harmony. What makes aquascaping amazing in this hobby is it is all derived from art, photo techniques, and garden scape designs. It is a true art form that is very rewarding when you create a major work of art. You can get started by learning about a few of the aquascape styles below
That was a long post wasn’t it :). Well, I hope you enjoyed reading and took away some words of wisdom. As always, please share and subscribe to our newsletter. If you have any tips you would like to share, please leave us a comment below. Thanks for reading and see you next time!
📘 Want to learn more? This article is part of our complete Freshwater Fish Guide. your ultimate resource for freshwater species, care tips, tank setup, and more.
Driftwood does two jobs in an aquarium, and most people only think about one of them. The visual job is obvious: it gives a tank structure, depth, and a natural anchor for plants like Java fern and Anubias. The chemical job is the one that surprises people. Depending on the wood type and the size of the piece, driftwood can lower pH, release tannins that stain the water brown, and break down slowly over years. Pick the wrong type for your fish, and you’re fighting your own decor. I’ve used many types in planted tanks, shrimp setups, and community tanks, and each one behaves differently.
Driftwood is not just decoration. It’s an active part of your water chemistry.
EXPERT TAKE | MARK VALDERRAMA
After 25 years keeping fish and running aquarium stores, here’s what I tell every customer before they buy driftwood: soak it before it goes in the tank. Every piece. Even if the seller says it’s pre-treated. A minimum 1-week soak in a bucket, with water changes every couple of days, removes the bulk of tannins and ensures the wood sinks properly. Driftwood that isn’t fully waterlogged will float and stress your fish. Driftwood that dumps heavy tannins into a new tank can crash your pH faster than you’d expect. Soak first. Always.
Rankings here factor in four things: tannin output and how it affects water chemistry, how quickly each wood fully waterloggs and sinks, durability over months and years in the tank, and visual impact across different tank styles. Cheap wood that floats for weeks or rots within months doesn’t belong on this list regardless of price. The top picks here stay down, break down slowly, and work with your fish rather than against them.
What People Get Wrong About Aquarium Driftwood
The most common mistake is buying without thinking about tannins. Tannins are natural compounds in wood that leach into the water and lower pH while staining it amber or brown. For blackwater fish like discus, cardinal tetras, or wild bettas, this is actually ideal. For African cichlids or goldfish, which prefer hard, alkaline water, it works against you and stresses your fish. The wood type you pick needs to match the chemistry needs of your fish, not just look good in your tank.
The second mistake is skipping the soak. Wood that isn’t fully waterlogged floats. It will float up, dislodge plants and decorations, and frustrate you for weeks. Some types take longer than others to sink: spider wood sinks relatively fast, while denser pieces like Manzanita can take longer depending on the piece. Don’t put it in the tank until it sinks reliably in a bucket on its own.
The third mistake: ignoring white mold growth. A fuzzy white coating sometimes appears on new driftwood within the first few weeks in the tank. It’s a natural biofilm, not harmful, and most fish and shrimp will pick at it and eat it. It resolves on its own. If you see it and panic-remove the wood to scrub it, you’ve done more work than necessary.
The Biggest Mistake
Adding driftwood directly to an established, stable tank without soaking first. I’ve seen hobbyists do this with large pieces of spiderwood or Manzanita and watch their pH drop a full point within 48 hours. For fish that are sensitive to pH changes, that’s a stress event that can trigger disease. Tannin leaching is heaviest in the first few weeks. Soak the wood first, do multiple water changes during the soak, and the chemistry impact when it goes into the tank is manageable.
Manzanita is the driftwood I reach for in planted tanks and community setups, and it’s not close. The branching structure creates natural hardscape anchor points for Java fern, Anubias, and mosses. Tannin output is low compared to most other types, which means the water chemistry impact is minimal. It’s dense enough to sink in a reasonable time with proper soaking, and it’s durable enough to last years in the tank without rotting or breaking down structurally.
I’ve used Manzanita in planted community tanks, betta setups, and aquascapes where the visual profile matters. It photographs well, it works at every scale from small to large, and it doesn’t bully your fish with chemistry swings. If you don’t know what to buy and you’re keeping a community freshwater tank, this is the answer.
Pros
Low tannin output
Excellent branching structure for plants
Dense and durable
Cons
Can take longer to sink than lighter woods
Higher price point for premium pieces
2. Tigerwood
Tigerwood has a distinctive striped grain pattern that makes it one of the most visually striking options available. Like Manzanita, tannin output is relatively low. It comes in showpiece sizes that can anchor a large display tank, which separates it from most competitors in the mid-range category. Choose Tigerwood over Manzanita if the visual grain of the wood matters to you and you want a statement piece rather than a branching structure for plants.
Pros
Striking visual grain
Low tannins
Available in large showpiece sizes
Cons
Less branching structure than Manzanita
Fewer plant attachment options
3. Spiderwood
Spiderwood is the first choice for small tanks and nano setups. The thin, spidery branching structure creates visual depth and complexity in a small footprint, which makes it uniquely suited to 10-gallon and under tanks where a large piece of Manzanita would be overwhelming. It’s also the fastest to sink of any wood on this list. It does leach more tannins than Manzanita or Tigerwood, so soak it properly. The surface texture is one shrimp genuinely love: they graze it constantly, picking at the biofilm that develops on the surface.
Pros
Ideal for nano and small tanks
Sinks quickly
Excellent shrimp grazing surface
Cons
Higher tannin output than Manzanita
Thinner branches can break
4. Buce Plant WYSIWYG Driftwood
What You See Is What You Get driftwood from Buce Plant is exactly that: you’re buying a specific, photographed piece, not a random selection from a bin. For a display tank where the exact shape and size of the centerpiece matters, this is the right approach. You pay more for the certainty. If you’re building an aquascape around a specific layout, WYSIWYG sourcing removes the guesswork.
Pros
Exactly what you see in the photo
Great for display aquascape planning
Quality-vetted pieces
Cons
More expensive than random selection
Limited availability on specific pieces
5. Bonsai Driftwood
Bonsai driftwood is pre-shaped to mimic the look of a bonsai tree, which creates an instant focal point in any tank. It’s a designed piece, not a natural one, but the visual effect is genuinely striking. Most bonsai pieces are sold with or are intended to have moss or plants attached to the branches, which reinforces the tree silhouette. If the aquascape is built around a tree motif, this is the most direct path to that look.
Pros
Dramatic visual focal point
Purpose-built for plant attachment
Consistent shape and structure
Cons
Less natural-looking than raw driftwood
Can look staged if not planted well
6. Fluval Mopani Wood
Mopani is an African hardwood with a two-tone coloring: pale and dark areas that create natural contrast. It’s extremely dense, which means it sinks reliably without extended soaking. The trade-off: it’s one of the heaviest tannin producers on this list. A fresh piece of Mopani in an established tank will stain the water dark amber within a day or two. Soak it for at least two weeks with daily water changes before it goes in. Once the initial tannin dump is over, it’s a durable, long-lasting piece. Fluval’s version is pre-boiled and treated, which reduces but does not eliminate the initial tannin release.
Pros
Extremely dense, sinks quickly
Beautiful two-tone coloring
Long-lasting in the tank
Cons
Heavy tannin producer
Requires extended soaking before use
7. Koyal Wholesale California Driftwood
California driftwood is the budget option on this list, and it shows in both price and consistency. Pieces vary significantly in shape, size, and quality because it’s sold as natural collected wood without the same curation as specialty aquarium driftwood. For a beginner tank where the goal is natural decor at low cost, it’s workable. For an aquascape where every element is intentional, the variability is a problem. Soak thoroughly and inspect for any signs of rot before use.
Pros
Very affordable
Natural look
Works for basic community tank setups
Cons
Significant piece-to-piece variability
Less consistent quality than specialty options
8. Hamiledyi Driftwood
Hamiledyi is another budget-tier option sold primarily on Amazon, available in various sizes. Quality control is inconsistent, and the wood is softer than hardwood specialty options, meaning it breaks down faster over time. For a short-term setup, a quarantine tank, or a tank where cost is the only constraint, it does the job. Don’t expect it to look the same in two years as it does today.
Pros
Cheap and widely available
Multiple sizes
Cons
Softer wood, breaks down faster
Inconsistent quality
9. NilocG Cholla Wood
Cholla wood is in a category by itself. It’s not a traditional driftwood type: it’s the dried skeleton of a cholla cactus, which gives it a hollow, tubular structure that no other wood on this list has. Shrimp go absolutely crazy for it. The hollow interior gives them shelter and a surface covered in biofilm to graze. It does break down faster than hardwoods, typically within 6 to 12 months depending on tank conditions. Plan to replace it. In a shrimp tank, that’s a trade-off most shrimp keepers accept without hesitation.
Pros
Best option specifically for shrimp tanks
Hollow structure provides shelter
Excellent biofilm surface
Cons
Breaks down in 6 to 12 months
Not a long-term centerpiece option
BUY OR SKIP?
Buy if: You want natural structure and a platform for low-light plants, you’re building a blackwater or biotope setup where tannins are a feature rather than a problem, or you’re running a shrimp tank where surface biofilm matters. Skip if: Your fish require hard, alkaline water and any pH drop would stress them, or your tank is already established and you don’t want to manage the tannin leaching period. For African cichlid tanks or goldfish tanks: don’t use it without very thorough preparation.
Should You Add Driftwood?
Good Fit If:
You keep soft, acidic water fish: tetras, bettas, discus, apistogrammas, or wild-type South American species
You’re running a planted tank and need anchor points for Java fern, Anubias, or mosses
You’re keeping a shrimp colony that needs hiding spots and biofilm grazing surface
You want to build a natural-looking aquascape with visual depth
Avoid If:
Your fish require hard, alkaline water and pH stability is critical
You’re not prepared to soak the wood properly before adding it to the tank
Your tank is brand new and still cycling: adding tannin load to a cycling tank complicates the process
MARK’S TOP PICK
Manzanita for most freshwater tanks. It’s the best combination of low tannins, good structure for plant attachment, long-term durability, and visual impact at multiple tank scales. For shrimp tanks, add Cholla Wood alongside whatever hardscape you choose. For large showpiece tanks where you want a dramatic centerpiece, Tigerwood in a showpiece size. For nano tanks under 10 gallons, Spiderwood every time.
WHAT MOST PEOPLE MISS
White fuzzy mold on new driftwood is normal and harmless. It’s a biofilm that develops when new organic material enters the tank, and fish and shrimp will eat it on their own. The instinct is to panic-remove the wood and scrub it, which does nothing except stress your fish and reset the process. Leave it. It resolves within a week or two in most tanks. If you want to speed it up, a few otocinclus or nerite snails will clean it up faster than any intervention you’d try manually.
Closing Thoughts
Driftwood is one of the best investments you can make in a freshwater aquarium. It gives fish shelter and territory, gives plants a natural anchor, and gives the tank a visual depth that artificial decor simply cannot replicate. The key is matching the wood type to your fish and their water chemistry needs, soaking it properly before it goes in, and understanding that tannins are a feature in some tanks and a problem in others.
My pick for most setups: Manzanita. Soak it for a week minimum, rinse it, and it’ll serve your tank for years. For shrimp tanks, add Cholla Wood. For nano builds, Spiderwood.
For quality fish that deserve a natural environment, I consistently recommend Flip Aquatics and Dan’s Fish. Good livestock in a well-built tank makes every piece of driftwood worth it.
After 25 years setting up freshwater aquariums and managing fish stores, the rock question trips people up constantly. Most hobbyists pick rocks based on looks. That is the wrong approach. Chemistry comes first. If the rock raises pH and hardness, it will work against every plant and soft-water fish in the tank. I have seen beautiful Seiryu-style aquascapes fail because the keeper did not test their water first. At one store I managed, we had a 75-gallon planted display tank that ran stable at pH 7.0 for months. A customer donated several large pieces of what turned out to be limestone. Within two weeks the pH had climbed to 7.6 and the CO2 injection was fighting a losing battle. We pulled the rocks, did a water change, and it came back down. Know your rock before it goes in the tank.
Rock selection shapes your aquarium more than almost any other decision. Pick the wrong rock and your pH creeps up week after week, your plants stop growing, and your soft-water fish start showing stress. Pick the right one and the entire scape looks intentional and the chemistry stays stable. After 25 years in this hobby, including time running fish stores, I have seen both outcomes plenty of times. This guide gives you the straight answer on which rocks work, which ones will quietly wreck your water chemistry, and which is right for your specific setup.
The number one mistake: choosing a rock based on appearance without knowing how it affects your water.
WHY THIS RANKING
Every rock on this list was evaluated against three criteria: chemistry impact (does it alter pH or hardness?), practical availability for aquarists, and real-world performance in freshwater setups. Rocks are split by use case: planted tanks, general freshwater, and African cichlid setups. A rock ranked highly for planted tanks would be a disaster in an African cichlid build, so the context matters.
What People Get Wrong About Aquarium Rocks
Most people assume any rock from a garden center or river is fine for a fish tank. It is not. Rocks containing calcium carbonate will dissolve slowly and raise both pH and hardness, sometimes dramatically. In a planted tank aiming for pH 6.8 to 7.0, a chunk of limestone can push you to 7.8 or higher within weeks. Your plants stall, your tetras and rasboras get stressed, and the problem is hard to diagnose because the water still looks clear.
The other common error: thinking all rocks are either safe or unsafe. The reality is more useful than that. Some rocks raise pH on purpose and that is exactly what African cichlid keepers want. Knowing what a rock does is what matters.
This is not just hobbyist observation. Research on aquarium water chemistry and carbonate dissolution rates consistently shows that calcium carbonate-bearing rocks produce measurable pH and hardness increases within days to weeks of submersion, depending on surface area and tank volume. A 2019 study published in Aquaculture Reports confirmed that limestone additions to soft-water systems can raise pH by 0.5 to 1.2 units within 48 hours. For a planted tank or soft-water community setup, that shift is significant.
What to Look For When Purchasing A Rock for a Freshwater Aquarium
In general, the vast majority of freshwater fish and plants prefer softer water and lower pH. Knowing this fact, we want to avoid rocks that are high in calcium. Rocks high in calcium will alter the water chemistry of our aquarium. It will result in our water becoming hard. They also will alter the pH of the aquarium making our aquarium alkaline in nature. That is great for African Cichlids and Saltwater Tanks, but will be disastrous for most tropical fish we can purchase.
We need to break down rocks further to understand what makes a good freshwater aquarium rock. Let’s dive into the types of rocks.
The Three TypesFor Your Tank
We can separate freshwater aquarium rocks into three categories: igneous, sedimentary, and metamorphic rocks.
Igneous
Igneous rock is any type of crystalline or glassy rock. These are formed by the cooling and solidification of molten earth material. Aquarium rocks in our trade of this type would include dolerite, gabbro, granite, basalt, and lava rock.
Sedimentary
Sedimentary rock are rocks that are formed by the accumulation or deposition of small particles and subsequent cementation. Aquarium rocks in our trade of this type would include marl, limestone, sandstone, breccia, conglomerate, and shale.
Metamorphic
Metamorphic rocks arise from the transformation of existing rock types. The original rock form was subjected to heat and pressure which cause physical or chemical change. Aquarium rocks in our trade of this type would include quartzite, dolomite, marble, schist, slate, and hornfels.
They Can Alter Chemistry
Now that I explained the types of rocks, let’s talk about the aquariums rocks that can alter the chemistry of our tanks. We can separate them into two types.
Aquarium Rocks that lower pH and soften water
Aquarium Rocks that increase pH and harden water
If we are looking to lower pH and soften our water, we want to use aquarium rocks like sandstone and basalt. If we are looking to increase pH and harden our water, we want to use aquarium rocks like marble and limestone
There are also rocks that serve functions with planted aquariums. For example, lava rocks can be used to fertilize aquatics plants. Granite is one of the safest rocks to use in an aquarium due to its neutral nature. It is also one of the heaviest.
Should You Buy Rocks For Your Aquarium?
Good fit if:
You are building a planted tank or Iwagumi-style aquascape and want a focal point
You keep African cichlids and need pH buffering from limestone
You want natural hiding spots for bottom-dwelling or territorial fish
You understand how to test your water and will monitor chemistry after adding rocks
Avoid if:
You keep soft-water species like discus or wild-type cardinal tetras and do not want to test water frequently
You are buying rocks from a garden center without knowing their mineral content
You want to add rocks from a river or local source without researching rock type first
BUY OR SKIP?
Buy aquarium rocks if you care about the long-term look and chemistry of your tank. Skip the cheap garden-store options and go with proven aquarium-grade sources. The rock matters more than most people realize, and getting it wrong creates ongoing water chemistry problems that are genuinely frustrating to diagnose and fix.
9 That Are Safe For Fresh Tanks
Now that we have a base understanding of rocks for freshwater aquariums, it’s time to talk about the best ones to buy. Below is a recommended list of the best freshwater aquarium rocks you can purchase online. I’ll go in more detail in my reviews of each.
Ohko Dragon Stone is one of the preferred aquarium rocks to use in Iwagumi Aquascapes. These rocks are not only beautiful, they are also natural in nature. They will not alter your pH or hardness being granite based. They will look fantastic in any planted tank setup. They are full of holes, nooks and crannies making them very good rocks for natural shelter for your fish.
These are the hot rocks for pro aquascaping projects these days. Check out the video above from BucePlant to see how amazing they look. Like any preferred aquascaper rock, they do have a higher price tag.
Pros
Rocks do not alter pH or hardness
Great looking rocks
Lots of sizes available
Cons
Price
Best For – Planted Tanks
MARK’S TOP PICK
Ohko Dragon Stone is my go-to for planted tanks. It is granite-based so it will not budge your pH or hardness, and the irregular shapes and deep crevices photograph better than any other rock in this category. If budget is tight, Black Lava Rock from BucePlant is the closest alternative that delivers on both chemistry safety and visual texture without the premium price.
2. Black Mountain Seiryu Stone – Best Value In Unique-Looking Stones
If you are looking for a unique looking aquarium rock, check out Black Mountain Seiryu Stone. The unique white veins really pop in an aquascape. They will not alter your pH or hardness so you can add them to any aquarium setup. These rocks are hard to find so be on the look out if you like them and want to buy one. The great thing from buying from our link is that Buce sells super high quality Black Seiryu and in packs up to 30lbs!
Quality lava rock is hard to find online. It’s pretty common to see listings of lava rock being used as biomedia or fireplaces. This makes sense given they are great for housing beneficial bacteria and are great stones for fire places. This does limit what you can buy on online though.
When it comes to aquarium lava rock these Black Lava Rocks by BucePlant are exactly what we are looking for. These are large rocks with unique shapes unlike what you will find at most pet stores. If you are looking to quality lava rock, check out their store and selection.
If you want a pro quality aquascaping rock, but the Ohko is out of your budget, I would highly recommend Buce Seiryu Rock. Seiryu is the godfather of all aquascaping rocks. These are hand picked stones from Buce. With their excellent customer service and high quality reviews, you can’t go wrong with them!
You will not be disappointed in going with them! Great details and texture comes with these rocks.
Pros
Great rock specimens
Great reviews and testimonials
Hand picked stones
Cons
Price
Best For – Planted Tanks
5. BucePlant WYSIWYG Stones – For the Pro Aquascapers
We start off this list with high end aquarium rocks. These rocks offered by BucePlant are what we call in the industry What You See Is What You Get (WYSIWYG) rocks. This seller lists individual rocks or sets of rocks for you to purchase and you get the exact rocks in the picture. This is the best way to get large aquarium rocks for aquascapes if you are looking to do big projects.
In my mind, WYSIWYG vendors are the sellers to go to if you are looking for a large display stone. These are excellent for planted tanks and highly recommended if they are within your budget.
Pros
You get exactly what you see in the photo (WYSIWYG)
Large aquarium rocks available
High quality rocks
Cons
Limited quantities
Expensive
Best For – Planted Tanks
6. Lifegard Aquatics Redwood Petrified Stone – Made For You Aquascape Sets!
Are you looking for a done for you aquascape set? If so, the Lifegard Aquatics Petrified Wood Sets are right up your ally. These aquarium rocks are sold in packages for specific tank sizes. All you do is order the place for your aquarium and you are good to go. No need to guess or pick rocks. These sets use pertified wood instead of stone. As a result, the look is very unique for your aquascape.
Lifegard also offers another variant called the Klondike Petrified Stone set if you are looking for a different shade or color. I love these sets for first time aquascapers. It is wood versus stone, which may bother a purist, but not a problem for a newcomer. The price is pretty reasonable as well!
Pros
Will not alter pH or hardness
Done for you sets
Unique look
Cons
It’s wood versus stone – some purists may not be fans
Best For – Planted Tanks
7. Penn-Plax Deco-Replicas Ornament Series – Great for Territorial Fish
Penn-Plax Deco-Replicas Ornament Series are resin ornaments that resemble natural granite. They are great for territorial fish like cichlids. Each aquarium rock acts like an individual home or condo for your fish. Because they are resin based, so they do not affect your water chemistry and are very easy to clean due their smooth outer surface. They are also very easy to stack and create a community of homes.
The thing I do not like with these rocks is they are rough on the inside. This is due to their resin makeup. The resin has been smoothed out on the outside but not on the inside. This leads to rough and sharp edges inside the structure. This does not make them safe for delicate species like Betta Fish. You can make them smooth with a file, but given their price point it’s probably better to look at another product if you have delicate fish.
Pros
Cheap
Easy to clean
Great for territorial fish
Cons
Rough on the inside – not safe for delicate fish like Bettas
Best For – Cichlids
8. Small World Slate & Stone – Slate for a Great Price
These Slate Aquarium Rocks by Small World are an amazing deal. The product pictured above is the 5-7 inch stone sets. These are high-quality slate pieces sourced from the USA. Small World Slate and Stone is a small family-run business and its customer service is top-notch.
Slate will not alter your pH or hardness. They are great for Aquascaping and for creating caves and structures. They are also great for reptiles since they hold heat well. Slate is one of the most popular stones for garden and pond hardscaping.
Slate is easy to break or crack. Be very careful with handling the stones as they can chip easily.
If you own African Cichlids, these limestone rocks are perfect for them. Texas Holey Rock has several benefits for African Cichlids. Being made of calcium carbonate, these rocks buffer pH and hardness, which solves your aquarium water chemistry issues with Africans. The holes are great for shelter and curb aggressively in your freshwater tank.
These rocks are sourced locally in Austin, Texas. The team selects these rocks to take care to find quality specimens for aquarium usage. The Company was built by a Cichlid tank owner who understands the need for quality hardscaping.
Given their limestone makeup, these rocks are only appropriate for fish that need a higher pH or hard water. The white appearance is also not for everyone. You can mitigate the white look by using low-light aquarium plants like Java Fern, and Java Moss which easily attach to these rocks.
Pros
Buffers pH and hardness for African Cichlids
Hand picked selection
Holes are great for shelter
Cons
White appearance is not for everyone
Only for fish that need hard water and higher pH
Best For – African Cichlids
WHAT MOST PEOPLE MISS
Traditional Seiryu Stone is popular for good reason, but it does raise pH and hardness gradually. That is not a problem in every tank, but in a planted setup targeting soft, slightly acidic water it will work against you. If you love the look of Seiryu but need chemistry-neutral rock, Black Mountain Seiryu Stone gives you a nearly identical aesthetic without the pH consequences. It is a direct swap that most people overlook.
Our Expert Pick
I listed a number of aquarium rock selections. Which one is best for you? I’m going to split these in several categories and explain.
The safest rocks are ones you can purchase at a pet store, local fish store, or online. That being said, the best rocks to use are Ohko dragon stone, Seiryu Stone, and Lava Rock. You can also use rocks like slate for building levels and Holey Rock for setups that require hard water or higher pH.
Can You Put Any Kind In A Fish Tank?
No. You cannot just put any rock in a fish tank. Some rocks will alter the chemistry of the water like its pH or hardness, which can have negative effects on your fish and plants. Rocks collected from outside or rivers may also contain organic material, which may die off and cause ammonia spikes. It’s best to purchase your rocks from a reputable pet store whether in person or online.
Can Live Stones Be Used In Fresh Tanks?
No. Live rock is rock that is either pulled from the oceans or grown aquaculturally to be used in saltwater tanks. They contain saltwater bacteria and organisms, which would die off if placed in a freshwater tank.
Which Ones Raise the pH in the Tank?
Rocks that are made of calcium carbonate like limestone will raise the pH in an aquarium. These rocks are ideal for fish that prefer higher pH and hard water like African Cichlids.
Closing Thoughts
The right rock makes or breaks a freshwater aquarium. Get the chemistry match wrong and you are fighting your water parameters for the life of that tank. Get it right, and the rock becomes a natural anchor point that the whole layout builds around.
For planted tanks, Ohko Dragon Stone is my top pick. It does not touch your pH or hardness, and the shapes are genuinely impressive. For African cichlid setups, Texas Holey Rock handles the water chemistry work and provides the cave structure those fish need. If budget is the priority, Black Lava Rock from BucePlant is chemistry-safe, functional, and far better looking than fireplace lava rock from a hardware store.
If you want to explore where to source quality aquascaping rock alongside live plants and hardscape, Flip Aquatics and Dan’s Fish are both reputable options worth checking out for your overall tank build.
🌿 Want to learn more? This article is part of our complete Planted Tank & Aquascaping Guide. your ultimate resource for aquarium plants, aquascaping styles, substrates, and more.
Rimless aquariums are something I genuinely love. The clean, borderless look transforms a fish tank into living art, and it’s the aesthetic I gravitate toward for serious aquascaping builds. The difference between a rimless and a standard braced tank is immediately obvious: you get an unobstructed view from every angle, which makes a dramatic difference in how planted tanks and reef setups look and feel.
But rimless tanks are not for everyone. Splash, evaporation, structural requirements, and the premium price of quality glass are all real considerations that most buyers skip over. Get this decision right and you’ll have a tank you’re proud of for years. Get it wrong and you’ll spend money fixing a mistake.
What People Get Wrong About Rimless Aquariums
The biggest misconception is that a rimless tank is just a standard tank without the plastic frame. It’s not. Rimless tanks use the direct injection silicone method, where the silicone is pressed into the joint and the glass is squeezed together under pressure. This method requires precision. Done correctly, you get a clean edge with no silicone overflow. Done poorly, you get a tank that may look fine at first but develops leaks under sustained water pressure.
The second misconception: any rimless tank works on any stand. It doesn’t. A rimless tank requires full bottom support across the entire footprint. Place one on a standard budget aquarium stand (the particle board stands with a center support beam and hollow sides) and the tank bottom will crack from the unsupported water weight. This is a critical safety issue, not a style preference.
Third: buyers assume rimless means “maintenance-free.” The open top design increases evaporation significantly, especially in saltwater systems. For a reef tank, you need a reliable auto top-off system or you’re topping off daily. In a planted freshwater tank, evaporation can drop your water level noticeably between maintenance days.
The Biggest Mistake Rimless Tank Buyers Make
Buying the cheapest rimless tank available. Silicone joint quality is everything on a rimless build. I’ve seen low-cost generic rimless tanks arrive with visible gaps in the joint work, uneven silicone application, and glass thickness below what’s appropriate for the tank’s volume. A 20-gallon rimless tank holds a lot of water weight. The silicone joints are the only thing holding it together. This is not the place to save $50.
EXPERT TAKE | MARK VALDERRAMA
After working with rimless tanks of various sizes and brands for years, here’s what I know for certain: UNS makes the best pure rimless tank for planted freshwater setups. Full stop. The German engineering, the 45-degree mitered edges, the Diamant glass clarity, nothing else touches it for an aquascaping build. For reef tanks, Waterbox has outpaced Red Sea with their plumbing design and sump quality. Red Sea created the ready-to-run reef tank category, but Waterbox refined it. If you’re new to rimless tanks and want to start without drilling or building a sump, the Fluval EVO and the JBJ Flat Panel are both solid entry points. Just understand their limitations before you buy.
What to Look for When Buying a Rimless Aquarium
Know your goals before you shop. A rimless tank for planted freshwater is a completely different purchase than a rimless reef-ready system. Here’s what I evaluate:
Quality: Glass thickness, silicone joint consistency, and low iron glass clarity
Features and Accessories: What’s included (filtration, lighting, stand) and what the brand’s ecosystem offers for upgrades
Brand Track Record: Service support, shipping reliability, warranty
Price vs. Long-term Value: Not just upfront cost, but the cost of mistakes
WHY THIS RANKING
These tanks are ranked on glass quality and construction method, brand reliability (packaging, shipping, warranty), ecosystem depth (accessories, furniture, upgrade options), and suitability for their stated application. Price is factored in at the category level: the best planted tank choice is different from the best reef-ready choice, and each is ranked within its context.
The Candidates
In a hurry? For a freshwater rimless aquarium I recommend UNS Systems. For a saltwater rimless aquarium I recommend Waterbox.
If I’m evaluating this from a pure rimless tank standpoint, Ultum Nature Systems is in a category of their own. German engineering, 45-degree precision mitered edges, and 91% Diamant glass with true low iron clarity. When you put a UNS tank next to any other rimless tank at the same size, the difference in glass clarity is visible immediately. This is what low iron glass looks like when done correctly.
UNS ships their larger tanks in crates, not just boxes. I’ve seen enough cracked aquariums arrive from careless shipping to appreciate this. The furniture options are high-end professional cabinets built to fit flush with the tank’s footprint. No hunting for a stand that “almost fits.” Everything is designed as a system.
Two limitations worth knowing: UNS focuses on freshwater, so they don’t offer reef-ready drilling. And they’re not cheap. But for an aquascaping build where the visual quality of the glass matters, nothing on this list touches them. See the full UNS Aquarium Review.
Pros: Best glass clarity available, mitered edges, excellent furniture system, professional crate shipping
Cons: Freshwater only (no reef-ready option), premium price
Waterbox delivers the best value in reef-ready rimless tanks. Their Platinum Reef Plumbing system uses a true BeanAnimal overflow (the reef standard), colored PVC for easy identification, and unions throughout for maintenance access. Their rimless glass sumps are multi-stage designs. This is the most complete plumbing system you’ll find in a ready-to-run reef tank.
Waterbox has also expanded into freshwater with their Clear models, though availability has been limited at launch. For reef applications, they’ve clearly separated themselves from the competition. I’ve felt for years that Waterbox had better designs than Red Sea; their V3 updates haven’t changed that assessment. See the full Waterbox Aquariums review.
Pros: Best plumbing system available, BeanAnimal overflow, excellent rimless glass sump, now available in freshwater versions
Cons: Premium price, freshwater Clear models have limited availability
The Landen rimless aquarium is the budget option for freshwater planted builds. Low iron glass, available in multiple sizes, and known for packaging that protects the tank during shipping. It’s a bare-bones tank without furniture or filtration, which makes it ideal for aquascapers who already have their equipment preferences and just need quality glass. At a lower price than UNS, it’s the entry point for serious planted tank setups.
The Current USA Serene is the first serious all-in-one freshwater rimless system I’ve seen that actually gets the package right. The 48x18x18 inch low iron glass tank comes with a frosted background pre-installed (the white background aquascapers love), an included backlight, OASE canister filter, Hydor inline heater, and a solid wood reclaimed wood finish cabinet. Current also offers professional aquascape bundles designed to be installed directly in the tank.
There’s a gap in the market for a planted-tank-optimized variant (better lighting, CO2 compatibility), and this tank is on the expensive side. But for someone who wants a turnkey freshwater rimless setup, nothing on this list offers as complete a package. See the video for the cabinet quality:
The Fluval Sea Evo is the official tank of Biota’s sustainable reef kits, which tells you something about its position in the market. It’s a beginner-friendly nano reef rimless tank that comes complete: LED lighting integrated into the cover, adequate filtration chambers, and a return pump strong enough for low-light corals and small reef fish. The peninsula-style design gives you viewing from three sides.
Know its limits: this is a low-light coral tank. Don’t try to push SPS corals in it. The integrated cover traps heat, which is a real concern in warm climates without good AC coverage. Fitting a nano protein skimmer in the chambers requires some creativity. But for a first reef tank where you want something that looks clean and works out of the box, this is a strong entry point.
Pros: Complete package, peninsula viewing, beginner-friendly, good price
Cons: Heat management issues in warm climates, light not powerful enough for demanding corals, limited skimmer space
The JBJ Rimless Flat Panel is my recommendation for a first saltwater reef aquarium. The 36×24 inch footprint is the sweet spot for reef aquascaping: enough length for territorial fish, enough depth for interesting rockwork and coral placement, and a width that works with standard lighting footprints. At 65 gallons, you have room to build a real reef without the complexity of a large sump system.
The AIO design makes it accessible for beginners: large enough bays to house an auto top-off and even a small protein skimmer. The cabinet is included, which makes the price look high but is actually reasonable when compared to pricing a tank, stand, and plumbing separately. The cabinet quality isn’t premium, but it functions.
Pros: Ideal dimensions, cabinet included, great volume for first reef, accessible bays
Cons: Cabinet construction is average quality, still expensive for some budgets
Innovative Marine’s Lagoon is a well-engineered nano reef AIO. The filtration chamber is excellent with media chamber options, a DC return pump with dual outlets for flow tuning, and mesh screen lids standard. IM has a full ecosystem of compatible accessories (skimmers, media reactors, wavemakers) sized specifically for Nuvo tanks, which means equipment fit is never a guessing game.
The one complaint: the tank height is only 12 inches. That limits your aquascape depth and coral height options. A 16-inch height would make this tank significantly better as a display system. At current pricing, it’s on the high end, but the IM brand quality and accessory ecosystem justify it for dedicated nano reef keepers.
Pros: DC return pump, excellent filtration chamber, full IM accessory ecosystem, mesh screen lids
The NUVO 40 EXT solves a real problem: you want a sump-connected reef tank but don’t want to drill glass. The EXT design uses a built-in external overflow that connects to the back of the tank without taking up interior display space. No drilling, no external overflow boxes with their associated leak risks. The overflow connects to a sump below.
The tradeoff is a Durso overflow rather than a full BeanAnimal. A Durso is simpler but not as quiet or reliable under full flow conditions. Still, for a beginner who wants a sumped reef without the complexity of drilling or wrestling with hang-on overflow boxes, this is the best available solution.
Pros: Built-in overflow without drilling, clean interior for aquascaping, no hang-on overflow leak risks
Cons: Durso vs BeanAnimal design, more expensive than DIY drilled setups
The Lifegard Crystal offers a hard-to-beat price for an ultra low iron glass AIO rimless tank. The included return pump is stronger than most entry-level AIO tanks, though you’ll likely need to dial it down for planted setups. The main weakness is the included biological media: bio balls are an outdated choice in 2026. Plan to replace them with proper bio media. But for the price, the glass quality and pump strength make this a legitimate contender.
The Red Sea Reefer created the modern ready-to-run reef tank category. Before the Reefer, you built your own system from scratch. Red Sea changed that. The V3 refresh improves the sump design (now adjustable and using colored PVC), and they’ve kept the BeanAnimal overflow that made the original so reliable. The Reefer community is enormous, which means advice, modifications, and upgrades are easy to find.
My honest assessment: Waterbox now edges out Red Sea on overall system quality and plumbing design. But Red Sea’s brand strength, community, and long track record give it a real advantage for buyers who want the support network that comes with the most widely adopted reef system on the market. Read the full Red Sea Reefer Review.
The SCA 66 gallon rimless cube is STARFIRE low iron glass with 24 inches of depth and width. For reef aquascaping, 24 inches of working depth is genuinely ideal. SC Aquariums builds quality Durso overflows and offers complete packages with sump and protein skimmer included. I’ve known many long-term reefers who built incredible display tanks around SCA systems and still swear by them. The price-to-quality ratio for a reef-ready cube is hard to match.
Pros: STARFIRE glass, 24-inch depth and width, complete packages available, great reef-ready value
Cons: PnP stand is lower quality, Durso overflow vs BeanAnimal
Best For: Reef tanks
BUY OR SKIP?
Buy a rimless aquarium if: Aesthetics are important to you and you’re planning a serious planted tank or reef build, you want open-top gas exchange, you’re building a display tank where the visual presentation matters, or you’re keeping corals and want to eliminate salt creep on frame bracing. Skip if: You’re new to the hobby and haven’t kept a standard tank yet (learn maintenance habits first), you have small children or pets who may interact with an open-top tank, or your setup location isn’t on a fully supportive flat surface.
MARK’S TOP PICK
For freshwater planted tanks: UNS Ultra Clear Tanks. Nothing else competes on glass quality for aquascaping. For saltwater reef tanks: Waterbox Aquariums. The best plumbing system and sump design in a ready-to-run reef package. If you’re choosing between Waterbox and Red Sea: choose Waterbox for build quality, choose Red Sea if you want the largest community and most accessible advice network.
WHAT MOST PEOPLE MISS
The Current USA Serene gets overlooked because it’s marketed primarily as a freshwater system, and most premium rimless tank discussions focus on reef applications. But the Serene is the only turnkey freshwater rimless package on this list that includes a backlight, a professional cabinet, an inline heater, and a canister filter, plus optional professional aquascape bundles. For a freshwater hobbyist who wants the clean rimless look without building the system from scratch, there’s nothing comparable. It’s genuinely underrated in its category.
Expert Picks by Category
Best Rimless Aquarium for Planted Tanks:UNS Aquariums
A rimless aquarium is a fish tank built without plastic bracing. Standard aquariums are siliconed together and then reinforced with plastic frames at the top and bottom. Rimless tanks use the direct injection method instead: silicone is pressed directly into the joint and the glass is compressed together under precision pressure. The result is a clean edge with no silicone overflow and no plastic border interrupting your view.
Traditional vs. Low Iron Glass
Most rimless tanks are built from low iron glass, sold under various names (Starfire, Ultra Clear, Diamant). Low iron glass removes the green tint that standard glass produces. In small tanks the difference is subtle. In a 100-gallon tank, the difference between low iron and standard glass is visually dramatic. For reef and aquascaping applications where you’re viewing the tank from multiple angles, low iron glass is worth the cost premium.
Types of Rimless Aquariums
Bare Bones
Just the glass tank. No filtration, no overflow, no equipment. These are for planted tank builds and aquascaping, where the hobbyist is sourcing their own canister filter, CO2 system, and lighting. You get a clear background and complete control over your setup. Best paired with a canister filter for invisible external filtration.
All-In-One
AIO rimless tanks include a filtration chamber built into the back or side of the display. The chamber holds filter media and has a return pump. These are the most common entry point for reef and saltwater hobbyists: easier to set up than a sump system, cleaner than running external hang-on equipment, and more beginner-accessible than drilled systems.
Reef Ready
Reef-ready tanks are drilled at the bottom with a built-in overflow for sump connection. High-end versions use BeanAnimal overflows (quiet, reliable, redundant). These tanks are designed for serious reef builds with dedicated sump filtration, protein skimmers, refugiums, and full automation. They require more planning but offer the most control over your system.
Tips and Tricks for Rimless Tank Owners
Full Bottom Support Is Not Optional
A rimless aquarium cannot sit on a budget particle board stand with hollow sides and a center support beam. The tank requires full contact support across the entire bottom footprint. Place it on the wrong stand and the unsupported bottom will crack under water weight. Most rimless tanks ship with a self-leveling mat. Use it. If yours didn’t include one, buy one.
Match Your Lighting to the Look
A bulky, ugly LED fixture on a rimless tank defeats the purpose. Either mount a slim-profile reef or planted LED on the rim, or hang the fixture from above. The visual impact of a properly lit rimless tank is worth investing in the right light. For saltwater: a quality reef LED. For freshwater: a planted LED that supports your plant spectrum requirements.
Plan for Evaporation
Open-top rimless tanks evaporate more than covered tanks, especially in warm environments. For saltwater: an auto top-off system is essentially required. For freshwater: monitor your water level weekly and top off with conditioned tap water or RODI as appropriate for your livestock.
FAQs
Are Rimless Aquariums More Fragile Than Standard Tanks?
A well-built rimless tank is not inherently more fragile than a standard tank when supported correctly. The silicone joint quality is critical. Cheap rimless tanks with poor silicone work are a risk. High-quality rimless tanks from proven brands are structurally sound. The key requirement: full bottom support. No partial support, no hollow-sided stands.
Do Rimless Aquariums Need a Special Stand?
Yes. The stand must provide full contact support across the entire tank footprint. Standard budget aquarium stands with center support beams and hollow sides are not appropriate. Purpose-built rimless stands, solid wood furniture, or heavy-duty steel stands with full support platforms are required.
What Is Low Iron Glass and Do I Need It?
Low iron glass removes the green tint from standard glass. For small tanks under 20 gallons, the difference is subtle. For tanks 40 gallons and up, it’s visually significant. For serious aquascaping or reef builds where aesthetics matter, low iron glass is worth the cost. For a utility freshwater tank, standard glass is fine.
UNS vs Waterbox: Which Is Better?
For different applications. UNS is the better tank for freshwater planted builds: superior glass quality, better aesthetic execution, and purpose-built for aquascaping. Waterbox is the better reef-ready system: superior plumbing, better sump design, and now expanding into freshwater. They’re not really competing for the same buyer.
Are Rimless Tanks Good for Beginners?
They can be, but I’d recommend getting experience with a standard tank first. Rimless tanks require proper support, more attention to evaporation, and higher investment in the right equipment to match the aesthetic. If you’re new to the hobby, start with a standard braced tank, get comfortable with maintenance routines, then upgrade to rimless when you know what you want.
Closing Thoughts
A rimless aquarium is one of the best investments you can make in how your tank looks and feels as a piece of your home. The clean borderless view, the open top, the clarity of low iron glass: it changes the way you experience the tank every day. But go in with your eyes open on the requirements. Full support, planned evaporation management, and quality glass from a proven brand are non-negotiable.
For planted freshwater: UNS is the answer. For reef-ready: Waterbox or Red Sea, depending on whether you prioritize system quality or community support. For a first reef at a reasonable price: JBJ Flat Panel or the SCA 66 gallon package.
Once you have your tank set up, source your livestock from reliable vendors. Flip Aquatics and Dan’s Fish are my go-to recommendations for healthy livestock delivered well.
Want to learn more? This article is part of our complete Aquarium Equipment & Gear Guide, your ultimate resource for filters, heaters, lights, pumps, tanks, and more.
A dedicated frag tank changes everything about how you approach coral keeping. Once you have one, you stop being a reef keeper and start being a coral grower. That’s a different mindset, and it’s one of the most satisfying transitions in the saltwater hobby.
I fragged my first coral years ago and immediately got hooked on the swap scene. Meeting up with local reef clubs, trading frags for species I’d never owned, building credit at the LFS for supplies and salt. A frag tank made all of that possible. It gave me a dedicated grow-out space that I could control independently of my display.
But most articles about frag tanks miss the single most important variable: tank height. Shallower is almost always better for fragging. Lower water depth means better light penetration to every frag, easier access without reaching into deep water, and faster daily maintenance. Most people pick a frag tank based on footprint. They should pick it based on water height first.
EXPERT TAKE | MARK VALDERRAMA
After years of running frag systems, my top advice to serious reefers is to look at Lo-Boy tanks: low-profile, wide-footprint aquariums purpose-built for frag work. The low height (typically 8 to 12 inches, or 20 to 30 cm) gives you direct access to every frag without arm-deep reaches, your lighting sits closer to the corals delivering higher PAR with less wattage, and the wide surface area gives you more rack real estate per gallon. If you’re just getting into fragging, the tanks listed below work great. If you’re growing frags at volume, calling on vendors, selling at swaps regularly, a Lo-Boy purpose-built setup changes how efficiently you can work. It’s not a luxury upgrade. It’s the right tool for the job.
What Is a Frag Tank?
A frag tank is a dedicated aquarium where coral frags are grown out. These corals come from your main display tank: you cut (frag) them and move them into the frag tank to heal and grow in a clean, controlled environment. The key advantages over keeping frags in your display are independent parameter control and pest isolation. If your frag tank gets a flatworm outbreak or a coral pest problem, it stays in the frag tank. Your display is protected.
What People Get Wrong About Frag Tanks
Most beginners assume any small reef tank works as a frag tank. It doesn’t. A standard all-in-one reef tank designed for a display prioritizes viewing angle and aesthetics. A proper frag tank prioritizes lighting efficiency, flow patterns, and access. The difference matters when you’re trying to grow corals, not just keep them alive. A tall display tank with a beautiful scaping job delivers poor PAR to the bottom where frags sit on racks. A shallow, wide frag tank with the light close overhead delivers consistent PAR across every frag plug with no shading from rockwork.
The Biggest Mistake
Connecting your frag tank to your display too early. An integrated system sounds appealing because it shares the stable parameters of a mature display. The problem: when (not if) you get a coral pest in your frag tank, it transfers to your display instantly. A coral pest outbreak in an integrated system means treating both tanks simultaneously, which is expensive and disruptive. Run your frag tank as a standalone system until you’ve established strong quarantine habits and are confident in your pest inspection routine.
BUY OR SKIP?
Buy a dedicated frag tank if: You’re actively fragging corals and running out of rack space in your display or sump, you want to sell or trade frags seriously, or you want to quarantine new coral arrivals before introducing them to your display.
Skip a dedicated frag tank if: You’re a casual reef keeper with one display tank and no plans to expand, or you haven’t yet mastered stable parameter maintenance in your display. Get the display dialed in first. The frag tank is a tool for serious growth, not a shortcut to a better reef.
Types of Frag Tank Setups
The Display Method
This is how most of us start. A magnetic coral rack in the display keeps frags visible and saves money. The problem is visual: racks in a display tank look cluttered and undermine the aesthetic you spent months building. If you have more than two racks in your display, you need a dedicated frag tank.
The Sump Method
A fourth chamber in your aquarium sump with a grow light overhead works and costs little if you have the space. The downside is access: sumps live in cabinets, which means bending down and working in tight quarters every time you handle your frags. Flow is also limited to what your overflow and return pump provide, with limited ability to customize the pattern for coral health.
The Integrated Frag Tank
A separate tank plumbed into your display shares stable parameters without requiring its own filtration system. Good stability. Bad pest containment. As mentioned above, an integrated system means one pest problem becomes two tank problems. Most advanced reefers eventually move away from integrated systems for this reason.
The Standalone Frag Tank
The right long-term answer. Separate filtration, independent parameters, total pest isolation. The standalone setup costs more and requires you to maintain stable water independently of your display, but it gives you maximum control and maximum protection. This is where serious fraggers eventually land, and the tanks reviewed below are all standalone-capable setups.
WHY THIS RANKING
I ranked these tanks on three dimensions that determine real-world frag tank performance: Frag Access (how easy it is to reach and work corals daily), Lighting Efficiency (how well the tank height and footprint deliver PAR to frag plugs), and System Integration (how cleanly it plumbs into a standalone or sump-based system). A tank that scores well on aesthetics but poorly on frag access doesn’t belong at the top of this list. I’m ranking for function, not looks.
My Recommendation for Hardcore Fraggers: Go Low
If you’re serious about frag volume, look into what the hobby calls a Lo-Boy tank: a low-profile, wide-footprint aquarium specifically built for frag work. The low height (typically 8 to 12 inches, or 20 to 30 cm) gives you direct access to every frag without reaching into deep water, your lighting sits closer to the corals, and the wide surface area gives you more rack real estate. The tanks listed below work great as starting points. But if you’re growing frags at scale, a Lo-Boy purpose-built setup is what I’d point you toward.
Purpose-built frag tank geometry. 12-inch depth, wide lagoon footprint, best light-to-frag distance of any AIO on this list. The right tool for serious frag work.
The Nuvo Fusion 25 Lagoon is the closest thing to a purpose-designed frag tank in the AIO market. The 12-inch (30 cm) water depth is the key feature. That shallow depth means your light sits close to every frag on the rack, delivering high PAR without needing an expensive high-wattage fixture. You can dial in flow easily with the dual DC return pump outlets, and you have room to work without submerging your arm to the shoulder to reach a plug on the bottom.
The ultra-clear glass gives you excellent coral color rendering for evaluating frag health and growth. The included mesh lid matters: wrasses are a common pest-control addition to frag tanks, and wrasses jump. This tank accounts for that. The only honest downside is price. It’s not cheap. But it’s purpose-built, and that shows in every dimension choice.
Best DIY frag tank conversion kit. Turns a cheap 20-gallon long (12 inches tall) into a functional AIO frag tank. Best system integration of any option on this list.
When people ask how to build a frag tank for as little money as possible, my answer is always the same: catch a dollar-per-gallon sale at a chain pet store, buy a 20-gallon long, and convert it with the Fiji Cube All-In-One Kit. The 20-gallon long is 30 inches (76 cm) in length and 12 inches (30 cm) tall, which puts it in the ideal shallow frag tank geometry. The Fiji Cube kit converts it into a back-compartment AIO system, hiding all your filtration equipment and giving you an unobstructed view of your corals. If you can find a 33-gallon long aquarium (48 inches, or 122 cm), the 20-gallon AIO kit fits that tank as well, giving you considerably more rack surface area for the same investment.
The included pump is underpowered. Add a wavemaker for proper coral flow, and budget for that upfront. The kit itself runs on the pricier side for what it is, but the combination of dollar-per-gallon tank plus Fiji Cube kit still undercuts any comparable pre-built frag tank at this size.
Good capacity AIO at an attractive price. Ultra-clear glass for display-quality clarity. Better for mixed coral display fragging than pure production volume.
Lifegard’s Crystal Aquarium is an ultra-clear glass AIO at an attractive price point. At 24 gallons with integrated back compartments, it’s a capable starter frag tank. The clarity is excellent for evaluating coral coloration and growth, which makes it particularly good if you’re keeping mixed coral types at different light demands rather than running a pure high-production frag setup.
The main limitation is the 16-inch (41 cm) tank height. That’s taller than ideal for pure frag work. Light has to travel further to reach bottom plugs, which means either more wattage in your LED or accepting lower PAR at the bottom of the rack. The included pump is calibrated for freshwater and lacks the flow intensity a reef frag system needs. Plan for a powerhead addition. Glass also means this tank doesn’t travel to frag swaps.
Modular Marine is a Texas-based acrylic and 3D-printed reef products maker with a long eBay track record. Their frag tanks are unique on this list because the overflow is external, which means the tank requires a sump connection to operate. That’s not a flaw, it’s a design choice for reefers running multiple frag tanks off one filtration system. If you’re building a frag farm with two or three tanks sharing a central sump, Modular Marine’s system is purpose-built for that architecture.
Pros
Acrylic construction, lightweight and portable
External overflow designed for multi-tank sump systems
LuckReef’s acrylic frag tanks come in multiple custom sizes with the low depth geometry that serious frag work requires. These are the tanks to buy when you’re heading to a frag swap: lightweight acrylic, correct shallow dimensions, attractive pricing. My personal experience with their eBay customer service has been consistently responsive. The bare-bones nature (no pump, no media included) keeps the price accessible but means you’re building the system yourself.
Pros
Low profile dimensions, correct frag geometry
Acrylic: lightweight for transport to swaps
Multiple size options, good pricing
Cons
Bare bones: no pump, media, or filtration included
eBay-only availability
MARK’S TOP PICK
The Nuvo Fusion 25 Lagoon is the clear pick if you have the budget. The 12-inch depth is purpose-built frag geometry and nothing on this list matches the light-to-coral distance efficiency. If budget is the constraint, the Fiji Cube kit plus a dollar-per-gallon 20-gallon long delivers comparable frag function at significantly less cost. For frag swap portability, LuckReef is the answer. For multi-tank sump systems, Modular Marine is the purpose-built option.
ASD Frag Tank Suitability Scores
I score each tank on three dimensions that determine real-world success for a dedicated frag setup, not just general reef use.
Nuvo Fusion 25 Lagoon: Frag Access 9/10 | Lighting Efficiency 9/10 | Integration 7/10 | ASD Overall: 8.7/10 The low-profile lagoon shape is purpose-built for frag work. Best light-to-frag distance of any AIO on this list.
Fiji Cube All-In-One Kit: Frag Access 8/10 | Lighting Efficiency 8/10 | Integration 9/10 | ASD Overall: 8.3/10 Best system integration of the AIO options. Pairs with cheap standard tanks for best overall value.
Lifegard Crystal Aquarium: Frag Access 7/10 | Lighting Efficiency 7/10 | Integration 8/10 | ASD Overall: 7.3/10 Rimless clarity is great for display fragging; less optimized for pure production at 16-inch depth.
Standard Lo-Boy (DIY): Frag Access 10/10 | Lighting Efficiency 10/10 | Integration 8/10 | ASD Overall: 9.3/10 If you’re serious about frag volume, nothing beats a custom lo-boy. 8 to 12-inch (20 to 30 cm) depth means every frag gets optimal light and you can reach every rack without difficulty.
ASD note: The single biggest variable most reviews ignore is tank height. For fragging specifically, shallower is almost always better. It reduces shading between frag racks, improves light penetration consistency, and makes daily maintenance significantly faster.
WHAT MOST PEOPLE MISS
Flow pattern matters as much as flow rate in a frag tank. Most new frag keepers add a powerhead and aim it across the tank, creating a single directional current. Corals on one side get direct flow; corals on the other get minimal circulation. For frag tanks, alternating flow or a wavemaker set to a gyre pattern delivers more consistent water movement to every frag plug on every rack position. This is why the Nuvo Lagoon’s dual return outlets matter: you can split the return flow to opposite ends of the tank, creating natural turbulence instead of a single directional current. Small detail, real difference in coral growth rates.
Frequently Asked Questions
Do I need a sump for a frag tank?
No. The AIO tanks on this list (Nuvo Lagoon, Fiji Cube Kit, Lifegard Crystal) run as standalone systems with internal filtration. A sump adds stability and filtration capacity, but it’s not required. The Modular Marine tanks are the exception: their external overflow design requires a sump connection.
What size frag tank do I need?
Bigger is more stable, but height matters more than footprint. A 20 to 30-gallon tank at 12 inches (30 cm) or less in height is the sweet spot for most reefers entering the frag tank category. More surface area means more rack positions. More height means worse light penetration and harder coral access.
What lighting works best for a frag tank?
Most reef LEDs designed for nano tanks work well in shallow frag tanks because the reduced water depth brings the light closer to the corals. A mid-range LED like the AI Prime or Kessil A80 covers a 20 to 25-gallon frag tank adequately. For higher production, two fixtures staggered to cover the full rack footprint gives you more consistent PAR across every position.
Can I put fish in my frag tank?
Small wrasses for pest control (six line, yellow coris) work well and serve a real function. Keep fish light. Heavy bioload in a small system creates ammonia spikes that damage corals. A wrasse or two for pest control is smart. A full fish community in a 25-gallon frag tank creates water quality problems.
How do I prevent coral pests in a frag tank?
Dip every coral before it enters the frag tank. No exceptions. A standard coral dip (Coral Rx, Revive, or similar) removes the majority of coral pests before they establish. Inspect frags under magnification before and after dipping. Flatworms and red bugs are the most common frag tank pests and both are visible if you look for them.
Closing Thoughts
A frag tank is where casual reef keeping becomes serious reef growing. The Nuvo Fusion 25 Lagoon is the best off-the-shelf option for reefers who want a purpose-built setup that doesn’t compromise on the dimensions that matter. The Fiji Cube kit paired with a cheap 20-gallon long is the best budget path to the same geometry. If you’re going to frag swaps, LuckReef’s portable acrylic tanks are built for exactly that use case.
For quality coral frags to start your frag tank with, check out Flip Aquatics and Dan’s Fish. Both ship quality livestock and are reliable sources I recommend for stocking a new frag system.