Tag: ReefKeeping

  • SPS Coral Types – An Intro To SPS Reefkeeping

    SPS Coral Types – An Intro To SPS Reefkeeping

    SPS corals were a turning point in my reef journey โ€” the moment I started keeping them successfully, I knew I’d reached a new level as a hobbyist. They demand stable parameters and consistent care, but the payoff is a reef that looks genuinely spectacular. If you’re thinking about making the jump from softies and LPS, this guide will help you understand what you’re getting into.

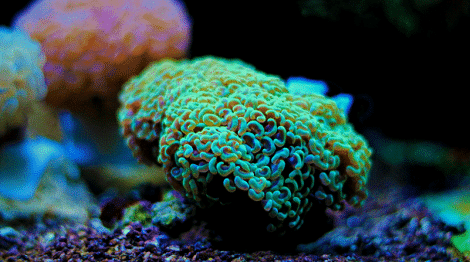
    Small polyp stony (SPS) corals are the end goal for many reef hobbyists. In the wild, these corals, like the impressive staghorn coral, define marine ecosystems and house a plethora of life on the reef. In the aquarium, they can bring the same color and depth to the tops of rockwork that other large polyp stony (LPS) corals and soft corals cannot.

    However, SPS corals are regarded as the most challenging species of coral to keep in the home aquarium setting. While it is true that they are more difficult than other types of common coral, they are not completely out of reach for more serious hobbyists.

    What Is The Difference Between Other Corals?

    SPS corals are easy to identify. They completely lack the fleshy, large colony quality that LPS and soft corals have. Instead, SPS corals have a hard branched or plated appearance with individual polyps.

    In the reef aquarium hobby, SPS are considered to be the most difficult species to keep, with LPS being for intermediate hobbyists, and soft corals being best for beginners. Apart from this, all three have very different anatomy and physiology.

    SPS Corals

    SPS corals, also known as hard corals, are responsible for building the natural reef. These animals excrete calcium carbonate skeletons that make structures for fish and invertebrates to find shelter; symbiotic zooxanthellae are also housed in these skeletons and complete photosynthesis which feeds the coral.

    Taxonomically, SPS corals belong to the Scleractinia order1. From there, they are members of the Hexocorallia subclass which means that their polyp symmetry is divisible by six. Such as they are named, they have very small polyps on the outside of their flesh-covered calcium carbonate skeleton.

    The calcium carbonate skeleton of SPS corals is built to withstand the battering from rough waves at the top of the reef where these corals are found. This also allows them to receive the most direct sunlight as their branches can grow for optimal exposure. This translates to a reef tank setting with the need for higher lighting and increased water flow.

    Soft and LPS Corals

    On the other hand, soft corals and LPS can be entirely fleshy, have a calcium carbonate skeleton, or contain sclerites, meaning they contain small pieces of hard internal structure; the main feature of soft corals and LPS corals though, is their very obvious polyps which can extend to impressive sizes.

    Some LPS corals do have a calcium carbonate skeleton, however, the polyps extend outwards and don’t cover all parts of the structure such as they do for SPS. Some soft corals may contain sclerites but are much less structured than LPS overall.

    Both LPS and soft corals are found lower down on the reef where the water current is not as strong and lighting is indirect. This translates into the aquarium with low to moderate lighting and moderate flow requirements for most species within these two categories.

    Keeping Them In The Aquarium

    SPS corals are notoriously known for being difficult to keep. But are they actually that much more demanding than other corals? Yes and no.

    Yes, SPS corals are much more demanding than soft corals and LPS corals, but this doesn’t necessarily mean that they’re all more difficult. The main difference is the setup and the maintenance: SPS corals need a high-tech setup and stable conditions while LPS corals and soft corals can adapt to less optimal conditions.

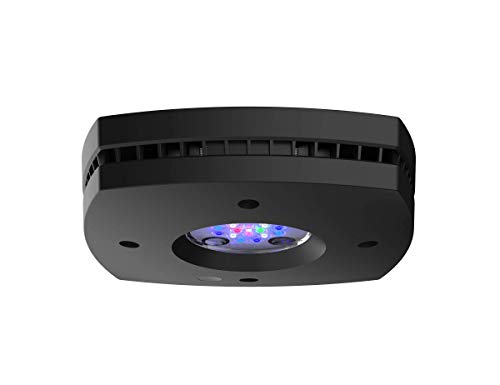
    A high-tech setup starts with good lighting, water flow, and filtration. SPS corals are some of the most light-demanding corals, and a good light fixture is necessary. This light needs to have a fully programmable spectrum, intensities, and photoperiod at the very least. The EcoTech Radion is a great example of an LED designed for the demands of an SPS tank.

    Used by World Wide Corals
    EcoTech Radion G5

    Editor’s Choice

    The newest Radion G5 is a massive update to the prior generation. It’s the light of choice for pro level reefers.

    Click For Best Price

    Water flow is almost, if not more, important than lighting. Water circulation keeps corals fed and prevents algae from taking over. Many SPS corals grow in tight colonies, which can cause dead zones in the densest parts. Water flow needs to be random in order to keep fresh water pushing past all areas of the colony at all times.

    Though some reef aquarium hobbyists run SPS-dominant reefs with simple filtration, it is usually also a must to have a sump system. Sumps allow for additional room for beneficial bacteria to grow, increased nutrient export, and adequate aeration. All of these factors play into a more stable system overall.

    Stability is arguably the most difficult part of keeping SPS. These corals are notorious for bleaching and eventually dying when conditions change too quickly. All major water parameters, along with alkalinity, calcium, magnesium, pH, salinity, and temperature all need to be constant for success.

    Many hobbyists regulate these parameters with digital monitors, auto top-offs, and doser pumps, even Calcium reactors for full high end systems. These all get get very expensive over time. However, if you’re willing to spend the money upfront for a top-of-the-line SPS system, then there is a good chance that you will succeed in keeping these corals. Of course, you may do everything right but still have problems.

    Water Parameters

    That being said, what are the perfect water parameters for an SPS reef tank?

    As always, these values can differ between tanks and hobbyists have had luck below and above the listed ranges; if your water parameters and tank conditions do not match these but your corals are healthy, do not attempt to change your system just to meet ‘ideal’ numbers.

    In general, though, these are the accepted ranges for keeping SPS corals:

    • Lighting – High (200+ PAR)
    • Flow Rate – High
    • Temperature Range – 76-82 F
    • pH Range – 8.0-8.4
    • Salinity – 1.025 and 35 PPTย 
    • Alkalinity – 8 dKH
    • Calcium Level – 350-450 PPM
    • Magnesium Level – 1200-1350 in PPM

    Note that many hobbyists keep SPS corals in lighting conditions well over 200 PAR, though this is considered to be the bare minimum for attempting them at all.

    Temperament In The Aquarium

    One of the good things about SPS is that they are not very aggressive corals. This allows multiple species to be housed very closely together without too many problems; this does not mean that they will not try to sting each other though, so it is always best to be cautious and to trim any corals that grow too close together.

    The main problem with SPS aggression is with other corals. LPS corals with long sweeper tentacles are very capable of stinging sessile SPS, which can quickly cause tissue loss and other damage. To prevent this, simply keep LPS away from SPS, possibly at another level of the tank.

    Though SPS is usually able to regrow once the problem has been addressed, this still gives time for algae to takeover exposed skeleton which can impact the overall health of the coral.

    What Is The Easiest Type To Keep?

    Though SPS corals are more difficult to keep than most corals, there are a few that are easier than others. This includes Montipora and species from the Pocilloporidae family.

    Frags of these corals are also usually cheap and easy to find, which can make the transition into keeping these corals a little less daunting.

    When Can You Add Them To The Aquarium?

    SPS corals need stability. The time for each reef aquarium to reach stability differs, but it is generally advised to not attempt keeping SPS corals until the system is at least one year old.

    This time should allow for water parameters to settle, algae blooms to be controlled, and new soft and LPS coral growth to begin. Also, keep in mind that some species of SPS might do better than others, and do not get discouraged if one species doesn’t grow at all in your tank; this may be temporary, or your system will simply not support that kind of coral.

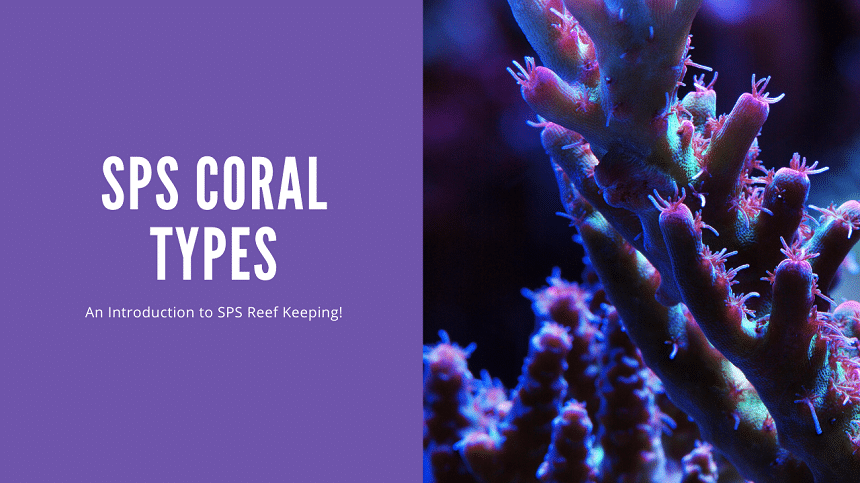
    Common Types (Different Species)

    SPS corals make up the ‘ideal reef’ that many envision when they think about a coral reef in the ocean; SPS are branching corals that give reefs their signature appearance. However, different species of SPS corals can be difficult to tell apart to the untrained eye. This could be due to a few reasons.

    One, SPS are usually sold as small frags, which can make exact identification nearly impossible with such a small sample. Secondly, species of SPS can vary greatly in color and shape across the genus; as we’ll see, Montipora especially can come in several formations.

    It should also be said that SPS-keeping is another level of the aquarium hobby. You will often come across corals that you have never seen before and might never see again. In general, it is best to know the general attributes of each major SPS genus and try to apply them to what you see.

    Montipora

    Montipora Cap Coral

    The Monti Cap coral is a good stepping stone to serious SPS reefkeeping. Becomes large and grows very fast

    Buy On eBay
    • Scientific Name: Montipora spp.
    • Difficulty Level: Easy-Moderate
    • Temperament: Not aggressive
    • PAR Requirements: Moderate (150 PAR)
    • Flow Requirements: Moderate-High
    • Placement: Middle, High
    • Origin: Indo-Pacific

    Montipora is a genus of SPS corals with very diverse members. These corals can come in branching, plating, and encrusting varieties in almost all colors. They are not overly demanding in regards to being an SPS coral, but they do require high lighting, good flow, and stable water parameters just as the other, more advanced corals on this list do.

    The most common types of Montipora to come across are Montipora digitata and plating Montipora.

    Montipora Varieties

    Montipora digitata is a branching variety of Montipora. The two most common colors are orange (‘Forest Fire Montipora digitata‘) and green (‘Green Montipora digitata‘); these corals have been modified to express the best colors and may be assigned a designer name.

    Montipora digitata have thicker branches that sometimes grow together to form antler-like structures. Their polyps are very concentrated and have a soft appearance. The tips of these branches will typically be bare and white where new skeleton growth is forming.

    In comparison, plating varieties, like Green Montipora digitata, grow outwards in large circular disks. Similarly, the tips of these plates will be white with new growth.

    All varieties of Montipora can be attractive to most hobbyists as they’re one of the easiest and fastest species of SPS to keep.

    Pocilloporidae Family

    • Scientific Name: Pocillopora spp., Seriatopora spp., and Stylophora spp.
    • Difficulty Level: Easy-Moderate
    • Temperament: Not aggressive
    • PAR Requirements: Moderate (200+ PAR)
    • Flow Requirements: High
    • Placement: Middle, High
    • Origin: Indo-Pacific

    Members of the Pocilloporidae family are largely known as bird’s nest corals due to their interweaving branching growth. They come in many colors and are said to be even easier to keep than Montipora, but still require SPS growing conditions.

    There are three genera of bird’s nest coral commonly found in the aquarium hobby: Pocillopora, Seriatopora, and Stylophora.

    Pocillopora

    Pocillopora have thick, stubby branches. They have a moderately fuzzy appearance and are most commonly found in greens and purples.

    Due to their thick branching, these corals do best with higher rates of water flow.

    Stylophora

    Stylophora are very similar to Pocillopora. In fact, it is usually only possible to tell these two corals apart by looking at a full colony.

    Stylophora also have rounded branches with moderately fuzzy polyps. However, the overall appearance of the colony tends to be more orderly and uniform than that of Pocillopora.

    Seriatopora

    Seriatopora are largely known as the true bird’s nest corals of this family as they have pointed tips and very thin branches that create an intricate twig-like cluster of coral. These corals are also most commonly found in pinks, greens, and purple and green combinations; their polyps are much more spread apart than the other related corals.

    Seriatopora are very delicate and need to be handled with care. This can make fragging them very easy but can also make transportation quite difficult for larger colonies.

    Acropora

    Acropora Coral

    Use Coupon Code ASD5 For 5% Off Your Order!

    The Acropora Coral is considered the pinnacle coral to keep in reef tank hobby. Difficult to care for, but extremely rewarding and easy to frag

    Click For Best Price Buy On Unique Corals
    • Scientific Name: Acropora spp.
    • Difficulty Level: Hard
    • Temperament: Not aggressive
    • PAR Requirements: Moderate (200+ PAR)
    • Flow Requirements: High
    • Placement: Middle, High
    • Origin: Indo-Pacific with some species in the Caribbean

    Acropora are the end goal of many intermediate and advanced reefers. These corals are seen as some of the most difficult, yet most rewarding species in all of the hobby. There are many types of Acropora to choose from that come in nearly all colors, including more exclusive designer names.

    Even though there are many different kinds of Acropora, they are still relatively easy to identify. These corals branch and have very identifiable polyps; each polyp has its own little tube that gives the coral a bumpy appearance. The actual polyps can be long and stringy or short and flat.

    Acropora are considered the most difficult because they are easily affected by changes in water parameters. They also demand the most light and water flow out of all these species.

    Closing Thoughts

    SPS corals are thought to be some of the hardest, yet some of the most rewarding species of coral available in the aquarium hobby. Though this is true, their actual requirements aren’t as challenging as you might think. Instead, it’s their need for stability and consistency that can make their care extra difficult.

    Luckily, there are a few easier species, like Montipora spp. and members from the Pocilloporidae family, that can make the transition from LPS corals and soft corals to Acropora a little less intimidating.


    ๐Ÿ“˜ Want to learn more? This article is part of our complete Saltwater Fish & Reef Guide โ€” your ultimate resource for marine fish, coral care, reef setup, and more.

  • How To Get Rid Of Aiptasia โ€“ Control, Prevention & Removal Guide

    How To Get Rid Of Aiptasia โ€“ Control, Prevention & Removal Guide

    Aiptasia is one of the most frustrating reef pests I’ve dealt with in my 125-gallon reef tank. These pest anemones showed up hitching a ride on live rock, and before I knew it they were spreading to my corals. I’ve personally tested most of the removal methods out there โ€” from Aiptasia-X to peppermint shrimp to berghia nudibranch โ€” and I can tell you firsthand what actually works and what doesn’t. This guide covers everything I’ve learned over 25 years of keeping reef tanks about controlling and eliminating Aiptasia for good.

    Hobbyists have been fighting the battle against Aiptasia for decades, and luckily, several solutions have been found to eradicate Aiptasia once and for all.

    What are Aiptaisa Anemones?

    What Is Aiptasia

    When setting up a new saltwater tank, it can be very exciting to find any signs of unexpected life during the nitrogen cycle and shortly after. Copepods start to show up on the glass and even algae can be an amazing discovery. Until suddenly, you find a small, clear what-seems-to-be coral.

    These ‘corals’ have long and thin tapered tentacles and might even resemble a kind of zoanthid at first. Usually, these tentacles will be attached to an oral disc that emerges from a long, translucent stalk. Sadly, more often than not, this unidentified polyp is actually a kind of pest anemone belonging to the Aiptasia genus.

    The main problem with Aiptasia Anemones is that they are both sexual and asexual; they can quickly split to create exponentially more anemones in a very small period of time. Like other species of anemone, they have stinging cells that can cause damage to nearby coral, fish, and invertebrates.

    They can also grow in very hard-to-reach places in the tank where you might not even see the problem forming. Their tentacles will grow in order to reach light, though their stalks may elongate and emerge from dark crevices within the rockwork.

    Naming And Other Pest Anemones

    In general, all species within the Aiptasia genus are simply referred to as Aiptasia even though there are several other known members; other common names include glass anemone and rock anemone (not to be confused with rock flower anemones of the Phymathidae family).

    Another type of pest anemone, Majano anemones (Anemonia manjano), may also be clumped together when talking about Aiptasia hitchhikers.

    Majano anemones are said to be easier to remove than Aiptasia, but they will both cause a headache at the end of the day. Majano anemones are, in some ways, prettier than Aiptasia and have rounded green tentacles with a purplish-pink oral disc; they are typically larger, have much more opaque flesh, and overall more vibrant colors than Aiptasia.

    Like Aiptasia, Majano anemones can quickly take over a tank and injure other corals and tankmates. Luckily, most of the removal methods are universal for pest anemones.

    How Do They Enter The Aquarium?

    Aiptasia Anemones are present in most aquarium systems. They can be very difficult to notice in dense rockwork and before you know it, you have a tank overrun by them. But how did they get there in the first place?

    These anemones are hitchhikers, just like any other algae or invertebrate that unintentionally enters the aquarium. This means that they can come in on live rock, corals, or even filter media. Once established in the tank, they can then spread to every part of it, including the filtration system and sump.

    In general, it’s not considered as an if these anemones will enter your system but a when.

    How Do You Prevent Them From Entering The Aquarium?

    Though Aiptasia Anemones will find its way into the aquarium if it wants to, there are some ways to protect your system.

    Mainly, observation and preparation are key.

    Observation And Identification

    It might sound simple, but observation is the best way to find and destroy Aiptasia before they get the chance to destroy your reef tank.

    Check and double-check new additions of live rock and coral. Use a flashlight to look in the crevices for any signs of tentacles popping up through the rockwork. Continue to check your tank daily for the next few weeks after a new addition.

    It is easiest to find pest anemones when they are extended in the water instead of when they are emersed. If possible, observe live rock and corals from a quarantine system. From there, use one of the following methods to remove it.

    One of the biggest mistakes beginners make is that they think an Aiptasia is a desirable coral and let it continue to grow. It is important to accurately identify the anemone first in order to go about fixing the problem. More often than not, any ‘lucky’ coral you see on new rock or a coral plug is actually an Aiptasia.

    Quarantine

    That being said, all new live rock and coral should be quarantined. No exceptions.

    Not only does quarantine help prevent disease and illness from entering the aquarium, but it also greatly reduces the risk of inadvertently introducing Aiptasia Anemones as well.

    Allowing two or more weeks of secluded observation will allow most hitchhikers to rear their ugly heads. It is much easier to fix these problems in a controlled setting than having to break down the rockwork and possibly filtration once put into a display. It also means that you can be more vigorous and widespread with treatments, such as chemical solutions.

    Remove Frag Plugs

    Frag Plug

    When buying new corals, they will often come on a frag plug. No matter if these corals were aqua-cultured in a controlled environment or gifted by a trusted fellow hobbyist, this frag plug should always be removed.

    For one reason or another, frag plugs are notorious for carrying in unwanted hitchhikers. Aiptasia are very quick to occupy free real estate and a frag plug is no exception. Most often, these anemones are very tiny and might only be able to be seen under a magnifying glass.

    When in doubt, throw it out.

    Source Rock

    Another way Aiptasia Anemones travels across tanks is by live rock and filter media. Many times, hobbyists share these with each other in order to seed a new tank with beneficial bacteria. Though this usually works flawlessly, there is always the chance that you’re introducing Aiptasia into the system.

    If you’re really worried about introducing pest anemones via live rock or filter media, do not use what has been in another tank. Instead, use brand new dry rock and cycle the tank with another method. This way, there is no chance of having any pests come in.

    The downside to this method is that many of the beneficial hitchhikers are lost as well, like copepods, and will need to be manually introduced later.

    How To Get Rid of Them From Your Aquarium (The Best Ways

    Aiptasia in Reef Tank

    The key to dealing with an Aiptasia outbreak in your aquarium is acting quickly and effectively as soon as you see one appear. The longer you wait to take action, the more chance they have to grow and spread throughout the reef tank.

    There are a few different methods based on the size, type, and amount of pest anemones in your saltwater tank. Whether the method works for you will also depend on several factors and Aiptasia removal could become a regular part of maintenance.

    Here are the best ways to get rid of Aiptasia Anemones from your saltwater aquarium.

    Manual Clean-Up

    Manual removal is one of the easiest methods, but also the least guaranteed way to fully remove Aiptasia from the aquarium. This is because these anemones are capable of growing from the smallest piece of flesh leftover, and it can be very easy to miss; in fact, Aiptasia only need a single remaining cell to regenerate into a new animal.

    For manual removal, you will need to be able to take the piece of rock out of the tank. Once removed, use scissors, razors, bone cutters, and whatever else you need to in order to get every last piece of anemone off of the rock. Some hobbyists split the rock in half entirely to ensure that there is no chance of the anemone coming back.

    Still, it is easy to miss other smaller Aiptasia that might have already propagated or left remnants behind.

    Super Glue (Cyanoacrylate)

    Super glue is one of the easiest and least damaging ways to control Aiptasia Anemones, though this method does not work all of the time.

    This method simply involves coating the anemone in a thick sarcophagus of superglue so that it is unable to extend. Simply remove the affected piece of rock from the aquarium and apply a healthy dollop of glue.

    There are a few problems with this method, though. First, it’s not always feasible to remove the piece of rock from the reef tank. Second, the anemone is very capable of growing around the glue and out through another opening, allowing it to live; some hobbyists have even seen them come out from the other side of the rock if the opportunity presents itself.

    Super glue is most effective for removable pieces of rock and small Aiptasia that can be generously coated and sealed.

    Chemical Products

    There are many chemical solutions on the aquarium market designed to eliminate Aiptasia from the aquarium. This method can be very effective when facing large colonies of pest anemone with sizable individuals.

    Kills Aiptasia
    Aiptasia-X

    A great solution for target elimination of Aiptasia in a reef tank.

    Click For Best Price Buy On Amazon

    One of the most popular Aiptasia removal chemicals is Aiptasia-X by Red Sea. This product needs to be applied to the surface of the oral disc of the anemone, where it is then forced to be ingested. Within a few minutes, the anemone implodes on itself, preventing regrowth and larvae from spreading throughout the rest of the reef aquarium.

    Other popular brands include:

    • Joe’s Juice Aiptasia Eliminator
    • Salifert Aiptasia
    • Blue Life Aiptasia Rx
    • Reef Kalkwasser (calcium hydroxide). Though not a product specifically meant for Aiptaisa, Reef Kalkwasser can be used to create a paste that can cover the disc of the anemone in a similar fashion.

    These chemicals are not effective for all reefers though, and these products can actually harm healthy corals if not applied correctly. The application can also become difficult if the anemone is situated in a hard-to-reach spot where it has time to react and retract. If only a small dosage is received, then the Aiptasia may come back stronger and start to propagate.

    Other DIY Solutions

    If you don’t have immediate access to chemical solutions, then you might need to make your own solution. It should be noted that these methods are very prone to failure and should only be done under close moderation.

    1. Lemon juice. Lemon juice has been used to successfully remove Aiptasia Anemones. Fill a syringe with lemon juice and inject it into the anemone. The acidity will theoretically cause the anemone to die.
    2. Vinegar. Similarly, vinegar can be injected and will kill Aiptasia due to its acidity.
    3. Hydrogen peroxide. Hydrogen peroxide is not likely to work when only applied over the anemone. Instead, it can be used to wipe off the remaining parts of Aiptasia that are leftover from previous attempts of removal.
    4. Boiling water. Boiling water can be mixed with lemon juice or vinegar or used by itself. Again, use a syringe to inject it into the anemone.

    These methods have worked for some hobbyists and completely failed for others. It is necessary to gauge how much solution is entering the system as both lemon juice and vinegar can start to affect pH due to their acidity. Boiling water can also burn nearby fish and invertebrates.

    If able to do so, attempt other methods first as to not encourage propagation from a failed removal.

    Lasers

    Lasers are an expensive solution but can be very effective at reaching hard-to-reach places without having to put your hands in the reef tank. They are a relatively new technology being introduced into the reef aquarium hobby for treating Aiptasia Anemones and come with mixed results that might not make their price worth it.

    These lasers need to be very strong and capable of melting away Aiptasia anemone. The problem with this is that they are also very capable of injuring other corals, fish, and invertebrates in the process.

    Some hobbyists have reported them as being completely ineffective.

    Livestock (Fish And Inverts That Love Eating This Type)

    Adding Aiptasia-eating fish and invertebrates to the tank system is usually a great alternative to the other methods mentioned. However, there is always a risk when adding something new to the tank.

    The main problem with adding additional livestock into the reef aquarium is that many of the species recommended to add cannot discriminate between a coral and an anemone. As a result, they might start to target colonies of desired corals and leave the Aiptasia nice and healthy. It is also possible that your fish or invertebrate will successfully eat Aiptasia and then starts to eat corals, too.

    Regardless, many hobbyists try their luck at adding a new fish or invertebrate species for dealing with Aiptasia problems; some can even arrange temporary housings until the anemones have been eliminated and then pass them along to another hobbyist.

    Here are some of the most common fish and invertebrates species for removing Aiptasia from your saltwater aquarium.

    Butterflyfish (Chaetodontidae family)

    Copper Band Butterfly

    For the most part, nearly all common species of butterflyfish have been used to effectively control Aiptasia populations. It is known that butterflyfish are not considered reef-safe and it should not come as a surprise if the one you add decides to go after corals.

    There are, however, a few species that seem to be more reliable than others. This includes:

    • Copperband butterflyfish (Chelmon rostratus)
    • Klein’s butterfly (Chaetodon kleinii)
    • Pearlscale butterfly (Chaetodon xanthurus)
    • Raccoon butterfly (Chaetodon lunula)

    Of course, always ensure that your setup is appropriate for the species you plan on adding. Tank size, water parameters, and diet should all be arranged to accommodate a new fish.

    Eating Filefish (Monacanthidae family)

    Aptasia Eating Filefish

    Aiptasia Eating Filefish are another popular addition for dealing with Aiptasia, though they are just as likely to nip at corals. Some hobbyists have found that buying captive-bred individuals helps deter coral picking and encourages Aiptasia Anemone hunting.

    Aiptasia Eating Filefish aren’t the prettiest to have in a reef tank display and some species can get very large. However, the most popular Aiptasia-eating species, like the matted filefish (Acreichthys tomentosus), stay small and can quickly take care of a pest anemone problem.

    It is not unheard of for filefish to suddenly start picking at corals, though.

    Peppermint shrimp (Lysmata wurdemanni)

    A group of peppermint shrimp is usually the route most reefers take for dealing with pest anemones as they are small yet effective.

    With multiple individuals, peppermint shrimp can be expensive and their high demand in the hobby can also make them more difficult to obtain. Not to mention that the peppermint shrimp has a very similar appearance to the camel shrimp (Rhynchocinetes durbanensis), which is not reef-safe, and can easily be confused.

    Overall, peppermint shrimp have a very high success rate for dealing with Aiptasia, however, they’ll typically avoid larger ones. They have also been known to graze on zoanthids as well.

    Berghia Nudibranch (Berghia stephanieae)

    If you’re limited on space but still want a natural predator of Aiptasia, Berghia nudibranchs are a great short-term solution.

    These nudibranchs can also be expensive and you will need a good amount of them depending on the size of your saltwater tank. Take into consideration that some fish and other invertebrates might also see them as food in the meantime just as they’re starting to hunt for anemones.

    The main problem with Berghia nudibranchs is that they only eat Aiptasia. This is great in the short term when you are desperate to get rid of all visible anemones, but doesn’t serve as a very long-term solution; once your anemone supply runs out, these nudibranchs will perish.

    Many hobbyists like to pass on their nudibranchs to other tanks suffering from Aiptasia so that they don’t die in the process. They can be very difficult to catch though, and often you will not be able to save them all. If you are interested in purchasing them, I recommend buying them from Salty Underground.

    Closing Thoughts

    Aiptasia are the last thing you want to see in your aquarium but are largely unavoidable. These ugly, fast-growing pest anemones can quickly take over a display and infiltrate filtration systems if left to grow.

    There are many different methods for removing them, including chemical products, more organic solutions, and livestock recommendations. Whatever method you end up choosing, you will most likely need to also use other alternatives and keep on schedule for a few months until there are absolutely no signs of Aiptasia.

    One of the best ways to prevent a pest anemone infestation is by prevention. Even then, it is good to be prepared if one ever happens to enter your system.


    ๐Ÿ“˜ Want to learn more? This article is part of our complete Saltwater Fish & Reef Guide โ€” your ultimate resource for marine fish, coral care, reef setup, and more.

  • The Ultimate Guide to Fishless Cycling โ€“ Step-by-Step From a 25-Year Hobbyist

    The Ultimate Guide to Fishless Cycling โ€“ Step-by-Step From a 25-Year Hobbyist

    Fishless cycling is the method I recommend to every new hobbyist, and it’s how I set up tanks myself. The old way โ€” adding a few “hardy” fish and hoping for the best โ€” works, but it puts fish through unnecessary stress during the most toxic phase of a new tank. With fishless cycling you get a fully established tank before a single fish goes in, and that makes all the difference in long-term success.

    The nitrogen cycle is the single most important concept in fishkeeping โ€” get it right before you add fish, and you avoid the most common cause of fish death in new tanks. Fishless cycling lets you establish your beneficial bacteria colony without exposing any fish to toxic ammonia and nitrite spikes, and it’s the method I recommend to every new hobbyist I talk to. I’ve cycled more tanks than I can count over 25 years, and in this guide I break down the process step by step so you can do it confidently and not rush it.

    Why Do We Cycle?

    The first question we should start with is why do we do a cycle anyway? And, what exactly is a cycle? Many newcomers may think you can just put a fish in a tank on day one and everything should work out well. Unfortunately, this can lead to some pretty sad results.

    Biology is the major reason why we need to cycle. It all starts with the nitrogen cycle. Until you have a complete cycle, your aquarium is prone to building up toxic levels of nutrients that can harm, stress, and even kill your fish!

    You want the best for your prized pets, so knowing how the nitrogen cycle works should be the first point of reference we need to understand.

    The Nitrogen Cycle

    There is a great video that really explains the nitrogen cycle in a fun and entertaining way by Girl Talks Fish below that I’ll embed for you. I’ll go more into my boring details below:

    There are 4 stages to the nitrogen cycle that occurs in our aquariums. They are:

    • Stage 1 – Ammonia is excreted as a fish waste product or from decaying matter
    • Stage 2 – Nitrosomonas bacteria convert ammonia to nitrite
    • Stage 3 – Nitrobacter bacteria convert nitrite to nitrate
    • Stage 4 – Plants use nitrates as fertilizer

    I’ll go into further details in a future article. The main thing to take away is if your ecosystem cannot get to at least stage 3 with stability, you will have major uses with fish and invert health in your aquarium. We cycle our aquariums in order to build a balanced ecosystem, one that is suitable for our fish to live in.

    How Does A Fishless Cycle Work?

    Fishless cycling works by using an ammonia source with a combination of beneficial bacteria. As the ammonia is added, the bacteria will consume the ammonia and convert it down to nitrate. Eventually, we get to the point where the aquarium has enough bacteria to handle livestock additions.

    In the old days of aquariums (like when I started ๐Ÿ˜…), it was an acceptable practice to use hardy fish to cycle an aquarium. Oftentimes, these poor sacrificial fish would either not make it, or they would be eaten by the larger display fish the aquarium owner really wanted to keep.

    In saltwater aquariums, the fish people would use for cycles would be damselfish. The hardy little fish would usually survive a cycle but would turn into terrors in a community tank since they are very territorial and are best added last. Check out our video from our YouTube channel for an overview. We go into more detail in our blog post further down. Subscribe if you like our content!

    To avoid fish mortality and unwanted aggression to future tank mates, hobbyists worked to develop more humane and effective techniques to cycle a fish tank. Not only were these new methods humane, but they also were a lot faster than the old methods. It’s all based on the use of nitrifying bacteria.

    What is Nitrifying Bacteria?

    As mentioned in the nitrogen cycle stages, Nitrosomonas and Nitrospira bacteria are the workhorses for turning ammonia into nitrate. These two types of bacteria make all life possible in your aquarium. Without them, the fish tank would get overwhelmed with toxic chemical levels and nothing could live in it.

    Nitrifying bacteria can come from many sources these days. Here are a few common ways of introducing them.

    • Bacteria in a bottle products
    • Introducing any livestock to the tank
    • Live Rock and Live Sand (for saltwater tanks)
    • Live plants (for planted tanks)

    I will go through each way in this article. There are pros and cons to each one and you should choose the one that works best for your situation. As for me, I like bacteria in a bottle. There are many good products these days like Fritz Turbo Start for freshwater tanks and BioSpira for saltwater tanks.

    My Pick For Freshwater Bacteria
    Fritz Turbo Start 700 Freshwater

    Fritz Turbo Start is known in the industry as the fastest acting nitrifying bacteria you can purchase. This 700 version is specialized for freshwater tank and has my highest recommendation

    Buy On Amazon Click For Best Price

    Necessary Equipment

    You actually do not need much to perform a fishless cycle. Depending on what method you use you will need the following:

    • A fish tank
    • An aquarium filter
    • A heater (for tropical tanks)
    • Liquid ammonia OR some other sort of ammonia source
    • Bacteria in a bottle or seeded filtration media (depending on what method you choose)

    Before we talk about methods, let’s discuss the advantages of a fishless cycle vs. a traditional cycle.

    Fishless Cycle vs. Traditional cycle

    Fishless cycling has several advantages over a traditional cycle. Here is a quick list:

    • Fishless cycling is more humane and reduces/eliminates livestock fatalities
    • Cycling with ammonia and bacteria in a bottle is disease-free
    • Fishless cycling is more aggressive and as a result cycles faster than a traditional cycle
    • You will not have any undesirable fish left over after the cycle

    Traditional cycling seems simple at first, but it can actually lead to a number of problems. You will have fish that are stressed and they could get sick as a result, leading to further complications. It’s better to be in control of the entire cycle by fishless cycling in order to start out your fish tank cycled and disease-free.

    Traditional cycling also takes far longer. A typical traditional cycle can take 30 – 45 days, while a fishless cycle can be completed in as little as 7 days and sometimes even quicker! There are way more advantages than disadvantages to using a fishless cycling method over a traditional one, so it’s no wonder nearly everyone these days starts with them.

    Now that we know why fishless cycling is best for us, let’s figure out what cycling method we will use.

    How to fishless cycle

    There are actually several methods you can use when it comes to performing a fishless cycle. Each one has its pros and cons. These methods are:

    • Cycling with ammonia
    • Cycling with fish food
    • The shrimp method
    • Cycling with live plants
    • Cycling with live rock & live sand
    • Cycling by seeding your tank with bacteria

    Each one of these methods will work to cycle your tank, oftentimes much faster than the traditional method. Many of these methods are “sterile” meaning they will not introduce diseases to your aquarium. Let’s dive into each method to learn more!

    1. Using Ammonia

    Cycling with pure ammonia is one of the most popular ways of cycling a new tank without fish. Not just any household ammonia will do though, because these often contain other ingredients that could do a lot of harm.

    For Fishless Cycling
    Dr. Tim s Aquatics Ammonium Chloride

    Ammonia into a tank?!? Sounds crazy doesn’t it. It’s what all the cool kids use to cycle their tanks these days.

    Buy On Amazon Click For Best Price

    For this cycling process, we want to use ammonium chloride. My go-to product for this method is Dr. Tim’s Ammonium Chloride. To use the ammonia method you would need to perform the following steps:

    • Step 1 – Add bacteria in a bottle
    • Step 2 – Add ammonium chloride until you read 2PPM
    • Step 3 – Wait 24 hours
    • Step 4 – Test ammonia and nitrite levels
    • Step 5 – If you are at 0 ammonia and 0 nitrites, add ammonia until you are at 2PPM again
    • Step 6 – Wait 24 hours
    • Step 7 – Test ammonia and nitrite, add ammonia until you are at 2PPM again
    • Step 8 – Wait 24 hours
    • Step 9 – If no ammonia and nitrites, test for nitrates, if high, do a water change to lower levels
    • Step 10 – Time to add fish

    For ammonia and nitrite level testing, a simple API test kit should work and will help you get the job done

    Pros of the Ammonia Approach

    • Easy to do and proven products available
    • Easy to test
    • Completely “sterile” – a great way to start off your tank disease-free
    • No mess method

    Cons of the Ammonia Approach

    • Expensive to do (especially for larger tanks and saltwater)
    • It may take longer than other methods

    2. Using Fish Food To Cycle The Aquarium

    Flake Food

    Using fish food as a cycling method is also a popular alternative in a new tank. This can be done with a combination of flake or pellet food and bacteria in a bottle. All you do is feed the aquarium every day with food and monitor your ammonia levels.

    It’s less of an exact science than the ammonia chloride method, but you can use the fish food you were planning to use from the start. Depending on your budget, you’ll find this a very affordable alternative for individuals who are looking to save a few dollars.

    Pros of Fish Food Approach

    • Cheap
    • You will need the fish food for when you get fish
    • It will get you used to feeding your fish

    Cons of Fish Food Approach

    • Messy
    • Not an exact science
    • It may take some trial and error to get right

    3. The Dead Shrimp Method

    The shrimp method cycling process was originally popularized by Melev’s reef as a safe way of cycling a tank. It involves purchasing a jumbo shrimp at your local supermarket and putting it inside your tank for several days in order to create an ammonia spike.

    Because the shrimp decays in your tank, it creates the opportunity for beneficial bacteria to populate. Due to the total organic chemistry, the dead shrimp method produces more ammonia than the fish feed procedure.

    This method does not require bacteria in a bottle but can be sped up with it. You should leave the shrimp in your tank for at least 2-3 days.

    For a nice video overview, check out this video by Blue Damsel as she explains how she cycled her tank with a shrimp.

    Pros of Shrimp Method

    • Doesn’t require bacteria in a bottle
    • Cheap
    • Only requires one introduction of ammonia

    Cons of Shrimp Method

    • Smelly
    • Can take longer than other methods

    4. Cycling With Live Plants

    Live Plants in Aquarium

    This is an aquascaper’s favorite here for the freshwater aquarium. Cycling with live plants is natural, effective, and kills two birds with one stone. You cycle your new tank, build a great setup, and your tank is ready for lots of fish when the cycle is done.

    There are two ways to do this cycling, you can perform a dry start or you can do a flood/underwater start. Depending on the plants you are planning, a dry start can be the best way to get this done.

    I recommend you start by using an active soil. This soil will introduce the necessary ammonia, which your plants and bacteria will consume.

    Let’s talk about steps:

    • Step 1 – Use an active substrate like Tropical Aquasoil
    • Step 2 – Plant your aquarium plants
    • Step 3 – Fill tank or grow dry if using the dry start method
    • Step 4 – Add bacteria in a bottle to accelerate the cycle process
    • Step 5 – Test every 24 hours to monitor ammonia and nitrite levels
    • Step 6 – Do not add any fish until you read 0 ammonia and nitrite levels for two straight tests
    • Step 7 – Add fish, starting with algae eaters first, then other fish 2-3 weeks later

    By using bacteria in a bottle, you can usually get to Step 7 in about a week sometimes longer.

    Pros of Live Plants Method

    • Works best for aquascapes and planted tanks
    • A healthy way to build a natural tank
    • Fast

    Cons of Live Plants Method

    • Expensive
    • Not ideal for certain fish setups
    • Algae blooms

    5. Cycling With Live Rock & Live Sand (Saltwater Aquariums Only)

    One of the best ways of cycling a marine or reef tank is to use live rock and sand. Of course, ‘live’ rock and sand are not really alive, but rather home to all sorts of bacteria and organisms that have colonized it in nature, or after being seeded in an established aquarium.

    Live rock usually has a very rough and intricate texture, with loads of holes and crevices for life forms to attach themselves. Healthy live rock or sand that has been handled correctly will introduce the beneficial nitrifying bacteria to your tank that maintain your water quality. The other organisms that live in the live rock and substrate will also produce some ammonia which helps in maintaining the cycle.

    Ocean Direct
    Maricultures Florida Live Rock

    An old school solution. Once cured, Dinos tend not to be an issue because of the great biodiversity contained in this rock.

    Click For Best Price

    Let’s talk about the steps:

    • Step 1 – Set up your aquarium, complete with filter, heater, thermometer, and all other necessary hardware. Add water of the correct salinity
    • Step 2 – Let your filter and heater run for a day or so and the water warm up to the right temperature
    • Step 3 – Get your live rock and sand. Use cured live rock that has been kept wet
    • Step 4 – Inspect the live rock or substrate for any unwanted organisms and remove them, but do not sterilize the seeding materials
    • Step 4 – Sprinkle live sand into the floor of the tank and add your live rock
    • Step 5 – Provide an ammonia source like some fish food to help sustain the nitrifying bacteria
    • Step 6 – After a few days, test the water, if you read 0 parts nitrite and ammonia, and some nitrates, your tank is cycled
    • Step 7 – Add fish

    If Ammonia and nitrite are present, your tank is still cycling. This often happens as a result of some of the organisms and bacteria dying off after being move to a new environment. Do a partial water change and retest the water in a few days.

    If you are still reading ammonia and nitrites, it is possible that your live rock was not cured, or the organisms died before getting to your tank. If that is the case, you might need to use one of the other fishless cycle techniques like the ammonia or dead shrimp method.

    Pros of cycling with live rock & live sand

    • The best way to introduce a healthy balanced community of bacteria and micro fauna to a reef tank
    • Very fast results if you have healthy live materials
    • Live rock is home to other beneficial organisms

    Cons of cycling with live rock & live sand

    • Potential to introduce unwanted animals
    • Live rock is expensive
    • If live rock is not handled correctly, bacteria and micro-organisms may not survive

    6. Seeding your tank with beneficial bacteria from an existing system

    Beneficial Bacteria from Existing Filter

    Seeding your new tank with beneficial bacteria from a mature aquarium is the ultimate shortcut to jump-starting the nitrogen cycle in a new aquarium. This is essentially what we are doing by adding live plants or live rock to a new aquarium because they are already home to the bacteria we need.

    In the home aquarium, the most important colony of beneficial bacteria lives in and on your filters media. The filters media is the sponge, foam, floss, or other material that the water flows through or over. These bacteria will colonize the filter quite quickly if they are present on the live rock for example, but there is an even faster way.

    It is possible to seed your filter media directly if you have a mature tank or a friend that does and is willing to help you out. The trick is to make sure your new tank has the same water parameters as the tank where you will be getting your nitrifying bacteria.

    Let’s talk about the steps:

    • Step 1 – Set up your aquarium, complete with all hardware, gravel, decorations, etc., and fill with water. Make sure to use a water conditioner
    • Step 2- Allow your filter to run for a day or so and the heater to warm your water to a stable temperature
    • Step 3 – Add a small piece of filter media from a mature tank to the media compartment of your new filter. You should not remove the new filter media, but rather use both together
    • Step 4 – Add some ammonia to the water in the form of fish food for example
    • Step 4- Test your water. Your ammonia and nitrite levels should read 0 after a week and nitrates should be present
    • Strep 5- Add fish

    Alternative method

    • Step 1 – Set up an extra filter in one of your other tanks or in a friend’s established tank a few weeks before setting up the rest of your new aquarium.
    • Step 2 – Move the now seeded filter over from the established tank over to your new tank once it has been colonized by nitrifying bacteria
    • Step 3 – Add an ammonia source, either from a bottle or from fish food
    • Step 4 – Test your water after a few days. You should note that ammonia and nitrites read 0, but nitrates are present.
    • Step 5 – Add fish

    Pros of seeding from an existing system

    • The fastest way to cycle a new tank. This method can be instant, but take a few days to confirm this by testing to be safe
    • Easy
    • Cost-effective

    Cons of seeding from an existing system

    • Getting hold of some mature filter media can be tricky if you don’t have other tanks or friends in the hobby
    • Possible introduction of disease if the tank getting media from is infected

    The Final Test

    After choosing the fishless cycling method and following the recommended steps, it’s time to find out whether your new tank has cycled successfully! This can be a pretty nerve-wracking time, because you’ve been patient, and you’re probably itching to start adding livestock to your aquarium.

    No matter which method you’ve used, you’re going to need to test the water to know if your tank is cycled. This means you need a test kit that can measure ammonia levels, nitrites, and nitrates. You can use liquid or strip test kits from your local fish store, and follow the instructions on the package. The API Freshwater Master Test Kit is a great option to test all major parameters.

    If after following all the steps of your chosen cycling technique and doing 2 water tests, you measure 0 ammonia, 0 nitrites, and some nitrates, you’ve been successful, and your tank is cycled! The presence of nitrates tells you that both the important types of bacteria you need are thriving in your tank.

    One thing that is very important to note is that nitrates are also toxic to fish, just less so than ammonia and nitrites. I’m sorry to spring this on you so late in the article but hang in there, we’re nearly done!

    The way to manage nitrates is simply to perform regular water changes. Basically, you need to remove enough aquarium water, as often as necessary, to keep your nitrate levels to below 20ppm.

    Can I Add Fish Now?

    Congratulations on completing the fishless cycling process, at this point, you can start to add your first fish!

    Although your tank now has established bacteria colonies, there are only enough of them to fully manage the ammonia level that has been available to them. Adding fish is going to increase the bio-load and the available ammonia levels in your aquarium water pretty quickly, so ideally you want to introduce the fish in stages to avoid overloading the system.

    Let’s imagine you plan on keeping a school of 20 tetras and a clean-up crew and algae eaters in your new tank. Unless you have plenty of live plants in your tank to help in taking up ammonia and nitrates, adding them all at once could cause an ammonia spike that your bacteria aren’t able to manage.

    Ember Tetra

    To avoid this, you could add 6 tetras to start and keep an eye on your nitrates. Perform a weekly water change to keep your nitrate level to below 20ppm and give your bacteria a chance to develop further. Introduce more fish in stages to allow the nitrifying bacteria colonies to grow. Growing live plants is also hugely helpful, because they take nitrates out of the tank water, and turn them into healthy new leaves.

    In some planted aquascapes, fish all added in 2 large stages. However, note that these setups are loaded with lots of plants and lots of filtration. This is an advanced techique that requires research if you want to do this.

    Depending on the type of fish you are looking for, I have many guides. You can check them out below:

    FAQS

    How long does it take to cycle a fishless cycle?

    Depending on the method you use, a fishless cycle will usually take anything from a few days to about 6 weeks before ammonia and nitrite levels drop off. If you’re starting from scratch with something like the fish flakes method, and with all new equipment and sterile gravel, the process can take over a month. If you seed your filter with mature media, the cycle can be instantly ready.

    Should I do a water change first?

    Since cycling is about allowing changes in water chemistry to happen, it would make sense to not interfere while this is happening. If however, your ammonia levels spike too high during your fishless cycle, it’s a good idea to perform a partial water change.

    This is because high ammonia levels can actually slow or stop the cycle. Only a partial water change is necessary though because you do need to have ammonia present for the cycle to happen.

    Is this necessary?

    Fishless cycling is absolutely necessary for the health and well-being of your future pets. Although it does take some patience, safely cycling your tank is the key to success when keeping fish and other live animals.

    Remember, starting up an aquarium is a long-term project, so try not to rush this important first stage. You could use the time while you’re cycling your tank to track down the fish you want and do all the research about their needs and care.

    What are the advantages of this?

    The major advantage of fishless cycling is that it does not stress or kill any fish unnecessarily. Apart from the obvious ethical side to this, it also prevents you from losing money by replacing livestock. Using fish to cycle your tank often leaves you with the problem of what to do with that unwanted fish once the tank is cycled.

    Do I need to add ammonia?

    Yes, the nitrogen cycle does need some form of ammonia to get started and grow your bacteria levels. Avoid using general-purpose household ammonia for this because it often has added chemicals that can affect the process.

    It is best to use a purpose-made product like Dr. Tim’s Ammonium Chloride to add ammonia in its pure form or use something like fish food or a dead shrimp to add this compound to the aquarium water.

    Final Thoughts

    After reading this article, I hope you have a better understanding of why cycling is so important and how to do it safely without the help of hardy fish. I know it can be tough to stay patient when setting up a new tank, but once you understand why we cycle, and the obvious benefits of having a healthy fishless cycled aquarium, the waiting gets a lot easier!


    ๐ŸŸ Want to learn more? This article is part of our complete Aquarium Care Guide โ€” your ultimate resource for water chemistry, maintenance, feeding, disease prevention, and everything you need for a healthy tank.

  • Green Star Polyp Care – A Complete Guide

    Green Star Polyp Care – A Complete Guide

    Green star polyps are one of the first corals I put in a new reef tank, and I still keep them in mine. They’re nearly bulletproof โ€” fast growing, tolerant of a range of parameters, and they create incredible motion in the tank when their polyps are extended and swaying in the flow. If you’re new to reef keeping, GSP is an excellent starting point that will give you quick success and build your confidence.

    When it comes to Green Star Polyp Care, there usually isn’t much to it. The main thing is learning how fast it grows, where to place it, and how to control it. It can grow quite large if given the right conditions and some reefers have event used them to create a wall of corals!

    Today’s post is all about the Green Star Poly. Come find out all there is to know about this beautiful creature with our complete guide on how best to take care of your Green Star Polyp. You’ll be glad you did!

    Species Overview

    Scientific NameBriareum spp. (widely Pachyclavularia violacea)
    Common NamesGreen star polyps (GSP), daisy corals, starburst corals, star corals
    Family
    OriginWidely found throughout the Indo-Pacific1
    Common ColorsGreens, yellows, and browns with purple skeleton
    Care LevelEasy
    TemperamentPeaceful
    LightingModerate-High (50-200+ PAR)
    Tank PlacementBottom, Middle, Top
    Flow RateModerate-High
    Temperature Range76-82 degrees F
    pH Range8.0 โ€“ 8.4
    Salinity1.025 or 35 PPT
    Alkalinity8 โ€“ 12 dKH
    Calcium Level350 โ€“ 450 PPM
    Magnesium Level1250 โ€“ 1350 PPM
    PropagationCutting/Fragging

    Origins And Habitat

    Like many other corals, green star polyps come from the warm waters of the Indo-Pacific in turbid lagoons and along shallow to moderately deep reefs. There, they can be found alongside other soft corals, such as Xenia spp. and Clavularia spp..

    Green star polyps are soft corals, meaning they do not have a calcium carbonate skeleton. Instead, they quickly grow as encrusting mats over rocks and other sessile objects.

    Naming

    In general, green star polyps are taxonomically categorized as Pachyclavularia violacea. This is a very broad name for these corals though, and it’s very likely that you have a species that is something other than Pachyclavularia violacea. The Pachyclavularia genus is also synonymous with Briareum and the two can be used interchangeably for this species.

    Green star polyps are a type of soft coral (Alcyonacea order) though they contain sclerites, or small pieces of skeleton, within their tissue for structure.

    What Do They Look Like?

    Green Star Polyp

    When fully spread, green star polyps look like a lawn of grass. Individually, they have a white center and eight radial green tentacles. These serrated-like tentacles come out from a purple base with tubes for every polyp.

    When closed, this coral looks like a pointy, purple mat. As we’ll discuss later, these corals can sometimes be temperamental and may be closed for extended periods of time if something is unfavorable in the tank.

    Varieties

    There are not many variations of green star polyp and their appearance largely depends on the type of aquarium light being used. Because they are so easy to grow, they are mostly aquacultured.

    There are a few varieties of green star polyp though, mainly with differences between shades of green, tentacle length, and skeleton branching.

    It is very common to come across ‘neon’ varieties of green star polyps where the tentacles are fluorescent green. Other variations might have a more defined white center or more tints of yellow, though the general purple and green coloration stays the same.

    Some variations of green star polyp might also be long-tentacled. It is believed that long green star polyps are hardier and grow faster than shorter ones, which can sometimes be confused with galaxea corals (Galaxea fascicularis).

    Within the aquarium, there is also said to be a branching variety of green star polyp. This variety is different from the regular encrusting type and is much more rare and desirable. The problem is that it can be very difficult to tell apart from others as there is little difference between small frags and usually no difference at all between namings.

    Branching green star polyps grow outwards, away from the rock; this means that they don’t necessarily need to grow on top of rock to spread and can create archways and limbs that extend across the reef tank.

    Still, green star polyps have not reached the brand-name-worthiness of other soft corals, which keeps their prices relatively low.

    Galaxea spp.

    To the untrained eye, green star polyps can look very similar to species of Galaxea coral. This can be a costly mistake as Galaxea have long sweeper tentacles that can severely damage other corals.

    These two corals look very similar and even have similar care requirements. Overall though, green star polyps tend to be larger, less compact, and have more tapered tips. In a mat, galaxea corals can have a shaggy appearance whereas green star polyps will have a more uniform sway.

    Green Star Polyp Care Guide

    Green Star Polyp Close Up

    Green star polyps are one of the most versatile corals in the aquarium, meaning they can be placed almost anywhere. The problem is that they will also spread everywhere they can.

    Green star polyps do best under moderate to high reef lighting with moderate to high flow; they can usually withstand conditions above and below this, though low light will result in slower or minimal growth and high light can cause bleaching and algae.

    These corals need moderate to high flow in order to keep algae off their purple skeleton. Because green star polyps are so concentrated, water flow needs to be able to remove any waste or debris from the top of the coral.

    If water flow is inadequate, algae can start to build over the opening of the tubes, which prevents the polyps from expanding. Even more so, snails, hermit crabs, and algae-loving fish might start to crawl over or pick at this algae which can result in longer periods of retraction.

    However, you also want to make sure that you don’t place your green star polyps too close to other corals. These corals grow extremely fast and won’t hesitate to grow over and shade out zoanthids or other peaceful corals.

    Because of this, many hobbyists like to keep them on a rock island of their own as they will rarely grow onto the substrate. Another option is to keep them around much more aggressive coral species (like LPS corals) that should fight back any green star polyps that try to invade their space.

    Another popular option for green star polyp placement is the back or the bottom of the reef tank. Many hobbyists choose to create a background of green star polyp or a lawn on a bare bottom setup. It only takes a small piece of frag to have a waving mat of green within a couple of months.

    Temperament In The Aquarium

    Green star polyps will not sting other corals and are very peaceful. However, they are highly invasive and will not hesitate to grow over and shade out other corals.

    As mentioned before, these corals do best when isolated. You do not need to worry about other corals being stung by them, but rather taken over by them. As long as green star polyps are kept away from other, less aggressive corals, then they should stay manageable.

    Though these corals aren’t known to have a powerful sting, it is still recommended to keep them away from other corals at all times to prevent aggression.

    Are They Toxic?

    There is some belief that green star polyps are toxic and can release damaging chemicals into the aquarium when stressed, like zoanthids. However, this is largely a myth and has yet to be proven within the hobby.

    If you are concerned about green star polyps releasing toxins, use gloves when handling and run activated carbon. Otherwise, it is extremely rare, if not impossible, to have any toxin complications due to green star polyps.

    Care And Maintenance

    Green star polyps are one of the easiest corals to care for, though some hobbyists can have difficulty with them due to the reef tank being too clean, inadequate flow, or extreme lighting.

    Otherwise, green star polyp maintenance and upkeep are straightforward.

    Dosing

    Like other corals, green star polyps need available nutrients in the water column. They need nitrates, phosphates, magnesium, calcium, and a stable alkalinity for healthy growth and vibrant colors.

    That being said, these soft corals do not need additional nutrients to be dosed other than what is introduced through feedings and fish waste. In fact, many hobbyists look to slow down green star polyp growth rather than speed it up.

    Feeding

    Many hobbyists choose not to feed their green star polyps as they get the majority of their food through photosynthesis, but they’ll definitely enjoy some supplemented foods every now and then.

    For best results, use a powder or liquid food, like zooplankton; these corals are not able to take in larger foods through their mouths.

    Trimming And Algae

    Green star polyps grow fast, and eventually, you will need to control that growth. Some hobbyists choose to frag these trimmings, though the supply might outweigh the demand.

    These corals can be difficult to completely remove from a surface and will often grow back after some time. When you see green star polyps growing somewhere you don’t want them, simply scrape them off and dispose of them. Make sure you get all the pieces as they can reseed themselves elsewhere in the tank.

    Another way to combat green star polyp growth is by shading it out with a larger object. This can affect other corals too if not carefully placed, but it is an effective way to deprive the coral of necessary light for growth.

    At the same time, you will want to look out for algae growing on the mat of the coral. It is recommended to use a turkey baster weekly to gently remove any algae or debris that might be caught. If you notice that your green star polyps have been closed more than usual lately, it could be bothersome algae.

    What Are Good Tankmates?

    Tank Raised Clownfish

    Green star polyps can be kept with nearly everything, including not reef-safe species. Here’s how.

    In theory, green star polyps can be kept with anything from clownfish and tangs to triggers and angels. This is due to the fact that this coral grows so incredibly fast. There is still the very real possibility that not reef-safe fish will eat green star polyps, but these corals are very likely to bounce right back and make up for what had been lost.

    It should also be noted that green star polyps might not look as appetizing as other fleshy large polyp stony (LPS) corals, so some coral-hungry fish might leave it alone. If you find yourself with a fish that eats everything you put into the tank but you’re still determined to have corals, then get an inexpensive frag of green star polyps and try your luck.

    Fragging

    It should come as no surprise that green star polyps are incredibly easy to frag. The hardest part will be separating the pieces from the rock.

    In order to frag green star polyps, first, find a manageable side of the rock where the mat will be easy to separate. If you can’t find a good place to cut, then choose the best spot and use a scissor, scalpel, or razor blade to cut through and detach the piece from the rock.

    For the most part, it doesn’t matter how big or small of a piece you frag as it will quickly recover and start growing. Simply attach the frag to a frag plug with superglue (cyanoacrylate). You may dip this frag in iodine or a special coral mix, but this is not necessary.

    Place the frag towards the bottom of the reef tank. The polyps should start to open in a few days, though these corals can be temperamental after handling. Do not worry as they can survive a couple of weeks of being retracted.

    As mentioned before, your green star polyps may grow too quickly for how much fragging you can manage. These excess corals can be moved to the sump to help with nutrient exportation, given to another hobbyist, or disposed of correctly. If you want a video tutorial, you can check out the video below by OceanStateAquaticsTV.

    How Long Does It Take For Them To Spread?

    Green star polyps can cover a rock in a matter of months. Growth may be slow initially and your coral might not even open for a few days when you first introduce it into the reef tank.

    If conditions are right though, you will have new growth almost every day. This can be seen on the edges of the mat, where the flesh is light purple or white instead of the dark reddish-purple of the rest of the colony.

    If you find that your green star polyps aren’t opening, try to keep conditions stable. You will want to move them around to new areas of the tank for better flow or lighting, but it is best to leave them where they are until they open. If you see algae starting to grow on top of the mat, gently waft away or turkey baster the algae off.

    At the same time, make sure there are available nutrients in the water column. It is not unheard of for green star polyps to not open when sufficient nutrients aren’t available.

    Closing Thoughts

    Green star polyps are one of the best corals and one of the worst corals. They offer vibrant colors and exciting movement to all levels of the aquarium, but they can easily outcompete other species and be extremely difficult to remove once introduced to the tank.

    They are one of the best beginner corals due to their resilience and relatively low care requirements, but can also make a beautiful backdrop or lawn for more intricate setups.


    ๐Ÿ“˜ Want to learn more? This article is part of our complete Saltwater Fish & Reef Guide โ€” your ultimate resource for marine fish, coral care, reef setup, and more.

  • These 9 Great Soft Coral Types Looking Amazing!

    These 9 Great Soft Coral Types Looking Amazing!

    Soft corals were my entry point into reef keeping, and I still think they’re the best place for any hobbyist to start. They’re forgiving with water parameters, grow quickly when happy, and many of them have a flowing, dynamic movement in the tank that you just can’t get from any other type of coral. My 125-gallon reef has always had a mix of softies alongside the SPS, and they fill the tank beautifully.

    Coral reef tanks are a great way to add some life and color to your home. They can bring out the natural beauty of your fish and other marine inhabitants while also adding intrigue in your reef aquarium. Soft corals are an excellent addition to any tank because they offer superb coloration as well as providing nutrients for other organisms that live in your tank. These 9 soft coral types I recommend will look absolutely amazing in tanks!

    Introduction

    Soft corals are largely considered to be some of the easiest corals in the hobby. These corals usually lack a calcium carbonate skeleton and have very fleshy polyps. Some of the most popular soft corals to come across are zoanthids and mushroom corals, but there are many species and variations available.

    Though these corals might seem easy, they can bring unique challenges to the tank, whether it be a toadstool coral that hasn’t opened in weeks or pulsing xenia that are taking over the rest of the display. When done correctly, they can bring as much color and excitement to the tank as any other species of more advanced coral.

    How Many Species Are There?

    In order to know how many soft coral species there are, we first need to understand the taxonomy of corals.

    At the highest rank, corals belong to the Cnidaria phylum1, which also contains jellyfish. After that, they may be part of the Octocoralia subclass or Hexacorallia subclass in the Anthozoa class. Subclasses are dependent on the symmetry of the polyps; soft corals belong to Octocoralia while stony corals belong to Hexacorallia.

    From these subclasses, corals then get broken up into four main orders that are commonly kept by reef tank hobbyists:

    • Corallimorpharia (approx. 50 species). These are considered soft corals as they lack a skeleton entirely, like mushroom corals.
    • Alcyonacea (approx. 1500 species). These corals are known as the true soft corals even though they contain sclerites, which are small pieces of calcium carbonate skeleton present in the flesh of the coral. Examples of Alcyonaceae are leather corals as well as gorgonians.
    • Zoantharia (approx. 100 species). Zoanthids are also considered soft corals, though they commonly incorporate sand and other hard materials into their flesh for structure.
    • Scleractinia (approx. 1600 species). These corals are considered true reef-building corals as they create their own calcium carbonate skeleton; this order contains large polyp stony (LPS) corals and small polyp stony (SPS) corals. Some of the most common species of Scleractinia are Acropora spp. and Euphyllia spp..

    These approximations are always changing so there can never be a sure number. However, it can be assumed that there are about 1500 species of true soft coral. Consider that not even a fraction of these are available in the home aquarium hobby, though there is still an overwhelming selection to choose from.

    It should also be noted that even though SPS and LPS are categorized together in the Scleractinia order, they are considered to be very different in the reef tank hobby.

    The 9 Best Soft Coral Types (Species of Soft Corals)

    Here are the most common species of soft coral you’re likely to come across at your local aquarium store and their care requirements.

    We got a video above from our YouTube Channel that you can follow along. If you like our content, be sure to subscribe as we post new videos every week! We go into more details below in our blog (and have links where you can purchase them).

    1. Zoanthids

    Editor’s Choice
    Zoanthids

    Editor’s Choice!

    Zoas come in multiple colors and easy to care for. The perfect choice for nano tanks!

    Shop Designer Zoas Shop For WYSIWSG Zoas!
    Scientific NameZoanthus spp.
    Difficulty LevelEasy-Moderate
    TemperamentNot aggressive
    PAR RequirementsModerate (50-150 PAR)
    Flow RequirementsModerate
    PlacementMiddle, High
    OriginWorldwide in warm, shallow waters

    Zoanthids are loved by beginner and expert hobbyists alike. There are many varieties of zoanthid available, coming in all colors and patterns. This diversity can make some zoanthids go for thousands of dollars.

    Zoanthids are very easy to care for if they like your tank; these corals are notorious for closing up for weeks at a time for apparently no reason at all. They can quickly overgrow other corals and their potential palytoxin can deter some hobbyists.

    Otherwise, multiple types of zoanthid can make a beautiful zoa garden at low, medium, and high placements of the tank with moderate flow and lighting.

    2. Mushroom Corals

    Mushroom Corals

    Mushroom corals have exploded in variety over the last few years. Multiple colors available and lots of exotic varieties. Affordable and easy to care for!

    Shop WYSIWYG Buy On eBay
    Scientific NameCorallimorpharia Order (Actinodiscus/Discosoma spp., Rhodactis spp., and Ricordea spp.)
    Difficulty LevelEasy
    TemperamentSemi-Aggressive
    PAR RequirementsLow-Moderate (<50-150 PAR)
    Flow RequirementsLow
    PlacementBottom, Middle
    OriginWidespread, mainly Australia, Tonga, the Caribbean, and Indonesia

    The Mushrooms coral at first glance may not be the most exciting coral to have, though hobbyists especially favor the Ricordea species, R. florida and R. yuma. Mushroom corals can be hairy, bumpy, or smooth and can come in purples, blues, greens, oranges, yellows, and reds.

    Mushroom corals are some of the easiest to frag, which can be good practice for beginner reefers. These corals also have a unique walking-propagation ability where they leave pieces of themselves behind to create new mushrooms. This can quickly lead to overgrowth, which can sometimes be difficult to control.

    3. Toadstool Leather

    Toadstool Leather Coral

    This leather coral offers a showpiece sized coral that is easy to care for. Requires no dosing and thrives in a variety of conditions

    Click For Best Price Buy Japanese Toadstool
    Scientific NameSarcophyton spp.
    Difficulty LevelEasy
    TemperamentPeaceful
    PAR RequirementsLow-Moderate (<50-150 PAR)
    Flow RequirementsModerate-High
    PlacementBottom, Middle, Top
    OriginThroughout the Indo-Pacific (Fiji, Australia, Tonga, Solomon Islands)

    Toadstool corals are some of the largest corals available, with some species growing 2 feet across. Luckily, these corals are also very easy to frag in order to help control rapid growth. They are limited in colors, coming only in greens, browns, tans, and yellows, but can have varying tentacle lengths.

    These corals regularly shed a thin layer of their flesh about once every month. This may be due to stress, but it is usually to help keep algae and other debris off the coral. Because of this regular shedding, they do best in moderate to high water flow.

    4. Green Star Polyps

    Green Star Polyp
    Scientific NamePachyclavularia spp.
    Difficulty LevelEasy
    TemperamentPeaceful
    PAR RequirementsLow-High (<50-200+ PAR)
    Flow RequirementsModerate-High
    PlacementBottom, Middle, Top
    OriginThroughout the Indo-Pacific (Fiji, Australia, Tonga, Solomon Islands)

    Green star polyps (GSP) are some of the fastest-growing soft corals, which is why some hobbyists avoid them entirely. It’s strongly recommended to keep them on a rock island on their own in order to prevent them from spreading everywhere; it is also very common to see them on the back of the reef tank to create a wall of shimmering green or on a glass-bottom to make a waving lawn.

    While green star polyps are one of the best choices for beginner hobbyists, many reefers regret introducing them into their tanks. Luckily, they are easy to frag as well.

    5. Pulsing Xenia

    Pulsing Xenia
    Scientific NameXenia spp.
    Difficulty LevelEasy
    TemperamentPeaceful
    PAR RequirementsLow-Moderate (<50-150 PAR)
    Flow RequirementsLow-Moderate
    PlacementBottom, Middle, Top
    OriginThroughout the Indo-Pacific (Fiji, Australia, Tonga, Solomon Islands)

    Xenias are one of the most popular soft corals next to green star polyps. These pale pink and purple corals bring immense movement to the tank as they pulsate their polyps without the need for additional water flow.

    Unfortunately, some xenia don’t pulse or stop after some time for unknown reasons even though they might be completely healthy otherwise. As long as they are kept in low to moderate flow and low to moderate lighting, they will continue growing regardless of if they stop pulsing.

    6. Kenya Tree

    Kenya Tree Coral
    Scientific NameCapnella spp.
    Difficulty LevelEasy
    TemperamentPeaceful
    PAR RequirementsLow-Moderate (<50-150 PAR)
    Flow RequirementsLow-Moderate
    PlacementBottom, Middle, Top
    OriginThroughout the Indo-Pacific (Fiji, Australia, Tonga, Solomon Islands)

    Kenya tree corals can fill up large spaces in the reef aquarium with their fluffy branches. Though they might be considered plain in their dull pink and brown colorations, these corals have a softness that not many other species offer.

    The problem with Kenya tree corals is that they spread rapidly. These corals are able to propagate by sending off their branches to other parts of the tank where they quickly establish themselves; these new frags are also hard to completely remove from the rockwork, which makes them very difficult to control.

    7. Colt

    Colt Coral
    Scientific NameKlyxum sp.
    Difficulty LevelEasy
    TemperamentPeaceful
    PAR RequirementsLow-Moderate (<50-150 PAR)
    Flow RequirementsLow-Moderate
    PlacementBottom, Middle, Top
    OriginThroughout the Indo-Pacific (Fiji, Australia, Tonga, Solomon Islands)

    Colt corals (picture source) are very similar to Kenya tree corals and difficult to tell apart even though they’re in two totally different genera. There are a few ways to tell these two species apart.

    First, colt corals have fuller and more transparent branches compared to the thick, opaque branches of Kenya trees. Second, colt corals can be described as more slimy than Kenya trees when handling, which resemble the feeling of a sturdier leather coral; remember, try avoiding touching your corals as much as possible to not stress them out.

    8. Devil’s Hand

    Devil's Hand Coral
    Scientific NameLobophytum spp.
    Difficulty LevelEasy
    TemperamentPeaceful
    PAR RequirementsLow-Moderate (<50-150 PAR)
    Flow RequirementsModerate-High
    PlacementBottom, Middle, Top
    OriginThroughout the Indo-Pacific (Fiji, Australia, Tonga, Solomon Islands)

    Devil’s hand corals are named after their unique fingerlike appearance. These corals are a type of leather coral, like toadstools, which means that they also shed due to stress or for cleaning; because of this, they need higher water flow to help remove the flaking flesh in the process.

    Unlike other leather corals, devil’s hand corals have very short tentacles which can make them look like they’re not fully expanded.

    9. Pipe Organ

    Pipe Organ Coral
    Scientific NameTubipora musica
    Difficulty LevelIntermediate
    TemperamentPeaceful
    PAR RequirementsLow-Moderate (<50-150 PAR)
    Flow RequirementsModerate-High
    PlacementBottom, Middle, Top
    OriginThroughout the Indo-Pacific (Fiji, Australia, Tonga, Solomon Islands) and the Western Pacific Ocean

    Pipe organs aren’t very common to come across in the home aquarium even though they come in beautiful floral patterns. These corals are not your typical soft coral. In fact, these soft corals have an intricate red calcium carbonate skeleton, which earns them their musical name!

    This slow-growing skeleton needs to be kept clean from algae and detritus with proper water flow. They also need available calcium and stable alkalinity to build their skeleton, which can make them more challenging than the other species on this list.

    What Is The Difference Between These and Hard Corals?

    When talking about aquarium corals, you may come across words like LPS, SPS, hard/stony, or soft corals. In general, soft corals are considered the easiest with LPS best for intermediate hobbyists and SPS being saved for only the most dedicated reefers. But anatomically, these corals are very different.

    Hard Corals

    Hard corals, also known as SPS, belong to the Scleractinia order and are responsible for reef-building. They form large calcium carbonate skeletons that house symbiotic zooxanthellae in fleshy polyps. As members of the Hexocorallia subclass, their polyp symmetry is divisible by six.

    These skeletons are usually branched and form the picturesque reefs we are used to seeing. They house a plethora of life, including fish, invertebrates, bacteria, and other microorganisms.

    Softer Corals

    Soft corals–according to the aquarium hobby–belong to the Corallimorpharia, Alcyonacea, and Zoantharia orders. These corals do not form full calcium carbonate skeletons and create very fleshy polyps. Some species, like those from Alcyonacea, form smaller skeletal structures called sclerites. As members of the Octocoralia subclass, their polyp symmetry is divisible by eight.

    Interestingly, most soft coral species do not have fossil records as the animal has no concrete structure that can be preserved.

    Keeping Them In The Aquarium

    Soft corals are considered to be some of the easiest corals to keep in the aquarium and are often recommended as corals for beginners. Many species do not require intense reef lighting or flow and they can grow very quickly in less-than-ideal conditions.

    On the other hand, some hobbyists greatly struggle with keeping some of these ‘easy’ corals. In some cases, the tank might be considered too perfect for these undemanding species and the coral fails to thrive as a result.

    For example, it is strongly believed that zoanthids favor dirtier water with plenty of available nutrients. More advanced hobbyists keeping delicate SPS might have water that is too clean and void of nutrients to sustain a healthy zoanthid colony.

    So even though soft corals do not require much special attention, there is no guarantee that they will be easy in your aquarium setup.

    What Is The Easiest Type To Keep?

    With that being said, which soft corals are the easiest to keep? For the most part, all of them.

    There are many options for beginners and advanced reefers alike to choose from. Here are the most common recommendations:

    • Green star polyps
    • Mushroom corals
    • Leather corals
    • Pulsing Xenia
    • Zoanthids

    As mentioned before, though these corals are generally considered easy, they can be some of the most challenging corals you have in your aquarium depending on your setup.

    When Can You Add Them To The Aquarium?

    If you’re a beginner just starting to explore the saltwater world of the aquarium-keeping hobby, you’ll be eager to add your first coral to the tank. In order to succeed in this hobby though, you will need lots of patience.

    Though soft corals are very forgiving of poor water parameters, they are still much more difficult to keep than marine fish or freshwater plants. They need stability, available nutrients, good lighting, and good water flow. New setups rarely have any of these.

    In short, it is not recommended to add soft corals to a newly established tank during the first 3 months. These 3 months test many new hobbyists with algae outbreaks, diatoms, Aiptasia, and livestock compatibility. Corals are expensive and it isn’t fair to them or worth the risk of introducing them into unfavorable conditions.

    Instead, allow the tank to establish a good beneficial bacteria population. Control algae and find the perfect photoperiod for your setup. Figure out if your tank runs best with weekly or biweekly water changes (or none at all if you are brave enough๐Ÿ˜…) . Trace how your nutrient import and export changes daily. Then, you may add corals.

    Soft corals are good starter corals for many as they don’t require nutrients to be dosed. As long as a reliable marine salt mix is being used and nutrients are being added into the tank via fish food, waste, and other detritus, your soft corals should be able to sustain themselves.

    For mature tanks, soft corals can be added at any time. More importantly, it is necessary to find the right placement for them in order to keep them away from other corals. Though most soft corals are not capable of stinging, they can easily overgrow and shade out other species.

    Closing Thoughts

    Soft corals are some of the easiest species to keep and come in all colors, shapes, and sizes. There are some differences between the scientific classification for soft corals, LPS, and SPS that differ from aquarium standards, but all soft coral species generally require the same care.

    With so many options to choose from, a soft coral and macroalgae setup might just be the next setup you have in mind for your own saltwater aquarium. Have any questions for me? Leave them in the comment section and let’s start a discussion. Happy Reefing!


    ๐Ÿ“˜ Want to learn more? This article is part of our complete Saltwater Fish & Reef Guide โ€” your ultimate resource for marine fish, coral care, reef setup, and more.

  • Bubble Coral Care – A Complete Guide

    Bubble Coral Care – A Complete Guide

    Bubble coral is one of those LPS corals that looks absolutely spectacular when it’s happy and fully inflated, and I’ve kept them in my reef over the years. They do require a bit more attention than beginner corals โ€” placement matters a lot, and their sweeper tentacles extend farther than the bubbles suggest. Get their care right and they’ll be a centerpiece coral that draws attention from anyone who sees your tank.

    Proper Bubble Coral Care can be a little more complicated than other types of corals. They require specific lighting and water parameters to thrive, so it’s important that you take the time to learn what they need before adding them to your tank! This guide will walk you through all the steps for setting up a bubble coral system and caring for these delicate creatures. Let’s get started!

    A Quick Overview On The Bubble Coral

    Scientific NamePlerogyra spp. and Physogyra spp.
    Common NamesBubble coral, grape coral, pearl coral
    FamilyEuphylliidae
    OriginCountry – Widely found throughout the Indo-Pacific and the Pacific Ocean (most colonies are imported from Indonesia)
    Common ColorsGreens, whites, yellows, pinks
    Care LevelEasy
    TemperamentAggressive
    LightingLow-Moderate (50-150 PAR)
    Tank PlacementBottom, Middle, Top
    Flow RateLow – Moderate
    Temperature Range76-82 degrees F
    pH Range8.0 โ€“ 8.4
    Salinity1.025 or 35 PPT
    Alkalinity8 โ€“ 12 dKH
    Calcium Level350 โ€“ 450 PPM
    Magnesium Level1250 โ€“ 1350 PPM
    PropagationCutting/Fragging (Expert Only)

    Origins And Habitat

    Bubble corals come from a wide range of environments. They have been found in dark and turbid waters as well as bright and clear seas.

    Bubbles are largely found throughout the Indo-Pacific and the Pacific Ocean, but most available colonies in the hobby originate from Indonesia specifically; more Australian colonies have entered the trade due to difficult propagation and trading bans on coral.

    Naming

    These corals are commonly known as the bubble coral, grape coral, or pearl coral due to their appearance. Though they have previously been categorized as a member of the Euphylliidae family, their exact taxonomic categorization is largely up for debate and still unknown.

    The common name ‘bubble coral’ is actually used to describe two different genera, Plerogyra and Physogyra. The difference between these two genera is that Plerogyra spp. usually have larger bubbles and a blade-like skeleton while Physogyra spp. have smaller bubbles with a flatter skeleton; Physogyra spp. are often referred to as pearl bubbles1.

    Some of the most common species to come across are Plerogyra sinuosa and Physogyra lichtensteinii. Luckily, the care requirements for these two genera do not differ.

    In the aquarium hobby, these corals may be further named according to their area of collection. For example, you may come across ‘Aussie bubble corals’, ‘Indo bubble corals’, ‘Marshall Island bubble corals’, or wherever else they might have been collected from; these names may even be carried over for those corals that have been aquacultured.

    Some hobbyists find Aussie bubbles to be more sensitive than Indo bubbles, but this is specific to each tank.

    What Do Bubble Corals Look Like?

    What Does A Bubble Coral Look Like

    These corals look exactly how you might imagine them. Bubble corals are large polyp stony corals (LPS) with a calcium carbonate skeleton and round fleshy polyps. They can grow to be several inches across and reach reasonable heights.

    There are two main types of bubble coral variety:

    • Ones with rounded, grape-shaped bubbles; some of these that have smaller bubbles may also be labeled as ‘pearl’ (Physogyra spp.)
    • Ones with irregularly shaped bubbles

    No matter what kind of bubble coral you have, your coral should always be fully extended. The level of polyp expansion can correlate to lighting. Low lighting can cause your coral to inflate more in order to optimize photosynthesis and high lighting can cause more compacted bubbles.

    Bubble corals have very jagged skeletons which can easily puncture their own bubbles. This can make transporting them very difficult, but not impossible. For as fragile as they are, hobbyists have found them to be incredibly resilient and can come back from near death.

    Along with being fully extended, your bubble coral should have bright colors; though they do not come in many different colors, the greens, whites, yellows, and pinks of your coral should be vibrant. Bubble corals have almost transparent flesh, but color should never be entirely absent.

    At night, these corals retract their bubbles. They send out long, clear sweeper tentacles that are used for feeding and attacking any corals that get too close; these tentacles do have nematocytes, or stinging cells, which can cause some irritation or inflammation to human skin and even more damage to nearby corals.

    During this time, the skeleton will be exposed and you will be able to see how jagged it really is. Remember, this skeleton should never be exposed at any other time.

    Placement In The Aquarium

    Bubble Coral Placement

    Bubble corals aren’t the most popular coral in the hobby, but they’re one of the most adaptable.

    These corals can be placed in nearly all locations of the aquarium as long as adequate acclimation is allowed for and care is given when handling; these corals can be more top-heavy than others, so long-term placement needs to be secured with superglue (cyanoacrylate) or epoxy.

    Do They Like High Water Flow?

    No, bubble corals do best with low to moderate water flow. Flow should be just enough to keep the bubbles slightly moving – aim for gentle water movement. Anything more than this could damage the coral.

    Moderate flow is needed for these corals to remove algae and debris as well as to keep them fed. At night, they use their sweeper tentacles to help catch food that needs to be moved past them with a current.

    How Much Light Do They Need?

    Naturally, bubble corals are found in a variety of light intensity conditions. They can withstand lower light (50 PAR) on the substrate or be acclimated to the top (150 PAR) of the reef.

    Because of how large they can get and how delicate they are if they fall, most hobbyists choose to keep them on or near the substrate. If choosing to keep them on the sand, make sure that the water flow is not pushing granules onto the coral. This can cause irritation which can lead to retraction and infection.

    Wherever you choose to place them, they should be secure and away from anything that could rub up against them, like rock, the aquarium glass, or other corals.

    Temperament In The Aquarium

    Though bubble corals might look harmless, they need to be given their space in the aquarium. Their sweeper tentacles are relatively long and very capable of inflicting a sting on nearby corals.

    It can be difficult to judge placement in the aquarium at first as these sweeper tentacles usually only emerge at night. In general, it is best to leave about 5-6 inches of buffer room for your coral to fully expand and extend its tentacles.

    It also isn’t uncommon for your bubble coral to change shapes throughout the day. When the lights come on, your bubble may still have its sweeper tentacles out with a lot of exposed flesh. As the day goes on and the light reaches higher intensities, it may form more compact bubbles.

    Care And Maintenance

    Bubble Coral Maintenance

    Bubble corals aren’t the easiest species of LPS, but they don’t require much special care either. As mentioned before, the biggest concern with these corals is transporting them and acclimating them correctly.

    Otherwise, they need standard reef conditions and can be kept with hang on the back, canister, or sump filtration. If you start to notice algae growing around the skeleton, it should be carefully removed with a turkey baster or by hand to prevent it from smothering the polyps.

    Dosing

    Bubble corals do not need any additional nutrients as long as a quality marine salt mix is being used. The main nutrients these corals need are nitrates, phosphates, calcium, magnesium, and stable alkalinity; contrary to once-popular belief, corals need available nitrates and phosphates for the best health.

    Because bubble corals make their own skeletons, they heavily rely on calcium, magnesium, and alkalinity for steady growth. These parameters are usually maintained through regular water changes, though they might need to be dosed if keeping larger colonies of LPS and/or keeping small polyp stony corals (SPS) as well.

    Simply track how parameters change in the tank between water changes. This will show how nutrients are being used and recycled throughout the system. If levels fall too much, then it might be time to start dosing; make sure to only dose what is needed.

    Feeding

    Unlike other species of LPS, bubble corals appreciate being fed every now and then. They get the majority of their food from the water column, but will usually willingly accept any supplemental feedings.

    In fact, these corals can be fed relatively larger pieces of meaty foods like fish, shrimp, and crab in addition to smaller foods like brine shrimp, mysis shrimp, and coral-specific products. A great coral food to try is reef-roids.

    Simply place the food near the mouth of the coral and wait for it to start moving it in. Do not overfeed as this can create unnecessary waste and start to stress out your coral in the long run.

    Are They Hard To Keep?

    Once settled, bubble corals are easy to care for. They’re not as common to come across as some of the other fleshy LPS species, like Euphyllia, but they can be just as eye-catching in a reef tank setup.

    In general, these corals can be kept by hobbyists at the beginner, intermediate, and advanced levels. Handle these corals with care and keep the skeleton clean of algae.

    What Are Good Tankmates?

    Bubble corals are one of the most tankmate-friendly coral options available. As long as it’s reef-safe, there’s a good chance it will get along with your bubble.

    Again, the main concern you should have is keeping your bubble coral undamaged. Anything with pincers or sharp teeth, like crabs or triggerfish, could easily damage your coral. Otherwise, tangs, gobies, damsels, and wrasses are all possible options.

    Unlike other LPS with longer tentacles, clownfish do not host bubble corals nearly as much. Though bubbles don’t bring as much movement to the aquarium as other similar corals, you don’t have to worry about losing your colony to an overly aggressive clownfish.

    Fragging

    Fragging bubble corals is usually not recommended for any hobbyist. But if you’re dealing with an overgrown coral, fragging is your only option.

    This process can be most likened to fragging a wall hammer coral in terms of difficulty. It is recommended to attempt fragging a bubble coral only if an electric saw is available. Here is a great video by MileHighReefers that shows the fragging process. I’ll provide a summary below.

    There are two main ways to frag your bubble coral:

    1. Just go for it. If choosing this method, first make sure all polyps are closed as much as they can be. Do this by lightly touching the coral, making sure not to cause injury. Next, look for already-defined lines of division; if your bubble coral is branched, divide the branches. It is not recommended to cut through the mouth or the flesh unless highly experienced.
    2. Have some patience. This method takes a little more time but tends to have higher success rates, especially if needing to split a large polyp. First, use a rubber band to divide the polyp; you want to force the coral to separate into two. From here, you will have a defined line that can be cut with a saw or, if done carefully, a Dremel tool.

    Both of these methods carry high failure rates, though bubble corals are known for bouncing back pretty quickly if something goes wrong.

    Why Is Your Coral Dying?

    There are three main reasons your bubble coral might be dying: water flow, injury, or water parameters.

    Bubble corals need some flow to deliver food and to keep them clean, but anything more than enough will damage their delicate flesh. If you notice your coral start to close up or recede from the base, check how much direct flow it is receiving and move accordingly.

    Injury and infection are the biggest killers for bubble corals and often happens during transportation. When purchasing a coral, but sure that it is fully extended and shows good coloration. Make sure to handle the coral from the base to prevent any further stress or injury; use a coral dip or iodine to facilitate healing. Brown jelly infections are also another common issue with bubble corals.

    Unfavorable aquarium water parameters, including lighting conditions, can also cause your coral to die back. Usually, other corals in the tank will also show signs of poor water quality, but LPS can recede very quickly once started. If you recently moved your coral to a higher spot in the tank and it is failing to extend, then you might not have allowed enough time for acclimation.

    Closing Thoughts

    Bubble corals are relatively easy to care for, but fragging and any excessive handling can cause problems. They don’t come in many colors, but their inflated appearance and full expansion bring life to the middle and lower regions of the tank. With some acclimation, they can even be moved to the top of the reef!


    ๐Ÿ“˜ Want to learn more? This article is part of our complete Saltwater Fish & Reef Guide โ€” your ultimate resource for marine fish, coral care, reef setup, and more.

  • Bristle Worm in Reef Tank โ€“ Friend or Foe? (Complete Guide)

    Bristle Worm in Reef Tank โ€“ Friend or Foe? (Complete Guide)

    Bristle worms are one of those reef tank discoveries that tends to freak people out the first time they see one โ€” I remember the first time I spotted one in my 125-gallon reef and wasn’t sure what I was looking at. After years of reef keeping, my view is clear: most bristle worms are your friends, not your enemies. They’re detritivores doing cleanup work you’d otherwise have to do yourself, and removing them all is usually a mistake.

    Bristle worms are one of those reef tank surprises that almost every reefer encounters sooner or later โ€” I certainly did when I set up my 125-gallon reef. The first time I spotted one under the rocks at night, I wasn’t sure whether to panic or leave it alone. After 25 years in the hobby, I’ve come to appreciate that these guys are often more beneficial than harmful, but there are exceptions. This guide covers everything you need to know about identifying bristle worms in your tank and deciding whether to remove them.

    What Are Bristle Worms?

    Bristle worms are one of the most common ‘pests’ to come across in reef aquariums though many hobbyists see them as essential cleanup crew members (featured image source).

    Scientifically, bristle worms are members of the Polychaeta class. With over 10,000 species under this taxonomic categorization, most members have segmented bodies with parapodia that grow chaetae made from chitin. In simple terms, these worms grow bristles on the sides of their body (earning them their name), though some species lack them.

    Polychaetes have perfectly adapted to a variety of aquatic environments with some being found in the coldest regions of the ocean and some in the hottest, like the Pompeii worm (Alvinella pompejana) that can be found at extreme pressures and temperatures around hydrothermal vents. These worms use these bristles as protection from being eaten by predators and to sometimes help circulate water in and out of tubes; these bristles may be venomous for further protection.

    In the wild, these worms greatly help with the decomposition of organic matter. However, they can also take part in commensalism relationships where the worm benefits but does not harm the other organism as well as parasitism where the worm benefits and harms the other organism.

    Almost unbelievably, bobbit worms (Eunice aphroditois) can grow to be almost 10 feet long with other species of Polychaete growing to all sizes under that. Luckily, bristle worm species in the aquarium hobby usually stay under 4 inches and are much tamer than their wild counterparts.

    Bristle Worms in the Aquarium

    When you first see a bristle worm in your fish tank, you may feel the sudden urge to tear down your tank and heavily sanitize–yes, these creatures can be scary to see at first especially if you’re not familiar with their existence.

    For the most part, bristle worms are not visible in the aquarium and will stay hidden. There are a few times you might see your bristle worms emerge though:

    1. During feedings. Bristle worms are scavengers and are quickly alerted to any food that becomes available in the water column. If you ever want to check the health of your bristle worm population, simply add some fish food to the tank and watch as they slither out of their cracks and crevices.
    2. During saltwater tank maintenance. If using a filter sock or other sponge media, you are bound to catch some bristle worms. For the most part, you can leave them alone. However, you will want to be careful during maintenance periods when handling that media as you can hit them with your hand; aquarium gloves would prevent most bristle worm encounters from happening.
    3. During decomposition. As mentioned before, bristle worms are excellent members of the reef tank cleanup crew. They are attracted to decaying matter and will be one of the first on the scene to take advantage of uneaten food or a dead fish or invertebrate.
    4. During the night. Bristle worms are largely nocturnal and will become most active and present when the tank lights are out.

    Bristle worm populations directly correlate to the abundance of food in the tank; more available food equals larger populations of bristle worms and vice versa.

    While there isn’t ever a thing as having too many bristle worms in your reef tank, they can definitely start to become unsightly over time; some more advantageous types of bristle worms might even start to steal food from fish and corals if food supplies become limited.

    It should be noted that there have been some claims of bristle worms injuring or killing fish. Though these claims are few and far in between, it’s not impossible.

    If keeping sand-dwelling fish, like gobies, it is also possible for your fish to get pricked by a bristle worm. Bristle worm-hungry fish, like wrasses, may get stabbed around their mouths while eating. These injuries will eventually heal and there is usually no reason to worry, however, keep an eye out for any signs of infection.

    How Do They Enter the Aquarium?

    Bristle worms enter the aquarium just as any other hitchhiker does: through objects moved between tanks.

    One of the most common ways to introduce a bristle worm into the aquarium is through live rock. These worms have the incredible capability to burrow themselves into the deepest parts of live rock where they can’t be reached.

    In the same way, bristle worms can come in on frags plugs and skeletons of coral (like LPS corals) as well as substrate or filter media that was previously used in another saltwater tank. Though less likely, some bristle worm species reproduce by releasing eggs and sperm into the water column that eventually become free-swimming larvae. Both eggs and larvae could possibly be transferred via water.

    Once in the aquarium, your bristle worms will continue to reproduce in this way in relationship to the amount of food available. Some species may also reproduce asexually.

    What Do They Do in the Aquarium?

    Besides looking somewhat scary, what do bristle worms actually do, and are they worth keeping in your reef tank?

    The short answer is yes. Bristle worms are one of the most beneficial hitchhikers that can be introduced into your tank as long as they are the right kind. These worms are natural detritivores that clean up the various waste and detritus that are created in the aquarium; some species can be omnivorous.

    For the most part, bristle worms stay in the substrate or in the live rock. Like terrestrial worms in the soil, they can help aerate substrate in order to prevent nitrate buildup. Shuffling the substrate can also help algae from forming on the surface and make vacuuming easier. Inside of the live rock, bristle worms can clean hard-to-reach places and help dead zones from collecting waste.

    Overall, bristle worms are a helpful, abundant, and often free member of the tank clean up crew that does not need to be removed or monitored. However, if you’re dealing with anything other than your typical bristle worm, there might be some cause for concern.

    Types

    Though all bristle worms might look the same, they’re usually lumped into two categories in the aquarium hobby: good (harmless) and bad (harmful).

    With so many species–and so many still unknown–it can be very difficult or even impossible to assign an exact scientific name to the type you have. It is very likely that you end up with more than one species in your reef tank anyway, so a broader categorization is better.

    The Good Guys

    Bristle Worm Upclose

    Most bristle worms are beneficial and look the same (picture source). They are typically light red to pink. There is usually a darker section of their body which is food being digested. These worms have clear or white bristles on either side of their flat body and usually stay under 3-4 inches long.

    The Bad Guys

    In general, bad bristle worms are any that deviate from this ‘common’ bristle worm appearance. This can mean deeper intensities of pinks and reds, striping, or differences in size; some hobbyists remove any worms they see that have breached the 4 inch mark, though this does not necessarily mean that they are a harmful species.

    The bigger concern with larger bristle worms is that they can start to produce significant amounts of bioload and possibly eat or injure fish and invertebrates. Most of all, they are an unsightly member of the tank system.

    On the other hand, there are a few species of bristle worm that are known to be bad through and through. This includes members from the Eunicidae family and fireworms.

    Eunicid Worms

    Eunicids are pretty easy to identify. These dark red or black worms are considerably larger and rounder than common bristles, with some growing in excess of 10 inches, like the bobbit worm.

    Their most defining feature is their antennae which surround their feeding structure. These can usually clearly be seen poking out from rockwork or the substrate. Otherwise, they have thinner and more separated bristles than regular bristle worms.

    Though some reef tank owners allow smaller eunicid worms to keep their tanks clean, larger individuals have been known to go after fish and corals. As a result, many hobbyists try to remove them as soon as possible.

    Fireworms

    Fireworm

    When researching saltwater aquarium bristle worms, one of the first things that will come up is a fireworm. These worms are considered one of the worst hitchhikers that could enter your system as they have highly irritable bristles that can cause severe pain and discomfort; it is strongly believed that some species of fireworm are venomous.

    These worms are named after their bright white bristles that are sometimes puffy-looking and fiery sting. Fireworms are usually thicker, longer, and much more ornate than regular bristle worms. They can feature dark reds and browns. If your bristle worm looks dangerous, it is probably a fireworm.

    There are over 120 different species of fireworm, though they’re not incredibly common to come across in the reef aquarium. One of the most common species to come across is the bearded fireworm (Hermodice carunculata).

    Though these worms can inflict serious pain, they are not deadly to humans or fish. If you suspect that you have a fireworm in your tank, use thick gloves and/or remove it from your tank immediately.

    What Happens If You’re Stung By A Fireworm?

    Fireworm stings aren’t very common, but if you happen to get stung by one, you’ll want to know what to do.

    Fireworm stings are painful and you’ll know right away that something has happened. Though, in an aquarium, there are many things that could possibly hurt you so closer examination is needed.

    First, look at the affected area. Most times, you’ll be able to see the bristles in the skin. These bristles should first be removed with tweezers or adhesive tape. Isopropyl alcohol and vinegar may be applied to the area; the isopropyl alcohol will help prevent infection while the vinegar will dissolve any remaining bristles. Ibuprofen may be taken for the pain.

    Common symptoms of a fireworm sting are localized burning sensations, bumpy skin, irritation, and blotchiness. In extreme cases, the person may experience dizziness and nausea and medical assistance is recommended.

    If mild symptoms continue, hydrocortisone may be applied over the following days. If infection starts, it is recommended to seek medical attention and start a course of antibiotics.

    Bobbit Worm (The Nightmare)

    The scariest bristle worm that you will ever come across would be the bobbit worm. They are known as the nightmare of saltwater fish tanks. These predators can grow as long as 10 feet and will readily eat fish in your aquarium. They often times will be hidden for a long time and the aquarist will wonder why their fish keep disappearing. They will hitchhike on live rock and considered one of the major pests you can get from them. Want to be scared? Check out this video below by Smithsonian Channel.

    https://youtu.be/K_7ByiYbCYM

    How to Get Rid of Worms

    If you really can’t stand the look of bristle worms, then you’ll want to get them out of your tank as soon as possible.

    Luckily, there are a few ways to get rid of bristle worms safely and with little to no additional work. Here are some of the best options for eliminating or controlling bristle worm populations.

    Traps

    There are many bristle worm traps commercially available that are specifically made for catching bristle worms. Simply place this trap in your tank with some food loaded and you should catch a good amount of worms at a time; these traps are designed so that the bristle worms can easily enter but cannot exit.

    There are also some DIY alternatives. One of the methods for making a bristle worm trap is by using a bottle or a piece of PVC piping. If using piping, make sure that both sides are sealed.

    First, cut form-fitting holes along the sides of the bottle or pipe. Angle straws or another cylindrical plastic tube pointing down towards the sand bed; you may create as many of these entryways as you want. Place some food inside, submerge overnight, and remove the bristle worms the following morning.

    Manual Removal

    In addition to traps, you may try manually remove bristle worms from your aquarium. This is much more time-consuming but can deal with any stragglers that might refuse to go in a trap.

    Basically, use tongs to remove any bristle worms you see at any given moment. These worms are surprisingly fast and will react to changes in light, like the shadow from an incoming hand, so make sure to be fast with your movements.

    Some hobbyists even lure bristle worms out by attaching food to the end of the tongs and picking up any that make their way out. There is no wrong way to catch them, though it is recommended to wear protective gloves if working up close to them.

    Natural Predators

    If you have a large enough aquarium and want to add another fish or invertebrate but also want to get rid of your bristle worm problem, then there are also a few livestock options.

    Arrow Crabs (Stenorhynchus seticornis)

    Arrow crabs are one of the best invertebrate solutions for controlling bristle worm populations. These crabs can be scavengers or active predators and will gladly eat any bristle worm they come across.

    However, these crabs aren’t 100% reef-safe. They have been known to pick at corals and even other slow invertebrates and fish. They will not take care of any algae in the tank and heavily rely on meatier foods for sustenance.

    If wanting to keep an arrow crab in the aquarium, then tank mates should be considered carefully; there should be nothing that your crab could accidentally eat and there should be nothing that could accidentally eat your crab!

    Wrasses

    Yellow Coris Wrasse

    Wrasses are one of the best fish to add to your aquarium if you’re having a bristle worm explosion. These fish are active and colorful and have a big appetite for worms.

    Wrasses can differ in size and behavior, so it’s important to check if your fish is compatible with your setup before adding it to your tank. Here are some of the best wrasse species to get rid of your bristle worm problem:

    • Six Line Wrasse (Pseudocheilinus hexataenia) – maximum size of 3 inches; minimum tank size of 55 gallons
    • Pink-streaked wrasse (Pseudocheilinops ataenia) – maximum size of 2.5 inches; minimum tank size of 15 gallons
    • Red coris wrasse (Coris gaimard) – maximum size of 15 inches; minimum tank size of 125 gallons
    • Melanurus wrasse (Halichoeres melanurus) – maximum size of 4.5 inches; minimum tank size of 50 gallons
    • Yellow coris wrasse (Halichoeres chrysus) – maximum size of 4.5 inches; minimum tank size of 50 gallons

    Apart from wrasses, there are a few other fish species that could help control bristle worm populations in your aquarium. Some of these options include goatfish (Mullidae family), butterflyfish (Chaetodontidae family), and gobies (Gobiidae family).

    What To Do With Unwanted Worms

    If you’ve chosen to use a trap or manually remove your bristle worms, you’ll find yourself wondering what to do with them. There are three options you have for dealing with unwanted bristle worms:

    1. Sell/give them away to another hobbyist. Believe it or not, bristle worms are in high demand. They’re one of the best cleanup crew members and some hobbyists haven’t been fortunate enough to have them come in on their rock. Ask local hobbyists and fish stores if they’re interested in taking them off your hands.
    2. Put them in your sump. If you have sump filtration, underneath the tank is the perfect spot for your worms. They will continue to clean just as well, but out of sight from your main display. It is very possible that some will make their way back up through the plumbing, but this can be controlled with a natural predator or regular removal.
    3. Dispose of them. If you have no other option, then humanely killing the bristle worms is the best method of disposal. You can place them in freshwater, hydrogen peroxide, or a coral dip that specifically targets invertebrates.

    Closing Thoughts

    While bristle worms might not be the prettiest aspect of your saltwater aquarium, they are one of the best live rock hitchhikers that and can come on coral frags. Like other hitchhikers, there are good and bad species, though the bad ones are relatively easy to remove by hand or with a natural predator; if handling, always use proper safety equipment.

    Otherwise, bristle worm populations will sustain themselves based on the amount of food available in the aquarium. Smaller ones will typically not affect fish or corals, though larger ones should be removed in order to prevent possible injury.


    ๐Ÿ“˜ Want to learn more? This article is part of our complete Saltwater Fish & Reef Guide โ€” your ultimate resource for marine fish, coral care, reef setup, and more.

  • Everything You Need to Know About Toadstool Coral Care

    Everything You Need to Know About Toadstool Coral Care

    Toadstool coral is one of my top recommendations for anyone setting up their first reef tank, and I keep them in my own reef. They’re remarkably hardy, grow relatively quickly, and the way they wave in the flow is something I never get tired of watching. One thing I always tell people: don’t panic when a toadstool sheds its slime coat and looks terrible for a few days โ€” it’s completely normal and part of how they grow.

    Looking to learn about proper Toadstool Coral Care? If so you are in luck! Toadstool Corals are a perfect choice if you are looking for a beautiful, hardy coral to add to your reef tank at home Toadstool corals are known for their bright colors and easy care. In fact, these beauties will thrive in even some of the most basic aquarium setups! Learn more about this fascinating invertebrate below so that it can become an integral part of your underwater ecosystem!

    Quick Overview

    Scientific NameSarcophyton spp.
    Common NamesToadstool, toadstool mushroom leather coral, leather coral, mushroom coral, trough coral
    Family
    OriginWidely found throughout the Indo-Pacific (Fiji, Australia, Tonga, Solomon Islands)
    Common ColorsGreens, browns, tans, yellows
    Care LevelEasy
    TemperamentPeaceful
    LightingLow-Moderate (50-150 PAR)
    Tank PlacementBottom, Middle, Top
    Flow RateModerate-High
    Temperature Range76-82 degrees F
    pH Range8.0 โ€“ 8.4
    Salinity1.025 or 35 PPT
    Alkalinity8 โ€“ 12 dKH
    Calcium Level350 โ€“ 450 PPM
    Magnesium Level1250 โ€“ 1350 PPM
    PropagationCutting/Fragging

    Origins And Habitat

    Like so many other species, the toadstool leather coral is commonly found throughout the Indo-Pacific off the coasts of Fiji, Australia, Tonga, and the Solomon Islands. These corals thrive in shallow, mixed reefs where they often grow into huge plates that can quickly overshadow life below.

    Though they will always grow towards the light, toadstool corals an be seen growing at most levels of the reef. If they are overshadowed by another coral, they can easily extend their stalk so that tentacles are once again at optimal lighting conditions.

    What Is It?

    In conversation, toadstool corals are regularly referred to as leather corals. However, there are actually several genera of leather coral, which can get confusing as they look and act pretty similar to one another; they are also all soft corals that lack an internal skeleton structure.

    The most common species of leather coral to come across in the aquarium hobby are:

    • Sarcophyton spp. are types of toadstool leather coral. Both Sarcophyton spp. and Lobophytum spp. have dimorphic polyps which means that some tentacles are extended while others stay in the flesh of the coral; toadstool leather corals have much longer extended tentacles than the other genera.
    • Lobophytum spp. include devilโ€™s hand leather corals. These corals also have dimorphic polyps, though their extended tentacles are much shorter and less present than those of toadstool corals. Devil’s hands are popular for their unique claw-shaped formations instead.
    • Sinularia spp. are even more branched than Lobophytum spp. and are largely referred to as finger corals. These corals have small tentacles close to the flesh of the coral that can make for a fuzzy appearance.

    Other leather coral genera you may come across are Kenya trees (Capnela), colt corals or finger leathers (Cladiella), colt corals or cauliflower colt corals (Klyxum), and nepthea or cauliflower corals (Nepthea).

    These corals can be very difficult to tell apart as undeveloped frag pieces. As you can also see, their names are very confusing, which can make identifying your leather very difficult even as fully grown corals.

    What Do They Look Like?

    How Does A Toadstool Leather Coral Look Like

    Toadstool corals are one of the most recognizable species of leather coral and one of the easiest corals to identify in general. A Toadstool leather coral has a singular stalk with a large cap. This cap features extended tentacles which can vary in length across species. Toadstool corals are very accurately named after their similar appearance to toadstool mushrooms.

    Though toadstool corals are relatively plain in color, only featuring greens, browns, tans, and yellows, they are a popular addition to the reef aquarium because of their impressive sizes. These corals can grow to be almost 2 feet across, though they usually stay under a foot in the aquarium setting!

    Luckily, toadstool corals are very easy to propagate so they are easy to handle if they get too big.

    Placement In The Aquarium

    Toadstools are very adaptable corals, however, they aren’t necessarily the least demanding. For being such a beginner-friendly coral, toadstools do best under low to moderate lighting with moderate to strong flow requirements.

    Many hobbyists find that lighting plays a big role in the colors expressed by your toadstool leather coral. Higher lighting will usually cause your toadstool leather coral to be brighter and more vibrant. However, these corals are a low-light species and only need about 50-150 PAR1. They need to either be acclimatized to higher areas in the tank over time or left to grow their stalk naturally.

    Keep in mind that these corals can get huge and will block out light from other corals below. While they can be placed at all levels of the aquarium, it takes some planning to make sure that you don’t lose a big chunk of real estate in your reef aquarium.

    Toadstool corals also need moderate to high flow. In most cases, flow can never be too strong as the coral will adapt and strengthen its stalk; of course, move the coral if it is being bent over by the current. On the other hand, flow can be too low.

    Shedding

    Leather corals are unique as they have the ability to shed. This happens about once every one to two months and is a natural part of how they keep algae and waste off of them. When your toadstool coral is getting ready to shed, you might notice that it changes colors and has its tentacles retracted for a couple of days.

    Eventually, you will see a thin shiny layer form on top of your toadstool coral. Over the next few days, this layer will be shed; this shed can get stuck on other rocks and corals in the tank, but it is not harmful. Once done shedding, your toadstool coral will emerge brighter and fuller than before.

    In order to make sheds easy for your toadstool leather coral, it is best to keep it under moderate to high flow.

    While shedding is a natural process to keep algae and waste from building up on your coral, it can also be a sign that something is wrong in the water column. Toadstool leather corals are notoriously temperamental with some hobbyists having corals that refuse to open on weeks on end.

    For the most part, this isn’t a concern if water parameters are stable and all other livestock is doing well. Expect your leather coral to shed towards the end of this ‘dormant’ period.

    Temperament In The Aquarium

    For being such a large coral, these corals are very peaceful and almost harmless to other species. There are two main concerns you might have if planning on getting a toadstool coral.

    Space

    These corals get huge and their growth is unpredictable. Their stalk does not take up much space on the rockwork, but their cap can spread out several inches.

    The direction of their growth also largely depends on the water flow and light, so they can take on weird shapes that you might not have allowed for. In general, it’s best to place toadstool corals first and allow some time for them to grow before adding more corals below them.

    Luckily, these corals do not have sweeper tentacles and can’t sting, so that is not a concern.

    Toxicity

    Some species of toadstool coral are toxic and can engage in chemical warfare. This might sound scary, and the effects can devastate a tank, but there are ways to be prepared should this happen.

    In most cases, toadstool leather corals release their toxins under stress and or if they’re dying. If this happens, you will see other corals also start to rot, shed, or die. For this reason, it is important to remove melting leather corals from the tank as soon as they are noticed; it is possible to frag dying corals if healthy areas still remain.

    Once the problem coral has been removed, add activated carbon to remove organic impurities (toxins) from the water and perform large water changes over the next few days. If possible, the remaining corals should also be removed from the reef aquarium and moved into quarantine until the tank is ready again.

    Care And Maintenance

    Toadstool Coral in Reef Tank

    Otherwise, toadstool coral care is easy and straightforward. These corals check all the boxes of growing quickly, bringing movement to the tank, and being easy to keep.

    There are many different species and varieties of toadstool leather coral, which can bring some difficulty to more advanced hobbyists if preferred. For example, the Fiji yellow coral (Sarcophyton elegans) is one of the hardest species to keep as it requires high light and high water flow to keep its yellow frilled appearance fully vibrant.

    Are They Easy To Keep?

    Leather corals, especially toadstool leather corals, are very easy to keep. These corals are hardy, easy to find, and easy to frag. They also grow very quickly and are very large, which can be appealing to beginner hobbyists who are looking to quickly fill their saltwater tank. In fact, there is little to no maintenance needed after adding a leather to your aquarium.

    Water Parameters And Dosing

    Toadstool corals do not need any special water parameters. As a soft coral, they do not need to build a calcium carbonate skeleton so they do not heavily rely on many nutrients to grow like large polyp stony corals (LPS) or small polyp stony corals (SPS).

    That being said, toadstool corals need average reef conditions with available nitrates and phosphates. Too often, hobbyists strive for perfect parameters with 0 ppm across the board. Though this might seem like the perfect system, limited nutrients are actually a sign of an unhealthy tank.

    Instead, nutrients should be available for coral growth. If keeping only soft corals, these nutrients usually do not need to be dosed and are introduced naturally into the tank through fish waste, food, and other debris. However, if keeping larger LPS or SPS, then it is recommended to dose those nutrients that are being used for growth.

    Feeding

    These corals do not need to be fed and will grow quickly enough on their own. In fact, these corals are actually too slow to be fed effectively; their tentacles are very slow to retract so food has the chance to be swept away or eaten by something else in the meantime.

    If you are really wanting to feed your toadstool leather coral, then small planktonic foods and specific coral foods, like coral powders, Phytoplanton, and pellets, can be given once or twice a week.

    What Are Good Tankmates?

    Toadstool corals can be kept with nearly all reef safe fish and invertebrates. It should be noted that toadstools with long tentacles may be mistaken as an anemone by clownfish. Unlike other anemone-lookalikes that retract when hosted, like Euphyllia, toadstools are typically better at withstanding annoyances from tankmates and will stay expanded.

    In fact, I have personally had hermit crabs crawl all over the tops of toadstools. Though the coral retracted when touched in that one location, it left its other tentacles open and was quick to extend to full size once the hermit crab left.

    Still, more coral-hungry fish and invertebrates should be avoided. Anything with teeth or pincers is capable of cutting through the soft flesh of a leather coral, which can lead to toxin release in extreme cases.

    Fragging

    Toadstool corals are one of the easiest corals to frag but can be a little intimidating due to their size and the possibility of toxin release. There is little reason to worry though as long as all tools and equipment are laid out ahead of time.

    First, you will need to decide if you want to frag the toadstool coral still inside the main display or if it is possible to remove it and frag it in another tank or bucket. Sometimes the coral is too large or too integrated to remove from the tank, in which case you will need to frag it directly in the aquarium. Here is a good video on how to frag a toadstool coral by How To Reef. I’ll have some details below if you want to keep reading along.

    To frag a toadstool that is still in the aquarium, simply use a scissor or a razor blade to cut pieces from the top. Be sure to avoid the stem as the parent toadstool will use this to grow a new cap. Remove the pieces of frag. It is strongly recommended to run activated carbon and perform larger water changes the following days to remove any possible toxins.

    Many hobbyists like to trim their toadstool frag pieces more uniformly in order to get a more symmetrical appearance once the coral grows; this is not required, but simply trim the pieces into squares and discard or frag the remaining scraps.

    In order to attach the frag to a frag plug or a piece of rock, you may use superglue (cyanoacrylate) or rubber bands. Superglue isn’t as effective with toadstools as these frags may shed several times before attaching to the given surface. In this case, be prepared that some frags may fall off before fully attaching.

    A more secure way to attach your toadstool frag is by using a rubber band. Simply wrap the rubber band around the frag and the rock/frag plug. Make sure that the pressure isn’t too tight as this can cause the frag to split apart.

    Once everything is done, simply dip the frag in fresh saltwater and/or a coral dip to make sure that no toxins are released back into the display aquarium and to help with recovery.

    How Fast Do They Grow?

    One of the reasons toadstools are so easy to propagate is because they recover very quickly. Most times, frags will open their tentacles immediately after being cut but will still take several weeks to completely attach to their new surface; the parent coral may take a little longer but should recover within a couple of weeks.

    After that, toadstools grow very quickly. A frag can turn into a mature coral in less than a year and continue to grow in girth and circumference.

    Why Won’t Your Coral Open?

    As mentioned before, toadstools are notoriously temperamental and have been known to close for weeks on end without any signs of improvement. But how long is too long and when should you start to be concerned?

    As mentioned before, toadstools are very hardy. However, this does not mean they will thrive in less-than-ideal conditions. Instead, they can take a long time to acclimatize to changed conditions. For example, a toadstool introduced to a new aquarium may take several weeks to fully open up even if water parameters are ideal.

    A closed toadstool leather coral can also be a sign of poor water quality, though other fish and corals will likely show signs of unhappiness first. Another reason might be that your coral is going to shed, whether it be because of stress or because it needs to clean itself. If you notice other corals closing up during this time as well, it would be best to test water parameters.

    Lastly, a closed toadstool could be a sign of brown jelly disease. These corals bruise very easily, which can invite infection, namely brown jelly disease. In which case, it is best to remove the affected coral and treat it vigorously as this can be highly contagious.

    Closing Thoughts

    The toadstool coral is a large, impressive coral that doesn’t require much extra care. Not only are toadstool leather corals easy to care for, but they’re also very affordable, quick to grow, and can be fragged easily. These corals might not be the showiest in terms of color, but their extended tentacles can bring movement to the beginner or advanced reef aquarium setup. Leave us your thoughts on this type of leathery reef builder below!


    ๐Ÿ“˜ Want to learn more? This article is part of our complete Saltwater Fish & Reef Guide โ€” your ultimate resource for marine fish, coral care, reef setup, and more.

  • Acan Coral Care – How To Care For Your New Coral

    Acan Coral Care – How To Care For Your New Coral

    Acan corals are some of my favorite LPS to collect โ€” the color variety is extraordinary and they respond visibly to feeding in a way that’s really satisfying to watch. I’ve kept them in my reef for years, and once you get their placement and lighting dialed in, they’re not particularly difficult. The main thing people get wrong is not feeding them directly, which is where most of their growth comes from.

    If you just got a new Acan coral for your reef tank and are wondering how to care for it, read on! Acan corals are one of the most popular types of coral in the hobby. They come in many colors and shapes, so if you’re looking to fill up some space with color, this is a great option. Let’s go deeper with the essentials on Acan Coral Care so you can have a thriving colony yourself!

    A Quick Overview

    Scientific NameAcanthastrea spp.
    Common NamesAcans and micros, largely named after their designer names
    FamilyLobophylliidae
    OriginWidely found throughout the Indo-Pacific (Fiji, Australia, Tonga, Solomon Islands) 1
    Common ColorsPurples, blues, greens, oranges, yellows, reds
    Care LevelEasy
    TemperamentAggressive
    LightingLow-Moderate (50-150 PAR)
    Tank PlacementBottom, Middle
    Flow RateLow-Moderate
    Temperature Range76-82 degrees F
    pH Range8.0 โ€“ 8.4
    Salinity1.025 or 35 PPT
    Alkalinity8 โ€“ 12 dKH
    Calcium Level350 โ€“ 450 PPM
    Magnesium Level1250 โ€“ 1350 PPM
    PropagationCutting/Fragging

    Origins And Habitat

    Acan corals originate from the tropical waters around Fiji, Australia, Tonga, and the Solomon Islands. They form large colonies often found on the seabed or near the bottom of the rockwork of shallow reefs (30-50m).

    Most acans available within the hobby today come from Australia. However, these corals are popular to aquaculture because many wild acans arrive with bacterial infections; aquaculture also gives better control over color expression and subsequent designer names as well as growth rates.

    Taxonomy And Naming

    Acan corals are abbreviated after their taxonomic genus, Acanthastrea. There are several large polyp stony coral (LPS) species within Acanthastrea, though only Acanthastrea echinata and Acanthastrea bowerbanki are widely kept in the saltwater aquarium hobby. 

    Micromussa lordhowensis (named after their discovery near Lord Howe Island) used to be classified under Acanthastrea, but was recently moved to the Micromussa genus. Now, these corals may still be referred to as their popular name, acan ‘lord’, or simply called micros. It’s an LPS coral with lots of hobby names!

    What Do They Look Like?

    How Does An Acan Coral Look Like

    An Acan coral is easy to identify, though their flattened, suction-cup appearance can sometimes resemble Blastomussa spp., species of brain coral (Mussidae and Merulinidae families), or even chalice corals (Echinophyllia spp.). Their fleshy polyps as a lot of interest contrast other corals in the display tank.

    In general, acan corals form tight colonies with puffy outer rims and deeper, flatter centers. The outside is usually a different color from the inside and might display a gradient of color. In healthy and/or hungry acan coral colony, clear tentacles will be visible along the inner rim of the mouth. A single acan coral polyp typically stays under an inch in diameter when fully grown, but larger species may be closer to two inches.

    The different species of acan corals can be difficult to tell apart from each other, though their requirements in reef aquariums are all relatively similar. Here are some ways to tell the most common three species apart:

    • Acanthastrea echinata is most commonly found in variations of red, orange, and green, but may be found in other colors as well. These corals are in between M. lordhowensis and A. bowerbanki in regards to the size. They have a smooth appearance and are flatter than these other species as well.
    • Acanthastrea bowerbanki is the largest species of acan coral out of these three. They are flattened and have a bumpy texture. In colonies, they take on irregular shapes.
    • Species of Micromussa lordhowensis are referred to micros due to their small size in comparison to the two other species. These are some of the most colorful acan coral and can come in many different colors and patterns.

    As mentioned before, the acan coral is largely marketed based on appearance. Some of the most desirable acan corals show the best colors, like ‘rainbow’ and ‘ultra’ variations.

    Acan Coral Care

    These corals are not demanding and can thrive in places of the saltwater aquarium where other species might lack light. However, their colors, size, and growth rate largely depend on the type of light they’re being kept under as well as how often they’re being fed.

    An Acan coral are a low to moderate light coral, which means that they will do best on or near the sandbed. They need moderate water flow to keep food moving past their clear center tentacles and to keep debris from building up in between the colony. If given ideal conditions with room to grow, they will quickly take over an isolated rock island.

    However, can acan coral can be very aggressive even though they lack the long sweeper tentacles of other LPS corals. Some hobbyists choose to keep them on the main rockwork of the display, but this can quickly become a problem once the acans get close to other corals; allowing the acan coral to grow on the rockwork also creates a flatter shape whereas they will create a more circular colony on an island.

    Different species of acan coral should not be placed together. Unlike other corals that are compatible within the same genus, members of Acanthastrea are incompatible with each other and will start to attack the other if placed too closely together.

    Do They Like High Light?

    Acans can actually be kept at most levels of the reef tank. However, they vary in size and color under different lighting conditions. An acan coral kept under LED lighting will look much different from one kept under T5HO lighting. This can be tricky purchasing an acan coral in-store or online as they will likely change color once introduced into a home system.

    In general, an acan coral does best under low to moderate lighting. This gives some freedom for placement, filling in shaded areas of the reef tank and bringing color to the sandbed.

    Are They Difficult To Keep?

    Overall, the acan coral is considered one of the easiest lps corals to care for and beginner-friendly. Unfortunately, they are not favored by most beginners though.

    Acans do not bring exciting movement to the reef tank like other LPS coral like Euphyllia that wave in the water current. On top of this, they do not grow fast and hobbyists might be left wanting more.Many of the cheaper varieties are much less colorful than the more desirable ones, so there is no real incentive to waste space on one of these seemingly boring corals.

    However, acans are very hardy and can adapt to most tank conditions. Their low lighting requirements make them a perfect addition for hard-to-fill shaded areas in the aquarium. Once the tank has become established enough, it’s more than worth it to go for the pricier varieties to bring a pop of color to dark areas of the reef tank.

    Maintenance

    Acan Coral

    An Acan coral does best in stable conditions with good water quality, unmoved and unbothered. Because these corals are naturally slow-growers, it’s extremely important to keep conditions favorable to prevent delaying the growing process any further.

    As a species of LPS coral, the acan coral needs nutrients to build its calcium carbonate skeleton. This includes some nitrates, magnesium, calcium, and trace elements; most importantly, the tank cannot be overly clean, or else your corals will not thrive. Alkalinity also needs to be stable in order for the rest of the system to be stable.

    Acan corals do not need any special care and can successfully be kept with sump filtration, a canister filter, or a simple hang on the back filter. A protein skimmer is not necessary and not recommended for low-nutrient systems.

    If keeping large colonies of acan coral or keeping SPS coral, it is recommended to dose those nutrients needed. However, acans are eager eaters and can get most of their nutrition through regular feedings.

    Feeding

    Though acan corals might not be the most exciting to watch in the reef aquarium, they’re one of the favorites to feed. These corals will accept most foods most of the time. You can tell they are hungry as they release their small, inner clear tentacles; some hobbyists have trained their acan coral colony to show these tentacles at feeding times.

    Otherwise, a healthy acan coral should have its feeding tentacles out a majority of the time. If you don’t see yours during the day, check back when the tank lights are shutting off and shortly after. If you still don’t see tentacles, make sure the coral looks healthy otherwise.

    Most hobbyists consider feeding acan corals a must for success. Yes, they can sustain themselves with the nutrients available in the water column, but additional feedings really make them thrive. You check out this video by The Reefer for a nice overview on feeding an acan coral.

    What Do They Eat?

    These corals can be fed a variety of foods and are very willing to try new things. Unlike other LPS coral, acans are relatively quick to eat. Simply place the food in the center of the polyp and the coral will start to eat almost immediately.

    This makes feeding easier as you’re not dealing with hungry fish or invertebrates that are trying to steal the food away. Good acan coral food options are fresh or frozen krill, brine shrimp, Mysis shrimp, and bloodworms as well as larger pieces of seafood, like fish, shrimp, and mollusks. Acan corals can also be fed coral powders and pellets, like Reef-Roids.

    Some hobbyists like to feed their acans every day, though this can start to cause nutrient buildup from the leftovers. Instead, target feed your acan corals 2-3 times a week. This may be done at night as this is when their tentacles are most present. They really live foods like Reef Roids. Make sure to feed each head.

    What Are Good Tankmates?

    These corals can be kept with most species of fish and invertebrates. With any reef aquarium system, you want to avoid species that are not reef-safe, like puffers, angels, and triggers. Keep in mind that most crabs are also not reef-safe.

    Some better reef safe fish would be:

    While gobies and blennies are reef-safe, they may choose to use your acan coral as a perch which will cause the coral to retract. Though this doesn’t directly injure the coral, it can interfere with photosynthesis and nutrient intake. It is also very unlikely that the coral will grow or reproduce if it is constantly stressed by a fish or invertebrate walking over it.

    Fragging

    Not only do acan corals grow slower than most other LPS coral species, but they can also be more difficult to frag. This is because the skeleton of the colony is connected throughout and can only be separated by an electric saw or a very careful bone cutter.

    If using an electric saw, simply cut the coral around the contour of the polyp. Make sure to never cut through the polyp as this will most likely kill it. Attach the frag to a piece of rock or frag plug and make sure to dip it in iodine or another coral solution; acan corals are very susceptible to bacterial infections and a dip will help keep the coral healthy and speed up recovery.

    If using a bone cutter, the process is the same. However, you need to be much more careful with where you cut and to make sure you don’t accidentally split the skeleton elsewhere in the colony as this could damage the whole colony. Given how precise you need to be when fragging Acan, I prefer a bandsaw like a Gryphon.

    My Pick For Pro Fragging
    Gryphon Bandsaw

    Best For Pro Fraggers

    The Gryphon Bandsaw is a high quality commercial fragging tool. Made in the USA and equipped with a diamond band saw. This is used to cut the highest quality, cleanest cuts possible for coral fraggers!

    Click For Best Price Buy On Amazon

    How Fast Do Acan Corals Grow?

    It is generally agreed that acan corals grow very slowly, but once they get going, they will quickly fill up space. Be prepared to wait close to a year to see any signs of growth from your acan coral. From there, they can develop several new heads at a time within a couple of weeks.

    Why Is It Dying?

    There are a few reasons why your acan coral might be dying. Some of the most common explanations are nutrients, light, other corals, or fish/invertebrates.

    1. Acan corals need nutrients to survive. For the last decade, hobbyists were convinced that all water parameters needed to be 0 ppm. This starved the corals and left hobbyists wondering what they were doing wrong. Acan corals need these nutrients from the water column to grow. This can then be supplemented with additional feedings. If your coral is lacking in color or not fully extending, test for nutrients.
    2. Remember, these corals prefer low light conditions. More light is not always better, though this might be true for more advanced LPS corals and SPS species. With acan corals, less light is better for growth and color. If you think your acan coral is too high in the tank and changes color or is retracted, then it probably is. Try slowly moving it to a more shaded area of the reef aquarium. They don’t like being in too much light!
    3. Acan corals are pretty aggressive corals. They have been known to engage in coral warfare more even aggressive LPS coral and SPS corals and win. However, they lack sweeper tentacles so their defenses are limited. If they are being stung by a coral with longer tentacles, they may be taking damage. Take a look into your tank at night and look for any corals that have their tentacles extended. Move the acan coral if necessary.
    4. Finally, your acan coral might be dying because it doesn’t get the chance to fully extend without being walked over or picked at by a fish or invertebrate. Observe your tank a few times throughout the day and take a headcount of where everything is. Watch how snails, hermit crabs, urchins, blennies, and gobies move throughout the day.

    Acan corals are pretty hardy and are not ones to die overnight without any explanation. Most likely, one of the reasons listed above is why your coral is not thriving.

    Make changes, but remember to do them slowly. Too many changes all at once can also damage your acan coral and unbalance your entire system.

    Closing Thoughts

    Acan corals aren’t the most popular coral, but they’re one of the easiest to care for and funniest to feed. Unfortauntely, they have been designated designer names which can make the more desirable varieties unattainable for some hobbyists. Luckily, the three species, Acanthastrea echinata, Acanthastrea bowerbanki, and Micromussa lordhowensis, give plenty of options. Even the simplest-colored acan coral can bring additional color and life to an otherwise dark and empty space of your tank!

    We hope you’ve enjoyed this blog post about Acan coral care. If it’s been inspiring and informative for you, we’d love to hear from you in the comments! What do your favorite coral varieties have that others don’t? Do they require different care or feeding than other species? Let us know below!


    ๐Ÿ“˜ Want to learn more? This article is part of our complete Saltwater Fish & Reef Guide โ€” your ultimate resource for marine fish, coral care, reef setup, and more.

  • Everything You Need to Know About Mushroom Coral Care

    Everything You Need to Know About Mushroom Coral Care

    Mushroom corals are one of the first corals I recommend to anyone setting up a reef tank, and I keep them in my own setup as well. They’re incredibly tolerant of less-than-perfect water parameters, they spread readily, and the color variety available is genuinely impressive. If you’ve never kept corals before, mushrooms are the place to start โ€” they’ll build your confidence while actually looking great in the tank.

    Looking for a colorful and easy to care for coral? A Mushroom Coral is as easy as it gets when it comes to easy coral care. These wonderful corals are not only easy to growth, but also come in a variety of colors. They will fulfill the needs of a reefer who is just starting out and satisfy the hobbyist looks for the most exotic corals they can buy. With the popularity of bounce corals and jawbreaker mushrooms, there is a mushroom coral for everyone!

    Let’s dive in and learn how awesome these corals are!

    Species Overview

    Scientific NameCorallimorpharia Order (Actinodiscus/Discosoma spp., Rhodactis spp., and Ricordea spp. most commonly found in the reef aquarium hobby)
    Common NamesMushroom corals, mushroom anemones, disc anemones, and false corals, but commonly named after physical attributes where possible
    FamilyVarious – Corallimorphidae, Disosomatidar, Ricordeidae, and Sideractiidae
    OriginWidespread in temperate to tropical waters; major origins include Australia, Tonga, the Caribbean, and Indonesia
    Common ColorsPurples, blues, greens, oranges, yellows, reds
    Care LevelEasy
    TemperamentSemi-aggressive
    LightingLow-Moderate (<50-150 PAR)
    Tank PlacementBottom, Middle
    Flow RateLow
    Temperature Range76-82 degrees F
    pH Range8.0 โ€“ 8.4
    Salinity1.025 or 35 PPT
    Alkalinity8 โ€“ 12 dKH
    Calcium Level350 โ€“ 450 PPM
    Magnesium Level1250 โ€“ 1350 PPM
    PropagationCutting/Fragging

    Origins And Habitat

    Mushroom corals are found throughout most temperate to tropical marine ecosystems. These corals do not need much light and thrive in low flow environments. Most notably, they can be found in Australia, Tonga, Indonesia, with some of the most popular species originating from the Caribbean, namely from the coasts of Florida.

    Mushroom corals, or mushroom anemones, can spread very quickly and are often found in large colonies, covering rocks and other structures, including other corals.

    Morphology And Common Names

    The Corallimorpharia Order1 is a large taxonomic category containing nearly 50 species. However, most coral species in the reef aquarium trade belong to the Actinodiscus/Discosoma, Rhodactis, and Ricordea genera, which are collectively referred to as mushroom corals.

    The mushroom coral is a soft coral, which means that it does not produce a hard calcium carbonate skeleton like large polyp stony corals (LPS) or small polyp stony corals (SPS). As we’ll see later, this makes for easy propagation of the coral.

    Interestingly, members of the Corallimorpharia Order are very similar in morphology to SPS (Scleractinia Order), though this is difficult to see without looking at polyp segmentation. Instead, to most of us, these corals resemble the dome-shaped top and stalk of a terrestrial mushroom, earning them their most common name.

    While members of Actinodiscus/Discosoma, Rhodactis, and Ricordea are generally referred to as mushrooms, many mushroom corals have been given specific names with more rare and expensive variations being assigned brand names.

    For example, members of Actinodiscus/Discosoma are typically named after their colors, like red and blue mushroom corals. Some types of Rhodactis may be named after their color combinations as well, but this genus also contains ‘bounce’ mushroom coral variations.

    Ricordea species are simply called ricordeas most of the time due to their unique longer-tentacle appearance and can only be classified into Ricordea florida or R. yuma:

    • R. florida has a small mouth that is usually not surrounded by tentacles. The tentacles on the rest of the polyp are random in size and placement. Sometimes these tentacles will have orderly color distribution, but this may be random as well.
    • R. yuma has tentacles surrounding the mouth and is much more colorful comparatively. Their structure follows more order and usually has alternating small and large tentacles as you move to the outside of the polyp.

    Are They A Type Of Soft Coral?

    It is also possible to find mushroom corals referred to as false corals. Do not be mistaken as these animals are soft corals. Soft coral refers to their lack of defined internal structure. More specifically, mushroom corals lack any trace of skeleton, even small pieces of sclerite.

    Because of this, mushroom corals do not have any fossil records.

    Other Types Of Mushroom

    There are several other species that are present in the reef aquarium hobby, but more uncommon to find in your average hobbyist’s tank.

    This includes members of Amplexidiscus and Paracorynactis which can be very aggressive eaters.

    What Do They Look Like?

    What Does A Mushroom Coral Look Like

    Most mushroom anemones are easy to identify, though some have been modified in appearance so that they might resemble other corals at first glance.

    These are a few ways you can tell species of mushroom coral apart. Here are several different types:

    Disco Mushrooms

    Actinodiscus/Discosoma (pictured above) is considered one of the easiest and hardiest genera of mushroom coral. These corals are simple in appearance with a circular disk and a mouth in the middle and lay flatly against the surface; these disc anemones usually has a bumpy texture. Actinodiscus/Discosoma spp. grow a few across in diameter and are most commonly found in solid reds, blues, and greens.

    Rhodactis Mushroom Corals

    Rhodactis Mushroom Coral

    Rhodactis contains some of the more desirable morphs of mushroom coral, like the bounce coral. However, most species of Rhodactis are slightly more ornate than Actinodiscus/Discosoma species and have a pilled or frilly characteristic. They are usually two or more colors with nearly all combinations and gradients available. These corals can range greatly in size and may stay under one inch or grow close to two feet like elephant ear mushroom corals.

    Ricordeas

    Ricordea Mushroom Coral

    Ricordea has become very popular in recent years, specifically for biotope setups. As mentioned before, there are only two species of Ricordea. In general, ricordea mushrooms are much different from the previous two genera and can be told apart even if interspecies differences might be similar. These ricordea shrooms come in a variety of bright colors, stay pretty small, and are recognized for their bumpy appearance. The most popular variant is Ricordea florida.

    Sadly, most plainer-looking mushrooms, like those from the Actinodiscus/Discosoma genus aren’t kept in the hobby as much anymore due to more desirable morphs and because of how rapidly they can spread across an aquarium.

    If you’re looking to quickly fill a rock with color in your reef tank though, these mushroom corals can be the perfect addition.

    Why Are Bounce Corals So Expensive?

    Bounce Mushroom

    Despite some mushrooms being undesirable, others are extremely favored and go for high prices. In specific, these are bounce mushrooms, like Sunkist Bounce mushrooms and OG Bounce mushrooms, that can go for over $200 and $700 per polyp respectively.

    Bounce mushrooms are a modified type of Rhodactis. They are prized for their overgrown tentacles that are often bright colors and patterns. However, it is unknown how these morphs come about, and so they are rarer to come across. This, in addition to the market of assigning brand names, has made these corals some of the most expensive frags in the industry.

    While expensive, these mushroom corals don’t require much extra attention than other types of mushrooms Though losing one of these definitely hurts a lot more than a regular $20 polyp!

    Placement And Temperament In The Aquarium

    Though mushrooms corals greatly in size, shape, and color, their overall requirements are very similar. These corals thrive in reefs with available nutrients as well as in low to moderate reef light and low water flow movement, apart from Ricordea yuma.

    The mushroom coral is very forgiving of water parameters, but won’t tolerate being exposed to too much light and high flow conditions. Mushrooms actually have the ability to move around the rock and even completely detach if they do not like their placement. This can lead to some problems, though.

    While mushrooms do not have sweeper tentacles that can attack other corals in close proximity, they can actually be pretty aggressive; some hobbyists have even seen their mushrooms win a fight with chalice corals (Pectiniidae Family). If a drifting mushroom coral lands near other corals, there is a chance that it will start to attack.

    Because of this, it is also not a good idea to mix different species from different genera together as they will most likely damage each other. Some hobbyists have had success keeping similar mushroom corals together, but this is still a risk.

    The main problem with mushroom coral placement is that they cannot be glued to one place. These corals excrete tons of mucus that prevent the glue from sticking and allow them to slip right out of the hold. Instead, a mushroom coral polyp needs to attach itself to another surface that you can then move–though, your coral might have other plans.

    This can be done by placing the coral under a permeable container or netting with pieces of rock or frag plugs. Within a few days, the mushroom coral should have attached itself. You may then move your coral to other places of the display, in low light and low water flow.

    Otherwise, if you have no other corals in the aquarium, then you can also let your mushroom coral loose in your main display and let it find its own preferred location. Of course, this risks your coral getting stuck in the back of the tank away from light, which could kill the coral.

    Care And Maintenance

    Mushroom Coral Care

    Once your mushroom has settled, these corals are some of the easiest to take care of and to propagate. As mentioned before, most mushroom corals need the same tank conditions and maintenance besides Ricordea yuma.

    General Water Parameters

    Mushrooms do not have any specific water parameter needs. Because they are soft corals, they rarely depend on calcium or magnesium due to their lack of skeleton; this is also true for alkalinity, though alkalinity levels should remain constant.

    Unless keeping other nutrient-demanding corals, dosing is not necessary. Before you know it, you will probably reach a point where your mushroom population gets out of hand and you will have to remove some.

    Otherwise, mushroom corals can adapt to most water parameters as long as they are in the standard range recommended for a reef tank. Of all parameters, these corals will especially appreciate nitrates as too clean of an aquarium can starve the coral in the long run. Mushroom corals can safely be added to new tanks that might fluctuate more in water quality.

    In fact, many hobbyists use mushrooms as a warning coral. While most mushroom corals can adapt to changes in conditions, they will shrivel up and excrete mucus when they are stressed. This can be a good indicator that something is majorly wrong in the tank before fish and invertebrates start being affected as well.

    Feeding

    Feeding your mushroom coral is not necessary. In some cases, feedings won’t show any results and excess nutrients are introduced into the tank.

    However, some types of mushroom corals can be very eager to eat and will enjoy smaller foods. Still, it isn’t recommended to feed more than two times a week to avoid excess waste and to give your coral time to digest.

    Ricordea spp. care

    Some hobbyists have difficulty keeping ricordeas happy in their tank, specifically R. yuma. There are a few reasons why your ricordeas aren’t doing well in your aquarium and it starts with importation.

    Because ricordeas can be found close offshore of Florida, there are large populations of wild-caught mushrooms available for sale. This means that all the hardiness that aquaculture brings with other mushrooms has not been evolved by this genus. This can make ricordeas more demanding when it comes to flow, lighting, and stability.

    Ricordeas seem to do best under moderate water movement and moderate light with a good source of nutrients available. It is also important to make sure that your mushrooms are healthy when introducing them into your display as wild-caught corals can bring disease and pests into the tank.

    However, if you’ve fixed placement and lighting conditions and your ricordeas are still melting, there is not much else you can do. Some aquariums just can’t support some corals no matter how much we try. The best thing to try is finding an alternative or setting up another aquarium completely with ricordea in mind.

    What Are Good Tankmates?

    Firefish

    Mushroom corals can be kept with a variety of reef-safe fish and invertebrates. Ricordea species are a favorite for biotope setups with macroalgae and other soft corals with endemic fish species, though they can be kept in all other reef setups as well. The way mushrooms grow and their size make them ideal for nano reef tanks.

    The main problem you will want to look out for is if your mushroom seems to be closed the better majority of the time. This could be a sign that something in your display is walking over it or stinging it. For the most part, though, mushroom corals are pretty resilient and will learn goby fish or snail habits and will stop closing up at the first touch.

    Of course, fish and invertebrates that are not reef-safe should never be placed with coral. This is especially true as mushrooms can excrete a lot of mucus that can get caught around the tank.

    Are They Toxic?

    Though mushrooms can be pretty messy once they get stressed out, these strings of slime and mucus are nothing to worry about. Mushrooms don’t carry any toxins that are comparable to the deadly palytoxin contained in zoas and palys.

    If you find that your mushroom coral is shedding slime, you may run carbon in your filter and run a protein skimmer until conditions clear up.

    How To Frag

    Propagating mushroom corals is easy and is usually necessary once colonies start overcrowing rocks and other corals. These corals have a unique feature that allows them to regenerate from a small piece of flesh. First, we need to understand how mushrooms reproduce on their own.

    Mushroom corals largely undergo asexual reproduction in the aquarium. However, how they reproduce is dependent on the species of coral. These are two ways that you may see your mushrooms splitting:

    1. Mushroom corals have the ability to split into two. Your mushroom coral may start to form an odd figure-8 shape where there have noticeably short and long sides of their polyp. During this time, you might even be able to see two independent mouths forming in the center. Eventually, these two sides will split into two new polyps.
    2. Mushrooms can also leave a piece of themselves behind, which will then grow into a whole new polyp; this is known as pedal laceration. In cases like this, you will see your coral stretching in one direction with one section of the foot taut. Eventually, the main foot will detach from this part and the piece will develop a recognizable polyp within a few weeks.

    It should be noted that mushrooms that are looking to detach from rocks and move to a new place may also look like #2 and can leave behind a piece in the process.

    When fragging, we try to emulate natural splitting. There are two main ways that mushroom corals can be fragged:

    1. Take a mushroom polyp that is attached to a small piece of rock. Use a scalpel to divide the coral down the middle near the mouth as it would divide on its own. Then, take a bone cutter and split the rock in half; this helps with the issue of a mobile frag and keeps the two pieces from rejoining.
    2. If you’re dealing with a mushroom that isn’t attached to a surface, then you will need another method similar to when you first introduced the coral into your tank. Simply cut the mushroom once down the middle again, or as many times as you would like. Then, use a controlled environment with low flow or use a permeable container that gives time for the frag to attach to a new surface.

    Once the coral has attached itself and fully healed, it is time to move the mushroom to the desired place in the tank or give it away to another hobbyist.

    Mushrooms are extremely forgiving of being fragged and can survive multiple slicings. It is usually not necessary to dip them before being placed back into the display, but iodine or another coral dip may be used for extra security. If you would like a more visual guide, here is a nice video from Reef Life Aquatics.

    Controlling Coral Growth

    Though mushrooms can fill empty spaces in the aquarium, they can also quickly start to get out of hand. Because of their ability to regrow from a small piece, it can be very difficult to control populations once established.

    If your mushrooms are confined to one section then one of the easiest, but definitely not one of the most convenient, ways to fix this is by removing the whole rock from the display. Sadly, this will remove some of the beneficial bacteria from your tank but it ensures that the mushrooms are gone for good.

    If you have mushrooms growing on multiple surfaces throughout the display, then this will be much more difficult and a longer struggle. This method involves removing the mushrooms one by one by hand. Simply keep removing any mushrooms you see and try to scrape away as much of the flesh as possible.

    If you’re comfortable with bringing in some chemical options, then anything that is meant to kill Aiptasia will also work on a mushroom coral, like Aiptasia-X. You will need to be careful as these solutions can also damage other nearby corals.

    Kills Aiptasia
    Aiptasia-X

    A great solution for target elimination of Aiptasia in a reef tank.

    Click For Best Price Buy On Amazon

    One of the last ways to deal with explosive mushroom growth is by reducing the number of available nutrients in the water column. However, this can be tricky and can have ill effects on the rest of your reef.

    Mushroom corals thrive in dirtier water. Once those nutrients are taken away, growth should hypothetically decrease along with them. This method is only recommended for experts in water chemistry.

    Closing Thoughts

    Mushrooms are an understated coral that can bring color to low flow areas of the display with low light conditions. With such a large variety of mushrooms to choose from, there are colors and patterns for everyone.

    These corals can spread very quickly, so population control will be needed to keep numbers in check or to regularly frag new pieces. Otherwise, they will continue to grow wherever they can when nutrients are available.


    ๐Ÿ“˜ Want to learn more? This article is part of our complete Saltwater Fish & Reef Guide โ€” your ultimate resource for marine fish, coral care, reef setup, and more.

  • How to Care for Your New Hammer Coral

    How to Care for Your New Hammer Coral

    Hammer coral is one of my favorite LPS corals to keep in a reef tank โ€” that flowing, tentacle motion in the current is genuinely mesmerizing. I’ve kept both branching and wall hammer varieties in my 125-gallon reef, and they’re moderately demanding but very rewarding once you find their sweet spot for flow and lighting. They’re also one of the corals I get asked about most at reef events, which tells you how popular they are.

    https://www.youtube.com/watch?v=8tLhi6lMLw8

    Welcome to the blog for reef tank owners! This week’s topic is on how to care for your new hammer coral. The Hammer Coral is one of the most popular corals for reef tanks for their unique shape and coloration. Caring for your new Hammer Coral is easy, as long as you know what to do! In this blog post, we’ll discuss how you can care for your new hammer coral so that you can enjoy its beauty! Let’s get started!

    A Quick Overview On The Hammer Coral

    Scientific NameEuphyllia ancora
    Common NamesHammer coral, less commonly known as the anchor coral
    FamilyEuphylliidae
    OriginIndo-Pacific (mainly in western regions) as well as the Red Sea
    Common ColorsGreens, purples/pinks, browns, oranges/yellows, blues
    Care LevelModerate
    TemperamentSemi-aggressive
    LightingModerate (50-150 PAR)
    Tank PlacementBottom, Middle
    Flow RateModerate
    Temperature Range76-82 degrees F
    pH Range8.0 โ€“ 8.4
    Salinity1.025 or 35 PPT
    Alkalinity8 โ€“ 12 dKH
    Calcium Level350 โ€“ 450 PPM
    Magnesium Level1250 โ€“ 1350 PPM
    PropagationCutting/Fragging

    Origins And Habitat

    The hammer coral can be found in large colonies throughout western regions of the Indo-Pacific; some occurrences have also been documented in the Red Sea, but these populations are secondary1.

    These corals prefer shallower waters with moderate flow on the reef. Hammer corals have been observed in turbid waters, but will not do well if placed in areas of excessively high water flow.

    Interestingly, they can be found among other species of Euphyllia, like frogspawns (Euphyllia divisa/Euphyllia paradivisa), as well as with their own even though they contain nematocysts that are capable of stinging other neighboring corals.

    However, more aggressive Euphyllia, like torches (Euphyllia glabrescens) can still cause damage to the hammer coral and will not coexist in close proximity.

    What Does The Hammer Coral Look Like?

    What Does A Hammer Coral Look Like

    Hammer corals are large polyp stony coral (LPS) which means that they form fleshy polyps on top of calcium carbonate skeleton. These corals are one of the most popular corals in the reef aquarium hobby due to their movement in the water current and variety of colors.

    Hammers can come in many colors, including greens, purples/pinks, browns, oranges/yellows, and blues. They typically have darker tentacles and lighter tips, though they can sometimes appear uniform in color.

    These corals are pretty easy to identify by looking at their tips, but not all hammers look the same. Here is a list of possible tip-shapes that you can find among hammer corals:

    • “T” shape. Hammer corals earn their most common name from the flattened tip that resembles the construction tool of the same name.
    • Anchor shape. This shape earns them their second common name and is similar to the “T” shape. However, the edges of the flattened area pull back towards the tentacles, creating an upward curve.
    • Rounded shape. A hammer coral with rounded tips can easily be mistaken for a torch coral. Though difficult to tell apart, hammers with rounded edges usually have shorter and wider tentacles than most torches.

    Hammer corals can also come in branching or wall varieties, both exhibiting all tip-shapes; branching hammers will have independent polyps separated by coral skeleton while a wall hammer coral will have one solid wall of coral skeleton with connected polyps.

    Placement And Temperament In The Aquarium

    Hammer corals are moderately aggressive and should be given plenty of space in the aquarium.

    Though they’re not as aggressive as torches, a hammer coral will extend their sweeper tentacles to keep other corals away. This sting is not completely damaging and most other LPS corals and soft corals can tolerate it, but placement should be planned to avoid eventual interaction.

    The only exception to this stinging is with other species of Euphyllia. Though hammer corals will try to sting other corals regardless of species, most hammers and frogspawn coral are able to peacefully live next to one another.

    If you notice that one species starts to retract more or lose its color, it’s possible that the larger colony is fighting for space and resources.

    How Much Light Do They Need?

    The hammer coral can be placed in most areas of the aquarium. They do best in medium water flow and medium light so that they can fully extend their tentacles. Hobbyists agree that keeping them at higher PARS in excess of 150 does not provide any benefit and can actually cause the coral to bleach.

    Hammer corals can tolerate being placed on the substrate, but care should be taken to avoid rubbing and irritation from rocks or stuck granules. Due to their lower light requirements, most reef led systems should be suitable for Hammers.

    Are They Easy To Keep?

    Yes they are. The Hammer coral is one of the best introductory LPS species for beginner hobbyists looking to move past soft corals. They don’t require intense lighting or water flow and don’t need additional feedings. However, these corals do need stable tank parameters so a mature tank is preferred.

    Water Quality

    But what parameters will allow your coral to thrive? As always, you should strive for stability rather than ideal numbers. There are some ranges where these corals will do their best though (video source).

    A Hammer coral should have access to available nutrients and will actually do better in ‘dirtier’ water. They do not require any special filtration and can be kept in tanks with hang on the back filters, canister filters, and sumps. A protein skimmer can be useful for larger tanks, though your hammer coral will probably appreciate the excess nutrients.

    Because hammers like dirtier water, your water should have up to 40 PPM nitrate and up to 0.1 PPM phosphate. For best color and coral skeleton growth, other parameters should be kept at:

    • magnesium: 1200-1350 PPM
    • calcium: 350-450 PPM
    • alkalinity: 8-12 dKH

    Dosing is not usually recommended unless dealing with much larger colonies and/or a mixed reef with small-polyp stony corals (SPS). Fish waste, water changes, and other detritus are usually enough to keep your hammer coral happy!

    If you are working with a mixed reef, then calcium, alkalinity, and other trace elements will be the most important nutrients for maintaining a healthy reef. Dosed parameters should be tested right after dosing and right before the next dose to measure how nutrients are being used in the tank.

    Feeding

    Hammer corals are not big eaters and will usually rely on what’s already in the water column, like small microorganisms.

    Spot feeding hammer corals can actually irritate them as larger foods cannot be quickly or easily moved into the mouth and might be initially seen as a predator. Because it takes a while for the food to reach the mouth, it is also likely that fish and invertebrates will try to take the food before it can be eaten, leading to further annoyance.

    Are There Any Benefits To Feeding?

    Not really. These corals are experts at finding their own food naturally throughout the tank and attempting to feed them more may just create a nutrient imbalance in your tank.

    If you really want to feed your hammer coral, broadcast feed brine shrimp, zooplankton, and other coral foods only once a week. Algae Barn’s Ocean Magik is a great source for Phytoplankton.

    What Are Good Tankmates?

    Not only can a hammer coral be kept with other Euphyllia coral, but they can also be kept with many species of reef-safe fish and invertebrates. As long as your fish or invertebrate doesn’t have teeth, hairy pincers, or an appetite for coral, then it will most likely get along with a hammer coral.

    Here are some stocking ideas for a reef aquarium that has a hammer coral:

    • Damsel Fish – like clownfish, azure, and springeri damsel fish
    • Tangs – like yellow, powder blue, and hippo tangs
    • Anthias – like lyretail, dispar, and Bartlett’s anthias
    • Gobies – like yellow watchman, diamond watchman, and Hector’s gobies
    • Blennies – like bicolor, algae, and tail spot blennies
    • Cardinals – like Banggai and pajama cardinals
    • Select wrasses – like possum, Carpenter’s flasher, and fairy wrasses

    It should be noted that clownfish may mistake a hammer coral for an anemone, which can cause the coral to retract.

    Non-reef-safe species in general would be:

    • Angelfish
    • Triggerfish
    • Groupers
    • Puffers
    • Parrotfish
    • Butterflyfish

    Any invertebrates that are known to snack on fleshier corals should also be avoided, like large hermit crabs and male emerald crabs.

    How To Propagate

    If you’ve ever propagated a frogspawn or torch coral, then fragging a hammer is straightforward and easy. If you’ve never done either, then no worries, it’s not too hard.

    First, you will need tools. An electric saw is most preferred as it provides a clean cut, though bone cutters can work as well. Next, you will want to identify if you have a wall or a branching variety of hammer coral.

    Branching hammer corals are easier to frag as you just need to separate one branch from the rest of the colony. You can do this by cutting below the flesh and above where the branch begins. This should give enough room to comfortably attach the frag to a plug.

    Wall hammers are much more difficult to frag and should only be done with an electric saw for a clean cut. There is no straight method for cutting wall hammers, but it’s ideal to cause as least stress as possible; cut in a section that is relatively straight and where the flesh is thinnest.

    All frags should be dipped in iodine or another solution to ensure healthy healing. Keep frag plugs at the bottom of the tank until ready to be moved up to their permanent placements or sold/given away to another hobbyist.

    Should You Dip This?

    Yes! You should always take the time to dip new corals in a pesticide dip. While this doesn’t guarantee 100% coverage against pests from entering your system, it kills a good amount of problematic species.

    For the best results, quarantine the coral in a separate tank for several weeks. This should be plenty of time for pests to rear their ugly heads.

    At the very least, it’s strongly recommended to remove the frag plug from the new coral before placing it in your tank. If you would like a base, then you may attach the frag to a new plug and use that in your tank instead.

    Possible Pests And Diseases

    What are you likely to find on a contaminated hammer coral? While some pests, like algae and various eggs, can be microscopic, there are a few major pests that you don’t want entering your system.

    This includes:

    Unfortunately, a dip won’t kill Aiptasia but should cover everything else.

    Handling

    Hammer corals are delicate and stress or injury can quickly lead to rapid tissue necrosis (RTN) which causes the coral to die within a matter of days.

    When handling a hammer coral, it’s important to avoid touching the polyp as the flesh is easily damaged. If you need to move the coral for whatever reason, hold it by the skeleton and use gloves as the sweeper tentacles can cause injury to human skin.

    How Much Do They Cost?

    Because hammer corals are so popular, they have become increasingly available over the past few years. A simple colored hammer coral frag can start at $35-40. Larger colonies with more interesting coloration can cost upwards of a couple of hundred dollars. Remember that hammer corals, especially the branching variety can grow very quickly so it might be worth the wait to let your coral grow on its own!

    Is Your’s Dying?

    While hammer corals are easy to care for, coral death can come quickly and once it starts, it’s very hard to stop.

    A dying hammer coral will be pale or brown, retracted, and sometimes spewing out brown stringy mucus; sometimes, this mucus is just waste that the coral is expelling but paired with the other symptoms, it’s usually the zooxanthellae being pushed out from the coral.

    If your coral is already expelling zooxanthellae, then it’s usually too late to reverse the damage. However, observe changes in the tank. Ask yourself these questions:

    1. Did you recently change the water flow or lighting?
    2. Did you introduce new fish or invertebrates?
    3. Did any of your water parameters swing within the last 24 hours?

    If you answered ‘yes’ to any of these questions, then this could be the cause of your coral’s decline. Luckily, most of these problems can be fixed if done slowly.

    Water Flow And Lighting

    If water flow and/or lighting are your problem, slowly return to your previous settings. You may have changed conditions too quickly and it would be best to reattempt at a slower pace. You can adjust your return pumps and your wavemakers as needed. This is why it’s best to work with pumps that can be adjusted on the fly when it comes to keeping a reef tank. There are many DC powered wavemakers these days with great controllers!

    New Livestock

    If you introduced new livestock, then this can be tricky as we all know how hard it can be to catch fish and invertebrates! Trying to remove them can also cause a good amount of stress, which isn’t ideal for a new addition.

    Instead, try covering the coral in a water-permeable container or moving it to quarantine either in or outside of the tank. This should give enough time to see if the new additions were the cause of the problem.

    Water Parameters

    If your water parameters changed over the last day, then this can be difficult to tell if you don’t have a record of your values. However, changes in conditions should also reflect on other corals and livestock. Are all your other corals fully extended with full color?

    If yes, then water parameters might not be your problem, or you might just have a sensitive hammer. Regardless, it is best to test all water parameters and perform a water change if you can’t find any other causes. Alkalinity, Nitrate, and Phosphate tends to be the main items to test with LPS coral tanks. Consider investing in quality reef tank test kits to monitor your levels.

    Closing Thoughts

    Hammer corals are a longtime favorite in the aquarium hobby. These corals sway and interact with the coral, bringing life to large portions of the aquarium. These corals don’t need any specific care and can adjust to a variety of water parameters, water flow rates, and lighting, but stability is key. Hammer corals also don’t need to be fed but will appreciate available nutrients in the water column.

    We hope you found this blog post informative and helpful in caring for your new Hammer Coral! If you have any questions or comments, please leave them below. Thank you for visiting!


    ๐Ÿ“˜ Want to learn more? This article is part of our complete Saltwater Fish & Reef Guide โ€” your ultimate resource for marine fish, coral care, reef setup, and more.

  • Zoanthids – The Soft Coral Superstar (A Care Guide)

    Zoanthids – The Soft Coral Superstar (A Care Guide)

    Zoanthids are one of my favorite soft corals to collect, and I’ve kept them in my reef for years. The color variety is absolutely insane โ€” I’ve seen zoas at Reefapalooza that looked like they were painted by an artist. They’re also very beginner-friendly, which makes them a perfect starting point for new reef hobbyists who want something visually impressive without a steep learning curve.

    Reef tank owners, are you looking for a new soft coral to add to your aquarium? If so, zoanthids may be the perfect addition! These beautiful and easy-to-care-for corals are an excellent choice for beginners. In this post we will cover everything you need to know about caring for zoanthids in your reef tank.

    A Quick Overview

    Scientific NameZoanthus spp.
    Common NamesZoas, zoos, zoanthids, and button polyps; usually referred to as their specific designer brand when applicable
    FamilyZoanthidae
    OriginMost warm, shallow waters but most species can be found universally at multiple depths
    Common ColorsAll colors, though what might appear as black is actually a very dark color instead
    Care LevelEasy-Moderate
    TemperamentNot aggressive, though can easily overcrowd other corals
    LightingModerate (50-150 PAR)
    Tank PlacementBottom, Middle, High
    Flow RateModerate
    Temperature Range76-82 degrees F
    pH Range8.0 โ€“ 8.4
    Salinity1.025 or 35 PPT
    Alkalinity8 โ€“ 12 dKH
    Calcium Level350 โ€“ 450 PPM
    Magnesium Level1250 โ€“ 1350 PPM
    PropagationCutting/Fragging

    Origins And Habitat

    Zoanthids are very closely related to sea anemones but belong to different taxonomic orders.

    Though these corals are extremely common to come across in the ocean and easy to cultivate in a laboratory setting, their species diversity is hardly understood. This can make placing certain species in the correct classification very difficult.

    Zoanthid corals can be found in most tropical water ecosystems, including the waters around the Caribbean as well as the Indian and Pacific Oceans1. That being said, they can be found at all levels of depth and different water temperatures as well.

    Interestingly, these corals have adapted to tolerate periods of emersion when the low tide goes out, which can help with collecting and fragging them for the aquarium. At the same time, other zoanthid coral species have been found all the way at the bottom of the ocean on the seafloor at colder temperatures with minimal light.

    It is believed that zoanthid corals are epizoic and like to grow on other animals, like sponges.

    What Do Zoanthids Look Like?

    Zoas

    Since they’re so closely related to sea anemones, zoanthid corals actually look like much smaller anemones! These corals form mats of polyps that individually give way to a colorful head. Zoanthids lack a calcium carbonate skeleton and are referred to as soft corals due to their fleshy structure.

    This polyp head has two rows of tentacles on the outer rim and usually has several colors as you work your way into the center towards the mouth. Zoas are sometimes confused with Palythoa spp., but zoanthids are usually smaller, more colorful, and also have shorter tentacles and a rounder mouth.

    However, some zoas and palys are impossible to tell apart and so many species are misidentified.

    Designer Names

    Zoanthids are one of the most modified corals available in the trade, coming in almost all color morphs with varying shapes, sizes, and tentacle lengths. Zoa gardens and collections have become increasingly popular over the past decade, and hobbyists can now find frags costing $5 or upwards of $2000.

    There is some controversy surrounding designer zoanthid corals. Many hobbyists believe that a desirable name increases the price of the coral to be much more than it’s actually worth. For the most part, there’s an affordable zoa for everyone.

    Here are some of the most popular designer brands you’re likely to come across:

    Blue Hornet Zoas
    • Rastas – Rasta zoanthids have yellowish-green tentacles, a bluish-purple outer rim with green, orange, and purple moving inward. These zoas tend to be smaller than other color morphs.
    • Eagle Eye – These zoas have light green tentacles, with a thin purple margin and center surrounded by orange.
    • Fruit Loops – Fruit Loops have bright orange tentacles, with a deep blue center surrounded by yellow.
    • Blue Hornets (pictured above) – These corals are one of the darker zoas available. They have neon-green tentacles with an electric blue center. There is a smaller yellow circle surrounding the mouth.
    • LA Lakers – These zoas are very similar in appearance to Fruit Loops. LA Lakers have yellow tentacles with a yellow outer rim and dark blue in the center.
    • Sunny D. – Sunny D zoanthids have longer purple tentacles that might appear to be lightly frosted. They have a striated center of greens, oranges, and yellows, with a sometimes purple mouth.
    • Ultimate Chaos – Ultimate Chaos zoanthids start moving into the next price tier and are usually only sold as one or two polyps at a time. These zoanthids look like mini galaxies with swirls of oranges, yellows, and purples. Ultimate Chaos is one of the larger zoanthids.
    • Grandmaster Krak – The Grandmaster Krak is one of the most expensive zoanthids, with normal morphs starting at several hundred dollars with the more collectible varieties going into the thousands. These corals are rich yellows, greens, oranges, and blues with a starburst effect. Typically only one polyp is sold at a time.

    Are They Corals Poisonous?

    Eagle Eye Zoanthid Coral

    Before introducing one of these corals into your reef tank, this is an important question to consider–and even more important if planning to frag. The problem is that not much is known about palytoxin and it’s hard to tell which corals actually produce it, though it’s mostly associated with those in the Palythoa genus.

    Palytoxin is a very dangerous toxin that can be life-threatening depending on exposure; palytoxin poisoning includes flu-like symptoms and skin reactions as well as muscular and cardiac complications.

    It is believed that bacteria living within the zoanthid coral polyp are responsible for making the palytoxin as opposed to the coral itself. This toxin can be released underwater as well as above and poses a risk of being inhaled or entering an orifice; consuming plants and animals that have been exposed to palytoxin can also cause poisoning.

    However, the chances that your zoas contain palytoxin are minimal. Hobbyists have kept zoas and palys in their tanks for decades with little to no problems. If you’re truly concerned about introducing this toxin into your aquarium, avoid purchasing more natural-looking varieties as it’s believed they are the most likely to be poisonous.

    Otherwise, always use protective equipment when working with your tank. Even if you’re not actively touching your zoas, there’s always the chance that they released palytoxin into the water column.

    Do not put your hands into the tank with open wounds and wash your hands with soap immediately after. Aquarium gloves, like West Chester 2920, may be appropriate if dealing with especially large colonies. Eye protection, like the 3M Cool Flow mask, is also appropriate if handling the zoanthid coral outside of the tank.

    Placement And Temperament In The Aquarium

    Even though zoas are one of the most dangerous animals on this planet, they’re not aggressive to other corals in the tank. However, there are a few potential problems that you might run into with having zoas in your aquarium outside of aggression.

    The first zoa problem you might have is rapid growth. Some zoas take months to start propagating and then start growing new heads every other day. This is great if you plan on fragging them, but can be a pain if they start growing over your other corals and/or shading out large portions of the tank.

    The other main problem with zoas is that they can grow so large and thick that they start to develop dead zones where nutrient transport suffers and algae starts to grow. This will require moving the colony to a higher area of flow, buying new equipment, fragging the colony, or routinely removing debris with a turkey baster.

    Are They Easy To Keep?

    Though zoas are regarded as one of the easiest corals to keep in the hobby, they are actually the most difficult for many hobbyists. Some hobbyists have zoas that close for months on end without any explanation.

    These corals are difficult because each morph requires different lighting, flow, and water parameters.

    Corals and Lighting

    In general, zoas need moderate lighting (50-150 PAR), but this isn’t to say that hobbyists haven’t kept them way below and way above these numbers.

    As mentioned before, zoas are found in extremely shallow waters that are sometimes left exposed when the tide goes out. This means that colonies are receiving tons of light without any moisture relief for extended periods of time. So why do most zoas melt once placed under high lighting then? Well, zoas can be placed under high reef lighting with the right steps.

    The secret to getting zoas to be happy under high lighting is proper acclimation. These corals need plenty of time to adjust to new conditions and hobbyists usually move them up in the tank too quickly or too often. Instead, start them at the bottom of your tank and gradually move them up over the course of several months.

    Great For Zoas
    AquaIllumination AI Prime

    The AI Prime is a great overall all light for Zoas. It contains the correct, PAR, spectrum, and spread needed to get you going with growing your own Zoa colony!

    Buy On Amazon Click For Best Price

    At this point, you may find that your zoas are actually happiest right next to your most demanding small polyp stony corals (SPS). Or, you might find that they start to melt right away with such high light.

    For the most part, zoas can also be kept in very low lighting. If you find that your corals are starting to extend upwards, they are probably stretching for light. This is a good indication that it’s time to move them up in the tank.

    Otherwise, leave them where they are and try not to move them around too much! Zoas are very temperamental and are used by many hobbyists as a warning coral for being the first to show distress when something is wrong in the tank.

    Flow

    Getting the water flow right for your zoas can be even more challenging than getting the lighting. Again, your corals will let you know they’re not happy with the conditions they’re in.

    As mentioned before, these corals can start to develop dead zones once the colony becomes larger. You will want to make sure that water is being moved past all parts of the coral to ensure that nutrients are being delivered and detritus doesn’t start to build up. However, too much flow can cause your zoas to retract and not open for extended periods of time.

    Start by placing your zoas in moderate flow and watch how they react. Move accordingly, but never too much at one time. An adjustable aquarium wavemaker is a great way to generate flow and adjust as needed.

    Water Parameters

    Here is where zoas can get very tricky. Though standard saltwater conditions are recommended for all zoa varieties, ideal parameters aren’t what some zoas want.

    Some hobbyists have found zoas to be very sensitive to pH, alkalinity, and nitrate levels. This can be very frustrating as one colony of zoanthids might be thriving in your tank while the other is quickly melting away.

    Unfortunately, this is mostly a game of trial and error of seeing which zoas do best in your system. It is not recommended to change conditions in your tank because of only one coral.

    Care And Maintenance

    Once you manage to establish a colony of zoas in your aquarium, then there’s not too much work to be done afterward.

    These corals can be kept in very low-tech tanks with hang on the back filters, canister filters, or sump filtration. They pull most of the nutrients they need from the water column, so a cleaner tank might not benefit from a protein skimmer.

    If keeping larger colonies, then brush off algae as it occurs and regularly flush with water to keep detritus from building up.

    Feeding

    Zoanthids do not need to be fed. These corals get most of their nutrients through fish waste as well as other detritus that is already available in the water column.

    Most hobbyists like to supplement with regular broadcast feedings or more concentrated feedings for enhanced color and faster growth rate. If wanting to feed your coral, do not try to feed larger foods. Instead, feed specific coral foods and other microorganisms, like phytoplankton.

    What Are Good Tankmates?

    Zoanthids are a great choice for any reef setup. This means that they can happily be housed with saltwater community fish, like clownfish, tangs, and cardinals.

    Tank Raised Clownfish

    However, zoas can be temperamental and they won’t appreciate fish that might annoy them. This includes species of goby and blenny that regularly rest on rock and corals while swimming around the tank. Though these fish can comfortably be kept with zoas, there’s a chance that you find your corals closed up because your fish is using them as a rest stop!

    Similarly, larger invertebrates, like urchins and shrimp, should also be avoided for the same reasons. Large crabs and invertebrates with pincers should not be kept with zoas and colonies have been known to disappear overnight due to a hungry cleanup crew.

    Of course, do not keep zoas with any fish that are known to eat corals, like angelfish and parrotfish. This can be especially dangerous if your zoa ends up containing palytoxin and releases it into the water column once injured.

    How To Propagate

    Propagating zoanthids can be a little intimidating as the threat of palytoxin is always looming. As long as you take precautions with safety equipment, wash your hands, and make sure you don’t have any open wounds, then propagating zoanthids is easy and usually becomes necessary when colonies start becoming too big.

    A few tools are recommended for propagating zoanthids, namely bone cutters for cutting rock and a scalpel or scissors for separating the coral from the rock and/or from the rest of the colony. Here is a great video by ReefAmorous showing how to frag Zoas. A simple breakout summary is below.

    1. First, break up the rock that the zoas are attached to into smaller, more manageable pieces. If only taking a small part of the colony, then simply move to the next step.
    2. Next, use your scalpel or scissor to carefully peel off some of the colony. You will want to be wearing eye protection during this part as liquids can squirt from the cut.
    3. These pieces can then be attached to a frag plug with super glue. Don’t be overly concerned with keeping the frags out of water for too long, but try to get them submerged as soon as possible.

    How Do You Get Zoas To Spread On Their Own?

    Zoanthids are one of the fastest-growing corals in the aquarium hobby. These corals are asexual and one polyp can quickly turn into 50 over the course of a few months.

    There is no secret to getting zoas to quickly reproduce. Like any coral, stability is key. If your zoa polyps are fully extended every day and tank conditions are good, then it’s only a matter of time before your zoa colony expands.

    Fragging will help spread that colony to other parts of the tank, but the healing process might delay the growth momentarily.

    How Fast Do They Grow?

    Even with perfect conditions, zoanthid coral growth rates will vary. Some hobbyists have recorded one new polyp every few days while others go months without any sign of growth.

    Zoanthid coral growth is not fully understood, and the rate seems to change tank to tank.

    How To Propagate

    Zoas can be found in any specialized local fish store. One of the biggest struggles if you are a big coral collector is finding all the designer names locally. Your best bet to find the new and best looking designer zoas is to purchase them online from specialty coral sellers or through auction sites.

    Closing Thoughts

    Zoanthids can be the easiest coral you’ve ever kept or one of the hardest. These soft corals don’t require any special care, but their preferred conditions aren’t usually straightforward as they vary with different morphs. They are a great addition to any reef tank, and we hope that you will consider placing these beautiful corals in your own. Leave us a comment below if you have any questions about zoanthids or how they can be cared for properly!


    ๐Ÿ“˜ Want to learn more? This article is part of our complete Saltwater Fish & Reef Guide โ€” your ultimate resource for marine fish, coral care, reef setup, and more.