After growing corals in my own reef setups, if your parameters are not stable, this coral will not survive the first month. Corals do not die from wrong numbers. They die from unstable numbers. The difference between a thriving reef and a dying one is consistency, not perfection.
Stable mediocre parameters beat perfect parameters that swing. Every time.
Fellow reefers, we have all been there. We are so excited to buy a new coral and the excitement is quickly followed by fear that we won’t know how to care for it properly. Fortunately a Duncan Coral is one of the easier LPS corals to keep in the hobby. However, they are a coral and require proper care. And being an LPS corals there are other parameters that come into play when it comes to growing a healthy colony of Duncans.
We’re going to go over the basics of how to care for your Duncan Coral. When you are done reading this post, you should have all that you need in order to keep your coral happy and healthy in its new home. Let’s get started!
Species Overview
Scientific Name
Duncanopsammia axifuga
Common Names
Duncans (abbreviated from their genus name), rarely referred to as the whisker coral or daisy coral
Family
Dendrophylliidae
Origin
Australia
Common Colors
Purples, blues, greens
Care Level
Easy
Temperament
Not aggressive
Lighting
Low-High (<50-200 PAR)
Tank Placement
Bottom, Middle, Top
Flow Rate
Moderate-High
Temperature Range
76-82 degrees F
pH Range
8.0. 8.4
Salinity
1.025 or 35 PPT
Alkalinity
8. 12 dKH
Calcium Level
350. 450 PPM
Magnesium Level
1250. 1350 PPM
Propagation
Cutting/Fragging
Origins And Habitat
The Duncan coral is the only species within the Duncanopsammia genus and originates from the waters surrounding Australia. More specifically, these corals is found off the western and northern coasts of Australia and as far away as the South China Sea.
There, these corals thrive in many conditions but prefer sandy areas. Once established in large colonies, it is difficult to see any of their branching skeleton. Duncan corals are a recent addition to the aquarium hobby and have only been available for about 15 years.
What Do Duncan Corals Look Like?
Though duncan corals might look fleshy from above, they are actually a type of large polyp stony coral (LPS). This means that each polyp is supported and sheltered by a hard calcium carbonate skeleton.
Duncan corals are an easy coral species to identify if you know what you’re looking for. Seen in tight colonies, these corals have wide polyp heads surrounded by tentacles with a mouth in the center. Some Duncans may have longer tentacles than others, but they’re relatively short. The center of the polyp stays under a few inches wide across.
These polyps are a mixture of purples, blues, and greens, though these colors might change and intensify under certain lighting. Almost all Duncans have a blueish-green center with light pink or purple tentacles. These tentacles are harmless to fish and other corals, though Duncans should be given their own space within the aquarium.
It is believed that this Duncan skeleton is much stronger than other LPS. The Duncan coral is a branching species, which means that each polyp head will extend from its own individual section of skeleton.
Though there is only one known species of this coral, the degree of branching can vary greatly between specimens. Some Duncans have tight and compact branching whereas others have very long tree-like branches where each polyp is very far from the next.
In general, the Duncan coral appearance is likened to elegance corals (Catalaphyllia jardinei) and Euphyllia spp., like hammers and frogspawns. However, Duncans are to be even easier to keep than those and are accepted as one of the best beginner corals in the hobby.
Are They Easy To Keep?
Duncan corals are to be one of the easiest LPS corals to care for and are great for beginners. As we’ll discuss, these corals can adapt to a variety of water conditions and tank setups.
That being said, Duncan corals are not the most popular coral to have in your tank. This is because they is slow growing, uninteresting to look at when compared to other corals, and take up a lot of space in the aquarium.
If you don’t want to spend a fortune on coral if you’re just starting out, then Duncan corals are a good choice! Give them some time in your tank and you might even grow a larger colony that is traded for more desirable species.
Placement And Temperament In The Aquarium
Duncan corals are extremely adaptable and can live in most conditions if acclimated properly. Hobbyists have kept Duncans at the bottoms of their reef aquariums in the shadows, or right next to Acropora small polyp stony coral (SPS) at the highest PAR values.
Though these corals is placed anywhere from low to high reef lighting, their color doesn’t change with intensity. Instead, Duncan color is highly influenced by the spectrum of the light being used; they might show more neon variations under actinic lighting than a light focused in the other spectrums.
Duncan corals do need good flow and should be placed in a medium to high current. This is because they are very susceptible to being taken over by algae due to stagnant areas in the colony; they are also voracious eaters and will want to catch any available food in the water column.
If flow allows, these corals is placed on the substrate or on the rockwork. Placement doesn’t need to be cautious of other corals as Duncans are completely harmless and cannot sting. That being said, they can easily be attacked by more aggressive corals which will cause them to close and eventually die.
Duncan corals can also quickly shade out other species below, so make sure you allow your Duncan enough room to grow to full size.
Care And Maintenance
Duncan corals are very low maintenance and are able to sustain themselves with good lighting, flow, and available nutrients. They can tolerate relatively large swings in water parameters but do best in optimal water conditions.
Water Parameters
Like most other corals, Duncans need stable water parameters. Most importantly, they need some nitrate to be available in the aquarium in order to grow and maintain their color.
Too clean of an aquarium will not allow your Duncan corals to thrive, and will be reflected in other coral development as well. Because these corals are LPS, they need ample levels of calcium and stable alkalinity in order to form their skeletons.
If keeping larger colonies of Duncan or if placed in a mixed reef aquarium with SPS, then it may be necessary to dose those depleted nutrients. Otherwise, regular feedings and water changes will be enough to keep nutrients available.
Duncan corals do not require any special filtration and is kept with a hang on the back filter, canister filter, or sump filtration. A protein skimmer is not necessary, especially if the system does not have many nutrients available.
Feeding
One of the best features of Duncan corals is their willingness to eat almost anything you give them. Unlike many other LPS, Duncans are actually very willing to use the mouth at the top of their polyp head to ingest both small and large pieces of food.
Duncan corals is fed an assortment of foods, including mysis shrimp, krill, pieces of seafood, as well as coral-specific powder formulas and pellets. These corals are voracious feeders and will accept these foods when offered. However, in order to keep nutrients down, it’s only recommended to target feed about one to two times per week.
Duncan corals will readily accept food that is placed near their mouths, though this can take some time to move the food and digest it. In that time, fish and invertebrates may steal the food and annoy the coral in the process.
The best way to stop this from happening is to broadcast feed at the same time to stop them from stealing the food. A great coral food to use to feed Duncans would be Reef Roids.
Duncan corals are not able to defend themselves like most other corals. The only thing they can do is retract if something starts to walk over them or attack them.
This is especially important to keep in mind when choosing other corals to place around your Duncan. Aggressive corals with long sweeper tentacles, like favia corals (Favia spp.) and torch corals (Euphyllia glabrescens), should be avoided or placed far away from your Duncan colony.
Otherwise, duncan corals is kept with a variety of reef-safe fish and invertebrates. Some options include:
Gobies and blennies are also on this list but have been known to excessively swim and walk over Duncan corals that is placed on the substrate. Invertebrates, like species of cleaner shrimp, should also be avoided for this same reason as they can cause your corals to be closed more than you would like.
Other invertebrates with pincers and an appetite for fleshy corals should never be placed in a reef tank either. This includes emerald crabs (Mithraculus sculptus) and banded coral shrimp (Stenopus hispidus).
Problems
For as easy as Duncans is for some hobbyists, they will be as temperamental as zoas! For the most part, though, solving Duncan coral problems is straightforward and a matter of adjusting lighting, flow, or pests.
Why Is They Not Opening Up?
The most common problem to have with Duncan corals is the failure for them to open or extend completely. Don’t panic though! Duncan corals are very easy to save if things go wrong and it’s just a matter of looking at what is causing the problem.
Lighting and flow
If you have a relatively new Duncan coral or just recently rearranged your saltwater tank, your Duncan might not be happy with its new placement.
Duncan corals can tolerate most light intensities, even when next to SPS, but this does not mean that they can go from very low light to bright light without any acclimation. If you find that your Duncan coral is not extending, try moving it away from the light. Slowly work back up towards that level in the tank instead.
The same solution goes for water flow. Duncans do best in moderate to high flow. Not enough flow can cause algae to grow and irritate the coral while overly high flow can start to cause tissue damage. You want to find a happy medium between these two extremes; a good placement would bring soft movement to all tentacles of the colony. Work with adjustable wavemakers or gyre (like the IceCap Gyre) to make things easier to adjust in your aquarium.
Believe it or not, a closed Duncan can actually be a good sign!
Sometimes these corals will close up for a few days while they develop new heads. These heads will be near the base of the polyp and lighter in color. If you notice these and hadn’t seen them before, then your coral is happy and growing!
If you don’t see any new heads, check out other reasons as to why your coral is closed.
Acclimation
Though Duncans can quickly adapt to new conditions, they still need to be acclimated like all other corals, invertebrates, and fish.
Most hobbyists don’t feel the need to drip acclimate their corals, but a temperature match is definitely recommended. A coral dip or quarantine period is also strongly recommended before adding the piece to your tank to avoid disease and pest introduction.
Before placing your coral in its final spot in the tank, it is best to leave it on the substrate or on a frag rack for a couple of weeks so that it can adjust to your tank’s parameters. Then, slowly move the frag to the desired placement.
Pests
Lastly, pests is the cause of your angry Duncan coral. If something like Aiptasia or hydroids start growing on the skeleton of your Duncan, it can easily irritate the polyp, causing it to start retracted.
Pests is hard to see and you might need to take a magnifying glass to the side of the tank, but your coral should make a full recovery once the pest has been removed.
Solutions
Most Duncan coral problems are straightforward, though it’s always scary to have to handle your corals.
If you can’t find any reason as to why your Duncan corals is closed, try enticing them to open. This is done with target feeding to encourage your coral to eat. Try not to do this too much, though, as you can irritate the coral and build up nutrients within the tank.
How To Frag
Duncans are one of the easiest and most forgiving species of coral to propagate. As a branching species of large polyp stony coral, simply use a bone cutter or electric saw to cut the skeleton below the flesh.
Fragging is the best way to control Duncan growth or to spread the coral around the tank. Fragging can also be helpful if one section of the colony is damaged or has been infected by pests.
Here is how to easily frag your Duncan colony:
First, remove the coral from the tank. Try to keep the coral submerged in water as much as possible.
Carefully cut the coral with the bone cutter or electric saw between where the flesh starts and the branching begins.
Attach this frag to a frag plug with superglue (cyanoacrylate).
Dip your coral. Dipping your Duncan in a coral solution or iodine is highly recommended to promote fast healing, but this is not entirely necessary.
Put the frag back into the tank, preferably on a frag rack or in the substrate; make sure that the coral is secure and won’t fall over.
Gradually more the coral up to its final spot in the tank or rehome it to another hobbyist.
If you are looking for a more visual example, our Aussie friends at Gallery Aquatic TV give a great example below on how to frag these Aussie originals.
Closing Thoughts
While Duncan corals might not be the most popular LPS coral to have in the reef aquarium, these beginner corals bring movement to the display. They is placed in almost all lighting intensities with acclimation, which can fill up empty spots in the aquarium. Duncan corals do require moderate to high water flow and will close for extended periods of time if conditions are unideal. However, they are very easy to frag and one of the most forgiving species to propagate.
We want all Duncan owners out there to know how much we appreciate them for taking the time to read this article. Leave us a comment below if you’ve got any questions about caring for your own Duncans!
📘 Want to learn more? This article is part of our complete Saltwater Fish & Reef Guide. Your ultimate resource for marine fish, coral care, reef setup, and more.
After growing corals in my own reef setups, if your parameters are not stable, this coral will not survive the first month. Corals do not die from wrong numbers. They die from unstable numbers. The difference between a thriving reef and a dying one is consistency, not perfection.
Stable mediocre parameters beat perfect parameters that swing. Every time.
Do you have a Frogspawn Coral in your reef tank? If so, congratulations, you have one of the most beautiful and beginner friendly LPS corals available in the hobby. They are hardy corals, but it’s important to know how to care for them if you want your tank to thrive. This blog post will cover everything you need to know about caring for this type of coral including light requirements, water flow preferences, feeding habits, and more!
Species Overview
Scientific Name
Euphyllia divisa (wall) and Euphyllia paradivisa (branching)
Common Names
Frogspawn coral, less commonly known as the wall coral, octopus coral, grape coral, or honey coral
Family
Euphylliidae
Origin
Indo-Pacific, mainly around Australia and Southeast Asia
Common Colors
Greens, Purples/Pinks, Browns, Oranges/Yellows
Care Level
Moderate
Temperament
Semi-aggressive
Lighting
Moderate (50-150 PAR)
Tank Placement
Bottom, Middle
Flow Rate
Moderate
Temperature Range
76-82 degrees F
pH Range
8.0 – 8.4
Salinity
1.025 or 35 PPT
Alkalinity
8 – 12 dKH
Calcium Level
350 – 450 PPM
Magnesium Level
1250 – 1350 PPM
Propagation
Cutting/Fragging
Origins And Habitat
Frogspawn coral is found in large colonies around reef structures of Southeast Asia and Australia. There, they is found in indirect sunlight at depths of about 130 feet.
Interestingly, these corals seem to prefer more turbid waters with gentle currents and muddy substrates, which is a very different environment from the aragonite-sand and clear water we strive for in our home reef aquariums.
As a species of Euphyllia, frogspawns have sweeper corals that are full of stinging nematocysts that is used to catch planktonic organisms and attack nearby corals that might outcompete the colony for resources. Because of this, there is some space between frogspawn coral and the next coral species on the reef.
Name
There are believed to be at least two unique species of frogspawn coral present in the aquarium hobby, Euphyllia divisa (wall) and Euphyllia paradivisa (branching). However, the aquarium hobby has created many hybrids of Euphyllia that have made placing frogspawn into an exact taxonomic categorization difficult.
The common name ‘frogspawn’ comes from their unique bubble-tipped appearance that resembles frog eggs.
What Do They Look Like?
The frogspawn coral is one of the most popular types of large-polyp stony coral (LPS) not only because of its easy care but also because of the flowing movement it can provide in a display.
As mentioned before, frogspawn coral looks like a bunch of frog eggs; these corals have many tentacles with different-colored tips along them. These tentacles can range in color with greens, pinks, oranges, and browns, while the tips can contrast with darker or lighter greens, pinks, purples, yellows, and oranges.
Of course, the brighter and more eye-catching the color, the more expensive the frogspawn coral will be.
In general, most frogspawn corals you come across will be the branching variety. This means that each polyp will have its own calcium carbonate skeleton base. Branching frogspawns can grow very quickly by forming new heads at the base of the polyp which will then mature within several months in favorable conditions.
This is in contrast to wall frogspawns, which are pretty rare to come across due to their slower growth rate and more difficult care. Instead of having defined polyps, wall frogspawns grow along a solid calcium carbonate skeleton, making the coral much more compact in appearance.
Different Types
Like other Euphyllia, frogspawn corals have been hybridized with each other and with other species. This has resulted in some spectacular colorations, but also some very unclear common names and designer brands.
Here are some of the most common frogspawn colors you’re likely to come across:
Golden peach frogspawn coral. These corals are one of the more expensive types of frogspawn due to their pink coloration; their tentacles are dark purplish-pink while the tips are light pink with some yellow fluorescence under certain lights.
Purple tip frogspawn coral. Probably the most common coloration you’re likely to come across, the purple tip frogspawn is easy to confuse with a hammer coral due to same coloration. These corals have bright green tentacles with electric purple tips. While not the most desirable color combination, these corals can still bring movement to the tank and accent other Euphyllia.
Toxic green frogspawn coral. A common and less in demand type of frogspawn, the toxic green frogspawn glows neon under certain lights. These corals have dark green tentacles and light green tips that look like a highlighter pen.
Both the purple tip and toxic green frogspawn coral are featured in the video above by Elite Reef Denver.
Placement And Temperament In The Aquarium
Frogspawn coral is often used as a centerpiece coral in the reef aquarium. They can quickly fill up a rock island, gently swaying in the flow.
While these corals can be placed anywhere throughout the reef tank, there are some things to keep in mind before gluing down that frag. The most important factors to consider are light and water flow.
Frogspawns do not require a lot of light and are naturally found in indirect sunlight. While replicating indirect sunlight in the aquarium is difficult, placing your frogspawn in the middle to lower water column with moderate lighting (50-150 PAR) will recreate those conditions.
Hobbyists agree that there is no true benefit to keeping these corals in higher lighting and can risk the health of the coral instead. If your coral starts to bleach and lose its color, then it is getting too much light.
Similarly, frogspawns do best in moderate flow. The amount that their tentacles extend largely depends on the flow they are placed in; higher flows equal more retracted tentacles while lower flows result in more extended tentacles. Because of this, many hobbyists keep their corals in just enough flow to keep algae away and to keep the frogspawn fed. Flow is provided either with return pumps or wavemakers.
Unlike other Euphyllia, like torch corals, frogspawns do not do well when placed on the substrate. This is because their tentacles fall over the sides of their skeleton, which can easily start to rub against sharp surfaces and invite injury.
Frogspawn coral should also not be placed next to other corals due to their sweeper tentacles. If placed too close to another coral, be prepared for some chemical warfare to break out in your tank. This is true for all coral species except for other frogspawns and hammer corals (Euphyllia ancora, Euphyllia parancora, etc.). Keep them away from other aggressive Euphyllia like bubble corals.
Interestingly, frogspawns is placed next to similar species (except torches) with little to no ill effect. They will continue to grow in and out of each other, which can make for a beautiful colony of many colors.
Successful – Water Quality
Frogspawn coral is very easy to keep and one of the best LPS coral species for beginner enthusiasts. As with any coral, stability is better than chasing numbers, though your water still should be testing within a given range.
Water Parameters
Euphyllia is not demanding in regards to nutrients, but will not do well with higher nitrates. At the same time, they also won’t do well if the tank is too clean and if there are limited nitrates and phosphates.
Since the frogspawn coral be the first LPS coral for many, it is our introduction to reef aquarium water parameters. Frogspawn corals should be kept in nitrates below 40 PPM with phosphates below 0.1 PPM. They do need 1200-1350PPM magnesium, 350-450 PPM calcium, and steady alkalinity at 8-12 dKH; these nutrients are fundamental for growing new skeleton and maintaining vibrancy.
As with any coral, frogspawn coral does best in stable conditions. While hobbyists have successfully kept frogspawn at values above and below those listed, consistency is more important.
Dosing
Dosing is not necessary for frogspawns unless the tank is filled with many LPS corals and small-polyp stony corals (SPS) that quickly deplete reef elements; if you have large colonies of Euphyllia, you may also want to consider dosing alkalinity, calcium, and other trace elements for healthy skeleton growth. ESV B-Ionic is a great choice for first time dosers. It works really well with dosing pumps while being easy to use for manual doing.
Frogspawns are very forgiving when it comes to parameter swings, but that doesn’t mean that you can allow your tank to have daily changes in conditions. Because of this, LPS corals should only be added once the tank has fully established after several months.
If dosing additional nutrients, water should be tested immediately after dosing and right before the next dose. This will allow you to trace how nutrients are being cycled throughout the tank.
Filtration
Frogspawn coral does not require any special filtration and is kept in setups with a hang on the back filter, canister filter, or sump filtration. A protein skimmer is also not necessary and might even be harmful to systems with low nutrient input.
Instead, focus on getting the placement of your coral correct. Nutrients should constantly be flowing in and out of your coral with moderate flow.
What Are Good Tankmates?
Frogspawn corals is kept with a variety of fish and invertebrates. However, their soft fleshy polyps is appetizing for some species, so it is important to have a truly reef-safe community. Some ideal tankmates would be:
It should be noted that some clownfish may attempt to host a frogspawn coral as it would with an anemone. Though some corals may tolerate this symbiosis, others will retract and could even begin to die back.
Some invertebrates, like hermit crabs, emerald crabs, and shrimp, may also pose a threat to frogspawn as they are not entirely reef-safe. Even though you might have an invertebrate that has never touched any of your other corals before, it is possible for them to develop an appetite for frogspawns overnight.
Likewise, fish species that are known to pick at corals should also be avoided. This includes:
Angelfish
Triggerfish
Groupers
Puffers
Parrotfish
Butterflyfish
What Do They Eat?
While frogspawn might look hungry with all those tentacles reaching for food, they’re actually best kept without any additional target feeding.
Trying to feed your frogspawn coral larger foods, like fish and shrimp, can actually do more harm than good. This is because the polyp will see this food as a threat, which can cause it to retract.
If your coral does accept the food, then your fish and invertebrates will also most likely steal it before the frogspawn has the chance to move the food into its mouth; either that or your coral will spit it out entirely!
If really wanting to feed your frogspawn coral, then it is best to broadcast feed brine shrimp, zooplankton, and coral foods, like Reef Roids.
If you do choose to feed your frogspawn coral, you should only feed once a week. This will not only help prevent nutrient buildup in your tank but there’s also no real benefit to overfeeding Euphyllia.
More importantly, light, flow, and water quality will determine the growth rate of your frogspawn coral.
Health And Disease
The frogspawn coral is a hardy lps species but can die back very quickly once subjected to disease. The most important factor in keeping these corals is protecting their delicate tentacles.
If their tentacles are scraped against rock or placed in high flow, they may succumb to stress or brown jelly infection or disease, which can kill the coral in a matter of days.
To help prevent diseases from entering your reef aquarium when purchasing new corals, it’s recommended to do an iodine or coral bath and to quarantine the piece for a couple of weeks.
Pests
Of course, you will have to be mindful of bringing pests into the aquarium with any new corals you bring into the system as well. A coral dip and quarantine will help, but it’s still possible for these pests to slip by:
Frogspawn coral is one of the fastest-growing species of Euphyllia, and you will probably have to frag your colony at some point. Don’t worry, this is easier than it sounds. First, you need to know if you have a branching or wall variety.
If you have a branching variety, then your chances of success are very high. You will need a bone cutter or electric saw that can cleanly cut through the skeleton. Remove the coral from the tank and use the instrument to cut underneath the flesh of the frogspawn coral and before the branch. Dip the coral in iodine and place it in a low-stress environment until it recovers.
Wall frogspawns are harder to frag and success is not guaranteed. This is because you will need to cut through a good majority of flesh with a saw; a saw will provide the cleanest cut, increasing chances of success.
There is no clean way to do this, but once the wall has been divided, dip the coral in iodine and place it in a low-stress environment. Monitor recovery and move the coral to its final place in the tank once fully healed.
Where To Buy
Because frogspawn coral is fast-growing, it is more available than some other Euphyllia, like torches. They also ship very easily, which makes them good online buys. However, expect to pay at least $50 for one frag with more colorful variations fetching closer to $200 and over.
Frogspawn Corals are not hard to keep. They are one of the easiest LPS corals you can keep and also one of the easier corals to keep in the saltwater aquarium trade. They are tolerate of less ideal conditions and do not respond as quickly to swings in parameter. Nevertheless, the more stable your tank is the better!
Where Should I Place Them?
You should place your frogspawn coral in the middle of your tank. They prefer moderate flow. In reef tanks setup for LPS corals, they is placed near the top of the water flow is lower and on the bottom and away from other corals in a mostly SPS coral configuration.
Do They Grow Fast?
Frogspawn corals do not grow fast. They are one of the slower growing corals in the aquarium trade. Because of this however, they will not demand a lot in terms of two part solution for dosing. You can increase the growth rate by better spectrum lighting, moderate flow
Closing Thoughts
Frogspawn corals are one of the best Euphyllia to have for beginner, intermediate, and advanced hobbyists as they are easy to care for, come in a variety of colors, and resemble an anemone without any of the aggression or over-splitting.
These corals need moderate light and moderate flow, but will quickly start to grow new polyps once established. Feeding is not required and the coral can easily be cut as needed. I hope you’ve learned a lot about caring for your Frogspawn Coral in this blog post and that it has answered any questions or concerns you may have had. If not, please leave me a comment below with anything else on your mind!
📘 Want to learn more? This article is part of our complete Saltwater Fish & Reef Guide. Your ultimate resource for marine fish, coral care, reef setup, and more.
After growing corals in my own reef setups, torch Coral is one of the most sought-after LPS corals in the hobby, and it has a disease problem. Torch coral syndrome, a form of rapid tissue necrosis, has wiped out collections overnight. Sourcing healthy specimens from reputable sellers is more important than any placement or flow advice.
A healthy torch coral is stunning. An infected one kills every torch in your tank within days.
The Torch Coral is a brightly colored and beautiful type of coral that is found in reef aquariums around the world. They are characterized by their long tentacles, which they use to feed on plankton from the water column. When cared for properly, Torch Corals will grow and thrive in your tank. In this blog post, I am going to show you how to care for a torch coral so that you can enjoy them for years!
We’ll cover what types of lights are best for Torch Coral growth and maintenance as well as other factors that can make or break your Torch Coral experience. We’ll also go over feeding schedules and anything else you need to know about caring for a Torch Coral. I hope this article helps you better understand how to keep your Torch Coral happy and healthy so it is admired by all!
A Brief Overview Of The Torch Coral
Scientific Name
Euphyllia glabrescens
Common Names
Torch coral, pom-pom coral, brain trumpet coral
Family
Euphylliidae
Origin
Indo-Pacific, Australia, Indonesia
Common Colors
Greens, Purple/Pinks, Browns, Oranges/Yellows
Care Level
Moderate
Temperament
Semi-Aggressive to Aggressive
Lighting
Moderate (50-150 PAR)
Tank Placement
Bottom, Middle
Flow Rate
Moderate
Temperature Range
76-82 degrees F
pH Range
8.0 – 8.4
Salinity
1.025 or 35 PPT
Alkalinity
8 – 12 dKH
Calcium Level
350 – 450 PPM
Magnesium Level
1250 – 1350 PPM
Propagation
Cutting/Fragging
Origins And Habitat
Like many other corals available in the aquarium trade, the torch coral comes from the warm waters of the Indo-Pacific around Australia and Indonesia1.
There, torch corals is found among other large-polyp stony corals (LPS) and small-polyp stony corals (SPS). However, torch corals have long sweeper tentacles that are used for catching food and stinging nearby corals and sessile animals that might try to steal resources. Because of this, the area surrounding the torch coral is clear around all sides.
Torch corals are very forgiving of water parameters but may struggle in conditions with higher nitrates. Interestingly, they have been found in waters with varying levels of turbidity which is much different from the sparkling, pristine waters of our home aquariums.
These corals cannot withstand higher flow rates as their delicate flesh is easily damaged.
What Does The Torch Coral Look Like?
The torch coral resembles a flickering flame when submerged under a decent flow. These corals have polyps with long tentacles that is a mixture of greens, purples, pinks, browns, oranges, and yellows.
Torch corals are stony lps corals that are part of the Euphylliidae family, which makes them close relatives to frogspawn corals (Euphyllia divisa) and hammer corals (Euphyllia ancora). While care and appearance are similar between these species, they is told apart by some key features.
Mainly, torch corals have long, skinny tentacles. The bottoms of the tentacles are noticeably darker than the round tips of the tentacles and are a different color altogether. A frogspawn coral has thicker, branching tentacles while a hammer coral has shorter, wider tentacles with flattened tips.
Each torch coral polyp can measure up to 10 inches across with another 10 inches in tentacle. Transparent sweeper tentacles maybe even longer than normal tentacles as they extend their reach for optimal feeding and territory defense.
As a type of large-polyp stony coral, torch corals have hard calcium carbonate skeletons. Unlike other euphillyas the Hammer Coral, torch skeletons are branching. Branching torches have defined coral polyps each with its own skeleton base whereas wall corals are a straight line of coral polyps with one connected skeleton.
DifferentTypes
Many varieties of torch coral have been brought into the aquarium hobby with differences in color, tentacle length, and hardiness; in general, the more attractive the color, the more expensive the coral. Luckily, care doesn’t differ too much between the varieties.
Here are the more rare and expensive varieties of torch coral you’re likely to come across:
Indo gold torch (AKA Holy Grail Torch). The gold torch is named after its deep orangey-green tentacles and lighter green tips. This variety has longer, skinnier tentacles and is said to be more forgiving of unfavorable water conditions than the Aussie gold torch.
Aussie gold torch. The Aussie torch is similar to the Indo gold torch but has orangey-gold tentacles with bluish-purple tips. The easiest way to tell these two torches apart is by looking at the difference in tentacle length; Aussie gold torches have much shorter and stubbier tentacles.
Black torch. The black torch is named after its intense purple coloration with neon green tips and does not require special care.
Placement And Temperament In The Aquarium
Torch coral placement varies in the aquarium. Some hobbyists prefer keeping them in lower lighting with the lower flow for the greatest tentacle extension. Other hobbyists like to keep their torches in moderate lighting with a higher flow to deter algae.
There doesn’t seem to be any benefit to placing torch corals under higher PAR (150+ PAR), and they might actually start to bleach if exposed to unfavorable conditions for too long; some hobbyists like to keep them on the sandbed if lighting and flow allow in order to keep other corals from getting stung. Most reef leds will support a Torch coral. The main thing will be to adjust light intensity or placement to get them within the desired PAR level.
Torch corals tend to do better under moderate flow, Higher rates of flow will cause your coral to not extend as far. Higher flow rates are beneficial for delivering food and keeping algae off the skeleton. As long as the water current isn’t directly hitting the polyp, then your torch coral should be able to withstand most flow rates.
Torch corals are moderately aggressive corals and will defend their place in a reef aquarium. At night, these corals will extend their sweeper tentacles in order to feed and to keep other corals from getting too close. Because of this, they should be given enough room to expand and release their sweeper tentacles; this is especially true for other corals that are behind the torch as the sweeper tentacles move with the water flow.
Water Quality
Overall, torch corals are relatively easy to keep and are recommended for beginner to medium-skilled coral enthusiasts. That being said, they do tend to be more sensitive to fluctuations in water parameters and poorer water conditions than other coral species of Euphyllia.
Water Parameters
Even though torch corals have sweepers, they heavily rely on the water column to provide the nutrients they need to grow and develop new skeletons. Surprisingly, the problem that most hobbyists run into is having too clean of a tank.
Torch corals need nitrate and phosphate; running 0 PPM phosphates and 0 PPM nitrates deprives the coral of important nutrients needed for development and sustaining their vibrant colors. At the same time, these corals don’t do well in high nutrients either.
Ideally, nitrates should be kept under 40 PPM and phosphates below 0.1 PPM. Torch corals also require steady magnesium levels (1250-1350 PPM), calcium levels (350-450 PPM), and alkalinity levels (8-12 dKH) to continually grow.
Of course, hobbyists have gone above and below these ideals with success. As long as conditions are stable and your corals look happy, then you have no need to worry.
Filtration
Torch corals do not require any special filtration. More importantly, placement and flow need to be correct.
As long as your torch is getting enough light and a strong enough current to carry food and keep off algae, then hang on the backs, sumps, protein skimmers, and canisters work just as well.
Maintaining parameters
As mentioned before, stability is key. Even though torch corals are more influenced by water parameters than other Euphyllia, as long as your tank is testing within a given range and staying accurate, then your torch coral will stay fully extended.
Dosing
It is agreed that dosing is not required for torch corals and other Euphyllia corals; for the most part, these corals will get the nutrients they need from food, fish waste, and the salt mix being used.
However, if keeping a larger colony of torches or a mixed reef with SPS, then some hobbyists might choose to dose for alkalinity, calcium, and other trace elements to help with skeleton growth.
Testing Water Conditions
If choosing to dose for alkalinity or calcium, then you will want to regularly test water conditions to see how your corals are incorporating those additives.
In order to do this, test water parameters right after dosing. Before the next dose, test the nutrients that you have been targeting. Keep a record of the numbers to watch how they interact and decrease between doses.
What Are Good Tank Mates?
Torch corals is kept with any reef-safe fish or invertebrate. This includes:
It is possible that clownfish will attempt to host a torch coral, but this can cause the coral to stress out and keep its tentacles retracted.
It should also be noted that ‘reef-safe’ invertebrates, like emerald crabs, hermit crabs, and some shrimp, may not be reef-friendly for fleshy large polyp stony corals. Too many times hobbyists have had a helpful crab become hungry for corals overnight and destroy a reef. For the best security, stick to herbivores instead.
Anything that has noticeable teeth or pincers is not a good combination for a reef tank!
What Do They Eat?(Feeding)
Torch corals don’t eat the same way other animals do that have a mouth in the middle of their polyp, like the similar-looking anemone. In fact, most torch corals will refuse larger foods, like shrimp and other pieces of meat.
If really interested in feeding torch corals for the extra nutrition, brine shrimp, zooplankton, and coral foods, like Reef Roids, are good choices.
If choosing to feed your torch coral, you should not overfeed. Some hobbyists never spot feed or give additional supplements to their corals and have substantial growth and vibrant colors. Others feed high-quality foods and see little to no growth. Coral success is largely based on water quality, lighting, and flow.
That being said, torch corals should only be fed once a week at maximum in order to allow time for your coral to digest and to keep water conditions more stable.
Health And Disease
During the daytime, your torch coral polyp should be fully extended with bright coloration. If purchasing a new coral, remember that coral will never look like how it does in the store or on online websites. This is simply due to differences in lighting and sometimes, color enhancement.
Euphyllia corals are very susceptible to brown jelly disease, which can cause the coral to die within a few days. Other bacterial infections are also very likely to come in on new torches, and the corals should be dipped and preferably quarantined before being placed in the display aquarium.
Pests
Like all corals, torch corals can bring in unwanted pests. Common pests you will need to look out for are:
Flatworms
Aiptasia
Isopods
Amphipods
In order to eliminate the threat of pests as much as possible, a coral dip should be used and the frag plug should be removed; again, quarantine will improve the chances of catching pests, but even then, it’s possible that they still slip by undetected.
How To Propagate
Fragging corals that are branching like torches are easy to do but will require some extra tools to ensure success. The best way to frag torches is by using an electric saw or bone cutters. Carefully, you want to cut the skeleton between the start of the flesh and where the coral branches. Use iodine to help disinfect and superglue the frag to a plug. Branching corals are easier to fag with proper bone cutter tools.
Leave the piece near the sand bed and in low to medium flow until ready to acclimate to higher lighting and water current.
Wall corals are more difficult to frag and have a lower success rate. This is because you will need to cut through the flesh of the coral, which can fatally injure it if not careful. Because of this, it is highly recommended to use a sharp electric saw like a Gryphon bandsaw to cut through the piece of the skeleton.
Use the best coral disinfectant product available and keep the frag in a low-stress environment until ready to move to its final location in the aquarium.
Where To Buy
Over the past few years, torch corals have been hard to find and the prices reflect that. On average, be prepared to spend upwards of $150 for a high-quality torch coral frag.
These corals ship well overnight and is purchased online or in-store. If you purchase online, my preference would be to purchase only what you see is what you get (WYSIWYG) corals
Closing Thoughts
Torch Coral care is a rewarding experience, but it can also be challenging. I hope this article helped you better understand how to keep your Torch Coral happy and healthy so that you can enjoy its beauty for years to come! Comment below if there are any more questions I haven’t answered in the article or on our site. I know caring for these beautiful creatures isn’t always easy, but hopefully, with some knowledge from this post, things will get easier as time goes by. Happy reefing!
📘 Want to learn more? This article is part of our complete Saltwater Fish & Reef Guide. Your ultimate resource for marine fish, coral care, reef setup, and more.
Marine velvet is the disease I fear most in a saltwater system. more than ich, more than bacterial infections. I’ve seen it kill entire tanks within 48 hours when it goes undetected, and because the early symptoms are so easy to miss, it often does. Running a 125-gallon reef for years, I’ve learned to spot the signs early and act immediately. If you keep saltwater fish, this is the one guide you can’t afford to skip.
Marine velvet is one of the most deadly diseases in the saltwater hobby. it kills faster than ich and is often misidentified until it’s too late. I’ve seen it wipe out entire tanks, and I’ve helped hobbyists navigate outbreaks after they reached out through my YouTube channel. The key is recognizing the early signs and acting immediately, because once fish are in late-stage velvet, your window to save them is very narrow. This guide covers exactly how to identify marine velvet, differentiate it from ich, and the treatment protocols that give your fish the best chance of survival.
What You Need To Know (The Facts)
Name
Amyloodinium ocellatum
Common Treatments
Chloroquine Phosphate or Copper
Short-Term Treatment
Acriflavine or Formalin bath
Causes
Transferred from infected fish, corals, or water
Fallow Period
6 weeks
Common Symptoms
Numerous white dots on the body, fins, flashing, swimming to flow of wavemakers, erratic swimming behavior
What is Marine Velvet? (Amyloodinium ocellatum)
Marine Velvet Disease, scientifically known as Amyloodinium ocellatum is a dinoflagellate (not the same brown stuff mentioned in my other post). It is well known for killing prized saltwater fish in less than 24 hours, and it spreads the most during the warmest months of the year in the aquarium trade. If you are well versed in the hobby, you will often hear of increased cases of this disease during the summer. It makes summer one of the riskiest times to purchase fish locally or online.
Because it is a dinoflagellate, it has unique features compared to other diseases in our hobby. It is often mistaken as ich (Cryptocaryon irritans), and because of this, you should learn the differences between the two.
Marine Velvet vs Ich – The 4 Key Differences
It’s very easy to confuse these two diseases. I’ve heard many folks say, “ich wiped my tank.” However, their stories, of how quickly everything happened, made me suspect it was actually Velvet. Let’s go into the four main differences so you know what you are tackling. They are:
The number of spots
Type of free swimmers
Life cycle
Time of infection
1. The Number of Spots
Your first indicator is usually the number of spots. Ich’s white spots are spread out and easy to count. With Velvet, the spots are so numerous it’s difficult to count them all. It’s almost as if the fish was dusted with white power (source). You can see an example of both diseases below. Note how the purple tang has spots spread out while the Achilles tang has spots all over its body, including the eyes.
Marine VelvetIch
2. Type Of Free Swimmers
Because Marine Velvet disease is a dinoflagellate, the free swimmers are called velvet dinospores, while ich’s are called theronts. While this is a technical term, one thing to know is that dinoflagellates feed off sunlight which makes it susceptible to blackouts, UV, and Ozone – though once you have an outbreak you will need to take more extreme measures to fight it off. All of these will control the spread, but will not cure an already infected fish!
3. Life Cycle
Velvet averages a 4-day life cycle and there are more attacking free swimmers than ich. This is why they can overwhelm and kill fish so fast. Ich’s life cycle can be as long as 2 weeks.
4. Time Of Infection
Because Velvet is a dino, it remains infective for up to 15 days. This is because as dinos, they can feed off sunlight. Ich is only infectious for up to 48 hours. The fact that it remains infective longer and attacks in larger numbers and longer is what makes this disease far deadlier than ich.
Life Cycle
As I mentioned before, the life cycle is only 4 days and starts when a Velvet dinospore attaches to a fish’s skin. The attached velvet dinospores are then called trophonts. This trophont will feed on your fish for several days before detaching. Sometimes, the trophonts are so numerous and overwhelming that it will kill the fish before it shows any symptoms.
Once the trophont detaches, it is called a tomont. These tomonts divide until they burst. When they burst, they become new velvet dinospores. These dinospores then attach to a new host, starting the lifecycle all over again.
Let’s illustrate this lifecycle with an image. The image below is from Dr. Fish himself, Humblefish. He is the go-to for all marine fish diseases in our hobby. Check out his site for further info on all other saltwater ailments and treatments.
Treatment (How To Cure)
Marine Velvet disease needs to be treated ASAP. You need to treat it in a quarantine tank as all effective medications against it are not suitable to be used in reef tanks. There are several steps you will need to take:
Get the proper medication
Get a test kit
Set up a quarantine tank
Perform short-term relief procedures
Perform treatment procedures
1. Get The Proper Medication
Step number 1 here. The preferred treatment option for Velvet is chloroquine phosphate. Unfortunately, due to the COVID-19 pandemic and its mass usage for treating malaria1 , it is getting difficult to find. Even with a vet, most are now reluctant to prescribe it to a hobbyist. Chloroquine phosphate is highly effective and can be used with no ramp-up time. However, given its lack of availability, it will not be your primary treatment option.
Copper is your new go-to treatment option. We will need to do some additional steps to make it work against Velvet. There are two types of copper: ionic and chelated. Ionic copper is what you will find in most fish stores due to the availability of SeaChem Cupramine. It has a shorter range of therapeutic levels (0.4 – 0.5 mg/L) and degrades fast. It’s not my preferred choice.
Chelated copper is stable and has a larger range of therapeutic levels. Fish are more tolerant to it than ionic copper, and it is generally more effective against diseases than ionic copper. My preferred choice for chelated copper is Copper Power by Endich. Make sure you get the blue version, as there is a green version that is exclusive to freshwater Velvet. The effective range for chelated copper is 1.5 to 2.0 PPM. If you want research-backed info of copper medications – see this write-up from the University of Florida (UF is also the source of my featured image).
Unfortunately, most stores will not have Copper Power in stock. Amazon Prime is your best bet for fast delivery. If you are researching this article and do not have a fish that is sick, I would purchase some now. It has a long shelf life.
2. Get A Test Kit
If you manage to get your hands on chloroquine phosphate, you are in luck. You do not have to use a test kit for CP because there is none available to the hobbyist. Only lab-grade equipment can test for CP and that is way out of the price range of most people, and also not available to purchase unless you are a lab tech.
If you get copper, you will need a test kit. There are many factors with copper that call for a test kit. For one, copper gets absorbed by lots of things in your aquarium – your filter, the silicone in your aquarium, and any decorations. This is why hospital tanks are set up with PVC piping and simple power filters or sponge filters.
Of all copper test kits available, the best out there is the Hanna Checker
3. Set Up A Quarantine Tank
A proper quarantine (AKA hospital tank) is a must. You will need to remove all fish from your display tank as the disease will need to be starved out of your display. More on this later when I explain the fallow period. Depending on the number and size of fish, most people will be working with a 10, 20L, or 55-gallon tank when treating for Marine Velvet disease. I prefer the 20L gallon since it is a nice combo of size, space, and cost-effectiveness. A 55-gallon tank is used for large or multiple fish. Ammonia levels should be monitored with a SeaChem Ammonia Alert Badge.
I walk you through the part selection below in my video. I bookmarked it to the section where I go through each piece of equipment.
The main concern with a hospital tank is not having a bacteria culture to jumpstart it. If you have media in your display tank, move it over to the hospital tank to seed the tank. I would also recommend using Bio-Spera. This is my preferred choice for bacteria in a bottle for hospital tanks because you can find it everywhere – even in chain pet stores.
4. Perform Short-Term Relief Procedures
Because most of you will need to use copper to treat Marine Velvet disease, you will need to perform short-term relief procedures to give your fish relief from the disease. To do so, we will want to use an Acriflavine or Formalin bath. Since Formalin is a controversial medication and even banned in some states, Acriflavine is going to be our best choice.
There is actually one product in our hobby that contains both Acrifalvine and Formalin, That product would be Ruby Reef Rally. This is the preferred solution for providing relief to our fish. Here are the steps:
Prepare a 2.5 gallon or 5 gallon bucket depending on your fish size with a heater and air pump
Put your display tank water into the bucket
Add the recommended dosage of Ruby Reef Rally to the bucket and mix fully
Place fish into the bucket and allow 90 minutes to observe for signs of stress
Remove fish and place it into your hospital tank – start the next relief procedures
Ruby Reef Rally is my go to for dips. I use it for disease relief and also before I introduce any fish into my quarantine tanks. It is available at most local fish stores.
If you are unable to procure Rally, you can do a 5-minute freshwater dip. Walking through a freshwater dip can be a separate article in itself. Here is a video from Meredith Presley to get you going. She does this for gill flukes, but a freshwater dip is an effective short-term option for Marine Velvet disease.
5. Perform Treatment Procedures
It’s time to attack this disease full-on. Since there are two ways to tackle this beast, I’ll walk you through both.
Treating With Chloroquine Phosphate
If you are fortunate to get this wonder drug, here is how you eradicate Velvet with it:
The typical dosage is 40mg per gallon
Use a digital scale when measuring your dosage
Use your hospital tank water in a cup to pre-dissolve the solution
For Velvet – you will need to maintain 40 mg per gallon for a minimum 14 days to treat – 30 days is preferred
If a water change is done, you must replace the water with medicated water using the same 40mg per gallon dosage
To top off water, you will not need to add medication
I provided my video again, this time at the 7:00 mark where I walk you through how I mix CP in my quarantine tanks. You can see how I use the digital scale to measure, how I pre-dissolve, and how I add it to the aquarium.
Treating With Copper
Copper is a bit tricky because we have to work with the ramp up time. Most fish cannot tolerate an instant ramp up to therapeutic ranges. This is why we need to perform those short term procedures I explained previously to buy us time. We will need to perform a 24-hour ramp up. Here are the steps to getting us to effective levels:
Start off by raising copper levels to 1.0 ppm – verify with your Hanna Checker
Over the next 24 hours – raise your levels to 1.5 ppm. Do this every 8 hours, raising 0.125 PPM each time
After you raise it to 1.5 ppm – bring it to 2.0 ppm over the next 24 hours. Do this every 8 hours, raising 0.125 PPM each time
Treat for 30 days keeping levels above 1.50 ppm. If you drop below 1.50 at any time, your countdown to 30 days starts over!
The Fallow Period – How to Eradicate The Disease In Your Display Tank
Treating the disease in the hospital tank and saving your fish is the first battle we fight. Completely eradicating Velvet from your display is how to get a total victory. To do this, we must understand the fallow period needed to wipe it out. I also need to explain what fallow means.
Fallow means no fish in your display. Velvet needs the fish as a host, without the fish, the disease starves out and can’t reproduce. Any coral inverts, and clean-up crew you have in your display can stay in your tank. This can be really discouraging for a reefer to have a fishless tank. There have been times that I have recommended to a hobbyist to impulse buy corals when at the beginning of the fallow period. Just buy a bunch now.
Why would I say that? Because after you place all those corals you always wanted, you can begin your fallow period. It’s something you can look forward to. When your fish return they will be treated to new corals and structures to explore in a disease-free tank! The fallow period is also a long time.
How long is it? The fallow period needed to completely wipe out Velvet from a display tank is 76 days. Yes, I know that is a long time. Now you see why I’m suggesting you go buy those corals you always wanted now where there is no risk to spread disease to your fish!
During this time, you must make sure you do not cross-contaminate your tanks. Keep your hospital tank 10 feet away from your display tank and use separate nets, buckets, and equipment. Make sure you wash your hands before switching tanks with a reef-safe cleaner like dawn dish soap.
Frequently Asked Questions
I’m going to add some FAQS here that I get from readers and also to help with visibility online so people can find this post. If you have any questions, I encourage you to leave a comment below. I will add to this FAQ over time.
Can Fish Survive This?
Yes, fish can survive Marine Velvet disease. They will need treatment to survive, however. Surviving fish have been known to develop an immunity to the disease, but can still be carriers. This is why we must treat the disease and completely eradicate it from your display tank.
How Do You Get Rid Of It?
There are two medications that are effective in getting rid of Marine Velvet disease. The most available is chelated copper using a product like Copper Power. The other medication is chloroquine phosphate, which is more effective but difficult to obtain. Both need to be treated in a hospital tank, and a fallow period must be done in the display tank to remove it completely.
How Do You Treat It?
You need to treat Velvet with either chelated copper or chloroquine phosphate in a hospital tank, then have a 76-day fallow period in your display tank to completely remove it from the system.
How Long Can They Live Without A Host?
Marine Velvet can live without a host fish for up to 72 days per a Texas A&M study. This is why I recommend a 76-day fallow period. This builds a buffer so you can ensure complete eradication
How Long Can A Fish Live With This?
It depends on the fish, but generally most fish cannot live with Velvet longer than 1-2 days. Some will die before they have any visible symptoms! This is why it’s critical for you to begin treatment as soon as possible. It is not a disease to take lightly!
The most resistant fish in our hobby are those with a thick slime coat. These would be fish like clownfish, mandarins, wrasses, and rabbitfish. Nevertheless, Velvet is capable of wiping out every fish in your aquarium!
I hope this guide got you all the information you need to combat this tank killer. Marine Velvet disease shouldn’t be taken lightly. You should run to your local fish store to get supplies now if you are dealing with it. If you are not dealing with it, work on building up your medicine cabinet now. It may save your fish’s life one day or save a fellow reefer’s fish. If you have any questions, please leave a comment below. I’ve successfully fought off Velvet in the past and I am happy to share my experience with you.
📘 Want to learn more? This article is part of our complete Saltwater Fish & Reef Guide. your ultimate resource for marine fish, coral care, reef setup, and more.
I get asked all the time where to buy fish online. and I take this question seriously, because buying from the wrong source is one of the fastest ways to lose fish. I’ve ordered from dozens of online vendors over 25 years, and the difference between a reputable seller and a bad one shows up the moment your box arrives. This guide reflects real experience buying fish for my own tanks.
Looking for the best place to buy fish online? I get this asked of me a lot and it brings back memories of when I started out in the saltwater tank hobby back in the early 90s. Back then you just went to the local fish store to get your fish, live plants, and corals. I remember there was a store called Flying Fish Express and me told myself how crazy this is that you can get a fish shipped to you overnight.
I have been have beenBeen Buying Fish Online For Over 20 Years: I have been embraking on my aquatic journey since the late 90s and have witness the boom of the online fish stores. I have been buying fish online since the late 90s and I have hands on experience working at local fish stores and understand the shipping process from unboxing numerous wholesaler boxers over the years. I developed one of the most comprehensive quarantine processes as documented on my YouTube Channel and have lent my expertise as the technicial editor for two books about freshwater and saltwater fish care (Freshwater Aquarium For Dummies and Saltwater Aquarium For Dummies). My passion for this hobby is why I write on this blog for my readers. I want the best for you and your finned friends.
No one wants to see a list of 50+ stores to buy fish, you only want the best of the best right?
My Top Picks
Let’s get straight to the point with my go to picks. These are the three places I trust the most. I will have others I list in this blog, but these three on the main standouts and cover most of my readers needs.
My friend Rob, whom I’ve known for several years at Flip Aquatics has the best quarantine process when it comes to the freshwater trade. BucePlant is my go to for freshwater plants and for high end freshwater equipment. TSM Aquatics is the only place I will purchase saltwater fish over $100 now, as their quarantine process is unmatched.
Since I can only include 3 in my top picks. My post goes into 5 separate categories with top 3s for each. Here are the categories.
Many of these stores I have purchased from personally over the years, and others I have gotten to know from my time in aquarium clubs and with other aquarist friends.
I included a video from my YouTube Channel. If you like our content, be sure to subscribe as we post new videos every week. We include a summary of the list below and go into more detail in our blog post.
Top Freshwater Store on the Internet
Most of us are used to buying freshwater fish at local fish stores since their variety and care are pretty good. After all, most freshwater fish are tank bred these days. There are a few places I would recommend if you are looking online.
Founded in 2010. Robert and his team at Flip Aquatics have set the standard for conditioned freshwater fish. One of the best selections of freshwater shrimp and nano fish on the internet
I’m a huge fan of Flip Aquatics. In fact, I’ve known Rob for a few years and have run into him a few times at Aquashella in Chicago and Dallas.
Rob started Flip Aquatics in 2010 and has set the standard when it comes to best practices in freshwater fish conditioning. He was the first in the industry to have a full 30-day quarantine process for shrimp. No other retailer on the internet is as robust when it comes to raising and selling properly conditioned shrimp. You can check out his video below from his YouTube channel. He is now the #1 online freshwater fish retail on the internet.
Rob and his team have also ventured into conditioned nano fish. You can now purchase the following fish types from his store:
This is my go-to for high-quality South American and African Cichlids. They have been around since 1970 and have been one of Florida’s leading tropical fish farms in the US. They have been a wholesaler to fish stores for many years and only recently have decided to branch out and offer their fish to the general public.
They specialize in African Cichlids, American Cichlids, Rainbow Fish, and Tetras. Their website has a few in construction pages, but they are easy to reach via email and are quick to respond. Because they are mainly a wholesaler, their shipping is expensive, so either order in bulk or order with a friend to keep your shipping costs low. They do not offer a free shipping option so keep that in mind when buying.
King Koi and Goldfish is a family-owned business that has been operating since 2016. They are known for providing the rarest and most exotic Bettas and Fancy Goldfish on the internet. They even sell rare Ranchu, and show-size Oranda goldfish. They also sell Koi fish, but I do not have familiarity with their Koi Quality. One thing that sets them apart is their quarantine process.
This is one of the rare online shops that have a large selection of Betta Fish where you do not have to deal with import sellers. It is tough to find a quality what you see is what you get (WYSIWYG) seller of Bettas and King Koi and Goldfish nails it. They work with top breeders to obtain unique Bettas. There is a lot of peace of mind that you aren’t risking it with an overseas seller that may ship fish over under a lot of stress or infected with diseases.
They will ship orders the next day and will ship to Canada!
Aquabid is the eBay of freshwater fish buying. They have been around for ages, as you can tell by their outdated-looking interface and website. However, this is the place where a lot of folks go when they are looking for rare and what you see is what you get (WYSIWYG) freshwater fish. You can find some rare imported freshwater fish this way, some you typically will not see in stores.
It is pretty crazy to think about how Aquabid has managed to build its community over time, especially with all the shipping matters when it comes to shipping live aquatic animals. Aquabid’s interface can look odd, but they have been doing it for years and once you get to know the sellers they will be a good source of unique freshwater fish and other livestock.
Buce Plant offers a wide variety of aquatic plants for sale. With one of the largest selections in the US, you will find what you need here. They are also a great source for freshwater shrimp!
Buceplant is a Freshwater focused aquarium store that sells mainly live freshwater plants and freshwater shrimp. Buce was created by aquascaping hobbyists for the planted tank enthusiast. They are located in Southern California and their name came about because they became the premier Bucephalandra provider locally.
They offer a variety of high-end cultured live plants and back everything they sell with a guarantee. You can purchase just about any freshwater plant for your aquascaping project and even purchase the stones and aquarium driftwood directly from them. They are also one of the few online sellers that sell the highest-end freshwater equipment brands like UNS Aquariums.
They also have a stellar freshwater shrimp collection. They have a bunch of varieties including Fire Red Cherry Shrimp and Amano Shrimp. If you are a big aquascaper and looking for a wide variety of plants, this is a great stop! Give them a try!
I’m a big fan of Cory. He has one of the most informational YouTube channels on the internet about the freshwater hobby. He covers a lot of basic and intermediate material that really takes the intimidation of the hobby away. He’s been an inspiration of the blog style that I do here to keep things simple and approachable for all. He also owns one of the best local fish stores in the country.
Cory and his team sell a variety of freshwater plants. They have all the basic beginner aquarium plants and several rare varieties. His team lives this hobby with a passion and it shows with the quality of plants you get from them. Cory has been part of our community for a long-time and he represents an ever shrinking list of online sellers who are truly small businesses. More and more of these online stores are becoming large corporations like Live Aquaria. It’s good to see Cory is still around serving the hobby as one of the little guys.
Amazon would be one of the place of places you won’t think of at first, but there have been a number of high quality sellers such as SoShrimp, GreenPro, and Big Pete’s Aquatics. For fish, Toledo Fish has been a great source of value cost Goldfish and Koi. If you have been a regular Amazon customer (let’s face, most of us are at this point), it doesn’t hurt to look at what is available.
Where To Get Saltwater Types On the Internet
Ah, my favorite topic. I am unashamedly a saltwater fish and reef tank junkie. Selecting saltwater fish is a tough job as the quality of livestock varies and there is a risk of diseases that can wipe out your tank. You only want to purchase from a top retailer with a solid history. Here is where I get my fish.
Saltwaterfish.com has a great history as an online seller. They have been around since the early days and built their own community with a message board that customers regularly interact with to give advice on saltwater fish keeping. They offer a variety of saltwater fish for sale, corals, live rock, inverts, and even reef tank setup supplies.
They are a saltwater fish store that will offer you a 15 day live guarantee on fish. These guarantees from sellers like SWF are the reasons why I get so many of my saltwater fish online now. Many local fish stores will not give you this guarantee. It’s the best piece of mind you can get in hobby.
They ship all their fish via FedEx overnight and you only need to spend $99 to get free shipping. That may seem like a lot, but saltwater fish are expensive. It’s pretty easy to get up to that level with 2 fish, sometimes one. You can see now why that guarantee is really important! No one likes to spend over $100 and have a fish die the next day and your investment just goes up in smoke!
These people care and it shows with their over 4,200 Trustpilot reviews. Give them a chance when you are shopping. You won’t be disappointed! They are one of the best online fish stores.
Live aquaria got a lot of bad rap when they were acquired by Petco back in 2015. Before they were acquired, they were Flying Fish Express. Yes, that’s right, the original online fish store. Live Aquaria has been shipping fish to customer’s doors since the 90’s. I would consider them the top dog sales wise when it comes to saltwater fish. These days though, I shop with them in only one section. That would be Diver’s Den.
Diver’s Den would be a what you see is what you get (WYSISYG) shopping section where Live Aquaria displays fish for sale and you get the exact fish in the picture. Each fish is put through Live Aquaria’s quarantine process. While the process is no where near as robust as my quarantine process, it is still one of the best out there in the industry and really the best place to go if you aren’t a fan of quarantining saltwater fish.
Live Aquaria has expanded into freshwater fish, koi, live plants, and corals over time, all of which are offered via Drivers Den. Their livestock has a guarantee like Saltwaterfish.com. Driver’s Den is more expensive, but if you are willing to spend a little more, this is a great option to look at for high quality saltwater aquarium fish.
This is the place I recommend when you are looking for exotic saltwater fish and want them to be completely quarantined for you. TSM offers the rarest and highest quality saltwater fish in the hobby!
TSM Aquatics is where I refer all my high end clients. If you are looking for the most exotic fish, the newest tank bred varieties, and want the best quarantine process in the industry, TSM is where you go. They are a standard above all other fish stores. They have super rare and exotic saltwater aquarium fish like the Gem Tang, Wrought Iron Butterflyfish, Flame Fairy Wrasses and Crosshatch Triggers!
All their fish are put through a rigorous quarantine process, the best I have seen in an saltwater fish store. You can even pre-order fish and they will put it through their process and get it ready for you. They are the best full-service fish store you can find today. All their fish are expensive as a result, but for my high-end clients who don’t want to deal with the QT process and want the most exotic fish money can buy this is where you go.
If you are looking for any single saltwater aquarium fish over $200, I would highly recommend you shop here over any other saltwater fish store.
Saltwater Corals On the Internet
Ah my favorite topic. It’s so easy to get lost in that saltwater candy. I’m guilty of impulse buys here, but I’m comfortable to purchase from these three sellers. To me they are the best sources on the internet.
TCK Corals is the place to go online to get the rarest and best-looking corals online in my opinion. It’s also the only place I will shop if I’m looking for an exotic bubble tip anemone type like a Black Widow or Rainbow BTA. They sell WYSIWYG corals, so every coral you see in their style is the exact coral. I also like that they are not heavy photoshop issues, an all too common problem I see with online coral dealers.
Their prices can be pretty expensive, however, they do have frequent specials. They are selling off their reputation. They have been around since 2007, based in NY, and have a stellar rating online as the source to go find the rarest corals and anemones. This is a coral shop you definitely want to visit often!
Ebay can be a tricky place to buy saltwater corals from. You can get some of the most exotic and nice looking corals from there, but there are also a number of bad sellers on their who photoshop like crazy. I am a fan of EBay myself and know the shops to look at. I’ll make your search easier by point you towards the ones I’ve had the best experience with:
Always do your own research when looking corals on EBay. Check reviews, check around in your local reef clubs, and check forum reviews. A bad coral seller won’t last long, but they will often rebrand to keep selling online.
Unique Corals is a family owned coral seller in Van Nuys, CA focused on environmentally responsible livestock collection for reef hobbyists, retail stores, and public aquariums
Unique Coral is a great place to get stock corals and WYSIWYG corals from. They also have bubble-tip anemones for sale, inverts, and some fish for sale on their site. They are also one of the few sellers out there that offers financing on large coral purchases. While I’m personally not a fan of that, I know several reefers like to do this to spread out payments for their builds.
They are a family owned business with a 6,000 square foot facility in Van Nuys, CA. They supply livestock to hobbyists, fish stores stores, and even public aquariums throughout the country.
Top Store To Purchase Koi (And Also Pond Goldfish)
Buying Koi is definitely a high-end hobby. There are some really fancy Koi you can buy these days and not everyone has access to a local garden nursery to get high-quality Koi. Fortunately, I have several I have dealt with over the years.
Next Day Koi is a e-store that is completely dedicated on shipping you the finest exotic Koi to your door. They focus on WYSIWYG Koi. Every fish you see on their website is exactly the one you will get when you order. They back all their orders with a 14 day live arrival guarantee and will also allow you chose your delivery date.
I really like that feature about them, as we are all busy people with schedules. It’s a nice feature to pick your date instead of trying to order on the right date to ensure it gets there when you are actually home. They sell a variety of koi including butterfly koi and all the popular koi fish types. They even sell pond goldfish and highly quality koi food.
You also get a 10% discount from me when you shop with them. Use my offer code ASDEPOT to get 10% off your order!
Kloubec Koi Farm is a direct dealer of exotic Koi. They have a farm that is 80 acres in size and have been around for over 30 years. They are known as the premier breeder of champion Koi in the US. They produce Koi to many retailers and they have a comprehensive quarantine process. They are also unique in the space as they do not rely on imported Koi. Every Koi you purchase from them was domestically born.
You actually have two ways you can order from them. You can either order directly on their website or you can shop their EBay store, which you can find bulk packages and super rare Koi for auction. Check out the Ebay store if you are looking for a champion-level Koi fish. The prices can get pretty crazy!
Internet Stores To Avoid
There are a few online fish stores I would not recommend. Below are a couple I steer my clients away from
1. PetSmart
Freshwater, tropical, marine
US Based
PetSmart is a source you can get live fish from online, however, I generally avoid it. The livestock quality isn’t that great – especially on the saltwater side. For freshwater, you can get fish from there; however, I would just rather go to other sources I mentioned above online. They do sell aquarium supplies, but honestly, if you are shopping for supplies, it’s best to buy from Chewy, which was the e-commerce subsidiary that they acquired in 2017 and then split off in 2020.
2. Petco
Freshwater, tropical, marine
US Based
Everyone in the US knows about Petco as they are the largest retailer of pet supplies in the country. However, they have issues with quality when it comes to caring for freshwater and marine fish. For marine fish, the tanks in most of their stores simply aren’t designed for them. Many fish you purchase from them will often be very stressed as a result. There are good Petcos though, but usually, there are more bad ones than good ones.
However, there is one way to purchase from Petco without all the issues that you see in their local stores. That would be purchased directly online. The reason why is the fish purchased from their online store are drop-shipped from the distributors. These distributors are usually going to be the same that many local fish stores in your area are going to use. This is no different than purchasing fish at the local fish store that just got shipped and is still in the bag.
While it will need conditioning and I recommend quarantining fish shipped overnight, they can be purchased at great prices from Petco. They also have a guarantee on freshwater fish.
Pro Tip: I'll make it very clear to my readers here that I ONLY recommend purchasing fish from Petco online since I know they dropship from the distributor. Your mile will vary if you purchase in store.
They are also great for getting supplies in a pitch though. I’ve gone to Petco before in a pinch when my local fish store was closed for supplies. If you are looking for conditioned/quarantined livestock, I would recommend buying from their subsidiary that specializes in it – Live Aquaria.
Conclusion
Well, there you have it, folks. That’s my recommended list of the best places to buy fish online. Are you a fan of a store that I left off of the list? Give a comment below and let’s start a discussion. If you are looking for guidance on how to set up your fish tank, I have several guides below that might help get you started.
Setting up a reef tank is one of the most rewarding things you can do in this hobby. and one of the most intimidating if you try to research it online. After 25 years in the saltwater side of this hobby and running a 125-gallon reef of my own, I understand how overwhelming the conflicting advice can be. Everyone has strong opinions on filtration, flow, lighting, and dosing, and beginners often end up paralyzed by contradictory information. In this guide I’m cutting through that noise with 7 things I consider genuinely essential for reef tank success. the fundamentals I wish someone had laid out clearly for me early on.
Reef Tanks Setup – The 7 Essentials
I get it, information is everywhere and not all sources of information are good to use either because some innocently tries to give you an answer not really having the knowledge because they want to help or the source of the information is biased with sponsors (looking at you YouTube). I’m completely sponsor free here and while I run a e-commerce shop, I am happy to refer folks to other sites and vendors to get the right equipment for them.
With saltwater reef tanks, while there isn’t one definitive answer, there are concepts for success. Following these concepts will put you in the best position to succeed. These 7 essentials are:
Figuring out what you want (planning)
Getting the right equipment
Obtaining quality saltwater
Understanding light needs
Knowing the flow you need
Adding livestock
Maintenance
1. Figuring Out What You Want (Aquarium Planning)
This part here can cause the biggest buyers anxiety or just get folks spread thin instead of focusing. To have success with a reef tank, you need to be focused on what you want to build. Saltwater fish and corals have various requirements and not coming up with a plan can cause all sorts of problems in the long run. The factors you want to consider are:
How big is your space?
What is your budget?
How much time do you want to put into your tank?
Yes, just these three. I am not even focusing on what fish you think are pretty or what corals you think look cool. The reason why is because you aren’t grounded to the limitations you have. I don’t want you to overstretch. A saltwater aquarium contains aquatic living beings after all. It’s heartbreaking to lose them, and it does happen often in this hobby for various reasons – with planning or impatience usually being the main culprits.
How Big Is Your Space?
This should be the first consideration you should think about setting up your reef aquarium. Where are you going to place your reef tank? If you only have space on a desktop or have an apartment, your choices will be limited. If you have a large space, but your significant other isn’t keen on you taking up a 1/4 of the living room with a massive tank, you are going to want to size down.
Tanks when it comes to interior design are accents to our home and a place of quiet and serenity for you and guests. You don’t want it be massive to the point where it is creating visual noise in your desired area. It needs to fit and highlight your home.
In saying this, the largest saltwater aquarium for most people will be a 4 foot long tank. This typically has the best options for builds and livestock and the dimensions make it easier to build a high end setup. A 6 foot long reef tank can do similar in a larger space, but is going to be more expensive, which brings me to the next factor.
What Is Your Budget?
Budget is a major limiting factor when it comes to reef aquarium building. It’s a fact that reef tanks are expensive. And it’s not just the equipment, but the fish and corals as well that add up to the space. Think about what you can afford for your initial setup. The general rule of thumb that has worked for me on client builds is $40 per gallon on a quality saltwater aquarium setup.
So if I take that rule then a 40 gallon reef tank should roughly cost $1600 to get it up and running with a quality setup. Can I go lower than that? Of course I can, but bear in mind we will have livestock to purchase and ongoing maintenance costs. One best practice I like to do with clients is when I get the number they are willing to work with, I try to size down.
For example, if someone tells me they have a $5000 budget for a 120 gallon reef aquarium, I will try to talk them down to a 75 gallon tank using the same budget. This gives you more wiggle room to purchasing the fish and corals you want and also go up in quality on the equipment you can purchase. This also finally gives you a budget on the most missed part of most hobbyist’s setups – aquarium power outagereadiness.
How Much Time Do You Want To Put Into You Saltwater Aquarium?
This is the final limiting factor you will need to consider. Reef tanks require maintenance, and the more advance the setup, the more time you are going to be spending maintenance. While larger tanks are more stable and easier to be successful (hence the “bigger is always better” saying in our hobby), they also require more time to maintain.
A good example of this is comparing the 125 gallon mixed reef tank I had versus my 40 gallon breeder. The 125 gallon reef tank required 20 gallon water changes and needed a 10 gallon auto top off container. I needed a large brute trash can to make water changes and have to had an RODI System on deck to make 0 TDS water. It got to be a chore so I make a DIY water changing station.
The 40 gallon breeder on the other hand only needed a 5 gallon bucket to change water. I could have purchased water from the fish store at that size or could have used a more budget friendly RODI system.
The 40 gallon reef aquarium was an all in one so I only need to care about the return pump and wavemakers for maintenance. The 125 gallon had an oversized protein skimmer, a sump, and larger fish that needed to be feed regularly. The corals were more advanced in the 125, requiring a dosing pump and more considered on the fish I selected.
The 40 gallon was just a softie tank and got to the point where it didn’t really need water changes – a reef tank owner’s dream.
2. Getting The Right Equipment(Setting Up A Saltwater Aquarium)
Equipment is critical for your reef tank. With modern reefs, it has gotten to the point where equipment runs off controllers and can do all sorts of automated tasks. With this in mind, it also makes it easy for you to either buy yourself poor or just want to get every new toy manufacturers come up with every year. Here are the basics of what you need to get started. Fortunately, I have buyers guide for each one which I will link to:
Aquarium Stand – Either buy a high quality one or consider DIY or hiring someone to make one
Return Pump – Whether you go all-in-one or with a sump everyone will need one
Wavemakers – Corals need flow. Wavemakers are the best source for getting consistent flow to make your corals thrive
Lighting – These days Reef LEDS are the rage. Consider a hybrid lighting system if SPS is your thing
Heater – An Aquarium Heater and a proper heater controller setup is essential. Always go with a heater controller. Heaters fail too often!
Reef Salt – If you want corals, you need the right salt. There is a specialized salt for every build
Rocks – Either live rock or dry rock. Personally I recommend a combination of live and dry rock to avoid Dinoflagellates
RODI System – For larger reef tanks. Consider a budget system for smaller ones
Notice I did not include a sump? Since an all-in-one tank doesn’t need an Aquarium Sump it’s off the list. I also left off a Protein Skimmer as smaller tanks do not need one. Protein skimmers are a consideration for larger saltwater aquariums.
3. Obtaining Quality Saltwater
Reef tanks need 0 TDS water. Without 0 TDS water, you will run into algae problems – typically hair and cyanobacteria due to the high levels of nutrients you are introducing into your system. There are two ways to obtain this water.
The first way is to purchase distilled water at a store or RODI water from your local fish store. Some local fish stores will sell you saltwater already mixed. All options work. The main issue you run into is if you have a tank emergency and it’s late at night or weekend, you are out of options.
That’s why I recommend that every reef tank owner purchase a quality RODI system for their aquarium. It is a one-time investment that will be with you on your entire reef aquarium keeping journey. Even if you decide to get out of the hobby later, you can always convert your system to a drinking water solution just running the RO piece of the system.
Lighting is a major factor with a reef tank. It is also a consistent source of confusion and frustration with every new reef keeper. The main issue I see with out hobby is overbuying LEDs for corals that don’t really need it. I’ll attempt to break it down very simply for you. There are three factors when it comes to lighting that you must know:
Intensity
Spectrum
Coverage
Light Intensity
Light intensity with corals is measured in either Lumens or PAR. Most of us use PAR. There are three types of corals in our trade and they will have different PAR requirements they are the following:
So when you just think about, the highest end corals will generally thrive in environments of 350 PAR. Let’s talk about this for a moment. Many manufacturers just light to boast about their high PAR figures. Really, if you can get consistent PAR, it doesn’t matter how high the PAR stated from the manufacture is. It’s just a number they like to brag about to think it is the best because it’s easier to talk about PAR versus the next factor.
Spectrum
Spectrum is the holy grail when it comes to coral. I don’t care how high that PAR number is from the manufactuer. If they get a high PAR number because they use a bunch of white LEDS (a common way of upping PAR), you will not get good results with that light.
Blues, violets, and UVs speak when it comes to coral grow, and the top manufactures like EcoTech understand this. Other manufactures like Kessil focus on Spectrum primarily over light intensity for this very reason. Spectrum is everything when it comes to coral growth. PAR is easy to manipulate. The only important manufacturer I’ve seen that gets this is Ocean Revive in the budget range, which is why many Coral Growers use them when trying to save money.
Coverage
So you got the right PAR and Spectrum, but still have issues? What could be the problem? That would be coverage. This is another major issue with lower quality lighting. They are build off narrow 60 or 90 degree lenses in order to pump up those PAR numbers, which leads to hotspots and board PAR ranges. The high quality manufacturers will use 120 degree lenses and double down on coverage so that PAR spreads more eventually the deeper you do into the tank.
Despite this, with a reef aquarium that is dominated with SPS corals, you will deal with shadowing with LEDs. This is because LEDs are designed to be a focused light source. To balance out coverage in these systems, a hybrid system is often use that combines T5s and LEDs. This combines the spread of T5 lights with the decrease electricity and maintenance costs of LEDs.
5. Knowing The Flow You Need
Corals have various flow needs depending on what type you keep. SPS corals generally need high flow while most soft corals like Zoas and Mushrooms will do flow in lower flow. I’ll break it down simply here:
Soft Corals – 15-20 times gallons per hour
LPS Corals and Mixed Reefs – 20-30 times
SPS Dominated – 45 times and up
So to provide an example, if you have a 75 gallon mixed reef tank you should be aiming for 1500 gallons an hour in flow as a minimum. You would place corals that want more flow at the top of the aquarium and those that prefer lower flow at the bottom. Flow is primarily regulated by your wavemakers.
6. Adding Livestock
Once you figured out what you can work with and cycled your tank, it’s time to work on adding livestock. The great things about corals is you can add them as soon as your tank is cycled. Fish can as well, but there are other factors to consider.
Many folks, including myself prefer to quarantine fish. Saltwater diseases are rampant today and getting more mutated with vendors using low doses of cooper in their holding tanks and with the conditions of our oceans with wild caught fish. I actually have a detailed post on How To Quarantine Saltwater Fish. Definitely give that a look!
You can now purchase quarantined fish online. If you are looking for that, TSM Corals is my go to. They have the more comprehensive quarantine process I have seen in the industry. I use them exclusively for my high end clients. No one likes spending $200 on a fish only to have it die from marine velvet with no guarantee.
Also check out my article on reef safe fish for good picks.
7. Aquarium Maintenance
Now that you got a reef tank going, you have to maintenance. It’s more than just water changes (which in all honestly you can get away with doing less of these or even none when your tank gets older!), you have to maintenance stability in your tank.
For LPS, SPS, and Mixed reefs, this involves keeping your reef parameters up – Calcium, Alkalinity, and Magnesium. You will need to get on a regular water testing schedule to monitor your levels. You will also want to test for nitrates and phosphates. You keep up your reef parameters with doing. Most of use a two part solution. For nitrates and phosphates, if they are high we can lower with water changes or using media like GFO.
There are also low nutrient tanks, a common issue a modern reef aquarium where you will actually need to dose phosphate and nitrates to keep your levels healthy in your aquarium.
Ideal Parameters Are:
Alkalinity – 8 – 11 dKH
Calcium: 350-450 ppm
Magnesium: 1250-1350
Phosphate: 0.001 to 0.25 (never go zero)
Nitrate: 1 to 10 (for most corals — never go to zero)
Salinity: 35 ppt or 1.026 specific gravity
Dosing can be done by using a dosing pump. There are even dosing systems now like the Neptune Triton that can automate dosing for you while testing your water at the same time! It’s all a matter of how much you want to invest in your tank. I always recommend people get on a regular test schedule with their reef aquarium first before going the automation route. You want to build up the discipline of checking your reef tank so you stay on top of things.
Reef Tank equipment will need to maintained as well. RODI and white vinegar are the cleaning tools of choice here. Just do a blended solution. a 1 to 10 solution will work for general cleaning and a 50/50 will work for tougher jobs. Just get a bucket, dip your equipment in there. After a few hours, get a brush and scrub off the the parts. If you are dealing with Coralline algae, consider dipping it into the solution overnight.
Got Any Questions? Ask For Help 😁
Got any buyer’s anxiety or not sure what to do? Ask a question in the comments and I will get back to you! I love talking to my readers and seeing them grow on their reef aquarium journey. No question is a silly one. Thanks for reading and see you next time.
📘 Want to learn more? This article is part of our complete Saltwater Fish & Reef Guide. your ultimate resource for marine fish, coral care, reef setup, and more.
Dosing pumps are one of those pieces of equipment that reef keepers either swear by or never bother with. and I understand both camps. When I set up my 125-gallon reef, manually dosing two-part was manageable at first, but as the coral load grew, consistency became critical. A good dosing pump takes the guesswork out of it completely. The difference in stability I saw after switching was noticeable within weeks.
Looking for the best aquarium dosing pump? It is common to have a lot of buyer anxiety when it comes to buying one. After all, you just graduated into the next level of reefing when you start considering a dosing pump. It is the gateway to advanced reef tanks like LPS and SPS dominated tanks and getting into coral fragging.
This is an exciting time for you. I’ve been in your shoes when I first started with my favorite tanks, The LPS dominated tank. I was going crazy with euphillyas to the point where I needed to dose regularly to keep up my levels. Over my 25 years of experience keeping saltwater tanks, I’ve seen it all and been through the journey you are going through now.
Finding the a dosing pump that is right for you involves several factors. My goal with this post is to help guide you in your decision to make an informed buy. Let’s first talk about what to look for.
What To Look For When Buying An Aquarium Dosing Pump
Before we start comparing dosing pumps, we need to talk about what to look for when purchasing one. Dosing pumps are precision instruments and not every model can stay accurate for long.
Dosing pumps are a premium piece of reef aquarium equipment. It is for advanced reefers and can be a expensive purchase. A solid dosing pump has the potential to automate the supplement schedule of your aquarium. Others can even change your water automatically!
For these dosing pumps I’m reviewing today, this is my criteria:
Quality
Features and Accessories
Brand Name
Price
Dosing Pumps – A Quick Comparison
Now that we know the criteria I’m looking at, let’s see who makes the cut. The list below are the picks I would be proud to put into my tank setups. They are offered by high quality manufacturers who have been around for years. There is no up and coming venture backed company here. These are all high quality name brand controllers. Let’s continue further below.
With great premium features like the ability to auto change water and an industrial level pump, the DOS is the best piece of equipment you can purchase today for your doing needs.
The Neptune DOS is the most advanced doser on the market today. It is one of only two dosers on the market that is capable of performing automatic water changes. It is designed to function with the Neptune Apex system, which in my aquarium controller review, was named the best controller you can purchase in our hobby.
Because the DOS works off a controller, it has the ability to perform multiple functions. Aside from being able to perform automatic water changes, it can provide provide 2 part dosing and any other type doing like trace elements through the controller.
The DOS separates itself for others with its build quality. The tubing is 3.3mm in diameter, nearly double of the what you see standard. It allows the pump to not only run for shorter amount of time, but also prevent clogging and promotes a longer pump life.
The main issue with the DOS is it requires you to have a Neptune Controller. It won’t run without one. If you are looking for doser with its own controller included, you can look at the other options I review below.
The Bubble Magus Dosing Pump is a dosing all in one dosing pump. It is a self run unit that has German-made medical tubing and is easy for a beginner to use.
The clock feature is easy to setup and program and these units have been known for lasting a long time. They remind me Bubble Magus’ Protein Skimmers, which are seen as value buys in our hobby. Bubble Magus delivers a high end offering with a reasonable price tag with this dosing pump.
The main issue with this pump is the tubing. While it is German-made, the tubing is thin so it is best to replace it once a year. As long as you do that, you shouldn’t have any issues using this doser for the long-term.
I’m a huge fan of the Kamoer X1. When dosers first came out, they were expensive and lacked simplicity. The X1 is the answer to that problem. Not only is it easy to use with its WiFi enabled app, but you can grow with it. The initial investment is very reasonable and as you grow in the hobby you can just buy additional units.
Kamoer will allow you to chain up to 4 of these units within the mobile app. This gives you the flexibility of not just running two part solution for your corals, but also trace elements and macronutrients for those of you who run a low nutrient reef tank. The fact that you can grow into this system makes it an excellent choice for a beginner.
The only downfall I can find with this wonderful product is that it only comes with one pump. You have to purchase additional units and pair them. Fortunately, the price for these units are very reasonable.
The GHL Doser is Germany’s answer to the Neptune DOS. I would argue that this is the best overall doser on this list. It not only comes with 4 dosing heads, but it comes with it’s own controller that is WiFi enabled. The app itself is easy to use and the pumps are powerful. They can push and pull liquids up to 50 feet in length, giving you a lot of flexibility on where you place this pump.
You can add an additional slave unit to this dosing pump for a total of 8 pump heads all controlled by the mobile app. It has one of the most accurate and reliable doing motors and each pump can be calibrated individually.
So what keeps it off from my editor’s choice badge? Its the price. It is very expensive, almost double the price of most other dosing pumps available. It tends to be out of the range for most hobbyists. It is worth the investment if you can afford it. It’s the most accurate and reliable dosing pump money can buy.
Amazing for – Those Looking For The Best Money Can Buy
The EcoTec Versa is a peristaltic pump that runs of their Mobius app. An excellence choice if you already own EcoTech products. Can link up to 200 units per system
The EcoTech Versa is Ecotech’s Answer to the GHL Dosing Pump. It is a perisaltic pump that is designed to run off Ecotech’s Mobius app. As we have seen in my reef led review post, the mobius app is well designed and easy to use. The dosing pump offers three modes of dosing with automated, continuous, or manual.
This is a great pump solution if you are already running EcoTech equipment since mobius can run everything for you in the app. The pump system also has nearly limitless expansion. The app will allow you to run 200 versa pumps per system. That number is just unheard of – not even an aquarium controller solution can pull that off! This pump is definitely for the hardcore reefer with multiple tanks or the frag grower.
The price to start isn’t that bad either for a premium solution. Because you can purchase these on a per unit basis, you can start with two to get you started on a two part dosing solution and still be under $300. Given the brand name and quality, that’s not a bad place to start.
For – Those Looking A High-End Solution They Can Growth Into
The new WiFi enabled Peristaltic pump from Kamoer offers a great solutions for those who need something very accurate and desires consistent dosing throughout the day
Peristaltic pumps are very popular for advanced reefers and also in the medical industry1. Their biggest selling point is their ability to change flow rates while they are running. They are designed to run constantly.
This new version model works off a WIFI app, which means it user friendly and easy to use. These pumps work really well with calcium reactors. One of the biggest issues with calcium reactors is frequent adjustments. You will save a bunch of time switching to this solution over other pumps like the Tom Aquatics dosing pumps. Just set it and relax.
It comes with a heft price tag, but if you are running a calcium reactor, it’s a great choice.
Perfect For – Those Wanting An Accurate Device or Using A Calcium Reactor
The Jebao Dosing Pump is usually what reefers on a budget go for when they looking for cheap dosing pump to get them started. I saved this product for last on my list. You may be wondering why. After all, it has four dosing pumps and has a great price!
The main thing is that they have a history of bad quality control. Quality can vary when you order an import product and for something like a dosing pump, I would prefer to stick to higher quality brand. I feel the Kamoer X1 is a better buy and easier to use.
If you are looking for cheap and multiple pump heads, this can be the solution for you. Just make sure you calibrate the pump consistently.
Amazing For – Those Looking For A Cheap Option
Pros
4 Dosing Heads
Great Price
Cons
Quality
Needs To Caliberated Often
What Kind Of Tanks Will Benefit from This?
The best aquariums for a dosing pump would be reef tanks that have a heavy need for calcium and alkalinity. These would be aquariums that are dominated by LPS and SPS corals. They are also beneficial for tanks that run on low nutrients. This is a more common issue with modern reef tanks. They often run low on phosphates and nitrates and need to be dosed into other to keep them at stable levels.
Another good aquarium to use a dosing pump for would be high end planted tanks. You can use a dosing pump to automate your micro and macro nutrient dosing and keep your planted tank stable
The best aquarium dosing pump to buy would the the following three:
Neptune DOS – The best overall pump and works directly with the Neptune APEX
Bubble Magus – The best value in dosing pumps. Reliable and easy to use
Kamoer X1 – The more budget friendly way when it comes to purchasing a dosing pump
FAQS
How Do They Work in Tanks?
Aquarium dosing pumps work by injecting additives to your aquarium on a set schedule. They will often include controllers where you can adjust the injection rate and frequency. Others like the Neptune DOS, work with an aquarium controller and will have more advanced feaures
Do I Need This Device?
No, you do not need a dosing pump to run a successful reef tank. In fact, if you lack any hard corals like LPS or SPS corals, you will not need a dosing pump. Dosing pumps are best suited for reef tank owners who run LPS or SPS dominated tanks. You will also need them for mixed reefs as your hard corals get larger over time.
In saying that, there are many reefers who still manually dose these days. There are also others who upgrade to a calcium reactor. A dosing pump is the easier to use, and most pain free method of the three. They also work with planted tanks for micro and macro nutrient dosing as well as trace elements.
How Do You Set This Up?
A dosing pump is very easy to setup. Once you find the doing pump that fits for you, the main thing you will need to do is calibrate it. Every dosing pump has calibration instructions where you run some of your additives through the tubes to determine the flow rate of the pump. Once you calibrate, it’s a matter of knowing your dosing needs and setting up the schedule. Once you set up the dosing schedule, you will want to regularly test your aquarium water in order to see if you need to make any adjustments.
How Do You Calibrate this Device?
The best tip with calibration is to calibrate with the fluid you are planning to dose. Do not use water, as it is not the same thickness as the solution you are using. If you use water, you will likely calibrate incorrectly. It’s best to calibrate for 20 minutes into a breaker to get the flow rate. Measure with the breaker to calibrate.
What’s Your Favorite? (Your Turn!)
Get a model I missed that you want to talk about? Leave a comment below and let’s start a discussion. I hope this post helped you make an informed decision. See you next time!
🔧 Want to learn more? This article is part of our complete Aquarium Equipment & Gear Guide. your ultimate resource for filters, heaters, lights, pumps, tanks, and more.
If your parameters are not stable, this coral will not survive the first month. Corals do not die from wrong numbers. They die from unstable numbers. The difference between a thriving reef and a dying one is consistency, not perfection.
Stable mediocre parameters beat perfect parameters that swing. Every time.
But what are these corals? Don’t worry, I have you covered. I have over 20 years of experience as a reefkeeper and have been involved in various client builds. My clients want easy to keep (or they just pay up for monthly maintenance ?). Either way, this post will focus on the easiest and more unique corals for your reef tank.
So let’s get started shall we?
The Criteria – How I Selected These Corals
Every coral on this list I’m going over here was hand picked by me. I used the following criteria to select them:
Variety
Ease of Care
Invasiveness
Type
Variety
I like colorful colors, and I feel you do too if you are reading this. Variety is everything with a coral reef tank. Hitting all the bright colors in a reef tank makes your tank the envy of your house guests. I put these corals on this list if they had multiple types and colors available. Green is the most plentiful color of corals – and no one wants a green only coral tank.
Ease of Case
I prefer corals that are easy to care for. The corals that melt as soon an my Alkalinity swings and are super sensitive to nutrient swings I have not selected. These corals for the most part fall under “bullet-proof” status in our hobby
Invasiveness
It would be very easy (and lazy) for me to just make a list and write down corals like Xenia, Green Star Polyps, and other easy to care soft corals. These are easy to grow, but they are also very invasive. They can take over a tank if you let them. You came here for easy to care and pretty – so that’s what I’m delivering.
Type
We have three types of corals in our hobby – Soft, LPS, and SPS corals. I have categorized each on this list because I know not everyone want to hear an aquarist tell them to only get soft corals. There are easy to care for corals in every category. Yes, the hard corals will require dosing, but overall these hard corals are forgiving and approachable for beginners
Easy Corals For Beginners – A Quick Comparison
I’m going to break down this list by category – Soft corals, LPS, and SPS. I’ll go over each one in detail
In a hurry? The best beginner coral are Zoas. Shop WYSIYSG or check out eBay Auctions for rare varieties
The Zoais the most amazing coral in our hobby. The basic zoa is cheap, easy to frag, grows fast, and is easy to care for. They are available in any color imaginable. Blues, reds, yellows, orange, purples it’s all there. They are also for all budgets. Some are so cheap and plentiful you can get them from reefing buddies.
Others can sell for hundreds of dollars for a few polyps! Did I mention they are easy to care for? They can thrive with the most basic reef led and will do fine in mixed reefs or growing with high intensity SPS dominated tanks.
I feel that every reef tank should have one of these wonderful corals. They offer so much variety and they can be dropped anywhere to accent other corals. Zoas are the best corals for beginners.
The frogspawn is my favorite LPS Coral. It is easy to care for and has a great color combination. There are also exotic varieties like octospawn and orange available if you will willing to pay more. They are forgiving with parameters and do not grow fast to the point where you can keep them without dosing much.
The only downfall with them is that they are aggressive. They will sting corals near them with their sweeper tentacles. However, there is a trick with this. Frogspawns and hammer corals will not sting each other and will live together. It would be best to place corals that you do not want to overgrow like Zoas near them so they can keep them in check. As long as you can work with their aggressive nature, they make amazing showpieces in a reef tank. When it comes to LPS coral for beginners, the Frogspawn takes the crown.
The birdnest offers an introduction to SPS keeping. Forgiving and hardy for an SPS, it will offer you the experience you need to get confident on more difficult corals
SPS corals are intimating for anyone starting a coral reef tank. Most of the stories of tank crashes and failures come from Acropora corals. There are several varieties of SPS corals that fall under forgiviing. The birdnest coral is the toughest SPS coral you will find in the category. With facilities like ORA producing tank raised corals, they are getting more and more adaptive to home aquaria then ever before
While they will require dosing to keep reef parameters up, they offer a good introduction to SPS reefing. They come in several colors from greens, pinks, purples, and red. They are a great stepping stone for moving up to the Montipora and Acroporas of the world as you have success with these. They can handle “dirty” water parameters better than all other SPS corals.
Mushroom corals have exploded in variety over the last few years. Multiple colors available and lots of exotic varieties. Affordable and easy to care for!
The mushroom coral sometimes will get a bad rap for reefers. This is because Disco mushrooms are so popular for newbies and their invasive nature to reproduce everywhere. These days though, the Mushroom coral has really come into their own, rivaling the Zoa with its variety of colors.
The main unique mushrooms these days are the Florida Ricordia mushrooms and exotic mushrooms like Jawbreaker Discos and Bounce Mushrooms. The later two are very expensive, but the Ricordia offers a lot of variety and color. They are my favorite mushrooms because they have great colors and are affordable. They also do not reproduce like crazy.
Give mushroom corals a shot, you won’t be disappointed with their colors and ease of care!
The Toadstool Leather Coral used to be the most prominent coral in the early days of reefing. If you had one of those you were the envy of your reef community. Growing over the size of a dinner plate, these leather corals will become the centerpiece of your reef tank and they are very easy to care for.
Because they get so large, they also save you a lot of money in the long run since you would need less corals with the space they take.
Leather corals like the toadstool have taken a backseat over the years with the popularity of designer SPS corals and LPS varieties like Euphyllias. However, they still offer an amazing showpiece coral at a reasonable price and they are easy to care for. They require no dosing whatsoever and are very forgiveness with parameters.
I mentioned the hammer coral as being able live peaceful with frogspawn corals. The hammer coral makes this list for being amazing to look at and being moderately easy to care for. However, you need to have caution when purchasing one.
This is because hammer corals are sold in either wall or branching varieties. The wall varieties will offer more exotic colors, but are harder to care for. With walls if the colony gets diseases or starts dying, the entire coral will go up in smoke. However, with branching types, you can simply cut off the diseased or dying area and the rest of the colony will keep going.
Like frogspawn corals, these are aggressive corals that will sting others nearby with their sweeper tentacles. As long as you pair them with the right corals you should be fine. They also do not grow fast so you can work your way into dosing as they grow.
The Blasto Coral lands on this list because of their prominent red colors and ease of care. They also come in oranges now if you are looking at Aussie variety. They are one of the most peaceful LPS corals you can purchase and do not grow fast. Because they do not grow fast, you can ease into reef parameter maintenance. If you are looking for an easy to care for red or orange color, this is a great addition!
The Pocillopora Coral is a easier to keep SPS coral that offers a fuzzy like look when they are fully expanded. They come in greens, pinks, and purples. Their skelton structure provides a more uniform look over the birdnest which can have sharp branches while the Pocillopora has smooth and thicker branches.
This is another SPS coral that you use to get your feet wet before attempting harder ones like Acropora. They are also peaceful, won’t bother other corals, and have lower light level requirements than other SPS corals. They are a moderate grower. You will need to get on a dosing schedule to keep one long-term.
The Monti Cap Coral is the hardest to keep coral on this list. Even with that statement, many experienced SPS keepers say thing coral is un-killable to them. The key thing with selection is to not go for the design Monti Caps. The basic ones like the greens and reds (like the one in the picture) are often hardy and forgiving.
Plating Montipora make up the majority of reef building corals in the ocean1. It makes sense giving how large they can grow even in a the confines of an aquarium!
And that size and fast growing rate is what makes easier varieties more difficult is their rate of growth. Their fast growing rate will exhaust calcium quickly, thus bringing down your alkalinity level. If you are not on a proper dosing schedule, this can quickly mean disaster for a first timer.
They get very large, which will save you money in the run and cutting them up as they get bigger offers the opportunity to community build and get credits from your local fish store. If you are thinking of getting serious about SPS keeping and fragging, this is a good jumping point.
Key Pocillopora Stats:
Temperament: Peaceful
Lighting: Moderate to High
Water Flow: Moderate to High
Placement: Middle to Top
Frequently Asked Questions (FAQs)
Here are some common questions I’ve gotten from readers. If I get additional e-mails and comments I find relevant, I will add to this list
What Is The Hardiest Coral?
The hardiest coral is going to be a coral that is tank raised and not a designer coral. Saying that, zoas and mushroom corals I would consider the hardiest corals in the hobby. They are happy in lower light environments and they are tolerant of parameter swings and high nutrients. They are as bullet proof as you can get with coral species!
When Can I Start Adding Corals?
You can start adding corals as soon as your aquarium completes the nitrogen cycle and the initial algae blooms pass. You do not need to add fish first to the aquarium. Many reefers these days jump straight into corals as soon as they cycle the tank. I would encourage you to do the same if you are shopping for easy to keep corals.
Are They Easy To Keep?
Yes, most corals are easy to keep. It’s about selecting the correct ones that do not require intense light, are tolerate of nutrient levels, and are forgiveness with parameter swings. All the corals I listed on this blog post are forgiving for first timers. All corals regardless of have husbandry requirements and water changes should be done regularly if nutrients get high.
What Are The Hardest Corals To Keep?
The hardest corals to keep in saltwater reef tanks would be Acropora corals and Non Photosynthetic Corals (NPS) like Tube Corals. Acropora demand stable parameters, high flow, and intense light. NPS corals require consistent manual feeding to keep thriving
How Long Do They Take To Grow?
Some corals like SPS corals go very fast in a stable reef tank. Others like Euphillya corals grow at a slower pace. The fastest growing corals would be soft corals like green star polyps and Xenia – both of which were left off this list because they is invasive due to their growth rate.
Where Should I Put Them In My Tank?
We define placement for corals in three categories – low, mid, and top. Where you should place your coral will be according to the placement recommendation. Some corals like Zoas is placed anywhere in the aquarium, while others like SPS will prefer the top or middle. These are based off the corals’ water flow and light intensity requirements
Note – you can always design a reef tank where the top of the aquarium has medium light intensity and medium water flow to suit a mostly LPS or lower light reef tank.
What Are Your Favorite Corals For Beginners?
Have any stories of your bulletproof corals that survived a tank crash? Share your stories below and get involved in the discussion, Leave a comment and let’s get a discussion going! Thanks for reading and see you next time!
📘 Want to learn more? This article is part of our complete Saltwater Fish & Reef Guide. Your ultimate resource for marine fish, coral care, reef setup, and more.
A protein skimmer is one of the most important pieces of filtration in any saltwater or reef system. and it’s also one of the most confusing to choose. I’ve tested more skimmers than I can count over the years running my 125-gallon reef, and I can tell you the difference between a good one and a mediocre one is night and day. A quality skimmer pulls out dissolved organics before they can break down into nitrate, and that stability shows in your coral health.
Are you struggling to find a reliable protein skimmer?
In this blog, we share the best protein skimmers from hand on backs all the way to DC powered skimmers.
With over 25 years of experience in the aquarium hobby, I’ve assisted countless clients, hobbyists, and readers like you find reliable equipment that lasts the test of time. I’ve personally tested these products in real world scenarios to determine the best protein skimmer to buy.
Things You Need To Know
Specialized Aquarium Protein Skimmers are difficult to find locally because local fish stores are limited in what brands they can carry. You will have a better selection of shopping online
Many other websites that recommend equipment typically only recommend products from Amazon. We at Aquarium Store Depot send readers to purchase the best products from the best brands at specialized retailers online
We thoroughly review every product we recommend or have had field experiences with most of the equipment we recommend. We do not recommend what we do not use or recommend to other aquarium keepers.
Our site owner has been in the aquarium since he was 11 and has over 25 years in the industry. We are run by hobbyists for hobbyists
This is a tough one because there are a lot of high quality protein skimmers out there. I’m actually going to list several here as each of these recommendations would fit different tanks. Before I provide the list I will say I’m a big advocate of Reef Octopus protein skimmers, but they don’t really fit with any of the category winners below:
Protein skimmers have a ton of marketing fluff behind them and that makes it difficult to find a protein skimmer that will work for your needs. I’m going to provide a list of recommended skimmers from all price ranges that we known have been part of very successful reef tank builds. I will also list out the only hang on back protein skimmer I recommend.
The Nyos Quantum in my mind is the pinnacle of AC powered protein skimmers. Made in Germany, this skimmer is designed for extreme performance. The German made pump is designed for power and silence, providing one of the quietest protein skimmers available. The skimmer is expertly crafted and designed to last throughout the life of your tank.
It is built to be disassembled so cleaning and maintaining is very painless with this skimmer. They also to break in very fast, nearly having no break in time! They are equipped with a larger reaction chamber than most on this list. This is the best built needle wheel skimmer I have come across. It has a unique twister bubble plate design that is designed to churn out more bubbles than most other skimmers on this list. It will remove nutrients like crazy out of your aquarium water. They are built for heavy bio load setups.
Model
Nyos Quantum 120
Nyos Quantum 160
Nyos Quantum 220
Nyos Quantum 300
Picture
Price
$$$
$$$$
$$$$$
$$$$$$
Gallon Recommendation
40-125 Gallons
100 – 250 Gallons
125 – 500 Gallons
250-1000 Gallons
Air Max (Liters Per Hour)
500 l/h
1500 l/h
2200 l/h
2200 l/h
Power Consumption
8 Watts
18 Watts
22 Watts
2 x 22 Watts
Dimensions (LxWxH) in Inches
5.91 x 8.27 x 18.31
7.29 x 9.85 x 20.87
12.2 x 9.25 x 23.8
13.4 x 16.4 x 26
Water Level
8-10 “
8 – 10″
8 – 10″
8 – 10″
Quality does come with a price. This is one of the most expensive protein skimmers on the market, but you definitely get what you pay for. If you are looking for very clean aquarium water, this is the skimmer to buy!
Specifications
Footprint – 7.1″ x 9.8″ (For Nyos 160 Model)
Height – 20.9″
Power Consumption – 18W @120VAC
Pros
German made skimmer
Expertly crafted and incredible performance
Easily disassembled for cleaning
Cons
Expensive!
2. Bubble Magus Elite – The Best Value On The Market
The Bubble Magus Elite is the best value on protein skimmers on the market today. It has a great price and it is equipped with a high quality Italian made Sicce. The red and black colors have a coolness factor to them. I also like the easy to use dials that adjust the bubble levels in the neck.
The elite skimmer is an upgrade to the original Curve Series. It addresses the biggest issue with the original Curve series which was the pump. The pump was okay quality. The upgrade to the Sicce put this on part with high end skimmers. This version addresses the original with a modern design. At the price it sells at, it is a great buy and outperforms many other skimmers above its price range.
Specifications
Footprint – 7.3″ x 7.1″ (For Elite 5 Model)
Height – 18.5″
Power Consumption – 18W @120VAC
Pros
Great value!
Italian made pump
Looks cool
Cons
Mid priced
Break in time
3. Bubble Magus Curve – The Best Bang For the Buck
The original Bubble Magus Curve series protein skimmers are the original bang for the buck protein skimmer. This is the protein skimmer that has been used by many reefers with great results. You can probably call this the Chinese Black Box LED equivalent for protein skimmers.
This is a very practical and efficient needle wheel skimmer. It is fitted with a needle wheel pump and the modern curve skimmer body that are commonplace with higher end protein skimmers.
The main con with this unit is the dial in time. They really take their time breaking in and the pump isn’t as high quality as other protein skimmers on this list. But the great thing now is the manufacturer came out with the Elite Protein Skimmers that are armed with a Sicce pump. These elites are now up there with the top brands and deserve your attention! Both models can be equipped with skimmer swabbies that will keep the neck of your collection cup clean.
Specifications
Footprint – 7.28″ x 7.08″ (For Curve 5 Model)
Height – 18.5″
Power Consumption – 8W @120VAC
Pros
Cheap!
Lots of features from higher end skimmer models
Elite versions are available for those wanting an Italian made pump
Cons
They take time to break in and can be finicky
The original curve’s pump is above average – upgrade to the elites for higher quality
4. Aquamxx HOB 1.5 – The Best Hang on Back Skimmer on the Market
For many years, the Aquamaxx HOB Protein Skimmer has held the title of best hang-on skimmer on the market. This new 1.5 remodel amps up the skimming power to the pinnacle of what HOB skimmers are capable of.
Armed with a Sicce rebranded “Shark”pump, this skimmer has all the power that an in-sump skimmer can provide but with the ability to be placed on the back of an aquarium. It is equipped with the same needle wheel impeller that you are used to seeing in their in-sump models. It is even compact enough to fit in larger all in one saltwater aquariums like the Innovative Marine 40.
The main complaint with this unit is the footprint inside of the tank. It does take away at the aesthetics using an HOB and the price is on par with many in-sump skimmers. It is the choice for HOB skimmers without a doubt! No need to look or find anything else.
Specifications
Footprint – 7.5″ x 3.5″
Height – 17″
Power Consumption – 11W @120V
Pros
Powerful skimmer – the best hang on back protein skimmer
Italian pump built to last
Compact enough to work in larger all in one systems
Nano Reef tanks have tough when it comes to get a quality skimmer. There is a lack of space and many skimmers that fit are of poor quality. The reef glass skimmer is the smallest protein skimmer you can purchase today and is very effective for its size. It is effective for aquariums up to 30 gallons and is less than an inch and a half thick. It can easily fit in a small reef and be hidding from view behind rockspaces.
This nano protein skimmer is also small enough to fit in many all in one aquarium chambers. All in one aquariums are great for starting out, but one of the biggest frustrations is finding a skimmer that fits in the chambers. This will fit in even the smallest of all in ones.
Because of its size, it is an air driven skimmer. This does not make it as powerful as a pump driven skimmer, but given the space restrictions, it still works well. It will outperform all those poor quality seaclones/lee brand skimmers that you will find at chain pet stores.
If you are looking for a DC Protein Skimmer, but do not want to spend an arm and a leg, the Simplicity DC Protein Skimmers are an incredible value. The adjustable speed of the DC speed offers incredible adjust-ability with these skimmers and silent functionality.
It is simple to use, which makes sense given the name brand and due to the DC pump takes less time to break in than traditional protein skimmers. Simplicity is also known for having great customer service, so you will have a good experience with support versus other value line protein skimmers.
The price is in line with many mid-grade protein skimmer so you are getting a skimmer with the higher end features of a DC protein skimmer, but with the price of a mid-grade skimmer.
There are only two things I see as cons with this protein skimmer. The first is that the simplicity protein skimmers body is held together with nylon bolts so it’s not a quick release like the others on this list. The other is the pump itself. The protein skimmer pump is a re-branded Jabeo which makes us question the long term reliability of the pump. The good thing though this also means that the pump is cheap to replace.
The CoralVue IceCap K-1 Skimmers are the main line of CoralVue skimmer offerings. They are mid-priced skimmers that offer a lot of value and features for the money. Like many of the higher end skimmers, this K-1 skimmer is equipped with the iconic Italian made Sicce pump. The skimmer has some extra touches with marking on the collection cup and adjustment dials so you know what levels you have adjusted to. This pipeless design also allows for a quieter operation than lower budget range skimmers.
It’s overall a really good value, with my only hesitation is that it may be still out of range for some reefers budgets.
Specifications
Footprint – 6.7″ x 8″ (For 160 model)
Height – 20″
Power Consumption – 15W @120V
Pros
Mid-Priced skimmer with high-end features
Italian made Sicce pump
Smaller footprint to comparable skimmers
Cons
Still a little out of range for some mid-priced shoppers
8. IceCap K-1 – An IceCap Skimmer for The Budget-Conscious Reefer
For those of you who like what the IceCap K-2 skimmers offer, but not in their budgets, the IceCap K-1 protein skimmers are a great alternative. The K-1 offers the same features as the K-2 with the exception of the pump. You still get the markings and a professional level adjustable valves.
While all the features offered are great, you are sacrificing the pump quality. The pump included here is a wavereef pump, which is a step down for the benchmark Sicce pumps that many reef veterans trust. It is nonetheless a great value offer for budget conscious saltwater aquarists.
Specifications
Footprint – 6.7″ x 8″ (For 160 model)
Height – 20″
Power Consumption – 16W @120V
Pros
A budget conscious, but value loaded skimmer
Various models sizes available for all sizes of aquariums
The Red Sea Protein Skimmer has a feature that stands out among all the skimmers listed on this article. It has a built in skimmer swabbie on the collection cup. A skimmer swabbie cleans the inside of the neck of your collection cup allow the skimmer to operate at maximum efficiency.
Usually, a battery run swabbie can be very expensive to fit on a skimmer and are not available on all brands and models. This skimmer has only built in. It’s a mechanical dial that allows you to clean the neck, but this feature alone is a huge deal if you want to run your skimmer at max capacity. It’s even a bigger deal if you don’t clean out your collection cup often and choose to drain the cup to a bucket or container before disposing.
This protein skimmer has highly quality adjustable dials and your benchmark Sicce PSK pump. It is on the pricier size of the skimmers on this list, but that swabbie is a really big deal in my mind and worth the extra money, especially if you don’t like to empty your skimmer collection cup that often.
Specifications
Footprint – 9.1″ x 8.3″ (For RSK 300 model)
Height – 21″
Power Consumption – 16W @120V
Pros
Skimmer Swabbie!
High quality dial for easy adjustments
Sicce Pump
Cons
Price
Loud
10. Reef Octopus Classic – Quality Name Brand With High-End Performance
Reef Octopus Classic Skimmers have been been unchanged for a very long time. The newest remodel of these skimmers of the classic line is an improvement over the decade old proven reliability of these series of protein skimmers.
The Reef Octopus brand is well known in the marine reef industry and has a long standing quality reputation among the community. They were the first protein skimmer manufacturers in the world that designed their very own protein skimmer pumps. When you purchase a Reef Octopus, you know you are purchasing a skimmer with a pump specifically designed for the protein skimmer instead of the typical bolted on 3rd party pump that other manufacturers use. It comes equipped with an air silencer, fittings for ratings, and tank water level adjustments so you can cater it to your sump levels.
Reef Octopus further backs up their product with a 2 year warranty versus your typical 1 year warranty. The also have a Reef Octopus Classic Space Saver Protein Skimmer model for those with small sumps.
Our only con to report on the classic line is the price. When these new classic models were released that came with an increased price, but you get what you pay for. If you are looking for a more compact model, you can check out their space saver models (The SSS models).
Specifications
Footprint – 10.4″ x 8.1″ (For 152-s model)
Height – 20.7″
Power Consumption – 11W @120V
Pros
Respected Reef Octopus name and quality
Skimmer pump is designed specifically for the skimmer
2 year warranty
Cons
Price
11. Reef Octopus Essence – High-End with Convenient Features
The skimmer cup has an easy to use twist and lift feature and there is a detachable silence collar that makes the skimmer super quiet. There are quick release tabs that are very similar to what bubble magus features that allows you easy access to the skimmer body for cleaning. They are designed to have a small footprint so you can fit these in tight spaces and the dials have a nice extra touch of being marked.
This is a skimmer for those who want simplicity. It does come with a price though as they are more expensive than the reef octopus classic series skimmers. Overall, it’s a great product release by Reef Octopus.
Specifications
Footprint – 8.3″ x 6.9″
Height – 20.5″
Power Consumption – 11W @120V
Pros
Respected Reef Octopus name and quality
Has a number of hobby friendly convenience features
2 year warranty
Cons
Price – more expensive than classic line
12. Reef Octopus Regal – High-End DC Skimmers for Serious Reefkeepers
The Reef Octopus Regal Protein Skimmer is a high end DC Powered skimmer. This is the top of the line skimmer series from Reef Octopus and it puts out no stops in providing the best of the best that current skimmer technology has to offer. The heart of the system is the high quality Reef Octopus VarioS DC Pump that is the considered one of the best aquarium return pumps in the industry.
This skimmer has the same high quality construction that you would expect from any Reef Octopus skimmer. The DC pump provides enhanced control, performance, and energy efficiency that puts it at another level compared to traditional AC powered options.
It’s a top of the line protein skimmer, so it commands a top of the line price. Again with Reef Octopus, you get what you pay for. There is also the Regal INT protein skimmer models for those who have additional space in their sumps.
Specifications
Footprint – 11.4″ x 7.5″ (For 150 INT model)
Height – 22.6″
Power Consumption – 15 – 25W @120V
Pros
DC Powered protein skimmer – enhanced controllability
Very powerful and efficient
Very high quality DC pump that is built to last
Cons
Price – most expensive protein skimmer on this list
13. SCA Protein Skimmers – The In Sump for the Ultra Budget Conscious
The SCA Protein Skimmer is the cheapest in sump protein skimmer on this list and it’s actually a pretty decent skimmer. It powered by an Atman skimmer pump, which is a value pump that is used to replace more expensive skimmer pumps, but it is plenty serviceable here.
The main value here is the simple construction of the skimmer. It is really simple to setup and use and just has all the bare essentials to get you skimming all the junk out of your tank.
The main gripes I have with this skimmer is the pump and the the maintenance. The pump isn’t the best and I tend to be bias for Sicce pumps and the body doesn’t have a quick release like the Bubble Magus or Essence skimmers. The atman pump draw a huge amount of power. It draws 28 watts, the highest on our list.
Specifications
Footprint – 9″ x 9.5″ (For 180 model)
Height – 18″
Power Consumption – 28W @120V
Pros
Cheap!
Simple construction and easy to use
Cons
The Atman skimmer is just an average skimmer pump
It uses nuts instead of a quick release for the skimmer body
What is a Protein Skimmer?
A protein skimmer is a filtration system that removes protein and other organic compounds. It works by relying on a chemical process to remove organic waste from the water column. Waste and dissolved organic compounds will adhere to the surface of air bubbles produced by the protein skimmer and are literally pulled out of your aquarium water by the thousands of bubbles produced by the skimmer. The waste from these bubbles will go to a collection cup where they can be removed by the aquarium keeper. This waste that is produced is called skimmate.
Along with aquarium usage, protein skimmers are used in commercial applications like municipal water treatment facilities. They have been around for many years and are a tried and true filtration technology.
Tidal gardens break down protein skimmers in the video below:
Types
Protein skimmers are, unfortunately one of the saltwater aquarium products that is plagued with tons of marketing fluff. I’m going to attempt to simplify the discussion by breaking down types of protein skimmers and the differences below:
Internal
These are protein skimmers you will typically see in nano tanks. They are usually air stone driven and generally, the quality of them really is not great. Unless you are purchasing a high quality internal skimmer, I would recommend you save your money and opt for high quality live or aquacultured rock.
Hang On Back – AKA HOB
A hang on back protein skimmer (HOB) is a skimmer that is designed to work without an aquarium sump. The skimmers will hang on the back of the tank and will pull aquarium water directly out of the display tank. While they are great for smaller tanks or tanks that do not have a sump, they often time are not as powerful and comprehensive compared to in sump protein skimmers. They also tend to leave a pretty sizable footprint in the tank as the pump needs to sit in the display tank, which leaves aesthetics to be desired. Some lower quality HOB skimmers struggle with releasing air bubbles into the aquarium.
In Sump
These are where the vast majority of the best protein skimmers fall under. The best manufacturers of skimmers make them to operate inside a sump as many reef tank keepers maintain an large aquarium sump that can hold these units. They offer lots of features like needle wheels, some are DC powered, and others are recirculating protein skimmers which provide even more cleaning power. We highly recommend shopping for an in sump protein skimmer.
External
These protein skimmers are usually meant for larger aquariums or commercial applications. They are often sold for aquariums over 300 gallons and most smaller aquarium setups do not have the room to house these. If you are a monster fish keeper with a fish room, a commercial external protein skimmer might be on your radar.
Do You Really Need One?
The short answer is no. However, many successful reefers and saltwater aquarium keepers use them because they are excellent tools of filtration and the best protein skimmers can do an incredible job of keeping nitrates and phosphates low when working in conjunction with a refugium or as part of a refugium sump build. Less phosphates and nitrates means you can keep lower levels for your fish and corals or even control your levels and dose up to the levels you prefer to stay at and maintain a healthy low term tank.
A protein skimmer has been essential to many of the key methods of filtration used by high end reefers today. The skimmer was one of the cornerstones of the Berlin Method that utilized live rock and protein skimmers and still is a preferred method of filtration for large coral sellers like World Wide Corals. The protein skimmer is also a key component of the Triton Method of filtration, which is a high level method of reef keeping that involves a skimmer, a large refugium, dosing of trace elements and supplements in order to keep an aquarium free of water changes.
So with both of these points stated, I would say it is a recommended piece of equipment for a saltwater aquarium.
FAQs for Beginners
The following FAQs are below for common questions. If you have additional questions, please leave a comment.
Can a Skimmer Be Used in Freshwater Tanks?
Generally no. The reason why skimmers do not work in freshwater is due to surface tension. They are best used in environments with a high level of dissolved organics in the water (e.g. – dirty). This means that heavy duty applications are the only realsitic means of use like commercial fish farms or large ponds. For most hobbyists running a freshwater tank, a simple water change is far more convenient and easier to do.
Will It Reduce Ammonia?
A protein skimmer will not remove ammonia from a saltwater aquarium directly. However, it will remove harmful organics from your water that will break down into ammonia, nitrite, and nitrate.
Do They Remove or Reduce Nitrates?
They do not directly, but they do so indirectly with how they work. Protein skimmers remove dissolved organic compounds out of the water column, which in effect will lower the concentration of nitrates over time. It is common for high end skimmers to run a tank “too clean” so the best answer is – indirectly yes they do.
Will They Help With My Algae Problem?
Indirectly yes. Protein skimmers will remove nutrients for algae by removing the organic pollutants from your aquarium water. I still believe that growing a marco source of algae like cheato can be very useful in choking out nuisance algae.
Do You Run a Skimmer All The Time?
You certainty can run a protein skimmer all the time and most people do. Monitoring your parameters with a quality test kit should give you a better answer though. If your levels are too low for your corals, you might want to consider leaving your skimmer operating less than 24 hours a days. This is easily controlled with an aquarium controller, or plugging your skimmer to a smart power strip, where you can set a schedule for it.
Is It Necessary To Have One?
In my opinion, a protein skimmer is not necessary in a saltwater aquarium. It has a great ability to remove organics in your aquarium and as a result will lower your nitrate and phosphate levels since there will be less nutrients in your aquarium. However, there are other natural ways of reducing nitrates and phosphates, with quality dry rock or live rock being the easiest to implement.
Do Skimmers Add Oxygen?
Yes, protein skimmers add oxygen in your aquarium. This is done by the air bubbles produced by your pump. The air bubbles inject oxygen in your tank indirectly due to the skimming process. This is a added side benefit to having a protein skimmer in your aquarium.
Where Should The Bubbles Be In My Skimmer?
In my opinion, the bubbles should be at the beginning of your collection cup at the neck of your skimmer. As your protein skimmer runs, there will be thicker skim mate that will get pushed to the top of the collection cup. I find this level to be the baseline operating line for most skimmers on the market. You can adjust from this baseline as you see fit. Some people prefer wet skimmate and others dry. Wet skimmate has the advantage of pulling more organics while dry skimmate provides a balance of organics removal and less maintenance.
How Deep Should The Skimmer Be?
Most manufacturers will recommend between 8″ to 10″ for a protein skimmer. However, how deep your protein skimmer should be in your sump will depend on your manufacturer specifications. Some protein skimmers can be placed in a shallow depth while others need to be placed in a deep water level. Always read the specs from the manufacturer to make sure you place it at the right level.
How Often Should You Clean It?
You should clean the collection cup of your protein skimmer at least every 2-3 days. You may be able to go longer if your collection cup is bigger or you have it connected to a larger container. For the skimmer body, you should clean it every three to six months. The skimmer pump should be cleaned every 2-3 months.
Where Should I Put A Skimmer In My Sump?
This is a preference-related question. However, I will state that the worse place to put a protein skimmer would be in the return chamber of your sump. That leaves us with either the first or second chamber and that’s the part that is going to depend on your saltwater tank build.
Traditionally, a protein skimmer is best placed in the first chamber of your sump. The reason why is your protein skimmer is your first filtration device after your filter socks or media cups (if you use either). This allows for cleaner aquarium water to pass through your other sections in the sump. This is my usual recommended place to put a skimmer. There is a newer method of system now called the Trition method that places the protein skimmer in the second chamber. Placing the skimmer in the second chamber allows for a great chance of pops populating in your refugium section and a high volume refugium. Some Triton systems will run socks though and I can tell you from experience that socks love to catch pods so to me if you are going to do Triton you should consider ditching your socks and living with a dirtier looking sump. Check out our best aquarium sump reviews for more info about the best sump available for your reef tank.
Closing Thoughts
My goal with these blog posts is to make you as well informed as possible with the products you are looking to purchase so you can make the best decision for your aquarium. I hope I achieved this and you were able to find what you were looking for. If you think I missed something, please feel free to leave a comment. See you next time!
🔧 Want to learn more? This article is part of our complete Aquarium Equipment & Gear Guide. your ultimate resource for filters, heaters, lights, pumps, tanks, and more.
An aquarium heater might seem like a boring purchase, but I’ve seen more fish deaths caused by heater failures than almost anything else. A heater that sticks on can cook your fish overnight; one that fails in winter can crash the tank before you notice. Over 25 years I’ve tested more heaters than I’d like to admit, and I’ve narrowed down what actually matters. accuracy, reliability, and safety shutoffs. These 11 are the ones I’d actually trust in my own tanks.
Are you struggling with finding a quality aquarium heater?
In this blog, we share the best products for aquarium heating, from submersible heaters to inline heaters. I also include aquarium controllers in the mix.
With over 25 years of experience in the aquarium hobby, I’ve assisted countless clients, hobbyists, and readers like you in overcoming their heater woes (and believe me, heaters are a headache with how often they fail). I’ve personally tested these products in real world scenarios to determine the best aquarium heater on the market. Check out our YouTube video below:
The Top Picks
I’m going to discuss multiple types of aquarium heaters at this point. But for those in a hurry, here is a quick view of the top 3 three. The answer may surprise you.
The best bang for the buck for those who are only able to purchase a single heater would be the Eheim Jager Aquarium Thermostat Heater. If you have medium to large setup, I would recommend the Finnex STE or go up to the Helio Heater if you have a lot invested in a tank (e.g. – a reef tank).
The Candidates – A Quick Comparison
There are many aquarium heaters out on the market for various tank size options out there. The list below was handpicked by our years of experience in the hobby and through various client builds. They all have their strengths in particular setups which I will explain below. This post will primarily focus on my aquarium heater reviews for the best fully submersible heater types.
Finnex has achieved what we as hobbyist have asked for decades. A reliable heater that won’t fail. Japanese components. Receives our top recommendation.
I’ll say it now and I’ll say it later in this post, aquarium heaters as a whole are generally prone to failure and highly unreliable. We as hobbyists, have struggled for years waiting for someone in the market to develop a heater that could be reliable and not destroy our bank account in the process. We finally have a player in the market who has finally delivered that reliable heating unit we have been waiting for.
The Finnex team at has developed the holy grail, a Controller with Japanese components and a advanced electronic heater element that rids us of all the nightmares of heater failure. What are the factors that scare us as aquarists with fish tank heaters? They are:
My heater gets stuck in the on position and fries my tropical fish
My heater cracks and explodes, which kills my fish
A large fish smacks my heater and cracks it
My glass heater is made of cheap glass that breaks over time from the heat stress
The Finnex team gave me the honor of providing me with a free heater so I could put in my friend Ryan’s tank. I have a video about the entire video below from our YouTube channel.
Here is what I love about this heater:
It’s Japanese made. I know how well Japanese made products are from the team at Tunze and ADA in the aquarium industry
It is accurate up to 1 degree – which is a benchmark for any heater controller I use
The dual circuitry built into the controller gives you a controller in a controller. The redundancy you need to prevent any type of overheating from failure
The controller is waterproof sealed, a step up from the Inkbird controller
It is ETL rated
While it is only covered by a 1 year warranty compared to a 3 year from BRS (more on them below), the Finnex STE is significantly cheaper and the controller is better making this is an overall best buy. I am and continue to be a fan of the BRS heater, however, the Finnex is more approachable. At its price point, it is more accessible to the general fishkeeping hobby, especially freshwater tanks, which I know is nearly 4 times bigger than the saltwater hobby.
In our review, Ryan and I did notice a problem with the heater. The heater is only designed to be on 30 minutes at a time. Because of this, my typical 3 watt per gallon rule of thumb doesn’t work here. You will need to size up appropriately. In Ryan’s 60 gallon tank, this required us to size up to the 400 watt package in order to achieve a reliable and stable temperature free of temperature fluctuations. Keep this in mind if you have amp concerns with your breaker or your controller if you use an aquarium controller.
This is the heater setup to purchase if you are looking for a top notch heater that is reasonably priced, won’t fail on you, and a heater that your fish can’t break (since the heater element is made of Titanium).
Pros
Japanese Components
Excellent controller with easy set temp features
Titanium heating element
Cons
1 year warranty
The controller doesn’t have a low and high temperature alarm
It’s expensive compared to other heaters like the Ehiem
Finnex STE Rating
9out of 10
Manufacturer of Origin9
Brand Name9
Accurancy9
Build Quality9
2. Eheim Jager – Old Faithful with Legendary Brand Name
Ah the Eheim Jager Aquarium Thermostat. They have been around seemingly forever and completely unchanged for ages, and there is a good reason why. It is simply a very well-built and reliable heating unit for both freshwater and saltwater tanks. Quality German-made, UL-listed electronics, and a manually adjustable heater gauge are its main features. The Jager aquarium thermostat heater has an accurate temperature sensor up to 0.5 degrees Fahrenheit of the desired temperature.
This makes it as accurate as the Cobalt Neo-Therms. It also has the ability to be re-calibrated! I has a thermo safety control which automatically shuts off the heater in the event that the tank runs low on water. The indicator light is also easy to see so you know when its working.
Because it is it a quality manufactured heater, it simply hasn’t been updated in years and looks the part. It is a big and bulky glass tube, it uses old school lab-grade glass, and the adjustable dial itself is cumbersome. However, Eheim’s legendary name brand is behind it and anyone who has been in the aquarium industry knows the great quality and durability that Eheim manufactured products bring. It’s ugly looking and big, but you won’t be disappointed using this as your fish tank heater.
Pros
German-made and Eheim name
Accurate up to 0.5 degrees Fahrenheit of set temperature
There comes a time with aquarium technology when a major breakthrough is made. We saw this when aquarium return pumps shifted from AC to DC and when we saw the shift from T5s to LEDs in lighting technology.
We now see the same shift with PTC technology with the Innovative Marine Helio. This heating unit is the first of its kind in the industry. It does not operate like the other heaters on this list that use traditional resistance wires to heater terms. This type of technology is quite old, originating from toasters. That’s right, the same technology used in many aquarium heaters today is no different than what you use to toast your bread!
The problem with this traditional technology is if these fish tank heaters are exposed to air or become covered in debris, they run the risk of overloading, which leads to the explosions and failures many of us experience hobbyists have dealt with in the past.
The Helio changes all of this. The PTC technology uses chips that are programmed to heat at predetermined set temperatures. This results in a safer and more reliable heater. It’s all controlled by the Helio controller. Both the heater and temperature control device were heavily researched by the IM team. They looked at how aquaculture facilities managed their aquarium water temperature. As a result, the Helio is developed like a commercial versus hobbyist grade product.
A new commercial developed product like this demands a very high price. This is the most expensive heater on the list but has the most potential of every heater here. The technology is promising. I see more and more high-end heaters in the future utilizing this technology as it matures, and the price as a result drops as more brands develop it. You will pay a price premium by adopting this technology early.
The heating element is made of titanium, which is unbreakable in our hobby and can conduct heat better throughout the body than other materials. It is German-made, a standout among a number of heaters that are now being produced in China.
When it comes to hearing and accuracy of this heater, the BRS element has been thoroughly tested and will maintain a temperature deviation of 0.5 degrees or less when equipped with a high-quality controller. This ensures that your tank’s temperature will remain stable and keep your aquatic pets healthy.
Being a titanium heater, the element is more efficient than traditional glass heaters. While it will consume the same base power, the heater is more efficient because the titanium construction will conduct heat better than glass. This will save you on energy costs and reduce the carbon footprint of the heater.
Being made from titanium, these heaters are the ultimate when it comes to durability. They are virtually unbreakable and will take the more extreme punishment from large fish and won’t explode on you. These fish tank heaters have the confidence of the manufacturer to provide a 3-year warranty.
Because of their makeup, they require a controller to adjust the temperature. You can either hook it up to an aquarium controller or use the model offered in the link above that connects to an Inkbird. The Inkbird has been a personal mainstay for me over the years, and I feel great using it with this system.
It’s a pricy heater, but it really is what fish tank owners have been looking for all these years. When you have a tank with hundreds or even thousands of prized tropical fish and corals (or tons of live plants) – you demand a heater that doesn’t fail. The titanium element offers you that peace of mind. It’s a must for anyone with a prized display tank.
Pros
German Made
3-year warranty
Works with a controller
Cons
Expensive
No models for smaller fish tanks
Inkbird controller isn’t as good as the Finnex STE
BRS Titanium Element Rating
9.5out of 10
Manufacturer of Origin10
Brand Name9
Accurancy9
Build Quality10
5. Cobalt Aquatic Neo-Therm – The Most Accurate on the Market
If you have a system that requires precise constant water temperature with sensitive inverts, corals, or tropical fish like a reef tank, the Cobalt Aquatics Neo Therm Heater can’t be beaten. Cobalt Aquatics computer tested all their Neo therm heaters. They are accurate up to 0.5 degrees Fahrenheit of the set temperature (better than most controllers on the market in fact), the Aquatics Neo Therm heater, to many in the reef aquarium hobby is the go-to – especially in nano tanks. The Neo-Therm is also one of the most compact heaters. It can fit in any all-in-one aquarium or nano tank and will hide well if placed inside the tank. For overall features, this is the best submersible aquarium heater you can buy today.
It does come with a higher price tag though. The Neo Therm heater is one of the more expensive heaters available and they also only come in smaller wattage sizes, meaning you will need multiple units to run a larger tank.
Pros
Accurate up to 0.5 degrees Fahrenheit!
Manual water temperature adjustment dial
Compact design – fits in all in one system
Cons
Only available in smaller wattage
Expensive
Neo-Therm Rating
8.3out of 10
Manufacturer of Origin7
Brand Name8
Accurancy10
Build Quality8
6. Aqueon Pro Adjustable – With a Limited Lifetime Warranty
If you are looking for a reliable shatterproof adjustable submersible heater, with a limited lifetime warranty, look no further than the Aqueon Pro Adjustable Heater. Aqueon has been in the Aquarium industry for a long time and many of us have trusted them for our tanks as many of the standard tanks old these days are manufactured either by Aqueon or Marineland.
The Aqueon Pro Adjustable Heater comes with a water temperature dial that is painless to adjust the temperature. Because it’s manual control, it is less prone for its temperature configuration to fail because the setting will not reset during a power outage. The Aqueon Pro is accurate within 1 degree of the desired temperature, which is adequate for most home aquariums, but would be considered suspect in a delicate environment such as a reef tank.
Pros
Lifetime warranty and Aqueon Name
Manual water temperature dial that will not reset in a power outage
The M-Series is Fluval’s value heater offering and one of the common ones you will see at pet stores and local fish stores. If all the heaters you will find at non-specialized pet stores, this will likely be the best glass heater you will find on the rack. It’s made of Borosilicate glass and backed by a 3-year warranty. Fluval has a big presence in our aquarium industry and many of its products are known for their reliability.
The M-Series is a budget heater. While it is not as high-end as the BRS heater element or as well-built as the Eheim Jager, it is still a competent heater. It’s also smaller and less bulky than the Jager, which makes it more suitable for all-in-one aquarium and smaller tanks.
While heaters are prone to failure, this is still one of the better ones out there. With proper backup protocols, you should be happy with purchasing an M-Series.
Pros
Good price
Hagen/Fluval name
Computer calibrated
More compact than the Eheim
The suction cups work well
Cons
Inferior to the Eheim heater
Still prone to break from large fish
No separate controller for redundancy
Fluval M-Series Rating
8.5out of 10
Manufacturer of Origin8
Brand Name10
Accurancy8
Build Quality8
8. Finnex Deluxe Titanium – Great for Monster Fish Keepers
For those of us with large tanks over 200 gallons, it is difficult to not only find a high wattage heater, but also a heater that is about to take the punishment of large aggressive fish who may thrash about in the aquarium and knock down rocks and equipment.
This is where the Finnex Deluxe Titanium Heaters answer the call. It is a titanium-built heater, which makes them virtually indestructible. A titanium heating element is more corrosive resistant than glass heaters, making it ideal for saltwater environments.
Before I discovered the Inkbird, this was my recommendation for someone who wanted to use titanium heaters. It’s cheaper than the BRS element, though the controller is not as accurate as an APEX or Inkbird.
However, because there is no adjustment dial on the heater itself, there is no redundancy on the submersible heater to protect against failure. The controller itself is only accurate up to 2 degrees Fahrenheit, which is fine for freshwater fish tanks and fish-only saltwater setups. Reef tank users will want to consider purchasing the Finnex Titanium Heater Rod only and go with a more accurate aquarium heater controller or utilize a high-end controller like an Apex Controller.
Pros
Titanium built design
Comes with a digital controller
Available in up to 800W
Cons
No adjustment dial on submersible heater itself
Controller is accurate only up to 2 degrees Fahrenheit of set temperature
Titanium heaters are considered better than glass heaters due to the fact that titanium is more corrosive resistant and is nearly indestructible. Our last heater was only available in high wattage, but this variation of Finnex Titanium Heaters is for the rest of us. With very similar pros and cons, this heater will get you a titanium submersible heater at a reasonable price. It also comes with a heater guard to protect fish from touching it.
Like with most titanium heaters, the heating element does not have a manual adjuster on board. To program to the desired set water temp, you have to use the controller that comes with it.
This heater is one of the most affordable titanium heater solutions out there that is a name brand. It’s cheaper than both the BRS and digital heater. It also comes in smaller sizes, so you can use them in smaller aquariums. Titanium heaters, in general, will use less electricity than glass heaters since they conduct heat better.
Pros
Titanium built design
Comes with a digital controller
Cons
No adjustment dial on the submersible heater itself
The controller is accurate only up to 2 degrees Fahrenheit
Finnex Titanium Ratings
7.6out of 10
Manufacturer of Origin7
Brand Name8
Accurancy8
Build Quality7.5
10. Hydor In-line – A Great Choice For Canister Filter Users
The Hydor Inline Heaters are the perfect choice for aquarists who own a Canister filter. Because this heater runs through your return line, you do not have to worry about this heater being inside of your fish tank and prone to the abuse some of your fish would cause on it moving rock work or even yourself hitting it accidentally performing maintenance. It is constructed with Hydor’s patented PTC heating technology. The way the unit works is that it is made of a special polymer that has been printed with aquarium-safe ink. This ink heats up the passing current as the water is transferred into your aquarium. It really is a fascinating technology!
When it comes to performance, the Hydor heater is a step up to a submersible heater. The PTC technology is unique and new age. It heats water as it passes through. It is more efficient and provides heating that can remain hidden in the tank
It does come with some major drawbacks though. It must be installed in the vertical position, which can be a problem for those with limited space in their cabinets. It can be only installed with vinyl tubing, making it non-ideal for setups with hard plumbing. It is also only available in up to 300W. You can’t run a second heater inline. However, my personal experience with these heaters is that they do not fail as often as traditional glass heaters.
Hydor also does not state how accurate the heater is on their specs; a controller is highly recommended. It is a great alternative to a submersible aquarium heater.
Pros
External heater
Slick operation and patented technology
No risk of heater burn on fish
Cons
No specs from Hydor on how accurate it is
Can only be used with vinyl tubing
Only available up to 300W
Hydor Rating
7.8out of 10
Manufacturer of Origin7
Brand Name8
Accurancy8
Build Quality8
11. Hyggar Titanium – New Player on the Market Delivering Budget Items
This aquarium heater really surprised us. The Hyggar Titanium Heaters come with a digital temp controller that claims 0.5 degrees of accuracy. That claim would make it one of the most accurate controllers on the market. I would say from testing this product now that it doesn’t have that stated accuracy, but it is a good budget titanium heater. It is cheaper than the BRS, and Finnex heaters.
Being titanium, it is nearly instructable and is more energy efficient than cheaper glass heaters. It is available in multiple sizes and is compact enough to work in some small tanks.
They were a newer brand in 2023, but the reviews have been pretty stellar, enough for us to consider them on our list for aquarists looking for an all-in-one solution titanium heater with a controller. They have reached out to use for a sponsored video, but we declined as we prefer to keep our reviews independent.
Pros
Titanium design
Controller claimed accuracy of 0.5 degrees
Cons
New manufacturer
Hyggar Titanium Rating
7.3out of 10
Manufacturer of Origin5
Brand Name6
Accurancy10
Build Quality8
Benefits (Why Do I Need To Purchase One)
Because most of us in the fish keeping hobby keep tropical fish (saltwater fish), they require the water temperature range to be consistently around 75 – 80 degrees Fahrenheit ( 24 to 27 Celsius). Since we keep aquariums indoors in our home, most people would think that the room temperature of our home could keep our aquariums at a safe water temperature. However, seasons change and there are certain times, like in the winter, when the room temperature in your home can drop below 70 degrees or less in your home putting our precious livestock at risk. They don’t handle temperature changes well.
The best aquarium heaters not only keep your water temperature up for your tropical fish but are easily adjustable so you can keep your water at the desired tank temperature. They are also accurate to boot. Some will even come equipped with a separate temperature controller so you add redundancy in the event a heater fails.
What We Looked For
Figuring out the best aquarium heaters on the market is not easy to do. There are lots of manufacturers out there from many different price points. To filter out the good from the bad here is what we used in our criteria.
Manufacturer of Origin
The aquarium industry is loaded with a ton of budget-friendly products, but this also means the quality and reliability of the product could be suspect. It’s very easy to go to places like Amazon and find a cheap Chinese-made heater to work on your tank. However, they typically do not have good quality control and aren’t built to last.
Heater failure is a serious issue in the hobby. I’m looking for German or Italian made and looking for products with big warranties.
Brand Name
Good brands back up their products with warranties and lab tests. Brands like Eheim have stood the test of time and get my vote over budget brands.
Accuracy
A heater should be pinpoint accurate and consistent. The best heaters on the market will be within 1 degree accurate and will be easy to calibrate.
Build Quality
You want a product that has features like auto shutoff if the heater gets too hot or it runs dry. You want a heater that is more durable materials like titanium or lab-grade glass.
All these criteria get a rating of 1 to 10 with 1 being the worst and 10 being the best. We take an average score to determine our best heaters. Note that price doesn’t come into the equation. With the exception of heaters on this list, we don’t feel that price is a major determining factor. With these two products that are pricey, if your livestock is expensive, we feel the purchase is justified.
How to Choose the Right One
I’ve provided a lot of choices here and it can be frustrating to figure out which one works best. No worries though, let me help you out.
Sizes
All the aquarium heaters listed in this blog post come in various sizes. Some like the Eheim Jager Aquarium Thermostat are very bulky while the Cobalt Neo Therm Heaters are very compact in size. If you do not have a sump or canister filter, the size of the heater will come into play as it may stick out like a sore thumb. Smaller heaters are easier to hide and also getting multiple heaters will help with hiding them in the fish tank (redundancy is also another reason to get more than one heater which I’ll explain in further detail).
Types
Aquariums
The type of aquarium you own will help determine what heater you will need. For example, if you have a fish-only freshwater community fish tank with mostly hardy fish, you can likely get by with a single heater and a relatively cheap one.
If you have larger predator fish like Cichlids or Arowanas, you will want a submersible heater that can take a beating. This is where Titanium heaters can come into play as they are virtually indestructible.
For those of us who have sensitive inverts or exotic fish as you may have with a saltwater reef aquarium, the accurate and reliable temperature is critical. A swing in temperature range could cost thousands of dollars in lost livestock with such setups. Therefore, as a reef tank owner, it is imperative that we build our heating system with multiple redundancies and safeguards to protect our livestock.
Heaters
I did throw out a number of terms when it came to fish tank heater construction so I can be a little more detailed here. A submersible aquarium heater will typically be constructed with the following materials:
Glass
High-Quality Glass like Quartz or Borosilicate
Titanium
Glass heaters are what you will typically find with value-based brands that are not listed on this list. I have completely ignored these because they are prone to exploding in a fish tank and shattering! Not something you want:
Highly quality glass like what you see with the Eheimand heaters is durable glass that is resistant to thermal shock and less prone to exploding like above. They can still crack if dropped or hit by a rock, but in normal operation, they should be fine, especially if they are placed in a safe area like a sump.
Titanium heaters like the Finnex heaters are virtually indestructible and great for tanks with larger fish. They also tend to be the most expensive of the lot.
Your Budget
I have listed a number of quality heaters in this post in all ranges of budgets. One thing to note is that many aquariums will run multiple heaters and I am aware that not everyone will have the budget to deploy a multiple heater setup. The heater for bang for the buck I feel is the Eheim heater. Eheim offers a reliable heater with the best mix of quality and price.
Where to Place It
It is the best to place your fish tank heater in an area that gets a good amount of flow. This will normally be an area in close proximity to a power head, power filter, or air stone. You also want to keep aesthetics in mind so if you are placing the heater directly into your display, you will want to place the heater behind rock work or plants.
Placement is even easier with an all-in-one aquarium as there are compartments available in the return section where you can place your submersible aquarium heater in. If you have a sump, it’s even easier can you can place them in your sump after your first chamber.
How Many Watts Does It Need to Be?
It is actually a very simple rule of thumb that unfortunately gets confusing if you visit aquarium forums. The rule is 3 watts per gallon of water. The chart below provides a clear breakdown of the common aquarium sizes for reference
Fish Tank Sizes
Heater Wattage Needed
10 G
30 Watts
20G
60 Watts
29G
87 Watts
40G
120 Watts
55G
165 Watts
75G
225 Watts
90G
270 Watts
125G
375 Watts
180G
540 Watts
225G
675 Watts
300G
900 Watts
How To Fool Proof Against Failure
As I stated when I talked about the BRS heater element, aquarium heaters, unfortunately are prone to a number of failures. These failure points are:
The aquarium heater explodes
The aquarium heater cracks
The aquarium heater’s internal thermometer fails
The aquarium heater’s off/on mechanism fails
The aquarium heater’s settings reset after a power outage
That is A LOT of failure points. It’s also a bit scary to know that the #1 tank crash reason are aquarium heater failures. It’s not a disease, it’s not a power outage, but your heater failing. That’s correct, a measly $30 heater can be the cause of you losing hundreds of dollars of fish and pets that you have owned and cherished for many years.
This is why we recommend purchasing an aquarium heater system. This would encompass:
The best fish tank heater from this list
Running two heaters instead of one that gets to the recommended wattage level
A separate aquarium controller that is accurate at least to 1 degree Fahrenheit and can run both heating and cooling equipment
A reasonable piece of cooling equipment that won’t break the bank
Since I know a number of my readers cannot afford or do not want to pay for the premium of the BRS heater element or Helios, this section of this blog post is to help guide you on setting up a reliable heating system for less money.
Get A Good One To Start
I mentioned it early on in the post what my top 3 are. I would stick with those as you can’t go wrong with either. All those heaters met my strict criteria and receive my full recommendation.
Failsafe #1 – Running Two Instead of One
Why would we run two heaters? Well, as I mentioned, heaters have many fail points and one of them is the off mechanism failing. This will mean that the heater will stay on and effectively cook your tank. This is the #1 reason for a heater fail. When you purchase two smaller heaters, if one fails at the on position it is not powerful enough to cook your tank inhabitants. It will stay on and you should have ample warning to notice the failure and act accordingly.
Failsafe #2 – Running a Separate Controller
Since running two heaters will give you time to act in the event one fails at the on position, you could be out of town or not present for some time to act. This is where a separate aquarium controller comes in. A separate aquarium controller has it’s own temperature sensors or probe and mechanics separate from an aquarium heater. This provides you with an additional fail safe. Now both heaters AND the controller would need to fail at the same time in order for your tank to experience a crash. That is very unlikely to happen.
The Controllers
So now let’s talk about aquarium heater controllers. The controllers from Finnex and Hyggar are pretty good, but the Finnex controller is only accurate up to 2 degrees and the Hyggar controllers are new to the market. There is one heater controller that has been around for a while and is trusted in other industries aside from the Aquatic industry – namely aquaponics, and beer brewing.
The Inkbird Aquarium Controller – The Best Bang for Buck Controller on the Market
I know there will be some folks on the comment section who may post and say that I should talk about aquarium controllers, but to me, that is a completely separate subject. Aquarium controllers are very expensive and even an entry-level controller is going to cost over $200, which is going to be out of the range of many readers of this post.
The inbird is a great budget controller with a large LED display. The Inkbird ITC-308 is a great aquarium heater controller that is accurate up to 1-degree Fahrenheit. It is easy to program and has the ability to not only control heaters but cooling equipment as well. This actually provides a TRIPLE FAIL SAFE as the cooling function will kick off in the event the aquarium gets too warm. If the aquarium gets too hot or cold, the Inkbird can sound an alarm letting you know something is wrong. There is also a wi-fi version available so you can get temperature alerts on your phone if the fish tank gets too warm or too cold!
The Hydros Control 2 is a step up from the Inkbird. It has the wifi features and more. It can control temperature and a number of devices, detect leaks, and more. It was developed to be a cheaper alternative to the Neptune APEX and a worthy successor to the Reefkeeper entry-level controller.
This controller provides even better assurance that your temperatures stay stable. I typically go with an inkbird on smaller budget builds, but if I have more budget and my client isn’t looking to get an APEX, this is a definite consideration for me. If you are looking for a compete solution, I would recommend looking into my best aquarium controller post for details about controllers that are able to automate multiple aquarium functions.
Since these aquarium heater controllers have the ability to cool down a tank, let’s get a reasonable piece of cooling equipment. An aquarium chiller is going to be out of the budget range of many aquarists so a cooling fan is a good option for us to look into.
The IPETTITE Aquarium Cooling Fan is a very reasonable piece of equipment when teamed with an aquarium heater controller can provide some cooling in the event your tank gets too warm. It’s not a chiller, but it should get you by in most situations. If you need to take it to another level, you can try looking at my best aquarium chiller post for options regarding chillers.
Final Solution – Incorporate Replacement In Your Maintenance Cost
Replacing your heater every year has become a trendy strategy, especially for those who keep expensive setups like reef tanks or aquascapes. When you have invested thousands into a setup, it’s not a big deal in the grand scheme of things to budget $60 a year to replace your heater annually. If you have a setup this expensive, I would recommend this approach but still stick to higher quality heaters. Jagers are a great choice for this method as they are fairly inexpensive to replace. The heating element for the Finnex STE is also reasonably inexpensive to replace.
FAQS
Wrapping It All Up
Well, this was a pretty long post. I hope I was able to provide you with the information you need to make the best-informed purchase. As I stated earlier, there is a reason for these aquarium heaters to be on our best-of lists as they all have their place depending on your aquarium situation and budget.
If you have any questions, please leave a comment in the comment section. If you have a fish tank heater you feel is the best, drop your thoughts below. Thanks for reading :).
🔧 Want to learn more? This article is part of our complete Aquarium Equipment & Gear Guide. your ultimate resource for filters, heaters, lights, pumps, tanks, and more.
Having your aquarium run automatically is a dream for many fish tank owners. Everyone wants a device that can automate many of the mandate tasks of fish and coral keeping. What if I told you that such devices exist today? They in fact do exist, and many do an excellent job of making your aquarium keeping life easier than ever before! They are called aquarium controllers and the technology is now over 10 years old. But what is the Best Aquarium Controller? There are a number in the market now, and they require a lot of research and development to create a long-standing product.
In today’s post, I look at the best of the best and tell you which ones are the ones to purchase today. So let’s get started and see what the marketplace offers. You will be excited to see what these things can do now!
What To Look For When Buying An Aquarium Controller
Before we start comparing aquarium controllers, we need to talk about what to look for when purchasing one. Controllers are a complex technology and not every company can maintain the product line in the long run.
A controller is a premium piece of aquarium equipment. It is one of the most expensive devices you can purchase for your tank and for very good reason. They are capable of automating many tasks in your tank.
For these controllers I’m reviewing today, this is my criteria:
Quality
Features and Accessories
Brand Name
Price
The Candidates
Now that we know the criteria I’m looking at, let’s see who makes the cut. The list below are the picks I would be proud to put into my tank setups. They are offered by high quality manufacturers who have been around for years. There is no up and coming venture backed company here. These are all high quality name brand controllers. Let’s continue further below.
The Neptune APEX was the original aquarium controller released in the United States and continues to be to this day the best controller on the market. What makes it stand out is its ability to integrate with nearly all modern reef keeping equipment today. Every high end manufacturer wants to market as an “APEX Ready” or APEX capable controller. Not having this feature puts them at risk of losing a large amount of sales. This type of brand name recognition makes the APEX the premier controller and the go to for modern tank automation.
The APEX package comes with four probes out of the box – temperature, salinity, ORP, and pH. The salinity probe is the biggest selling point of this set. A salinity monitor is usually a separate purchase – and it isn’t a cheap add-on. These probes are lab grade and have a longer lifespan due to their double junction construction.
The new APEX model runs off wi-fi, eliminating the need to have your controller plugged into a laptop to access. You can run it on your desktop, laptop, tablet, even on your phone while you are away from your tank. It is total piece of mind when you can monitor many parameters while you are away. You can even have a maintenance profession log into your console and see your setups.
The energy bar 8 is an ETL certified power block that holds up to 8 devices. Each outlet has independent monitoring to your console. Each outlet is measure for voltage, which is a key parameter to measure when it comes to equipment. Low output could point to upcoming equipment failure and an early warning sign to replace equipment.
And this is all just talking about what comes in the box! The APEX has a number of add-ons you can bolt onto the system. Such add-ons include a leak detection kit, dosing automation, flow monitoring, an ATO line, PAR monitoring, and automatic fish feeders. The most recent add-on, the Trident, promising complete dosing automation. This is the holy grail of reef automation. It really is a complete aquarium monitoring system.
The future is bright with the APEX Neptune. It is a solid investment that comes with you with any aquarium you keep and can even be used to run multiple tanks. The biggest downfall is its price. If you are running an aquarium with prized exotic livestock and corals, the price actually doesn’t seem that bad compared to the value that is housed in the tank.
The biggest issue with the APEX Neptune is the price. This Neptune ApexEL line is Neptune’s answer for a budget friendly aquarium monitoring system. The APEX EL still has the same great tech with the wifi capability, energy bar 8 hub, and the ability to add all the major Apex add-ons.
What’s missing from the EL model? It’s three main things:
The APEX EL does not have a salinity probe
The console hub is missing a 0-10v port which doesn’t it allow it to connect with devices like Kessils and Varios pumps
The APEX EL does not have an ORP port or probe
All three missing items can be added back with add-ons if you chose to purchase them. I feel what is missing is a good sacrfice compared to what is included. The salinity probe, while great to have isn’t completely necessary and is also new technology to the hobby. The missing ports are only a factor if you purchase Kessils. Finally, many reefer tank owners don’t even bother with ORP monitoring, so a missing ORP probe is not a deal breaker.
This is a great alternative model to the main APEX model. The price can still be too expensive to some. For the price it sells out, there is a lot of value. If you want something cheaper, I have a great option below at #3.
If you reefed in the early mid 2000s, you were treated to this wonderful early level controller called the ReefKeeper Lite. It was praised across the hobby as the bang for the buck controller that would one day save your tank from an aquarium heater malfunction with its temperature controller. It provided the most essential pieces of tank automation to you with its 4 outlet power block. However, the company that created the ReefKeeper Lite – Digital Aquatics, went out of business in 2018. Ever since then the hobby has been search for the next ReefKeeper Lite in a world that was dominated by high end controllers like the Neptune Controller.
Enter the new kid on the block – the Hydros Control 2 kit. This is CoralVue’s answer to the demand of the return of our beloved ReefKeeper controller. Now with the backing of a major manufacturer like CoralVue, the Hydros as the ability and capability to provide what we love out of the APEX without the crazy APEX price.
This Control 2 model is the closest match you will find to the old ReefKeepers. With this package you get
A 4 outlet power supply
Temperature probe
WiFi capacbility
Hydros Control App
The Control App is a great step up to what we are used to seeing with the Reefkeeper which was just a simple interface with buttons. The control runs off a mobile app. It allows you to program the controller without coding knowledge. One of the biggest frustrations with high end controllers is they are too complex to use for newcomers. The Hydros app is user friendly
The price of this controller is more expensive then the original Reefkeeper Lite, however, the value they provide is greater. The price for these I still feel is entry level and a solid investment. The sensor ports currently support optical sensors, leak detectors, water level sensors, flow rate sensors, and switches. This package has incredible value and my #1 pick when it comes to the best budget option for a controller.
Pros & Cons
Pros
Entry level price
Has all the main features included
Backed by CoralVue
Cons
Does not come with salinity monitor or pH probe
New to market
4. GHL ProfiLux – Germany’s Answer to the Neptune Apex
The GHL ProfiLux is internationally recognized for its reliability and accuracy and reliability. Used by major research institutions and public aquariums
The GHL ProfiLux is Europe’s version of the Neptune Apex. It is German made and has quickly grabbed market share away from Neptune as Reefers have realized how reliable and durable these controllers are. The controller is globally recognized for its accuracy and reliability, being used in research institutions and public aquariums.
Aside from the global recognition of the controller, what else makes this controller stand out from the APEX? In short sum, here are the main points:
The GHL has future proof internal boards that are replaceable and upgradeable
Better detailed control of lighting, temp, pH levels, pumps, etc
Easier to program through their logic gate programming
Simple yet more durable build quality
One of the biggest selling points from the GHL controller is how long they last. You will find owners in the community who have been running the same GHL controller for 10 years. They run the older models, not needing to upgrade to the newest model because GHL continues to support the older models with firmware updates. Try to find someone who is still using one of the original APEX models. You will be hard-pressed. Some have failed over time while others have just wanted the latest and greatest.
German and Italian made products are of the highest quality in the aquarium industry and have been so for many years. It shows again in this controller. It doesn’t beat out the APEX on this round up because of its lack of presence in the United States. Most manufacturers shot for being APEX ready and don’t market to other controllers. It’s also harder to find other aquarists who use these controllers. It’s a niche user base, though a very loyal and happy one. If you want one, be prepared to pay slightly more than you would for the APEX. However, you can expect your controller to last for many years.
Pros & Cons
Pros
German Made & German Engineering
Used in research and museums
Easier to program
Cons
More expensive then APEX
Not as well known in the US
5. Neptune Trident – True Dosing Automation Is Here
The Neptune Trident is a controller that automatizes dosing and monitors the most important 3 parameters of coral reef keeping – alkalinity, calcium, and magnesium.
The Neptune Trident when it was announced created a huge buzz around it. It is a game changer for reef aquariums. This is a Dosing controller that attempts to completely automate dosing and monitor the big 3 parameters of coral reef keeping – alkalinity, calcium, and magnesium. Stability is everything when it comes to a reef tank, especially when you get into more advanced corals like SPS.
It works by testing your water multiple times a day then adjusting the dosing schedule based on the results. It uses regents in order to test your water. It takes away all the work of having to test your water every week and tests with excellent precision giving accurate readings to the following:
Alkalinity: + or – .05 DKH
Calcium: + or – 15 PPM
Magnesium: + or – 15 PPM
The Trident interface will also let you know the parameter tests and how much regent you have left. Your reef tank will be its more stable ever with one of these installed in your system.
The main drawback is its price. The regents also add up in monthly costs. This is the benchmark for doing automation today and well worth the investment
Pros & Cons
Pros
Works directly with Apex
Automations dosing and monitors all main reef parameters
Cons
Expensive
Regents add to maintenance costs
6. GHL KH Director – An Excellent Trident Alternative
The GHL KH Director is GHL’s answer to the Neptune trident. It focuses on the primary reef tank parameter monitor for corals – Alkanity. Changes in Alkanity also affect Calcium, so have a device that focuses on Alkanity will also work with keeping Calcium stable as well as pH.
The KH Director works with Lab-grade accuracy. It can work standalone with a GHL Doser 2 or can work with the ProfiLux controller. I really like how GHL has this flexibility since not everyone wants to get a controller. The GHL Doser 2 is also one of the best and accurate dosers on the market so pairing them together is a solid choice.
The regents also last much longer than the Trident. A regent will last you up to 3 months while the Tridents only last 1 month and require multiple types of regents. This gives you cheaper ongoing costs over the Trident. It won’t test all the core reef parameters like the Neptune does, but I feel the KH Director is one of the best dosing automation controllers on the market.
The Aqua Logic Temperature controller makes the list as the premier controller for aquarium heater malfunctional prevention. It only does one job, and it does that job very well.
Because it only does only function, it is simple to use and easy to install in your system. These are extremely reliable controllers that will last a lifetime. They are not prone to glitches or errors in software because they are based on tried and true technology that originates in the HVAC industry1. It is a commercial level device that has been implemented into home aquarium usage.
The big con with this product is that it only does one function. Most controllers these days offer temperature controllers as part of their package. It is also expensive for what it does. The link on this product is the single stage controller. The dual stage temperature controller is a more expensive offering.
The American Marine Pinpoint pH controller is a standalone controller designed to work with equipment like calcium reactors and CO2 regulators. It is accurate within .01 resolution with its lab grade pH probe. They are extremely durable controllers that are designed to work for a lifetime.
They will shut down equipment if the pH goes out of range and are easy to use and calibrate. They are excellent for what they are designed for and plug and play.
The main downfall is they are designed for one purpose. They lack the functionality of what modern controller can do. However, these are extremely reliable controllers and if you have one thing you want to monitor like a Calcium reactor or planted tank, this is a great deal for a product that is known to last for many years.
The Neptune continues to be the best overall brand when it comes to aquarium controllers. I highly recommended the Neptune Apex for those looking for full aquarium automation at the highest level. The Neptune ApexEL is a cheaper alternative for those wanting to build up to a premium system over time. The Hydros Control 2 is a new entry level controller which I feel is a reincarnation of the Reefkeeper Lite. It will do everything that budget controller used to do and more!
Benefits of a Monitoring System
A controller can have many benefits to your aquarium. The biggest benefit is peace of mind and automation. Many of the controllers I have featured here have reporting dashboards that can be loaded on your smartphone, tablet, or PC. They allow you to monitor many aspects of your tank. If something breaks, the controller will know. If something is not operating correctly, you will usually know from the voltage readers on the Neptune Apex.
Regarding automation, controllers have come a long way. The biggest need from a controller is temperature automation, as many of the heaters these days are not high quality and a proper monitoring system is required to keep your tank safe. Controllers can also control your reef light, know when you turn on your aquarium chiller, keep your pH stable, monitor your aquarium wavemakers, and automate your dosing schedule and parameter testing.
The other great benefit is anyone can see your parameters if you grant them access. This is a huge perk if you have a maintenance company working on your aquarium. Some higher end maintenance companies will require you to have a controller for big setups so they can monitor and tweek your tank settings as necessary.
When used correctly, aquarium controllers can offer a ton of peace of mind and save you from an expensive tank crash. They are stellar investments to protect your prized aquatic pets.
FAQs
What is it and what does it do?
An aquarium controller is a computer device that work on monitoring equipment in your aquarium. It also automates several maintenance tasks and are highly customizable to suit the tank setup and needs. They will typically send alerts and texts to your phone if an issue is detected and can also shut down equipment in an emergency.
What happened to Digital Aquatics?
Digital aquatics closed its doors in 2018 and ceased all operations. They were well known for creating entry level aquarium controllers. The new Hydros Control 2 is considered a successor to the Digital Aquatics ReefKeeper as they have a similar price and updated technology
Do I need one?
You do not need an aquarium controller to have a success in the hobby. Prior to the controller technology innovation there were many and continue to be many new setups that are successful without a controller. A controller offers a lot of automation and monitoring, which will reduce the maintenance you have to do in the aquarium. It also gives you peace of mind when you are away from the tank. Given the price of livestock these days, the investment is well worth if you have thousands invested in your tank.
What does an apex unit do?
An Apex controller can do many things in your aquarium, but it’s best to focus on core functionality to see what makes them so great. They can shut off your heater if it malfunctions, saving you from a tank crash. They can detect leaks, your monitor water level, and shut off equipment or the tank before your home is damaged from a flood of tank water. You can monitor your tank while you are on vacation. You can setup auto dosing to keep your aquarium stable for your precious corals.
One of the biggest perks if you willing to do a setup is automated water changes. With the proper setup, a controller can automate the water changing function completely making your tank nearly self-running.
Closing Thoughts
Controllers are really amazing pieces of equipment. They have made our maintenance lives so much better and I look forward to see more advances with the technology as it matures. I hope you enjoyed this article and it helps you make an informed decision. If you have any questions, please leave a comment below. See ya next time :).
🔧 Want to learn more? This article is part of our complete Aquarium Equipment & Gear Guide. your ultimate resource for filters, heaters, lights, pumps, tanks, and more.
Are you struggling with finding a quality aquarium sump or refugium?
In this blog, we share the best aquarium sump and refugium offerings, from Triton style sumps to 4 stage sumps. Even DIY kits are included.
With over 25 years of experience in the aquarium hobby, I’ve assisted countless clients, hobbyists, and readers like you determining their filter needs and also built a few sumps myself for a 40G breeding and 125 G reef tank. I’ve personally tested these products in real world scenarios to determine the best aquarium sump and refugium on the market.
The Top Picks
There are a lot of options presented in this post so you may be wondering what we would recommend. If you are longer for a sump that has everything, I would strongly recommend the Trigger Systems Triton Sumps. The triton is the go to method for premium reefs today and they offer massive value for those in that price range.
For the budget conscious aquarist, I would recommend the DIY sump and refugium kit by Fiji Cube and pair it with a match dollar per gallon tank at Petco or Pet Smart. You can built a great sump and save quite a bit of money over purchasing a manufactured sump. Sometimes the best aquarium sump is the one you design.
With all that said, let’s dive in and look at the best aquarium sumps and refugiums available for purchase today. These are the offerings we feature in this post and ones we tested out.
The Trigger Systems Triton Sumps are a new concept in sump systems. Sumps first started with Berlin sumps, which was just a sump that had a chamber for a protein skimmer. Then you had the creation of refugium sumps with the skimmer in the first chamber than a small refugium chamber. These were primarily designed for a reef tank to house beneficial organisms. The Triton method is a new reefing method that relies on a larger refugium chamber where the primary filtration method is from the natural filtration of your refugium.
The Triton sump by Trigger systems delivers on the method. It is feature loaded with probe holders, three drains, and adjustable baffles. The refugium section is oversized to accommodate the needs of the triton method. Trigger is well known for making quality sumps in the reefing screen. This is Trigger systems high end reef sump offering.
The Trigger Systems Crystal Sumps is a reasonably priced 3 stage sump that everything you need to build out an elite level setup. It comes with two drains to connect your plumbing and comes with a bubble trap to ensure your return pump doesn’t pull our microbubbles. The bubble trap area can actually house media with their included media platforms. This is an added plus as it puts the chemical filtration in the back versus the front.
The filter sock holder is a locking style that keeps filter socks secure and accepts standard 4″ 100 micro socks. Each drain comes with a bulk head at allows you to insert PVC plumbing into it.
It is a very lean design with a eurobrace to ensure it stays study. This series comes in various sizes, so you can find one that fits in your aquarium stand. It doesn’t have adjustable baffles or probe holders like the Triton to keep costs down. It doesn’t have probe holders, but then can be added easily with accessories in the future
I am a big fan of building your own sump, especially if you want to incorporate a sump and refugium in your sump as many sump makers do not have chambers for both. This DIY sump and refugium kit by Fiji Cube really answers the call with a high quality sump kit.
The dollar per gallon sales from PetSmart and Petco offer a great way to get a cheap sump and Fiji Cube’s kits are meant for either a 20 gallon or 40 gallon aquarium. This 40 gallon gallon kit will handle all medium sized aquariums and is easily adjustable to either be setup as a traditional sump + fuge setup or as a triton setup.
The IceCap sumps are a well designed sump that include a fresh water reservoir so you do not have to maintain a separate reservoir for top off. This sump has dual drains allowing for a bean animal overflow to be connected to it and the covers most for a very clean and professional looking sump. The sump comes with probe holders and the ability to adjust the water level from 5-9 inches.
This is a great reef sump if you are working with a tight space, or just want a sump with the reservoir built in. The measurement lines on the reservoir is extra helping in determining how much water you have left in the reservoir.
My only critique on this design is the reservoir sacrifices the ability to hold a refugium. I would have preferred a refugium section over the reservoir myself. Fortunately, their larger IceCap XL Sump models actually do have a refugium section AND a reservoir, making the models a comprehensive package.
Pros
Dual drains so bean animal overflow can be connected to it
Has a freshwater reservoir so you do not have to have a separate one
Clean and professional looking
Cons
Non XL models do not have a refugium section
Refugium is still a little small on the XL models
5. Trigger Systems Ruby – The Brand Name In These Products
Trigger Systems really started the cool looking sump craze and has been recognized in the industry for their high quality craftsmanship. This Trigger Systems Ruby Sump offers a true 3 chamber sump. Both the protein skimmer and refugium sections are adequately sized to house both comfortably. It has dual drains like most of the premium sumps we have reviewed here.
The filter sock holders lock into place so you don’t have to worry about them accidentally falling into your sump. Three probe holders are included in the first chamber and a media chamber is included so you can place carbon before the return section. The design is finished off by a clean red colored euro-braced design. It really is a competent and well rounded design.
Pros
Recognized name brand in the industry
Great all around design
Nice aesthetics
Cons
Fuge still could be larger, but Trigger does sell Triton sumps
Can be on the more expensive side compared to others listed here
6. EShopps Advanced Series – For the Serious Hobbyist
The Eshopps Advanced Series Sumps is the 3rd generation advanced series sump from Eshopps. It is a well built sump that incorporates a skimmer and refugium section. What I love about this sump is that it has a two channel design so as one drain goes to the sump while the other goes to the skimmer. This allows for you to have separate drain flows to your skimmer and fuge section. It comes complete with probe holders and a float valve holder. It is a great all round design.
Because it has two drains on it, it is designed for bean animal overflows. It has a very generous protein skimmer section, which will allow you to add an oversized skimmer. The fuge section is smaller than I would like, but is adequate for this design as it a primarily skimmer run sump so you are definitely going to want to add the best protein skimmer you can afford on this build.
When I first saw Fiji Cube’s Sumps, I immediately feel in love. This is such a clean looking sump and expertly designed. The blue and white design will look great in your cabinet or fish room and they make longer sumps that the other manufacturers do not make.
Let’s talk about why this sump is so awesome. First is the computer laser cut design. Next is verstalie first chamber than can either hold filter socks or be converted to hold media. The skimmer section is just right, and features a tighter fit so there is less wasted space in the sump. The sump comes with probe holders and all baffles can be adjusted. The water level is adjustable to 12″ – which is the highest level available for sumps on this list and all chambers can be adjusted. I love the extra fit features like the removable lids on every section. It keeps things clean of salt creep and enclosed for less water evaporation and humidity in your cabinet.
It is a pricy sump given it’s features. If you are looking for that “cool” sump for your setup, this is one of the best ones to purchase.
The Bubblefin DIY Kit is how to get a DIY done on the cheap. It comes with the acryclic baffles to get your started. You can build your sump configuration however you want with this kit. All you need is silicon and a steady hand when placing the baffles. It’s a completely bare bones kit with just baffles, but a lot of DIYers like this option because they can build whatever they want.
The price of this kit is so affordable, you would have a hard time coming up with something comparable in time and money going to the hardware store and purchasing glass or acrylic baffles.
The only complaint I have from this kit is it is missing a pipe hold or bulkhead. You can purchase those separate from other vendors online though. It doesn’t have the same features as the Fiji Cube kit, but the price is very hard to beat
This is the budget offering from Eshopps. The Eshopps RS Series Sumps is most common aquarium sump you will see at local fish stores.
It is a very basic, no frills sump that gets the job done for those who are starting out or just want a very basic sump. They are best meant for protein skimmer powered Berlin style saltwater aquarium and reef tank setups.
Pros
Simple
Cheap
Easy to Setup
Cons
Single drain means you cannot setup a bean animal overflow
Can only accommodate a protein skimmer
Not pretty to look at
What Is An Aquarium Sump?
An aquarium sump is a separate aquarium that is plumbed into your main aquarium. They are frequently used in saltwater aquariums and considered the best aquarium filter option. This is because most of the best equipment available is meant to be placed in a sump. The sump is normally placed inside the tank cabinet and other times they are pump to a separate fish room or basement. A separate fish room or basement offers the most accessibility, but mostly common on larger or commercial builds.
Most of us who will setup a sump are usually going to place the sump inside the cabinet and use a submersible return pump to move water back to the display tank. You can see how a sump is used in a professional environment like Tidal Gardens below:
Most sumps will be designed with 3 sections:
The drain section
The flex space section
The return section
The drain section will usually have mechanical filtration either through filter rocks or filter cups that will have sponges or floss with chemical media. In most saltwater setups, this is where you would install the best protein skimmer that works for your setup..
The flex space section is a section where the a refugium (or fuge for short) would be spaced. Sometimes live or dry rock is placed here along with macroalgae to support microfauna and to remove excessive nitrates and phosphates from the aquarium. In a freshwater setup, this section can be used as a safe place to put freshwater plants like Anubias, Java Fern, Duck Weed, Guppy Grass, Java Moss, and Luffy Marimo Moss Balls are all excellent candidates for a freshwater refugium.
In reef tanks, there is a new method called the Triton Method that switches the order of the refugium and protein skimmer. The refugium is placed first and the skimmer follows it.
The also section is the return section, which is where your return pump goes and where your auto top off is placed. This return section is the part of the sump that will have a variable water level so as your water evaporates the water in this section will drop. This will also be the first area of your sump that will fill up if your return pump is shut off.
What Is A Refugium?
A refugium is a section in your sump that is reserved as a safe space for micro fauna and macro algae in your aquarium in saltwater tanks and a safe spot for live plants in a freshwater tank. The advantages of a refugium are several:
In a saltwater aquarium, this allows you to cultivate beneficial pods that your fish and corals will in turn eat. The pods also act as a clean up crew that eats detritus in the aquarium.
Macro algae and live/dry rock can be used in a refugium to house pods and filter out excessive nitrates and phosphates in the aquarium. A large enough refugium in combination with a quality protein skimmer can potentially eliminate water changes.
For freshwater tanks, plants can be housed here to act as a filtration device to filter out chemicals and excessive phosphates and nitrates. while not as effective as in saltwater aquariums, they are still useful when a large enough refugium is used.
How To Select An Aquarium Sump and Refugium (Buying Guide)
There are A LOT of sumps and refugium designs to chose from. It is pretty overwhelming to figure out what will work best for you. Here are a few factors to consider to help you out:
Size – You are limited to the size of your cabinet. The bigger the sump the better if you can fit and manage it.
Versatility – Sump designs with multiple chambers and adjustable baffles allow you to work around the design to fit a variety of equipment.
Durability – You want your sump to last the life of the tank. It is a pain to replace a size. Consider the following:
Acrylic vs. Glass – Acrylic is light and less prone to cracking. Scratching is not as big of a deal with sumps as they are in your display
Acrylic vs. PVC – PVC is an even more durable sump design, but very expensive. You can consider a PVC Hybrid that combines both PVC and Acrylic at a lower cost or chose to go all PVC. Either way, the build will likely be a custom aquarium sump
Accessories – Features like probe holders and euro bracing make for a cleaner and easier to work with design
Ease of Installation – If there are videos or instructions available that makes things a whole lot better. A sump with bulkheads included is also extra nice
Aesthetics – You want your sump to look cool right ? ?
Low Noise – A bean animal design will have the lowest noise possible.
Conclusion
Sump purchasing will drive a lot of buyer anxiety to you. It’s the central operating hub of your reef tank. I hope I helped alleviate your anxiety in your purchasing decision. If you felt I left something out, please leave a comment below. Thanks for reading!
🔧 Want to learn more? This article is part of our complete Aquarium Equipment & Gear Guide. your ultimate resource for filters, heaters, lights, pumps, tanks, and more.
🐠
Before you go — free aquarium tips!
Get Mark's weekly fish & reef guides. No fluff, no spam — just real hobby experience from 25+ years in the tank.


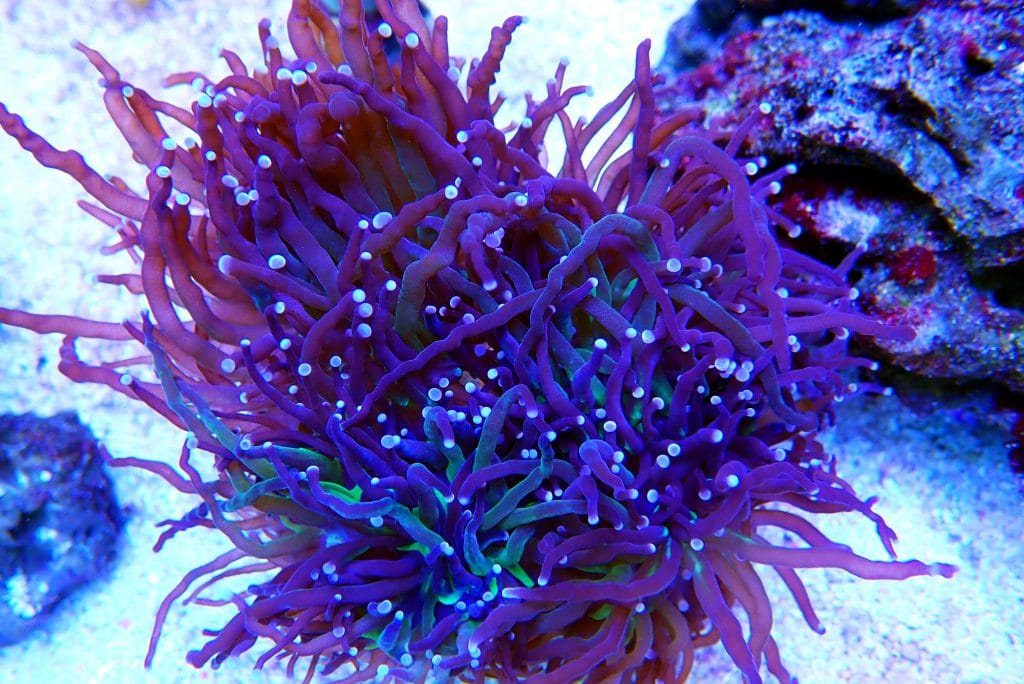


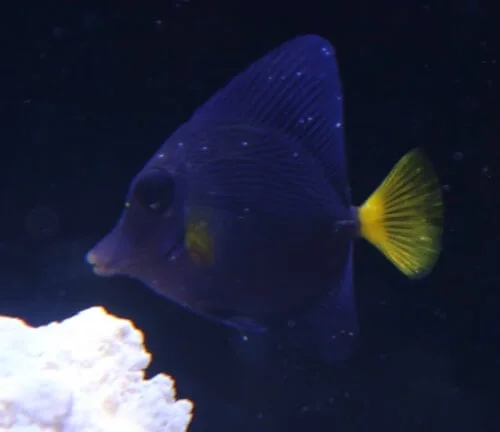

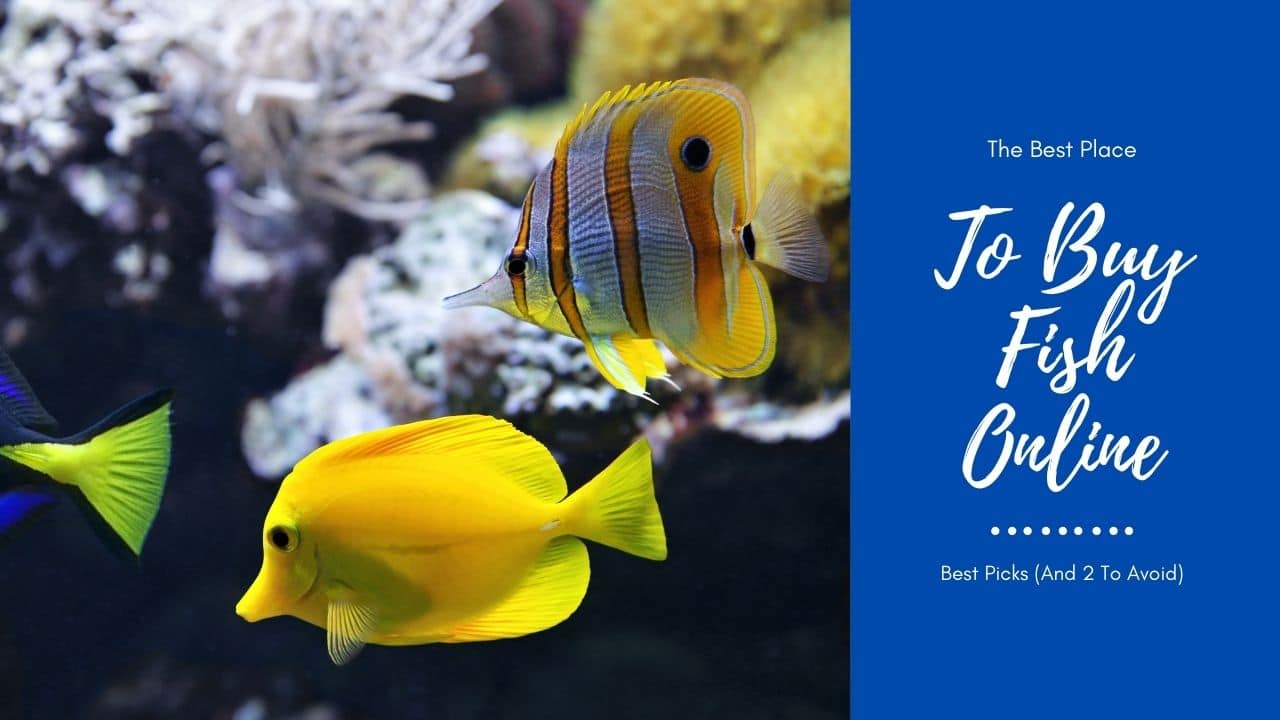


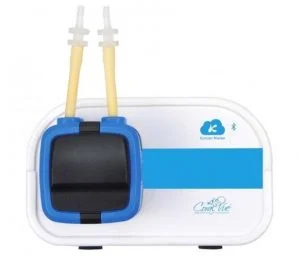


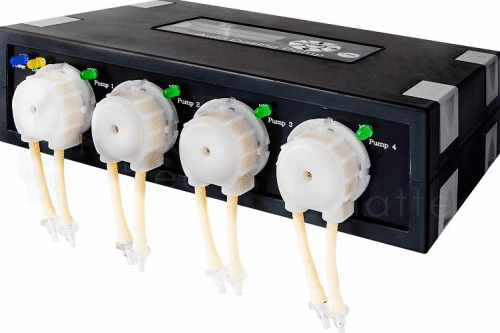


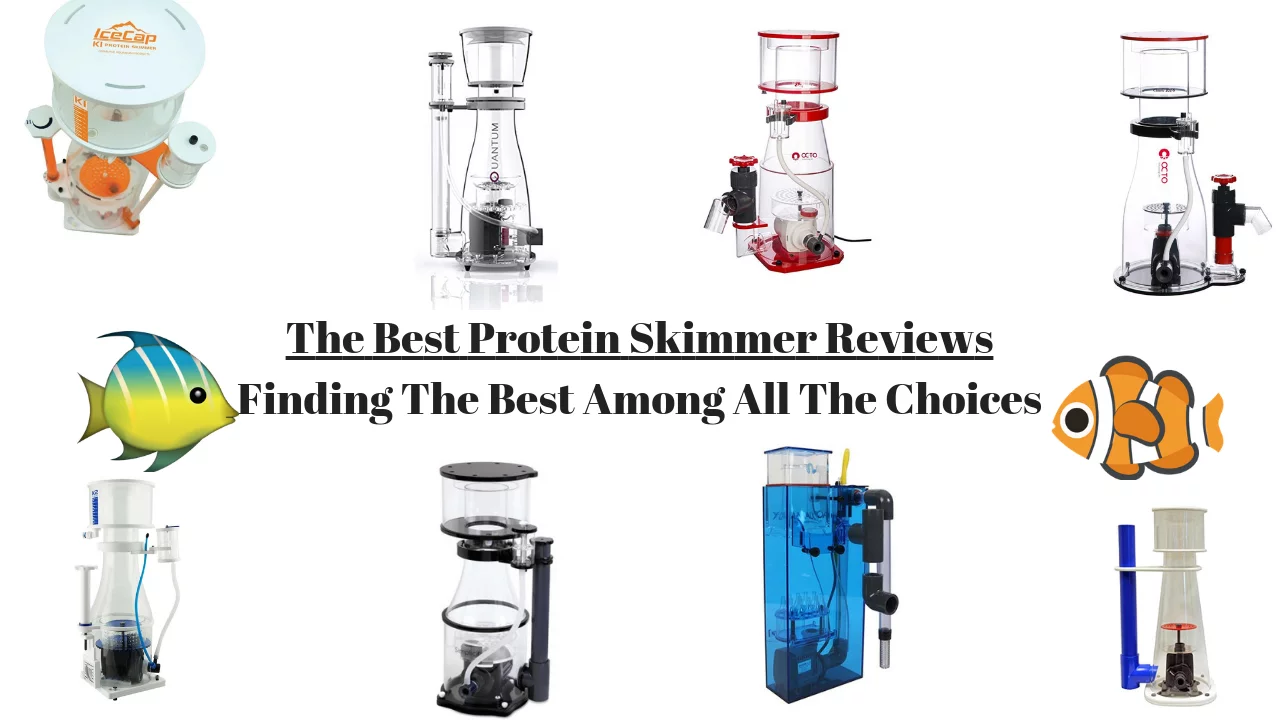
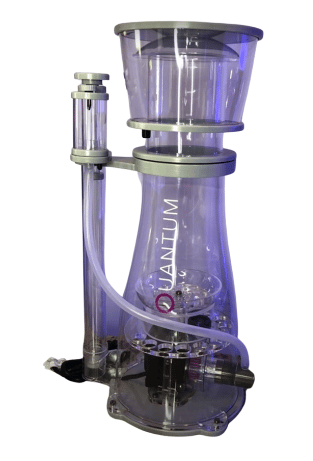


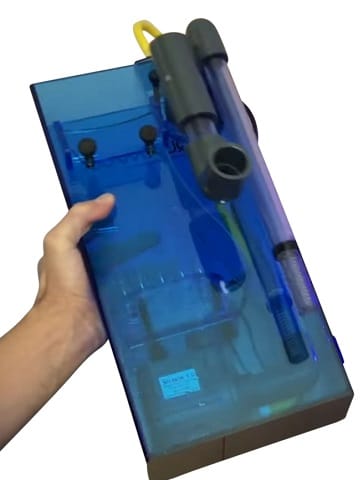
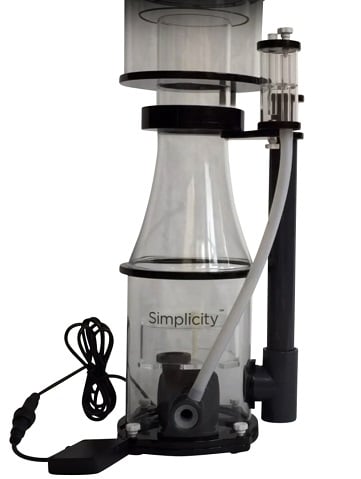
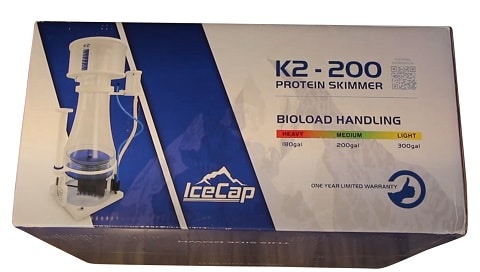

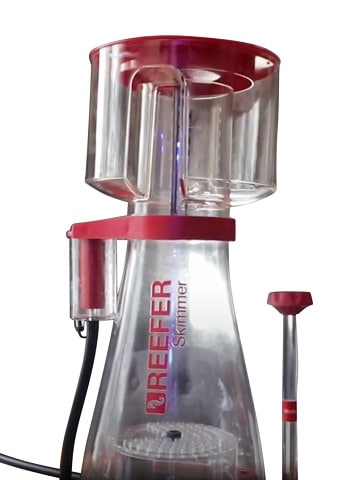
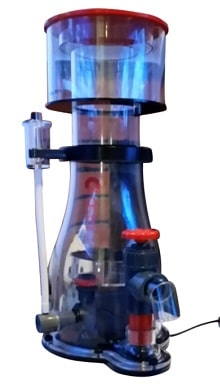
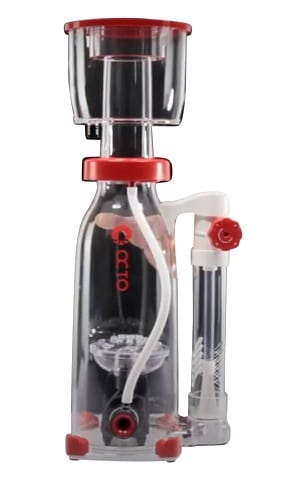
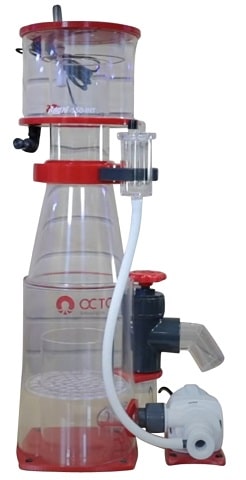
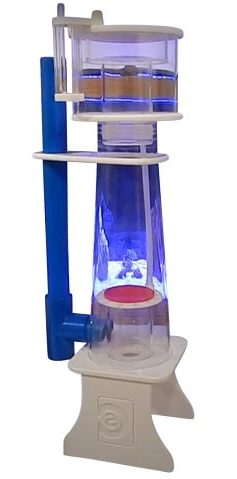
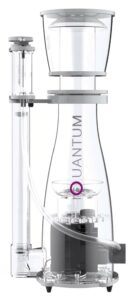

![The 11 Best Aquarium Heaters Of 2026 [Tested & Reviewed]](https://aquariumstoredepot.com/wp-content/uploads/Best_Aquarium_Heaters_c7430c47-2206-4be5-95eb-abd20ab344ac-1.png)