ASD Difficulty Rating: Tier 1 – Beginner
Harlequin rasboras are one of the most reliable beginner schooling fish. They are hardy, peaceful, and tolerate a range of water parameters. A group of 8+ in a planted tank with soft tank mates is the ideal setup.
Hard Rule
Keep harlequin rasboras in groups of 8 or more. In groups of 6 or fewer, the schooling breaks down and fish become shy and reclusive. The natural active schooling behavior only emerges in groups of 8+.
Expert Take
Harlequin rasboras are one of the most underappreciated schooling fish in the hobby. Easy to care for, peaceful, and genuinely beautiful in the right setup – but they need to be kept in groups of 10 or more to show what they can actually do. A school of 15 harlequin rasboras in a planted tank is one of the most satisfying sights in freshwater fishkeeping. Five in a 20-gallon is just mediocre fish. — Mark Valderrama, AquariumStoreDepot
Table of Contents
- What Most Care Guides Get Wrong About Harlequin Rasbora The Classic Schooling Fish for Community Tanks
- Frequently Asked Questions
- Species Of Overview
- Classification
- Behaviour: What to Expect
- What Do They Look Like?
- Harlequin Rasbora Care Guide
- Tank Mates
- Is the Harlequin Rasbora The Classic Schooling Fish for Community Tanks Right for You?
- What Do They Eat?
- Diseases That Affect The Rasboras
- Conclusion
- Recommended Video
The Harlequin Rasbora is one of the most popular freshwater fish for a reason, but popularity does not mean it is indestructible. It needs soft, slightly acidic water and a group of at least eight to school properly. Keep three in hard, alkaline water and you get stressed, pale fish that hide instead of school. The difference between a good setup and a bad one is obvious with this species.
Everyone’s kept harlequin rasboras. Almost nobody has kept enough of them.
What Most Care Guides Get Wrong About Harlequin Rasbora The Classic Schooling Fish for Community Tanks
The most common mistake I see with harlequin rasbora the classic schooling fish for community tankss is keeping too few. Guides will say “minimum 6” and leave it at that. In reality, these fish behave completely differently in a proper group of 8 to 10 or more. Keeping just 3 or 4 often leads to stress, hiding, and fin nipping that wouldn’t happen in a larger school. Another thing most guides miss is how much lighting and decor affect this species. Harlequin Rasbora The Classic Schooling Fish for Community Tankss look washed out under bright white LEDs on a light substrate. Dim the lights, add some tannins, use a dark background, and you’ll see colors you didn’t know they had. I’ve also noticed that many care sheets recommend overly broad water parameters. Yes, harlequin rasbora the classic schooling fish for community tankss are adaptable.
Frequently Asked Questions
How many harlequin rasboras should be kept together?
Harlequin rasboras should be kept in groups of at least eight, with twelve or more being ideal. They are true schooling fish that display their most natural behavior, best coloring, and lowest stress levels in larger groups. A school of twelve in a planted tank is a stunning sight.
Are harlequin rasboras good community fish?
Harlequin rasboras are among the best community fish available. They are peaceful, hardy, and compatible with a wide range of tank mates including tetras, corydoras, gouramis, and shrimp. Their calm temperament makes them suitable for nearly any peaceful community tank.
How big do harlequin rasboras get?
Harlequin rasboras reach about 1.75 to 2 inches in length. Their moderate size makes them suitable for tanks of 20 gallons or larger when kept in a proper school. Despite their small size, they are robust and hardy fish.
Can harlequin rasboras live with bettas?
Harlequin rasboras are one of the most recommended tank mates for bettas. They are fast enough to avoid aggression, stay in the mid-water level, and their muted coloring does not trigger territorial responses from most bettas. A 20-gallon or larger planted tank works best for this combination.
How long do harlequin rasboras live?
With proper care, harlequin rasboras typically live 5 to 8 years in captivity. They are hardy fish that tolerate a reasonable range of water conditions. Stable parameters, a varied diet, and a stress-free school environment are the keys to longevity.
Species Of Overview
| Scientific Name | Trigonostigma heteromorpha |
| Common Names | Harlequin Rasbora, lamb chop rasbora |
| Family | Cyprinidae |
| Origin | South and Southeast Asia |
| Diet | Omnivore (they aren’t picky eaters) |
| Care Level | Easy to Care For |
| Activity | Calm, friendly and active |
| Lifespan | 5 to 8 years |
| Temperament | Peaceful |
| Tank Level | Midwater |
| Minimum Tank Size | 10 gallons |
| Temperature Range | 71 ° to 80 °F |
| Water Hardness | 6 to 8 dkH |
| pH Range | 6.0 to 7.8, with 6.5 being the optimum |
| Filtration/Water Flow | Moderate |
| Water Type | Freshwater |
| Breeding | Egg spawners |
| Difficulty to Breed | Very Difficult to Breed |
| Compatibility | Community tanks |
| OK, for Planted Tanks? | Yes |
Classification
| Order | Cypriniformes |
| Family | Danionidae |
| Genus | Trigonostigma |
| Species | T. Heteromorpha (Duncker, 1904) |
Everyone wants these colorful fish in their aquarium because of its cheerful disposition and glistening patterns. Fortunately, this is a beginner-level tropical fish so it isn’t too difficult to keep it healthy.
Behaviour: What to Expect
The first principle of keeping this fish healthy is to understand its basic features and behavioral patterns.
Harlequin Rasboras are a peaceful fish. They aren’t wily creatures that will drive the other fish crazy around the aquarium.
Depending on the company they are kept with, you will see the behavior of these fishes change accordingly. If you pair them with aggressive fish, they will become reclusive. They will find a corner in the aquarium and stay in hiding most of the time. These fishes become somewhat nervous around will exhibit boisterous energy.
However, if you keep them with friendly company, they will flourish. These shoaling fish like to stay in the middle of the community tank with their gang when they feel safe.
If they are found near the surface of the water or its substrate, there’s something wrong.
Sometimes Rasbora becomes timid if new fish are introduced in the aquarium. So it would help if you kept an eye on them after introducing new fish in their tank. If your Rasboras don’t come out of hiding, then the new fish isn’t good company for them. However, there is nothing to worry about if they do come out of hiding. It’s natural for them to take their time before they trust the new fish.
But don’t be reluctant about introducing new fish into their tank. If there are plenty of fish around to school with, Harlequins are at their best behavior. The more fish in the school, the better.
If they are in a big school, you might see some of them nibbling at each other occasionally but that is nothing to be concerned about – this behavior is quite playful and typical from time to time.
However, you might see one or two Rasboras become slightly aggressive is when they are spawning. The pregnant rasbora females need a secure place for their eggs, so that they might become vigilant towards other fish coming too close to their spawning area.
However, this behavior is rare because it is tough to breed Rasboras in the first place. And in any case, if you want to breed Rasboras, transfer them into a separate breeding tank to increase chances of success.
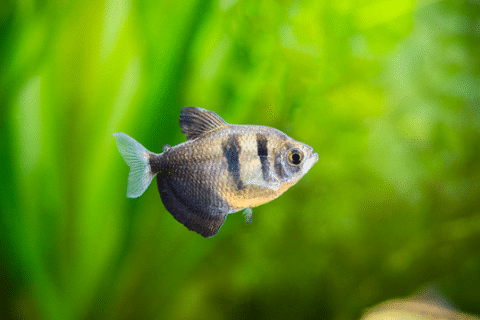
What Do They Look Like?
Harlequin rasboras look orange but that’s only a gradient on their silver body. The orange hue runs down from dorsal fins and fades away around the mid-region. A little bit of the orange gradient runs from its tail too, but just as well, it fades off beautifully into the rest of the colors.
Their tall mid-section tapers near the mouth and the tail. In the rear part (abdominal region) of the Rasbora’s body, there is a dark black triangular patch characteristic of their uniqueness.
Rasboras generally grow around 2 inches in length. They might grow to become slightly bigger than that if you are keeping them in ideal conditions and larger aquariums.
One curious thing about them is that their fins change in hue depending on their tank’s conditions and mood. Their fins turn darker in color if their water is unclean or if they are under stress. And if the fish contracts any disease, their fins will always be the first part of their body to show signs on it.
Male and female rasboras are similar in size and description. However, the black patch is slightly bigger on the male. Also, males seem to be a bit more orange than the females. The females have more of a golden hue on their entire bodies. And if you see that the belly of a female harlequin rasbora is turning bright, it means there are eggs in its little pouch.
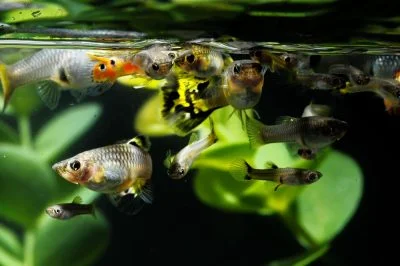
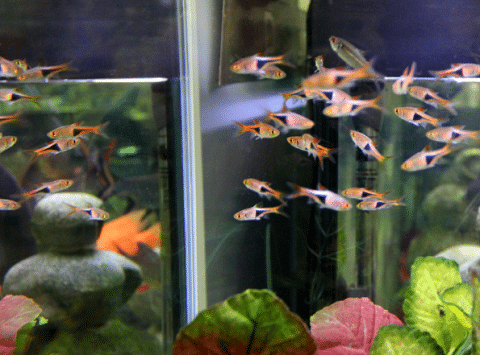
The appearance of the harlequin rasbora will not seem too extraordinary to you. Still, since you’re reading this article, we’ll assume that you have seen a school of harlequin rasbora swim together.
Rasboras are shoaling fish that are at their best when they’re together with their bunch. When a school of harlequin rasboras swim together, the features of their body display cool colors and patterns by corresponding in a peculiar manner that is truly impressive to behold.
Natural Habitat of Harlequins
Harlequin rasbora (Trigonostigma Heteromorpha) are freshwater fish from tropical habitats like rivers, swamp forests, and streams. There are many variables involved here but water chemistry, tank water temperature, and pH value stay the same throughout all of these habitats.
Swamps generally have soil substrates that are full of water, but riverbeds are pretty sandy. So you see, there are quite some differences here. The common denominator in both these habitats are aquatic plants. Harlequins like plants very much; when they become timid, they hide behind plants to feel safe.
Harlequin Rasbora Care Guide
These small freshwater fish are accustomed to living in shallow water with an abundance of plant life.
In their natural habitat, the pH of the water is pretty low. However, the harlequins that you will find in the market have been bred in higher pH.
If you got your Rasboras from the store, ask them in which pH these fish were bred. Generally, commercially bred Rasbora stay healthiest if kept in a pH range of 6.8 to 7.8.
The alkalinity of water should be around 6 to 8 dkH for store-bought Rasbora. If the alkalinity falls or drops, your fish will become weak due to an inability to get rid of metabolic wastes.
The temperature of the water should be 71 to 80 degrees Farenheit. If the temperature goes above this level, oxygen solubility of the water will decrease and your fish will become lethargic.
So the water plays the most critical role in keeping the fish healthy. Make sure always to keep the water conditions at an optimum level. Here’s what you need to do.
Tank Size
You can keep harlequin rasboras in a 10-gallon tank. Bigger tanks are always better, because these are shoaling fish that don’t like to isolate or stay dormant. So whatever you do, make sure that you don’t go with anything smaller than 10 gallons.
One rule of thumb is to get a pair of harlequin rasbora for every 2 gallons of water. That way, you get to keep 10 in a 10-gallon tank.
However, we would strongly suggest you get a bigger tank because the fish will thrive better in a bigger space where they can swim more freely.
Tank Preparation
This is the main deal. If you get a decent tank but set it up incorrectly, the health of your Rasbora will still keep deteriorating.
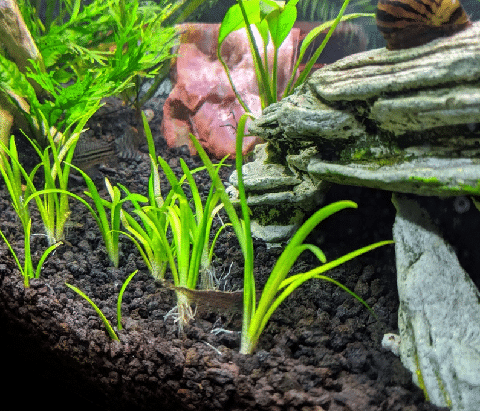
Make A Substrate: Create a soft substrate at the bottom of the tank. Use soil, sand, or gravel to mimic the riverbed or the swampy substrates.
The substrate is just to create the same atmosphere as the fish had in their natural habitat. These fish aren’t bottom-dwellers, so you’ll rarely see them poke around near the bottom but you still have to create a suitable habitat for them with the substrate.
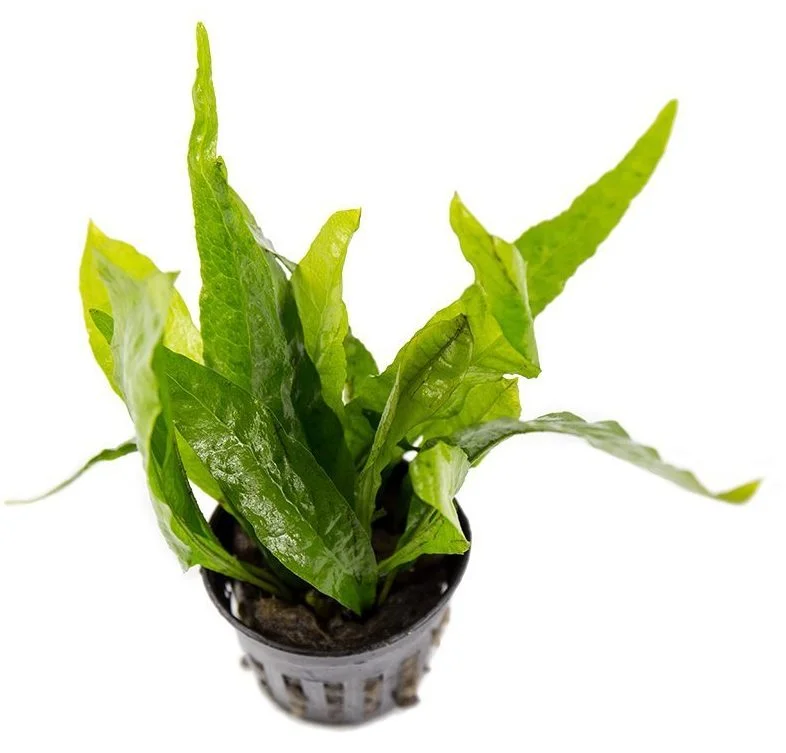
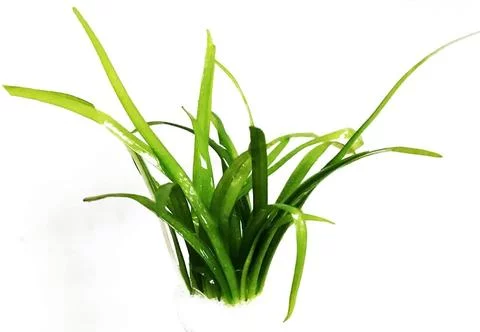
Add Plants: Put some nice, aquatic plants in the tank so that your harlequin rasbora can go into hiding if they feel stressed or threatened in any way. You can also add rocks and other ornamental artifacts in the aquarium to make the tank atmosphere aesthetically pleasing.
Control Water Parameters: Use a heater to control the temperature of water against the changing temperatures outside. Stick a thermometer onto the tank and keep an eye on it to check the temperature of the water from time to time.
Setting Up A Breeding Tank For the Harlequin Rasbora
It isn’t easy to breed a rasbora in a regular community tank at home because they need very specific conditions for successful fertilization to occur.
You need to transfer the breedable Harlequins to a separate tank and create the perfect breeding conditions.
Put soft water in the tank, aim to stay within 1.5 to 2.5 dkH of their preferred hardness of 7. The temperature should be 71 to 80 degrees Fahrenheit. Then put in their favorite plants – Cryptocoryne. This plant has broad leaves that are perfect for them to hide behind while they’re spawning.
Keep the breeding tank in low light, because bright lights make Rasboras somewhat nervous.
If the tank conditions aren’t perfect, then the fish won’t be fully fertile. So learn how to make soft water and how to adjust the pH of water before you attempt this.
For more information on the intricate details of the actual breeding process, watch this video from Mark’s Aquatics.
The Reality of Keeping Harlequin Rasboras
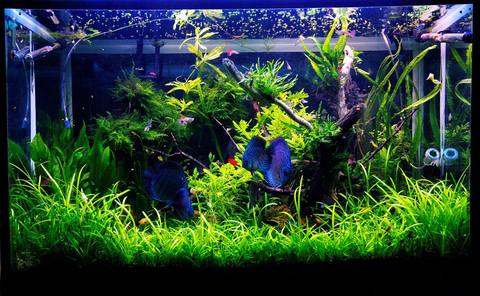
Harlequin rasboras are mid-water fish that stay in motion. A healthy school moves together with loose but constant synchrony – not tight formation like neons, but cohesive enough that the orange flash of a large group ripples visually. This behavior only happens with the right group size and the right tank.
They are sensitive to water conditions in the sense that they show it immediately. Pale color, fins held close, and reduced schooling behavior are early warning signs of stress. Poor water quality is the most common cause. Weekly water changes and a mature filter are the baseline.
Feeding is simple. They eat anything that fits in their mouth and are not picky about food type. High-quality flake with occasional frozen daphnia or brine shrimp keeps them healthy and improves coloration.
id=”right-for-you”>Is the Harlequin Rasbora The Classic Schooling Fish for Community Tanks Right for You?
Before you add a harlequin rasbora the classic schooling fish for community tanks to your tank, it’s worth asking whether this species actually fits your setup and your goals. Here’s a quick breakdown to help you decide.
This species is a good fit if:
- You have a large enough tank to manage territories. Cramped conditions amplify aggression.
- You’re comfortable managing aggression through stocking ratios, line of sight breaks, and tank layout.
- You can commit to regular water changes. These fish produce more waste than many smaller species.
- You’re not planning a peaceful community tank. Harlequin Rasbora The Classic Schooling Fish for Community Tankss need tank mates that can hold their own.
- You enjoy watching active, interactive fish. Cichlids have personality that smaller species simply don’t match.
- You have backup plans. Sometimes a particular fish just doesn’t work out, and you need a way to rehome it.
- You’re feeding a varied, high-quality diet. Color and health depend on nutrition.
If most of those points line up with your setup, the harlequin rasbora the classic schooling fish for community tanks is worth serious consideration. If several don’t, it’s better to choose a species that matches your tank now rather than trying to make it work.
Avoid If:
- You cannot keep a group of 8+ – small groups produce pale, anxious fish that hide rather than school
- You keep large, aggressive fish that will eat or bully them – they are small and peaceful
- You want a species that thrives in hard, alkaline water – they need soft, slightly acidic conditions long-term
Tank Mates
Rasboras are schooling fish, so they like to swim around with a lot of tank mates. Don’t keep them on their own because they will become shy and reclusive. While they look to be around many types of fish, you still will need to be meticulous when choosing their company. It will help if they are kept in the company of fish with which they can be cheerful and active but never fall prey.
Good Tank Mates
The good news is that plenty of magnificently colored peace-loving fish can be kept with schools of Harlequin Rasboras. Here are just a few fish and inverts that work well:
- Others of their own species
- Shrimp
- Guppies
- Snails
- Cory Catfish
- Tetras (Like Neon, Cardinal, and Black Skirt)
- Mollies
- Platies
- Plecos
- Danios
- Dwarf Gourami
- Hatchetfish
- Zebra Loaches
Bad Tank Mates
Any fish that is twice the size of your Harlequin Rasboras shouldn’t be kept in the same tank with it. They say it’s better to be safe than sorry. So you should keep your fish safe in the tank to avoid feeling stressed out about them during the day. Some of the fish that you should definitely avoid are:
- Betta fish
- Bala Sharks
- Redtail Sharks
- Cichlids
- Barbs
- Fish with different water chemistry requirements like Goldfish
Note: Some Betta fish lovers will argue that Betta fish is too slow a swimmer to ever harm the Harlequin Rasbora. However, this can still be a mixed bag. For one, a school of Rasbora can feed quickly and leave a Betta with very little to eat. There are also more athletic Bettas like Plakats that can potentially harass your Rasbora school. The Betta and the Rasbora will likely come close if they live in a tank together – especially if the tank is small. So if you want to protect your rasboras, we suggest you to not take chances with a Betta fish.
What Do They Eat?
Thankfully, harlequin rasboras aren’t fussy eaters. They are omnivorous, so they will eat pretty much anything starting with zooplankton, worms, crustaceans, and small insects that are edible. All you have to do is make sure that the food isn’t toxic for them.
Since you want your rasboras to be healthy, take some out to condition them to a healthy, all-inclusive harlequin rasbora diet by introducing a variety of foods to them in tiny amounts. Do note that they have tiny mouths, so it’s better to not give them anything that isn’t bite-sized.
When they first come to live in your aquarium they will be a bit shy, so you need to draw them out by giving them proper foods. Start off with herbivore fish foods such as Algae Wafers and Spirulina. Give them good quality fish food, a range of greens like blanched spinach, water lettuce, and then slowly introduce them to live food and frozen food. A good staple food to try is Xtreme Aquatics Nano formula.

Xtreme Aquatic Foods Nano
Xtreme Aquatics Nano formula is specially designed for smaller fish and contained a well balance mix of raw ingredients. It is a great staple food for your nano fish.
Rasboras are particularly found of Daphnia, shrimp, blackworms, and bloodworms. They will eat these meaty options live and frozen. When you give them live food, they will become overly enthusiastic and chase it around for a bit before eating it – it’s quite adorable to watch, really.
Diseases That Affect The Rasboras
Rasboras are hardy fish from the streams, rivers and swamps, so they don’t get sick easily. Here are some of the diseases that might inflict suffering on your beloved fish.
Fungal Infections
This is the most common disease that Harlequin Rasboras get. If left untreated it starts to damage vital organs like liver, brain, lungs, etc.
Cause: Ichthyosporidium, Exophiala sp., and Flavobacterium columnare
Signs: Patches on the gills and skin, slimy layer on the surface of their skin, and skin turning brown.
Treatment: Isolate the infected fish from its tank mates, add aquarium salt in water, get rid of chlorine from the tank water, increase the water temperature to 77 Fahrenheit, and try an over the counter medication like API Fungus Cure.
Ich/White Spot Disease
This persistent disease is another widespread one for rasboras. External parasites will cling onto the fish’s body and cause white spots to appear on its skin and gills.
Cause: Ichthyophthirius Multifiliis (an Ectoparasite), contact with other infected fish, sudden shifts in the water temperature of the aquarium, decorative plants that have parasitic cysts on them.
Signs: Crystals formation on the body, skin becoming slimy, asthmatic breathing, itching against rough surfaces, and hiding for days on end.
Treatment: Bring the water temperature up to 71.8 to 86 degrees Fahrenheit, or try an over the counter medication like Ich-X.
Columnaris
This disease is highly contagious, but it only affects freshwater fish.
Cause: Low oxygen levels in the tank, and temperature of 80 Fahrenheit degrees.
Signs: Ulcerations on the skin, visible accumulation of mucus in its gills, and dorsal fin, noticeably long periods of time gone without eating.
Treatment: Stabilize the water temperature, and consult the vet for antibiotics or try an antibiotic like API’s Furan-2.
Dropsy
This is basically kidney failure. Water and other fluids accumulate in the body and cause swelling in the abdomen.
Cause: Aeromonas bacteria, water with excess ammonia and nitrites.
Signs: Irregular swimming, gills losing color, scales standing out, stringy faeces, and bloating belly.
Treatment: See the freshwater disease link posted above.
Fin and Tail Rotting
The tissues of the tail and fins start rotting outwards in. The rotting might start from a wound that your fish already has, and it also may happen because of unclean water.
Cause: Dirty water, overfeeding, low-nutrition food, and high levels of stress.
Signs: It starts with inflammation of the fins. Then the fins start to lose color and eventually start becoming very fragile.
Treatment: Clean the water, optimize the temperature and pH of the water in the tank. Use a medication like SeaChem KanaPlex.
Conclusion
To watch your Harlequin Rasboras live their best life, make sure you keep them with friendly tank mates. Remember to give them proper sustenance, remove any excess leftover from their waters, and do remember to clean the entire tank every 2 to 3 weeks. May your beautiful Harlequin Rasboras live long and keep many more of your guests in awe!
We hope you didn’t have any trouble following our instructions about proper Harlequin Rasbora care. With a little bit of mindfulness, you can keep your fish very active and healthy. Best of luck!
Meta: Learn Harlequin Rasbora care, and give your beautiful rasboras their best life.
How the Harlequin Rasbora The Classic Schooling Fish for Community Tanks Compares to Similar Species
Choosing between similar species can be tricky. Here’s how the harlequin rasbora the classic schooling fish for community tanks stacks up against some common alternatives.
The harlequin rasbora the classic schooling fish for community tanks occupies a specific niche in the aquarium hobby, and direct comparisons really depend on what you’re looking for. In my experience, the most common question people ask is whether they should choose the harlequin rasbora the classic schooling fish for community tanks or something similar that’s more widely available. The answer usually comes down to three things: tank size, water parameters, and what other fish you’re keeping. If your setup matches what the harlequin rasbora the classic schooling fish for community tanks needs, it’s hard to beat. If not, there are usually alternatives worth exploring.
Closing Thoughts
The harlequin rasbora is one of the best schooling fish you can put in a community planted tank. They are not demanding, they do not fin-nip, and they look spectacular in groups. The only mistake is buying too few. Get 10 or more, set up a planted tank with dark substrate, and watch them do what they do best.
Recommended Video
Check out our rasbora video where we cover the most popular rasboras in the hobby:
This guide is part of our Rasboras & Danios: Complete Species Directory. Visit the hub page to explore care guides for all popular rasbora and danio species.