Author: Mark Valderrama

  • How to prevent and treat Malawi bloat in your cichlids

    How to prevent and treat Malawi bloat in your cichlids

    Malawi bloat is one of the most dreaded conditions in the African cichlid hobby, and I’ve seen it take fish quickly when it’s not caught early. The insidious part is that by the time the swelling is obvious, you’re often already behind. Understanding the dietary triggers. primarily too much protein and not enough plant matter for mbuna. is the key to prevention, and that’s where most keepers go wrong.

    Malawi Bloat is a term that strikes fear into the hearts of cichlid keepers all over the world. Yes, this is a serious and often fatal illness but you don’t have to lose hope, if caught early enough, treatment is often possible. In this article, we’ll cover the identification, causes, and treatment of this illness so that you know what to look out for, and what to do if it affects your fish.

    Overview of Malawi Bloat

    NameMalawi Bloat
    Common TreatmentsMetronidazole, Epsom salt
    CausesHexmitia and secondary bacterial infections. Poor diet and stress
    Common SymptomsLoss of appetite/spitting out food, Hiding, Stringy white feces, Bloated belly/Dropsy, Lifted scales

    What is Malawi Bloat In Fish?

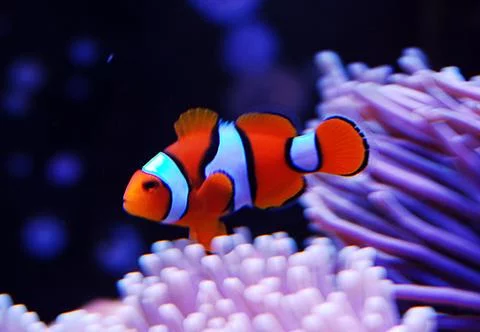
    Malawi Bloat is a pretty common, but serious illness that mostly affects African cichlids from East African lakes like Lake Malawi and Lake Tanganyika. This problem isn’t limited to African species from the rift lakes, however, and other tropical fish can also be affected.

    Malawi bloat is a disease of the fish’s digestive system that causes swelling and eventually death after a matter of days if left untreated.

    What Does Bloat Look Like?

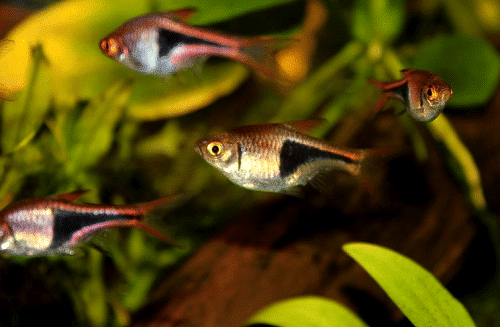
    In its early stages, Malawi bloat causes some behavioral changes like hiding and a lack of appetite in your cichlid. You might also see, long, stringy white feces hanging from your fish.

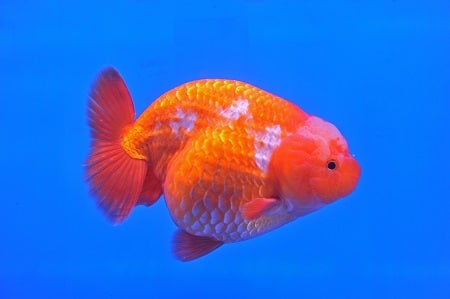
    The physical appearance of Malawi cichlid Bloat in its more advanced stages is a bloated/swollen belly that looks like dropsy. The scales of the fish might also lift up, and there might be red markings around its vent. Here is an example of a fish that is recovering from bloat. This was the best video I could find without scaring folks. It’s from Universal Cichlids’ YouTube channel.

    Malawi Bloat isn’t the only cause of a swollen abdomen in cichlids, however, so don’t panic too soon. Often, your fish may simply be overfed or constipated. If a bloated cichlid is still eating, you’re in luck, it is highly unlikely to have Malawi Bloat.

    What Causes Bloat?

    The general consensus on the medical cause of Malawi Bloat is an increase in numbers of a protozoan parasite in the gut of fish. These protozoan parasites, or flagellates as they are also known, are tiny creatures that live in all fish and don’t usually cause any serious harm. The culprit that is to blame for bloat is called Hexmitia. I’ll leave a scholarly article at the bottom of this post that discusses Hexmitia more in detail.

    There is also some reason to believe that Malawi Bloat can progress into a bacterial infection, although this is likely to be a result of the increased parasite load that is already causing illness. Some keepers believe the disease is caused primarily by a bacterial infection like dropsy.

    The fact of the matter is that there isn’t (at the time of writing anyway) a universally accepted cause.

    You may be wondering why parasites and bacteria that occur naturally in your fish could become such a huge problem all of a sudden, and the simple answer is stress. When your fish is under stress, its immune system becomes compromised and parasites and bacteria that are usually kept in check start to multiply.

    There are many possible causes of stress, or stressors, for your fish. Some of the most important stressors are:

    Poor Diet

    Feeding high protein diets to herbivorous fish is thought to be a possible cause of Malawi Bloat. Whether it can be directly linked to the disease is not known for sure, but a poor diet is definitely a stressor in any fish.

    Always research the natural diet of your fish to find out if they are herbivorous, carnivorous, or omnivorous. Remember, if they don’t eat meat in the wild, it shouldn’t be on top of the menu in your tanks. Though this is a highly debated topic regarding protein, the real underlining matter is how much roughage the fish is eating. This can come in the form of protein, such as the chitin from arthropods like brine shrimp and krill.

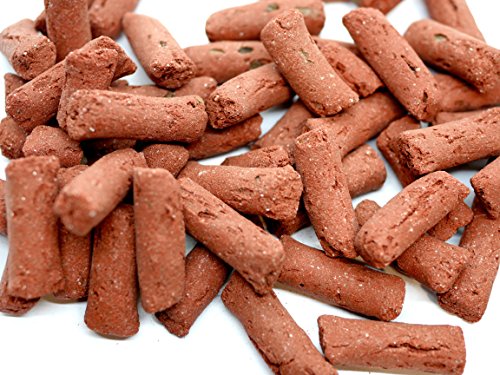
    I know it can be difficult to work with frozen food, so I can point you to a pellet that works. This fish food is crated by Ron Demers, an African Cichlid breeder with over 25 years experience. He developed his food line to have the balance of proteins, veggies, and minerals. He removes all the fillers that you would get from lower quality foods. This is about as good as you can get with pellet food.

    Great Balanced Food
    Ron's Cichlid Food

    Ron is an African Cichlid breeder with over 25 years in experience who created a line of food that is well balanced. A great option when you can’t use frozen foods.

    Buy On Amazon

    Roughage, like with humans are needed to maintain a healthy digestive system. It would make sense you would want this to for your African cichlids. Manufactured foods like flake food will not contain the essential roughage. You will want to seek out more natural and raw foods.

    Poor Water Quality

    This is a big one folks, and there are quite a few possible causes of poor water conditions in your aquarium.

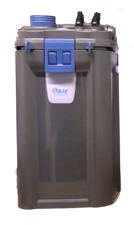
    Inadequate filtration often causes poor water quality in fish tanks. A good filter in a properly stocked and cycled aquarium should keep your ammonia, nitrite, and nitrate levels in check. A filter that can process 4 to 6 times the volume of your aquarium is generally advised. Cichlids are larger, active, and tough on a bioload. One should be looking at upgrading their filtration with quality biological media and filters with large media capacity like canister filters.

    Even with the right filter, you should be careful not to feed too much fish food and clean your tank regularly. Get into the habit of performing routine partial water change to keep your water conditions safe.

    Water Parameters

    Aquarium water chemistry is very important to keeping healthy, happy cichlids and you should always strive to keep parameters like pH, GH, and KH as close to your fish’s ideal values as possible. Be sure to use a water conditioner when adding new water to your aquarium during a water change and use aquarium salt as little as possible as this is thought to be a possible cause of Malawi Bloat. Keep your nitrates at management levels to also reduce the stress on your fish and monitor with aquarium test kits.

    Other parameters like incorrect water temperature, low oxygen levels, too much water flow, and unnatural and irregular lighting can also be very stressful for your aquarium fish.

    Stocking

    Stocking your tank with incompatible species can be a major source of stress and aggression for your fish. Cichlids tend to be territorial and many species are very aggressive in defending their territories, often injuring or even killing other fish in the tank. This aggression is a major cause of stress.

    When stocking your fish tank, make sure that all the fish in the tank are comfortable in the same water parameters and make sure that the species you choose are compatible. With many cichlids, you will need to get the ratio of males and females right to avoid aggression.
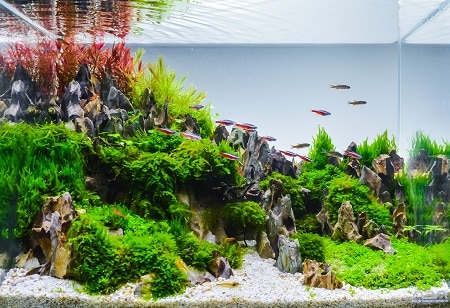
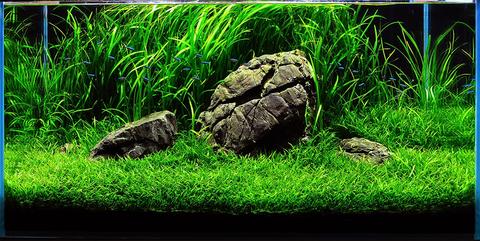
    Tank Layout

    The layout of your tank can also have a pretty big effect on the well-being of your aquarium fish. Species that prefer to live in open water can easily become stressed in a crowded tank for example, or a bare tank without hiding spaces can also cause significant stress to fish that live in very rocky areas with a lot of structure.

    Any one of these stressors could result in complications for your fish, and often the problem can be made even worse by a combination of factors. As a rule, always do your best to limit all of the stressors mentioned here. It could go a long way towards preventing most of the problems you might pick up in your tanks.

    Identification And Symptoms

    In the initial stages of Malawi cichlid Bloat, the signs that you have sick fish are mostly changes in behavior like:

    • Lack of appetite
    • Spitting out food
    • reduced activity
    • Increased breathing rate

    One of the tell-tale symptoms is the feces of the fish will be clear or white-ish and stringy, remaining attached for long periods of time. Normal feces can also occur in long strands but it will be thicker and darker in color. Fish may also struggle to stay right-side-up and may have problems with buoyancy.

    If you notice one or more of these symptoms in your aquarium fish, it’s time to act. By the time the disease becomes physically visible, sadly it’s often too late. When the disease becomes advanced, the gut area will swell up, often massively. This is where the term bloat comes from.

    Other common physical signs of Malawi Bloat are:

    • Ulcers on the skin
    • Red marks around the vent
    • Lifted scales

    Treatment

    If you’ve spotted some of the symptoms of Malawi Bloat in your cichlids, act immediately by moving the infected fish to a hospital tank for treatment. If more than one individual is affected, you may wish to treat the entire tank instead.

    Do a water test to check all parameters and look for any sign of other stressors in the aquarium. Try to fix any problems you find and go ahead and perform a large water change of up to 40% or so.

    Medication

    In the past, aquarists often made use of a product known as Mardel Clout for the treatment of Malawi Bloat. Unfortunately, this product has been discontinued and is no longer available.

    Currently, the most popular medicine for the treatment of Malawi cichlid bloat is Metronidazole, commonly known as Metro. This is an antibiotic that works on certain bacterial and parasitic protozoan infections.

    This drug is commonly sold as Metroplex, Flagyl, or Octozin. It is also used in the treatment of another common parasite-caused illness of freshwater aquarium fish known as hole in the head, or head and lateral line erosion.

    Metronidazole can be administered in two ways, orally, or dosed in the water column. Of course, a sick fish affected by Malawi bloat will not eat and so you’re probably going to need to administer treatment through the water column.

    At the same time, it is a good idea to feed your other fish a medicated food to prevent any more cases or treat them before they get serious. Again, Metronidazole-soaked food is the best option, even if the other fishes aren’t showing any symptoms.

    A great method for preparing medicated food is to use a product like Seachem Metroplex combined with Seachem Focus, which will bind the metroplex with the food and minimize it leaching out in the water. Another great combo is General Cure and Focus.

    Seachem Metronidazole

    Seachem Metro is great to use with focus as a medicated food supplement option

    Buy On Amazon

    To prepare one tablespoon of medicated fish food, Mix one scoop of Metroplex and one scoop of Focus with a little water. Soak your frozen or pellet fish food in the mixture for at least 15 minutes and store this food in a clean container. This medicated fish food can be kept refrigerated or frozen and it should be fed to your fish until any affected fish have recovered, or for up to 3 weeks. Move your affected fish to a hospital tank to keep the disease from spreading and to keep the fish from getting bullied.

    Other Treatments

    You can dissolve Epsom salt into your fish tank water to further assist your fish by decreasing bloating in the digestive system. Use about 1 tablespoon of Epsom salts per 5 gallons of water in your tank but add it gradually to prevent shock.

    You can also feed your fish peas at this time, which should be boiled lightly and allowed to cool. Peas are known to be a natural laxative for fish. During treatment, keep your lights low because this has a calming effect on your fish.

    If you’ve been successful in your treatment, the symptoms like swelling should subside and the scales should flatten out. Once your fishes have regained their normal, healthy appetite and begin to defecate normally again, you know you’re back on track.

    Another great medication that used to be available was Mardel’s Clout. Unfortunately, it has been banned due to having cancer causing agents. Hoping there can be a replacement in the market eventually as this medication used to be the go to when it came to fighting this disease.

    FAQS

    How do you fix bloat?

    The advised treatment for Malawi cichlid bloat is with the use of an antibiotic known as Metronidazole. This can be done after moving the affected fish to a hospital tank or you can medicate all of the fish if there is more than one case.

    You should try to find the root of the problem if possible and perform a partial water change. It is also helpful to dose the water with Epsom salt.

    Is bloat contagious in fish?

    It is unclear as to whether this disease is contagious but it definitely can affect several individuals in the tank at the same time. This could be explained by all your fish being exposed to the same stressors in their environment at the same, or maybe because of an increased load of bacteria and parasites in the system.

    While there isn’t a clear answer at this time, you are recommended to treat all of your fish with Metronidazole soaked fish food, even if they don’t show any symptoms.

    How do you treat dropsy in cichlids?

    Dropsy is a symptom of various conditions (including Malawi Bloat) that is seen as swelling of the abdomen. The best treatment for this symptom is to medicate with a product containing Metronidazole, dose Epsom salt, and feed boiled peas, as you would with Malawi Bloat.

    Will this type of bloat go away?

    Unfortunately, Malawi Bloat will not clear up without treatment. You should act quickly if you identify this disease in your cichlids because once the condition progresses to the point where symptoms are visible, it is often too late.

    How do you stop cichlids from bloating?

    By far the best way to stop cichlids from bloating is to keep them in a healthy environment that is specifically designed for their needs and to feed them correctly. In the case that Malawi cichlid bloat does occur, don’t beat yourself up about it, it is a common condition that even experienced keepers struggle with from time to time.

    The key is to keep an eye on your fish and their behavior and catch the problem early. Once diagnosed, treat the fish with a product containing Metronidazole and dose the water with Epsom salt.

    References & Further Reading

    When it comes to talking about fish diseases, we should use cited scientific articles when available. Here are several to help educate you on bloat and parasites.

    University of Florida – Management of Hexamita in Ornamental Cichlids

    Klinger, R. & Francis-Floyd, R. Introduction To Freshwater Fish Parasites. University Of Florida, IFAS Extension

    Francis-Floyd, R. Stress-Its Role In Fish Disease. University Of Florida, IFAS Extension

    Conclusion

    Malawi Bloat is a serious disease that often affects African cichlids and other aquarium fish. Itโ€™s important to remember that bloat is very scary and can happen at any time. This article has provided you with a number of tips on how to prevent it as well, but if your fish does get bloated there are some medications that will be effective in treating the disease. We encourage everyone who reads this blog post to leave us their thoughts below about what they think causes malawi bloat or anything else they might want more information on. Happy reading!


    ๐Ÿ“˜ Want to learn more? This article is part of our complete Freshwater Fish Guide. your ultimate resource for freshwater species, care tips, tank setup, and more.

  • Everything You Need to Know About Mushroom Coral Care

    Everything You Need to Know About Mushroom Coral Care

    After growing corals in my own reef setups, if your parameters are not stable, this coral will not survive the first month. Corals do not die from wrong numbers. They die from unstable numbers. The difference between a thriving reef and a dying one is consistency, not perfection.

    Stable mediocre parameters beat perfect parameters that swing. Every time.

    Looking for a colorful and easy to care for coral? A Mushroom Coral is as easy as it gets when it comes to easy coral care. These wonderful corals are not only easy to growth, but also come in a variety of colors. They will fulfill the needs of a reefer who is just starting out and satisfy the hobbyist looks for the most exotic corals they can buy. With the popularity of bounce corals and jawbreaker mushrooms, there is a mushroom coral for everyone!

    Let’s dive in and learn how awesome these corals are!

    Species Overview

    Scientific NameCorallimorpharia Order (Actinodiscus/Discosoma spp., Rhodactis spp., and Ricordea spp. most commonly found in the reef aquarium hobby)
    Common NamesMushroom corals, mushroom anemones, disc anemones, and false corals, but commonly named after physical attributes where possible
    FamilyVarious – Corallimorphidae, Disosomatidar, Ricordeidae, and Sideractiidae
    OriginWidespread in temperate to tropical waters; major origins include Australia, Tonga, the Caribbean, and Indonesia
    Common ColorsPurples, blues, greens, oranges, yellows, reds
    Care LevelEasy
    TemperamentSemi-aggressive
    LightingLow-Moderate (<50-150 PAR)
    Tank PlacementBottom, Middle
    Flow RateLow
    Temperature Range76-82 degrees F
    pH Range8.0. 8.4
    Salinity1.025 or 35 PPT
    Alkalinity8. 12 dKH
    Calcium Level350. 450 PPM
    Magnesium Level1250. 1350 PPM
    PropagationCutting/Fragging

    Origins And Habitat

    Mushroom corals are found throughout most temperate to tropical marine ecosystems. These corals do not need much light and thrive in low flow environments. Most notably, they is found in Australia, Tonga, Indonesia, with some of the most popular species originating from the Caribbean, namely from the coasts of Florida.

    Mushroom corals, or mushroom anemones, can spread very quickly and are often found in large colonies, covering rocks and other structures, including other corals.

    Morphology And Common Names

    The Corallimorpharia Order1 is a large taxonomic category containing nearly 50 species. However, most coral species in the reef aquarium trade belong to the Actinodiscus/Discosoma, Rhodactis, and Ricordea genera, which are collectively referred to as mushroom corals.

    The mushroom coral is a soft coral, which means that it does not produce a hard calcium carbonate skeleton like large polyp stony corals (LPS) or small polyp stony corals (SPS). As we’ll see later, this makes for easy propagation of the coral.

    Interestingly, members of the Corallimorpharia Order are very similar in morphology to SPS (Scleractinia Order), though this is difficult to see without looking at polyp segmentation. Instead, to most of us, these corals resemble the dome-shaped top and stalk of a terrestrial mushroom, earning them their most common name.

    While members of Actinodiscus/Discosoma, Rhodactis, and Ricordea are referred to as mushrooms, many mushroom corals have been given specific names with more rare and expensive variations being assigned brand names.

    For example, members of Actinodiscus/Discosoma are named after their colors, like red and blue mushroom corals. Some types of Rhodactis may be named after their color combinations as well, but this genus also contains ‘bounce’ mushroom coral variations.

    Ricordea species are simply called ricordeas most of the time due to their unique longer-tentacle appearance and can only be classified into Ricordea florida or R. Yuma:

    • R. Florida has a small mouth that is not surrounded by tentacles. The tentacles on the rest of the polyp are random in size and placement. Sometimes these tentacles will have orderly color distribution, but this may be random as well.
    • R. Yuma has tentacles surrounding the mouth and is much more colorful comparatively. Their structure follows more order and has alternating small and large tentacles as you move to the outside of the polyp.

    Are They A Type Of Soft Coral?

    It is also possible to find mushroom corals referred to as false corals. Do not be mistaken as these animals are soft corals. Soft coral refers to their lack of defined internal structure. More specifically, mushroom corals lack any trace of skeleton, even small pieces of sclerite.

    Because of this, mushroom corals do not have any fossil records.

    Other Types Of Mushroom

    There are several other species that are present in the reef aquarium hobby, but more uncommon to find in your average hobbyist’s tank.

    This includes members of Amplexidiscus and Paracorynactis which is very aggressive eaters.

    What Do They Look Like?

    What Does A Mushroom Coral Look Like

    Most mushroom anemones are easy to identify, though some have been modified in appearance so that they might resemble other corals at first glance.

    These are a few ways you can tell species of mushroom coral apart. Here are several different types:

    Disco Mushrooms

    Actinodiscus/Discosoma (pictured above) is one of the easiest and hardiest genera of mushroom coral. These corals are simple in appearance with a circular disk and a mouth in the middle and lay flatly against the surface; these disc anemones has a bumpy texture. Actinodiscus/Discosoma spp. grow a few across in diameter and are most commonly found in solid reds, blues, and greens.

    Rhodactis Mushroom Corals

    Rhodactis Mushroom Coral

    Rhodactis contains some of the more desirable morphs of mushroom coral, like the bounce coral. However, most species of Rhodactis are slightly more ornate than Actinodiscus/Discosoma species and have a pilled or frilly characteristic. They are two or more colors with nearly all combinations and gradients available. These corals can range greatly in size and may stay under one inch or grow close to two feet like elephant ear mushroom corals.

    Ricordeas

    Ricordea Mushroom Coral

    Ricordea has become very popular in recent years, specifically for biotope setups. As mentioned before, there are only two species of Ricordea. In general, ricordea mushrooms are much different from the previous two genera and is told apart even if interspecies differences is similar. These ricordea shrooms come in a variety of bright colors, stay pretty small, and are recognized for their bumpy appearance. The most popular variant is Ricordea florida.

    Sadly, most plainer-looking mushrooms, like those from the Actinodiscus/Discosoma genus aren’t kept in the hobby as much anymore due to more desirable morphs and because of how rapidly they can spread across an aquarium.

    If you’re looking to quickly fill a rock with color in your reef tank though, these mushroom corals is the perfect addition.

    Why Are Bounce Corals So Expensive?

    Bounce Mushroom

    Despite some mushrooms being undesirable, others are extremely favored and go for high prices. In specific, these are bounce mushrooms, like Sunkist Bounce mushrooms and OG Bounce mushrooms, that can go for over $200 and $700 per polyp respectively.

    Bounce mushrooms are a modified type of Rhodactis. They are prized for their overgrown tentacles that are often bright colors and patterns. However, it is unknown how these morphs come about, and so they are rarer to come across. This, in addition to the market of assigning brand names, has made these corals some of the most expensive frags in the industry.

    While expensive, these mushroom corals don’t require much extra attention than other types of mushrooms Though losing one of these definitely hurts a lot more than a regular $20 polyp!

    Placement And Temperament In The Aquarium

    Though mushrooms corals greatly in size, shape, and color, their overall requirements are very similar. These corals thrive in reefs with available nutrients as well as in low to moderate reef light and low water flow movement, apart from Ricordea yuma.

    The mushroom coral is very forgiving of water parameters, but won’t tolerate being exposed to too much light and high flow conditions. Mushrooms actually have the ability to move around the rock and even completely detach if they do not like their placement. This can lead to some problems, though.

    While mushrooms do not have sweeper tentacles that can attack other corals in close proximity, they can actually be pretty aggressive; some hobbyists have even seen their mushrooms win a fight with chalice corals (Pectiniidae Family). If a drifting mushroom coral lands near other corals, there is a chance that it will start to attack.

    Because of this, it is also not a good idea to mix different species from different genera together as they will most likely damage each other. Some hobbyists have had success keeping similar mushroom corals together, but this is still a risk.

    The main problem with mushroom coral placement is that they cannot be glued to one place. These corals excrete tons of mucus that prevent the glue from sticking and allow them to slip right out of the hold. Instead, a mushroom coral polyp needs to attach itself to another surface that you can then move–though, your coral might have other plans.

    This is done by placing the coral under a permeable container or netting with pieces of rock or frag plugs. Within a few days, the mushroom coral should have attached itself. You may then move your coral to other places of the display, in low light and low water flow.

    Otherwise, if you have no other corals in the aquarium, then you can also let your mushroom coral loose in your main display and let it find its own preferred location. Of course, this risks your coral getting stuck in the back of the tank away from light, which could kill the coral.

    Care And Maintenance

    Mushroom Coral Care

    Once your mushroom has settled, these corals are some of the easiest to take care of and to propagate. As mentioned before, most mushroom corals need the same tank conditions and maintenance besides Ricordea yuma.

    General Water Parameters

    Mushrooms do not have any specific water parameter needs. Because they are soft corals, they rarely depend on calcium or magnesium due to their lack of skeleton; this is also true for alkalinity, though alkalinity levels should remain constant.

    Unless keeping other nutrient-demanding corals, dosing is not necessary. Before you know it, you will probably reach a point where your mushroom population gets out of hand and you will have to remove some.

    Otherwise, mushroom corals can adapt to most water parameters as long as they are in the standard range recommended for a reef tank. Of all parameters, these corals will especially appreciate nitrates as too clean of an aquarium can starve the coral in the long run. Mushroom corals can safely be added to new tanks that might fluctuate more in water quality.

    In fact, many hobbyists use mushrooms as a warning coral. While most mushroom corals can adapt to changes in conditions, they will shrivel up and excrete mucus when they are stressed. This is a good indicator that something is majorly wrong in the tank before fish and invertebrates start being affected as well.

    Feeding

    Feeding your mushroom coral is not necessary. In some cases, feedings won’t show any results and excess nutrients are introduced into the tank.

    However, some types of mushroom corals is very eager to eat and will enjoy smaller foods. Still, it isn’t recommended to feed more than two times a week to avoid excess waste and to give your coral time to digest.

    Ricordea spp. care

    Some hobbyists have difficulty keeping ricordeas happy in their tank, specifically R. Yuma. There are a few reasons why your ricordeas aren’t doing well in your aquarium and it starts with importation.

    Because ricordeas is found close offshore of Florida, there are large populations of wild-caught mushrooms available for sale. This means that all the hardiness that aquaculture brings with other mushrooms has not been evolved by this genus. This can make ricordeas more demanding when it comes to flow, lighting, and stability.

    Ricordeas seem to do best under moderate water movement and moderate light with a good source of nutrients available. It is also important to make sure that your mushrooms are healthy when introducing them into your display as wild-caught corals can bring disease and pests into the tank.

    However, if you’ve fixed placement and lighting conditions and your ricordeas are still melting, there is not much else you can do. Some aquariums just can’t support some corals no matter how much we try. The best thing to try is finding an alternative or setting up another aquarium completely with ricordea in mind.

    What Are Good Tankmates?

    Firefish

    Mushroom corals is kept with a variety of reef-safe fish and invertebrates. Ricordea species are a favorite for biotope setups with macroalgae and other soft corals with endemic fish species, though they is kept in all other reef setups as well. The way mushrooms grow and their size make them ideal for nano reef tanks.

    The main problem you will want to look out for is if your mushroom seems to be closed the better majority of the time. This is a sign that something in your display is walking over it or stinging it. For the most part, though, mushroom corals are pretty resilient and will learn goby fish or snail habits and will stop closing up at the first touch.

    Of course, fish and invertebrates that are not reef-safe should never be placed with coral. This is especially true as mushrooms can excrete a lot of mucus that can get caught around the tank.

    Are They Toxic?

    Though mushrooms is pretty messy once they get stressed out, these strings of slime and mucus are nothing to worry about. Mushrooms don’t carry any toxins that are comparable to the deadly palytoxin contained in zoas and palys.

    If you find that your mushroom coral is shedding slime, you may run carbon in your filter and run a protein skimmer until conditions clear up.

    How To Frag

    Propagating mushroom corals is easy and is necessary once colonies start overcrowing rocks and other corals. These corals have a unique feature that allows them to regenerate from a small piece of flesh. First, we need to understand how mushrooms reproduce on their own.

    Mushroom corals largely undergo asexual reproduction in the aquarium. However, how they reproduce is dependent on the species of coral. These are two ways that you may see your mushrooms splitting:

    1. Mushroom corals have the ability to split into two. Your mushroom coral may start to form an odd figure-8 shape where there have noticeably short and long sides of their polyp. During this time, you might even be able to see two independent mouths forming in the center. Eventually, these two sides will split into two new polyps.
    2. Mushrooms can also leave a piece of themselves behind, which will then grow into a whole new polyp; this is known as pedal laceration. In cases like this, you will see your coral stretching in one direction with one section of the foot taut. Eventually, the main foot will detach from this part and the piece will develop a recognizable polyp within a few weeks.

    It should be noted that mushrooms that are looking to detach from rocks and move to a new place may also look like #2 and can leave behind a piece in the process.

    When fragging, we try to emulate natural splitting. There are two main ways that mushroom corals is fragged:

    1. Take a mushroom polyp that is attached to a small piece of rock. Use a scalpel to divide the coral down the middle near the mouth as it would divide on its own. Then, take a bone cutter and split the rock in half; this helps with the issue of a mobile frag and keeps the two pieces from rejoining.
    2. If you’re dealing with a mushroom that isn’t attached to a surface, then you will need another method similar to when you first introduced the coral into your tank. Simply cut the mushroom once down the middle again, or as many times as you would like. Then, use a controlled environment with low flow or use a permeable container that gives time for the frag to attach to a new surface.

    Once the coral has attached itself and fully healed, it is time to move the mushroom to the desired place in the tank or give it away to another hobbyist.

    Mushrooms are extremely forgiving of being fragged and can survive multiple slicings. It is not necessary to dip them before being placed back into the display, but iodine or another coral dip may be used for extra security. If you would like a more visual guide, here is a nice video from Reef Life Aquatics.

    Controlling Coral Growth

    Though mushrooms can fill empty spaces in the aquarium, they can also quickly start to get out of hand. Because of their ability to regrow from a small piece, it is very difficult to control populations once established.

    If your mushrooms are confined to one section then one of the easiest, but definitely not one of the most convenient, ways to fix this is by removing the whole rock from the display. Sadly, this will remove some of the beneficial bacteria from your tank but it ensures that the mushrooms are gone for good.

    If you have mushrooms growing on multiple surfaces throughout the display, then this will be much more difficult and a longer struggle. This method involves removing the mushrooms one by one by hand. Simply keep removing any mushrooms you see and try to scrape away as much of the flesh as possible.

    If you’re comfortable with bringing in some chemical options, then anything that is meant to kill Aiptasia will also work on a mushroom coral, like Aiptasia-X. You will need to be careful as these solutions can also damage other nearby corals.

    Kills Aiptasia
    Aiptasia-X

    A great solution for target elimination of Aiptasia in a reef tank.

    Click For Best Price Buy On Amazon

    One of the last ways to deal with explosive mushroom growth is by reducing the number of available nutrients in the water column. However, this is tricky and can have ill effects on the rest of your reef.

    Mushroom corals thrive in dirtier water. Once those nutrients are taken away, growth should hypothetically decrease along with them. This method is only recommended for experts in water chemistry.

    Closing Thoughts

    Mushrooms are an understated coral that can bring color to low flow areas of the display with low light conditions. With such a large variety of mushrooms to choose from, there are colors and patterns for everyone.

    These corals can spread very quickly, so population control will be needed to keep numbers in check or to regularly frag new pieces. Otherwise, they will continue to grow wherever they can when nutrients are available.


    ๐Ÿ“˜ Want to learn more? This article is part of our complete Saltwater Fish & Reef Guide. Your ultimate resource for marine fish, coral care, reef setup, and more.

  • Goldfish temperature – what, how and why

    Goldfish temperature – what, how and why

    Goldfish are not easy. They produce more waste than fish three times their price and need more space than most people realize. A single goldfish needs 20 gallons minimum and heavy filtration. Most goldfish deaths come from undersized tanks and inadequate filtration.

    A goldfish kept properly is more impressive than most tropical fish. The problem is almost nobody keeps them properly.

    You might not know this, but Goldfish can live in water of different temperatures. But whatโ€™s the range? What temperature is best for a goldfish? Why does it matter so much? Goldfish are some of the hardiest fish you will find, yes. And because of this, they certainly can survive at colder temperatures, but that’s not always the ideal setting for them to thrive in.

    In actuality, putting your goldfish in water of the wrong temperature can have irreversible adverse effects, and might even lead to death. You also have to take other factors into account, such as the species.

    In this article, weโ€™re covering everything you need to know about goldfish temperature. Let’s get started!

    What’s The Best Goldfish Temperature?

    The correct water temperature for a goldfish isnโ€™t so easy to figure out given that they can live in a wide range of temperatures. However, for all intents and purposes I’ll give a quick and general answer:

    The ideal water temperature goldfish will thrive in is between 65 and 72 degrees F / 18 to 24 degrees C.

    Now, the temperature range mentioned above is a general range for all goldfish. But it’s important to remember that these fish are mainly divided into two main categories: fancy and slim-bodied. And knowing about fish types will help you to determine the right water temperature range more easily.

    Letโ€™s have a look at the differences between the two types, and the associated temperature conditions.

    What is a Fancy Breed?

    What is a fancy goldfish

    Also called egg-shaped goldfish, fancy goldfish are characterized by their uniquely beautiful, sometimes bizarre, appearance. These double-tailed fish have round bodies resembling golf balls.

    The main deal with fancy goldfish is that they are more modified. Genetically speaking. Than slim-bodied goldfish. Itโ€™s also important to understand that these fancy fish are much more prone to freshwater fish diseases if their tank environment is incorrect.

    As such, these goldfish need more specific temperature and living conditions, and are better suited to tank living than pond living. They can’t survive in a wide range of temperatures, and as such, they should also not be kept in a tank with overly cold water — or water that is too warm.

    Here are some of the most commonly kept goldfish of the fancy variety:

    What is a Slim-Bodied Breed?

    What is a slim bodied goldfish

    If you know about comets and shubunkins, you already know what slim-bodied goldfish are. They are one of the most popular choices for novice aquarists. They are much more hardy, fast, and athletic than their fancy counterparts. This allows them to do pretty well in varying tank water qualities and cooler tank temperatures. This suitability to various water conditions makes them suitable for living outdoors. In fact, it’s actually recommended to keep certain slim-bodied goldfish in a pond instead of a tank, because they can grow quite large in size.

    Many people wrongly think that slim-bodied goldfish aren’t as attractive as the fancy kind, but this is untrue. You will find many common goldfish with unique and appealing physical traits, such as large nostrils, distinctive head growth, funny eyes and flowing fins. They also come in a variety of colors.

    Here are the best known fish in this category:

    Fancy vs Slim-bodied Temp Requirements

    Slim-bodied vs Fancy Goldfish

    Now that you know more about the differences between fancy and slim-bodied goldfish varieties, you can probably begin to guess that they have differing tank requirements when it comes to water temperature.

    Compared to other fish, goldfish of the slim-bodied variety are much better able to withstand fluctuating temperature changes and environments, such conditions would not only stress out a fancy goldfish but even put them at risk of death.

    So, it ultimately comes down to this:

    Fancy goldfish should be kept at a tank temperature between 65 and 72 degrees Fahrenheit if you want them to have a long and healthy life.

    In contrast, slim-bodied goldfish, as we have already established, are much better able to withstand colder water temperatures resembling those of outdoor ponds. They need a tank temperature between 65 and 72 degrees F, but have the ability to survive winters outdoors and can tolerate higher temperatures better.

    Indoor vs Pond Temp Differences

    Goldfish are exothermic, which means that their surrounding temperature determines their body temperature. They absorb and release energy from and into the water. Which means the bodily functions of this fish are entirely dependent upon the water temperature being correct.

    Digestion, immune system, respiration. These are all metabolic functions that are directly affected by water temp. The higher the goldfish water temperature in your tank, the faster these processes will be.

    So, for goldfish kept in a tank with a temperature of 75 degrees, for example, you’ll have to provide 5-10 times more food than those kept in an outdoor pond where the temperature is as low as, say, 58 degrees. In fact, they can actually get much colder. In this example video below by David Cook, his pond froze over and water temperature was around 41 degrees F. You can see the fish are exhibiting dormancy and we can see slim-bodied goldfish in the pond.

    When it comes to indoor tank temperatures, you also have to take into consideration the toxicity of ammonia concentration. When the water temperature is higher, the likelihood of poisoning from toxicity in the tank is higher. This becomes a bigger issue in aquariums as the overall tank volume is lower.

    Household Temperature Requirements

    Homehold Temperature Requirements

    For fish that youโ€™re keeping in home aquariums, itโ€™s important to take into account the temp range of your household. As a rule, aquarium water is at least 2 degrees warmer than room temperature1, so you need to take steps to cool your aquarium water by other means. This is particularly true if youโ€™re keeping your pet in a warm climate.

    First, ensure that your goldfish tank or tanks are not placed near direct sunlight. Next, you have the option of using your existing air conditioner or ceiling fan to cool the water (in the latter case, itโ€™s recommended to remove the goldfish tank lid to allow the water to cool faster).

    Alternatively, if you have money to spare, you might want to look into investing in an aquarium fan or a mobile AC for your fish. Some people like to float ice packs in their goldfish tank, but we donโ€™t recommend this as it can change the tank temperature too much too fast. And that can lead to temperature shock for your pet.

    Value Priced
    BLACK+DECKER Portable AC

    Mobile AC units are an unconventional, but very effective and cheaper solution over many chiller options

    Buy On Amazon

    Working through your room temperature is the best way to manage heater. An aquarium chiller is a consideration, but very expensive and not as versatile as a mobile AC solution that can function as a backup system in the event your central AC unit goes down.

    Temperature Shock and How to Deal With It

    Sudden tank temperature fluctuations can lead to your fish experiencing temperature shock. Changes of even 2 degrees can shock your fish. So, when youโ€™re performing water changes, itโ€™s crucial that you ensure the new water is within 2 degrees of the old water. For this, itโ€™s recommended that you use a digital aquarium thermometer to measure the water temperature.

    Now, itโ€™s a very important part of goldfish care to know when your fish is suffering from temperature shock. Here are the most common symptoms, which are similar to those of oxygen deficiency:

    • Sitting at the bottom
    • Rapid breathing
    • Lethargy / aimless floating
    • Excess slime production
    • Buoyancy problems
    • Gulping at the surface (insufficient oxygen).

    If you think your fish have been afflicted by temperature shock, donโ€™t do a big water change to set things right. This is counterproductive and actually over-stress your fish anew. Gradually bring the water temperature up if it has gone down.

    In the case of an overheated aquarium, you can follow the steps we outlined in the above section to quickly but manageably bring the temperature back down. This includes using a fan or air conditioner, or floating a frozen pack in the goldfish water. But be careful of not making the situation worse.

    If you live in a climate where you continually face problems of too-hot fish tanks, you might want to consider getting an aquarium chiller for your fish, if you can cover the cost.

    Do They Need an Aquarium Heater?

    Once again, this depends on the type of goldfish you have, as well as your surrounding climate. Fancy varieties can certainly benefit from the stability of an aquarium heater if the temperature fluctuate in your tank, or if your home is located in a cold environment, or ifย  the temperature is below 68 ยฐF (or 20ยฐC).

    You don’t have to get a tank heater for most slim-bodied goldfish. These guys can take good care of themselves and are very adaptable.

    Does Water Temperature Affect Breeding?

    Absolutely. The temperature of goldfish water determines their reproductive abilities. Male fish release higher amounts of androgen, a reproductive hormone, during spring time, and less of it during winter. This is because larvae are more likely to survive in spring temperatures. So it stands to reason that, if youโ€™re interested in goldfish breeding, you need to recreate these environment conditions.

    Start by lowering the temperature gradually to around 54ยฐF or 12ยฐC. Then, to induce breeding, slowly raise the temperature to 68 ยฐF. 74ยฐF (or 20ยฐC. 23ยฐC). This should help you induce breeding behaviors in your goldfish.

    Closing Thoughts

    The water conditions and temperatures at which you keep your aquatic pets greatly impacts their health and capabilities. If you want a more low-maintenance fish, we would not recommend getting yourself a fancy goldfish since they require stricter temperature conditions. But for slim-bodied fish, you should be prepared to keep them in an outdoor pond.

    Also remember that the temperature of the water in your tank should also be suitable for the other fish inhabiting it. So choose your goldfish tank mates wisely.

    If you have any questions about caring for goldfish or want more information on them feel free leave us a comment below!


    ๐Ÿ“˜ Want to learn more? This article is part of our complete Freshwater Fish Guide. Your ultimate resource for freshwater species, care tips, tank setup, and more.

  • How to Care for Your New Hammer Coral

    How to Care for Your New Hammer Coral

    After growing corals in my own reef setups, if your parameters are not stable, this coral will not survive the first month. Corals do not die from wrong numbers. They die from unstable numbers. The difference between a thriving reef and a dying one is consistency, not perfection.

    Stable mediocre parameters beat perfect parameters that swing. Every time.

    https://www.youtube.com/watch?v=8tLhi6lMLw8

    Welcome to the blog for reef tank owners! This week’s topic is on how to care for your new hammer coral. The Hammer Coral is one of the most popular corals for reef tanks for their unique shape and coloration. Caring for your new Hammer Coral is easy, as long as you know what to do! In this blog post, we’ll discuss how you can care for your new hammer coral so that you can enjoy its beauty! Let’s get started!

    A Quick Overview On The Hammer Coral

    Scientific NameEuphyllia ancora
    Common NamesHammer coral, less commonly known as the anchor coral
    FamilyEuphylliidae
    OriginIndo-Pacific (mainly in western regions) as well as the Red Sea
    Common ColorsGreens, purples/pinks, browns, oranges/yellows, blues
    Care LevelModerate
    TemperamentSemi-aggressive
    LightingModerate (50-150 PAR)
    Tank PlacementBottom, Middle
    Flow RateModerate
    Temperature Range76-82 degrees F
    pH Range8.0. 8.4
    Salinity1.025 or 35 PPT
    Alkalinity8. 12 dKH
    Calcium Level350. 450 PPM
    Magnesium Level1250. 1350 PPM
    PropagationCutting/Fragging

    Origins And Habitat

    The hammer coral is found in large colonies throughout western regions of the Indo-Pacific; some occurrences have also been documented in the Red Sea, but these populations are secondary1.

    These corals prefer shallower waters with moderate flow on the reef. Hammer corals have been observed in turbid waters, but will not do well if placed in areas of excessively high water flow.

    Interestingly, they is found among other species of Euphyllia, like frogspawns (Euphyllia divisa/Euphyllia paradivisa), as well as with their own even though they contain nematocysts that are capable of stinging other neighboring corals.

    However, more aggressive Euphyllia, like torches (Euphyllia glabrescens) can still cause damage to the hammer coral and will not coexist in close proximity.

    What Does The Hammer Coral Look Like?

    What Does A Hammer Coral Look Like

    Hammer corals are large polyp stony coral (LPS) which means that they form fleshy polyps on top of calcium carbonate skeleton. These corals are one of the most popular corals in the reef aquarium hobby due to their movement in the water current and variety of colors.

    Hammers can come in many colors, including greens, purples/pinks, browns, oranges/yellows, and blues. They have darker tentacles and lighter tips, though they will appear uniform in color.

    These corals are pretty easy to identify by looking at their tips, but not all hammers look the same. Here is a list of possible tip-shapes that you can find among hammer corals:

    • “T” shape. Hammer corals earn their most common name from the flattened tip that resembles the construction tool of the same name.
    • Anchor shape. This shape earns them their second common name and is similar to the “T” shape. However, the edges of the flattened area pull back towards the tentacles, creating an upward curve.
    • Rounded shape. A hammer coral with rounded tips can easily be mistaken for a torch coral. Though difficult to tell apart, hammers with rounded edges have shorter and wider tentacles than most torches.

    Hammer corals can also come in branching or wall varieties, both exhibiting all tip-shapes; branching hammers will have independent polyps separated by coral skeleton while a wall hammer coral will have one solid wall of coral skeleton with connected polyps.

    Placement And Temperament In The Aquarium

    Hammer corals are moderately aggressive and should be given plenty of space in the aquarium.

    Though they’re not as aggressive as torches, a hammer coral will extend their sweeper tentacles to keep other corals away. This sting is not completely damaging and most other LPS corals and soft corals can tolerate it, but placement should be planned to avoid eventual interaction.

    The only exception to this stinging is with other species of Euphyllia. Though hammer corals will try to sting other corals regardless of species, most hammers and frogspawn coral are able to peacefully live next to one another.

    If you notice that one species starts to retract more or lose its color, it’s possible that the larger colony is fighting for space and resources.

    How Much Light Do They Need?

    The hammer coral is placed in most areas of the aquarium. They do best in medium water flow and medium light so that they can fully extend their tentacles. Hobbyists agree that keeping them at higher PARS in excess of 150 does not provide any benefit and can actually cause the coral to bleach.

    Hammer corals can tolerate being placed on the substrate, but care should be taken to avoid rubbing and irritation from rocks or stuck granules. Due to their lower light requirements, most reef led systems should be suitable for Hammers.

    Are They Easy To Keep?

    Yes they are. The Hammer coral is one of the best introductory LPS species for beginner hobbyists looking to move past soft corals. They don’t require intense lighting or water flow and don’t need additional feedings. However, these corals do need stable tank parameters so a mature tank is preferred.

    Water Quality

    But what parameters will allow your coral to thrive? As always, you should strive for stability rather than ideal numbers. There are some ranges where these corals will do their best though (video source).

    A Hammer coral should have access to available nutrients and will actually do better in ‘dirtier’ water. They do not require any special filtration and is kept in tanks with hang on the back filters, canister filters, and sumps. A protein skimmer is useful for larger tanks, though your hammer coral will probably appreciate the excess nutrients.

    Because hammers like dirtier water, your water should have up to 40 PPM nitrate and up to 0.1 PPM phosphate. For best color and coral skeleton growth, other parameters should be kept at:

    • magnesium: 1200-1350 PPM
    • calcium: 350-450 PPM
    • alkalinity: 8-12 dKH

    Dosing is not recommended unless dealing with much larger colonies and/or a mixed reef with small-polyp stony corals (SPS). Fish waste, water changes, and other detritus are enough to keep your hammer coral happy!

    If you are working with a mixed reef, then calcium, alkalinity, and other trace elements will be the most important nutrients for maintaining a healthy reef. Dosed parameters should be tested right after dosing and right before the next dose to measure how nutrients are being used in the tank.

    Feeding

    Hammer corals are not big eaters and will rely on what’s already in the water column, like small microorganisms.

    Spot feeding hammer corals can actually irritate them as larger foods cannot be quickly or easily moved into the mouth and is initially seen as a predator. Because it takes a while for the food to reach the mouth, it is also likely that fish and invertebrates will try to take the food before it is eaten, leading to further annoyance.

    Are There Any Benefits To Feeding?

    Not really. These corals are experts at finding their own food naturally throughout the tank and attempting to feed them more may just create a nutrient imbalance in your tank.

    If you really want to feed your hammer coral, broadcast feed brine shrimp, zooplankton, and other coral foods only once a week. Algae Barn’s Ocean Magik is a great source for Phytoplankton.

    What Are Good Tankmates?

    Not only can a hammer coral be kept with other Euphyllia coral, but they can also be kept with many species of reef-safe fish and invertebrates. As long as your fish or invertebrate doesn’t have teeth, hairy pincers, or an appetite for coral, then it will most likely get along with a hammer coral.

    Here are some stocking ideas for a reef aquarium that has a hammer coral:

    • Damsel Fish – like clownfish, azure, and springeri damsel fish
    • Tangs – like yellow, powder blue, and hippo tangs
    • Anthias – like lyretail, dispar, and Bartlett’s anthias
    • Gobies – like yellow watchman, diamond watchman, and Hector’s gobies
    • Blennies – like bicolor, algae, and tail spot blennies
    • Cardinals – like Banggai and pajama cardinals
    • Select wrasses – like possum, Carpenter’s flasher, and fairy wrasses

    It should be noted that clownfish may mistake a hammer coral for an anemone, which can cause the coral to retract.

    Non-reef-safe species in general would be:

    • Angelfish
    • Triggerfish
    • Groupers
    • Puffers
    • Parrotfish
    • Butterflyfish

    Any invertebrates that are known to snack on fleshier corals should also be avoided, like large hermit crabs and male emerald crabs.

    How To Propagate

    If you’ve ever propagated a frogspawn or torch coral, then fragging a hammer is straightforward and easy. If you’ve never done either, then no worries, it’s not too hard.

    First, you will need tools. An electric saw is most preferred as it provides a clean cut, though bone cutters can work as well. Next, you will want to identify if you have a wall or a branching variety of hammer coral.

    Branching hammer corals are easier to frag as you just need to separate one branch from the rest of the colony. You can do this by cutting below the flesh and above where the branch begins. This should give enough room to comfortably attach the frag to a plug.

    Wall hammers are much more difficult to frag and should only be done with an electric saw for a clean cut. There is no straight method for cutting wall hammers, but it’s ideal to cause as least stress as possible; cut in a section that is relatively straight and where the flesh is thinnest.

    All frags should be dipped in iodine or another solution to ensure healthy healing. Keep frag plugs at the bottom of the tank until ready to be moved up to their permanent placements or sold/given away to another hobbyist.

    Should You Dip This?

    Yes! You should always take the time to dip new corals in a pesticide dip. While this doesn’t guarantee 100% coverage against pests from entering your system, it kills a good amount of problematic species.

    For the best results, quarantine the coral in a separate tank for several weeks. This should be plenty of time for pests to rear their ugly heads.

    At the very least, it’s strongly recommended to remove the frag plug from the new coral before placing it in your tank. If you would like a base, then you may attach the frag to a new plug and use that in your tank instead.

    Possible Pests And Diseases

    What are you likely to find on a contaminated hammer coral? While some pests, like algae and various eggs, is microscopic, there are a few major pests that you don’t want entering your system.

    This includes:

    Unfortunately, a dip won’t kill Aiptasia but should cover everything else.

    Handling

    Hammer corals are delicate and stress or injury can quickly lead to rapid tissue necrosis (RTN) which causes the coral to die within a matter of days.

    When handling a hammer coral, it’s important to avoid touching the polyp as the flesh is easily damaged. If you need to move the coral for whatever reason, hold it by the skeleton and use gloves as the sweeper tentacles can cause injury to human skin.

    How Much Do They Cost?

    Because hammer corals are so popular, they have become increasingly available over the past few years. A simple colored hammer coral frag can start at $35-40. Larger colonies with more interesting coloration can cost upwards of a couple of hundred dollars. Remember that hammer corals, especially the branching variety can grow very quickly so it is worth the wait to let your coral grow on its own!

    Is Your’s Dying?

    While hammer corals are easy to care for, coral death can come quickly and once it starts, it’s very hard to stop.

    A dying hammer coral will be pale or brown, retracted, and sometimes spewing out brown stringy mucus; sometimes, this mucus is just waste that the coral is expelling but paired with the other symptoms, it’s the zooxanthellae being pushed out from the coral.

    If your coral is already expelling zooxanthellae, then it’s too late to reverse the damage. However, observe changes in the tank. Ask yourself these questions:

    1. Did you recently change the water flow or lighting?
    2. Did you introduce new fish or invertebrates?
    3. Did any of your water parameters swing within the last 24 hours?

    If you answered ‘yes’ to any of these questions, then this is the cause of your coral’s decline. Luckily, most of these problems is fixed if done slowly.

    Water Flow And Lighting

    If water flow and/or lighting are your problem, slowly return to your previous settings. You may have changed conditions too quickly and it would be best to reattempt at a slower pace. You can adjust your return pumps and your wavemakers as needed. This is why it’s best to work with pumps that is adjusted on the fly when it comes to keeping a reef tank. There are many DC powered wavemakers these days with great controllers!

    New Livestock

    If you introduced new livestock, then this is tricky as we all know how hard it is to catch fish and invertebrates! Trying to remove them can also cause a good amount of stress, which isn’t ideal for a new addition.

    Instead, try covering the coral in a water-permeable container or moving it to quarantine either in or outside of the tank. This should give enough time to see if the new additions were the cause of the problem.

    Water Parameters

    If your water parameters changed over the last day, then this is difficult to tell if you don’t have a record of your values. However, changes in conditions should also reflect on other corals and livestock. Are all your other corals fully extended with full color?

    If yes, then water parameters might not be your problem, or you might just have a sensitive hammer. Regardless, it is best to test all water parameters and perform a water change if you can’t find any other causes. Alkalinity, Nitrate, and Phosphate be the main items to test with LPS coral tanks. Consider investing in quality reef tank test kits to monitor your levels.

    Closing Thoughts

    Hammer corals are a longtime favorite in the aquarium hobby. These corals sway and interact with the coral, bringing life to large portions of the aquarium. These corals don’t need any specific care and can adjust to a variety of water parameters, water flow rates, and lighting, but stability is key. Hammer corals also don’t need to be fed but will appreciate available nutrients in the water column.

    We hope you found this blog post informative and helpful in caring for your new Hammer Coral! If you have any questions or comments, please leave them below. Thank you for visiting!


    ๐Ÿ“˜ Want to learn more? This article is part of our complete Saltwater Fish & Reef Guide. Your ultimate resource for marine fish, coral care, reef setup, and more.

  • How to Care for a Jewel Cichlid in Your Home Aquarium

    How to Care for a Jewel Cichlid in Your Home Aquarium

    Jewel cichlids are one of those fish where the name really does justice to the animal. The iridescent red and blue coloration on a healthy specimen is genuinely stunning. I’ve kept them and they’re hardy, bold fish with a lot of personality. The one thing I always emphasize: they’re aggressive, especially during breeding, and tankmate selection requires real thought or you’ll have problems.

    If you’ve been researching different species of cichlids, the jewel cichlid may, quite understandably, have caught your eye. Now, despite its undeniable beauty, the jewel cichlid gets a bad rap due to its semi-aggressive temperament.

    For many aquarists who wish to maintain a peaceful community tank, adding a jewel cichlid will not be worth it. However, keeping jewel cichlids is not only fun and rewarding, itโ€™s also a great way to liven up your aquarium. Although their temperament will pose a problem to novice aquarists, the jewel cichlid is a worthwhile pet.

    Wondering whether a jewel cichlid is worth putting in your home aquarium? Let our jewel cichlid care guide help you decide.

    Species Overview

    Scientific NameHemichromis bimaculatus
    Common NamesJewel cichlid, jewel fish, African jewelfish
    FamilyCichlidae
    OriginAfrica
    DietOmnivore
    Care LevelModerate
    ActivityModerately active to active
    Lifespan5 – 7 years
    TemperamentSemi-aggressive (Aggressive when breeding)
    Tank LevelMid to top level
    Minimum Tank Size30 gallons
    Temperature Range70ยฐF to 74ยฐF
    KHNeutral to soft; below 12 dKH
    pH Range7.0 to 7.5
    Filtration/Water FlowModerate
    Water TypeFreshwater
    BreedingMouth Brooders
    Difficulty to BreedEasy to breed; forms breeding pairs easily
    CompatibilitySpecies only or aggressive tank
    OK, for Planted Tanks?With Caution

    Origins and Habitat

    The jewel cichlid Hemichromis bimaculatus originates in West Africa. This is where the fish inhabit richly vegetated freshwater bodies like streams, rivers, and lakes. Jewel cichlids have also been documented in some parts of North Africa.

    Because these water bodies are teeming with other cichlids and don’t offer a wide variety of sustenance, they are very competitive habitats. This explains why these jewel fish are naturally aggressive and territorial.

    What Does the they Look Like?

    How Does A Jewel Cichlid Look Like

    The coloration of the jewel cichlid species varies widely. You’ll find them mostly in a bright orange-tinted red with vibrant white spots (this is the blood red jewel cichlid), but many are also colored purple with contrasting greenish spots (green jewel fish).

    This color will be intensified during the breeding season. During this time, you’ll also notice a longer ventral, anal, and dorsal fin. Some say that male cichlids have a brighter coloration than their female counterparts. 

    How Big Are They?

    Jewel cichlids may vary greatly in size, from as little as 3 inches to as large as 6 inches. In an aquarium, the size of this fish will be smaller than in the wild.ย 

    How Long Do Hemichromis bimaculatus Live?

    On average, a cichlid of this kind can be expected to live up to 5 years. If youโ€™re able to provide superior tank conditions and provide a perfectly balanced diet, your jewelfish might even live up to 7 years. This is rare, however.ย 

    Temperament and Activity Level

    The hemichromis bimaculatus is recognizable by its aggressive behavior. Particularly when it is stressed or underfed, a jewelfish is more likely to lash out and attack his/her tank mates. Breeding season is when the fish reaches the height of its aggression.

    This will all sound very scary, but for the committed aquarist, it’s actually not that difficult to ensure a stress-free environment for this freshwater fish. As long as tank requirements are strictly maintained. The best thing to curb aggression is space and lots of shelter. If you have a small tank, with lots of fish, and no shelter, your Jewel Cichlids will be more aggressive as they fight to claim limited territory.

    , your jewel cichlid fish will be seen flitting back and forth across the water. They are also very active fish who like to dig at their substrate, looking for food.

    Jewel cichlids are also monogamous, which means they form a breeding pair for life. If your jewel fish are in a pair, donโ€™t be surprised to see them together most of the time! 

    What are Good Tankmates?

    It will seem like a bad idea to include any tank mates for your jewelfish, fin nippers as they are. Well, you should listen to your instincts. Don’t put them in a community tank. These freshwater fish are best off in a species only or cichlid tank.  

    Good Tank Mates

    Despite their bad reputation, some jewelfish can, in fact, cohabit peacefully with certain other semi-aggressive species. Accordingly, here are some fish that will make acceptable mates for your jewelfish.

    • Clown loaches
    • Plecos
    • Electric blue acaras
    • Redtail shark
    • Syndontis catfish
    • Scavenger catfish
    • Leopard bullfish

    Jewel cichlids are one of the most aggressive fish you will ever keep relative to their size. They will terrorize tank mates, destroy aquascapes, and turn a peaceful community tank into a war zone overnight. When breeding, their aggression doubles. I have kept these for years and the number one mistake I see is people treating them like a regular community fish. They are not.

    The Reality of Keeping How to Care for a Jewel Cichlid in Your Home Aquarium

    The aggression reputation is earned but misunderstood. How to Care for a Jewel Cichlid in Your Home Aquarium is not randomly violent. It is territorial, and territory disputes in a poorly planned tank look like chaos.

    Group size controls behavior. Keep too few and you get a bully. Keep enough and aggression spreads out. There is a threshold, and missing it ruins the tank.

    Most problems are stocking problems. The fish is not the issue. The tank plan is the issue.

    Biggest Mistake New How to Care for a Jewel Cichlid in Your Home Aquarium Owners Make

    Keeping too few. A small group of How to Care for a Jewel Cichlid in Your Home Aquarium creates a hierarchy where the bottom fish gets destroyed. The solution is not fewer fish. It is more fish to spread aggression.

    Expert Take

    Stock heavily, filter aggressively, and provide sight breaks throughout the tank. How to Care for a Jewel Cichlid in Your Home Aquarium is manageable when you control the environment. Let the environment control itself and this fish exposes every weakness.

    Fish Species to Avoid

    When selecting home aquarium tank mates for your jewel cichlid, itโ€™s best to avoid all fish species if you can, except a few semi-aggressive fish mentioned above.

    In particular, peaceful aquarium fish species (for example, any goldfish species) should be avoided at all costs, as your jewelfish will harm them and will even eat or kill them. MBunas and Rift Lake Cichlids should be avoided as they are likely to be attacked and killed. 

    What Do Jewelfish Eat?

    Feeding jewel cichlids is fairly easy. As omnivorous freshwater fish, jewel fish will readily eat pellets, flake food, and live food as well.

    You should aim to provide as balanced a diet as possible. This means mixing and matching different food types. You can also consider giving them vegetables such as lettuce leaves and spirulina. Frozen foods are alright once a week. If feeding pellets or flakes, consider one that contains probiotics like the Cobalt Aquatics line.

    Best Flake Formula
    Cobalt Aquatics Cichlid Flakes

    With probiotics and specially formulated for Cichlids, this is bar none the best flake formula available for your Africans

    Buy On Amazon Buy On Chewy

    What about Live Foods?

    Bloodworms, white worms, tubifex, and frozen baby brine shrimp are great live foods for jewel cichlids. Limit providing live foods to once a week.

    How Much and How Often to Feed

    You should aim to feed your jewel cichlids at least twice a day. Be careful not to overfeed them, however, and donโ€™t confuse their voracious eating for constant hunger.

    Feeding your jewel fish properly is crucial if you want them to retain their vivid coloration.

    How to Set Up Your Fish Tank

    Recreating the Africa habitat or breeding conditions of the jewelfish is not too difficult. Hereโ€™s all you need to know about how to set up the tank of your jewelfish.

     Tank Size

    Jewel Cichlid Pair

    For one pair of jewel cichlids, a tank size of at least 30 gallons is required. For each new pair, add 20 gallons. If you put them in a community aquarium (not recommended), provide a tank divider. When your Jewel Cichlids are in breeding mode, consider removing other tank mates if your tank is on the small side. They are known for taking over 30 and 40 gallon tanks!

    Substrate

    A sandy substrate is best for these fish as they love to dig. Anything sharper will injure them.

    Decor

    Decorations are a necessity when rearing jewel fish, who are territorial and love to claim their own space. Provide rocks and aim to create cave-like conditions. Rocks with holes or caves are ideal to provide shelter.

    Plants

    These fish are curious and active fish who love to dig. So, they will get in the way of your aquarium plants thriving unless the plants are protected by rocks and such. Floating plants and column feeders like Anubias Nana and Java Fern would be good examples of plants that could work.

    Water Quality

    Here are the water conditions you need to ensure for your jewel cichlids

    Filtration

    Provide adequate filtration for your jewel cichlids to ensure that they can enjoy a water flow mimicking the currents of the streams and rivers they’re used to. They are particularly hardy. They do well with your standard power filter

    Water Parameters

    Maintain these water conditions in your home tank to ensure a healthy environment for your jewelfish.

    • Water Temperature: 70ยฐF to 74ยฐF
    • pH Range: 7 to 7.5
    • Hardness Range: Not above 12 dGH
    • Water Movement: Moderate to strong

    Aquarium Maintenance

    Besides ensuring the proper parameters for your cichlid aquarium, conduct regular water changes of 25% – 40%. Remember, the goal is to reduce your jewelfishโ€™s aggression. Otherwise, their lifespan will be shortened.

    How to Breed?

    Breeding this species in tanks is relatively easy once you can determine their sex. As they are monogamous, cichlids form pairs quickly and easily during mating season, and once they are parents, they will stick together.

    Breeding Tank

    You can isolate your cichlid pair in a breeding aquarium, but itโ€™s not necessary if you have just one pair. Gradually raise the water temperature from their regular temperature by a few degrees every day until you reach 80ยฐ to 82ยฐ F (or 26.7ยฐ – 27.8ยฐ C).

    Breeding Behavior

    When the male is ready, his color will become very vibrant, and he will become very aggressive. Like other cichlid species, the male will chase the female about the tank for a little bit until she lays eggs.

    Once sheโ€™s ready, the female will search for the right place to lay her eggs. She will likely settle on a flat surface, typically a flat-faced rock. She will produce up to 500 eggs.

    After Breeding

    Once the eggs are fertilized, they will hatch within 2 to 4 days. After hatching, the jewelfish parents will help each other move their kids to a different part of the aquarium. During this time, the parents will be excessively aggressive in order to defend their young fish. 

    Feeding Fry

    Let the fry absorb the remainder of the egg yolk in the first few days. Afterward, feed them crushed flakes and mashed pellets. Donโ€™t be distressed if the new parents eat some of their offspring. 

    Health and Disease

    Your jewel cichlid is, unfortunately, prone to the illnesses most freshwater cichlids are prone to. Hereโ€™s how to tell whether your jewelfish is healthy or needs care. 

    Signs of Health

    A healthy jewelfish is a happy one. A happy jewelfish is playful and active (is interpreted as aggression), burrowing in the substrate or flitting about their aquarium. Most significantly, healthy jewelfish retains its vibrant coloration. 

    Signs of Ill Health

    Here’s a list of several common issues you may come across

    •  When a jewelfish is highly stressed, ill, or underfed, it will very likely lose its color. This is one of the most easily seen warning signs of this fish.
    • Swelling, loss of appetite, rapid breathing, and differently colored feces are all symptoms of Malawi bloat, a condition that mostly affects African cichlids.
    • Notice an indentation in the head of your jewel cichlid? He/she is suffering from hexamita, also known as “hole in the head” disease.
    • Look out for ich, which manifests in symptoms like lethargy, loss of appetite, and restless behavior, but most importantly, white spots on the body of the fish.
    • Labored breathing and a loss of color might indicate gill flukes.

    All of these conditions are covered in our freshwater fish diseases post.

    Common Health Issues and Treatment

    One of the easiest ways to ensure that your jewel fish is healthy is to provide the required tank parameters with care. Feed them regularly, donโ€™t overfeed, and provide a varied diet. This will keep most illnesses at bay.

    Hereโ€™s how to deal with other diseases that will come up:

    • If you think your jewelfish is suffering from Malawi bloat, act quickly. Change the tankโ€™s water and introduce a dose of Metronidazole. However, know that Malawi bloat is a condition that quickly turns fatal, so donโ€™t blame yourself if something goes wrong.
    • Administer the same treatments for ich as you would for other cichlids: increased tank temperature, salt baths, potassium permanganate, acriflavine, and malachite green.
    • If you suspect your fish is suffering from gill flukes, use Praziquantel.

    Where to Buy?

    Compared to other cichlid breeds, the jewelfish is a little harder to buy in brick-and-mortar pet shops. They will also be a little more expensive. If you cannot find them locally, try using an online fish store. Often times, their guarantee will be superior to what you can find locally.

    Frequently Asked Questions

    Female Jewel Cichlid

    Are they aggressive?

    Semi-aggressive, yes. Especially when theyโ€™re in pairs and ready to breed, their aggression is strongest. Once the fry are born, jewel cichlids will defend their offspring to the best of their ability.

    If you must put your jewel cichlids in with other fish, get a tank divider. Even better if you can get a separate tank entirely. And try to ensure large tanks.

    What fish can go with them?

    Put bluntly, it’s best not to put your jewel cichlids in with other fish. If you must, we would recommend other cichlids as tank mates, as well as certain bottom-dwelling semi-aggressive species.

    Can they live with oscars?

    Itโ€™s not impossible, but itโ€™s difficult to achieve harmony between oscars and jewel cichlids. This is not only because oscars are famously aggressive fish; they are also significantly larger than jewel fish. So unless you can provide a large tank (at least 100 gallons), itโ€™s not recommended.

    Can angelfish live with this type of fish?

    Once again, itโ€™s not recommended. Although the jewelfish and angelfish are both cichlids, the latter is somewhat more docile and therefore more prone to being harmed by your jewel fish.

    Are they hard to keep?

    If you want a varied and healthy community tank, jewel cichlids is more trouble than they are worth. Besides this, these fish are pretty easy to keep, with the right tank size and setup.

    What It Is Actually Like Living With How to Care for a Jewel Cichlid in Your Home Aquarium

    A properly stocked How to Care for a Jewel Cichlid in Your Home Aquarium tank is one of the most active, dynamic setups in the hobby. There is always something happening.

    The aggression is structured, not random. Once territories are established, the tank settles into a pattern. Disrupting that pattern restarts the conflict.

    Watching How to Care for a Jewel Cichlid in Your Home Aquarium interact is endlessly entertaining. These are smart fish with complex social dynamics.

    What It Is Actually Like Living With Jewel Cichlid

    A jewel cichlid tank is never boring. These fish are always doing something. Patrolling territory, displaying to each other, digging in the substrate, or staring you down through the glass. They have more personality per inch than most fish three times their size. You will catch yourself talking to them, and you will not feel weird about it.

    The color display during breeding is the highlight. Both parents intensify to a deep, glowing red covered in iridescent blue-white spots. It looks like someone painted them. The male flares and displays while the female fans the eggs, and the entire tank seems to pulse with energy. It is one of the most visually spectacular things that happens in a freshwater aquarium.

    The aggression is the price of admission. During breeding, you cannot do tank maintenance without getting bitten. You reach in with a siphon and both parents charge your hand. It does not hurt much, but it is startling every time. Other fish in the tank learn to stay in their corners or suffer the consequences. You accept this or you remove the jewels. There is no peaceful coexistence during a breeding cycle.

    Closing Thoughts

    Jewel cichlids do not have tank mates. They have targets.

    Even our dearest loved ones are sometimes obnoxious, we donโ€™t stop loving them. Try to adopt the same approach to your jewel cichlids. Maintaining their behavior is difficult, but maintaining their diet and water parameters is easy. And the end result is definitely rewarding. Good luck!


    ๐Ÿ“˜ Want to learn more? This article is part of our complete Freshwater Fish Guide. Your ultimate resource for freshwater species, care tips, tank setup, and more.

  • The Secrets To Keeping A Planted Aquarium โ€“ An Aquascaper’s Approach

    The Secrets To Keeping A Planted Aquarium โ€“ An Aquascaper’s Approach

    I’ve been keeping planted tanks for over 25 years, and the biggest thing I’ve learned is that success comes down to understanding a few core principles. not collecting more gear or more plants. I’ve set up everything from simple low-tech tanks to high-tech CO2-injected setups, and the fundamentals are what separate thriving planted tanks from the ones that turn into algae disasters within a month. This guide gives you an aquascaper’s honest perspective on what actually matters when keeping a planted aquarium.

    The Basic Question – What Do You Want Out Of A Planted Aquarium?

    This is the number 1 question you need to ask yourself when setting up a planted aquarium. To make it simple for you I will ask you this question

    What Type Of Planted Aquarium Do you Want?

    Are you looking for easy maintenance? Championship level? Do you want one of those crazy planted tanks you see on Pinterest and Instagram? All of this is attainable if you set your goals. It all starts on if you are in the low-tech or high-tech side of the hobby. This all relates to CO2 usage. There are four levels of planted tanks that you should be aware of and they are:

    • Level 1 – Low-tech non-CO2
    • Level 2 – Low-tech CO2 supplementation with SeaChem Excel
    • Level 3 – High-tech CO2 with low light (Most aquascapers will eventually fall here)
    • Level 4 – High-tech CO2 with high intensity lighting

    Before we can go over each level we should understand the role of CO2 in our aquariums.

    Planted Aquariums and CO2

    CO2 levels drives grows in a planted aquarium. It’s not nutrients, proper lighting, or substrates. CO2 is the center and driver to rich, fast, and supple healthy plant growth in your aquarium plants. There are multiple levels of non-CO2 usage and CO2 usage. 50% of plants dry mass is carbon. As we learned in my CO2 System Article, aquatic plants in the wild enjoy evaluated levels of CO2 as high as 50 PPM.

    Since CO2 drives the growth in our planted aquariums, we have to design the rest of our system around it. Let’s next talk about the decision to do CO2 or not.

    To Add or Not to Add CO2

    CO2 Injected Planted Tank

    What do you sacrifice the most when you decide to not use CO2? What you sacrifice is growth and the showcase look. There are plenty of low light aquarium plants that will do well without CO2, however, you will sacrifice their growth rate and thickness by excluding CO2.

    In essence, they are generally living in a non-CO2 environment. These non-CO2 low light plants will grow, but their true potential is unleashed with a CO2 system.

    This is why I recommend even if an aquarist is planning on not using CO2, that they at least consider dosing CO2 using SeaChem Excel. SeaChem Excel functions as an alternative to CO2 injection. While not as effective, Excel will still improve the growth rate of aquarium plants 2 – 4 times versus the traditional 10 – 25 times plant growth rate you will experience with injection.

    Excel dosing puts us in level 2 territory. We can still build plenty of wonderful aquascapes with this and not have to deal with the added complexity and cost of a CO2 system. I am definitely an odd ball compared to many bloggers online, as I do not recommend level 1 if one is getting into planted aquariums. Call me vain, a purist, or spoiled – but I do love me some killer looking aquascapes and I want you to have the ability to enjoy building to that level.

    For those of you looking to do amazing aquascapes and looking to get into reds, stem plants, and lush carpeting plants, CO2 injection is a must. It’s hard to visualize what these aquascapes will look like, so I will explain that later in this post when we get into aquascape styles and examples.

    When it comes to a quality CO2 system, I highly recommend CO2Art. They sell an excellent combo package that gives you all the essentials you need to get start. The box below comes with a inline diffusor, my favorite method of diffusor. I would love a CO2 reactor, but unfortunately those cool looking AquaMedic CO2 reactors can’t be found in the US – so this is the best you can get in the states.

    The Ultimate CO2 Kit
    CO2Art Pro Elite Series Bundle

    Use Offer Code ASD10%Off

    The highest end offering by CO2Art. This package includes everything you need to perform consistent and the highest quality CO2 injection in the industry!

    Click For Best Price

    Which Substrate is Best?

    When it comes to planted aquascapes the hierarchy I believe in is CO2>Substrate>Lighting>Fertilizer. CO2 drives the 3 others, substrate is our next starting point, planted aquarium lighting pushes CO2 intake, and fertilizer is how we balance everything.

    Substrate comes into planted tanks as this is our base for nutrients for our aquarium plants. Whether you decided on column feeding plants or roots plants, substrate will still play a role. A good substrate for a planted aquarium will be an active, nutrient-rich substrate to serve as a baseline for nutrient uptake for our aquatic plants.

    When it comes to planted tank substrates, many articles you may come across may stop at a basic overview of substrates. I’m going to give you the professional aquascapers view first then break it down to a more realistic senario for beginner. You should always understand the professionals perspective so you know the end goal and why quality investments are key for long term success.

    The secret for professional aquascapers is utilizing a layer system. This layer system is founded on ADA principals and are the following:

    • Layer 1 – Nutrient-Rich Planted Aquarium Power (Base Powder)
    • Layer 2 – Nutrient-Rich Aqua Soil
    • Layer 3 – Inert substrates and decorative caps

    Each layer plays a role in a professional aquascape. Let’s dive in!

    Layer 1 – Nutrient-Rich Substrates (Powder)

    This is the first level in a professional aquascape, This is also known as “power sand” or power soils with ADA being the major brand and benchmark in this field. This fine powder serves as a bottom layer in a planted aquascape. This substrate only covers the first 1.5 inches of the bottom. The rest of the layers will have other substrates.

    The purpose of this power sand is to provide a nutrient rich base to the bottom floor for our rooted and carpeting plants. This will ensure your bottom level has a strong base and can be refreshed with root tabs in the future.

    Unfortunately, ADA power sand is difficult to find online. It is best to purchase from an LFS or directly from AquaForest Aquarium – the main US distributor of ADA products.

    Layer 2 – Nutrient-Rich Aquarium Substrates (Soil)

    Layer 2 are our Aquasoils or our active substrates. This is what many planted aquarium enthusiasts work with. They will work primarily with this soil and spread it across their tank so they can use rooted plants and carpeted plants to cover their aquarium. It is also designed to be sloped and can maintain its shape when doing so. The most famous aqua soil is ADA Amazonia. It is the most nutrient rich and can be difficult for new aquascapers to use.

    Editor’s Choice!
    ADA Aqua Soil

    The Best Planted Tank Substrate

    The world’s standard in active substrates for planted tanks. Created by brand that founded modern aquascaping

    Buy On Amazon

    For new aquascapers, Tropica aquasoil is a great alternative that is well proven in Europe and touted by the likes of world famous aquascaper George Farmer.

    If you are working with rooted plants, it is a good idea to use layer 1 and this layer in combination to have a rich base for your aquatic plants to absorb in as they grow. There are DIYers who like to use organic soil as an active substrate. I’m guilty of being a purist, so I won’t cover it in this post, but I will have one of my other aquascapers cover it in a future post.

    The next layer can be decorative or functional

    Layer 3 – Inert Substrates

    Planted Tank With Inert Substrate

    These can have two functions in a planted tank. In a planted aquarium that is low tech with mostly column feeding aquatic plants, this substrate can be spread all across the aquarium to cover the bottom. There are also beginner based substrates like Caribsea Eco Complete that can be use as a functional substrate for beginner friendly rooted tanks.

    The second function is decorative. In a professional aquascape, you will see inert substrates cover the other 2 layers and “cap” the substrates for aesthetic purposes. Other times, the functional layers are separated into sections in the aquascape where layer 1 and 2 are together for carpeting and rooted plants and there is a separate area of the fish tank with the inert substrate that serves as a foreground and an area for bottom dweller fish and shrimp.

    One awesome accent you can do with inert substrates with separate sections is make pathways in the aquascape that make your aquarium look like a living underwater forest. These can create spectacular scapes and are often features you will see in award winning Aquascapes

    Purpose of Lighting

    A proper light has the right PAR, spread, and spectrum. I preach these 3 principles in any aquarium lighting topic I cover.

    PAR

    PAR (or Photosynthetically Active Radiation) is the measurement of light intensity in our aquarium. Quality manufacturers will have done their R&D and will have their PAR figures published for customers to see. PAR levels by plant species varieties. The ones that require the least amount of PAR are known as low-light plants in our tech.

    For PAR, I have this sheet from the Barr Report below that shows you the ranges. The lights I’m going to talk about today will get you in these ranges. Check out my best LED lights for Planted Tanks post for more in-depth detail on PAR.

    PAR for Planted Tanks

    Spectrum

    Spectrum is all about hitting the hitting the desired wavelengths in the Red, Green, and Blue spectrum as shown below from ADA. Spectrum is another complex topic. The lights I’m going to mention below have this covered. To break it down simply, the best lights that hit these desired wavelengths are branded as “RGB” lights in our hobby.

    Spread

    Spread is the last principle. Because these are LEDs, they need to be spread and diffuse. All the best LED systems will have a diffusor built in to work around the limitations of LED as they are naturally focused lights. This prevents shading and ensures even coverage in your fish tank.

    The 4 levels of Lighting Systems

    A high quality light will have all 3 principles checked. When it comes to the plant tank market, I can separate planted aquarium lighting into 4 categories:

    • Level 1 – Entry Level Lights
    • Level 2 – Lights For Dense Planting (Most of you will fall here)
    • Level 3 – Lights For Advanced Aquaccapes
    • Level 4 – Professional Level Lights

    Level 1 – Entry Level Plant Lights

    Entry level lights are for simpler aquascapes. This lights will allow you to keep the low light plants and easier to maintain aquatic plants. These lights will include such lights like the Twinstar B and C Series, Chihiros A-Series and C-2, and the Fluval Planted 3.0.

    Level 2 – Lights for Dense Planting

    This is the level I look at when it comes to Aquascaping. At this level level, you should be able to keep around 3/4 of the live plants available in the trade. If you desire carpeting plants like Monte Carlo and densely planted aquascapes this is where we start.

    For these lights, we look at the Twinstar E Series, Chihiros WRGB, ONF Flat Nano.

    Level 3 – Lights for Advanced Aquascapes

    These are the lights you go to where you want to grow a bunch of harder to care for plants and red plants. These lights have the ideal PAR, Spectrum, and spread and will successfully grow all aquatic plants. Your main concern here is balancing light, CO2, and nutrients so you don’t have a bunch of algae growth. For this range you would be looking at the Twinstar S Series, Chihiros WRGB, Chihiros C2 RBG3, and ONF Flat One+

    Level 4 – Professional Lights

    These are the lights that the pros use and competition entrants. These would include lights like the ADA Solar RGB, Chihiros Vivid 2, and UNS Titan. This lights are not for beginners and requires an advanced understanding of aquascaping.

    For most plant tanks owners. I would recommend you look at level 2 lights.

    Nutrients and Fertilizers

    Aquatic plants use macro and micro nutrients to grow. Macro nurients include Nitrates, Phophate, and Potassium. Micro nutrients include Iron, Manganese, and trace elements. Some plants feed primarily through their leaves, while others are root-feeders. I go through in detail in my best aquarium fertilizer post. The main takeaway are live plants need Macro and Micronutrients and fertilizers supply that in mass planted tanks.

    Fertilizer Requirements

    Every aquarium is unique, so it is advisable to look at your aquatic plants over the course of the first month or two and look for signs of deficiency. Fertilizers come more into play as you use CO2 as the nutrients your fish produce will not be enough for them to grow. Plants use nutrients continuously just like CO2.

    When selecting a good liquid fertilizer, look for a supplement with trace elements such as iron, manganese, boron, zinc, etc. Look for a good ratio of nitrogen (N), phosphorus (P), and potassium (K), otherwise known as the NPK ratio1. Regular water changes also replenish other elements, such as dissolved minerals (calcium, magnesium) and carbonate salts in the water, which are a necessity for fish.

    This is can get super confusing very quick and turn into a massive post. To take out the guesswork, I’ll recommend that you work with daily dosing with a branding all in one liquid fertilizer. The best in the business in my opinion is APT Complete by 2Hr Aquarist. Just follow their instructions and you should be well on your way in A CO2 injected tank. They even back it up with a 100 day guarantee.

    Editor’s Choice!
    APT Complete

    Editor’s Choice

    Made by an aquascaper for aquascapers. This is the best all around aquarium plant fertilizer on the market. Marco and micronutrients in one bottle!

    Use Coupon Code ASDComplete for 10% off your order!

    Click For Best Price Buy On Amazon

    Filtration

    There are two schools of thought when it comes to planted tanks. The first is what I call the more casual approach where an aquarist feels that you can run a planted aquarium with a massive amount of plants will little or no filtration. The second school of thought is the aquarist that feels that you filtration is the heart of every successful system.

    I fall under the second school of thought. Live plants have the potential to produce more ammonia (aka fish waste) that your fish ever will in a densely planted aquarium. The leaves they drop will decay and need to be picked up by your filter. You need to have a ton of biological filtration to reduce ammonia because it becomes problematic and leads to algae growth.

    This is why I feel if you are going to be serious about aquascaping, you need to consider buying the best canister filter you can afford. Personally, I’m a OASE fanboy. They are in my mind, the best canister filter ever built. The prefilter section comes out for easy maintenance and the aquarium heater chamber is innovative. The prefilter feature sells itself!

    All you need to do is modify the setup by removing all the filtrations chambers and replacing it with a superior biological filtration like SeaChem Matrix and putting Purigen to keep your water clear. Add a fine polishing filter pad and you are good to go!

    Types of Plants and Their Lighting Requirements

    All types of plants require different lighting levels, some require bright light and others survive on less. Let’s start with the types of plants first. For these plant examples, I’ll focus on low light plants or low energy/low tech plants.

    Foregound Plants

    These are smaller plants that are on the shorter side. They can be placed in the substrate or placed near the beginning of the hardscape. Examples of these plants would include plants like:

    Mid-Ground Plants

    Anubias Plant

    These are taller plants best suited in the middle of the aquarium. These would include plant species like:

    Background plants

    Background plants are tall plants that serve as a background to your aquarium. These would include plants like:

    When it comes to aquarium lighting requirements, reds, stem plants and carpeting plants will require the most light. The good thing is a solid online retailer will give you the ability to search plants by light level so you can determine which ones work for you.

    Carpeting plants

    Some carpet plants are Dwarf baby tears (Hemianthus callitrichoides) and dwarf hairgrass. These are famous for their vibrant natural look and require a lot of light. Staurogyne Repens is one of the more popular carpeting plants for low tech/low energy setups. Monte Carlo is one of the most popular carpeting plant species used in aquascapes due to its easier to grow nature and spread in CO2 injected tanks.

    To have the best success with carpeted plants, CO2 injection is recommended. You can also give yourself a good head start if you use a dry start method to grow out your carpet.

    Red Plants

    Red plants is a whole section in itself as many have more advanced care requirements. If you are beginner, I would recommend to avoid red plants until you have more experience. That being said if you really want a red plant, consider plant species like Ludwigia Natans Super Red, Ludwigia Repens, or Alternanthera Rosanervig. As with carpeting plants, CO2 injection is recommended.

    Live Plant Selection

    Live plant selection can be overwhelming with over 400 aquarium plants to choose from in our hobby. The best place to start is determine what you are looking for. If you are looking for low energy/low tech plants, stick with those. Stem plants require more maintenance as they grow fast.

    I also recommend starting with low energy/low tech plants, then moving into CO2, then move into more advanced plants. These easier to care for plants will thrive even more in CO2. Always shop with a plan and never walk into a local fish store not knowing what you are looking for.

    Selecting Live Plants

    Aquarium selection I feel is easier these days if you use the rimless aquarium selections available. I would recommend a rimless aquarium if you want to do an aquascape as it offers the highest clarity and aesthetics. They also offer them in ideal sizes. If we use ADA standards here are the dimensions for selecting an aquarium.

    • 60P (Small) – 24″ x 12″ x 14″ or 60 x 30 x 36 cm (17 gallons)
    • 90P (Medium) – 36″x 18″ x 18″ or 90 x 45 x 45 cm (48 gallons)
    • 120P (Large) – 48″ x 19.7″ x 19.7″ or 120 x 50 x 50 cm (80 gallons)

    If you work off these dimensions at the 2, 3, and 4 foot fish tank length, you will have an ideal space to build an aquascape and show depth. You can purchased rimmed tanks for less. They will offer less clarity and aesthetics, but it will save you money. The most available rimless for aquascapers online will be from Landen and UNS Aquariums.

    Determining Your Aquascape

    Sanzon Iwagumi

    Aquascapes are beautiful yet complex. I’m going to list out the main three aquascaping styles in our aquarium hobby then will link to articles that go more in-depth. The top three scaping styles are:

    Of the 3 styles, the most trendy currently is the Nature Aquarium. This style has been popularized by ADA and featured in many aquascaping competitions.

    Selecting Fish

    When it comes to fish for aquascapes, schooling fish are going to be the more ideal. There is are also design elements to keep in mind when selecting fish. This would be:

    • Smaller and long fish add a dynamic effect to a planted aquarium
    • Tall and round fish add calm and peacefulness

    There are also sizes of the aquarium to keep in mind to. I’ll split this by size so you can determine what fits for you and include links to the fish profiles:

    Rasboras

    There are other inhabits you can include such as freshwater shrimp and algae eaters like Otocinclus. The schooling fish are the heart of the scape. The other fish and inhabitants are functional fish that serve a role such as algae eating.

    How to Set Up a Fish Tank with Live Plants

    We are going to work with level 2 setup here – low-tech with CO2 supplementation using SeaChem Excel. I’ll use a 60P tank to build. Here would be the list to setup:

    • Aquarium. UNS 60U orย Landen 60P
    • Stand. Aqua Worx Aquarium Stand. 60U
    • Filtration. Oase Biomaster 350
    • Driftwood . ย Manzanitaย or Spiderwood Driftwood
    • Substrate. Tropica Aquarium Soil. Powder Granule
    • Aquarium Lighting. Fluval Plant 3.0 orย Twinstar E-Series
    • Plants (examples below)
      • Easy To Care For- Bucephalandra, Anubias Nana, Crypts
      • Carpets. Micranthemum โ€˜Monte Carloโ€™, Dwarf Hairgrass
      • Mosses. Java Moss,ย Christimas Moss
      • Reds. Ludwigia Natans Super Red, Ludwigia Repens

    This is likely a higher end setup than what you would typically see. I want to set you up for success. This setup is more future proof as you can step up to CO2 and more aggressive growing aquatic plants as the foundation of the system is setup to handle this. You may have to upgrade the light if you push to high light demand plants, but this should get you going well.

    Common FAQS

    Are they hard to maintain?

    If setup with a beginner in mind, they will not be hard to maintain. Planted aquariums can be as easy to maintain or as difficult as you want. It all depends on your plant selection, your light intensity, and CO2 injection. A fish tank with high intensity aquarium lighting and CO2 injection will require lots of pruning. A tank with low intensity and no CO2 will requirement less pruning, but may struggle with excessive algae growth.

    Do these tanks need water changes?

    Most planted tanks will require water changes. There are some low tech setups that can be designed to live without water changes. They are not the best looking, but one of the easiest to maintain aquariums. Most high energy planted tanks will require regular water changes due to purposely overdoing aquarium fertilizers to reset the system (known as the estimative index1).

    What is the best substrate?

    The best substrate for a planted aquarium would be an active substrate. The best beginner active substrate for an aquascape would be Tropica aquarium soil powder. The best advanced active substrate would be ADA’s Amazonia substrate system.

    Can I use LED lights?

    Yes, you can use LED lights for planted aquariums. They have come a long way since they were first introduced. Many even include timers, dimmers, and color spectrum customizations that can all run off your smart phone! They are the new wave of lighting in our hobby.

    Further Reading

    This blog article is fairly long and there is a whole bunch I could get into. The best way to get more in-depth on this is with books. Here is what I would recommend for reading:

    Aquascaping – By George Farmer

    My Pick
    Aquascaping

    Created by UK Aquascaper and co-founder of the UK Plant Society, George Farmer. This book is a full color 317 page deep drive into the incredible world of aquascaping!

    Buy On Amazon

    This to me is the modern aquascaping bible. Created by world renowed aquascaper and YouTube personality George Farmer, this book offers a lot of information well beyond the scope of this blog post. I highly recommend this to anyone who is serious about getting into aquascaping.

    Sunken Gardens – A Step By Step Guide To Planting Freshwater

    Also Great
    Sunken Gardens

    Written by American Aquascaper, ADA Judge, and editor of AGA magazine Karen Randall. This 252 page book offers an in-depth look into your first aquascape build!

    Buy On Amazon

    Karen is a seasoned aquascaper and past president of the Boston Aquarium Society and chairs several aquascaping competitors every year. Her book goes into great detail about planted aquarium setup and has several how to picture tutorials.

    Closing Thoughts

    This article was a joy to write up. Passionate subjects like this I can write for days ๐Ÿ˜….I hope youโ€™ve found this article helpful in understanding how to maintain a planted aquarium. If you have any other questions, please donโ€™t hesitate to leave them in the comments below and I will get back with an answer for you as soon as possible! Happy scaping!


    ๐ŸŒฟ Want to learn more? This article is part of our complete Planted Tank & Aquascaping Guide. your ultimate resource for aquarium plants, aquascaping styles, substrates, and more.

  • RANCHU GOLDFISH – Caring For The Beautiful King Of Goldfish

    RANCHU GOLDFISH – Caring For The Beautiful King Of Goldfish

    Ranchu Goldfish are the most selectively bred fancy goldfish variety. That breeding comes at a cost. They are slow swimmers, poor competitors for food, and sensitive to water quality swings.

    Ranchus are not for beginners. They are for goldfish keepers who already understand filtration, water changes, and feeding.

    Considered the โ€œKing of Goldfishโ€ by the Japanese, Ranchu goldfish are among the oldest and most popular fancy goldfish. They hold a special place in the minds of many goldfish enthusiasts, thanks to their unique appearance. An aquarium teeming with these beautiful fish is sure to enhance the aesthetic appeal of just about any place, be it your home or your office!

    So, if youโ€™re looking to keep fancy goldfish, you should consider Ranchu Goldfish. They are available in various shapes and colors to make your fish tank appear lavish and elegant. Keep reading to learn more about these incredible fancy goldfish, as we will provide all the necessary information on how to properly care for your King (or Queen).

    A Brief Overview of Ranchu Goldfish

    Scientific Name Carassius Auratus Auratus
    Common Names Maruko, Buffalo-head Goldfish, Korean Goldfish
    Family Cyprinidae
    Origin Japan
    Diet Omnivore
    Care Level Moderate
    Activity Moderately Active
    Lifespan 10 to 15 Years
    Temperament Peaceful
    Tank Level Medium
    Minimum Tank Size 20 Gallons
    Temperature Range 65ยฐF to 72ยฐF
    Water Hardness 4-20 dGH
    pH Range 6.5 to 7.5
    Filtration/Water Flow Moderate
    Water Type Freshwater
    Breeding Egg-layer
    Difficulty to Breed Moderate
    Compatibility Compatible with Other Slow-Moving Fancy Goldfish
    OK, for Planted Tanks? With Caution

    Origins and Habitat

    The story of Ranchu Goldfish (Carassius auratus) begins in ancient Japan, unlike other fancy goldfish that began in ancient China. They were developed from Chinese Lionhead Goldfish by skilled Japanese breeders. Today, modern day Ranchu Goldfish is found almost anywhere in the world, not just in China or Japan.

    Ranchuโ€™s arenโ€™t wild fish, so we must look at their ancestors to learn about their natural habitat.

    Like any other goldfish, they descended from an old species of wild carp, known commonly as the Gibel Carp, Silver Prussian carp, or simply Prussian Carp.

    These wild carp thrive in slow-moving, slightly cold waters of ponds, lakes, and rivers. Ranchus also prefer similar water conditions and share a lot of traits with Prussian Carp and other goldfish.

    What Does Ranchu Goldfish Look like?

    Ranchu Goldfish

    Itโ€™s quite easy to identify Ranchu Goldfish as they have a rather unusual head growth, an egg-shaped body with a deeper belly, and a horizontally spreading caudal (tail) fin. Looking from the top view, they look a lot like moving worms when swimming. Thatโ€™s where the name โ€œRanchuโ€ comes from (which literally means “dutch worm” in Japanense).

    Another striking feature of the Ranchu goldfish species is that they donโ€™t have any dorsal fin, much like their Lionhead counterpart. However, Ranchus come with arched backs, unlike the flat backs of Lionhead specimens. Initially bred for top view, they look just as impressive when viewed from the sides nowadays.

    They are available in a wide variety of colors, ranging from red, white, orange, blue to bi-colors like red-and-white, black and red, black and white, etc. Their scales is metallic, matte, or nacreous. So, a couple of differently-colored Ranchus will make your aquarium colorful and lively! Black ranchu goldfish are one of my personal favorites.

    These fish are comparatively more delicate than other goldfish because of their unique anatomy. So, they are probably not the best option for beginner aquarists. Overall, the beautiful appearance and the unique swimming style of the Ranchu goldfish make them the perfect candidate for any goldfish aquarium.  

    Are They Easy to Take Care of?

    Ranchu Goldfish are genetically weaker than other goldfish as they are highly inbred. They are pretty exquisite and not as hardy as other species. Their unique anatomy makes them prone to health issues. So, they arenโ€™t easy to take care of and require special care. You must have some experience before handling this fish.

    The rounded body and the lack of dorsal fin reduce the amount of control Ranchus have over their body when swimming. So, they canโ€™t swim as efficiently as others. Swimming is more tiring for them as well, as you will often see them moving slowly and resting now and then to regain energy. Moreover, the wen or the head growth covers their eyes and makes it harder for them to see.

    As a result, Ranchus arenโ€™t good at competing for food. In a tank with fast swimmers and aggressive fish, they will be unable to feed and thrive. The Ranchu goldfish cannot tolerate pollution at all. They will be quick to pick up diseases if the water isnโ€™t clean enough.

    Thanks to their rounded body shape, they are highly vulnerable to swim bladder disease. Furthermore, the wen can easily get infected. If you donโ€™t keep a Ranchu goldfish in a well-maintained fish tank with a high-quality aquarium filter, they wonโ€™t thrive. It doesnโ€™t take much to stress them out and put them into shock. Their care requirements are much higher than others, so make sure to be extra careful and put more effort.

    What Is their Eating Habits?

    Itโ€™s easy to feed Ranchus as they are omnivorous. They like to eat whatever they find, so itโ€™s up to you to decide which type of food you will provide them. A well-balanced diet comprised of high-quality frozen, fresh, and flake foods is the best for any breed of goldfish.

    Brine shrimp, Daphnia, tubifex worms, blood worms, black worms, etc., are some of the most suitable foods for Ranchus. You should minimize the use of live foods as they often contain bacteria and parasites that can make them sick. Ranchus take longer to feed as they have poor vision due to their head growth. You will have to feed them several times a day but remember not to overfeed.

    A favorite food staple is soaked pellets or freeze fried food supplemented with vita-chem. This is a great way to add much needed nutrients to common foods. Probiotics are also becoming more common place with food manufacturers with Companies like Cobalt leading the charge.

    My Pick


    Vita Chem

    One of the best nutritional supplements you can use for freshwater fish. Works great with pellet and fried dried foods.


    Buy On Amazon


    Buy On Chewy

    Can They Live Alone?

    The Ranchu, like any other goldfish, can live a long life in solitude. This breed of fish doesnโ€™t mind living alone as long as they get enough food and decent water quality.  However, they are social animals, and they can benefit from social interaction. Ranchus love playing around with other fish as they enjoy companionship.

    They love being social in groups. In fact, check out super-cute video of Ranchu goldfish playing football (As reported by the South China Morning Post) to see how fun they is to have around.

    They will be visibly happier if you keep them together with other tank mates that wonโ€™t compete with them or harass them. So, itโ€™s better to introduce similar types of fish in a Ranchu aquarium if you want the best for them. They do great in an all goldfish tank full of other fancy goldfish varieties.

    How Big Can They Grow? What Tank Size Is Right for Them?

    Fancy fish like the Ranchu Goldfish are developed to impress you with their shapes, not their sizes. With that being said, the average length of adult Ranchus is around 5โ€. However, under the right water conditions, they can grow even larger, up to 8 inches!

    Learning the size is important because it determines what the tank size that houses them should be. You must make sure to provide them enough room where they can swim freely. In general, the minimum requirement for housing one full-grown Ranchu is 20 gallons.

    However, you should start with 20-30 gallons if you want to ensure maximum comfort for your prized fish. Increase the tank size by 10-gallons every time you bring a new fish into the tank. Larger tanks are recommended because that will provide more space for them to swim, and you wonโ€™t have to deal with water changes as frequently.

    How Long Do They Live?

    The Ranchu have a surprisingly long lifespan. This breed of Japanese goldfish can live for 10 to 15 years! If you keep them in an aquarium with suitable water conditions and ensure a proper diet plan, you can increase the lifespan to 18 years or even more!

    Taking care of Ranchus will undoubtedly pay off. Even though these fish have low tolerance, they will stay healthy and active for a long time as long as you provide for them.

    Additionally, you should keep them under constant monitoring. Look for any signs of diseases or discomfort. Perform water changes as often as required. If you notice any difference in their bodies, take action quickly to prevent them from suffering or dying.

    Are They Aggressive?

    The Ranchu Goldfish is anything but aggressive. They have an incredibly peaceful temperament, and they are rather friendly and cheerful. Their unique structure prevents them from being violent, anyway. For instance, they canโ€™t swim all that fast and tire out pretty easily. They canโ€™t see clearly with their eyes, often due to the growth in their heads. You wonโ€™t see them fighting other fish for food because they arenโ€™t equipped to compete.

    However, Ranchus do enjoy foraging for food. Make sure not to choose aggressive fishes as their tank mates if you donโ€™t want your goldfish to struggle for survival and fail. They get along pretty well with other similarly morphed goldfish. You can feel free to house them together in an aquarium. Rest assured, they will not transform your tank into the Colosseum and fight each other to death!

    How Much Do They Cost?

    The price may also vary depending on factors like the size, source, age, etc. In general, you should be able to get your hands on one of them for 5 to 25 dollars from any local pet store or local breeders. However Japanโ€™s โ€œKing of Goldfishโ€ has garnered a lot of popularity over the decades with its fancy appearance. Ranchus are prized by many aquarists all over the world, and they are definitely in demand.

    The most expensive Ranchus will be shipped directly from Japan or China. These are the most prized of all Ranchus and earn their moniker of “King of Goldfish. These types of Ranchus will easily commander prices of over $50 and can get much more expensive! Importing is how you obtain Ranchu Goldfish developed for competing in various Japanese shows. The video below by hendrink Nursalim shows a competition level Ranchu competing in Aquarama in 2011.

    Competition Ranchu Goldfish tend to have more defining features, and their price can range from hundreds to thousands of dollars! You donโ€™t need them unless youโ€™re in the Ranchu Goldfish Enthusiasts category and planning to win one of those competitions. You will have to spend quite some money taking care of these types of goldfish, which you should consider.

    No matter what type of fish you get, you must invest in creating and maintaining a proper diet plan for keeping them healthy. Rest assured, they are definitely worth the price.

    Tank Requirement

    If youโ€™re a goldfish enthusiast, chances are youโ€™ve already got a fancy goldfish aquarium. It might just be the perfect one for the king of goldfish from Japan! A Ranchu will flourish in a tank with slow-moving clean water, with suitable temperatures (65ยฐ. 72ยฐ). The recommended aquarium size for a single Ranchu is 20 to 30 gallons.

    The pH range must be within 6.5 to 7.5, while the hardness range should be around 5 to 19 dGH. Make sure to keep the levels of ammonia, and nitrite close to zero. Nitrate should be maintained below 40 PPM.

    Filtration and Water Quality

    There should be a functioning water filtration system for these fish. Given the delicate nature of this fish, You should elect at minimum a quality hang on the back filter for smaller aquariums.

    For larger fancy goldfish setups, you should consider an oversized canister filter to manage nitrates with a quality all-in-one biomedia like BioHome. Setting your filtration up like this ensure you have the most stable water quality to keep your Ranchus in excellent health.

    Editor’s Choice!


    Biohome Ultimate Filter Media

    Editor’s Choice!

    This is the best media you can buy for your aquarium. It does it all – removes ammonia, nitrite, and nitrates


    Buy On Amazon

    Goldfish Tank Environment

    For creating a comfortable and natural environment, you should add a sand or fine gravel substrate. Ensure itโ€™s safe and doesnโ€™t pose any choking hazard because your fish will regularly dig around that part as they like foraging for food.

    Feel free to decorate your aquarium but refrain from using anything with sharp edges and protruding tips. If you are using artificial plants, consider silk plants. If you are using aquarium rocks, consider rocks without sharp edges or round ones. Driftwood should be avoided unless you are rounding out edges and ensuring there is plenty of open room to swim.

    You can add a variety of plants to make the environment appear more natural. Due to their digging habit, live plants may not always be suitable. Some great plants to consider for fancy goldfish would include:

    Make sure to anchor your plants to rocks instead of the substrate. The difficulty with plants is why many choose to go with artificial plants.

    The Ranchu has no dorsal fin. That is not decoration. It is a limitation. Swimming is harder, competing for food is harder, and keeping one with faster fish is a mistake.

    Tank Mates

    You must be careful in choosing suitable tank mates for the Ranchu Goldfish. They are best paired with other fancy goldfish such as:

    Final Words

    Ranchu goldfish stand out easily from other fish aided by their unique body. The wen on their head, combined with their round body, and arched backs make them look special. You will be impressed at how lovely they appear when swimming, thanks to the horizontally spreading double tail.

    If you take good care of these fish, your aquarium will be rightly populated with one of the fanciest goldfish you can find on the market. They will stay with you for a long time and keep you entertained! Ranchus keep a goldfish tank lively and entertaining. Consider adding these beautiful creatures! Leave a comment below if you think that we should add more information on how to care for them in this blog post.


    ๐Ÿ“˜ Want to learn more? This article is part of our complete Freshwater Fish Guide. Your ultimate resource for freshwater species, care tips, tank setup, and more.

  • Zoanthids – The Soft Coral Superstar (A Care Guide)

    Zoanthids – The Soft Coral Superstar (A Care Guide)

    If your parameters are not stable, this coral will not survive the first month. Corals do not die from wrong numbers. They die from unstable numbers. The difference between a thriving reef and a dying one is consistency, not perfection.

    Stable mediocre parameters beat perfect parameters that swing. Every time.

    What It Is Actually Like Growing Zoanthids to The Soft Coral Superstar (A Care Guide)

    Coral growth is measured in weeks and months, not days. You will stare at your frag daily and see nothing. Then one morning, you notice new polyp extension or a visible encrustation line. That moment is deeply satisfying.

    Corals open and close based on lighting and flow. Learning to read your coral’s polyp extension tells you more about tank conditions than any parameter test.

    Nuisance algae will grow on and around your coral. Keeping it clean without damaging the tissue takes a gentle hand and a turkey baster. This is a regular maintenance task.

    The color payoff is real. A coral that looked brown in the store develops vivid greens, purples, or oranges under proper lighting over weeks. That transformation is what makes reef keeping addictive.

    Table of Contents

    The Zoanthids to The Soft Coral Superstar (A Care Guide) is a go-to recommendation for newer reefers, but it is not bulletproof. Lighting, flow, and placement mistakes kill more frags than disease ever will. After maintaining reef tanks for over two decades, I know exactly where people go wrong with this coral.

    More coral frags die from too much light than too little. That surprises most beginners.

    Corals grow slowly and demand stable conditions for months and years. This is a long-term commitment to water chemistry, lighting schedules, and consistent maintenance.

    Coral keeping is gardening with saltwater. The patience required is identical.

    Reef tank owners, are you looking for a new soft coral to add to your aquarium? If so, zoanthids may be the perfect addition! These beautiful and easy-to-care-for corals are an excellent choice for beginners. In this post we will cover everything you need to know about caring for zoanthids in your reef tank.

    What Most Care Guides Get Wrong About Zoanthids. The Soft Coral Superstar (A)

    Many care guides make the zoanthids. The soft coral superstar (a) sound easier than it really is. They’ll list basic parameters and call it a day. In my experience running reef systems, stability matters far more than hitting a perfect number. Flow and placement get glossed over constantly. I’ve seen perfectly healthy zoanthids. The soft coral superstar (a) colonies stress and close up simply because they were in the wrong spot. Getting flow right is half the battle. The other mistake is overfeeding or over-supplementing. More is not better with corals. Clean water and patience will outperform any additive regimen.

    The Reality of Keeping Zoanthids to The Soft Coral Superstar (A Care Guide)

    Lighting is the most common source of coral death. New reefers blast their corals with too much PAR on day one. Corals need to acclimate to your lighting over weeks. Starting at 50% intensity and slowly ramping up prevents bleaching and tissue recession.

    Flow matters as much as light. Dead spots collect detritus on coral tissue and cause tissue necrosis. Too much direct flow strips flesh from the skeleton. Finding the right flow pattern takes observation and adjustment.

    Stability beats perfection. A reef tank with slightly elevated nitrates that stays consistent will grow coral better than a tank with perfect numbers that swings every few days. Corals adapt to stable conditions. They die from instability.

    Biggest Mistake New Owners Make

    Placing a new coral frag in the highest-light spot of the tank immediately. Corals from a store or vendor have been in shipping bags for hours. They need low light and gradual acclimation. Blasting them with full intensity causes bleaching within days.

    Expert Take

    Start your lights at 50% and increase by 10% every two weeks. More corals die from too much light too fast than from any disease I have encountered in 25 years of reef keeping.

    Frequently Asked Questions

    Are zoanthids poisonous?

    Some zoanthids, particularly Palythoa species, contain palytoxin, which is one of the most potent toxins found in nature. Always handle zoanthids with gloves and never boil, scrub, or frag them near your face. If you get the toxin in your eyes or an open wound, seek medical attention immediately.

    Are zoanthids good for beginners?

    Zoanthids are one of the best beginner corals. They are hardy, tolerate a wide range of lighting and flow conditions, and grow quickly. They come in an almost endless variety of colors and patterns, making them fun to collect even as your experience grows.

    How fast do zoanthids grow?

    Under ideal conditions, zoanthids can add a new polyp every few days to every couple of weeks. Growth rate depends on lighting, flow, water quality, and feeding. Some high-end varieties grow more slowly than common morphs.

    Why are my zoanthids not opening?

    Closed zoanthids are stressed by water quality issues, pests, or improper placement. Check for zoa pox, nudibranch pests, and asterina starfish on the colony. Elevated nitrates, low alkalinity, or a recent parameter swing can also cause them to stay closed.

    Can you keep different zoanthid species together?

    Yes, different zoanthid varieties is kept on the same rock or near each other. However, faster-growing varieties may overgrow slower ones, so keep an eye on aggressive spreaders. Some keepers prefer to keep different morphs on separate islands of rock for easier management.

    A Quick Overview

    Scientific NameZoanthus spp.
    Common NamesZoas, zoos, zoanthids, and button polyps; referred to as their specific designer brand when applicable
    FamilyZoanthidae
    OriginMost warm, shallow waters but most species is found universally at multiple depths
    Common ColorsAll colors, though what might appear as black is actually a very dark color instead
    Care LevelEasy-Moderate
    TemperamentNot aggressive, though can easily overcrowd other corals
    LightingModerate (50-150 PAR)
    Tank PlacementBottom, Middle, High
    Flow RateModerate
    Temperature Range76-82 degrees F
    pH Range8.0. 8.4
    Salinity1.025 or 35 PPT
    Alkalinity8. 12 dKH
    Calcium Level350. 450 PPM
    Magnesium Level1250. 1350 PPM
    PropagationCutting/Fragging

    Classification

    PhylumCnidaria
    ClassHexacorallia
    OrderZoantharia
    FamilyZoanthidae / Sphenopidae
    Common NameZoanthids (Zoas / Palythoa)

    Origins And Habitat

    Zoanthids are very closely related to sea anemones but belong to different taxonomic orders.

    Though these corals are extremely common to come across in the ocean and easy to cultivate in a laboratory setting, their species diversity is hardly understood. This can make placing certain species in the correct classification very difficult.

    Zoanthid corals is found in most tropical water ecosystems, including the waters around the Caribbean as well as the Indian and Pacific Oceans1. That being said, they is found at all levels of depth and different water temperatures as well.

    Interestingly, these corals have adapted to tolerate periods of emersion when the low tide goes out, which can help with collecting and fragging them for the aquarium. At the same time, other zoanthid coral species have been found all the way at the bottom of the ocean on the seafloor at colder temperatures with minimal light.

    It is believed that zoanthid corals are epizoic and like to grow on other animals, like sponges.

    What Do Zoanthids Look Like?

    Zoas

    Since they’re so closely related to sea anemones, zoanthid corals actually look like much smaller anemones! These corals form mats of polyps that individually give way to a colorful head. Zoanthids lack a calcium carbonate skeleton and are referred to as soft corals due to their fleshy structure.

    This polyp head has two rows of tentacles on the outer rim and has several colors as you work your way into the center towards the mouth. Zoas are sometimes confused with Palythoa spp., but zoanthids are smaller, more colorful, and also have shorter tentacles and a rounder mouth.

    However, some zoas and palys are impossible to tell apart and so many species are misidentified.

    Designer Names

    Zoanthids are one of the most modified corals available in the trade, coming in almost all color morphs with varying shapes, sizes, and tentacle lengths. Zoa gardens and collections have become increasingly popular over the past decade, and hobbyists can now find frags costing $5 or upwards of $2000.

    There is some controversy surrounding designer zoanthid corals. Many hobbyists believe that a desirable name increases the price of the coral to be much more than it’s actually worth. For the most part, there’s an affordable zoa for everyone.

    Here are some of the most popular designer brands you’re likely to come across:

    Blue Hornet Zoas
    • Rastas – Rasta zoanthids have yellowish-green tentacles, a bluish-purple outer rim with green, orange, and purple moving inward. These zoas are smaller than other color morphs.
    • Eagle Eye – These zoas have light green tentacles, with a thin purple margin and center surrounded by orange.
    • Fruit Loops – Fruit Loops have bright orange tentacles, with a deep blue center surrounded by yellow.
    • Blue Hornets (pictured above) – These corals are one of the darker zoas available. They have neon-green tentacles with an electric blue center. There is a smaller yellow circle surrounding the mouth.
    • LA Lakers – These zoas are very similar in appearance to Fruit Loops. LA Lakers have yellow tentacles with a yellow outer rim and dark blue in the center.
    • Sunny D. – Sunny D zoanthids have longer purple tentacles that might appear to be lightly frosted. They have a striated center of greens, oranges, and yellows, with a sometimes purple mouth.
    • Ultimate Chaos – Ultimate Chaos zoanthids start moving into the next price tier and are only sold as one or two polyps at a time. These zoanthids look like mini galaxies with swirls of oranges, yellows, and purples. Ultimate Chaos is one of the larger zoanthids.
    • Grandmaster Krak – The Grandmaster Krak is one of the most expensive zoanthids, with normal morphs starting at several hundred dollars with the more collectible varieties going into the thousands. These corals are rich yellows, greens, oranges, and blues with a starburst effect. Only one polyp is sold at a time.

    Are They Corals Poisonous?

    Eagle Eye Zoanthid Coral

    Before introducing one of these corals into your reef tank, this is an important question to consider–and even more important if planning to frag. The problem is that not much is known about palytoxin and it’s hard to tell which corals actually produce it, though it’s mostly associated with those in the Palythoa genus.

    Palytoxin is a very dangerous toxin that is life-threatening depending on exposure; palytoxin poisoning includes flu-like symptoms and skin reactions as well as muscular and cardiac complications.

    It is believed that bacteria living within the zoanthid coral polyp are responsible for making the palytoxin as opposed to the coral itself. This toxin is released underwater as well as above and poses a risk of being inhaled or entering an orifice; consuming plants and animals that have been exposed to palytoxin can also cause poisoning.

    However, the chances that your zoas contain palytoxin are minimal. Hobbyists have kept zoas and palys in their tanks for decades with little to no problems. If you’re truly concerned about introducing this toxin into your aquarium, avoid purchasing more natural-looking varieties as it’s believed they are the most likely to be poisonous.

    Otherwise, always use protective equipment when working with your tank. Even if you’re not actively touching your zoas, there’s always the chance that they released palytoxin into the water column.

    Do not put your hands into the tank with open wounds and wash your hands with soap immediately after. Aquarium gloves, like West Chester 2920, may be appropriate if dealing with especially large colonies. Eye protection, like the 3M Cool Flow mask, is also appropriate if handling the zoanthid coral outside of the tank.

    Placement And Temperament In The Aquarium

    Even though zoas are one of the most dangerous animals on this planet, they’re not aggressive to other corals in the tank. However, there are a few potential problems that you might run into with having zoas in your aquarium outside of aggression.

    The first zoa problem you might have is rapid growth. Some zoas take months to start propagating and then start growing new heads every other day. This is great if you plan on fragging them, but is a pain if they start growing over your other corals and/or shading out large portions of the tank.

    The other main problem with zoas is that they can grow so large and thick that they start to develop dead zones where nutrient transport suffers and algae starts to grow. This will require moving the colony to a higher area of flow, buying new equipment, fragging the colony, or routinely removing debris with a turkey baster.

    Are They Easy To Keep?

    Though zoas are regarded as one of the easiest corals to keep in the hobby, they are actually the most difficult for many hobbyists. Experienced keepers have zoas that close for months on end without any explanation.

    These corals are difficult because each morph requires different lighting, flow, and water parameters.

    Corals and Lighting

    In general, zoas need moderate lighting (50-150 PAR), but this isn’t to say that hobbyists haven’t kept them way below and way above these numbers.

    As mentioned before, zoas are found in extremely shallow waters that are sometimes left exposed when the tide goes out. This means that colonies are receiving tons of light without any moisture relief for extended periods of time. So why do most zoas melt once placed under high lighting then? Well, zoas is placed under high reef lighting with the right steps.

    The secret to getting zoas to be happy under high lighting is proper acclimation. These corals need plenty of time to adjust to new conditions and hobbyists move them up in the tank too quickly or too often. Instead, start them at the bottom of your tank and gradually move them up over the course of several months.

    Great For Zoas
    AquaIllumination AI Prime

    The AI Prime is a great overall all light for Zoas. It contains the correct, PAR, spectrum, and spread needed to get you going with growing your own Zoa colony!

    Buy On Amazon Click For Best Price

    At this point, you may find that your zoas are actually happiest right next to your most demanding small polyp stony corals (SPS). Or, you might find that they start to melt right away with such high light.

    For the most part, zoas can also be kept in very low lighting. If you find that your corals are starting to extend upwards, they are probably stretching for light. This is a good indication that it’s time to move them up in the tank.

    Otherwise, leave them where they are and try not to move them around too much! Zoas are very temperamental and are used by many hobbyists as a warning coral for being the first to show distress when something is wrong in the tank.

    Flow

    Getting the water flow right for your zoas is even more challenging than getting the lighting. Again, your corals will let you know they’re not happy with the conditions they’re in.

    As mentioned before, these corals can start to develop dead zones once the colony becomes larger. You will want to make sure that water is being moved past all parts of the coral to ensure that nutrients are being delivered and detritus doesn’t start to build up. However, too much flow can cause your zoas to retract and not open for extended periods of time.

    Start by placing your zoas in moderate flow and watch how they react. Move accordingly, but never too much at one time. An adjustable aquarium wavemaker is a great way to generate flow and adjust as needed.

    Water Parameters

    Here is where zoas can get very tricky. Though standard saltwater conditions are recommended for all zoa varieties, ideal parameters aren’t what some zoas want.

    Experienced keepers have found zoas to be very sensitive to pH, alkalinity, and nitrate levels. This is very frustrating as one colony of zoanthids is thriving in your tank while the other is quickly melting away.

    Unfortunately, this is mostly a game of trial and error of seeing which zoas do best in your system. It is not recommended to change conditions in your tank because of only one coral.

    Care And Maintenance

    Once you manage to establish a colony of zoas in your aquarium, then there’s not too much work to be done afterward.

    These corals is kept in very low-tech tanks with hang on the back filters, canister filters, or sump filtration. They pull most of the nutrients they need from the water column, so a cleaner tank might not benefit from a protein skimmer.

    If keeping larger colonies, then brush off algae as it occurs and regularly flush with water to keep detritus from building up.

    Feeding

    Zoanthids do not need to be fed. These corals get most of their nutrients through fish waste as well as other detritus that is already available in the water column.

    Most hobbyists like to supplement with regular broadcast feedings or more concentrated feedings for enhanced color and faster growth rate. If wanting to feed your coral, do not try to feed larger foods. Instead, feed specific coral foods and other microorganisms, like phytoplankton.

    What Are Good Tankmates?

    Zoanthids are a great choice for any reef setup. This means that they can happily be housed with saltwater community fish, like clownfish, tangs, and cardinals.

    Tank Raised Clownfish

    However, zoas is temperamental and they won’t appreciate fish that might annoy them. This includes species of goby and blenny that regularly rest on rock and corals while swimming around the tank. Though these fish can comfortably be kept with zoas, there’s a chance that you find your corals closed up because your fish is using them as a rest stop!

    Similarly, larger invertebrates, like urchins and shrimp, should also be avoided for the same reasons. Large crabs and invertebrates with pincers should not be kept with zoas and colonies have been known to disappear overnight due to a hungry cleanup crew.

    Of course, do not keep zoas with any fish that are known to eat corals, like angelfish and parrotfish. This is especially dangerous if your zoa ends up containing palytoxin and releases it into the water column once injured.

    How To Propagate

    Propagating zoanthids is a little intimidating as the threat of palytoxin is always looming. As long as you take precautions with safety equipment, wash your hands, and make sure you don’t have any open wounds, then propagating zoanthids is easy and becomes necessary when colonies start becoming too big.

    A few tools are recommended for propagating zoanthids, namely bone cutters for cutting rock and a scalpel or scissors for separating the coral from the rock and/or from the rest of the colony. Here is a great video by ReefAmorous showing how to frag Zoas. A simple breakout summary is below.

    1. First, break up the rock that the zoas are attached to into smaller, more manageable pieces. If only taking a small part of the colony, then simply move to the next step.
    2. Next, use your scalpel or scissor to carefully peel off some of the colony. You will want to be wearing eye protection during this part as liquids can squirt from the cut.
    3. These pieces can then be attached to a frag plug with super glue. Don’t be overly concerned with keeping the frags out of water for too long, but try to get them submerged as soon as possible.

    How Do You Get Zoas To Spread On Their Own?

    Zoanthids are one of the fastest-growing corals in the aquarium hobby. These corals are asexual and one polyp can quickly turn into 50 over the course of a few months.

    There is no secret to getting zoas to quickly reproduce. Like any coral, stability is key. If your zoa polyps are fully extended every day and tank conditions are good, then it’s only a matter of time before your zoa colony expands.

    Fragging will help spread that colony to other parts of the tank, but the healing process might delay the growth momentarily.

    How Fast Do They Grow?

    Even with perfect conditions, zoanthid coral growth rates will vary. Experienced keepers have recorded one new polyp every few days while others go months without any sign of growth.

    Zoanthid coral growth is not fully understood, and the rate seems to change tank to tank.

    How To Propagate

    Zoas is found in any specialized local fish store. One of the biggest struggles if you are a big coral collector is finding all the designer names locally. Your best bet to find the new and best looking designer zoas is to purchase them online from specialty coral sellers or through auction sites.

    Is the Zoanthids. The Soft Coral Superstar (A) Right for You?

    Before you add a zoanthids. The soft coral superstar (a) to your tank, it’s worth asking whether this species actually fits your setup and your goals. Here’s a quick breakdown to help you decide.

    This species is a good fit if:

    • You have an established reef tank with stable parameters. New setups are not the place for corals.
    • You’re committed to regular water testing and maintenance. Reef tanks require more attention than freshwater.
    • Your lighting and flow match what this coral needs. Not all corals want the same intensity.
    • You understand that coral growth is slow. Patience is not optional in reefkeeping.
    • You have a plan for fragging or managing growth if the colony expands beyond its space.
    • You’re not adding it to a tank with known coral pests. Prevention is easier than treatment.

    If most of those points line up with your setup, the zoanthids. The soft coral superstar (a) is worth serious consideration. If several don’t, it’s better to choose a species that matches your tank now rather than trying to make it work.

    How the Zoanthids. The Soft Coral Superstar (A) Compares to Similar Species

    Want easy, fast-growing coral? Start with green star polyps or zoanthids. Want a challenge? Get SPS and invest in dosing equipment.

    Choosing between similar species is tricky. Here’s how the zoanthids. The soft coral superstar (a) stacks up against some common alternatives.

    The zoanthids. The soft coral superstar (a) occupies a specific niche in the aquarium hobby, and direct comparisons really depend on what you’re looking for. In my experience, the most common question people ask is whether they should choose the zoanthids. The soft coral superstar (a) or something similar that’s more widely available. The answer comes down to three things: tank size, water parameters, and what other fish you’re keeping. If your setup matches what the zoanthids. The soft coral superstar (a) needs, it’s hard to beat. If not, there are alternatives worth exploring.

    Closing Thoughts

    Zoanthids is the easiest coral you’ve ever kept or one of the hardest. These soft corals don’t require any special care, but their preferred conditions aren’t straightforward as they vary with different morphs. They are a great addition to any reef tank, and we hope that you will consider placing these beautiful corals in your own. Leave us a comment below if you have any questions about zoanthids or how they is cared for properly!

  • BUCEPHALANDRA – Buying, planting and caring for your first One

    BUCEPHALANDRA – Buying, planting and caring for your first One

    This plant will grow in almost anything. But if you want it to actually look good, you need to understand what it wants. The gap between alive and thriving is lighting, nutrients, and consistency.

    Any plant stays alive. Making it look good takes understanding.

    Are you looking to buy your first Bucephalandra plant? Look no further! This blog post will show you how to find the best one for your needs and care instructions. You’ll learn about what they are, where to get them, what kind of light they need, and much more! We hope this helps make choosing a new plant that much easier.

    Species Overview

    Scientific Name Bucephalandra spp.
    Common Names Buce plant, Buceps
    Family Araceae
    Origin Borneo, Southeast Asia
    Skill Level Easy, moderate
    Lighting Low, 40 PAR (Umols)
    Tank Placement Foreground, Midground
    Flow Rate Moderate, High
    Temperature Range 71-79ยฐF
    Height 1-10 inches
    pH Range 6.0 – 8.0
    Propagation Rhizome division
    Growth Rate Slow growth rate
    Feed Type Column or Root Feeder
    CO2 Requirement No, but recommended

    Origins And Habitat

    In nature, the Bucephalandra species are mostly found growing densely over stones and aquarium rocks. They grow in and along streams and rivers in tropical forests in Borneo.

    In these habitats, the plants are flooded in the rainy season, growing submerged. In the dry season, water levels drop and they continue to grow emersed. Bucephalandra, or buce plants as they are often known, are great low-maintenance plants for beginners or more experienced aquarists. These tough little plants come in a huge range of cultivars, but all are small, slow-growing aquarium plants.

    What Do They Look Like?

    How Does Bucephalandra Look Like

    Bucephalandra species are broadleaf flowering plants that grow from a creeping rhizome that tend to run across rocks and driftwood. Although they are pretty new to the hobby, there are already a huge variety of cultivars and varieties available.

    The shape and color of the leaves vary, but the upper sides tend to be glossy, and sometimes even iridescent. The edges of the leaves in the different varieties is wavy, like as in ‘Wavy Green’ or flattened and leaf shape varies from teardrop-shaped, elongated, to rounded.

    The size of the leaves varies a lot as well, depending on the species or variety you have. They measure anything from less than a half an inch long in a type like ‘Black Tears’ to leaves of about 3 inches long in ‘Green Broad Leaf’.

    The undersides of the leaves is spotted in different colors and are often interestingly marked in red, yellow, or white. The tops of leaves can also have interesting white spotting. For many of these species, their new leaves may have strong coloration.

    These plants vary in size with some species staying lower than an inch in height, and others reaching over 2 feet. Most plants in the hobby measure between 1 and 10 inches tall.

    Placement And Lighting

    Being small rhizome plants, buce plants look great when grown rooted in the foreground or on hardscape elements in the midground of the planted aquarium. They are adapted to life in flowing water and this makes them an ideal choice for aquascapes with some current, like hillstream biotopes for example.

    Bucephalandra species grow from a creeping rhizome where branches readily emerge them. This new growth will be bigger than the original.

    Due to how their new growth and new leaves emerge, they should not be planted in the aquarium substrate. It is possible to grow these aquatic plants rooted, provided only the root system is covered by the gravel.

    These plants is grown attached to aquarium rocks or driftwood and will attach themselves better to surfaces that are heavily textured. Until they are properly attached, they is secured with thread or glue.

    Being a slow-growing broadleaf aquarium plant, the buce plant is vulnerable to algae growth on the leaves, which can happen quickly in a tank with strong planted aquarium lighting and unbalanced parameters. Buce plants are really easy to care for if grown under low light or shaded out by other aquarium plants or hardscape features.

    What Are Good Tank Mates?

    Bucephalandra plants are suitable for most species only and community freshwater tropical aquariums. These are hardy plants that most fish will not damage or eat.

    Good Tank Mates

    Good fish species to keep with these aquatic plants include those that enjoy slightly cooler water with a good flow. Hillstream loaches for example may do well with this aquarium plant.

    That being said, Bucephalandra is quite an adaptable group and will survive in warmer conditions with a lower flow as well. As a plant with a low growth rate, buceps can easily be overtaken by algae.

    Grazers like Otocinclus catfish, Stiphodon gobies, and siamese algae eaters make great tank mates because they will actively clean the surfaces of the leaves. Inverts like Amano shrimp and nerite snails will also help to keep the leaves clean.

    Schooling fish like cherry barbs and cardinal tetra do an excellent job of contrasting the wavy green leaves of the buce plant.

    Fish Species To Avoid

    Buce plants are pretty tough and hardy specimens in the aquarium. It is probably best to avoid keeping them with large fish like oscars that might disturb them, especially if you plan on growing them rooted.

    As a plant that does well in aquariums with a good flow, avoid keeping fish like fancy goldfish or bettas that are not strong swimmers. Buceps are one of the best options for African cichlid and goldfish tanks but this doesn’t mean they’re completely immune to these plant-eaters.

    If you do want to grow buceps in a cichlid or goldfish tank, be sure to plant a few plants (the more the better), to spread out the damage and give the plants a chance to recover.

    Feeding and Fertilization

    How Much And How Often To Feed

    Being a slow-growing plant with a low light demand, bucephalandras don’t necessarily need to be fed to maintain good health. Unused nutrients in the water will tend to promote algae growth that the plants may not be able to compete with.

    If you wish to grow these plants under more high-tech conditions with stronger lighting and CO2 injection, light feeding in the water column will help these aquatic plants grow faster in these conditions. An all in one aquarium fertilizer like APT Complete is great to use for feeding plants in aquascapes.

    Editor’s Choice!


    APT Complete

    Editor’s Choice

    Made by an aquascaper for aquascapers. This is the best all around aquarium plant fertilizer on the market. Marco and micronutrients in one bottle!

    Use Coupon Code ASDComplete for 10% off your order!


    Click For Best Price


    Buy On Amazon

    If planted in coarse gravel with good water flow to the roots, water column feeding will still provide all the nutrients they need.

    Types

    There are at least 30 different plant species in the Bucephalandra genus and the taxonomy of plants in the aquarium trade is quite confused. Most buce plant species do not have common names.

    There are a huge variety of trade names out there, but the following types are all popular choices:

    • Bucephalandra sp. ‘Brownie Ghost’
    • Bucephalandra sp. ‘Brownie Brown’
    • Bucephalandra sp. ‘Titania’
    • Bucephalandra pygmaea ‘Green Wavy’
    • Bucephalandra sp. ‘Kedagang’
    • Bucephalandra sp. ‘Black Pearl’
    • Bucephalandra sp. ‘Green Tears’
    • Bucephalandra sp. ‘Super Blue’
    • Bucephalandra sp. ‘Deep Blue’
    • Bucephalandra sp. ‘Rainbow Marble’

    There are a large variety of Buce Plants available. They are best illustrated by a video. This one by iConic Scape is a great slide show of over 20 varieties to see!

    Bucephalandra grows slowly. If you expect fast results, you will pull it out before it establishes. Patience is the only care requirement most guides forget to mention.

    Bucephalandra Care Guide

    Bucephalandra is similar in its care requirements to the more familiar anubias species. These are not difficult plants to grow, provided you maintain suitable and stable water parameters.

    Even under ideal conditions, buce plants are always going to be slow-growing. This makes for a great, low-maintenance option for a planted tank.

    Planted Tank Parameters

    Bucephalandras are not that particular about water parameters, as long as they are stable. Ideal water temperatures are on the cooler side, but these aquatic plants do well in standard tropical freshwater aquarium temperatures between 71-79ยฐF. If you live in a colder climate, consider purchasing a quality aquarium heater.

    If you do run a CO2 system in your tank, begin injection 2 hours before your lights start up and keep your carbon dioxide levels below 30ppm.

    Tank size is not very important because these plants don’t get very big and have very slow growth rate. For this reason, bucephalandra plants are great low-maintenance options for nano tanks of about 5 gallons or more, provided you can keep your water parameters stable.

    Water Quality

    Although bucephalandra plants are easy to keep, they do require good water quality. A buce plant grown in an uncycled, or overstocked aquarium with unstable water parameters is likely to melt.

    There is loads of information out there on the aquarium nitrogen cycle, but without going into too much detail, a cycled aquarium is one that has an established colony of beneficial bacteria living especially inside the media of its filter.

    These good bacteria convert the ammonia in fish waste and uneaten fish food into nitrites and then nitrates which are much safer for plant and animal life. It takes a little while to get a new aquarium cycled, which is why you shouldn’t stock an uncycled aquarium for at least a month or so.

    Filtration

    Adequate filtration is key to success when growing any bucephalandra species. Good filtration will provide the plants with the flow they prefer as well as assist in maintaining good water quality by maintaining a healthy colony of beneficial bacteria.

    Use a filter that creates a good amount of movement in the tank, and processes the volume of your tank at least 4-6 times in an hour. For mass planted tanks, it is best to consider a high end canister filter as plant waste will produce ammonia and added waste matter that a good filter will pick up.

    Flow

    Bucephalandras are naturally adapted to grow along streams and rivers with a decent amount of flow, particularly in the rainy season. For this reason, it is best to keep them in an environment with a good flow rate to mimic these conditions. The lily pipe is a great way to distribute flow across the aquarium.

    Aquarium Maintenance

    Testing Water Conditions

    Buceps are sensitive to poor water quality and changing water parameters. For this reason, testing water conditions regularly is definitely recommended when growing these aquarium plants.

    Pick up some liquid aquarium test kits and start by testing your water before buying the plant. In this way, you can figure out whether your parameters are good.

    Record the test results and compare them with your findings the next time you test. By doing this, you’ll be able to figure out how stable your water conditions are.

    Retest your water parameters before and after a water change to see how much the conditions are changing and decide whether your water changes are frequent and or large enough. Remember, the smaller your aquarium and the more heavily stocked it is, the more water you’re going to need to change.    

    How To Set Up Your Aquarium Tank

    Buceps grow really well on hardscape elements like aquarium driftwood or lava rock. You can use super glue or fishing wire to attach them.

    The best types of super glue for the job are the gel types. Another simple trick is to use a rubber band to secure the plant until it has grown roots around the feature.

    If you want to grow them rooted, coarse aquarium soil or gravel is recommended. You might want to anchor the plant to the substrate for a few weeks until the roots have had the chance to become established.

    Temporarily anchoring the plant will be especially helpful if you have a good water flow in your aquascape. If the conditions in your aquarium are suitable, the roots will grow pretty fast.

    How To Propagate

    Since bucephalandras grow from a creeping rhizome, the easiest way to propagate new plants is to divide the rhizome. It is important that each portion of the rhizome is large enough, and a good minimum size to aim for is about 1.5 inches.

    Health And Disease

    Signs Of Health

    Even though these plants have a slow growth rate, healthy specimens should produce a new leaf structure or two every few weeks or so. Another sign of a healthy buce plant is flower production. The flowers are pretty short-lived when grown submerged, however.

    Signs Of Ill Health

    Unhealthy plants will be limp and the leaves will have a light brown coloration. These plants will melt back or become covered in algae.  

    Common Health Issues And Treatment

    Algae growth on the leaves is a common problem in poor water quality because bucephalandra is a slow growth rate plant and their wavy green leaves have large surfaces.

    If your plants have lost the fight against algae issues, it is possible to treat them using a product like Seachem Excel or hydrogen peroxide, but remember that some algae in the aquarium is needed if you have algae-eating livestock. Prevention is definitely better than cure though so be sure to figure out the cause and take steps to avoid the algae growing back.

    Another common problem with buceps is melt. This often happens just after planting or when moving plants between tanks with different parameters. Melt is less likely to be a problem in tanks with good water flow and added CO2.

    Other common causes for melt are unstable water conditions in overstocked, overfed, or uncycled aquariums. Probably the easiest cause of melt to treat is when they are rooted with the rhizome buried. Adjust the position of these plants so that the creeping rhizome is clear of the substrate and prune out any melting growth before it fouls your water.

    Plant Pests

    The safest way to add a new bucephalandra to your aquascape without introducing any unwelcome pests is to purchase tissue culture specimens. These plants are grown in a sterile, pest-free lab environment.

    If you get a potted plant from your local fish store or a cutting from a friend, be sure to inspect the plant carefully for any snails that is hiding on its leaves. Remove anything you find and also prune out any unhealthy or badly damaged leaves to avoid them melting in your tank.

    Dipping your buceps in a very mild bleach solution (20 parts water: 1 part bleach) is another option, just take care not to overdo it and burn your plants. Take care to rinse the plant very well after treatment.

    Where To Buy

    Although Bucephalanda is a fairly new plant to the hobby, it is quite widely available. You are not going to find them in chain pet stores as a result. They are only going to be available at local fish stores and online. Often the plants you buy at your local fish store have been grown emersed and do not look quite like they will when established underwater, making selecting a specific type or species even more confusing. Buying online ensure you get the correct plant variety, and when it comes to online, there is one place I highly recommend.

    That would be a store with the very name Buce in it, Buceplant. Their business was founded by a local aquascaping who loves Buce plants so much that he created a store so there is a reliable source of high quality and less expensive Bucephalandra. If you are shopping online, this is the destination to get these wonderful plants.


    Bucephalandra

    Bucephalandra is a slow-growing plant that’s perfect for anyone looking to grow their first aquatic plant. They are great for attaching to hardscape


    Click For Best Price


    Shop Tissue Culture

    Wherever you end up buying your buceps, make sure you get them from a reputable dealer because the collection and trade of wild buce plant species is a risk to wild populations and their habitat.

    FAQS

    Are they easy to grow?

    The bucephalandra plant species are easy to grow in low-tech aquariums. The best colors and plant growth rate is achieved with stronger light and CO2 injection and this is where more experience is required to limit algae growth on the leaves.

    Can they grow on wood?

    Bucephalandra is an ideal plant for growing on wood. You will need to attach the rhizome to the wood in some way until the roots have become established enough to keep the aquarium plant anchored.

    Where do they grow?

    In nature, the Bucephalandra species grow in and along shallow streams and rivers in the tropical jungle environments of Borneo, Southeast Asia.

    Does Bucephalandra need substrate?

    Bucephalandra does not need substrate and grows well as an epiphyte. These plants is attached to the hardscape using various methods and will gather their nutrients from the water column.

    Why is this so expensive?

    The price of bucephalandra plants be pretty high because they are such slow-growing plants, meaning growers can’t produce a lot of plants for the market. Fortunately, authorities have also clamped down on illegal harvesting of wild plants from their natural environment, which is eliminating cheap illegal exports.

    Can they grow emersed?

    Buce plant species grow well emersed and are great plants for humid ripariums and paludariums as well. Buceps may take slightly different growth forms when grown emersed and they tend to flower better.

    Closing Thoughts

    As far as low-maintenance aquarium plants go, bucephalandra is pretty hard to beat. They might cost a little more, but these plants offer a great alternative to the similar but more common Anubias nana.

    We hope this blog post has helped you learn more about the Bucephalandra plant, and that it’s made your decision to purchase one a little bit easier. If there are any questions we didn’t answer or if something isn’t clear enough for you, please leave us a comment below! Thank you so much for reading our blog – we appreciate your feedback and time!


    ๐ŸŒฟ Want to learn more? This article is part of our complete Planted Tank & Aquascaping Guide. Your ultimate resource for aquarium plants, aquascaping styles, substrates, and more.

  • How To Care For Your New Duncan Coral

    How To Care For Your New Duncan Coral

    After growing corals in my own reef setups, if your parameters are not stable, this coral will not survive the first month. Corals do not die from wrong numbers. They die from unstable numbers. The difference between a thriving reef and a dying one is consistency, not perfection.

    Stable mediocre parameters beat perfect parameters that swing. Every time.

    Fellow reefers, we have all been there. We are so excited to buy a new coral and the excitement is quickly followed by fear that we won’t know how to care for it properly. Fortunately a Duncan Coral is one of the easier LPS corals to keep in the hobby. However, they are a coral and require proper care. And being an LPS corals there are other parameters that come into play when it comes to growing a healthy colony of Duncans.

    We’re going to go over the basics of how to care for your Duncan Coral. When you are done reading this post, you should have all that you need in order to keep your coral happy and healthy in its new home. Let’s get started!

    Species Overview

    Scientific NameDuncanopsammia axifuga
    Common NamesDuncans (abbreviated from their genus name), rarely referred to as the whisker coral or daisy coral
    FamilyDendrophylliidae
    OriginAustralia
    Common ColorsPurples, blues, greens
    Care LevelEasy
    TemperamentNot aggressive
    LightingLow-High (<50-200 PAR)
    Tank PlacementBottom, Middle, Top
    Flow RateModerate-High
    Temperature Range76-82 degrees F
    pH Range8.0. 8.4
    Salinity1.025 or 35 PPT
    Alkalinity8. 12 dKH
    Calcium Level350. 450 PPM
    Magnesium Level1250. 1350 PPM
    PropagationCutting/Fragging

    Origins And Habitat

    The Duncan coral is the only species within the Duncanopsammia genus and originates from the waters surrounding Australia. More specifically, these corals is found off the western and northern coasts of Australia and as far away as the South China Sea.

    There, these corals thrive in many conditions but prefer sandy areas. Once established in large colonies, it is difficult to see any of their branching skeleton. Duncan corals are a recent addition to the aquarium hobby and have only been available for about 15 years.

    What Do Duncan Corals Look Like?

    What Does A Duncan Coral Look Like

    Though duncan corals might look fleshy from above, they are actually a type of large polyp stony coral (LPS). This means that each polyp is supported and sheltered by a hard calcium carbonate skeleton.

    Duncan corals are an easy coral species to identify if you know what you’re looking for. Seen in tight colonies, these corals have wide polyp heads surrounded by tentacles with a mouth in the center. Some Duncans may have longer tentacles than others, but they’re relatively short. The center of the polyp stays under a few inches wide across.

    These polyps are a mixture of purples, blues, and greens, though these colors might change and intensify under certain lighting. Almost all Duncans have a blueish-green center with light pink or purple tentacles. These tentacles are harmless to fish and other corals, though Duncans should be given their own space within the aquarium.

    It is believed that this Duncan skeleton is much stronger than other LPS. The Duncan coral is a branching species, which means that each polyp head will extend from its own individual section of skeleton.

    Though there is only one known species of this coral, the degree of branching can vary greatly between specimens. Some Duncans have tight and compact branching whereas others have very long tree-like branches where each polyp is very far from the next.

    In general, the Duncan coral appearance is likened to elegance corals (Catalaphyllia jardinei) and Euphyllia spp., like hammers and frogspawns. However, Duncans are to be even easier to keep than those and are accepted as one of the best beginner corals in the hobby.

    Are They Easy To Keep?

    Duncan corals are to be one of the easiest LPS corals to care for and are great for beginners. As we’ll discuss, these corals can adapt to a variety of water conditions and tank setups.

    That being said, Duncan corals are not the most popular coral to have in your tank. This is because they is slow growing, uninteresting to look at when compared to other corals, and take up a lot of space in the aquarium.

    If you don’t want to spend a fortune on coral if you’re just starting out, then Duncan corals are a good choice! Give them some time in your tank and you might even grow a larger colony that is traded for more desirable species.

    Placement And Temperament In The Aquarium

    Duncan corals are extremely adaptable and can live in most conditions if acclimated properly. Hobbyists have kept Duncans at the bottoms of their reef aquariums in the shadows, or right next to Acropora small polyp stony coral (SPS) at the highest PAR values.

    Though these corals is placed anywhere from low to high reef lighting, their color doesn’t change with intensity. Instead, Duncan color is highly influenced by the spectrum of the light being used; they might show more neon variations under actinic lighting than a light focused in the other spectrums.

    Duncan corals do need good flow and should be placed in a medium to high current. This is because they are very susceptible to being taken over by algae due to stagnant areas in the colony; they are also voracious eaters and will want to catch any available food in the water column.

    If flow allows, these corals is placed on the substrate or on the rockwork. Placement doesn’t need to be cautious of other corals as Duncans are completely harmless and cannot sting. That being said, they can easily be attacked by more aggressive corals which will cause them to close and eventually die.

    Duncan corals can also quickly shade out other species below, so make sure you allow your Duncan enough room to grow to full size.

    Care And Maintenance

    Duncan Coral Care

    Duncan corals are very low maintenance and are able to sustain themselves with good lighting, flow, and available nutrients. They can tolerate relatively large swings in water parameters but do best in optimal water conditions.

    Water Parameters

    Like most other corals, Duncans need stable water parameters. Most importantly, they need some nitrate to be available in the aquarium in order to grow and maintain their color.

    Too clean of an aquarium will not allow your Duncan corals to thrive, and will be reflected in other coral development as well. Because these corals are LPS, they need ample levels of calcium and stable alkalinity in order to form their skeletons.

    If keeping larger colonies of Duncan or if placed in a mixed reef aquarium with SPS, then it may be necessary to dose those depleted nutrients. Otherwise, regular feedings and water changes will be enough to keep nutrients available.

    Duncan corals do not require any special filtration and is kept with a hang on the back filter, canister filter, or sump filtration. A protein skimmer is not necessary, especially if the system does not have many nutrients available.

    Feeding

    One of the best features of Duncan corals is their willingness to eat almost anything you give them. Unlike many other LPS, Duncans are actually very willing to use the mouth at the top of their polyp head to ingest both small and large pieces of food.

    Duncan corals is fed an assortment of foods, including mysis shrimp, krill, pieces of seafood, as well as coral-specific powder formulas and pellets. These corals are voracious feeders and will accept these foods when offered. However, in order to keep nutrients down, it’s only recommended to target feed about one to two times per week.

    Duncan corals will readily accept food that is placed near their mouths, though this can take some time to move the food and digest it. In that time, fish and invertebrates may steal the food and annoy the coral in the process.

    The best way to stop this from happening is to broadcast feed at the same time to stop them from stealing the food. A great coral food to use to feed Duncans would be Reef Roids.

    What Are Good Tankmates?

    Duncan corals are not able to defend themselves like most other corals. The only thing they can do is retract if something starts to walk over them or attack them.

    This is especially important to keep in mind when choosing other corals to place around your Duncan. Aggressive corals with long sweeper tentacles, like favia corals (Favia spp.) and torch corals (Euphyllia glabrescens), should be avoided or placed far away from your Duncan colony.

    Otherwise, duncan corals is kept with a variety of reef-safe fish and invertebrates. Some options include:

    Gobies and blennies are also on this list but have been known to excessively swim and walk over Duncan corals that is placed on the substrate. Invertebrates, like species of cleaner shrimp, should also be avoided for this same reason as they can cause your corals to be closed more than you would like.

    Other invertebrates with pincers and an appetite for fleshy corals should never be placed in a reef tank either. This includes emerald crabs (Mithraculus sculptus) and banded coral shrimp (Stenopus hispidus).

    Problems

    For as easy as Duncans is for some hobbyists, they will be as temperamental as zoas! For the most part, though, solving Duncan coral problems is straightforward and a matter of adjusting lighting, flow, or pests.

    Why Is They Not Opening Up?

    The most common problem to have with Duncan corals is the failure for them to open or extend completely. Don’t panic though! Duncan corals are very easy to save if things go wrong and it’s just a matter of looking at what is causing the problem.

    Lighting and flow

    If you have a relatively new Duncan coral or just recently rearranged your saltwater tank, your Duncan might not be happy with its new placement.

    Duncan corals can tolerate most light intensities, even when next to SPS, but this does not mean that they can go from very low light to bright light without any acclimation. If you find that your Duncan coral is not extending, try moving it away from the light. Slowly work back up towards that level in the tank instead.

    The same solution goes for water flow. Duncans do best in moderate to high flow. Not enough flow can cause algae to grow and irritate the coral while overly high flow can start to cause tissue damage. You want to find a happy medium between these two extremes; a good placement would bring soft movement to all tentacles of the colony. Work with adjustable wavemakers or gyre (like the IceCap Gyre) to make things easier to adjust in your aquarium.

    Best Value
    IceCap Gyre

    Best Value

    Breakthrough technology at a reasonable price. The IceCap Gyre is a great deal!

    Click For Best Price Buy On Amazon

    New growth

    Believe it or not, a closed Duncan can actually be a good sign!

    Sometimes these corals will close up for a few days while they develop new heads. These heads will be near the base of the polyp and lighter in color. If you notice these and hadn’t seen them before, then your coral is happy and growing!

    If you don’t see any new heads, check out other reasons as to why your coral is closed.

    Acclimation

    Though Duncans can quickly adapt to new conditions, they still need to be acclimated like all other corals, invertebrates, and fish.

    Most hobbyists don’t feel the need to drip acclimate their corals, but a temperature match is definitely recommended. A coral dip or quarantine period is also strongly recommended before adding the piece to your tank to avoid disease and pest introduction.

    Before placing your coral in its final spot in the tank, it is best to leave it on the substrate or on a frag rack for a couple of weeks so that it can adjust to your tank’s parameters. Then, slowly move the frag to the desired placement.

    Pests

    Lastly, pests is the cause of your angry Duncan coral. If something like Aiptasia or hydroids start growing on the skeleton of your Duncan, it can easily irritate the polyp, causing it to start retracted.

    Pests is hard to see and you might need to take a magnifying glass to the side of the tank, but your coral should make a full recovery once the pest has been removed.

    Solutions

    Most Duncan coral problems are straightforward, though it’s always scary to have to handle your corals.

    If you can’t find any reason as to why your Duncan corals is closed, try enticing them to open. This is done with target feeding to encourage your coral to eat. Try not to do this too much, though, as you can irritate the coral and build up nutrients within the tank.

    How To Frag

    Duncans are one of the easiest and most forgiving species of coral to propagate. As a branching species of large polyp stony coral, simply use a bone cutter or electric saw to cut the skeleton below the flesh.

    Fragging is the best way to control Duncan growth or to spread the coral around the tank. Fragging can also be helpful if one section of the colony is damaged or has been infected by pests.

    Here is how to easily frag your Duncan colony:

    1. First, remove the coral from the tank. Try to keep the coral submerged in water as much as possible.
    2. Carefully cut the coral with the bone cutter or electric saw between where the flesh starts and the branching begins.
    3. Attach this frag to a frag plug with superglue (cyanoacrylate).
    4. Dip your coral. Dipping your Duncan in a coral solution or iodine is highly recommended to promote fast healing, but this is not entirely necessary.
    5. Put the frag back into the tank, preferably on a frag rack or in the substrate; make sure that the coral is secure and won’t fall over.
    6. Gradually more the coral up to its final spot in the tank or rehome it to another hobbyist.

    If you are looking for a more visual example, our Aussie friends at Gallery Aquatic TV give a great example below on how to frag these Aussie originals.

    Closing Thoughts

    While Duncan corals might not be the most popular LPS coral to have in the reef aquarium, these beginner corals bring movement to the display. They is placed in almost all lighting intensities with acclimation, which can fill up empty spots in the aquarium. Duncan corals do require moderate to high water flow and will close for extended periods of time if conditions are unideal. However, they are very easy to frag and one of the most forgiving species to propagate.

    We want all Duncan owners out there to know how much we appreciate them for taking the time to read this article. Leave us a comment below if you’ve got any questions about caring for your own Duncans!


    ๐Ÿ“˜ Want to learn more? This article is part of our complete Saltwater Fish & Reef Guide. Your ultimate resource for marine fish, coral care, reef setup, and more.

  • Anubias Nana Care guide: The Beginner’s Aquarium Plant

    Anubias Nana Care guide: The Beginner’s Aquarium Plant

    This plant will grow in almost anything. But if you want it to actually look good, you need to understand what it wants. The gap between alive and thriving is lighting, nutrients, and consistency.

    Anubias nana grows on rocks, driftwood, and patience. Bury the rhizome and you have killed it.

    Any plant stays alive. Making it look good takes understanding.

    Table of Contents

    The Anubias Nana is sold as an easy plant, but easy does not mean neglect-proof. Wrong lighting, wrong substrate, or wrong CO2 approach will turn this plant into a melting mess. After growing aquarium plants for 25 years, I have learned what actually works and what the packaging never tells you.

    Healthy plants grow. If yours is not growing, something fundamental is off.

    This plant thrives when given consistent conditions over weeks and months. Quick fixes do not work in planted tanks. Patience and consistency are the real requirements.

    A well-grown aquarium plant does more for water quality than any filter media you can buy.

    Anubias nana, or to use its more technical name, Anubias barteri var. nana has to be one of the best freshwater plants for beginners. These great-looking plants for freshwater aquariums are really forgiving and is grown without powerful light or CO2 injection.

    If you’re new to the hobby of keeping plants alive in an aquarium, you may be unsure of which plant is best for your first. If so, Anubias Nana is just the ticket! These hardy little plants are perfect for beginners because they tolerate a wide range of water conditions and grow slowly enough that it’s easy to keep up with their maintenance. This article will teach you everything you need to know about caring for these beautiful aquatic plants.

    What Most Care Guides Get Wrong About Anubias Nana

    Want the easiest plant? Get java fern or anubias. Want a carpet? Get dwarf sagittaria. Want the best balance of easy and impressive? This plant delivers.

    Most guides treat anubias nana like a plug-and-play plant. Just drop it in and it grows. In my experience, that oversimplification leads to a lot of failed attempts. Lighting matters more than people think, and placement is critical. I see people making the same mistakes over and over: burying the rhizome, placing it in too much direct light, or expecting instant growth. Getting the basics right from the start saves you weeks of watching your plant slowly deteriorate. Even easy plants need consistent care and some baseline nutrition.

    The Reality of Growing Anubias Nana

    Melting after purchase is normal. Most aquarium plants go through a transition period where emersed-grown leaves die off and submersed growth takes over. This is not a sign of failure. It is the plant adapting. Do not pull it out or move it during this phase.

    Lighting is not one-size-fits-all. Too little light and the plant grows leggy or stops entirely. Too much light without CO2 supplementation causes algae explosions. Match your lighting to your CO2 and fertilization strategy.

    Nutrient deficiencies show up in the leaves. Yellow leaves mean iron or nitrogen deficiency. Holes mean potassium deficiency. Black spots mean phosphate issues. Learning to read your plants saves you from guessing.

    Biggest Mistake New Owners Make

    Cranking up the light intensity without adding CO2 or fertilizers. High light without nutrients does not grow plants faster. It grows algae faster. Balance your light, CO2, and nutrients together or keep all three low.

    Expert Take

    If your plant is not growing, check your lighting duration and nutrient levels before changing anything else. Nine times out of ten, the problem is one of those two factors.

    A Brief Overview Of Anubias nana

    Scientific NameAnubias barteri var. nana
    Common NamesDwarf anubias, nana anubias, petite anubias
    Family NameAraceae
    OriginCameroon, equatorial West Africa
    Skill LevelEasy
    LightingLow to medium light, 40-125 PAR (Umols)
    Tank PlacementForeground or Midground
    Flow RateLow, Moderate
    Temperature Range72 – 82 F
    Height6 inches
    pH Range6-7.5
    PropagationRhizome division
    Growth RateSlow
    Feed TypeColumn or Root Feeder
    CO2 RequirementNo

    Classification

    DivisionMagnoliophyta
    ClassLiliopsida
    OrderAlismatales
    FamilyAraceae
    GenusAnubias
    SpeciesA. Barteri var. nana (Engler, 1899)

    Origins And Habitat of Anubias Nana

    This plant was originally collected from around riverbanks near Victoria, Cameroon in West Africa. In nature, it grows wild as a semiaquatic marsh plant. It rarely grows completely submerged in the wild. It is known as an African with the moniker of “the plastic plant that grows” due to it’s dark green leaves that can make it look plastic with its leathery shine.

    What Do They Look Like?

    How Does Anubias Nana Look Like

    Anubias barteri var. nana is a highly attractive little plant that grows from a thick horizontal rhizome. They are the smallest variety in the Anubias genus that are commonly kept in the aquarium trade.

    The plants are firm in texture and the leaves, stems, and rhizome are deep green in color. This is a compact, stocky plant with rounded, horizontally arranged leaves that measure about 1.5-3.5 inches long and about 1.5 inches across. The leaves have secondary veins that are laid out diagonally from the center vein.

    Anubias nana is one of the few aquarium plants that can flower fully submerged underwater. The flowers are not particularly impressive but are definitely interesting in the aquascape. You can see an example of the flower from this video by Aquascaping the World By BM.

    Placement And Lighting

    Anubias nana is a small plant that looks great in the foreground or attached to hardscape features in the midground of the aquascape. They work best in nature-style aquascapes and look especially good when anchored to driftwood in heavily structured, tropical biotopes.

    This anubias grows from a thick rhizome that should not be covered by the substrate. The roots growing from the rhizome can, however, be set into the substrate where they will develop and anchor the plant.

    With smaller plants, this is done by carefully pushing the plant’s rhizome into the substrate until the roots are buried and then pulling the rhizome back out slowly and carefully until just the root system are covered and the rhizome is clear.

    These dwarf anubias plants can also feed from the water column, and they look great when tied to driftwood or rocks with fishing line, cotton thread, or even glued with a product like Seachem Flourish glue.

    Some growers even leave these plants to float, although they are not ideal for this. At least in my experience, when not anchored they will drift around until becoming trapped against another plant, often upside-down.

    Anubias Nana is a slow grower in a planted tank, with relatively large leaves, and low to medium light requirements. When grown under strong lighting, they will develop problems with algae growth on the leaves.

    Is the Anubias Nana Right for You?

    Before you add a anubias nana to your tank, it’s worth asking whether this species actually fits your setup and your goals. Here’s a quick breakdown to help you decide.

    This species is a good fit if:

    • You want a relatively low-maintenance plant that adds natural texture to your aquascape.
    • Your lighting is at least moderate. Even easy plants need consistent light to grow well.
    • You’re willing to provide basic nutrients, whether through root tabs, liquid fertilizer, or a nutrient-rich substrate.
    • You have a stable tank. Newly cycled tanks with fluctuating parameters can cause melting and die-off.
    • You’re not relying on this plant to solve an algae problem. Plants help with algae over time, but they’re not a quick fix.
    • You’re prepared to trim and maintain. Most aquarium plants grow continuously and need periodic pruning.

    If most of those points line up with your setup, the anubias nana is worth serious consideration. If several don’t, it’s better to choose a species that matches your tank now rather than trying to make it work.

    What Are Good Tank Mates?

    These plants work great with all sorts of freshwater aquarium fish. Because of their tough leaves, they are one of the few species for the planted tank that most herbivorous fish won’t feed on.

    Good Tank Mates

    Rasboras

    Algae eaters like otos (Otocinclus spp.), siamese algae eaters, and neon blue gobies (Stiphodon spp.) are excellent fish to keep with this plant. These little freshwater fish will actively feed directly from the leaves of the plant. They also do well with any schooling fish like tetras, cherry barbs, and Harlequin Rasboras.

    This is one of the few plants that is safely grown with goldfish and African cichlids. Even though these plants will prefer lower pH, they will do fine in the alkaline water in African cichlid tanks.

    Tank Mates To Avoid

    Even though this is one of the best plants for destructive freshwater aquarium fish species, you will still be taking a risk by growing this Anubias with fish like silver dollars and oscars. In an oscar tank, you might have better results by growing this plant attached to the hardscape rather than near the soil.

    Feeding And Fertilization

    Being a slow-growing plant that will grow in a low tech/low energy tank, fertilizing with aquarium fertilizers isn’t necessary or recommended. If you are keeping fish with your plants, the nutrients in their food and waste are likely to be more than enough for these tough little plants.

    How Much And How Often To Feed

    Fertilizing these plants is not necessary and might do more harm than good. The only time feeding is a good idea is if you keep these plants in a heavily planted tank with other fast-growing column feeders like stem plants and floating plants that will use up the nutrients and out-compete any algae growth in the system. In situations like this, rooted anubias plants might well benefit from a substrate fertilizer. It would also benefit the plants in general to use an active substrate as this releases nutrients for the plants and will soak in nutrients as bacterial colonies establish themselves.

    Different Types

    The plant commonly called Anubias nana is actually a variety of the species Anubias barteri. These plants are, therefore, most correctly calledby the name Anubias barteri var. nana.

    There are a few other varieties of this species, all of which grow to a larger size and height than nana. Without going into too much detail, Author Christel Kasselmann, in his book, Aquarium Plants describes the following other closely related anubias barteri species:

    • Anubias barteri var. barteri ‘coffeefolia’
    • Anubias barteri var. angustifolia
    • Anubias barteri var. caladiifolia
    • Anubias barteri var. glabra
    • Anubias Nana Petite

    One very popular form of Anubias barteri species in the planted tank hobby is Anubias barteri var. Nana ‘petite’. These plants are most often called Anubias nana petite, or sometimes Anubias nana bonsai, and are great little low-maintenance plants. The care of this petite anubias is the same as that of regular Anubias nana except theyare a smaller plant, maxing out at a size of about 2 inches tall.

    Care

    Anubias barteri var. nana is one of the easiest aquarium plants to care for because of its slow growth rate and low nutrient, low to medium light requirement, and carbon dioxide requirements. In time, you might want to give these plants a trim or remove leaves that have become covered in algae growth but they are very low-maintenance. Anubias nana can live for many years, and will survive all the mistakes of people that are new to the hobby.

    Anubiarium 9L v2

    Planted Tank Parameters

    Anubias nana and nana petite are hardy in quite a wide range of water parameters. A stable temperature of anything between 72 and 82ยฐF is preferred and pH values of 6.0 – 7.5 are ideal. These plants do, however, will do better in mildly acidic conditions. Water hardness does not seem to have much of an effect on these adaptable plants.

    Water Quality

    Being a robust variety, Anubias nana is more tolerant of changes in water quality than many other freshwater plants. That being said, the aquarist should always strive to keep the conditions in their tank as stable as possible. Maintaining a stable water temperature is also important, so be sure to use an aquarium heater and monitor its performance with a thermometer or aquarium controller.

    Filtration

    Filtration is extremely important in the planted tank. These plants don’t have any specific filtration needs, but without a good filter, your chances of developing problems with algae are much higher.

    So be sure to run a good quality filter in your tank and if you keep fish or other animals, be sure to stock appropriately. The general advice when selecting a filter is to choose a model with a flow rate that is 4-6 times the volume of your aquarium. In a causally planted tank, a hang-on filter will suffice.

    However, in a mass planted tank, one needs to factor in the waste many aquatic plants produce. This added bioload demands for a higher end filtration unit. I highly recommended canister filters for mass planted and high end aquascaped tanks.

    Flow

    Anubias nana and Anubias nana petite are robust and compact little plants that will do well in a wide range of flow strengths. They is difficult to keep anchored when growing rooted, and a strong flow will probably frustrate you by uprooting your plants. In tanks with faster currents, use a hardscape feature like a rock to protect the plant from any strong and direct flow. The use of a lily pipe will also allow you to use a higher flow filter while spreading the flow throughout the tank.

    Aquarium Maintenance

    While easy to care for, this plant still requires a good home that is well maintenance. Let’s talk about needs.

    Testing Water Conditions

    Before buying any new plant, start by testing your water conditions to see if your setup is suitable for that species. You can do this at home quite easily using liquid water test kits.

    Water quality can change or fluctuate, especially in tanks with high fish stocking rates. These changes happen especially quickly in small aquariums so be sure to test regularly.

    A good time to perform these tests is once every one to two weeks when you’re doing your regular partial water changes. The results will indicate whether your water changes are being done often enough. You will want to test for:

    • Ammonia
    • Nitrite
    • Nitrate
    • pH
    • Water Hardness

    If any of these are off, consider remedying the situation before you plant other aquarium plants.

    How To Set Up Your Aquarium Tank

    This aquarium plant doesn’t have any really specific tank requirements. They stay small and compact so they are a great choice for smaller tanks, anywhere from about 5 gallons and up. Anubias nana petite could even be grown in smaller aquariums, provided you keep a close eye on your water quality.

    A great way to grow this species is by attaching its rhizome to driftwood, rocks, or even an aquarium decoration, so look out for a nice fish-safe piece to use for this purpose.

    This variety also grows well when rooted, as long as you keep the rhizome uncovered. The root system will hold well in a fine medium like sand, although a nutrient-rich medium like an aquarium soil will help these plants grow stronger.

    How To Propagate

    Although they are very slow-growing plants, Anubias nana propagation is easy, even for aquarists with low experience levels. To create new plants, one simply has to divide a mature rhizome. The rhizome is easy to spot, it’s the stem-like structure that the roots grow from.

    This structure grows parallel to the ground and, if grown in the right conditions, will grow in length, developing new stems in time. By taking a section of the rhizome with its own leaves and stems, you can easily grow a new plant.  

    A great video by The Small Scape has one of the best in-depth videos on how to perform rhizome division on these little guys. Check it out below and give her a sub if you like it!

    Health And Disease

    Signs Of Health

    Healthy Anubias nana and nana petite plants will produce new leaves regularly. This is a slow process, but young new growth will have a bright green color, unlike the dark green of mature foliage. Plants with a few small, light-colored leaves are in good health.

    Signs Of Ill Health

    Avoid plants that are covered in algae, have a damaged rhizome without roots or have full-grown but discolored leaves.

    Common Health Issues And Treatment

    The most common health issue in Anubias nana and Anubias nana petite is algae infestation. The most common cause of this condition is excessively strong lighting and too many nutrients in the water.

    This problem mostly affects plants that have been recently added to the aquarium and have not established strong and healthy root systems and adapted to your water parameters. The best thing to do in this case is to shade these plants by growing them under a floating species or consider adjusting your light strength.  

    Anubias nana plants that have their rhizome planted below the surface of the soil will melt and slowly die. Reposition these plants so that the rhizome is clear of the soil to solve this problem.

    Some growers may be concerned about the slow growth of these plants, but rest assured, this is completely normal and healthy for the species.

    Plant Pests

    The easiest way to start out with pest-free plants, and avoid introducing unwanted hitch-hikers to your tank is to grow tissue culture plants that are propagated under strict lab conditions.

    When growing regular potted Anubias nana plants, be sure to inspect them for snails or any other organisms and remove anything you find. Go ahead and remove any dead or diseased plant parts while you’re at it and then wash the plants off carefully before adding them to your aquascape.

    You can go one step further and give your plants a bleach dip to kill off anything you might have missed. Use a very weak solution of 20 parts water to 1 part bleach and dip the plant in the mixture for a minute or two. After dipping your plant, be sure to wash it off very carefully to avoid adding bleach to your aquarium.

    Where To Buy

    Anubius nana and Anubias nana petite are very popular and common aquarium plants. They are easy to find in pet stores, local pet stores, or they is bought online.

    If purchasing online, I would highly recommend purchasing your plants from BucePlant. They offer the highly quality aquatic plants you can find online and offer an amazing selection of both potted and tissue culture plants. Local fish stores that specialize in aquascaping are difficult to find. Give BucePlant a chance if you have no store local to you!

    Great Beginner Plant
    Anubias Nana

    Hardy, forgiving and easy to grow. The Anubias Nana is your ticket to the incredible hobby that is aquascaping!

    Click For Best Price Buy Tissue Culture

    How the Anubias Nana Compares to Similar Species

    Want the easiest plant? Get java fern or anubias. Want a carpet? Get dwarf sagittaria. Want the best balance of easy and impressive? This plant delivers.

    Choosing between similar species is tricky. Here’s how the anubias nana stacks up against some common alternatives.

    Anubias Nana vs. Java Fern: Both are rhizome plants that attach to hardscape rather than being planted in substrate, and both are excellent beginner plants. The main difference is growth pattern. Anubias nana stays compact and low, making it ideal for foreground and midground placement. Java fern grows taller with longer fronds, making it better suited for background or mid-tank positions. Both tolerate low light and don’t need CO2, but anubias is more prone to algae growth on its slow-growing leaves. Check out our Java Fern care guide for a detailed breakdown.

    What It Is Actually Like Growing Anubias Nana

    The first two weeks after planting are ugly. Emersed-grown leaves melt, new growth starts slow, and your tank looks worse before it looks better. This is normal. Do not rip out the plant and start over.

    Once established, this plant grows. You will be trimming it regularly, replanting cuttings, and giving away excess. The transition from fragile newcomer to aggressive grower happens faster than you expect.

    Algae will try to grow on the leaves. Healthy, fast-growing plants outcompete algae naturally. Slow-growing or struggling plants get covered in it. The plant’s health and algae presence are directly related.

    In the right conditions, aquarium plants produce visible oxygen bubbles called pearling. Watching tiny bubbles stream from the leaves during peak lighting is one of the most rewarding sights in planted tanks.

    FAQS

    Does they need soil?

    Anubias nana plants do not need soil. These plants is grown quite easily without soil by attaching them to a hardscape feature like driftwood, rocks, or even an ornament.

    Can you plant them petite?

    Just like its larger form, Anubias nana petite is planted, as long as its rhizome is kept clear of the substrate.

    Does they need CO2?

    Of course, all plants need CO2 injection for rapid and healthy growth. When it comes to Anubias nana petite, however, the background carbon dioxide levels in most home aquariums is enough for healthy growth.

    Injecting CO2 could well result in faster, healthier growth. The challenge is to match the lighting and feeding in a way that will not result in unwanted algae growth.

    Do they need fertilizer?

    These plants don’t need any fertilizer. If you keep fish in your tank, the nutrients in their waste and feed should be more than enough for this species.

    Can you plant them in substrate?

    This species is planted in the soil and will grow very well if set up this way. The key to success with this method is to make sure that rhizomes are not covered by the soil.

    Roots from the rhizome will grow into the soil in time, and it is best to anchor the plant with a few stones or something similar until it is secure.

    What Questions Do You Have?

    Want the easiest plant? Get java fern or anubias. Want a carpet? Get dwarf sagittaria. Want the best balance of easy and impressive? This plant delivers.

    Anubias Nana is a wonderful plant for beginners because it tolerates a wide range of water conditions and grows slowly so that maintenance is easy. If you’re new to the hobby of keeping plants alive in an aquarium, this article should have helped teach you everything you need to know about caring for these beautiful aquatic plants. Leave us your thoughts on whether or not this was helpful by leaving a comment below! We’d love to hear from you!

  • Caring For Your Black Moor Goldfish (With Pictures)

    Caring For Your Black Moor Goldfish (With Pictures)

    Black Moor Goldfish have telescope eyes that make them nearly blind in competitive feeding situations. They are slow, clumsy, and get outcompeted by every other goldfish variety.

    Never mix black moors with single-tail goldfish. The moors will lose every feeding competition.

    Have you just purchased your first Black Moor Goldfish? Congratulations on being a new fish parent and thank you for taking the time to research how to care for them. You will find that not only are they easy to take care of, but their beautiful colors make them a great addition to any home or office.

    Of all the fancy goldfish which have attracted the interest of the home aquariums of beginner aquarists, one the most distinct aquarium fish is undoubtedly the black moor goldfish. Named for its beautiful black coloring, this is a peaceful type of goldfish that is very easy and rewarding to care for. What distinguishes the black moor from other fancy goldfish types are, mainly, its “dragon” eyes. As one of the telescope goldfish, these fish have eyes with a comic and endearing bulging appearance.

    It’s important to follow the proper care specifications in order to ensure a long and healthy life for your new friends: hereโ€™s my comprehensive guide to black moor goldfish care.

    A Brief Overview of the Black Moor Goldfish

    Scientific Name Carassius Auratus
    Common Names Black Moor Goldfish, Dragon Eye Goldfish, Black Demekin, Black Peony Goldfish, Telescope Goldfish
    Family Cyprinidae
    Origin China and Japan
    Diet Omnivore
    Care Level Easy
    Activity Moderately Active
    Lifespan 10. 15 years
    Temperament Peaceful
    Tank Level All levels, mainly mid level
    Minimum Tank Size 20 gallon aquarium
    Temperature Range 65ยบF to 72ยบF
    KH 4-20
    pH Range 6.5 to 7.5
    Filtration/Water Flow Moderate
    Water Type Freshwater
    Breeding Lay eggs seasonally, is hand spawned
    Difficulty to Breed Moderate
    Compatibility Peaceful community species, best with other Fancy Goldfish
    OK for Planted Tanks? Mostly No

    Origins and Habitat

    Like all goldfish carassius auratus, the lineage of the black moor has its beginnings in the Prussian carp, a wild carp specimen found in parts of North America, Europe and most notably, Asia. The first incidence of carp being caught and domesticated, however, occurred in China.

    The black moor goldfish is a result of selective fish breeding done in China and Japan to obtain and retain its defining genetic abnormality: telescope eyes. This was done by confining fish with such eyes to a single pond, leading to a larger spawn. The unqiue black coloring and long tail fins of the black moor were thus bred into permanence.

    What Does they Look Like?

    What Does A Black Moor Goldfish Look Like

    With bulging eyes and a metallic coat of black scales, the black moor goldfish has an easily recognizable appearance:

    Body

    Like many other fancy goldfish, the body of the black moor goldfish is rotund, with an egg shape. This is offset by their beautiful tail and anal fins, which are long, graceful and flowing. Meanwhile, their pectoral and dorsal fins tend to be larger.

    Color

    The black moor goldfish gets its name from the distinct, fully black coloration of its scales. However, this beautiful metallic black color is not seen until they get older. As a juvenile, the scales of a black moor goldfish have a color more accurately described as dark bronze. Beyond maturity, when it begins aging, a black moorโ€™s fins may turn grayish, but don’t begrudge them for not staying true to their name.

    Eyes

    And now for the best part of the black moor goldfish: its large, bulging eyes, which are quite fittingly called telescope eyes (and alternatively, dragon eyes). As they age, black moor goldfish’s eyes tend to get bigger. So, if you look into a tank full of these fish, you can easily pick out the eldest among them by the size of his or her eyes. The bulging eyes phenomenon is a result of intraocular pressure, which causes the fancy goldfish to, ironically, have very weak eyesight. 

    Gender Differences

    Telling the sex of a black moor is decidedly difficult, although males do tend to be smaller than females. During mating season, however, the fins of a male black moor goldfish is covered with breeding tubercles, which look like little white bumps.

    HOW BIG ARE THEY?

    The size of a black moor goldfish changes quite noticeably as he or she grows. The average size of a black moor is about 6 inches. At their largest, they might measure up to 8 inches.

    HOW LONG DO THEY LIVE?

    Like most other goldfish varieties, these fish have a life expectancy between 10 and 15 years. However, if you manage to provide superior water quality and diligently keep up tank maintenance, you might even see your black moors make into 20 years of age.

    Temperament and Activity Level

    Whether you put your black moors in with other tank mates or in a community tank, you will be pleased by their friendly and peaceful temperament. That said, the best course of action is to put these slow swimmers in with a shoal of other black moors.

    Not only that, but their low activity level also makes black moor goldfish care easy: these fancy goldfish like to simply swim back and forth across their tank without bothering any other fish. You’ll often find them swimming leisurely in the middle of the tank, although you shouldn’t be surprised to see your fish concealing him or herself in the decorations or in the substrate.

    What are Good Tank Mates?

    Choose the members of your aquarium carefully. As these fish are fragile and peaceful goldfish carassius auratus, their chosen companions should have a similar disposition and set of traits. This is a very important aspect of black moor goldfish care as it ensures that your fish wonโ€™t be bullied or injured. This is not only limited to fin nipping but extends to their eyes, which are easily injured.

    Good Tank Mates

    For non-fish the best tankmates would be:

    Many fish available will need different water temperature requirements. Peaceful and schooling fish like minnows your Goldfish may try to eat, but they are are fast enough to get away and not be stressed out in larger tanks. You will need to worry about feeding though as fancy goldfish are slow swimmers and eaters.

    Black Moors have terrible eyesight. Tank decorations with sharp edges become hazards. The tank you build for this fish has to account for what it cannot see.

    The best tank mates for a black moor goldfish would be other goldfish of the fancy variety, such as:

    Pearscale Goldfish

    Inverts like freshwater shrimp are going to be a bad idea. While shrimp is fast enough to get away, the stress of being constantly chased could make them jump out of the tank. Snails would be a better choice with nerite and the mystery variety being known to coexist peacefully with your black moors.

    Fish Species to Avoid

    You should at all costs avoid pairing your black moor with territorial or aggressive goldfish varieties. Such types of fish are known to nip at the long flowing fins of black moors, which can cause fin rot. It can also be quite stressful for black moors to try and avoid aggressive tank mates, which in turn might affect their health and lifespan. Such tankmates that do not pair well with Goldfish would be Cichlids.

    What Do Carassius Auratus Eat?

    Most goldfish varieties are omnivorous fish, which means they is fed food of the meat as well as plant variety. Although this extends your range of options, you should also be warned that, as fish with big and hungry appetites, your black moors are liable to start feeding on anything you put in your aquarium.

    Dry pellets and flakes can easily be fed to a black moor. That said, you should also aim to create variety in their diet to ensure good health. You can feed them vegetables such as broccoli, spinach and lettuce. Make sure to stream your veggies before introducing as this sterilizes them. Specialized frozen foods are highly recommended as they offer the best nutritional value you can get in the hobby. High protein foods help to bring out the black coloration of these fish quicker.

    What About Live Foods?

    As carnivores, black moors take well to certain easily digestible freeze-dried live foods or frozen live foods, such as blackworms, bloodworms, brine shrimp, tubifex worms, and daphnia (brine shrimp has the lowest nutritional value of all I mentioned). Before feeding freeze-dried foods to your black moors, however, you should soak the food in some aquarium water first to facilitate a smoother digestion process. Soaking with supplements like Vita-Chem will help boost the nutritional content of the food.

    My Pick


    Vita Chem

    One of the best nutritional supplements you can use for freshwater fish. Works great with pellet and fried dried foods.


    Buy On Amazon


    Buy On Chewy

    How Much and How Often to Feed

    Most goldfish carassis auratus varieties should be given food several times a day (though most fish keepers can only do twice a day), and the same is true for the black moor goldfish carassius auratus. But keeping their big appetite in mind, itโ€™s also important not to overfeed your black moors. Their internal organs are squeezed into a compact body, which can lead to fatal digestive problems such as constipation, when the fish is given excessive food.

    Moreover, be sure to eliminate any leftover food so as to keep the water unpolluted and safe for your fish to live and thrive in. Using a rule of thumb of only feeding what your fish can eat in 2 minutes is a good guideline to work with.

    How to Set Up Your Fish Tank

    Black moor goldfish in aquarium

    Remember, goldfish are descended from carps. As such, itโ€™s best to try to ensure a tank environment that closely mimics the natural habitat of a carb. Black moors have weak eyesight and love to feed on almost any small object they find, which is important to keep in mind. Murky, moderately brackish water with a gravel substrate should be a good fit for your black moors.

    Furthermore, considering that they are weak swimmers, the optimal tank shape for them is long rather than tall. This gives them more swimming space. If it’s tall, it is harder for black moors to reach any food on the surface.

    Minimum Tank Size Considerations

    Despite their relatively small size, these fish do take up a lot of space due to their long and large fins. So, for a single black moor goldfish, you should provide at least a 20 gallon aquarium. Then, for every new fish you add, you should add another 10 gallons.

    Substrate

    Care should be taken when selecting substrates for goldfish. Goldfish will regularly dig in the substrate and with their large mouths, it is easy for them to accidentally shallow gravel. I would recommend a sandy substrate for goldfish as this allows them to forgage freely and split out any sand bits as they dig around the tank.

    Ideal For Goldfish


    Caribsea Super Naturals Sand

    This sand by Caribsea is perfect for supporting the foraging habit of goldfish. Also works with bottom feeders and discus fish.


    Buy On Amazon


    Buy On Petco

    Decor

    Despite their slow swimming speed, black moors are big eaters who are prone to nibbling on almost anything they find. So, itโ€™s best to avoid putting a lot of tank dรฉcor in their aquarium. They might just start chewing on it. That said, if you must include decor, ensure that they have smooth surfaces and donโ€™t have any sharp or protruding edges. Itโ€™s best to steer clear of driftwood and sharp rocks.

    Plants

    As they are known diggers, donโ€™t be surprised if your fish start digging up any live plants youโ€™ve planted in their substrate. The best way to work around their digging nature is to attach plants to aquarium rocks. You need to be selective on your plants though, as goldfish will eat many live plants and their temperature requirements are not compatible with most plants.

    The safest plants to use on goldfish would be:

    All the plants above are beginner aquarium plants, so you can still maintain a easy to keep tank! You can also use artifical plants. Silk plants are better to use than plastic ones as they will lack the sharp edges that will harm your fish.

    Water Quality (Care)

    Here are the specifics of maintaining optimal water quality.

    Filtration

    It’s recommended to include an efficient filter in your black moor’s tank. This ensures that the water stays clear, which is important since black moors produce a lot of waste. For smaller tanks a quality hang on filter like an aquaclear or seachem tidal would work well.

    For larger tanks, it would be best to consider using a well made canister filter. Goldfish are bulky and large. This size makes them hard on your bioload. A canister filter is designed to handle large bioloads. With goldfish tanks, I would recommend loading up on a quality biological media that can process nitrates. I feel Biohome Ultimate Filter Media is the best complete filtration media when it comes to high bio-load non-planted tanks.

    Editor’s Choice!


    Biohome Ultimate Filter Media

    Editor’s Choice!

    This is the best media you can buy for your aquarium. It does it all – removes ammonia, nitrite, and nitrates


    Buy On Amazon

    Water Parameters

    As black moors are an artificially bred species, there is no exact habitat you can replicate for them. However, we do know that their black color appears more quickly in low water temperatures. So donโ€™t set the tank up in any room that get hot, or near any heat source (e.g. A fireplace), as this will affect water temperatures. They also benefit from neutral pH levels. Let’s look at some specifics of water conditions for these freshwater fish:

    • Water Temperature: 65.0 to 72.0ยฐ F  / 18.3 to 22.2ยฐ C
    • pH Range: 6.0 – 7.5
    • Lighting: Strong lighting is required to help your ocularly impaired fish.
    • Hardness Range: 5 – 19 dGH
    • Salinity: Below 10%; specific gravity should be below 1.002
    • Water Movement: Moderate

    Aquarium Maintenance

    Itโ€™s of utmost importance to ensure clean water conditions for your fish as it directly affects their health. About 20% of the water should be changed on a monthly basis to keep phosphate and nitrate levels at a healthy level. What’s more, it’s recommended to make use of a gravel siphon to remove elements such as organic debris and sludge.

    Test Water Conditions

    If youโ€™re committed to ensuring a long life for your fish, you should invest in an aquarium test kit. It allows you to determine whether the mentioned water parameters are being maintained properly in your black moorโ€™s tank. 

    How to Breed

    It’s relatively easy to breed black moors on your own in a tank. To get your black moors to mate and start laying eggs, create the following conditions.

    Breeding Tank Setup

    Start by moving your pair of breeding black moors to a separate tank (video by All Blue Amante Del Pesce). You should aim to ensure that there are adequate surfaces such as plants and decor for the female to lay eggs when it’s time.

    Breeding Temperature

    Once your fish are in their tank, start by slowly lowering the temperature to 60ยฐ F (15.5ยฐ C). Then, gradually increase the water temperature by 3ยฐ daily until your fish look ready to mate. You should also make daily water changes of 20%. This will bring on spawning season.

    After Breeding

    Once your female fish lays her eggs, the male will go on to fertilize them. This process involves a courtship ritual in which the male chases the female around for some time. This might take several hours and you might see as many as 10,000 eggs in the tank by the end of it. Once the eggs appear, swiftly remove the pair back into their original tank as they will otherwise eat the eggs.

    Feeding Your Fry

    In a week, you’ll have black moor fancy goldfish babies. Congrats, you’ve unlocked a new level in fish keeping! Keep feeding them foods high in protein and iron until they take on an adult size. In about two months, you can start feeding them the same food you give to their parents.

    Health and Disease

    Concerned about the health of your freshwater fish? Hereโ€™s what you need to know if you have a sick fish.

    Signs of Health

    If your fancy goldfish are swimming about normally, that’s a good indicator of health. They should be regularly eating and should sign good colors and believing should not be labored.

    Signs of Ill Health

    Here are the three main indicators of poor health in your black moor goldfish that anyone practicing fish keeping should know:

    • Their appearance. Note whether there is any dull coloration, color changes, or colorless patches. If you notice any significant color changes, your black moors is suffering from velvet disease or skin disease.
    • Their movements. Healthy goldfish swim and bob along the middle of the tank. So if you see that they are sitting at the bottom of the tank or floating on the surface, they is afflicted by swim bladder.
    • Their appetite. If you notice that your goldfish is not eating properly, they is suffering from ich, which occurs when there is a parasitic protozoan in the body of the fish. In advanced cases, you might also notice white spots, rapid breathing, and isolation.

    Common Health Issues and Treatment

    Like all common freshwater fish, black moors are at risk of being inflicted by ich, fin rot, fungus, and flukes. With their long fins, they are particularly likely to catch fin rot. However, this is prevented if you maintain a high quality of water in their tank.

    If you suspect a swim bladder (symptoms discussed above), check out my freshwater fish diseases post. There is a great video and explanation on treatment and alternative long-term solutions like fabricated “wheel chairs” that hobbyists have used to save their fish.

    As a telescopic goldfish breed with poor eyesight, black moors are prone to eye diseases caused by fungi and bacteria (particularly if their tank is not clean and well-maintained). When handling your black moors, always be very cautious so as not to accidentally injure or damage their eyes.

    It’s important to keep ammonia and nitrate levels low in your black moor’s goldfish tank. To ensure this, you should aim to replace about 25% of the water volume on a weekly basis. You need to increase the volume based on your test results. Regularly testing your water with an aquarium test kit will help you adjust your water change routine to manage nitrates.

    Where to Buy

    Black moor goldfish are quite inexpensive and are commonly found. You can find them in chain pet stores. However, I would recommend you either purchase at a specialty local fish store or if you cannot find a good one in your area, looking into an online fish store.

    Frequently Asked Questions

    Are they hard to take care of?

    No, theyโ€™re relatively low-maintenance: as long as you feed them in a timely manner, maintain tank conditions and remember to conduct regular water changes, youโ€™ll be good to go!

    How long do they live?

    Like the majority of goldfish species, these dragon fish live up to 10 to 15 years.

    Can they live in a 3-gallon tank?

    No. A black moor needs at least a 20 gallon aquarium. And, for every new fish you introduce, you should add 10 gallons of water to the aquarium.

    Their small size at pet stores can fool a novice fish keeper into thinking that itโ€™s okay to place your black moor goldfish in a small aquarium or fish bowl, but they need a lot of space to swim slowly about and they get large. With their bulky size, goldfish produce a lot of waste; so the smaller the aquarium, the more quickly the water will go toxic and endanger the life of your fish.

    Are they aggressive?

    No. On the contrary, black moors are some of the most peaceful species of goldfish youโ€™ll find, which makes them agreeable tank mates like many other goldfish species. Their physical limitations (i.e. Poor eyesight and heavy body) also make it difficult for a black moor to be aggressive.

    Closing Thoughts

    This fascinating fish might make it seem like they’re difficult to care for, but a species like the black moor goldfish makes it obvious that that’s a misconception. As long as you can commit to ensure optimal tank standards, and donโ€™t place them with any aggressive fish species, your gentle and beautiful black moors will stay by your side for at least 10 years! I hope youโ€™ve found this guide helpful in understanding black moor goldfish care. Your feedback would be appreciated, so please leave a comment below!


    ๐Ÿ“˜ Want to learn more? This article is part of our complete Freshwater Fish Guide. Your ultimate resource for freshwater species, care tips, tank setup, and more.