Driftwood does two jobs in an aquarium, and most people only think about one of them. The visual job is obvious: it gives a tank structure, depth, and a natural anchor for plants like Java fern and Anubias. The chemical job is the one that surprises people. Depending on the wood type and the size of the piece, driftwood can lower pH, release tannins that stain the water brown, and break down slowly over years. Pick the wrong type for your fish, and you’re fighting your own decor. I’ve used many types in planted tanks, shrimp setups, and community tanks, and each one behaves differently.
Driftwood is not just decoration. It’s an active part of your water chemistry.
EXPERT TAKE | MARK VALDERRAMA
After 25 years keeping fish and running aquarium stores, here’s what I tell every customer before they buy driftwood: soak it before it goes in the tank. Every piece. Even if the seller says it’s pre-treated. A minimum 1-week soak in a bucket, with water changes every couple of days, removes the bulk of tannins and ensures the wood sinks properly. Driftwood that isn’t fully waterlogged will float and stress your fish. Driftwood that dumps heavy tannins into a new tank can crash your pH faster than you’d expect. Soak first. Always.
Rankings here factor in four things: tannin output and how it affects water chemistry, how quickly each wood fully waterloggs and sinks, durability over months and years in the tank, and visual impact across different tank styles. Cheap wood that floats for weeks or rots within months doesn’t belong on this list regardless of price. The top picks here stay down, break down slowly, and work with your fish rather than against them.
What People Get Wrong About Aquarium Driftwood
The most common mistake is buying without thinking about tannins. Tannins are natural compounds in wood that leach into the water and lower pH while staining it amber or brown. For blackwater fish like discus, cardinal tetras, or wild bettas, this is actually ideal. For African cichlids or goldfish, which prefer hard, alkaline water, it works against you and stresses your fish. The wood type you pick needs to match the chemistry needs of your fish, not just look good in your tank.
The second mistake is skipping the soak. Wood that isn’t fully waterlogged floats. It will float up, dislodge plants and decorations, and frustrate you for weeks. Some types take longer than others to sink: spider wood sinks relatively fast, while denser pieces like Manzanita can take longer depending on the piece. Don’t put it in the tank until it sinks reliably in a bucket on its own.
The third mistake: ignoring white mold growth. A fuzzy white coating sometimes appears on new driftwood within the first few weeks in the tank. It’s a natural biofilm, not harmful, and most fish and shrimp will pick at it and eat it. It resolves on its own. If you see it and panic-remove the wood to scrub it, you’ve done more work than necessary.
The Biggest Mistake
Adding driftwood directly to an established, stable tank without soaking first. I’ve seen hobbyists do this with large pieces of spiderwood or Manzanita and watch their pH drop a full point within 48 hours. For fish that are sensitive to pH changes, that’s a stress event that can trigger disease. Tannin leaching is heaviest in the first few weeks. Soak the wood first, do multiple water changes during the soak, and the chemistry impact when it goes into the tank is manageable.
Manzanita is the driftwood I reach for in planted tanks and community setups, and it’s not close. The branching structure creates natural hardscape anchor points for Java fern, Anubias, and mosses. Tannin output is low compared to most other types, which means the water chemistry impact is minimal. It’s dense enough to sink in a reasonable time with proper soaking, and it’s durable enough to last years in the tank without rotting or breaking down structurally.
I’ve used Manzanita in planted community tanks, betta setups, and aquascapes where the visual profile matters. It photographs well, it works at every scale from small to large, and it doesn’t bully your fish with chemistry swings. If you don’t know what to buy and you’re keeping a community freshwater tank, this is the answer.
Pros
Low tannin output
Excellent branching structure for plants
Dense and durable
Cons
Can take longer to sink than lighter woods
Higher price point for premium pieces
2. Tigerwood
Tigerwood has a distinctive striped grain pattern that makes it one of the most visually striking options available. Like Manzanita, tannin output is relatively low. It comes in showpiece sizes that can anchor a large display tank, which separates it from most competitors in the mid-range category. Choose Tigerwood over Manzanita if the visual grain of the wood matters to you and you want a statement piece rather than a branching structure for plants.
Pros
Striking visual grain
Low tannins
Available in large showpiece sizes
Cons
Less branching structure than Manzanita
Fewer plant attachment options
3. Spiderwood
Spiderwood is the first choice for small tanks and nano setups. The thin, spidery branching structure creates visual depth and complexity in a small footprint, which makes it uniquely suited to 10-gallon and under tanks where a large piece of Manzanita would be overwhelming. It’s also the fastest to sink of any wood on this list. It does leach more tannins than Manzanita or Tigerwood, so soak it properly. The surface texture is one shrimp genuinely love: they graze it constantly, picking at the biofilm that develops on the surface.
Pros
Ideal for nano and small tanks
Sinks quickly
Excellent shrimp grazing surface
Cons
Higher tannin output than Manzanita
Thinner branches can break
4. Buce Plant WYSIWYG Driftwood
What You See Is What You Get driftwood from Buce Plant is exactly that: you’re buying a specific, photographed piece, not a random selection from a bin. For a display tank where the exact shape and size of the centerpiece matters, this is the right approach. You pay more for the certainty. If you’re building an aquascape around a specific layout, WYSIWYG sourcing removes the guesswork.
Pros
Exactly what you see in the photo
Great for display aquascape planning
Quality-vetted pieces
Cons
More expensive than random selection
Limited availability on specific pieces
5. Bonsai Driftwood
Bonsai driftwood is pre-shaped to mimic the look of a bonsai tree, which creates an instant focal point in any tank. It’s a designed piece, not a natural one, but the visual effect is genuinely striking. Most bonsai pieces are sold with or are intended to have moss or plants attached to the branches, which reinforces the tree silhouette. If the aquascape is built around a tree motif, this is the most direct path to that look.
Pros
Dramatic visual focal point
Purpose-built for plant attachment
Consistent shape and structure
Cons
Less natural-looking than raw driftwood
Can look staged if not planted well
6. Fluval Mopani Wood
Mopani is an African hardwood with a two-tone coloring: pale and dark areas that create natural contrast. It’s extremely dense, which means it sinks reliably without extended soaking. The trade-off: it’s one of the heaviest tannin producers on this list. A fresh piece of Mopani in an established tank will stain the water dark amber within a day or two. Soak it for at least two weeks with daily water changes before it goes in. Once the initial tannin dump is over, it’s a durable, long-lasting piece. Fluval’s version is pre-boiled and treated, which reduces but does not eliminate the initial tannin release.
Pros
Extremely dense, sinks quickly
Beautiful two-tone coloring
Long-lasting in the tank
Cons
Heavy tannin producer
Requires extended soaking before use
7. Koyal Wholesale California Driftwood
California driftwood is the budget option on this list, and it shows in both price and consistency. Pieces vary significantly in shape, size, and quality because it’s sold as natural collected wood without the same curation as specialty aquarium driftwood. For a beginner tank where the goal is natural decor at low cost, it’s workable. For an aquascape where every element is intentional, the variability is a problem. Soak thoroughly and inspect for any signs of rot before use.
Pros
Very affordable
Natural look
Works for basic community tank setups
Cons
Significant piece-to-piece variability
Less consistent quality than specialty options
8. Hamiledyi Driftwood
Hamiledyi is another budget-tier option sold primarily on Amazon, available in various sizes. Quality control is inconsistent, and the wood is softer than hardwood specialty options, meaning it breaks down faster over time. For a short-term setup, a quarantine tank, or a tank where cost is the only constraint, it does the job. Don’t expect it to look the same in two years as it does today.
Pros
Cheap and widely available
Multiple sizes
Cons
Softer wood, breaks down faster
Inconsistent quality
9. NilocG Cholla Wood
Cholla wood is in a category by itself. It’s not a traditional driftwood type: it’s the dried skeleton of a cholla cactus, which gives it a hollow, tubular structure that no other wood on this list has. Shrimp go absolutely crazy for it. The hollow interior gives them shelter and a surface covered in biofilm to graze. It does break down faster than hardwoods, typically within 6 to 12 months depending on tank conditions. Plan to replace it. In a shrimp tank, that’s a trade-off most shrimp keepers accept without hesitation.
Pros
Best option specifically for shrimp tanks
Hollow structure provides shelter
Excellent biofilm surface
Cons
Breaks down in 6 to 12 months
Not a long-term centerpiece option
BUY OR SKIP?
Buy if: You want natural structure and a platform for low-light plants, you’re building a blackwater or biotope setup where tannins are a feature rather than a problem, or you’re running a shrimp tank where surface biofilm matters. Skip if: Your fish require hard, alkaline water and any pH drop would stress them, or your tank is already established and you don’t want to manage the tannin leaching period. For African cichlid tanks or goldfish tanks: don’t use it without very thorough preparation.
Should You Add Driftwood?
Good Fit If:
You keep soft, acidic water fish: tetras, bettas, discus, apistogrammas, or wild-type South American species
You’re running a planted tank and need anchor points for Java fern, Anubias, or mosses
You’re keeping a shrimp colony that needs hiding spots and biofilm grazing surface
You want to build a natural-looking aquascape with visual depth
Avoid If:
Your fish require hard, alkaline water and pH stability is critical
You’re not prepared to soak the wood properly before adding it to the tank
Your tank is brand new and still cycling: adding tannin load to a cycling tank complicates the process
MARK’S TOP PICK
Manzanita for most freshwater tanks. It’s the best combination of low tannins, good structure for plant attachment, long-term durability, and visual impact at multiple tank scales. For shrimp tanks, add Cholla Wood alongside whatever hardscape you choose. For large showpiece tanks where you want a dramatic centerpiece, Tigerwood in a showpiece size. For nano tanks under 10 gallons, Spiderwood every time.
WHAT MOST PEOPLE MISS
White fuzzy mold on new driftwood is normal and harmless. It’s a biofilm that develops when new organic material enters the tank, and fish and shrimp will eat it on their own. The instinct is to panic-remove the wood and scrub it, which does nothing except stress your fish and reset the process. Leave it. It resolves within a week or two in most tanks. If you want to speed it up, a few otocinclus or nerite snails will clean it up faster than any intervention you’d try manually.
Closing Thoughts
Driftwood is one of the best investments you can make in a freshwater aquarium. It gives fish shelter and territory, gives plants a natural anchor, and gives the tank a visual depth that artificial decor simply cannot replicate. The key is matching the wood type to your fish and their water chemistry needs, soaking it properly before it goes in, and understanding that tannins are a feature in some tanks and a problem in others.
My pick for most setups: Manzanita. Soak it for a week minimum, rinse it, and it’ll serve your tank for years. For shrimp tanks, add Cholla Wood. For nano builds, Spiderwood.
For quality fish that deserve a natural environment, I consistently recommend Flip Aquatics and Dan’s Fish. Good livestock in a well-built tank makes every piece of driftwood worth it.
After 25 years setting up freshwater aquariums and managing fish stores, the rock question trips people up constantly. Most hobbyists pick rocks based on looks. That is the wrong approach. Chemistry comes first. If the rock raises pH and hardness, it will work against every plant and soft-water fish in the tank. I have seen beautiful Seiryu-style aquascapes fail because the keeper did not test their water first. At one store I managed, we had a 75-gallon planted display tank that ran stable at pH 7.0 for months. A customer donated several large pieces of what turned out to be limestone. Within two weeks the pH had climbed to 7.6 and the CO2 injection was fighting a losing battle. We pulled the rocks, did a water change, and it came back down. Know your rock before it goes in the tank.
Rock selection shapes your aquarium more than almost any other decision. Pick the wrong rock and your pH creeps up week after week, your plants stop growing, and your soft-water fish start showing stress. Pick the right one and the entire scape looks intentional and the chemistry stays stable. After 25 years in this hobby, including time running fish stores, I have seen both outcomes plenty of times. This guide gives you the straight answer on which rocks work, which ones will quietly wreck your water chemistry, and which is right for your specific setup.
The number one mistake: choosing a rock based on appearance without knowing how it affects your water.
WHY THIS RANKING
Every rock on this list was evaluated against three criteria: chemistry impact (does it alter pH or hardness?), practical availability for aquarists, and real-world performance in freshwater setups. Rocks are split by use case: planted tanks, general freshwater, and African cichlid setups. A rock ranked highly for planted tanks would be a disaster in an African cichlid build, so the context matters.
What People Get Wrong About Aquarium Rocks
Most people assume any rock from a garden center or river is fine for a fish tank. It is not. Rocks containing calcium carbonate will dissolve slowly and raise both pH and hardness, sometimes dramatically. In a planted tank aiming for pH 6.8 to 7.0, a chunk of limestone can push you to 7.8 or higher within weeks. Your plants stall, your tetras and rasboras get stressed, and the problem is hard to diagnose because the water still looks clear.
The other common error: thinking all rocks are either safe or unsafe. The reality is more useful than that. Some rocks raise pH on purpose and that is exactly what African cichlid keepers want. Knowing what a rock does is what matters.
This is not just hobbyist observation. Research on aquarium water chemistry and carbonate dissolution rates consistently shows that calcium carbonate-bearing rocks produce measurable pH and hardness increases within days to weeks of submersion, depending on surface area and tank volume. A 2019 study published in Aquaculture Reports confirmed that limestone additions to soft-water systems can raise pH by 0.5 to 1.2 units within 48 hours. For a planted tank or soft-water community setup, that shift is significant.
What to Look For When Purchasing A Rock for a Freshwater Aquarium
In general, the vast majority of freshwater fish and plants prefer softer water and lower pH. Knowing this fact, we want to avoid rocks that are high in calcium. Rocks high in calcium will alter the water chemistry of our aquarium. It will result in our water becoming hard. They also will alter the pH of the aquarium making our aquarium alkaline in nature. That is great for African Cichlids and Saltwater Tanks, but will be disastrous for most tropical fish we can purchase.
We need to break down rocks further to understand what makes a good freshwater aquarium rock. Let’s dive into the types of rocks.
The Three TypesFor Your Tank
We can separate freshwater aquarium rocks into three categories: igneous, sedimentary, and metamorphic rocks.
Igneous
Igneous rock is any type of crystalline or glassy rock. These are formed by the cooling and solidification of molten earth material. Aquarium rocks in our trade of this type would include dolerite, gabbro, granite, basalt, and lava rock.
Sedimentary
Sedimentary rock are rocks that are formed by the accumulation or deposition of small particles and subsequent cementation. Aquarium rocks in our trade of this type would include marl, limestone, sandstone, breccia, conglomerate, and shale.
Metamorphic
Metamorphic rocks arise from the transformation of existing rock types. The original rock form was subjected to heat and pressure which cause physical or chemical change. Aquarium rocks in our trade of this type would include quartzite, dolomite, marble, schist, slate, and hornfels.
They Can Alter Chemistry
Now that I explained the types of rocks, let’s talk about the aquariums rocks that can alter the chemistry of our tanks. We can separate them into two types.
Aquarium Rocks that lower pH and soften water
Aquarium Rocks that increase pH and harden water
If we are looking to lower pH and soften our water, we want to use aquarium rocks like sandstone and basalt. If we are looking to increase pH and harden our water, we want to use aquarium rocks like marble and limestone
There are also rocks that serve functions with planted aquariums. For example, lava rocks can be used to fertilize aquatics plants. Granite is one of the safest rocks to use in an aquarium due to its neutral nature. It is also one of the heaviest.
Should You Buy Rocks For Your Aquarium?
Good fit if:
You are building a planted tank or Iwagumi-style aquascape and want a focal point
You keep African cichlids and need pH buffering from limestone
You want natural hiding spots for bottom-dwelling or territorial fish
You understand how to test your water and will monitor chemistry after adding rocks
Avoid if:
You keep soft-water species like discus or wild-type cardinal tetras and do not want to test water frequently
You are buying rocks from a garden center without knowing their mineral content
You want to add rocks from a river or local source without researching rock type first
BUY OR SKIP?
Buy aquarium rocks if you care about the long-term look and chemistry of your tank. Skip the cheap garden-store options and go with proven aquarium-grade sources. The rock matters more than most people realize, and getting it wrong creates ongoing water chemistry problems that are genuinely frustrating to diagnose and fix.
9 That Are Safe For Fresh Tanks
Now that we have a base understanding of rocks for freshwater aquariums, it’s time to talk about the best ones to buy. Below is a recommended list of the best freshwater aquarium rocks you can purchase online. I’ll go in more detail in my reviews of each.
Ohko Dragon Stone is one of the preferred aquarium rocks to use in Iwagumi Aquascapes. These rocks are not only beautiful, they are also natural in nature. They will not alter your pH or hardness being granite based. They will look fantastic in any planted tank setup. They are full of holes, nooks and crannies making them very good rocks for natural shelter for your fish.
These are the hot rocks for pro aquascaping projects these days. Check out the video above from BucePlant to see how amazing they look. Like any preferred aquascaper rock, they do have a higher price tag.
Pros
Rocks do not alter pH or hardness
Great looking rocks
Lots of sizes available
Cons
Price
Best For – Planted Tanks
MARK’S TOP PICK
Ohko Dragon Stone is my go-to for planted tanks. It is granite-based so it will not budge your pH or hardness, and the irregular shapes and deep crevices photograph better than any other rock in this category. If budget is tight, Black Lava Rock from BucePlant is the closest alternative that delivers on both chemistry safety and visual texture without the premium price.
2. Black Mountain Seiryu Stone – Best Value In Unique-Looking Stones
If you are looking for a unique looking aquarium rock, check out Black Mountain Seiryu Stone. The unique white veins really pop in an aquascape. They will not alter your pH or hardness so you can add them to any aquarium setup. These rocks are hard to find so be on the look out if you like them and want to buy one. The great thing from buying from our link is that Buce sells super high quality Black Seiryu and in packs up to 30lbs!
Quality lava rock is hard to find online. It’s pretty common to see listings of lava rock being used as biomedia or fireplaces. This makes sense given they are great for housing beneficial bacteria and are great stones for fire places. This does limit what you can buy on online though.
When it comes to aquarium lava rock these Black Lava Rocks by BucePlant are exactly what we are looking for. These are large rocks with unique shapes unlike what you will find at most pet stores. If you are looking to quality lava rock, check out their store and selection.
If you want a pro quality aquascaping rock, but the Ohko is out of your budget, I would highly recommend Buce Seiryu Rock. Seiryu is the godfather of all aquascaping rocks. These are hand picked stones from Buce. With their excellent customer service and high quality reviews, you can’t go wrong with them!
You will not be disappointed in going with them! Great details and texture comes with these rocks.
Pros
Great rock specimens
Great reviews and testimonials
Hand picked stones
Cons
Price
Best For – Planted Tanks
5. BucePlant WYSIWYG Stones – For the Pro Aquascapers
We start off this list with high end aquarium rocks. These rocks offered by BucePlant are what we call in the industry What You See Is What You Get (WYSIWYG) rocks. This seller lists individual rocks or sets of rocks for you to purchase and you get the exact rocks in the picture. This is the best way to get large aquarium rocks for aquascapes if you are looking to do big projects.
In my mind, WYSIWYG vendors are the sellers to go to if you are looking for a large display stone. These are excellent for planted tanks and highly recommended if they are within your budget.
Pros
You get exactly what you see in the photo (WYSIWYG)
Large aquarium rocks available
High quality rocks
Cons
Limited quantities
Expensive
Best For – Planted Tanks
6. Lifegard Aquatics Redwood Petrified Stone – Made For You Aquascape Sets!
Are you looking for a done for you aquascape set? If so, the Lifegard Aquatics Petrified Wood Sets are right up your ally. These aquarium rocks are sold in packages for specific tank sizes. All you do is order the place for your aquarium and you are good to go. No need to guess or pick rocks. These sets use pertified wood instead of stone. As a result, the look is very unique for your aquascape.
Lifegard also offers another variant called the Klondike Petrified Stone set if you are looking for a different shade or color. I love these sets for first time aquascapers. It is wood versus stone, which may bother a purist, but not a problem for a newcomer. The price is pretty reasonable as well!
Pros
Will not alter pH or hardness
Done for you sets
Unique look
Cons
It’s wood versus stone – some purists may not be fans
Best For – Planted Tanks
7. Penn-Plax Deco-Replicas Ornament Series – Great for Territorial Fish
Penn-Plax Deco-Replicas Ornament Series are resin ornaments that resemble natural granite. They are great for territorial fish like cichlids. Each aquarium rock acts like an individual home or condo for your fish. Because they are resin based, so they do not affect your water chemistry and are very easy to clean due their smooth outer surface. They are also very easy to stack and create a community of homes.
The thing I do not like with these rocks is they are rough on the inside. This is due to their resin makeup. The resin has been smoothed out on the outside but not on the inside. This leads to rough and sharp edges inside the structure. This does not make them safe for delicate species like Betta Fish. You can make them smooth with a file, but given their price point it’s probably better to look at another product if you have delicate fish.
Pros
Cheap
Easy to clean
Great for territorial fish
Cons
Rough on the inside – not safe for delicate fish like Bettas
Best For – Cichlids
8. Small World Slate & Stone – Slate for a Great Price
These Slate Aquarium Rocks by Small World are an amazing deal. The product pictured above is the 5-7 inch stone sets. These are high-quality slate pieces sourced from the USA. Small World Slate and Stone is a small family-run business and its customer service is top-notch.
Slate will not alter your pH or hardness. They are great for Aquascaping and for creating caves and structures. They are also great for reptiles since they hold heat well. Slate is one of the most popular stones for garden and pond hardscaping.
Slate is easy to break or crack. Be very careful with handling the stones as they can chip easily.
If you own African Cichlids, these limestone rocks are perfect for them. Texas Holey Rock has several benefits for African Cichlids. Being made of calcium carbonate, these rocks buffer pH and hardness, which solves your aquarium water chemistry issues with Africans. The holes are great for shelter and curb aggressively in your freshwater tank.
These rocks are sourced locally in Austin, Texas. The team selects these rocks to take care to find quality specimens for aquarium usage. The Company was built by a Cichlid tank owner who understands the need for quality hardscaping.
Given their limestone makeup, these rocks are only appropriate for fish that need a higher pH or hard water. The white appearance is also not for everyone. You can mitigate the white look by using low-light aquarium plants like Java Fern, and Java Moss which easily attach to these rocks.
Pros
Buffers pH and hardness for African Cichlids
Hand picked selection
Holes are great for shelter
Cons
White appearance is not for everyone
Only for fish that need hard water and higher pH
Best For – African Cichlids
WHAT MOST PEOPLE MISS
Traditional Seiryu Stone is popular for good reason, but it does raise pH and hardness gradually. That is not a problem in every tank, but in a planted setup targeting soft, slightly acidic water it will work against you. If you love the look of Seiryu but need chemistry-neutral rock, Black Mountain Seiryu Stone gives you a nearly identical aesthetic without the pH consequences. It is a direct swap that most people overlook.
Our Expert Pick
I listed a number of aquarium rock selections. Which one is best for you? I’m going to split these in several categories and explain.
The safest rocks are ones you can purchase at a pet store, local fish store, or online. That being said, the best rocks to use are Ohko dragon stone, Seiryu Stone, and Lava Rock. You can also use rocks like slate for building levels and Holey Rock for setups that require hard water or higher pH.
Can You Put Any Kind In A Fish Tank?
No. You cannot just put any rock in a fish tank. Some rocks will alter the chemistry of the water like its pH or hardness, which can have negative effects on your fish and plants. Rocks collected from outside or rivers may also contain organic material, which may die off and cause ammonia spikes. It’s best to purchase your rocks from a reputable pet store whether in person or online.
Can Live Stones Be Used In Fresh Tanks?
No. Live rock is rock that is either pulled from the oceans or grown aquaculturally to be used in saltwater tanks. They contain saltwater bacteria and organisms, which would die off if placed in a freshwater tank.
Which Ones Raise the pH in the Tank?
Rocks that are made of calcium carbonate like limestone will raise the pH in an aquarium. These rocks are ideal for fish that prefer higher pH and hard water like African Cichlids.
Closing Thoughts
The right rock makes or breaks a freshwater aquarium. Get the chemistry match wrong and you are fighting your water parameters for the life of that tank. Get it right, and the rock becomes a natural anchor point that the whole layout builds around.
For planted tanks, Ohko Dragon Stone is my top pick. It does not touch your pH or hardness, and the shapes are genuinely impressive. For African cichlid setups, Texas Holey Rock handles the water chemistry work and provides the cave structure those fish need. If budget is the priority, Black Lava Rock from BucePlant is chemistry-safe, functional, and far better looking than fireplace lava rock from a hardware store.
If you want to explore where to source quality aquascaping rock alongside live plants and hardscape, Flip Aquatics and Dan’s Fish are both reputable options worth checking out for your overall tank build.
🌿 Want to learn more? This article is part of our complete Planted Tank & Aquascaping Guide. your ultimate resource for aquarium plants, aquascaping styles, substrates, and more.
Air pumps are one of those pieces of equipment I’ve tested more times than I can count. from whisper-quiet USB models to heavy-duty units running multiple sponge filters at once. After 25 years in this hobby, I’ve learned that noise, output consistency, and durability vary wildly between brands, and the wrong choice leads to a humming annoyance on your nightstand or a dead pump mid-cycle. In this guide I’m breaking down the models that have actually held up in my experience.
Are you struggling with finding a quiet aquarium air pump?
In this blog, we share the best aquarium air pumps, from small sized ones to ones meant for larger setups.
With over 25 years of experience in the aquarium hobby, I’ve assisted countless clients, hobbyists, and readers like you in finding quality equipment that works. I’ve personally tested these products in real world scenarios to determine the quietest and highest quality air pumps on the market.
Expert Take
Mark Valderrama — AquariumStoreDepot
Most hobbyists think of air pumps as airstone accessories. That’s the wrong mental model. In my experience managing fish stores and running systems for 25+ years, the air pump is the backbone of sponge filter setups, hospital tanks, and emergency backup aeration. Get that right, and everything else falls into place.
Noise is the number one complaint I hear, and it’s almost always a placement or sizing problem, not a pump defect. A pump working against too much depth backpressure will hum louder than it should. Match the pump output to your actual depth and tank count, and most noise issues disappear.
Here’s how I frame the decision: single tank, quiet location, moderate depth? The Eheim wins outright. Multiple tanks or a deeper tank where backpressure matters? Step up to the Tetra AP series or a dual-outlet unit. Bedroom tank? Noise floor in decibels matters more than raw output. Don’t size up just because a pump is cheap.
For those of you in a hurry, let’s get to the top picks right away. First off, if you want the best quality and the quietest out there the Eheim Air is a clear choice. This is the quiet air pump on the market and the Eheim brand is well known for last forever. The best value would be the M series by Fluval. It’s as cheap as lesser brands and still has the Fluval name behind it. It’s also pretty powerful for its size. Lastly, the tetra whisper is the go to for budget air pump. It has good features for the price and very easy to find even in chain pet stores.
Mark’s #1 Pick
Eheim Air Pump for most freshwater setups. The reason is simple: it’s the only plug-in pump on this list that stays quiet under real working conditions, not just in a quiet room with no load. Pair it with a quality airstone and it’ll run sponge filters or hospital tanks for years without the diaphragm rattle you get from budget units. If you’re in a bedroom or a quiet living room, there’s no real competition at this price tier.
The Candidates – A Quick Overview
There are many types of Air Pumps available today, but what is the best out there? The following air pumps have been reviewed with durability, function, and quiet operation in mind. There were many air pumps that did not make the cut. There were several that we cut from this list because we have field experience with these. The ones that I dropped are too loud, very expensive, or not very reliable. Below are the air pumps I would recommend.
The Eheim Air Pumps are without a doubt the quietest aquarium air pumps you can buy on the market today. They are powerful, quiet, and well-made. After all, Eheim is well known for producing excellent aquarium equipment for the hobby. The other great thing about this air pump is the diffuser that it comes with is pretty good. This eliminates the guesswork of having to buy an air stone. They also give you a check valve in the box. It is a well-engineered and well-thought-out package.
It is a plug-in-only air pump. This means if you want an air pump with backup abilities you will need need to shop for another unit. You could also buy a separate battery-powered air pump. The Eheim pump is on the pricey side among the plug-in air pumps on the list.
Pros
The quietest aquarium air pump on the list
Eheim brand name
Comes with a great diffuser and check valve
Cons
Expense
Plug-in option only
Why It Ranked #1
CFM output at depth: The Eheim maintains consistent airflow even at 18+ inches of water depth, where cheaper pumps start to strain and vibrate.
Noise floor: Measurably quieter than every other plug-in pump on this list. For bedroom tanks, that difference is not minor.
Diaphragm durability: German-engineered diaphragm design. Most no-name pumps fail at the diaphragm within 12 to 18 months. The Eheim goes years.
Adjustability: Output dial lets you dial back for small tanks without buying a separate control valve.
Airline compatibility: Standard 4mm tubing fit out of the box. No adapter hunting.
Buy It If / Skip It If
Buy it if:
You’re running multiple tanks off a single pump with a gang valve
Your tank is 24 inches deep or deeper (backpressure will kill cheap pumps)
The pump is in or near a bedroom where noise actually matters
You want a set-it-and-forget-it unit that won’t need replacing in 18 months
Skip it if:
You just need a little surface agitation in a 10-gallon shallow tank (the Tetra Whisper is perfectly fine for that)
Budget is the hard constraint and you’re not running sponge filters or hospital tanks
You need battery backup capability (this is plug-in only)
The Fluval Q Series Air Pumps offer an entry-level price with the brand name we love in Fluval. Fluval, as they have always done, backs up their equipment with a generous 2-year warranty on this air pump model. For a brand name air pump, it has a get price point and should definitely be a consideration over cheaper Chinese-made units out there. It is a powerful unit with dual air outlets.
Due to the unit’s power, it does give off more noise than I would like. The sound level is more equal to lesser brand names. This is disappointing for a Fluval branded air pump. But given they are designed for larger tank capacities, it may be worth looking at if noise isn’t a concern for you. The price point for a brand name air pump is great.
The Tetra Whisper Air Pump is a staple in our industry. Tetra and their name brand Whisper have been what they are known for. The air pump is their major item in the Whisper lineup. The Tetra Whisper has a good balance of features. It is very cheap compared to the others on this list and it is quiet. It also doesn’t look that bad in your cabinet or hanging outside of your tank due to its unique shape. I guess you could say there is a bit of a cool feature with its not boxy look.
It is cheap and gets the job done. If you are looking for value, the Tetra Whisper is for you!
The Tetra AP Series Air Pumps are pumps designed for larger tanks. This is Tetra’s best product in the Aquarium trade. It is super quiet for how powerful it is. It is not as quiet as the Ehiem air pump. But, it is close and operates at much larger aquarium capacities, handling up to 300 gallons in fact. Even with its large operating capacity, it still retails at a great price. To top it all off, Tetra backs this air pump with a limited lifetime guarantee. What isn’t there to like here?
The only grip I have with this air pump is it only comes with a single airline outlet for the AP 150 outlet. That is fixed with a proper Gang Valve.
Pros
Quiet for a large air pump
Value Priced
Limited lifetime guarantee
Cons
AP 150 only has one airline hose outlet
5. Cobalt Rescue – Great Unit With Back-up Capability
The Cobalt Aquatics Rescue Air Pumps is our first pump on the list with backup capability. It comes with an internal battery that can power the air pump for 24 hours in the event of a power outage. Add to the fact that it can be plugged in, this unit afters a primary air pump with power outage backup. It has a good amount of power output and should suit a medium-sized fish tank.
Given that it is a unit that offers a battery backup function, it is on the pricier side. It has also been reported as loud compared to some of the more quiet models that we will be looking at later. If noise isn’t that much of a concern for you and you want a power backup option, this unit would be a great pick for you.
Pros
Backup capability with internal that lasts up to 24 hrs
Powerful out of the box – will suit most aquariums
Not as quiet as other models
Cons
Expensive
Louder than other models
6. Penn Plax Silent – A Quality Battery Powered Unit
The Penn Plex Silient Air B 11 is the perfect battery-powered air pump. It has a good amount of power, being able to handle tanks up to 29 gallons. The unit is powered by 2 D batteries that should give you a life of about 6-8 hours. The auto-on feature is a nice bonus as you can plug this into your outlet and it will monitor if a power outage occurs. If an outage occurs, the battery-powered unit will turn on.
This is great piece of mind if you go out of town or away from your aquarium and an outage occurs. I feel that every aquarium owner should have one of these units. They will save your livestock one day.
It is more expensive than other battery powered air pumps on the market. Yet, the generic and cheaper alternatives out there are not very reliable. This is a piece of equipment you pull out when your pet’s lives are in danger. I’d rather spend more for something I know that is going to work. Going for a cheap unit that may or may not work when it is most needed can be disastrous. This unit is not built for quiet. In fact, it is the loudest air pump on this list by far. But, that’s not it’s function. It exists to save your pets lives in the event of a power outage. This is an air pump you should buy today as part of your emergency planning.
Pros
Battery Powered
Good power – works for up to 29 gallons
Auto On Feature
Cons
More expensive than other battery powered air pumps
Loud
7. Deep Blue Professional Hurricane Category 5 – The Ultimate In Battery Powered Backup Units
Armed with a lead acid battery pack, this unit does not mess around with its battery backup capacity. It not only comes with a 4.0 Ah battery out of the box, it will also operate with 12 Ah. It is some great piece of mind to know you can work the unit with these larger batteries if needed. Note that if you use a 12 Ah battery you will not be able to house the battery in the unit. It is a powerful air pump that is designed for mid-size aquarium. With dual airline outlets, this unit can serve as your primary air pump as well as your backup. This has everything you want in a good air pump.
You get what you pay for with this unit. It is the most expensive air pump on the list and its larger size will produce more noise than the Eheim. If you have a mid-size tank and want to protect your investment out of the box, this is the unit to buy.
Pros
Battery backup that will run for days not hours!
Powerful
Dual airline outlets
Cons
Expensive
Louder than others on the list
What Cheap No-Name Air Pumps Miss
I’ve tested a lot of no-name air pumps over the years in store settings. Here’s what they consistently get wrong:
Vibration noise: The casing resonates on hard surfaces. You end up hearing the cabinet vibrate more than the pump itself. A neoprene mat helps, but it doesn’t solve the problem.
Diaphragm failure: Most cheap pumps use thinner diaphragm material. At 12 to 18 months you start getting reduced output, then failure. The sound changes first: the hum gets rougher before it stops.
Inadequate output at depth: A pump rated for a 40-gallon tank assumes a shallow tank. Drop the airstone to 20 inches of depth and that same pump is working at the edge of its capacity, running hotter and louder. Name-brand pumps spec for depth, not just volume.
Airline fitting tolerance: Generic fittings slip on standard 4mm tubing. Air leaks mean reduced output and a louder pump working harder to compensate.
What Are They?
Aquarium air pumps are a piece of equipment that delivers oxygen to your aquarium. Air pumps are external devices. They need to be placed outside of your aquarium, which means they are not waterproof. The air they generate is delivered through airline tubing. You can use accessories like air stones and bubble decorations.
Air stones can distribute oxygen while bubble decorations add interest to your aquarium. They work in both freshwater and saltwater tanks. For saltwater, they tend to be used with wood stones in applications such as Protein Skimmers. Since saltwater fish tanks need to have more current than freshwater fish tanks, a wave maker is a better fit for them.
The mechanics of an aquarium air pump are actually pretty simple (image source). You have a magnet, which is the tan-colored part above that turns on and of. As the magnet turns on and off, the lever on the bottom left of the photo moves up and down. This movement from the level pumps the rubber part in the middle called the diaphragm. The diaphragm is the part that takes in air and pushes it out to the airline tubing.
Do I Need It?
The main reason to get an aquarium air pump would be to provide oxygen in the tank. The most common application for an aquarium air pump is with fish that need rich oxygen. Discus (due to higher temperatures) or Goldfish (Due to their size) are two examples. They are also great to use if you want to connect them to a Sponge Filteror Air Pump Powered Protein Skimmers.
Pumps versus Wavemakers
I do get this question a lot. Why should I get an aquarium air pump over a wavemaker? Aquarium Wavemakers are great solutions for water movement and aeration. Yet, they are not for every aquarium setup. In freshwater tanks, there are certain setups where an air pump is more appropriate. For example, fish like African Cichlids need current. Other fish like Goldfishand Betta Fish, want calmer waters. With an aquarium air pump, you can have oxygen-rich water without having a current that is too strong for fish.
Types
There are three types of air pumps in general. They are:
Plug-in
Battery Powered
Battery Backup
Plug-In
This is going to be the more common air pump you come across. They plug into your outlet and run all day. Super simple and for the most part very reliable. They do not have an on and off switch and are meant to run 24-7. You can if you want to control their operation if you have a controllable power outlet.
Battery Powered
These air pumps operate off batteries. They are smaller air pumps and come in handy in the event of a power outage. The batteries tend to last a good while – usually around 8 hours. All battery-powered air pumps are unfortunately very loud. It’s simply not their main design to be quiet. They are designed to be used in a pinch. They are not designed to be your primary air pump in your aquarium. I would recommend that you have a battery-powered air pump on hand for emergencies. They will save your fish tank one day.
Battery Backup
This air pump is a combination of the two previous types of air pumps. They plug into your outlet and have a bay to place backup batteries in the unit. When the power goes out, the battery backup will kick in to keep your fish tank oxygenated. Lack of oxygen is one of the major reasons for a tank crash during a power outage. A high-end unit will likely save your aquarium one day from a power outage. They are priceless units.
Accessories – Getting the Essentials
So we have got through all the best aquarium air pumps available to buy today. Before you go get your air pump, let’s talk about all the essential accessories. You will want to look into these before setting everything up. They are:
Airline Tubing
Air Check Valve
Air Control Valve
Airstone/Bubblers
Airline Connector
Gang Valve
Airline Tubing
These connect your air pump to your air stone, bubble, or sponge filter The tubing transfers the airflow to your fish tank. They are very cheap to obtain and just about any you purchase will be very reliable. I would recommend Penn Plax’s Airline Tubing or Lee’s brand if shopping locally. All you do is measure and cut to length and you are good to go.
Airline Check Valve
An Airline Check Valve is an accessory that will prevent your airline tubes from siphoning water out of your aquarium. This can occur in the event of a power outage or equipment failure. They are a must for any air pump application.
Control Valve
An Air Control Valve is an accessory that allows you to have more precise control over your Air Pump’s output. They work by turning the valve to reduce or increase the airflow. For control valves, I prefer the ones made by Fluval.
Stones and Bubblers
An air stone or aquarium bubbler helps better distribute the oxygen into your aquarium. Without either, the airline connected to your air pump will generate big bubbles. These large bubbles can be loud and disruptive to your water line. In a freshwater fish tank, we prefer a smooth distribution of bubbles.
The finer the better as this provides more rich oxygen into the aquarium. Air stones are the standard that most of us in the hobby are used to and provide fine bubbles. Bubblers are more expensive than air stones and take it a step up producing a fine mist of bubbles. Air stones are cheap and get the job done, but if you want the best, go with a bubbler.
Airline Connectors
Airline Connectorsare plastic pieces that allow you to split your airline in two or to connect your airline at 90-degree angles. They come in handy when you have a lot of airlines that you need to work with. Airline tubes can get bent reducing the output of your pump. The connectors will create a good directional change for you preventing the issue.
Gang Valve
A gang valve is an air pump accessory that will split your airline output into multiple lines. It also has the added benefit of being able to control the airflow of each line. It’s a combination of an air control valve and airline connectors. I would recommend Penn Plax’s Gang Valve if you are looking to get one.
How to Reduce the Noise From Your Unit
A common question I get from readers is how do I reduce the noise from my air pump. Of all the features and models I listed on this best of the post, the primary concern with an air pump is noise. The unfortunate truth is that all air pumps make a sound. There are two things we can work on here when it comes to noise:
Quality of sound
Reducing sound
The quality or the type of sound that your air pump produces is a major factor. A lower-quality air pump will rattle and bump while the higher-quality brands like Eheims will hum along. An air pump that hum along tends to not annoy people, even if they are louder than the ones that rattle.
Reducing the sound itself is the next thing we can work on. We can do the following to further reduce the noise produced by our air pump:
Raise the depth of our airstones
Moving the air pump to a different location
Fill any unused airline outlets
Raise the Depth of Your Stones
For smaller pumps, they will work harder the deeper your air stones are placed in the tank. You can solve this by moving the air stones up or considering purchasing a larger air pump that can operate at those depths without having to work hard.
Move It To A Different Location
Air pump location is a very important factor. If they are leaning on something, they can create more vibrations that can create more noise. Even the surface it sits on could create a problem. If the surface is an issue, you can consider moving it or placing the air pump on a Neoprene Mat.
If you have an Aquarium Cabinet with doors, placing the air pump inside the cabinet can muffle the noise. Keep in mind that many budget built aquarium cabinets are made of particle board. A particle board and an air pump are a bad combination. Consider a neoprene mat to migrate the noise if you are using such a cabinet. Oak cabinets fare a lot better at noise absorption.
Fill Any Unused Airline Outlets
Some of the air pumps we have featured in this post have multiple airline outlets. This is great for having the ability to use multiple airlines out of the box, but can also create a problem if you do not utilize them. Unused airline outlets will be noisy as the air pump will push air to these outlets even if unused. To reduce the noise, one way would be to plug in airline tubing to the unused outlet. It will generate less noise than if the outlet was left open.
FAQS
Can A Unit Be Too Strong For A Fish Tank?
Yes, an air pump can be too strong for a fish tank. If they are oversized, they can disrupt the water surface too much causing stress on your livestock. It’s best to either buy a smaller air pump or split the outlets so they can be spread out to other parts of the tank.
Should I Turn It Off At Night?
No. It’s not necessary to turn off your air pump at night. However, you can if you wish to disconnect it if your air pump is not connected to your filtration system, like a sponge filter
Do Fish Like Stones and Bubblers?
Yes, but not because they actually like the way it looks. Air stones distribute air more calmly than just your airline and the added oxygen benefits your fish. So in that way, fish do like air stones in their tank.
Do I Need One If I Have A Filter?
You typically will not need an air pump if you have a capable filter. However, there are certain fish where added oxygen would benefit them like Discus fish. Air pumps also become more important if a tank is overcrowded because oxygen starts to become scarce.
Conclusion
Final Word
The right air pump is invisible. You never think about it. The wrong one is the hum you fall asleep counting. Buy once, buy right, and pick a pump with a diaphragm designed to last. Your fish don’t care about the brand name. You will, at 2am.
We went through quiet a lot today. We learned about how air pumps work. What different models are available for purchase. We looked at accessories for our air pump. We then provided a few pro tips to make your pump as quiet as possible.
The fact of the matter is air pumps do generate noise. There is no way around that. But, we want to reduce that noise as much as possible. We want a quality air pump that produces a sound that will not annoy us. An air pump should produce a smooth sound versus a banging or clanging sound. If you have any questions below, please leave them in the comments. Thanks for reading.
🔧 Want to learn more? This article is part of our complete Aquarium Equipment & Gear Guide. your ultimate resource for filters, heaters, lights, pumps, tanks, and more.
After 25 years of watching goldfish keepers make the same mistakes, goldfish are not easy. They produce more waste than fish three times their price and need more space than most people realize. A single goldfish needs 20 gallons minimum and heavy filtration. Most goldfish deaths come from undersized tanks and inadequate filtration.
A goldfish tank is not a set-it-and-forget-it project. It is a commitment to managing waste.
A goldfish kept properly is more impressive than most tropical fish. The problem is almost nobody keeps them properly.
The Goldfish is one of the most popular fish in our aquarium hobby. It may even have been the first fish you had when you first got introduced to aquariums. You may have even come across this article thinking about setting up a Goldfish tank for the first time or for a loved one. They really are amazing fish that is also easily misunderstood. Because they are first-time fish, a number of us enter into Goldfish care with little knowledge on what is needed to have them thrive.
I’m sharing this article with you today so you can learn all the essentials plus more. I want you to be very successful in caring for your pet Goldfish. As quick disclosure, this blog post will contain affiliate links which I may get a small commission at no extra cost to you should you make a purchase. Now let’s get started!
Key Takeaways
Goldfish are not beginner fish. They require larger tanks and are quite messy
They are coldwater fish and are best with other goldfish
Live plants with goldfish is possible if you know what plants to select
There are slim-bodied and fancy goldfish. Slim bodied are more athletic and can live in ponds
History of Goldfish
One crazy fact about Goldfish is that they were first kept for their meat. Yes, that’s right. Goldfish used to be what was for dinner in China, their area of origin. Goldfish are the domesticated version of wild carp from East Asia. Their original colors were silver-grey and they were known as “chi” in the East. It was one of the most common staples of meat in China at one time.
As carp continued to be bred for meat, a strange thing happened. Genetic mutations would occur with the carp and these “mutants” would end up with flashy red, yellow, and orange colors. If these fish were in the wild, they would get quickly eaten by predators since they stood out so much. These flashy-looking new fish caught the eye of Buddhist monks in the 9th century. They began to keep these colorful fish in their ponds. The Goldfish was born at this time as an ornamental pet.
The breeding of the fancy Goldfish varieties did not begin until the 1600s starting in Ming Dynasty China. They were highly regarded for their scales and it was tradition for a man to give his wife a goldfish on their first anniversary to symbolize the prosperous years to come. Goldfish were imported to North America around the 1850s. This video by Aquatographyprovides a deep look into the origins of goldfish.
Care – The Major Factors We Need To Know
Goldfish on the surface seem very hardy and easy to take care of. For the most part, they are. However, we want to have the best environment we can place them in. I want to go beyond the basic beginner setup and set you up for long-term success. Goldfish care is broken down into several parts:
We have a video from our YouTube Channel that you can follow along as well. Be sure to check both as our blog goes into more detail. If you enjoy our channel, be sure to subscribe as we post videos every week!
Aquarium Size
I’m going to say it upfront to my readers. Goldfish do not belong in a Goldfish bowl. You may see Goldfish bowls everywhere, but bowls are not big enough for the long-term. You may purchase them as young new fish for your fish tank, but they will get large. In fact, the Common Goldfish can grow up to 10 inches in size and Fancy Goldfish can grow up to 8 inches in length. Some have grown as large as cats in rivers! That is a lot of Goldfish for a tank! Goldfish also have a lot of mass, especially the Fancy types. Given their adult sizes, it’s no wonder they were originally kept in ponds.
When sizing an aquarium for a Fancy Goldfish, you will want to start out with a tank size of 20 gallons for a single Fancy. After that, it’s roughly 10 gallons per every other Fancy Goldfish. This means a 40 gallon tank can hold 3 adult-sized Fancy Goldfish. That doesn’t sound like a lot of fish, but remember they get pretty big. We need to ensure an aquarium is big enough not only for them to have room to swim around, but also so you are not a slave to water changes.
For a common variety of Goldfish like a Comet, you will want to consider an aquarium size of 30 gallons and target at least 4 feet in length. Each subsequent comet you add would need an additional 12 gallons so for a 55 gallon tank, we are talking about 3 full-size Comets. Again, not a lot of fish. Keep in mind that Comets can grow up to 12 inches in length!
For a Fancy Goldfish setup, I would recommend a larger aquarium like a 55-gallon tank or 60 gallon breeder. These 4-foot-long tanks offer everything you need to get started. You can go cheaper if you wait for a dollar-per-gallon sale at your local chain pet store to pick these aquariums up.
Filtration
Goldfish in general are very hard on the bioload of an aquarium. They are large, messy, eat constantly throughout the day, and stir up your Aquarium Substrate all day. Maintaining a Goldfish tank requires a hefty filter. Keeping in mind that Goldfish are an entry-level fish for Aquarists, we are going to focus on more budget-friendly options. Our best option is a good quality aquarium Power Filter like a Hagen Aquaclear
The Hagen Aquaclear is a quality-made, readily available power filter that has stood the test of time. It is very easy to customize each section of the filter stages to suit your needs. It will provide years of reliable operation. Make sure you size up one model that is made for a larger aquarium. A goldfish aquarium produce a lot of waste, so get try aiming for oversized filtration
Parameters (Water Quality)
The main thing with Goldfish tanks once you have the tank cycled is consistently monitoring your Nitrate and pH levels. Ammonia is a concern when you first cycle the tank or when you add new fish. Goldfish, due to their messiness and consistent desire to eat will produce a lot of waste. A full goldfish tank will end up running higher nitrate levels as a result. You want to test your nitrate levels regularly with a proper Aquarium Test Kit. Take care of your goldfish by ensuring your nitrates don’t go above 40. This will ensure you have the best water quality possible.
The pH levels of your Goldfish aquarium are also critical. Goldfish are like an aquarium at 7-8 pH at all times. This is different from most tropical fish and planted aquarium environments which prefer a pH at an acidic level lower than 7. Make sure your tap water has the proper pH and adjust accordingly if your tap is below 7. Always use a water conditioner like Sea Chem Prime to treat your water. A water conditioner will remove harmful chemicals out of your tap water like ammonia and chlorine and make it aquarium safe.
Temperature
Goldfish are cold water fish. Anything over 75 degrees for a Goldfish is going to stress out your fish. Goldfish actually have a large range of temperatures that they can live in. The range is from 50-75 degrees F, with the general ideal range being 65-72 degrees. This means that if you keep your home at room temperature, you should be fine without having an Aquarium Heater in your tank.
There are two things we have to keep in mind with Goldfish tanks. If you live in a hotter climate, you need to control the temperature in your aquarium in the summer. This require an Aquarium Chiller or getting your specific room where your tank is to a cooler temperature with a mobile AC. If you live in a cold climate with very cold winters, you may want to consider having a heater handy when the temperatures get below freezing in your area.
Decorations
When we think about Decorations for a Goldfish tank, we have to consider both space and safety. Common Goldfish are fast and enjoy swimming around. Fancy Goldfish are slow, clumsy, and have delicate fins. Both types of Goldfish need their space to swim. Consider having an open aquascape when building out a Goldfish tank.
When it comes to the decor itself, we want to consider rocks, and artificial plants without sharp edges. We take the same consideration as we do with Betta Fish where we avoid sharp edges as the long fins of our Fancy Goldfish can get caught and damaged.
A good brand to look into is marina naturals when looking at silk artificial plants. These plants will not damage the fins of your Fancy Goldfish. You will need to keep in mind that goldfish like to dig out plants. It may be a good ideal to anchor these down with rocks.
Substrate
Goldfish love to stir the substrate in search of food. They have big mouths, so substrates that are medium or larger in size can pose a problem for them as they can accidentally shallow the pebbles. We want to make sure that goldfish have a substrate that they can easily stir and scavenge around. Knowing this, the best goldfish tank substrate is going to be a sandy one.
A sandy grain size substrate like the one sold by Caribsea is what we are looking for. We want to work with a thin layer of sand. This is to counteract the big pitfalls of a sandy substrate. Sand can compact and create anaerobic pockets, which is very dangerous for your fish. A thin layer that barely covers the bottom of your aquarium and no more than 1/2 an inch is what we are shooting for. This sandy substrate will get stirred all day by your Goldfish and mimics their natural environment. This substrate is also pH neutral – a major factor because Goldfish need a pH of 7.2 – 7.6.
Diet
Food for Goldfish is an interesting topic because the industry is loaded with a lot of food targeted at beginners. These foods are cheap, easy to feed, clean, and last a long time. That is great for us humans, but they are not that great for our Goldfish.
The most basic food offered to Goldfish is flakes. Most flake food offered on the market is full of fillers, which long-term is unhealthy for your Goldfish and creates a lot of waste. We want to upgrade the diet of our Goldfish to something better. At a minimum, we want to think about quality pellet food.
A good brand for goldfish pellet is Northfin. They sell a premium Goldfish pellet formula specially designed for them. It is free from fillers and includes a healthy dose of Omega 3s to really help bring out the color in your Goldfish. I would recommend presoaking your pellets in aquarium water before you feed them to your Goldfish. This will allow for the pellets to soften and expand a bit so they don’t expand in your Goldfish’s gut.
Going further, we can look into freeze-dried food. I would recommend Hikari’s Bio-Pure Krill. Kill has the ability to boost carotene levels in your Goldfish. This helps produce better coloration in your Goldfish and can prevent them from turning black. This formula is multi-vitamin enriched so you do not have to supplement with a vitamin supplement like Vita-Boost.
The next step up would be frozen food. These you would likely need to purchase from your local pet or fish store. For frozen food, look for brine shrimp, blood worms, or daphnia. Good brands to look at would be Hikari or Cobalt Aquatics.
Lastly, we go with live foods. For live foods, I want to look at live plants. Goldfish in general, are known for eating a number of aquarium plants. While this is bad if you are looking for a planted goldfish tank (it is possible to have plants with goldfish – more on this later), we can use this to our advantage when supplementing our Goldfish’s diet. One plant that Goldfish love to eat that is fast-growing and readily available in our trade is Duckweed.
If you are part of an Aquarium society or know anyone with a Planted Tank, there is a good chance they either have Duckweed or have grown it in the past. Duckweed is also grown in ponds for Koi and Goldfish. Goldfish love to gobble this plant up. It is very cheap to obtain and a very fast grower. It is very important to have food readily available in your aquarium for a Goldfish. We have to keep in mind that Goldfish do not have true stomachs.
Because of this, they are always eating and hungry. You do need to feed goldfish regularly, but a natural food like Duckweed can really come in handy because you can make it available in your tank, it’s a natural filter, and it is eaten away by your Goldfish throughout the day.
Aquarium Mates
Tank mates for Goldfish is quite tricky. They have several factors working against potential Goldfish tank mates. They are a coldwater fish, so that eliminates all tropical freshwater fish right off the bat. Fancy Goldfish also are slow and have large fins, which is attractive to nip for a more active fish. Goldfish can also be bullies themselves. Their large size, mouths, and mass can present problems to smaller fish. For this reason, the best recommendation is to have a Goldfish-only tank.
That being said, there are some tank mates that would work. These tank mates would be:
Coldwater snails like Nitrite and Apple Snails
Brittle Nose Plecos
Dojo Loaches
Snails are a great addition because they will work on algae in the tank and for the most part Goldfish should leave them alone. If the Goldfish do decide to harass them, they are large enough to handle themselves and give you enough time to reconsider their compatibility. Every Goldfish is different after all.
When it comes to Plecos, only the Bristle Nose Pleco is compatible with a goldfish. Common plecos are a bad idea as they require driftwood and can get very large.
Dojo Loaches (pictured above) are likely the best candidate when it comes to other fish in a goldfish tank. They get rather long at 5 inches and require at least a 30-gallon tank, but they can tolerate the cooler waters of a goldfish tank. They are very peaceful, very active, full of personality, and excellent scavengers.
It’s always best to introduce these new fish and inverts AFTER our goldfish have been added. We want to make sure our goldfish are established since they tend to be the ones that are bullied not the other way around! You will also want to consider a larger tank if you want to have other tank mates. A 55 gallon or 75 gallon fish tank would be good options.
Live Plants
Plants for Goldfish like tank mates are tricky. You have a number of things working against you when it comes to them. Because Goldfish like cold water that is 7-8 in pH, this eliminates the majority of tropical aquarium plants available for sale. Goldfish also love to gobble up plants. They will eat just about any plant you stick in the tank. Another factor is that Goldfish stir up the substrate, which means that if you have any rooted plants that need to be established in your substrate, it is likely that your Goldfish will dig them out.
That seems like there are a lot of things going against you when it comes to aquarium plants, but we also need to think about the benefits as well. Plants will really help with your water change efforts. They will thrive in the high nutrient environment that goldfish will create with the waste they produce. If you don’t want to be a slave to water changes, live plants is your ticket to relief. In large quantities, they can act as natural filtration for your tank.
So let’s talk about what plants work best. We want to make sure these plants tolerate higher pH, will do well with high nutrients, won’t mind the cooler temperatures, and won’t get eaten by our Goldfish. These are:
There are a lot of different Goldfish types to house in your aquarium. All goldfish are long-lived and will provide years of joy for you. I’m going to break down a small list of Goldfish for you. I’m going to split it into two types:
Slim Bodied Goldfish
Fancy Goldfish
Slim Bodied
Slim bodied Goldfish are one of the hardiest fish you can purchase in the hobby. They is placed in home aquariums or outdoor in ponds. They will tolerate a wide range of temperatures. They are fast swimmers, very active, and aggressive eaters. They cannot be kept with Fancy Goldfish as they will out-compete them in an aquarium with how fast they swim around and eat. Below are a few types of slim bodied Goldfish:
The common Goldfish is also known as your “feeder” goldfish at pet stores. They are also the Goldfish you used to get at fairs as prizes. This Goldfish most resembles their original ancestors, the carp. They can grow as long as a foot if given a large enough aquarium or if housed in a pond. They are very hardy, very cheap, and long-lived fish.
The Comet Goldfish is a variant of the common Goldfish that has a long fancy tail. They share the same hardy characteristics of the common, but with more flash with their tails. They will also get a foot long and are fast swimmers. They a relatively cheap fish to purchase.
The Shubunkin Goldfish is a multicolored goldfish. These you will see placed in ponds as they get long and command a higher price tag than the former 2 mentioned. Some varieties of Shubunkin will grow fancy tails and fins.
Fancy
Fancy Goldfish are selectively bred fish that have been created over the years. They are not found in the wild and exhibit multiple unique characteristics depending on the type. They are fish with a lot of mass on them and are clumsy in nature. They have long elegant fins and are slow swimmers. Because of the slower swimming speed, they do not mix well with slim-bodied Goldfish as they will be unable to compete with them for food.
These egg shaped fish are valued for their looks. They tend to be more delicate than slim bodied Goldfish, but there are several varieties that are hardy and appropriate for beginners. A few examples of Fancy Goldfish types are:
The Fantail, Black Moor, and Ryukin Goldfish are great fancy varieties that are appropriate for beginners. The Lionhead and Telescope Goldfish are varieties that would be considered more delicate and better suited for experienced Goldfish keepers. The main difference between the first three and their others is what stands out with the two other fish. The Lionheads are so modified that their dorsal fin is missing. Their fleshy-like head and clumsy nature make them sensitive to injury. For the Telescope, it’s the eyes. The eyes give them limited vision and make them delicate. It’s another Fancy that is not for beginners.
I go into more detail on fancies in this blog post, but I wanted to help you identify what is a hardy Fancy Goldfish and which ones aren’t. The less modified features of the fish, the more likely it will be better suited for a beginner. Of all the Fancies listed here, my personal favorite is the Ryukin. It is bold, elegant, and hardy. It is a wonderful addition to a Fancy Goldfish aquarium.
Putting It Together
We have discussed a lot about Goldfish Tank care, food, housing, and types of Goldfish. It’s time to put everything we have learned today and make a comprehensive setup. In this setup, we are going to set up a Goldfish tank with live plants. You can opt not to use plants and save yourself on upgrading your light.
Tank – 55 gallon for 60-gallon breeder
Lighting – Add another light strip to host low-light plants
Rocks – Margo Garden Products 3-5″ Rain Forest Large Rocks (available on Amazon)
Substrate – Caribsea Super Naturals
Fancy Goldfish – 2 of your choice (after the tank has been cycled)
Water Conditioner (To treat tap water) – SeaChem Prime
To save on money, we can purchase a 40 gallon breeder to 55 gallon tank during Petco’s dollar-per-gallon sale. All the other components fit very well for this setup and for what we want to house. If you opt for a 55 gallon tank, you can house 3-5 fancy goldfish. You will want to anchor your plants to your rocks so they don’t get stirred up by your Goldfish.
If you opt for a dollar-per-gallon sale tank, you are free to select the light of your choice. I would recommend an led light like the Serene Pro LED if you are selecting a light for a planted aquarium setup.
Additional Resources
There are many books out there that go beyond the scope of this blog post. However, not all are created equal. There is one book I recommend when it comes to Goldfish care.
Fancy Goldfish: Complete Guide To Care And Collecting
This Book Written by Dr. Johnson goes over diseases, prevention, health, breeding, and proper fish selection. It contains over 100 color photos of Fancy Goldfish. The information contained in this book is a full deep dive into the world of Fancy Goldfish. You will become an expert in knowledge after you read this book. It does have some outdated information given it was published back in 2001, but the majority of the information in this book I would consider evergreen.
I would highly recommend it to anyone who really wants to keep the more exotic Fancy Goldfish or considering expanding into larger display tanks.
FAQs
What Size Aquarium Do They Need?
The minimum size tank that a goldfish needs is 20 gallons. For each additional goldfish after the initial one, you will need at least 10 gallons. The best starter size to house multiple goldfish would be a 55 gallon tank.
How Long Can They Live In A 1 Gallon Aquarium?
A goldfish will not thrive and may not live very long in a 1-gallon tank. These tanks are too small for them. Goldfish do not have a labyrinth organ like a betta fish. This is how betta fish can live in small containers. Even then, it’s not ideal to place a fish in such a small tank. Consider placing your goldfish in an appropriately sized tank for its long-term health.
Can They Live Without A Filter Or Air Pump
Yes, goldfish can live without a filter or an air pump. However, it’s risky to do so. Without a filter, a goldfish tank may experience ammonia spikes.
Closing Thoughts
Goldfish go way beyond the fish in the bowl that money of us have seen in the past. There are many varieties of Goldfish with some of the exotic Fancy types selling for hundreds of dollars. They are large fish with personality and unique aesthetics. They do require larger tanks long-term, but they are long-live fish easily living over 10 years in more aquariums. I hope I showed you what Goldfish can offer you as a pet by reading this post. If you have any questions, leave a comment below. Thank you for reading.
📘 Want to learn more? This article is part of our complete Freshwater Fish Guide. Your ultimate resource for freshwater species, care tips, tank setup, and more.
Most Betta Fish owners kill their fish slowly without realizing it. Tiny bowls, no heater, zero filtration. I have kept bettas for over 25 years and the difference between a Betta Fish surviving and actually thriving is night and day. This is what real Betta Fish care looks like.
If your Betta Fish is not flaring, building bubble nests, and actively exploring, something is wrong with the setup.
A healthy Betta Fish lives 3 to 5 years. That means years of weekly water changes, a heated and filtered tank, and a varied diet. This is not a disposable pet.
A betta in a filtered, heated 5-gallon tank acts like a completely different animal than one sitting in a cup at the pet store. The difference is not subtle. It is dramatic.
ASD Difficulty Rating: Tier 1 – Beginner
Betta fish are one of the most beginner-friendly fish in the hobby, but they are not zero-maintenance. They need a heated, filtered tank – not a bowl. A 5-gallon minimum with a gentle filter and heater is the real starting point.
Hard Rule
Betta fish need a heater and a filter – not a bowl, not a vase. The bowl myth kills more bettas than any disease. A 5-gallon heated, filtered tank is the minimum for a healthy, long-lived betta.
The Betta Fish for some of us fish keepers was our first experience with a pet fish. It was our introduction to this wonderful world of aquarium keeping. Betta Fish after all has a lot going for them that makes them great pets. They have a great personality and come in a variety of colors. They can exist in smaller tanks and is relatively hardy as long as the environment is properly cared for.
What Most Care Guides Get Wrong About Betta Fish What They Actually Need to Thrive
Want a centerpiece fish for a nano tank? Get a betta. Want a peaceful community schooler? Get ember tetras instead. Want low maintenance? Get neither. Both need real care.
The most common mistake I see with bettas is the bowl. It is still the number one killer of betta fish in this hobby. A betta in an unheated, unfiltered bowl is not living. It is slowly dying. The pet store cup is transport, not housing. The second mistake is assuming all bettas can have tank mates. Every betta has a different temperament. Some tolerate a community setup with small, peaceful fish. Others attack anything that moves, including snails. You cannot predict this before you try it, so always have a backup plan. Finally, people underestimate how much bettas respond to enrichment. A betta in a bare 5 gallon tank with nothing to explore will sit at the bottom and do nothing. Add plants, a cave, something to investigate, and you see a completely different fish. They are curious, interactive animals that need stimulation.
The Reality of Keeping Betta Fish
They are not low-maintenance pets. Bettas need a heater, a filter, and weekly water changes just like any other tropical fish. The myth that they thrive in small, unfiltered containers has killed millions of these fish. A proper betta setup starts at 5 gallons with a gentle filter and a heater set to 78 degrees.
Aggression varies wildly between individuals. Some bettas tolerate tank mates without issue. Others attack anything that moves, including snails. There is no way to predict this before you try it. Always have a backup plan if your betta turns out to be a loner.
Fin rot is the number one killer. Poor water quality causes fin rot faster in bettas than in almost any other fish. Those long, flowing fins are bacteria magnets in dirty water. Weekly 25% water changes are not optional. They are the single most important thing you do for this fish.
Biggest Mistake New Owners Make
Putting a betta in an unheated bowl and calling it a day. Bettas are tropical fish that need 76 to 82 degrees. Below 74, their immune system shuts down and they stop eating. A $15 heater is the difference between a vibrant fish and a slow death.
Expert Take (Mark Valderrama, AquariumStoreDepot)
After 25 years of keeping bettas, the single best upgrade you can make is a quality heater in a 5-gallon filtered tank. Everything else matters less than getting the basics right first.
Key Takeaways
Betta fish are the best beginner fish to start your aquarium journey with
A 5-gallon aquarium is a minimum needed for a single adult Beta fish
Betta fish require heaters as they prefer warmer waters
Betta fish are aggressive to other Bettas but is bullied by many tropical fish
There are a vast variety of Betta fish varieties available with many of the rarer variants being better acquired via online stores
A Quick Overview
Scientific Name
Betta splendens
Common Names
Betta Fish, Siamese Fighting Fish
Family
Gourami
Origin
Thailand
Diet
Omnivore
Care Level
Beginner
Activity
Slow to Moderate
Lifespan
2 – 5 years
Temperament
Peaceful (Aggressive to own kind)
Tank Level
Middle to top
Minimum Tank Size
5 gallon
Temperature Range
76°-81°F
Water Hardness
5 to 20 DH
pH Levels
6.5. 8.0 (for most varieties)
Filtration/Water Flow
Low
Water Type
Freshwater
Breeding
Egg-layer
Difficulty to Breed
Easy to breed
Compatibility
Community tank (with properly selected species)
OK, for Planted Tanks?
Yes
Classification
Taxonomic Rank
Classification
Common Name
Betta Fish
Scientific Name
Betta splendens
Order
Anabantiformes
Family
Osphronemidae
Genus
Betta
Species
B. Splendens
All About Betta Fish Care
The Betta Fish’s scientific name is Betta splendens. They are also known as Siamese Fighting Fish. They originate from Asia and were kept in the past for their fighting nature. They were originally brought into aquariums by locals who caught on rice paddies. They were first imported to the US in 1927. These days, Bettas are primarily kept for their appearance. They have been selectively bred over the years into many different colors and tail types. They are now known as the designer fish in the freshwater hobby.
In the wild, Betta splendens originate from Southeast Asia. They are native to areas that are visited by frequent flooding that will also go through periods of intense droughts afterward. As a result, Betta evolved to become a labyrinth fish. A labyrinth is a fish that has the ability to take in oxygen from the air as well as take oxygen from its grills. Because of this adaption, Bettas have the ability to live outside of water for short periods of time and can breathe the air around them provided they can stay moist. This is the reason why you will see Bettas in small containers at the pet store or at home (though I would not recommend this — more on this as we through this post).
Here is a short video on Betta for a quick intro from my YouTube Channel. If you like it, please subscribe for more great videos!
Betta is pronounced Bet-tah. It is very common for newcomers to pronounce it as Bay-tah. They received their name from the ancient Asian “Bettah” warrior clan. They were discovered in Thailand. Their Thai name is Iken Bettah, which is translated as “biting fish.” They are also known as Siamese fighting fish. This name was taken from the word Siam, with Siam being the former name of Thailand. They became very popular in the mid-1800s for their fighting. The fighting sport became so popular that the King of Thailand ended up regulating the sport and taxing it. The sports competitions were actually measured on the fish’s bravery versus the damage they inflicted on their opponent, however.
Male and Female Differences
Males and females are distinctly different when it comes to Betta Fish. The males are more colorful with larger fins. Females have shorter fins and are duller in color. Male betta fish also will have a more torpedo-shaped and larger body. Female betta fish also have an Ovipositor on the undersize of their body. These are tiny tubes that release eggs.
The International Congress (Competitions)
Betta Fish breeding has been very popular over the years with breeders raising some of the most beautiful fish you will ever see in the hobby. In fact, there are competitions for the show Bettas (pronounced Bet-uh) hosted by the International Betta Congress (IBC). Below is a video by DocAquaTV showing an IBC competition in full swing. There is a huge community when it comes to Betta Fish, and seeing these unique-looking and high-quality Betta is a real treat.
I would highly encourage anyone who is passionate about keeping these fish to look into a scientific-based community like the International Betta Congress and maybe even think about joining to deep dive into the Betta world. They offer a lot of benefits like their membership forum and magazine. They have been around since 1967 and really take efforts to bring education and care to Bettas all over the world.
The Major Factors We Need To Know
Now that we know a little bit about the Betta itself and the scientific-based community that supports them let’s talk caring for your betta. We are going to split care for a Betta Fish into the following elements:
Housing
Filtration
Heating
Decor
Diet
Tank Mates
Aquarium (Housing)
I’m going to be very upfront and clear to my readers here with this statement. The best aquarium to start with for a Betta is a 5-gallon tank. That’s correct, 5 gallons. You may be a little taken aback by this statement as you may have visited your pet store and seen many of the “Betta tanks” available for sale. Many of them are badly undersized.
I encourage anyone who is keeping a Betta Fish long-term to invest in a proper five Gallon tank like the the ones offered by Marineland and Fluval. Betta fish live best in a good-sized tank and you want the best for your pet. Invest in the proper tank so your fish can thrive.
We also want to limit the number of male bettas in our aquariums. We should only have 1 male betta in our aquarium unless we are using tank dividers to keep our male bettas separated. Keeping more than 1 male is going to require more than 5 gallons. A 20-gallon tank is best for housing multiple male bettas – 3 to 4 are best for a 20-gallon tank using a 1 betta for every 5 gallons approach.
Aquarium Filtration
Contrary to what you may see in the chain pet stores, Betta fish are not best served in a fish bowl. We want their tanks filtered. This will make it easier to maintain as a fish tank without a filter is going to need a water change every 2 to 3 days. This can get very old fast! We want to make tank maintenance easy to do rather than a major chore. Having proper filtration that houses a lot of beneficial bacteria in your tank will provide a proper nitrogen cycle for your fish tank and for your Betta. This will cut down the number of times you will need to change the water int he tank every month and give your Betta a better environment to grow and thrive. I would recommend a Power Filter if you are not using an aquarium kit or all-in-one tank. The best power filter for a small tank like this is going to be a Penn Plex Power Filter or AquaClear as these companies design power filters at this size and both are adjustable.
When using a power filter, you will still need to protect your Betta. Bettas are known for having delicate fins and being very curious. It’s pretty common for them to get sucked into a filter accidentally or have one of their fins damaged. You will want to dampen the intake of your betta fish filter by putting a sponge over it and adjusting the flow to make it calmer and suitable for the Betta. Bettas prefer calmer waters, and some power filters on the market are designed for a higher gallon-per-hour applications. Adjust it down for your Betta and let them adjust to the flow. Another alternative is to use a low-flow canister like an Aquael Multikani.
Tap Water
Because Siamese fighting fish have labyrinth fish, it is a common misconception to put them in any type of water. While we can use tap water, we want to make sure we have the right type of tap water. Tap water needs to be chlorinated with a proper water conditioner produce like Seachem Prime. Water conditioners like Seachem Prime will remove chlorine, harmful chemicals, ammonia, and nitrite from your tap.
Never stick a Betta in straight tap water. Always make sure to dechlorinate tap water to keep your fish safe.
Tank Heating (Water Temperature)
It may not seem like it because you see many of these Betta for sale at pet stores in bowls or small tanks, but they are actually tropical fish and betta fish need water water. They are most comfortable with water temperatures at 75 to 82 degrees with 78 degrees being your target temperature. I would recommend choosing a quality heater from our Best Aquarium Heaters Reviews post. Eheim heaters are one of the most reliable heaters on the market and are worth a look. Neo Therm Heaters are great as well. They have a smaller footprint that works better with the smaller size of the Betta Fish tanks and will fit in all-in-one tank chambers. Both heaters are accurate up to 1 degree of water temperature, the best in our industry.
I would also highly recommend that you get a Digital Thermometer as a backup for your heater’s internal thermometer. If you have the budget, you can invest in a proper Aquarium Heater Controller for a more foolproof water temperature regulation system.
Tank Decorations
There are two parts of the Decor for Betta’s tank: plants and hardscape (rocks and branches). For plants, specifically artificial plants (I’ll touch on live plants later in the post), we need to be very selective about what we put in our Betta Fish tank.
Silk plants like the Marina Naturals Plant shown above are what we want to purchase for our Bettas. Traditional plastic plants you will see at the pet store are not safe for a Betta Fish. This is because many will contain sharp edges and do not give way if the Betta runs into them. This leads to the delicate fins of the Betta Fish getting torn up which in turn causes injury and possible infection. We want to prevent as much harm to the delicate fins of our Betta, so let’s stay away from the hard plastic plants if we are going to shop for artificial plants.
For hardscaping like rocks, we again want to watch out for sharp edges. Hardscaping for Betta Fish needs to be soft or round. You should be able to run your fingers through the hardscape and not get your fingers caught. If your fingers get caught, you have rough edges that will be dangerous to your Betta. Either consider sanding down the hardscape or picking another one.
Another factor to consider with Betta decorations is to watch out for rocks and other hardscaping with lots of small holes. Betta Fish have a tendency to get caught or stuck in holes. I would recommend that you purchase smooth round rocks or rocks with larger holes that your Betta will not get stuck in.
The image above is a good example of a hardscape that is suitable for a Betta Fish. A Coconut shell decoration you can find at a pet store is smooth and the hole is large enough to fit the Betta without it getting caught or stuck inside. Lastly, the water surface should have space for your Betta to build bubble nests.
Diet (Feed Them Right!)
A Betta Fish is a fish with lots of vibrant colors. That is why it’s vital that your betta fish eat quality food to be happy and achieve brighter colors. The fish food hierarchy in today’s hobby is frozen food, fried dried, pellet, then flake food. We want to be selective in what we feed our Betta fish so I will help with the breakdown. Let’s feed your Betta the best food available.
Frozen food is at the top of our list because you can get some of the highest-quality blends and mixes. Unfortunately, frozen foods are going to be the one food you will have a hard time finding online. Even if you do find it, the shipping costs is expensive to the point where it is not worth it. Do yourself and your local store a favor and pick these up locally. I would recommend frozen blood worms, black worms, and daphnia. All is found at your local pet stores.
Next would be freeze-dried. For freeze-dried, I would recommend either freeze-dried Bloodworms or Blackworms. The great thing with freeze-dried foods is because they are dehydrated foods, they will soak up vitamin supplements. Consider supplementing your food with a product like VitaChem to boost their immune system and to keep betta fish healthy. Mixing VitaChem plus Blackworms is a great nutritional mix to feed your betta fish.
One thing to note in this blog post is that I am not recommending brine shrimp as a food source. You may be wondering why I don’t when many fish stores and bloggers are happy to recommend it. I do not recommend brine shrimp because there are way better food sources you can feed your fish. It’s great if you are in pinch, the store doesn’t have much else, or if you have a picky fish. Brine shrimp are just low on nutritional value. We can do better, so why not?
Pellet food would be the next food I would touch on. There is really only one pellet food I would recommend for a Betta. That would be NorthFin’s Betta Bits Food.
Pellet fish should be presoaked before giving to your Betta. This will prevent the pellets from expanding in your Betta’s stomach and causing issues like bloat or constipation. You can also soak pellet food with vitamins.
Flake food I will avoid. Many types of flake food in our industry are simply not up to snuff for our fish and it’s hard to soak them in vitamins. If you want to go with flake food to feed your betta fish, I would consider flake food with probiotics. One such flake food that comes to mind would be Cobalt Aquatics Tropical Fish Color Formula. It is flake food loaded with probiotics and one of the mainstream flake foods around that I would be okay with recommending.
The main benefit of live food is the live beneficial bacterial cultures that you are feeding your Betta. These are priceless nutrients that your betta fish need and truly can extend their lifespan and quality of life. However, there are major cons with live food.
The biggest issue is disease and poor quality live food. You really need to do your due diligence if you are going to feed live foods to your Betta fish. It may even be better to grow them yourself if you really want or find a very trusted retailer who sells them. For live foods, I would highly recommend blackworms. Earthworms are also another natural source that you can pull from your garden and feed to your Betta if you are willing to cut them into bits. Microworms would be another live food to look at. All three of these is cultured at home if you are willing to do so. I included a video from AquaStudent below explaining how to keep blackworms. It’s probably more relevant to Keeping Cichlids given how much you can grow, but I wanted to provide it anyway for your reference. If you take care of live food, you can have success with them. It’s just not something I would not consider for a beginner.
Tank Mates
I’ll start this section with a very honest statement. Not every Betta is meant for a community tank. There is also the size of the tank you need to consider as tank mates in a Betta Fish aquarium should not be considered unless you have an aquarium 10 gallons or larger in size. To maintain the lowest levels of aggression possible with these mixed setups, a planted tank setup is going to be key to keeping the fighting down.
I’ll provide a list below and then explain after. I’m going to start from safest to riskiest. The best tank mates for a Betta Fish are community fish and inverts like:
Snails are going to be our best test tank mate to start with. Snails are low risk to add to an aquarium and we can take time to observe our Betta’s reaction to them. If your Betta is nipping at the antennas of the nails, this is a likely sign that your particular Betta is not going to accept tank mates readily.
If snails are not harassed, then we can attempt the next set of possible tank mates. These would be Freshwater Aquarium Shrimp like Cherry, Amano, or Ghost shrimp. If your Betta is not attacking snails, there is a good chance they will leave pet shrimp alone. The great thing with shrimp is they are colorful and is used to contrast your Betta colors. Be careful of overpopulation though as shrimp can breed rapidly. There is a chance they could eat the shrimp. A bamboo shrimp is the safest shrimp you can pair with a betta.
The next set of teammates would be bottom-dwelling fish like Corydoras and Pleco. Because we are working with fish who inhabit a different section of our tank area, it is likely that both sets of species will leave each other alone.
The final and riskiest set of tank mates are going to be school fish like Tetras and Rasboras. The activity level of these fish may actually stress out the more calm Betta. We have to observe their interactions and watch for warning signs. It is very possible to have a Betta that lives happily in a tank with schooling fish.
Bettas are naturally solo fish though. To add tank mates into an aquarium with a Betta is asking the fish to adapt outside of its natural tendencies. Take your time and be patient. Be ready to make changes with your tank mates if things do not work out well for you.
Another thing I forgot to mention in this section is DO NOT place two males in the same tank. Males fighting is where the Bettas got their Siamese Fighting fish came from. Two males will fight to the death in an aquarium. Avoid placing two males in the same aquarium at all costs. There is only one exception – which I cover in this post and is reserved for seasoned aquarists.
Male Bettas will also show aggression to females. It is best if you want multiple Bettas in your aquarium to go female only. Females are not as colorful as males, but a group of 5 females will complement the colors of your tank as they have unique colors and fins in their own right. A group of female Bettas will require a larger tank and there are really no guarantees of their compatibility as they reach maturity.
Lastly, avoid fish like tiger barbs that enjoy nipping at long fish.
Live Plants
Live plants are a wonderful addition to your Betta to simulate natural habitat. Not only do they add natural hiding places for your Betta, but they are also natural filtration in your aquarium. I recommend live plants for most freshwater setups because they are great for improving water quality. Some plants are also known for being natural water conditioners as they can remove harmful chemicals in your water.
I would highly recommend Low Light Aquarium Plants for your aquarium. If you do decide to go with live plants, get a Planted Tank LED fixture that can grow plants. I am recommending low-light plants because they are easy to grow and keep. However, many lights that come with starter aquariums will not have the proper light to grow even low-light aquarium plants.
For tanks these small, there is a Finnex FugeRay model that is available that will adequately cover a standard 5-gallon tank. Another option is a Fluval Plant Bluetooth Nano. The Fluval Nano is a perfect light for desktop aquariums.
With one of these lights, you are set to grow just about any low-light aquarium plant you can acquire. For low-light plants here are several you can obtain that would work well in a Betta tank:
There is actually a large variety of Betta Fish available for sale in our hobby. For most of the Bettas, you will see that the pet store will not have a specific breed or type listed. There are actually large numbers of available varieties with Bettas. Many have exotic colors and fins. I’m going to talk about several here to show you the vast variety of Bettas available today. If you are shopping online for exotic-style Betta Fish, I would highly recommend that you purchase from a place that offers What You See Is What You Get (WYSIWYG) fish for purchase and from a place that offers you a multiple-day guarantee.
Veil Tail
The Veil Tail Betta is the most common Betta you will find at a pet store. They are often labeled as Siamese Fighting Fish at chain pet stores. It is very likely if you are reading this article after you have purchased a Betta yourself that you have a Veil Tail. They are the most widely available Betta in the hobby. After all, this was the original domestic Betta that was brought over to the US. They are also one of the easiest Betta Fish to breed. These Bettas are known for their easy-going nature and are one of the better candidates for a community aquarium.
Half Moon
The Half Moon Betta is a Betta that is bred and raised in captivity. It gets its name its tail that spreads 180 degrees to form the half-moon. It is a very striking Betta to have. It is notorious for being a very challenging Betta to breed. They are becoming one of the easier-to-find exotic Betta types nowadays due to their popularity. It was first bred in the 1980s. Half Moon Bettas are also known for their aggressiveness. They are best suited to be solo in an aquarium. Many of the fancier Bettas are only available through local breeders, specialty fish stores, or online.
Rose Tail
A Rose Tail is a variation of the Half Moon. The ends of their tails are more ruffled creating a striking appearance. As the Half Moon, they are also very difficult to breed. It requires a genetic mutation to occur to get the look and as a result, they tend not to be as hardy as other Betta fish species. They are an amazing-looking Betta
Plakats
Plakats are a short-finned version of the traditional Betta you find in stores. Plakats are the original Betta and very close to the ones you will find in the wild. They are known as the ancestors of all Bettas in the trade today. They are more actively swimming fish over the other fancier varieties and will do better in larger tanks as a result. It is actually possible to find a Halfmoon Plakat from a breeder. Given the fact the Plakat Betta is closer to a wild Betta, they are hardier, less prone to injury, and more energetic than fancier Bettas.
Purchasing a fancy Plakat fish is a good balance if you want a fancy Betta, but would prefer a hardier and more active sub-type. The picture above is a Halfmoon Plakat. Another popular variety of Plakat are Koi Bettas.
Elephant Ear
These Bettas get their names from their pectoral fins that look like the ear of an elephant. These are one of the more exotic and striking Betta you will find. These varieties can also be found in the wild (though with less bold colors than their captive-bred varieties). They are aggressive Betta and best suited as a sole specimen. They slow down a lot later in life, so a calm tank alone is the best for them.
Crowntail
Crowntail Betta Fish”/>
This unique-looking variety has web fins that resemble a crown. It is one of the new varieties among breeders debuting in 1997. This Betta variety produces some of the most exotic colors and mixes available in the trade. Because of its breeding though, this also makes it one of the more difficult Betta to find and take care of. They are more delicate than the other Bettas on the list. It requires exceptionally higher water quality for its fins to stay healthy.
Putting It Together – Creating An Amazing Aquarium
We spent quite a bit of time talking about Bettas, their care requirements, food, and types of Bettas. It’s time to put it all together and built a set up for you. I’m going to use a Fluval Spec V for this build. It is an all-in-one tank with 5 gallons as its volume. The tank really solves a lot of issues for us, namely the filtration and the lighting. The lighting that comes with the unit can grow Low Light Aquarium Plants and the aquarium size is ideal for our Betta. You can use any Aquarium Substrate you want since both Java Fern and Java Moss are water column feeders so either will do fine without an active substrate.
Tank – Fluval Spec V
Lighting – Fluval Spec V light is perfect :). No changes are needed!
Aquarium Filter – Fluval Spec V stock filtration
Heater – Cobalt NeoTherm
Hardscape – Coconut Shell or Fluval Driftwood
Plants – Java Fern and/or Java Moss (Micro Swords and Crypts work as well)
Substrate – Activ Betta Gems Live Gravel
A single Male Betta of your choice – Once the tank is cycled!
We can either use a simple aquascape or get fancy with some Driftwood, to ensure it has no sharp edges by sanding down any rough spots. If we go with driftwood, we can attach the moss and ferns to the hardscape with either thread or superglue. Below is a video by Fishaholic showing how to attach Java Fern to driftwood.
Tank Water Quality
Now that you have your Betta tank, you may have questions about water quality. Bettas in general are hardy fish, with fancy sub-types begin to be more sensitive. We want to keep our water quality in good condition when taking care of a Betta. I would recommend doing water changes weekly about 15-20%. You can reduce the water changes if your water quality is high. I always say water changes based on your water parameters. Get used to testing your water conditions every week using a high-quality aquarium water test kit and always use a water conditioner on your tap water.
Some tanks can go bi-monthly or monthly depending on how well the tank is filtered, which your aquarium test kit will hope you monitor when you should make a water change. Check for ammonia, nitrite, and nitrate levels. Ammonia levels and nitrite levels should be at 0 and keep your nitrates below 25.
For pH, Bettas are pretty tolerant of neutral to soft water. They are best with a neutral pH of 7. They will do fine in a slightly acidic pH if accumulated to it, but as close to 7 as possible is ideal.
Maintenance Checklist
Here is a quick maintenance checklist guideline that will help keep your Betta fish happy and to have a long and healthy life.
Daily
Weekly
Monthly
Check water temperature (76 – 81 F)
Change 25-50% water in the tank
Replace filter media or filter cartridge (mechanical and chemical)
Observe fish and check for signs of ill health
Siphon out uneaten food and water
Wash media in aquarium water (if reusable)
Check equipment to see if it is working (heaters, filtration system, pumps)
Test water parameters
Clean rocks, decor, and/or driftwood
Feed your fish
Check plant health and prune overgrowth
Check water levels to see if topping off is needed
Clean off algae from glass
Additional Resources (Books To Read)
There are some incredible books available about Bettas that go beyond the scope of this blog post. I would encourage you to look into these books and purchase them if you are serious about taking your Betta Fish keeping to another level.
The Betta Bible is the source when it comes to knowledge about Betta Keeping. It is an expensive book, but well worth it. It is loaded with detailed and expert-level information. It has information about the genetics of Bettas, breeding, and the history of the Bettas in our hobby. It is loaded with over 150 pictures of various types of Bettas and the style of writing is very down-to-earth.
Written by Dr. Brammah, this book has been known in the hobby as the book of all books. It’s a must-buy in my opinion. The kindle version is a steal at the price if you can get that. It is everything you would want to know and more about Bettas jammed packed into 300 pages.
The Simple Guide
If the Betta Bible is too much to start with, the Betta Fish book by Walter James is a good alternative. Weighing in at only 124 pages, it is a more digestible deep dive into Betta Fishkeeping.
Where To Buy
Betta fish is purchased at local fish stores, chain pet stores, and online fish stores. You will get the best selection from an online store as they will have many varieties that other stores won’t carry. You can go wrong either way. Bettas will ship in good condition due to their hardiness and ability to breathe air outside of the water.
Your Betta Fish will learn to recognize you. It will swim to the front of the tank when you approach, flare at its own reflection, and patrol every inch of its territory like it owns the place. Because in its mind, it does.
Feeding time is the highlight of the day. Bettas are aggressive eaters that will snatch food from the surface the moment it hits the water. They prefer variety. Pellets one day, frozen bloodworms the next, an occasional freeze-dried daphnia treat.
Bubble nests appear without warning. Your male will spend hours building and repairing a cluster of bubbles at the surface. This is normal healthy behavior, not a sign that it needs a mate.
At night, bettas sleep. Sometimes in strange positions. On a leaf, wedged behind a filter, or resting on the substrate. The first time you see it, you will think something is wrong. It is not.
FAQS
Are They Easy To Care For?
Yes, Betta fish are one of the easiest freshwater fish to care for. They have a labyrinth organ, which allows them to tolerate smaller spaces and water with high nutrient content. That being said, Betta fish should still have a tank at least 5 gallons in size, a quality filtration unit, heating, and regular feeding and tank cleaning.
Can They Live In Tap Water?
Yes, a Betta fish can live in tap water if you condition the water prior to putting your new fish in your tank. You will want to use a conditioner like Seachem Prime. If you are thinking about using purified water, avoid distilled water or RODI water. You can use that type of water if you use an aquarium materializer, but most aquarists do fine with tap water + a water conditioner when it comes to running a Betta tank.
How Often Should You Change The Water?
If you keep your Betta in an aquarium, you should consider changing your aquarium water every 7-10 days. I know some people do keep Bettas in bowls. If you are keeping them in a bowl, you should consider changing the bowl water every other day.
How Often Should I Feed Them?
You should feed your Betta fish twice per day. Keep in mind, that you need to have the filtration to feed them that much. Test your tank water to see if your levels are stable. If not, you can feed them less. It’s also okay to have a freshwater fish fast for a day every week. Fasting is actually good for their digestive system!
Is the Betta Fish Right for You?
Before you add a betta fish what they actually need to thrive to your tank, it’s worth asking whether this species actually fits your setup and your goals. Here’s a quick breakdown to help you decide.
This species is a good fit if:
You have a large enough tank to manage territories. Cramped conditions amplify aggression.
You’re comfortable managing aggression through stocking ratios, line of sight breaks, and tank layout.
You can commit to regular water changes. These fish produce more waste than many smaller species.
You’re not planning a peaceful community tank. Betta Fish What They Actually Need to Thrives need tank mates that can hold their own.
You enjoy watching active, interactive fish. Cichlids have personality that smaller species simply don’t match.
You have backup plans. Sometimes a particular fish just doesn’t work out, and you need a way to rehome it.
You’re feeding a varied, high-quality diet. Color and health depend on nutrition.
If most of those points line up with your setup, the betta fish what they actually need to thrive is worth serious consideration. If several don’t, it’s better to choose a species that matches your tank now rather than trying to make it work.
How the Betta Fish Compares to Similar Species
Want a centerpiece fish for a nano tank? Get a betta. Want a peaceful community schooler? Get ember tetras instead. Want low maintenance? Get neither. Both need real care.
Choosing between similar species is tricky. Here’s how the betta fish what they actually need to thrive stacks up against some common alternatives.
The betta fish what they actually need to thrive occupies a specific niche in the aquarium hobby, and direct comparisons really depend on what you’re looking for. In my experience, the most common question people ask is whether they should choose the betta fish what they actually need to thrive or something similar that’s more widely available. The answer comes down to three things: tank size, water parameters, and what other fish you’re keeping. If your setup matches what the betta fish what they actually need to thrive needs, it’s hard to beat. If not, there are alternatives worth exploring.
Closing Thoughts
A Betta Fish tank is in my mind the best way to introduce yourself to the wonderful world of aquarium keeping. A Betta tank is small and low on maintenance making it a lower barrier to entry than other aquarium setups. There are a large variety of Betta breeds and colors. It is difficult to really get bored keeping Betta because there is so much variety and they are loaded with personality.
Dutch aquascaping is the most plant-dense, visually complex style in the hobby. think lush layers of color, contrasting textures, and meticulously planned plant streets that create depth. It originated in the Netherlands in the 1930s and remains the most demanding style to execute well. I’ve studied Dutch layouts extensively and find them fascinating precisely because the challenge is so high: no rocks, no driftwood, just masterful plant selection and placement carrying the whole design. If you’re ready to step up your planted tank game, this guide covers exactly how Dutch aquascaping works and how to approach it.
Key Takeaways
Dutch aquascapes are an aquascape style that focuses on stem plants
They require CO2 injection and heavy fertilization in order to thrive
They are one of the most prune-heavy scapes to maintain due to the number of stem plants used
They require more intense lighting than other scapes and shadowing is a concern due to stem plants
History
The Dutch Aquascape or Dutch Style’s roots originates all the way back to the 1930’s in the Netherlands. It is the oldest aquascaping style in our hobby. The aquascaping style originated with the creation of the Dutch Society of Aquarists or NBAT. It wasn’t until 1956 the the NBAT published the initial set of guidelines of what defined the Dutch Aquascape. They would run annual contests with these guidelines and the judges would actually visit the aquariums instead of working with submitted photos.
Concepts of the Dutch Style Aquascape
The Dutch Aquascape is based on the following principles
No more than 1 plant species per 4 inches of tank length
No duplication of the same species in another group
A shoal of fish should be issued with at least 12 fish from the same species
The rules of the Dutch aquascaping style is very restrictive. Many of the dutch aquascapes you see these days are actually Dutch hybrids with just variations of the rules above. The general rule is to keep about 70% of the aquarium floor planted.
Layout
A Dutch Aquascape is all about the plants. There is no hardscaping to do with this style as we are going to use the plants to setup our landscape. The main thing with this style is obtaining a taller tank as you will be using certain plants that do get tall and you want to allow them time to grow and show their length before pruning. We want to aim for at least 18-24 inches in height for a Dutch scape. Dutch scapes also tend to be a bit wider usually in the 3 to 4 feet range. The 40 gallon breeder tank is a great consideration to use. If you want a serious competition like tank setup, consider a rimless tank.
A Dutch style aquascape does follow the rule of two thirds concept like the Iwagumi, but it’s a bit trickier to pull off. It’s really about impact with this style. The main technique you need to know with Dutch style is terracing and spacing. You will want to place the biggest and brightest plants at your focus points. You can also choose to not follow the rule and then have the option of 4 focal points.
Terracing
Terracing is used with Dutch Style aquariums to convey depth in the aquarium. This is also to create focal points in the aquascape.
Terracing traditionally in agriculture would be creating mounds of soil to create raised sections in the landscape. With the Dutch style or aquascape we position the substrate in a way where we slope it. We start almost flat at the bottom and increase the depth of the substrate as we go from the front of the tank to the back. This is the way this aquascaping style is done in modern times because it allows us to be more flexible with our setup.
Another way of doing is by keeping plant groups on different heights. Space is key as well. We want to space groups of plants at least a half inch between groups of plants. This gives the plants breathing room and room for growth. They will also expand to their best appearance and make pruning a bit easier to do. Spacing to spread out density is also known as streeting in the Dutch Style. Streets are spaces between your plant groups that help create depth and perspective in your aquascape.
Plant Selection
Plants are everything with the Dutch Aquascape. They are your feature pieces. We have to select a variety of plants to have an eye popping aquascape. This means we have to look at shapes, texturs, and colors with our plants. We also need to plant in an order to contrasts our plant mix so our piece does not end up looking dull or overdone. Most of our plants will also be stem plants, meaning they will feed on the nutrients in our substrate. Let’s breaking down our plant selection to the following:
When discussing Dutch Aquascapes, we need to drive into stem plants a bit more. The dutch style will use the most stem plants of any aquascape style. Stem plants growth patterns are vertical with branches. Many will grow tall and will keep growing in the aquarium until they reach the top of your tank.
Because of this, they require the most management of any plants in our hobby. It is not uncommon for these plants to require weekly pruning. If left unchecked, it is very possible that these plants will cover the top of your aquarium and will end up shadowing your entire aquarium. You can see an example from Tropictank YouTube Channel of an overgrown Dutch aquascape that badly needs to be pruned:
Stem plants will also require strong Aquarium Lighting and AquariumInjected CO2 Systems to grow their best and to display their best colors. Shadowing is a concern with Dutch style tanks.
The good thing with stem plants is they can be easily propagated by cutting off nodes and simply replanting them. This can make a fully planted Dutch Aquascape more fun as you can trade with friends or trade your plants to your aquarium store for credit to help fund your hobby.
Tension vs. Harmony
We talked about this earlier on the Iwagumi style. We know to create visual interest and energy that we need to balance tension and harmony.
So what is tension in a dutch aquascape? This is going to do with the leaf shape ,structure of our plants, shape, and color. Plants with more textured leaves and sharper leaves versus round will create tension. Plants that grow tall versus round will create more tension.
Color is really what stands out from other aquascape styles with the Dutch style. Let’s discuss how this works. In color theory, we have what we call warm and cool colors. Warm colors have the following emotions tied to them: happy, excitement, bright, and angry. They have shorter wavelengths on the light spectrum which makes them feel energetic to us
Cool colors have the following emotions tied to them: Calm, soothing, relaxing, and harmony. They have longer wavelengths on the light spectrum which makes them feel more calm then warm colors.
Contrasting warm and cool colors creates are our tension in our aquascape. We have many things to work with on balancing our tension and harmony balance. Color is just going to be the most obvious, which is why I am touching on it. If you want to learn more about color theory here is a video below from Purple Pretty Door for your enjoyment.
Your goal as the aquascaper is to create that blend of balance with your tension and your harmony. Too much tension and the viewers eye will be over the place. Too much harmony and your aquascape will look boring and too uniform. Research your plant selection careful and draw out a plan for where you are going to plant everything and what plants you are going to use.
Obtaining Your Plants (Tissue Culture vs. Aquacultured)
We discussed it earlier in our Iwagumi Aquascape post. Always lean on tissue culture stem plants. You have less risk with pests and nuisance algae going this route versus purchasing aquascultured plants. They are good value for the money and lab grown.
As with the Iwagumi, you will want to purchase all your live plants at once. You will want to plant densely to start, you will want to plant densely to start.
Setting Up for This Style
Because of the type of plants will be using for a Dutch Aquarium, we cannot utilize the dry start method. We will need to densely plant and flood our tanks when we start up.
This aquascaping style is one type of scape you will not be able to dry scape. It requires more research on the plants and their grow patterns then other styles because of it. Take time to learn your plant’s grow patters so you know where to put your plants to create a proper foreground, background, and middle section of the tank. Use the tension and harmony discussion below to balance your visual impact and create your focal points.
Revisit the discussion about Dutch Style Terracing so you can create proper depth, focal points, and grouping for your plants. For an example Aquascape setup. See the video below by Yulia below:
Lighting
Dutch Aquascapes will use the most light intensive plants in our hobby. We not only want to select a light that encourages a lot of growth, but we have to keep in mind coverage. Coverage and spread is a major and critical consideration in our light selection. Because we are using stem plants that will go large and spread through our tank, we will have an issue with shadowing as plants grow. If you know about LEDs weakness, you will be familiar with shadowing issues with them.
For example with hobbyists with SPS coral tanks, shadowing is a major issue as corals grow. Such will be the case with a Dutch Style aquarium.
Because of this, a T5 fixture is going to be the best choice for our dutch aquascape. T5s strength is from its spread and uniformity. A cheap route that works for our Dutch Style setup is an Odyssea T5 Quad Fixture or Hydrofarm T5s.
Bulb selection is very important with T5 setups. For bulbs I would recommend Giesemann bulbs. 2 x Giesemann Super Flora and 2x Giesemann Topic T5s will create a combo of spectrum and proper color tones.
CO2 Systems
The Dutch Style will have some of the most demanding plants in our hobby. They will require CO2 supplementation in order to display their best colors and shape. Without CO2, our Dutch Style attempt will simply fail. There is no way around it with a Dutch Style tank, they are simply a high tech planted tank at their core.
These hungry plants will want a proper CO2 regulator, CO2 bubble diffusor, and an appropriate sized CO2 canister. Check out our Best CO2 Systems Reviews for insights on CO2 systems and why CO2 is so essential for your success.
Because we are going to be planting stem plants that will feed on the soil of our aquarium, an active substrate is a must. We want to have an active substrate that can hold lots of nutrients to help our plants grow to their best potential.
In our Best Planted Tank Substrates blog post, we talked about how ADA Aquasoil is the name in the game when it comes to planted tank substrates. This is the go to soil for planted that require heavy feed. It is a substrate that will allow for regular replanting.
The ADA Aquasoil is going to give us an excellent start with our Dutch Aquascape and will provide a soil for our plants to feed off of. However, a Dutch style is an aquarium that will require a heavy amount of feeding to the plants so we will be using so may of them. Red plants also make this more complex as they have higher demands than most green plants. Plants in your Dutch Aquascape will grow fast, demand food, want great lighting, and require a lot of CO2 supplementation.
The good thing is thatAPT Complete is actually designed for Dutch Style aquariums. It was designed by a hobbyist who grows Dutch Style tanks. This is the main supplement you will want to use for your dutch style tank. You can use the full dosage recommended on the bottle and adjust from there.
APT Complete is a all in one fertilizer that is designed for heavily planted, heavy demand aquariums. To learn more about fertilizers, see the Best Aquarium Plant Fertilizers blog post for details on macro and micro nutrients.
Like the Iwagumi tank, fish are not center point in a Dutch Aquascape. Our focus is on the plants and creating a work of art. The fish compliments our piece, not take it over. Due to this, we are again look at schooling fish like Tetras, especially a Neon Tetra. What I like about Neon Tetras is that they contain the blue we are lacking in our plants. As you may recall, blue is a cool color that unfortunately we are not able to obtain through our plan selection.
Neons offer a perfect opportunity to obtain that rare blue that is available in our aquascape. Not only that, they move in our aquarium so they will work within your aquarium to contrast your tank. It really comes with my highest recommendations when it comes to creating a eye popping Dutch Aquascape.
There are also people who will use Angelfish or even Discus in Dutch Aquascapes. These can work, but the size of the fish can really take away from your aquascape. The decision; however, is all up to you.
Filtration
Dutch Aquascape setups are even more high demanding than the Iwagumi style. It’s one of the most intensive planted aquariums you can keep. A top of the line filtration unit should be considered.
As such, I’m going to recommend the Biomaster Thermos Series of Canister Filters. It’s a complete, durable unit with an aquarium heater built into it. It is the go to now for high tech planted tanks in today’s age.
So we have talked about the history and concepts of the Dutch Aquascape, plant selection and color theory, the best plants, how to setup up the tank, and the fish. Now let’s bring it all together build a setup. Let’s create our shopping list.
The major issue with Dutch Aquascapes is pruning. There is so much pruning that needs to be done with your tanks as the plants grow fast and you need to main shapes so your streets look clean and your tank is presentable. One such saying I have heard over the years is someone saying that the only time their Dutch Aquascape looked good was the first day after a pruning. They really do require a lot of upkeep just like any well groom landscape garden. Be prepared to purchase Pruning Aquascape Tools. The video below by Tropictank YouTube Channel illustrates what happens if you let your aquascape go too long without a pruning!
Closing Thoughts
The Dutch Aquascape is a classic aquascape style for freshwater planted tanks. It is one of the most challenging setups you can work with, and also one of the most rewarding. It’s a purely planted tank at its core. You can really flex your planting muscles with this style of aquascape. The Dutch Style reminds me of flower gardens in your home. If you have any comments, please leave them in the comments section. Thank you for reading!
🌿 Want to learn more? This article is part of our complete Planted Tank & Aquascaping Guide. your ultimate resource for aquarium plants, aquascaping styles, substrates, and more.
Planted tank fertilization is one of those areas where I’ve seen hobbyists go in two completely opposite directions. either ignoring it entirely and wondering why plants melt, or going so deep into the EI dosing rabbit hole that they stress themselves out. The truth is somewhere in the middle. After 25 years of keeping planted tanks, I know which fertilizer approaches work for most setups and which products consistently deliver results.
Fertilization is one of those areas where planted tank keepers either overthink it completely or neglect it until their plants start declining. I’ve been dosing fertilizers in planted tanks for over 25 years and have used everything from all-in-one liquid ferts to the Estimative Index dry dosing method. The right fertilizer depends heavily on your tank’s light level, plant density, and whether you’re running CO2. and I break all of that down here alongside my picks for the best products available.
With over 25 years of experience in the aquarium hobby, I’ve assisted countless clients, hobbyists, and readers like you in overcoming their plant growth woes (and believe me, there are a ton of fertilizer products out there). I’ve personally tested these products in real world scenarios to determine the best aquarium plant fertilizer on the market. You can check out the video below from our YouTube Channel.
Let’s cut straight to the point for those of you in a hurry. My two recommended choices would be Florinmultias it is readily available at more specialty stores and APT Complete due to how concentrated the mix is. APT is complete fertilizer with everything plants need. You can’t go wrong with either choice and both are designed with planted tank hobbyists in mind. Go with NilocG’s formula if you are keeping a shrimp tank.
Knowing all of this, I still feel in order to get the best results with fertilization, that you should consider CO2 Injection in your aquarium as that will significantly enhance the growth of your plants and will make fertilization far more effective. When the CO2 levels are higher and stable in your planted tank system, your plants will take off with the available CO2 for them to utilize. The fertilizers they will then use will fuel their growth further.
Mark’s Expert Take
I’ve seen this play out hundreds of times: hobbyists either dump in too much fertilizer and wonder why they suddenly have an algae explosion, or they dose almost nothing and watch their plants slowly melt over weeks. The sweet spot is matching your fertilizer approach to your tank’s tech level. For high-tech tanks running CO2, the Estimative Index (EI) method is the most reliable system I know. You dose a known excess of nutrients, do a large weekly water change to reset, and your plants never starve. For low-tech setups, keep it simple: a good root tab near your heavy feeders plus a weekly dose of an all-in-one liquid like APT Complete or Brightwell Florinmulti. I dosed fertilizers in store planted displays for years and the lesson that cost me the most time was learning that algae outbreaks are usually a dosing problem first, a light problem second. Get the nutrients dialed in before you start blaming your lights.
Mark Valderrama — Owner, AquariumStoreDepot | 25+ years in the hobby
Why These Products Ranked Where They Did
Not all fertilizers are equal and the difference isn’t just marketing. Here’s what I actually weighed:
Macro/micro balance — does it cover NPK plus iron and traces, or does it leave gaps you have to fill separately?
Concentration per dose — a highly concentrated formula means fewer milliliters used per gallon, which matters for cost per gallon treated over time
Iron chelate form — DTPA-chelated iron stays available at higher pH levels (up to 7.5) while EDTA-chelated iron drops out of solution above pH 6.5. If you’re running a planted tank above pH 7, this matters a lot
Phosphate inclusion — some products omit phosphate on purpose so you can control it separately based on fish load; others include it and risk algae in lightly stocked tanks
Value per gallon dosed — a $30 bottle that lasts 6 months beats a $15 bottle you burn through in 6 weeks
Shrimp/invertebrate compatibility — copper content is the main flag; shrimp tanks need formulas specifically tested at low copper levels
The Candidates – A Quick Comparison
Now, let’s get started with fertilizer recommendations. I’m going to provide both liquid fertilizers and root tabs and explain further as I go through each product.
APT Complete is the comprehensive planted aquarium plant fertilizer to use for enthusiasts. It is designed for demanding aquarium plants by a demanding planted tank expert that is research backed. The key here is the concentrate of this formula. Just 1ML per 20 liters adds the following nutrients:
1.5PPM Nitrogen
0.7 PPM Phosphorous
4 PPM Potassium
0.3 PPM Iron
0.4 PPM Magnesium
This concentrate is at a higher level than many of the branded fertilizers on this list and is truly designed for those with high demanding tanks. That means not only will you save on fertilizer, but you will grow successfully as well. it’s also shrimp friendly as it has a low amount of copper compared to other brands.
This is a liquid fertilizer product that is not well known in the industry as they maker of the product is in Singapore. You won’t find this product in most stores. It’s worth it’s price in gold. It comes with everything aquarium plants need in one bottle. It is the best all in one aquarium plant fertilizer I’ve seen on the market. And to top it all off, you can use the offer code ASDComplete for a cool 10% off. What are you waiting for!
Pros
Designed for planted tank enthusiasts
Saves money in the long run
Shrimp tank friendly
Has everything plants need
Cons
Not available in most stores
Need to be careful with low tech tanks due to concentration
Mark’s #1 Pick
APT Complete by 2Hr Aquarist
The concentration level is what sets it apart. At 1 mL per 20 liters, you get 1.5 ppm nitrogen, 0.7 ppm phosphorus, 4 ppm potassium, 0.3 ppm iron, and 0.4 ppm magnesium in a single dose. That’s a full planted tank meal from one bottle, and the cost per gallon treated comes out lower than most of the cheaper all-in-ones once you do the math. The formula was designed by a serious aquascaper, not a general pet product manufacturer, and that shows in the balance. Use coupon code ASDComplete for 10% off.
I know Brightwell Aquatics from their saltwater products, but their freshwater products are also pretty amazing. This Florinmulti aquarium plant fertilizer is a great mix of macro and mico nutrients that will make your aquatic plants thrive. Brightwell’s name in the industry is well know and they do their research on their products. It’s an easy to use product.
The main thing that Brightwell did with this liquid fertilizer product is not include phosphate and nitrogen in their supplement. I actually liked how they did this because nitrate and phosphate supplementation can be done separately and can be controlled. Phosphate and nitrate are very dependent on your bio-load and I feel that Brightwell made the right choice excluding it from their brand. As with many brightwell products, it’s a premium price product.
NilocG Aquatics Shrimp Specific Fertilizer is a great choice for those with FreshwaterShrimp Tanks. Supplementation for shrimp like Cherry or Amano Shrimp is more specific than for fish because you have to be careful of copper levels and this fertilizer keeps that in mind by not including copper in its mix. I’m always a fan of aquarium plant fertilizers that provide a guaranteed analysis and this product has good numbers.
This liquid fertilizer product is very safe to use with shrimp. NilocG sells the best aquarium plant fertilizers for shrimp tanks on the list.
Seachem Flourish is a common supplement you will see in the retail stores when looking for an aquarium plan fertilizer. It’s very easy to use and beginner friendly due to the light amount of nutrients it contains. This makes Seachem Flourish ideal for the beginner and for those with low light or low tech planted tanks. It is readily available and Seachem has a brand name behind their product.
Pros
Ideal for low light/low tech planted tanks
Easy to use
Readily available
Cons
Contains little phosphate and nitrate
You will use the bottle quickly
5. Seachem Flourish Trace – Trace Element Supplementation for Planted Tanks
Seachem Flourish Trace a product that includes a variety of trace elements like Boron, Manganese, and Copper. Because this product only contains trace elements – it makes it easier to use with other products like nitrate, phosphate, iron supplements so you can be extra accurate. SeaChem Flourish Trace is a readily available aquarium plant fertilizer product at stores making this easy for you to pick up if you’re in a jam.
It does contain copper though, so keep that in mind if you keep a shrimp tank.
Pros
Trace elements only – good for supplementation
Easy to use – Beginner friendly
Cons
Contains copper – not safe for shrimp tanks
Runs out quick
6. Seachem Flourish Tabs – Great Choice for Rooted Plants
Root tabs like Seachem Flourish are great for planted tanks with inert substrates. These tabs work by placing them down in your substrate around the roots of your aquarium plants like Amazon Swords. The Seachem Flourish product has all the major and minor elements needed to feed your aquarium plants. It’s a comprehensive fertilizer, but it is designed for beginner planted tanks. Those with higher demand aquarium plants and bigger planted tank loads should to look at other fertilizers or should to separate out some of the main macros like nitrate and phosphate.
Pros
Easy to use
Readiliy available
Has the all the elements you need
Cons
Designed as a catch all for all tanks – not for high demanding tanks
Only suited for rooted aquatic plants
7. API Leaf Zone – Budget and Beginner Friendly Supplementation
If you head off to your local pet store, API Leaf Zone will likely be the aquarium plant fertilizer product that you will find there. It is readily available in most stores and is a pretty cheap product. It contains iron and potassium, two of the nutrients we listed earlier that are not produced by livestock or come from source water. Because it doesn’t include other nutrients, the product assumes that you have a heavy bio-load that will produce the other essential nutrients in your aquarium.
This supplement is best for what we call “low-tech” planted tanks. These are tanks that contain Low Light Plants and aquatic plants that are easy to care for. Because it only contains two nutrients, it is beginner friendly to use.
Pros
Cheap
Readily available
Cons
Runs out fast
Only contains potassium and iron
8. API Root Tabs – Supplementation for Heavy Bio-Load Tanks
API Root Tabs are likely going to be the most readily available root tab that you will find in stores. it’s a very easy to use product and it contains iron. It is relevantly cheap making it an easy to afford for newcomers to planted tanks. Because it’s a tabbed product, it’s not ideal for aquatic plants that feed off the water column so know this before using.
The main drawback for me is there is no guaranteed analysis on the product. This can be frustrating for those who want to dial in their dosing routines.
Pros
Easy to use
Contains Iron
Cheap
Cons
Not for water column feeding plants
No guaranteed analysis info
Buy or Skip? Straight Verdicts
Running a planted tank with CO2? Buy an all-in-one liquid (APT Complete is my top pick). You need the full macro and micro package and a concentrated formula will save you money long-term.
Doing EI (Estimative Index) dosing? Skip the all-in-ones. Buy dry macro salts (KNO3, KH2PO4, K2SO4) and a quality micro mix separately. You’ll have real control over every nutrient and spend a fraction of what bottled all-in-ones cost at scale.
Running a low-tech, low-light tank with easy plants? Root tabs plus Seachem Flourish once a week is enough. Don’t overcomplicate it.
Keeping shrimp? NilocG is the clear choice. Don’t risk your colony with a formula that hasn’t been tested for copper levels at invertebrate-safe concentrations.
Just starting out and not sure yet? Start with APT Complete. The dosing is simple, it covers everything, and when you’re ready to upgrade to EI you’ll already understand what each nutrient does.
Macro and Micro Nutrients for Aquarium Plants – What Are They?
We are going to start with the nutrients that aquatic plants need. Aquatic plants like terrestrial plants require a variety of nutrients to grow and thrive. These nutrients are split into two groups – macro and micro nutrients
Macro Nutrients
Macros nutrients make up the majority of your aquarium plant’s mass. These nutrients will come either from your water column or your Aquarium Substrate. We can split up these macro nutrients into the following:
Carbon
Nitrogen
Phosphorous
Potassium
Carbon
Carbon is the big chuck of the equation. Plants need carbon. It makes up 40% of your plant’s dry mass. As I mentioned in our Best CO2 System for Planted Aquarium post, the fact that carbon is such a big part of your plant’s mass is why CO2 supplementation makes such a giant impact on your plant growth. With higher CO2 levels, you can scale up your nutrient requirements and accelerate the growth and improve the health of your aquatic plants by leaps and bounds. We want to aim for 30PPM of CO2.
Nitrogen
Nitrogen levels will have impact on your plant growth rates. When it’s very limited it can cause growth rates to halt and plants to become brittle. In green plants, low levels will lead to yellowing of the leaves. It can also enhance the reds of some plants at lower levels. Nitrogen can be made available from livestock if the bio-load if significant.
Phosphorous
This is an often under-dosed nutrient. PO4 plays a big role in the energy systems if plants. If you have an ideal amount of PO4 in your aquarium, an aquatic plant will be more robust and will display better colors. Phosphorus can be made available from livestock if the bio-load if significant.
Potassium
Potassium helps with the metabolism of your plants. Without it, your plant health will deteriorate cause visible issues like pinholes or brittle leaves. Potassium is not produced by your livestock in your aquarium and is not usually available from your water. It requires dosing to maintain ideal levels.
Micro Nutrients
Micro nutrients are nutrients that are required by your aquatic plants in lesser amounts, but are critical to your plant’s success. Micro Nutrients are:
Iron
Manganese
Trace Elements
Iron
Iron is important for chlorophyll production. Without the proper amount of iron, plants can be afflicted with clorosis in the leaves (aka yellowing of leaves). Iron is neither available from livestock or your source water. It requires dosing to maintain proper levels.
Manganese
Manganese is part of the photosynthesis process. When levels are lacking, this will affect the ability to take in macro nutrients. Like Iron, this must be dosed in order to maintain levels.
Trace Elements
These would include things like Magnesium, Boron, Zine, Copper, Cobalt, etc. They can be contained in source water, but often times are required to be dosed to maintain levels.
What Generic Fertilizers Get Wrong
Pond fertilizer tablets and cheap all-in-one liquids show up on planted tank forums constantly. Here’s why I don’t recommend them:
Wrong iron chelate form — most cheap fertilizers use EDTA-chelated iron, which precipitates out of solution above pH 6.5. If your tank runs neutral to slightly alkaline, plants can show iron deficiency even when you’re dosing regularly
Too much phosphate — generic formulas often load up on phosphate, which sounds fine until you’re fighting hair algae and green spot algae on every leaf. In a low-bioload planted tank, added phosphate plus light equals algae
No potassium — potassium doesn’t come from fish waste or most source water. It needs to be dosed. Many cheap products skip it entirely, which leads to pinhole deficiencies and brittle leaf margins
Wrong dosing concentration — pond tablets are made for outdoor ponds with high dilution ratios. In a planted aquarium, you’ll either underdose without knowing it or overdose a specific nutrient and create an imbalance that triggers algae
Types of Aquarium Fertilizers
Aquarium fertilizers come in a variety of form. They are:
An active substrate like ADA Aquasoil will act as its own fertilizer being a source of nutrients for your aquatic plants. they’re great for getting your planted aquariums started. They will degrade over time. This requires you to replace the substrate over time and increase dosing as it breaks down. You won’t need to use an active substrate if you have plants that are column feeders. This is because column feeders can’t access the nutrients in your substrate.
Liquid
Liquid Fertilizers are the standard plant fertilizer you will see. they’re easy to use and distribute. They can both be feed into the water column and injected into the substrate. This give them the advantage of being able to feed both column and root feeders.
Root Tabs
Roots Tabs are designed for root plants. If you have a large amount of aquarium plants that feed through their root system, Rooted tabs is useful in delivering the nutrients they need to continue to thrive and grow. Root tabs won’t be useful for aquatic plants that feed off your water column.
Should You Dose These Products?
The quick answer is yes, if you want to have the best growth and coloration of most plant species.
Because your aquarium is a closed environment, there is not a natural cycle of renewal of nutrients. Our substrates and soil eventually will delete and other nutrients will be removed via water changes over time. There are also elements in that can’t be replaced with source water or produced by livestock as mentioned above. A planted tank can definitely grow without fertilization, but they won’t achieve the best plant growth. You are Bottom line: not allowing your aquarium to live to its full potential. We want our environments and pets to thrive and give them the best, so fertilization is there to provide an ideal environment.
We proper levels, your aquatic plants will grow more dense, with better color, and will remain healthy.
Understanding The Three Elements of Aquatic Greenery Success
We are covering one of the elements today. There are three of them for planted tank success and they are:
Fertilizers are probably the most difficult to understand and easiest to ignore. It’s also easy to under and overdose! Below is a picture from aquaticplantcentral’s forum to give you an overview on plant nutrient deficiencies as a quick reference.
Getting familiar with the photo above will help you diagnose issues in your planted tank as your plants will give you visual queues and signs on what they are lacking in the aquarium.
Frequently Asked Questions
Below are common questions I get from readers and clients. If you have any you free I missed, please leave a comment below and I can update the post to including the additional question and answer.
What Are The Parameters I Should Be Maintaining In A Planted Tank?
This is a loaded question, but assuming you run a higher light and CO2 system, these would be figures you would generally aim for in a planted tank. You can use Aquarium Test Kits to monitor your levels:
Parameter
Level
Ammonia
0 PPM
Nitrite
0 PPM
GH (General Hardness)
2-8 dGH
KH (Carbonate Hardness)
3-6 dKH
pH
6.5 – 7.0
N03 (Nitrate)
5 – 10 PPM
CO2
20 – 30 PPM
PO4 (Phosphate)
0.2 – 0.5 PPM
Fe (Iron)
0.2 – 0.7PPM
Why Do You Not Recommend API Leaf Zone and Flourish?
Unlike other sites or bloggers you may have visited I don’t recommend API Leaf Zone or Flourish for serious planted tank owners. API Leaf Zone only contains Potassium and Iron. It is designed for a low tech planted tank and lacks the macro nutrients needed for serious grow in a full blown planted tank that is running CO2.
Flourish on the other hand is an entry level dosing product. It contains little nitrate and phosphate. This allows for forgiveness if you overdose or not sure what you are doing at first. When you have a full planted tank with lots of hungry plants, you will go through this product quickly.
Both the Brightwell and APT products are designed for planted tank owners will full planted tanks running off CO2 systems. They are designed for serious hobbyist who want big time growth. API Leaf Zone and SeaChem Flourish are entry level products for when you start out. When you’re ready to graduate you can use Brightwell and APT. Most of the time, I just tell folks to go with Brightwell or APT right away knowing their goals are a full planted tank with CO2.
What About CO2 Boosters?
CO2 boosters are great for low light and low tech planted tanks. I would only recommend them for those setups. A CO2 booster product like API CO2 Booster will work on these low light and low tech setups. All planted aquariums will welcome a boost in CO2 levels regardless of what types of plants you put into your system.
The issue with CO2 boosters is outside of a low light or low tech planted tank. When you get into setups that have full tanks of hungry and fast growing plants, they will require constant CO2 levels. You will struggle to maintain stable CO2 levels in a fully planted tank, especially if you decide to make a high demand planted aquascape like say an Dutch Aquascape. A CO2 Booster simply won’t do with these setups. I would recommend a CO2 system if your long term plan is a fully planted tank or if you want an advanced aquascape setup.
Are They Bad for Fish?
Fertilizers are not bad for fish in general. The main parameter we may have to keep an eye on is nitrates if we are housing particularly sensitive fish like say Discus. Fertilizers encourage plant grow, which in turn will increase the quality of your water. It will increase the natural look of your aquarium and provide shelter for your fish. Large plants will reduce aggression and decrease stress levels. For some fish, it will produce a food source for them. There is virtually no drawback to your tank health if you use fertilizers properly as healthy plants is healthy for all the inhabitants in your tank.
How Do I Dose Liquid Products?
If you are using an all-in-one fertilizer like we are recommending, your job should be fairly easy. We should follow the instructions on the bottle, in which both APT and Brightwell offer clear guidelines on how much to dose. Pour the suggested dosage in the cap or a small container and release the fertilizer to the outlet of your tank. Before you recap the bottle make sure you dip the cap in your aquarium water to rinse off. This will keep your cap from crusting over time.
Experienced planted tank owners prefer to dose everyday. It is better for your planted to have sustained stable levels in your tank. Dosing once a week with a big dosage can lead to unstable levels, which will hurt the potential grow you can get if you dosage smaller and constantly everyday.
When Should I Dose My Tank?
You should fertilize as soon as your tank is cycled and your plants are actively growing. it’s best to dose every day. it’s best to dose all in one day.
Do These Products Increase Nitrates?
It most certainty can. It depends on the fertilizer. it’s best to follow your manufacturer’s instructions and monitor your levels via a test kit. You needs to adjust overtime as your plants grow.
Do Planted Tanks Need Fertilizer?
Yes, aquarium plants should be given fertilizer. However, the need to fertilizer doesn’t trump the need for higher CO2 levels. The effectiveness of plant growth goes CO2 > Lighting > Fertilizer. You need to balance all three, but you will get greater initial plant growth going with CO2 first. If you have a good aqua soil, you will generally get a good fertilizer boost to start.
Closing Thoughts
Aquarium plant fertilizers are 1 of 3 major components of planted tank success with lighting and substrates being the other. I hope I helped to point you in the right direction on what fertilizer is right for you and your budget. If you have any questions, feel free to leave a comment below. Thanks for reading!
Fertilizer deficiency looks like plant problems. But so does an algae outbreak caused by too much fertilizer. The two look totally different, but both trace back to the same source: a dosing decision that’s out of balance with your tank’s light level, CO2, and plant mass. The right fertilizer product makes finding that balance achievable instead of a constant guessing game. Start with APT Complete if you want one product that covers everything. Move to EI dosing with dry salts if you want real precision. Either way, once you nail the balance, your plants will show you immediately.
🌿 Want to learn more? This article is part of our complete Planted Tank & Aquascaping Guide. your ultimate resource for aquarium plants, aquascaping styles, substrates, and more.
Substrate is the single most underrated decision in planted tank setup. Every planted tank failure I’ve seen over 25 years traces back to it: wrong substrate type, wrong depth, wrong product for the plants chosen. And unlike a bad filter or a broken heater, a substrate mistake is almost impossible to fix without tearing the tank down completely.
Get the substrate wrong and nothing above it will thrive. Not the lighting, not the CO2, not the fertilizers. The foundation is everything.
I’ve used inert gravels, active volcanic soils, capped dirt setups, and everything in between. After 25 years and more planted tanks than I can count, I can tell you exactly which substrates perform and which ones waste your time and money. This guide covers what I actually recommend, what I’ve seen beginners get catastrophically wrong, and how to match substrate to your specific setup.
Expert Take | Mark Valderrama, AquariumStoreDepot
My go-to recommendation for most planted tanks is Fluval Stratum. It’s volcanic soil, it buffers pH into the slightly acidic range that most tropical plants love, and it doesn’t trigger the brutal ammonia spike you get with fresh ADA Amazonia. For serious aquascapers or anyone running high-demand plants like glosso or HC Cuba, I still point them to ADA Amazonia, but you need to be ready for the 6-8 week establishment period. The biggest mistake I see over and over: beginners buying plain pea gravel at the chain pet store, planting Amazon Swords in it, and wondering why the plants melt two months later. Inert gravel with root feeders is a setup for frustration. Don’t do it.
With over 25 years of experience in the aquarium hobby, I’ve assisted countless clients, hobbyists, and readers in building successful planted tanks. I’ve personally tested these substrates in real setups across multiple tank sizes and plant communities.
For those in a hurry: ADA Amazonia is the world benchmark for active planted substrates, and nothing else on this list touches it for serious aquascaping. Fluval Stratum is my everyday recommendation for most hobbyists: effective, forgiving, and half the price. The CaribSea Eco Complete hits the best balance of price and nutrient availability for budget-conscious beginners.
What People Get Wrong About Planted Tank Substrate
The most common mistake I see is straightforward: people buy plain aquarium gravel, plant Amazon Swords and crypts in it, and then blame everything except the substrate when the plants melt. Plain gravel is inert. It provides zero nutrition for root-feeding plants. The plants look okay for a few weeks because they’re living off stored energy. Then they crash.
The second mistake is the opposite: buying an active soil like ADA Amazonia without understanding what you’re signing up for. Fresh active soil dumps ammonia into the water column. If you just add fish and skip the proper cycling and water change schedule during establishment, you’ll lose fish and get algae explosions that take months to control.
The fix is simple: match the substrate to the plants, and match the plants to your experience level.
The Biggest Mistake Planted Tank Owners Make
Buying cheap inert substrate for a root-feeding plant setup is the fastest way to a failed tank. I’ve seen it dozens of times at the stores I’ve managed. Someone buys a 20-gallon, fills it with colored aquarium gravel, plants six Amazon Swords, and asks why the leaves are yellowing and dying six weeks later. The answer is always the same: the roots have nothing to feed on.
Inert gravel doesn’t absorb or retain nutrients. Without root tabs, root-feeding plants in plain gravel will slowly starve regardless of how good your liquid fertilizer routine is. The bigger the plant, the faster it starves.
The Hard Rule: if you’re serious about a planted tank, the substrate is not where you save money. This is the one area where investing up front saves you from a complete teardown later.
How We Ranked These Planted Tank Substrates
Nutrient content: does it provide root-zone nutrition plants need, or is it inert
Longevity: how long before nutrients deplete and supplementation becomes necessary
Particle size: appropriate for plant root systems (not too coarse, not so fine it compacts)
pH impact: does it buffer acidic/neutral or is it inert
Aesthetics: looks natural and appropriate for most freshwater planted tank styles
ADA Amazonia is the best active planted substrate on the market, full stop. The plant growth I’ve seen from it is in a different league from anything else I’ve tested. Yes, it’s expensive, and yes, you’ll deal with an ammonia spike and cloudy water for several weeks on setup. For a serious aquascape with demanding foreground plants and stem plants, that tradeoff is worth it. For a casual community tank with easy plants, it’s overkill. Know what you’re building before you spend the money.
ADA Amazonia is recognized by expert aquascapers worldwide. It lowers hardness and pH into the mildly acidic range preferred by most tropical fish and plants. The substrate is dense with nutrients, including ammonia and phosphate, which feed plants through the root zone.
The tradeoff is significant: a newly set up ADA tank will experience high ammonia, cloudy water, and algae blooms during the 6-8 week establishment period. Daily or every-other-day water changes are necessary during this phase. Many experienced aquascapers use a dry start to get plants established before flooding the tank, which dramatically reduces algae pressure. ADA also breaks down over 12-18 months and requires replenishment or capping. When you do replace it, the disturbed substrate releases another ammonia surge, so plan carefully.
This is a substrate for people who take planted tanks seriously. It’s not the right call for a beginner’s first tank.
Pros and Cons
Pros
Unmatched nutrient density for root-feeding plants
Proven results with top aquascapers globally
Designed for demanding, expert-level plant species
Cons
Releases ammonia heavily during initial weeks
Expensive
6-8 week establishment period with water changes required
Fluval Stratum is made from volcanic soil and is my everyday recommendation for hobbyists who want active substrate performance without ADA’s aggressive establishment phase. It buffers pH into the slightly acidic range that most tropical plants prefer, establishes beneficial bacteria colonies quickly due to its porous structure, and doesn’t discolor the water significantly when first added.
One practical warning: don’t place heavy rocks or driftwood directly on Fluval Stratum. The granules crush under pressure and broken-down particles lose their porous structure. Also keep the siphon well above substrate level during water changes; it’s lightweight and easy to accidentally vacuum out.
Fluval Stratum is significantly cheaper than ADA and more widely available in stores. For a beginner’s first planted tank or a shrimp setup, it’s the call I make every time.
Pros and Cons
Pros
Natural volcanic base with high CEC value
Works well in smaller tanks and shrimp setups
Much gentler ammonia release than ADA Amazonia
Cons
Lightweight: easy to siphon away during maintenance
Granules crush under weight from rocks or driftwood
CaribSea Eco Complete is packed with liquid fertilizer held within its structure for easy plant absorption. It’s inert in terms of pH impact, so it won’t shift your water chemistry long-term, which is a genuine advantage for tanks where you want more control over parameters. It comes pre-loaded with a beneficial bacteria colony, which shortens the nitrogen cycle when establishing a new tank. The iron content also makes it better suited for red-colored plants than most other substrates on this list.
The main limitations: it’s lightweight, which makes anchoring larger root-feeding plants difficult, and its particle shape isn’t great for bottom dwellers. For budget-conscious beginners starting their first planted tank, it’s the most accessible entry point that still provides real nutrient support.
Pros and Cons
Pros
Pre-loaded with beneficial bacteria
Inert: won’t shift pH or hardness
No rinsing required
Good iron content for red plants
Cons
Lightweight: struggles to anchor large root feeders
Tropica Aquarium Soil is Europe’s equivalent to ADA Amazonia. It’s active, nutrient-rich, and lowers pH and hardness like most soils on this list, but with a notably less aggressive ammonia release than standard ADA Amazonia. The non-uniform grain size also gives it a more natural, less manufactured look in the tank. If you’re looking for ADA-level performance with a somewhat easier establishment period, Tropica is worth the search. The main challenge is availability, since it’s harder to find in North American stores than the other substrates here.
Pros and Cons
Pros
Lower ammonia release than ADA Amazonia
Natural, non-uniform grain variety and shape
Lowers pH and hardness for tropical plants
Cons
Expensive
Hard to find in North American stores
5. Mr. Aqua Aquarium Soil: ADA Performance at a Lower Price
Mr. Aqua Aquarium Soil is an active soil that performs similarly to ADA Amazonia but with less ammonia intensity and a more porous granular structure. The higher porosity improves water exchange through the substrate and makes it particularly well-suited for shrimp tanks. Like most active soils on this list, it lowers pH and softens water.
I recommend Mr. Aqua to hobbyists who want the benefits of a quality active soil without the ADA price tag and without the full aggression of ADA’s ammonia cycle. The main inconvenience is availability: you generally need to order online rather than finding it locally.
Pros and Cons
Pros
Cheaper than ADA with a more porous structure
Lowers pH and softens water
Lower ammonia release: easier cycling period
Cons
Harder to find in local stores
6. ADA Aqua Soil Amazonia Light: The Beginner-Friendly ADA Option
ADA Amazonia Light is ADA’s answer for hobbyists who want the brand’s quality without the full intensity of the standard formula. It carries significantly lower nutrient concentration, which means a shorter, less severe establishment period and fewer algae spikes when plants are getting started. It still lowers pH and hardness into the ideal range for most tropical plants. If you’ve been intimidated by the standard ADA’s required water change regimen, this is the version to start with.
Pros and Cons
Pros
ADA quality with a shorter, gentler establishment period
Lowers pH and hardness for tropical plants
Good choice for first-time ADA users
Cons
Expensive for what is a reduced-nutrient product
Still requires 4-6 weeks of establishment monitoring
Seachem Flourite is a clay-based substrate that never needs replacing. Unlike active soils that break down over 12-18 months, Flourite is permanent. It comes in several colors and grain types and doesn’t alter tank chemistry, giving you full control over water parameters through supplementation.
Flourite isn’t nutrient-loaded the way active soils are. That means no establishment period, no ammonia spikes, no algae surge in week one. The flip side: root-feeding plants need regular root tabs to thrive long-term. It’s also worth noting that Flourite is dusty when first opened and needs thorough rinsing before use. It’s not ideal for corydoras or other bottom dwellers because of its sharp particle edges. Choose Flourite if you want a long-term, low-maintenance substrate and you’re comfortable managing plant nutrition through root tabs and liquid fertilizers.
Pros and Cons
Pros
Multiple colors and grain types available
Never breaks down: permanent substrate
Readily available in stores
No establishment period or ammonia spike
Cons
Dusty: requires thorough rinsing before use
Not nutrient-loaded: root tabs needed for demanding plants
Not suitable for bottom dwellers due to sharp particle edges
What Is Planted Tank Substrate?
Substrate is the material that covers the bottom of your aquarium. In a planted tank, it serves as the physical anchor for plants and, in the case of active or nutrient-rich substrates, as the primary food source for root-feeding species. It also houses beneficial bacteria colonies as part of your tank’s biological filtration.
Not all plants use substrate the same way. Most aquatic plants are water column feeders, meaning they absorb nutrients from the water directly through their leaves and stems. Plants like Java Fern, Anubias, and Java Moss don’t even root in substrate at all. Root-feeding plants are a different story. Amazon Swords, Vallisneria, crypts, and most carpeting plants pull a substantial portion of their nutrition from the root zone. For these, substrate quality directly determines plant health.
Why Substrate Choice Matters More Than You Think
Active planted substrates work by releasing nutrients from organic matter as it breaks down in the substrate layer. Your plants consume those nutrients through their roots. But there’s a catch: if you buy a rich active substrate and plant only water column feeders, the nutrients still release into the water column. The only things that will consume those elevated nutrients are algae. Lots of algae.
This is why matching substrate to plant type is the first decision in any planted tank build. Most substrates stay nutrient-rich for 12-18 months before needing replenishment via root tabs or supplemental dosing. Plan for this from the start and your long-term maintenance routine becomes much simpler.
If you’re focused on water column feeders, substrate choice opens up considerably. You can use almost any substrate that appeals aesthetically and focus fertilization entirely on liquid column dosing. Anubias, Java Fern, and Java Moss don’t care what’s in the gravel below them.
Types of Planted Tank Substrate
Clay-Based
Clay-based substrates like Seachem Flourite are inert and permanent. They don’t alter water chemistry and never need replacing. The tradeoff is that they provide no root-zone nutrition on their own. Root-feeding plants in clay substrate need root tabs to thrive. Best suited for long-term setups where you want total parameter control.
Sand
Sand is another inert option. The key factor to watch is particle size: too fine and the substrate compacts, choking plant roots and creating anaerobic pockets. Coarse sand at 1-2mm particle size works well for plants; ultra-fine sand does not. Sand is a good choice for tanks with corydoras, as it’s soft on their barbels.
Gravel-Based
Standard aquarium gravel is inert and provides zero nutrition. It’s fine for fish-only tanks or setups composed entirely of column-feeding plants. For root feeders, gravel requires consistent root tab supplementation to prevent plant starvation. We have a video covering plants that do well in gravel from our YouTube channel below:
Active/Mineral Soils
These are the nutrient-rich substrates: ADA Amazonia, Fluval Stratum, Mr. Aqua, Tropica Soil. They contain organic material that breaks down and releases nutrients into the root zone. Most lower pH and soften water. Most require an establishment period during which ammonia levels spike and algae pressure is high. They’re the right tool for serious planted tanks with root-feeding plant communities.
pH-Boosting Substrates
Substrates like crushed coral raise pH and maintain alkalinity. These are relevant for African Cichlid setups and hard-water species. They don’t belong in a planted tank setup where most plant species prefer neutral to slightly acidic water.
Key Factors When Choosing Planted Tank Substrate
Grain Size
Grain size is critical for root-feeding plants. Too coarse and roots can’t penetrate or absorb nutrients efficiently. Too fine and the substrate compacts, cutting off oxygen to the root zone and creating anaerobic pockets that harm plant roots and produce hydrogen sulfide. The sweet spot for planted tanks is 1-3mm, with 2mm being ideal for most species.
Material
Avoid substrates containing limestone, crushed coral, or calcium carbonate, as these raise hardness and pH. Most plants prefer neutral to slightly acidic water. The products on this list are all appropriate choices that eliminate the guesswork.
CEC Value (Cation Exchange Capacity)
CEC measures how effectively a substrate binds and retains nutrients for plant use. Higher CEC means more nutrients held in the root zone rather than leaching into the water column. This is why volcanic soils like Fluval Stratum and ADA Amazonia outperform plain gravel even when liquid fertilizers are added to inert substrate.
Weight and Longevity
Plants with delicate or fine root systems need a substrate that won’t crush those roots under its own weight. Consider your plant species before choosing a heavier substrate. And think about longevity: active soils deplete nutrients over 12-18 months. Clay-based substrates like Flourite last indefinitely but require supplementation from the start. Build your maintenance plan around whichever type you choose.
Going the DIY Route
Some experienced hobbyists use garden topsoil as a base, capped with coarse sand or a commercial substrate to save money. It can work, and I’ve seen tanks built this way do well. But it’s genuinely not beginner territory. Garden soils vary enormously in composition, and there’s no way to predict exactly how your water parameters will shift until the tank is running. Ammonia from topsoil can be extreme. Cycling times extend significantly. If something goes wrong, diagnosing the cause is much harder when your substrate is an unknown variable.
For first-time planted tank owners, stay with a commercial substrate from this list. The predictability alone is worth the price difference.
What Most Planted Substrate Reviews Get Wrong
Not distinguishing between inert substrate (which needs heavy liquid fertilizing from day one) vs. nutrient-rich active substrate: treating them as interchangeable leads to plant failures that are entirely predictable.
Not warning about new tank syndrome with active soils: ADA Amazonia and similar products release significant ammonia as they break in. Fish added too early will suffer or die.
Recommending the same substrate for shrimp tanks and planted community tanks without noting pH buffering differences: caridina shrimp need acidic, soft water; neo shrimp are more flexible. The substrate needs to match the shrimp species, not just the plants.
Not mentioning longevity: active substrates deplete nutrients in 12-18 months and then require capping with root tabs or substrate replacement. This is a significant cost and effort commitment that reviews almost never address upfront.
Frequently Asked Questions
I get a number of questions from readers about planted aquarium setups. Below are the ones that come up most often.
How Deep Should My Aquarium Soil Be?
For a sloped aquascape like an Iwagumi layout, the standard recommendation is 3 inches (7.5 cm) in the front and 5 inches (12.5 cm) in the back. In practice, 2 inches (5 cm) in front and 4 inches (10 cm) in back works fine for most plant species. Unless you’re keeping large root feeders like Amazon Swords, you don’t need more than 4 inches (10 cm) at the deepest point.
For column-feeding plant setups, substrate depth matters much less. A shallow layer that just covers the bottom is sufficient and makes the tank easier to clean and maintain.
Closing Thoughts
Substrate is the decision most hobbyists underinvest in and the one they can’t easily undo. Every planted tank I’ve built over 25 years, the tanks that thrived had substrate dialed in first. The ones that struggled almost always had the wrong substrate for the plants in them.
Here’s the short version: if you’re keeping root feeders, get an active soil. Fluval Stratum for most people, ADA Amazonia if you’re serious about aquascaping and willing to manage the establishment phase. If you’re keeping column feeders only, any inert substrate works and you can focus your fertilization effort on liquid dosing. Don’t use plain gravel for root feeders and wonder why your plants are melting.
The substrate doesn’t care how good the light is. If the roots have nothing to feed on, the plant dies. Build from the bottom up.
🌿 Want to learn more? This article is part of our complete Planted Tank & Aquascaping Guide, your ultimate resource for aquarium plants, aquascaping styles, substrates, and more.
If you don’t have a high-end lighting system and CO2 injection, low-light plants are not a fallback. They’re the right choice. Most freshwater tanks run standard aquarium LEDs with no CO2, and the plants that actually thrive in those conditions are the ones on this list. After 25 years in the hobby and time managing fish stores, I’ve watched countless beginners buy “easy” plants at the LFS that were actually medium-to-high light demands in disguise. They melt within two weeks, the hobbyist blames themselves, and half the time they quit planting altogether. That’s not a beginner failure. That’s bad advice.
Low-light plants aren’t a compromise. For 90% of freshwater tanks, they’re the only plants that will actually work.
In this guide I’ll walk you through the 21 best low-light aquarium plants I’ve used and recommended over the years. I’ll tell you which ones I reach for first, what people consistently get wrong about low-tech planted tanks, and how to set yourself up for genuine success without CO2 or specialty lighting.
Expert Take | Mark Valderrama, AquariumStoreDepot
My two go-to recommendations for any tank without CO2 are Java Fern and Anubias barteri. I’ve put both in tanks ranging from 10 gallons to 150 gallons, in everything from soft rainwater to hard tap, and they just grow. Java Fern ties to wood or rock and needs no substrate at all. Anubias is the slowest-growing plant in the hobby, which sounds like a downside until you realize it also means you’re never ripping it out and replanting every two weeks. For tanks with dark substrates and community fish, I’ll also add Cryptocoryne wendtii. Under a standard LED and a weekly liquid fertilizer dose, these three plants make any tank look established within a few months. No CO2 required. I’ve set this up dozens of times in stores and for clients. It works every time.
The Top Picks
I’m going to list the top 3 aquatic plants for quick reference as I’m going to go through a bunch of options for you today. The top 3 are hand picked for you! I’m going to try to stick with common names to keep confusion to the minimum. Every one of these low light plants I’ll go over in this post can run off low lighting conditions.
Java fern is the most readily available and one of the easiest plants to care for in the hobby. Anubias offers a low light plant that grows slow while Moss balls are cheap and work in small tanks.
How We Ranked These Low-Light Plants
True low-light tolerance: confirmed to thrive under standard aquarium LED (1-2 watts per gallon equivalent)
No CO2 requirement: grows well without injection
Beginner survivability: forgiving of missed water changes and minor parameter swings
Growth rate: manageable without constant trimming
Availability: findable at most LFS or online
Is Low-Light Planted Right for You?
Perfect Fit
Standard aquarium LED (not a specialty planted tank light)
No CO2 injection system
Community freshwater tank wanting natural aesthetics
Beginner or low-maintenance setup
Want More? Upgrade First
If you want carpet plants or lush foreground growth, you need a proper planted tank light and CO2
Aquascape competition-style tanks need high-tech setups
Very fast growth or intense green color usually requires more than low-light
The Top 21 Low Light Aquarium Plants
Let’s get started with our best low light aquarium plants list!
Java Fern is one of the most readily available freshwater plants available in the industry. Java Ferns are a slower grower, but it can tolerate most light conditions and is a very hardy plant species. It also has a unique leaf structure and can be glued to rocks for some unique aquascaping accents. Like the other plants above, many fish ignore java ferns. It is a foreground plant that is a literally set it and forgot it plant. Java ferns are the perfect plants for beginners, or those looking for a stress free planted tank. The Java fern is a staple in most low light tank setups.
Mark’s Top Low-Light Pick
Java Fern has been my go-to recommendation for decades. It’s genuinely indestructible under standard aquarium conditions. Tie it to driftwood or a rock with thread or super glue gel, point a basic LED at the tank for 8 hours a day, and it grows. No CO2, no special substrate, no fuss. I’ve kept it alive in tanks with poor lighting, inconsistent water changes, and aggressive fish that would shred any delicate plant. It survives all of it. If I could only recommend one plant to a beginner, this is always the one.
Anubias Barteri is one of the most popular and hardy freshwater aquarium plants available in the hobby. Also known as Coffeefolia, it has heavy thick leaves that are rippled in appearance. When the Anubias barteri plant is young, it will have reddish brown leaves which will change to green as it matures.
This plant is actually ideal for fish that like to eat plants because many fish will tend to leave it alone as they do not like the taste. It is a midwater plant that is a root feeder so you will need a substrate that has room for it to grow its root system. It is a moderate grower and grows well even in low light. If you are looking for a small plant, the Anubias Nana variety works really well!
These Anubias barteri plants also flower. They will flower better when emerged, but they will also flower when submerged in an aquarium. Check out this video by Dovydas below.
Marimo Moss Balls are foreground plants that are very easy to care and grow. They will thrive in just about any light condition and just ask to be rotated every water change or so. They can be kept in just about any tank. From a large planted display to a fish bowl it will thrive in any condition. Some people will even place the in sumps as a form of refugium. They are also very long lived with the species living over 200 years in the wild.
Marimo Moss balls are ideal for small plants and for small inhabits like shrimp. They are also a good fit for smaller activity fish like Bettas. Marimo moss balls aren’t actually considered a plant, more so a form of green algae that grows into a ball formation. Because of their size they are ideal for a smaller fish tank. They do very well in a low light aquarium.
The Amazon Sword is a staple in many freshwater planted tanks. It is found in aquariums all over the world as it is well known for its hardiness and ability to thrive in a vary of conditions. It is also a fairly inexpensive plant and readily available in most stores. It can grow to an impressive length usually growing to over a foot in height. Having an aquarium at least 16 inches in height would be ideal for it. These plants are also easy to propagate and do just fine in low light.
It’s main drawback are its root system. They are fairly large and powerful and will grow deep into the substrate. It does require a deeper (at least 2.5 inches deep) and solid substrate due to this.It grows to a dark green color. If you see the leaves start to brown out, this means that your nutrients are low. It must be planted in the substrate as it is a root feeder.
This plant does not require a ton of light and will thrive in a low light aquarium. It does not require much pruning as well. It is a common plant in a planted tank for a reason.
Cryptocoryne Lucens is a low growing crypt plant that generally grows within the 3 to 5 inches in height range. It sometimes is used as a foreground plant in larger tanks and due to its size it can work as a background plant in smaller tanks.
It’s an undemanding plant that thrive in most aquarium conditions. It is a slow grower and prefers not to move around. Once you plant it, plan on not moving it. It is often recommended to beginners because of it’s easy level of care, slow growth rate, and low light demand. Crypts in general make great low light plants.
Vallisneria Americana or Eel Grass is a native aquatic plant from Florida. It has nice twisted and ribbon like leaves and is usually one of the first plants beginners will try and most often are very successful with it because it is easy to take care of. It is a fast grower as well and is a great background plant due to its taller spread.
It is one of the easiest aquarium plants to propagate via its runners and this also gives it the ability to take over a fish tank, so proper pruning and maintenance will be necessary to keep it in check. It is considered a staple in planted aquariums due to its well earned reputation of being easy to care for and being able to thrive in low light.
Dwarf Sagittaria is a great first time plant for a beginner. It is a low level of care plant that stays small in size and will spread to form a grass like carpet. It is ideally placed in the foreground of your aquarium where it can provide a great looking grass covering to accent your taller and larger plants.
There aren’t any high light or fertilizer requirements with this plant. It will readily grow in just about any tank conditions. It is an ideal low light carpeting plant.
Java moss is a plant that can attach to rocks, driftwood, and roots. It is a very hardy plant that does not need a lot of attention and will grow in just about any condition. It is commonly used to help baby fry hide from adults. Like Anubias Barteri, Java moss is compatible with most fish as many will not pick at it. Java moss is a foreground plant that can grow like a lawn if you want it to and can grow fast. It does well in a low light aquarium.
Pearl Weed is a carpet growing plant that bright green and low growing. It is the ideal carpet plant for beginners. This is a really accommodating plant in that it can be used in the foreground, mid ground, and background as it doesn’t require much to be planted. It will also grow plenty fast under lower light aquarium conditions.
Because of its fast growing and carpet nature, it will require constant pruning to keep it from growing vertically. It also will not mind a hard prune and being shaped to the way you desire. This is also a very easy plant to propagate as all you need to do is cut the end of the stems, group them together and simply bury them together in your substrate.
This is an ideal carpet covering plant for those struggling with others.
Anacharis is a plant you may have seen in science class in school. Because it’s leaves are only one or two cells thick they are often used to teach children about cellular and plant cell structure as they can be easily view through a microscope.
It is a highly valued aquarium plant that can soak up nutrients in the water. It is so good at its job that it is used in wastewater treatment models as it has been found to remove harmful chemicals in water such as arsenic!
It is very easy to grow grow very fast even in low light. It does have an issue of being considered a pest to wildlife though, which means it has been deemed illegal in several states in the US due to its invasive nature. It is very popular in Ponds and cold water aquariums because it is tolerate of a variety of water temperatures. It is also used as a plant for goldfish as they will happily eat the plant and they are cheap to purchase.
It is a very fast grower and it’s chemical and nutrient soaking ability make Anacharis a very utilitarian plant to have in a planted tank.
The Rose Sword Plant is a variant of the Amazon Sword plant that has a range of colors from green, brown, pink, to red. New leaves will start out as pink or bronze and will eventually turn to bright or dark green as they mature. They are just as easy to take care of Amazon Swords, but will require a bit stronger lighting conditions in order to bring out the best colors. However, they will thrive and grow in low light conditions. Most red plants tend to require higher lighting which is why they don’t make this list. This is one type of plant you can get that gets you the red, but won’t require higher light conditions or CO2 injections.
The Water Sprite is another commonly available plant that has the ability to thrive either planted or floating in low light conditions. It is an ideal plant for cover for fry and for timid fish due to the cover it can provide with its grow spread. These plants are also valuable to scientist because they germinate so fast. They are often used in genetic research.
They are fast growers and will suck up nutrients in a fish tank. Both a good and bad thing, but the plant is relatively low maintenance and can still do well without supplementation. They make good background and middle placement plants and actually do a good job of keeping algae at bay as they create a lot of shade under them. It is a commonly available and cheap plant.
Hornwort is like many plants on this list, are one of the easiest freshwater plants to grow in an aquarium. In the wild, you can find it across all continents except for Antarctica. It is a fast growing plant, so it will require pruning to keep in check. What I love about this plant is that is it very flexible. You can either plant it in the substrate or use it as a floating plant on the surface of the water as it will thrive in either situation. It is a dark green plant with dense foliage with a unique leaf structure that provided excellent aesthetics to your aquarium.
It can get tall, but can be controlled with regular pruning. It is a truly non-demanding plant and will do great in the background or attached to rocks. It is also one of the plants on this list that can grow in cold water temperatures. It is a great low light tank plant.
Christmas moss is a staple in freshwater shrimp tanks. It has a bold green color and can be used in a variety of ways to space an aquarium. It’s most common use is to attach it to aquarium rocks or driftwood. What makes this work in shrimp tanks is it’s hardiness.
While it is a low light plant in the sense that it can live without CO2 injection, it will thrive with it. If you want to go as hands off as possible, consider our next option below, Java Moss.
Java moss is arguably the most popular aquarium plant in the hobby today. This moss is great for beginners, does great in low lighting conditions and doesn’t need a high level of care. Java moss has many applications as you can attach it to driftwood, rocks, or even have it as a carpet in your substrate. There are two reasons why I put it below marimo moss balls and christmas moss. That is for the aesthics.
It’s the not the best looking plant. In fact, most plants in the Java class don’t really look the same as other plants. They are hardy and have a certain look to them. They are great for beginners. If you are looking for a show stopping aquascape though, most aquascapers will not use them and will default to less unruly plants like christmas moss.
Bucephalandra is a undervalued low light plant in the aquarium industry. I say that because many beginners don’t consider it. It is usually reserved for more advanced hobbyists, mostly due to its availability and price. It is a plant that has a number of varieties available and colors. From dark green, to light green and even near blacks, this plant can pop in any environment.
Because they are rhizomes like Anubias, they are best grown on rocks and driftwood. They also prefer a good amount of water flow, which make them a better candidate for professional aquascapes and planted aquariums.
A great low tech plant for multiple aquascape types and setups. Forgiving and hardy, the Cyrptocoryne Wendtii is a great introduction to rooted plants!
Cryptocoryne Wendtii are great plants for low light conditions. This particular species called Cryptocoryne Wendtii is well known for its shades of pink and green. It’s a forgiving plant that doesn’t need a high level of care and it offers a unique look compared to other aquatic plants on this list. It’s also one of the few rooted plants on this list that is easy to find tissue culture grown.
That’s one of my frustrations with plants like java fern and anubias. It’s difficult to find them as tissue culture. You can find this one available though. If you want a plant that is easy to grow and that you know will be pest free, consider buying a tissue culture version.
Dwarf hairgrass is a bright green aquarium plant that gives the appearance of grass. It only grows to 3 inches in height. It can give the appearance of a groundcover when grown in mass at the bottom of the tank.
It’s green look works well in simple aquascapes like Iwagumi. It can outcompete other carpeting plants, so if you want to plant it, know that it will become the dominant foreground plant in your tank. It is a hardy plant that doesn’t require a high level of care that beginners will appreciate.
Floating plants are a great option if you are looking for low light/low tech plants. One of the more unique floating plants available is called the floating fern. Not only can it do well in low light conditions, but it does well in cold water temperatures too.
It has a unique leaf shape and the root systems are very large. These make these plants ideal for betta fish tanks and axolotls as they can shade your aquatic pet from the light and still give you a pretty plant that will tolerate low flow water conditions.
Ludwigia Repens is the only red aquarium plant that makes this list. While it is considered a moderate light plant, many plant lights will accommodate its par requirement. It is a stem plant and red plant that doesn’t require CO2 to grow.
Ludwigia Repens is a forgiving and low level of care stem plant. It is the best plant to stepping stone with if you want to get into growing those harder to grow red plants.
Anubias Nana is the smaller cousin of Anubias Barteri. It’s a low level of care plant and is one of the most forgiving aquarium plants you can purchase in the hobby. It can grow in a variety conditions, most fish won’t eat it, and it be grown either emerged or submerged. This makes this plant an excellent candidate for terrariums and paludariums.
Given its smaller size, it works well in smaller fish tanks. If you are looking for an even smaller plant for nano tanks, consider trying Anubias Nana Petite.
Lucky bamboo, often overlooked as an aquarium backdrop, has gained recognition through recent social media trends, particularly on social media. This plant offers a lush, verdant area within your tank, providing a natural playground for fish to dart through.
Known for its resilience and minimal maintenance requirements, lucky bamboo thrives even with the simplest of care routines. An added advantage is its ability to flourish in dimly lit environments, as ambient light suffices for its growth, making it an ideal choice for lower light aquariums. To ensure its longevity, remember to keep the foliage emerged above the water’s surface.
What People Get Wrong About Low-Light Plants
The most common mistake I see is treating “low-light” as a synonym for “no light.” Every plant in this list needs real light. Low-light means the plant thrives at 20-50 PAR, which is what most standard aquarium LEDs produce. It does not mean you can run a dim desk lamp over a covered tank and expect growth. 8 hours of decent light per day is still the baseline.
The second mistake is buying plants mislabeled at the store. Dwarf hairgrass gets sold as low-light constantly. It needs high light and CO2 to produce a carpet. Without that setup it sits and slowly dies. Glossostigma is another one. Beautiful in high-tech aquascapes, completely unsuitable for a basic LED tank. If a plant is in the foreground at a store display that also has a $200 light and CO2 bubbles running, assume it needs that setup to survive.
Hard Rule: Low-light means no CO2 injection required, not no light. Every plant needs some light. The difference is intensity, not presence.
The Biggest Mistake Low-Tech Plant Keepers Make
Skipping fertilizer entirely. The assumption is that since you’re not running a high-tech setup, you don’t need to dose nutrients. That’s backwards. Your low-light plants grow slowly, but they still pull nutrients from the water column. In a tank with no fertilizer and no CO2, plants eventually run into deficiencies: yellowing older leaves, holes in leaves, stunted new growth. A basic all-in-one liquid fertilizer dosed once a week fixes all of that. It takes 30 seconds. It makes a visible difference within a month. Don’t skip it.
Types of Aquarium Plants
Let’s start first with the type of aquarium plants and how they are different we have the following:
These plants reproduce in the aquarium by producing spores. These plants include plants such as Java Fern, Java Moss, and Water Sprite. These plants tend to be popular among breeders because they provide good cover for fry in an aquarium. Most ferns and mosses are aquarium plants that will do well in low light.
Rosettes
These are flowering plants that you will see in both aquariums and outdoor ponds. These include plants like the Amazon Sword plant and Anubias. Rosettes are known for their shortened stems and are very leafy. This makes them a very popular plant for aquariums.
Floaters
These are plants that are not rooted in the substrate and do best floating at the surface of the water line. Some species would include Hornwort and duckweed. They are great plants for new fry to hide it, but several species grow extremely fast and can take over a fish tank.
Types of Feeders
Plants are also separated in the way they feed in your aquarium. We separate plants in the aquarium hobby as column feeders and root feeders. A column feeding plant take nutrients from the water column, which means you can place column feeders above your gravel substrate and do not have to worry about having a nutrient rich substrate. Root feeders take nutrients from the substrate. These plants will anchor to your substrate and require substrate that can sustain them.
Not only do we need to know about how plants feed, but also where they are best placed. There are foregound, midwater, floating, and background plants. Knowing what plants are best for each section in your planted aquarium setup will help you design an aquascape that looks beautiful and professional!
How to Select Tank Foliage
We supplied a video from our YouTube channel that summarizes the list above. Subscribe to us if you like our videos. We post new ones every week.
It can be intimidating when purchasing plants for the very first time from a fish or pet store. Here are a few tips when it comes to selecting a plant for your aquarium:
Don’t purchase plants with damaged fins or holes in the leaves
Look for discoloration of leaves as well as yellow leaves
Considering dipping your plants in a 1/10 bleach solution to remove any unwanted snails and algae from the leaves.
Another option to get the best plants possible is to consider tissue cultured plants. Tissue cultured plants are grown in labs and will not have any pest hitchhikers. I would definitely consider purchasing them if you can find them for the plant you are looking for. The most well known brands for tissue culture would be Tropica and Aquatic Farmer, both of which you can find in online stores if your local store does not carry any.
Planted Tank Lighting Options
We do have a post about the Best Planted Tank LED Lights but we can pull from that list to provide a few options if you don’t have time to read that article. For a low light aquarium on a budget, the NiCrew Sky LED would be the easiest choice. If you want an overall comprehensive light with the ability to expand to more light demanding plants, the Serene LED is one of the best lights out there and is simple to use. The Serene is ideal if you are planning to graduate beyond low light aquarium plants.
CO2 is the driver of growth for any planted tank. While many of these plants can grow without the assistance of a CO2 system, they will grow a lot better and faster with CO2. While a full blown CO2 system may not be a good option for you, there is a good middle ground to get growth via supplementation.
Seachem Excel is arguably the best CO2 supplement when you are beginner. It’s easy to use and also works great for eliminating nuisance algae. It’s super easy to use. All you have to do is add 1 cupful for every 50 gallons daily or every other day. When you do a major water change and on the initial use, you add 1 cupful for every 10 gallons. It’s also safe on moss balls (which is considered a form of algae).
Aquarium fertilizers are important to keep your nutrient levels stable for growth. If you start supplementing CO2, you will need to look into fertilizers to keep your growth levels up. While APT complete is considered a supplement for full blown planted tanks, it can be adjusted for low energy setups. I’m a fan of the supplement as it is a complete all in one that is superior to most pet store purchased products.
Including plants labeled “low-light” in stores that actually need medium to high light. Dwarf hairgrass is the biggest offender. It’s routinely sold as easy and low-light. It needs high light and CO2 to look good. Without them it melts, goes brown, and dies.
Not explaining what “low-light” actually means in real terms. Marketing language is useless here. A true low-light plant thrives at 20-50 PAR. Most store-bought aquarium LEDs without special plant settings sit in that range.
Forgetting that fertilizer still matters. Low-light plants grow slowly but they still consume nutrients. A basic liquid fertilizer dosed weekly makes the difference between a plant that survives and one that actually looks good.
Skipping the epiphyte warning. Java Fern, Anubias, and Bucephalandra are epiphytes. Do not plant them in substrate. Bury the rhizome and they rot and die. Tie them to hardscape. This one mistake kills more plants than anything else.
FAQS
What Aquatic Foliage Does Well With Muted Lighting?
There are many plants that do well in low light aquariums. Plants such as Java Fern, Anubias, Bucephalandra are excellent choices. They will go well even in low light and no CO2.
Can I Grow Tank Foliage Without A Lamp?
No. You cannot grow aquarium plants without a light. Whether its direct sunlight (not recommended to avoid algae) or a plant light – all plants in the aquarium trade need light to survive. Most plants will survive around 7 days without lights while other more sensitive plants will start showing signs of stress after 2 or 3 days.
How Many Hours of Illumination Do These Types of Tank Foliage Need?
Plants need about 8 to 10 hours of light to survive. Low light plants do well with this much light. Other plants may need more light, but it is more about the intensity of the light versus the duration.
What is considered moderate illumination for tank foliage?
Moderate light is anything over 100 PAR. Most planted tank lights will provide moderate light. If you are looking for intense lighting, there are brands of lights from companies like UNS that make high-intensity lights desired for professional aquascapes.
Will normal LEDs grow foliage?
Yes, a normal LED light can grow plants assuming the amount of PAR is enough to grow the plant. It will not have the best spectrum to grow optimally though. Plain white lights tend to give off a lot of PAR and may actually burn plants or encourage more algae growth. It’s best to purchase a specially-made aquarium plant light to ensure you get the best growth rate from your plants.
Closing Thoughts
The biggest myth in planted aquariums is that low-light plants are just training wheels until you can afford CO2 and a proper light. They’re not. They’re the foundation of the most durable, natural-looking, low-maintenance tanks in the hobby. Anubias, Java Fern, Cryptocorynes, and Java Moss have been the backbone of successful planted tanks for decades precisely because they work in the conditions most aquarists actually have.
Start with your light and your tank. Be honest about both. A standard LED with no CO2? You’re in low-light territory, and these plants are your plants. Build around Anubias barteri and Java Fern first. Add a Cryptocoryne or two for the midground. Throw some Java Moss on your hardscape. Dose a liquid fertilizer once a week. That’s the whole system. No CO2 reactor, no expensive lighting controller, no complexity.
Low-light plants aren’t a shortcut. They’re the right call. The best planted tanks I’ve ever set up for customers were low-tech. They looked incredible, stayed healthy, and the fish owners actually enjoyed maintaining them instead of fighting them.
Build the tank you can maintain, not the tank you think you should have.
🌿 Want to learn more? This article is part of our complete Planted Tank & Aquascaping Guide. your ultimate resource for aquarium plants, aquascaping styles, substrates, and more.
Aquarium chillers are one of those purchases I see reef keepers delay until they’ve already lost livestock. and that’s a painful way to learn. I run a 125-gallon reef and have tested chillers across multiple summers in a warm climate. The difference between a quality unit and a cheap one shows up fast when ambient temps climb. Here’s what’s actually worth your money.
Summer of 69 could be the best days of Bryan Adam’s life but not in general for people like us. Summer, typically, is a hard time to pass if you live in hot areas like the South in the United States or South-Asian countries like India, Bangladesh and Pakistan. And if you think of those fish, aquatic plant and coral living in high-temperature water the whole day, you will realize that summer is actually a nightmare with a poker face. An aquarium in a hot climate may require an aquarium chiller in order to keep stable temperatures.
Keep this in mind that aquariums shouldn’t get hotter than 83°F in any situation. At 83°F or higher water temperature, the oxygen level in aquarium water starts to diminish and this leads to a stressful-competitive situation for the fish and other inhabitants to get oxygen. Be fearful, this may lead to the death of your aquarium residents.
For the optimum health of your fish and other aquarium species, it is advised to keep them in an acceptable range of water temperature. For example, tropical fish and saltwater aquarium fish have an acceptable range of 72° to 80° F (optimal is 78° F), Fancy Goldfish, like Fantails, have an acceptable range of 65° to 72° F and Common Goldfish have an acceptable range of 65º to 68º F.
Now if you stay outside from home the whole day, which of course you do because of office, class or for simple groceries, DON’T keep your aquarium in a place that has direct contact with the sun. This will lead to an increase in growth of algae that would be difficult to clean. So you can figure it out by now that keeping the aquarium water temperature optimum is vital. Here are some of the best, cheapest and quickest methods that will help you reduce the tank’s water temperature in summer.
How to Protect Your Aquarium Against Summer Temperatures
Straight as it sounds! The cooler the temperature outside, the lesser the water temperature will increase inside the aquarium. The temperature will be within the safe range for your fish. Plus, your friends and family will thank you too for the air cooler/conditioner.
Beat The Heat On A Budget (Mobile ACs for Tanks)!
Before I get into the Best Aquarium Chillers, there is a bit of secret many of these chiller manufacturers do not want you to know. There are actually reasonably priced mobile ACs that can be purchased online that will keep the area you keep your aquarium cool! Here are a few suggestions. This choice is a good consideration if you add an aquarium in a den, garage, or addition:
Global Air Portable AC – This mobile AC will handle up to 450 square feet and is another value priced model.
Honeywell Mobile AC – Honeywell is a major trusted name brand. Handles up to 400 sq ft looks aesthetically pleasing.
Mobile ACs require an outside vent so your only limitation is having a vent to the outside of your home or a window when you can insert the window outlet to it. They are very easy to install and the window outlets are made to universally fit on just about any window. Having the area in your home where your aquarium sits in cool is the most vital aspect of keeping temperatures safe. These mobile solution will not only work in new additions of your home, but also will protect you in the event of a AC failure.
An even cheaper alternative is a Window AC unit. While these units are cheap and will get the job done, they are a lot longer than the portable AC units I have showed above. I feel that the Portable AC units are better values and since they are portable, you can move them around the house for other rooms if need.
Invest in an Tank Cooler
Now if you want to have a substitute of an air cooler or if you think your existing air conditioner isn’t doing much in terms of keeping the temperature in check for fish, you can purchase an aquarium chiller. Chillers have a variety of shapes, sizes and styles. So to buy the perfect chiller, you need to know the dimension and size of your aquarium and the temperature degree that has to be brought down to keep it at an optimum level.
Once you are done buying just fix it in the sump or plumb it in-line of your tank. Voila! This is a sure effective method for beating that scorching heat of summer, plus you can also place it with your heater to control the temperature changes of your room. Let’s talk about the best aquarium chillers out there to purchase.
The Candidates – A Quick Comparision
Now to know which aquarium chiller is the best or which suits your needs the most is a big question, which I am here to answer. When you are buying look at the chiller’s packaging for the horsepower rating; this rating is useful to determine the number of watts the chiller is going to use. British Thermal Units (BTU) is another rating which you should check before purchasing your ultimate aquarium chiller. Below are some recommended picks I’ll go over.
When it comes to JBJ, most people recognize them for their aquarium chillers. The JBJ Arctica Chillers come in a variety of sizes and use a titanium coil design, which makes them ideal for all aquariums. They are also known for being quiet to operate – a big consideration if you are planning to install one of these in a living room. These are energy efficient and quality units that will last a very long time.
They do come with a premium price tag though. They are one of the more expensive aquarium chiller solutions on the market, but their reputation is well known in the industry for being reliable and effective.
The Euro Max Chillers are a mainstay in the aquarium industry. It is probably the most commonly available aquarium chiller on the market, which means finding parts, service, and replacement are much easier than other units on this list.
These chillers are designed for aquariums, specially for saltwater aquariums. They are known for being long-lasting units. It comes with a removable air filter that is easy to pull to maintain. This filter is there to keep the chiller operating for a longer life, so you money will be well invested with this unit.
Aside from their price, the only complaint I have with these units is that it comes with a barb connector. As a chiller that is designed for saltwater aquariums, a PVC connector via a slip fitting or bulkhead would have been more desirable especially knowing that many reef tanks get hard plumbed.
Pros
Quality built unit made for reef tanks
Long-lasting
Readily available and easy to find parts and service
The Active Aqua Chiller is a Freon-free aquarium chiller that is typically used in hydroponic systems. Because it is Freon-free, this makes the Active Aqua unit environmentally safe and easier to maintain. It has its own control unit with LCD displays. It has an anti-corrosive titanium evaporator – which is a huge deal for saltwater aquarium users. The Active Aqua 1/10 model pictured here is rated 1,020 BTU and will suit a 50 gallon tank.
Active Aqua gives you a number of choices though, going all the way up to 1 horsepower units that will suit large tanks. Its price point puts it in the middle of the pack of this list.
Pros
Freon-free unit
Titanium make up – anti-corrosive
Lots of models available
Cons
While mid-priced, it’s still expensive
4. Teco Tank Tank Cooler – The Ultimate In Temperature Regulation
The Teco Tank Aquarium Chiller is bar none the most advance aquarium chiller available on the market for a hobbyist. It supplies the ultimate in aquarium temperature regulation. It not only provides aquarium chilling, but also very high quality aquarium heating. While it’s marketed as a aquarium chiller, it really is a complete temperature regulation solution.
You probably know from reading my Best Aquarium Heaters post that aquarium heaters are one of the more fail probe pieces of equipment. The Teco Tank aquarium chiller provides a heating and cooling solution for consumers and professional tanks. See the video below by Dutch Reefer to see the Teco Tank chiller in action.
The unit starts off with high-end compressors and titanium coaxial heaters to provide complete temperature regulation. It comes complete with a temperature controller that is accurate up to 1 degree Fahrenheit and contains audible alarms if the temperatures get too low or too cold. They add this all in with a compact design and Italian made engineering and you have a top of the line unit. This is also the only unit on the list has has a warranty over a year.
So what’s the catch? It’s easily the price tag. They are the most expensive units on this list by a mile, but for someone running a high end planted tank or reef tank it may be worth the price.
The IceProbe Thermoelectric Chiller is a unit piece of equipment that can cool an aquarium yet still have a small footprint. This is accomplished by using a thermoelectric probe that is inside the water line and an external fan and controlled unit.
What you get is a chiller that can take a very small footprint in the aquarium. Multiple units can be purchased to handle larger tanks. Purchasing 3 for a larger tank will equal to the purchase price of one of the middle-end units on this list so the price isn’t that bad when you think about it.
The biggest downfall with this unit is that is requires a drilled aquarium. You need to have a hole to fit the probe or you stick it on top of your aquarium, which leaves an ugly looking piece of equipment visible. Others have had success placing the unit on top of a Power Filter for those with hang on back filters.
I like to hide as much equipment as possible so I feel this unit is best in an Aquarium Sump or drilled to the back of an aquarium. If you want to learn more about drilling aquariums, check out my Best Aquarium Overflow Box Reviews post.
The Baoshishan Aquarium Chiller is a new entry in the market. It is made to be a premium quality chiller, but with a mid-level price. It is designed for aquarium and hydroponic usage. It comes with some higher features like a digital temperature controller. The built in controller will keep the unit from over cooling the tank. The controller is borrowing from the refrigeration industry and is one of the higher quality ones that come with a chiller. It is designed to be a easy to use and quiet chiller.
The main issue with this unit is it is new to the market and a few users have had issues with the unit trigger their breaker switches due to the power demand of these units. The pump it comes with is not very powerful and the instructions are fairly useless. Fortunately, it’s an easy to operate unit.
Pros
Good Price
Solid temperature controller
Cons
Bad instructions
New to market
Power demanding
Tips
There is more to keeping an aquarium cool than just having a chiller and or an AC. Here are some other pointers.
A good filtration system
Aeration enables the tank surface water not to be exposed to the higher temperature outside for long. Plus, the filtration system will filter the water as well (the double benefit you know).
Circulation of water
Good water circulation is a must to keep the water cool. Heat energy evaporates from the surface of the water. In addition to that, gases do an exchange at the surface of the water; where Carbon Dioxide leaves the water surface and Oxygen takes place instead. Without this circulation, the water’s dissolved oxygen levels can turn out critically low at higher tank temperatures.
But the question is what is considered to be “a good water circulation”? Water circulation may vary because of the dimension of the tank, the inhabitants it holds and the way it is decorated. Now speaking generally, tanks which have fish only must have water flow that turns the water over 10-40 times per hour (tph).
If your tanks hold soft corals then the water turns over should be 10-30 tph. If you have all the soft, hard and large polyp stony corals then make sure the tank’s water turns over about 30-50 tph. Aquarium with small polyp stony coral should have water turn over 40-80 tph at least.
Well, these are rules of thumb that can vary from tank to tank. But following this would make sure that the aquarium tank runs naturally cooler in summer.
Use LED Lighting
LED lighting versus T5s or Metal Halides have a big advantage over heat production. LEDs are the produce the least lighting and are ideal for aquariums house in hot climates. Check our our Best Reef LED Reviews for recommended selections.
Cheap Solutions – How Not To Break Your Bank
Now let’s talk about some quick solutions which do not break your bank:
Frozen water bottles
Freeze water in a clean bottle that has never been in contact with soap or other detergents. This is the easiest solution because when the temperature is high just place the frozen bottle in the tank, once the temperature drops, bring it out as per your convenience.
My suggestion here is not to throw ice cubes direct into the aquarium (no matter how easy and time-saving it may seem). Adding direct ice cubes may introduce chlorine and/or chloramine in your tank water (which you do not want unless you’re using un-chlorinated water for ice cubes). Plus avoid using ice packs too which has a tendency to leak.
Keep a constant sharp eye when the temperature starts to fall- there are no sure ways to tell when the temperature would drop or how long does it take for the water bottle to bring the temperature at an optimum level. So, yes- it is compulsory to keep the aquarium water cool; but no- you can’t rush in doing it.
Increase evaporation and air circulation with a fan
Evaporation, as the water transforms into the gas, cools the tank water. This happens when a form of energy such as heat transferred from pumps, lighting and the room’s air temperature adds to the water. For this to happen, the surface of the water must be in contact with the open air. In other words, the aquarium cannot be hooded.
Now to increase the evaporation and air flow process, keep a small fan in such a way that it blows air across the surface of the water. Now the question is how many fans do you need to make this air flow and evaporation process! Well, it solely depends on the size and dimension of your aquarium-tank. But only having a single fan would do the trick and you can see a huge difference in terms of keeping your aquarium cool.
Placement of Tank
Too much of a good thing may actually harm more than you think. Sunlight is important for living objects to get nutrients, for growth and development but the constant contact of sun rays to your aquatic friends may do more harm than good. Position your aquarium tank in such a way that it is not in direct contact with the sunlight. Plus, during summer sun travels higher in the sky- thus constantly changing angles of sun rays.
So you may have to re-position your aquarium more often. If you don’t want to go through all these hassles, install blinds in your tank room to block out the sunlight as temperature rises. Reducing this light, in turn, will also reduce the amount of heat energy passing through the tank water. Also, refrain from adding any artificial lighting to your fish-tank. Remember, it may look all those shimmery when you add blinking lights to your aquarium, but in the long turn it is harming the health of your fish and corals- the actual beauty of your “live-box”.
Ditch the Tank Canopy/Top – Let the Air Flow!
A common trend now in the aquarium industry are open tops. They have the advantage of additional gas exchange and keep your aquarium cooler by have the water open in the room. You exchange this additional cooling with added evaporation and you will want to put down a mesh cover in order to keep your fish from jumping while keep the tank open. If you happen to run an air pump, one other downside to consider is that air pumps will blow water out causing additional water spots or salt creep if you run a saltwater tank.
Be a “miser” when adding that extra fish
Now, as you are passing by the aquarium shop you may see some of the world’s best colorful fish swimming from one corner to the other of a fancy aquarium and it may happen that it is the last day of the month and you have just got a text from your bank that your account has been debited with the current month’s salary- sounds like a God sent notification to buy an extra fish for your aquarium? NO! Adding that extra little life to your already low oxygen level aquarium will result in a stressful situation for all the poor inhabitants of your tank. So always check your aquarium water temperature before you purchase an extra life for it.
Though differently sized aquarium requires different methods to keep the temperature in check; these are few of the tactics that go well with almost every aquarium that you may have. Adapt these techniques in summer to maintain a better environment in your aquarium, your fish-friends will thank you!
Closing Thoughts
I have provided a number of options for you to keep your aquarium cool. From fans, placement of the aquarium, to mobile ACs to aquarium chillers themselves there are many options available for you. Look at what your budget can afford and take it from there. I hope this post was useful to you. If you have any questions, please leave a comment below. Thanks for reading.
🔧 Want to learn more? This article is part of our complete Aquarium Equipment & Gear Guide. your ultimate resource for filters, heaters, lights, pumps, tanks, and more.
Test kits are something I use every single week across freshwater and saltwater tanks. Over 25 years I’ve worked through a lot of them, from cheap strip kits that give you a rough ballpark to professional-grade liquid reagent kits I now rely on. Getting your water parameters right starts with trusting your test results, and not all kits earn that trust. Here’s what I actually recommend.
Are you struggling to find a reliable aquarium test kit?
In this blog, we share the best aquarium test kits, from test strips to digital readers.
With over 25 years of experience in the aquarium hobby, I’ve assisted countless clients, hobbyists, and readers like you in overcoming their water chemistry issues. I’ve personally tested these kits in real world scenarios to determine the best test kits to buy today.
Expert Take
Mark Valderrama — AquariumStoreDepot.com
After 25 years in this hobby and running retail fish stores, here is what I actually tell every new hobbyist: liquid test kits beat strips every time. Not slightly. Significantly. Strips give you a ballpark. Liquid reagents give you a number you can act on.
The four parameters that matter most are ammonia, nitrite, nitrate, and pH. Test those four and you have a complete picture of what is happening in your tank. I ran these tests on every system that came through my stores. When a customer brought in a water sample, those four numbers told us almost everything we needed to know in under five minutes.
One habit I always pushed: keep a log. Write down your readings with the date every time you test. A single reading tells you where your tank is right now. A month of readings tells you whether it is stable or drifting. That pattern is what saves fish. Most hobbyists skip the log and wonder why problems sneak up on them.
For freshwater, the API Master Kit is what I hand to beginners. For saltwater, Red Sea Marine Care covers the bases. If you are running a serious reef with SPS corals, step up to Hanna Checkers for alkalinity and phosphate. The precision matters at that level.
There are many kits available, so why not start with our top picks? Above, we have the API Master test kit, the most comprehensive kit you can buy for freshwater, and the Red Sea Marine Care, which covers the bases for most saltwater aquarium beginners. The Hanna rounds out the picks as the most accurate.
Mark’s #1 Pick for New Hobbyists
API Freshwater Master Test Kit
Every customer who walked into the stores I managed and bought their first tank walked out with one of these kits. It covers the four parameters that actually kill fish during a new tank cycle, the color charts are readable without a chemistry background, and the reagents last long enough that most beginners will replace it before it expires. It is not the most sophisticated kit on this list. But it is the right kit to start with, and starting right matters more than starting fancy.
The Candidates – A Quick Comparision
I have to combine freshwater and saltwater test kits in one post. Below are the best test kits that get the job done for most aquarists.
The API Freshwater Master Aquarium Test Kit is a higher end version of their 5 in 1 test strips. This aquarium water test kit allow you to check on your pH, Ammonia, Nitrite, and Nitrate levels. Because the API Freshwater Master Test Kit uses test tubes versus test strips, it is a little more complex to use but nothing a beginner can’t figure out. This freshwater master test kit is the recommended kit for a freshwater aquarist who is starting out. API also sells an API Saltwater Master Test Kitand a Reef Master Test Kit, but there are better test kits on this list better suited for saltwater and reef tanks. Overall, this is a comprehensive and affordable freshwater master test kit.
Just like with the test strips, the API master test kit is also a very common test kit that specialty local fish stores will use when you bring in your water to test. This is because these aquarium test kits are cheap to use. Keep that in mind if you want to save some money or want to double verify test results.
My biggest gripe with this master test kit is the ammonia test kit. This is a total ammonia kit, not a free ammonia tester. Because of that, it is common to get false positive test results, especially on the saltwater master test kit (which is why I don’t recommend them for saltwater tanks). The color gauge is not easy to read as well.
Pros
Easy to use
Has all the basic parameter needs to test in a freshwater fish tank
Cons
Color gauge can be genuinely hard to read under certain lighting
Ammonia test is total ammonia not free ammonia test
Color gauge can be hard to read or interpret at times
Why the API Freshwater Master Kit Is #1
It is not the flashiest kit on this list, but it earns the top spot for freshwater for three reasons:
Accuracy that strips cannot match. Because it uses liquid reagents and test tubes instead of paper strips, you get a proper color reaction. The difference between 0 ppm and 0.25 ppm ammonia matters. Strips blur that line. This kit does not.
800+ tests per kit. A single API Master Kit contains enough reagent for 800 pH tests, 130 ammonia tests, 180 nitrite tests, and 90 nitrate tests. At normal weekly testing, this kit lasts 1 to 2 years before you need refills. The cost per test is minimal.
Color charts that work in real lighting. The comparison vials and printed charts are calibrated to be read together. Hold the tube next to the chart in natural light and the reading is clear in under 10 seconds. Not perfect, but far better than any strip you will squint at under a fish store’s fluorescent bulbs.
The only real weakness: The ammonia test measures total ammonia, not free ammonia specifically. In saltwater tanks, this leads to false positives. For freshwater, it is accurate enough to make informed decisions.
2. Red Sea Marine – The Top Pick for Saltwater Beginners
When I talked to people just starting out in the saltwater tank hobby and they are looking for a master saltwater test kit, the Red Sea Marine Care Multi Test Kit is my usual recommendation. This test kit includes tests for Ammonia, Nitrate, Nitrite, pH, and Alkalinity. It is a very generous test kit as well as you get 100 ammonia tests and 100 nitrate test. This should easily last you until the test kits expire.
I prefer this saltwater aquarium test kit over because they are superior quality then what the local specialty stores will usually use (API) and the nitrate test kit has a large range. Red Sea sells a nitrate pro test kit which has two different tests for low and high range. I prefer this test kit over the pro as the majority of beginners shouldn’t really have to work with ultra low levels of nitrates.
I also really like how this includes an Alkalinity test, which will help ease your way into reef tank keeping if you chose to do that in the future.
Pricier than API, yes. Worth it if you are serious about saltwater.
Pros
Includes alkalinity test
Good ammonia test kit
Easy to read for a beginner kit
Cons
Fairly pricey
Nitrate test is not low range for ultra low nutrient tanks
The SeaChem Ammonia Alert badge has been a mainstay for me in every aquarium I have setup. I use them on every quarantine tank I use and they go into freshwater and saltwater tanks. What sets this ammonia test kit apart from others is that it is a free ammonia tester. Free ammonia is the type of ammonia we really want to look out for as it is the most deadly.
Many aquarium water test kits only measure total ammonia, which doesn’t give you the full picture. It also measures your ammonia levels in your aquarium water 24-7 so you will know right away if something is off. Given they work 24-7 and last a long amount of time, these are a great buy.
The main thing with these kits is getting a proper read on the badge. I would recommend that you shine a light on the back of the badge to get an accurate measurement if you can’t tell if it is yellow or another color. They also tend to last more like 3-6 months instead of a year. Overall, these have served me very well over the years and I continue to use them.
Pros
Monitors free ammonia
Monitors ammonia levels 24-7
Cheap
Cons
Can be hard to read
Usually won’t last for a year like the package states
One of the trickier things to do in a freshwater planted tank is testing your CO2 levels. A CO2 drop checker is a great way to consistency monitor your CO2 levels. It comes with a Glass CO2 checker and a 15ml drop checker solution. It’s a reasonably priced solution that is easy to setup in a planted tank.
If you are want to make your own test solution, here is a detailed video below so you can save a few dollars.
To me, this is essential test equipment for a serious planted tank. The color chart can be a little hard to read at times, but if you want to monitor your CO2 levels constantly, this is the way to go.
When I talk to folks who are starting to get into reef tanks and want a comprehensive test kit that covers all essential parameters of a reef tank, I point them towards the Salifert Test Kit Combos. This has 6 tests in total, pH, Nitrate, Magnesium, Phosphate, Alkalinity, and Calcium. You can run any reef tank setup you desire with this test kit package.
This will get you going for a reef tank. It is on the pricey side, but keep in mind that you are getting 6 test kits at once. For those of you looking for a digital readout that is easy to read, look at the Hanna Checkers listed below in this post.
Pros
Comprehensive – has every test kit you need to run a reef tank
If I have a saltwater hobbyist looking for a high quality nitrate test kit as a single purchase, the Nyos Nitrate Test Kit is the test I recommend. It’s the easy to read, easiest to know, one of the most accurate, and covers a wide range of levels.
I actually have a Red Sea saltwater aquarium test kit that I usually use, but once I ran out of nitrate tests, I switched to this kit. It’s just far easier to use and read in my opinion and I continue to use this kit today on my reef tanks.
Reef tank enthusiasts demand high end solutions for their aquariums. The Hanna Checker Alkalinity tester is one such solution. This kit is easy to use and genuinely accurate. I am a big fan of Hanna Checkers because they give you a digital readout so there is no guess work on reading some color chart or trying to figure out the colors.
The kit is expensive, no question about it. The kit itself is as expensive as the test combos from Salifert and Hanna is known for having test regents that do not last very long. The refills from Hanna will only last 25 tests so keep this in mind if you want to purchase one. It is a very accurate kit though and I would highly recommend it if you are planning to keep a high end reef full of stony corals.
Pros
Extremely accurate test results with no guess work
Phosphate level testing is a major deal in a reef tank. Too low can result in nuisance outbreaks like dinoflagellates and bleaching of stony corals while too high can lead to nuisance algae. I prefer Hanna’s ULR Phosphate tester over their standard test as it is more accurate.
This is an expensive test kit, but it is the phosphate tester of choice in the industry without a doubt. It is extremely accurate and delivers results quickly.
Pros
Extremely accurate with no guess work
Very quick to test
Cons
Expensive
Regents do not last very long
What Test Strips and Cheap Kits Miss
Here is where bargain options fail when it counts:
Color ambiguity. Test strips produce a single blended color from multiple reagents saturated into one pad. When nitrite reads 0.5 ppm, the strip color is almost indistinguishable from 0 or 1.0 ppm. You are not getting a reading. You are getting a guess.
No ammonia test on basic strips. The popular API 5-in-1 strip tests pH, nitrite, nitrate, carbonate hardness, and general hardness. Ammonia is not included. That is the one parameter most likely to spike during a new tank cycle and the one most likely to kill your fish. You need a separate ammonia test, which defeats the convenience argument.
Narrow pH range. Most test strips cap out at pH 8.5. If you are running a tank that drifts above that, or you need to confirm pH below 6 for soft-water species, the strip hits its limit and you get no usable reading.
Reagent cross-contamination. Strips that test multiple parameters at once can have reagents bleed into adjacent pads when wet. The result is a false reading on a parameter that is actually fine.
Expiration disguised as accuracy. Old strips fade their color range before they show any visible sign of aging. A strip kit that is 18 months old may read “fine” on nitrate even when your tank is running at 60 ppm. Liquid reagents lose potency more predictably and visibly.
9. API Freshwater 5 in 1 Strips – Easy and Affordable
The API 5 in 1 test strips are a great way for a beginner to test their freshwater tank. The aquarium test strips will test pH, Nitrite, Nitrate, Carbonate and General Hardness. With the exception of ammonia, this has everything you need to test your freshwater aquarium. It is very easy to you as all you need to do is get some sample water from your aquarium and dip the strip. The results show up quickly you can compare to the color chart that comes with API test kits. These test strips are also one of the most affordable kits in the hobby.
Because a test strip kit is so affordable, it is the test kit you will see used by aquatic departments at chain pet stores. These test strips are not very accurate, which is why this is not recommended for saltwater aquariums. It also lacks an ammonia test, so you will have to purchase a separate tester for that.
Pros
5 tests in one
Simple to use
Cheap
Cons
Widely available but accuracy does not justify relying on it as your only test
No ammonia test
Not super accurate
Quick Verdicts: Buy vs. Skip
Buy the API Master Kit if:
You are setting up your first freshwater tank
You need to track your cycle and want reliable ammonia readings
You test weekly and want a kit that lasts 1 to 2 years without restocking
Your local fish store uses API and you want to cross-check their readings at home
Skip the API Master Kit if:
You are running a saltwater or reef tank (false positives on ammonia)
You need ultra-low nitrate readings below 1 ppm for a high-end reef
You want a digital readout with no color-matching required
Buy Hanna Checkers if:
You keep SPS corals and alkalinity swings cost you frags
You want a digital number, not a color you try to match under poor lighting
You are running a low-nutrient reef where phosphate needs to be exact
Skip Hanna Checkers if:
You are a beginner who does not yet have a stable tank to optimize
The reagent cost ($10 to $15 per 25 tests) bothers you at your testing frequency
You are running a FOWLR tank that only needs basic parameter tracking
Why Do We Test Our Water?
Good question to ask yourself. Experienced hobbyists always say test your water, like that answers the question. Here is the real reason I do it. To me, this is like getting a check up on your tank. You can see what is out of wack, or how much you need to change to get it back in balance. Ideally, you will want to perform water testing before you make a water change because they will tell you where your levels peak. Here are other reasons.
When your tank is new
This is the major reason to get into the habit of water testing. New tanks are unstable and if you are doing a fishless cycle, you will need to test your water to see when it is safe to add fish and other inhabitants into your tank. Testing for Ammonia and Nitrites is really important when you are going through the cycling process. As your tank matures, you will be mostly focused on nitrates and pH levels.
It will tell you if you need to dose
Both planted tanks and saltwater reef tanks have additional parameters you need to monitor to ensure healthy growth of your plants or corals. If parameters are unstable, your plants or corals will suffer. Testing parameters like alkalinity tells you if you need to adjust your dosing schedule. The amount you need to dose changes over time as your plants or corals grow.
It will tell you if a water change is actually necessary
Believe it or not, planted tanks and saltwater reef tanks can be built so that constantly changing your water can be a thing of the past. I’ve frequently built reef tanks that had complete nitrogen cycles. They were so efficient that I had a lack of nitrates and phosphates, and I actually had to dose them to keep my corals healthy!
In most setups, with plants and modern reefs you may not need to change your water every week. This is where water testing comes into play. Test your water quality and see where your levels stand. If the water conditions are stable and not out of wack, then there is no need to make a water change!
It’s best to only perform water changes when they are necessary – especially with reef tanks. They thrive off stability in your tank water. The more delicate corals you have, the more stability comes into play. If you change water when it’s not necessary your levels will change and may cause stress to your more sensitive corals like SPS corals.
Parameters for a Freshwater Tanks
Let’s talk about the water quality parameters you want to test for in a freshwater aquarium. Below are the main water parameters to test on a regular basis:
Ammonia
Ammonia is the result of waste being excreted from fish and decaying matter. There are two types of ammonia that are present in the aquarium, These are total ammonium (NH4) and free ammonia (NH3). Total ammonia is the ionized version of ammonia. While it is toxic, it is not as toxic as free ammonia in your tank water.
Most water test kits will test for total ammonia, which can make the test results of the testing kit not always as reliable. Free ammonia is the most dangerous form of ammonia. Test kits that detect free ammonia are considered more reliable to use.
Nitrite
As bacteria breaks down ammonia, it converts ammonia to Nitrite, a less toxic substance. While it is less toxic than ammonia, over time, high levels of nitrite will disrupt the metabolism of your fish and eventually destroy their oxygen carrying cells, resulting in the suffocation and death of your inhabitants.
Nitrate
The third form of the nitrogen cycle. This is the least toxic of the 3 forms in the nitrogen cycle and will be present in your water. At low levels it is not toxic to your fish, but at elevated levels it will cause stress to your fish and make them susceptible to disease.
Nitrates can be managed with a proper water change schedule. It is one of the parameters you will always need to test regularly with accurate aquarium test kits.
pH
pH is the measurement of hydrogen ions. The lower the pH of the aquarium water, the more acidic it is and the higher the pH the more alkaline it is. In freshwater aquariums, different setups will have different pH needs so do your research on what pH level is desired for the inhabitants you keep. In general, pH for freshwater aquariums range from 6-8. Worth knowing: ammonia is more toxic to fish at higher pH levels and the production of nitrifying bacteria slows down when pH goes below 6.
Water Hardness
Aquarium water hardness is the measurement of calcium and magnesium ions. Some fish thrive in hard water, like cichlids while other fish like discus prefer soft water. Hardness is also really important for fish breeders, as some types of fry require soft water. To know your ideal hardness, it is best to research the specific type of fish you want to keep and check their requirements as it varies in a freshwater tank.
Carbonate Hardness (KH)
The range for carbonate hardness depends on your inhabitants in the freshwater aquarium. Some species prefer a low carbonate hardness while others require a higher carbonate hardness. The key is that once you know the appropriate water conditions and carbonate hardness levels, you should maintain this water quality in your tank.
Parameters for a Freshwater Planted Tank
These are additional water quality parameters to test for in a freshwater planted tank.
Phosphate
Phosphate is a nutrient that supports photosynthesis. It’s a parameter that is vital to maintain for freshwater aquariums.
Iron
With planted tanks there are macronutrients to supplement like nitrogen, phosphorous, and potassium. Iron is what we call a micronurient. It is a trace element that is needed for plants and one of the common miconutrients that we monitor in planted tanks.
Parameters for a Saltwater Tank
The main parameters in a saltwater tank are mostly the same, and are Ammonia, Nitrite, Nitrite, Phosphate, and pH. The other main parameter is salinity.
Salinity can be measured with a refractometerand regularly calibrating it with a calibration fluid. For tanks with saltwater fish only, you can run your aquarium at 1.020, but reef tanks will generally run at 1.025 – 1.026 or 35 PPM. Salinity can change as your water evaporates over time. In order to prevent swings, consider investing in an auto top off unit. These units will fill your aquarium with fresh water and keep your water level and salinity stable.
When you move into a saltwater reef tank, there are more water parameters to test in order to ensure your corals thrive. Below are the main parameters to test.
Alkalinity
As mentioned in our Best Reef Salt Mix post, alkalinity is the fuel to build coral skeletons. Calcium and alkalinity relate to each which is way two-part solution is a common way of supplementing alkalinity.
Calcium
Calcium is used when corals build their skeletons and also by coralline algae. Without calcium, your corals will not build their skeleton and cannot maintain them.
Magnesium
This is the catalyst for the reefs. Without magnesium, the elements in the reef tank cannot interact.
Trace Elements
Elements like Silica, Iodine, Strontium, Boron, Iron, and minor trace elements are typically tested through ICP water testing, which is something to consider if you are planning to run an advanced reef tank filled with Acropora corals.
Frequently Asked Questions
How Often Should I Check My Water?
I would recommend that you test your water once a week, on the same day, and around the same time. Let your test parameters dictate when you need to make a water change. This statement is especially relevant for heavily planted freshwater tanks and saltwater tanks with live rock and corals. Plants and corals can remove nitrates and phosphates in the aquarium to the point where you may not need to do water changes as frequently. In these environments, you can have water that is too clean which means your plants and corals may not thrive because nutrients are not available for your plants and corals to grow. As long as you test every week you can say on top of the changes in you aquarium and adjust your maintenance and dosing schedule as needed.
Do They Expire?
They actually do. Most test kits will expire in about 1 to 2 years. You should always check the expiration on your test kits and replace when the date passes. The expiration is a guarantee on accuracy as the regents have a limited shelf life. They lose their potency over time leading to less accurate tests.
What is the Top Freshwater Choice?
The API Master Test Kit is the best freshwater kit for most people. It has just about everything you need to start out and is fairly accurate for a freshwater aquarist. It is cheap and will last a long time. Really can’t ask for more.
What is the Top Saltwater Choice?
Without a doubt, the Red Sea Marine Care Multi Test Kit is the best core test kit to buy for a saltwater aquarium. It is a higher grade test than what you will get at the local fish store and it comes with an alkalinity tester so you are covered if you decide to move onto a reef tank in the future.
What is the Top Saltwater Reef Choice?
If you are looking for the highest grade equipment for your reef tank, you cannot go wrong with Hanna Checkers for Alkalinity and Phosphate. For Nitrate, The Nyos test kit is the best for nitrate. For everything else, I would consider Salifert.
If you are running a high end SPS coral tank with designer acropora, I would highly recommend doing ICP testing to regularly check on all essential parameters.
What should I check for in my tank water?
The most basic water parameters to test in any aquarium water would be ammonia, nitrite, nitrate, and pH. Other parameters to test will be required depending on your setup. Planted tanks require Phosphate, Iron, and CO2 levels to be monitored. Saltwater tanks require salinity. Saltwater reef tanks require alkalinity, calcium, and magnesium
How Accurate Are The Strips?
They are accurate for basic setups. However, as you advance in the hobby you will want more accurate testing which is why I recommend API test kits for freshwater and Red Seas kits for saltwater
Conclusion
The test kit is not optional equipment. It is how you know what is actually happening in your tank. Every fish death that looks like a mystery is almost always a parameter problem that went undetected for too long. Test weekly. Keep a log. Act on the numbers. That is the whole job.
Aquarium test kits do not need to be complicated. As you have seen from many of these test kits, nearly all of them are easy to use and understand. Testing your water is a regular part of aquarium maintenance. Continue to test your water weekly to keep up with changes in your tank. This will allow you to respond before things go downhill. I hope this guide help you get the test kits that work with your budget and needs for your aquarium. If you have any questions, leave a comment below. Thanks for reading!
🔧 Want to learn more? This article is part of our complete Aquarium Equipment & Gear Guide. your ultimate resource for filters, heaters, lights, pumps, tanks, and more.
UV sterilizers are one of the most debated pieces of equipment in the hobby. some swear by them, others say they’re unnecessary. I’ve run them on both freshwater and reef systems and my take is nuanced: they’re genuinely useful in specific situations, and a liability in others if sized wrong. After testing several units across different tank sizes, I have a clear picture of what works and what’s just marketing.
Mark’s Expert Take
UV sterilizers get a bad reputation because most people buy the wrong one or expect the wrong things from it. Here’s how I actually think about them after 25+ years in the hobby and running them on store quarantine systems: they’re not a fix for bad husbandry. If your tank is overcrowded, your water quality is poor, and you’re not quarantining new fish, a UV won’t save you. But for outbreak prevention, green water, and quarantine setups, they’re genuinely valuable tools. The single most important spec is dwell time, which is the ratio of flow rate to wattage, not just raw wattage. A 25-watt TMC Vecton with the right flow rate outperforms a 40-watt budget unit with too much flow. I used TMC Vectons in our store quarantine systems for years. That’s not a coincidence. Mark Valderrama, AquariumStoreDepot
The Aquarium UV Sterilizer is one of the most praised and most critiqued piece of equipment in both freshwater and saltwater aquariums. It’s easy to see why because the quality of the aquarium UV sterilizers differ greatly and many people do not know the difference. It’s easy to just purchase a cheap UV sterilizer and expect it to work wonders for disease and algae management. I was a little hesitant to write this article at first , but there is a lot of misinformation out there with these products so I feel it’s best to write a comprehensive article educating people on how they work so you have reasonable expectations of what you will get out of them to improve the water quality.
The best aquarium UV sterilizers are expensive, but have the ability to mitigate pathogens in the aquarium water. The cheap UV sterilizers will often only be best for water clarification. With that being said, let’s talk about what exactly is a UV Sterilizer.
In A Hurry? The best uv sterilizer is the TMC Vecton!
What is a UV Sterilizer For A Fish Tank?
A UV sterilizer is a filtration unit that uses a germicidal florescent lamp that uses a particular wavelength (254 nm). Water is delivered to the UV sterilizer via a pump where the water passes through a quartz chamber. As the water passes through this chamber, the UV light damages algae, parasites, and bacteria’s DNA preventing them from growing and reproducing.
UV sterilizers have been a topic of discussion regarding the fight on superbugs. Superbugs are evolved (or mutated depending on how you want to label them) pathogens which are drug resistant. UV light has showed to attack parasite resistance as it destroys the DNA. If you own a marine aquarium, you may be familiar with drug resistant ich and marine velvet coming through aquarium trade supply chain. This is a must watch below:
Aquarium UV Sterilizer Dwell Time And Why It’s So Important
The time spent in the quartz chamber of UV sterilizers is known as dwell time. This dwell time is something you are going to write down as you research units as this is the most important factor when deciding what the best UV light is for your budget.
UV Sterilizer in theory, are all designed the same way with a sleeve and UV bulb, but certain units have larger dwell time due to the width and length of the quartz chamber. The longer and wider the chamber, the higher the dwell time. You can also increase the dwell time by lowering the flow to the unit, but if the unit is too short and not wide enough you will hit a limit to the sterilization you can achieve.
The longer dwell time you have, the longer the water is exposed to the UV sterilizer light. This in turn means there is a higher likelihood that all pathogens/organisms passing through the UV light will be affected. So how do we rate dwell time? The best way to rate this is to categorize the level of sterilization and what this means when choosing an aquarium filter.
Not All Are Created Equal
Knowing the sterilization levels an aquarium UV sterilizer can achieve is what you need to know as a consumer in order to purchase the best UV light for your fish tank or pond. We can break down UV sterilization into 3 uses.
Green Water Clarification (Clarification)
Bacterial, Flagellates, and Light Parasite Sterilization (Sterilization)
Heavy Parasite Sterilization (Heavy Sterilization)
The best aquarium UV sterilizers on the market can do the 3rd category. The middle grade models can do the 1st and second. Budget unit uv sterilizers can only do the first.
UV Clarification – The Most Common on the Market
The first category of UV Sterilization is the main reason why UV lights can get such a bad rap in the industry amongst aquarium owners. The vast majority of UV sterilizers available for sale will only be capable of clarification. In freshwater tanks and ponds, this is still a very good unit as it will eliminate the free floating green algae (green water), but don’t expect it to do anything for bacterial and parasite mitigation or redox balance.
These sterilizers are usually hang-on or internal which makes them easy to install. These UV sterilizers offer little dwell time and comprise of many cheaper sterilizers on the market.
Sterilization – Mid-Level Units
We start getting into more serious UV sterilizers at level 1 sterilization . These UV lights are capable of actual sterilization with their higher dwell time. These units are most suited for common fish tank and pond usage. They have enough dwell time to not only clarify water, but can destroy harmful viruses and bacteria in your aquarium water. Level 1 UV sterilizers are particularly useful in marine aquariums at helping to eliminating dinoflagellates.
Heavy Sterilization – The Premier Choice
This category represents the uv sterilizers with the best dwell time. They are the best of the best in the industry and common to what you will see in public aquariums. That is not to say that this is not available to the common hobbyist, it’s just that sterilizers of this level are very expensive in comparison to others that do not have the dwell to be in this category.
These UV sterilizers are fully capable of water clarification, disease mitigation, redox balance, algae containment, and suitable for increasing the disease resistance of your fish population.
What Is Redox And How Does It Relate?
I mentioned redox in the discussion about aquarium sterilizer categories, but did not define it. Redox refers to ORP (Oxidation Reduction Potential). This relates to the degree of water purity in your aquarium. An effective UV sterilizer will increase your redox potential. If you want the full explanation. You can view the full explanation from Reef Sanctuary.
A Quick Comparison for the Money
Now that I have explained how UV sterilizers work and what the levels of sterilization are, let’s discuss the best UV Sterilizers for fish tanks and ponds.
Below is the comprehensive list of aquarium UV sterilizers with their category of sterilization listed.
Let us go in depth and see why each UV sterilizer made the list!
1. TMC Vecton
Why the TMC Vecton Ranks #1: The Real Reasons
Dwell time wins every time. The Vecton’s oversized quartz chamber and T8 bulb (not the T5 that most competitors use) delivers more UV exposure per gallon than anything else in the hobby class. Wattage is marketing. Dwell time is performance.
Flow rate matters more than wattage. Run any UV too fast and you’re wasting money. The Vecton’s chamber design gives you real flexibility to dial in the right GPH-per-watt ratio without hitting a physical ceiling. Budget units hit that ceiling quickly.
Bulb replacement cost is real. Vecton bulbs are special-order, but they last. Cheap units with cheap T5 bulbs look affordable until you’re replacing bulbs every 4 months because output degrades fast. Budget for the bulb cycle before you buy.
Housing build quality matters for reef systems. The Vecton’s docking bay keeps electronics protected and maintenance simple. Cheap housings crack, leak UV into the display, and fail at connections. Not a theoretical risk.
It doesn’t kill beneficial bacteria as long as you install it on the return line (after your sump or filter), not inline before biological media. UV kills what passes through it. Your established biological filter is safe. This is true for all properly installed UV sterilizers, but worth saying plainly because the myth persists.
The TMC Vecton is without a doubt the best UV sterilizer on the market. At first, you may think what is this brand and what makes the unit so great. TMC stands for Tropic Marine Centre, which is based out in the United Kingdom. TMC has been leading the UK in fish trade since the 1970s and specializes in high end aquarium equipment with reef tanks being their main focus. The are the leading supplier in the UK for livestock and design their own equipment, with their equipment being used in commercial facilities all over Europe. You can learn more about them in the video below. I wish we had more suppliers like this in the US:
So now that you know what TMC is let’s talk about why this unit is the best available.The main thing that makes TMC Vectons so great is their dwell time. They have the longest dwell time available in aquarium UV sterilizers because their chamber is very wide. The UV bulb is also unique from other makers in that they use a wider T8 UV bulb versus a the standard T5 used in most UV sterilizers. This wide UV bulb is more effective at sterilizing than other units in the market.
The next thing to love is how the UV light is assembled. It comes with its own docking bay so you can easily mount to your aquarium stand or wall. This docking bay allows you to pop up the bay and perform maintenance on the unit and keeps the electronics safe and secure. The UV sterilizer also comes with a swivel arm that can be placed at the top or below of the unit for ease of install and adapt to piping.
The main downfall with this sterilizer is its availability. Because it’s made in the UK, it’s difficult to find their small units available unless you purchase a transformer. The 25 watt unit is the main UV sterilizer you want to look for and will handle small and large tanks.
The UV light and its dwell time will outperform larger wattage units. This UV light will be the equivalent of 40 watts for many other UVs out there. The UV bulbs will also need to be special ordered, but given the performance this unit provides and the fact that it is a bargain over the more expensive Aqua UV classic makes these worth it.
Pros
The best heavy sterilization available to the hobbyist
T8 over T5 provides the highest dwell time available
Docking bay is an excellent feature that makes this unit easier to install
Cons
Hard to find and order
Only 25 watts
2. Aqua Advantage – Hang On The Back for Small Tanks
The Aqua UV Advantage series is a hang on the back UV sterilizer specifically made for small and sumpless tanks. Aqua UV makes some of the best UV sterilizers in the market and they haven’t skipped on their well known quality in this unit. This UV sterilizer has the same quality build and larger dwell chamber.
It is a bit small to qualify as a sterilizer capable of level 2 sterilization for your tank water, but it is a strong first category sterilizer and there are honestly very few high end sterilizers available at this size. If you have a sumpless fish tank, this is a great UV sterilizer to look into.
Pros
Compact size
Works with sumpless tanks
Quality sterilization
Cons
Expensive
Smaller dwell time than the classic models
Best For: A sumpless fish tank
3. Green Killing Machine – Simple To Use Green Water Clarifier
For those of you looking for an easy to use UV light out of the box, the Green Killing Machine is a great unit to get. It works internally with a pump included. The Green Killing Machine is small enough to fit in a small sump or inside your fish tank where you plants or rock can hide it.
This unit is not very powerful though. You will need to purchase this knowing it is only UV capable of clarification, but it does a great job of clearing up green water out of the aquarium. Just see the differences below of what this little UV light can do.
Before:
After 6 days:
If you have a green water problem, the Green Killing Machine is the perfect aquarium UV sterilizer for you. It is cheap and easy to use. The Green Killing Machine is very effective at what it is marketed for, which is removing green water.
Pros
Cheap ready to run unit
Can be run internally in the display tank
Cons
Only capable of clarification in your tank water
May be too large to work in all in one aquarium chambers
The Aqua UV Classic is the gold standard in aquarium UV sterilizers in the market, especially in the US. This is an American Made UV Sterilizer that has a great dwell time capable of heavy sterilization. One of the models can be very large like the 40 watt UV sterilizer model that is a 44 inch unit! The length of these units is to increase the dwell time of the UV light as much as possible.
These units are meant to be run in an aquarium sump or separate area for pond usage. If you are looking for a top quality American Made UV-C light, look no further than an Aqua UV Sterilizer. They are expensive, but worth the investment for what they can do to your tank water. Just get the non wiper variants if you are purchasing this UV sterilizer for a reef tank.
Pros
American Made UV sterilizer
Capable of heavy sterilization
Many sizes so they can handle very large aquariums and ponds
Cons
Expense
Large – they are best in sump and basement/fishroom setups
Best For: A large fish tank with sumps or canister filters. Ideal for ponds
The Bloom Clean UV Sterilizer is one of the cheapest sterilizers on the market. They are perfect for those with small tanks and just want something that gets rid of green water. It has no fancy sleeve or chamber like others. Make sure to keep the uv light in a hidden area. It is very bare bones, which is why they are so cheap.
You will want to use them in an all in one aquarium chamber or in a larger power filter away from the main display tank. As a clarifier and the price, it is a great UV light for a budget fish tank keeper and a cheap solution for those who want to get rid of green water.
Pros
Cheap
Compact and will fit in power filters and all in one chambers
Cons
Only a clarifier
Bare bones – no sleeve to block UV light to rest of tank
Best For: A small fish tank with power filters or all in one aquariums
The Coralife Turbo Twist UV Sterilizer is probably going to be the most widely available UV sterilizer on this list. The main feature with the Coralife Turbo Twist UV Sterilizer is that it has a twist chamber which really cuts down on the size making this a compact unit even for it’s larger models. It still needs to be used with a Canister Filter or a Sump, but you can work with smaller spaces with it.
Given it’s twist chamber, it has the added dwell time that makes it a first category sterilizer, which will satisfy most requirements for fish tank and pond keepers. Overall, the Coralife Turbo Twist UV Sterilizer is a good all around unit that is easy to find in stores and easy to get UV bulbs and replacement parts.
Pros
Widely available UV Sterilizer
Compact Size for its dwell time
Cons
Can be used in an all in one tank
Pricey for a first category UV light sterilizer
Best For: Aquariums with sumps or canister filters
7. Innovative Marine Auqa Shield – The Choice for All-In-One Tanks
Finding a quality UV sterilizer for aquarium can be frustrating for those with all in on tanks because of the size of the chambers. Innovative Marine has addressed this issue with their very own AUQA Shield UV Sterilizer. This high quality UV light is made to work in your first chamber with a sponge prefilter so you can still have space your other equipment like media reactors and protein skimmers or additional biological media.
Innovative marine makes this a very easy to use unit as the aquarium uv sterilizer bulbs work in cartridges that you just pull out and dispose off when they are ready to be replaced. this makes maintenance and install very easy and one of the easiest and carefree units to operate on the list. Innovative also makes a universal model that hang right into an aquarium sump for those of you with small sumps that want a plug and play unit. These uv sterilizer units are capable of the first category of sterilization so you will be getting a standard sterilization, which should suit most aquarists needs.
Pros
Compact and works in all in one aquariums
Disposable cartridges make this easy to maintain
Comes with a prefilter
Cons
Larger models not available for big tanks
A bit on the pricey side
Low wattage UV light
Best For: All in one aquariums
8. Lifegard Prostep – A Good Choice for Canister Filters
The Lifegard Prostep UV Sterilizer is an inline sterilizer that is made to either hang on your tank or stand inside your stand. Given the way this UV light is built and how it works, the Lifegard Prostep UV Sterilizer works best for canister filter setups as it can sit right next to your canister filter in your stand. This is an easier and trouble free setup than say your Aqua UV classic, which does not come with any mounting equipment and you have to worry about fitting a giant UV sterilizer unit in your stand and buying mounts for it.
This unit has pushes water through the UV sterilizer in a step pattern to maximize the dwell time in the chamber. This puts this unit at the higher end of the first category sterilizers but at a much cheaper price than the Aqua UV classic. While it is not at the performance level of a UV Classic, it is close enough where if one is considering a higher end UV light, this will be seen as a bargain unit. You can also hang this on the back of your fish tank or sump, which give this extra versatility.
Pros
Works great under the cabinet with its standalone design
Step design gives good dwell time
Cons
More advanced install then cheaper units
Hang on is still pretty large even for the 15 watt UV sterilizer models
The Jabeo UV Sterilizer in my experience usually comes into play when I have someone I know dealing with a dinoflagellates outbreak. You need at least a level 1 aquarium UV sterilizer to kill dinos and the Jabeo is a cheap and effective unit to use to handle them. They are big units with a good amount of dwell time. For the price and size, they are good units to consider and also work very well in ponds clearing up green water and providing clarity in the water.
What I don’t like with this unit is the ballast is bulky and will not detach from the sleeve assembly. This makes it a bit of a pain fitting it into a cabinet because you have to provide a hole big enough to fit the ballast in. The UV lamp bulbs are easy to find online and you know that it is a solid first category sterilizer. It is a good all around unit and one of the better Jabeo units on the market next to their DCP aquarium return pumpsand SOW wavemakers.
Pros
Cheap for the performance you get
Inlet and out adjust up and down for easy adjustments
Readily available UV light bulbs
Cons
Made to be made inside a cabinet
Ballast is large and annoying to work with
Best For: Tanks dealing with dino outbreaks and larger tank owners who want some parasite control.
What Cheap UV Units Get Wrong
Inadequate dwell time. A cheap unit with a narrow, short chamber pushes water through so fast that most pathogens survive even if you turn the flow down. There’s a physical minimum chamber size below which you can’t achieve true sterilization, regardless of wattage.
UV bulb degradation isn’t visible. The bulb still glows at month 9 or 10, but UV-C output drops significantly after 6 months of continuous use. Cheap units don’t come with any reminder system, and most hobbyists never replace bulbs on schedule. You’re paying to run a light that stopped sterilizing months ago.
Cheap quartz sleeves lose transmission. The quartz sleeve between the UV bulb and the water is what keeps the bulb safe and lets UV light pass through. Low-grade quartz (or plastic in some budget units) absorbs and scatters UV light rather than transmitting it. You get a fraction of the rated UV exposure at the water surface.
No rated flow data. Quality units publish GPH-per-watt flow charts for each sterilization level. Most budget units don’t, which means you can’t set flow rate correctly and you have no idea what you’re actually achieving.
Our Recommendations
Mark’s Top Pick: TMC Vecton
After testing units across multiple store quarantine systems and personal tanks, the TMC Vecton is the one I keep recommending. It’s not the cheapest and the bulbs aren’t off the shelf, but the dwell time on this thing is in a different class from everything else. When I was running high-turnover quarantine setups at the stores, this was what we trusted. If you can find the 25-watt model, get it. It outperforms 40-watt competitors because the chamber does the actual work, not the wattage number on the box.
Like I usually do, I’m going to provide a list as it will depend on your aquarium and needs. Here is what I would recommend.
You run a reef tank or heavily stocked fish-only system where outbreaks are expensive and fish are difficult to replace
Green water is a recurring problem in a pond or high-light freshwater setup
You’re running a quarantine system and want to reduce pathogen load between batches
You’re dealing with a dinoflagellate outbreak in a reef tank (minimum level 1 sterilization required)
Skip It If:
Your tank is under 30 gallons and well-maintained. You don’t have enough flow to use a UV effectively at that size without stressing the system.
You have green water but haven’t addressed the root cause (excess light, phosphate, no water changes). A UV clarifier fixes the symptom, not the problem. Fix the cause first.
You’re buying a cheap unit expecting disease control. Budget clarifiers don’t achieve sterilization. You’ll spend the money and still have the problem.
FAQs
Aquarium UV sterilizers fall in the more advanced category of fish keeping equipment so these FAQs should hopefully help out.
How Do I Install One In My Tank?
It will depend on the make and model you purchase, but I’m going to supply the video of one of the best out there from TMC to show you know the installs work. Many of these units are designed to be ready to run with some tubing required on your end to purchase or a pump or outlet source to be provided.
How Often Do I Change the Bulbs?
You should change your UV lamp bulb every 6-12 months. You can stretch it to 12 months if you want, but the effectiveness of the UV bulb decreases as it ages so you do not want to go too long not replacing them. If you replace your UV light bulb every 6 months, you can ensure that you have the optimum performance running 24-7.
Can They Really Eliminate Ich?
Freshwater (Ichthyophthirius) and Saltwater (Cryptocaryon) ich is always a big topic in disease when it comes to our hobby. Some people will tell you that a UV sterilizer can eliminate ich, but that is not the case. A UV sterilizer will not completely eliminate ich, but it will be a very useful tool in disease management, particularly hobbyist who are not willing to quarantine fish. If you are buying the healthiest stock you can get, there is still a decent chance (much higher chance with marine fish) that there will be ich present living in your fish tank. UV sterilizers will eliminate the free floating ich stage in your aquarium, but it will only eliminate the free floating parasites that manage to make it into the sterilization chamber. You will have less parasites with a level 1 or level 2 aquarium UV sterilizer, which will increase fish immunity.
How Many Gallons Per Hour (Flow) Does It Need?
Here is a real simple chart to sort out what gallons per hour you need to run through your UV sterilizer in order to achieve the proper sterilization stages:
Clarification 40-50 GPH per watt for most 50-60 GPH per watt for Aqua UV Classic/Vecton Sterilization 20-30 GPH per watt for most 30-35 GPH per watt for Aqua UV Classic/Vecton Heavy Sterilization 10-12 GPH per watt for Aqua UV Classic/Vecton
Closing Thoughts
Think of a UV sterilizer the way you think of insurance. You don’t need it every day, and it won’t replace good husbandry, proper quarantine, or responsible stocking. But when you do need it, you’ll be glad it’s running. A coral outbreak, a green water crash, a parasite introduction from a supplier with poor handling, these happen in even well-managed tanks. A properly sized UV on the return line gives you a margin of error that unprotected tanks don’t have. Buy the right level for your actual system. Understand dwell time before you spend money. Replace the bulb on schedule even when it still glows. That’s it. That’s the whole game with UV sterilizers.
Conclusion
I hope this article helps dispel a number of myths about aquarium UV sterilizers. Judging performance on UV sterilizers is all about knowing dwell time and separating the various players in the market by how much dwell time they offer. Once you know that, you can choose the UV sterilizer for your aquarium based on your needs and budget. If you have any questions, please leave a comment below. Thanks for reading.
🔧 Want to learn more? This article is part of our complete Aquarium Equipment & Gear Guide. your ultimate resource for filters, heaters, lights, pumps, tanks, and more.
🐠
Before you go — free aquarium tips!
Get Mark's weekly fish & reef guides. No fluff, no spam — just real hobby experience from 25+ years in the tank.

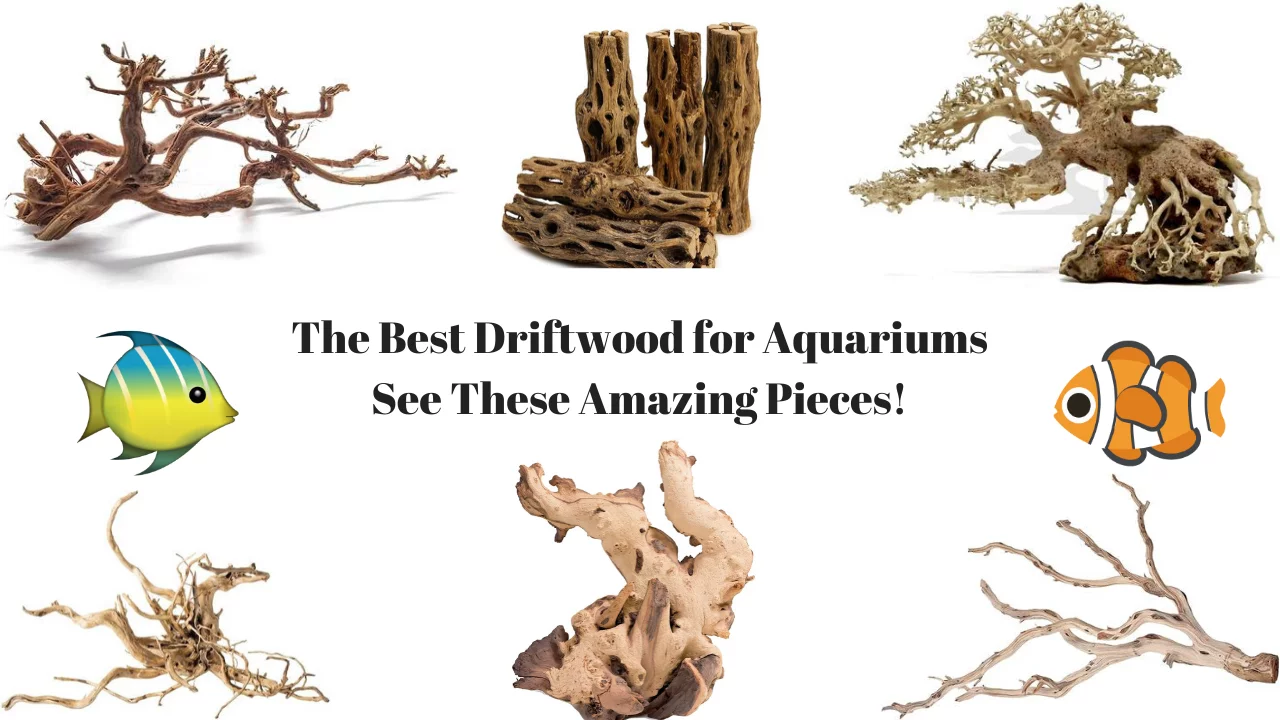
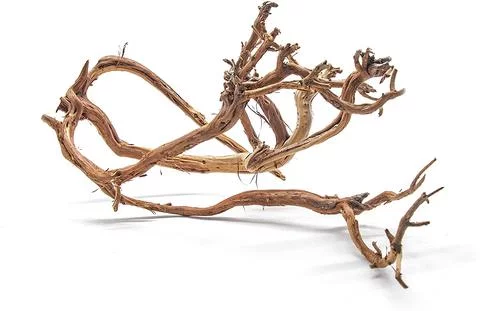
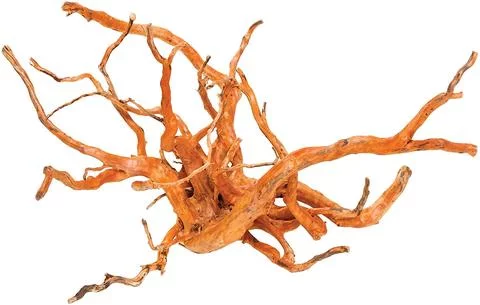


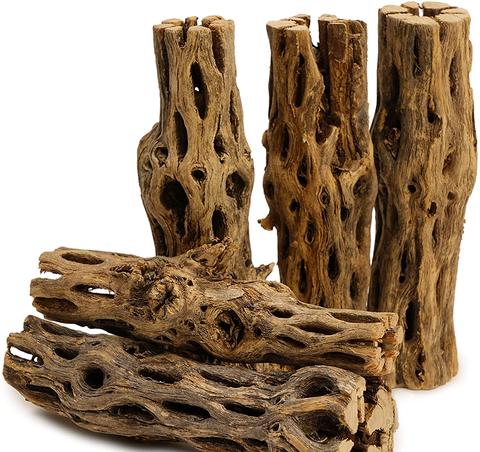
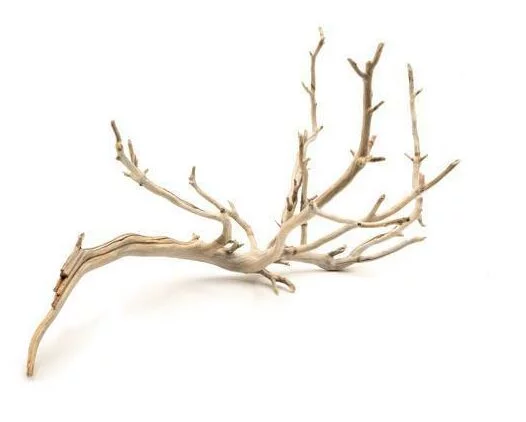
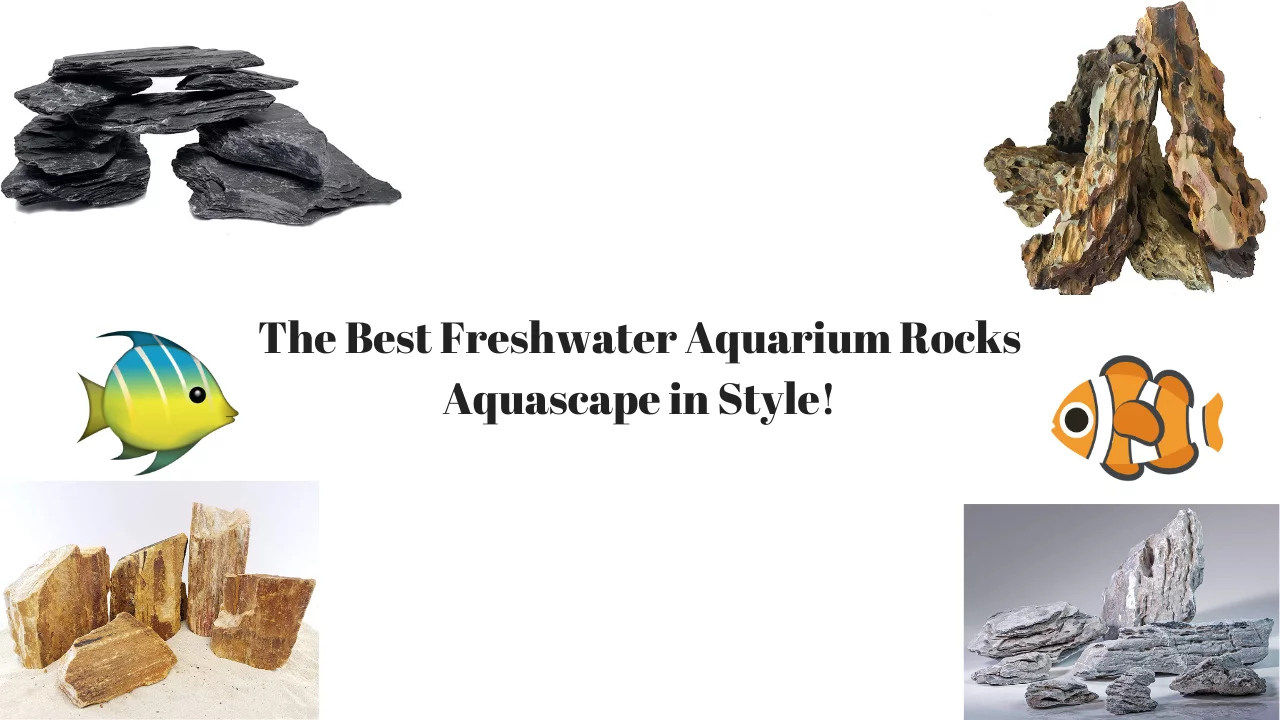
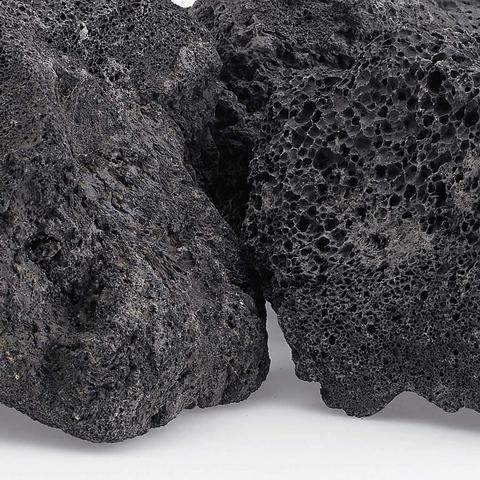

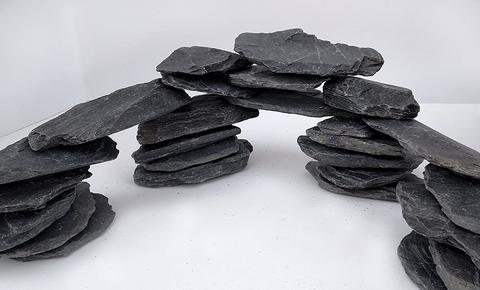
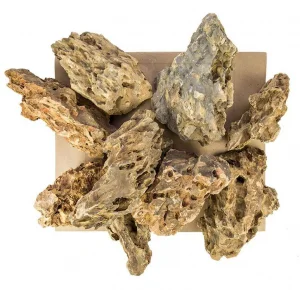
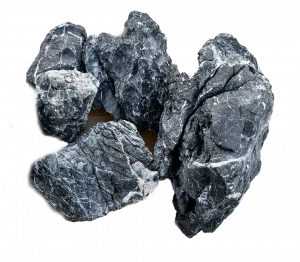
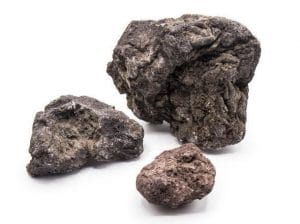
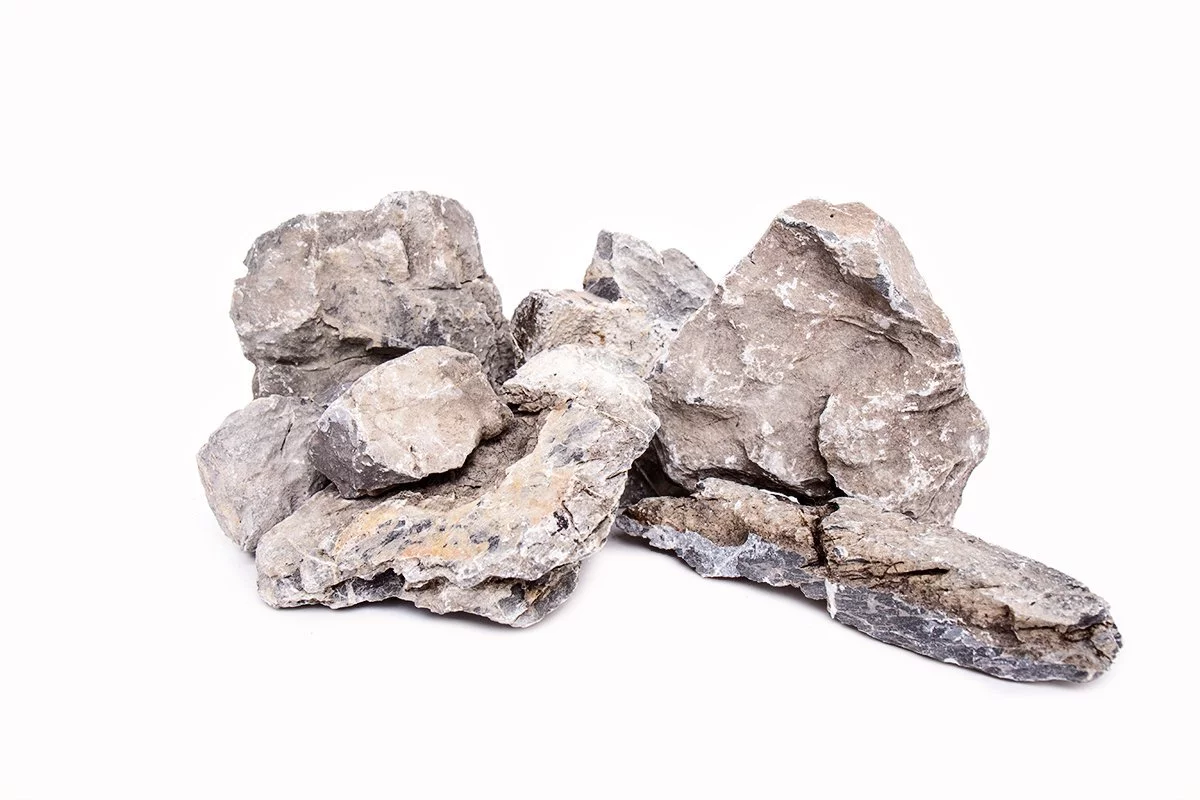
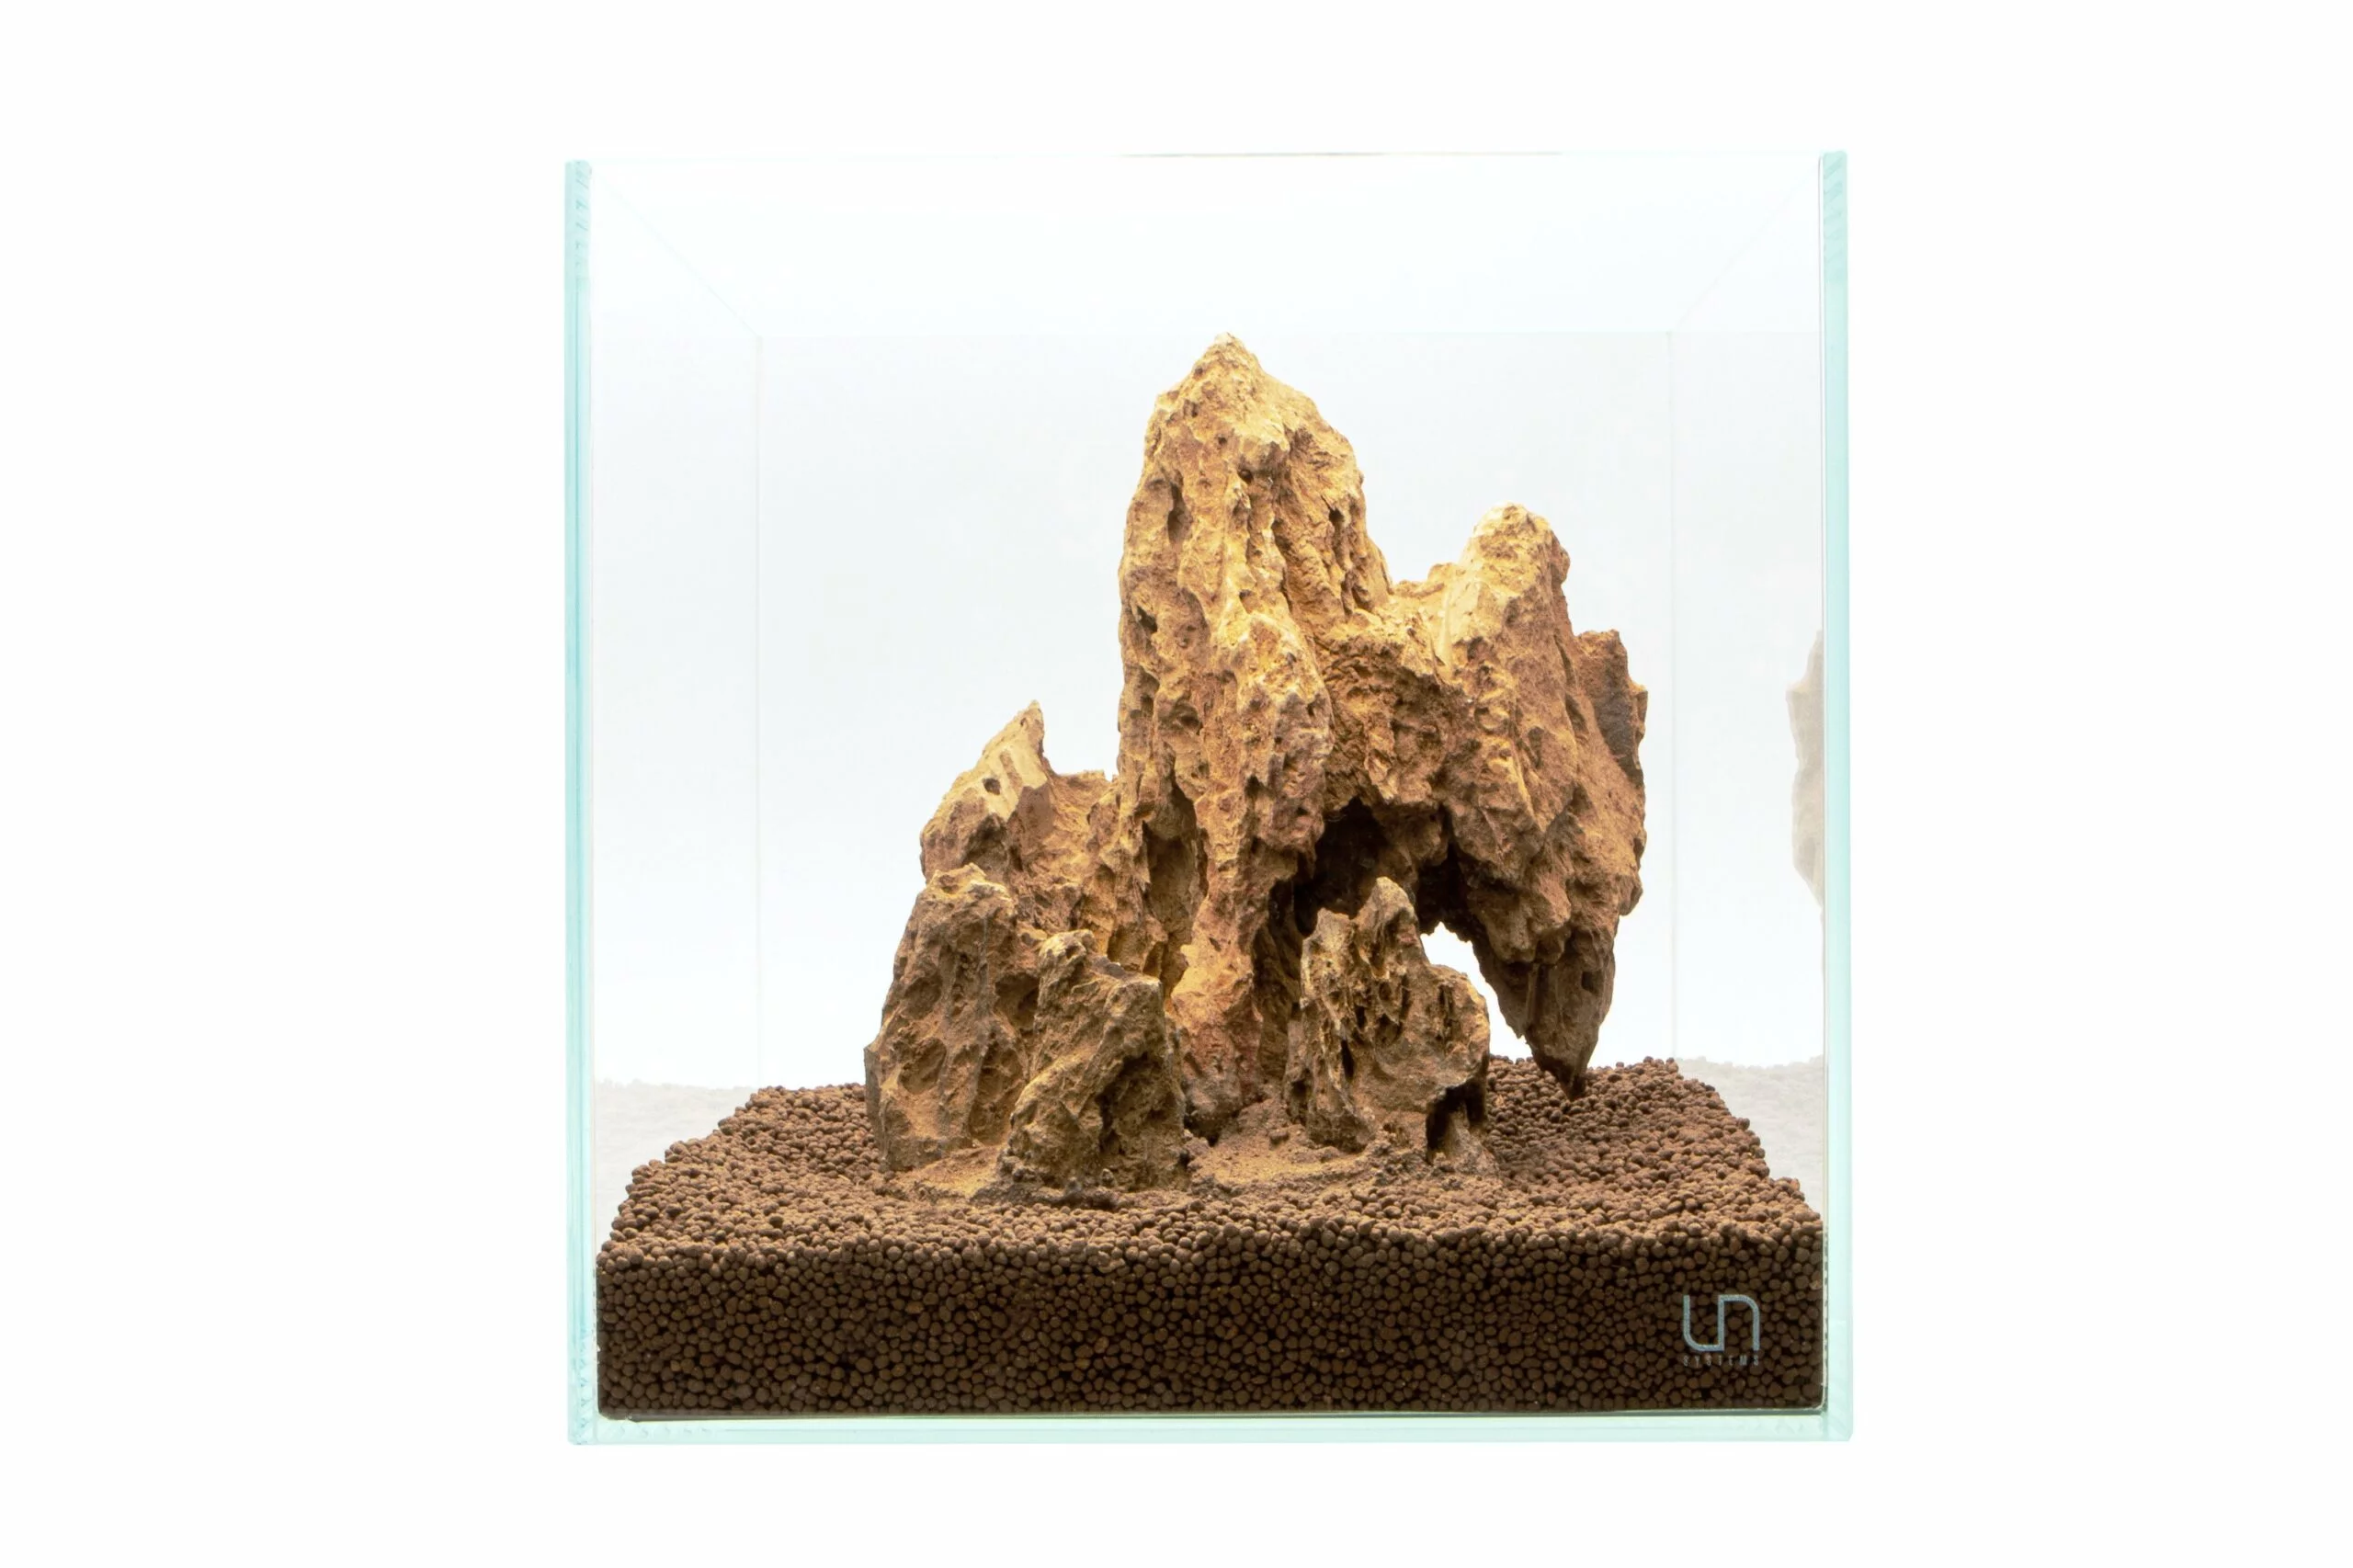

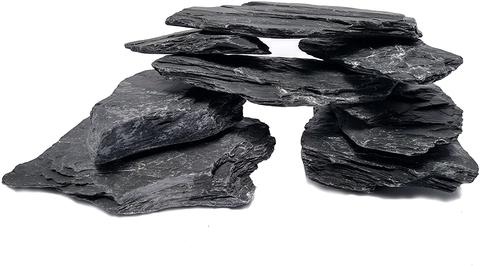


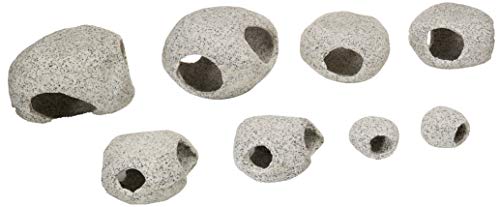

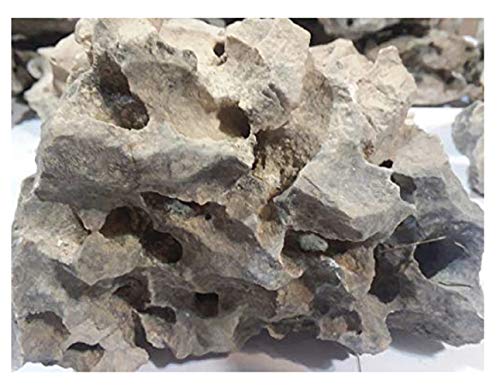
![The 7 Best Aquarium Air Pumps [Tested and Reviewed]](https://aquariumstoredepot.com/wp-content/uploads/Best_Aquarium_Air_Pump-1.png)
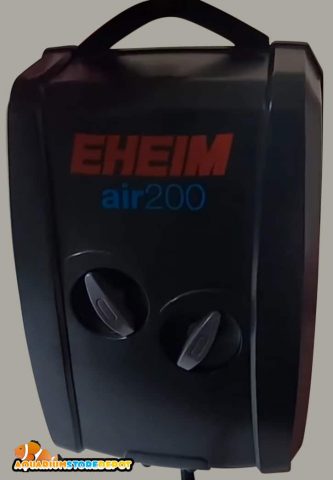


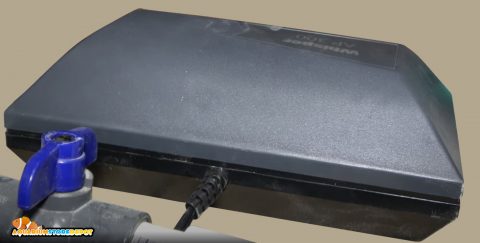


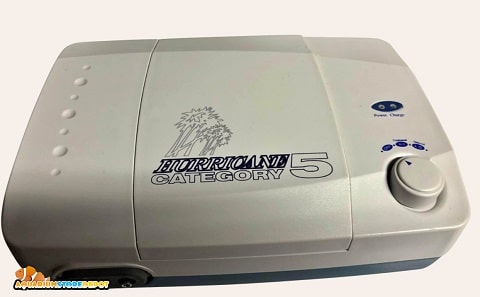


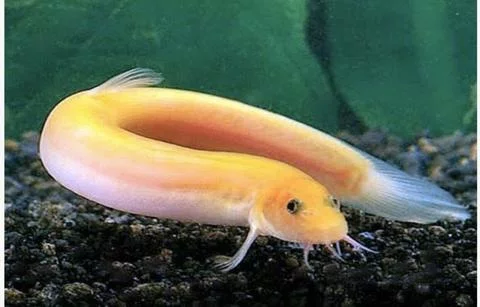

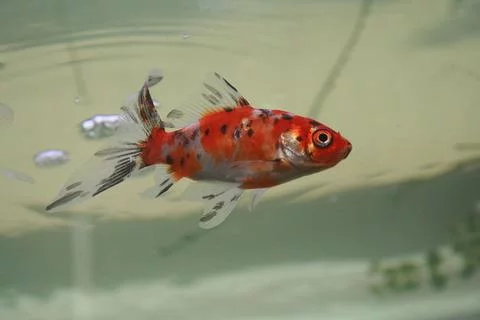
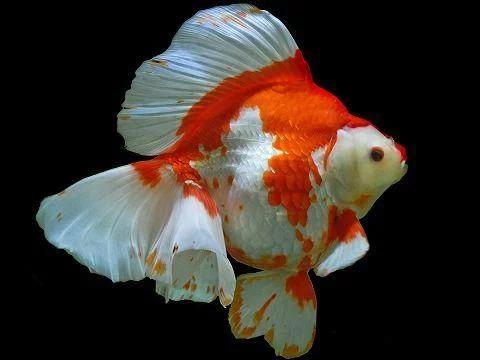
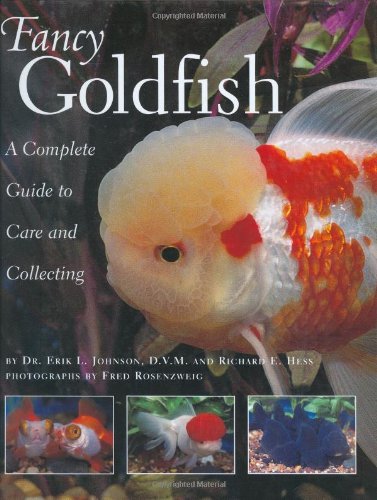
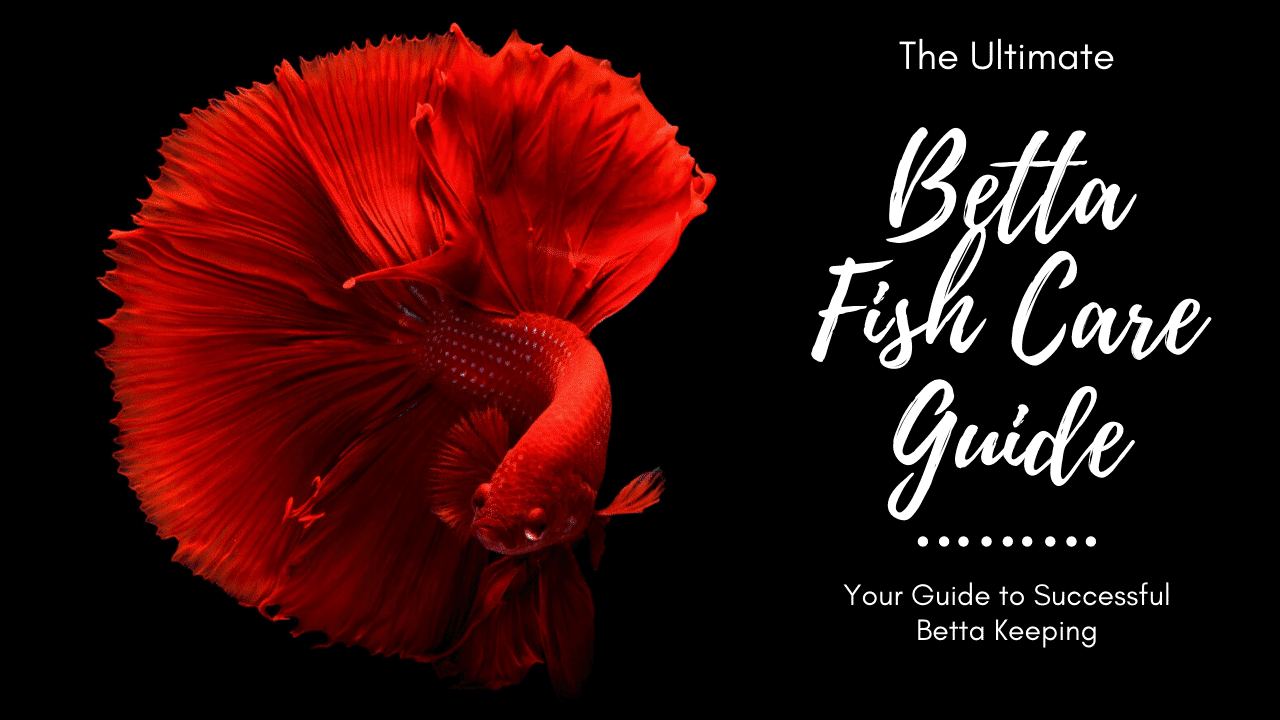

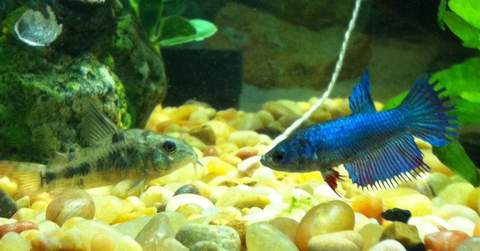
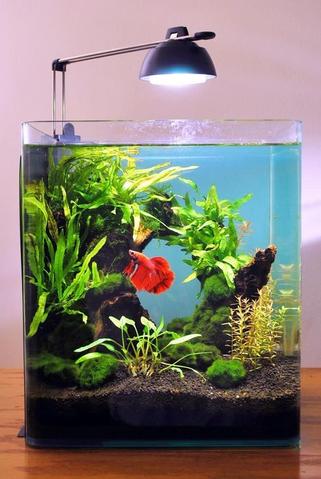
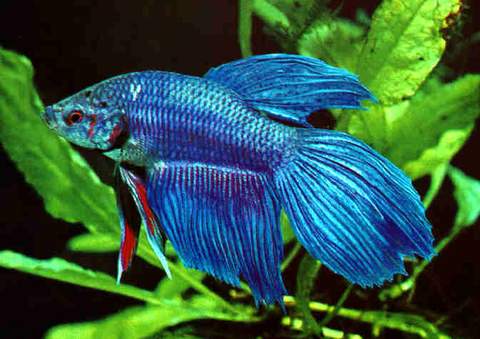
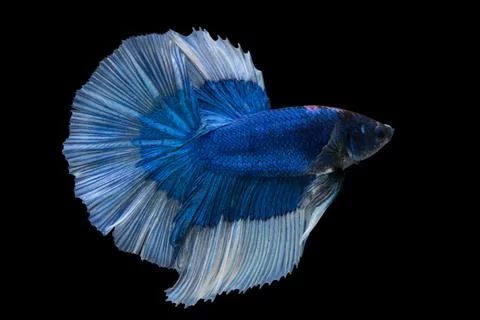

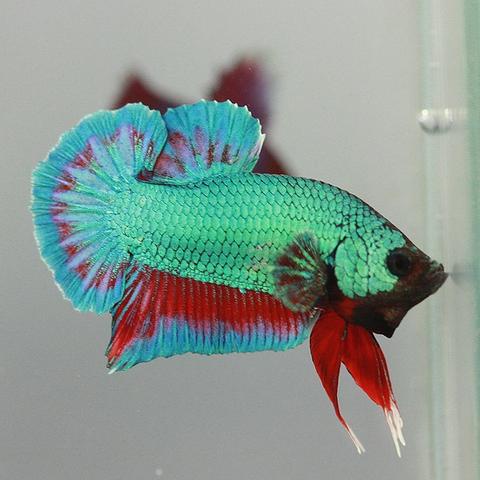
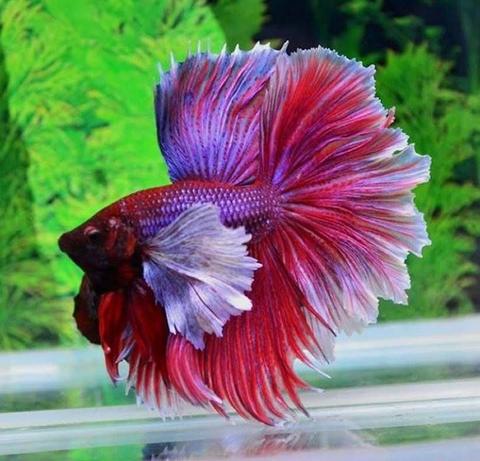
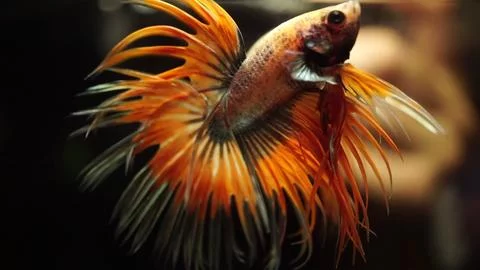 Crowntail Betta Fish”/>


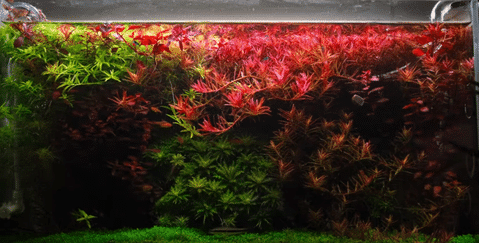


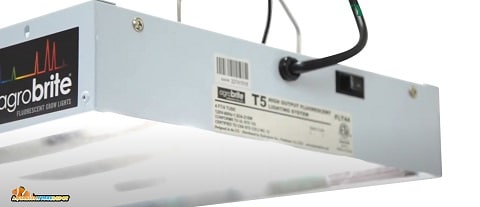


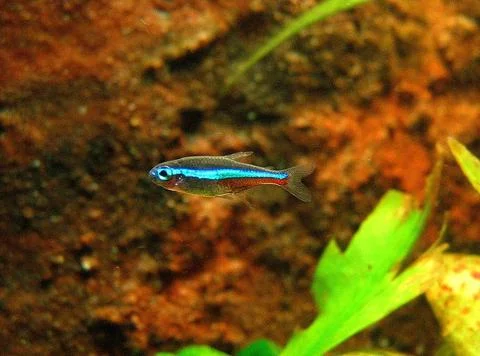
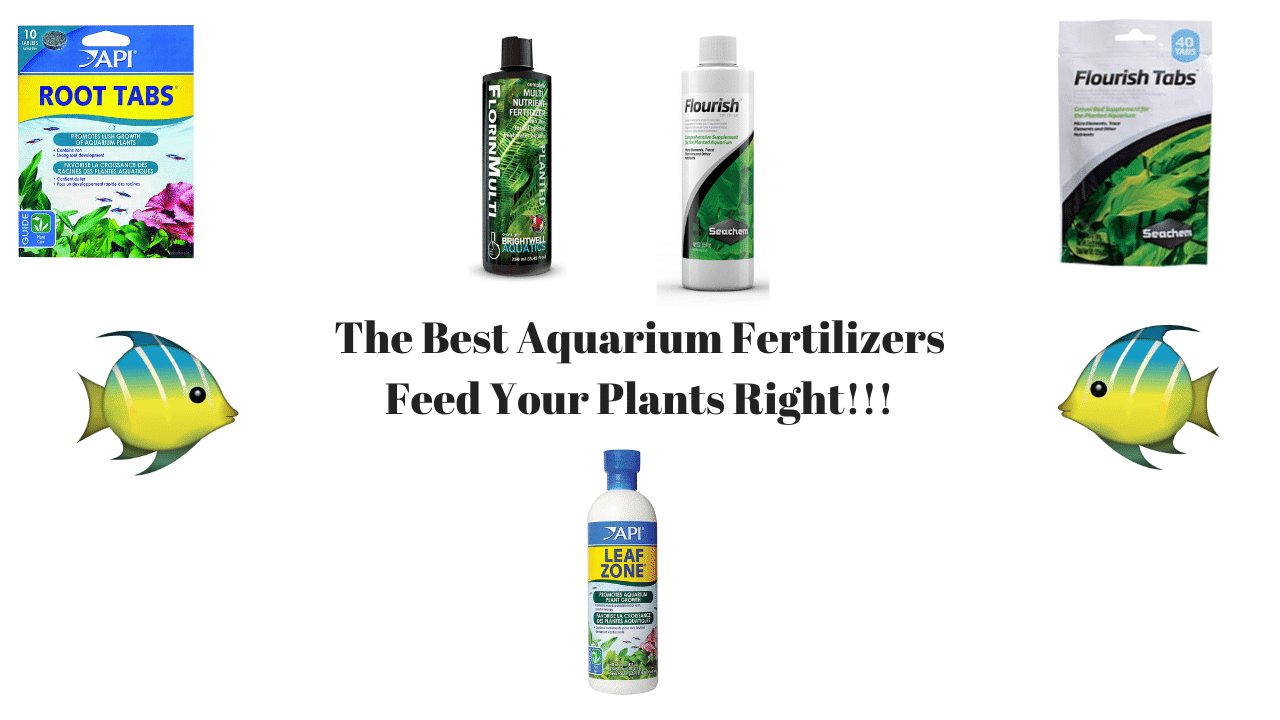


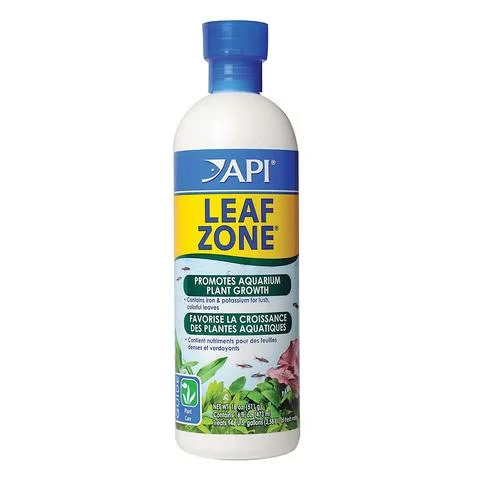


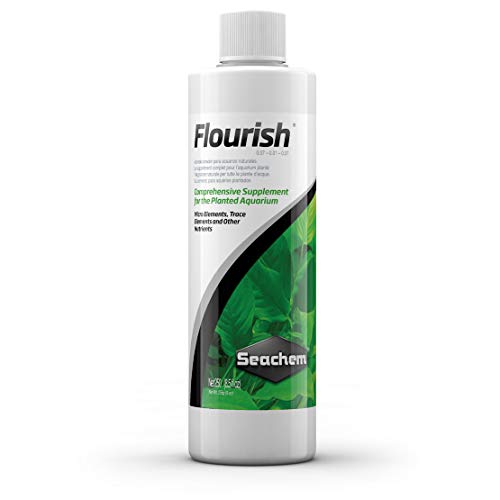


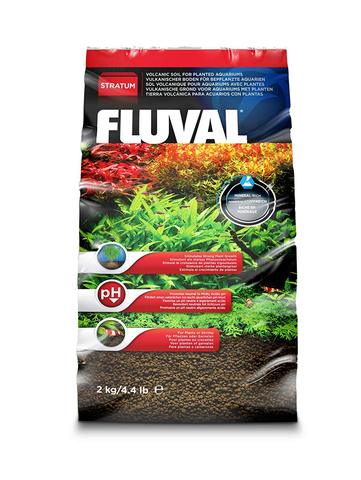

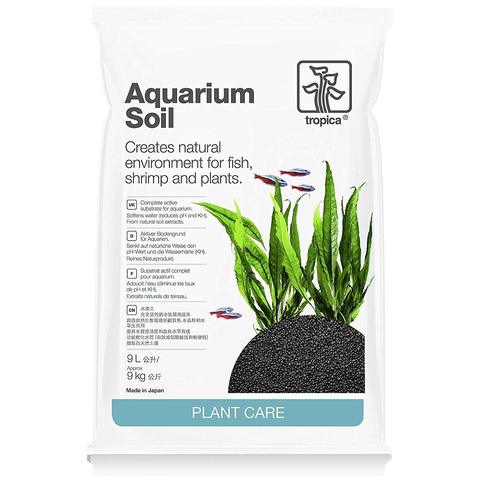


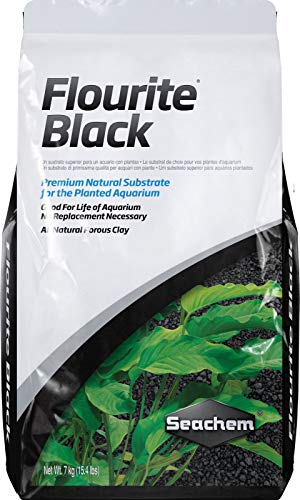


![The 21+ Best Low Light Aquarium Plants – [Reviewed and Tested]](https://aquariumstoredepot.com/wp-content/uploads/Best_Low_Light_Aquarium_Plants-1.png)
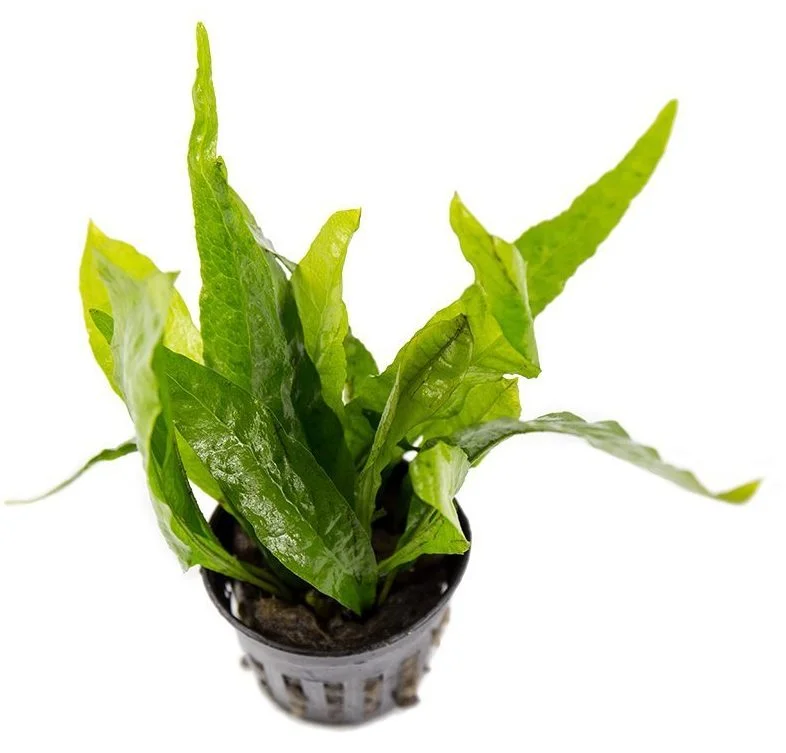
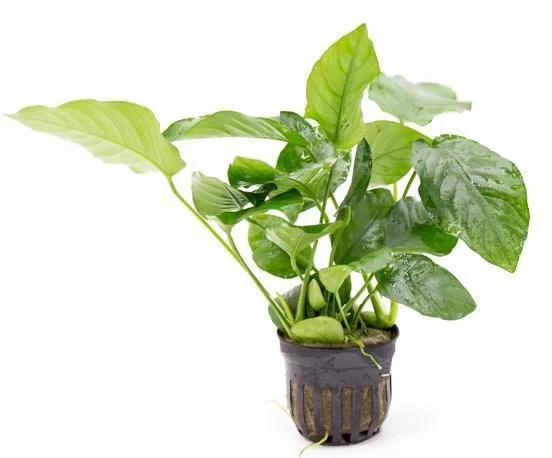
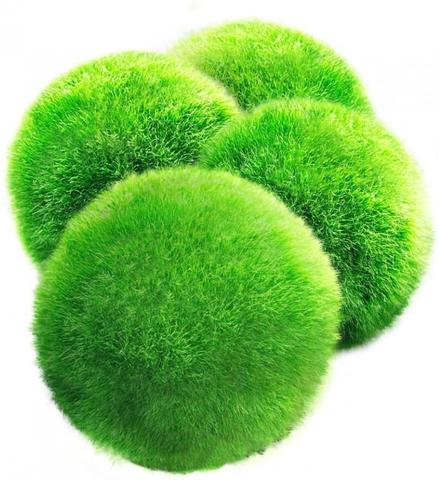
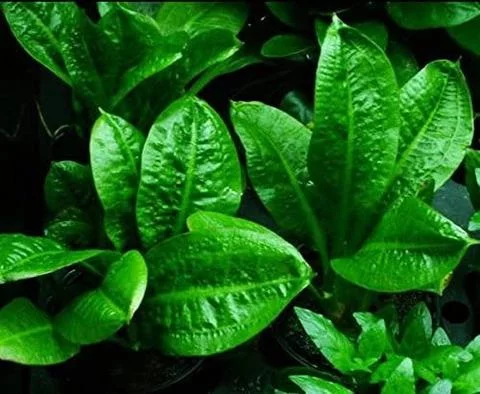


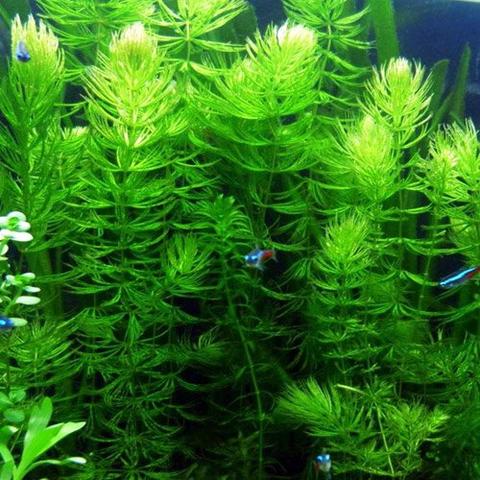
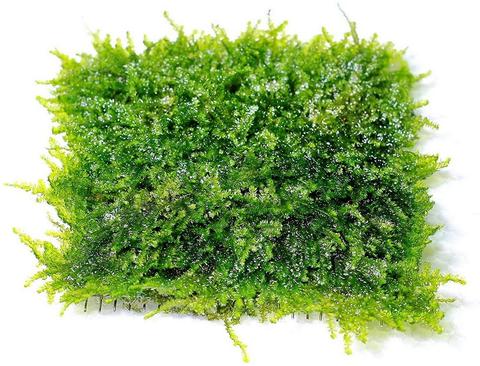


![The 5 Best Aquarium Chillers of 2026 [Tested & Reviewed]](https://aquariumstoredepot.com/wp-content/uploads/Best_Aquarium_Chillers_Reviews-1.png)