Generic selectors

Exact matches only

Search in title

Search in content

Post Type Selectors

Tag: Fishkeeping

  • Best Aquarium Controller (2026 Reviews) – Tank Automation Is Here!

    Best Aquarium Controller (2026 Reviews) – Tank Automation Is Here!

    Having your aquarium run automatically is a dream for many fish tank owners. Everyone wants a device that can automate many of the mandate tasks of fish and coral keeping. What if I told you that such devices exist today? They in fact do exist, and many do an excellent job of making your aquarium keeping life easier than ever before! They are called aquarium controllers and the technology is now over 10 years old. But what is the Best Aquarium Controller? There are a number in the market now, and they require a lot of research and development to create a long-standing product.

    In today’s post, I look at the best of the best and tell you which ones are the ones to purchase today. So let’s get started and see what the marketplace offers. You will be excited to see what these things can do now!

    Mark Valderrama — AquariumStoreDepot

    Expert Take: Why Controllers Are the Apex of This Hobby

    I ran the Neptune Apex on my store display tanks for years. At first it felt like a luxury. Then I had a heater stick on at 2am and got a text alert before anything died. After that, the Apex wasn’t a luxury anymore. It was the most important piece of equipment in the room.

    The real value isn’t automation. Every controller does automation. The real value is the alert system. Knowing your salinity spiked, your return pump stalled, or your heater is drawing abnormal voltage at 3am while you’re asleep, that’s what separates a controller from every other piece of equipment you’ll ever buy for your reef.

    For freshwater: skip it. For saltwater with any real livestock investment: don’t skip it. Period.

    Mark Valderrama — AquariumStoreDepot

    Expert Take: Why Controllers Are the Apex of This Hobby

    I ran the Neptune Apex on my store display tanks for years. At first it felt like a luxury. Then I had a heater stick on at 2am and got a text alert before anything died. After that, the Apex wasn’t a luxury anymore. It was the most important piece of equipment in the room.

    The real value isn’t automation. Every controller does automation. The real value is the alert system. Knowing your salinity spiked, your return pump stalled, or your heater is drawing abnormal voltage at 3am while you’re asleep, that’s what separates a controller from every other piece of equipment you’ll ever buy for your reef.

    For freshwater: skip it. For saltwater with any real livestock investment: don’t skip it. Period.

    What To Look For When Buying An Aquarium Controller

    Before we start comparing aquarium controllers, we need to talk about what to look for when purchasing one. Controllers are a complex technology and not every company can maintain the product line in the long run.

    A controller is a premium piece of aquarium equipment. It is one of the most expensive devices you can purchase for your tank and for very good reason. They are capable of automating many tasks in your tank.

    For these controllers I’m reviewing today, this is my criteria:

    • Quality
    • Features and Accessories
    • Brand Name
    • Price

    The Candidates

    Now that we know the criteria I’m looking at, let’s see who makes the cut. The list below are the picks I would be proud to put into my tank setups. They are offered by high quality manufacturers who have been around for years. There is no up and coming venture backed company here. These are all high quality name brand controllers. Let’s continue further below.

    In a hurry? I recommend the Neptune Apex!

    Picture Name Best For Link
    Editior’s Choice

    Neptune Apex

    Neptune Apex
    • Whole Tank Automation
    Click For Best Price
    Best Value

    Neptune ApexEL Controller

    Neptune ApexEL Controller
    • Whole Tank Automation
    Click For Best Price
    Budget Option

    Hydros Contol 2 Starter Pack

    Hydros Contol 2 Starter Pack
    • Whole Tank Automation
    Click For Best Price
    GHL ProfiLux GHL ProfiLux
    • Whole Tank Automation
    Click For Best Price
    Neptune Trident Neptune Trident
    • Dosing Automation
    Click For Best Price
    GHL KH Director GHL KH Director
    • Dosing Automation
    Click For Best Price
    Aqua Logic Aquarium Temperature Controller Aqua Logic Aquarium Temperature Controller
    • Temperature Control
    Click For Best Price
    American Marine Pinpoint pH Controller American Marine Pinpoint pH Controller
    • Calcium Reactors
    • Planted Tanks
    Click For Best PriceBuy On Amazon

    The 8 Best Aquarium Controllers – 2023 Reviews

    Let’s see what these made the cut!

    1. Neptune Apex

    Mark’s #1 Pick

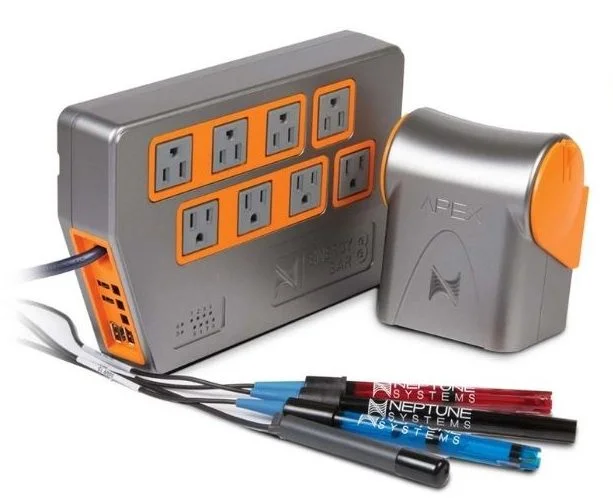
    Neptune Apex — the controller I deployed on store display tanks.

    When I was running aquarium stores, the Apex was what we used on our high-end display systems. Not because it was the cheapest option — it isn’t — but because the alert system worked every time, the app never crashed mid-emergency, and clients with maintenance contracts could hand us remote access without any hoops. If it’s good enough for a store display running 24/7, it’s good enough for your home reef.

    Why the Neptune Apex Is #1

    I’ve looked at every serious controller on the market. Here’s what puts the Apex ahead:

    • Alert system reliability — battle-tested by hundreds of thousands of reefers over 15+ years
    • Probe accuracy — lab-grade dual-junction probes for temp, pH, salinity, and ORP out of the box
    • Module ecosystem — flow monitoring, leak detection, PAR sensing, auto water changes, dosing automation; no other platform comes close in breadth
    • App stability — the Apex Fusion app has been refined for years; it’s not a startup product
    • Community and support — the largest controller community in the hobby; someone has solved your problem already
    • Company longevity — Neptune Systems has shipped controllers since 2008; they’re not going away
    Mark’s #1 Pick

    Neptune Apex — the controller I deployed on store display tanks.

    When I was running aquarium stores, the Apex was what we used on our high-end display systems. Not because it was the cheapest option — it isn’t — but because the alert system worked every time, the app never crashed mid-emergency, and clients with maintenance contracts could hand us remote access without any hoops. If it’s good enough for a store display running 24/7, it’s good enough for your home reef.

    Why the Neptune Apex Is #1

    I’ve looked at every serious controller on the market. Here’s what puts the Apex ahead:

    • Alert system reliability — battle-tested by hundreds of thousands of reefers over 15+ years
    • Probe accuracy — lab-grade dual-junction probes for temp, pH, salinity, and ORP out of the box
    • Module ecosystem — flow monitoring, leak detection, PAR sensing, auto water changes, dosing automation; no other platform comes close in breadth
    • App stability — the Apex Fusion app has been refined for years; it’s not a startup product
    • Community and support — the largest controller community in the hobby; someone has solved your problem already
    • Company longevity — Neptune Systems has shipped controllers since 2008; they’re not going away

    Editor’s Choice!


    Neptune Apex

    Editor’s Choice!

    The Neptune Systems Apex Wi-Fi Controller is the best controller on the market. It integrates with almost all modern reef keeping equipment


    Click For Best Price

    The Neptune APEX was the original aquarium controller released in the United States and continues to be to this day the best controller on the market. What makes it stand out is its ability to integrate with nearly all modern reef keeping equipment today. Every high end manufacturer wants to market as an “APEX Ready” or APEX capable controller. Not having this feature puts them at risk of losing a large amount of sales. This type of brand name recognition makes the APEX the premier controller and the go to for modern tank automation.

    The APEX package comes with four probes out of the box – temperature, salinity, ORP, and pH. The salinity probe is the biggest selling point of this set. A salinity monitor is usually a separate purchase – and it isn’t a cheap add-on. These probes are lab grade and have a longer lifespan due to their double junction construction.

    The new APEX model runs off wi-fi, eliminating the need to have your controller plugged into a laptop to access. You can run it on your desktop, laptop, tablet, even on your phone while you are away from your tank. It is total piece of mind when you can monitor many parameters while you are away. You can even have a maintenance profession log into your console and see your setups.

    The energy bar 8 is an ETL certified power block that holds up to 8 devices. Each outlet has independent monitoring to your console. Each outlet is measure for voltage, which is a key parameter to measure when it comes to equipment. Low output could point to upcoming equipment failure and an early warning sign to replace equipment.

    And this is all just talking about what comes in the box! The APEX has a number of add-ons you can bolt onto the system. Such add-ons include a leak detection kit, dosing automation, flow monitoring, an ATO line, PAR monitoring, and automatic fish feeders. The most recent add-on, the Trident, promising complete dosing automation. This is the holy grail of reef automation. It really is a complete aquarium monitoring system.

    The future is bright with the APEX Neptune. It is a solid investment that comes with you with any aquarium you keep and can even be used to run multiple tanks. The biggest downfall is its price. If you are running an aquarium with prized exotic livestock and corals, the price actually doesn’t seem that bad compared to the value that is housed in the tank.

    Pros & Cons

    Pros
    • Integrates with most aquarium equipment
    • Capable of dosing automation
    • Peace of mind when travel
    Cons
    • Expensive
    • Requires coding knowledge

    2. Neptune ApexEL – A Budget Apex

    Best Value


    Neptune ApexEL

    Best Value

    The Neptune ApexEL line is a budget-friendly aquarium monitoring system. It can add all major Apex add-ons and is equipped with wifi capability.


    Click For Best Price

    The biggest issue with the APEX Neptune is the price. This Neptune ApexEL line is Neptune’s answer for a budget friendly aquarium monitoring system. The APEX EL still has the same great tech with the wifi capability, energy bar 8 hub, and the ability to add all the major Apex add-ons.

    What’s missing from the EL model? It’s three main things:

    • The APEX EL does not have a salinity probe
    • The console hub is missing a 0-10v port which doesn’t it allow it to connect with devices like Kessils and Varios pumps
    • The APEX EL does not have an ORP port or probe

    All three missing items can be added back with add-ons if you chose to purchase them. I feel what is missing is a good sacrfice compared to what is included. The salinity probe, while great to have isn’t completely necessary and is also new technology to the hobby. The missing ports are only a factor if you purchase Kessils. Finally, many reefer tank owners don’t even bother with ORP monitoring, so a missing ORP probe is not a deal breaker.

    This is a great alternative model to the main APEX model. The price can still be too expensive to some. For the price it sells out, there is a lot of value. If you want something cheaper, I have a great option below at #3.

    Pros & Cons

    Pros
    • Cheaper than Apex
    • Can expand with additional modules
    Cons
    • Still expensive
    • Does not come with salinity monitor

    3. Hydros Control 2 – A Modern ReefKeeper Lite

    Budget Option


    HYDROS Control 2

    Budget Option

    The Hydros Control 2 kit is very simple to use. It allows you to program the controller without having any prior coding knowledge. 


    Click For Best Price

    If you reefed in the early mid 2000s, you were treated to this wonderful early level controller called the ReefKeeper Lite. It was praised across the hobby as the bang for the buck controller that would one day save your tank from an aquarium heater malfunction with its temperature controller. It provided the most essential pieces of tank automation to you with its 4 outlet power block. However, the company that created the ReefKeeper Lite – Digital Aquatics, went out of business in 2018. Ever since then the hobby has been search for the next ReefKeeper Lite in a world that was dominated by high end controllers like the Neptune Controller.

    Enter the new kid on the block – the Hydros Control 2 kit. This is CoralVue’s answer to the demand of the return of our beloved ReefKeeper controller. Now with the backing of a major manufacturer like CoralVue, the Hydros as the ability and capability to provide what we love out of the APEX without the crazy APEX price.

    This Control 2 model is the closest match you will find to the old ReefKeepers. With this package you get

    • A 4 outlet power supply
    • Temperature probe
    • WiFi capacbility
    • Hydros Control App

    The Control App is a great step up to what we are used to seeing with the Reefkeeper which was just a simple interface with buttons. The control runs off a mobile app. It allows you to program the controller without coding knowledge. One of the biggest frustrations with high end controllers is they are too complex to use for newcomers. The Hydros app is user friendly

    Hydros Control App

    The price of this controller is more expensive then the original Reefkeeper Lite, however, the value they provide is greater. The price for these I still feel is entry level and a solid investment. The sensor ports currently support optical sensors, leak detectors, water level sensors, flow rate sensors, and switches. This package has incredible value and my #1 pick when it comes to the best budget option for a controller.

    Pros & Cons

    Pros
    • Entry level price
    • Has all the main features included
    • Backed by CoralVue
    Cons
    • Does not come with salinity monitor or pH probe
    • New to market

    4. GHL ProfiLux – Germany’s Answer to the Neptune Apex


    GHL ProfiLux 4

    The GHL ProfiLux is internationally recognized for its reliability and accuracy and reliability. Used by major research institutions and public aquariums


    Click For Best Price

    The GHL ProfiLux is Europe’s version of the Neptune Apex. It is German made and has quickly grabbed market share away from Neptune as Reefers have realized how reliable and durable these controllers are. The controller is globally recognized for its accuracy and reliability, being used in research institutions and public aquariums.

    Aside from the global recognition of the controller, what else makes this controller stand out from the APEX? In short sum, here are the main points:

    • The GHL has future proof internal boards that are replaceable and upgradeable
    • Better detailed control of lighting, temp, pH levels, pumps, etc
    • Easier to program through their logic gate programming
    • Simple yet more durable build quality

    One of the biggest selling points from the GHL controller is how long they last. You will find owners in the community who have been running the same GHL controller for 10 years. They run the older models, not needing to upgrade to the newest model because GHL continues to support the older models with firmware updates. Try to find someone who is still using one of the original APEX models. You will be hard-pressed. Some have failed over time while others have just wanted the latest and greatest.

    German and Italian made products are of the highest quality in the aquarium industry and have been so for many years. It shows again in this controller. It doesn’t beat out the APEX on this round up because of its lack of presence in the United States. Most manufacturers shot for being APEX ready and don’t market to other controllers. It’s also harder to find other aquarists who use these controllers. It’s a niche user base, though a very loyal and happy one. If you want one, be prepared to pay slightly more than you would for the APEX. However, you can expect your controller to last for many years.

    Pros & Cons

    Pros
    • German Made & German Engineering
    • Used in research and museums
    • Easier to program
    Cons
    • More expensive then APEX
    • Not as well known in the US

    5. Neptune Trident – True Dosing Automation Is Here


    Neptune Trident

    The Neptune Trident is a controller that automatizes dosing and monitors the most important 3 parameters of coral reef keeping – alkalinity, calcium, and magnesium. 


    Click For Best Price

    The Neptune Trident when it was announced created a huge buzz around it. It is a game changer for reef aquariums. This is a Dosing controller that attempts to completely automate dosing and monitor the big 3 parameters of coral reef keeping – alkalinity, calcium, and magnesium. Stability is everything when it comes to a reef tank, especially when you get into more advanced corals like SPS.

    It works by testing your water multiple times a day then adjusting the dosing schedule based on the results. It uses regents in order to test your water. It takes away all the work of having to test your water every week and tests with excellent precision giving accurate readings to the following:

    • Alkalinity: + or – .05 DKH
    • Calcium: + or – 15 PPM
    • Magnesium: + or – 15 PPM

    The Trident interface will also let you know the parameter tests and how much regent you have left. Your reef tank will be its more stable ever with one of these installed in your system.

    The main drawback is its price. The regents also add up in monthly costs. This is the benchmark for doing automation today and well worth the investment

    Pros & Cons

    Pros
    • Works directly with Apex
    • Automations dosing and monitors all main reef parameters
    Cons
      • Expensive
      • Regents add to maintenance costs

    6. GHL KH Director – An Excellent Trident Alternative


    GHL KH Director

    The GHL KH Director monitors the main reef tank parameter for corals – Alkalinity.


    Click For Best Price

    The GHL KH Director is GHL’s answer to the Neptune trident. It focuses on the primary reef tank parameter monitor for corals – Alkanity. Changes in Alkanity also affect Calcium, so have a device that focuses on Alkanity will also work with keeping Calcium stable as well as pH.

    The KH Director works with Lab-grade accuracy. It can work standalone with a GHL Doser 2 or can work with the ProfiLux controller. I really like how GHL has this flexibility since not everyone wants to get a controller. The GHL Doser 2 is also one of the best and accurate dosers on the market so pairing them together is a solid choice.

    The regents also last much longer than the Trident. A regent will last you up to 3 months while the Tridents only last 1 month and require multiple types of regents. This gives you cheaper ongoing costs over the Trident. It won’t test all the core reef parameters like the Neptune does, but I feel the KH Director is one of the best dosing automation controllers on the market.

    Pros & Cons

    Pros
    • Cheaper than Trident
    • Integrates with GHL controllers
    • Will work with old GHL controllers and dosers
    Cons
    • Expensive
    • Doesn’t do as much as Trident

    7. Aqua Logic


    Aqua Logic Aquarium Temperature Controller

    The Aqua Logic Temperature controller is the best tool available today to prevent your tank against heater failure


    Click For Best Price

    The Aqua Logic Temperature controller makes the list as the premier controller for aquarium heater malfunctional prevention. It only does one job, and it does that job very well.

    Because it only does only function, it is simple to use and easy to install in your system. These are extremely reliable controllers that will last a lifetime. They are not prone to glitches or errors in software because they are based on tried and true technology that originates in the HVAC industry1. It is a commercial level device that has been implemented into home aquarium usage.

    The big con with this product is that it only does one function. Most controllers these days offer temperature controllers as part of their package. It is also expensive for what it does. The link on this product is the single stage controller. The dual stage temperature controller is a more expensive offering.

    Pros & Cons

    Pros
    • Extremely reliable
    • Easy to use
    Cons
    • Won’t control your other equipment
    • Expensive

    8. American Marine Pinpoint pH


    American Marine Pinpoint pH Controller

    The American Marine Pinpoint pH controller is suited to work with equipment such as calcium reactors and CO2 regulators.


    Click For Best Price


    Buy On Amazon

    The American Marine Pinpoint pH controller is a standalone controller designed to work with equipment like calcium reactors and CO2 regulators. It is accurate within .01 resolution with its lab grade pH probe. They are extremely durable controllers that are designed to work for a lifetime.

    They will shut down equipment if the pH goes out of range and are easy to use and calibrate. They are excellent for what they are designed for and plug and play.

    The main downfall is they are designed for one purpose. They lack the functionality of what modern controller can do. However, these are extremely reliable controllers and if you have one thing you want to monitor like a Calcium reactor or planted tank, this is a great deal for a product that is known to last for many years.

    Pros & Cons

    Pros
    • Good Price
    • Great at it’s job
    • Easy to use
    Cons
    • Modern controllers offer pH monitoring now
    • Only serves one function

    Should You Get an Aquarium Controller?

    Buy If:

    • You’re running a reef tank with SPS, LPS, or rare invertebrates
    • Your livestock value is $500 or more
    • You travel or spend nights away from the tank
    • You want a maintenance company to monitor remotely
    • You’ve already crashed a tank from a heater failure

    Skip If:

    • You keep freshwater fish — a controller is overkill for 99% of freshwater setups
    • Your tank is under 40 gallons with low-value livestock
    • You’re still learning the basics of reef chemistry
    • Your budget is tight — spend that money on better livestock first

    Our Expert Editor’s Choice

    Editor’s Choice!

    Neptune Apex

    Neptune Apex

    The Perfect Aquarium Controller!

    Best Value

    Neptune ApexEL Controller

    Neptune ApexEL Controller

    Best Value for the Money

    Budget Option

    Hydros Control 2. A Modern ReefKeeper Lite

    Hydros Control 2. A Modern ReefKeeper Lite

    Budget Friendly Alternative

    The Neptune continues to be the best overall brand when it comes to aquarium controllers. I highly recommended the Neptune Apex for those looking for full aquarium automation at the highest level. The Neptune ApexEL is a cheaper alternative for those wanting to build up to a premium system over time. The Hydros Control 2 is a new entry level controller which I feel is a reincarnation of the Reefkeeper Lite. It will do everything that budget controller used to do and more!

    What Manual Monitoring and Cheap Timers Can’t Do

    A lot of reefers try to replicate controller functionality with a combination of timers, standalone temperature controllers, and manual testing schedules. It works until it doesn’t.

    Here’s what you can’t get from that approach:

    • Cross-parameter logic — a controller can fire an alert or shut down equipment when two conditions happen together. If your temp spikes AND your salinity rises at the same time, that’s an evaporation emergency, not a bad probe. Manual monitoring catches each problem individually, too late.
    • Remote access — being able to pull up live readings from your phone while you’re at work isn’t a gimmick. It’s the thing that saves your tank the one time you’re stuck late and your return pump stops.
    • Flow monitoring — cheap timers don’t know your wavemaker died. They just keep the schedule. Your corals find out the hard way.
    • Voltage monitoring — the Apex energy bar reads voltage draw per outlet. A heater that’s drawing low voltage is about to fail. You get the warning before you lose fish.
    • Automated water change logic — combining level sensors, ATO, and drain schedules into one system is only possible with a full controller. You can’t build that with a timer strip.

    I’m not saying a basic setup can’t work. Plenty of beautiful reefs run without a controller. But if you lose a $300 mandarin because a heater stuck on overnight, you’ll do the math on what the Apex would have cost you pretty fast.

    What Manual Monitoring and Cheap Timers Can’t Do

    A lot of reefers try to replicate controller functionality with a combination of timers, standalone temperature controllers, and manual testing schedules. It works until it doesn’t.

    Here’s what you can’t get from that approach:

    • Cross-parameter logic — a controller can fire an alert or shut down equipment when two conditions happen together. If your temp spikes AND your salinity rises at the same time, that’s an evaporation emergency, not a bad probe. Manual monitoring catches each problem individually, too late.
    • Remote access — being able to pull up live readings from your phone while you’re at work isn’t a gimmick. It’s the thing that saves your tank the one time you’re stuck late and your return pump stops.
    • Flow monitoring — cheap timers don’t know your wavemaker died. They just keep the schedule. Your corals find out the hard way.
    • Voltage monitoring — the Apex energy bar reads voltage draw per outlet. A heater that’s drawing low voltage is about to fail. You get the warning before you lose fish.
    • Automated water change logic — combining level sensors, ATO, and drain schedules into one system is only possible with a full controller. You can’t build that with a timer strip.

    I’m not saying a basic setup can’t work. Plenty of beautiful reefs run without a controller. But if you lose a $300 mandarin because a heater stuck on overnight, you’ll do the math on what the Apex would have cost you pretty fast.

    Benefits of a Monitoring System

    A controller can have many benefits to your aquarium. The biggest benefit is peace of mind and automation. Many of the controllers I have featured here have reporting dashboards that can be loaded on your smartphone, tablet, or PC. They allow you to monitor many aspects of your tank. If something breaks, the controller will know. If something is not operating correctly, you will usually know from the voltage readers on the Neptune Apex.

    Regarding automation, controllers have come a long way. The biggest need from a controller is temperature automation, as many of the heaters these days are not high quality and a proper monitoring system is required to keep your tank safe. Controllers can also control your reef light, know when you turn on your aquarium chiller, keep your pH stable, monitor your aquarium wavemakers, and automate your dosing schedule and parameter testing.

    The other great benefit is anyone can see your parameters if you grant them access. This is a huge perk if you have a maintenance company working on your aquarium. Some higher end maintenance companies will require you to have a controller for big setups so they can monitor and tweek your tank settings as necessary.

    When used correctly, aquarium controllers can offer a ton of peace of mind and save you from an expensive tank crash. They are stellar investments to protect your prized aquatic pets.

    FAQs

    What is it and what does it do?

    An aquarium controller is a computer device that work on monitoring equipment in your aquarium. It also automates several maintenance tasks and are highly customizable to suit the tank setup and needs. They will typically send alerts and texts to your phone if an issue is detected and can also shut down equipment in an emergency.

    What happened to Digital Aquatics?

    Digital aquatics closed its doors in 2018 and ceased all operations. They were well known for creating entry level aquarium controllers. The new Hydros Control 2 is considered a successor to the Digital Aquatics ReefKeeper as they have a similar price and updated technology

    Do I need one?

    You do not need an aquarium controller to have a success in the hobby. Prior to the controller technology innovation there were many and continue to be many new setups that are successful without a controller. A controller offers a lot of automation and monitoring, which will reduce the maintenance you have to do in the aquarium. It also gives you peace of mind when you are away from the tank. Given the price of livestock these days, the investment is well worth if you have thousands invested in your tank.

    What does an apex unit do?

    An Apex controller can do many things in your aquarium, but it’s best to focus on core functionality to see what makes them so great. They can shut off your heater if it malfunctions, saving you from a tank crash. They can detect leaks, your monitor water level, and shut off equipment or the tank before your home is damaged from a flood of tank water. You can monitor your tank while you are on vacation. You can setup auto dosing to keep your aquarium stable for your precious corals.

    One of the biggest perks if you willing to do a setup is automated water changes. With the proper setup, a controller can automate the water changing function completely making your tank nearly self-running.

    Closing Thoughts

    A controller doesn’t make your reef easier to keep. It makes your reef survivable when things go wrong.

    And in a reef tank, things will go wrong. A heater sticks. A pump stalls. An ATO fills when it shouldn’t. It’s not pessimism — it’s just the math on running a living ecosystem 24 hours a day. The question is whether you find out at 3am via a text alert or the next morning when you’re looking at $1,000 in dead livestock.

    The Neptune Apex is my recommendation for anyone serious about reef keeping. The Hydros Control 2 is where I’d start if budget is a hard constraint. The GHL ProfiLux is for the reefer who wants German engineering and doesn’t mind paying a premium for a controller that might outlast the tank itself.

    If you’re in freshwater, save your money. If you’re in saltwater with any real investment in your livestock, a controller isn’t a luxury upgrade. It’s the last piece of insurance you’ll ever actually be glad you bought.

    Questions? Drop them in the comments. I read every one.


    🔧 Want to learn more? This article is part of our complete Aquarium Equipment & Gear Guide. your ultimate resource for filters, heaters, lights, pumps, tanks, and more.

  • The 9 Best Aquarium Sump & Refugiums For 2026 – Tested And Reviewed

    The 9 Best Aquarium Sump & Refugiums For 2026 – Tested And Reviewed

    Are you struggling with finding a quality aquarium sump or refugium?

    In this blog, we share the best aquarium sump and refugium offerings, from Triton style sumps to 4 stage sumps. Even DIY kits are included.

    With over 25 years of experience in the aquarium hobby, I’ve assisted countless clients, hobbyists, and readers like you determining their filter needs and also built a few sumps myself for a 40G breeding and 125 G reef tank. I’ve personally tested these products in real world scenarios to determine the best aquarium sump and refugium on the market.

    Expert Take (Mark Valderrama, AquariumStoreDepot)

    A sump is the single best upgrade you can make to a reef tank. Period. I’ve built sumps for store display systems and custom client builds over 25 years in this hobby, and nothing else delivers the same combination of benefits in one shot: equipment moves out of the display, total water volume goes up (which means more stability), and a refugium section packed with chaeto gives you free nitrate reduction around the clock.

    On sizing, people consistently go too small. The sump should hold 20–30% of your display volume at minimum. A 100-gallon display needs a 20–30 gallon sump. If you can fit larger, go larger. The extra water volume is insurance against parameter swings during a heater failure or a missed water change.

    What I evaluate on every sump: chamber layout (skimmer section, refugium section, return section), acrylic thickness, baffle heights relative to equipment, pump compatibility at the return section, and whether the refugium area can accommodate a proper grow light mount. Cheap sumps cut corners on all of these.

    The Top Picks

    There are a lot of options presented in this post so you may be wondering what we would recommend. If you are longer for a sump that has everything, I would strongly recommend the Trigger Systems Triton Sumps. The triton is the go to method for premium reefs today and they offer massive value for those in that price range.

    Editor’s Choice

    Trigger Systems Triton

    • Trition setup
    • Size
    • Adjustable baffles
    Best Value

    Trigger Systems Crystal

    • 3 stages
    • Media chambers
    Budget Option

    Fiji Cube DIY Kit

    • DIY Kit
    • 3 stages
    • High quality acrylic construction

    For the budget conscious aquarist, I would recommend the DIY sump and refugium kit by Fiji Cube and pair it with a match dollar per gallon tank at Petco or Pet Smart. You can built a great sump and save quite a bit of money over purchasing a manufactured sump. Sometimes the best aquarium sump is the one you design.

    The Trigger Systems Crystal is a great all around package and has a great name behind it.

    Mark’s Top Pick

    My #1 recommendation is the Trigger Systems Triton. The reason is specific: it’s the only commercially available sump designed from the ground up for the Triton method, which means the refugium section is oversized by design, not as an afterthought. The adjustable baffles let you tune water levels to your exact equipment. I’ve seen lesser sumps cause microbubble problems for months because the baffles were fixed at the wrong height. The Triton eliminates that. If you’re running a serious reef and the budget is there, this is the one to buy and not look back on.

    The Candidates

    Let’s dive in and look at the best aquarium sumps and refugiums available for purchase today. These are the offerings we feature in this post and ones we tested out.

    Picture Name Type Link
    Editor’s Choice!

    Trigger Systems Triton Sumps

    Trigger Systems Triton Sumps

    Triton Sump

    Click For Best Price
    Best Value

    Trigger Systems Crystal Sumps

    Trigger Systems Crystal Sumps

    Refugium Sump

    Click For Best Price
    Budget Option

    Fiji Cube Refugium Sump Baffle Kit

    Fiji Cube Refugium Sump Baffle Kit

    DIY Sump

    Buy On Amazon
    IceCap Reef Sumps IceCap Reef Sumps

    Refugium Sump

    Click For Best PriceBuy On Amazon
    Trigger Systems Ruby Sumps Trigger Systems Ruby Sumps

    Refugium Sump

    Click For Best PriceBuy On Amazon
    EShopps Advanced Series Sumps EShopps Advanced Series Sumps

    Refugium Sump

    Buy On Amazon
    Fiji Cube Pro Sump Fiji Cube Pro Sump

    Refugium Sump

    Buy On Amazon
    Bubblefin Aquarium Sump Bubblefin Aquarium Sump

    DIY Sump

    Buy On Amazon
    EShopps RS-Reef Sumps EShopps RS-Reef Sumps

    Berlin Sump

    Buy On Amazon

    Why It Ranks #1: What Actually Separates a Great Sump

    • Chamber layout — dedicated skimmer section, proper refugium section, and a clean return section with room for a pump and ATO sensor. All three need to be correctly sized, not crammed.
    • Acrylic quality — thin acrylic warps under heat and water weight. Quality sumps use thicker stock that holds square after years of use.
    • Baffle heights — baffles that are too low let microbubbles pass through into the return section and up into your display. Adjustable baffles solve this entirely.
    • Pump compatibility — the return section needs to be wide and deep enough to seat your return pump without it starving for flow at low water levels.
    • Refugium lighting mount options — chaeto needs light. A sump with no way to mount a refugium light above the fuge section is an oversight that costs you later.

    The Reviews (2023 Update)

    Now that you have seen the list, let us dive in and see what these sumps are all about!

    1. Trigger Systems Triton

    Editor’s Choice!


    Trigger Systems Triton

    The Best Aquarium Sump

    Developed for the triton method and feature rich, this the best overall sump you can purchase today


    Click For Best Price

    The Trigger Systems Triton Sumps are a new concept in sump systems. Sumps first started with Berlin sumps, which was just a sump that had a chamber for a protein skimmer. Then you had the creation of refugium sumps with the skimmer in the first chamber than a small refugium chamber. These were primarily designed for a reef tank to house beneficial organisms. The Triton method is a new reefing method that relies on a larger refugium chamber where the primary filtration method is from the natural filtration of your refugium.

    The Triton sump by Trigger systems delivers on the method. It is feature loaded with probe holders, three drains, and adjustable baffles. The refugium section is oversized to accommodate the needs of the triton method. Trigger is well known for making quality sumps in the reefing screen. This is Trigger systems high end reef sump offering.

    Pros

    • Brand name
    • Quality construction
    • Modern filtration method for today’s reefs

    Cons

    • Expensive
    • Only one color

    2. Trigger Systems Crystal

    Best Value


    Trigger Systems Crystal Sump

    Best Value

    The crystal sumps are the perfect template for a 3 stage sump. Reasonably priced and high quality brand name


    Click For Best Price

    The Trigger Systems Crystal Sumps is a reasonably priced 3 stage sump that everything you need to build out an elite level setup. It comes with two drains to connect your plumbing and comes with a bubble trap to ensure your return pump doesn’t pull our microbubbles. The bubble trap area can actually house media with their included media platforms. This is an added plus as it puts the chemical filtration in the back versus the front.

    Crystal Sump Design

    The filter sock holder is a locking style that keeps filter socks secure and accepts standard 4″ 100 micro socks. Each drain comes with a bulk head at allows you to insert PVC plumbing into it.

    It is a lean design with a eurobrace to ensure it stays study. This series comes in various sizes, so you can find one that fits in your aquarium stand. It doesn’t have adjustable baffles or probe holders like the Triton to keep costs down. It doesn’t have probe holders, but then can be added easily with accessories in the future

    Pros

    • Reasonable price
    • Has everything you need to get started
    • Brand name

    Cons

    • Still expensive for some
    • No probe holders

    3. Fiji Cube Kit – A Great Do It Yourself Kit

    Budget Option


    Fiji Cube Sump Kit

    Budget Option

    This kit allows you to build a high quality sump on budget


    Buy On Amazon

    I am a big fan of building your own sump, especially if you want to incorporate a sump and refugium in your sump as many sump makers do not have chambers for both. This DIY sump and refugium kit by Fiji Cube really answers the call with a high quality sump kit.

    The dollar per gallon sales from PetSmart and Petco offer a great way to get a cheap sump and Fiji Cube’s kits are meant for either a 20 gallon or 40 gallon aquarium. This 40 gallon gallon kit will handle all medium sized aquariums and is easily adjustable to either be setup as a traditional sump + fuge setup or as a triton setup.

    I really love the three filter sock design, I just wish they would do 55 gallon and 75 gallon sump kits. Fortunately, there is a nice 55 gallon triton sump kit available from Jax.Racks for those of you with 6 foot long tanks.

    Pros

    • DIY Kit allows you to build the best sump setup for your tank
    • Can be setup for either standard Skimmer + Fuge or Triton method
    • Kit + dollar per gallon tank = cheap and great value!

    Cons

    • No drain bulkheads do you need to DIY the drain area to fit
    • Only 20 and 40 gallon aquarium kits available
    • You need to assemble the kit yourself

    4. IceCap – With Auto Top Off Reservoirs Built-In


    IceCap Reef Sump

    A well made 3 stage sump with a built in ATO reservoir


    Click For Best Price


    Buy On Amazon

    The IceCap sumps are a well designed sump that include a fresh water reservoir so you do not have to maintain a separate reservoir for top off. This sump has dual drains allowing for a bean animal overflow to be connected to it and the covers most for a clean and professional looking sump. The sump comes with probe holders and the ability to adjust the water level from 5-9 inches.

    This is a great reef sump if you are working with a tight space, or just want a sump with the reservoir built in. The measurement lines on the reservoir is extra helping in determining how much water you have left in the reservoir.

    My only critique on this design is the reservoir sacrifices the ability to hold a refugium. I would have preferred a refugium section over the reservoir myself. Fortunately, their larger IceCap XL Sump models actually do have a refugium section AND a reservoir, making the models a comprehensive package.

    Pros

    • Dual drains so bean animal overflow can be connected to it
    • Has a freshwater reservoir so you do not have to have a separate one
    • Clean and professional looking

    Cons

    • Non XL models do not have a refugium section
    • Refugium is still a little small on the XL models

    5. Trigger Systems Ruby – The Brand Name In These Products


    Trigger Systems Ruby Sump

    Trigger’s best selling reef sump. The benchmark for how all manufacturer sumps are measured


    Click For Best Price

    Trigger Systems really started the cool looking sump craze and has been recognized in the industry for their high quality craftsmanship. This Trigger Systems Ruby Sump offers a true 3 chamber sump. Both the protein skimmer and refugium sections are adequately sized to house both comfortably. It has dual drains like most of the premium sumps we have reviewed here.

    The filter sock holders lock into place so you don’t have to worry about them accidentally falling into your sump. Three probe holders are included in the first chamber and a media chamber is included so you can place carbon before the return section. The design is finished off by a clean red colored euro-braced design. It really is a competent and well rounded design.

    Pros

    • Recognized name brand in the industry
    • Great all around design
    • Nice aesthetics

    Cons

    • Fuge still could be larger, but Trigger does sell Triton sumps
    • runs more expensive than the others listed here

    6. EShopps Advanced Series – For the Serious Hobbyist


    EShopps Advanced Sumps

    The premium offering from EShopps. Well constructed and readily available at most local fish stores


    Buy On Amazon


    Click For Best Price

    The Eshopps Advanced Series Sumps is the 3rd generation advanced series sump from Eshopps. It is a well built sump that incorporates a skimmer and refugium section. What I love about this sump is that it has a two channel design so as one drain goes to the sump while the other goes to the skimmer. This allows for you to have separate drain flows to your skimmer and fuge section. It comes complete with probe holders and a float valve holder. It is a great all round design.

    Because it has two drains on it, it is designed for bean animal overflows. It has a generous protein skimmer section, which will allow you to add an oversized skimmer. The fuge section is smaller than I would like, but is adequate for this design as it a primarily skimmer run sump so you are definitely going to want to add the best protein skimmer you can afford on this build.

    Pros

    • Two drains so you can use a bean animal overflow
    • Very generous protein skimmer section
    • Is built to use a protein skimmer and refugium

    Cons

    • Models only go up to 36″ in length
    • Refugium section is not that large

    7. Fiji Cube Pro – A Pro Level Reef Unit


    Fiji Cube Sumps

    A high quality, flexible pro level aquarium sump. Offers models up to 46 inches long


    Buy On Amazon

    When I first saw Fiji Cube’s Sumps, I immediately fell in love. This is such a clean looking sump and expertly designed. The blue and white design will look great in your cabinet or fish room and they make longer sumps that the other manufacturers do not make.

    Let’s talk about why this sump is so awesome. First is the computer laser cut design. Next is verstalie first chamber than can either hold filter socks or be converted to hold media. The skimmer section is just right, and features a tighter fit so there is less wasted space in the sump. The sump comes with probe holders and all baffles can be adjusted. The water level is adjustable to 12″ – which is the highest level available for sumps on this list and all chambers can be adjusted. I love the extra fit features like the removable lids on every section. It keeps things clean of salt creep and enclosed for less water evaporation and humidity in your cabinet.

    It is a pricy sump given it’s features. If you are looking for that “cool” sump for your setup, this is one of the best ones to purchase.

    Pros

    • Design
    • Lots of sizes – up to 46″ long
    • All baffles are adjustable

    Cons

    • Pricey

    8. Bubblefin DIY – A Cheap Option


    Bubblefin DIY Sump Kit

    A barebones kit that greats you started on building your own sump


    Buy On Amazon

    The Bubblefin DIY Kit is how to get a DIY done on the cheap. It comes with the acryclic baffles to get your started. You can build your sump configuration however you want with this kit. All you need is silicon and a steady hand when placing the baffles. It’s a completely bare bones kit with just baffles, but a lot of DIYers like this option because they can build whatever they want.

    The price of this kit is so affordable, you would have a hard time coming up with something comparable in time and money going to the hardware store and purchasing glass or acrylic baffles.

    The only complaint I have from this kit is it is missing a pipe hold or bulkhead. You can purchase those separate from other vendors online though. It doesn’t have the same features as the Fiji Cube kit, but the price is hard to beat

    Pros

    • Very cheap!
    • Configure your sump like you want

    Cons

    • Missing filter sock holders and bulkheads

    9. Eshopps RS Series – A Great Entry Level Unit


    EShopps RS Sumps

    An affordable Berlin style sump from EShopps. Readily available at most local fish stores


    Buy On Amazon

    This is the budget offering from Eshopps. The Eshopps RS Series Sumps is most common aquarium sump you will see at local fish stores.

    It is a basic, no-frills sump that gets the job done for those who are starting out or just want a basic sump. They are best meant for protein skimmer powered Berlin style saltwater aquarium and reef tank setups.

    Pros

    • Simple
    • Cheap
    • Easy to Setup

    Cons

    • Single drain means you cannot setup a bean animal overflow
    • Can only accommodate a protein skimmer
    • Not pretty to look at

    What Is An Aquarium Sump?

    An aquarium sump is a separate aquarium that is plumbed into your main aquarium. They are frequently used in saltwater aquariums and considered the best aquarium filter option. This is because most of the best equipment available is meant to be placed in a sump. The sump is normally placed inside the tank cabinet and other times they are pump to a separate fish room or basement. A separate fish room or basement offers the most accessibility, but mostly common on larger or commercial builds.

    Most of us who will setup a sump are usually going to place the sump inside the cabinet and use a submersible return pump to move water back to the display tank. You can see how a sump is used in a professional environment like Tidal Gardens below:

    Most sumps will be designed with 3 sections:

    • The drain section
    • The flex space section
    • The return section

    The drain section will usually have mechanical filtration either through filter rocks or filter cups that will have sponges or floss with chemical media. In most saltwater setups, this is where you would install the best protein skimmer that works for your setup..

    The flex space section is a section where the a refugium (or fuge for short) would be spaced. Sometimes live or dry rock is placed here along with macroalgae to support microfauna and to remove excessive nitrates and phosphates from the aquarium. In a freshwater setup, this section can be used as a safe place to put freshwater plants like Anubias, Java Fern, Duck Weed, Guppy Grass, Java Moss, and Luffy Marimo Moss Balls are all excellent candidates for a freshwater refugium.

    In reef tanks, there is a new method called the Triton Method that switches the order of the refugium and protein skimmer. The refugium is placed first and the skimmer follows it.

    The return section, which is where your return pump goes and where your auto top off is placed. This return section is the part of the sump that will have a variable water level so as your water evaporates the water in this section will drop. This will also be the first area of your sump that will fill up if your return pump is shut off.

    What Is A Refugium?

    A refugium is a section in your sump that is reserved as a safe space for micro fauna and macro algae in your aquarium in saltwater tanks and a safe spot for live plants in a freshwater tank. The advantages of a refugium are several:

    • In a saltwater aquarium, this allows you to cultivate beneficial pods that your fish and corals will in turn eat. The pods also act as a clean up crew that eats detritus in the aquarium.
    • Macro algae and live/dry rock can be used in a refugium to house pods and filter out excessive nitrates and phosphates in the aquarium. A large enough refugium in combination with a quality protein skimmer can potentially eliminate water changes.
    • For freshwater tanks, plants can be housed here to act as a filtration device to filter out chemicals and excessive phosphates and nitrates. while not as effective as in saltwater aquariums, they are still useful when a large enough refugium is used.

    What Cheap All-In-One Sumps Get Wrong

    Budget sumps look fine on paper. In practice, they fail in the same ways every time:

    • Poorly designed baffles — fixed baffles at the wrong height push microbubbles straight into your return section. You’ll see a snowstorm effect in your display that doesn’t go away. This is a design flaw, not a setup error.
    • Thin acrylic — 3mm acrylic is not enough for a sump that holds water 24/7 under equipment load. It bows. Over time it can delaminate at seams.
    • Inadequate refugium space — a 4-inch refugium section is not a refugium. It’s a decoration. Chaeto needs room to tumble and grow to actually export nutrients.
    • No room for a quality skimmer — the skimmer section on cheap sumps is sized for whatever the manufacturer’s skimmer happens to be. If you bought a proper skimmer that’s a few inches wider, it doesn’t fit and you’re improvising.

    How To Select An Aquarium Sump and Refugium (Buying Guide)

    There are A LOT of sumps and refugium designs to chose from. It is pretty overwhelming to figure out what will work best for you. Here are a few factors to consider to help you out:

    • Size – You are limited to the size of your cabinet. The bigger the sump the better if you can fit and manage it.
    • Versatility – Sump designs with multiple chambers and adjustable baffles allow you to work around the design to fit a variety of equipment.
    • Durability – You want your sump to last the life of the tank. It is a pain to replace a size. Consider the following:
      • Acrylic vs. Glass – Acrylic is light and less prone to cracking. Scratching is not as big of a deal with sumps as they are in your display
      • Acrylic vs. PVC – PVC is an even more durable sump design, but very expensive. You can consider a PVC Hybrid that combines both PVC and Acrylic at a lower cost or chose to go all PVC. Either way, the build will likely be a custom aquarium sump
    • Accessories – Features like probe holders and euro bracing make for a cleaner and easier to work with design
    • Ease of Installation – If there are videos or instructions available that makes things a whole lot better. A sump with bulkheads included is also extra nice
    • Aesthetics – You want your sump to look cool right ? ?
    • Low Noise – A bean animal design will have the lowest noise possible.

    Buy or Skip? Honest Verdicts

    Buy a sump if:

    • You’re running a reef tank with a protein skimmer — the skimmer needs to live somewhere, and the sump is the right place
    • You want to add a refugium for natural nitrate reduction without a separate hang-on unit
    • Your display tank looks cluttered with equipment inside it — a sump solves that permanently
    • You’re building a serious FOWLR or SPS reef where water stability is non-negotiable

    Skip a sump if:

    • You don’t have cabinet clearance under your tank — a sump that doesn’t fit is worse than no sump
    • You’re running a strictly freshwater planted tank and a canister filter already handles your load
    • Your budget is already maxed on the display, skimmer, and lights — do those first, add the sump when you can do it right

    Conclusion

    The Bottom Line

    Here’s the thing about sumps that most buyers miss: the sump is where the real filtration happens on a reef. Everything in the display is just livestock. The skimmer, the chaeto, the return pump, the ATO, the probe holders, the media reactors — all of it runs out of the sump. When you buy a sump, you’re buying the foundation that everything else plugs into. Get it right the first time. A sump is not a place to cut corners.

    Sump shopping is stressful because the stakes are real. It’s the central operating hub of your reef tank, and getting it wrong means fixing it later under a full system. I hope this breakdown made the decision easier. If you have questions or think I missed something, drop a comment below. Happy reefing.


    🔧 Want to learn more? This article is part of our complete Aquarium Equipment & Gear Guide. your ultimate resource for filters, heaters, lights, pumps, tanks, and more.

  • The 7 Best Betta Fish Tanks: Tested and Reviewed

    The 7 Best Betta Fish Tanks: Tested and Reviewed

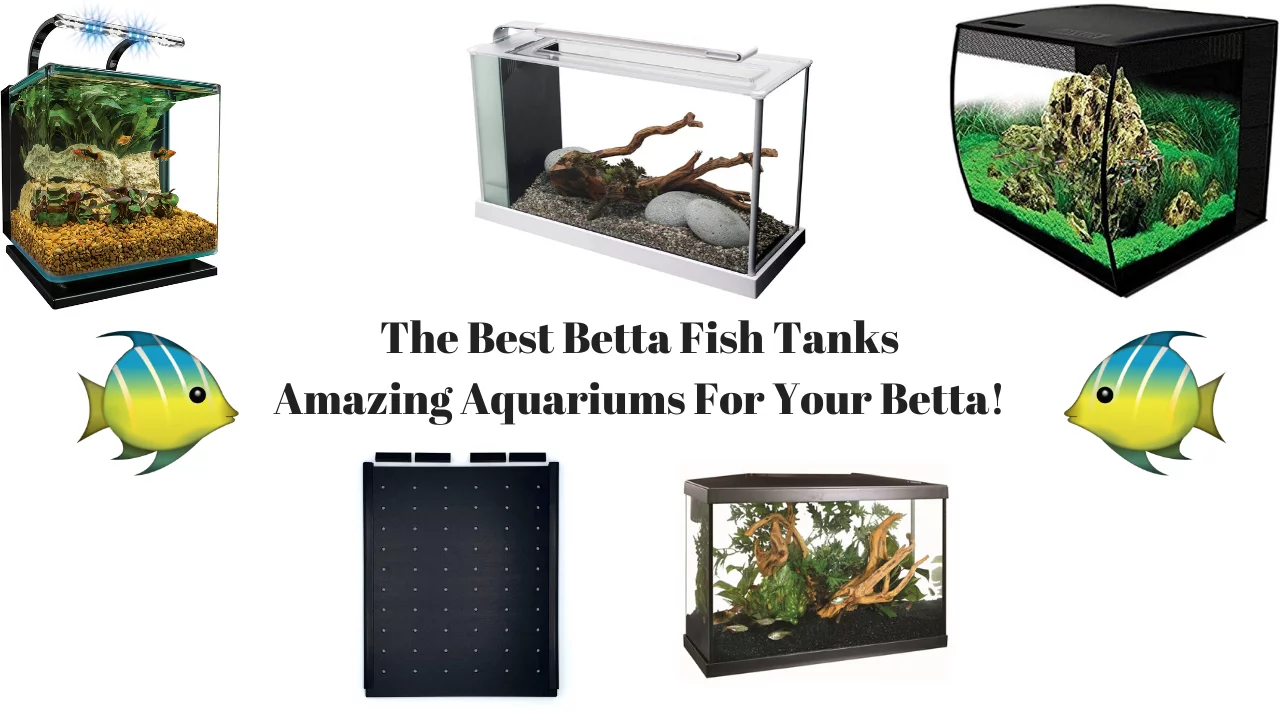
    Choosing a betta tank is where most new betta keepers go wrong before they even bring the fish home. The “betta bowl” and tiny desktop vases you see in stores are transport containers, not homes. They’re too small to maintain stable water parameters, can’t accommodate a heater, and stress the fish from day one. A betta in a bowl doesn’t thrive. It just slowly declines. After 25 years in the hobby and selling hundreds of betta setups in the stores I managed, my recommendation hasn’t changed: minimum 5 gallons, a heater, low-flow filtration, and a secure lid. Period. Every tank on this list meets those requirements. The top picks exceed them.

    With over 25 years of experience in the aquarium hobby, I’ve assisted countless clients, hobbyists, and readers like you in overcoming their aquarium selection axiety. I’ve personally tested or used these products in real world scenarios to determine the best betta fish tank on the market.

    Mark’s Expert Take

    Bettas are sold in tiny cups and people see that and think small is fine. It’s not. That cup is a transport container, not a home. At the store I managed, every betta that came back sick was living in an unheated, unfiltered bowl. Every single one. A betta needs at least 5 gallons, a heater dialed to 78-80 degrees F, a low-flow filter, and a lid. Those are not optional upgrades. That speech went out with every single betta we sold. The fish that got those four things thrived. The ones that didn’t came back within months.

    The Top Picks

    Editor’s Choice!

    Fluval Spec V

    Fluval Spec V

    The Perfect Betta Tank!

    Best Value

    Marina LED Aquarium Kit

    Marina LED Aquarium Kit

    Budget Friendly Alternative

    Budget Option

    LifeWithPets Tank Divider

    LifeWithPets Tank Divider

    For The DIYer

    Let’s start with my top picks. To summarize, the Fluval Spec V is the best fish tank for your betta that you can buy today. It really has it all. It has the perfect filtration unit. The dimensions of the tank are ideal. The LED lightning that comes out of the box works for beginner plants. The tank also looks amazing in person. I recommend the Fluval Spec V for anyone starting up a Betta fish tank.

    The Marina is a great value choice for those who want to spend a bit less but still want good features in an aquarium kit. It is cheaper than the Spec V aquarium kit and the LED lighting will still support low light plants. The LifeWithPets dividers are a great money saving option for those who want to make an Betta tank with multiple males.

    The Candidates – A Quick Overview

    I reviewed 7 tanks in this round up. Below is the list of the best betta fish tanks on the market today. I put the preferred choices at the top for ease of selection for you. I’ll go into more detail about each further down in the blog.

    Picture Name Size Link
    Editor’s Choice!

    Fluval Spec V

    Fluval Spec V

    5 Gallons

    Buy On ChewyBuy On Amazon
    Best Value

    Marina LED Aquarium Kit

    Marina LED Aquarium Kit

    5 Gallons

    Buy On ChewyBuy On Amazon
    Budget Option

    LifeWithPets Tank Divider

    LifeWithPets Tank Divider

    10 Gallons

    Buy On Amazon
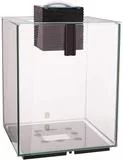
    Marineland Contour Glass Aquarium Kit Marineland Contour Glass Aquarium Kit

    5 Gallons

    Buy On Amazon
    Hagen Fluval Chi Aquarium Kit Hagen Fluval Chi Aquarium Kit

    5 Gallons

    Buy On Amazon
    Hagen HG Fluval Flex Aquarium Hagen HG Fluval Flex Aquarium

    9 Gallons

    Click For Best PriceBuy On Amazon
    Aqua One Trio Aqua One Trio

    8.8 Gallons

    Buy On Amazon

    The 7 Best Best Betta Fish Tanks

    Now that you know the products we are reviewing, let find out why each tank made the list. Here is a video from our YouTube Channel. Subscribe if you enjoy our content!

    1. Fluval Spec V

    Editor’s Choice!


    Fluval Spec V

    The Best Betta Fish Tank

    Best filtration, best light, perfect size and with everything you need to get started. It was made for Bettas!


    Buy On Petco


    Buy on Amazon

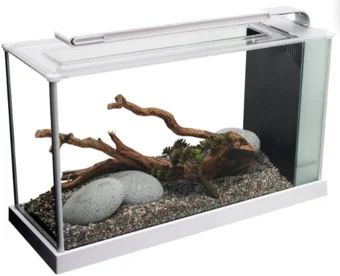
    Let’s start off the list with the very best of the bunch. The Fluval Spec V has everything you need. Let’s start off with the size of the aquarium. It is an ideal 5-gallon aquarium tank kit and is designed horizontally. Horizontal dimensions are better for fish like Betta because it gives them more space to swim around side by side. The peninsula style with aluminum trim design gives you a full view of the tank in 3 sizes. This makes it perfect to use on a countertop or cabinet as the plugs and filtration are hidden from view.

    The filtration system is top-notch on the Fluval Spec V aquarium kit. It comes with complete 3 stage filtration system foam as mechanical, carbon for chemical, and ceramic bio max media for biological. The filter components come out easily with a basket lifter. With the large filter chambers, you heat the tank’s water temperature without seeing the aquarium heater. The filter flow can also be modified by either using a sponge at the end or installing a rain bar kit.

    The light is built for freshwater planted tanks. Its led light has enough output for many beginner freshwater plants. The newest generation led lighting on the Fluval Spec Vs are 20% brighter than the previous generation. Your betta will look noticeably more colorful and vibrant under these lights.

    The best comes with a price. The Spec V aquarium kit is one of the most expensive aquariums on this list. You get what you pay for with this aquarium and more. The light itself in my mind is cheaper in the long run than purchasing a similar output separately. The pump is also powerful for these types of fish. You will want to dampen the output with a sponge on the outlet. This is a beautiful-looking tank that will give our fish the size and space it needs. Well deserving of the Editor’s Choice badge.

    Pros & Cons

    Pros
    • Best filtration unit
    • Best LED light
    • Looks amazing
    Cons
    • Powerful pump
    • Expensive

    Mark’s Top Pick

    Fluval Spec V. The filtration is the best on any 5-gallon kit I’ve tested. The 3-stage chamber is large enough to hide a heater, the LED is strong enough for low-light plants, and the build quality is excellent. The flow is strong out of the box, but a sponge on the outlet or a rain bar kit fixes that immediately. Nothing else at this size competes on package quality.

    2. Marina Aquarium Kit

    Best Value


    Marina Aquarium Kit

    Best Value

    A more budget friendly alternative. Solid equipment and tank


    Buy On Chewy


    Buy On Amazon

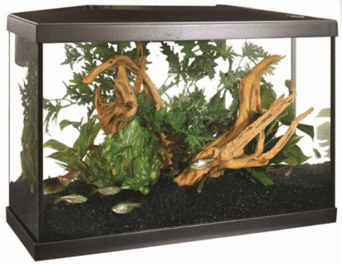
    Marina is a value brand of Hagen. Hagen as you might already know is a high-quality manufacturer of aquarium products in business since 1955. They are known for creating well-priced start kit aquariums. This Marina aquarium kit from Hagen screams value. Like the Fluval Spec V, it has everything you need, but at a lower price.

    Let’s start off with the starter kit packager itself. It comes with not only a tank, light, and filter but other essentials to get you started. The aquarium kit comes with fish food, a water conditioner, a fish net, a thermometer, and biological supplements to get you started. All these together would cost you a fair amount of money. Given the price, I feel like Marina is practically giving this away.

    The LED lighting that comes with this kit is powerful enough to house low-light aquarium plants. The LED light fits within the canopy giving this aquarium a clean look. The lid is fully enclosed preventing evaporation issues.

    What’s there not to like? The biggest thing is the power filter. While it comes with a sponge that will actually protect your fish from getting sucked in, it can be an eyesore in the tank. The motor of the filter is housed with the intake, which allows you to hold more media in the filter. In a small tank like this, motor can be easily seen. Placing a heater can be tough to do with this as there isn’t a spot to place one. You will need to place the heater within the tank.

    Still, this 5-gallon tank is an incredible value and worthy of my best value tag.

    Pros & Cons

    Pros
    • Great value
    • Good LED light
    • Comes with other essentials
    Cons
    • Powerful filter
    • Heater placement

    3. LifeWithPets Dividers – Great Budget Option For Multiple

    Budget Option


    LifeWithPets Tank Divider

    Budget Option

    A DIYer’s option. Divide your aquarium and house multiple Bettas!


    Buy On Amazon

    Small aquariums go on sale all the time at chain pet stores. When these sales happen, you can purchase a great 5 gallon or 10 gallon tank for a Betta fish. When you get these deals, you can build a custom DIY aquarium with multiple Bettas with these tank dividers from LifeWithPets.

    I love these dividers. These are my go-to when it comes to multiple Bettas in an aquarium. They are well-designed and sturdy. Designed from PVC, these dividers will last a lifetime in your tank. Because this is a DIY aquarium kit, you are free to divide up your tank any way you desire.

    Life With Pets Dividers

    The kit I linked to is for a 10 gallon tank kit, which will allow you to house 2 male bettas comfortably. The picture above is using a 20 gallon long tank divider. This allows you to house 3 male Bettas!

    Because of their holed design, The male Bettas will see each other and display their male aggression. This results in fin flashing and other desirable behaviors that show off your Bettas’ fins and color while also keeping your males safe from each other. Your Bettas will get their space and will remain active with the other males around.

    What’s not to like about these dividers? The dividers are designed for Aquaeon glass tanks only. Other glass tank brands will likely have too tight of a fit and could risk cracking. Because of the design, it is recommended you place a filter in each section. I feel the cost of multiple filters can be mitigated by utilizing sponge filters. Check out our Best Sponge Filter blog post for the best ones to buy.

    Pros & Cons

    Pros
    • Well designed
    • Cheap DIY
    • Houses multiple Betta
    Cons
    • Only works with Aqueon
    • Requires more filtration

    4. Marineland Contour Glass Aquarium – A Great Cheap Choice


    Marineland Contour Glass Kit

    A budget all in one aquarium that is a great size for a Betta


    Buy On Amazon

    The Marineland Contour Glass Aquarium kit is a great valued priced Betta tank. The price for what it comes with is amazing. Marineland is a well known manufacturer of aquariums so you can purchase their tanks with confidence that they will last a lifetime. This is similar to Marineland portrait aquarium kit, but this won out because I like the lighting system on this over the portrait aquarium.

    The main attraction of this tank is its presentation. The rail-mounted LED light kit give this Betta tank a wonderful touch. It looks amazing with nothing in it in the person sitting on a desktop. LED lighting is powerful enough to work with low-light plants like Java Fern. I like the blue LED lights for the moonlight look as well.

    The filtration system on this 5 gallon tank is a 3 stage unit using Marineland’s famous Rite-Size cartridges. These cartridges have to bother mechanical and chemical in the same package and are easy to remove for maintenance. The tank comes with a lid that is easy to move out of the way when feeding or cleaning.

    This cube design aquarium kit is a great package with a great price. My biggest gripe about the Marineland Portrait Glass LED Aquarium Kit is that you cannot place the heater in the filtration chamber. It’s recommended that you do not according to Marineland. I want to hide my heater with an all-in-one chamber so this is a big disappointment for me. The curved glass can look odd at certain angles, but not a deal breaker. The main money gripe here is the Rite-Size cartridge. It doesn’t use foam, which is reusable. The cartridges get thrown away after the carbon is exhausted, which means you need to continue to buy replacements. Long-term, that will add to your cost.

    Pros & Cons

    Pros
    • Good price
    • Looks great
    • 3 stage filter
    Cons
    • Heater placement
    • Rite-Size cartridges

    5. Fluval Chi – Zen-like Aquarium In A Small Package


    Fluval Chi Aquarium

    A great looking aquarium. Accents well in the home. Great for desktops and a great size for a single Betta Fish


    Buy On Amazon


    Buy On Chewy

    Are you looking for a jaw dropping aquarium? If so, the Fluval Chi is easily the best looking aquarium kit on this list. The Fluval Chi is elegantly designed and inspired by Feng Shui. It starts with it’s clean horizontal design and its water flow.

    The water flow is made by a specially design filtration unit. This unit filters from the bottom of the unit then filters down with a fountain like stream down to your aquarium. This creates a therapeutic setting. It does an amazing job of creating calm and accenting counter tops and even has a centerpiece on a piece of furniture. The water flow is so calm that it requires no modification for to use as a Betta tank.

    So why isn’t this aquarium at the top of the list? It sounds amazing so far. Well, the LED lightning is not that great. I would not even recommend low light aquarium plants with the LED light it comes with. The filtration system is built into the light, which means if either the light or filter fails you have to buy an entire unit.

    The price to replace the light/filter combo is nearly as much as the aquarium kit itself! The final con is the dimensions. Bettas prefer more horizontal space to swim around. You can mitigate horizontal dimensions with a mirror or a multiple betta divider, but for a single Betta fish I would prefer a long tank.

    Pros & Cons

    Pros
    • Best looking aquarium
    • Therapeutic
    Cons
    • Failure risk
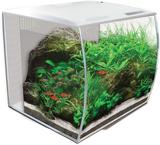
    • Tank dimensions

    6. Hagen Fluval Flex – A Large Aquarium


    Fluval Flex

    A larger and more robust all in one aquarium. Excellent for a Betta and has plenty of room for aquascaping


    Buy On Amazon


    Buy On Petco

    The Hagen HG Fluval Flex Aquarium kit debuts on this list as the largest aquarium. Weighing in at 9 gallons in volume, this tank will provide plenty of swimming space for your prized Betta and maybe a couple of peaceful tank mates. The Fluval Flex aquarium kit uses the exact same filtration system as the Flex Spec V. This true 3 stage filtration unit is top notch and the all-in-one chambers are large enough to fit a heater in the return section.

    The aquarium has some really nice touches to it. It has a feeding opening that you can use to feed your Betta and the return comes with a multi-directional output so you are able to spread out the current. The aluminum trim on the cover is very appealing and fits flush on the aquarium.

    The LED lighting on this aquarium kit has some interesting features to it. The LED lights have the ability to change colors so you can do various color blends to bring out the best coloration out of your Betta fish. This is great for a fish only tank, however if you are going to add plants to the tank I would recommend keeping the stock settings. LED is part of the lid that fully encloses the tank preventing evaporation issues.

    Speaking of plants, this light can handle low light aquarium plants. This saves you on having to purchase a separate Planted Aquarium LED. The white version of this tank pictured above is actually excellent for aquascaping. Many freshwater aquascapes prefer a white or frost background to bring out the max coloration of your plants.

    This is a great aquarium kit with a few flaws. The price is up there near the price of the Fluval Spec V, but the Spec V overall is a better package. The glass has been known to crack easily due to it’s curved design. I am also not a fan of the honeycomb design at the top of the tank. I know it’s done to hide the waterline, it just looks odd to me, especially if you go with plants.

    Pros & Cons

    Pros
    • Large size
    • Filter system
    Cons
    • Expensive
    • Past faulty units

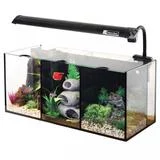
    7. Aqua One Trio – Great Concept But Falls Short


    Aqua One Betta Trio

    A great concept tank that can house 3 bettas


    Buy On Amazon

    The Aqua One Trio is a great concept. It is an all in one aquarium kit that is specifically designed to house multiple male Betta fish. This is what every Betta fish enthusiast wants. It also has a hefty filtration system to handle three full growth males. At 8.8 gallons, it has one of the largest volumes on this list. It comes with a glass lid that is easy to remove when feeding and maintenance.  It looks like the perfect Betta tank on paper.

    So what’s the issue with this tank? Where does it fall short? It is a great concept and a dream design. It looks slick too. My biggest issue is the divider design. The divider holes are not designed that well. With the powerful pump equipped on this unit, it is possible for your Betta fish to get stuck on the divider flow holes. The dividers also do not allow for even flow, meaning the chamber where the return is will have a heavy stream of water over the others.

    As you may already know, Bettas need calm waters. I can see how the male betta housed near the return chamber would be stressed from the flow. The LED lighting is okay not great. The Fluval LED lighting is superior in my mind.

    Great concept and potential for a betta tank that needs refinement in my mind.

    Pros & Cons

    Pros
    • Houses multiple bettas
    • Great concept
    • Large size
    Cons
    • Divider design
    • Light

    How We Ranked These Tanks

    These tanks were evaluated on the criteria that actually affect betta health and longevity. Here’s what I looked at:

    • Size (5-gallon minimum). Anything under 5 gallons is too small for stable water parameters. The 5-gallon threshold is not arbitrary. It’s the point where a proper nitrogen cycle can establish and temperature holds reasonably well.
    • Adjustable flow filter included. Bettas come from slow-moving water. High-flow filters stress them and can shred their fins. An adjustable or low-flow filter is not a nice-to-have. It’s a requirement.
    • Heater included and appropriately sized. Bettas are tropical fish. They need 78-80 degrees F consistently. Without a heater, a betta in a room-temperature tank is chronically stressed and immunocompromised.
    • Lid security. Bettas jump. This is not a rare event. A secure lid is the difference between finding your fish in the tank and finding it on the floor.
    • Visibility and viewing angle. Bettas have personality. A tank that lets you actually see your fish from multiple angles is worth paying for.
    • Ease of water changes. Frequent water changes are non-negotiable in a small tank. If access is awkward or the design makes maintenance annoying, it won’t get done.

    What Betta Bowls and Small Vases Miss

    The pet industry markets betta bowls, desktop vases, and 1-gallon “starter” kits as legitimate housing. They’re not. Here’s what they consistently fail to provide:

    • No biological filtration. Ammonia builds up in any container where a fish lives. Without a cycled filter, that ammonia has nowhere to go. In a small bowl, ammonia reaches toxic levels within days. The fish doesn’t die suddenly. It deteriorates slowly, which is worse.
    • Temperature instability. Room temperature swings throughout the day and season. A betta without a heater lives in chronic thermal stress. Their immune system operates at 78-80 degrees F. Below that, they get sick. It’s that simple.
    • No room for a heater. Most bowls and vases under 3 gallons can’t safely accommodate a heater even if the owner wants to add one. The tank itself is the constraint.
    • Shortened lifespan. A betta in a proper 5-gallon heated, filtered setup lives 3 to 5 years. A betta in a bowl lives 6 to 12 months and is stressed the entire time.

    Should You Get a Betta Tank?

    Buy If

    • You want a proper setup for one betta from day one
    • You’re willing to do weekly 25% water changes
    • You want a fish that actually interacts with you
    • You’re looking for a desktop display tank with personality

    Skip If

    • You’re considering anything marketed as a “betta bowl”
    • Budget is driving you to unheated or unfiltered options
    • You want a low-maintenance fish (bettas require consistent care)
    • The tank is under 3 gallons (don’t do it)

    The honest recommendation: Skip anything under 3 gallons entirely. A betta in the right tank is a genuinely rewarding pet with a real personality. A betta in a bowl suffers quietly for months and then dies. The tanks on this list are the ones worth building around.

    Our Criteria

    I searched and reviewed a ton of aquariums for your Beta Fish. There are hundreds of fish tanks available to purchase online. How did we decide what was best? It came down to the following criteria.

    Aquarium Size

    Through my research and experience in fish keeping (over 25 years and counting), the best aquarium size for a Betta is a 5-gallon tank. Anything smaller will be too little space and detrimental to the long-term health and lifespan of your Betta. Anything larger is too much space for a single Betta. Our focus in this review is ideal aquariums for a single Betta. An aquarium kit will also be preferred.

    Filtration

    I want a complete aquarium kit. Ideally, one that comes with a filter unit built in. This makes maintenance easy to do.

    Lighting

    Ideally, I can find an aquarium with light that is suitable for beginner aquarium plants. Having plants in our aquarium will make things not only more comfortable for our Betta but also healthier as plants will filter the nutrients in our water. These days led lighting is the way to go. If the light is part of a lid that’s a bonus for me.

    Aesthetics

    I want our tank to look sharp. I don’t want equipment to be showing everywhere in the tank. I want this aquarium to look nice on a desktop, cabinet, or countertop. I would prefer a lid to avoid evaporation issues.

    Price

    I don’t want this tank to break your bank. It must have a good price, but at the same time, it needs to be value priced. If it’s cheap and offers me junky equipment, I’m not putting it on this list!

    How To Care For Them

    So you got an awesome tank for your Siamese Fighting Fish. Great job! Now you might be wondering how to take care of a Betta fish. I’m right here for you! In fact, I wrote up a lengthy guide on Betta Fish Care. In this article I go over:

    • History of the Siamese Fighting Fish
    • Male and female differences
    • The major factors of betta fish care including
      • Housing – 5 gallons is ideal
      • Filtration – 3-stage filtration
      • Decor – Soft and smooth decor
      • Diet – Worms + VitaChem
      • Tank Mates – From safest to riskiest
    • Types of Betta Fish
    • Sample full tank build

    The great thing is I started you off on the right foot with the top 3 choices of this post. Want to learn more? Check out my article.

    Additional Tips And Tricks

    Here are some additional tips and tricks for you to keep your Siamese Fighting Fish in the best shape possible

    Selection

    Purchase your Betta from a reliable vendor. Betta is readily available at all pet stores including chain stores. Make sure you purchase a quality Betta that is not sick. Look for obvious signs like damaged fins, white spots, cloudy eyes, and red sores. Always ask the place you buy your Betta fish from to feed it and observe it eating. If it is near other males, look for signs of aggression. A healthy male Betta should display aggression to other males.

    Maintenance

    Change your water at least biweekly to start after your aquarium has cycled. Always observe your water quality parameters with a proper Aquarium Test Kit. Once you get in the habit of testing and see consistency in your numbers, you can water change according to your water quality parameters. If you have gravel clean it out with a gravel vacuum. Clean your filtration media once a month with your tank water.

    Aquascaping

    You can build a fantastic-looking aquascape with a Betta Fish Tank. These are super easy to maintain and set up. All it requires is some Driftwood for Aquarium and some Beginner Freshwater Plants. You can look at those links for additional selections on driftwood and plants. Most of the LED lights that come with the aquariums on this list will support plants. I’ve already took care of the guesswork for you ?.

    I know likely are in a hurry to go get your aquarium, so here is this quick video from Regis Aquatics showing a natural aquascape style using a Betta Fish for inspiration. Enjoy!

    FAQS

    What type of aquarium is right for you?

    The best type of tank for a single Betta fish would be a 5 gallon fish tank. A 5 gallon fish tank offers enough space and filtration to keep a betta happy and healthy. In order to keep more fish, however, you will need to increase the tank size. For multiple fish, you can consider a 10-gallon or even a 20-gallon tank.

    Do They Prefer Long or Tall?

    Like many fish, Bettas prefer to have longer tanks than tall. This is because they are used to shallow waters in the wild. As such, they tend to have wide territories. Many other fish are more comfortable with long and shallow versus tall tanks. Tall tanks tend to be better for the fish tank owner, who prefers horizontal space for viewing, aquascaping, and aesthetics.

    What Do They Like In Their Environment?

    Bettas are partial to live plants. In particular, large leaf plants like Anubias and floating plants are preferred. Bettas love to lounge and rest on leaves and hide within driftwood while perching. You also play with them with toys like a ping ball!

    Can it Be Too Big?

    Absolutely not. In a larger tank, Bettas will establish their territory and generally stick to their general area. They won’t get lost in a large tank and they will get along better with schooling fish with the extra space. If anything, more space curbs their aggression. In fact, there are documented cases where even male bettas can coexist in large tanks with plenty of floating and live plants for both to establish their own space!

    Aussie aquatics is the most documented influencer in our space who has successfully kept multiple male bettas in a tank without a divider. You can check out his video here.

    Do They Get Lonely?

    It’s not really a matter of them getting lonely, but them getting bored. Betta fish are actually one of the more intelligent fish you can purchase in the freshwater hobby. They can be taught tricks and make a great solo pet fish to keep when housed in an appropriate-sized aquarium.

    When kept in bowls and other small containers under 5 gallons, a betta fish can get bored due to lack of stimulation. Try to make your environment healthy for your betta by offering it a good amount of space, decorations, and interaction. If you purchase a larger aquarium, you can purchase tank mates who will get along with them and stimulate them more.

    Closing Thoughts

    A betta in the right tank lives 3 to 5 years and has real personality. They recognize their owners. They patrol their territory. They flare at their reflection and beg for food. That fish in a properly set up 5-gallon is genuinely interesting to keep. A betta in a bowl lives 6 months and suffers the whole time. The Fluval Spec V is the tank I recommend to anyone starting from scratch. It’s the right size, it has the right filtration, and it’s built to last. Get it set up, cycle it before you add the fish, dial the flow down with a sponge, and your betta will thrive.


    📘 Want to learn more? This article is part of our complete Betta Fish Guide. your ultimate resource for betta care, types, tank setup, feeding, tank mates, and more.

  • 7 Best Sponge Filters – Tested and Reviewed for Every Tank Type

    7 Best Sponge Filters – Tested and Reviewed for Every Tank Type

    Sponge filters are one of the most underappreciated tools in the hobby. simple, cheap, and brutally effective for biological filtration. I use them religiously in my quarantine tanks because they’re gentle on fish, easy to seed with beneficial bacteria from an established tank, and nearly impossible to break. They’re also my top recommendation for betta tanks and shrimp tanks where strong flow from a HOB can be a problem. After testing many brands over the years, there’s a clear difference in sponge density, fit, and airflow efficiency between the best and the rest.

    With over 25 years of experience in the aquarium hobby, I’ve assisted countless clients, hobbyists, and readers like you in setting up successful aquariums. I’ve personally tested these products in real world scenarios to determine the best sponge filter on the market.

    Expert Take

    Mark Valderrama, AquariumStoreDepot

    Sponge filters are the unsung hero of this hobby. I ran quarantine systems in every store I managed, and a seeded sponge filter was always in the tank before the fish arrived. You can pull a sponge from an established tank, drop it into a new setup, and have a cycled filter running in minutes. No canister startup ritual, no priming, no media cartridge to buy next month. The sponge IS the media. That biological colony lives in the foam permanently. For breeding tanks, fry tanks, shrimp tanks, and betta tanks, nothing beats it. The gentle flow won’t stress delicate fish or pull fry into an intake. Air-driven biological filtration is genuinely underrated by hobbyists who default to HOBs out of habit.

    The Top Picks

    Editor’s Choice

    Hikari Bacto Surge

    • Name brand
    • Highest quality
    Best Value

    Qanvee Filter

    • Chemical filtration
    • Great price
    Budget Option

    Uxcell Biochemical

    • Well priced
    • Hikari clone

    Let’s get straight to the point and talk about my top picks among the crowd of sponge filters available. So, among all the sponge filters I reviewed, the Hikari Bacto Surge is the clear top pick. It has the best song material and is of the highest quality. The Qanvee offers chemical filtration and a dual sponge setup at a great price. The Uxcell Biochemical is a clone of the Bacto Surge at a much cheaper price (though the sponge material isn’t the same quality. is which one is the best sponge filter? We have several category winners in this review.

    Mark’s Top Pick

    Hikari Bacto Surge for most hobbyists. The sponge quality is genuinely better, the double-sponge design lets you seed new tanks instantly by splitting, and Hikari’s foam holds a bacterial colony that cheap generics can’t match. If you’re running a breeding setup or a dedicated shrimp tank, this is the filter I’d put in every single time. If budget is the hard constraint, the Uxcell is the closest clone, but the foam density isn’t the same. You’ll notice the difference in how it maintains a cycle.

    Sponge Filter: Buy It or Skip It?

    BUY IF YOU HAVE:

    • A breeding or fry tank
    • A shrimp colony (cherry, neocaridina, caridina)
    • A betta tank or nano setup
    • A quarantine or hospital tank
    • A lightly stocked tank under 20 gallons
    • A need to seed a new tank fast

    SKIP IF YOU HAVE:

    • A heavily stocked display tank (needs real mechanical filtration)
    • A large cichlid or goldfish setup with heavy waste
    • An aquascape where aesthetics matter
    • Messy eaters that produce a high particle load

    The Candidates – A Quick Overview

    Below is a list of the best sponge filters you can purchase today. I will discuss the pros and cons of each filter below. 

    Image Name Features Link
    Editor’s Choice

    Hikari Bacto Surge Sponge Filter

    Hikari Bacto Surge Sponge Filter
    • Name Brand
    Buy On ChewyBuy On Amazon
    Best Value

    Qanvee Sponge Filter

    Qanvee Sponge Filter
    • Chemical Filtration
    • Price
    Click For Best PriceBuy On Amazon
    Budget Option

    Uxcell Biochemcial Sponge Filter

    Uxcell Biochemcial Sponge Filter
    • Best price for value
    Buy On Amazon
    Aquarium Technology Hydro-Sponge Filter Aquarium Technology Hydro-Sponge Filter
    • American Made
    Buy On Amazon
    AquaNet Sponge Filter AquaNet Sponge Filter
    • Chemical Filtration
    Buy On Amazon
    Huijukon Air Drive Sponge Filter Huijukon Air Drive Sponge Filter
    • Dual Sponges
    Buy On Amazon
    Huijukon Sponge Filter Kit Huijukon Sponge Filter Kit
    • Includes Air Pump
    Buy On Amazon

    The 7 Best Sponge Filters Reviewed

    Now that you know the 7 I considered and the top choices, let’s look at each one in detail to see what makes these products stand out. Starting with our top choice from Hikari! Check out the video from our YouTube Channel below.

    1. Hikari Bacto Surge – High Quality Name Brand Product

    Editor’s Choice


    Hikari Bacto Surge Sponge Filter

    The Best Sponge Filter

    With a name brand and high quality reputation, the Bacto Surge separates itself from the pack


    Buy On Chewy


    Buy On Amazon

    The Hikari Bacto Surge Sponge Filter is the name brand sponge filter on this list. Hikari is a highly quality name brand in the industry. They did not cheap out on this filter. The bacto surge filter uses a highly porous sponge filter that maximizes biological filtration for beneficial bacteria that is better than most filters on this list. Because of their construction, it is easy to modify these filters to make them more silent by inserting an air stone inside them.

    Like the Aquarium Technology filter, the Bacto Surge is more expensive than most on this list. Unlike the aquarium technology filter though, this one is more readily available in fish stores.

    Why the Hikari Bacto Surge Is Ranked #1

    It comes down to sponge density and pore size. The Bacto Surge foam has a finer, more consistent cell structure than any budget clone on this list. That translates directly to surface area, and surface area is where your beneficial bacteria live. More surface area means a larger, more stable bacterial colony. The Hikari is also a double-sponge design, which matters more than people realize: you can split the sponge when seeding a new tank by dropping one half into the new setup while the other half keeps your original tank cycled. No waiting. No bottled bacteria needed. That one feature alone makes it worth the price premium.

    Pros

    • Top grade foam material
    • Can be modified to be make more silent
    • Hikari Name

    Cons

    • Expensive
    • No Chemical filtration

    2. Qanvee Bio

    Best Value


    Qanvee Bio Sponge Filter

    Best Value

    Sponge and chemical filtration in one. Qanvee offers great value with their sponge filter


    Buy On Amazon


    Click For Best Price

    This style of sponge filter has really grown on me. This double sponge filter from Qanvee has a lot of great features. It has a media chamber that comes with surprisingly good ceramic media. This allows you to use the sponges as a mechanical and the ceramic media as your biological. You can also replace it with carbon and have a 3 stage filter. The telescoping lift tube allows you to quiet down the filter a little. That very welcome considering that you cannot modify these with an airstone. The color is more naturally being dark.

    Overall, this is one of the better buys for a sponge filter.

    Pros

    • Telescoping lift tube
    • Sponge filter can hold chemical media
    • Dual sponge filter

    Cons

    • Can’t be modified
    • Green color

    3. Uxcell Biochemical – A Cheap Hikari Clone

    Budget Option


    Uxcell Biochemcial Sponge Filter

    Budget Option

    A value priced version of the Hikari. This is great for folks looking for a cheap yet quality sponge filter


    Buy On Amazon

    Hikari and Aquarium Technology sponge filters are well constructed and great filtration units. However, they are pricey. What if you could get a similar unit for less? This is where Uxcell comes in with their sponge filter. This is among the cheapest sponge filters on our list and it is well made. It starts off with its superior foam, easily the best among all the value priced brands on our list. You get the advantages of modification with this filter. Dropping in an air stone in the bull eye makes them very quiet 

    The downfalls with this sponge filter? It doesn’t offer an option for chemical filtration and the weighted base is on the cheap. 

    Pros

    • Cheap!
    • Can be modified to be make more silent
    • Best foam among all value priced brands

    Cons

    • No Chemical filtration
    • Lower quality base

    4. Aquarium Technology Hydro – Top Grade


    Aquarium Technology Hydro-Sponge Filter

    An American made, high quality sponge filter. A great choice for those wanting to support a family business


    Buy On Amazon

    Aquarium Technology Hydro-Sponge Filters are one of the best sponge filters available on the market. Founded in 1991 , this Atlanta based company has continued to make high quality sponge filters that can work on small aquariums, large aquariums, and even ponds. It all starts with the patented foam and superior construction. The foam is unique to Aquarium Technologies with a ideal density for both mechanical and biological filtration. This density provides maximum surface area for beneficial bacteria. The construction is american made and expertly engineered with a free standing heavy base that locks securely in place. The base is also easy to take apart so you can accommodate in other spots.

    This construction allows for great flexibility on how you implement filtration. You can modify the install by inserting an air stone to make it extra quiet. If want to increase the flow on the sponge filter, you can power it with an aquarium powerhead instead of an air pump. 

    This well constructed product made by a family based business only has one downfall I can think of. It’s expensive compared to other sponge filters here.

    Why the Hikari Bacto Surge Is Ranked #1

    It comes down to sponge density and pore size. The Bacto Surge foam has a finer, more consistent cell structure than any budget clone on this list. That translates directly to surface area, and surface area is where your beneficial bacteria live. More surface area means a larger, more stable bacterial colony. The Hikari is also a double-sponge design, which matters more than people realize: you can split the sponge when seeding a new tank by dropping one half into the new setup while the other half keeps your original tank cycled. No waiting. No bottled bacteria needed. That one feature alone makes it worth the price premium.

    Pros

    • Top grade foam material
    • Can be modified to be make more silent
    • Larger models can operate via powerhead 

    Cons

    • Expensive
    • No Chemical filtration 

    5. AquaNeat – Dual BioMedia


    Aquaneat Sponge Filter

    A value priced combo sponge filter. Good for those looking for a cheap sponge filter with chemical filtration


    Buy On Amazon

    AquaNet’s Sponge Filter is a unique design as it features a dual media design. It comes with biomedia for these media chambers, but you can switch those out with chemical media and have a full 3 stage filtration unit. The lift tube can be turned 360 degrees as well.

    The suction cups are not the best quality. Several users complained that the unit tends to fall down. They also can’t be modified to be made quieter. 

    Pros

    • Dual biological media
    • Media chamber can hold chemical media
    • Lift tube can be turned 

    Cons

    • Suction cups not the best quality
    • Can’t be modified
    • Odd colors

    6. Huijukon – Dual BioMedia


    Huijukon Air Driven Sponge Filter

    Dual Sponges to make it easier for you clean and maintain. The Huijukon offers excellent value


    Buy On Amazon

    The Huijukon Air Driven Sponge Filter is a great value price sponge filter to consider. The dual sponge filter construction allows you to clean one sponge instead of both which keeps your bacterial losses less during maintenance. I also like the telescoping lift tube that gives you an extra 4 inches. It is small enough to fit in smaller tanks and provides a good amount of filtration.

    Because of its construction, it cannot be modified with an airstone to be made more silent. It also lacks chemical filtration. I’ve seen this sponge filter used a lot in quarantine and breeder tanks. It’s a great sponge filter to consider.

    Pros

    • Telescoping lift tube
    • Dual sponge filter

    Cons

    • Can’t be modified
    • No Chemical filtration

    7. Huijukon Kit – A Great Combo Value


    Huijukon Sponge Filter Kit

    A sponge filter that comes with an air pump


    Buy On Amazon

    Sponge filters are cheap, but somethings getting the air pump is also an added cost that can price you out. Fortunately Huijukon has a great package that addresses this. This combo kit includes an air pump, airline hose and air stone to get you start. To top it off, the sponge filter has a media chamber that allows you to convert the filter to a 3 stage unit.

    Like all suction cup style sponge filters, this cannot be modified. The air pump is also a dual outlet. Given the output of the air pump, I feel it was more appropriate for it to be a single outlet. I do like that it comes with all the accessories though. This is a well priced and competent package.

    Pros

    • Air Pump Included
    • Sponge filter can hold chemical media
    • Dual sponge filter

    Cons

    • Can’t be modified
    • Air pump should be single outlet

    What Is It?

    Sponge Filter Make Up

    A sponge filter is super simple. It literally is a piece of foam that filters your entire fish tank. Some people are taken aback that that really is all there is too. It’s simplicity has to do with it’s foam filter that doubles up as a mechanical and biological filtration unit. A well made sponge filter will be made of the following components.

    Sponge Filter Construction

    1. Foam

    The better the quality sponge filter, the better the foam. This matters a ton in your selection process! The sponge will house the beneficial bacteria that becomes your biological filtration. The best sponge will have more surface area and will have superior biological filtration capacity.

    2. Weighted Base

    This keeps your sponge filter from floating away or getting dragged around by your fish and current. The base can be anchored against gravel or aquarium rocks. Some aquarium sponge filters utilize a suction cup mount instead of a weighted base. Suction cup mounts can come in handy in bare bottom setups.

    3. Strainer and Bulls Eye

    The strainer keeps out detritus and food particles from filtering out of your sponge filter. The bulls eye allows you to connect your airline tubing directly to your sponge filter from your air pump. Some value priced sponge filters will not have this feature. They will have an airline hose connector that sticks out eternally from the filter for you to connect.

    4. Lift Tube

    This moves the water out of the sponge filter to the rest of your fish tank. On higher quality and larger sponge filters, you can use this tube to connect the sponge filter to an aquarium power head. This allows you to have a quieter and more powerful filter. Other sponge filters will have a lift tube that will extend higher so the bubbles made by your air pump will be less disruptive.

    What Are The Benefits Of Having One?

    Sponge filters have a lot going for them that make them super attractive for fish tank keepers.

    1. Easy To Use Biological Filtration

    Nothing is easier than a sponge filter. It just works. If you purchase a high quality sponge filter, you can filter large tanks. In fact, there are many local fish stores that use large high quality sponge filters to save on costs! Imagine that!

    2. Two In One Design

    A sponge filter can handle both mechanical and biological filtration. Any foam will do a great job at mechanically filtering your tank. A good foam will stand out in its biological filtration capacity. They are also very easy to adjust with an air pump. 

    3. They Are Gentle

    If you have fish tank setup with inhabitants that require low current, these are great filters to use. You won’t have to worry about a sponge filter sucking up your baby fish, small fish, aquatic amphibians like axolotls or ornamental shrimp like the Cherry Shrimp.

    4. Very Quick to Cycle

    Because of the flexibility of the foam filter it is very easy to always have a spare foam handy to cycle another tank in an emergency. I’ve also done quick cycles by soaking the sponge in bacteria in a bottle solutions Fritz Turbo Start and got other tanks running.

    5. They are CHEAP!

    Ya I know that should have probably been the 1st reason. I just feel that shouldn’t be your ONLY reason for getting them ?.

    What HOBs and Canisters Get Wrong

    High-flow HOBs and canisters are great filters for the right tank. But there are three things they consistently get wrong for sensitive setups, and sponge filters get them right every time.

    1. They’re not gentle enough for fry or shrimp. HOB intakes are powerful enough to pull in baby fish, shrimplets, and juvenile shrimp. Even with a pre-filter sponge on the intake, you’re adding a workaround to fix a problem that sponge filters never had in the first place.

    2. They destabilize during medication. Canister media and HOB cartridges absorb medications, reducing treatment effectiveness or wiping out your biological colony when you do a cartridge change mid-treatment. A sponge filter doesn’t care. No chemical media, no interference. You treat the tank, the sponge keeps cycling.

    3. They create a cartridge replacement cycle you don’t need. HOB manufacturers sell replacement cartridges because it’s a business model, not because the media needs replacing. A quality sponge filter breaks that cycle. The sponge is permanent. Rinse it in old tank water monthly and it keeps running. No upsell, no subscription, no planned obsolescence.

    What Are The Disadvantages?

    So we know why they are great. Let’s see where aquarium sponge filters fall short.

    1. They are Big and Ugly

    If you are setting up a simple fish tank or breeder tank looks won’t matter too much. However, these sponge filters are not going to look great if you are doing a grand aquascape or driftwood setup. They are also very large and difficult to hide. 

    2. No Chemical Filtration

    This is a big no go for me. I like having the ability to use chemical media in a pinch whenever it is needed. Not having that in a fish tank is a major issue for me. You can mitigate chemical filtration with lots of quality live plants, but then you will still have #1 to deal with above.

    3. Some Fish Will Try To Eat It

    Because a sponge filter is meant to be placed inside your fish tank, your fish are around it all day. It also traps food particles because it acts as a mechanical filter. If you have a fish like a Pleco or a large hungry aggressive fish they may decide to snack on your sponge filter thinking it would make a niece meal. 

    4. They A Loud And Splash Water Everywhere

    I’m demand a quiet display tank when I setup a fish tank. I don’t want noisy equipment and I quietly don’t want my significant other or hear about my client’s significant other complaining about how the noise the fish tank makes keeps them up at night. Quiet and media are the main reasons I go for high quality filters like canister filters. You will also need to factor in the noise level of the air pump you purchase.

    With their uplift tubes, many sponge filters will splash water everywhere at the top of your aquarium. Water droplets will get all over your aquarium canopy and the back of your walls. Again, I want quiet and clean in a display tank. 

    What Are The Ideal Uses?

    I hit you with a number of disadvantages of using a sponge filter. While they may not be the best choice for a display tank, let’s talk about what types of fish tank they are excellent choices for.

    1. Breeder Tanks

    One of the best applications for a sponge filter is for a breeder fish tank. Because sponger filters are gentle they do an amazing job filtering in a breeder tank. You won’t have to worry about losing your small fish fry to your aquarium filter intake. They deliver great piece of mind in these setups.

    2. Quarantine/Hospital Tanks

    Because sponge filters can be setup and cycled so quick and easy, they are great to use in a quarantine tank. A cycled sponge can provide all the beneficial bacteria and biological filtration capacity for a quarantine tank. Since they do not use chemical filtration you are free to use whatever medication you need without worrying about your media removing or absorbing the medication. The sponge filter is also gentle to your inhabitant keeping stress levels down. 

    3. Freshwater Shrimp Tanks

    Sponge filters are amazing in a Freshwater Shrimp Tank. Because of their makeup, you don’t have to worry about the filter sucking up your shrimp and their babies. Sponge filters will also grow biofilm on the surface of the foam making it food producing resource for your shrimp. It’s no wonder sponge filters are used so much in shrimp tanks!

    4. Betta Fish Tanks

    Betta Fish need calm waters. They also have long fins that can be sucked up by more powerful filters. Betta fish prefer light currents and will usually be housed in smaller tanks. This makes a sponge filter an attractive filtration choice for them.

    5. Small Fish Tanks

    Any aquarium 20 gallons and under is ideal for a sponge filter. This makes maintainance and filteration easy. A good quality sponge filter will have plently of surface area to support the small fish appropriate for a smaller fish tank. 

    How To Make It Quieter

    So I kept mentioning that sponge filters can be modified to be made quieter. This is true for models with weighted bases like the Uxcell, Aquarium Technologies, and Hikari sponge filters. All you need to do is take it apart and insert an air stone in the bull eye. This video by BairCichlids shows you how to make the modification. Once done, your sponge filter will be more quiet and more effective in oxygen delivery.

    Maintenance (How To Clean)

    Sponge filters are super easy to maintain. Because the main piece of the filtration unit is the sponge itself, it is a permanent media. This ends up saving you media on disposable media and mechanical filtration cartridge that you might spend otherwise with an Aquarium Power Filter. The main thing you have to maintain is the sponge. Every month, take it out of of your fish tank and wash it in your aquarium water. DO NOT use tap water when cleaning a sponge filter. Doing so will kill the beneficial bacteria on the sponge.

    The main thing you have to be careful of when removing your sponge is all the particles trapped in the sponge getting released. It is a great idea to take our your sponge when doing a water change so you can get what escapes out of the sponge cleaned out. I would recommend that you get a cover on the sponge when pulling it out. You can use a fish bag or a zip-lock bag when doing this. 

    Once you have your sponge and some of your aquarium water in a separate container put the sponge that and squeeze it several times. This will release all the particles out of the sponge. Replace the water in the container several times only you have fairly clear water after squeezing the sponge. 

    Tips and Tricks

    Here are some more tips and tricks regarding sponge filters.

    Your Aquarium Air Pump Matters A Lot!

    Aquarium air pumps are a huge deal when it comes to the effectiveness of your sponge filter. An air pump is the engine of your sponge filter. You do not want to cheap out on a low quality air pump. Check out our Best Aquarium Air Pump post for details on the best out there. For a value priced air pump, I would recommend the Tetra Whisper. Tetra is best known for their air pump models and the Whisper is a great buy to get your going.

    Consider One For Power Back Up Purposes

    Aquarium power outages suck. They are the #2 tank killer in our hobby. A sponge filter and battery powered air pump can save your livestock in a pitch. If you aren’t in the market for a sponge filter as your main aquarium filter, consider it for your power outage plan. Just have a sponge cycled and ready to go.

    The Material Matters

    The better the sponge material the better the surface area for your beneficial bacteria. All the sponge filters here were selected for a reason.

    FAQS

    What Type Should I Buy?

    The best type of sponge filter is one that has a lot of surface area to house beneficial bacteria. The HHikari Bacto Surge excels by having more surface area than cheaper generic sponge filters available in the hobby.

    Are They Worth It?

    Yes – sponge filters are worth it when they are used in the right conditions. They are best utilized in freshwater shrimp tanks, for raising fry, and for small fish tanks. They also work great in quarantine tanks. While they can be used in display tanks, the general practice is that they are not as there are better filtration units available such as power filters and canisters filters.

    How Often Should You Change It?

    Hopefully never. Sponge filters are meant to be used indefinitely as the sponge houses your bacteria. If you threw away the sponge, you would lose all the bacteria housed in it. It’s best to wash your sponge filter in your aquarium water when it needs to be cleaned, but you should avoid replacing it so you don’t disrupt your aquarium’s biological ecosystem.

    Do They Provide Oxygen?

    Yes, sponge filters provide oxygen in aquariums. In fact, they are one of the best filters to do this because they are hooked to air pumps and change a lot of surface agitation. They can also still provide oxygen during power outages as they can be run with battery powered air pumps when other filters would be offline.

    Closing Thoughts

    Sponge filters are cheap aquarium filters, get the job done, and are very easy to use. It’s not wonder they are one of the most popular filtration units on the market. I hope today’s post helped you make an informed decision on what sponge filter to buy. If you have any questions, please leave them in the comment below. Thanks for reading!

    The best filter for a breeding tank, a shrimp colony, or a quarantine setup isn’t the one with the most features. It’s the one that does the job without getting in the way. That’s always been the sponge filter.


    🔧 Want to learn more? This article is part of our complete Aquarium Equipment & Gear Guide. your ultimate resource for filters, heaters, lights, pumps, tanks, and more.

  • 8 Best Aquarium Decorations

    8 Best Aquarium Decorations

    Most hobbyists pick aquarium decorations based on how they look. That’s backwards. After 25 years in this hobby and managing fish stores, I’ve watched fish pace, hide compulsively, and fight constantly in tanks that looked great on Instagram but were functionally empty. Decorations aren’t just aesthetics. They’re behavioral infrastructure. The right decoration reduces stress, establishes territory, enables breeding behavior, and gives your fish something to actually do. The wrong ones just take up swimming space.

    A bare tank is stressful for fish, but an overcrowded one is worse.

    EXPERT TAKE | MARK VALDERRAMA

    In my tanks, driftwood, rocks, and caves always come before novelty decorations. I’ve set up hundreds of tanks over the years and the pattern is consistent: fish with proper hiding spots are less skittish, eat better, and show more natural behavior. Caves matter for cichlids and bettas especially. I’ve seen male bettas display properly only after a cave or dense plant cover gave them a home base to defend. The plastic castle might look fun, but if it has sharp molding seams and no functional hiding chamber, it’s doing nothing for the fish. What I actually put in most of my tanks: driftwood or cork bark for structure, a cave or terracotta pot for territory, and soft plants (live or silk) for cover. That combination works for almost every community setup I’ve built.

    What People Get Wrong About Aquarium Decorations

    The number one mistake I see in customer tanks: decorations chosen entirely for looks, with zero thought given to what the fish actually needs. Plastic castles and skull ornaments show up constantly. They photograph well. But many have sharp molding seams along the interior edges that tear fins on bettas and other slow-moving fish. I’ve pulled decorations out of customer tanks and found shredded fins within a week of installation. If you run your finger along the inside of a decoration and feel resistance or roughness, so does your fish.

    The second mistake: overcrowding. A tank stuffed with decorations leaves no open swimming lanes. Fish that need to swim in groups, like tetras and danios, get compressed into corners. Territorial fish have nowhere to establish boundaries, so aggression escalates. My rule for every new hobbyist: fill no more than 40% of your tank volume with hardscape and decorations. The other 60% belongs to the fish.

    Third mistake: buying painted decorations from unknown brands. Cheap painted resin leaches dye into the water, especially as the paint fades from light exposure. Fish-safe resin is cured and non-leaching. If the product listing doesn’t specifically say “fish safe” or “aquarium grade resin,” skip it.

    The Biggest Mistake Decoration Buyers Make

    Prioritizing appearance over function. I’ve seen it hundreds of times: someone spends $80 decorating their tank with colorful novelty pieces and the fish are stressed and hiding constantly because there are no real territories, no hiding spots fish actually want to use, and no visual breaks in the open water. The fish needs the decoration more than you need the visual. When you finally add one good cave or a piece of real structure and watch a territorial fish calm down immediately, claim it, and start acting normal, the lesson hits. Decorations that look good but don’t function are a waste of space and money.

    WHY THIS RANKING

    I ranked these on five factors: (1) functional value for fish behavior, (2) fish safety with no sharp edges or toxic materials, (3) visual quality that looks natural or high-quality, (4) durability without fading or leaching, and (5) value relative to behavioral and visual benefit. Aesthetic appeal alone is not a ranking criterion. These decorations earn their spot because fish actually benefit from them.

    BUY OR SKIP?

    Good fit if: You want decorations that actually benefit your fish, not just your photos. You keep territorial species (cichlids, bettas, gobies) that need caves and boundary markers. You want a natural-looking scape without the chemistry complications of real driftwood.

    Skip the novelty items if: You keep schooling fish that need open water, you have delicate-finned fish like bettas or angelfish that can’t afford sharp edges, or you’re building a serious biotope where authenticity matters. In those cases, invest in real hardscape, live plants, or species-specific decor rather than novelty ornaments.

    Finding Great Aquarium Decorations

    Below is a table of the candidates. I’ve looked at both artificial and natural aquarium decorations. This list focuses primarily on artificial decorations. If you’re looking for real aquarium stones, plants, or driftwood, check the links below:

    In a hurry? I recommend Current USA Manzanita or their Aquascaping bundle line! Use Coupon Code ASD15 At Checkout!

    Picture Name Features Link
    Editor’s Choice

    Current USA Black Manzanita

    Current USA Black Manzanita

    • Artificial
    • Life-like
    Click For Best PriceBuy On SWA
    Best Value

    Current USA Seiryu Stones

    Current USA Seiryu Stones

    • Artificial
    • Life-like
    Click For Best PriceBuy On Amazon
    Budget Option

    Current USA Fountain Grass

    Current USA Fountain Grass

    • Artificial
    • Life-like
    Click For Best PriceBuy On Amazon
    Penn-Plex SpongeBob Aquarium Ornament

    Penn-Plex SpongeBob Aquarium Ornament

    • Artificial
    • Resin
    Buy On PetcoBuy On Amazon
    Underwater Galleries Cichlid Stones

    Underwater Galleries Cichlid Stones

    • Artificial
    • Ceramic
    Buy On Amazon
    SLOCME Aquarium Ornaments Resin Castle Decorations

    SLOCME Aquarium Ornaments Resin Castle Decorations

    • Artificial
    • Resin
    Buy On Amazon
    Estes Gravel Malaysian Driftwood

    Estes Gravel Malaysian Driftwood

    • Natural
    • Driftwood
    Buy On Amazon
    Marimo Moss Balls

    Marimo Moss Balls

    • Natural
    • Live Plant
    Buy On Amazon
    CousDUoBe Aquarium Decorations

    CousDUoBe Aquarium Decorations

    • Artificial
    • Plastic
    Buy On Amazon

    The 8 Best Aquarium Decorations (Reviewed)

    Let’s get into the details on each decoration. I’ll break down what works, what doesn’t, and who each one is actually for.

    1. Current USA Manzanita Wood

    This is the decoration I recommend most often for hobbyists who want a natural-looking scape without the headaches of real driftwood. The Black Manzanita is 100% artificial but looks so convincing that it works in planted tanks and display setups where you’d normally use real wood. The branching structure gives fish actual navigation space: they swim through, around, and behind it, which is what you want from any piece of hardscape.

    The real advantage over actual driftwood comes in water chemistry. This piece releases zero tannins, doesn’t affect pH, and doesn’t require a week of soaking before use. That makes it the right choice for African cichlid tanks or any setup where you need higher pH or harder water. Real driftwood would tank your chemistry. This one won’t.

    Current USA built this line consulting with aquascapers and provides templates and videos to help you design with it. Ready to go out of the box. No soaking. No floating. No chemistry effects.

    Pros and Cons

    • Unique, natural-looking structure with real navigational value for fish
    • No tannins, no water chemistry effects
    • Works in high-pH setups where real driftwood can’t go
    • Ready to use out of the box
    • Limited variety compared to real wood

    2. Current USA Seiryu Stones

    I used to be a strong advocate for natural stones over artificial. Then Current USA’s Seiryu Stones changed my mind. These artificial rocks have the same exotic porous look that makes real Seiryu stone popular in aquascaping and bonsai displays. The resemblance is good enough that you can’t tell them apart in a tank photo. The real win is weight: real Seiryu stone is heavy enough to crack aquarium glass if it falls. These won’t.

    Pre-washed and ready to go. No alteration to water chemistry. If you want to put Seiryu stones in an African cichlid tank where real rock would raise your pH, now you can. The aquascaping bundles from Current USA make it easy for beginners to get a coherent scape without guessing at layout.

    The only real limitation is variety. Real rocks come in unpredictable, interesting shapes. These are templated. For beginners that’s actually a benefit, since templated pieces make layout easier. For advanced aquascapers who want the organic randomness of real stone, you might want both.

    Pros and Cons

    • Life-like appearance, indistinguishable in photos
    • Lightweight with no glass-cracking risk
    • No water chemistry effects
    • Limited variety compared to real stone

    3. Current USA Fountain Head Grass

    Budget Option

    Current USA Fountain Grass

    Use Coupon Code ASD15 At Checkout!

    Current USA offers budget-conscious, life-like artificial plants that deliver the aquascaper look without the maintenance.


    Click For Best Price


    Buy On Amazon

    Most artificial plants look obviously fake. Current USA solved this problem. Their Fountain Grass line looks like taller background plants such as Vallisneria, without requiring any of the maintenance. No trimming. No fertilizer. No CO2. For hobbyists who want background plant coverage without a planted tank setup, this is the answer.

    Affordable, non-toxic, made in the USA. The catch: artificial plants provide cover but don’t compete with algae the way live plants do. If algae control is a priority, live plants or a dedicated algae management approach is still necessary. But for pure visual impact and fish cover at a budget price, these are hard to beat.

    Pros and Cons

    • Life-like appearance unlike most artificial plants
    • Easy to maintain, works in any tank
    • Made in the USA
    • Won’t compete with algae like live plants
    • Can get expensive if you need large quantities

    4. Penn-Plax SpongeBob Ornament

    Budget Option

    SpongeBob Aquarium Ornament

    Budget Option

    A well-priced, charming, and functional shelter for small fish


    Buy On Petco


    Buy On Amazon

    This one is for the kids’ tanks and the aquarists who want something fun. It’s officially licensed, made from 100% water-safe resin, and actually functions as a shelter with multiple openings for fish to explore. At 5 inches tall, it fits without overwhelming smaller tanks. The door opening is large enough for most small-to-medium fish.

    The word of caution: check the interior edges when it arrives. Some edges can be sharp, and that matters for bettas and fancy goldfish. Run your finger through the opening before it goes in the tank. If you feel roughness, give it a light sanding. Otherwise, this is a solid novelty ornament that also provides actual hiding value for small fish.

    Pros and Cons

    • Durable, water-safe resin
    • Multiple entrances for fish to explore
    • Officially licensed, fun aesthetic
    • Too small for larger fish
    • Some interior edges need checking before use

    5. Underwater Galleries Cichlid Stones


    Underwater Galleries Cichlid Stones

    A practical decoration for cichlids and bettas. Provides private territory for aggressive or shy fish.


    Buy On Amazon

    These are the decoration I recommend for anyone keeping cichlids or bettas who need structured territory. The hollow ceramic chambers give territorial fish a real home to claim and defend. That matters more than most people realize: cichlids without territory escalate aggression toward tankmates. A fish with a cave it has claimed is a calmer fish.

    Made from natural treated ceramic with a pre-coated gravel base so they don’t slide around. Lightweight enough that they won’t crack your glass if repositioned. Each set comes with both small and large stones. Not every species will use them immediately, but for the fish that need this kind of structure, they make a visible difference in behavior within days of introduction.

    Pros and Cons

    • Functional caves that territorial fish actually use
    • Lightweight ceramic, won’t scratch glass
    • Precoated gravel base prevents sliding
    • Not all species will use them
    • Color can fade over time

    6. SLOCME Resin Castle Decoration


    SLOCME Aquarium Ornaments

    Made of water-safe resin. Won’t fade over time and provides nooks and crannies for fish to explore.


    Buy On Amazon

    A classic novelty castle ornament done right. The SLOCME castle is made from 100% water-safe, eco-friendly resin that won’t fade or leach into the water over time. At 8″ x 3″ x 5.8″, it provides multiple openings for fish to explore. The detailing is solid, with precision-etched stonework that looks genuinely decorative rather than cheap.

    The bottom edge can have some sharp spots, so check it before installation. It works best in tanks 20 gallons and larger where it won’t dominate the space. For a kids’ tank or a family aquarium where fun aesthetic is the goal alongside fish wellbeing, this gets the job done without compromising safety.

    Pros and Cons

    • Detailed, sophisticated design
    • Sturdy eco-friendly resin
    • Multiple openings for fish exploration
    • Check bottom edges before use
    • Too small for larger fish species

    7. Estes Gravel Malaysian Driftwood


    Estes Gravel Malaysian Driftwood

    A budget-friendly real driftwood option that comes in multiple size ranges.


    Buy On Amazon

    Real driftwood is the best structural decoration available for most freshwater tanks, and Malaysian driftwood from Estes is the budget-accessible entry point. The natural brown coloring works in any community or biotope setup, and it comes in small, medium, and large sizes so you can match it to your tank properly.

    This wood releases tannins that lower pH and tint the water a natural tea-brown color. For soft-water fish like tetras, discus, and South American dwarf cichlids, that chemistry shift is actually beneficial. For hard-water fish or pristine display tanks where water clarity is a priority, use the artificial options instead.

    Soak it thoroughly in warm water before adding to the tank to remove surface dust. Individual pieces vary in shape from product photos, which is the nature of real wood. If you need predictable shapes, use the artificial options. If you want genuine biological and behavioral value for your fish, real driftwood delivers.

    Pros and Cons

    • Natural wood that fish genuinely interact with
    • Tannins benefit soft-water species
    • Available in multiple sizes
    • Tints water brown (a deal-breaker for some setups)
    • Individual pieces differ from product photos

    8. Marimo Moss Balls

    Marimo Moss Balls are one of the most underrated decorations in the hobby. They’re technically live plants (a type of algae), but they require no special Planted Tank Light, no Aquarium Fertilizer, and no CO2 System to thrive. Drop them in any freshwater tank and they work. They absorb nitrogen and phosphates from the water, provide grazing for shrimp and snails, and add a natural, calming visual element that works with almost any aquascape style.

    They grow slowly and can live for years. You can roll them around periodically to maintain their round shape. The main issues are quality control from some sellers and the potential for moss fragments to clog filters. Get them from a reputable source and give them a quick rinse before adding to the tank.

    Pros and Cons

    • No special lighting, fertilizer, or CO2 needed
    • Absorbs nitrogen and phosphates from the water
    • Food source for shrimp and snails
    • Quality varies by seller
    • Moss fragments can clog filters

    My Recommendation

    MARK’S TOP PICK

    The Current USA Black Manzanita is my top recommendation for most freshwater setups. I’ve used it in multiple display tanks and it holds up better than real wood in one specific situation: tanks that need higher pH or harder water, like African cichlid setups, where real driftwood would tank your chemistry. It’s also ready to go out of the box with no soaking, no tannin leach, and no floating issues. For the average hobbyist who wants the look of a natural scape without the hassle, this is the one I’d buy first.

    WHAT MOST PEOPLE MISS

    Most decoration reviews skip the safety check entirely. Before any new decoration goes in your tank, run your finger along the interior edges. If you feel roughness or resistance, so does your fish’s fin tissue. Cheap painted resin is another overlooked hazard: the paint can leach color into the water as it fades under aquarium lighting, especially in tanks with strong UV output. Always verify the product specifically says “aquarium safe resin” or “fish safe.” And watch scale: a decoration that photographs well at 8 inches may overwhelm a 20-gallon or disappear completely in a 75-gallon. Measure before you buy.

    Buying Guide

    Aquarium decorations come in all shapes, sizes, and materials. When you’re shopping, keep these factors in mind.

    Tank Size

    Cramming too many decorations into a small tank looks cluttered and robs your fish of swimming space. Fish need room to move. My rule: no more than 40% of tank volume occupied by hardscape and decorations. For a small tank (10-20 gallons), one or two meaningful pieces is enough. Spread decoration evenly rather than clustering everything in one area.

    For height balance: aim for a rough 2:3 ratio of tall to mid-height structures. Two tall structures balanced with two or three medium pieces keeps the scape from feeling top-heavy or unnatural.

    Natural vs Non-natural

    Natural decorations (real driftwood, stones, live plants) serve double duty as fish habitat. They look more credible in a display tank and often benefit water chemistry or fish behavior directly. Non-natural decorations (novelty ornaments, bright plastic plants) are easier to maintain and can be fine in kids’ tanks or setups where function is already covered by other hardscape.

    The choice doesn’t have to be either/or. Many great tanks mix natural structure with one novelty piece for personality. What you’re avoiding is a tank built entirely of novelty items with nothing that actually serves the fish.

    Plants

    Live plants are the best decoration for most freshwater setups. They oxygenate the water, remove ammonia, compete with algae, and give fish cover that feels natural to them. The tradeoff is maintenance: trimming, fertilizing, light management. Artificial plants skip the maintenance but lose those biological benefits. Silk plants are the best compromise: soft enough to be safe for fin-delicate fish, look better than plastic, and require nothing from you. Avoid stiff plastic plants with hard or pointed leaf edges, especially in betta tanks.

    Lighting

    Aquarium lighting affects how your decorations look and how your tank functions. Match your light spectrum to your fish and plants. Most freshwater setups do well with a 6,500K “daylight” spectrum. Deeper saltwater setups use higher Kelvin ratings to simulate depth. LED technology has made this easier than ever: most quality aquarium LEDs let you adjust spectrum and intensity. Don’t overpower the tank with light intensity. Too much light drives algae growth and stresses fish that prefer dimmer conditions.

    FAQ

    Can I use any rock in my tank?

    No. The right rock depends on your water chemistry goals. For freshwater, shale, slate, basalt, quartz, and lava rocks are safe choices. Avoid calcium-rich rocks like limestone: they harden the water and raise pH, which is wrong for most soft-water species. For saltwater tanks, reef rock or man-made “Real Reef Rock” is the standard. Whatever you use, wash it thoroughly before adding to the tank.

    Is resin safe for fish tanks?

    Fully cured aquarium-grade resin is safe. It won’t leach chemicals or toxins into the water. The key word is “aquarium grade” or “fish safe.” Generic or cheaply painted resin products are a different story: if the product listing doesn’t specifically confirm fish-safe materials, skip it. Painted decorations from unknown brands can leach dye as the paint fades under aquarium lighting over months.

    Can you put any wood in a fish tank?

    No. Untreated wood rots in water, degrades water chemistry, and can harm fish. Only use wood that is prepared specifically for aquarium use. Driftwood is the standard choice. Malaysian driftwood, spiderwood, and mopani are all commonly used and safe. If you collect wood from outside, it needs extensive drying, cleaning, and boiling before it goes anywhere near your tank.

    How can I make tank decorations at home?

    You can use clay, ceramics, and certain food-safe plastics. Nothing painted, nothing with chemical coatings, nothing that hasn’t been thoroughly cleaned. Terra cotta pots are one of the best DIY options: cheap, widely available, safe, and loved by cave-dwelling fish like cichlids and bettas. Clean everything thoroughly before adding it to the tank.

    Can you put regular toys in a fish tank?

    Sometimes. Non-toxic, food-safe plastics are generally safe in aquariums. Avoid anything painted, adhesive-covered, or made of degradable materials. Legos are a common example of something that works fine. When in doubt, coat with aquarium-safe silicone before adding to the tank. And run your finger over any toy before adding it: if you feel sharp edges, your fish will too.

    How can I make my fish tank look better?

    Start with function. A tank that gives your fish proper hiding spots, territory, and cover looks natural because it is natural. The best-looking aquariums I’ve built in 25 years are the most functionally designed ones. Get the structure right first: a piece of driftwood or hardscape, some plant cover, a cave if you have territorial species. The aesthetics follow from the function.

    Closing Thoughts

    Here’s the truth about aquarium decorations that most reviews skip: function comes before form. Every piece of hardscape, every cave, every plant should earn its place in the tank by doing something for the fish. Hiding spots reduce stress. Territory markers reduce aggression. Open swimming lanes let schooling fish behave naturally. A decoration that doesn’t do at least one of those things is visual noise that’s taking up space your fish need.

    That doesn’t mean your tank can’t look great. It absolutely can. The best-looking tanks I’ve built over 25 years are also the most functionally designed ones. Natural hardscape that also functions as territory, cover, and behavioral enrichment. That’s the goal.

    A decoration that looks great but stresses your fish isn’t a decoration. It’s a liability.

    The Current USA Manzanita and Seiryu Stone line are my go-to picks because they nail both sides of that equation. Beautiful enough for a display tank, functional enough to benefit the fish. Underwater Galleries Cichlid Stones are the best choice for territorial species that need structured hiding spots. And if you’re just starting out, a simple piece of driftwood and a few silk plants will do more for your fish’s wellbeing than a shelf full of novelty ornaments.

    When you’re ready to add quality fish to a well-decorated tank, check out Flip Aquatics (flipaquatics.com) and Dan’s Fish (dansfish.com). Two sources I trust for healthy livestock. Start with function. The aesthetics will follow.


    🔧 Want to learn more? This article is part of our complete Aquarium Equipment & Gear Guide, your ultimate resource for filters, heaters, lights, pumps, tanks, and more.

  • 11 Best Canister Filters – Tested & Reviewed After 25 Years in the Hobby

    11 Best Canister Filters – Tested & Reviewed After 25 Years in the Hobby

    Canister filters are my go-to recommendation for anyone running a larger tank or a heavily stocked system. they offer more biological and mechanical filtration capacity than hang-on-back filters, and when set up correctly they run quietly and efficiently for years. I’ve personally tested 11 canister filter models over 25 years, and this is exactly what I found: which ones actually hold up, which ones disappoint, and which one I’d put on my own tank today. This guide covers the best canister filters I’ve used and what actually separates the good from the great.

    ✍ Expert Take | Mark Valderrama, AquariumStoreDepot

    After 25 years running aquarium stores and keeping everything from nano planted tanks to 300-gallon (1,136 L) predator builds, I’ve run nearly every canister filter brand on the market. The difference between a good canister and a great one isn’t the GPH rating on the box. It’s how the filter performs after 6 months of real use: noise floor, priming reliability, and whether your biological media survives your cleaning routine. Budget filters can move water. Premium filters move water consistently, quietly, and without punishing you every time you open the canister. That gap matters more than most buyers realize until they’ve already made the wrong call.

    🔬 How I Tested

    Each filter was run empty of media in a 30-gallon (114 L) watering trough for a minimum of 72 hours before noise measurements were taken; that eliminates break-in vibration as a variable. For decibel readings I used the Decibel X app on my iPhone 14, phone flat on the surface, right next to the filter housing, same distance every time. I also ran the top six units on stocked tanks in my fishroom, ranging from a lightly loaded 55-gallon (208 L) community setup to a heavily stocked 125-gallon (473 L) South American cichlid tank, for at least 60 days each to catch real-world flow drop and maintenance friction that a short bench test won’t reveal.

    The Top Picks

    Editor’s Choice!

    OASE Biomaster Thermo

    • Integrated Heater
    • Easy Maintenance
    • The Pro’s Choice
    Best Value

    Fluval Canister Filter

    • Great Brand
    • Great Value
    Budget Option

    SunSun UV Canister Filter

    • Great Price
    • UV Sterilizer

    Let’s look at my top 3 picks for those in a hurry. There is no doubt in my mind that the OASE Biomaster Thermo is the best canister filter you can buy today. It’s German-designed with an integrated heater. It is the easiest filter to maintain due to its quick release mechanical filtration section. The Fluval canister filter continues to be the best value buy with its solid name brand and reputation. For budgets, the SunSun offers a great price with a UV sterilizer that will combat green water in freshwater aquariums.

    The Candidates – A Quick Comparison

    I narrowed this list down from 20+ units I’ve run over the years. Some got cut for noise issues. Some for build quality failures I caught in the field. A few are here because they genuinely surprised me. Canister filters are not a fun purchase to repeat, so the goal here is to help you get it right the first time.

    Below is my list of the best canister filters in the industry:

    Product Average Score Noise Engineering Quality Brand Features Price
    OASE Biomaster 9.1 9.5 10.0 9.0 10.0 7.0
    Fluval 8.6 7.0 10.0 10.0 8.0 8.0
    Sun Sun UV 5.8 2.0 5.0 5.0 7.0 10.0
    Fzone Canister 5.4 3.0 5.0 5.0 8.0 6.0
    SICCE Whale 8.2 10.0 10.0 9.0 6.0 6.0
    Eheim Classic 7.6 6.0 10.0 10.0 5.0 7.0
    Eheim Pro 7.5 7.0 10.0 10.0 7.0 5.0
    Fluval FX 7.8 7.0 10.0 10.0 8.0 4.0
    UNS Delta 6.4 4.0 7.0 7.0 7.0 7.0
    Marineland Mangiflow 6.8 4.0 9.0 8.0 6.0 7.0
    Penn Plex Cascade 7.0 5.0 8.0 7.0 6.0 9.0

    What People Get Wrong About Canister Filters

    The number one mistake I see is buying a canister filter based on the advertised GPH rating. That number is measured with the filter sitting on a flat surface, pumping water horizontally in a lab. The moment you put that filter under your stand and ask it to push water up 36 inches (91 cm) to your tank rim, that GPH drops, sometimes by 30 to 40 percent. Every foot of head height costs you flow. A filter rated at 400 GPH at zero head height might be delivering 260 GPH by the time the water reaches your tank. Always check the manufacturer’s head pressure curve, not the headline number. If they don’t publish one, that’s already a red flag.

    The second mistake is sizing the filter to match your tank exactly. I’ve heard the “10x turnover” rule repeated so many times I’ve stopped counting, and it’s a starting point at best. For a lightly stocked, heavily planted tank it might be fine. For a cichlid tank, a goldfish setup, or anything with messy eaters, you want more headroom, not less. I always recommend going one size up from what the packaging says is rated for your tank volume. The cost difference between filter sizes is usually $20 to $40. The cost of a crashed tank from under-filtration is a lot higher than that.

    The third mistake, and honestly it still gets me, is watching people nuke their bio media during a cleaning. I’ve had customers come in panicked because their tank crashed out of nowhere, and when I walked them back through what they did, it was always the same thing: they pulled out the ceramic rings, rinsed them under the tap, put everything back, and called it good. Tap water. That’s all it takes to wipe out the colony you spent months building. If you’re going to clean your bio media at all (most of the time you shouldn’t), do it in a bucket of water you just pulled from the tank during a water change. Gentle agitation only. The mechanical stuff you swap out on a schedule. The biological stuff you mostly leave alone and trust.

    The 11 Top Selections In-Depth

    1. Oase Biomaster. Top pick
    2. Fluval Canister Filter . Reader’s Choice
    3. SunSun Pro Canister Filter . Best Budget
    4. FZone – ADA Clone
    5. SICCE Whale – Italian Made
    6. Eheim Classic – The O.G.
    7. Eheim Pro – German Made
    8. Fluval FX – Highest Flow Rate
    9. UNS Delta – Hang On Back
    10. Marineland Magniflow – Successor To Magnum 350
    11. Penn Plax Cascade – Family Owned Business

    You have the top picks and the list of all the filters I’m reviewing. Let’s look into each one in-depth below – starting with my favorite from OASE.

    1. OASE Indoor Aquatics Biomaster Thermo

    Are you simply looking for the best canister filter for your hard-earned money? If so, OASE Indoor Aquatics canister filter is the very best you can find today, end of the story, full stop. Just go buy it now and stop reading…

    OASE Indoor Aquatics is a brand that has been quietly getting buzz among planted tank hobbyists. It is a very high quality canister filter that is made by German Engineering. OASE itself has been around since 1949, but they haven’t been in the US that long, debuting in 1994. This is a high end canister filter with a unique feature as it is the only canister filter that can hold a heater inside the canister.

    The pre-filter is the feature I keep coming back to. It pulls out clean, no mess, no water dripping on your cabinet floor. It’s foam-based, so you’re rinsing and reusing it instead of buying disposable pads every month. There’s a flow regulator on the unit so you can dial back output for a planted tank without swapping hardware. And priming is dead simple. Push a button, done. No siphoning by mouth, no wrestling with a hand pump.

    The staging works exactly right: mechanical first, then biological, no shortcuts. That matters more than it sounds. Filters that let water bypass stages are the ones where you end up with detritus sitting on your bio media, and your biological colony suffers for it. The Biomaster gets this right every time.

    There is a standard BioMaster canister filter, but I feel that the Thermo model really stands out with its integrated heater. The heater fits right into the filter. This keeps your heater out of your display tank. This takes that ugly heater out of your display and keeps you with a proven heater technology versus an inline that can be hit or miss. The heaters themselves are of excellent quality and backed by 3 year warranties.

    The product we tested was the OASE Biomaster 250. In our testing, it ended up being the second most silent canister filter that we tested. The pre-filter option is one of a kind and stands out among all others reviewed and tested. The media capacity is above average. Not amazing like the FX of Eheim pros, but still at the higher end. The specs of their entire line-up is in the table below:

    Specs BioMaster Thermo
    250
    BioMaster Thermo
    350
    BioMaster Thermo
    600
    BioMaster Thermo
    850
    Dimensions (in.) 9.4 x 9.4 x 14.6 9.4 x 9.4 x 16.7 9.4 x 9.4 x 19 9.4 x 9.4 x 22
    Dimensions (mm) 240 x 240 x 370 240 x 240 x 425 240 x 240 x 480 240 x 240 x 560
    Rated voltage 120V / 60 Hz
    Power consumption, filter 15 watts 16 watts 23 watts 25 watts
    Power cord length 6 ft. (1.8 m)
    Net weight 9 lbs. (4 kg) 10 lbs. (4.5 kg) 11 lbs. (5 kg) 12 lbs. (5.4 kg)
    Maximum flow rate 250 gph (900 l/h) 300 gph (1100 l/h) 350 gph (1250 l/h) 400 gph (1500 l/h)
    Maximum Head Height 5.6 ft. (1.7 m) 5.9 ft. (1.8 m) 6.6 ft. (2 m) 7.4 ft. (2.3 m)
    Connection fits 5/8″ ID (16 mm)
    Tubing 5/8 in. ID x 13 ft. (16/22 mm x 4 m)
    Filter Volume 1.2 gal (4.4 L) 1.5 gal (5.6 L) 1.8 gal (6.8 L) 2.1 gal (6.8 L)
    Pre-filter Volume 0.11 gal (0.4 L) 0.13 gal (0.5 L) 0.16 gal (0.6 L)
    Suitable for aquariums up to max. 66 gal (250 L) 90 gal (350 L) 160 gal (600 L) 225 gal (850 L)

    It costs more than a Fluval or Eheim. That’s real money, and I’m not going to pretend otherwise. But after years of running both, the OASE wins on convenience, and convenience is what keeps you on a maintenance schedule. You won’t find it at a local fish store; order it online. The availability issue is frustrating but not a dealbreaker.

    I’ll be straight with you: the OASE Biomaster is what I personally run on my own tanks. I’ve used Fluvals for years and still think they’re excellent filters, and Eheim builds some of the most reliable canisters ever made. But the Biomaster wins on convenience. The pre-filter basket pops off without shutting down the whole unit, which means a quick mechanical media rinse takes two minutes instead of twenty. After 25 years of maintaining tanks, that time difference adds up fast. For anyone who actually wants to stay on top of maintenance rather than dreading it, that convenience factor is what puts the OASE over the top for me.

    Pros

    • Has a chamber to hold heaters
    • No Mess removal of mechanical filtration
    • Second quietest filter tested
    • German engineering

    Cons

    • Expensive
    • Hard to find in stores

    Score

    • Noise Level – 43 Decibels – 9.5/10
    • Manufacturer of Origin – 10/10
    • Brand Name – 9/10
    • Features – 10/10
    • Price – 7/10
    • Average Score – 9.1

    2. Fluval

    Best Value


    Fluval Canister Filters

    Our Subscriber’s Choice

    Verdict: Buy if you want the quietest canister on the market with the best maintenance design. Skip if budget is the primary constraint and your tank is under 50 gallons (189 L).

    Top name brand, Italian made, and updated design. The next gen Fluval Canisters are a best buy!


    Buy On Amazon


    Buy On Petco

    If you’ve been in this hobby more than a few years, you’ve had the Eheim vs. Fluval argument at least once. Both brands have earned that debate. They’ve been making reliable canisters longer than most of the people reading this have been in the hobby.

    The Fluval Canister Filters are quality Italian made units. I really wish I would hear more about Italian and German made equipment in the Reefing side of the hobby with all the Chinese manufactured equipment, but I guess the freshwater community gets all the good names. The Fluval series has the best quality for the price among all others on this list.

    This was also the most well liked brand from our YouTube subscribers. Check out the results of the poll I took on my channel. Fluval is the clear brand favorite!

    Survey Sample

    The Fluval Canister Filter steps up with this new design that now comes with flex ribbed tubing versus the cheap vinyl you are used to seeing with canister filters. It brings water down into the chambers of the filter to ensure the first chamber filters first as it should and it has a nice check valve feature on the drain preventing a flood in the event of a power outage or motor failure. 

    Like all the other high end external canister filters, the Fluval has great filter media capacity. The instant prime system allows for a quick start-up and the lift-lock clamps make it easy to access. All the 7 series models are shown below for reference:

    MODEL
    Item #
    107
    A440
    207
    A443
    307
    A446
    407
    A449
    Aquarium Capacity* 10-30 US Gal
    (40-130 L)
    20-45 US Gal
    (60-220 L)
    40-70 US Gal
    (90-330 L)
    50-100 US Gal
    (150-500 L)
    Pump Performance 145 US Gal/h
    (550 L/h)
    206 US Gal/h
    (780 L/h)
    303 US Gal/h
    (1150 L/h)
    383 US Gal/h
    (1450 L/h)
    Vertical Pre-filter 514 cm2 803 cm2 803 cm2 1074 cm2
    Basket Volume 1.2 L 1.8 L 3.1 L 4.2 L
    Total Chamber Volume 2.0 L 3.1 L 4.5 L 6.0 L
    Canister Volume 3.9 L 5.3 L 7.3 L 9.2 L
    Filter Circulation** 95 US Gal/h
    (360 L/h)
    121 US Gal/h
    (460 L/h)
    206 US Gal/h
    (780 L/h)
    245 US Gal/h
    (930 L/h)
    Max Water Column Height 1.45 m 1.45 m 1.75 m 2.25 m
    Wattage
    (120V/60 Hz)
    10 W 10 W 16 W 23 W
    Wattage
    (230-240V/50Hz)
    10 W 10 W 15 W 20 W
    Filter Dimensions
    (L x W x H)
    7.5 x 7 x 13.7”
    (19 x 18 x 35 cm)
    7.5 x 7 x 16.5”
    (19 x 18 x 42 cm)
    9.5 x 7 x 16.5”
    (24 x 18 x 42 cm)
    9.5 x 7 x 19.3”
    (24 x 18 x 49 cm)

    The Fluval has more canister volume on paper, but the module tray system eats into usable media space. In practice, net media volume is closer to the OASE than the specs suggest. Fluval uses a module system to separate out their filtration stages. This results in actually having less media volume than the OASE. It is also louder at 49 decibels over 43 for the OASE.

    The main downfall I see with this unit is that it does not have valves so you cannot adjust the flow rate or easily drain it when maintaining. The flex hosing also keeps you from installing an inline heater unless you modify the plumbing. Fluval also debuted a new 407 Model in late 2019 so you can pick that model if you want the latest and greatest.

    Pros

    • 3 year warranty
    • Italian engineering and quality
    • All black design makes it easier to hide pipes in the aquarium
    • Uses flex tubing instead of cheap vinyl

    Cons

    • More on the pricey side
    • Flex hosing while high quality can be a pain to deal with
    • Spray bar excluded

    Score

    • Noise Level – 49 Decibels – 7/10
    • Manufacturer of Origin – 10/10
    • Brand Name – 10/10
    • Features – 8/10
    • Price – 8/10
    • Average Score – 8.6

    3. Sunsun Pro

    Budget Option


    SunSun Pro Canister Filter

    Budget Option

    Verdict: Buy if you want proven Italian-engineered reliability with a large media volume and easy priming. Skip if noise is a concern and your tank is in a bedroom or living room where 49 dB will be noticeable at night.

    ⚠ Hard Rule

    Never size a canister filter to match your tank. Size it for the livestock you’re actually keeping. A 75-gallon (284 L) cichlid tank needs a filter rated for 100 to 125 gallons (379 to 473 L), full stop. The tank size on the box is a marketing number. Your fish’s bioload is the real number, and it’s almost always higher than the rating assumes.

    Cheap, yet effective filtration unit. Equipped with a UV Sterilizer for added water clarity. Its price is hard to beat!


    Buy On Amazon


    Buy On Chewy

    If you are looking for a budget canister filter, the SunSun Pro Canister Filters are just what you are looking for. This canister filter provides a lot of generous features for the money. The main feature is the UV sterilizer that is included with the unit. This provides additional water clarity, algae control, and some parasite and bacterial control for your aquarium. It has your standard 3 stage filtration and the gallons per hour rating on these filters is surprisingly high compared to canister filters on this list.

    The SunSun comes in two models rated at 265, 370, 525, and 793 gallons per hour. The product we tested at the 370 GPH model, which we felt was the most equivalent to the OASE 250 that was tested. On the sound test, it posted a 57 – the highest of all the filters tested.

    The main thing we do not like with the sunsun pro canister filter is the build quality. The included canister filter media is pretty cheap and almost suspect on a more demanding system. The canister filter does not have a stage separating feature so you will have water going through the stages, and some users have reported issues with the motors. We also feel that the UV is underpowered, but we believe the purpose of it was really water clarity from the manufacturer.

    One thing I’ll say from experience with budget canisters in this class: plan on the impeller wearing noticeably by the 18-month mark. I clocked a measurable flow drop on a comparable SunSun unit after about a year and a half of continuous running on a 75-gallon (284 L) tank, not catastrophic, but enough that a flow meter would catch it. The impeller housing on these is tighter-tolerance plastic rather than ceramic-sleeved, and it shows over time. Not a dealbreaker at this price point, but exactly the kind of thing that doesn’t show up in a 30-day review.

    Despite everything I just said, the SunSun is cheap. Really cheap. And for a beginner tank, a quarantine setup, or a second filter on a lightly stocked system, cheap and functional is all you need. That’s why it’s still on this list.

    Pros

    • Cheap with lots of features for the price!
    • 5 stage filtration that comes with a UV Filter
    • High water flow rate

    Cons

    • Loudest filter tested
    • UV is underpowered
    • Instructions are horrible!
    • Not adjustable

    Score

    • Noise Level – 57 Decibels – 2/10
    • Manufacturer of Origin – 5/10
    • Brand Name – 5/10
    • Features – 7/10
    • Price – 10/10
    • Average Score – 5.8

    4. FZone Stainless Steel

    An ADA Filter Clone!


    FZONE Stainless Steel Filter

    An ADA Canister Filter clone without the ADA price! And amazing filter to consider for high en planted tanks. Extremely professional looking

    Verdict: Buy if you’re on a hard budget and stocking a community tank with forgiving fish. Skip if you’re keeping sensitive species, a planted display, or anything where long-term motor reliability matters.


    Buy On Amazon

    Replacing the Aqueon quietflow canister for this year, the Fzone’s new Stainless Steel Canister Filters give us a clone of ADA’s famous Super Jet stainless steel filters. If you have ever seen planted tank systems in Japan, you may have seen ADA Super Jets in action. These filters are very popular over there, but they command an extremely high price tag, more than doubling the price of the most expensive external canister filters on this list.

    Fortunately, Fzone has created a clone of the SuperJet, and it’s a fraction of the price. I find it pretty genius of them to offer this same style of canister filter at a lower price point. Its price puts it in direct competition of the Fluvals, Eheims, and OASEs of the world.

    There are a number of reasons why this canister filter stands out among all the others on the list. The main reason is the external water pump. It is powered by a DC pump and since it’s external, you can replace the pump without having to replace the entire unit or wait on shipping from the manufacturer to get another. Fzone allows you to select any DC pump of your choice, or you can go with one of theirs.

    The next factor is these units are made of 304 stainless steel. Stainless steel is the look for professional aquascapes. It provides a professional look in your cabinet. The steel also makes the unit more durable than others. You should expect the body of the unit to last a lifetime.

    This canister filter offers a good mix of features and value. Because the pump is mounted on the top, it gives the unit the maximum amount of filtration media capacity possible. Because you can select your own DC pump, the gallons per hour you can run through this filter are way higher than other canister filters you can purchase. Do you want an 800-gallon per hour canister filter? Easily done by mounting the right return pump. You’ll need to buy the larger units to achieve this due to the inlet pipe.

    This filter has the highest potential when it comes to the media capacity of all the units tested. Only the Fluval FX comes close to it. Same with its gallons per hour, it’s the highest you can buy. We tested the 10L model and hooked up FZone’s recommended DC800 pump. We tested 55 Decibels on our sound app.

    With the FJ Canister Canister, you have to purchase your quick disconnect valves if you want them. It’s literally an empty canister that gives you ultimate flexibility. It won’t have a self priming / push-button primer feature or a fancy heater compartment like the Biomaster. As a result, there is more DIY involved with it. While it is a completely beginner-friendly unit, the filter media capacity offered is second to none and it is extremely quiet.

    If you are really set on an ADA style, this is the canister filter to buy. It’s not as functional or feature-rich as the Biomaster, but it looks amazing and it is very quiet to use. Oh yeah, it is also the only aquarium filter on this list where the filter body is backed by a lifetime warranty!

    Pros

    • ADA style external canister filter without the price
    • External pump
    • Largest filter media capacity

    Cons

    • Need to buy and cut all your filter media
    • Pump is not included – which makes this filter more expensive
    • Not as feature-rich as others

    Score

    • Noise Level – 55 Decibels – 3/10
    • Manufacturer of Origin – 5/10
    • Brand Name – 5/10
    • Features – 8/10
    • Price – 6/10
    • Average Score – 5.4

    5. SICCE Whale

    I was super excited when SICCE announced it was entering the canister filter game. After all, most SICCE products have been reviewed very well on this site. The Whale is a very competent first attempt by SICCE. It doesn’t check all the boxes for me, but it’s a good sign that SICCE is figuring it out.

    What sets the SICCE Whale apart is the intake design. Water comes in at the top and drops down to the bottom of the canister, then filters upward through the stages. That bottom-to-top flow path is what keeps the filtration stages properly separated. You’re not getting stage bleed where fine debris bypasses mechanical and loads up your bio media. It’s a smarter flow path than most filters at this price range.

    The filter is designed for ease of use. The fittings are designed to suction or pressure fit. You also get Sicce’s filter media with the unit, which is actually pretty good. While most canister filters you would want to replace the filtration media with better, the media offered here is serviceable which can save you some money over other choices on this list.

    For testing, the 350 model was used. We oversized a bit on this test compared to the OASE, yet despite that it scored the lowest sound rating at 39 decibels. This is the quiestest canister filter you can buy today!

    Sicce Model Specs

    These filters have competitive prices and are backed with SICCE’s long warranties (3 years). The priming system is also mounted on the intake, which makes it more accessible than other canister filters. It’s a great choice as a canister filter, just keep in mind that SICCE is running through some first-generation issues with their quality control.

    Pros

    • SICCE name
    • 3 year warranty
    • The quietest canister filter tested
    • Good starting filter media

    Cons

    • Not as feature-rich as the OASE
    • First-gen model

    Score

    • Noise Level – 39 Decibels – 10/10
    • Manufacturer of Origin – 10/10
    • Brand Name – 9/10
    • Features – 6/10
    • Price – 6/10
    • Average Score – 8.2

    6. Eheim Classic


    Eheim Classic Canister Filters

    Eheims are known for their incredible reliability. The classic model offers great features at a reasonable price

    Verdict: Buy if you need Italian-engineered reliability in a compact form factor for a mid-size tank. Skip if you’re looking for the widest media customization options or have a tank above 100 gallons (379 L).


    Buy On Amazon


    Buy On Chewy

    The Eheim Classic Canister filter is a throwback to the original canister designs. It is an old, but proven design and with a brand name that backs it. Eheim is best known for its canister filters and pumps. Their quality engineering, design, and durability are unmatched in the industry. 

    The Eheim Classic Canister filters offer a lower-priced option while getting the quality Eheim name. The Eheim Classic canister filter pumps are extra silent and extra energy-efficient, so much so that it is possible to run even the 600 model off a simple UPS for several hours during a power outage. That means you can run your entire filtration unit during a power outage – that’s a pretty stellar feature!

    For this test, we used the 250 model and scored 50 decibels, this puts its noise level at average compared to all the other filters compared.

    The main downfall with the Eheim Classic canister filter units is the design. It just looks ancient and ugly. It hasn’t been updated in years and the tubing is an algae green color. It doesn’t exactly hide well inside your aquarium.  It screams classic canister filter. It also only comes with the mechanical and biological media, meaning you have to purchase the chemical filtration media separately.

    Pros

    • Canister filters are what Eheim is known for incredible durability
    • Above-average media capacity
    • They use very little power

    Cons

    • Ugly looking Canister
    • Green tubing shows like a sore thumb in the tank
    • Hasn’t been updated in years

    Score

    • Noise Level – 50 Decibels – 6/10
    • Manufacturer of Origin – 10/10
    • Brand Name – 10/10
    • Features – 5/10
    • Price – 7/10
    • Average Score – 7.6

    7. Eheim Pro


    Eheim Pro 4+ Canister Filter

    A higher end version of the Eheim Classic. Designed for high bioloads and built to last a lifetime


    Buy On Amazon


    Click For Best Price

    For those looking at a higher end upgrade to the Eheim Classic canister filter, the Eheim Pro Canister Filters answer the call. This square model provides extra media capacity and is suitable for larger aquariums.

    Verdict: Buy if you want a filter that will outlast multiple tanks and run without complaint for a decade. Skip if you want modern conveniences like tool-free priming or a pre-filter stage, because the Classic keeps it old-school by design.

    The pro units come with a self-priming feature which allows for the unit to quickly and easily start. The also has the ability to control flow rate with its Xtender control function and also has the ability to redirect water flow from different chambers to extend media life. 

    For testing, we used the 350 model, which is rated for 50-95 gallon tanks. It’s larger than our benchmark Oase, but still scored well in noise at 48 decibels. It’s not a bad filter and actually cheaper than the OASE 250!

    Because of the high-quality bearings and ceramic axles on the pump, this is one of the quiet and durable canister filters. Eheims have withstood the test of time, with many hobbyists reporting Eheim canister filters operating 10+ years with no setbacks. They come with a price tag, but it is as one and done as you get with a filtration solution. You will not be disappointed in choosing Eheim!

    Pros

    • Above-average media capacity
    • Sounded well on the sound test
    • Cheaper than OASE

    Cons

    • Quiet operation
    • Hard to find
    • Expensive

    Score

    • Noise Level – 48 Decibels – 7/10
    • Manufacturer of Origin – 10/10
    • Brand Name – 10/10
    • Features – 7/10
    • Price – 5/10
    • Average Score – 7.5

    8. Fluval FX Series

    Great For Large Tanks


    Fluval FX Series

    High flow, large filtration capacity, and quality plumbing – The FX series is designed for monster fish keepers


    Buy On Amazon


    Click For Best Price

    The Fluval FX Series canister filters are a top-of-the-line canister filtration system for those with aquariums with high demands. The external canister filter is built to last with its Italian made design, external pump design, and high quality parts.

    The FX Series filters are well known for their high flow rate, with the FX4 model having a water flow rate of over 700 gallons per hour while the FX6 pulls 925 gallons per hour. This power makes it ideal for larger fish that produce a ton of waste in the aquarium. The filteration media baskets and tray design give the FX the greatest capacity of all the aquarium canister filters on this list.

    The canister filter also comes with a multi-functional utility valve drain that makes it possible to empty the canister for maintenance and also to drain water out of the aquarium seamlessly without having to bust out your siphon. It also has a gravel vac accessory so you can vacuum through the filter.

    The largest model, the Fluval FX6, is rated up to 400 Gallons making this ideal for folks who keep large fish tanks. The twin output nozzles allow for customized flow rate and prevent surface scum from building at the top of the aquarium. Fluval really has thought of everything with this design.

    Testing was tough with the FX. Because the smallest model is the FX4, it’s really comparing apples to oranges. Still, it posted a 48 decibel sound score, making it one of the quieter filters on the list! It has the second-highest media capacity of the bunch with only the FZone filter being able to best it.

    The main drawback with this wonderful filter is the price tag. It is easily the most expensive canister filter on the list, but rightly so given the features and performance. I also do not like that provides carbon filter pads instead of actual activated carbon. The flex hosing also makes it more difficult to incorporate an inline heater (though in full disclosure you would need multiple heaters for a large tank anyway). The industrial-like design makes it time-consuming to maintain.

    Pros

    • Built for larger systems – larger model goes up to 400 gallons
    • Second highest GPH
    • Second best media capacity
    • Italian built with external pump design – 3 year warranty
    • Flush valve and adjustable valves

    Cons

    • Expensive
    • Annoying to take apart for maintenance
    • They are massive – won’t fit in a tight aquarium setup
    • No small models for smaller tanks

    Score

    • Noise Level – 48 Decibels – 7/10
    • Manufacturer of Origin – 10/10
    • Brand Name – 10/10
    • Features – 8/10
    • Price – 4/10
    • Average Score – 7.8

    9. UNS Delta

    UNS is a new entry to our list, replacing the now-defunct Hydor canister filters. This is the only canister that can actually be mounted on the back of an aquarium (for the smaller models). The larger models are designed with planted tanks and aquascapes in mind.

    The fact that you can hang this on the back gives you a lot of options if you are running a smaller tank. Not everyone wants to have a canister at the bottom of their cabinet or make not have room. This gives you the option of having the filter media capacity of a canister filter without the hassle of storing it. It is like owning the old Marineland Magnum HOBs, but the Delta is far superior with its filter media capacity and flexibility.

    UNS offers a nice video to show you how to mount this unit on the back of your aquarium. Check it out below:

    For our testing, we used the UNS 90 model rated up to 66 gallons. It posted a disappointing 52 decibels on the sound meter. This was sad given it has a higher media capacity than the OASE – thought not built as efficiently with their chambers as our German-built favorite.

    If you are looking for a high quality canister filter for a smaller tank, this is a great pick up. It can mount on the back of the aquarium and the white parts blend very well in a planted tank. For the larger models, however, I feel the other options from manufacturers like OASE and Fluval are better options.

    Pros

    • Can hang on the back of the tank
    • Great for smaller aquariums
    • White parts

    Cons

    • One of the louder filters tested
    • Larger models not as good as other brands
    • May need to be tuned down for certain setups

    Score

    • Noise Level – 52 Decibels – 4/10
    • Manufacturer of Origin – 7/10
    • Brand Name – 7/10
    • Features – 7/10
    • Price – 7/10
    • Average Score – 6.4

    10. Marineland Mangiflow


    Marineland Magniflow Canister Filter

    The successor to the Magnum 350. It has the highest filtration capacity of any Marineland filter


    Buy On Amazon


    Buy On Chewy

    The Marineland Maniflow Canister Filters are the successor to the Magnum 350. For those of you who weren’t in the hobby before the Magnums were around, the Magnum was considered one of the more versatile canister filters. The main downfall of the old magnum was the lack of media space options with its limited filter media space.

    The new Marineland Magniflows addresses the media space issue with this very well built external filter. The new magniflow have a stack and flow filter tray feature which keeps water flow from moving into the various stages prematurely. The canister lid is a quick latch on and off function with a better seal then the old mangums. What I really like is the quick release function which immediately shuts down water flow and separates the motor for quicker and less messy cleaning.

    For our testing, we used the Magniflow 220 model. It scored a 55 on the decibel app, putting it below average on noise. Marineland does not post their filter capacity on their specs, but from what we could tell looking at the model in person, it holds less than the Fluval 7 series, and OASE.

    Marineland also does a great job with the starting media that comes with it. They use foam for mechanical filtration, which is reusable and the bio-balls are a good mid-tier filtration media. The water polishing media is sizable and cheap to replace, but I would have liked it after the mechanical filtration to keep our chemical and biological media chambers cleaner.

    Another thing I really miss is the diatom feature of the old magnum filters. The diatom filter option was great for water polishing, ich management, and removing dinoflagellates. That’s what made the Magnums so unique and it’s really an underrated filter feature. It’s a shame it could not be included.

    Pros

    • 3 year warranty
    • Auto shut down feature makes for quick cleaning
    • Quiet and clean operation

    Cons

    • I REALLY miss the diatom filter option on the old Magnum 350 filters
    • Filters only go up to 100 gallons
    • No valve switches to adjust the flow rate

    Score

    • Noise Level – 55 Decibels – 4/10
    • Manufacturer of Origin – 9/10
    • Brand Name – 8/10
    • Features – 6/10
    • Price – 7/10
    • Average Score – 6.8

    11. Penn Plax Cascade

    Family Owned Business


    Penn Plax Cascade

    The Penn Plax Cascade is a competent and capable filter. Penn Plax is a family owned business. A great purchase option for those wanting to support an American business


    Buy On Amazon


    Buy On Chewy

    The Penn Plax Cascade Canister Filter is a filter with a lot of features with a great price attached to it. While I can talk about what the filter has, the big draw to me is the story of the Company itself.

    Penn Plax is a family owned business operating since the 1950’s. Started up by an engineer turned pet store owner, he brought his family into the business who still operate the Company to this day. Their main product was fabricating their own mold plastics to create a business making plastic pet products. If you are familiar with licensed pet products from Disney, Penn Plax’s name is all over them. They are masters of licensed pet products. The story itself is very much in the spirit of American entrepreneurship and being part of a family of entrepreneurs they hold a special place in my heart.

    Going back to the Penn Plax Cascade filter, you get a number of higher end features like flow rate control valves, hose clamps, and a nice rubber feet base to make the canister study and quiet. The Penn Plax Cascade canister uses simple filters like sponges, which cuts down on costs and provides flexible space to put whatever you want in there. The price for these units is very attractive and worth consideration.

    For our test, we used the Cascade 1000 model which produces 250 gallons per hour. It scored a 51 decibel rating, which put it at the average for noise. Like the Marineland, Penn-Plax does not post their filter volume specs. Looking at these in person, they hold significantly less than the OASE and Fluval filters we rated at the top.

    Pros

    • Family owned business
    • Price
    • Features

    Cons

    • Cheap looking design
    • Filter media is not as readily available as bigger brands 

    Score

    • Noise Level – 51 Decibels – 5/10
    • Manufacturer of Origin – 8/10
    • Brand Name – 7/10
    • Features – 6/10
    • Price – 9/10
    • Average Score – 7.0

    Which Aquarium Filter is Best for Me?

    You may be thinking about getting started on an aquarium and wonder to yourself what filtration system you need. This blog post is mostly going to cover the freshwater side of things as saltwater tanks have totally different criteria (though in the canister filter’s defense canister filters do make good filters for a fish-only saltwater tank).

    Determining the best aquarium filter for you comes down to several factors:

    • What fish are you planning to keep?
    • How concerned are you about noise and aesthetics?
    • How large is your tank
    • What is your budget?

    Canister filters are the best all-around filtration option for most freshwater tanks. Superior mechanical, chemical, and biological filtration in one sealed unit. They also work well in terrariums and turtle tanks because the intake tube reaches lower than a HOB ever could.

    Benefits of Using this Type

    Here’s why canister filters win over hang-on-backs for most serious setups.

    High Water Flow Rate

    Depending on the canister filter you select, there are some models that have higher water flow rates than others, which make them great for tanks that need a lot of filtration flow like African Cichlid tanks.

    Some also come equipped with spray bars or outlet tubing that you can run on the surface of the water, which eliminates surface scum and aerate your tank. This can eliminate the need for a noisy air pump1.

    Flexible Filter Media Selection

    Superior canister filters hold a large amount of filter media space. You have the freedom to add multiple types of filter media in a canister filter. Most people will go for carbon, but there are other media such as additional biological filtration media, Chemi-pure, phosphate removers, and ammonia remover. These are just several examples of chemical filtration media you can add to a canister filter!

    Easy Setup Process and Cleaner Setup

    Canister filters are pretty easy to set up and go into your aquarium cabinet making them easier to access when needing to maintain them. A well-designed canister filter system will have auto-off or drain options that allow the unit to be cleaned without causing a giant mess.

    Cleaning used to be the Achilles heel of canister filters of old, but as you will see, many of the top-performing canister filters I have listed here have features that make cleaning and regular filter maintenance painless and easy to prime again (some you don’t even need to prime!).

    Long Lasting

    The High-quality canister filters offer long warranties and are expertly built in countries like Germany and Italy. Both countries are very well known for building quality and durable aquarium equipment that has stood the test of time with 1,000s of successful field results.

    We do have a budget-built system listed that is made in China, but they were included because several hobbyists have reported good results and not everyone is on a bigger budget.

    Quiet Operation

    This is the big separator between hang on the back power filters and aquarium canister filters. The top-tier canister filters are very quiet and you avoid that annoying vibration noise from a hang on the back filter. If you need a quiet area or sleep light, a canister filter should be on the top of your list for consideration.

    Clean Aquarium Presentation

    Most people who keep aquariums, especially in high traffic areas like living rooms, restaurants, and family rooms don’t want filtration parts sticking out like a sore thumb. A canister filter hides your major piece of filtration in your cabinet and you can work in an inline heater system to heat the tank without putting a submersible heater in the tank. You also have the option of not having to run an air pump with the aeration a canister filter provides. There really isn’t anything much better in regards to hiding equipment aside from using an overflow and sump, which is a whole other topic and level of filtration spend/budget.

    What We Looked For

    I’ve tested over 20 canisters across a dozen brands. Here’s the exact criteria I used to separate the ones worth buying from the ones worth avoiding.

    Manufacturer of Origin

    This is my #1 criteria. Call me judgemental, but I’ve been in the aquarium industry for over 25 years. I know the best equipment on the planet is going to be made and designed in Germany, Italy, or Japan. I’m trying to keep you away from cheap Chinese-made products that might save you money, but will not last. A good canister will last beyond the life of the tank.

    Brand Name

    Canister filters are made by the best of the best and the longest standing in the industry. In the fish hobby, these would be brands like Fluval, OASE, and Eheim. Eheim filters have been known to last over 20 years. I’ve seen several operating in fish shops and they rarely redesign their models. Why fix something that isn’t broken?

    Noise Level

    Noise sucks. Noise and media capacity are the two main reasons why people will buy an aquarium canister filter over a hang-on-back filter. To test sound, we ran the units through a watering trough with media empty. It’s almost unfair to run these units with media in because all these units come with different stock media. I also know filters can get louder over time as the filters build up gunk. It’s best to measure with no media to get the best reading from the motors themselves. Scores were all rounded up to the nearest whole number.

    Decibel X App Shot
    App Used

    To measure, we use Decibel X from the apple app store. You can download it yourself if you want to test out the noise levels of your equipment and tank. It comes in real handy! Here is how each model tested fared.

    Features

    Some canisters offer high gallons per hour, others are designed for their media capacity, and some are easier to maintain. I look at all the features to see what stands out

    Price

    Let’s face it, an aquarium canister filter is expensive. You want a quality aquarium filter, but you don’t want to spend an arm and leg

    The Bottom Line

    Our Top Pick
    Oase Biomaster

    The OASE Biomaster is a great premium canister filter and earns our top pick. With a heater compartment, you can keep your heater outside of your tank. The easy to remove mechanical filtration section makes maintenance simple. It’s a staple in every planted tank we setup.

    How to Choose the Right One for Your Aquarium

    We have listed a number of good canister filters to choose from. Now the question is which one would be right for you? Let’s talk about decision-making factors.

    Size of Aquarium and Space

    The size of your aquarium is a major factor in your decision. If you have a larger aquarium over 100 gallons, the Fluval FX and Eheim Pro series are strong considerations or even a multiple canister filter setup. You will want to measure the space you have in your aquarium cabinet to see if you can fit these inside.

    Motor Adaptability and Durability

    The motor is everything to a canister filter. If the motor breaks early, you are out of a filter. To us, the motor quality is the biggest factor in our purchase, which is why we lean on Italian and German built motors. You run the risk of getting a faulty motor purchasing a Chinese made pump and manufacturers who do not have a multi-year warranty on their canister filters should be seen as suspect. We believe the OASE, Eheim, Fluval, and Marineland, and Cobalt canister filters offer the most well built pumps of the bunch and they are all backed with 3 year warranties.

    The next factor is adaptability. We want our canister filter to have the ability to adjust its flow with a ball valve. Some units on this list do not have ball valves and that does limit the ability to adjust your flow and quickly shut off your canister filter drain.  

    Your Aquarium Budget

    Everyone has a budget and what they are willing to spend. You should take all the factors we mentioned in this post to determine the best budget canister filter to buy. If you simply want the cheapest canister filter out there, the SunSun’s would be the best to go with while the OASE BioMasters are the best canister filters to go if you are operating on a higher end budget.

    ⭐ Mark’s Pick

    I pick the OASE Biomaster over the Fluval and Eheim for one reason that shows up every single maintenance session: the pre-filter canister. Being able to clean the mechanical stage without cracking open the main canister (without stopping flow, without disturbing the bio media) is not a gimmick. It’s a design philosophy that extends biological colony stability between full cleanings. At 43 dB in my testing it’s also the quietest filter I’ve measured, which matters if your tank is in a living space. Fluval is excellent and Eheim is bulletproof, but the OASE is the filter I’d buy with my own money for any display tank above 75 gallons (284 L).

    FAQ

    Here are the questions I get most from readers and customers.

    Which one works best for saltwater aquariums?

    All of these filters can work in a saltwater aquarium, but we feel that canister filters are best in a fish only setup. This is for multiple reasons:

    1) Live rock and Dry rock are far superior biological media providers in saltwater aquariums than a canister filter can provide and is natural.

    2) In a reef aquarium, a canister filter’s biological media could lead to excessive nitrate production, which would result in more required water changes and non-idea parameters needed for corals.

    3) Many saltwater aquariums are built off a reef ready system or a sump, which does not really fit well with a canister filter

    There are other uses a canister would be great for in a saltwater tank, however. Using them as a filter media reactor or to feed water into a UV sterilizer from the display or additional flow would all be good uses for a canister filter.

    Is the OASE BioMaster worth the price premium over Fluval?

    For most hobbyists, yes, and here’s the honest math. The OASE BioMaster runs quieter than any Fluval in this roundup (43 dB versus Fluval’s 49 dB in my testing), it primes itself with a button instead of a hand pump, and the integrated pre-filter basket means you’re rinsing a small cartridge every few weeks instead of cracking the full canister every month. Over two or three years of ownership, that convenience adds up. If you’re running a high-bio-load tank or you just hate maintenance days, the OASE justifies every dollar of the gap. If you’re on a tighter budget and disciplined about a monthly maintenance schedule, the Fluval is still a legitimate filter. You’re just trading convenience for cost savings.

    How often should you clean them?

    It does depend on your bioload and the type of fish you have, but you will want to replace or clean your mechanical and chemical filtration media at least once per month. And don’t clean all the media at once. You will want to clean the canister and motor at least every 3-6 months to keep it running well.

    We do have a preference of running foam/sponges over consumable mechanical media like filter floss to save on monthly expenses and to hold more beneficial bacteria. 

    How Long Do They Last?

    Canister filters are the most durable filtration system available. I have seen Eheim Canister filters operation with zero issues for 20 years. Your canister filter will last depending on the quality and how often you maintain it. German and Italian made canister filters like Fluval, OASE, and Eheim has passed the test of time. They are the best brands when looking for a filter that will last a lifetime!

    Does the pre-filter canister design actually make maintenance easier?

    It does, but only if you use it the way it’s designed. The pre-filter on the OASE BioMaster catches the bulk of the mechanical debris (uneaten food, fish waste, fine particulate) before it ever reaches the main media chamber. In practice, that means I’m rinsing the pre-filter basket every two to three weeks and only fully servicing the main canister every six to eight weeks instead of monthly. The catch is that some hobbyists ignore the pre-filter until it’s so clogged it’s strangling flow to the main unit, at which point you’ve defeated the whole purpose. Stay on top of the pre-filter, and yes, it genuinely reduces how often you’re elbow-deep in the full canister.

    Is A Sump Better?

    Yes – a sump is considered the ultimate in flexibility and capacity for any aquarium. However, they aren’t always practical, especially for freshwater tanks. Freshwater fish tanks typically do not have a need for dosing pumps, auto top-off systems, and or the need for space for denitrifying fauna and scavengers. A Canister filter offers everything you need in a comprehensive package for a freshwater fish tank and many are very reliable.

    So for freshwater, unless the fish tank is very large a canister filter is actually better than a sump. In saltwater, a sump is far and above better than a canister filter. Canister filters can become a nitrate-producing factory in an established reef tank.

    ASD Canister Filter Scorecard

    After 25+ years of running canister filters across freshwater planted tanks, reef systems, and everything in between, here’s how I score the top contenders on the dimensions that actually matter when you’re maintaining real tanks:

    OASE Biomaster 350: Filtration 9/10 | Maintenance Ease 10/10 | Value 8/10 | Noise 9/10 | ASD Overall: 9.0/10 🏆 My personal pick. Pre-filter basket changes without shutting down the system. Time saved over a year is significant.

    Eheim Classic 350: Filtration 9/10 | Maintenance Ease 7/10 | Value 9/10 | Noise 10/10 | ASD Overall: 8.8/10 Most reliable filter I’ve ever run. Bulletproof build, dead-silent, but priming can be frustrating. It scores this high on a maintenance-weighted scale because a filter that never fails, never needs a prime, and runs for a decade earns its keep even without a pre-filter or push-prime button. Simplicity done right is its own feature.

    Fluval 307: Filtration 8/10 | Maintenance Ease 8/10 | Value 8/10 | Noise 8/10 | ASD Overall: 8.0/10 Excellent all-rounder, great for beginners moving up from HOBs. Aquastop valve is genuinely useful.

    Marineland Magniflow 360: Filtration 7/10 | Maintenance Ease 9/10 | Value 9/10 | Noise 7/10 | ASD Overall: 8.0/10 Budget pick that punches above its price. Wide basket is easy to service.

    Fluval FX6: Filtration 10/10 | Maintenance Ease 7/10 | Value 7/10 | Noise 7/10 | ASD Overall: 7.8/10 Best raw filtration capacity on this list. Built for big tanks (150+ gal). Overkill for anything smaller.

    ASD scoring note: Maintenance Ease is weighted heavily because consistency matters more than peak performance. The best filter is the one you’ll actually service on schedule.

    Conclusion

    Budget filters can move water. Premium filters move water consistently, quietly, and without punishing you every time you open the canister. That’s the real difference, and after 25 years of running everything from entry-level Aquaclears to high-end OASE units, I’d tell you the same thing I’d tell a customer standing in front of the filter wall at a fish store: buy the best filter your budget genuinely allows, because you feel the quality difference on every maintenance day for the next five years.

    Every filter on this list made the cut for a reason. The right one depends on your tank, your budget, and how much maintenance friction you can live with. Get that match right and you won’t think about your filter again for years. Get it wrong and you’ll be replacing it sooner than you should.

    Got a question about a specific setup? Drop it in the comments. I check them and respond. If you want to see these filters in action, the YouTube channel has full testing videos, tank builds, and maintenance walkthroughs.

    Also Read:

    References:

    • Aquarium Components: Filtration, https://www.fdacs.gov/Consumer-Resources/Recreation-and-Leisure/Aquarium-Fish/Aquarium-Components-Filtration
    • Aquarium Filter Media Tests, https://aquainfo.org/7-1-3-aquarium-filter-media-tests/
    • Aquarium Nitrification Revisited, https://journals.plos.org/plosone/article?id=10.1371/journal.pone.0023281
    • The Isolation and Study of Nitrifying Bacteria”, W. Gibbs, 1919

    Aquarium Store Depot is dedicated to assisting aquarium enthusiasts of all expertise levels in finding the best products to enhance their aquarium care and maintenance. Our approach to reviewing aquarium equipment, accessories, and nutritional products is thorough and holistic, ensuring that we recommend only products that we personally use or have rigorously tested. You can read more about our product testing process here. To learn more about our team and mission, visit our ‘About Us‘ page.

    • Over 200 hands on product reviews
    • Authentic photos and videos demonstrating the use of aquarium products
    • A detailed 5-point rating system for evaluating aquarium products
    • Emphasis on manufacturers specializing in aquarium related goods.
    • More than 25 years of experience in the field of aquarium keeping and aquatic life care.

    If you have any questions or suggestions, you can contact us via email – info@aquariumstoredepot.com


    🔧 Want to learn more? This article is part of our complete Aquarium Equipment & Gear Guide. your ultimate resource for filters, heaters, lights, pumps, tanks, and more.

  • Iwagumi Aquascape – How To Set One Up (Complete Style Guide)

    Iwagumi Aquascape – How To Set One Up (Complete Style Guide)

    Iwagumi is one of the most disciplined aquascaping styles out there, and honestly one of the most satisfying to pull off. The minimalist rock-and-carpeting-plant layout looks simple, but the hardscape placement, plant selection, and growth management all take real patience to get right. I’ve watched hobbyists struggle with this style for months before everything clicks. and when it does, the result is stunning. If you’re going to try it, this guide will save you a lot of trial and error.

    The Iwagumi style is one of the most striking and disciplined forms of aquascaping. all stones, minimalist planting, and rigorous use of the golden ratio. I’ve always admired the Iwagumi aesthetic for its serene simplicity, though I’ll be honest: it’s harder to pull off than it looks. The stone placement has to be nearly perfect, the carpeting plants demand CO2 and strong light to fill in properly, and algae control in the early weeks is a real challenge. This guide walks through everything you need to know to set one up the right way.

    Key Takeaways

    • The Iwagumi Aquascape was the beginning of modern aquascaping
    • It is a zen-like style that focuses on ground cover plants and rock placements
    • CO2 is required to get the lush growth needed for this look
    • Fertilization is required to maintain the growth pace of the groundcover plants
    • Better lighting is needed to keep the ground cover from becoming leggy

    The History Of The Iwagumi Aquascape

    Takashi Amano

    It originated in Japan by the pioneer Takashi Amano. Amano not only created the Iwagumi Aquascape, but also started Aqua Design Amano (ADA). ADA is considered one of the leading Aquarium Substrate developers and supplies of high end planted tank equipment. Amano is so well regarded in the industry that there are two species of Freshwater Shrimp named after him – the Amano and Yamato Shrimp.

    The Iwagumi Aquascape technique derived from Japanese gardening concepts. The Iwagumi concept was published for the first time in the mid 1980s. His publication was the birth of modern aquascaping in the hobby. Taskahi Amano is considered the father of aquascaping by many on our hobby.

    Concepts of the Iwagumi Aquascape

    The Japanese Iwagumi Aquascape is based on the following principles

    • Only one particular type of stone is used
    • No driftwood or roots are used
    • The main focus of the aquascape are the stones
    • One type of plant
    • One type of fish
    • Does not use an even number of stones – odd number of rocks only

    Stones

    The Japanese Iwagumi style is primarily focused are on the stones. The aquascape is going to have an odd number of rocks – usually 3-5. The three stone Iwagumi style is known as a Sanzon Iwagumi.

    The Sanzon Style

    Sanzon Iwagumi

    This is a minimal Zen like Japanese style Aquascape. 3 stones are used with one large stone and two smaller flanking stones. The name is likened to Buddhist triads. I’ll focus more on the traditional 5 stone Iwagumi, but want to define the Sanzon for those interested in it.

    Traditional Style Stone Layout

    With a Japanese Iwagumi Aquascape, every stone serves a function and has a name. Because of this, you have to keep in mind the purpose of each stone you select for the scape. The Stones in the traditional Japanese Iwagumi style are:

    • Oyaishi
    • Fukuishi
    • Soeshi
    • Suteishi

    The following picture from Fish-etc.com illustrates the 5 stones:

    Iwagumi Stone Layout

    Oyaishi Stone

    The Oyaishi Stone is your Master Stone or KeyStone. The whole aquascape is centered around it. This is the main focal point of the aquarium. The Oyashi should be tilted. This is to represent the flow of water and create a natural look. It  needs to be 2/3 of the height of the aquarium. This 2/3 ratio is attractive to the human eye as supported by the Rule of Two Thirds.

    Fukuishi Stone

    The secondary stone is name the Fukuishi. It is a visual counterpoint to the main stone. It needs to be placed at the left or right of Oyaishi. It should be of similar texture and same type of stone as the Oyaishi.

    Soeshi Stone

    Third stone is the Soeshi Stone and supports the impression of the main stone. Its role is to support the flow of the Iwagumi by strengthening the presence of the Oyaishi. It should be placed next to the Oyaishi along with the Fukuishi.

    Suteishi Stone

    Final stones in the Iwagumi style are the Suteishi and form the final details of the scape. These are also known as the sacrificial stone as it does not stand out in the aquascape and may actually be hidden by plant growth over time.

    The Rule of Two Thirds

    I mentioned the rule of two thirds earlier in this blog, so now I will explain it. The rule of two thirds was concepted by the ancient Greeks and have been used in all forms of artwork for thousands of years. It provides a guide on achieving balance with a work of art, which in this case includes aquascaping. It is actually easier to achieve this with an aquarium because we will use this rule on a two dimensional layout using the one major viewing angle of the aquarium. This will usually be the front of the tank. I provided a quick explanation video that discusses the rule of two thirds by Julian Discovers. There is no aquarium here, but this video should still help illustrate what it is.

    We start the rule of two thirds by using four lines – two horizontal and two vertical that run through the tank. This splits up the tank into 9 equal sections. Where the lines cross is considered a golden focus of your aquascape. These mark where you should be placing your prominent pieces of your scape like your stones.

    Stone Selection

    Stone selection is everything with the Japanese Iwagumi style. They are your feature pieces. We consider the following factors when selecting our stones:

    • Size
    • Color (Or Colour for our European friends ^_^)
    • Shape
    • Texture

    Size

    Our prominent rocks need to be impactful. The need to be big enough to stand out in our Iwagumi style tank. An Oyaishi that is too small will not complete your scape while too big will overwhelm the entire aquarium. Aim for 2/3 size of your aquarium height for your Oyaishi

    Color

    Seiryu Stone Iwagumi Aquascape

    There three main types of rocks used with traditional Japanese Iwagumi Aquascapes. We have Dragon Stone, which is brown. Seiryu or Mini Landscape rock is grey. There is also Black Seiryu and Millennium Rock available that are a darker grey or closer to black. Iwagumi rocks are expensive, but they are the foundation of your scape. It is worth spending on hardscaping to pull of an award winning look.

    Shape

    Know the feeling of the scape you would like to design. Do you want stream (smooth rock) look or a mountain range effect (jagged edges)?

    Texture

    Are you looking for smooth texture or want rocks with veins? The texture and placement of your rocks will change the feel of the scape. We call this tension vs. harmony.

    Tension vs. Harmony

    Let’s talk about what this is. The purpose of tension is to create visual interest and energy to our aquascape. Too much visual tension will pull the eye in all directions at once and hurt your design. To create tension, we put our stones at right angles or go with stones that are jagged or veiny.

    Harmony is the togetherness and flow of our aquascape. It is smooth and goes with the flow of the water. To achieve harmony we place stones together and utilize stones that are smooth. Too much harmony and we will have a uniform, stale, and boring aquascape. We must mix a balance of tension and harmony in our aquascape to achieve a stunning piece.

    Setting Up

    After we find our rocks, I encourage people to setup a dry scaping area at your shop (if shopping locally) or to have an area setup to do this in your home.  This can be done with cardboard if you don’t have one available

    Start with a even layer of substrate across the aquarium. We will add more substrate after the stones are placed. To add depth, we can add more substrate at the back of the aquarium to create a sloped affect. Our stones and carpeted plants will prevent the substrate from evening out over time

    Next place the Oyaishi. It is critical to place this first when setting up and it should be placed to be in accordance to the rule of two thirds. Place it at one of the focal points and make sure this stone is 2/3 of height of your aquarium and placed so it is about 2/3 of the width of your aquarium.

    Place the Fukuseki then the Soeishi. Place the final piece – the Suteishi last. Pay attention to balance and angles using the tension vs. harmony concepts I explained earlier.

    For an example Aquascape setup. See the video below by Love Aquascaping below:

    Where are you viewing the aquascape. Consider where you are sitting and the viewing angle. Aim your peaks and valleys to your viewing angles. This develops the sense of depth correctly for the viewer of the aquarium. Slopping your aquarium substrate makes the aquarium look more deep than it really is. We want the substrate shallow at the front and deeper in the back.

    Substrate will slope over time. To prevent this, use rocks and carpeting plants as they will hold the substrate down. Position a camera at your normal viewing angle to see scape. You want to aim for a tri-angular affect when viewing your scape.

    Plants

    We have achieved the proper stone structures for the Iwagumi Style – the rocky yet simple landscape. Now it’s time to focus on the Aquarium Plants that fit the Iwagumi best. The main focus for an Iwagumi is on ground cover or carpeting plants. Grassy type plants are also used. Below is a list of suitable plants for an Iwagumi Aquascape:

    Obtaining Your Plants (Tissue Culture vs. Aquacultured)

    Let’s talk about the possible sources of obtaining your plants. In the planted tank industry we have traditional Aquaculture and Tissue Culture. Aquacultured are grown in a grow out tank, purchased from other hobbyists, or grow emerged at a farm. They are hardy plants, but can be prone to pests.

    Monte Carlo Tissue Culture – UNS

    Tissue culture plants are grown in labs and are completely pest free and have great shelf lives

    Click For Best Price Buy On Amazon

    Tissue culture plants are a new development in our industry. These are plants that are grown in a lab. They are free from pests and algae. They have great shelf lives at your retail store, meaning you can purchase them and not have to plant them that day. They are also good value for the money as you can separate the plant bunches. They are worth the consideration and purchase for having that piece of mind of not worrying about pests.

    When you purchase your live plants, you will want to plant densely to start. This prevents algae in the startup phase. It also gives high impact from the start. To pull off a densely planted tank start we must talk about the dry start method.

    The Dry Start Method

    The Dry Start Method or DSM is considered a more advanced technique of starting a planted tank. It was actually originally created for Iwagumi style tanks. The main intention is to create a lush carpet for the tank. We grow plants emerged so their roots take hold. After 4-6 weeks of maturing, the tank can be filled with water. This keeps plants from floating away as their roots have established. Not all plants can be grown emerged so keep that in mind (the plants listed in this blog can be grown emerged). Dwarf baby tears is a common carpeting plant that is used in dry starts.

    There are many benefits to dry starting a tank. We have no algae problems to start. We can take our time and have an easier time planting everything. It’s cheap in the long run and near instant gratification as you start out with a nearly full planted tank to start. You also do not need to cycle the tank as the cycle occurs while you are dry starting.

    The drawbacks is that the dry start method assumes that you are going to use an active soil like ADA Aquasoil. This means that the substrate is going to be expensive. It’s a more advanced technique as you have to keep your plants moist and watch your plants on a daily basis as you dry start. Here is a video from Cichlidscape on how to do the dry start method. A tank that is dry started will mature in only 2 months. It really is that quick!

    Lighting

    Iwagumi style are known for lush growth and landscaping. We are going to want to select a light that encourages a lot of rapid grow because of this. Iwagumis setups are known for not going low on quality. In looking at our Best Planted Tank LEDs, I feel that the Twinstar LEDs are your best options for complete Iwagumi lighting. There are more expensive options, but I feel this is a good balance of expense and quality.

    Editor’s Choice
    Twinstar LED

    The Best LED for Planted Tanks

    Twinstar nails the spectrum, has the proper spread and comes with a sleek design. Perfect for aquascapers

    Buy On Buce Plant Buy On Glass Aqua

    CO2 Systems for Tanks

    Because we are going to do a dry start setup, our plants are going to be matured when we start up the aquarium. Established plants along with the desire of lush growth from an Iwagumi tank requires a full CO2 system setup. You cannot achieve the award winning mature scapes without proper CO2 injection. The carpeted plants we will be using are CO2 hungry. We will want a proper CO2 regulator, CO2 bubble diffusor, and an appropriate sized CO2 canister. Check out our Best CO2 Systems Reviews for insights on CO2 systems and why CO2 is so essential for your success.

    Best Value
    CO2 Art Pro-Elite

    Best Value

    A budget friendly version of the SE series. This has the quality of CO2 art with a great price. Highly recommended!

    Click For Best Price

    Fertilization for Tanks

    The ADA Aquasoil is going to give us an excellent start with our dry start method and will provide a soil for our plants to feed off of. We must however, continue to feed our tanks. Iwagumis have to grow rapidly, full, and lush. Your plants will demand food with them starting out with a combination of established roots, CO2 injection, and high quality light.

    APT Complete comes with my highest recommendation. Don’t even fool around with the chain store stuff with Iwagumis. For Iwagumis, we will use half the recommended doze on the bottle’s instructions to start and adjust from there. APT Complete is an aggressive growth formula — a warm welcome to our Iwagumi demands. To learn more about fertilizers, see the Best Aquarium Plant Fertilizers blog post for details on macro and micro nutrients.

    Editor’s Choice!
    APT Complete

    Editor’s Choice

    Made by an aquascaper for aquascapers. This is the best all around aquarium plant fertilizer on the market. Marco and micronutrients in one bottle!

    Use Coupon Code ASDComplete for 10% off your order!

    Click For Best Price Buy On Amazon

    Fish

    In an Iwagumi tank, the fish are part of your backdrop not the feature. We are not going to seek large fish because of this. We want peaceful schooling fish for our aquascape to complete our work of art. Tetras like neons, cardinal, embers or rummy noses are great. Harlequin Rasboras will also work.

    Fish for Iwagumi Aquascapes

    Filtration

    Iwagumis are high demand tanks. They are simple looking and zen like, but they are high bioload tanks with heavily feed plants. A top of the line filtration unit is a serious consideration here.

    We want the best for an Iwagumi, so I’m going to recommend the Biomaster Thermos Series of Canister Filters. It’s a complete, durable unit with an aquarium heater built into it. It is the go to now for high end planted tanks in today’s age.

    Putting It All Together

    So we have talked about the history and concepts of the Iwagumi, the rock layout, rule of two third, the plants, how to dry start, and the fish. Now it’s time to bring it all together and build a setup. Let’s make a shopping list for you.

    Maintenance Issues

    Plants used in this style of scape are usually heavy root feeders. In the beginning, they will be prone to algae issues. However, using the dry start method will limit our exposure. You may get a diatom outbreak when you come out of the dry start. Diatom blooms are common early on. Consider an Amano shrimp to take care of this as they will eat diatoms and savage for debris in your scape.

    Expect to do big water changes every week and regular pruning. 50% water changes are not uncommon with an Iwagumi. They look surprisingly simple and will be overtime as you get used to the demands of your plant growth, fertilizing, CO2 load, and bioload.

    When cleaning your rocks, a common toothbrush will do the job. Just scrub them and then trim your plants as needed with Pruning Aquascape Tools.

    Closing Throughts

    The Iwagumi Aquascape is my favorite aquascape of all freshwater planted tank setups. There is so much history with it. A complete setup is so zen like, peaceful, simple, yet complex. It is a true work of art. They look like landscape pictures to me or a mountain scape. Building an Iwagumi is definitely something that should be on the bucket list for any aquarium enthusiast. I hope you enjoyed spending some time together with me learning about this wonderful art craft. It truly is that – art. If you have any comments, please leave them in the comments section. Until next time folks. It’s been a pleasure!


    🌿 Want to learn more? This article is part of our complete Planted Tank & Aquascaping Guide. your ultimate resource for aquarium plants, aquascaping styles, substrates, and more.

  • 7 Best Nano Reef Tanks – Tested and Reviewed for Coral Keepers

    7 Best Nano Reef Tanks – Tested and Reviewed for Coral Keepers

    Nano reef tanks have gotten genuinely impressive in the last decade. The hardware has finally caught up to what serious reef keepers actually need in a small footprint. But here’s what nobody tells you when you’re browsing these systems online: a nano reef is not an easier reef. It’s a faster one. Parameters that drift slowly in a 120-gallon tank can crash overnight in a 20-gallon. I’ve seen it happen in the stores I managed, and I’ve seen it happen to hobbyists who bought the wrong kit. Choosing the right system from the start is the difference between a thriving coral display and a expensive lesson.

    Modern all-in-one systems have made it genuinely possible to keep healthy corals and reef fish in 20 to 50-gallon setups that would have been nearly impossible a decade ago. Running a 125-gallon reef myself, I have real appreciation for what nano reef builders accomplish in a small footprint. The key to success at this size: integrated filtration, adequate flow, and quality lighting are not optional. At small volumes, they’re survival requirements.

    With over 25 years of experience in the aquarium hobby, I’ve assisted countless clients, hobbyists, and readers like you in finding the right system. I’ve personally kept and serviced nano reefs in real-world scenarios to determine what works and what doesn’t.

    Mark’s Expert Take

    Here’s the thing people get backwards about nano reefs: they think smaller means easier. It doesn’t. It means faster. Parameters that drift slowly in a 120-gallon tank swing overnight in a 20-gallon. I’ve watched nano reefs in the store crash from a single anemone dying in a back corner nobody noticed. The water volume has no buffer. A nano reef done right is stunning. Getting it right requires daily attention, a stable evaporation routine, and gear that doesn’t cut corners. This is not a beginner’s tank. It’s an expert’s tank in a small package, and you need to go in with that mindset.

    The Top Picks

    Editor’s Choice!

    Red Sea Max

    • All in one
    • Premium equipment
    • Rimless
    Best Value

    Nuvo Fusion Lagoon

    • Great Brand
    • Premium Equipment
    • Rimless
    Budget Option

    Fluval Sea Evo

    • Small footprint
    • Great price

    Let’s start off with the top selections for those of you in a hurry. The red sea tops our list with their all in one aquarium while the Fluval sea offers a great value package for those wanting to try a nano reef tank.

    The Candidates – A Quick Comparison

    Let me list out the best nano reef tanks available and the ones who made our list for consideration. For this round up I focused on all in one tanks. 

    Picture Name Type Link
    Editor’s Choice

    Red Sea Max Nano

    Red Sea Max Nano
    • Fully Functional Aquarium
    • Premium Equipment
    • Rimless
    Click For Best PriceBuy On Amazon
    Best Value

    NUVO Fusion 25 Lagoon

    NUVO Fusion 25 Lagoon
    • Premium Equipment
    • Rimless
    Click For Best PriceBuy On Amazon
    Budget Option

    Fluval Sea Evo

    Fluval Sea Evo
    • Fully Functional Aquarium
    • Great Price
    Click For Best PriceBuy On Amazon
    Waterbox Nano Waterbox Nano
    • Cube
    Click For Best PriceBuy On Amazon
    JBJ Nano-Cube WiFi JBJ Nano-Cube WiFi
    • 40W LED
    Click For Best PriceBuy On Amazon
    Coralife Biocube Coralife Biocube
    • Beginner Friendly
    Buy On ChewyBuy On Amazon
    Fiji Cube All-In-One-Kit Fiji Cube All-In-One-Kit
    • DIY Kit
    Buy On Amazon

    The Top 7 Nano Reef Tanks (2026 Reviews)

    Okay so you got the must knows. Now it’s time to find out what makes these tanks so great. Time to see why they made the cut! You can also check out our YouTube Channel below and follow along with this blog post.

    1. Red Sea Max

    Best Nano Reef Tank!


    Red Sea Max Nano

    Editor’s Choice

    A high end plug and play reef system. Top shelf reef equipment and design


    Click For Best Price


    Buy On Amazon

    If you are looking or a top of the line aquarium kit with premier equipment, the Red Sea Max Nano Aquarium kit is where to go if you are on a higher end budget. It’s a 20 gallon aquarium that comes with high quality Red Sea 50 led light that is suitable for most corals in a nano reef system. The Red Sea Max Nano aquarium kit is equipped with features such as European built pumps, micro filter bag for mechanical, an automatic top-off unit, and a protein skimmer this comes with every single major piece of equipment you will need to run a successful reef all in a complete integrated package.

    It is a full aquarium that has an easy set up and high quality nano protein skimmer. It runs day and night and is one of the high quality saltwater aquariums we recommend that comes equipped as a full kit.

    Pros & Cons

    Pros
    • Premium Equipment
    • Great Light
    • Rimless
    Cons
    • Expensive

    Mark’s Top Pick

    Red Sea Max Nano. It’s the only all-in-one nano reef kit that ships with gear I wouldn’t immediately want to swap out. The Red Sea 50 light is genuinely reef-capable, the included skimmer works, the ATO is built in, and the European-built pumps are quiet and reliable. It costs more than the competition. It’s worth it. Every other AIO on this list requires at least one meaningful upgrade to be fully reef-ready.

    2. Innovative Marine Fusion 20 Pro

    Best Value


    Innovative Marine Nuvo Fusion PRO

    Best Value

    Complete with pump and filter, this rimless nano tank screams value


    Click For Best Price


    Buy On Amazon

    This nano saltwater aquarium tank holds 20 gallons of water and comes is a fully equipped kit with just about everything your aquarium fish could need. The Fusion Nano 20 has plenty of room for giving your fish a fun environment and comes with a water stage filtration system. It fits perfectly on the back of the tank, well hidden and out of the way, and runs quiet. You won’t be woken up by the noise of it or hardly notice it at all. 

    An added bonus to this high quality aquarium kit is that it comes with a magnetic glass cleaner. It’s super easy to use and great at cleaning the glass, so you won’t have to get wet when scrubbing down the tank. It makes keeping the water quality good easy, so you don’t have to spend valuable time. Besides, who wants to contribute to poor water quality that harms your aquarium unknowingly?

    Pros and Cons

    Pros
    • Premium Equipment
    • Great Pump
    • Rimless
    Cons
    • Expensive
    • No Light

    3. Fluval Evo Marine Aquarium Kit

    Budget Option


    Fluval Sea Evo XII

    Budget Option

    The Fluval Evo is a great way to create a nano reef tank. The light is ideal for low light corals


    Buy On Amazon


    Click For Best Price

    This glass tank is great for saltwater fish. It fits nicely in smaller spaces while still giving your fish ample room to swim around and explore. The glass tank is sleek with a smooth design and made from aluminum casing. It also comes with an led lighting system for both during the day and at night. The led system has a just as easy set up so that rest of the aquarium, so you won’t have to search for help.

    The Fluval Evo marine aquarium kit has a straight forward set up and features a powerful mechanical filter. It isn’t loud and won’t bother you during the day or at night, allowing your fish to have high quality filtered water without annoyance. The 3 stage filtration works day and night without aid and keeps your glass tank from growing algae as quickly. You’ll also find this tank has an easy feeding door located at the top of the tank.

    Pros and Cons

    Pros
    • Beginner Friendly
    • Great Price
    Cons
    • Only works for low light corals

    4. Waterbox Aquarium


    Waterbox Nano

    A classy rimless nano reef tank that won’t break the bank! Great design with a well design all in one chamber


    Click For Best Price


    Buy On Amazon

    Waterbox has really shook the industry with very precise and classy glass nano aquariums. The Waterbox Nano Aquarium is a perfect saltwater tank for someone looking for a nano aquarium kit with an all in one set up. It comes with all the stage filtration system parts you need to start and it’s easy to upgrade with the space given in the all in one chamber.

    This saltwater tank comes in sizes between 4 gallons and 20 gallons, shaped in a cube with 5-6mm thick glass. The back of it is smooth and well covered so you won’t have to look at awkward parts or an ugly set up. It’s complete with a built in water overflow system and 3 stage filtration system chambers as well. During the day and night, you’ll hardly notice the sounds of the three stage filtration system or water pump.

    The rimless design of this waterbox aquarium makes it appealing and sleek, easily blending into your home decor. There is plenty of room to landscape the aquarium to your liking. It doesn’t have a cover, but as long as you don’t have other animals that might get into it, you’ll be fine.

    Pros and Cons

    Pros
    • Great Build Quality
    • Cube Shaped
    Cons
    • No Light

    5. JBJ Nano Cube Wifi 28 – All In One With Light At A Reasonable Price


    JBJ Nano Cube LED Aquarium, 24-Gallon

    This nano reef tank is powered by a 40 watt LED system that can house mid and low light corals


    Buy On Amazon


    Click For Best Price

    The new JBJ Nano Cube 28 Wifi is the successor to the well known JBJ Nano Cubes and a great upgrade for a larger cube aquarium. This new model features a wifi enabled 40W LED lighting hood with 3 stage filtration system baskets that are easily removable. The main cost savings with this aquarium is the wifi-enabled LED lights which is easy to control with the app and will handle most light and medium light demand corals.

    The Wi-Fi system is easy to use and the wavemakers make this a true self run system. It’s one of the better all-in-one systems out there. The price just keeps it lower on this list.

    Pros and Cons

    Pros
    • 40W LED System
    • WiFi Enabled
    • Smart Phone Controlled
    Cons
    • Expensive
    • Curved Glass

    6. Coralife BioCube

    The BioCube is what created this category in reefing. This cute little LED biocube nano tank is great for putting on a nightstand or another small space. It measures 15” x 16.75” x 17.5” long, wide, and high. This small square won’t hold a hugely diverse collection of fish, but it will give your few fish a nice little home to play in.

    This saltwater nano tank features a 24 hour timer to replicate a natural day and integrated LED lights. There is a built in 3 stage filter and an easy flip lid that nicely covers the top of the aquarium. The 3 stage filtration system and led lights really make this kit great.

    Pros and Cons

    Pros
    • Brand Name
    • Readily Available
    • Lots of Upgrades Available
    Cons
    • Expensive
    • Underpowered Lights
    • Curved Glass

    7. Fiji Cube All In One Kit

    Great for DIYers


    Fiji Cube AIO Box

    A DIYers special! The Fiji Cub AIO Box turns any standard aquarium at a pet store into an all in one system that can run a nano reef tank


    Buy On Amazon

    This fiji cube kit is available in sizes ranging from 10 gallons to 40 gallons and all the way up to 75 gallons. It includes a plumbing kit with an adjustable nozzle and a filter sock holder. Well constructed, this reef tank kit features just enough space for all the filter media you’ll need.

    This all in one kit can be put into your aquarium to step up your tank game. As long as you purchase the right size kit for your tank, you’ll be able to deck out your fish’s home and make your tank look just a little classier. It has a reliable filtration system, submersible pump, and other features to up your game.

    Pros and Cons

    Pros
    • Cheap
    • Converts Any Standard Aquarium
    Cons
    • Underpowered Pump

    How We Ranked These Tanks

    After running a 125-gallon reef and keeping nano systems in the stores I managed, I know what separates a nano reef that thrives from one that crashes. Every tank on this list was evaluated on six criteria that actually matter:

    • Lighting quality for coral: PAR output and spectrum matter more in a nano than anywhere else. Underpowered lights mean soft corals only; properly specced lights open the door to LPS and even select SPS.
    • Flow and turnover rate: A reef tank needs 20-30x turnover at minimum. Most budget nano kits fall short, which leads to dead spots, algae, and unhappy corals.
    • Heater precision: Small water volume means temperature spikes faster. A cheap heater in a 20-gallon is a coral killer. Precise, controllable heaters matter here.
    • ATO compatibility: Evaporation in a nano tank is significant and daily. A system without ATO support means manual top-offs or salinity swings. That’s a problem.
    • Filtration chamber accessibility: If you can’t easily access the sump/chamber to clean and maintain, you won’t do it consistently. Poor access equals poor maintenance equals crashes.
    • Footprint vs. water volume: Bigger footprint with lower height is almost always better. More surface area, more gas exchange, easier coral placement.

    What Most Nano Reef Kits Get Wrong

    Most all-in-one nano reef kits look complete on paper. They’re not. Here’s what they consistently miss:

    • Lighting inadequate for LPS and SPS. Budget nano kits ship with lights designed to sell the tank, not grow corals. If the spec sheet doesn’t list PAR values and a reef-appropriate spectrum, assume it won’t grow anything demanding.
    • No automatic top-off. Evaporation in a nano tank is 0.5 to 1 gallon per day depending on heat and flow. Miss a day or two and your salinity is already shifting. An ATO is not optional equipment on a nano reef. It’s a stability requirement.
    • Skimmer chamber access is an afterthought. Several popular nano kits have sump chambers you essentially need tweezers to service. If maintenance is difficult, it doesn’t get done. That’s how tanks crash quietly.
    • Undersized return pumps. A tank rated at 20 gallons with a 200 GPH return pump is not hitting adequate reef turnover. Look for pumps capable of 400+ GPH at head pressure, not the marketing number.

    Should You Get a Nano Reef?

    Buy If

    • You already keep a larger reef and want a focused display tank
    • You have daily time for top-offs (or budget for an ATO)
    • You want a showpiece tank, not a starter tank
    • You’re comfortable with water testing 2-3x per week

    Skip If

    • This is your first reef tank (start with 40+ gallons)
    • You travel frequently or can’t commit to daily checks
    • You want a low-maintenance saltwater tank
    • Budget is the primary concern (the cheap kits create expensive problems)

    The honest answer: A nano reef is the most demanding tank per gallon you can keep. If you’re not experienced with reef chemistry, do yourself a favor and run a larger system first. The stability buffer you get from extra water volume is worth more than the space savings of going small.

    The 5 Things You Must Know Before Buying a Nano Reef Tank

    I showed you a quick list of the best out there. Before I go into detail on each tank, Let me go through the 5 things you must know before you venture into the Nano Reef Tank journey.

    #1 It’s Cheaper to Setup than A Traditional Saltwater Reef Aquarium

    Most hobbyists and fish keeping experts will recommend starting out with a larger aquarium typically anywhere from a 40 – 75 gallon. This is because a larger tank will have more water volume for added stability. However, not everyone can afford a tank this size (or have the space for one) so a nano reef tank is a legitimate consideration for those with small budgets.

    A good aquarium kit will include features such as a filter, submersible pump, and a protein skimmer. Some may even have LED lights to provide light day and night.

    While a nano reef aquarium is still expensive compared to a freshwater tank, you will not need to shell out thousands of dollars on a small setup. With proper preparation and care, one can successfully keep a smaller nano reef and often times produce a stunning aquarium that rivals the looks of larger aquariums – at only a faction of the cost!

    So what exactly is it?

    Well, let’s define it here as many hobbyists will break out the nano reefs into two categories:

    • Nano Reef Tank – Aquarium that is 40 gallons of water or less
    • Pico Reef Tank – 5 gallons of water or less

    We are going to discuss nano reef tanks in this post only. Pico tanks are the subject of an advanced aquarist nature and definitely not for the faint of heart, so it’s best to wait for the pico tank of your dreams until you know what you’re doing. So now that the term nano reef tank has been defined, let’s talk about why they are cheaper.

    Let’s break it down into several reasons:

    • Minimalistic setup
    • LED lights are cheap in a nano 
    • Nanos are far easy to break down and move

    The first part are the setups. Nano reef tanks will usually have a bare bones type of setup. There is usually not a sump involved which means there is no plumbing to deal with. A simple powerhead or aquarium wavemaker is used for flow and flow tends to be less complicated because nano tanks will often be coral reef type dominant vs. mixed. 

    Protein skimmers are not necessary, though many hobbyists will use them. When a protein skimmer is used a hang-on back protein skimmer is typically used. Due to the small size of the tank often times a hobbyist will opt for purchasing distilled or RODI water from a local fish store instead of investing in a RODI system.  Your electrical bill will also be cheaper as well since you will not be using that much equipment.

    Budget Option


    Aquatic Life RO Buddie

    Budget Option

    Compact and great for smaller tanks. This is the best unit if you live in an apartment or dorm


    Buy On Petco


    Buy On Amazon

    Lighting is another cost savings. One of the most expensive pieces of equipment for larger tanks are the lighting systems required for higher intensity and the number of LED lights needed for longer tanks. With nano reef tank kits, the lighting cost is cost down drastically.

    Some nano reef kits will actually come with features for lighting and this lighting is plenty for soft coral or fish only with live rock setups. Even for a high end lighting system, you will likely not spend more than $200 on lighting for a nano reef tank (and in most cases much less than this). Chinese Black Box lights are often used for nano tanks as they are well sized and have the light intensity to accommodate all setups and are cheap.

    Mobility is another great benefit of a nano reef. These aquariums often are placed in tight areas like a desktop, bedroom, or on a stand in a living room. Because they are able to be moved easily, one can move them throughout the home to suit the home decor changes you make over time. They are also one of the aquariums that you can safely place upstairs.

    With larger systems, one has to consider the structural support of the home to ensure it can support the weight upstairs. If your home does not have the proper weight support for a large system, it is likely that you would need to increase the support or consider a different location. There is also water spills to consider with a larger tank upstairs.

    #2 It’s Considered an Advanced Level Aquarium

    I will open and honest and say that a nano reef tank is more suited for an experienced aquarist. There are three reasons for this:

    • Stability with salinity
    • Stability with temperature
    • Stability with nutrients

    The main reason why there is lack of stability is due to having less water volume in the tank. Evaporation in particular, is extremely brutal to a nano reef tank. Every other day freshwater top-off is usually needed to keep salinity parameters in check. Sometimes, the task is a bit overbearing so you will often see an auto top off system (ATO) installed in a nano reef tank. 

    Temperature is another concern, especially if you live in a warmer climate. Temperatures can swing during the summertime especially if you live in a home without air conditioning. When in doubt, a cooler room is easier to deal with than a warmer room in the home.  You should also utilize an open tank setup. Your lighting system must be suspended above the aquarium either with a suspension kit or the suspension mounts your LED light system comes with.

    A canopy is a no-no for a nano reef tank. You can ensure proper control of temperature with a controller like an Ink Bird controller. This controller will guard against aquarium heater failure – the #1 reason for tank crashes.

    Protects Against Heater Failure!


    Inkbird Heater Controller

    Protect your investment with this heater controller. An excellent choice for small tanks. WiFi models now available!


    Buy On Amazon


    Click For Best Price

    Nutrient stability is the last issue with a nano reef tank. Because you do not have a larger volume of water, weekly water changes are a must for a nano reef. In a larger system, it is reasonable to perform bi-monthly or monthly water changes. There are even cases where other hobbyists go months after establishing a complete nitrogen cycle in the tank.

    Unfortunately, this is not a reality in a nano reef tank. You will not have enough volume and space to establish a complete system and with the stability issues – it is a best practice to continue weekly water changes even after running the desk successfully for some time.

    The good thing, however, is that water changes are a breeze in a nano reef tank because you changing a very small amount of water volume.

    Because of the inherent stability issues with a nano reef tank, it is not uncommon to spend extra time monitoring the tank. Leaving your tank unattended for more than two days can be disastrous if something would happen like a heater failure.

    It is best to know a friend in the hobby if you are planning to be out of town to watch your tank. You can use my earlier blog post of a list of hobby clubs near you to find other hobbyists in your area. 

    #3 Your Options for Fish are Limited in This Type of Setup

    Due to the limited amount of space and stability issues of a nano reef, your options for fish are very limited. When thinking about fish to put into a nano reef tank, we need to consider the following:

    • What is our fish’s natural temperament?
    • How large does the fish get?
    • How hardy is the fish?
    • Are the fish reef safe?

    When thinking about the fish’s natural temperament, we really want to focus on getting a fish that has a mellow temperament. This is likely going to be the only fish or one of the only fish in the tank. So if you are considering placing more than one fish in the tank, we really want to purchase a peaceful fish.

    If you are happy with only one fish in the tank, we can do that as well. But we have to keep in mind any invertebrates that you want to add – especially shrimp.  Some fish like damselfish are known for attacking shrimp when space is lacking. It may be best to consider avoiding any damselfish if you are considering shrimp.

    Your fish’s size is the next consideration. We really want to purchase a fish that is going to get no larger than 3 inches for a nano reef tank. This means no large fish like Tangs. I do know some hobbyist placing a tang in larger nano reef tanks like a 40 gallon tank in the short term, but if you are new to nano reefs or do no have the money for a future upgrade I would not consider a Tang for the sake of the fish’s livelihood.

    The hardiness of your fish is another important factor. A nano reef tank will have parameters fluctuate no matter how much try to prevent it. Because of that, you want to make sure you have the most resilient fish you can buy. Look for tank bred fish or fish labeled as easy to keep or hardy.

    Reef safe fish is our last consideration. It actually many not be a factor if you are considering a fish only with live rock setup, but nevertheless you do not want to house a known coral picker in your tank. Your space is small and you will not have many corals.

    If you have a coral picker, it will not take very long for your fish to wreck havoc on a small tank. This means that even borderline reef safe fish like dwarf angels are out of the consideration for a reef tank. It’s best to take the risk with a larger tank with fish like that as you can remove the picker before things get our of hand.   

    So now that I have outlined the important factors, let’s talk about fish that fit this criteria. Several fish from my top 10 best saltwater fish for any reef tank post make great nano reef tank fish. You can check out that post for further info, but here are several fish that would fit well in virtually any nano reef tank setup:

    Editor’s Choice


    Tank Raised Clownfish

    Best Choice For Reef Tanks!

    Clownfish are hardy, full of personality, and are safe for all corals. They are an icon for any saltwater tank


    Click For Best Price


    Purchase ORA Clownfish

    Keep in mind when it comes to stocking fish in a nano reef tank, we want to lightly stock our tank. You are dealing with a small amount of volume, limited space which will increase aggressiveness, and limited bioload capacity from having a smaller tank. I know that movement and personality of the fish is the big draw with aquariums, so this takes me to the next section of our article.

    #4  It’s More About Your Corals Than The Fish

    As we covered earlier, one of the issues that nano reef tanks face is their lack of size. The very thing that makes them an attractive option for small spaces also puts them at a disadvantage when it comes to stability. Chemistry and temperature changes happen quickly in a nano reef tank. Because of this some corals are going to be ill suited for a nano reef tank. We talked about fish earlier. So what are some good choices when it comes to corals?

    Because we know that our fish choice and stocking is limited, we really should focus on corals. Picking a variety of the correct corals will add lots of color and movement to a nano reef tank that will mitigate the lack of space and stocking options. I will break down the consideration factors below:

    • Hardiness
    • Movement
    • Aggressiveness
    • Variety

    Hardiness is our number one factor when it comes to selecting corals in our nano reef tank. We want corals that can take a few parameter swings. This makes soft corals the prime candidate for nano reef tanks.

    Nano Reef Tank - 5 Things You Need To Know

    The movement of corals will create a flow in the tank and make the aquarium pop. Without the movement, you are going to have very little moving life in the tank because you will likely have one or two fish in the tank. Lots of movement sometimes comes with added aggressiveness.

    Because of our lack of space, aggressiveness is a bigger consideration than in larger tanks. Spacing aggressive corals too close to each may cause coral deaths, especially with corals with strong stingers like some LPS corals. The preference would be to house corals that are known for living in dense spaces.

    Variety is our last consideration. We want to have a variety of colors available in our corals because we will not have many fish. The good thing is with the availability of aqua cultured and fragged corals, the variety of colors are ever increasing with this hobby. 

    #5 Patience is a Virtue

    Any experienced hobbyist will tell you that patience is key when it comes to reef aquariums. It is even more pronounced in a nano reef tank.

    In a larger system, you can sometimes get away with rushing things because you have the buffer of a larger volume of water. That is not the case in a nano reef aquarium. Take the time to cycle your tank correctly, ask a ton of questions, and do not impulse buy. Any mistake or impulse purchase gone bad will get ugly very quick in nano reef aquariums.  

    How To Setup (3 Main Setups for Success)

    So now that I have gone through the selection factors for corals in a nano reef tank, let’s talk about setups. I’m going to focus on coral type tanks as those are the easiest ones to explain. I will go through the following:

    • The Bullet Proof Setup
    • The LPS Setup
    • The SPS Setup

    1. The Bullet Proof Setup

    A bullet proof setup in the best nano reef tanks would comprise of easy-to-care corals such as soft corals, polyps, zoas, and mushrooms. These types of corals are great choices for a nano reef tank as they are tolerant of a few fluctuations in chemistry and temperature in the tank. Not only are these corals hardy, but they will also provide much needed motion in the tank.

    Here are a few examples of corals that would make good additions in a bullet proof setup:

    Editor’s Choice


    Zoanthids

    Editor’s Choice!

    Zoas come in multiple colors and easy to care for. The perfect choice for nano tanks!


    Shop Designer Zoas


    Shop For WYSIWSG Zoas!

    Finger leather corals are fast growing and great for filling vertical space while mushrooms, polyps, and zoas can fill the mid and low spaces. Their rapid growth will cause them to fill out a nano reef within a few months.

    The main advantage with corals like these is they have a weaker stinging ability compared to other corals. This means that they are able to be in close proximity to each other without too much stress. There is always some type of territory combat in a reef aquarium, but soft corals are less likely to kill each other off and you are given more leeway for to make up for mistakes.

    The other great thing about a bullet proof setup is your lighting requirements are pretty simple. Virtually any type of LED fixture available for a nano reef tank is going to provide ample lighting for these corals and the lighting solution will be easy on the wallet.

    I have not even mentioned the color variety available – especially for zoas. I have seen many beautiful Zoa only nano reef tanks that are absolutely stunning. It is very easy to get addicted to Zoa collecting and building up your own mini water garden.

    Zoa Nano Reef Tank

    2. The LPS Setup

    While not as hardy as a soft coral setup, a LPS setup can provide one of the most stunning looking aquariums.  With many LPS corals to chose from, they provide a variety  of colors and motion in the tank.  

    The main issue with LPS is their aggressive nature. Careful spacing will need to be provided especially when it comes to Hammer, Frogspawns and Torch corals. These corals are know to kill off other neighboring corals if placed to close to each other. 

    Here are a few examples of corals that would make good additions in a LPS setup:

    • Frogspawn
    • Hammer
    • Torch
    • Blastomussa (Blasto)
    • Acanthastrea Lordhowensis (Acan Lord)
    • Micromussa Coral (Micro Coral)
    • Candy Cane Coral
    • Trumpet Coral

    Because of the more aggressive nature of Frogspawns, Hammer, and Torch corals, it would be best to only have a select few of these.  In smaller nanos, it is probably best to avoid these corals because of their aggressive nature and their size, or consider a Frogspawn/Hammer coral only setup. and all Euphillya setup is a great way to mimic an anemone tank look.

    Candy Canes, Acans, and Micro corals, however, are more peaceful. Your lighting is going to need to be more intense than with the bullet proof setup, but any reef grade LED should work for an LPS setup.

    LPS Only Nano Reef Tank

    3. The SPS Setup

    Small Polyps Stony Corals or SPS corals are a very popular reef tank setups in the hobby. If you have been to any of the big reefing forums, you will see that many of the feature tanks on those forums are dominated by SPS setups. They are the hardest of the three setups I have outlined.

    Here are the reasons why SPS are usually not a good idea for a nano reef tank:

    • Very delicate corals
    • Very combative
    • Requires intense lighting

    Any sudden change in water or light can suddenly kill multiple colonies in an SPS tank. Their combative nature is known in nature. What typically happens is that two colonies will grow over time and eventually touch each other – which causes a die off in both colonies.  

    The lighting requirements of SPS corals are also very high, which means the intensity of your lighting in a small space might increase your temperature to deadly levels.

    So while they are not a good fit for a nano reef tank, many hobbyist will still place SPS in corals in the tank. I am not going to get into harder-to-keep SPS corals as that is the subject of a more advanced coral keeping post for another time.

    I want to concentrate on the hardiest SPS corals out in the market that would be appropriate if one desires to keep SPS corals in their nano reef tank. When looking for SPS corals in a nano reef tank, we want to find SPS corals that are hardy and tolerant of subdued lighting conditions.

    Here is the list of the best SPS corals for a nano reef tank:

    • Seriatopora hystrix (Bird’s Nest Coral)
    • Pocillopora
    • Echinophyllia aspera (Chalice Coral)

    What I am doing here with these recommendations is replicating the big draws of an SPS setup (branching and plating corals), but selecting SPS corals that are on the hardier and less light intensive end.

    SPS Nano Reef Tank

    Both bird’s nest and pocillopora will gave you that branching look of an Acropora coral while the chalice coral will give you a look similar to a Montipora coral.

    While they are on the hardier end of the SPS care spectrum, it is all relative. This type of setup is far from a bullet proof setup. SPS corals are still an advanced level coral and you would still need to keep a watchful eye on water parameters. 

    Closing Thoughts

    A nano reef done right is one of the most impressive things in the hobby. Fifteen gallons of living coral under good light, with a clownfish and an anemone, looks like a piece of ocean on your desk. It genuinely does. But getting there takes real commitment: consistent top-offs, weekly parameter checks, and gear that doesn’t cut corners. The tanks on this list are the ones worth building that commitment around. Skip the bargain bins. Nano reefs do not forgive cheap equipment.


    🔧 Want to learn more? This article is part of our complete Aquarium Equipment & Gear Guide. your ultimate resource for filters, heaters, lights, pumps, tanks, and more.

  • How To Survive A Fish Tank Power Outage – Read This To Save Your Pets!

    How To Survive A Fish Tank Power Outage – Read This To Save Your Pets!

    The most dreaded event in our hobby is a fish tank power outage. I write this article with a heavy heart as a good friend of mine just lost his reef tank of over 11 years after the snowstorms here in Texas. He had a wonderful 150 gallon reef tank and within a few days everything was gone!

    I don’t want you to go through the same thing and hopefully you are reading this before you had a power outage. It’s a horrible and helpless feeling. I also feel this should have been one of the first articles I wrote when I started up this blog. Either way, I’m here to guide you and get you prepared. I’ll cover it all. I’ve been in your shoes and have survived several here in Texas. It’s an all too common event here with our weather.

    Why Is An Aquarium Power Outage So Deadly?

    Let’s start with this first question. For the vast majority of pets that we know of, most will be unaffected by a power outage. A dog will continue to be your companion and a cat will happily hunt for its own food if things get very dire. Both pets in these cases continue to have free unrestricted reign to their space.

    The live animals in your aquarium do not have this privilege. They are in a closed environment – their aquatic world. Everything in your aquarium requires the ecosystem to be stable. When the electricity goes out, the entire system is thrown off balance. Air pumps and wavemakers move water and oxygenate it. Your power filters and sump maintain your nitrogen cycle and keep your bacteria colonies going. If you keep live plants or live rock, these lifeforms provide filtration and need your fish happy and healthy to function.

    Electricity is the heart of the your artificial ecosystem you have created. Without it, the life support breaks – and it gets ugly and tragic very quick

    Why You Need A Backup Plan

    Let me highlight the story of my friend. Below is a picture of his tank before the snowstorms here in Texas. 11 years of building his reef tank down the drain in a few days. He didn’t have the equipment to get through the power outage. Most people with tanks this large don’t. I don’t spare you the aftermath, it’s not for the faint of heart

    Aquarium Power Outage

    Let’s talk about everything that goes wrong during a power outage

    Oxygen Levels

    This is the primary concern when you have a power outage. Oxygen will be the first thing the depletes in your aquarium. Once your air pumps, wavemakers, and return pumps power off it’s a race to keep your oxygen levels up. Within a few hours of no water flow, your oxygen levels will deplete and everything will start to suffocate. It gets ugly very quick.

    Temperature

    This is the next killer. This is what I call the long-term killer when power outages last for days. Depending on your climate it will either be a cold tank or one that overheats. Cold weather is actually either to deal with because animals in aquariums can handle colder weather for some time. They will go dormant or slow down. I have seen reef tanks go through cold temperatures for several days hitting low 60s and the corals and fish pop right back up after the power comes on.

    Heat is a other other matter. It makes a lot of sense as we have see mass bleaching events in our oceans when temperatures rise only a few degrees1. This is the same with freshwater fish. Heat kills aquatic animals fast. And it doesn’t take a power outage either! A failed AC and 85+ degrees in your home and your apartment is dangerous for your fish tank

    Ammonia Spikes

    Once animals start dying, there will be massive ammonia spikes. Your bacteria colonies, which are handicapped during an outage will be overwhelmed at the increase in ammonia. It will be like dominos falling. Once something dies, everything else will start doing so quickly!

    Get Your Gear Now – Don’t Wait!

    I’m going to provide you a quick shopping list of what you will need that covers different sizes of fish tanks and needs. I will go over why each one is effective. Get this gear now before disaster strikes. You owe it to your aquatic animals

    PictureNameTypeLink
    For Large Tanks
    Champion Generator
    Champion Generator
    • For large tanks
    • Long-term power outages
    Buy On Amazon
    Requires No Electricity
    Dr. Sochting's Oxydator
    Dr. Sochting’s Oxydator
    • Requires No Electricity
    • Removes Ammonia
    Buy On eBay
    Most Portable
    AmPeak Car Inverter
    AmPeak Car Inverter
    • Works on Cars
    • Long term outages
    Buy On Amazon
    For Small Tanks
    Penn Plax Battery Powered Air Pump
    Penn Plax Battery Powered Air Pump
    • Battery Powered
    • Small Tanks
    Buy On Amazon
    For Wavemakers
    IceCap Battery BackUp
    IceCap Battery BackUp
    • Battery Backup
    • DC Wavemakers
    Click For Best PriceBuy On Amazon

    Gear

    I’ll go over each piece of equipment and explain what they are best for

    1. Generators

    Generators are the best solution for a long-term power outage. A lot of aquarium stores and retailers do not like to talk about them because they want to sell you their aquarium based solution, but the fact of the matter is an old school generator will get you through the worse power outages.

    The one I linked to is an all-rounder that will work for virtually any situation and setups. I know some hobbyists who have so much invested in their tanks, that they have purchased a whole home generator. These are very expensive and out of the budget of most folks. They run off gas that you can get from a gas station or siphon from your vehicles. A full tank should run you about half the day. If you don’t purchase one for your aquarium, you should consider getting one for your house as part of your diester planning efforts

    2. Dr. Sochting’s Oxydator

    This has been my secret weapon for years against power outages. This amazing piece of equipment requires no elecricity to operate. It functions by using a catalyst and hydrogen peroxide. The chemical reaction creates oxygen for your aquarium and detoxes ammonia from your aquarium. This can efficiently replace your biological filteration and keep your tank full of oxygen during the outage

    Since they do not require electricity to operate, they are ideal for long-term power outages. The hydrogen peroxide will last 5-7 days and it’s easy to buy the solution in bulk and stock up. They are hard to find though. They are best ordered through EBay or get one now while you can wait on shipping

    3. Car Inverter

    This is another unconventional solution for an aquarium, but also way more efficient than what other retailers tell you. A car inverter converts the DC voltages in your car’s battery into AC power for your devices. You can keep your car on to keep your battery charged. Because your car runs off gas, this is another long-term solution and also a portable one as well.

    If you own multiple cars, it’s easy to switch between cars as you need power and if you run low on gas you just go to the gas station to get more

    4. Battery Air Pumps

    Battery powered air pumps are ideal for smaller tanks. All they require is C or D batteries and are very affordable to purchase. They are one of the easier go to solutions when it comes handling a power outage. Batteries usually last about 8-12 hours and can be replaced with a supply that you can store.

    Every aquarium should have one of these. They come in handy in a pinch

    5. Battery Backups

    This is the most common solution retailers will offer to you. It makes sense, most are made by aquarium equipment manufacturers. They have their place and will last several days.

    You will also see other options people will throw out like a Uninterruptible Power Supply (UPS). The problem with these is they are not designed to power aquarium equipment for long. They will using give you a few hours of power. The backups designed by aquarium equipment manufacturers are a better choice.

    Still though, battery backups aren’t effective for long-term power outages. I’d rather go with the combination of a Oxydator and generator to keep my tank going.

    How To Aerate Fish Tank Without Electricity

    Okay, so maybe you have come across this post and you have no equipment and you are on your phone trying to figure out what to do. If you lack equipment, here is the best way to low tech your way out of a power outage

    Low Tech-ing Oxygen

    • Get a bowl and scoop water out of your water and poar it back in
    • Use the same bowl to move the aquarium water across like a pump and create air bubbles
    • Repeat this process every 15-30 minutes

    Keeping Your Water Warm

    • Get thermal blanks and cover your aquarium in it
    • If you do not have these blankets, use any other blankets you have around the home
    • Huddle up the family near the aquarium too bring around body heat
    • Pour hot water into the aquarium slowly to raise the temperature – make sure this water is de-chlorinated

    Keeping Your Water Cool

    • Get ice out of your freezer and put it in a container
    • Put this container into your aquarium to cool your tank
    • Refill the container with more ice as it melts
    • Continue doing so to keep the temperature down
    • Remove your tank hood or open your canopy if you have one

    Common Questions

    How Long Can Fish Survive Without Electricity?

    Not very long. If you have not backup equipment, it can be as little as 2 hours before your fish run out of oxygen in your tank and they start suffocating. If you do not invest in a power outage solution your cherish pets can perish within a few hours after the power goes out!

    Can Fish Survive Without a Filter?

    They actually can if you invest in a power outage solution. An Oxydator will keep your aquarium’s oxygen’s levels up and will provide ammonia detox. If you have a battery backup or generator, your equipment will run during an outage

    Will My Fish Die If The Electricity Goes Out?

    Yes, they may very well die if you don’t take proper action! Get the proper equipment like battery powered air pumps or a generator if you have a larger aquarium. Flow the low tech plan of pouring and moving water to keep oxygen levels up and keep your temperatures stable.

    Will Tropical Fish Die Without A Heater?

    Yes, they can. However, cold is a slower killer to fish versus heat as fish will attempt to go dormant in the event the temperature drops low in the short term. You should take action in trying to keep your tank warm during a power outage. Most fish should be able to survive mid 60 degree temperatures in the short term. Just take the steps needed to in order to keep your tank as warm as possible. There is no heater that runs well in an outage as they draw a lot of energy.

    How Can I Oxygenate My Fish Tank Without Electricity?

    There are multiple ways to do this. Battery powered air pumps are the usual go to. A Sochting Oxydator is another great tool that will run for weeks without electricity while also removing ammonia. A low tech way of oxygenating without electricity would be to move the water manually every 15-20 minutes to keep oxygen flowing in the tank.

    Still Not Sure What To Do? Ask A Question Below

    We supplied a video below for reference from our YouTube channel. If you find our content helpful, please subscribe to us as we post new videos every week.

    I know it’s tough and I know it’s heart breaking to experience a power outage tragedy. I’m here to help. Don’t be afraid to reach out in the comments below, email me, or even call me on my business line on my site’s foot below. I’ve survived several of these successfully in the past so I know what it feels like to be in your shoes. Best of luck for you and don’t be afraid to reach out.

  • Best Auto Top Off System (2026 REVIEWS 🏅) – Keeping Your Aquarium Stable

    Best Auto Top Off System (2026 REVIEWS 🏅) – Keeping Your Aquarium Stable

    An auto top off system is one of those pieces of equipment that seems optional until you realize how much salinity swings can stress your livestock. In a reef tank, evaporation can drop salinity noticeably within a day or two. especially in warm climates. I’ve run ATO systems on my 125-gallon reef for years and the stability difference is real. Once you set one up, you won’t go back to manual top-offs.

    Mark’s Expert Take

    An ATO is the piece of equipment most reef keepers wish they had bought sooner. Salinity swings from evaporation are slow and invisible until they are not. On a hot summer day a small reef can lose a gallon to evaporation. A manual top-off that is two days late is a 0.5 salinity point swing, and corals notice before you do. I made ATO a requirement on every store reef display I ran, and I give the same advice to every customer who asks. Get one before you need it, not after something crashes.

    Aquarium automation is becoming more and more of a reality to the modern aquarist these days. One of the most common applications of tank automation are auto top of systems (AKA ATOs). They are many out there, but which one is the best auto top off system? Today’s post is all about figuring that out

    These systems work to add freshwater to your aquarium as water evaporates. In saltwater tanks, they are extremely valuable in maintaining stable salinity levels as salinity can swing as water evaporates and does not get replaced. In freshwater tanks, this will keep your water level stable so your filtration can run optimally and so your tank doesn’t completely dry out.

    Replacing evaporated water is a real pain, especially for those with larger aquariums. Auto top off systems make things easy for you to manage without carrying a bucket of water everyday. However, you have to be very diligent about the system you choose. Auto top off systems are finicky and selecting one of poor quality ones can lead to a tank disaster and possibly an expensive home repair bill!

    This is the reason for this post today. Auto top off systems are great tools for making your life easier, but not all auto top off systems are created equal. I’ve used or have experience with most of these top off systems I will go over today. Before we get started, let’s talk about why a top off system is so great and what features you should be looking for.

    Why Do You Need An Auto Top Off System? 

    Anyone with a large amount of money invested in an complete aquarium system wants to protect their investment. An auto top off system is an automation tool that maintains stability in your aquarium. With saltwater aquariums it does more than just keep your salinity levels stable, but also to add supplements to your reef tank via Kalkwasser. In freshwater systems, it will keep your levels stable for equipment to run correctly.

    The main thing with an auto top off system is that you need a reservoir of water to pull from. You can use a sample 5 gallon bucket, brute trash can, or a glass/acrylic top of container designed for aquarium usage. The reservoir will usually last 5-7 days before needing to be filled up again saving you the time from having to fill up water manually. Auto top off systems are essential if you are out of town or frequently away and can’t regularly maintain the tank’s water level.

    Choosing An Auto Top Off System (What To Look For)

    Auto top off systems are widely available in the hobby and there are several cheaper options like a DIY systems, however we have to outline the major critical features that are required in a quality system. Below are the main things we want when selecting a proper top off system for our aquariums:

    Redundancy (Fail Safes)

    This is the most important feature to look for. Auto top off failure is pretty common, especially with systems that use a manual float switch. If the switch fails, the top off system will fail to turn off, which causes too much water to be added. Ideally, we need dual sensors with our auto top off system. We also desire both a manual and digital sensor. 

    Aquarium Float Switch

    For a manual sensor we want a float switch (pictured above). The float switch has a switch that floats with the water level in your aquarium. As the water level rises the switch triggers and turns off the top off system. This the most common type of top off switch and something you may be familiar with if you have seen the float switches on your toilets. They are fairly reliable, but since it has moving parts they are prone to getting clogged with salt creep, getting jammed with critters like inverts, getting interrupted by waves, or breaking.

    Auto Top Off System Digital Sensor

    For a digital sensor (pictured above), we want an electronic eye sensor. This sensor monitors the water level in the aquarium and turns off the top off system electronically when the eye senses water above where it’s set. It is reliable, but prone to getting clogged up by water impurities over time. Most top off manufactures like to market these sensors as “not having moving parts” knowing that manual switches can fail, but don’t really like to mention the faults of a digital switch.

    This is why we want to have a system with both manual and digital sensors. We can live with a dual manual or digital sensor, but the best of both worlds is a combo of digital and manual as both sensors can fail for different reasons.

    Timers

    Another critical feature we are going to want is a auto top off system with an auto shut off timer. In the event of a switch failing, an auto top off system with a shut off timer will shut off the pump before a major water disaster can occur. One of the biggest concerns with a DIY ATO solution is that there is no auto shut off timer.

    This means that water will continue to fill in your aquarium if your switches fail. This can be disastrous not only to your aquarium, but also to your home as well! You would have to add some type of auto shut off feature on a DIY system or consider an aquarium controller, both of which will add costs to the system.

    Value For Your Money

    Now that we know what we are looking for. Let’s look at the best auto top off systems available on the market.

    In a hurry? I recommend the Tunze Osmolator!

    Why #1 Ranked: What Actually Separates a Good ATO from a Bad One

    • Sensor type – Optical sensors beat float valves. Optical has no moving parts to jam with salt creep or get blocked by a stray snail. The Tunze Osmolator wins here by combining both.
    • Fail-safe mechanism – If a sensor fails, does the pump keep running? The Tunze has a timed shut-off that kills the pump automatically. Most budget units do not. That difference is a flooded sump vs. a saved tank.
    • Pump reliability – A bundled pump matters. Units that ship without a pump leave you guessing on flow rate and compatibility. The Tunze and IceCap include tested, right-sized pumps.
    • Reservoir size compatibility – The pump needs to reach the bottom of whatever container you use. Verify tubing length before you commit to a 5-gallon bucket vs. a dedicated ATO reservoir.
    • Alarm system – Low reservoir alert and high-water alert are both non-negotiable on a reef. Without them, you learn the reservoir is empty by watching your salinity climb.
    Picture Name Features Link
    Editor’s Choice!

    Tunze Osmolator

    Tunze Osmolator
    • Digital and Manual Sensors
    • Auto Shut Off
    Click For Best PriceBuy On Amazon
    Best Value

    XP Aqua Duetto ATO

    XP Aqua Duetto ATO
    • Dual Digital Senors
    Click For Best PriceBuy On Amazon
    Budget Option

    JBJ Auto Top Off

    JBJ Auto Top Off
    • Dual Manual Sensors
    Click For Best PriceBuy On Amazon
    Hydor Smart Level Controller Hydor Smart Level Controller
    • Dual Digital Sensors
    Buy On Amazon
    IceCap ATO IceCap ATO
    • Dual Digital Sensors
    Click For Best PriceBuy On Amazon
    EPTTECH Aquarium ATO System EPTTECH Aquarium ATO System
    • Digital Sensor
    Buy On Amazon

    ATOs – 2023 Reviews

    Let’s see why each ATO system made the list. Let’s dive in!

    1) Tunze Osmolator 3155 – The Gold Standard of ATOs

    Editor’s Choice


    Tunze Osmolator

    Editor’s Choice

    The most reliable and best auto top off unit available today. Digital and manual sensors with an auto shut off feature


    Click For Best Price


    Buy On Amazon

    The Tunze Osmolator is without a doubt the gold standard for auto top off systems in the industry. It has everything that I listed earlier that we are looking for in an ATO system. It has dual sensors – one float switch and one digital sensor that work together to manage your water level. It has an auto shut off feature so you won’t have to worry about the pump running too long or your house flooding if the switches fail. It has an audible alarm if the water level gets too high and comes with a quality pump from Tunze.

    The Tunze brand is well known for building lasting equipment and the reputation of this auto top off system is well known. They last for years and rarely fail with the pump usually failing first and being easy to replace. This is the ATO of choice for anyone building a quality display tank. You may have noticed there is a nano osmolator available from Tunze – but it’s simply not the same as it only has one sensor and I only list dual sensor ATOs for a reason on this post.

    It comes with a high price though. It’s the most expensive auto top off system for a reason. You get what you pay for with this system.

    Pros

    • Manual and digital sensors
    • Proven reputation and name brand in Tunze
    • Quality pump included
    • Auto shut off feature

    Cons

    • Expensive
    • Pump can be a little loud

    2) XP Aqua Dueletto ATO – Built for All In Ones

    Best Value


    XP Aqua Duetto

    Best Value

    Compact , dual sensors, and well priced. The XP Aqua Duetto is a stand out best buy


    Click For Best Price


    Buy On Amazon

    The XP Aqua Duetto ATO system is an ATO that has been designed with all-in-on aquariums in mind. It is designed for this purpose so well that Waterbox Aquariums often sells this ATO as an add on to their reef ready system. It is marketed as the “world’s smallest dual-sensor aquarium top-off system” and you can see by the sensors and pump how small it really is. It can achieve this small footprint by not using moving parts, opting for a digital sensor setup.

    The pump is a DC pump, which draws less power and allows it to be smaller in size. So small that it can easily fit in all-in-one chambers and operate effectively. It uses dual digital sensors that will work in complete darkness. Because the sensors mount magnetically without a sensor mount, they can be placed just about anywhere in the aquarium or sump chamber and can be hidden easily.

    For those aquarists who want a compact version of an osmolator, XP offers an ultimate version with 4 sensors that competes with the Osmolator 3155

    Pros

    • Small enough for all-in-one tanks
    • Good purchase considering pump is included

    Cons

    • Only uses a digital sensor
    • No auto shut off feature

    3) JBJ – Budget Friendly ATO

    Budget Option


    JBJ Automatic Top Off System

    Budget Option

    A great auto top off for those on a budget. Dual manual sensors and a easy to use controller get the job done


    Click For Best Price


    Buy On Amazon

    The JBJ Auto Top Off system is one of the main time tested entry level auto top off systems on the market. This system is different than the others before it on this list as it features two manual float switches that will trigger as your water level rises. There are no of digital sensors on this auto top of system. I actually don’t mind the dual float sensors and with the two types of setups you can do with this ATO system, you can have a pretty full proof and redundant system. 

    Another great feature is this system is easy to customize. You can modify the auto shut off timer by upping the time on the controller and tuning the shut off with a screw driver and you can also turn on an alarm when the ATO turns on. That’s a really great feature for control and to prevent any flooding in the event the float switches fail.

    The controller features an audible alarm if the max float switch triggers and both float switches are reversible if you need to do that. It really offers a lot for its price point.

    The things I don’t like with this system is you have to purchase a pump and the mount options aren’t that great. There is a suction cup mount option, which I would not recommend, and the bracket mount options just don’t look very pleasing to the eye and may mount weird if you have a rimless tank or sump. Not having a pump included usually brothers me with auto top off systems. I tend to lean on systems that comes with pumps as it takes out any guesswork I need to do.

    Pros

    • Reasonable price
    • Easily modifiable and customized
    • Auto shut off feature

    Cons

    • Suction cup mounts (Use brackets instead!)
    • No pump included

    4) Hydor Smart Level Controller – Dual Sensor ATO For A Reasonable Price

    The Hydor Smart Level Controller is an ATO system that uses a dual sensor to manage your aquarium’s water level. The sensors are included on a single plug making it easy to install. It is a sump based ATO systems, so I would not recommend it for using it in tank as the alarm level is set very high if used in an aquarium. It features a dual alarm system with both lights and sound. The sensors are not affected by waves in the tank.

    What I don’t like about this auto top off system is that it does not come with a pump. You have to purchase that separately so the price may not be as great as it seems if you pick up a more expensive pump. The switch holder is also a hybrid suction/magnet. I would prefer a true magnet mount.

    Pros

    • Reasonable Price
    • Alarm
    • Dual Sensors

    Cons

    • No Manual switch
    • Not a True Magnet switch holder
    • No Pump included!

    5) IceCap ATO – Reliable Dual Sensor


    IceCap ATO

    A dual digital sensor ATO system designed by CoralVue. Good price and good features


    Buy On Amazon


    Click For Best Price

    The IceCap ATO is a comprehensive top off system that includes dual digital sensors. These dual digital sensors read your water level and provide a min and max sensor. This provides a dual sensor back up for the auto top off unit. CoralVue advertises this unit as one without moving parts. It is a bit of marketing fluff to do this, but overall it is a competent unit for the price.

    The pump that is included is of good quality and it is mounted with magnets, which I feel is a better and more secure mount than the Hydor system. The alarm has a nice feature that lets you when your reservoir is low, which helps when you don’t look at the ATO container. CoralVue is a brand is also known for quality customer service so that’s another thing that gives this system a leg up.

    It has a decent price for what it offers. It lacks a manual switch and a shut off feature but overall it is a good package for the price.

    Pros

    • Reasonable Price
    • Dual Sensors

    Cons

    • No Manual switch

    6) EPTTECH ATO – Good But Needs Refinement


    EPTTECH ATO System

    Good value with a small footprint. Lacks the quality control to make it higher on the list


    Buy On Amazon

    The EPPTECH ATO is a good value and has a small footprint. This is a clone of the smart ATO system. The smart ATO system was actually excluded from our list because of availability and price compared to others that made the cut. This does not have a float switch, but a single digital senor. As a result, it has a very small footprint and will fit anywhere in an aquarium.

    My biggest gripe is the quality control on this unit. There are several reviews on the product where it fails. The sensor fails or the magnetic optical part corrodes in the tank. These are all no go’s in my book. As such, I would not recommend this unit and stick to the others I mentioned prior.

    Pros

    • Good value
    • Small footprint

    Cons

    • Only uses one sensor
    • Quality Control

    Our Recommendation

    If you want the best quality and most reliable auto top off system, my recommendation is very simple. It would be the Tunze Osmolator 3155. It’s ironclad reliable, will service your tank for years, and is built very well. If that is not in your budget, I would recommend the XP Aqua Duetto Auto or JBJ Auto Top Off depending on if you have a pump available or not. The XP Aqua offers a good price and includes the pump and is reliable. The JBJ is cheap if you have a pump and has adjustable features when you access the inside of the controller. 

    I Don’t Have A Sump. Which ATO should I use?

    There is one auto top off system that is designed for people without sumps. That would be the XP Aqua Sumpless ATO System. If you are running your ATO directly out of your display aquarium, this is the best ATO to get for your needs.

    What Manual Top-Off and Cheap Float-Valve ATOs Miss

    • Float valves can stick. Salt creep, debris, or a curious snail jamming the mechanism means the valve does not close. The pump keeps running. Your sump overflows or your salinity crashes below 1.020 before you notice.
    • No fail-safe means no safety net. A cheap single-sensor ATO has one point of failure. When that sensor fouls or fails, freshwater addition does not stop. A 5-gallon reservoir of fresh water dumped into a 40-gallon reef is a livestock emergency.
    • No reservoir alarm. Manual top-off means you remember, or you do not. Miss two days and salinity climbs. Miss four days and you are doing an emergency water change. Most cheap ATOs have no alert for an empty reservoir either, so you get the same problem with extra steps.
    • Inconsistent dosing interval. Manual top-off adds water in large batches. A proper ATO adds small amounts continuously, keeping salinity within 0.001 of target. That consistency is what corals and invertebrates actually need.

    How to Setup

    ATOs are actually really easy to install. They are probably one of the easiest tank automation tools to maintain and install on an aquarium. This video below shows how to install an XP Aqua Ultimate on a sump system. The install would be very similar installing an ATO in the display tank or all in one aquarium. 

    For the reservoir you will want to use a food grade bucket or trash can or an acrylic or glass ATO container. If you are running a saltwater tank, you will want to use RODI water from an RODI System. Make sure to fill up the reservoir and put the pump in the container before you turn on the system so the pump does not run dry.

    Conclusion

    Final Thought

    On a reef, stability is everything. Temperature, salinity, alkalinity – the animals you are keeping evolved in one of the most chemically stable environments on the planet. An ATO is what makes stability possible without babysitting the tank every day. It is a one-time purchase that quietly protects everything else in the system. Get the right one, set it up correctly, and it becomes the last thing you think about – which is exactly the point.


    🔧 Want to learn more? This article is part of our complete Aquarium Equipment & Gear Guide. your ultimate resource for filters, heaters, lights, pumps, tanks, and more.

    Mark’s Top Pick

    Tunze Osmolator 3155. I used these on every display reef at the stores I managed, and I use one on my personal 125-gallon reef. The combination of an optical sensor, a float valve backup, and the timed shut-off is the reason it earns top spot. Every other unit on this list makes a compromise somewhere. The Tunze does not. If you can only afford one piece of automation on your reef, this is the one.

    Buy or Skip? Straight Verdict

    Buy if:

    • You are running any saltwater tank. Full stop. This is not optional equipment for a reef.
    • You travel, work long hours, or go more than 48 hours between maintenance sessions.
    • Your tank is in a warm room or runs warm – evaporation accelerates fast above 80°F (27°C).
    • You are keeping SPS corals or other animals sensitive to salinity swings of even 0.2 points.

    Skip if:

    • You have a freshwater tank and check water level daily – manual top-off is fine for most freshwater setups.
    • You run a small planted freshwater tank where slight level drops between weekly water changes are a non-issue.

    Freshwater keepers: an ATO is a convenience upgrade, not a necessity. Saltwater keepers: it is a necessity dressed up as a convenience.

    >

  • Christmas Moss – Care, Propagation, & Issues

    Christmas Moss – Care, Propagation, & Issues

    This plant will grow in almost anything. But if you want it to actually look good, you need to understand what it wants. The gap between alive and thriving is lighting, nutrients, and consistency.

    Any plant stays alive. Making it look good takes understanding.

    Are you looking for the most attractive aquatic moss species you can purchase for your planted tank? If so, Christmas Moss is a plant you should consider. Today, I’m going to do a full overview on the plant and discuss why it is such a staple in our aquarium hobby!

    As you may have read in my Best Beginner Aquarium Plants round up article, Christmas Moss was featured as an excellent ground cover plant. It is an extremely hardy plant that will survive a wide range of aquarium parameters. This moss has been used in award winning aquascapes and is easy to groom. It’s easy to shape it so it takes over the spots that you intend for it to grow over. Let’s look into this wonderful plant more shall we?

    My overview will cover the following on this plant:

    • Difficulty and Care
    • Lighting Requirements
    • Growth Rate and Maintenance
    • Fertilization and CO2 Needs

    In a hurry? I recommend purchasing Christmas Moss from BucePlant

    Christmas Moss has a branching growth pattern that no other moss replicates. But it grows slowly. If you want instant coverage, this is not your plant.

    Christmas Moss Difficulty

    Aquarium moss in general is very hardy. This is what makes them great for beginners. Christmas moss is no exception. It is just as hardy as Java moss and Flame moss. Personally, I find it the most attractive of all the aquatic mosses you can purchase. The plant comes from Asia, India, and Japan. In the wild, you will it find it growing outside of water of all things. However, it grows well in an aquatic environment.

    As long as your parameters stay stable, this is a easy plant to care for. If your parameters are out of wack a common issue with Christmas Moss is the moss will “melt” away. This will also happen if the tank gets too cold or too warm. As always, test your aquarium parameters to ensure you have the proper levels using an aquarium test kit.

    Care

    Difficulty: Easy pH: 5.0 – 7.5
    Size: 3″ tall Hardness: 5 – 15 dKH
    Propagation: Creeping and clippings Placement: Foreground
    Fertilizer: Liquid Origin: Southeast Asia
    Grow: Moderate Temperature: 72 – 82F

    Christmas Moss is an overall easy plant to care for. You can see the stats above for quick reference. Let’s talk about how to place this moss in your aquairum.

    How To Attach

    The best way to attach Moss is using Superglue. There is an excellent video on this technique posted by Jurijs Jutjajevs on YouTube. I posted the video below so you can view it easily. Jurijs is an Aquascaping expert in our aquarium hobby and someone I would highly recommend you subscribe to if you are looking for advanced aquascaping content. He walks you through the process below.

    Another method of attaching moss is by using thread. Personally, I am not a fan of this method as it is messy and mostly will work best on driftwood. The superglue method is superior in my mind because it is easy to do and the gel will cure as soon as you place it in water. Other people will try fishing line. This is a similar technique and another one I’m not a fan of. The main issue with using fishing line is that it will stay permanently in your tank. Thread will deteriorate over time while fishing line will not. The base of the super glue will not be seen over time as the moss grows over.

    In my mind, if superglue is the preferred method for attaching corals, why can’t it be the go to for aquarium plants? It’s super simple and easy to do.

    Light Conditions

    Christmas Moss is a moderately demanding plant when it comes to lighting requirements. I wouldn’t consider it a low-tech moss like Java Moss. You will need a specialty planted tank light to grow it. You will want to place the plant in an area where it is not going to get shadowed by other aquatic plants. If you grow it under high light, it will grow more horizontally then vertically. If it grows up, then you know that you lighting is not that strong.

    You can adjust your lighting intensity or move the moss up in order to get it to grow horizontally. Horizontal grow is more appealing when it comes to mosses.

    For planted tank lights I would consider two. Either a TwinStar LED or a Serene RGB light. You can see the full review of the Twinstar LED here.

    Editor’s Choice


    Twinstar LED

    The Best LED for Planted Tanks

    Twinstar nails the spectrum, has the proper spread and comes with a sleek design. Perfect for aquascapers


    Buy On Buce Plant


    Buy On Glass Aqua

    Growth Rate

    Christmas moss is a moderate grower. It does not grow at fast as Java Moss. This is helpful for a busier hobbyist who does not want to be pruning all the time. You can slow down the grow of the moss by not using CO2 injection at the cost of a less thick moss. Pruning is very easy to do. You just trim with pruning scissors and can even shape the moss if you chose to. If you have a piece of moss that is overgrowing in an area, you can slice a piece of the carpet and remove it from the aquarium.

    Trimming techniques for moss are best shown through a video and Jurijs delivers again with an excellent video on how the pros do it.

    Other Mosses To Consider

    There are various other mosses in your aquarium that you can consider growing. Here are a few others that you can mix:

    Fertilizer and CO2 Needs

    Christmas Moss can grow with or without an active substrate. It’s completely optional. However, for it to thrive you will want to use liquid fertilizer to get it going. For liquid aquarium plant fertilizers, I highly recommended APT Complete. This is the most comprehensive fertilizer you can purchase online and is designed by a professional aquascaper.

    Editor’s Choice!


    APT Complete

    Editor’s Choice

    Made by an aquascaper for aquascapers. This is the best all around aquarium plant fertilizer on the market. Marco and micronutrients in one bottle!

    Use Coupon Code ASDComplete for 10% off your order!


    Click For Best Price


    Buy On Amazon

    Christmas moss will grow without CO2 injection. However, if you want to bring out the full potential of its growth and have a thicker moss CO2 will help with this greatly. For CO2 systems, I would highly recommend CO2 Art regulators. You can see a full review here.

    Best Value


    CO2 Art Pro-Elite

    Best Value

    A budget friendly version of the SE series. This has the quality of CO2 art with a great price. Highly recommended!


    Click For Best Price

    Common Issues

    Below are a few issues that come up with keeping aquarium mosses. Moss plants in general are easy to care for and the issues described below are easy to address.

    Melting

    Moss Melting

    This is one of the most common issues with aquatic plants upon introduction. Even more so if the plants were grown above water in lab like conditions. Most plants grown like this will shed the old growth in order to establish foliage that is more suited for being submerged in water. When this happens, pull out the melted or brow pats before they rot away and give it some time for the new growth to replace it. If this is an established plant, check your water parameters with your test kits to see if something is out of wack.

    Algae

    Algae on is a major problem on all aquatic plants. Once algae grows on a moss, it is very difficult to remove. This is a sign of imbalance in your ecosystem. There should be excessive nutrients in the water or too much light with not enough CO2 to support plant growth. The fast step is to test your water parameters and see what is our of wack then evaluate your CO2 injection, lighting, and fertilization dosage and frequency.

    Debris

    Debris is another common issue with moss plants as they can accumulate a lot with their makeup. If you have a shrimp tank, snails, or dealing with fry, the issue isn’t as pronounced as both will happily feed off it. However, if you have none of those or just can’t tolerate the look of the debris, you may want to look at it further. This is a water flow and filtration issue

    Filtration

    It is common with lots of plants to accumulate lots of debris in your aquarium filters. It is best to equip your aquarium with a high quality canister filter if you are going to go for a planted tank. These filters do a much better job of cleaning and providing circulation then power filters and are also more silent. I would highly recommend the OASE BioMaster canister filters for any planted tank setup.

    FAQS

    Which is Better Java Moss or CM?

    Java moss is hardier and easier to care for. Christmas moss is better looking and more suitable for fry and shrimp. Both are great plants for beginners and will grow in low light and without CO2 injection.

    Do they Attach?

    Yes, Christmas Moss will is attached to any piece of driftwood or aquarium rock. All you need is superglue. Some sellers will actually sell the moss already attached to a piece of wood, rock, or steel grid.

    How Fast Do They Grow?

    Christmas Moss is a slow grower. It is sped up with CO2 injection and ample fertilizer feedings. It’s slower growing rate makes this a better fit for those who desire a lower maintenance tank

    Conclusion

    Christmas the best looking and more appealing moss available in the hobby. It isn’t as easy to care for as Java Moss, but it’s requirements are basic enough for it to be beginner friendly. I would recommend it for any beginner or advanced aquascaper looking to have a striking moss in their tanks. As always, I recommend you purchase the moss as a reputable fish store.

    If you do not have one available near you, I would highly recommend purchasing from BucePlant. They are the premier seller if live plants in the industry. Excellent customer service and I have had great experience with them. I left a ratings at the bottom of this point for easy reference. If you have any experience with this plant, feel free to comment below and let me know what you think about it. Thanks for reading!


    🌿 Want to learn more? This article is part of our complete Planted Tank & Aquascaping Guide. Your ultimate resource for aquarium plants, aquascaping styles, substrates, and more.

  • Sicce SYNCRA SDC Review An In-Depth Look

    Sicce SYNCRA SDC Review An In-Depth Look

    The return pump is the heart of any sump-based system. it determines flow rate, heat input, noise level, and reliability for everything downstream. I’ve run various return pumps on my 125-gallon reef over the years, and the Sicce Syncra SDC caught my attention because of its DC motor and controller. Here’s my in-depth take on whether it delivers for serious reef setups.

    Looking for the very best Aquarium Return Pump available for your tank today? Well, this is the very post you have been looking for as the Sicce Syncra SDC has solved may of the issues that have plagued DC pumps since they were first introduced in the hobby.

    As you may have read in my Best Aquarium Return Pump round up article. DC pumps are cursed with multiple issues. The main thing are the failure points and the quality control of the manufacturing. So what happens when we combine one of the most reliable and high quality Italian manufacturers in our industry and DC pump technology? It sounds like a dream combination doesn’t it? It sounds like Sicce may have solved the very issue that has frustrated most us with DC pumps since they were released – reliability!

    As a reminder for my viewers, this post will contain affiliate links. An affiliate link means I may earn advertising or referral fees if you make a purchase through my link. I’ve had the pleasure of working with some great partners in the industry and highly recommended working with these links as they happily help hobbyists and content creators support their work. With that disclose away let’s get started! Let’s find out what makes The Sicce Syncra SDC stand out from the crowd!

    My Sicce Syncra SDC Review will be fairly structured. I’m going to be reviewing the following for this product:

    • Features
    • Craftsmanship
    • Ease of Use
    • Value For Money
    • Product Support
    • Price

    In a hurry? Purchase the SICCE Syndra SDC Now!

    Features

    I’ll start off by giving a quick disclaimer. I’m absolutely unashamedly bias to Sicce pumps. In the 15+ years I have been involved with this hobby, I have been very loyal to them. They have never done me wrong. This DC return pump is an absolute dream. Let’s discuss the crazy amount of features included with this pump:

    • Fully functioning in wet & dry environments
    • Self cleaning impeller
    • 360 chamber rotation
    • Wi-Fi enabled
    • ETL certified (This is a UL equivalent1)
    • Variable speed
    • Feed mode

    You may have seen these features in other DC pumps, the main difference here is that Sicce delivers all if this with a FREE controller app that runs on your smartphone. There is no additional accessory to purchase (calling you out EcoTech), The app can actually run multiple Sicce pumps. In fact, it will run any Sicce related product that has wifi enabled. This is an amazing feature that Sicce has added. It’s simply the best in the industry that I have seen from an return pump.

    The Syncra SDC is offered in 3 models all built with energy efficiency in mind. The pump meets the needs of advanced recirculating applications and are equipped with integrated intelligence systems.

    Craftsmanship

    Italian design and manufacturing. That’s the best way to start this section of the review. It’s not a secret in our industry that German and Italian engineering are highly valued. They are known for their quality, effectiveness, and reliability. With the large number of Chinese manufactured DC pumps these days, something that has the original high quality of the Germans and Italians is increasingly rare. It’s one of the biggest things I’ve been with the DC transition as many AC pumps are still made with German and Italian manufacturing and engineering.

    Sicce Syncra SDC Craftsmenship

    The Syncra SDC is no exception. It is 100% designed and produced in Italy. The design if the pump is no frill and functional based. I actually prefer this over the cool looking DC pumps I have seen with blue and red colors. I just want the pump to work for ages. I could care less about the fancy colors of something I only see when I pop open my cabinet.

    The biggest proof of craftsmenship by Sicce is their offer of a 5 year warranty. That blows away EVERY competitor on the market at it’s price point. It’s not even close. Ecotech and CoralVue can’t even sniff a 5 year warranty on their pumps. There are only two groups of competitors that will come close to a 5 year warranty. That would be going with an AC return pump or moving up to Abyzz DC pumps that have 10 year warranties. The Abyzz pump however is 3 times the price!

    Ease Of Use

    The Syncra SDC install is similiar with any DC pump out there that will involve plumbing.I won’t really cover that here since that is a whole separate discussion. However, what I will talk about how easy to use and install their Contrall App is. The video below walks you through the process. I found the install process pretty painless and the fact that you can get notifications on your phone is pretty amazing given this is all included in your purchase of the return pump.

    Value for Money

    The Sicce Syncra SDC is no doubt an expensive DC return pump. However, let’s talk about the value. It’s priced at the levels of a EcoTech and VarioS. This puts it at the higher end of the market. It is also the only pump that offers a 5 year warranty. If I’m going to invest over $200 on a return pump – I better get a long-term warranty. I’ve heard too many stories of EcoTech pumps failing prematurely.

    I’m old school in that I believe a return pump is a purchase and forgot about it for the next 10 years. Sicce is the ONLY DC return pump in this price range that offers this assurance. As such, it’s the only DC pump I recommend for high end builds. It is the one DC pump that truly combines the energy efficiency of DC pumps with the reliability of AC pumps.

    Product Support

    Given Sicce is headquartered in Italy, they can be sometimes hard to reach. However, in my experience their customer support is responsive, just not in your desired timezone. I do like their registration process and there are plenty of videos online they provide that show how to operate their products. When you register your product, you create a registered customer login where you can login your tickets and get support. It’s a rather easy to use portal.

    Price

    The biggest con in this product review. They are one of the more expensive DC Pumps on the market. They also have the best reputation for their durability. There prices are more expensive then the Reef Octopus Varios, but on Par with EcoTechs. Given the superior warranty and durability history with Sicce products in general, I feel they are priced competitively. For those at lower budgets, you can’t do wrong with a traditional Sicce AC pump.

    Closing Thoughts

    The SDC Pumps are available in various sizes. The models are shown below:

    ModelWattsGPH
    SDC 6.010 – 40 Watts530 – 1430 GPH
    SDC 7.020 – 65 Watts800 – 1900 GPH
    SDC 9.030 – 90 Watts800 – 2500 GPH

    There is a model for all aquariums. This is the best Aquarium DC Return Pump on the market today without a doubt. Well deserving of my Editor’s Choice badge. You can see the ratings below from me. As I’m open to all reviews, you can leave your own in the comments section and discuss your experience with this return pump. If you have any questions, please leave them in the comments below. Thanks for reading!

    References