Generic selectors

Exact matches only

Search in title

Search in content

Post Type Selectors

Tag: Fishkeeping

  • Betta Fish Care Guide: What They Actually Need to Thrive

    Betta Fish Care Guide: What They Actually Need to Thrive

    Most Betta Fish owners kill their fish slowly without realizing it. Tiny bowls, no heater, zero filtration. I have kept bettas for over 25 years and the difference between a Betta Fish surviving and actually thriving is night and day. This is what real Betta Fish care looks like.

    If your Betta Fish is not flaring, building bubble nests, and actively exploring, something is wrong with the setup.

    A healthy Betta Fish lives 3 to 5 years. That means years of weekly water changes, a heated and filtered tank, and a varied diet. This is not a disposable pet.

    A betta in a filtered, heated 5-gallon tank acts like a completely different animal than one sitting in a cup at the pet store. The difference is not subtle. It is dramatic.

    ASD Difficulty Rating: Tier 1 – Beginner

    Betta fish are one of the most beginner-friendly fish in the hobby, but they are not zero-maintenance. They need a heated, filtered tank – not a bowl. A 5-gallon minimum with a gentle filter and heater is the real starting point.

    Hard Rule

    Betta fish need a heater and a filter – not a bowl, not a vase. The bowl myth kills more bettas than any disease. A 5-gallon heated, filtered tank is the minimum for a healthy, long-lived betta.

    Table of Contents

    The Betta Fish for some of us fish keepers was our first experience with a pet fish. It was our introduction to this wonderful world of aquarium keeping. Betta Fish after all has a lot going for them that makes them great pets. They have a great personality and come in a variety of colors. They can exist in smaller tanks and is relatively hardy as long as the environment is properly cared for.

    What Most Care Guides Get Wrong About Betta Fish What They Actually Need to Thrive

    Want a centerpiece fish for a nano tank? Get a betta. Want a peaceful community schooler? Get ember tetras instead. Want low maintenance? Get neither. Both need real care.

    The most common mistake I see with bettas is the bowl. It is still the number one killer of betta fish in this hobby. A betta in an unheated, unfiltered bowl is not living. It is slowly dying. The pet store cup is transport, not housing. The second mistake is assuming all bettas can have tank mates. Every betta has a different temperament. Some tolerate a community setup with small, peaceful fish. Others attack anything that moves, including snails. You cannot predict this before you try it, so always have a backup plan. Finally, people underestimate how much bettas respond to enrichment. A betta in a bare 5 gallon tank with nothing to explore will sit at the bottom and do nothing. Add plants, a cave, something to investigate, and you see a completely different fish. They are curious, interactive animals that need stimulation.

    The Reality of Keeping Betta Fish

    They are not low-maintenance pets. Bettas need a heater, a filter, and weekly water changes just like any other tropical fish. The myth that they thrive in small, unfiltered containers has killed millions of these fish. A proper betta setup starts at 5 gallons with a gentle filter and a heater set to 78 degrees.

    Aggression varies wildly between individuals. Some bettas tolerate tank mates without issue. Others attack anything that moves, including snails. There is no way to predict this before you try it. Always have a backup plan if your betta turns out to be a loner.

    Fin rot is the number one killer. Poor water quality causes fin rot faster in bettas than in almost any other fish. Those long, flowing fins are bacteria magnets in dirty water. Weekly 25% water changes are not optional. They are the single most important thing you do for this fish.

    Biggest Mistake New Owners Make

    Putting a betta in an unheated bowl and calling it a day. Bettas are tropical fish that need 76 to 82 degrees. Below 74, their immune system shuts down and they stop eating. A $15 heater is the difference between a vibrant fish and a slow death.

    Expert Take (Mark Valderrama, AquariumStoreDepot)

    After 25 years of keeping bettas, the single best upgrade you can make is a quality heater in a 5-gallon filtered tank. Everything else matters less than getting the basics right first.

    Key Takeaways

    • Betta fish are the best beginner fish to start your aquarium journey with
    • A 5-gallon aquarium is a minimum needed for a single adult Beta fish
    • Betta fish require heaters as they prefer warmer waters
    • Betta fish are aggressive to other Bettas but is bullied by many tropical fish
    • There are a vast variety of Betta fish varieties available with many of the rarer variants being better acquired via online stores

    A Quick Overview

    Scientific Name Betta splendens
    Common Names Betta Fish, Siamese Fighting Fish
    Family Gourami
    Origin Thailand
    Diet Omnivore
    Care Level Beginner
    Activity Slow to Moderate
    Lifespan 2 – 5 years
    Temperament Peaceful (Aggressive to own kind)
    Tank Level Middle to top
    Minimum Tank Size 5 gallon
    Temperature Range 76°-81°F
    Water Hardness 5 to 20 DH
    pH Levels 6.5. 8.0 (for most varieties)
    Filtration/Water Flow Low
    Water Type Freshwater
    Breeding Egg-layer
    Difficulty to Breed Easy to breed
    Compatibility Community tank (with properly selected species)
    OK, for Planted Tanks? Yes

    Classification

    Taxonomic Rank Classification
    Common Name Betta Fish
    Scientific Name Betta splendens
    Order Anabantiformes
    Family Osphronemidae
    Genus Betta
    Species B. Splendens

    All About Betta Fish Care

    The Betta Fish’s scientific name is Betta splendens. They are also known as Siamese Fighting Fish. They originate from Asia and were kept in the past for their fighting nature. They were originally brought into aquariums by locals who caught on rice paddies. They were first imported to the US in 1927. These days, Bettas are primarily kept for their appearance. They have been selectively bred over the years into many different colors and tail types. They are now known as the designer fish in the freshwater hobby.

    In the wild, Betta splendens originate from Southeast Asia. They are native to areas that are visited by frequent flooding that will also go through periods of intense droughts afterward. As a result, Betta evolved to become a labyrinth fish. A labyrinth is a fish that has the ability to take in oxygen from the air as well as take oxygen from its grills. Because of this adaption, Bettas have the ability to live outside of water for short periods of time and can breathe the air around them provided they can stay moist. This is the reason why you will see Bettas in small containers at the pet store or at home (though I would not recommend this — more on this as we through this post).

    Here is a short video on Betta for a quick intro from my YouTube Channel. If you like it, please subscribe for more great videos!

    Betta is pronounced Bet-tah. It is very common for newcomers to pronounce it as Bay-tah. They received their name from the ancient Asian “Bettah” warrior clan. They were discovered in Thailand. Their Thai name is Iken Bettah, which is translated as “biting fish.” They are also known as Siamese fighting fish. This name was taken from the word Siam, with Siam being the former name of Thailand. They became very popular in the mid-1800s for their fighting. The fighting sport became so popular that the King of Thailand ended up regulating the sport and taxing it. The sports competitions were actually measured on the fish’s bravery versus the damage they inflicted on their opponent, however.

    Male and Female Differences

    Males and females are distinctly different when it comes to Betta Fish. The males are more colorful with larger fins. Females have shorter fins and are duller in color. Male betta fish also will have a more torpedo-shaped and larger body. Female betta fish also have an Ovipositor on the undersize of their body. These are tiny tubes that release eggs.
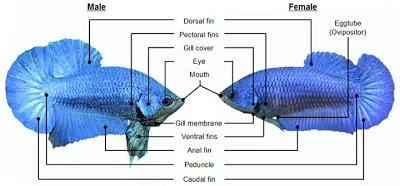
    Betta Male versus Female

    The International Congress (Competitions)

    Betta Fish breeding has been very popular over the years with breeders raising some of the most beautiful fish you will ever see in the hobby. In fact, there are competitions for the show Bettas (pronounced Bet-uh) hosted by the International Betta Congress (IBC). Below is a video by DocAquaTV showing an IBC competition in full swing. There is a huge community when it comes to Betta Fish, and seeing these unique-looking and high-quality Betta is a real treat.

    I would highly encourage anyone who is passionate about keeping these fish to look into a scientific-based community like the International Betta Congress and maybe even think about joining to deep dive into the Betta world. They offer a lot of benefits like their membership forum and magazine. They have been around since 1967 and really take efforts to bring education and care to Bettas all over the world.

    The Major Factors We Need To Know

    Now that we know a little bit about the Betta itself and the scientific-based community that supports them let’s talk caring for your betta. We are going to split care for a Betta Fish into the following elements:

    1. Housing
    2. Filtration
    3. Heating
    4. Decor
    5. Diet
    6. Tank Mates

    Aquarium (Housing)

    I’m going to be very upfront and clear to my readers here with this statement. The best aquarium to start with for a Betta is a 5-gallon tank. That’s correct, 5 gallons. You may be a little taken aback by this statement as you may have visited your pet store and seen many of the “Betta tanks” available for sale. Many of them are badly undersized.

    I encourage anyone who is keeping a Betta Fish long-term to invest in a proper five Gallon tank like the the ones offered by Marineland and Fluval. Betta fish live best in a good-sized tank and you want the best for your pet. Invest in the proper tank so your fish can thrive.

    We also want to limit the number of male bettas in our aquariums. We should only have 1 male betta in our aquarium unless we are using tank dividers to keep our male bettas separated. Keeping more than 1 male is going to require more than 5 gallons. A 20-gallon tank is best for housing multiple male bettas – 3 to 4 are best for a 20-gallon tank using a 1 betta for every 5 gallons approach.

    Aquarium Filtration

    Contrary to what you may see in the chain pet stores, Betta fish are not best served in a fish bowl. We want their tanks filtered. This will make it easier to maintain as a fish tank without a filter is going to need a water change every 2 to 3 days. This can get very old fast! We want to make tank maintenance easy to do rather than a major chore. Having proper filtration that houses a lot of beneficial bacteria in your tank will provide a proper nitrogen cycle for your fish tank and for your Betta. This will cut down the number of times you will need to change the water int he tank every month and give your Betta a better environment to grow and thrive. I would recommend a Power Filter if you are not using an aquarium kit or all-in-one tank. The best power filter for a small tank like this is going to be a Penn Plex Power Filter or AquaClear as these companies design power filters at this size and both are adjustable.

    When using a power filter, you will still need to protect your Betta. Bettas are known for having delicate fins and being very curious. It’s pretty common for them to get sucked into a filter accidentally or have one of their fins damaged. You will want to dampen the intake of your betta fish filter by putting a sponge over it and adjusting the flow to make it calmer and suitable for the Betta. Bettas prefer calmer waters, and some power filters on the market are designed for a higher gallon-per-hour applications. Adjust it down for your Betta and let them adjust to the flow.  Another alternative is to use a low-flow canister like an Aquael Multikani.

    Tap Water

    Because Siamese fighting fish have labyrinth fish, it is a common misconception to put them in any type of water. While we can use tap water, we want to make sure we have the right type of tap water. Tap water needs to be chlorinated with a proper water conditioner produce like Seachem Prime. Water conditioners like Seachem Prime will remove chlorine, harmful chemicals, ammonia, and nitrite from your tap.

    Never stick a Betta in straight tap water. Always make sure to dechlorinate tap water to keep your fish safe.

    Tank Heating (Water Temperature)

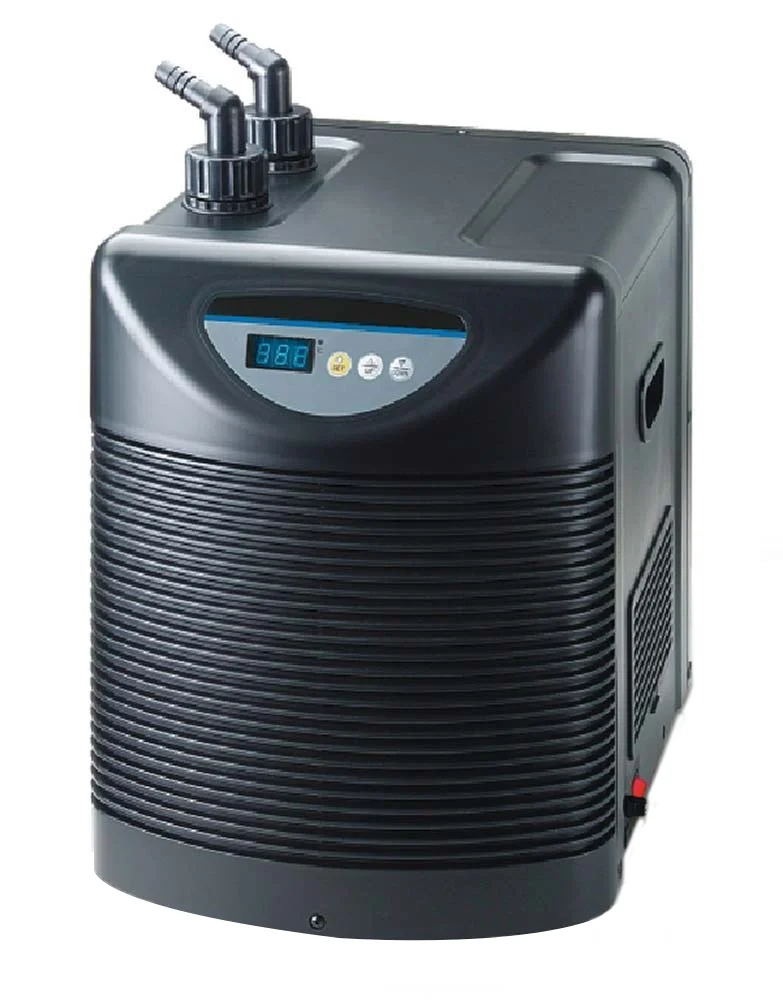
    It may not seem like it because you see many of these Betta for sale at pet stores in bowls or small tanks, but they are actually tropical fish and betta fish need water water. They are most comfortable with water temperatures at 75 to 82 degrees with 78 degrees being your target temperature. I would recommend choosing a quality heater from our Best Aquarium Heaters Reviews post. Eheim heaters are one of the most reliable heaters on the market and are worth a look. Neo Therm Heaters are great as well. They have a smaller footprint that works better with the smaller size of the Betta Fish tanks and will fit in all-in-one tank chambers. Both heaters are accurate up to 1 degree of water temperature, the best in our industry.

    I would also highly recommend that you get a Digital Thermometer as a backup for your heater’s internal thermometer. If you have the budget, you can invest in a proper Aquarium Heater Controller for a more foolproof water temperature regulation system.

    Tank Decorations

    There are two parts of the Decor for Betta’s tank: plants and hardscape (rocks and branches). For plants, specifically artificial plants (I’ll touch on live plants later in the post), we need to be very selective about what we put in our Betta Fish tank.

    Silk plants like the Marina Naturals Plant shown above are what we want to purchase for our Bettas. Traditional plastic plants you will see at the pet store are not safe for a Betta Fish. This is because many will contain sharp edges and do not give way if the Betta runs into them. This leads to the delicate fins of the Betta Fish getting torn up which in turn causes injury and possible infection. We want to prevent as much harm to the delicate fins of our Betta, so let’s stay away from the hard plastic plants if we are going to shop for artificial plants.

    For hardscaping like rocks, we again want to watch out for sharp edges. Hardscaping for Betta Fish needs to be soft or round. You should be able to run your fingers through the hardscape and not get your fingers caught. If your fingers get caught, you have rough edges that will be dangerous to your Betta. Either consider sanding down the hardscape or picking another one.

    Another factor to consider with Betta decorations is to watch out for rocks and other hardscaping with lots of small holes. Betta Fish have a tendency to get caught or stuck in holes. I would recommend that you purchase smooth round rocks or rocks with larger holes that your Betta will not get stuck in.

    The image above is a good example of a hardscape that is suitable for a Betta Fish. A Coconut shell decoration you can find at a pet store is smooth and the hole is large enough to fit the Betta without it getting caught or stuck inside. Lastly, the water surface should have space for your Betta to build bubble nests.

    Diet (Feed Them Right!)

    A Betta Fish is a fish with lots of vibrant colors. That is why it’s vital that your betta fish eat quality food to be happy and achieve brighter colors. The fish food hierarchy in today’s hobby is frozen food, fried dried, pellet, then flake food. We want to be selective in what we feed our Betta fish so I will help with the breakdown. Let’s feed your Betta the best food available.

    Frozen food is at the top of our list because you can get some of the highest-quality blends and mixes. Unfortunately, frozen foods are going to be the one food you will have a hard time finding online. Even if you do find it, the shipping costs is expensive to the point where it is not worth it. Do yourself and your local store a favor and pick these up locally. I would recommend frozen blood worms, black worms, and daphnia. All is found at your local pet stores.

    Next would be freeze-dried. For freeze-dried, I would recommend either freeze-dried Bloodworms or Blackworms. The great thing with freeze-dried foods is because they are dehydrated foods, they will soak up vitamin supplements. Consider supplementing your food with a product like VitaChem to boost their immune system and to keep betta fish healthy. Mixing VitaChem plus Blackworms is a great nutritional mix to feed your betta fish.

    One thing to note in this blog post is that I am not recommending brine shrimp as a food source. You may be wondering why I don’t when many fish stores and bloggers are happy to recommend it. I do not recommend brine shrimp because there are way better food sources you can feed your fish. It’s great if you are in pinch, the store doesn’t have much else, or if you have a picky fish. Brine shrimp are just low on nutritional value. We can do better, so why not?

    Pellet food would be the next food I would touch on. There is really only one pellet food I would recommend for a Betta. That would be NorthFin’s Betta Bits Food.

    Pellet fish should be presoaked before giving to your Betta. This will prevent the pellets from expanding in your Betta’s stomach and causing issues like bloat or constipation. You can also soak pellet food with vitamins.

    Flake food I will avoid. Many types of flake food in our industry are simply not up to snuff for our fish and it’s hard to soak them in vitamins. If you want to go with flake food to feed your betta fish, I would consider flake food with probiotics. One such flake food that comes to mind would be Cobalt Aquatics Tropical Fish Color Formula. It is flake food loaded with probiotics and one of the mainstream flake foods around that I would be okay with recommending.

    The main benefit of live food is the live beneficial bacterial cultures that you are feeding your Betta. These are priceless nutrients that your betta fish need and truly can extend their lifespan and quality of life. However, there are major cons with live food.

    The biggest issue is disease and poor quality live food. You really need to do your due diligence if you are going to feed live foods to your Betta fish. It may even be better to grow them yourself if you really want or find a very trusted retailer who sells them. For live foods, I would highly recommend blackworms. Earthworms are also another natural source that you can pull from your garden and feed to your Betta if you are willing to cut them into bits. Microworms would be another live food to look at. All three of these is cultured at home if you are willing to do so. I included a video from AquaStudent below explaining how to keep blackworms. It’s probably more relevant to Keeping Cichlids given how much you can grow, but I wanted to provide it anyway for your reference. If you take care of live food, you can have success with them. It’s just not something I would not consider for a beginner.

    Tank Mates

    I’ll start this section with a very honest statement. Not every Betta is meant for a community tank. There is also the size of the tank you need to consider as tank mates in a Betta Fish aquarium should not be considered unless you have an aquarium 10 gallons or larger in size. To maintain the lowest levels of aggression possible with these mixed setups, a planted tank setup is going to be key to keeping the fighting down.

    I’ll provide a list below and then explain after. I’m going to start from safest to riskiest. The best tank mates for a Betta Fish are community fish and inverts like:

    1. Snails
    2. Medium-sized Shrimp
    3. Corydoras catfish
    4. Plecos
    5. Schooling Fish

    Snails are going to be our best test tank mate to start with. Snails are low risk to add to an aquarium and we can take time to observe our Betta’s reaction to them. If your Betta is nipping at the antennas of the nails, this is a likely sign that your particular Betta is not going to accept tank mates readily.

    If snails are not harassed, then we can attempt the next set of possible tank mates. These would be Freshwater Aquarium Shrimp like Cherry, Amano, or Ghost shrimp. If your Betta is not attacking snails, there is a good chance they will leave pet shrimp alone. The great thing with shrimp is they are colorful and is used to contrast your Betta colors. Be careful of overpopulation though as shrimp can breed rapidly. There is a chance they could eat the shrimp. A bamboo shrimp is the safest shrimp you can pair with a betta.

    The next set of teammates would be bottom-dwelling fish like Corydoras and Pleco. Because we are working with fish who inhabit a different section of our tank area, it is likely that both sets of species will leave each other alone.
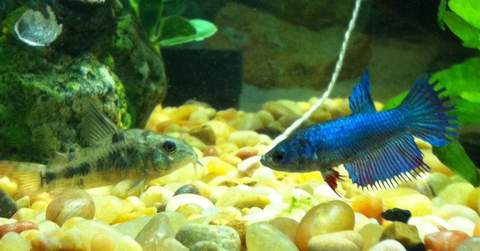
    Cory and Betta

    The final and riskiest set of tank mates are going to be school fish like Tetras and Rasboras. The activity level of these fish may actually stress out the more calm Betta. We have to observe their interactions and watch for warning signs. It is very possible to have a Betta that lives happily in a tank with schooling fish.

    Bettas are naturally solo fish though. To add tank mates into an aquarium with a Betta is asking the fish to adapt outside of its natural tendencies. Take your time and be patient. Be ready to make changes with your tank mates if things do not work out well for you.

    Another thing I forgot to mention in this section is DO NOT place two males in the same tank. Males fighting is where the Bettas got their Siamese Fighting fish came from. Two males will fight to the death in an aquarium. Avoid placing two males in the same aquarium at all costs. There is only one exception – which I cover in this post and is reserved for seasoned aquarists.

    Male Bettas will also show aggression to females. It is best if you want multiple Bettas in your aquarium to go female only. Females are not as colorful as males, but a group of 5 females will complement the colors of your tank as they have unique colors and fins in their own right. A group of female Bettas will require a larger tank and there are really no guarantees of their compatibility as they reach maturity.

    Lastly, avoid fish like tiger barbs that enjoy nipping at long fish.

    Live Plants
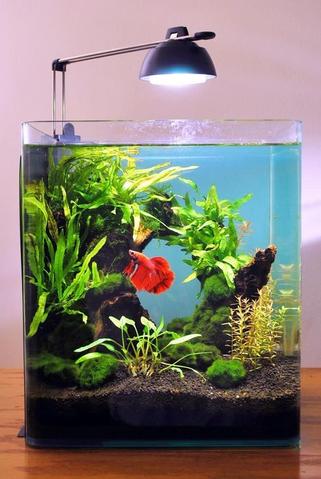
    Betta in Planted Tank

    Live plants are a wonderful addition to your Betta to simulate natural habitat. Not only do they add natural hiding places for your Betta, but they are also natural filtration in your aquarium. I recommend live plants for most freshwater setups because they are great for improving water quality. Some plants are also known for being natural water conditioners as they can remove harmful chemicals in your water.

    I would highly recommend Low Light Aquarium Plants for your aquarium. If you do decide to go with live plants, get a Planted Tank LED fixture that can grow plants. I am recommending low-light plants because they are easy to grow and keep. However, many lights that come with starter aquariums will not have the proper light to grow even low-light aquarium plants.

    For tanks these small, there is a Finnex FugeRay model that is available that will adequately cover a standard 5-gallon tank. Another option is a Fluval Plant Bluetooth Nano. The Fluval Nano is a perfect light for desktop aquariums.

    With one of these lights, you are set to grow just about any low-light aquarium plant you can acquire. For low-light plants here are several you can obtain that would work well in a Betta tank:

    Different Types

    There is actually a large variety of Betta Fish available for sale in our hobby. For most of the Bettas, you will see that the pet store will not have a specific breed or type listed. There are actually large numbers of available varieties with Bettas. Many have exotic colors and fins. I’m going to talk about several here to show you the vast variety of Bettas available today. If you are shopping online for exotic-style Betta Fish, I would highly recommend that you purchase from a place that offers What You See Is What You Get (WYSIWYG) fish for purchase and from a place that offers you a multiple-day guarantee.

    Veil Tail
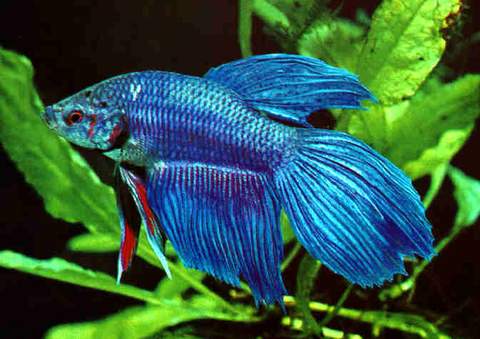
    Veil Tail Betta Fish

    The Veil Tail Betta is the most common Betta you will find at a pet store. They are often labeled as Siamese Fighting Fish at chain pet stores. It is very likely if you are reading this article after you have purchased a Betta yourself that you have a Veil Tail. They are the most widely available Betta in the hobby. After all, this was the original domestic Betta that was brought over to the US. They are also one of the easiest Betta Fish to breed. These Bettas are known for their easy-going nature and are one of the better candidates for a community aquarium.

    Half Moon
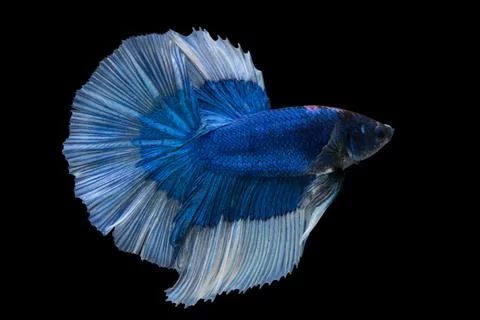
    Halfmoon Betta Fish

    The Half Moon Betta is a Betta that is bred and raised in captivity. It gets its name its tail that spreads 180 degrees to form the half-moon. It is a very striking Betta to have. It is notorious for being a very challenging Betta to breed. They are becoming one of the easier-to-find exotic Betta types nowadays due to their popularity. It was first bred in the 1980s. Half Moon Bettas are also known for their aggressiveness. They are best suited to be solo in an aquarium. Many of the fancier Bettas are only available through local breeders, specialty fish stores, or online.

    Rose Tail
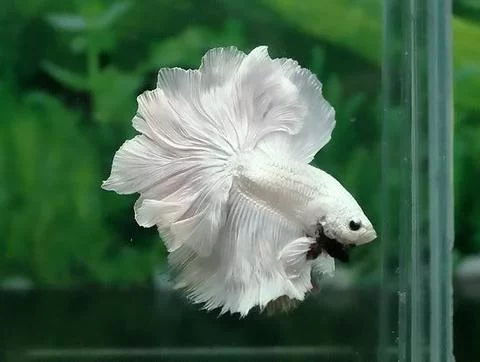
    Rose Tail Betta Fish

    A Rose Tail is a variation of the Half Moon. The ends of their tails are more ruffled creating a striking appearance. As the Half Moon, they are also very difficult to breed. It requires a genetic mutation to occur to get the look and as a result, they tend not to be as hardy as other Betta fish species. They are an amazing-looking Betta

    Plakats
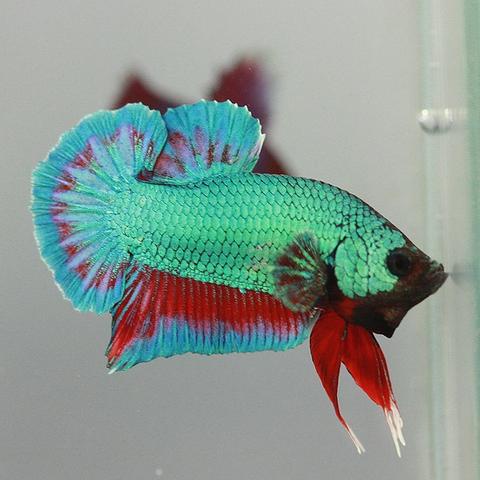
    Plakat Betta Fish

    Plakats are a short-finned version of the traditional Betta you find in stores. Plakats are the original Betta and very close to the ones you will find in the wild. They are known as the ancestors of all Bettas in the trade today. They are more actively swimming fish over the other fancier varieties and will do better in larger tanks as a result. It is actually possible to find a Halfmoon Plakat from a breeder. Given the fact the Plakat Betta is closer to a wild Betta, they are hardier, less prone to injury, and more energetic than fancier Bettas.

    Purchasing a fancy Plakat fish is a good balance if you want a fancy Betta, but would prefer a hardier and more active sub-type. The picture above is a Halfmoon Plakat. Another popular variety of Plakat are Koi Bettas.

    Elephant Ear
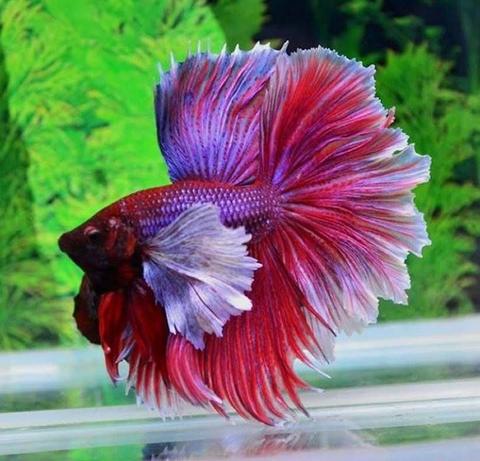
    Elephant Ear Betta Fish

    These Bettas get their names from their pectoral fins that look like the ear of an elephant. These are one of the more exotic and striking Betta you will find. These varieties can also be found in the wild (though with less bold colors than their captive-bred varieties). They are aggressive Betta and best suited as a sole specimen. They slow down a lot later in life, so a calm tank alone is the best for them.

    Crowntail
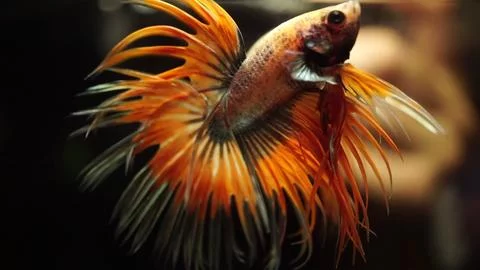
    <a href=Crowntail Betta Fish”/>

    This unique-looking variety has web fins that resemble a crown. It is one of the new varieties among breeders debuting in 1997. This Betta variety produces some of the most exotic colors and mixes available in the trade. Because of its breeding though, this also makes it one of the more difficult Betta to find and take care of. They are more delicate than the other Bettas on the list. It requires exceptionally higher water quality for its fins to stay healthy.

    Putting It Together – Creating An Amazing Aquarium

    We spent quite a bit of time talking about Bettas, their care requirements, food, and types of Bettas. It’s time to put it all together and built a set up for you. I’m going to use a Fluval Spec V for this build. It is an all-in-one tank with 5 gallons as its volume. The tank really solves a lot of issues for us, namely the filtration and the lighting. The lighting that comes with the unit can grow Low Light Aquarium Plants and the aquarium size is ideal for our Betta. You can use any Aquarium Substrate you want since both Java Fern and Java Moss are water column feeders so either will do fine without an active substrate.

    • Tank – Fluval Spec V
    • Lighting – Fluval Spec V light is perfect :). No changes are needed!
    • Aquarium Filter – Fluval Spec V stock filtration
    • Heater – Cobalt NeoTherm
    • Hardscape – Coconut Shell or Fluval Driftwood
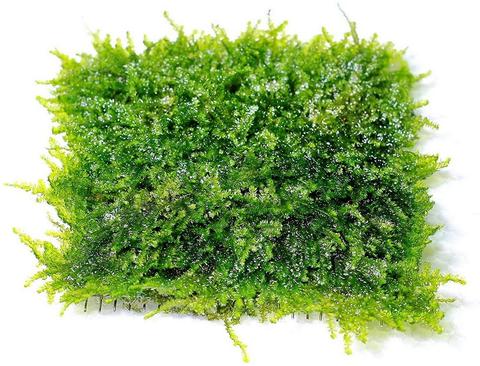
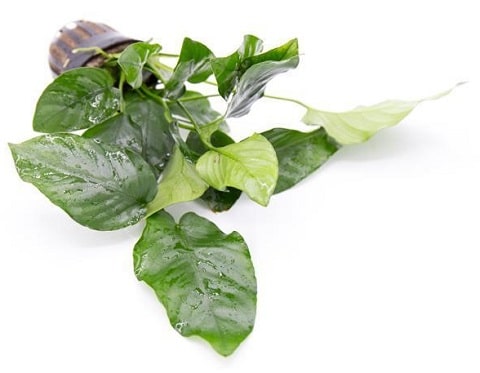
    • Plants – Java Fern and/or Java Moss (Micro Swords and Crypts work as well)
    • Substrate – Activ Betta Gems Live Gravel
    • A single Male Betta of your choice – Once the tank is cycled!

    We can either use a simple aquascape or get fancy with some Driftwood, to ensure it has no sharp edges by sanding down any rough spots. If we go with driftwood, we can attach the moss and ferns to the hardscape with either thread or superglue. Below is a video by Fishaholic showing how to attach Java Fern to driftwood.

    Tank Water Quality

    Now that you have your Betta tank, you may have questions about water quality. Bettas in general are hardy fish, with fancy sub-types begin to be more sensitive. We want to keep our water quality in good condition when taking care of a Betta. I would recommend doing water changes weekly about 15-20%. You can reduce the water changes if your water quality is high. I always say water changes based on your water parameters. Get used to testing your water conditions every week using a high-quality aquarium water test kit and always use a water conditioner on your tap water.

    Some tanks can go bi-monthly or monthly depending on how well the tank is filtered, which your aquarium test kit will hope you monitor when you should make a water change. Check for ammonia, nitrite, and nitrate levels. Ammonia levels and nitrite levels should be at 0 and keep your nitrates below 25.

    For pH, Bettas are pretty tolerant of neutral to soft water. They are best with a neutral pH of 7. They will do fine in a slightly acidic pH if accumulated to it, but as close to 7 as possible is ideal.

    Maintenance Checklist

    Here is a quick maintenance checklist guideline that will help keep your Betta fish happy and to have a long and healthy life.

    Daily Weekly Monthly
    Check water temperature (76 – 81 F) Change 25-50% water in the tank Replace filter media or filter cartridge (mechanical and chemical)
    Observe fish and check for signs of ill health Siphon out uneaten food and water Wash media in aquarium water (if reusable)
    Check equipment to see if it is working (heaters, filtration system, pumps) Test water parameters Clean rocks, decor, and/or driftwood
    Feed your fish Check plant health and prune overgrowth
    Check water levels to see if topping off is needed Clean off algae from glass

    Additional Resources (Books To Read)

    There are some incredible books available about Bettas that go beyond the scope of this blog post. I would encourage you to look into these books and purchase them if you are serious about taking your Betta Fish keeping to another level.

    The Betta Bible is the source when it comes to knowledge about Betta Keeping. It is an expensive book, but well worth it. It is loaded with detailed and expert-level information. It has information about the genetics of Bettas, breeding, and the history of the Bettas in our hobby. It is loaded with over 150 pictures of various types of Bettas and the style of writing is very down-to-earth.

    My Choice


    The Betta Bible

    The Best Book About Keeping Bettas!

    With over 300 pages and written by Ecologist Dr Martin Brammah. This offers one of the best deep dives into the world of Betta care!


    Buy On Amazon

    Written by Dr. Brammah, this book has been known in the hobby as the book of all books. It’s a must-buy in my opinion. The kindle version is a steal at the price if you can get that. It is everything you would want to know and more about Bettas jammed packed into 300 pages.

    The Simple Guide

    If the Betta Bible is too much to start with, the Betta Fish book by Walter James is a good alternative. Weighing in at only 124 pages, it is a more digestible deep dive into Betta Fishkeeping.

    Where To Buy

    Betta fish is purchased at local fish stores, chain pet stores, and online fish stores. You will get the best selection from an online store as they will have many varieties that other stores won’t carry. You can go wrong either way. Bettas will ship in good condition due to their hardiness and ability to breathe air outside of the water.

    WYSIWYG Available!


    Betta Fish

    Use Coupon Code ASDFISH at Checkout

    Betta Fish are one of the most beautiful varieties of freshwater fish available in the hobby. Easy to care for with plenty of varieties!


    Buy Premium Varieties


    Buy On Petco Online

    What It Is Actually Like Living With Betta Fish

    Your Betta Fish will learn to recognize you. It will swim to the front of the tank when you approach, flare at its own reflection, and patrol every inch of its territory like it owns the place. Because in its mind, it does.

    Feeding time is the highlight of the day. Bettas are aggressive eaters that will snatch food from the surface the moment it hits the water. They prefer variety. Pellets one day, frozen bloodworms the next, an occasional freeze-dried daphnia treat.

    Bubble nests appear without warning. Your male will spend hours building and repairing a cluster of bubbles at the surface. This is normal healthy behavior, not a sign that it needs a mate.

    At night, bettas sleep. Sometimes in strange positions. On a leaf, wedged behind a filter, or resting on the substrate. The first time you see it, you will think something is wrong. It is not.

    FAQS

    Are They Easy To Care For?

    Yes, Betta fish are one of the easiest freshwater fish to care for. They have a labyrinth organ, which allows them to tolerate smaller spaces and water with high nutrient content. That being said, Betta fish should still have a tank at least 5 gallons in size, a quality filtration unit, heating, and regular feeding and tank cleaning.

    Can They Live In Tap Water?

    Yes, a Betta fish can live in tap water if you condition the water prior to putting your new fish in your tank. You will want to use a conditioner like Seachem Prime. If you are thinking about using purified water, avoid distilled water or RODI water. You can use that type of water if you use an aquarium materializer, but most aquarists do fine with tap water + a water conditioner when it comes to running a Betta tank.

    How Often Should You Change The Water?

    If you keep your Betta in an aquarium, you should consider changing your aquarium water every 7-10 days. I know some people do keep Bettas in bowls. If you are keeping them in a bowl, you should consider changing the bowl water every other day.

    How Often Should I Feed Them?

    You should feed your Betta fish twice per day. Keep in mind, that you need to have the filtration to feed them that much. Test your tank water to see if your levels are stable. If not, you can feed them less. It’s also okay to have a freshwater fish fast for a day every week. Fasting is actually good for their digestive system!

    Is the Betta Fish Right for You?

    Before you add a betta fish what they actually need to thrive to your tank, it’s worth asking whether this species actually fits your setup and your goals. Here’s a quick breakdown to help you decide.

    This species is a good fit if:

    • You have a large enough tank to manage territories. Cramped conditions amplify aggression.
    • You’re comfortable managing aggression through stocking ratios, line of sight breaks, and tank layout.
    • You can commit to regular water changes. These fish produce more waste than many smaller species.
    • You’re not planning a peaceful community tank. Betta Fish What They Actually Need to Thrives need tank mates that can hold their own.
    • You enjoy watching active, interactive fish. Cichlids have personality that smaller species simply don’t match.
    • You have backup plans. Sometimes a particular fish just doesn’t work out, and you need a way to rehome it.
    • You’re feeding a varied, high-quality diet. Color and health depend on nutrition.

    If most of those points line up with your setup, the betta fish what they actually need to thrive is worth serious consideration. If several don’t, it’s better to choose a species that matches your tank now rather than trying to make it work.

    How the Betta Fish Compares to Similar Species

    Want a centerpiece fish for a nano tank? Get a betta. Want a peaceful community schooler? Get ember tetras instead. Want low maintenance? Get neither. Both need real care.

    Choosing between similar species is tricky. Here’s how the betta fish what they actually need to thrive stacks up against some common alternatives.

    The betta fish what they actually need to thrive occupies a specific niche in the aquarium hobby, and direct comparisons really depend on what you’re looking for. In my experience, the most common question people ask is whether they should choose the betta fish what they actually need to thrive or something similar that’s more widely available. The answer comes down to three things: tank size, water parameters, and what other fish you’re keeping. If your setup matches what the betta fish what they actually need to thrive needs, it’s hard to beat. If not, there are alternatives worth exploring.

    Closing Thoughts

    A Betta Fish tank is in my mind the best way to introduce yourself to the wonderful world of aquarium keeping. A Betta tank is small and low on maintenance making it a lower barrier to entry than other aquarium setups. There are a large variety of Betta breeds and colors. It is difficult to really get bored keeping Betta because there is so much variety and they are loaded with personality.


  • Dutch Aquascape – Complete Style Guide for Dutch Style Planted Tanks

    Dutch Aquascape – Complete Style Guide for Dutch Style Planted Tanks

    Dutch aquascaping is the most plant-dense, visually complex style in the hobby. think lush layers of color, contrasting textures, and meticulously planned plant streets that create depth. It originated in the Netherlands in the 1930s and remains the most demanding style to execute well. I’ve studied Dutch layouts extensively and find them fascinating precisely because the challenge is so high: no rocks, no driftwood, just masterful plant selection and placement carrying the whole design. If you’re ready to step up your planted tank game, this guide covers exactly how Dutch aquascaping works and how to approach it.

    Key Takeaways

    • Dutch aquascapes are an aquascape style that focuses on stem plants
    • They require CO2 injection and heavy fertilization in order to thrive
    • They are one of the most prune-heavy scapes to maintain due to the number of stem plants used
    • They require more intense lighting than other scapes and shadowing is a concern due to stem plants

    History

    The Dutch Aquascape or Dutch Style’s roots originates all the way back to the 1930’s in the Netherlands. It is the oldest aquascaping style in our hobby. The aquascaping style originated with the creation of the Dutch Society of Aquarists or NBAT. It wasn’t until 1956 the the NBAT published the initial set of guidelines of what defined the Dutch Aquascape. They would run annual contests with these guidelines and the judges would actually visit the aquariums instead of working with submitted photos.

    Concepts of the Dutch Style Aquascape

    The Dutch Aquascape is based on the following principles

    • No more than 1 plant species per 4 inches of tank length
    • No duplication of the same species in another group
    • A shoal of fish should be issued with at least 12 fish from the same species

    The rules of the Dutch aquascaping style is very restrictive. Many of the dutch aquascapes you see these days are actually Dutch hybrids with just variations of the rules above. The general rule is to keep about 70% of the aquarium floor planted.

    Layout

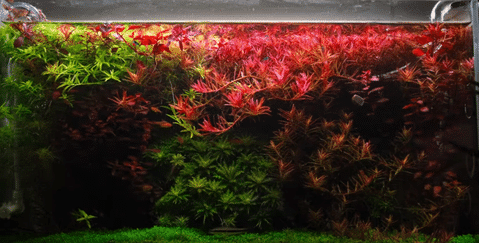
    Dutch Style Aquarium

    A Dutch Aquascape is all about the plants. There is no hardscaping to do with this style as we are going to use the plants to setup our landscape. The main thing with this style is obtaining a taller tank as you will be using certain plants that do get tall and you want to allow them time to grow and show their length before pruning. We want to aim for at least 18-24 inches in height for a Dutch scape. Dutch scapes also tend to be a bit wider usually in the 3 to 4 feet range. The 40 gallon breeder tank is a great consideration to use. If you want a serious competition like tank setup, consider a rimless tank.

    A Dutch style aquascape does follow the rule of two thirds concept like the Iwagumi, but it’s a bit trickier to pull off. It’s really about impact with this style. The main technique you need to know with Dutch style is terracing and spacing. You will want to place the biggest and brightest plants at your focus points. You can also choose to not follow the rule and then have the option of 4 focal points.

    Terracing

    Terracing is used with Dutch Style aquariums to convey depth in the aquarium. This is also to create focal points in the aquascape.

    Terracing traditionally in agriculture would be creating mounds of soil to create raised sections in the landscape. With the Dutch style or aquascape we position the substrate in a way where we slope it. We start almost flat at the bottom and increase the depth of the substrate as we go from the front of the tank to the back. This is the way this aquascaping style is done in modern times because it allows us to be more flexible with our setup.

    Another way of doing is by keeping plant groups on different heights. Space is key as well. We want to space groups of plants at least a half inch between groups of plants. This gives the plants breathing room and room for growth. They will also expand to their best appearance and make pruning a bit easier to do.  Spacing to spread out density is also known as streeting in the Dutch Style. Streets are spaces between your plant groups that help create depth and perspective in your aquascape.  

    Plant Selection

    Plants are everything with the Dutch Aquascape. They are your feature pieces. We have to select a variety of plants to have an eye popping aquascape. This means we have to look at shapes, texturs, and colors with our plants. We also need to plant in an order to contrasts our plant mix so our piece does not end up looking dull or overdone. Most of our plants will also be stem plants, meaning they will feed on the nutrients in our substrate. Let’s breaking down our plant selection to the following:

    Short plants

    Mid-Size Stem Plants

    Taller Colored Stem Plants

    • Ludwigia pantanal or cuba
    • Pogostemon stellatus
    • Limnophila hippuroides

    There is actually a great stem plant pack available online that will get you some great plants to start with. Check out the link below!

    Stem Plant Dutch Pack

    This starter pack includes popular dutch style plants like Ludwigia Natans, Bacopa Monnieri. A great way to start out!

    Click For Best Price

    More About Stem Plants in Tanks

    When discussing Dutch Aquascapes, we need to drive into stem plants a bit more. The dutch style will use the most stem plants of any aquascape style. Stem plants growth patterns are vertical with branches. Many will grow tall and will keep growing in the aquarium until they reach the top of your tank.

    Because of this, they require the most management of any plants in our hobby. It is not uncommon for these plants to require weekly pruning. If left unchecked, it is very possible that these plants will cover the top of your aquarium and will end up shadowing your entire aquarium. You can see an example from Tropictank YouTube Channel of an overgrown Dutch aquascape that badly needs to be pruned:

    Dutch Style Pruning

    Stem plants will also require strong Aquarium Lighting and Aquarium Injected CO2 Systems to grow their best and to display their best colors. Shadowing is a concern with Dutch style tanks.

    The good thing with stem plants is they can be easily propagated by cutting off nodes and simply replanting them. This can make a fully planted Dutch Aquascape more fun as you can trade with friends or trade your plants to your aquarium store for credit to help fund your hobby. 

    Tension vs. Harmony

    We talked about this earlier on the Iwagumi style. We know to create visual interest and energy that we need to balance tension and harmony.

    So what is tension in a dutch aquascape? This is going to do with the leaf shape ,structure of our plants, shape, and color. Plants with more textured leaves and sharper leaves versus round will create tension. Plants that grow tall versus round will create more tension.

    Color is really what stands out from other aquascape styles with the Dutch style. Let’s discuss how this works. In color theory, we have what we call warm and cool colors. Warm colors have the following emotions tied to them: happy, excitement, bright, and angry. They have shorter wavelengths on the light spectrum which makes them feel energetic to us 

    Warm Colors With Planted Tanks

    Cool colors have the following emotions tied to them: Calm, soothing, relaxing, and harmony. They have longer wavelengths on the light spectrum which makes them feel more calm then warm colors.

    Cool Colors With Planted Tanks

    Contrasting warm and cool colors creates are our tension in our aquascape. We have many things to work with on balancing our tension and harmony balance. Color is just going to be the most obvious, which is why I am touching on it. If you want to learn more about color theory here is a video below from Purple Pretty Door for your enjoyment.

    Your goal as the aquascaper is to create that blend of balance with your tension and your harmony. Too much tension and the viewers eye will be over the place. Too much harmony and your aquascape will look boring and too uniform. Research your plant selection careful and draw out a plan for where you are going to plant everything and what plants you are going to use.

    Obtaining Your Plants (Tissue Culture vs. Aquacultured)

    We discussed it earlier in our Iwagumi Aquascape post. Always lean on tissue culture stem plants. You have less risk with pests and nuisance algae going this route versus purchasing aquascultured plants. They are good value for the money and lab grown.

    As with the Iwagumi, you will want to purchase all your live plants at once. You will want to plant densely to start, you will want to plant densely to start. 

    Setting Up for This Style

    Because of the type of plants will be using for a Dutch Aquarium, we cannot utilize the dry start method. We will need to densely plant and flood our tanks when we start up. 

    This aquascaping style is one type of scape you will not be able to dry scape. It requires more research on the plants and their grow patterns then other styles because of it. Take time to learn your plant’s grow patters so you know where to put your plants to create a proper foreground, background, and middle section of the tank. Use the tension and harmony discussion below to balance your visual impact and create your focal points. 

    Revisit the discussion about Dutch Style Terracing so you can create proper depth, focal points, and grouping for your plants. For an example Aquascape setup. See the video below by Yulia below: 

    Lighting

    Dutch Aquascapes will use the most light intensive plants in our hobby. We not only want to select a light that encourages a lot of growth, but we have to keep in mind coverage. Coverage and spread is a major and critical consideration in our light selection. Because we are using stem plants that will go large and spread through our tank, we will have an issue with shadowing as plants grow. If you know about LEDs weakness, you will be familiar with shadowing issues with them.

    For example with hobbyists with SPS coral tanks, shadowing is a major issue as corals grow. Such will be the case with a Dutch Style aquarium.

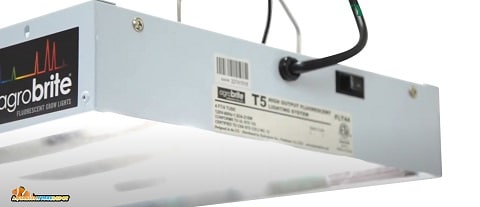
    Because of this, a T5 fixture is going to be the best choice for our dutch aquascape. T5s strength is from its spread and uniformity. A cheap route that works for our Dutch Style setup is an Odyssea T5 Quad Fixture or Hydrofarm T5s.

    Hydrofarm T5

    Oldschool T5s are still the very best in spread and spectrum. Ideal for dutch aquascapes

    Buy On Amazon

    Bulb selection is very important with T5 setups. For bulbs I would recommend Giesemann bulbs. 2 x Giesemann Super Flora and 2x Giesemann Topic T5s will create a combo of spectrum and proper color tones.

    CO2 Systems

    The Dutch Style will have some of the most demanding plants in our hobby. They will require CO2 supplementation in order to display their best colors and shape. Without CO2, our Dutch Style attempt will simply fail. There is no way around it with a Dutch Style tank, they are simply a high tech planted tank at their core.

    These hungry plants will want a proper CO2 regulator, CO2 bubble diffusor, and an appropriate sized CO2 canister. Check out our Best CO2 Systems Reviews for insights on CO2 systems and why CO2 is so essential for your success.

    Editor’s Choice
    CO2 Art PRO-SE Series

    Best CO2 Regulator

    Professional level CO2 Regulator for top level aquascapers and reef tank owners. Backed by a 10 year warranty

    Click For Best Price

    Aquarium Substrates

    Because we are going to be planting stem plants that will feed on the soil of our aquarium, an active substrate is a must. We want to have an active substrate that can hold lots of nutrients to help our plants grow to their best potential.

    In our Best Planted Tank Substrates blog post, we talked about how ADA Aquasoil is the name in the game when it comes to planted tank substrates. This is the go to soil for planted that require heavy feed. It is a substrate that will allow for regular replanting. 

    Editor’s Choice!
    ADA Aqua Soil

    The Best Planted Tank Substrate

    The world’s standard in active substrates for planted tanks. Created by brand that founded modern aquascaping

    Buy On Amazon

    Fertilization

    The ADA Aquasoil is going to give us an excellent start with our Dutch Aquascape and will provide a soil for our plants to feed off of. However, a Dutch style is an aquarium that will require a heavy amount of feeding to the plants so we will be using so may of them. Red plants also make this more complex as they have higher demands than most green plants. Plants in your Dutch Aquascape will grow fast, demand food, want great lighting, and require a lot of CO2 supplementation. 

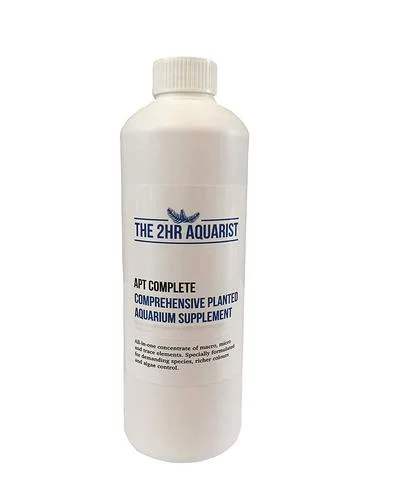
    The good thing is that APT Complete is actually designed for Dutch Style aquariums. It was designed by a hobbyist who grows Dutch Style tanks. This is the main supplement you will want to use for your dutch style tank. You can use the full dosage recommended on the bottle and adjust from there.

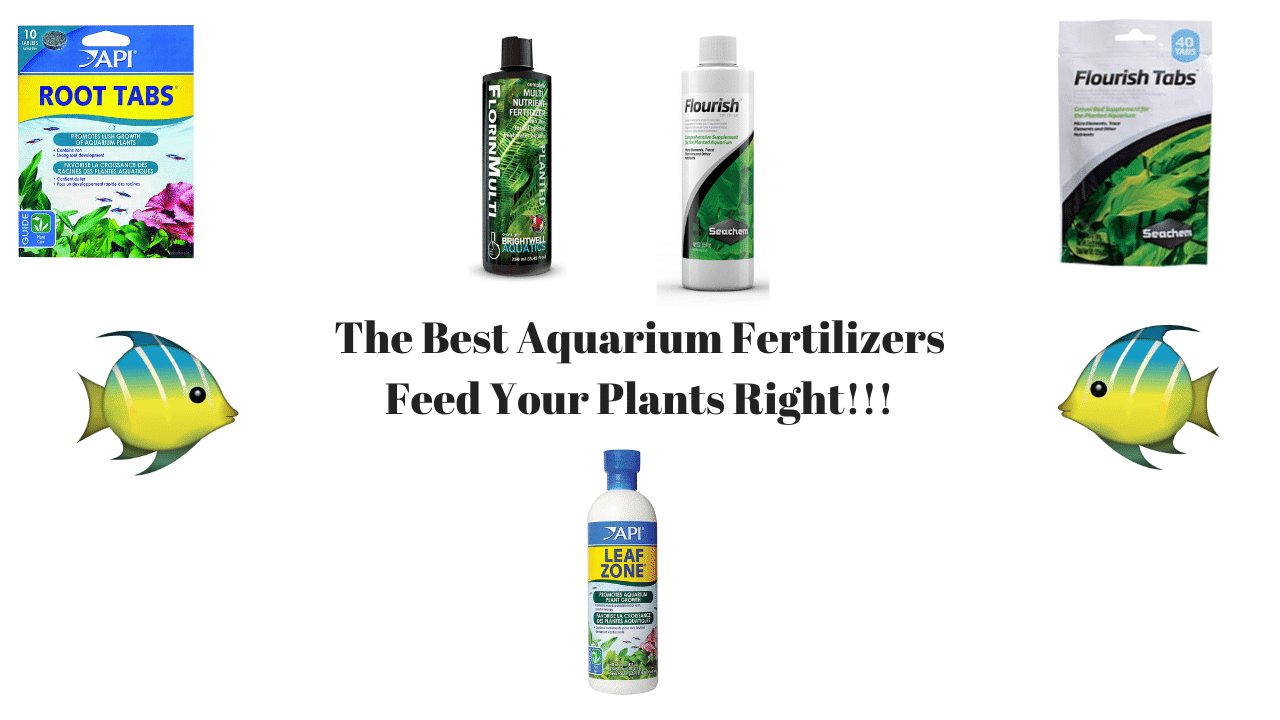
    APT Complete is a all in one fertilizer that is designed for heavily planted, heavy demand aquariums.  To learn more about fertilizers, see the Best Aquarium Plant Fertilizers blog post for details on macro and micro nutrients.

    Editor’s Choice!
    APT Complete

    Editor’s Choice

    Made by an aquascaper for aquascapers. This is the best all around aquarium plant fertilizer on the market. Marco and micronutrients in one bottle!

    Use Coupon Code ASDComplete for 10% off your order!

    Click For Best Price Buy On Amazon

    Fish For These Aquariums

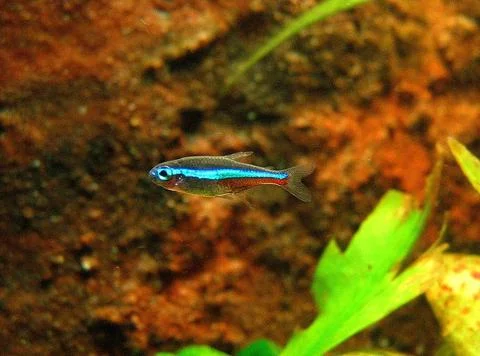
    Like the Iwagumi tank, fish are not center point in a Dutch Aquascape. Our focus is on the plants and creating a work of art. The fish compliments our piece, not take it over. Due to this, we are again look at schooling fish like Tetras, especially a Neon Tetra. What I like about Neon Tetras is that they contain the blue we are lacking in our plants. As you may recall, blue is a cool color that unfortunately we are not able to obtain through our plan selection.

    Neons offer a perfect opportunity to obtain that rare blue that is available in our aquascape. Not only that, they move in our aquarium so they will work within your aquarium to contrast your tank. It really comes with my highest recommendations when it comes to creating a eye popping Dutch Aquascape.

    Neon Tetra

    There are also people who will use Angelfish or even Discus in Dutch Aquascapes. These can work, but the size of the fish can really take away from your aquascape. The decision; however, is all up to you. 

    Filtration

    Dutch Aquascape setups are even more high demanding than the Iwagumi style. It’s one of the most intensive planted aquariums you can keep. A top of the line filtration unit should be considered. 

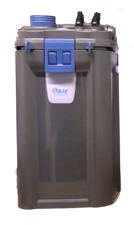
    As such, I’m going to recommend the Biomaster Thermos Series of Canister Filters. It’s a complete, durable unit with an aquarium heater built into it. It is the go to now for high tech planted tanks in today’s age.

    How To Set Up This Style

    So we have talked about the history and concepts of the Dutch Aquascape, plant selection and color theory, the best plants, how to setup up the tank, and the fish. Now let’s bring it all together build a setup. Let’s create our shopping list.

    Pruning Issues

    The major issue with Dutch Aquascapes is pruning. There is so much pruning that needs to be done with your tanks as the plants grow fast and you need to main shapes so your streets look clean and your tank is presentable. One such saying I have heard over the years is someone saying that the only time their Dutch Aquascape looked good was the first day after a pruning. They really do require a lot of upkeep just like any well groom landscape garden. Be prepared to purchase Pruning Aquascape Tools. The video below by Tropictank YouTube Channel illustrates what happens if you let your aquascape go too long without a pruning!

    Closing Thoughts

    The Dutch Aquascape is a classic aquascape style for freshwater planted tanks. It is one of the most challenging setups you can work with, and also one of the most rewarding. It’s a purely planted tank at its core. You can really flex your planting muscles with this style of aquascape. The Dutch Style reminds me of flower gardens in your home. If you have any comments, please leave them in the comments section. Thank you for reading!


    🌿 Want to learn more? This article is part of our complete Planted Tank & Aquascaping Guide. your ultimate resource for aquarium plants, aquascaping styles, substrates, and more.

  • Algae Eaters – The 7 Best For Your Saltwater Tank

    Algae Eaters – The 7 Best For Your Saltwater Tank

    Saltwater algae control is a challenge I’ve dealt with across every phase of reef keeping, and having the right cleanup crew makes a genuine difference. I’ve tried most of the common saltwater algae eaters in my 125-gallon and know which ones actually earn their spot. and which ones cause more trouble than they solve.

    Today’s post is about Algae eaters for your saltwater tank. Before we get into our list of 7 best, I want to talk about the 3 key steps in implementing an algae control system. When most people have an outbreak, the first thing one might do is buy livestock to fix the issue. However, livestock is not the fix, but actually the control. Livestock controls algae and prevention measures fix outbreaks. Knowing prevention, the types of algae, and how to combat them will ensure that you implement the right algae control measures in your tank 

    Algae Eaters

    Step 1 – Know How To Prevent Outbreaks

    The first step in controlling algae is preventative. Virtually all algae comes from the following sources:

    • Age of tank
    • Excessive Nutrients – Phosphates, Nitrates Silicates, TDS in source water
    • Poor lighting
    • Hitchhiked from live rock or coral purchases

    Age of tank is usually the first issue. If your tank is establishing or just got out of its cycle, it is very common to get nuisance algae. Usually this starts with diatoms and then moves to hair algae and red slime. You get outbreaks because your bacteria cycle is still maturing. As you perform proper maintenance, your nutrient levels should stabilize. Stay patient if you are a newcomer experiencing your first bloom 

    What Causes It?

    To answer the question about what does algae eat, let’s talk about excessive nutrients. The most common cause of Saltwater Aquarium algae outbreaks is poor source water. Water from the tap can be filled with silicates, phosphates, and nitrates that make nuisance algae thrive in your tank. Algae thrives no this nutrients as this is their food source and they will grow to consume these nutrients in your tank. These nutrients will then get “trapped” in the algae, meaning you will not be able to remove these nutrients out the system until you remove both the algae and the source of these nutrients.

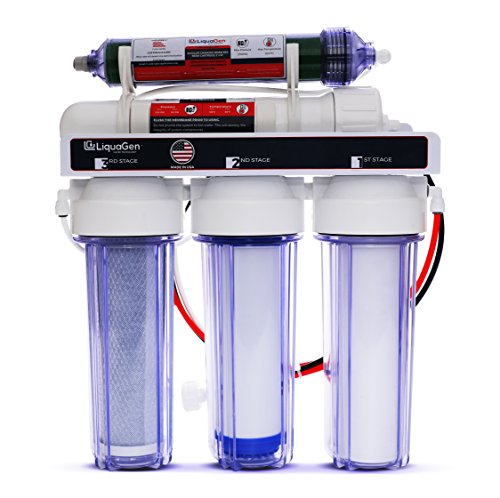
    After learning about the age of the tank, the second question I also ask hobbyist when they have an outbreak is where their source water is coming from. If you are not using an RODI System ((Please note, this post includes affiliate links for which I may make a small commission at no extra cost to you should you make a purchase), you will have outbreaks unless your source water is very pure. Even with an RODI system, one can still have outbreaks and sometimes this is due to not replacing your RODI parts timely.

    Best Value
    LiquaGen – 5-Stage RODI

    Best Value

    A complete 5 stage RODI unit without the excessive price

    Buy On Amazon

    This brings us to the next part with nutrient control – maintenance. You need to have a proper maintenance schedule in order to prevent high nutrient levels. This means water changes, cleaning equipment, changing light bulbs if you use T5 fluorescent lighting, having a proper protein skimmer, and not overfeeding or overstocking your tank.

    Poor lighting is another factor that is usually fixed easily. This is common with T5 fluorescent lighting as the spectrum and intensity degrades as the lights age. If you have older bulbs, you should replace them with fresh bulbs. If you have a light fixture that does not produce the correct spectrum, you should consider getting an appropriate reef light.

    Hitchhiking algae is our last culprit. Macroalgae, Byropsis, and Macro Algae are usually the types of algae that make their way through Hitchhiking. You can avoid most of these issues by investing in dry rock instead of live rock. This leaves corals as your only source of introduction. You can limit your exposure by purchasing frags, inspecting corals before purchase, and only purchasing from reputable local or online stores.

    Dry Rock

    This dry rock from ARC reef is mined from the Earth and is completely eco-friendly

    Buy On Amazon

    Prevention is the first step in algae control. Our next stop is knowing your algae.

    Step 2 – Know What Type You Are Dealing With

    When combating algae, you need to know what type of algae you are dealing with, how they come about, and how to limit or eliminate them. I will be going over the following algae below:

    • Diatoms
    • Dinoflagellates
    • Film Algae
    • Red Slime (Cyanobacteria)
    • Hair Algae
    • Bubble Algae
    • Bryopsis Algae 
    • Calerpa Algae

    Diatoms

    Diatoms

    Diatoms are brown algae that usually appear when a tank has just completed its cycle. They can cover sand, rocks, pumps, glass…pretty much everything. They are unsightly, but harmless in your tank. Diatoms feed off silicates. You can prevent silicate by using an RODI system and keeping up with the maintenance. Even with proper maintenance though, they can still appear via additives, salt mixes, or using improper sand. 

    Film

    This is a common algae in a tank that grows due to nutrients in the tank. They are not harmful, just unsightly and easily removed manually or eaten by algae eaters.

    Dinoflagellates

    Dinoflagellates

    Also known as brown slime algae. This type of algae is some nasty stuff. They release toxins, will kill sensitive inverts like snails, and will feed off what they kill. Eliminating them in the tank requires a mult-prong approach involving granular activated carbon, black out periods, raising pH, reduced feedings, and manual removal. It’s not an outbreak to be taken lightly. More on How To Get Rid of Dinoflagellates.

    Red Slime (Cyanobacteria)

    Cyanobacteria

    Often called algae, this is actually bacteria. Cyanobacteria is another common nuisance that pops up in a newer tank. While not harmful to fish, they are harmful to corals – especially soft corals. It is something that will always been present in your system. It is all about nutrient control with Cyano. The key parameters to control are phosphate (below 0.05 ppm) and nitrates (below 10 ppm). Nutrients can be locked in the red slime, so a common frustration point with reefers is their parameters test well, but the cyano is holding the nutrients until they are removed.

    Other factors are lighting and low flow. Redirect power heads and wavemakers or add more to eliminate dead spots. If the tank is overtaken, you can manually remove by siphoning the cyanobacteria. Chemical options would include using Chemi-Clean ,which can be used as a good way of wiping out Cyano while address the long-term issue.

    Treats Cyanobacteria
    Chemi-Clean

    This solution from Boyd Enterprises efficiently treats cyanobacteria outbreaks

    Buy On Amazon Buy On Petco

    Hair

    Hair Algae

    Hair Algae is an algae that thrives on nutrients. Having high phosphates and nitrates will cause this algae to thrive. Like Cyanobacteria, it can always be present in the tank, but can be controlled and virtually eliminated with good maintenance practices and algae eaters. You can also purposely grow in a container filtration unit like an Algae Scrubber where it can be used to keep phosphates and nitrates low and pH stable at night.

    Bubble

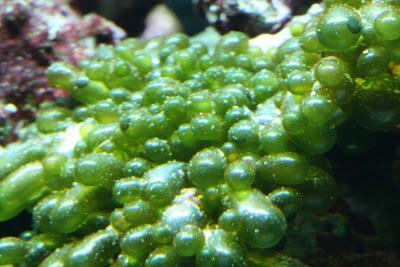
    Bubble Algae

    Bubble algae is usually introduced in the tank as a hitchhiker from either purchased live rock or corals. The best way to prevent it is to carefully inspect all of your rock or coral purchases for this hitchhiker. If you do end up with bubble algae, work to eliminate it early. You can manually remove it (but be careful about popping the bubbles or you will have it reproduce everywhere) or enlist algae eaters that specialize in eating this algae.

    Bryopsis

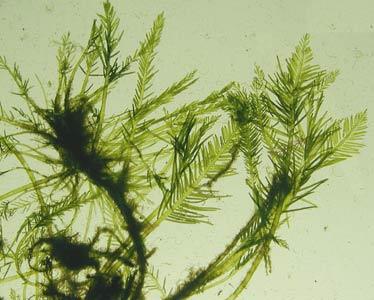
    Bryopsis Algae

    Bryopsis Algae is a fern-like algae that usually gets introduced in your aquarium from live rock or purchased corals. It is very difficult to get rid of and there are all sorts of horror stories about this algae. This is an algae unfortunately that many algae eaters will not touch.

    The best way to get rid of it is to raise your magnesium levels using a supplement like Kent Marine Tech M. You would want to increase your magnesium to the 1500 levels gradually over a week and keep it consistent until the Bryopsis is wiped out.  

    Kent Marine Magnesium

    Kent Marine Magnesium is a safe, high-quality ionically balanced magnesium supplement that supports both the health of your coral reef inhabitants and the growth of healthy corals.

    Buy On Amazon

    Calerpa

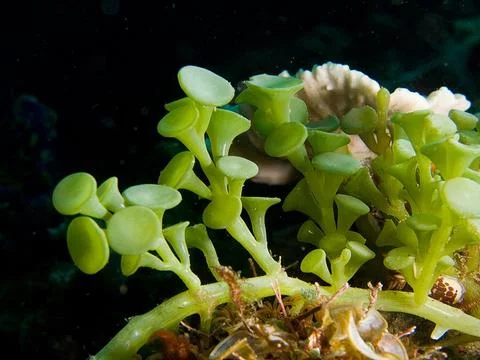
    Caulerpa Racemosa Algae

    Calerpa Algae is another algae that finds its way to your tank as a hitchhiker. It is another algae that is difficult to get rid of, but there are algae eaters that will happily eat away at this algae. If it has over taken your tank, it is best to manually remove what you can and then implement the help of an algae eating crew to keep it contained. This algae, like many others on this list thrive on nutrients so keeping phosphates and nitrates low will limit its growth rate.

    Chaetomorpha

    chaetomorpha algae

    Chaetomorpha Algae is a single celled algae that is actually used as a beneficial type of algae in many saltwater aquarium setups. While not considered a nuisance algae, I listed this on here to saw that not all algae is bad algae. Chaetomorpha algae is usually placed in a sump and grown in a separate section of the sump to help control nitrates and phosphates.

    While it is fine in a sump, they do happen to hitch hike in the display aquarium when you purchase corals or live rock. They can quick grow out of hand if they grow in your display tank if there is nothing in the tank to eat it and may require manual removal to keep it in check.

    Step 3 – Add Them To Your Aquarium

    We have gone through preventative measures and identification. Since algae is always present in our systems, you should implement some algae eaters to control the algae that does make itself present. Step 1 and 2 were guides on how to prevent an outbreak. Step 3 is about how to implement the best crew to control the algae that does show up. Check out our video from our YouTube channel.

    Below are the list of my recommended algae eaters:

    The Top 7 Control Livestock for Saltwater Tanks

    Let’s go into further detail about each algae eater. Below is a short description of each of your crew member candidates.

    ImageNameTypeLink
    Nassarius Snail Nassarius Snail

    Diatoms

    Click For Best PriceBuy on SWF.com
    Cerith Snail Cerith Snail

    Cyano, Hair, Film

    Click For Best PriceBuy on SWF.com
    Mexican Turbo Snail Mexican Turbo Snail

    Cyano, Diatoms, Film, Macro Algae

    Click For Best PriceBuy on SWF.com
    Tailspot Blenny Tailspot Blenny

    Film, Hair

    Click For Best Price
    Kole Tang Kole Tang

    Film

    Click For Best Price
    FoxFace FoxFace

    Hair, Macro Algae

    Click For Best Price
    Emerald Crab Emerald Crab

    Bubble, Hair

    Click For Best Price

    1. Nassarius Snail

    Best For Diatoms
    Nassarius Snail

    Best For Diatoms

    Nassarirus Snails excel at keeping your sandbed clean and algae free!

    Click For Best Price Buy on SWF.com

    Stats:

    • Temperament – Peaceful
    • Minimum Tank Size – 10 gallons
    • Size – 1/2″
    • Care Level – Easy 
    • Target Algae – Any nutrient reliant algae

    Contrary to belief, the Nassarius Snail does not directly eat algae. So why would it make this list? Because as we had discussed earlier, algae control is mostly about nutrient control. These are savaging snails that do an incredible job of eating detritus in the tank, keeping your nutrients in check, and algae at bay. They do most of their work in the sand, so they will only be compatible with tanks with a substrate. 

    2. Cerith Snails

    Small But Mighty!
    Cerith Snail

    A Workhorse Algae Eater

    Ceriths are small, but in large numbers do a great job at removing algae from rocks and glass

    Click For Best Price Buy From SWF.com

    Stats:

    • Temperament – Peaceful
    • Minimum Tank Size – Any
    • Size – 1″
    • Care Level – Easy
    • Target Algae – Cyano, Hair Algae, Film

    The Cerith Snail makes it to our honorable mention. Many reefers would put these to the top of their list, but I have it an honorable mention for a few reasons. The first is that they can reproduce in the aquarium and you can have dozens of snails in a short period of time. 

    The second is their size – they tend to be pretty small which can be a bad thing if they get sucked into your overflow box and cause some issues with plumbing.

    Aside from that though they are a great hybrid cleaner. They clean on the rock, glass, and sand. They all are most active at night so they tend to avoid getting eating by fish who like to snack on snails. Their small size makes them ideal for nano reef tanks. They are also dirt cheap to get in large qualities. Just check out this deal on 100 cerith snails.

    3. Mexican Turbo Snail

    Great For Larger Tanks!
    Mexican Turbo Snail

    A Work Horse Algae Eater

    Great for larger tanks, the Mexican Turbo Snail eats most types of algae in your aquarium

    Click For Best Price Buy From SWF.com

    Stats:

    • Temperament – Peaceful
    • Minimum Tank Size – 10 gallons
    • Size – 2″
    • Care Level – Easy 
    • Target Algae – Cyanobacteria, Diatoms, Film Algae, Macro Algae

    The Mexican Turbo Snail is the ultimate reef snail for larger tanks. It will mow down several types of nuisance algae, grow sizable, and have the ability to flip itself over. Its shell shape makes it difficult for crabs to eat it as well. It does not take many of these snails to establish a good clean up crew in a tank. Every reefer should consider these snails. The only downfall with them is they get large. For small saltwater aquariums, I would recommend you go with Ceriths instead.  

    4. TailSpot Blenny

    Great For Small Tanks
    Tailspot Blenny

    Great For Small Tanks

    Great personality and algae eater. The Tailspot Blenny is an entertaining addition to any saltwater tank.

    Click For Best Price

    Stats:

    • Temperament – Peaceful
    • Minimum Tank Size – 10 gallons
    • Size – 2 1/2″
    • Care Level – Easy 
    • Target Algae – Film Algae, Hair Algae

    Most hobbyists think about the lawnmower blenny when it comes to an algae eating blenny. I tend to shy away from the lawnmower primarily due to its max size of 5″. The Tailspot Blenny has all the algae eating characteristics of the lawnmower blenny but in a smaller, more colorful, and more peaceful package. They have great personalities and are a great addition to your tank.

    5. Kole Tang

    Great For Large Tanks
    Kole Tang

    A Hardy Tang

    Hardy and medium sized, the Kole Tang is great at removing film algae from rocks and glass

    Click For Best Price

    Stats:

    • Temperament – Semi-aggressive
    • Minimum Tank Size – 70 gallons
    • Size – 7″
    • Care Level – Moderate
    • Target Algae – Film Algae

    The Kole Tang makes our list for a few reasons. It is one of the smaller tangs you can put in your aquarium, which means that those with a medium sized tank can house them. They tend to be less aggressive in smaller aquariums than yellow, purple, or scopas tangs.

    Kole tangs will eat film algae though in some cases will eat hair and macro algae. For those with larger tanks, a yellow tang or a foxface/rabbitfish would be a viable candidate for hair and macro algae. If you have a much larger tank mixing both a bristle tooth tang like a Kole and a zebra species tang or foxface/rabbitfish make for a solid algae control team.

    6. Foxface

    Hair Algae Specialist
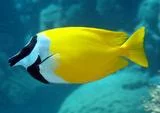
    Foxface

    Hair Algae Specialist

    Hardy, peaceful and full of personality – the Foxface is a wondering addition to any tank.

    Click For Best Price

    Stats:

    • Temperament – Semi-aggressive
    • Minimum Tank Size – 75 gallons
    • Size – 8″
    • Care Level – Moderate
    • Target Algae – Hair, Macro Algae

    The best companion for an algae destroying fish duo is a Kole Tang and Foxface. The Foxface is an amazing algae eater in saltwater aquariums. They will chew up any hair algae in the aquarium and will happily eat most macro algae. Combining them with a Kole tang covers more algae you will face in a saltwater tank. It is also one of the most the hardy herbivores you can purchase for a saltwater aquarium. Their thick slime coats make them very resistant to ich and bacterial infections.

    There are some significant drawbacks with a Foxface however. The main one is they are venomenous. They have spikes that can leave a nasty sting, though not as dangerous as a lionfish or scorpion fish. They get pretty large at 8″ and grow very fast. They also can develop a taste for some corals and inverts – specifically clams. If a Foxface gives you pause, a Scopas Tang could be a good alternative. A Scopas is the most hardy Zebrasoma species tang you can buy. 

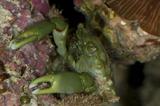
    7. Emerald Crab

    Bubble Algae Destroyer
    Emerald Crab

    Bubble Algae Destroyer

    The emerald crab is a great scavenger and bubble algae eater

    Click For Best Price

    Stats:

    • Temperament – Semi-aggressive
    • Minimum Tank Size – 10 gallons
    • Size – 2 1/2″
    • Care Level – Easy
    • Target Algae – Bubble Algae, Hair Algae, controls nutrient reliant algae

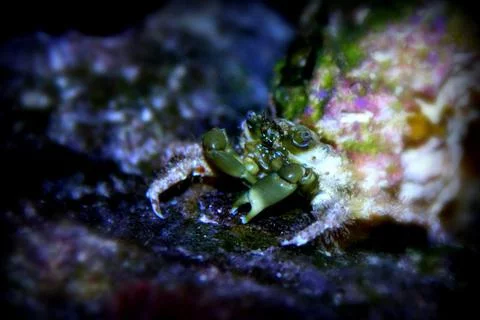
    The emerald crab is well known for eating bubble algae. It is a scavenger that will feed on uneaten foods and many types of nuisance algae. They are generally a peaceful invert, but can become an opportunistic eater if food sources are low. This invert should be part of any clean up crew in a reef tank. If you are going to get an emerald crab, ensure that your crab is guaranteed to eat bubble algae.

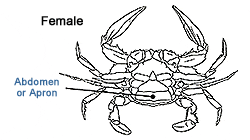
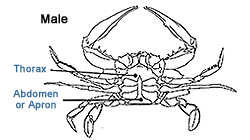
    There are some clean-up crew sellers out there that guarantee their crabs will do so, and those are the ones you want. You will also want to make sure you purchase a female as they are typically less aggressive than males. A picture is shown below so you can tell the difference:

    Emerald Crab Male vs Female
    Male Emerald Crab

    Which Have You Used?

    So that’s my list folks. These 7 aquatic animals I feel are the best algae control livestock you can add to your saltwater aquarium. If you want to go the equipment route, I would highly recommend an algae turf scrubber for controlling all types of nuisance algae growth.

    Did I miss any of your favorites in the list above? Share what I missed in the comments below and please share this post with others if you found it helpful. Thanks for reading!

  • Damselfish – Yes, Sane Damsels Do Exist!

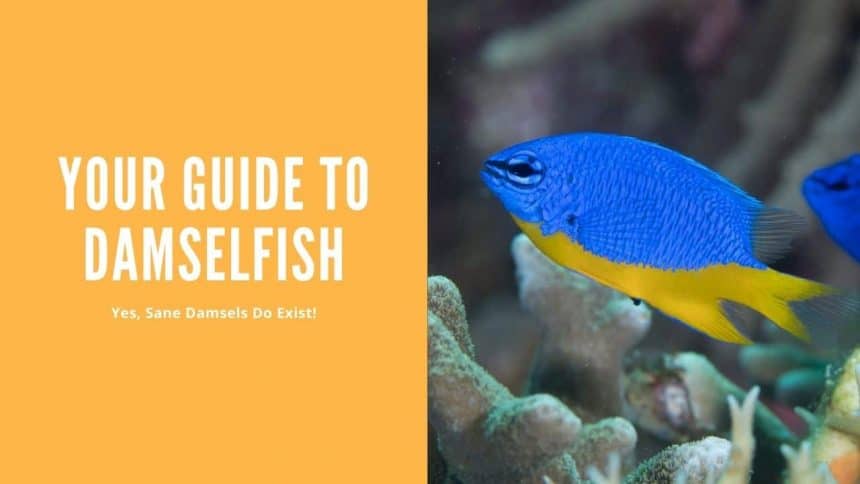
    Damselfish – Yes, Sane Damsels Do Exist!

    After running reef tanks for over two decades, damselfish are sold as starter fish to cycle saltwater tanks. Then they grow up, become territorial nightmares, and nobody catches them in a reef full of rock.

    The damselfish is cheap, hardy, and aggressive enough to terrorize fish three times its size.

    Damsels are easy to add and nearly impossible to remove. Think about that before you buy one.

    Damselfish get a really bad rap in the saltwater aquarium hobby. They are highly aggressive, bite your hand if you put it in the tank, have been known to harass timid tank mates to death, and are a pain to remove if you have to take one out of your tank. Check out the video below from our YouTube Channel.

    So why would anyway ever consider a damsel for their fish tank let alone a reef tank? Well they are several:

    • They are an extremely hardy marine fish
    • They will eat just about anything you feed them
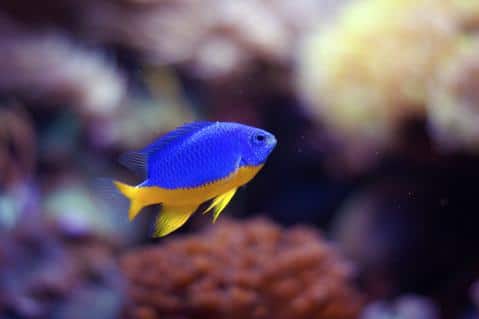
    • They have an exclusive blue color that is difficult to find 
    • They are small and do not require a large tank
    • They are reef safe when introduced correctly

    Back in the day before fishless cycling was common practice, the Damselfish was the fish you would use to cycle a saltwater tank because they could tolerate levels of ammonia, nitrite, and nitrates that would kill off many other saltwater fish. Of course, nowadays one should never consider cycling with damselfish.  However, they are extremely hardy in a tank and are a very forgiving fish for a novice.

    Damselfish will eat just about anything you feed them in the tank. They do not require a specialized diet and will do just fine with any food you buy them.

    Damselfish have a blue color that is very hard to find for a reef tank. Think about it for a second. How often have you thought about looking for a blue colored fish to compliment your coral reef tank setup?  Let’s think about likely candidates:

    • Blue Tang AKA “Dory” – Very large, susceptible to ich
    • Powder Blue Tang – Notoriously difficult to keep and best for experts
    • Mandarin Goby – Notoriously difficult to keep from starving to death and will devastate a micro-fauna population in a smaller tank
    • Large Angelfish – Not reef safe and get very large
    • Coral Beauty Angelfish – Hit or miss on reef safe; intermediate level fish
    • Blue Reef Chromis – The most suitable candidate, but get 5″ long and should be grouped

    Wow, that was pretty quick. So unless you have a large tank or pretty skilled at reefing already, your options are pretty limited for a blue fish.  

    Damsel fish - Yes, Sane Damsels Do Exist!

    Most Damsels stay very small. Only a few members get large and should be avoided for a community tank as they get very aggressive. Their compact size makes them attractive for smaller tanks, especially those under 75 gallons.

    Damselfish are reef safe, but have to be introduced in the correct manner. This means that you have to introduce them last and with the right tankmates, I’ll get into this in detail later in this article.

    So we have established the reasons why a Damselfish is a good candidate for your saltwater aquarium, but we have all heard the horror stories of their aggressive nature. Is there such thing as a sane Damselfish?  The answer is – YES!

    Expert Take (Mark Valderrama, AquariumStoreDepot)

    Most damselfish articles tell you to avoid the whole family. That misses the point. Chrysiptera damsels are genuinely different from the three-stripe damsels and domino damsels that give the group its reputation. After 25 years in the hobby and managing aquarium stores, the Chrysiptera species on this list are ones I have stocked and recommended repeatedly for reef tanks. They are not aggressive enough to be the classic damsel problem fish, and they are hardy enough to handle the conditions that challenge other reef species.

    ASD Difficulty Rating: Tier 1 – Beginner-Friendly (Chrysiptera species only)

    The Chrysiptera damsels covered in this guide are some of the hardiest and most beginner-accessible saltwater fish available. Hardy, reef-safe, and available as tank-bred. Not all damselfish are created equal, and these are the exceptions worth keeping.

    Introducing the Chrysiptera Damselfish Species

    Scientific Name Chrysipertera
    Common Name (Species) Damselfish
    Family Pomacentridae
    Origin Indo Pacific
    Diet Omnivore
    Care Level Easy
    Activity Active
    Lifespan to 10 years
    Temperment Semi-aggressive
    Tank Level All Areas
    Minimum Tank Size 30 Gallons
    Temperature Range 73. 81 Degrees F
    pH Range 8.1 – 8.4
    Filtration/Flow Rate All
    Water Type Saltwater
    Breeding Egg-layers, Difficult to breed
    Compatibility Semi-Aggressive tanks
    Ok, For Reef Tanks? Yes
    Ok, For Inverts? Mostly Yes

    These Damsels comes from the family pomacentridae and hail from the indo Pacific. There is a genus in the Damselfish family called Chrysiperta. They are just as pretty as other other Damsel relatives but far more peaceful. They will bring the lively nature and action of Damsels without the aggressiveness.

    I will break down 4 of the more colorful Chrysiperta Damsels that fit the exclusive Damsel blue that many hobbyist love:

    • Azure Damsel
    • Starck’s Damsel
    • Yellow-Tail Damsel
    • Springer’s Damsel

    Azure Damsel
    Azure – Tank Bred and tame

    Max Size – 3″
    Minimum Tank Size – 30 gallons

    The Azure damselfish species is the most mild-mannered of the group. It has a wonderful disposition in the group and has rarely caused disruptions in aquariums. It is the best Damselfish to choose if you are considering one that is blue. In larger tanks, they have been kept in groups. It is as of the date of this post, the only Damselfish of the 4 that is available as tank bred.

    Starck's Damsel

    Starck’s – The Beauty of the Group

    Max Size – 4″
    Minimum Tank Size – 30 gallons

    The Starck is more aggressive than the Azure but still far less than many other Damsels. It has a brilliant blue body with a broad yellow band running along the top. It can almost pass as an Angelfish to a layperson’s eye. Unfortunately the Starck’s Damsel is a hard Damselfish to find available part of the year and commanding a price tag equivalent to Dwarf Angelfish like Flame Angels.

    Yellow Tail Damsel

    Yellow Tail – The “Dory” Substitute

    Max Size – 3″
    Minimum Tank Size – 30 gallons

    This is the most aggressive of the four and has the most horror stories behind it. It’s on the list for two reasons. First, many of the stories I have seen have been involving timid saltwater fish or where the yellow tail was placed in first and established its territory. Both are incorrect ways on how to introduce a Damselfish. Second, the its yellow tail fin and color is often mistaken as a “Baby Dory” by children and with it’s hardiness can withstand a novice hobbyist or parent purchasing a “Dory” (AKA Blue Tang) for their children.

    I personally have recommend this marine fish to potential Blue Hippo Tang buyers along with a lot of education about the care and maintenance required to successfully keep saltwater fish. The suggestion was so common, that I actually was interviewed by the Huffington Post about my experience with this aquarium fish.

    Springer’s – The Coral Pest Slayer

    Max Size – 3″
    Minimum Tank Size – 30 gallons

    Springer's Damsel

    Of all the damsels on this list, the Springer’s Damsel offers pest control abilities. This Indo Pacific fish is well known for wiping out flatworms in a reef tank, their ability to wipe out pests have been compared with Wrasses like Six-line and Malnanrus Wrasses. The great thing about a Springer’s damsel is they are just as docile as Azures so you can get a small pest control fish without the attitude of a Six-line Wrasse in a small system! In a smaller system they cannot be beat for pest control. Keep in mind though as they mature they will look at your hands as threats to their territory and will likely attack your hands!

    So I have outlined the four best Damselfish. Now let’s break down the best practices for adding a Damsel to your tank.

    Reality Check

    Even Chrysiptera damsels are still damsels. They are territorial, they will claim a cave or corner of the tank, and they do not appreciate fish that look similar to them being added afterward. The species on this list are significantly calmer than classic damsels, but they are not passive fish. They will hold territory, and they will assert themselves if the stocking order goes wrong or the tank is too sparse.

    Best Practices for Adding Them

    I’m going to break this done into 3 parts:

    • Introduce them last
    • Have other semi-aggressive fish in the tank
    • Have lots of rockwork

    Damselfish are often going to be the most aggressive marine fish you will add to your tank. Because of this, you need to introduce them last into your tank where territory has already been established by your other tankmates. This will prevent your damsel from becoming the alpha fish in your tank.

    Semi-aggressive fish need to be in the tank in order to be successful in the tank. If you have timid tank mates like firefish, damsels should be avoided. Here is a quick list of semi-aggressive fish that suit a damsel’s nature:

    • Tangs
    • Dwarf Angelfish
    • Clownfish
    • Dottybacks
    • Basslets like the Royal Gramma
    • Semi-Aggressive wrasses like Malnarus. Caution with flasher wrasses
    • Bottom Dwelling Gobies

    Rockwork is the third factor on our list. You are likely going to have a lot of rockwork if you have a reef aquarium so you will likely be okay. This is mostly a consideration if you have a fish-only setup.

    When selecting damselfish for your aquarium, you pretty much won’t go wrong with these guys if you’re looking for a community setup. Just make sure you have a tank that is suited for the species of fish you are getting, add them last, and pay attention to tankmates.

    Hard Rule

    Always add Chrysiptera damsels last. Adding them before other fish in an established tank creates a territory problem that is nearly impossible to fix without removing rockwork. Add them after your other fish are settled and you eliminate most of the aggression risk.

    Care Guide

    The damselfish on this list, with the exception of the Starcki Damsel, will grow to about 2-3 inches in length. The Starcki will be a bit bigger topping out at 4 inches. Give their more aggressive nature, it is best to keep them in a 30 gallon aquarium or larger with length being a major factor as damsels tend to claim an area of the tank as their own.

    Water temperature should remain at 73 to 81 Fahrenheit, which pH levels at 8.1 to 8.4 and salinity at 1.020 – 1.026. Open spaces are ideal for them as damsels are open swimmers. The rocks you keep in the tank should have plenty of hiding places to reduce aggression.

    Best Food For Them

    What makes damselfish great in saltwater tanks is that they tend to not be very picky eaters, but doesn’t mean that you should just feed the first fish food you find at the grocery store! Damselfish should be offered a complete diet. Let’s talk about the hierarchy of saltwater aquarium food.

    • Best – Fresh/Raw Food, Enriched Frozen Food
    • Better – Fried Dried + Nutrient Soaked Food
    • Good – Enriched Flake/Pellet Food

    The Best Frozen Food for Them – LRS Nano

    There are not many of us in this hobby who will go make fresh seafood for our marine fish. There are videos available on how to do this, but I’m going to assume it’s just not realistic for you to make your own. It’s a pretty smelly process! The next best option would be live black worms if you can somehow get it locally and grow a culture, but again your significant other may not be a fan of you keeping worms around the house or in the fridge ;-).

    So this brings us to frozen food. Without a doubt, LRS Nano frozen is the best frozen food you can get on the market. It is only available at your local fish store so if you are fortunate to have a store that carries it buy it today! The rest of the items are available online with Amazon (Affiliate Links Below) being the best way to get them quickly.

    The Best Freeze Died Food for Them – Fried Dried California Blackworms + Selcon

    California black worms have been praised by long-term reefers as a great source of nutrition and the most pickiest of fish will eat them. At least for the live black worms, but as I stated before live is tough to get and this is the next best thing you can get at a reasonable price. These freeze dried California black worms are ready to go for your Damselfish to eat 

    It is highly recommended to soak them in Selcon prior to feeding. The great thing about freeze dried food is they take vitamin soaks like Selcon very well so you know your fish are getting a vitamin rich diet!


    Selcon

    A vitamin enhancer that works great in freeze dried and frozen foods. A great choice to boost nutrition in brine shrimp, mysis, and blackworms


    Buy On Amazon


    Click For Best Price

    The Best Flake Food for Them – Cobalt Aquatics Marine Omni Flake Food

    While you can make a very good case for pellet food, in our experience damselfish have an easier time eating flake food given their smaller mouths. Pellets are a more appropriate food for their large cousins, Clownfish. What makes Cobalt Aquatics Marine Omni Flakes stand out is their food contains probiotics. The mix of the flake is also very comprehensive containing highly quality ingredients like squid, spirulina, plankton, krill, and mussel. The product is made in the USA and it’s highly palatable formula are great for finicky eaters and avoids the digestion/nutrition issue common with low quality flake foods.

    Contains Probiotics!


    Cobalt Aquatics Marine Omni Flakes

    One of the better flake foods available for marine fish today


    Buy On Amazon


    Buy On Chewy

    Who Grows Most With This Fish

    Chrysiptera damsels suit beginner and intermediate saltwater keepers who want a hardy, colorful fish that can handle the conditions of a new or maturing reef tank. If you want a reef-safe fish that is tank-bred, affordable, and can coexist with corals and most common saltwater community fish, these are among the best options available. Experienced reefers who want to fill a small territory role without the aggression of a larger damsel species also find these a practical choice.

    Is a Chrysiptera Damsel Right for You?

    Good Fit If:

    • You want a hardy, reef-safe damsel that is significantly calmer than the classic problem species
    • You are stocking a new reef and want a fish that can handle the process while being easy to keep long-term
    • You can add the damsel last, after all other fish are established
    • Your tank is 30 gallons or larger with established rockwork and territory options

    Avoid If:

    • You plan to add the damsel first and stock other fish around it (territory conflict guaranteed)
    • You already have another damsel species in the tank (they will fight)
    • You want a fish that is completely passive in a community reef (all damsels will hold territory)

    Closing Thoughts

    Not all damsels are the same fish. The Chrysiptera species on this list are the exceptions in a family known for aggression, and they deserve to be treated that way. Add them last, choose the right tank mates, and these small, colorful fish will hold their place in a reef tank for years without creating the problems that made damsels infamous in the first place.


    📘 Want to learn more? This article is part of our complete Saltwater Fish & Reef Guide. Your ultimate resource for marine fish, coral care, reef setup, and more.

  • Best Reef Safe Fish – Top 11 (That Won’t Eat Corals)

    Best Reef Safe Fish – Top 11 (That Won’t Eat Corals)

    When going to a local fish store (LFS), it can be always tempting to impulse buy a fancy looking fish that you have never seen or heard of before.  Listed below are best reef safe fish fish that are best suited for virtually any community and reef setup.  Equipment is important for this hobby, but proper fish selection is critical for success.  I always would find it frustrating to see LFS sell fish that are for advanced fish keepers or not suited to the tank of the buyer (*cough* Tangs).  In a later post, I will go through the top 10 saltwater aquarium fish you should avoid.

    My Criteria For Selecting These Fish

    The fish on my list selected using the following criteria:

    1. Does not require a large tank (more than 4 feet tank)
    2. Well known for being reef safe (won’t nip at corals)
    3. Not overly aggressive (e.g. – Damsels)
    4. Hardy fish or fish that is available as tank bred
    5. Does not require a specialized diet 

    Reef Safe Fish For Everyone

    Here are our candidates. I’ll go over more details below. This is a quick reference point for you.

    In a hurry? I recommend Tank Raised Clownfish for any reef tank!

    PictureNameMinimum Tank SizeLink
    Editor’s Choice
    Tank Raised Clownfish
    Tank Raised Clownfish

    20 Gallons

    Click For Best Price
    Banggai Cardinal Banggai Cardinal

    30 Gallons

    Click For Best Price
    Orchid Dottyback Orchid Dottyback

    30 Gallons

    Click For Best Price
    Royal Gramma Royal Gramma

    30 Gallons

    Click For Best Price
    Blue Green Chromis Blue Green Chromis

    30 Gallons

    Click For Best Price
    Firefish Firefish

    30 Gallons

    Click For Best Price
    Six Line Wrasse Six Line Wrasse

    30 Gallons

    Click For Best Price
    Watchman Goby Watchman Goby

    30 Gallons

    Click For Best Price
    Midas Blenny Midas Blenny

    30 Gallons

    Click For Best Price
    McCosker's Wrasse McCosker’s Wrasse

    55 Gallons

    Click For Best Price
    Azure Damselfish Azure Damselfish

    30 Gallons

    Click For Best Price

    The Top 11 For Any Saltwater Aquarium (2023 Update)

    Let’s dive into each fish and their profiles. These reef aquarium fishes will be suitable for virtually any saltwater aquarium.

    1. Tank Raised Clownfish (Ocellaris or Percula Species)

    Editor’s Choice
    Tank Raised Clownfish

    Best Choice For Reef Tanks!

    Clownfish are hardy, full of personality, and are safe for all corals. They are an icon for any saltwater tank

    Click For Best Price Purchase ORA Clownfish

    Stats:

    • Minimum Tank Size – 20 Gallons
    • Max Size – 3″
    • Temperament – Peaceful to Semi-Aggressive

    The Ocellaris clownfish is the industry’s most popular saltwater aquarium fish.  With the explosion of the tank raised fish industry, all sorts of designer clownfish are now available.  Ocellaris clownfish can be kept in pairs as long as you buy two when young or purchase one larger and one smaller.  They are known to spawn in captivity and will host corals. They are 100% reef safe and hardy fish  Quite simply, a reef tank is incomplete without a pair!

    2. Banggai Cardinalfish

    Peaceful Fish
    Banggai Cardinal

    A peaceful and easy going fish. They are very hardy and openly breed in aquariums. Available as tank bred

    Click For Best Price

    Stats:

    • Minimum Tank Size – 30 Gallons
    • Max Size – 3″
    • Temperament – Peaceful to Semi-Aggressive

    Peaceful tank mates, great personality and striking black lines make up this iconic saltwater aquarium fish. They can also be kept in pairs, will spawn in captivity, and are very hardy.  The Banggai Cardinalfish is the poster child of how hobbyist, industry professionals, and scientists came together to support sustainable production of a marine species in captivity. They are excellent for reef tanks and will not bother any tank inhabitants or corals. They are ideal beginner saltwater fish. 

    3. Orchid Dottyback

    Orchid Dottyback

    Tank bred and very hardy. This is the most mild-mannered dottyback you can purchase

    Click For Best Price

    Stats:

    • Minimum Tank Size – 30 Gallons
    • Max Size – 3″
    • Temperament – Semi-Aggressive

    Yes, I know this is a bad picture–but the fish is awesome. Dottybacks in general get a bad rap.  This is mostly due to the fact that most dottybacks can channel their inner damsel and create havoc in your reef tank.

    Fortunately, the Orchid Dottyback is not one of those. They have a mild temper in a community reeftank and are the great tankmates.  It is not recommended to keep these in pairs unless you can purchase a mated pair.  There is no easy way to identify the differences between a male and female, and they do not change gender like clownfish.  Nevertheless, they are a great saltwater aquarium fish. They are reef safe and actually do a good job at eradicating bristle worms from an aquarium.

    4. Royal Gramma

    Royal Gamma

    Amazing colors and easy to care for. The royal gamma will not bother any coral or invert in your aquarium

    Click For Best Price

    Stats:

    • Minimum Tank Size – 30 Gallons
    • Max Size – 3″
    • Temperament – Semi-Aggressive

    A striking blend of colors and personality make up this beautiful saltwater aquarium fish.  The Royal Gramma will try to be the boss in your tank, but will generally be kept in check by clownfish, tangs, and angelfish.   They will be aggressive to similar bodied fish and their own kin.  You cannot keep both a Dottyback or Royal Gramma in the same reef aquarium so pick the one you prefer.  I lean towards to the Orchid Dottyback because they are available as tank bred. The Gramma is more mild mannered than the Orchid. They will not bother any corals

    5. Blue Green Chromis

    Blue Green Chromis

    A schooling reef fish. These are great in larger numbers to see their schooling nature

    Click For Best Price

    Stats:

    • Minimum Tank Size – 30 Gallons
    • Max Size – 3.5″
    • Temperament – Peaceful

    The Blue Green Chromis hardy long-lived saltwater fish that will school together.  They are the neon-tetra of saltwater aquarium fish. You cannot go wrong putting this fish in your tank.

    6. Firefish

    Great For Nano Reefs
    Firefish

    Peaceful and great in smaller fish. Make sure your tank is covered. They are jumpers

    Click For Best Price

    Stats:

    • Minimum Tank Size – 10 Gallons
    • Max Size – 3″
    • Temperament – Peaceful

    The Firefish is the go to saltwater fish for nano tanks.  Peaceful, quiet, striking colors, and very hardy.  They can be kept in pairs and generally the pair will be together, but it is best to purchase them young to increase your chances of success.  

    They are timid fish that can be harassed by more aggressive tank mates. They are model citizens in a reef aquarium. They are safe for all corals and invertebrates.  

    7. Six Line Wrasse

    Great For Coral Pests
    Six Line Wrasse

    A coral pest eliminator that will not harm corals. They are on the aggressive side so add them last

    Click For Best Price

    Stats:

    • Minimum Tank Size – 30 Gallons
    • Max Size – 3″
    • Temperament – Semi-aggressive

    Wrasses are very active fish.  The Sixline Wrasse is no exception.  A reef safe and hardy saltwater aquarium fish.  The only downfall with this wrasse is they are a on the aggressive side and will harass easily intimidated fish.  It’s best to keep them with other semi-aggressive fish like clownfish and to add them last to avoid any tank drama. They do an amazing job at removing various pests from corals while still remaining reef safe. 

    8. Yellow Watchman Goby

    Great With Pistol Shrimps
    Watchman Goby

    A tank bred goby that has a symbiotic relationship with pistol shrimp. Hardy and won’t bother any corals

    Click For Best Price

    Stats:

    • Minimum Tank Size – 30 Gallons
    • Max Size – 3″
    • Temperament – Peaceful

    The Yellow Watchman Goby is considered one of the best saltwater aquarium fish for beginners.  They can be paired with a pistol shrimp and they two will form a pair.  If you are attempting a pair, ensure that you have at least a 2″ sand bed available and purchase a small shrimp like a candy cane shrimp.  Seeing the interaction with watchman goby and a pistol is a joy. The goby works to keep the shrimp safe which the shrimp does it’s work on the sand and gather food.

    If you decide not to pair them with a shrimp, they are still a great fish to have on their own and readily eat any prepared food

    9. Midas Blenny

    Midas Blenny

    A beautiful fish with a unique swimming style. They are excellent for any coral setup and are very active in the aquarium

    Click For Best Price

    Stats:

    • Minimum Tank Size – 30 Gallons
    • Max Size – 6″
    • Temperament – Peaceful

    The Midas Blenny is the perfect Blenny.  Colorful, great personality, and completely reef safe. Most hobbyist who have them state they are their favorite saltwater fish in the tank. They have no swim bladder so they are consistently moving and have an eel like look when swimming.

    10. McCosker’s Wrasse

    McCosker's Wrasse

    A lovely and peaceful community wrasse. The males like to flash their fins. They are 100% reef safe

    Click For Best Price

    Stats:

    • Minimum Tank Size – 55 Gallons
    • Max Size – 3″
    • Temperament – Peaceful

    The McCoosker’s Wrasse is only fish on the list that requires a tank larger than 3 feet.  It is generally encouraged to keep them in groups as the male will perform colorful displays to the females in the tank.  However, you will need to introduce the female first or introduce as a group.  They do change genders like clown fish.  

    They are one of lesser aggressive tank mates, so if you are going to keep them, make sure they are one of the first saltwater aquarium fish you put in your tank.  These wrasse fish are known to be jumpers so a cover is recommended. 

    11. Azure Damselfish

    A Sane Damselfish!
    Azure Damselfish

    The Safest Damsel For Reef Tanks

    Damsels get a bad rep. This one bunks the trend if introduced last. They are the least aggressive damsels you can add

    Click For Best Price

    Stats:

    • Minimum Tank Size – 30 Gallons
    • Max Size – 2.5″
    • Temperament – Semi-Aggressive

    Also known as the Kupang Damsel, this is easily the most controversial fish on my list. Here me out before you react though. Not all damselfish are horrible. You can check our damselfish article for more details about it. Among all the damels available in our hobby, the Azure is the best option for a community reef fish.

    They will still be careful considerations to be made to ensure you have success with their more aggressive nature. If you take the right steps, they make the cut on my list. You cannot have more than one of these per 18 inches of reef tank length as they will bully each other to death. They are great color additions as they contrast a number of reef aquarium fishes with their blue colors. They also look amazing under actinic reef lighting.  

    Honorable Mentions

    These fish could have made the list, but we ran out of room to talk about them in the article

    • Chalk bass – great fish, hard to find in stores
    • Swallowtail Angelfish – reef safe, moderate difficulty
    • Engineer Goby

    Fish To Avoid

    • Powder Blue Tang – Reef safe, but not hardy
    • Leopard Wrasse – Does bad in captivity
    • Mandarin Goby – Tends to strive in a tank unless it’s large and full of copepods
    • Maroon Clownfish – Aggressive as an adult

    What Does The Term Mean?

    You would be surprised being on this post how confusing this term can be. I’m going to define this for you so you can determine how best you want to build your reef.

    What Does It Mean In The Hobby?

    The general term reef safe means that the fish you purchase will not brother corals and other sensitive invertebrates. Because the general term means the fish won’t bother corals and inverts, you will get a lot of “with caution” in our trade. To help, Let’s break it down further with fish that won’t eat corals and fish that won’t eat inverts.

    The Ones That Won’t Eat Corals

    To me, this is what I define as reef safe to truly be. These fish will not eat corals and do not pose a danger to them. The following fish species are generally not going to eat corals:

    • Damselfish
    • Clownfish
    • Most tangs
    • Most blennies
    • Cardinalfish
    • Most wrasse fish
    • Gobies

    The Ones That Won’t Eat Corals, But Will Eat Inverts

    The list above are the usual fish species you will see listed as safe, but we can take it even further. These fish will not eat corals, but may pose a danger to inverts like shrimp and small fish.

    • Lionfish
    • Reef safe triggerfish
    • Marine bettas
    • Snowflake eels
    • Hawkfish
    • Hogfish
    • Groupers like the Miniatus

    Notice that our list got a lot bigger. Yes, you can get pretty creative when you open up your reef tank to fish that will eat inverts, but will not bother your corals. You will need a larger reef tank to house this fish, but you can add more color and more aggression to the tank with these choices. If you don’t believe me, check out this video by Robs Koi Pond. His snowflake eel is happily house in his reef tank.

    FAQS

    Which Ones Go Well With Corals?

    Generally any fish that does not have a taste for corals are your best bet. These types of fish would generally be damsels, clownfish, most tangs, blennies, cardinal fish, most wrasses, and gobies.

    Note when it comes to the term reef safe – there are two types. Reef safe meaning they will not eat corals and another classification meaning they will not eat inverts like crabs and shrimp like cleaner shrimp.

    Knowing this, there are some fish like Lionfish that will happily eat small fish and small inverts, but will not bother corals.

    Which Is The Most Peaceful Saltwater Species?

    Most blennies and gobies are considered the most peaceful saltwater fish you can buy. Cardinalfish are also a great choice. Some fairy wrasses are also considered timid and will not bother most fish.

    Which Is The Easiest Saltwater Species To Keep?

    In general, clownfish are going to be the easiest and least demanding fish you can keep in a saltwater aquarium. They are semi-aggressive, but are generally hardy and come tank bred. They are reef safe and are small enough to be comfortable in most saltwater tank sizes.

    What Are Your Recommendations?

    I created this list to help starters and I know I did exclude a few excellent choices.  What saltwater fish do you think make a great start for a saltwater aquarium newbie?  Share it with us in the comment section below or you can read more about our blog here.  I’m sure a lot of new and potential fish keepers would love to hear your feedback :).

    P.S. – Want more info on saltwater reef tanks? Check out my post title 55 saltwater reef tank words of wisdom

  • Best Overflow Boxes – Hang On Overflows vs. Drilled and Best to Buy 2026 Reviews

    Best Overflow Boxes – Hang On Overflows vs. Drilled and Best to Buy 2026 Reviews

    Choosing between a hang-on overflow box and a drilled tank is one of the first real decisions you make when setting up a sump-based system. and it’s one I’ve thought about carefully on my own setups. A drilled tank is always my first choice for reliability, but hang-on boxes have gotten significantly better and are a legitimate option when drilling isn’t possible. Here’s how to think through the choice and which products I’d actually recommend.

    Mark’s Expert Take | AquariumStoreDepot

    Overflow boxes exist for one reason: you want a sump but you can’t or won’t drill your tank. They work. I won’t pretend otherwise. But they carry a real risk that most reviews gloss over: siphon failure. A siphon break at 2am means the water in your sump stops replenishing. If your return pump keeps running, it empties the sump and pumps air. I’ve seen setups flood floors over it. The Bean Animal overflow design solves this with a three-drain redundant system, but most hang-on-back boxes don’t use it. They run a single U-tube siphon with no backup. That’s the core tradeoff. One more thing people get wrong on sizing: the overflow’s GPH rating must exceed your return pump’s output at actual head height, not rated max. If your return pump moves 700 GPH at 5 feet of head and you buy a 600 GPH overflow, you will flood your display. Size up, always.

    Mark Valderrama | AquariumStoreDepot.com | 25+ years in the hobby

    For anyone who has a reef tank or freshwater tank where one is considering a cleaner setup, an overflow box is a major consideration. An overflow box is an entry point to setting up a sump. It filters out surface scum off the top of your aquarium and a properly installed overflow is a clean addition to your aquarium.

    There are many overflow boxes out in the market, so what is the best overflow box? In today’s post I will go over the types of overflow boxes, hang-on versus drilled overflow boxes, the best hang on overflow box and drilled overflow boxes, and how to install an overflow on your aquarium. I hope at the end of the article you will become more informed and less scared about installing an overflow to create a primer aquarium equipment system.

    Types of Overflow Boxes 

    There are generally three types of overflow boxes:

    • Internal Hang-On Overflow Boxes
    • Internal Built-In Overflow Boxes
    • External Overflow Boxes

    Internal hang-on overflow boxes are the simplest to install, but have the greatest risk of failure in your aquarium. The failure usually will occur with the loss siphon due to failure of the tubes, pump, or a power outage. They are usually the most affordable of the three and can be a good choice for those who do not want to drill their tank. The failure points of a hang-on overflow can be mitigated by building a larger sump.

    Internal built-in overflow boxes are what you will usually see with Reef Ready Systems like a Red Sea Reefer. They are integrated with the tank and usually are built with a Durso style system, which can operate with only one hole but do not have the silent features of a Bean Animal Overflow. It is possible to get a custom aquarium with a bean animal internal built-in overflow, but you will typically pay a lot more then going with an internal hang-on overflow or drilling your tank and getting an external overflow box.

    An external overflow box offer the most feature rich option on the market currently. You can easily find external overflow boxes with a bean animal setup and there are several models now that offer a slim overflow design, which leaves a very small footprint inside the aquarium. The main downfalls with an external overflow is that you cannot have a flush aquarium to the wall since the box will stick out, and you will have to drill your tank (or pay someone to drill your tank – more on that later in this post).

    Why These Are Ranked #1

    Not all overflow boxes fail the same way, and not all “GPH ratings” mean the same thing. Here’s what actually separates the top picks from the also-rans:

    • Siphon reliability mechanism – Does it have a backup if the primary siphon loses prime? Single U-tube = one point of failure. Bean Animal = three-drain redundancy.
    • Actual GPH vs. rated GPH – Manufacturers rate at zero head height. Your real-world flow at 4–5 feet of head is typically 40–60% of the box lid number. The CPR CS90 rated at 800 GPH delivers around 450 GPH at 5 feet. Know this before you buy.
    • Dual-chamber vs. single-chamber design – Dual-chamber hang-ons (CPR style) isolate the siphon tube from the drain box, reducing air intrusion. Single-chamber boxes (most budget models) are noisier and more prone to losing prime.
    • U-tube vs. Durso standpipe – U-tube siphons on hang-on boxes are the weak link. Durso standpipes (used in reef-ready systems) are quieter but still single-drain. Bean Animal kills both problems.
    • Startup ease – Priming a hang-on overflow is the one task that trips up new hobbyists. Models with an Aqualifter pump port make this significantly more reliable than manual siphon-start methods.

    The 3 Best Hang-On Overflow Box (2023 Reviews)

    While my recommendation would be to purchase an external overflow or consider a reef ready tank, there are many people reading this post who may not have this option. Below would be my recommendations for a hang-on overflow box:

    In a hurry? I recommend the CPR Overflow Box as a hang on option!

    Editor’s Choice!
    CPR Overflow Box
    CPR Overflow Box
    • Adjustable Water Level
    • Failure Prevention Features
    Best Value
    EShoops Overflow Box
    EShoops Overflow Box
    • Brand
    Budget Option
    Blue Ocean Overflow Box
    Blue Ocean Overflow Box
    • Great Price

    1. CPR – A Comprehensive External Unit With Failure Prevention Features

    Editor’s Choice
    CPR Overflow Box

    Best Hang On Overflow Box

    The CPR is known as the safest hang on overflow box to use. This is the best option if you are not able to drill your tank

    Click For Best Price Buy On Amazon

    CPR is brand name that longtime reefers know. They are a small private company that has been around for ages pioneering one of the first successful hang-on protein skimmers on the market, the CPR Bakpak. Their overflow is another very successful product. This external overflow box is a step up to the Eshopps overflow box as it includes failure prevention options such as installing an aqua lifter pump.

    The water level on the CPR Overflow Box can be adjusted on this overflow box allow you to modify the water level in your tank and it comes with a generous 1″ bulkhead with a pre-filter that can be used to prevent any clog from large inverts like snails. I highly recommend purchasing the aqua lifter pump for a full proof setup!

    Pros

    • Failure prevention features
    • Adjustable water level

    Cons

    • Internal part of the box is clear instead of black
    • Only one siphon & one drain
    • Need to buy aqua lifter pump separately

    2. Eshopps – The Budget Minded Solution

    Best Value
    Eshopps Overflow Box

    An easy to use, easy to install hang on overflow box

    Buy On Amazon

    We are going to talk about the Eshopps PF-800 for this review. This overflow box is made for aquariums 75-125 gallons in size. The black part of the overflow (the part that you can see in the tank) only measures 8″ x 2 1/4″ leaving a small footprint in the tank. It only has one siphon tube, but that tube measures 1.25″. It includes a pre-filter, which you can remove or keep on to prevent snails like clogging the pipe. It has nylon nuts so you can easily fasten to your tank. A lot of us who got started with sump filtration started with one of these and it has been unchanged for many years.

    Pros

    • Cheap
    • Black Internal box and small footprint

    Cons

    • No failure prevention features
    • Only one siphon & one drain

    3. Blue Ocean – For The Value Conscious Shopper

    Budget Option
    Blue Ocean Overflow Box

    Blue Ocean’s overflow is a budget friendly overflow box

    Buy On Amazon

    The Blue Ocean Overflow Box represents a value for overflow boxes. It doesn’t have the name recognition like Eshopps or CPR has, but it does offer similar features to the CPR as long as you purchase the optional power head. The drain is a ample 1″ bulkhead with a strainer equipped, which means you don’t need to add a pre-filter to the box.

    Pros

    • Cheap!
    • Strainer feature which means no prefilter needed

    Cons

    • Requires a power head vs. an air pump to prevent loss siphon
    • Clear overflow box

    The Top 3 (2021 Reviews)

    I have provided a number of recommended overflow boxes above for those not considering drilling a tank. For those who are considering drilling a tank, there are a few one external overflow boxes I go to.

    In a hurry? I recommend Fiji Overflow Boxes!

    Editor’s Choice!
    Fiji Cube Overflow Box
    Fiji Cube Overflow Box
    • Bean Animal
    • Very Quiet
    Best Value
    EShopps Eclipse Overflow Box
    EShopps Eclipse Overflow Box
    • Brand
    Premium Pick
    Prodigy Slim Overflow Box
    Prodigy Slim Overflow Box
    • Slimmest Design

    1. Fiji Cube – A Cheaper And Better Option Than The Eshopps Eclipse!

    Editor’s Choice!
    Fiji Cube Overflow Box

    The Fiji Cube overflow is the best value and best choice for a bean animal external overflow box

    Buy On Amazon

    The Fiji Cube Overflow Box is the ideal design for an overflow box. The design has the overflow box lower so the water level in the overflow box can be adjusted to be super quiet. They are also offered in more sizes than the Eclipses with the smaller models being a Durso design, while the larger models offering a true bean animal design.

    Not only is the Fiji Cube overflow box have a superior design to the Eclipse, but it is also cheaper! Designed and made in Minnesota, Fiji Cube has been known for developing high quality tanks and sumps. This overflow box is another high quality product and worth a look if you want a slim overflow box.

    One word of caution with the Fiji is that the template is made for a rimless tank. For a rimmed tank, you will need to place the template INSIDE the tank and drill where the water line marker is ABOVE the plastic rim. This will result in the box being mounted inbetween the rim on some smaller tank installs. On small installs I’ve done, this required me to make my own gasket (1/4” or 1/2” depending on the install) to make the box fit even.

    Pros

    • Superior design and cheap for a slim overflow box!
    • Takes up very little space inside the aquarium
    • Kit comes complete with drill template, hole saw, and emergency drain piping

    Cons

    • You will need to drill the tank (or pay someone to do it)
    • More advanced setup knowledge required over hang-on overflows
    • Template is for rimless tanks 

    2. Eshopps Eclipse Slim – Bean Animal Unit at an Affordable Price!

    Best Value
    Eshopps Eclipse Overflow Box

    The best way to jump into a bean animal overflow system

    Buy On Amazon Click For Best Price

    The Eshopps Eclipse slim overflow boxes represent a great entry level into a bean animal setup. What makes a bean animal such a special overflow setup is that it covers multiple points of failure. The largest model has three drains, which will provide a complete full proof overflow design. The smaller models include two drains, but even that would be considered a pretty full proof setup.

    The other great feature about the the Eclipse overflow box is the slim external design. It takes up a very small footprint in the aquarium that won’t get in the way of aquascaping your tank. Finally, it comes with everything you need. It comes with the drill template, the hole saw, and even an emergency drain pipe ready to install!

    The main gripe with this overflow design is the box design itself. The slim overflow stands too high compared to the overflow box drain. This leads to a noisier overflow box than designed. Fortunately, our next overflow box on the list solves this issue!

    Pros

    • Full proof design
    • Slim overflow takes up little space inside the aquarium
    • Kit comes complete with drill template, hole saw, and emergency drain piping

    Cons

    • You will need to drill the tank (or pay someone to do it)
    • More advanced setup knowledge required over hang-on overflows
    • The overflow box can be too high compared to the drain box which makes it louder than it should be if you oversize the box

    3. Prodigy External – Limitless Potential

    Premium Pick
    Prodigy Slim Overflow

    The Thinnest Overflow Box Ever!

    With an overflow that is less than 1/3 of an inch thick, this product makes any coral aquascaper jump for joy!

    Click For Best Price

    The new Prodigy External Overflow Box is an adjustment breakthrough in overflow technology. When overflows first came out, they covered an entire section of an aquarium, cutting out valuable aquascaping space. Then we had the traditional overflow box, which left an ugly block in the middle of your tank. Then we move to the slim overflow, which is what the Eclipse and Fiji Cube represent.

    This new overflow box is the next generation of overflows. The overflow piece that goes to your display tank is only 8mm thick! That’s less than 1/3 of an inch. You can now get a bean animal overflow installed in your aquarium and have all the room for your aquascaping. I’m super excited the potential this product brings to our aquariums.

    It also allows you to adjust the overflow gate, giving you an easy option to adjust your box’s water flow level without having to reach into your sump and turn a gate value.

    So what’s the catch here? The first is the price. It one of the most expensive overflow boxes you can purchase and I’m also not feeling in the color. Orange is just weird to me and I would have preferred a neutral color like a black. It’s also brand new, so it is bound to have some issues from the onset.

    Give it a couple of years though and every manufacturer will be jumping to replicate this overflow – and also lower the price in the process ?.

    Pros

    • Slimmest overflow available
    • Bean Animal design
    • Adjustable overflow gate

    Cons

    • Expensive
    • The overflow box can be too high compared to the drain box which makes it louder than it should be if you oversize the box

    Prepping for a Hang On Sump Setup

    If you have decided to get a hang-on overflow, the next setup is prepping for a sump setup. Let’s talk about the considerations you need to take into account:

    • How will I hang my return piping – assuming I don’t want to drill
    • What size sump should I get?
    • What return pump should I get?

    How will I hang my return piping – assuming I don’t want to drill

    Assuming you want to go with a complete drill free setup, you will want to get a U-Tuber directional return to get water to enter your display tank in an orderly fashion. This U-Tube by ThePetStop will get you going and will support either 3/4″ or 1″ tubing and is very easy to install. It comes in black so it should blend in well with black backgrounds.

    U-Tube Return

    This U-Tube Return pip is a great choice for DIY drill free setups

    Buy On Amazon

    What Size Sump Should I Get?

    Another very important consideration. Again, since we are considering a budget build with a hang-on overflow the go to would be a cheap aquarium from a dollar per gallon size off Petco. Get the longest and largest tank you can fit in your cabinet. For a 4 foot 120 gallon tank, this would be a 40 gallon breeder and for a 6 foot 125 gallon tank, this would be a 55 gallon tank. Keep your water level low, about 7-9 inches, in the sump and the remaining space can be used as overflow protection in the event that the overflow or return pump fails.

    What Return Pump Should I Get?

    For a budget build, I would just add in an Italian made AC return pump like a Fluval SP. These pumps are made with the legendary Askoll pump and are backed by a 3 year warranty. Don’t go with a DC Pump for a budget build as you will likely be shopping for cheap Chinese made pumps, which can be disastrous if they fail and you lack the budget to replace. Other options would include a Sicce Syncra or a Aquaeon Quietflow for smaller tanks. See our Best Aquarium Return Pumps post for more pumps that we reviewed.

    Prepping for an External Sump Setup

    If you have decided to get an external overflow box, the next setup is prepping to drill the tank and setting it up. Let’s talk about the considerations you need to take into account:

    • How will I drill the tank? DIY or Paying Someone?
    • What size sump should I get?
    • What return pump should I get?

    How will I Drill The Tank? DIY Or Paying Someone?

    The major reason why most people do not go with external overflows is they are scared to drill a tank. It’s actually pretty easy to do as long as you have the right equipment and setup the time to do it. Here is what you will need if you decided to drill the tank yourself:

    • Hole saws
    • Drilling Template
    • Drill Stand
    • Corded Drill
    • Plumbers Putty 

    How to Drill A Fish Tank

    Before you decide to drill a tank, make sure that the aquarium glass you are drilling is not made of tempered glass. It is a pretty reasonable assumption that if you are drilling on the back of the tank that you don’t have to worry about this as the vast majority of manufacturers will not make the back of the glass tempered glass. However, the sides or the bottom are usually made of tempered glass so check with the manufacturer if you are planning to drill on the side or bottom.

    The good thing is if you are following this review guide and selected the Eshopps overflow box, you already have a hole saw and drill template. You may need a hole saw for your return piping, which I have linked here so you can purchase. You will want a hole saw to drill a 3/4″ return if you use 1″ drain piping.

    One of the optional pieces of equipment is a Drill Stand. A drill stand is excellent to use because it will steady your hand and allow you to go slowly while drilling the hole. Make sure you remove the spring when drilling an aquarium.

    My Pick
    Milescraft Drillmate

    This is my go to drill stand that I use whenever I need to drill an aquarium. Makes drilling stable and even

    Buy On Amazon

    I would recommend a corded drill instead of a cordless drill for drilling an aquarium. The reason why is that drilling a tank does take time and it is likely that you will need to stop to replace the battery mid-way. A corded drill is more powerful, easier to use for this application, will drill a cleaner hole safely, and will get the job done quicker than a cordless drill. I prefer to use a DeWalt Corded Drill for drilling aquariums.

    My Pick
    DEWALT Corded Drill

    Drilling a tank takes a long time, especially on larger tanks. A corded drill ensures you have full power without worry about your battery dying

    Buy On Amazon

    Plumbers putty and water is the last items you will need. You want to have water in the area you are drilling to lubricate and cool the drill as you go. Use the plumber’s putty to create a circle to hold the water as you drill.

    Finally I have included a video to help from Melev’s Reef. He is a seasoned expert and uses a cordless drill. I still recommend going with a drill stand at minimum if you are doing this for the first time.

    Paying Someone to Drill Your Tank

    If all of that scares you, you can always offer to pay someone to drill your tank. A number of local aquarist Facebook groups will have people who will happily drill your tank or you can ask your local aquarium club if there are any members who will drill tanks. Usually the fee is pretty minimal and some people will even do it for free! I would definitely check out a facebook group or your aquarium club before even considering paying a plumber or local fish store to drill your tank.

    What Size Sump Should I Get?

    As big as you can get. Since we are talking about a drilled tank setup, we venture into the realm of custom made sumps. There are several stock sumps out there that I would say are the best aquarium sumps you can buy that are manufactures. You can of course still go with a DIY baffle kit for smaller tanks as well.

    What Return Pump Should I Get?

    Since we are talking about a higher end budget, I feel more comfortable recommending a DC Pump if you want the features that a DC Pump has. The best DC Pump that won’t break the bank and is not cheap Chinese junk are the Reef Octopus Varios DC Pumps. Other options on the AC side would include the Fluval SPSicce SDC, and Rossmont Pumps. Check out our best aquarium return pump post for more details on pump picks.

    Editor’s Choice
    Syncra SDC

    Editor’s Choice

    The Syncra is a perfect combination of DC control with AC reliability. Backed by a 5 year warranty and the legendary Sicce brand name

    Click For Best Price Buy On Amazon

    Buy or Skip? My Honest Verdict

    Buy an HOB overflow if:

    • You can’t drill (tempered glass, rental, or landlord situation)
    • You need a sump on an existing display tank you don’t want to move
    • Your sump is large enough to absorb a siphon failure without overflowing (7–9 inches of headroom minimum)
    • You’re willing to check the siphon weekly and prime it after every power outage

    Skip the HOB overflow if:

    • You can drill the tank – a drilled setup with a true external overflow is always more reliable
    • You’re running a reef tank with expensive coral; a single siphon failure could wipe it out
    • You won’t be home regularly to check the system
    • Your sump is undersized – a small sump with an HOB overflow is a flood waiting to happen

    My Recommended Picks

    I have provided a good chuck of information and you may be wondering what my recommendation is. If you are going with a hang-on overflow box setup, I would recommend the CPR overflow box, an aqualift pump, and a Fluval SP or Syncra as your return pump.

    Mark’s #1 Pick

    For hang-on boxes: CPR CS90 with an Aqualifter pump. It’s the only mainstream HOB overflow with a dedicated port for an Aqualifter, which keeps the siphon running even after a brief power blip. I’ve set up probably a dozen of these in store tanks over the years and the ones with the Aqualifter attached almost never lost prime. The ones without? Came in on Monday mornings to a sump running dry more times than I’d like to admit. The pump costs $25 more. Just buy it.

    For drilled setups: Fiji Cube. Bean Animal design, made in the US, priced well below the competition. The Eclipse is a fine box but the Fiji Cube’s lower profile solves the noise issue that plagues the Eclipse on larger installs. If you’re drilling anyway, there’s no reason not to run a true Bean Animal.

    If you are going with a drilled setup, you can’t go wrong with the Eshopps Eclipse overflow, but the Fiji Cube overflow box is a killer design and price. There are others out there, but they are far more expensive and the Eshopps Eclipse or Fiji Cube will serve the vast majority of aquarists. If you are going with a DC pump, it’s pretty much the Reef Octopus Pump or something far more expensive unless you are okay with purchasing multiple Jebeo pumps and having them ready on hand to replace as they tend to fail prematurely.

    What Cheap Single-Chamber Overflows Miss

    The budget single-chamber hang-on boxes you’ll find from no-name brands all skip the same things:

    • No siphon backup – One tube, one failure point. When it breaks prime (and it will), there’s nothing to catch it. You either notice in time or you don’t.
    • Durso gurgle and no fix – A single standpipe creates a loud gurgling sound that cheap boxes have no way to tune. It’s not just annoying; the noise is the sound of air getting into the drain line, which is a reliability issue, not just a comfort one.
    • Inadequate GPH at real depth – A $35 overflow rated “1200 GPH” almost never has the internal diameter to deliver that at real head height. The tube restricts flow far below the label claim. Pair it with a reasonably sized return pump and you’ll overflow your display on the first fill.

    Save yourself the headache. Pay for the CPR or skip the HOB category entirely and drill the tank.

    Closing Thoughts

    I hope I have provided you a wealth of information to make an informed decision. Please leave a comment below if you have any questions. Thanks for reading!

    One last thing. If you run an HOB overflow, check the siphon every week. Every week. Not monthly. Not when you remember. Every week. Set a calendar reminder if you have to. A siphon that’s losing prime will show you tiny air bubbles in the U-tube before it fully breaks. Catch it there and you re-prime in 30 seconds. Miss it and you come home to a sump running dry and a return pump burning out. It’s not optional maintenance. It’s the whole game with these boxes.


    🔧 Want to learn more? This article is part of our complete Aquarium Equipment & Gear Guide. your ultimate resource for filters, heaters, lights, pumps, tanks, and more.

  • 8 Best Aquarium Plant Fertilizers – Tested Across 25 Years of Planted Tanks

    8 Best Aquarium Plant Fertilizers – Tested Across 25 Years of Planted Tanks

    Planted tank fertilization is one of those areas where I’ve seen hobbyists go in two completely opposite directions. either ignoring it entirely and wondering why plants melt, or going so deep into the EI dosing rabbit hole that they stress themselves out. The truth is somewhere in the middle. After 25 years of keeping planted tanks, I know which fertilizer approaches work for most setups and which products consistently deliver results.

    Fertilization is one of those areas where planted tank keepers either overthink it completely or neglect it until their plants start declining. I’ve been dosing fertilizers in planted tanks for over 25 years and have used everything from all-in-one liquid ferts to the Estimative Index dry dosing method. The right fertilizer depends heavily on your tank’s light level, plant density, and whether you’re running CO2. and I break all of that down here alongside my picks for the best products available.

    With over 25 years of experience in the aquarium hobby, I’ve assisted countless clients, hobbyists, and readers like you in overcoming their plant growth woes (and believe me, there are a ton of fertilizer products out there). I’ve personally tested these products in real world scenarios to determine the best aquarium plant fertilizer on the market. You can check out the video below from our YouTube Channel.

    The Top Picks

    Editor’s Choice!
    APT Complete
    • Made for aquascapers
    • All in one formula
    • Easy to use
    Great For Dosing
    Brightwell Aquatics Florinmulti
    • Macro Nutrients
    • Micro Nutrients
    • Brand Name
    Great For Shrimp
    NilocG Shrimp Specific
    • Shrimp Specific

    Let’s cut straight to the point for those of you in a hurry. My two recommended choices would be Florinmulti as it is readily available at more specialty stores and APT Complete due to how concentrated the mix is. APT is complete fertilizer with everything plants need. You can’t go wrong with either choice and both are designed with planted tank hobbyists in mind. Go with NilocG’s formula if you are keeping a shrimp tank.

    Knowing all of this, I still feel in order to get the best results with fertilization, that you should consider CO2 Injection in your aquarium as that will significantly enhance the growth of your plants and will make fertilization far more effective. When the CO2 levels are higher and stable in your planted tank system, your plants will take off with the available CO2 for them to utilize. The fertilizers they will then use will fuel their growth further.

    Mark’s Expert Take

    I’ve seen this play out hundreds of times: hobbyists either dump in too much fertilizer and wonder why they suddenly have an algae explosion, or they dose almost nothing and watch their plants slowly melt over weeks. The sweet spot is matching your fertilizer approach to your tank’s tech level. For high-tech tanks running CO2, the Estimative Index (EI) method is the most reliable system I know. You dose a known excess of nutrients, do a large weekly water change to reset, and your plants never starve. For low-tech setups, keep it simple: a good root tab near your heavy feeders plus a weekly dose of an all-in-one liquid like APT Complete or Brightwell Florinmulti. I dosed fertilizers in store planted displays for years and the lesson that cost me the most time was learning that algae outbreaks are usually a dosing problem first, a light problem second. Get the nutrients dialed in before you start blaming your lights.

    Mark Valderrama — Owner, AquariumStoreDepot | 25+ years in the hobby

    Why These Products Ranked Where They Did

    Not all fertilizers are equal and the difference isn’t just marketing. Here’s what I actually weighed:

    • Macro/micro balance — does it cover NPK plus iron and traces, or does it leave gaps you have to fill separately?
    • Concentration per dose — a highly concentrated formula means fewer milliliters used per gallon, which matters for cost per gallon treated over time
    • Iron chelate form — DTPA-chelated iron stays available at higher pH levels (up to 7.5) while EDTA-chelated iron drops out of solution above pH 6.5. If you’re running a planted tank above pH 7, this matters a lot
    • Phosphate inclusion — some products omit phosphate on purpose so you can control it separately based on fish load; others include it and risk algae in lightly stocked tanks
    • Value per gallon dosed — a $30 bottle that lasts 6 months beats a $15 bottle you burn through in 6 weeks
    • Shrimp/invertebrate compatibility — copper content is the main flag; shrimp tanks need formulas specifically tested at low copper levels

    The Candidates – A Quick Comparison

    Now, let’s get started with fertilizer recommendations. I’m going to provide both liquid fertilizers and root tabs and explain further as I go through each product.

    PictureNameFeaturesLink
    Editor’s Choice!
    APT Complete

    APT Complete

    • Macro Nutrients
    • Micro Nutrients
    • All In One Formula
    Click For Best PriceBuy On Amazon
    Best For Dosing
    Brightwell Aquatics Florinmulti

    Brightwell Aquatics Florinmulti

    • Macro Nutrients
    • Micro Nutrients
    Buy On Amazon
    Ideal For Shrimp
    NilocG Aquatics Shrimp Specific Fertilizer

    NilocG Aquatics Shrimp Specific Fertilizer

    • Shrimp Specific
    Buy On Amazon
    Seachem Flourish

    Seachem Flourish

    • Macro Nutrients
    Buy On Amazon
    Seachem Flourish Trace

    Seachem Flourish Trace

    • Trace Elements
    Buy On Amazon
    Seachem Flourish Tabs

    Seachem Flourish Tabs

    • Root Tabs
    Buy On Amazon
    API Leaf Zone

    API Leaf Zone

    • Macro Nutrients
    • Micro Nutrients
    Buy On ChewyBuy On Amazon
    API Root Tabs

    API Root Tabs

    • Root Tabs
    Buy On ChewyBuy On Amazon

    The Top 8 Products (2023 Reviews) 

    Let’s take a lot at each plant fertilizer and see why they made the cut

    1. APT Complete – for Serious Planted Tank Enthusiasts 

    Editor’s Choice!
    APT Complete

    Editor’s Choice

    Made by an aquascaper for aquascapers. This is the best all around aquarium plant fertilizer on the market. Marco and micronutrients in one bottle!

    Use Coupon Code ASDComplete for 10% off your order!

    Click For Best Price Buy On Amazon

    APT Complete is the comprehensive planted aquarium plant fertilizer to use for enthusiasts. It is designed for demanding aquarium plants by a demanding planted tank expert that is research backed. The key here is the concentrate of this formula. Just 1ML per 20 liters adds the following nutrients:

    • 1.5PPM Nitrogen
    • 0.7 PPM Phosphorous
    • 4 PPM Potassium
    • 0.3 PPM Iron
    • 0.4 PPM Magnesium

    This concentrate is at a higher level than many of the branded fertilizers on this list and is truly designed for those with high demanding tanks. That means not only will you save on fertilizer, but you will grow successfully as well. it’s also shrimp friendly as it has a low amount of copper compared to other brands.

    This is a liquid fertilizer product that is not well known in the industry as they maker of the product is in Singapore. You won’t find this product in most stores. It’s worth it’s price in gold. It comes with everything aquarium plants need in one bottle. It is the best all in one aquarium plant fertilizer I’ve seen on the market. And to top it all off, you can use the offer code ASDComplete for a cool 10% off. What are you waiting for!

    Pros

    • Designed for planted tank enthusiasts
    • Saves money in the long run
    • Shrimp tank friendly
    • Has everything plants need

    Cons

    • Not available in most stores
    • Need to be careful with low tech tanks due to concentration

    Mark’s #1 Pick

    APT Complete by 2Hr Aquarist

    The concentration level is what sets it apart. At 1 mL per 20 liters, you get 1.5 ppm nitrogen, 0.7 ppm phosphorus, 4 ppm potassium, 0.3 ppm iron, and 0.4 ppm magnesium in a single dose. That’s a full planted tank meal from one bottle, and the cost per gallon treated comes out lower than most of the cheaper all-in-ones once you do the math. The formula was designed by a serious aquascaper, not a general pet product manufacturer, and that shows in the balance. Use coupon code ASDComplete for 10% off.

    2. Brightwell Aquatics Florinmulti – Advanced Comprehensive Supplementation

    Brightwell Aquatics Florinmulti

    A comprehensive fertilizer solution that is more available at local fish stores. Works for all planted tanks

    Buy On Amazon

    I know Brightwell Aquatics from their saltwater products, but their freshwater products are also pretty amazing. This Florinmulti aquarium plant fertilizer is a great mix of macro and mico nutrients that will make your aquatic plants thrive. Brightwell’s name in the industry is well know and they do their research on their products. It’s an easy to use product.

    The main thing that Brightwell did with this liquid fertilizer product is not include phosphate and nitrogen in their supplement. I actually liked how they did this because nitrate and phosphate supplementation can be done separately and can be controlled. Phosphate and nitrate are very dependent on your bio-load and I feel that Brightwell made the right choice excluding it from their brand. As with many brightwell products, it’s a premium price product.

    Pros

    • Contains 14 elements
    • Brightwell name brand
    • Easy to use

    Cons

    • doesn’t contain nitrogen or phosphate
    • Expensive

    3. NilocG Aquatics – for Shrimp Tanks

    Great For Shrimp Tanks!
    Thrive S Fertilizer

    An aquarium plant fertilizer specifically designed for shrimp tanks

    Buy On Amazon

    NilocG Aquatics Shrimp Specific Fertilizer is a great choice for those with Freshwater Shrimp Tanks. Supplementation for shrimp like Cherry or Amano Shrimp is more specific than for fish because you have to be careful of copper levels and this fertilizer keeps that in mind by not including copper in its mix. I’m always a fan of aquarium plant fertilizers that provide a guaranteed analysis and this product has good numbers.

    This liquid fertilizer product is very safe to use with shrimp. NilocG sells the best aquarium plant fertilizers for shrimp tanks on the list.

    Pros

    • Specifically make for shrimp tanks
    • Product has guaranteed analysis

    Cons

    • Expensive

    4. Seachem Flourish – Entry Level Supplementation for Planted Tanks

    Seachem Flourish

    An easy to use entry level fertilizer for freshwater planted tanks. Readily available at most stores

    Buy On Amazon

    Seachem Flourish is a common supplement you will see in the retail stores when looking for an aquarium plan fertilizer. It’s very easy to use and beginner friendly due to the light amount of nutrients it contains. This makes Seachem Flourish ideal for the beginner and for those with low light or low tech planted tanks. It is readily available and Seachem has a brand name behind their product.

    Pros

    • Ideal for low light/low tech planted tanks
    • Easy to use
    • Readily available

    Cons

    • Contains little phosphate and nitrate
    • You will use the bottle quickly

    5. Seachem Flourish Trace – Trace Element Supplementation for Planted Tanks

    Seachem Flourish Trace

    A great aquarium fertilizer for getting essential trace elements into your planted tank. Readily available in stores

    Buy On Amazon

    Seachem Flourish Trace a product that includes a variety of trace elements like Boron, Manganese, and Copper. Because this product only contains trace elements – it makes it easier to use with other products like nitrate, phosphate, iron supplements so you can be extra accurate. SeaChem Flourish Trace is a readily available aquarium plant fertilizer product at stores making this easy for you to pick up if you’re in a jam.

    It does contain copper though, so keep that in mind if you keep a shrimp tank.

    Pros

    • Trace elements only – good for supplementation
    • Easy to use – Beginner friendly

    Cons

    • Contains copper – not safe for shrimp tanks
    • Runs out quick

    6. Seachem Flourish Tabs – Great Choice for Rooted Plants

    Seachem Flourish Tabs

    A tab fertilizer designed for rooted aquarium plants

    Buy On Amazon

    Root tabs like Seachem Flourish are great for planted tanks with inert substrates. These tabs work by placing them down in your substrate around the roots of your aquarium plants like Amazon Swords. The Seachem Flourish product has all the major and minor elements needed to feed your aquarium plants. It’s a comprehensive fertilizer, but it is designed for beginner planted tanks. Those with higher demand aquarium plants and bigger planted tank loads should to look at other fertilizers or should to separate out some of the main macros like nitrate and phosphate.

    Pros

    • Easy to use
    • Readiliy available
    • Has the all the elements you need

    Cons

    • Designed as a catch all for all tanks – not for high demanding tanks
    • Only suited for rooted aquatic plants

    7. API Leaf Zone – Budget and Beginner Friendly Supplementation

    API Leaf Zone Freshwater Aquarium Plant Fertilizer

    Contains iron and potassium. Best suited for heavily stocked aquariums or low tech plant setups. Easy for beginners to use

    Buy On Chewy Buy On Amazon

    If you head off to your local pet store, API Leaf Zone will likely be the aquarium plant fertilizer product that you will find there. It is readily available in most stores and is a pretty cheap product. It contains iron and potassium, two of the nutrients we listed earlier that are not produced by livestock or come from source water. Because it doesn’t include other nutrients, the product assumes that you have a heavy bio-load that will produce the other essential nutrients in your aquarium.

    This supplement is best for what we call “low-tech” planted tanks. These are tanks that contain Low Light Plants and aquatic plants that are easy to care for. Because it only contains two nutrients, it is beginner friendly to use.

    Pros

    • Cheap
    • Readily available

    Cons

    • Runs out fast
    • Only contains potassium and iron

    8. API Root Tabs – Supplementation for Heavy Bio-Load Tanks

    API Root Tabs

    An easy to use and beginner friendly root tab fertilizer

    Buy On Chewy Buy On Amazon

    API Root Tabs are likely going to be the most readily available root tab that you will find in stores. it’s a very easy to use product and it contains iron. It is relevantly cheap making it an easy to afford for newcomers to planted tanks. Because it’s a tabbed product, it’s not ideal for aquatic plants that feed off the water column so know this before using.

    The main drawback for me is there is no guaranteed analysis on the product. This can be frustrating for those who want to dial in their dosing routines.

    Pros

    • Easy to use
    • Contains Iron
    • Cheap

    Cons

    • Not for water column feeding plants
    • No guaranteed analysis info

    Buy or Skip? Straight Verdicts

    • Running a planted tank with CO2? Buy an all-in-one liquid (APT Complete is my top pick). You need the full macro and micro package and a concentrated formula will save you money long-term.
    • Doing EI (Estimative Index) dosing? Skip the all-in-ones. Buy dry macro salts (KNO3, KH2PO4, K2SO4) and a quality micro mix separately. You’ll have real control over every nutrient and spend a fraction of what bottled all-in-ones cost at scale.
    • Running a low-tech, low-light tank with easy plants? Root tabs plus Seachem Flourish once a week is enough. Don’t overcomplicate it.
    • Keeping shrimp? NilocG is the clear choice. Don’t risk your colony with a formula that hasn’t been tested for copper levels at invertebrate-safe concentrations.
    • Just starting out and not sure yet? Start with APT Complete. The dosing is simple, it covers everything, and when you’re ready to upgrade to EI you’ll already understand what each nutrient does.

    Macro and Micro Nutrients for Aquarium Plants – What Are They?

    We are going to start with the nutrients that aquatic plants need. Aquatic plants like terrestrial plants require a variety of nutrients to grow and thrive. These nutrients are split into two groups – macro and micro nutrients

    Macro Nutrients

    Macros nutrients make up the majority of your aquarium plant’s mass. These nutrients will come either from your water column or your Aquarium Substrate. We can split up these macro nutrients into the following:

    • Carbon
    • Nitrogen
    • Phosphorous
    • Potassium

    Carbon

    Carbon is the big chuck of the equation. Plants need carbon. It makes up 40% of your plant’s dry mass. As I mentioned in our Best CO2 System for Planted Aquarium post, the fact that carbon is such a big part of your plant’s mass is why CO2 supplementation makes such a giant impact on your plant growth. With higher CO2 levels, you can scale up your nutrient requirements and accelerate the growth and improve the health of your aquatic plants by leaps and bounds. We want to aim for 30PPM of CO2.

    Nitrogen

    Nitrogen levels will have impact on your plant growth rates. When it’s very limited it can cause growth rates to halt and plants to become brittle. In green plants, low levels will lead to yellowing of the leaves. It can also enhance the reds of some plants at lower levels. Nitrogen can be made available from livestock if the bio-load if significant.

    Phosphorous

    This is an often under-dosed nutrient. PO4 plays a big role in the energy systems if plants. If you have an ideal amount of PO4 in your aquarium, an aquatic plant will be more robust and will display better colors. Phosphorus can be made available from livestock if the bio-load if significant.

    Potassium

    Potassium helps with the metabolism of your plants. Without it, your plant health will deteriorate cause visible issues like pinholes or brittle leaves. Potassium is not produced by your livestock in your aquarium and is not usually available from your water. It requires dosing to maintain ideal levels.

    Micro Nutrients

    Micro nutrients are nutrients that are required by your aquatic plants in lesser amounts, but are critical to your plant’s success. Micro Nutrients are:

    • Iron
    • Manganese
    • Trace Elements

    Iron

    Iron is important for chlorophyll production. Without the proper amount of iron, plants can be afflicted with clorosis in the leaves (aka yellowing of leaves).  Iron is neither available from livestock or your source water. It requires dosing to maintain proper levels.

    Manganese

    Manganese is part of the photosynthesis process. When levels are lacking, this will affect the ability to take in macro nutrients. Like Iron, this must be dosed in order to maintain levels.

    Trace Elements

    These would include things like Magnesium, Boron, Zine, Copper, Cobalt, etc. They can be contained in source water, but often times are required to be dosed to maintain levels.

    What Generic Fertilizers Get Wrong

    Pond fertilizer tablets and cheap all-in-one liquids show up on planted tank forums constantly. Here’s why I don’t recommend them:

    • Wrong iron chelate form — most cheap fertilizers use EDTA-chelated iron, which precipitates out of solution above pH 6.5. If your tank runs neutral to slightly alkaline, plants can show iron deficiency even when you’re dosing regularly
    • Too much phosphate — generic formulas often load up on phosphate, which sounds fine until you’re fighting hair algae and green spot algae on every leaf. In a low-bioload planted tank, added phosphate plus light equals algae
    • No potassium — potassium doesn’t come from fish waste or most source water. It needs to be dosed. Many cheap products skip it entirely, which leads to pinhole deficiencies and brittle leaf margins
    • Wrong dosing concentration — pond tablets are made for outdoor ponds with high dilution ratios. In a planted aquarium, you’ll either underdose without knowing it or overdose a specific nutrient and create an imbalance that triggers algae

    Types of Aquarium Fertilizers

    Aquarium fertilizers come in a variety of form. They are:

    Substrates

    An active substrate like ADA Aquasoil will act as its own fertilizer being a source of nutrients for your aquatic plants. they’re great for getting your planted aquariums started. They will degrade over time. This requires you to replace the substrate over time and increase dosing as it breaks down. You won’t need to use an active substrate if you have plants that are column feeders. This is because column feeders can’t access the nutrients in your substrate.

    Liquid

    Liquid Fertilizers are the standard plant fertilizer you will see. they’re easy to use and distribute. They can both be feed into the water column and injected into the substrate. This give them the advantage of being able to feed both column and root feeders.

    Root Tabs

    Roots Tabs are designed for root plants. If you have a large amount of aquarium plants that feed through their root system, Rooted tabs is useful in delivering the nutrients they need to continue to thrive and grow. Root tabs won’t be useful for aquatic plants that feed off your water column.

    Should You Dose These Products?

    The quick answer is yes, if you want to have the best growth and coloration of most plant species.

    Because your aquarium is a closed environment, there is not a natural cycle of renewal of nutrients. Our substrates and soil eventually will delete and other nutrients will be removed via water changes over time. There are also elements in that can’t be replaced with source water or produced by livestock as mentioned above. A planted tank can definitely grow without fertilization, but they won’t achieve the best plant growth. You are Bottom line: not allowing your aquarium to live to its full potential. We want our environments and pets to thrive and give them the best, so fertilization is there to provide an ideal environment.

    We proper levels, your aquatic plants will grow more dense, with better color, and will remain healthy.

    Understanding The Three Elements of Aquatic Greenery Success

    We are covering one of the elements today. There are three of them for planted tank success and they are:

    Fertilizers are probably the most difficult to understand and easiest to ignore. It’s also easy to under and overdose! Below is a picture from aquaticplantcentral’s forum to give you an overview on plant nutrient deficiencies as a quick reference.

    Aquarium Plant Deficiency Symptoms

    Getting familiar with the photo above will help you diagnose issues in your planted tank as your plants will give you visual queues and signs on what they are lacking in the aquarium.

    Frequently Asked Questions

    Below are common questions I get from readers and clients. If you have any you free I missed, please leave a comment below and I can update the post to including the additional question and answer.

    What Are The Parameters I Should Be Maintaining In A Planted Tank?

    This is a loaded question, but assuming you run a higher light and CO2 system, these would be figures you would generally aim for in a planted tank. You can use Aquarium Test Kits to monitor your levels:

    ParameterLevel
    Ammonia0 PPM
    Nitrite0 PPM
    GH (General Hardness)2-8 dGH
    KH (Carbonate Hardness)3-6 dKH
    pH6.5 – 7.0
    N03 (Nitrate)5 – 10 PPM
    CO220 – 30 PPM
    PO4 (Phosphate)0.2 – 0.5 PPM
    Fe (Iron)0.2 – 0.7PPM

    Why Do You Not Recommend API Leaf Zone and Flourish?

    Unlike other sites or bloggers you may have visited I don’t recommend API Leaf Zone or Flourish for serious planted tank owners. API Leaf Zone only contains Potassium and Iron. It is designed for a low tech planted tank and lacks the macro nutrients needed for serious grow in a full blown planted tank that is running CO2.

    Flourish on the other hand is an entry level dosing product. It contains little nitrate and phosphate. This allows for forgiveness if you overdose or not sure what you are doing at first. When you have a full planted tank with lots of hungry plants, you will go through this product quickly.

    Both the Brightwell and APT products are designed for planted tank owners will full planted tanks running off CO2 systems. They are designed for serious hobbyist who want big time growth. API Leaf Zone and SeaChem Flourish are entry level products for when you start out. When you’re ready to graduate you can use Brightwell and APT. Most of the time, I just tell folks to go with Brightwell or APT right away knowing their goals are a full planted tank with CO2.

    What About CO2 Boosters?

    CO2 boosters are great for low light and low tech planted tanks. I would only recommend them for those setups. A CO2 booster product like API CO2 Booster will work on these low light and low tech setups. All planted aquariums will welcome a boost in CO2 levels regardless of what types of plants you put into your system.

    The issue with CO2 boosters is outside of a low light or low tech planted tank. When you get into setups that have full tanks of hungry and fast growing plants, they will require constant CO2 levels. You will struggle to maintain stable CO2 levels in a fully planted tank, especially if you decide to make a high demand planted aquascape like say an Dutch Aquascape. A CO2 Booster simply won’t do with these setups. I would recommend a CO2 system if your long term plan is a fully planted tank or if you want an advanced aquascape setup.

    Are They Bad for Fish?

    Fertilizers are not bad for fish in general. The main parameter we may have to keep an eye on is nitrates if we are housing particularly sensitive fish like say Discus. Fertilizers encourage plant grow, which in turn will increase the quality of your water. It will increase the natural look of your aquarium and provide shelter for your fish. Large plants will reduce aggression and decrease stress levels. For some fish, it will produce a food source for them. There is virtually no drawback to your tank health if you use fertilizers properly as healthy plants is healthy for all the inhabitants in your tank.

    How Do I Dose Liquid Products?

    If you are using an all-in-one fertilizer like we are recommending, your job should be fairly easy. We should follow the instructions on the bottle, in which both APT and Brightwell offer clear guidelines on how much to dose. Pour the suggested dosage in the cap or a small container and release the fertilizer to the outlet of your tank. Before you recap the bottle make sure you dip the cap in your aquarium water to rinse off. This will keep your cap from crusting over time.

    Experienced planted tank owners prefer to dose everyday. It is better for your planted to have sustained stable levels in your tank. Dosing once a week with a big dosage can lead to unstable levels, which will hurt the potential grow you can get if you dosage smaller and constantly everyday.

    When Should I Dose My Tank?

    You should fertilize as soon as your tank is cycled and your plants are actively growing. it’s best to dose every day. it’s best to dose all in one day.

    Do These Products Increase Nitrates?

    It most certainty can. It depends on the fertilizer. it’s best to follow your manufacturer’s instructions and monitor your levels via a test kit. You needs to adjust overtime as your plants grow.

    Do Planted Tanks Need Fertilizer?

    Yes, aquarium plants should be given fertilizer. However, the need to fertilizer doesn’t trump the need for higher CO2 levels. The effectiveness of plant growth goes CO2 > Lighting > Fertilizer. You need to balance all three, but you will get greater initial plant growth going with CO2 first. If you have a good aqua soil, you will generally get a good fertilizer boost to start.

    Closing Thoughts

    Aquarium plant fertilizers are 1 of 3 major components of planted tank success with lighting and substrates being the other. I hope I helped to point you in the right direction on what fertilizer is right for you and your budget. If you have any questions, feel free to leave a comment below. Thanks for reading!

    Fertilizer deficiency looks like plant problems. But so does an algae outbreak caused by too much fertilizer. The two look totally different, but both trace back to the same source: a dosing decision that’s out of balance with your tank’s light level, CO2, and plant mass. The right fertilizer product makes finding that balance achievable instead of a constant guessing game. Start with APT Complete if you want one product that covers everything. Move to EI dosing with dry salts if you want real precision. Either way, once you nail the balance, your plants will show you immediately.


    🌿 Want to learn more? This article is part of our complete Planted Tank & Aquascaping Guide. your ultimate resource for aquarium plants, aquascaping styles, substrates, and more.

  • 7 Best Substrates for Planted Tanks – Tested After 25 Years of Planted Tanks

    7 Best Substrates for Planted Tanks – Tested After 25 Years of Planted Tanks

    Substrate is the single most underrated decision in planted tank setup. Every planted tank failure I’ve seen over 25 years traces back to it: wrong substrate type, wrong depth, wrong product for the plants chosen. And unlike a bad filter or a broken heater, a substrate mistake is almost impossible to fix without tearing the tank down completely.

    Get the substrate wrong and nothing above it will thrive. Not the lighting, not the CO2, not the fertilizers. The foundation is everything.

    I’ve used inert gravels, active volcanic soils, capped dirt setups, and everything in between. After 25 years and more planted tanks than I can count, I can tell you exactly which substrates perform and which ones waste your time and money. This guide covers what I actually recommend, what I’ve seen beginners get catastrophically wrong, and how to match substrate to your specific setup.

    Expert Take | Mark Valderrama, AquariumStoreDepot

    My go-to recommendation for most planted tanks is Fluval Stratum. It’s volcanic soil, it buffers pH into the slightly acidic range that most tropical plants love, and it doesn’t trigger the brutal ammonia spike you get with fresh ADA Amazonia. For serious aquascapers or anyone running high-demand plants like glosso or HC Cuba, I still point them to ADA Amazonia, but you need to be ready for the 6-8 week establishment period. The biggest mistake I see over and over: beginners buying plain pea gravel at the chain pet store, planting Amazon Swords in it, and wondering why the plants melt two months later. Inert gravel with root feeders is a setup for frustration. Don’t do it.

    With over 25 years of experience in the aquarium hobby, I’ve assisted countless clients, hobbyists, and readers in building successful planted tanks. I’ve personally tested these substrates in real setups across multiple tank sizes and plant communities.

    Top Picks

    Editor’s Choice!
    ADA Aqua Soil Amazonia
    ADA Aqua Soil Amazonia
    • World Class
    • Best For Aquascapers
    Best Value
    Fluval Stratum
    Fluval Stratum
    • Great Price
    • Beginner Friendly
    Budget Option
    CaribSea Eco Complete
    CaribSea Eco Complete
    • Best Price
    • Beginner Friendly

    For those in a hurry: ADA Amazonia is the world benchmark for active planted substrates, and nothing else on this list touches it for serious aquascaping. Fluval Stratum is my everyday recommendation for most hobbyists: effective, forgiving, and half the price. The CaribSea Eco Complete hits the best balance of price and nutrient availability for budget-conscious beginners.

    What People Get Wrong About Planted Tank Substrate

    The most common mistake I see is straightforward: people buy plain aquarium gravel, plant Amazon Swords and crypts in it, and then blame everything except the substrate when the plants melt. Plain gravel is inert. It provides zero nutrition for root-feeding plants. The plants look okay for a few weeks because they’re living off stored energy. Then they crash.

    The second mistake is the opposite: buying an active soil like ADA Amazonia without understanding what you’re signing up for. Fresh active soil dumps ammonia into the water column. If you just add fish and skip the proper cycling and water change schedule during establishment, you’ll lose fish and get algae explosions that take months to control.

    The fix is simple: match the substrate to the plants, and match the plants to your experience level.

    The Biggest Mistake Planted Tank Owners Make

    Buying cheap inert substrate for a root-feeding plant setup is the fastest way to a failed tank. I’ve seen it dozens of times at the stores I’ve managed. Someone buys a 20-gallon, fills it with colored aquarium gravel, plants six Amazon Swords, and asks why the leaves are yellowing and dying six weeks later. The answer is always the same: the roots have nothing to feed on.

    Inert gravel doesn’t absorb or retain nutrients. Without root tabs, root-feeding plants in plain gravel will slowly starve regardless of how good your liquid fertilizer routine is. The bigger the plant, the faster it starves.

    The Hard Rule: if you’re serious about a planted tank, the substrate is not where you save money. This is the one area where investing up front saves you from a complete teardown later.

    How We Ranked These Planted Tank Substrates

    1. Nutrient content: does it provide root-zone nutrition plants need, or is it inert
    2. Longevity: how long before nutrients deplete and supplementation becomes necessary
    3. Particle size: appropriate for plant root systems (not too coarse, not so fine it compacts)
    4. pH impact: does it buffer acidic/neutral or is it inert
    5. Aesthetics: looks natural and appropriate for most freshwater planted tank styles

    Do You Need Specialized Planted Substrate?

    Yes, Get It If

    • Keeping root-feeding plants (swords, crypts, stem plants)
    • Setting up a high-tech planted tank with CO2
    • Want to minimize liquid fertilizer dosing
    • Building a shrimp tank (buffering substrate helps caridina shrimp)

    Plain Substrate Is Fine If

    • Keeping only epiphytic plants (anubias, java fern, don’t use substrate at all)
    • Low-tech tank with minimal plant species
    • Budget is very tight and you’ll supplement with liquid fertilizers consistently
    • Goldfish or cichlid tank where plants are secondary

    Our Candidates

    Here are the substrates I reviewed and tested for this guide.

    PictureNameFeaturesLink
    Editor’s Choice
    ADA Aqua Soil Amazonia
    ADA Aqua Soil Amazonia
    • Active Substrate
    • Nutrient Rich
    Buy On Amazon
    Best Value
    Fluval Stratum 
    Fluval Stratum 
    • Active Substrate
    • Nutrient Rich
    Buy On ChewyBuy On Amazon
    Budget Option
    CaribSea Eco Complete
    CaribSea Eco Complete
    • Inert
    • Beginner Friendly
    Buy On ChewyBuy On Amazon
    Tropica Aquarium Soil Tropica Aquarium Soil
    • Active Substrate
    • Nutrient Rich
    Click For Best PriceBuy On Amazon
    Mr. Aqua Aquarium Soil Mr. Aqua Aquarium Soil
    • Active Substrate
    • Nutrient Rich
    Buy On Amazon
    ADA Aqua Soil Amazonia Light ADA Aqua Soil Amazonia Light
    • Active Substrate
    • Beginner Friendly
    Buy On Amazon
    Seachem Flourite Seachem Flourite
    • Inert
    • Readily Available
    Buy On Amazon

    The Top 7 Best Substrates for Planted Tanks

    Let’s go over each substrate and why it made the list.

    1. ADA Aqua Soil Amazonia: The World Standard

    Editor’s Choice!
    ADA Aqua Soil

    The Best Planted Tank Substrate

    The world’s standard in active substrates for planted tanks. Created by the brand that founded modern aquascaping.

    Buy On Amazon

    Mark’s Top Pick

    ADA Amazonia is the best active planted substrate on the market, full stop. The plant growth I’ve seen from it is in a different league from anything else I’ve tested. Yes, it’s expensive, and yes, you’ll deal with an ammonia spike and cloudy water for several weeks on setup. For a serious aquascape with demanding foreground plants and stem plants, that tradeoff is worth it. For a casual community tank with easy plants, it’s overkill. Know what you’re building before you spend the money.

    ADA Amazonia is recognized by expert aquascapers worldwide. It lowers hardness and pH into the mildly acidic range preferred by most tropical fish and plants. The substrate is dense with nutrients, including ammonia and phosphate, which feed plants through the root zone.

    The tradeoff is significant: a newly set up ADA tank will experience high ammonia, cloudy water, and algae blooms during the 6-8 week establishment period. Daily or every-other-day water changes are necessary during this phase. Many experienced aquascapers use a dry start to get plants established before flooding the tank, which dramatically reduces algae pressure. ADA also breaks down over 12-18 months and requires replenishment or capping. When you do replace it, the disturbed substrate releases another ammonia surge, so plan carefully.

    This is a substrate for people who take planted tanks seriously. It’s not the right call for a beginner’s first tank.

    Pros and Cons

    Pros
    • Unmatched nutrient density for root-feeding plants
    • Proven results with top aquascapers globally
    • Designed for demanding, expert-level plant species
    Cons
    • Releases ammonia heavily during initial weeks
    • Expensive
    • 6-8 week establishment period with water changes required
    • Breaks down in 12-18 months

    2. Fluval Stratum: Best Value for Most Hobbyists

    Best Value
    Fluval Stratum

    Best Value

    A beginner-friendly alternative to ADA Soil. Also excellent for shrimp tanks.

    Buy On Petco Buy On Amazon

    Fluval Stratum is made from volcanic soil and is my everyday recommendation for hobbyists who want active substrate performance without ADA’s aggressive establishment phase. It buffers pH into the slightly acidic range that most tropical plants prefer, establishes beneficial bacteria colonies quickly due to its porous structure, and doesn’t discolor the water significantly when first added.

    One practical warning: don’t place heavy rocks or driftwood directly on Fluval Stratum. The granules crush under pressure and broken-down particles lose their porous structure. Also keep the siphon well above substrate level during water changes; it’s lightweight and easy to accidentally vacuum out.

    Fluval Stratum is significantly cheaper than ADA and more widely available in stores. For a beginner’s first planted tank or a shrimp setup, it’s the call I make every time.

    Pros and Cons

    Pros
    • Natural volcanic base with high CEC value
    • Works well in smaller tanks and shrimp setups
    • Much gentler ammonia release than ADA Amazonia
    Cons
    • Lightweight: easy to siphon away during maintenance
    • Granules crush under weight from rocks or driftwood

    3. CaribSea Eco Complete: Best Budget Option

    Budget Option
    CaribSea Eco Complete

    Budget Option

    A beginner-friendly substrate with nutrient content and beneficial bacteria built in.

    Buy On Petco Buy On Amazon

    CaribSea Eco Complete is packed with liquid fertilizer held within its structure for easy plant absorption. It’s inert in terms of pH impact, so it won’t shift your water chemistry long-term, which is a genuine advantage for tanks where you want more control over parameters. It comes pre-loaded with a beneficial bacteria colony, which shortens the nitrogen cycle when establishing a new tank. The iron content also makes it better suited for red-colored plants than most other substrates on this list.

    The main limitations: it’s lightweight, which makes anchoring larger root-feeding plants difficult, and its particle shape isn’t great for bottom dwellers. For budget-conscious beginners starting their first planted tank, it’s the most accessible entry point that still provides real nutrient support.

    Pros and Cons

    Pros
    • Pre-loaded with beneficial bacteria
    • Inert: won’t shift pH or hardness
    • No rinsing required
    • Good iron content for red plants
    Cons
    • Lightweight: struggles to anchor large root feeders
    • Particle shape not ideal for bottom-dwelling fish

    4. Tropica Aquarium Soil: The European Standard

    Tropica Aquarium Soil

    A top-grade planted tank substrate from Europe. More natural-looking than ADA Soil and lower ammonia release.

    Click For Best Price Buy On Amazon

    Tropica Aquarium Soil is Europe’s equivalent to ADA Amazonia. It’s active, nutrient-rich, and lowers pH and hardness like most soils on this list, but with a notably less aggressive ammonia release than standard ADA Amazonia. The non-uniform grain size also gives it a more natural, less manufactured look in the tank. If you’re looking for ADA-level performance with a somewhat easier establishment period, Tropica is worth the search. The main challenge is availability, since it’s harder to find in North American stores than the other substrates here.

    Pros and Cons

    Pros
    • Lower ammonia release than ADA Amazonia
    • Natural, non-uniform grain variety and shape
    • Lowers pH and hardness for tropical plants
    Cons
    • Expensive
    • Hard to find in North American stores

    5. Mr. Aqua Aquarium Soil: ADA Performance at a Lower Price

    Mr. Aqua Soil

    An active soil that performs like ADA at a lower price point, with better porosity for shrimp tanks.

    Buy On Amazon

    Mr. Aqua Aquarium Soil is an active soil that performs similarly to ADA Amazonia but with less ammonia intensity and a more porous granular structure. The higher porosity improves water exchange through the substrate and makes it particularly well-suited for shrimp tanks. Like most active soils on this list, it lowers pH and softens water.

    I recommend Mr. Aqua to hobbyists who want the benefits of a quality active soil without the ADA price tag and without the full aggression of ADA’s ammonia cycle. The main inconvenience is availability: you generally need to order online rather than finding it locally.

    Pros and Cons

    Pros
    • Cheaper than ADA with a more porous structure
    • Lowers pH and softens water
    • Lower ammonia release: easier cycling period
    Cons
    • Harder to find in local stores

    6. ADA Aqua Soil Amazonia Light: The Beginner-Friendly ADA Option

    ADA Amazonia Light

    An ADA substrate designed with beginners in mind. More forgiving, but still pro-grade quality.

    Buy On Amazon

    ADA Amazonia Light is ADA’s answer for hobbyists who want the brand’s quality without the full intensity of the standard formula. It carries significantly lower nutrient concentration, which means a shorter, less severe establishment period and fewer algae spikes when plants are getting started. It still lowers pH and hardness into the ideal range for most tropical plants. If you’ve been intimidated by the standard ADA’s required water change regimen, this is the version to start with.

    Pros and Cons

    Pros
    • ADA quality with a shorter, gentler establishment period
    • Lowers pH and hardness for tropical plants
    • Good choice for first-time ADA users
    Cons
    • Expensive for what is a reduced-nutrient product
    • Still requires 4-6 weeks of establishment monitoring

    7. Seachem Flourite: Reliable Clay-Based Substrate

    SeaChem Flourite

    A clay-based substrate that never breaks down. Readily available and parameter-neutral.

    Buy On Amazon

    Seachem Flourite is a clay-based substrate that never needs replacing. Unlike active soils that break down over 12-18 months, Flourite is permanent. It comes in several colors and grain types and doesn’t alter tank chemistry, giving you full control over water parameters through supplementation.

    Flourite isn’t nutrient-loaded the way active soils are. That means no establishment period, no ammonia spikes, no algae surge in week one. The flip side: root-feeding plants need regular root tabs to thrive long-term. It’s also worth noting that Flourite is dusty when first opened and needs thorough rinsing before use. It’s not ideal for corydoras or other bottom dwellers because of its sharp particle edges. Choose Flourite if you want a long-term, low-maintenance substrate and you’re comfortable managing plant nutrition through root tabs and liquid fertilizers.

    Pros and Cons

    Pros
    • Multiple colors and grain types available
    • Never breaks down: permanent substrate
    • Readily available in stores
    • No establishment period or ammonia spike
    Cons
    • Dusty: requires thorough rinsing before use
    • Not nutrient-loaded: root tabs needed for demanding plants
    • Not suitable for bottom dwellers due to sharp particle edges

    What Is Planted Tank Substrate?

    Substrate is the material that covers the bottom of your aquarium. In a planted tank, it serves as the physical anchor for plants and, in the case of active or nutrient-rich substrates, as the primary food source for root-feeding species. It also houses beneficial bacteria colonies as part of your tank’s biological filtration.

    Not all plants use substrate the same way. Most aquatic plants are water column feeders, meaning they absorb nutrients from the water directly through their leaves and stems. Plants like Java Fern, Anubias, and Java Moss don’t even root in substrate at all. Root-feeding plants are a different story. Amazon Swords, Vallisneria, crypts, and most carpeting plants pull a substantial portion of their nutrition from the root zone. For these, substrate quality directly determines plant health.

    Why Substrate Choice Matters More Than You Think

    Active planted substrates work by releasing nutrients from organic matter as it breaks down in the substrate layer. Your plants consume those nutrients through their roots. But there’s a catch: if you buy a rich active substrate and plant only water column feeders, the nutrients still release into the water column. The only things that will consume those elevated nutrients are algae. Lots of algae.

    This is why matching substrate to plant type is the first decision in any planted tank build. Most substrates stay nutrient-rich for 12-18 months before needing replenishment via root tabs or supplemental dosing. Plan for this from the start and your long-term maintenance routine becomes much simpler.

    If you’re focused on water column feeders, substrate choice opens up considerably. You can use almost any substrate that appeals aesthetically and focus fertilization entirely on liquid column dosing. Anubias, Java Fern, and Java Moss don’t care what’s in the gravel below them.

    Types of Planted Tank Substrate

    Planted Aquarium Soil

    Clay-Based

    Clay-based substrates like Seachem Flourite are inert and permanent. They don’t alter water chemistry and never need replacing. The tradeoff is that they provide no root-zone nutrition on their own. Root-feeding plants in clay substrate need root tabs to thrive. Best suited for long-term setups where you want total parameter control.

    Sand

    Sand is another inert option. The key factor to watch is particle size: too fine and the substrate compacts, choking plant roots and creating anaerobic pockets. Coarse sand at 1-2mm particle size works well for plants; ultra-fine sand does not. Sand is a good choice for tanks with corydoras, as it’s soft on their barbels.

    Gravel-Based

    Standard aquarium gravel is inert and provides zero nutrition. It’s fine for fish-only tanks or setups composed entirely of column-feeding plants. For root feeders, gravel requires consistent root tab supplementation to prevent plant starvation. We have a video covering plants that do well in gravel from our YouTube channel below:

    Active/Mineral Soils

    These are the nutrient-rich substrates: ADA Amazonia, Fluval Stratum, Mr. Aqua, Tropica Soil. They contain organic material that breaks down and releases nutrients into the root zone. Most lower pH and soften water. Most require an establishment period during which ammonia levels spike and algae pressure is high. They’re the right tool for serious planted tanks with root-feeding plant communities.

    pH-Boosting Substrates

    Substrates like crushed coral raise pH and maintain alkalinity. These are relevant for African Cichlid setups and hard-water species. They don’t belong in a planted tank setup where most plant species prefer neutral to slightly acidic water.

    Key Factors When Choosing Planted Tank Substrate

    Grain Size

    Planted Aquarium Sand

    Grain size is critical for root-feeding plants. Too coarse and roots can’t penetrate or absorb nutrients efficiently. Too fine and the substrate compacts, cutting off oxygen to the root zone and creating anaerobic pockets that harm plant roots and produce hydrogen sulfide. The sweet spot for planted tanks is 1-3mm, with 2mm being ideal for most species.

    Material

    Avoid substrates containing limestone, crushed coral, or calcium carbonate, as these raise hardness and pH. Most plants prefer neutral to slightly acidic water. The products on this list are all appropriate choices that eliminate the guesswork.

    CEC Value (Cation Exchange Capacity)

    CEC measures how effectively a substrate binds and retains nutrients for plant use. Higher CEC means more nutrients held in the root zone rather than leaching into the water column. This is why volcanic soils like Fluval Stratum and ADA Amazonia outperform plain gravel even when liquid fertilizers are added to inert substrate.

    Weight and Longevity

    Plants with delicate or fine root systems need a substrate that won’t crush those roots under its own weight. Consider your plant species before choosing a heavier substrate. And think about longevity: active soils deplete nutrients over 12-18 months. Clay-based substrates like Flourite last indefinitely but require supplementation from the start. Build your maintenance plan around whichever type you choose.

    Going the DIY Route

    Some experienced hobbyists use garden topsoil as a base, capped with coarse sand or a commercial substrate to save money. It can work, and I’ve seen tanks built this way do well. But it’s genuinely not beginner territory. Garden soils vary enormously in composition, and there’s no way to predict exactly how your water parameters will shift until the tank is running. Ammonia from topsoil can be extreme. Cycling times extend significantly. If something goes wrong, diagnosing the cause is much harder when your substrate is an unknown variable.

    For first-time planted tank owners, stay with a commercial substrate from this list. The predictability alone is worth the price difference.

    What Most Planted Substrate Reviews Get Wrong

    • Not distinguishing between inert substrate (which needs heavy liquid fertilizing from day one) vs. nutrient-rich active substrate: treating them as interchangeable leads to plant failures that are entirely predictable.
    • Not warning about new tank syndrome with active soils: ADA Amazonia and similar products release significant ammonia as they break in. Fish added too early will suffer or die.
    • Recommending the same substrate for shrimp tanks and planted community tanks without noting pH buffering differences: caridina shrimp need acidic, soft water; neo shrimp are more flexible. The substrate needs to match the shrimp species, not just the plants.
    • Not mentioning longevity: active substrates deplete nutrients in 12-18 months and then require capping with root tabs or substrate replacement. This is a significant cost and effort commitment that reviews almost never address upfront.

    Frequently Asked Questions

    I get a number of questions from readers about planted aquarium setups. Below are the ones that come up most often.

    How Deep Should My Aquarium Soil Be?

    For a sloped aquascape like an Iwagumi layout, the standard recommendation is 3 inches (7.5 cm) in the front and 5 inches (12.5 cm) in the back. In practice, 2 inches (5 cm) in front and 4 inches (10 cm) in back works fine for most plant species. Unless you’re keeping large root feeders like Amazon Swords, you don’t need more than 4 inches (10 cm) at the deepest point.

    For column-feeding plant setups, substrate depth matters much less. A shallow layer that just covers the bottom is sufficient and makes the tank easier to clean and maintain.

    Closing Thoughts

    Substrate is the decision most hobbyists underinvest in and the one they can’t easily undo. Every planted tank I’ve built over 25 years, the tanks that thrived had substrate dialed in first. The ones that struggled almost always had the wrong substrate for the plants in them.

    Here’s the short version: if you’re keeping root feeders, get an active soil. Fluval Stratum for most people, ADA Amazonia if you’re serious about aquascaping and willing to manage the establishment phase. If you’re keeping column feeders only, any inert substrate works and you can focus your fertilization effort on liquid dosing. Don’t use plain gravel for root feeders and wonder why your plants are melting.

    The substrate doesn’t care how good the light is. If the roots have nothing to feed on, the plant dies. Build from the bottom up.


    🌿 Want to learn more? This article is part of our complete Planted Tank & Aquascaping Guide, your ultimate resource for aquarium plants, aquascaping styles, substrates, and more.

  • The 21+ Best Low Light Aquarium Plants – [Reviewed and Tested]

    The 21+ Best Low Light Aquarium Plants – [Reviewed and Tested]

    If you don’t have a high-end lighting system and CO2 injection, low-light plants are not a fallback. They’re the right choice. Most freshwater tanks run standard aquarium LEDs with no CO2, and the plants that actually thrive in those conditions are the ones on this list. After 25 years in the hobby and time managing fish stores, I’ve watched countless beginners buy “easy” plants at the LFS that were actually medium-to-high light demands in disguise. They melt within two weeks, the hobbyist blames themselves, and half the time they quit planting altogether. That’s not a beginner failure. That’s bad advice.

    Low-light plants aren’t a compromise. For 90% of freshwater tanks, they’re the only plants that will actually work.

    In this guide I’ll walk you through the 21 best low-light aquarium plants I’ve used and recommended over the years. I’ll tell you which ones I reach for first, what people consistently get wrong about low-tech planted tanks, and how to set yourself up for genuine success without CO2 or specialty lighting.

    Expert Take | Mark Valderrama, AquariumStoreDepot

    My two go-to recommendations for any tank without CO2 are Java Fern and Anubias barteri. I’ve put both in tanks ranging from 10 gallons to 150 gallons, in everything from soft rainwater to hard tap, and they just grow. Java Fern ties to wood or rock and needs no substrate at all. Anubias is the slowest-growing plant in the hobby, which sounds like a downside until you realize it also means you’re never ripping it out and replanting every two weeks. For tanks with dark substrates and community fish, I’ll also add Cryptocoryne wendtii. Under a standard LED and a weekly liquid fertilizer dose, these three plants make any tank look established within a few months. No CO2 required. I’ve set this up dozens of times in stores and for clients. It works every time.

    The Top Picks

    I’m going to list the top 3 aquatic plants for quick reference as I’m going to go through a bunch of options for you today. The top 3 are hand picked for you! I’m going to try to stick with common names to keep confusion to the minimum. Every one of these low light plants I’ll go over in this post can run off low lighting conditions.

    Editor’s Choice!
    Java Fern
    Java Fern
    • Background or mid placement
    • Column feeder
    Best Value
    Anubias Barteri
    Anubias Barteri
    • Mid-ground placement
    • Column Feeder
    Budget Option
    Marimo Moss Ball” data-lasso-lid=”38687″>Marimo Moss Ball
    Marimo Moss Ball
    • Foreground or Background
    • Column Feeder

    Java fern is the most readily available and one of the easiest plants to care for in the hobby. Anubias offers a low light plant that grows slow while Moss balls are cheap and work in small tanks.

    How We Ranked These Low-Light Plants

    1. True low-light tolerance: confirmed to thrive under standard aquarium LED (1-2 watts per gallon equivalent)
    2. No CO2 requirement: grows well without injection
    3. Beginner survivability: forgiving of missed water changes and minor parameter swings
    4. Growth rate: manageable without constant trimming
    5. Availability: findable at most LFS or online

    Is Low-Light Planted Right for You?

    Perfect Fit

    • Standard aquarium LED (not a specialty planted tank light)
    • No CO2 injection system
    • Community freshwater tank wanting natural aesthetics
    • Beginner or low-maintenance setup

    Want More? Upgrade First

    • If you want carpet plants or lush foreground growth, you need a proper planted tank light and CO2
    • Aquascape competition-style tanks need high-tech setups
    • Very fast growth or intense green color usually requires more than low-light

    The Top 21 Low Light Aquarium Plants

    Let’s get started with our best low light aquarium plants list!

    1. Java Fern

    Java Fern is one of the most readily available freshwater plants available in the industry. Java Ferns are a slower grower, but it can tolerate most light conditions and is a very hardy plant species. It also has a unique leaf structure and can be glued to rocks for some unique aquascaping accents. Like the other plants above, many fish ignore java ferns. It is a foreground plant that is a literally set it and forgot it plant. Java ferns are the perfect plants for beginners, or those looking for a stress free planted tank. The Java fern is a staple in most low light tank setups. 

    Mark’s Top Low-Light Pick

    Java Fern has been my go-to recommendation for decades. It’s genuinely indestructible under standard aquarium conditions. Tie it to driftwood or a rock with thread or super glue gel, point a basic LED at the tank for 8 hours a day, and it grows. No CO2, no special substrate, no fuss. I’ve kept it alive in tanks with poor lighting, inconsistent water changes, and aggressive fish that would shred any delicate plant. It survives all of it. If I could only recommend one plant to a beginner, this is always the one.

    2. Anubias Barteri

    Best Value
    Anubias Barteri

    Best Value

    A forgiving low light aquarium plant that will not be eaten by most fish

    Click For Best Price Buy On Amazon

    Anubias Barteri is one of the most popular and hardy freshwater aquarium plants available in the hobby. Also known as Coffeefolia, it has heavy thick leaves that are rippled in appearance. When the Anubias barteri plant is young, it will have reddish brown leaves which will change to green as it matures.

    This plant is actually ideal for fish that like to eat plants because many fish will tend to leave it alone as they do not like the taste. It is a midwater plant that is a root feeder so you will need a substrate that has room for it to grow its root system. It is a moderate grower and grows well even in low light. If you are looking for a small plant, the Anubias Nana variety works really well!

    These Anubias barteri plants also flower. They will flower better when emerged, but they will also flower when submerged in an aquarium. Check out this video by Dovydas below.

    3. Marimo Moss Balls

    Budget Option
    Marimo Moss Ball

    Budget Option

    A cheap and easy to care for aquarium plant. Thrives in low light and very low maintenance

    Click For Best Price

    Marimo Moss Balls are foreground plants that are very easy to care and grow. They will thrive in just about any light condition and just ask to be rotated every water change or so. They can be kept in just about any tank. From a large planted display to a fish bowl it will thrive in any condition. Some people will even place the in sumps as a form of refugium. They are also very long lived with the species living over 200 years in the wild.

    Marimo Moss balls are ideal for small plants and for small inhabits like shrimp. They are also a good fit for smaller activity fish like Bettas. Marimo moss balls aren’t actually considered a plant, more so a form of green algae that grows into a ball formation. Because of their size they are ideal for a smaller fish tank. They do very well in a low light aquarium.

    4. Amazon Sword

    Amazon Sword

    A classic background aquarium plant. Grows large and will be a centerpiece in your aquarium

    Click For Best Price Buy On Amazon

    The Amazon Sword is a staple in many freshwater planted tanks. It is found in aquariums all over the world as it is well known for its hardiness and ability to thrive in a vary of conditions. It is also a fairly inexpensive plant and readily available in most stores. It can grow to an impressive length usually growing to over a foot in height. Having an aquarium at least 16 inches in height would be ideal for it. These plants are also easy to propagate and do just fine in low light. 

    It’s main drawback are its root system. They are fairly large and powerful and will grow deep into the substrate. It does require a deeper (at least 2.5 inches deep) and solid substrate due to this.It grows to a dark green color. If you see the leaves start to brown out, this means that your nutrients are low. It must be planted in the substrate as it is a root feeder.

    This plant does not require a ton of light and will thrive in a low light aquarium. It does not require much pruning as well. It is a common plant in a planted tank for a reason.

    5. Cryptocoryne Lucens

    Cryptocoryne Lucens is a low growing crypt plant that generally grows within the 3 to 5 inches in height range. It sometimes is used as a foreground plant in larger tanks and due to its size it can work as a background plant in smaller tanks. 

    It’s an undemanding plant that thrive in most aquarium conditions. It is a slow grower and prefers not to move around. Once you plant it, plan on not moving it. It is often recommended to beginners because of it’s easy level of care, slow growth rate, and low light demand. Crypts in general make great low light plants.

    6. Vallisneria Americana (Eel Grass)

    Vallisneria Americana or Eel Grass is a native aquatic plant from Florida. It has nice twisted and ribbon like leaves and is usually one of the first plants beginners will try and most often are very successful with it because it is easy to take care of. It is a fast grower as well and is a great background plant due to its taller spread.

    It is one of the easiest aquarium plants to propagate via its runners and this also gives it the ability to take over a fish tank, so proper pruning and maintenance will be necessary to keep it in check. It is considered a staple in planted aquariums due to its well earned reputation of being easy to care for and being able to thrive in low light.

    7. Dwarf Sagittaria

    Dwarf Sagittaria

    A great first time beginner plant. Hardy and thrives in low light. Provides a natural looking ground cover

    Click For Best Price Buy On Amazon

    Dwarf Sagittaria is a great first time plant for a beginner. It is a low level of care plant that stays small in size and will spread to form a grass like carpet. It is ideally placed in the foreground of your aquarium where it can provide a great looking grass covering to accent your taller and larger plants.

    There aren’t any high light or fertilizer requirements with this plant. It will readily grow in just about any tank conditions. It is an ideal low light carpeting plant.

    8. Java Moss

    Java moss is a plant that can attach to rocks, driftwood, and roots. It is a very hardy plant that does not need a lot of attention and will grow in just about any condition. It is commonly used to help baby fry hide from adults. Like Anubias Barteri, Java moss is compatible with most fish as many will not pick at it. Java moss is a foreground plant that can grow like a lawn if you want it to and can grow fast. It does well in a low light aquarium.

    9. Pearl Weed

    Pearl Weed

    A carpet growing plant that is fast growing and will do well in low light

    Click For Best Price Buy On Amazon

    Pearl Weed is a carpet growing plant that bright green and low growing. It is the ideal carpet plant for beginners. This is a really accommodating plant in that it can be used in the foreground, mid ground, and background as it doesn’t require much to be planted. It will also grow plenty fast under lower light aquarium conditions.

    Because of its fast growing and carpet nature, it will require constant pruning to keep it from growing vertically. It also will not mind a hard prune and being shaped to the way you desire. This is also a very easy plant to propagate as all you need to do is cut the end of the stems, group them together and simply bury them together in your substrate. 

    This is an ideal carpet covering plant for those struggling with others.

    10. Anacharis (Elodea Densa)

    Anacharis is a plant you may have seen in science class in school. Because it’s leaves are only one or two cells thick they are often used to teach children about cellular and plant cell structure as they can be easily view through a microscope.

    It is a highly valued aquarium plant that can soak up nutrients in the water. It is so good at its job that it is used in wastewater treatment models as it has been found to remove harmful chemicals in water such as arsenic! 

    It is very easy to grow grow very fast even in low light. It does have an issue of being considered a pest to wildlife though, which means it has been deemed illegal in several states in the US due to its invasive nature. It is very popular in Ponds and cold water aquariums because it is tolerate of a variety of water temperatures. It is also used as a plant for goldfish as they will happily eat the plant and they are cheap to purchase.

    It is a very fast grower and it’s chemical and nutrient soaking ability make Anacharis a very utilitarian plant to have in a planted tank. 

    11. Rose Sword Plant

    Rose Sword Plant

    One of the rare red plants that can grow in low light. Easy to care for and grows large

    Click For Best Price Buy On Amazon

    The Rose Sword Plant is a variant of the Amazon Sword plant that has a range of colors from green, brown, pink, to red. New leaves will start out as pink or bronze and will eventually turn to bright or dark green as they mature. They are just as easy to take care of Amazon Swords, but will require a bit stronger lighting conditions in order to bring out the best colors. However, they will thrive and grow in low light conditions. Most red plants tend to require higher lighting which is why they don’t make this list. This is one type of plant you can get that gets you the red, but won’t require higher light conditions or CO2 injections.

    12. Water Sprite

    Water Sprite

    Readily available and easy to grow. This fast growing plant will soak up nutrients and thrive in low light

    Click For Best Price Buy On Amazon

    The Water Sprite is another commonly available plant that has the ability to thrive either planted or floating in low light conditions. It is an ideal plant for cover for fry and for timid fish due to the cover it can provide with its grow spread. These plants are also valuable to scientist because they germinate so fast. They are often used in genetic research.

    They are fast growers and will suck up nutrients in a fish tank. Both a good and bad thing, but the plant is relatively low maintenance and can still do well without supplementation. They make good background and middle placement plants and actually do a good job of keeping algae at bay as they create a lot of shade under them. It is a commonly available and cheap plant.

    13. Hornwort

    Hornwort is like many plants on this list, are one of the easiest freshwater plants to grow in an aquarium. In the wild, you can find it across all continents except for Antarctica. It is a fast growing plant, so it will require pruning to keep in check. What I love about this plant is that is it very flexible. You can either plant it in the substrate or use it as a floating plant on the surface of the water as it will thrive in either situation.  It is a dark green plant with dense foliage with a unique leaf structure that provided excellent aesthetics to your aquarium.

    It can get tall, but can be controlled with regular pruning. It is a truly non-demanding plant and will do great in the background or attached to rocks. It is also one of the plants on this list that can grow in cold water temperatures. It is a great low light tank plant.

    14. Christmas Moss

    Christmas moss is a staple in freshwater shrimp tanks. It has a bold green color and can be used in a variety of ways to space an aquarium. It’s most common use is to attach it to aquarium rocks or driftwood. What makes this work in shrimp tanks is it’s hardiness.

    While it is a low light plant in the sense that it can live without CO2 injection, it will thrive with it. If you want to go as hands off as possible, consider our next option below, Java Moss.

    15. Java Moss

    Java moss is arguably the most popular aquarium plant in the hobby today. This moss is great for beginners, does great in low lighting conditions and doesn’t need a high level of care. Java moss has many applications as you can attach it to driftwood, rocks, or even have it as a carpet in your substrate. There are two reasons why I put it below marimo moss balls and christmas moss. That is for the aesthics.

    It’s the not the best looking plant. In fact, most plants in the Java class don’t really look the same as other plants. They are hardy and have a certain look to them. They are great for beginners. If you are looking for a show stopping aquascape though, most aquascapers will not use them and will default to less unruly plants like christmas moss.

    16. Bucephalandra

    Bucephalandra

    Bucephalandra is a slow-growing plant that’s perfect for anyone looking to grow their first aquatic plant. They are great for attaching to hardscape

    Click For Best Price Shop Tissue Culture

    Bucephalandra is a undervalued low light plant in the aquarium industry. I say that because many beginners don’t consider it. It is usually reserved for more advanced hobbyists, mostly due to its availability and price. It is a plant that has a number of varieties available and colors. From dark green, to light green and even near blacks, this plant can pop in any environment.

    Because they are rhizomes like Anubias, they are best grown on rocks and driftwood. They also prefer a good amount of water flow, which make them a better candidate for professional aquascapes and planted aquariums.

    17. Cryptocoryne Wendtii

    Low Tech Plant!
    Cryptocoryne Wendtii

    A great low tech plant for multiple aquascape types and setups. Forgiving and hardy, the Cyrptocoryne Wendtii is a great introduction to rooted plants!

    Buy Tissue Culture Buy Potted

    Cryptocoryne Wendtii are great plants for low light conditions. This particular species called Cryptocoryne Wendtii is well known for its shades of pink and green. It’s a forgiving plant that doesn’t need a high level of care and it offers a unique look compared to other aquatic plants on this list. It’s also one of the few rooted plants on this list that is easy to find tissue culture grown.

    That’s one of my frustrations with plants like java fern and anubias. It’s difficult to find them as tissue culture. You can find this one available though. If you want a plant that is easy to grow and that you know will be pest free, consider buying a tissue culture version.

    18. Dwarf Hairgrass

    Easy To Grow Carpet!
    Dwarf Hairgrass

    Dwarf hairgrass is an easy to grow carpet that is great for beginners. Purchase tissue culture plants to ensure pest free plants!

    Click For Best Price Buy On Glass Aqua

    Dwarf hairgrass is a bright green aquarium plant that gives the appearance of grass. It only grows to 3 inches in height. It can give the appearance of a groundcover when grown in mass at the bottom of the tank.

    It’s green look works well in simple aquascapes like Iwagumi. It can outcompete other carpeting plants, so if you want to plant it, know that it will become the dominant foreground plant in your tank. It is a hardy plant that doesn’t require a high level of care that beginners will appreciate.

    19. Floating Fern

    Salvinia Natans (Floating Fern)

    A floating plant that tolerates cold water. Does best in low flow tanks

    Click For Best Price Buy From Glass Aqua

    Floating plants are a great option if you are looking for low light/low tech plants. One of the more unique floating plants available is called the floating fern. Not only can it do well in low light conditions, but it does well in cold water temperatures too.

    It has a unique leaf shape and the root systems are very large. These make these plants ideal for betta fish tanks and axolotls as they can shade your aquatic pet from the light and still give you a pretty plant that will tolerate low flow water conditions.

    20. Ludwigia Repens

    My Pick
    Ludwigia Repens

    Buceplant offers both stem and tissue culture Ludwigia Repens at great prices. A great beginner red plant to try!

    Buy Stem Plants Buy Tissue Culture

    Ludwigia Repens is the only red aquarium plant that makes this list. While it is considered a moderate light plant, many plant lights will accommodate its par requirement. It is a stem plant and red plant that doesn’t require CO2 to grow.

    Ludwigia Repens is a forgiving and low level of care stem plant. It is the best plant to stepping stone with if you want to get into growing those harder to grow red plants.

    21. Anubias Nana

    Great Beginner Plant
    Anubias Nana

    Hardy, forgiving and easy to grow. The Anubias Nana is your ticket to the incredible hobby that is aquascaping!

    Click For Best Price Buy Tissue Culture

    Anubias Nana is the smaller cousin of Anubias Barteri. It’s a low level of care plant and is one of the most forgiving aquarium plants you can purchase in the hobby. It can grow in a variety conditions, most fish won’t eat it, and it be grown either emerged or submerged. This makes this plant an excellent candidate for terrariums and paludariums.

    Given its smaller size, it works well in smaller fish tanks. If you are looking for an even smaller plant for nano tanks, consider trying Anubias Nana Petite.

    22. Lucky Bamboo

    • Scientific Name: Dracaena sanderiana
    • Skill Level: Easy
    • Size: Up to 39 inches
    • Lighting: Low
    • pH: 6.0 – 7.5
    • Growth Rate: Slow to Moderate
    • CO2 Requirement: Optional

    Lucky bamboo, often overlooked as an aquarium backdrop, has gained recognition through recent social media trends, particularly on social media. This plant offers a lush, verdant area within your tank, providing a natural playground for fish to dart through.

    Known for its resilience and minimal maintenance requirements, lucky bamboo thrives even with the simplest of care routines. An added advantage is its ability to flourish in dimly lit environments, as ambient light suffices for its growth, making it an ideal choice for lower light aquariums. To ensure its longevity, remember to keep the foliage emerged above the water’s surface.

    What People Get Wrong About Low-Light Plants

    The most common mistake I see is treating “low-light” as a synonym for “no light.” Every plant in this list needs real light. Low-light means the plant thrives at 20-50 PAR, which is what most standard aquarium LEDs produce. It does not mean you can run a dim desk lamp over a covered tank and expect growth. 8 hours of decent light per day is still the baseline.

    The second mistake is buying plants mislabeled at the store. Dwarf hairgrass gets sold as low-light constantly. It needs high light and CO2 to produce a carpet. Without that setup it sits and slowly dies. Glossostigma is another one. Beautiful in high-tech aquascapes, completely unsuitable for a basic LED tank. If a plant is in the foreground at a store display that also has a $200 light and CO2 bubbles running, assume it needs that setup to survive.

    Hard Rule: Low-light means no CO2 injection required, not no light. Every plant needs some light. The difference is intensity, not presence.

    The Biggest Mistake Low-Tech Plant Keepers Make

    Skipping fertilizer entirely. The assumption is that since you’re not running a high-tech setup, you don’t need to dose nutrients. That’s backwards. Your low-light plants grow slowly, but they still pull nutrients from the water column. In a tank with no fertilizer and no CO2, plants eventually run into deficiencies: yellowing older leaves, holes in leaves, stunted new growth. A basic all-in-one liquid fertilizer dosed once a week fixes all of that. It takes 30 seconds. It makes a visible difference within a month. Don’t skip it.

    Types of Aquarium Plants 

    Let’s start first with the type of aquarium plants and how they are different we have the following:

    Ferns and Mosses

    These plants reproduce in the aquarium by producing spores. These plants include plants such as Java Fern, Java Moss, and Water Sprite. These plants tend to be popular among breeders because they provide good cover for fry in an aquarium. Most ferns and mosses are aquarium plants that will do well in low light. 

    Rosettes

    These are flowering plants that you will see in both aquariums and outdoor ponds. These include plants like the Amazon Sword plant and Anubias. Rosettes are known for their shortened stems and are very leafy. This makes them a very popular plant for aquariums.

    Floaters

    These are plants that are not rooted in the substrate and do best floating at the surface of the water line. Some species would include Hornwort and duckweed. They are great plants for new fry to hide it, but several species grow extremely fast and can take over a fish tank.

    Types of Feeders

    Plants are also separated in the way they feed in your aquarium. We separate plants in the aquarium hobby as column feeders and root feeders. A column feeding plant take nutrients from the water column, which means you can place column feeders above your gravel substrate and do not have to worry about having a nutrient rich substrate. Root feeders take nutrients from the substrate. These plants will anchor to your substrate and require substrate that can sustain them. 

    Not only do we need to know about how plants feed, but also where they are best placed. There are foregound, midwater, floating, and background plants. Knowing what plants are best for each section in your planted aquarium setup will help you design an aquascape that looks beautiful and professional!

    How to Select Tank Foliage

    We supplied a video from our YouTube channel that summarizes the list above. Subscribe to us if you like our videos. We post new ones every week.

    It can be intimidating when purchasing plants for the very first time from a fish or pet store. Here are a few tips when it comes to selecting a plant for your aquarium:

    • Don’t purchase plants with damaged fins or holes in the leaves
    • Look for discoloration of leaves as well as yellow leaves
    • Considering dipping your plants in a 1/10 bleach solution to remove any unwanted snails and algae from the leaves.

    Another option to get the best plants possible is to consider tissue cultured plants. Tissue cultured plants are grown in labs and will not have any pest hitchhikers. I would definitely consider purchasing them if you can find them for the plant you are looking for. The most well known brands for tissue culture would be Tropica and Aquatic Farmer, both of which you can find in online stores if your local store does not carry any.

    Planted Tank Lighting Options

    We do have a post about the Best Planted Tank LED Lights but we can pull from that list to provide a few options if you don’t have time to read that article. For a low light aquarium on a budget, the NiCrew Sky LED would be the easiest choice. If you want an overall comprehensive light with the ability to expand to more light demanding plants, the Serene LED is one of the best lights out there and is simple to use. The Serene is ideal if you are planning to graduate beyond low light aquarium plants.

    Best Value
    Serene RGB Pro LED

    Current USA’s offering into aquascaping is an incredible value. Spectrum, spread, easy to program and great PAR output.

    Click For Best Price Buy On Amazon

    CO2 Systems

    CO2 is the driver of growth for any planted tank. While many of these plants can grow without the assistance of a CO2 system, they will grow a lot better and faster with CO2. While a full blown CO2 system may not be a good option for you, there is a good middle ground to get growth via supplementation.

    Seachem Excel is arguably the best CO2 supplement when you are beginner. It’s easy to use and also works great for eliminating nuisance algae. It’s super easy to use. All you have to do is add 1 cupful for every 50 gallons daily or every other day. When you do a major water change and on the initial use, you add 1 cupful for every 10 gallons. It’s also safe on moss balls (which is considered a form of algae).

    Fertilizers

    Aquarium fertilizers are important to keep your nutrient levels stable for growth. If you start supplementing CO2, you will need to look into fertilizers to keep your growth levels up. While APT complete is considered a supplement for full blown planted tanks, it can be adjusted for low energy setups. I’m a fan of the supplement as it is a complete all in one that is superior to most pet store purchased products.

    Editor’s Choice!
    APT Complete

    Editor’s Choice

    Made by an aquascaper for aquascapers. This is the best all around aquarium plant fertilizer on the market. Marco and micronutrients in one bottle!

    Use Coupon Code ASDComplete for 10% off your order!

    Click For Best Price Buy On Amazon

    What Most Low-Light Plant Lists Get Wrong

    • Including plants labeled “low-light” in stores that actually need medium to high light. Dwarf hairgrass is the biggest offender. It’s routinely sold as easy and low-light. It needs high light and CO2 to look good. Without them it melts, goes brown, and dies.
    • Not explaining what “low-light” actually means in real terms. Marketing language is useless here. A true low-light plant thrives at 20-50 PAR. Most store-bought aquarium LEDs without special plant settings sit in that range.
    • Forgetting that fertilizer still matters. Low-light plants grow slowly but they still consume nutrients. A basic liquid fertilizer dosed weekly makes the difference between a plant that survives and one that actually looks good.
    • Skipping the epiphyte warning. Java Fern, Anubias, and Bucephalandra are epiphytes. Do not plant them in substrate. Bury the rhizome and they rot and die. Tie them to hardscape. This one mistake kills more plants than anything else.

    FAQS

    What Aquatic Foliage Does Well With Muted Lighting?

    There are many plants that do well in low light aquariums. Plants such as Java Fern, Anubias, Bucephalandra are excellent choices. They will go well even in low light and no CO2.

    Can I Grow Tank Foliage Without A Lamp?

    No. You cannot grow aquarium plants without a light. Whether its direct sunlight (not recommended to avoid algae) or a plant light – all plants in the aquarium trade need light to survive. Most plants will survive around 7 days without lights while other more sensitive plants will start showing signs of stress after 2 or 3 days.

    How Many Hours of Illumination Do These Types of Tank Foliage Need?

    Plants need about 8 to 10 hours of light to survive. Low light plants do well with this much light. Other plants may need more light, but it is more about the intensity of the light versus the duration.

    What is considered moderate illumination for tank foliage?

    Moderate light is anything over 100 PAR. Most planted tank lights will provide moderate light. If you are looking for intense lighting, there are brands of lights from companies like UNS that make high-intensity lights desired for professional aquascapes.

    Will normal LEDs grow foliage?

    Yes, a normal LED light can grow plants assuming the amount of PAR is enough to grow the plant. It will not have the best spectrum to grow optimally though. Plain white lights tend to give off a lot of PAR and may actually burn plants or encourage more algae growth. It’s best to purchase a specially-made aquarium plant light to ensure you get the best growth rate from your plants.

    Closing Thoughts

    The biggest myth in planted aquariums is that low-light plants are just training wheels until you can afford CO2 and a proper light. They’re not. They’re the foundation of the most durable, natural-looking, low-maintenance tanks in the hobby. Anubias, Java Fern, Cryptocorynes, and Java Moss have been the backbone of successful planted tanks for decades precisely because they work in the conditions most aquarists actually have.

    Start with your light and your tank. Be honest about both. A standard LED with no CO2? You’re in low-light territory, and these plants are your plants. Build around Anubias barteri and Java Fern first. Add a Cryptocoryne or two for the midground. Throw some Java Moss on your hardscape. Dose a liquid fertilizer once a week. That’s the whole system. No CO2 reactor, no expensive lighting controller, no complexity.

    Low-light plants aren’t a shortcut. They’re the right call. The best planted tanks I’ve ever set up for customers were low-tech. They looked incredible, stayed healthy, and the fish owners actually enjoyed maintaining them instead of fighting them.

    Build the tank you can maintain, not the tank you think you should have.


    🌿 Want to learn more? This article is part of our complete Planted Tank & Aquascaping Guide. your ultimate resource for aquarium plants, aquascaping styles, substrates, and more.

  • The 5 Best Aquarium Chillers of 2026 [Tested & Reviewed]

    The 5 Best Aquarium Chillers of 2026 [Tested & Reviewed]

    Aquarium chillers are one of those purchases I see reef keepers delay until they’ve already lost livestock. and that’s a painful way to learn. I run a 125-gallon reef and have tested chillers across multiple summers in a warm climate. The difference between a quality unit and a cheap one shows up fast when ambient temps climb. Here’s what’s actually worth your money.

    Summer of 69 could be the best days of Bryan Adam’s life but not in general for people like us. Summer, typically, is a hard time to pass if you live in hot areas like the South in the United States or South-Asian countries like India, Bangladesh and Pakistan. And if you think of those fish, aquatic plant and coral living in high-temperature water the whole day, you will realize that summer is actually a nightmare with a poker face. An aquarium in a hot climate may require an aquarium chiller in order to keep stable temperatures.

    Keep this in mind that aquariums shouldn’t get hotter than 83°F in any situation. At 83°F or higher water temperature, the oxygen level in aquarium water starts to diminish and this leads to a stressful-competitive situation for the fish and other inhabitants to get oxygen. Be fearful, this may lead to the death of your aquarium residents. 

    For the optimum health of your fish and other aquarium species, it is advised to keep them in an acceptable range of water temperature. For example, tropical fish and saltwater aquarium fish have an acceptable range of 72° to 80° F (optimal is 78° F), Fancy Goldfish, like Fantails, have an acceptable range of  65° to 72° F and Common Goldfish have an acceptable range of  65º to 68º F.

    Now if you stay outside from home the whole day, which of course you do because of office, class or for simple groceries, DON’T keep your aquarium in a place that has direct contact with the sun. This will lead to an increase in growth of algae that would be difficult to clean. So you can figure it out by now that keeping the aquarium water temperature optimum is vital. Here are some of the best, cheapest and quickest methods that will help you reduce the tank’s water temperature in summer.

    How to Protect Your Aquarium Against Summer Temperatures

    Straight as it sounds! The cooler the temperature outside, the lesser the water temperature will increase inside the aquarium. The temperature will be within the safe range for your fish. Plus, your friends and family will thank you too for the air cooler/conditioner.  

    Beat The Heat On A Budget (Mobile ACs for Tanks)!

    Before I get into the Best Aquarium Chillers, there is a bit of secret many of these chiller manufacturers do not want you to know. There are actually reasonably priced mobile ACs that can be purchased online that will keep the area you keep your aquarium cool! Here are a few suggestions. This choice is a good consideration if you add an aquarium in a den, garage, or addition:

    Value Priced
    BLACK+DECKER Portable AC

    Mobile AC units are an unconventional, but very effective and cheaper solution over many chiller options

    Buy On Amazon

    Mobile ACs require an outside vent so your only limitation is having a vent to the outside of your home or a window when you can insert the window outlet to it. They are very easy to install and the window outlets are made to universally fit on just about any window. Having the area in your home where your aquarium sits in cool is the most vital aspect of keeping temperatures safe. These mobile solution will not only work in new additions of your home, but also will protect you in the event of a AC failure.

    An even cheaper alternative is a Window AC unit. While these units are cheap and will get the job done, they are a lot longer than the portable AC units I have showed above. I feel that the Portable AC units are better values and since they are portable, you can move them around the house for other rooms if need. 

    Invest in an Tank Cooler

    Now if you want to have a substitute of an air cooler or if you think your existing air conditioner isn’t doing much in terms of keeping the temperature in check for fish, you can purchase an aquarium chiller. Chillers have a variety of shapes, sizes and styles. So to buy the perfect chiller, you need to know the dimension and size of your aquarium and the temperature degree that has to be brought down to keep it at an optimum level.

    Once you are done buying just fix it in the sump or plumb it in-line of your tank. Voila! This is a sure effective method for beating that scorching heat of summer, plus you can also place it with your heater to control the temperature changes of your room. Let’s talk about the best aquarium chillers out there to purchase.

    The Candidates – A Quick Comparision

    Now to know which aquarium chiller is the best or which suits your needs the most is a big question, which I am here to answer. When you are buying look at the chiller’s packaging for the horsepower rating; this rating is useful to determine the number of watts the chiller is going to use. British Thermal Units (BTU) is another rating which you should check before purchasing your ultimate aquarium chiller. Below are some recommended picks I’ll go over.

    In a hurry? I recommend the JBJ Artica!

    PictureNameSizesLink
    Editor’s Choice!
    JBJ Arctica 
    JBJ Arctica 
    • 1/15 HP
    • 1/10 HP
    • 1/5 HP
    • 1/3 HP
    Click For Best PriceBuy On Amazon
    Best Value
    Hamilton Technology Aqua Euro Max
    Hamilton Technology Aqua Euro Max
    • 1/13 HP
    • 1/10 HP
    • 1/4 HP
    • 1/2 HP
    • 1 HP
    Click For Best PriceBuy On Amazon
    Budget Option
    Active Aqua Chiller
    Active Aqua Chiller
    • 1/10 HP
    • 1/4 HP
    • 1/2 HP
    • 1 HP
    Buy On Amazon
    Teco Tank Aquarium Chiller Teco Tank Aquarium Chiller
    • 1/6 HP
    • 1/4 HP
    Buy On Amazon
    IceProbe Thermoelectric Chiller IceProbe Thermoelectric Chiller
    • 1/4/ HP
    Buy On Amazon
    Baoshishan Aquarium Chiller Baoshishan Aquarium Chiller
    • 1/10 HP
    • 1/3 HP
    Buy On Amazon

    The Top Choices For The Money – 2023 Updated

    Let’s see each aquarium chiller in detail

    1. JBJ Artica – The Name Brand

    Editor’s Choice
    JBJ Arctica Aquarium Chiller

    Editor’s Choice

    The name brand in aquarium chillers. The JBJ Arctica efficiently keeps tanks cool and are quiet

    Click For Best Price Buy On Amazon

    When it comes to JBJ, most people recognize them for their aquarium chillers. The JBJ Arctica Chillers come in a variety of sizes and use a titanium coil design, which makes them ideal for all aquariums. They are also known for being quiet to operate – a big consideration if you are planning to install one of these in a living room. These are energy efficient and quality units that will last a very long time.

    They do come with a premium price tag though. They are one of the more expensive aquarium chiller solutions on the market, but their reputation is well known in the industry for being reliable and effective.

    Pros

    • Well-known reliable chillers
    • Titanium make up
    • Energy Efficient

    Cons

    • Expensive

    2. Hamilton Technology Aqua Euro Max

    Best Value
    Aqua Euro Max Aquarium Chiller

    Best Value

    One of the most popular brands of aquarium chillers on the market. Designed for saltwater tank usage

    Buy On Amazon

    The Euro Max Chillers are a mainstay in the aquarium industry. It is probably the most commonly available aquarium chiller on the market, which means finding parts, service, and replacement are much easier than other units on this list. 

    These chillers are designed for aquariums, specially for saltwater aquariums. They are known for being long-lasting units. It comes with a removable air filter that is easy to pull to maintain. This filter is there to keep the chiller operating for a longer life, so you money will be well invested with this unit.

    Aside from their price, the only complaint I have with these units is that it comes with a barb connector. As a chiller that is designed for saltwater aquariums, a PVC connector via a slip fitting or bulkhead would have been more desirable especially knowing that many reef tanks get hard plumbed.

    Pros

    • Quality built unit made for reef tanks
    • Long-lasting
    • Readily available and easy to find parts and service

    Cons

    • Barb instead of bulkhead fitting
    • Expensive

    3. Active Aqua – Simple To Use

    Budget Option
    Active Aqua Chiller

    Budget Option

    A budget friendly aquarium chill that offers a variety of models and sizes

    Buy On Amazon

    The Active Aqua Chiller is a Freon-free aquarium chiller that is typically used in hydroponic systems. Because it is Freon-free, this makes the Active Aqua unit environmentally safe and easier to maintain. It has its own control unit with LCD displays. It has an anti-corrosive titanium evaporator – which is a huge deal for saltwater aquarium users. The Active Aqua 1/10 model pictured here is rated 1,020 BTU and will suit a 50 gallon tank. 

    Active Aqua gives you a number of choices though, going all the way up to 1 horsepower units that will suit large tanks. Its price point puts it in the middle of the pack of this list.

    Pros

    • Freon-free unit
    • Titanium make up – anti-corrosive
    • Lots of models available

    Cons

    • While mid-priced, it’s still expensive

    4. Teco Tank Tank Cooler – The Ultimate In Temperature Regulation

    Teco WiFi Tank Chiller

    An advanced chiller with loads of features. Capable of heating and cooling a tank

    Click For Best Price Buy On Amazon

    The Teco Tank Aquarium Chiller is bar none the most advance aquarium chiller available on the market for a hobbyist. It supplies the ultimate in aquarium temperature regulation. It not only provides aquarium chilling, but also very high quality aquarium heating. While it’s marketed as a aquarium chiller, it really is a complete temperature regulation solution.

    You probably know from reading my Best Aquarium Heaters post that aquarium heaters are one of the more fail probe pieces of equipment. The Teco Tank aquarium chiller provides a heating and cooling solution for consumers and professional tanks. See the video below by Dutch Reefer to see the Teco Tank chiller in action.

    The unit starts off with high-end compressors and titanium coaxial heaters to provide complete temperature regulation. It comes complete with a temperature controller that is accurate up to 1 degree Fahrenheit and contains audible alarms if the temperatures get too low or too cold. They add this all in with a compact design and Italian made engineering and you have a top of the line unit. This is also the only unit on the list has has a warranty over a year.

    So what’s the catch? It’s easily the price tag. They are the most expensive units on this list by a mile, but for someone running a high end planted tank or reef tank it may be worth the price.

    Pros

    • Heating and Cooling all in one unit
    • Italian made engineering
    • Professional/Commercial level equipment

    Cons

    • Very expensive

    5. Iceprobe Thermoelectric – Compact Solution

    Iceprobe ThermoElectric Chiller

    A compact chiller solution. Also works with drilled tanks

    Buy On Amazon

    The IceProbe Thermoelectric Chiller is a unit piece of equipment that can cool an aquarium yet still have a small footprint. This is accomplished by using a thermoelectric probe that is inside the water line and an external fan and controlled unit.

    What you get is a chiller that can take a very small footprint in the aquarium. Multiple units can be purchased to handle larger tanks. Purchasing 3 for a larger tank will equal to the purchase price of one of the middle-end units on this list so the price isn’t that bad when you think about it.

    The biggest downfall with this unit is that is requires a drilled aquarium. You need to have a hole to fit the probe or you stick it on top of your aquarium, which leaves an ugly looking piece of equipment visible. Others have had success placing the unit on top of a Power Filter for those with hang on back filters.

    I like to hide as much equipment as possible so I feel this unit is best in an Aquarium Sump or drilled to the back of an aquarium. If you want to learn more about drilling aquariums, check out my Best Aquarium Overflow Box Reviews post. 

    Pros

    • Compact
    • Reasonably price for what it can do
    • Requires no pump

    Cons

    • Large aquariums require multiple units

    6. Baoshishan – A New Player To The Market

    Baoshishan Aquarium Chiller

    A chiller with premium level parts without the premium level price. Easy to operate and maintain

    Buy On Amazon

    The Baoshishan Aquarium Chiller is a new entry in the market. It is made to be a premium quality chiller, but with a mid-level price. It is designed for aquarium and hydroponic usage. It comes with some higher features like a digital temperature controller. The built in controller will keep the unit from over cooling the tank. The controller is borrowing from the refrigeration industry and is one of the higher quality ones that come with a chiller. It is designed to be a easy to use and quiet chiller.

    The main issue with this unit is it is new to the market and a few users have had issues with the unit trigger their breaker switches due to the power demand of these units. The pump it comes with is not very powerful and the instructions are fairly useless. Fortunately, it’s an easy to operate unit.

    Pros

    • Good Price
    • Solid temperature controller

    Cons

    • Bad instructions
    • New to market
    • Power demanding 

    Tips

    There is more to keeping an aquarium cool than just having a chiller and or an AC. Here are some other pointers.

    A good filtration system

    Aeration enables the tank surface water not to be exposed to the higher temperature outside for long. Plus, the filtration system will filter the water as well (the double benefit you know).

    Circulation of water

    Good water circulation is a must to keep the water cool. Heat energy evaporates from the surface of the water. In addition to that, gases do an exchange at the surface of the water; where Carbon Dioxide leaves the water surface and Oxygen takes place instead. Without this circulation, the water’s dissolved oxygen levels can turn out critically low at higher tank temperatures.

    But the question is what is considered to be “a good water circulation”? Water circulation may vary because of the dimension of the tank, the inhabitants it holds and the way it is decorated. Now speaking generally, tanks which have fish only must have water flow that turns the water over 10-40 times per hour (tph).

    If your tanks hold soft corals then the water turns over should be 10-30 tph. If you have all the soft, hard and large polyp stony corals then make sure the tank’s water turns over about 30-50 tph. Aquarium with small polyp stony coral should have water turn over 40-80 tph at least.

    Invest in good aquarium wavemakers and aquarium return pumps to get to the times per hour requirements you need for your aquarium.

    Well, these are rules of thumb that can vary from tank to tank. But following this would make sure that the aquarium tank runs naturally cooler in summer.

    Use LED Lighting

    LED lighting versus T5s or Metal Halides have a big advantage over heat production. LEDs are the produce the least lighting and are ideal for aquariums house in hot climates. Check our our Best Reef LED Reviews for recommended selections.

    Cheap Solutions – How Not To Break Your Bank

    Now let’s talk about some quick solutions which do not break your bank:

    Frozen water bottles

    Freeze water in a clean bottle that has never been in contact with soap or other detergents. This is the easiest solution because when the temperature is high just place the frozen bottle in the tank, once the temperature drops, bring it out as per your convenience.

    My suggestion here is not to throw ice cubes direct into the aquarium (no matter how easy and time-saving it may seem). Adding direct ice cubes may introduce chlorine and/or chloramine in your tank water (which you do not want unless you’re using un-chlorinated water for ice cubes). Plus avoid using ice packs too which has a tendency to leak.

    Keep a constant sharp eye when the temperature starts to fall- there are no sure ways to tell when the temperature would drop or how long does it take for the water bottle to bring the temperature at an optimum level. So, yes- it is compulsory to keep the aquarium water cool; but no- you can’t rush in doing it.

    Increase evaporation and air circulation with a fan

    Evaporation, as the water transforms into the gas, cools the tank water. This happens when a form of energy such as heat transferred from pumps, lighting and the room’s air temperature adds to the water. For this to happen, the surface of the water must be in contact with the open air. In other words, the aquarium cannot be hooded.

    Now to increase the evaporation and air flow process, keep a small fan in such a way that it blows air across the surface of the water. Now the question is how many fans do you need to make this air flow and evaporation process! Well, it solely depends on the size and dimension of your aquarium-tank. But only having a single fan would do the trick and you can see a huge difference in terms of keeping your aquarium cool.

    Placement of Tank

    Too much of a good thing may actually harm more than you think. Sunlight is important for living objects to get nutrients, for growth and development but the constant contact of sun rays to your aquatic friends may do more harm than good. Position your aquarium tank in such a way that it is not in direct contact with the sunlight. Plus, during summer sun travels higher in the sky- thus constantly changing angles of sun rays.

    So you may have to re-position your aquarium more often. If you don’t want to go through all these hassles, install blinds in your tank room to block out the sunlight as temperature rises. Reducing this light, in turn, will also reduce the amount of heat energy passing through the tank water. Also, refrain from adding any artificial lighting to your fish-tank. Remember, it may look all those shimmery when you add blinking lights to your aquarium, but in the long turn it is harming the health of your fish and corals- the actual beauty of your “live-box”.

    Ditch the Tank Canopy/Top – Let the Air Flow!

    A common trend now in the aquarium industry are open tops. They have the advantage of additional gas exchange and keep your aquarium cooler by have the water open in the room. You exchange this additional cooling with added evaporation and you will want to put down a mesh cover in order to keep your fish from jumping while keep the tank open. If you happen to run an air pump, one other downside to consider is that air pumps will blow water out causing additional water spots or salt creep if you run a saltwater tank.

    Be a “miser” when adding that extra fish

    Now, as you are passing by the aquarium shop you may see some of the world’s best colorful fish swimming from one corner to the other of a fancy aquarium and it may happen that it is the last day of the month and you have just got a text from your bank that your account has been debited with the current month’s salary- sounds like a God sent notification to buy an extra fish for your aquarium? NO! Adding that extra little life to your already low oxygen level aquarium will result in a stressful situation for all the poor inhabitants of your tank. So always check your aquarium water temperature before you purchase an extra life for it.

    Though differently sized aquarium requires different methods to keep the temperature in check; these are few of the tactics that go well with almost every aquarium that you may have. Adapt these techniques in summer to maintain a better environment in your aquarium, your fish-friends will thank you!

    Closing Thoughts

    I have provided a number of options for you to keep your aquarium cool. From fans, placement of the aquarium, to mobile ACs to aquarium chillers themselves there are many options available for you. Look at what your budget can afford and take it from there. I hope this post was useful to you. If you have any questions, please leave a comment below. Thanks for reading.


    🔧 Want to learn more? This article is part of our complete Aquarium Equipment & Gear Guide. your ultimate resource for filters, heaters, lights, pumps, tanks, and more.

  • Yellow Coris Wrasse: The Reef Tank’s Best Pest Control Fish

    Yellow Coris Wrasse: The Reef Tank’s Best Pest Control Fish

    The yellow coris wrasse is one of the most useful fish I’ve kept in a reef. An active hunter that picks off flatworms, pyramid snails, and other pests that can plague a mature system. I’ve had one running in my 125-gallon and wouldn’t go without it. Here’s what you need to know before adding one to your reef.

    The Yellow Coris Wrasse does pest control that no chemical treatment can match. It hunts flatworms and parasitic snails while most wrasses just look pretty.

    The Yellow Coris Wrasse is one of the most underrated reef tank additions in the hobby. And one of the first fish I recommend to anyone dealing with a flatworm or pyramidellid snail outbreak. This wrasse actively hunts and eats both pests, often eliminating a flatworm problem within days of being added. In my 125-gallon reef, I’ve seen it work through substrate, rocks, and the waterline picking off small inverts that would otherwise multiply unchecked. It’s also genuinely reef-safe with corals, which sets it apart from many wrasse species that is hit-or-miss. One non-negotiable: it needs a sand bed of at least 2 to 3 inches deep. These fish sleep buried in the sand at night, and without adequate depth they’ll stress and eventually die. Get that right and this wrasse is one of the best utility fish in saltwater.

    Today’s post we are going to talk about the Yellow Coris Wrasse. This Wrasse is a workhorse in the aquarium. It is a great choice for a saltwater reef tank because it preys on many types of pests that can infest your corals. It is super active and full of personality. It’s one of my favorite yellow saltwater fish that is available in stores.
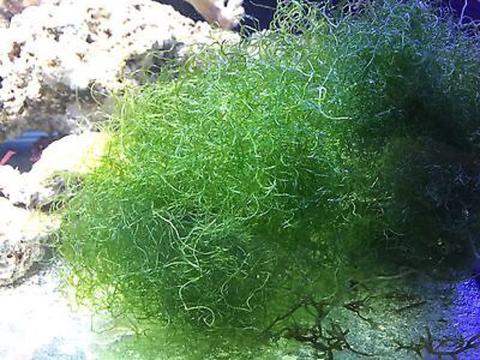
    About the Yellow Coris Wrasse

    The Yellow Coris Wrasse is known to the aquatic community under various names: golden rainbowfish, golden wrasse, yellow coris, and canary are several names that you will see. Its scientific name is Halichoeres chrysus and it hails from the Pacific Ocean to the edges of the eastern Indian Ocean. In the wild, they is found in areas around 60 to 200 feet deep.They are known for grouping together in all stages of life and young wrasses and be identified with the one or two spots they have on their dorsal fin. 

    Yellow Coris Wrasse in the Aquarium

    Scientific Name Halichoeres chrysus
    Common Name (Species) Yellow Coris Wrasse
    Family Labridae
    Origin Western Central Pacific
    Diet Omnivore
    Care Level Easy
    Activity VERY active
    Lifespan to 5 years
    Temperment Semi-aggressive
    Size 5 inches
    Tank Level All Areas
    Minimum Tank Size 55 Gallons
    Temperature Range 73. 81 Degrees F
    pH Range 8.1. 8.4
    Filtration/Flow Rate All
    Water Type Saltwater
    Breeding Breeding not possible at this time
    Compatibility Semi-Aggressive tanks
    Ok, For Reef Tanks? Yes
    Ok, For Inverts? Small shrimp, snails, and worms are at risk

    The Yellow Coris Wrasse is best known for its ability to eat a number of nuisance pests in the aquarium. Really they well eat just about any pest in the aquarium except for aiptasia.

    They will eat nearly any type of meaty food offered to them and do not get too large with the max size being around 5″. They are one of the more docile wrasses in the Halichoeres genus and are model citizens in your tank. They are not aggressive towards other fish nor are they particularly territorial. They do prefer a sandy substrate as they are known for burying themselves1. Keep this in mind if you are thinking about a bare-bottom setup. They are a fairly hardy fish and a good choice for a beginner.

    The great thing about the yellow coris wrasse is the availability of tank raised varieties. They is easily found tank bred either online or locally. The tank raised varieties are different than tank bred. Tank raised means the fish as been raised in an aquarium since it was very young.

    This makes the fish hardier, drama free, and easier to care for then usual wrasses you will fine. Whenever a tank raised variety is available I always recommend the tank raised aquarium fish over the older wild caught one. Technology is rapidly advancing. There is a day where we see the first tank bred wrasses. It is very difficult to do right now with current technology and research.

    The main issue with these yellow fish are their tendency to jump out of the tank when stressed. It it recommended that you cover your tank with a mesh screen  to prevent any accidental fatalities.  

    Tank Mates

    Because of the peaceful nature of the Yellow Coris Wrasse, they get along with nearly all saltwater fish. There are two main things two watch out for. The first, is because the Yellow Coris Wrasse is so active, they will bother slower moving and timid fish. Larger predatory fish will also try to eat them. Knowing this, here are a few good choices and others to avoid:

    Fish That Work Will

    Fish That Will Not Work

    • Other Halichoeres wrasses
    • Lionfish
    • Groupers
    • Eels
    • Pufferfish

    Are They Reef Safe?

    Yes, they are reef safe. I have seen reports on forums where they have eating corals or disturbs other inhabitants, but I feel a lot of these issues are mostly due to not having the fish feed well or lack of space. That being said, all fish have different personalities and you could get a yellow coris wrasse who’s personality is not the norm. The best way to prevent any tank drama is having the right tank, having them well feed, and purchasing a tank bred specimen. I have not seen them bother Softies, LPS, or SPS corals.

    FAQs

    What Do They Eat?

    Yellow Coris wrasses are carnivores by nature. They will readily eat anything you put in the tank. Brine shrimp, black worms, shellfish, mysis shrimp are some meaty foods they will enjoy.

    Within a reef tank, a Yellow Coris wrasse will eat bristle worms and copepods mainly. They are great against many types of coral pests like flatworms.

    Are They Aggressive?

    Yellow Coris Wrasses are semi-aggressive, which means they will defend territory. However, they tend to be on the lower scale of aggression. They will get along with most marine fish, even the most timid ones.

    How Fast Do They Grow?

    Yellow Coris wrasses grow very fast. They can reach adult size in within 1 to 2 years. They will display their adult colors within this timeframe. Nearly all wrasses in a home aquarium will transition into a Male.

    What’s Your Experience?

    Let us know your experience with this fish in the comments below. We love hearing everyone’s personal experience and tank stories.

    References

  • The 9 Best Aquarium Test Kits For 2026 – Reviewed

    The 9 Best Aquarium Test Kits For 2026 – Reviewed

    Test kits are something I use every single week across freshwater and saltwater tanks. Over 25 years I’ve worked through a lot of them, from cheap strip kits that give you a rough ballpark to professional-grade liquid reagent kits I now rely on. Getting your water parameters right starts with trusting your test results, and not all kits earn that trust. Here’s what I actually recommend.

    Are you struggling to find a reliable aquarium test kit?

    In this blog, we share the best aquarium test kits, from test strips to digital readers.

    With over 25 years of experience in the aquarium hobby, I’ve assisted countless clients, hobbyists, and readers like you in overcoming their water chemistry issues. I’ve personally tested these kits in real world scenarios to determine the best test kits to buy today.

    Expert Take

    Mark Valderrama — AquariumStoreDepot.com

    After 25 years in this hobby and running retail fish stores, here is what I actually tell every new hobbyist: liquid test kits beat strips every time. Not slightly. Significantly. Strips give you a ballpark. Liquid reagents give you a number you can act on.

    The four parameters that matter most are ammonia, nitrite, nitrate, and pH. Test those four and you have a complete picture of what is happening in your tank. I ran these tests on every system that came through my stores. When a customer brought in a water sample, those four numbers told us almost everything we needed to know in under five minutes.

    One habit I always pushed: keep a log. Write down your readings with the date every time you test. A single reading tells you where your tank is right now. A month of readings tells you whether it is stable or drifting. That pattern is what saves fish. Most hobbyists skip the log and wonder why problems sneak up on them.

    For freshwater, the API Master Kit is what I hand to beginners. For saltwater, Red Sea Marine Care covers the bases. If you are running a serious reef with SPS corals, step up to Hanna Checkers for alkalinity and phosphate. The precision matters at that level.

    The Top Picks

    Editor’s Choice – Freshwater
    API Master
    • Multiple parameters
    • Easy to use
    • Easy to find
    Editor’s Choice – Saltwater
    Red Sea Marine Care
    • Various Parameters
    • Easy to use
    • Easy to find
    Most Accurate
    Hanna Checker
    • Very accurate
    • Easy to use

    There are many kits available, so why not start with our top picks? Above, we have the API Master test kit, the most comprehensive kit you can buy for freshwater, and the Red Sea Marine Care, which covers the bases for most saltwater aquarium beginners. The Hanna rounds out the picks as the most accurate.

    Mark’s #1 Pick for New Hobbyists

    API Freshwater Master Test Kit

    Every customer who walked into the stores I managed and bought their first tank walked out with one of these kits. It covers the four parameters that actually kill fish during a new tank cycle, the color charts are readable without a chemistry background, and the reagents last long enough that most beginners will replace it before it expires. It is not the most sophisticated kit on this list. But it is the right kit to start with, and starting right matters more than starting fancy.

    The Candidates – A Quick Comparision

    I have to combine freshwater and saltwater test kits in one post. Below are the best test kits that get the job done for most aquarists.

    PictureNameParametersLink
    Editor’s Choice – Freshwater
    API Freshwater Master Test Kit
    API Freshwater Master Test Kit

    Various

    Buy On PetcoBuy On Amazon
    Editor’s Choice – Saltwater
    Red Sea Marine Care Aquarium Test Kit
    Red Sea Marine Care Aquarium Test Kit

    Various

    Click For Best PriceBuy On Amazon
    Seachem Ammonia Alert Seachem Ammonia Alert

    Free Ammonia

    Click For Best PriceBuy On Amazon
    C02Art Drop Check Kit C02Art Drop Check Kit

    CO2

    Click For Best Price
    Salifert Master Reef Aquarium Test Kit Combo Salifert Master Reef Aquarium Test Kit Combo

    Reef Tank Parameters

    Click For Best PriceBuy On Amazon
    Nyos Nitrate Test Kit Nyos Nitrate Test Kit

    Nitrate

    Click For Best PriceBuy On Amazon
    Hanna Checker Alkalinity Aquarium Test Kit Hanna Checker Alkalinity Aquarium Test Kit

    Alkalinity

    Click For Best PriceBuy On Amazon
    Hanna Checker ULR Phosphate Test Kit Hanna Checker ULR Phosphate Test Kit

    Phosphate

    Click For Best PriceBuy On Amazon
    API Freshwater 5 in 1 Test Strips API Freshwater 5 in 1 Test Strips

    Various

    Buy On PetcoBuy On Amazon

    The 9 Best Aquarium Test Kits

    Each aquarium test kit has their own purposes and strengths. I will go in further detail below

    1. API Freshwater Master – The Choice For Beginners

    The API Freshwater Master Aquarium Test Kit is a higher end version of their 5 in 1 test strips. This aquarium water test kit allow you to check on your pH, Ammonia, Nitrite, and Nitrate levels. Because the API Freshwater Master Test Kit uses test tubes versus test strips, it is a little more complex to use but nothing a beginner can’t figure out. This freshwater master test kit is the recommended kit for a freshwater aquarist who is starting out. API also sells an API Saltwater Master Test Kit and a Reef Master Test Kit, but there are better test kits on this list better suited for saltwater and reef tanks. Overall, this is a comprehensive and affordable freshwater master test kit.

    Just like with the test strips, the API master test kit is also a very common test kit that specialty local fish stores will use when you bring in your water to test. This is because these aquarium test kits are cheap to use. Keep that in mind if you want to save some money or want to double verify test results.

    My biggest gripe with this master test kit is the ammonia test kit. This is a total ammonia kit, not a free ammonia tester. Because of that, it is common to get false positive test results, especially on the saltwater master test kit (which is why I don’t recommend them for saltwater tanks). The color gauge is not easy to read as well. 

    Pros

    • Easy to use
    • Has all the basic parameter needs to test in a freshwater fish tank

    Cons

    • Color gauge can be genuinely hard to read under certain lighting
    • Ammonia test is total ammonia not free ammonia test
    • Color gauge can be hard to read or interpret at times

    Why the API Freshwater Master Kit Is #1

    It is not the flashiest kit on this list, but it earns the top spot for freshwater for three reasons:

    • Accuracy that strips cannot match. Because it uses liquid reagents and test tubes instead of paper strips, you get a proper color reaction. The difference between 0 ppm and 0.25 ppm ammonia matters. Strips blur that line. This kit does not.
    • 800+ tests per kit. A single API Master Kit contains enough reagent for 800 pH tests, 130 ammonia tests, 180 nitrite tests, and 90 nitrate tests. At normal weekly testing, this kit lasts 1 to 2 years before you need refills. The cost per test is minimal.
    • Color charts that work in real lighting. The comparison vials and printed charts are calibrated to be read together. Hold the tube next to the chart in natural light and the reading is clear in under 10 seconds. Not perfect, but far better than any strip you will squint at under a fish store’s fluorescent bulbs.

    The only real weakness: The ammonia test measures total ammonia, not free ammonia specifically. In saltwater tanks, this leads to false positives. For freshwater, it is accurate enough to make informed decisions.

    2. Red Sea Marine – The Top Pick for Saltwater Beginners

    Editor’s Choice – Saltwater
    Red Sea Marine Care Kit

    The Aquarium Test Kit For Saltwater

    This kit from Red Sea has all the essentials need to start your Saltwater Aquarium journey!

    Buy On Amazon Click For Best Price

    When I talked to people just starting out in the saltwater tank hobby and they are looking for a master saltwater test kit, the Red Sea Marine Care Multi Test Kit is my usual recommendation. This test kit includes tests for Ammonia, Nitrate, Nitrite, pH, and Alkalinity. It is a very generous test kit as well as you get 100 ammonia tests and 100 nitrate test. This should easily last you until the test kits expire. 

    I prefer this saltwater aquarium test kit over because they are superior quality then what the local specialty stores will usually use (API) and the nitrate test kit has a large range. Red Sea sells a nitrate pro test kit which has two different tests for low and high range. I prefer this test kit over the pro as the majority of beginners shouldn’t really have to work with ultra low levels of nitrates.

    I also really like how this includes an Alkalinity test, which will help ease your way into reef tank keeping if you chose to do that in the future.

    Pricier than API, yes. Worth it if you are serious about saltwater.

    Pros

    • Includes alkalinity test
    • Good ammonia test kit
    • Easy to read for a beginner kit

    Cons

    • Fairly pricey
    • Nitrate test is not low range for ultra low nutrient tanks

    3. SeaChem Ammonia Alert

    SeaChem Ammonia Alert

    A must for any aquarium setup. Tests free ammonia and monitors it 24-7

    Buy on Amazon Click For Best Price

    The SeaChem Ammonia Alert badge has been a mainstay for me in every aquarium I have setup. I use them on every quarantine tank I use and they go into freshwater and saltwater tanks. What sets this ammonia test kit apart from others is that it is a free ammonia tester. Free ammonia is the type of ammonia we really want to look out for as it is the most deadly.

    Many aquarium water test kits only measure total ammonia, which doesn’t give you the full picture. It also measures your ammonia levels in your aquarium water 24-7 so you will know right away if something is off. Given they work 24-7 and last a long amount of time, these are a great buy.

    The main thing with these kits is getting a proper read on the badge. I would recommend that you shine a light on the back of the badge to get an accurate measurement if you can’t tell if it is yellow or another color. They also tend to last more like 3-6 months instead of a year. Overall, these have served me very well over the years and I continue to use them. 

    Pros

    • Monitors free ammonia 
    • Monitors ammonia levels 24-7
    • Cheap

    Cons

    • Can be hard to read
    • Usually won’t last for a year like the package states

    4. CO2 Art Drop Checker – For Planted Tanks

    One of the trickier things to do in a freshwater planted tank is testing your CO2 levels. A CO2 drop checker is a great way to consistency monitor your CO2 levels. It comes with a Glass CO2 checker and a 15ml drop checker solution. It’s a reasonably priced solution that is easy to setup in a planted tank.

    If you are want to make your own test solution, here is a detailed video below so you can save a few dollars.

    To me, this is essential test equipment for a serious planted tank. The color chart can be a little hard to read at times, but if you want to monitor your CO2 levels constantly, this is the way to go.

    Pros

    • Easy to use
    • High quality

    Cons

    • Color chart can be hard to read

    5. Red Sea Marine – The Top Saltwater Pick

    Great For Reef Tanks
    Salifert Master Reef Kit

    This kit has every thing you need to test your reef tank parameters

    Buy On Amazon Click For Best Price

    When I talk to folks who are starting to get into reef tanks and want a comprehensive test kit that covers all essential parameters of a reef tank, I point them towards the Salifert Test Kit Combos. This has 6 tests in total, pH, Nitrate, Magnesium, Phosphate, Alkalinity, and Calcium. You can run any reef tank setup you desire with this test kit package. 

    This will get you going for a reef tank. It is on the pricey side, but keep in mind that you are getting 6 test kits at once. For those of you looking for a digital readout that is easy to read, look at the Hanna Checkers listed below in this post.

    Pros

    • Comprehensive – has every test kit you need to run a reef tank
    • High quality test kits overall
    • One of the better calcium test kits on the market

    Cons

    • Pricey
    • No digital read out like Hannas

    6. Nyos Nitrate – For Saltwater Tanks

    Best For Nitrate Testing
    NYOS Nitrate Test Kit

    The best nitrate test kit on the market. Very accurate and easy to use

    Click For Best Price Buy On Amazon

    If I have a saltwater hobbyist looking for a high quality nitrate test kit as a single purchase, the Nyos Nitrate Test Kit is the test I recommend. It’s the easy to read, easiest to know, one of the most accurate, and covers a wide range of levels. 

    I actually have a Red Sea saltwater aquarium test kit that I usually use, but once I ran out of nitrate tests, I switched to this kit. It’s just far easier to use and read in my opinion and I continue to use this kit today on my reef tanks.

    Pros

    • Easy to use
    • Cheaper than other kits
    • Easy to read test results

    Cons

    • No ideal for ultra low nutrient tanks

    7. Hanna Checker Alkalinity – For Reef Tanks

    Hanna Alkalinity Checker

    The most accurate Alkanity test on the market. Highly recommended for reef tanks

    Click For Best Price Buy On Amazon

    Reef tank enthusiasts demand high end solutions for their aquariums. The Hanna Checker Alkalinity tester is one such solution. This kit is easy to use and genuinely accurate. I am a big fan of Hanna Checkers because they give you a digital readout so there is no guess work on reading some color chart or trying to figure out the colors. 

    The kit is expensive, no question about it. The kit itself is as expensive as the test combos from Salifert and Hanna is known for having test regents that do not last very long. The refills from Hanna will only last 25 tests so keep this in mind if you want to purchase one. It is a very accurate kit though and I would highly recommend it if you are planning to keep a high end reef full of stony corals.

    Pros

    • Extremely accurate test results with no guess work
    • Very quick to test

    Cons

    • Expensive
    • Regents do not last very long

    8. Hanna Checker ULR – For Reef Tanks

    Hanna Phosphate Checker

    The most accurate phosphate checker on the market. Great for low nutrient reef tanks

    Click For Best Price Buy On Amazon

    Phosphate level testing is a major deal in a reef tank. Too low can result in nuisance outbreaks like dinoflagellates and bleaching of stony corals while too high can lead to nuisance algae. I prefer Hanna’s ULR Phosphate tester over their standard test as it is more accurate. 

    This is an expensive test kit, but it is the phosphate tester of choice in the industry without a doubt. It is extremely accurate and delivers results quickly.

    Pros

    • Extremely accurate with no guess work
    • Very quick to test

    Cons

    • Expensive
    • Regents do not last very long

    What Test Strips and Cheap Kits Miss

    Here is where bargain options fail when it counts:

    • Color ambiguity. Test strips produce a single blended color from multiple reagents saturated into one pad. When nitrite reads 0.5 ppm, the strip color is almost indistinguishable from 0 or 1.0 ppm. You are not getting a reading. You are getting a guess.
    • No ammonia test on basic strips. The popular API 5-in-1 strip tests pH, nitrite, nitrate, carbonate hardness, and general hardness. Ammonia is not included. That is the one parameter most likely to spike during a new tank cycle and the one most likely to kill your fish. You need a separate ammonia test, which defeats the convenience argument.
    • Narrow pH range. Most test strips cap out at pH 8.5. If you are running a tank that drifts above that, or you need to confirm pH below 6 for soft-water species, the strip hits its limit and you get no usable reading.
    • Reagent cross-contamination. Strips that test multiple parameters at once can have reagents bleed into adjacent pads when wet. The result is a false reading on a parameter that is actually fine.
    • Expiration disguised as accuracy. Old strips fade their color range before they show any visible sign of aging. A strip kit that is 18 months old may read “fine” on nitrate even when your tank is running at 60 ppm. Liquid reagents lose potency more predictably and visibly.

    9. API Freshwater 5 in 1 Strips – Easy and Affordable

    API Test Strips

    This is a basic test kit that are used in many pet stores. There are better options, but this is readily available at most stores

    Buy On Petco Buy On Amazon

    The API 5 in 1 test strips are a great way for a beginner to test their freshwater tank. The aquarium test strips will test pH, Nitrite, Nitrate, Carbonate and General Hardness. With the exception of ammonia, this has everything you need to test your freshwater aquarium. It is very easy to you as all you need to do is get some sample water from your aquarium and dip the strip. The results show up quickly you can compare to the color chart that comes with API test kits. These test strips are also one of the most affordable kits in the hobby.

    Because a test strip kit is so affordable, it is the test kit you will see used by aquatic departments at chain pet stores. These test strips are not very accurate, which is why this is not recommended for saltwater aquariums. It also lacks an ammonia test, so you will have to purchase a separate tester for that.  

    Pros

    • 5 tests in one
    • Simple to use
    • Cheap

    Cons

    • Widely available but accuracy does not justify relying on it as your only test
    • No ammonia test
    • Not super accurate

    Quick Verdicts: Buy vs. Skip

    Buy the API Master Kit if:

    • You are setting up your first freshwater tank
    • You need to track your cycle and want reliable ammonia readings
    • You test weekly and want a kit that lasts 1 to 2 years without restocking
    • Your local fish store uses API and you want to cross-check their readings at home

    Skip the API Master Kit if:

    • You are running a saltwater or reef tank (false positives on ammonia)
    • You need ultra-low nitrate readings below 1 ppm for a high-end reef
    • You want a digital readout with no color-matching required

    Buy Hanna Checkers if:

    • You keep SPS corals and alkalinity swings cost you frags
    • You want a digital number, not a color you try to match under poor lighting
    • You are running a low-nutrient reef where phosphate needs to be exact

    Skip Hanna Checkers if:

    • You are a beginner who does not yet have a stable tank to optimize
    • The reagent cost ($10 to $15 per 25 tests) bothers you at your testing frequency
    • You are running a FOWLR tank that only needs basic parameter tracking

    Why Do We Test Our Water?

    Good question to ask yourself. Experienced hobbyists always say test your water, like that answers the question. Here is the real reason I do it. To me, this is like getting a check up on your tank. You can see what is out of wack, or how much you need to change to get it back in balance. Ideally, you will want to perform water testing before you make a water change because they will tell you where your levels peak. Here are other reasons.

    When your tank is new

    This is the major reason to get into the habit of water testing. New tanks are unstable and if you are doing a fishless cycle, you will need to test your water to see when it is safe to add fish and other inhabitants into your tank. Testing for Ammonia and Nitrites is really important when you are going through the cycling process. As your tank matures, you will be mostly focused on nitrates and pH levels.

    It will tell you if you need to dose

    Both planted tanks and saltwater reef tanks have additional parameters you need to monitor to ensure healthy growth of your plants or corals. If parameters are unstable, your plants or corals will suffer. Testing parameters like alkalinity tells you if you need to adjust your dosing schedule. The amount you need to dose changes over time as your plants or corals grow.

    It will tell you if a water change is actually necessary

    Believe it or not, planted tanks and saltwater reef tanks can be built so that constantly changing your water can be a thing of the past. I’ve frequently built reef tanks that had complete nitrogen cycles. They were so efficient that I had a lack of nitrates and phosphates, and I actually had to dose them to keep my corals healthy!

    In most setups, with plants and modern reefs you may not need to change your water every week. This is where water testing comes into play. Test your water quality and see where your levels stand. If the water conditions are stable and not out of wack, then there is no need to make a water change!

    It’s best to only perform water changes when they are necessary – especially with reef tanks. They thrive off stability in your tank water. The more delicate corals you have, the more stability comes into play. If you change water when it’s not necessary your levels will change and may cause stress to your more sensitive corals like SPS corals.

    Parameters for a Freshwater Tanks

    Let’s talk about the water quality parameters you want to test for in a freshwater aquarium. Below are the main water parameters to test on a regular basis:

    Ammonia

    Ammonia is the result of waste being excreted from fish and decaying matter. There are two types of ammonia that are present in the aquarium, These are total ammonium (NH4) and free ammonia (NH3). Total ammonia is the ionized version of ammonia. While it is toxic, it is not as toxic as free ammonia in your tank water.

    Most water test kits will test for total ammonia, which can make the test results of the testing kit not always as reliable. Free ammonia is the most dangerous form of ammonia. Test kits that detect free ammonia are considered more reliable to use.

    Nitrite

    As bacteria breaks down ammonia, it converts ammonia to Nitrite, a less toxic substance. While it is less toxic than ammonia, over time, high levels of nitrite will disrupt the metabolism of your fish and eventually destroy their oxygen carrying cells, resulting in the suffocation and death of your inhabitants.

    Nitrate

    The third form of the nitrogen cycle. This is the least toxic of the 3 forms in the nitrogen cycle and will be present in your water. At low levels it is not toxic to your fish, but at elevated levels it will cause stress to your fish and make them susceptible to disease.

    Nitrates can be managed with a proper water change schedule. It is one of the parameters you will always need to test regularly with accurate aquarium test kits.

    pH

    pH is the measurement of hydrogen ions. The lower the pH of the aquarium water, the more acidic it is and the higher the pH the more alkaline it is. In freshwater aquariums, different setups will have different pH needs so do your research on what pH level is desired for the inhabitants you keep. In general, pH for freshwater aquariums range from 6-8. Worth knowing: ammonia is more toxic to fish at higher pH levels and the production of nitrifying bacteria slows down when pH goes below 6.

    Water Hardness

    Aquarium water hardness is the measurement of calcium and magnesium ions. Some fish thrive in hard water, like cichlids while other fish like discus prefer soft water. Hardness is also really important for fish breeders, as some types of fry require soft water. To know your ideal hardness, it is best to research the specific type of fish you want to keep and check their requirements as it varies in a freshwater tank.

    Carbonate Hardness (KH)

    The range for carbonate hardness depends on your inhabitants in the freshwater aquarium. Some species prefer a low carbonate hardness while others require a higher carbonate hardness. The key is that once you know the appropriate water conditions and carbonate hardness levels, you should maintain this water quality in your tank.

    Parameters for a Freshwater Planted Tank

    These are additional water quality parameters to test for in a freshwater planted tank.

    Phosphate

    Phosphate is a nutrient that supports photosynthesis. It’s a parameter that is vital to maintain for freshwater aquariums.

    Iron

    With planted tanks there are macronutrients to supplement like nitrogen, phosphorous, and potassium. Iron is what we call a micronurient. It is a trace element that is needed for plants and one of the common miconutrients that we monitor in planted tanks.

    Parameters for a Saltwater Tank

    The main parameters in a saltwater tank are mostly the same, and are Ammonia, Nitrite, Nitrite, Phosphate, and pH. The other main parameter is salinity.
    Salinity can be measured with a refractometer and regularly calibrating it with a calibration fluid. For tanks with saltwater fish only, you can run your aquarium at 1.020, but reef tanks will generally run at 1.025 – 1.026 or 35 PPM. Salinity can change as your water evaporates over time. In order to prevent swings, consider investing in an auto top off unit. These units will fill your aquarium with fresh water and keep your water level and salinity stable.

    My Pick
    Refractometer

    A basic refractometer and calibration fluid is all you need to efficiently measure salinity

    Buy On Amazon Click For Best Price

    Parameters for a Saltwater Reef Tank

    When you move into a saltwater reef tank, there are more water parameters to test in order to ensure your corals thrive. Below are the main parameters to test.

    Alkalinity

    As mentioned in our Best Reef Salt Mix post, alkalinity is the fuel to build coral skeletons. Calcium and alkalinity relate to each which is way two-part solution is a common way of supplementing alkalinity.

    Calcium

    Calcium is used when corals build their skeletons and also by coralline algae. Without calcium, your corals will not build their skeleton and cannot maintain them.

    Magnesium

    This is the catalyst for the reefs. Without magnesium, the elements in the reef tank cannot interact.

    Trace Elements

    Elements like Silica, Iodine, Strontium, Boron, Iron, and minor trace elements are typically tested through ICP water testing, which is something to consider if you are planning to run an advanced reef tank filled with Acropora corals.

    Frequently Asked Questions

    How Often Should I Check My Water?

    I would recommend that you test your water once a week, on the same day, and around the same time. Let your test parameters dictate when you need to make a water change. This statement is especially relevant for heavily planted freshwater tanks and saltwater tanks with live rock and corals. Plants and corals can remove nitrates and phosphates in the aquarium to the point where you may not need to do water changes as frequently. In these environments, you can have water that is too clean which means your plants and corals may not thrive because nutrients are not available for your plants and corals to grow. As long as you test every week you can say on top of the changes in you aquarium and adjust your maintenance and dosing schedule as needed.

    Do They Expire?

    They actually do. Most test kits will expire in about 1 to 2 years. You should always check the expiration on your test kits and replace when the date passes. The expiration is a guarantee on accuracy as the regents have a limited shelf life. They lose their potency over time leading to less accurate tests. 

    What is the Top Freshwater Choice?

    The API Master Test Kit is the best freshwater kit for most people. It has just about everything you need to start out and is fairly accurate for a freshwater aquarist. It is cheap and will last a long time. Really can’t ask for more.

    What is the Top Saltwater Choice?

    Without a doubt, the Red Sea Marine Care Multi Test Kit is the best core test kit to buy for a saltwater aquarium. It is a higher grade test than what you will get at the local fish store and it comes with an alkalinity tester so you are covered if you decide to move onto a reef tank in the future.

    What is the Top Saltwater Reef Choice?

    If you are looking for the highest grade equipment for your reef tank, you cannot go wrong with Hanna Checkers for Alkalinity and Phosphate. For Nitrate, The Nyos test kit is the best for nitrate. For everything else, I would consider Salifert.

    If you are running a high end SPS coral tank with designer acropora, I would highly recommend doing ICP testing to regularly check on all essential parameters.

    What should I check for in my tank water?

    The most basic water parameters to test in any aquarium water would be ammonia, nitrite, nitrate, and pH. Other parameters to test will be required depending on your setup. Planted tanks require Phosphate, Iron, and CO2 levels to be monitored. Saltwater tanks require salinity. Saltwater reef tanks require alkalinity, calcium, and magnesium

    How Accurate Are The Strips?

    They are accurate for basic setups. However, as you advance in the hobby you will want more accurate testing which is why I recommend API test kits for freshwater and Red Seas kits for saltwater

    Conclusion

    The test kit is not optional equipment. It is how you know what is actually happening in your tank. Every fish death that looks like a mystery is almost always a parameter problem that went undetected for too long. Test weekly. Keep a log. Act on the numbers. That is the whole job.

    Aquarium test kits do not need to be complicated. As you have seen from many of these test kits, nearly all of them are easy to use and understand. Testing your water is a regular part of aquarium maintenance. Continue to test your water weekly to keep up with changes in your tank. This will allow you to respond before things go downhill. I hope this guide help you get the test kits that work with your budget and needs for your aquarium. If you have any questions, leave a comment below. Thanks for reading!


    🔧 Want to learn more? This article is part of our complete Aquarium Equipment & Gear Guide. your ultimate resource for filters, heaters, lights, pumps, tanks, and more.