Reef salt mix is one of those decisions that quietly affects everything in your tank. alkalinity swings, coral growth, and even equipment longevity. I’ve mixed and tested a lot of these for my 125-gallon reef over the years, and the differences between brands are more significant than most beginners realize. Some are dead-on consistent batch to batch; others drift enough to cause problems. Here’s what I’ve found actually holds up.
Mark Valderrama | Expert Take
Reef salt is not where you cut corners. The difference between a salt that mixes at NSW parameters consistently and one that doesn’t is the difference between stable coral and a tank that fights you every water change. I stocked and mixed dozens of salts across store displays over 25 years. Consistency batch to batch matters more than the NSW label on the bucket.
Are you struggling with finding a quality reef salt mix?
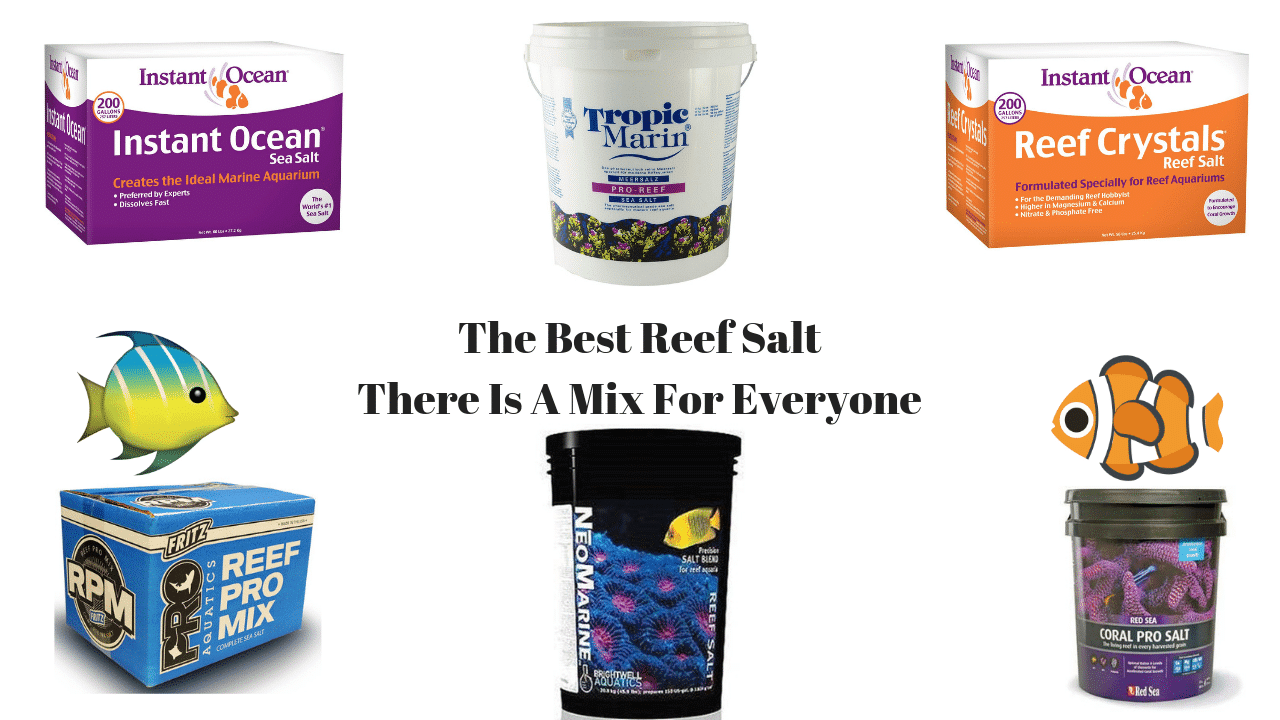
In this blog, we share the best salt mix products for reef tanks, from those designed for high end reefs to basic salts meant for fish only tanks.
With over 25 years of experience in the aquarium hobby, I’ve assisted countless clients, hobbyists, and readers like you in overcoming their salt mix decisions (and believe me, there are so many mixes out there). I’ve personally tested these products in real world scenarios to determine the best reef salt maxes on the market.
The Top Picks
Why Ranking Order Matters: What I Weigh
- Batch-to-batch consistency — this is the most important factor. A great average number means nothing if the next bucket is off.
- Calcium / alkalinity / magnesium ratios out of the bucket — how close to NSW, and how safely you can do water changes without spiking parameters.
- Dissolve time — faster is better when you’re mixing 50+ gallons for display tanks.
- Particulate clarity — some cheaper mixes leave visible sediment or cloud water longer.
- Price per gallon mixed — premium salts cost more upfront but often require less dosing to compensate.
- Availability — a great salt you can’t get in a pinch is a liability.
- For The Pro Reefer
- Best SPS Salt
- Great Value & Great Salt
- Best Mixed Reef Salt

- Great Price
- Best Beginner Salt
It really depends on what corals you are planning to keep. There is a quick list for you depending on your needs below:
- Best Beginner Reef Salt – Instant Ocean Reef Crystals
- Best Mixed Reef Salt – Brightwell NeoMarine
- Best SPS Heavy Reef Salt – Tropic Marin Pro Salt
Buy vs. Skip: The Short Answer
Buy a premium reef salt if: you’re keeping SPS or demanding corals where NSW parameters are essential. Batch variance will hurt you, and it will show up in your coral health before your test kit catches it.
Skip the premium and save money if: you run a FOWLR or softies-only tank. A reliable lower-tier salt does the job, and you’re not putting parameter-sensitive animals at risk. Spend the savings on livestock.
The Candidates
Now let’s talk about the reef salt mix candidates themselves. Below is a list of the best reef salt mixes available today.
| Picture | Name | Best For | Link |
|---|---|---|---|
|
Editor’s Choice!
|
Tropic Marin Pro Reef Salt |
SPS Tanks |
Click For Best PriceBuy on Amazon |
|
Best Value
|
Brightwell Aquatics Neomarine Salt |
SPS Tanks |
Click For Best PriceBuy On Amazon |
|
Budget Option
|
Instant Ocean Reef Crystals |
Mixed Reefs |
Click For Best PriceBuy On Amazon |
|
Premium Pick
|
Aquaforest Probiotic Reef Salt |
SPS Tanks |
Click For Best Price |
 |
Red Sea Coral Pro Salt |
SPS Tanks |
Click For Best PriceBuy On Amazon |
 |
Instant Ocean Sea Salt |
Fish Only Tanks |
Click For Best PriceBuy On Amazon |
 |
Fritz Reef Pro Mix |
LPS & Mixed Reefs |
Click For Best PriceBuy On Amazon |
The 7 Top Reviews (Updated 2023)
Now let’s go into detail and see why each mix was picked
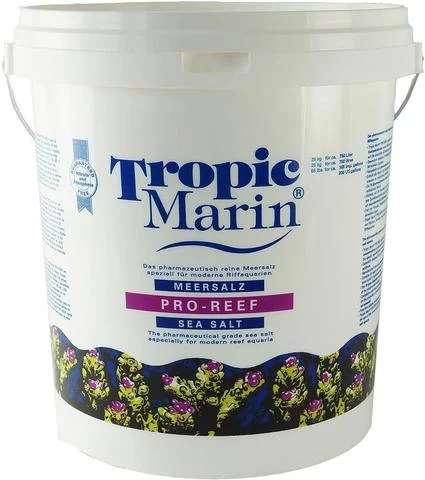
1. Tropic Marin Pro – For SPS Tanks
Tropic Marin Pro Reef Salt
The Best Reef Salt Mix
With pharmaceutical level ingredients and a guarantee of all 70 trace elements, Tropic Marin is ideal for tanks full of designer corals
Tropic Marin Pro Reef Salt is the best salt mix you can purchase for your reef tank available on the market today – period. It is formulated with pharmaceutical level ingredients and one of the fully synthetic salt mixes on this list (Brightwell being the other).
Tropic Marin is a brand you won’t see regularly at the local fish store or chain stores, but they have been a major name brand all across the world, particularly in Europe.
The pro reef salt has the most ideal big three parameters for SPS tanks. The parameters out of the boxes are perfect and makes it very safe to make water changes so you don’t have to worry about swings when you make a water change. The stability and quality control of this mix makes this pretty much a must for those with the most demanding corals like Acroporas.
It’s the one of most expensive marine salts on the list, but if you have prized designer SPS corals, Tropic Marine Pro is what you will want in your reef aquarium.
Mark’s Top Pick: Why Tropic Marin Pro
I’ve mixed a lot of salt for a lot of display tanks. Tropic Marin Pro is my pick because it is the most consistent salt I’ve worked with across multiple batches over many years. When you’re mixing for a 125-gallon reef with designer Acroporas, you don’t want surprises between buckets. This salt doesn’t give you any. The pharmaceutical-grade sourcing and the guarantee of all 70 trace elements aren’t just marketing — the parameters prove it every time you test.
Specs:
- Alkalinity – 8.5 DKH
- Calcium – 450 PPM
- Magnesium – 1380 PPM
Pros
- Pharmaceutical level ingredients
- Perfect big 3 parameters out of the box
- Guarantees ALL 70 trace elements found in seawater
- Great quality control and brand name
Cons
- Expensive
- Hard to find locally
Best For: SPS Tanks
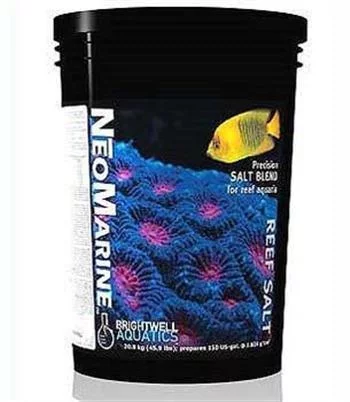
2. Brightwell Aquatics Neomarine – The Choice For Worldwide Corals
BrightWell Aquatics NeoMarine Salt
Best Value
The salt of choice for World Wide Corals. It is a top tier salt mix with a reasonable price
I’ve recommended Brightwell Aquatics products in the past like their Neophos and Mircobacter 7. The founder of Brightwell is the former owner of Kent Marine and their products are extensively researched and tested over a multi-year period. The Brightwell NeoMarine Salt is so well regarded, that it is the reef salt of choice for World Wide Corals, one of the major coral sellers in the United States.
Brightwell Aquatics NeoMarine Salt not only has all the essential elements of a salt mix, but also does not have anti-caking agents. Anti-caking agents tend to turn your saltwater holding buckets and vats brown over time. What I feel separates NeoMarine from other salt mixes aside from their research and efforts are the parameters of the salt.
Many reef mixes you will see on this list will have evaluated Alkalinity. NeoMarine has a lower Alkalinity, which is great for SPS tanks. SPS tanks need to have extremely stable levels in the aquarium and having a mix with evaluated ALK is catastrophic as the Alkalinity levels can spike after a water change. This mix is perfect as you can dose to 7.5 – 8.0 and not worry about a water change completely throwing off your key parameters.
Specs:
- Alkalinity – 7.5 DKH
- Calcium – 413 PPM
- Magnesium – 1290 PPM
Pros
- Low ALK is perfect for SPS tanks
- Salt mix package is measure at 35 PPM – you will actually get the volume stated on the box
- Used by big coral dealers
Cons
- Expensive
- Low ALK is a disadvantage for those who don’t dose (e.g. – nanoreef tanks)
- Hard to find locally
Best For: SPS Tanks
3. Instant Ocean Crystals – Budget Friendly

Instant Ocean Reef Crystals
Budget Option
The of the most available and affordable salt mix. Many successful reefs use this salt
Instant Ocean Reef Crystals Reef Salt is the budget friendly reef salt for many of us with reef tanks. It is also the most readily available reef salt on the market so if you are in a rush or bind it’s very easy to get locally even from a chain pet store. It’s the same quality and field tested Instant Ocean salt we are familiar with the industry, but with a better formula designed for mixed reef tanks.
There are many incredible looking reef tanks that use Instant Ocean Reef Crystals and you will save some money using it over the other brands. There are a few cons here though. The first thing is the anti-caking agents in the salt mix. If you keep water changing stations or store saltwater there is a high likelihood that the agents will eventually encrust your containers with brown crud. This is really annoying to clean and can lead you to having to replace containers.
The other issue is the evaluated alkalinity of the mix. Instant Ocean Reef Crystals can be as high as 13, which is disastrous to an SPS tank after a water change. This salt will work great for softy and LPS tanks that can take the swings better, but you run the risk of problems after water changes with this mix with sensitive SPS corals like Acros.
Specs:
- Alkalinity – 13 DKH
- Calcium – 490 PPM
- Magnesium – 1440 PPM
Pros
- Cheap for a reef salt mix
- Readily available everywhere
- Great quality control and proven field results
Cons
- High alkalinity makes this not safe for Acro heavy tanks
- Anti-caking agents
Best For: Mixed Reef Tanks
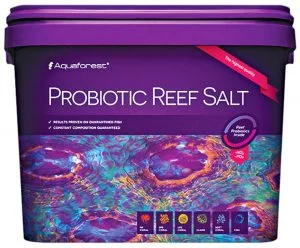
4. AquaForest Probiotic – The Only One That Is ICP Tested

Aquaforest Probiotic Reef Salt Mix
The Europeans do it again with a revolutionary probiotic salt mix. Every batch is ICP tested
AquaForest has been quietly making a name for itself in the reef industry. They started in Europe in the late 1990s and recently entered into the US Market. With brand names like Instant Ocean and Red Sea dominating online and Fritz’s presence at local fish stores, AquaForest is unknown to most hobbyist.
However, this is the best salt money can buy today. Every batch is ICP tested. In fact, you can look up the test results online with every salt bucket you purchase. The owner of AquaForest uses all his products on his tanks. If you have seen his Instagram channel, you can see how incredible his tanks look.
It is very expensive and hard to find locally, but if you have designer SPS corals, this is the reef salt to buy. It doesn’t make the #1 pick because of its price, not because of its quality.
Specs:
- Alkalinity – 8.3 DKH
- Calcium – 460 PPM
- Magnesium – 1360 PPM
Pros
- All salt batches ICP tested
- Probiotics
- Great field results
Cons
- Expensive
- Hard to find locally
Best For: SPS Tanks
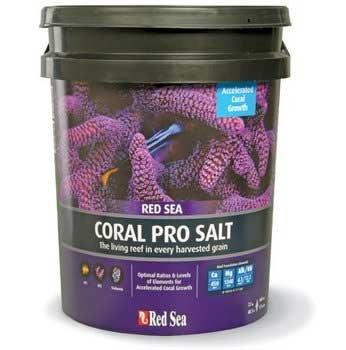
5. Red Sea Coral Pro – Made From the Actual Red Sea
Red Sea Coral Pro Salt is about as close as you can get from natural sea water from how they formulate their mix. The salt is collected from the Red Sea. This produces an all natural eco-friendly mix that is one of the best mixes in the industry. You can learn more about their process in the video below:
Red sea coral pro salt is one of the more trusted mixes used by frag sellers and SPS stick heads. There are actually two mixes Red Sea sells. The pro mix has higher alkalinity while the regular Red Sea mix has lower alkalinity. Both work great, but I lean on the regular mix if you have a heavy SPS tank for better Alkalinity stability.
The main issue with the Red Sea Coral Pro is its availability. Chain stores do not carry it and you will mostly see higher end local fish stores that specialize in marine livestock carry them.
Specs:
- Alkalinity – 12.2 DKH
- Calcium – 450 PPM
- Magnesium – 1340 PPM
Pros
- Naturally harvested
- Two choices with regular and pro depending on what alkalinity you desire
- Great quality control and brand name
Cons
- Expensive
- Hard to find locally
Best For: SPS Tanks
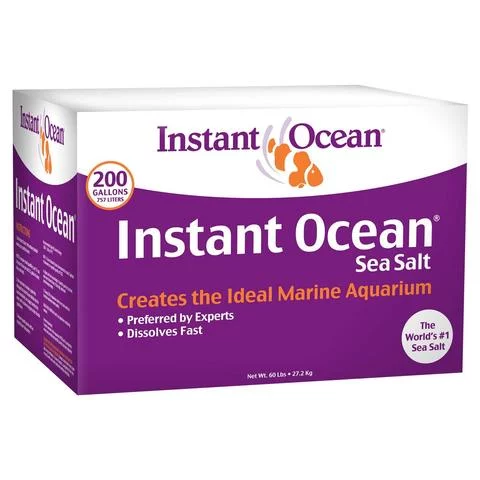
6. Instant Ocean – Top Choice For Fish Only Tanks

Instant Ocean Sea Salt
Instant Ocean Sea Salt is the best selling aquarium salt in the world. Used by public aquariums and research facilities
Instant Ocean Sea Salt is the most used sea salt in the world. Used by hobbyists, public aquariums, and research facilities. Instant Ocean has been a mainstay in the industry for over 50 years. They have created the benchmark for the industry and quality control standards. No other salt on the market has the history and field results of proven usage then the Instant Ocean brand.
That being said, Instant Ocean Sea Salt is made for fish only tanks. It does not have the evaluated levels and trace elements that Reef Crystals have. However, it is a great aquarium salt mix for those with fish only, fish only with live rock, and soft coral dominated tanks. The mix also has anti-caking agents which will turn your buckets and holding vats brown over time with crud making non-ideal to use for those who like to store saltwater.
Specs:
- Alkalinity – 11 DKH
- Calcium – 400 PPM
- Magnesium – 1350 PPM
Pros
- Cheap
- Readily available everywhere
- Great quality control and proven field results
Cons
- Lacks evaluated levels and elements for hard coral heavy reef tanks
- Anti-caking agents
Best For: Fish Only Tanks
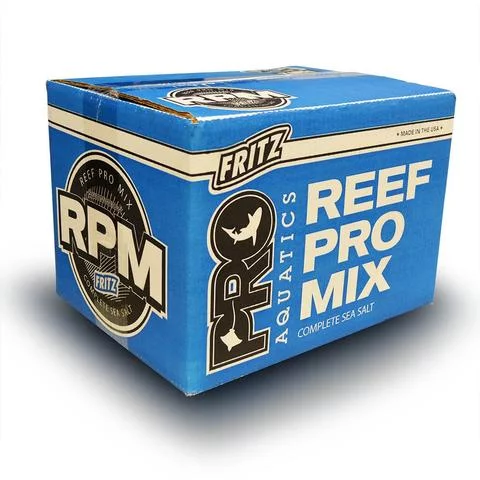
7. Fritz Pro Mix – Readily Available Quick Mixing Product
Fritz Reef Pro Mix
One of the fastest dissolving and readily available salt mixes at local fish stores
If you follow reef YouTubers around, you likely have heard of Fritz Reef Pro Mix. Fritz has a big marketing machine that sponsors a lot of YouTubers and they tend to be everywhere at the local fish stores. While they are everywhere, this is not the best reef salt mix on the list. It’s mostly on here because it’s so readily available at local fish stores and they regularly go on sale where you can purchase boxes at huge discounts.
The main advantage with Fritz Reef Pro Mix is that it mixes very fast. I say the mix time is around that of Brightwell’s product. For a mixed reef and smaller reef tanks I say this is a great salt mix for you. However, if you are serious about Acropora corals, I steer away from this mix.
This is because it is well documented that Fritz has had quality control issues in the past. When they first went to market, there were some batches with different Alkalinity numbers. I have also seen a few mixes that have failed ICP tests with several parameters being too low. Given those reasons, I don’t recommend this mix for Acroporas.
It is readily available at the local fish stores and online though, meaning you won’t have to worry about getting your normal salt mix in a pinch if you need to get it locally.
What Cheap and Inconsistent Salts Miss
- Batch variance that throws your parameters off. You test one bucket, dial in your dosing, then the next bucket has different alkalinity. That gap shows up as bleaching or stalled growth before you figure out what changed.
- Low magnesium out of the bucket. Some budget mixes are short on Mg, which means calcium and alkalinity won’t interact correctly no matter how much you dose.
- Excess nutrients from impurities. Lower-grade salt sources can introduce phosphates and nitrates into a tank you’re trying to run lean. This is the one that trips up SPS keepers who can’t figure out why their nutrients won’t drop.
Specs:
- Alkalinity – 8.0 – 8.5 DKH
- Calcium – 400-450 PPM
- Magnesium – 1300-1400 PPM
Pros
- Quick mixing and no caking agents
- Readily available online and locally
- Tends to go on sale locally
Cons
- Expensive
- Bad quality control history
Best For: LPS and Mixed Reef Tanks
How To Chose A Mix
This is where we start getting into details. What type of tank do you have and making sure you dose to what your salt mix is. There are even tanks where people do not dose, so a mix with evaluated parameters will make the most sense for those people. Nano reef tanks are good candidates for a salt mix with higher parameters since they sometimes are not dosed as they rely on water changes to get parameters back up.
Pro Tip – Pick One Closest To Your Ideal Parameters
This relates most to reef tank owners. Every tank has different needs depending on the type of corals you have. For example, SPS corals like Acropora are going to need different parameters and trace elements vs. say a softie tank. Softie and LPS tanks can tolerate more swings so going with a mix with a high alkalinity isn’t going to hurt you.
However, for a Acropora heavy tank, many reefers like to keep their alkalinity lower in order to keep it more stable and closer to natural sea water. Then there is fish only and fish only with live rock (FOWLR) setups. Fish only saltwater aquariums are not going to need an expensive or advanced salt mix so a budget mix will do the job. Same can be said with a FOWLR tank.
Synthetic Versus Mined Reef Salt Mixes

In the list I’m going to provide you will see that I label each marine salt for you as synthetic or mined. Mined reef salt mixes come from the mined evaporated natural seawater ocean deposits. Others will be pulled from the ocean like Red Sea Salt. There is also mainly synthetic made salt, which is very popular in Europe. Salt mixes that are mostly or 100% synthetic represent some of the highest quality and most expensive reef salt mixes in the market.
Aquarium Mix Parameters And Major Elements
Let’s talk about the main parameters that make up a reef salt mix.
- Calcium – This is the major foundation of the reefs. Through a process called biominealization, corals skeletons are created. Without calcium, hard corals cannot continue to build and maintain their skeletons.
- Alkalinity – Alkalinity is related to pH but also gives us awareness of available bicarbonate in our tanks. Without a stable alkalinity level, our corals will not have the fuel to build their skeletons. Stable alkalinity will also prevent pH fluctuations. Calcium and Alkalinity closely relate to each other as dosing calcium will reduce alkalinity so keeping a balance is essential if you are having to dose elements. This is why two-part solutions are so common in reef aquariums.
- Magnesium – Magnesium is the catalyst of the reef. They ensure alkalinity, calcium, and various reef foundation elements can interact with each other. It doesn’t need to be dosed as often, but if it is out of wack, the your corals start suffering.
There are many other trace elements I can discuss, but for most aquarists, these are the big 3 we concern ourselves with and test for in our reef tanks.
FAQs
Below is a list of common questions I get asked. Hopefully, these answer your questions.
Which Should I Use?
It actually depends on your reef tank setup and the corals you keep. A soft coral dominated tank will not have as many needs as a Heavy SPS tank. If you are just getting started out, you cannot go wrong with the Instant Ocean Reef Crystals salt as this will work for most reef tanks including mixed reefs. But let’s go further into the question.
Where Should I Purchase My Mix?
It’s a known fact in our hobby that most retailers lose money selling salt, especially online retailers as the shipping cost is very high in comparison to other dry goods. This means there are two ideal places to purchase your salt mix. At your local fish store, where your fish store gets salt in pallets so they don’t lose money or on an online merchant like Amazon where you know you are not making the retailer lose money shipping the box or bucket of salt to you.
This is the main reason I stopped selling salt mixes online. It’s just not worth taking the losses to ship them.
How Do I Mix It For My Tank?
It’s actually easier than you think. The main thing since I’m going to assume that you are planning to do a reef tank or fish only with live rock setup is that you use RODI water made from an RODI System.
you’ll want to use at least a Refractometer along with 35 PPM calibration fluid to ensure you have the right salinity. Keep in mind that the temperature of your water matters when measuring your salinity so try to make sure your temperature is close to the ideal temperature using an Aquarium Heater to bring the water inside your home if you need to cool it down.
Once you have the RODI water at the correct temperature you’ll want to put in circulation from an Aquarium Wavemaker or Aquarium Return Pump. Then put in your salt according to the manufacturer’s instructions until you get to 35 PPM (or 1.026).
you’ll want to wait at least 20-30 minutes every time you have to add salt in when testing your salinity. After you have the salt at the correct salinity, let it mix in the container. I usually let it mix overnight and test the salinity again because I do my water changes.
Below is a video from Raising Reef with better visual introductions and with directions for those of you who like to use water changing stations or store water. This is one of the more detailed videos on the net that describes the process so give him a sub and like if you like the video.
Closing Thoughts
Every water change is a chance to reinforce stability or introduce variance. The salt you choose determines which one it is. If you’re running a serious reef — SPS corals, tight parameter windows, livestock you actually care about — invest in a salt that is consistent batch to batch. The upfront cost per bucket is nothing compared to the cost of a crash. For FOWLR and softy tanks, spend the savings on something else. Know your tank, know what your corals need, and match your salt to that. It’s one of the few decisions in this hobby where buying once and buying right actually pays off.
— Mark Valderrama, AquariumStoreDepot
🔧 Want to learn more? This article is part of our complete Aquarium Equipment & Gear Guide. your ultimate resource for filters, heaters, lights, pumps, tanks, and more.