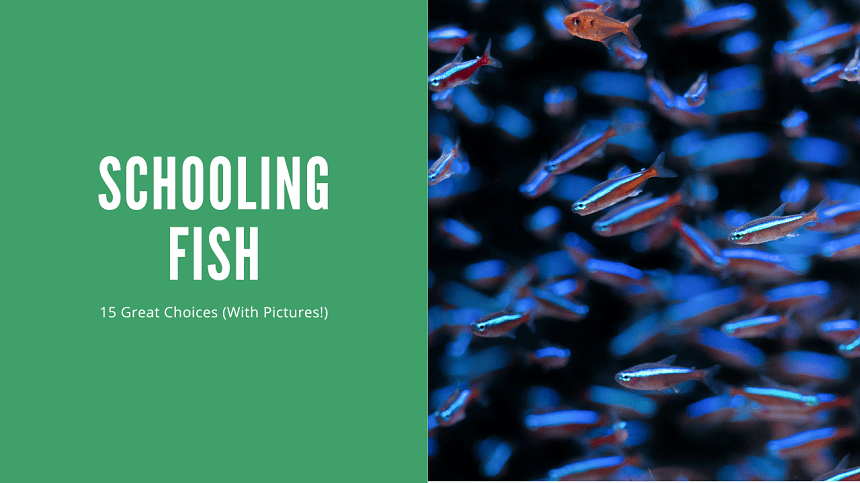
A proper school of fish is one of the things that makes a freshwater tank genuinely come alive. After 25 years in this hobby, I still find a tight-moving school of rummy nose tetras or a shoal of cardinal tetras more visually impressive than most single showpiece fish. The effect doesn’t happen with three fish. It barely happens with six. You need numbers, and most people don’t commit to them.
Here’s what I tell anyone building a community tank: decide on your schooling fish first, decide how many you’re actually going to keep, and build the rest of the tank around that. Ten rummy nose tetras in a 20-gallon planted tank will outperform 40 species in a mixed 75-gallon every time in terms of visual impact and fish health.
Expert Take | Mark Valderrama, AquariumStoreDepot
Six is the minimum for most schooling fish. It’s not the goal. Ten is where most species start showing the synchronized, tight-grouping behavior people actually want to see. I’ve kept schools from 6 to 30+ and the difference in behavior is not subtle. Bigger groups school more. Smaller groups scatter and stress out. Commit to the numbers and you’ll get the tank you’re picturing.
Schooling vs. Shoaling: The Distinction That Actually Matters
Most hobbyists use these terms interchangeably. They’re not the same thing, and knowing the difference helps you set expectations.
Shoaling means fish group together loosely for social reasons: safety in numbers, finding food, mating. They’re aware of each other and prefer proximity, but they’re not moving in unison. Most “schooling” fish in the hobby are actually shoaling fish most of the time.
True schooling is synchronized movement: the whole group turns together, tightens and loosens as a unit, moves as if it’s one organism. You see this in rummy nose tetras, harlequin rasboras, and danios. It’s triggered by stress, threat detection, or current. It’s the behavior people think they’re buying when they pick up a “schooling fish.”
The practical takeaway: more fish triggers more schooling behavior. A group of 6 corydoras mostly shoal along the bottom. A group of 12 will school visibly when startled and show much more coordinated movement in general. Group size is the lever.
ASD Schooling Fish Tiers
Tier 1 (Best Visual Schoolers): Rummy nose tetra, harlequin rasbora, celestial pearl danio, zebra danio. These form tight, synchronized schools and produce the most dramatic visual effect.
Tier 2 (Strong Shoalers, Some Schooling): Neon tetra, cardinal tetra, corydoras, otocinclus. Group together reliably, school under stress. Excellent community fish.
Tier 3 (Looser Groups): Ember tetra, chili rasbora. More fragile or tiny. Shoal consistently but true synchronized schooling is less pronounced. Need very stable parameters.
15 Best Schooling Fish for Freshwater Aquariums
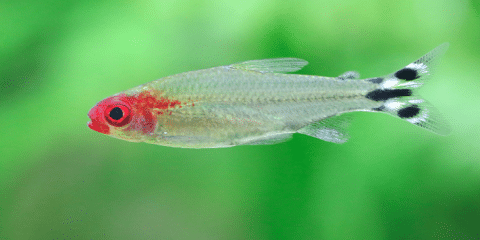
1. Rummy Nose Tetra
- Scientific Name: Hemigrammus rhodostomus
- Care Level: Easy to Moderate
- Tank Size: 20 gallons (76 L)
- Adult Size: 2 inches (5 cm)
- Temperature: 75 to 84°F (24 to 29°C)
- pH: 5.5 to 7.0
- School Size: 10+
The rummy nose tetra is the gold standard for synchronized schooling in the hobby. A group of 15 or 20 moving in a planted tank is genuinely mesmerizing. They’re also a water quality indicator: when parameters slip, the red on the nose fades. Keep the red bright and you know your water is right.
They need warm, soft, slightly acidic water and a mature tank. Not the first fish for a new setup, but absolutely worth building toward.
Mark’s Pick
If you want the best schooling display in a planted tank, rummy nose tetras in groups of 15 or more are my top recommendation. Nothing else in the freshwater hobby produces the same visual effect. Keep 20. You won’t regret it.
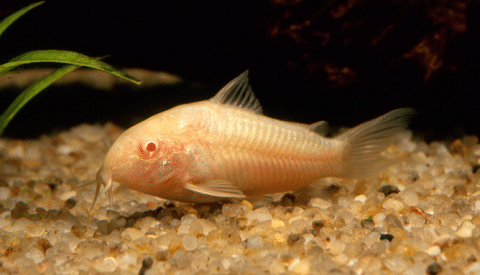
2. Corydoras Catfish
- Scientific Name: Corydoras spp.
- Care Level: Easy
- Tank Size: 15 to 30 gallons (57 to 114 L)
- Adult Size: 1 to 4 inches (2.5 to 10 cm)
- Temperature: 74 to 80°F (23 to 27°C)
- pH: 5.5 to 8.0
- School Size: 6+
Corydoras are bottom-level schoolers that add activity where most fish won’t go. A group of 6 or more will move together across the substrate, forage in groups, and sometimes shoot to the surface for a gulp of air. There are dozens of species, all with the same peaceful, group-oriented temperament. Pygmy corydoras (Corydoras pygmaeus) stay tiny at 1 inch (2.5 cm) and are one of the few corydoras that school mid-water as well.
3. Chili Rasbora
- Scientific Name: Boraras brigittae
- Care Level: Moderate
- Tank Size: 5 gallons (19 L) minimum, 10+ preferred
- Adult Size: 0.75 inches (2 cm)
- Temperature: 68 to 82°F (20 to 28°C)
- pH: 4.0 to 7.0
- School Size: 10+
The chili rasbora is a nano fish that demands a specific setup to look its best. Dark substrate, heavy planting, soft acidic water, and a group of at least 10 to 15. In the right tank, they’re stunning: bright red with a black lateral stripe. In the wrong setup (bright light, light substrate, small group), they fade and stress out. They’re not the easiest fish on this list, but the payoff is real when you build the tank around them.
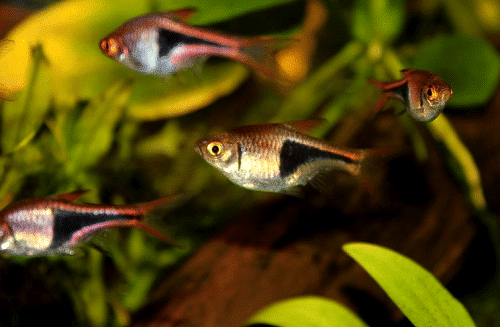
4. Harlequin Rasbora
- Scientific Name: Trigonostigma heteromorpha
- Care Level: Easy
- Tank Size: 15 gallons (57 L)
- Adult Size: 1.5 inches (4 cm)
- Temperature: 70 to 82°F (21 to 28°C)
- pH: 5.0 to 7.5
- School Size: 8+
The harlequin rasbora is the beginner’s schooling fish. Hardy, peaceful, recognizable by its black triangular patch, and compatible with just about anything else in a community tank. They school actively and are more forgiving of parameter variation than rummy noses or cardinals. A reliable choice for any community setup.
5. Neon Tetra
- Scientific Name: Paracheirodon innesi
- Care Level: Easy
- Tank Size: 15 gallons (57 L)
- Adult Size: 1 inch (2.5 cm)
- Temperature: 70 to 77°F (21 to 25°C)
- pH: 4.0 to 7.5
- School Size: 10+
Neon tetras are sold everywhere and bought everywhere, but they’re also killed everywhere when people don’t understand their actual needs. They’re not as bulletproof as their reputation suggests. They need a cycled, stable tank, cooler water than most tropical community fish, and they’re susceptible to neon tetra disease in stressed conditions. In a well-maintained tank with a group of 15 or more, they’re spectacular. In a new tank with unstable parameters, they’ll die.
6. Cardinal Tetra
- Scientific Name: Paracheirodon axelrodi
- Care Level: Easy to Moderate
- Tank Size: 15 gallons (57 L)
- Adult Size: 1.25 inches (3 cm)
- Temperature: 73 to 84°F (23 to 29°C)
- pH: 5.5 to 7.5
- School Size: 10+
The cardinal tetra outshines the neon tetra visually: the red stripe runs the full length of the body instead of just the lower half. They prefer warmer, softer water and are more delicate than neons. Wild-caught cardinals need careful acclimation. Tank-raised specimens are significantly more adaptable. In a warm, planted blackwater setup, a school of cardinals is one of the best displays in freshwater fishkeeping.
7. Otocinclus Catfish
- Scientific Name: Otocinclus spp.
- Care Level: Moderate
- Tank Size: 15 gallons (57 L)
- Adult Size: 1.5 to 2 inches (4 to 5 cm)
- Temperature: 72 to 82°F (22 to 28°C)
- pH: 6.0 to 7.5
- School Size: 6+
Otocinclus are algae-eating shoaling catfish that belong in most planted tanks. They graze glass and broad-leaved plants for algae and need supplemental algae wafers or blanched vegetables when algae supply runs low. They’re often sold as “easy” but they arrive stressed from import and need a mature, stable tank with established algae growth. Keep a group of 6 or more. Solo otos decline.
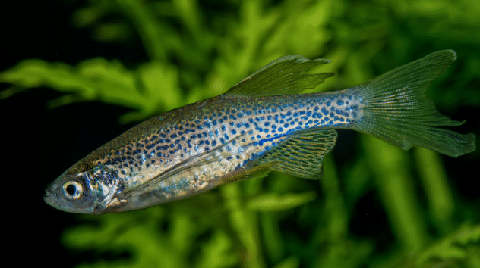
8. Zebra Danio
- Scientific Name: Danio rerio
- Care Level: Easy
- Tank Size: 10 gallons (38 L)
- Adult Size: 2 inches (5 cm)
- Temperature: 65 to 77°F (18 to 25°C)
- pH: 6.5 to 7.5
- School Size: 6+
Zebra danios are fast, active, and one of the hardiest freshwater fish in the trade. They tolerate a wide range of temperatures and water conditions, making them a good choice for newer setups. They school tightly when startled and spend most of their time zipping around the upper half of the tank. The trade-off is that their speed and activity can stress slower, more timid fish. Don’t mix them with fancy goldfish, bettas, or any slow-moving long-finned species.
9. Celestial Pearl Danio (Galaxy Rasbora)
- Scientific Name: Danio margaritatus
- Care Level: Easy to Moderate
- Tank Size: 10 gallons (38 L)
- Adult Size: 1 inch (2.5 cm)
- Temperature: 73 to 79°F (23 to 26°C)
- pH: 6.5 to 7.5
- School Size: 8+
The celestial pearl danio is small, visually complex, and one of the best nano schooling fish available. Pearl-spotted body, orange-red fins, tight group movement. They stay in the lower half of the tank and work beautifully in planted nano setups. Males can be competitive with each other, so a higher ratio of females to males prevents constant chasing. A group of 10 to 15 in a heavily planted 15-gallon is a stunning display.
10. Black Phantom Tetra
- Scientific Name: Hyphessobrycon megalopterus
- Care Level: Easy
- Tank Size: 20 gallons (76 L)
- Adult Size: 1.5 inches (4 cm)
- Temperature: 72 to 82°F (22 to 28°C)
- pH: 6.0 to 7.5
- School Size: 6+
The black phantom tetra is a confident, visually bold tetras that stays mid-water and schools actively. Males display to each other with spread fins, which is interesting to watch without causing real damage. They tolerate a wide range of water conditions and get along with most peaceful community fish. A good option for hobbyists who want something beyond the neon/cardinal staples.
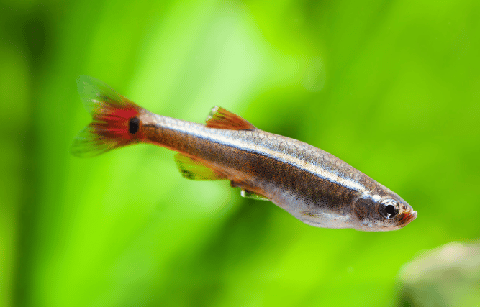
11. White Cloud Mountain Minnow
- Scientific Name: Tanichthys albonubes
- Care Level: Easy
- Tank Size: 10 gallons (38 L)
- Adult Size: 1.5 inches (4 cm)
- Temperature: 60 to 72°F (15 to 22°C)
- pH: 6.0 to 8.0
- School Size: 6+
White cloud mountain minnows are cold-water schooling fish that thrive without a heater in most indoor environments. They’re one of the few options for unheated tanks and cool rooms. They school actively and are extremely hardy. Don’t mix them with tropical fish that need 78°F (26°C) water. At their correct temperature range, they’re nearly indestructible and produce a tight, active school.
12. Buenos Aires Tetra
- Scientific Name: Hyphessobrycon anisitsi
- Care Level: Easy
- Tank Size: 30 gallons (114 L)
- Adult Size: 2.5 inches (6 cm)
- Temperature: 64 to 82°F (18 to 28°C)
- pH: 5.5 to 8.5
- School Size: 6+
The Buenos Aires tetra is tougher than most tetras and more active. They’re one of the few tetras that will eat live plants, so don’t put them in a planted tank. In a fish-only or artificial plant setup, they’re a great schooling option that handles wide temperature ranges and tolerates cooler water. Their silver body with red fins schools attractively and they hold up well in community tanks with similarly sized, assertive fish.
13. Ember Tetra
- Scientific Name: Hyphessobrycon amandae
- Care Level: Easy
- Tank Size: 10 gallons (38 L)
- Adult Size: 0.8 inches (2 cm)
- Temperature: 73 to 84°F (23 to 29°C)
- pH: 5.0 to 7.0
- School Size: 8+
Ember tetras are a deep orange nano fish that look best against dark substrate and green plants. They’re peaceful, stay small, and school loosely in the mid-level. In a well-planted tank with soft water and a large enough group, they’re an excellent nano option. They’re more accessible than chili rasboras and tolerate a slightly wider pH range, making them a good entry point for the planted nano category.
14. Penguin Tetra
- Scientific Name: Thayeria boehlkei
- Care Level: Easy
- Tank Size: 20 gallons (76 L)
- Adult Size: 2.5 inches (6 cm)
- Temperature: 72 to 82°F (22 to 28°C)
- pH: 6.0 to 8.0
- School Size: 6+
The penguin tetra is named for its swimming posture: tail angled downward, moving at a slight tilt. They’re more visible than the common tetras because of their distinctive size and movement pattern. They adapt to a wider pH range than most tetras and are genuinely easy to keep. A group of 8 in a 30-gallon community tank is reliable and produces good schooling behavior.
15. Boesemani Rainbowfish
- Scientific Name: Melanotaenia boesemani
- Care Level: Easy
- Tank Size: 30 gallons (114 L)
- Adult Size: 4 inches (10 cm)
- Temperature: 75 to 82°F (24 to 28°C)
- pH: 7.0 to 8.0
- School Size: 6+
Boesemani rainbowfish are the large-tank schooling option on this list. They need harder, more alkaline water than most tetras, which makes them an unusual but excellent choice for tanks that run naturally hard. Males develop vivid blue-front, orange-rear coloration. A group of 6 to 8 males in a 55-gallon tank is one of the most visually striking community setups in the freshwater hobby.
Quick-Reference Comparison
| Species | Size | Min Tank | Min School | Best For |
|---|---|---|---|---|
| Rummy Nose Tetra | 2 in (5 cm) | 20 gal (76 L) | 10+ | Best visual schooler |
| Harlequin Rasbora | 1.5 in (4 cm) | 15 gal (57 L) | 8+ | Best beginner choice |
| Chili Rasbora | 0.75 in (2 cm) | 10 gal (38 L) | 10+ | Best nano planted tank |
| Neon Tetra | 1 in (2.5 cm) | 15 gal (57 L) | 10+ | Most popular/accessible |
| Cardinal Tetra | 1.25 in (3 cm) | 15 gal (57 L) | 10+ | Best color impact |
| Zebra Danio | 2 in (5 cm) | 10 gal (38 L) | 6+ | Most active schooler |
| Corydoras | 1-4 in (2.5-10 cm) | 15 gal (57 L) | 6+ | Best bottom school |
| White Cloud Minnow | 1.5 in (4 cm) | 10 gal (38 L) | 6+ | Best unheated tank |
| Boesemani Rainbow | 4 in (10 cm) | 30 gal (114 L) | 6+ | Best large tank schooler |
What People Get Wrong About Schooling Fish
The most common mistake is buying 4 or 5 schooling fish and wondering why they look stressed, hide constantly, or swim erratically. The problem is almost never water chemistry. It’s group size. Schooling fish kept in groups below their minimum number are anxious fish. They spend energy on threat assessment instead of normal behavior. The coloration fades, the schooling stops, and the keeper blames the species instead of the stocking decision.
The second mistake is mixing incompatible schooling fish in the same tank expecting them to school together. Species don’t cross-school. Six rummy nose tetras and six neon tetras in the same tank are two groups of six, not one group of twelve. Both need enough individuals of their own kind.
The third mistake is adding schooling fish to a tank that isn’t cycled or is too small to maintain stable parameters. Neon tetras, chili rasboras, and cardinal tetras are not beginner fish in the sense that they’ll survive a new tank with unstable parameters. They’ll look fine for a week and then crash.
Avoid If…
- You’re planning to buy fewer than 6 of any schooling species
- Your tank is under 10 gallons and you want more than one species
- You’re mixing schooling species that need very different water parameters (e.g., danios at 65°F/18°C with discus at 86°F/30°C)
- You’re adding sensitive schoolers like rummy nose or chili rasboras to a tank under 3 months old
- Your budget only covers 4 or 5 fish: save up and buy the full group at once
FAQs
What is the minimum group size for schooling fish?
Six is the absolute minimum for most species. Ten is where the behavior really starts to look like what people expect from a schooling fish. For nano species like chili rasboras and ember tetras, I recommend starting with 10 to 15. You’ll see a dramatic difference in how confidently they behave compared to a group of 6.
What is the difference between schooling and shoaling?
Shoaling is grouping together for social reasons without synchronized movement. Schooling is synchronized movement where the whole group turns and moves as a unit. Most “schooling fish” in the hobby are shoaling most of the time and school when startled or threatened. Larger groups produce more true schooling behavior.
Which schooling fish are best for beginners?
Harlequin rasboras and zebra danios are the most forgiving. Harlequin rasboras are peaceful and tolerate a wide range of community setups. Zebra danios are extremely hardy and handle less-than-perfect water conditions. Both school reliably and are available at most fish stores.
Can different species of schooling fish school together?
No. Fish school with their own species. A group of 6 neon tetras and 6 cardinal tetras in the same tank will form two separate groups, not one group of 12. Each species needs a large enough group of its own kind to produce the schooling behavior you want to see.
Which schooling fish school the most visibly?
Rummy nose tetras produce the tightest, most synchronized schooling in the hobby when kept in large groups. Zebra danios are close behind in terms of visible movement, though less synchronized. Harlequin rasboras produce good schooling behavior in groups of 10 or more. The key with all of them is group size.
Closing Thoughts
Schooling fish transform a tank from a collection of individual fish into a living display. The difference between a group of 5 and a group of 15 is not just more fish. It’s a completely different kind of tank. That synchronized turn, that split-second response to movement on the glass, that tight formation through the plants: that’s what people are picturing when they imagine a proper aquarium. You can have it. You just have to commit to the numbers.
Pick one species, stock it properly, and build the rest of the tank around it. That’s the formula that works.
Ready to stock up? Flip Aquatics and Dan’s Fish both carry a strong selection of schooling fish and ship them directly to your door.