Distilled water in aquariums is something I get asked about regularly, especially from hobbyists trying to hit very specific water parameters for soft-water fish or discus. I’ve used it myself as part of RO/DI blends for my reef tank. The short answer is that distilled water alone is actually too pure. it’s stripped of everything, including minerals fish need. Here’s the real explanation and how to use it correctly.
The short answer is: you can use distilled water in a fish tank, but not straight from the jug. Distilled water has had all minerals removed. which sounds clean, but for fish it’s actually dangerous. There’s no buffering capacity, so pH becomes unstable and can crash rapidly. Fish need some dissolved minerals to regulate their bodies. Where distilled water is genuinely useful is in reef keeping, where I use RO/DI water (similar to distilled) to top off evaporation and then add minerals back precisely through two-part dosing. For freshwater, mixing distilled with tap can also help soften water for species like discus or German blue rams that need low hardness. This article explains when and how to use it correctly.
What Is It?
As we know, water has three states; liquids, solid, and gas. The distillation process involves boiling the water to an extend it starts evaporating. The water is then allowed to cool down at low temperature and condensed back into its original liquid form.
This water distillation process eliminates germs, bacteria, other impurities, and minerals from water, leaving behind pure distilled water1.
It was once a misconception that distilled water heated faster than normal tap water. Therefore, it was dangerous to consume back then. However, this theory was ruled out and it was confirmed that distilled water is like regular tap water. If you want a breakdown on how the distillation process works, check out the video below by Pure Water Distllers.
Today, distilled water is used in numerous applications: batteries, steam irons, cooling systems for vehicles, and sometimes in aquariums.
Is It Safe To Use?
As mentioned above, using distilled water in aquariums is becoming popular day by day because distilled water doesn’t contain chemicals mostly found in tap water such as Chlorine and Chloramine. So, novice aquarists believe distilled water is the safest option for aquariums.
However, it is not recommended to use an exclusive supply of distilled water in your fish tanks. Your aquatic life demands certain minerals for their survival. And there’s no source of those essential minerals in distilled water for your fish.
Distilled water also poses a negative impact on the water pH levels; as minerals in water helps maintain the pH levels in your aquarium, which is essential for the survival of your fish. distilled water lacks minerals like Calcium that won’t help buffer ph and water hardness.
But there are instances where pure distilled water can be used in the tank water.
If your aquarium is losing water, pure distilled water can be used to top off.
Distilled water can be added to reduce the water hardness of normal tap water.
Whatever the case may be, distilled water has zero essential minerals in it to sustain the aquatic life as minerals are essential for aquatic plants and life and also help buffer ph.
But you can still use distilled water in your fish tanks by mixing it with mineralizing supplements or water that help your fish stay healthy and stabilize water pH levels as well.
Can You Use Distilled Water In A Fish Tank?
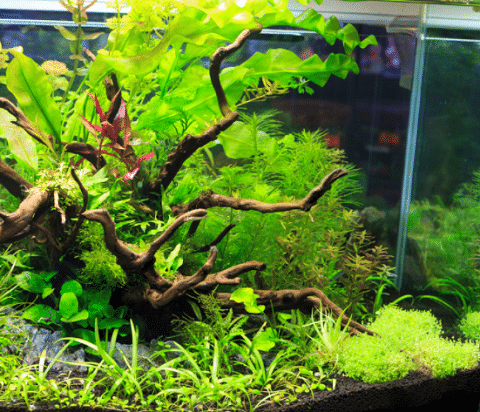
Freshwater fish and plants, both require water loaded with natural minerals, which is found in tap water. The tap water in the freshwater fish tanks allows the aquatic plants to photosynthesize. Additionally, many invertebrates including shrimps need these essential minerals to grow and thrive happily in your fish tank.
If you’re planning to use distilled water in a freshwater fish tank, measures should be taken to maintain mineral balance to stabilize ph levels and water hardness accordingly. If there’s no need to use distilled water in freshwater fish tanks, I suggest avoiding using it. That’s because on one end, it gives you more control over nutrient input and output, on the other hand, it gets very costly and can be difficult to manage specially for novice fish keepers.
Contrary to distilled water, I highly recommend using tap water in freshwater fish tanks because it’s already rich in all the beneficial minerals required for a healthy aquarium. Treated tap water with a de-chlorinator like Seachem Prime will be fine for most aquariums.
If you venture into planted tanks, discus fish, and saltwater tanks, remineralized distilled water can be a consideration.
Should you use Tap Water for Saltwater?
Aquarium experts are usually reluctant to use tap water in saltwater tanks. That’s because the water parameters of saltwater aquarium need to be precise than a freshwater aquarium and many unknown nutrients enter the tank water and cause unnecessary problems.
The water parameters in saltwater: Salinity, pH, Carbonate hardness, Phosphates, Calcium, etc. However, the major problem in saltwater is the levels of these components can fluctuate on and off, creating instability and leading to algae problems in the tank water.
Not only this, but tap water introduces many other impurities that can mess up with your aquarium ecosystem. Therefore, many seasoned aquarists choose other reliables sources of water such as distilled water, reverse osmosis water, or reverse osmosis deionized (RODI) water, other than tap water.
How to Use In Your Tanks?
Suppose you own a freshwater fish tank and you know all the consequences of using distilled water in a freshwater aquarium. But still, you want to use distilled water. Sure, you have your reasons. And yes, you can use distilled water and NOT harm your fish by following these precautionary steps. Following these steps will prevent a fatal effect on your aquarium health.
Re-mineralized
The minerals in tap water create a healthy and stable environment for your fish. Therefore, to make distilled water safe for your fish, you first need to remineralize it.
How to Remineralize for tanks
There are numerous ways you can remineralize distilled water for a fish tank.
Mixing in Epsom Salt, Calcium Chloride, and Baking soda
This is one of the best and most cost-effective ways of remineralizing distilled water.
All the above-mentioned nutrients work in a rhythmic pattern to make your fish tank a living heaven for your fish.
Epsom salt helps raise the magnesium level in distilled water
Calcium chloride ensures proper osmotic balance in the aquarium water by bringing the crucial minerals
Baking soda helps raise the pH levels of distilled water and ensures a stable ph.
Adding water conditioner, Baking soda, and Acid Buffer
Another easy method to remineralize distilled water is taking some water conditioner, containing essential minerals. Add baking soda so the pH levels of distilled water can be raised, and then an acid buffer to bring down the pH levels by 7.
Add Seachem Equilibrium or Shrimp Mineral (Recommended)
For freshwater tanks, adding Seachem Equilibrium in distilled water to remineralize it, does wonders.
For this, I recommend using a commercial remineralize that comes with instructions for proper usage and dosage to avoid inconvenience.
And if you’re looking to remineralize distilled water for a shrimp tank, I strongly recommend using shrimp mineral to add essential minerals to the tank water for your healthy and happy shrimps.
Never use only distilled water in your fish tank as this would harm the fish. They possess a selectively permeable membrane which may lead to a trauma (caused by osmosis) when placed in distilled water. A good example of fish that is highly susceptible to such trauma is are Betta fish.
Proper tank and water maintenance
When changing the water in your fish tank, you’ll need to be familiar with some of the tips I provided. This will help preserve the lives of your fish and the tank in which they are kept.
Make sure to clean your tank when the need arises or you might just be harboring a foreign pathogenic species. The good thing about this is that you don’t need to visit an expert in order to get it done. Just ensure that there are no leakages before draining the water in your fish tank so that they don’t flow into a nearby stream when doing this!
FAQS
Is This Type Safe For Fish?
On it’s own, distilled water is not safe for fish. Distilled water lacks trace elements and materials that are essential to the lives of your aquatic inhabitants. You can use a remineralizer like Seachem Equilibrium for freshwater tanks or marine salt mix for saltwater tanks to get these missing elements back into your water.
What Water Is Best?
For freshwater tanks, the best for the money is tap water treated with a decholorinator. For planted tanks or sensitive fish like Discus Fish, RO or distilled water that is mineralized work great. For reef tanks, RODI water is the best.
Can I Top Off My Tanks With this type of water?
Yes, you can top off your fish tank with distilled water. Trace elements and minerals remain in your aquarium when water evaporates. You are just replacing the lost water, which makes distilled water okay to use for top off.
Is Spring Water Better For Tanks?
Distilled Water that is remineralized would be a better choice. Spring water’s make up can differ from brand to brand, which can cause shock to your fish. Distilled will be a more consistent source – just remineralize it.
How Do You Remineralize Water?
You can purchase a remineralizer like Seachem Equilibrium for freshwater tanks. For saltwater tanks, marine salt mix will remineralize your water.
Final Thoughts
So, when shouldn’t you consider filling your fish tank with distilled water?
Never use distilled water only when you’re changing water in your fish tank!
I hope you got that clearly, right? The reason for this is because of the immediate change in pH that this will cause and the lack of minerals essential to your fish’s health. Avoid a catastrophe by remineralizing your distilled water if you decide to use it. If you have any questions, leave a comment below and let’s start a conversation. Thanks for reading!
Brackish water is one of the most underappreciated setups in the hobby, and I’ve always thought it deserves more attention. The species you can keep in brackish. figure-eight puffers, archerfish, mudskippers. you simply can’t replicate in freshwater or saltwater. I’ve kept brackish tanks and the challenge of nailing that salinity range is part of what makes it interesting. This guide covers the 15 species I’d actually recommend for a brackish setup.
Brackish water is one of the most underserved niches in the freshwater hobby. and also one of the most commonly misrepresented at the fish store level. A lot of popular species get sold as “freshwater” when they’re actually brackish: green spotted puffers, archer fish, bumblebee gobies, figure-eight puffers, and more. These fish often survive short-term in freshwater but slowly decline over months without the salt content they need. A true brackish setup uses marine salt at a lower concentration than a reef tank (specific gravity around 1.005 to 1.015) and produces fish with noticeably better health and color. This guide covers 15 species that genuinely thrive in brackish, along with what setting up a proper brackish tank actually involves.
What Most Care Guides Get Wrong About 15 Best Brackish Water Fish (And Common Mislabeling Explained)
The most common mistake I see with 15 best brackish water fish (and common mislabeling explained)s is keeping too few. Guides will say “minimum 6” and leave it at that. In reality, these fish behave completely differently in a proper group of 8 to 10 or more. Keeping just 3 or 4 often leads to stress, hiding, and fin nipping that wouldn’t happen in a larger school. Another thing most guides miss is how much lighting and decor affect this species. 15 Best Brackish Water Fish (And Common Mislabeling Explained)s look washed out under bright white LEDs on a light substrate. Dim the lights, add some tannins, use a dark background, and you’ll see colors you didn’t know they had. I’ve also noticed that many care sheets recommend overly broad water parameters. Yes, 15 best brackish water fish (and common mislabeling explained)s are adaptable.
What Are They?
Brackish fish are native to environments where fresh and saltwater mix. These environments are common in coastal areas all over the world, particularly where rivers and streams meet the ocean.
This type of habitat is known as an estuary, although brackish coastal lakes also exist. The salinity of brackish water varies with the tides and other factors like river water levels. As a result, these brackish water fish species must either move with the water or be adaptable to these changeable conditions.
Brackish fish are technically known as euryhaline species1, which means they can adapt to different salinities. They can often live in fully fresh or marine water for certain periods of time, but they are most comfortable in that in-between range for the long term.
Why Keep this type?
There are many reasons to keep a brackish aquarium. The most obvious is probably because there are some truly amazing-looking brackish fish species! In fact, many of the fish sold as freshwater fish are actually brackish. If you want to give these fish the best care, you’re going to need to go brackish.
Apart from the fish themselves, the brackish environment is a fascinating underwater world. A Brackish water environment is an exciting new challenge for anyone who has started out with a tropical freshwater tank.
15 BestBrackish Water Fish
Now that you know what a brackish aquarium fish is, it’s time to get to know some of the best types! All of these species are suitable for the home aquarium, but their care and space requirements differ very much. I have a video above from our official YouTube Channel for a visual. Our blog will go in more detail below. That’s why I’ve put together the following list of vital stats for each species:
Diet: Feed dried and live/frozen food, spirulina/vegetable matter
Origin: USA, Mexico, Northern South America
Temperature: 72-82°F
Water salinity/specific gravity: 1.005-1.015
pH: 7-8.5
Difficulty to breed: Easy
Molly fish are highly adaptable fish that can be kept in anything from hard freshwater all the way to full marine conditions. In fact, these inexpensive livebearers thrive in brackish conditions!
There are a few different species and many different breeds available in the fish-keeping hobby. Check out my complete guide for more details on these awesome beginner brackish aquarium fish!
Diet: Feed dried and live/frozen foods, spirulina/vegetable matter
Origin: Northern South America & Caribbean Islands
Temperature: 63-82°F
Water salinity/specific gravity: 1.001-1.010
pH: 7-8.5
Difficulty to breed: Easy
Guppies are the smaller, more colorful cousins to the molly fish. These popular livebearers are one of the most common species in the aquarium trade. They are available in an amazing variety of shapes and colors, and they’re really easy to breed in the home aquarium.
Guppy fish is usually thought of as freshwater fish species, but they can be kept in brackish water too. In fact, studies have shown that these amazing fish can even tolerate full marine conditions.
Diet: Feed dried and live/frozen foods, spirulina/vegetable matter
Origin: Venezuela, South America
Temperature: 75-86°F
Water salinity/specific gravity: 1.001-1.025
pH: 7-8.5
Difficulty to breed: Easy
The Endler’s livebearer is another great nano brackish fish. These hardy fish thrive in brackish environments, even though they are usually kept in freshwater.
The males of these tiny fish are much smaller and more colorful than the females, so if you don’t want them to breed, males are the better choice. Endler’s livebearers should not be kept with large fish or aggressive tank mates.
4. Archer
Scientific Name: Toxotes jaculatrix
Difficulty Level: Moderate
Temperament: Semi-aggressive
Adult Size: 12 inches
Minimum Tank Size: 125 gallons
Diet: Feed dried & live/frozen foods
Origin: Widespread in Southern Asia and Northern Australia
Temperature: 77-86°F
Water salinity/specific gravity: 1.005-1.010
pH: 7-8
Difficulty to breed: Advanced
Archerfish are brackish fish species with a fascinating hunting technique. In their natural habitat, these intelligent fish spit water at insects on leaves and tree branches above the water. This knocks the prey onto the water surface where the fish can get to it. Pretty neat!
They will also take regular flake food and do great in larger brackish water aquariums. These fish are generally very peaceful with other fish but can be a little nippy with other archerfish unless kept in groups of 4 or more.
Scats are large and beautiful brackish water aquarium fish. These spotted fish look amazing in schools in large aquariums. These curious fish make wonderful pets and are easy to feed and care for.
The secret is to keep them in groups of at least 4 fish, maintain excellent water quality in a large enough tank, and always make sure their water is in the preferred salinity range.
These beautiful silvery fish are very fast and active so they require a large aquarium with plenty of swimming space. They make great tank mates for other brackish fish like scats, although they do equally well in full marine tanks. Mono fish can be skittish and are known to be fin nippers too, so they are best left to expert aquarists.
7. Green Spotted Puffer
Scientific Name: Tetraodon nigroviridis
Difficulty Level: Moderate
Temperament: Semi-aggressive
Adult Size: 6 inches
Minimum Tank Size: 30 gallons
Diet: Live/ frozen foods, and hard-shelled food sources like snails are essential
Origin: India to Southeast Asia
Temperature: 75-82°F
Water salinity/specific gravity: 1.005
pH: 7.5-8.5
Difficulty to breed: Advanced
The green spotted puffer is an amazing brackish water aquarium fish for more experienced fish keepers. These active puffers can be kept with other fish in a community setup, but they should be the only pufferfish in the tank to avoid aggression.
Pufferfish have beak-like teeth that grow continuously. It is very important to feed these fish hard food like snails and shellfish to keep their teeth worn down.
8. Figure 8 puffer
Scientific Name: Tetraodon biocellatus
Difficulty Level: Moderate
Temperament: Semi-aggressive
Adult Size: 3 inches
Minimum Tank Size: 20 gallons
Diet: Live/ frozen foods, hard-shelled food sources like snails are essential
Origin: Southeast Asia
Temperature: 72-79°F
Water salinity/specific gravity: 1.005
pH: 6.5-7.5
Difficulty to breed: Advanced
The figure 8 puffer fish is an awesome species that can be kept in both fresh and brackish water conditions. They get their name from the interesting markings on their backs. These little fish are generally peaceful but they are known to nip the fins of slow-moving tankmates
9. Bumblebee Goby
Scientific Name: Brachygobius doriae
Difficulty Level: Moderate
Temperament: Semi-aggressive
Adult Size: 1-1.5 inches
Minimum Tank Size: 10 gallons
Diet: Feed live food
Origin: Borneo
Temperature: 72-82°F
Water salinity/specific gravity: 1.001-1.006
pH: 7-8.5
Difficulty to breed: Moderate
These nano fish are best for a small species only tank. They get their name from their bold black and yellow colors. This fish can be a bit of a picky eater and they generally prefer live food.
The bumblebee goby can be a little aggressive with other members of its own species so it is best to keep at least 6 together to prevent anyone from getting singled out. A brackish aquarium with plenty of hiding places is ideal for the bumblebee goby.
10. Dragon goby
Scientific Name: Gobioides broussonnetii
Difficulty Level: Moderate
Temperament: Semi-aggressive
Adult Size: 15-25 inches
Minimum Tank Size: 125 gallons
Diet: Feed algae wafers, live/frozen foods
Origin: Widespread along the North, Central & South American coasts
Temperature: 73-79°F
Water salinity/specific gravity: 1.005-1.015
pH: 7.5-9
Difficulty to breed: Advanced
The dragon goby is a strange, eel-like fish. Dragon gobies are actually a whole lot more peaceful than they look or sound though.
They are not known to bother or eat smaller fish, although they can be semi-aggressive to other members of their own species. The Dragon goby can grow really long, so they should be kept in large tanks for good long-term care.
11. Orange Chromide
Scientific Name: Etroplus maculatus
Difficulty Level: Moderate
Temperament: Peaceful
Adult Size: 3 inches
Minimum Tank Size: 20 gallons
Diet: Feed, dried and live/frozen foods, spirulina/vegetable matter
Origin: India & Sri Lanka
Temperature: 68-82°F
Water salinity/specific gravity: 1.002-1.010
pH: 7-8.5
Difficulty to breed: Moderate
Orange chromides (video source) can be kept in both fresh and brackish waters. This beautiful fish requires great quality water so regular aquarium maintenance is very important.
They are peaceful but will eat very small fish if they can catch them. Provide your orange chromides with a varied diet that includes both meaty foods and plant matter.
12. Kribensis
Scientific Name: Pelvicachromis pulcher
Difficulty Level: Easy
Temperament: Semi-aggressive
Adult Size: 3-4 inches
Minimum Tank Size: 20 gallons
Diet: Cichlid pellets, frozen/live foods
Origin: Cameroon and Nigeria
Temperature: 75-81°F
Water salinity/specific gravity: 1.000-1.005
pH: 5-7.5
Difficulty to breed: Easy
Kribensis cichlids are usually kept in freshwater tanks but they can survive in slightly brackish water too. These fish have beautiful colors and bold horizontal stripes that can really brighten up your tank.
These beautiful West African cichlids are very peaceful except when breeding. It is best to keep a single pair with other fish in a community tank.
13. Golden Wonder Killifish
Scientific Name: Aplocheilus lineatus
Difficulty Level: Easy
Temperament: Semi-aggressive
Adult Size: 4 inches
Minimum Tank Size: 20 gallons
Diet: Feed dried, frozen/live foods
Origin: India & Sri Lanka
Temperature: 72-77°F
Water salinity/specific gravity: 1.000-1.005
pH: 6-7.5
Difficulty to breed: Moderate
The golden wonder killifish (video source), or striped panchax, is another great species that can be kept in either fresh or slightly brackish water. These predatory fish will eat smaller fish, so they should only be kept with similarly sized fish. These hardy and adaptable killifish spend most of their time at the top of the tank.
14. Banded Banjo Catfish
Scientific Name: Platystacus cotylephorus
Difficulty Level: Easy
Temperament: Peaceful
Adult Size: 12 inches
Minimum Tank Size: 30 gallons
Diet: Sinking dried foods, live/frozen food
Origin: Widespread in Central & South America
Temperature: 72-77 °F
Water salinity/specific gravity: 1.003-1.010
pH: 6-8.2
Difficulty to breed: Advanced
The banded banjo catfish (video source) is nocturnal fish with a very unusual body shape. These fish aren’t the most active or exciting to watch, but they still make a great oddball specimen for a brackish tank. They make great community fish but should not be kept with very small fish that could be swallowed whole.
15. Colombian shark catfish
Scientific Name: Ariopsis seemanni
Difficulty Level: Advanced
Temperament: Peaceful
Adult Size: 12-14 inches
Minimum Tank Size: 225 gallons
Diet: Meaty foods, can be picky eaters
Origin: Coastal regions of eastern Central and South America
Temperature: 72-78 °F
Water salinity/specific gravity: 1.015-1.025
pH: 6.8-8.5
Difficulty to breed: Advanced
The Colombian shark catfish is not an aggressive fish but it will swallow any smaller fish that it can catch. These are large fish so they should not be purchased unless you have plenty of room.
One important thing to note is that their fins have venomous spines that can cause serious pain and swelling. This means you should be very careful about handling these fish.
Tank Setup
Setting up a great brackish aquarium is not that different from setting up a regular tropical fish tank. Let’s take a look at how to set up a brackish water aquarium.
Substrate & Decorations
You have a few choices when it comes to the substrate for brackish tanks.
Aragonite is an excellent option because it releases calcium carbonate into the water which helps to maintain stable and healthy high pH levels. This substrate looks great and is easy to clean. Aragonite is available in various colors and textures from fine sand to larger particles.
Crushed coral is another great option for a brackish tank but is a little more difficult to maintain because of the larger grain size. You can still get the benefits of this material by putting some into your filter media compartment.
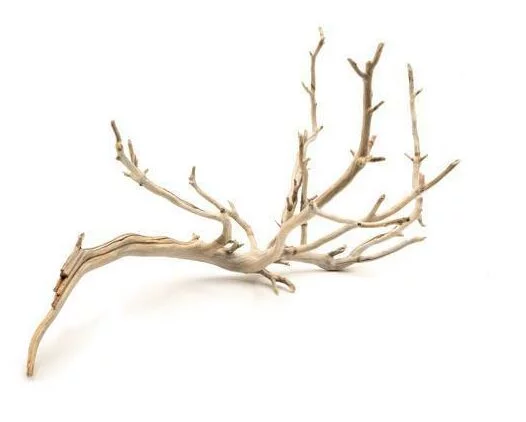
When it comes to decorations, you can use any aquarium safe ornaments that are suitable for saltwater. Rocks are a great choice but small amounts of driftwood can be used too. Avoid large amounts of driftwood, however, since they can leach tannins and lower the water pH to some degree.
Planted Tanks
It will be surprising for some aquarists to hear that you can in fact grow live plants in a brackish water aquarium. The water’s specific gravity or salinity levels certainly do play a role in what kind of plants can be grown, however.
On the higher salinity end, few common aquarium plants will be able to survive. There are options, however, including the various mangrove species, seagrasses, and algae.
Fortunately, many well-known aquarium plants are adaptable to low salinity levels. The following species can be grown in slightly brackish water:
Unless you are growing live plants, bright lighting is not required for a brackish tank. The timing of your lighting is important, however. Maintain a regular day/night schedule for your fish by setting your lighting on a timer. 6 to 8 hours per day is recommended.
With an easy to remove prefilter chamber and intregrated heater chamber, this is the most advanced canister filter you can buy today. German engineered and aquascaper approved!
Apart from their specific salinity needs, brackish fish have much the same needs as any other species. Read on to learn more about caring for fish in brackish aquariums.
Aquarium Maintenance
Performing regular aquarium maintenance is just as important for a healthy brackish aquarium as it is for any other type of fish tank.
Weekly or twice monthly partial water changes and gravel vacuuming will help keep nitrate levels within a safe range for your fish.
Salinity Levels
The main difference between a freshwater tank and a brackish fish tank is the salinity level. Pure freshwater is 1.000 while marine water has a salinity of 1.025. Brackish water aquariums are typically maintained between about 1.005 and 1.012. You can measure salinity with a refractometer and adjust it with calibration solution.
Brackish water is prepared by mixing marine salt with fresh water or mixing marine water with fresh water. Not just any salt will do of course! You’ll need to use good quality marine salt for this. Regular aquarium salt does not contain all the mineral elements that occur in natural brackish water.
It is best to use RO water because you will be starting from a ‘level playing field’. If you are using tap water, make sure to mix in a water conditioner to neutralize any harmful chemicals.
Always mix up the water before adding it to your aquarium. Mix up your water in a separate bucket so you can siphon out the old water into one bucket, and add the new water right after.
Testing
Apart from a regular water test kit that all fishkeepers should have, there’s one extra piece of equipment you will need. Since you will be mixing salt into your water, you’ll need a device to help you measure and monitor the salinity in your tank.
You can opt for an inexpensive hydrometer if you’re happy with ‘ballpark’ readings. This is usually perfectly fine for brackish tanks because the animals tend to be quite adaptable.
For more accurate readings, spend a little more and pick up a decent refractometer. Whichever instrument you choose, make sure to test your salinity (and other parameters) after each water change.
Where To Buy
Brackish water species are not as easily available as freshwater species, but you can still find them at your local fish store from time to time. Common species like sailfin mollies and guppies can be found just about anywhere, but I would recommend trusted online retailers for the more exotic species.
FAQS
Can freshwater fish live in this?
True freshwater fish should not be kept in brackish water. Many freshwater species will survive for varying amounts of time in brackish water, but it will certainly put them under stress and reduce their lifespan.
What fish can live in both salt and freshwater?
There are a few aquarium fish that can live in both fresh and saltwater. These types of fish are called euryhaline species.
Most of these species are at home somewhere in between these two environments, however. Mollies are fish that can live in both fresh and saltwater.
What freshwater fish can survive in this type?
Mollies, guppies, and Endler’s livebearers are all fish that people tend to think of as freshwater species. In fact, all of these species are perfectly at home in brackish water.
Can Guppies live in brackish water?
Guppies are very comfortable in brackish water. In fact, scientific studies have shown that these fish can even live in saltwater.
Do shrimp like this?
Some popular aquarium shrimp species like cherry and Amano shrimps can survive in very low-level brackish water. Ghost shrimp often thrive in brackish aquariums, however.
Expert Take
Brackish is the forgotten middle ground of fishkeeping. Most hobbyists have kept freshwater or saltwater, but very few have built a true brackish system. The challenge is that there is no universal salinity. What works for an archer fish is wrong for a bumblebee goby. Know your target species’ ideal SG before you mix salt. — Mark Valderrama, AquariumStoreDepot
ASD Difficulty Rating: Tier 3 – Advanced — Brackish tanks require regular salinity monitoring, species-matched SG levels, and careful top-off management. More demanding than standard freshwater.
Hard Rule: Every brackish species has a different ideal salinity range. Do not mix species that require significantly different SG levels in the same tank. Match the water chemistry to the most demanding species you plan to keep.
The Reality of Keeping Brackish Fish
Brackish tanks require a hydrometer or refractometer for regular salinity checks. Evaporation raises salinity quickly. Top-off water must always be fresh, not saltwater. Many brackish keepers discover this the hard way when salinity climbs slowly over weeks until fish show stress. This is the most common maintenance mistake with brackish setups.
Is the 15 Best Brackish Water Fish (And Common Mislabeling Explained) Right for You?
Before you add a 15 best brackish water fish (and common mislabeling explained) to your tank, it’s worth asking whether this species actually fits your setup and your goals. Here’s a quick breakdown to help you decide.
This species is a good fit if:
You have a large enough tank to manage territories. Cramped conditions amplify aggression.
You’re comfortable managing aggression through stocking ratios, line of sight breaks, and tank layout.
You can commit to regular water changes. These fish produce more waste than many smaller species.
You’re not planning a peaceful community tank. 15 Best Brackish Water Fish (And Common Mislabeling Explained)s need tank mates that can hold their own.
You enjoy watching active, interactive fish. Cichlids have personality that smaller species simply don’t match.
You have backup plans. Sometimes a particular fish just doesn’t work out, and you need a way to rehome it.
You’re feeding a varied, high-quality diet. Color and health depend on nutrition.
If most of those points line up with your setup, the 15 best brackish water fish (and common mislabeling explained) is worth serious consideration. If several don’t, it’s better to choose a species that matches your tank now rather than trying to make it work.
Avoid If:
You want a set-it-and-forget-it tank (brackish systems require consistent salinity monitoring)
You are not prepared to measure and maintain specific gravity regularly
You want to combine many different freshwater species in the same community tank
You expect the same minimal water chemistry management as a standard freshwater setup
How the 15 Best Brackish Water Fish (And Common Mislabeling Explained) Compares to Similar Species
Choosing between similar species can be tricky. Here’s how the 15 best brackish water fish (and common mislabeling explained) stacks up against some common alternatives.
The 15 best brackish water fish (and common mislabeling explained) occupies a specific niche in the aquarium hobby, and direct comparisons really depend on what you’re looking for. In my experience, the most common question people ask is whether they should choose the 15 best brackish water fish (and common mislabeling explained) or something similar that’s more widely available. The answer usually comes down to three things: tank size, water parameters, and what other fish you’re keeping. If your setup matches what the 15 best brackish water fish (and common mislabeling explained) needs, it’s hard to beat. If not, there are usually alternatives worth exploring.
Final Thoughts
Setting up a brackish tank can be a great next step for aquarists looking to expand their collection. The range of different fish that this side of the hobby opens up is really exciting. This is a fascinating side of the hobby that all fish keepers should try out!
Do you keep brackish fish? Tell us about your favorite species in the comments below!
A 100-gallon tank is a serious commitment. and I mean that in the best way. My main display tank is a 125-gallon reef, and moving up to that size changes what’s possible in the hobby. You get genuine stability (larger water volume means slower swings in temperature, pH, and chemistry), room for fish that would be cramped in a 55 or 75, and the kind of visual impact that makes people stop and stare. The practical reality: 100 gallons of water weighs over 800 pounds before you add substrate, rocks, and the tank itself. You need a proper stand and ideally floor support below it. Get those logistics sorted first, then choose the tank. Here are 5 worth considering.
Our Criteria (How These Aquariums Made The Cut)
I’ve been involved in aquariums since I was 11. Through my over 25 years of experience as a fish tank keeper, There are certain things I look for when purchasing an aquarium. Here is what I focused on when I made this list:
Features – Aquariums of this size are usually more than just the aquarium. I like systems that have everything in one because you don’t need to guess what your fish needs! The equipment is also better than most entry-level setups and budget builds
Build – For a good quality product, it’s important to look for the right manufacturer. You should make sure that they have warranties and reviews of their workmanship if you want your purchase protected or even replace any broken pieces in case something goes wrong later on down the line! Brace aquariums have been around for a very long time, while rimless are new and need more vetting to determine if they are a smart buy
Dimensions – A 100-gallon fish tank can be 4 or 6 feet. If the tank is 4 feet, you will more space for aquascaping, and spend less on other equipment like lighting. A 6 feet length will be better for most fish as they prefer more horizontal swimming space.
Waterbox offers one of the best in class peninsula setups you can purchase in the industry. Modern touches with a high quality sump. A statement piece in any home!
Peninsula aquariums are great for living rooms or room splitters. With a 100 gallon fish tank, their size makes them ideal to purchase one with this configuration. Waterbox offers an excellent choice when it comes to a Peninsula-style aquarium.
This aquarium is 48 inches in length with a total water volume of 108.5 gallons when you include the sump. The Peninsula style allows you to either keep saltwater or freshwater fish. The drain is a bean animal style, which is going to be of better quality than anything else you will find at a chain pet store or even some local fish stores.
The sump comes with dual filter socks, which you can convert to a media cup. A media cup setup is more useful for freshwater setups. The sump is well-sized with both a skimmer section and a refugium section. For a freshwater setup, you can load your skimmer section with biological media like marine pure and the fuge section with floating plants if you want some nitrate control. For reef tanks, this is a get setup to house microorganisms in the fuge section.
Peninsula aquariums do come with a hefty price tag. This aquarium is a statement piece. If you are looking for high-quality and looks, you can’t go wrong with this fish tank.
The Red Sea Reefer 425XL is a top-of-line rimless aquarium that comes with a sump and overflow. It was one of the first ready-to-run large saltwater tanks in history. It started up an entire craze for those who want their worry-free premium setup! You can see how proud they are about this process below:
This 425 XL model is the best choice if you’re looking for more space to customize your scaping. It is wider as it’s 4 feet long and the piping is already assembled for you. The pipes require no gluing.
I also love how well setup the newest generation models are with the sump. The ATO container sits at the top of the sump, freeing room on the opposite side of the aquarium stand to place all your equipment and wire manage efficiently.
Red Sea Reefers are expensive but are a great way to get started in the reefing hobby. They have everything you need and look great too!
Innovative Marine is well known for developing premium quality all-in-one aquariums. They have to lead the aquarium industry with larger all in aquariums like this INT 100 model. This model is a 100 gallon, 4 foot long aquarium with its overflow built into the back.
This is the one of the few internal overflow systems of its kind that incorporates a bean animal drain system for added safety. The overflow is a trapezoid style, which doesn’t put as big of a footprint as typical internal overflow box systems.
The stands that comes with these systems are premium quality. They are made of anodized aluminum, which makes them corrosion-resistant. They will not warp or swell and provide better long-term reliability then wooden cabinets. Because of their aluminum structure, they are lightweight as well. The white or black aquarium stand also have a modern look to them and they are easy to assemble.
Innovative also sells their own line of aquarium equipment, most of which are designed to work and fit in this aquarium.
If you are looking for a premium quality all in one aquarium at this size, this is the aquarium to buy. It can be suited to work with both freshwater and saltwater aquariums. Keep in mind that these do not come with sumps.
UNS is the leading brand for high-quality freshwater fish aquariums. They have world class manufacturing process with 45 degree precision cut mitered edges that are made from low iron glass, which has 91% Diamant grade material making it ideal to be used in commercial applications like restaurants or hotels where heavy wear may come about due other factors such as temperature changes.
This 24″ tall and wide aquarium is perfect for scaping. It has plenty of room to roam, with a large number of schooling fish in the tank as well as larger ones like angels and discus fish! The clear background also makes it better looking for planted tanks than the other reef ready systems showed beforehand. You can plant things without worrying about covering up your beautiful decorations because they’ll still be visible through their water surface
It’s not best to picture this tank if you are looking for a saltwater setup and the price can be up there. However, if you are looking for a large aquascape tank, this is the one to buy.
A great choice if you want a sump and good price is to look at SC Aquariums 100 gallon fish tanks. They are a eurobaced glass aquarium, which is a good compromise from the rimless aquariums we have seen so far.
The overflow is three drains in a bean animal configuration. The aquarium stand is closer to the standard wood cabinets you will see at a fish store, except they use oak instead of MDF that you would find in cheaper builder.
What you get here is a high quality setup at a more reasonable price. The aquariums come with a 3 year warranty and black background is removable if you want to swap out for another or need it clear for a freshwater tank setup. Overall, it’s an excellent buy if you want an sump system.
Pros and Cons
Pros
Great price
6 foot long tank
Easy to find locally
Cons
Rimmed Tank
Low cabinet quality
Limited space in cabinet
Buying Guide
What Do You Want
Figuring out which type of fish you want in your 100 gallon fish tank will narrow down what equipment is necessary for running and maintaining it. Do have a particular species or setup that suits YOU better than others do – like:
Saltwater versus freshwater aquariums
Saltwater fish only vs. Fish only with live rock (FOWLR) vs. Reef aquarium
Particular species of fish only tanks like Discus Fish
There are so many ways to find inspiration for what you want in your fish tank. You can visit forums, go to an aquarium club meeting, or check out Pinterest and get a few ideas from there!
Budget Concerns
Aquariums of this size are expensive. They are even more so than 2 or 3 foot long tanks. When you get into 4 and 6 foot long tanks, the amount of equipment can double and it goes up higher the more complex the setup. Fish only is reasonable compared to a aquascape or a reef tank.
You should expect to spend over $45 per gallon on a reef aquarium setup vs 10 – $30 dollars a gallon for a freshwater setup. If you want to save some money, consider getting a carpenter friends to build a cabinet for you or purchase cheap aquariums second hand locally.
Equipment Investment
When you get to aquariums over 100 gallons, you usually start looking at higher end filtration systems to run your tank regardless if your goal is fish only, a planted tank, or reef tank. This has to do with the amount of bioload these tanks will be handling.
When you get to aquariums over 100 gallons, the type of filtration system is important for maintaining clean water. For example if your goal is just fish only then a simpler filter will be sufficient but when planning on keeping plants or reefs there are more expensive options that will be needed. For example, you may need to get RO water for a planed tank and RODI water for a reef tank.
A canister filter is the best choice for a freshwater aquarium. It has large media capacity and will keep your tank more stable than other systems, you won’t need to place heavy hang-on back filters on top of it or add ugly equipment that stick out like sore thumbs with this size!
The best way to keep a saltwater tank is with an aquarium sump. Sumps offer ultimate flexibility and the ability to hide away equipment in the sump instead of the display thank.
Even if you purchase a used tank, you can always convert an aquarium to a sump system either by drilling it or installing a hang on back overflow box system. A drilled overflow box will be the most reliable.
You will also need to consider a CO2 system if you want to keep a lot of plants and dosing pumps for a major reef tank setup.
Aquarium lighting is the last major piece of equipment to look at. This will vary depending on if you go with a saltwater or freshwater setup. For either setup, Current USA offers great options at reasonable prices. Note that your lighting costs will increase significantly if you go with a 6 foot format versus a 4 foot format.
A 100 gallon fish tank will be more maintenance extensive than smaller aquariums. The water changes are larger and the amount of glass cleaning will be greater. Pruning a tank like this can be a major chore as well!
For saltwater tanks, you will be using lots of aquarium salt and RODI water for water changes. A freshwater tank will be cheaper and take less time to maintain. There are some saltwater reef tanks however, that can get to the point of requiring minimal water changes. You can achieve the same with planted tanks, but you will still need to prune.
Keep maintenance in mind when you are determining if a 100 gallon tank is for you.
Types
Rimless vs Rimmed Tanks
Rimless vs rimmed tanks becomes a big consideration at this size. Not only is a 100-gallon fish tank large, there is also a noticeable black rimmed on standard glass tanks of this size. The appeal of a rimless really shows cosmetically when you get to 4 and 6-foot-long tanks.
Rimmed tanks will use standard glass, which will have a green hue to them. You will notice a clarity difference at this size. Rimless tanks will use low iron glass, which will be more transparent, and also more expensive than rimmed tanks.
The extra cost for this clarity is totally worth it! The look and more transparent hue are noticeable when looking at 4 or 6-foot-long tanks.
Glass vs Acrylic
Another consideration will be glass vs acrylic. There are pros and cons to both:
Glass is very difficult to scratch
Acrylic is much lighter
An acrylic tank will have the best clarity of any tank type
Glass are offered in rimless formats. Acrylic tanks have bracing
Glass can crack, acrylic is difficult to break
Acrylic is easier to drill than glass
I did not include any acrylic tanks in this list. Acrylic tanks sold online are pretty subpar compared to the glass tanks you can find online. To get a higher quality acrylic tank, you will need to go to a local fish store or work with a custom manufacturer. Buying locally is the best bet for arycilic tanks.
A 100 gallon can be purchased in a 4 foot or 6 foot long format. The 4-foot format is going to be more readily available. There are some factors to consider when thinking about a 4 vs 6-foot tank:
The 4-foot format will be wider than taller making it more ideal for aquascaping
Because of the shorter length, a 4-foot tank will generally be cheaper to set up. You only need one or two light fixtures and less substrate over a 6-foot format!
Most premium level ready-to-run setups are going to be in 4 foot sizes over 6.
Because of its long length, the 6-foot format gives you plenty more options when it comes to what fish can be placed in a tank
Longer fish tanks will have fewer territorial disputes amongst tank mates
You will have more room to store equipment in a longer tank
If you are purchasing a 100-gallon tank primarily for fish, I would recommend that you purchase the 4-foot format. You tend to get a thin tank with at the 100 gallon size. If you want a 6-foot long tank, I would suggest looking at 125 gallon aquariums.
Best Options
For those who are looking at the 100 gallon aquarium, we’ll discuss what types of setups suit this size best. Let’s look at the different options!
Aquascape Aquariums
An Aquascape Aquarium is an incredible display tank. It typically isn’t seen at 6 feet as many will cap out around 4′ in length, but if you’re looking to go this route then your options for fish open up quite significantly. Angelfish and discus are ideal for this size!
African Cichlid Tanks
African Cichlids are beautiful, colorful fish that need space to thrive. The size of a 100-gallon tank allows them plenty room for to settle territory – making it the perfect choice for them!
Discus Fish Tanks
A large tank like this is great for Discus Fish. Discus need tall and long tanks to thrive. You get both with a 100 gallon setup. It’s also large enough to consider tank mates for them.
Reef Tanks
A 100 gallon tank is great entry level aquarium at the 4 foot size for a reef tank. You get a lot of stability with this volume and have great size for corals. Dwarf angelfish and some Tangs can be housed at this size.
The height and length of a 4 foot 100 gallon tank works great for mixed reefs, softy, or LPS coral tanks.
FAQs
How Big Is this size of Aquarium?
A standard 6 foot long 100 gallon tank is 72″ x 18″ x 20″. In the 4 foot format, it will be 48″ x 20″ x 24″. When filled up, they can easily weigh over 1100 lbs. They will need to placed in an area of your house that can support its weight. This makes a 1st floor or basement location ideal. If you are going to run a reef tank, try to working with a 15 or amp circuit breaker.
What Are The Dimensions?
A standard 100 gallon aquarium will measure 72″ x 18″ x 20″. A 4 foot 100 gallon aquarium will measure 48″ x 20″ x 24″
How Many Fish Can I Put In This Size of Aquarium?
How many fish you can put in a tank will depend on your setup and the type of fish you want to keep. You can use an advisor as a great tool for freshwater tanks. I don’t feel this is a good tool for saltwater fish though. For saltwater, it does depend on the fish, but generally, 1 inch for every 5 gallons is the rule of thumb for saltwater. This is about 20 inches of fish which will get you about 4-5 fish that average 5 inches in length.
You can certainly get more saltwater fish, however, most fish are semi-aggressive and territorial. Because of this, most reef keepers will mix in more corals to fill up their tanks.
What size sump for this size of an aquarium?
You have plenty of options with a 100 fish tank regarding a sump. Most aquarium sumps you can buy will be at 36 inches and should fit in your aquarium stand. 48 inch sumps are hard to come across. You can make a DIY sump out of a 55 gallon aquarium.
What Size Heater?
According to my best aquarium heater article, 300 watts is what you will need. It is best to run two heaters for this size (150W each) and to pair it will a quality heater controller or aquarium controller to prevent failure.
Closing Thoughts
I hope that this article was able to help you in your quest for the perfect fish tank. If you have any questions or concerns, please leave a comment below, and let’s have a conversation. I’ll do my best to answer any questions you may have and continue to update this post as more information comes to light. Thanks for reading and happy fishkeeping!
🔧 Want to learn more? This article is part of our complete Aquarium Equipment & Gear Guide. your ultimate resource for filters, heaters, lights, pumps, tanks, and more.
Expert Take | Mark Valderrama — AquariumStoreDepot
Livebearers get recommended to beginners constantly, and for good reason. They are forgiving, colorful, and active. But the part people gloss over is the population math. A single pregnant female guppy can deliver up to 100 fry. If you keep males and females together and you are not actively managing the population, you will have a tank problem within a few months. Plan for it from day one. I have seen more beginner tanks crash from livebearer overcrowding than from almost any other cause.
Livebearers breed constantly, eat their young, and will overpopulate any tank without predation or sex separation. The appeal is obvious. The population explosion that follows is the part nobody warns you about.
If you keep males and females together, you are breeding livebearers. There is no opt-out.
That said, guppies, platies, mollies, swordtails, and Endler’s are some of the most rewarding and colorful fish in the freshwater hobby. Here is what you actually need to know to keep them long-term, including the population management piece that most beginner guides skip entirely.
Key Takeaways
Livebearers give birth to live, free-swimming fry rather than scattering eggs; they will breed without any intervention from you
“Beginner-friendly” means forgiving on water parameters, not zero effort; water quality still matters, and overcrowding is the most common way livebearer tanks fail
Mollies benefit from slightly hard, alkaline water and tolerate low-level salinity; they are the most sensitive of the group to consistently poor water quality despite their hardy reputation
Fancy guppy strains have been selectively bred for appearance, which has reduced hardiness compared to wild-type stock; feeder guppies are often hardier than fancy varieties
The solution to population control is simple: all-male tanks, all-female tanks, or a grow-out tank with a plan for rehoming fry
What Are Livebearers?
Livebearers are fish that internally fertilize their eggs and give birth to free-swimming young rather than scattering eggs to be fertilized externally. Over 300 species qualify as livebearers, but in the aquarium hobby the term almost always refers to the Poeciliidae family: guppies, platies, mollies, swordtails, and Endler’s.
The key biological fact is that a female livebearer can store sperm from a single mating and produce multiple batches of fry without any additional male contact. This means a female bought at a fish store can already be pregnant. She will deliver fry whether or not there is a male in your tank.
These fish are found in Central and South America and the Caribbean, typically in warm, slow-moving freshwater habitats. They have been kept in aquariums for over 100 years and have been selectively bred into an enormous range of color forms, fin types, and body shapes. The hobby versions often look nothing like the wild originals.
Livebearer Difficulty Tiers
Easiest (True Beginner)
Endler’s livebearers, platies, wild-type guppies. Hardy, tolerate a wide pH range, eat anything, small footprint. Population management is the only real challenge.
Easy with Caveats
Fancy guppies, mollies, swordtails. Hardier than most fish but with specific needs: fancy guppies are more disease-prone from inbreeding; mollies need harder water and higher pH than most freshwater fish; swordtails need space and may jump.
Not True Livebearers to Worry About for Now
Goodeids, halfbeaks, and other specialty livebearers require specific conditions and are more advanced. Start with the Poeciliidae family.
The Population Problem Nobody Warns You About
This is the section most beginner guides skip. It should not be skipped.
A female guppy can produce 20 to 100 fry every 4 to 6 weeks. Platies deliver 20 to 50 every month or two. Mollies produce 10 to 60 every 30 to 45 days. These numbers compound quickly. A 10-gallon (38 L) tank with two males and four females becomes unmanageable within 3 to 4 months without active intervention.
The practical options are straightforward:
All-male tank: Beautiful display, no fry, zero population growth. Works great for guppies and Endler’s where males are the colorful sex.
All-female tank: Less colorful, but still active. Keep in mind females purchased from most stores are likely already pregnant on arrival.
Mixed tank with a plan: Set up a small separate tank as a grow-out. Move fry there and find them homes through local aquarium clubs, Facebook groups, or local fish stores that accept donations.
Overstocked tanks lead to elevated ammonia and nitrite, which leads to stressed fish, disease, and die-offs. The population control issue is not just an inconvenience. It is the most common way a livebearer tank becomes unhealthy.
Avoid These Livebearer Mistakes
Keeping mixed-sex livebearers in a 10-gallon (38 L) tank without a population plan; it will overcrowd within months
Keeping mollies in very soft, acidic water long-term; they prefer hard, alkaline water around pH 7.5-8.5 and become more disease-prone in soft acidic setups
Buying fancy guppies expecting the same hardiness as the wild-type; selective breeding for appearance has reduced their overall robustness
Not cycling the tank before adding livebearers; “beginner fish” does not mean “add to an uncycled tank”
Keeping swordtails in an uncovered tank; males jump, especially when chasing females
Male vs. Female: How to Tell Them Apart
Knowing the sex of your fish is essential for population management. The good news is that livebearers are relatively easy to sex once you know what to look for.
Guppies: Males are smaller and dramatically more colorful, with flowing fins. Females are larger, drabber, and noticeably rounder when pregnant.
Endler’s: Same pattern as guppies. Males have bold neon coloring; females are silver-tan and plainer.
Platies: Females have a fan-shaped anal fin and a rounder body. Males have a pointed, narrow anal fin (gonopodium).
Mollies: Same as platies. Female has a fan-shaped anal fin; male has a gonopodium. Females are often larger-bodied.
Swordtails: The easiest to sex. Males have the elongated lower tail ray (the sword) and a gonopodium. Females are rounder and lack the sword.
Aim for a ratio of one male to two or three females when keeping mixed-sex groups. A higher male-to-female ratio leads to the females being harassed constantly, which causes chronic stress and shortened lifespans.
Breeding Frequency: Every 4-6 weeks, 20-100 fry per batch
The guppy is the most commonly kept freshwater fish in the world. Males carry an extraordinary range of color and fin variations from generations of selective breeding. They survive beginner mistakes that would kill most fish, and they are still one of the better community fish even for experienced hobbyists who want activity and color in a planted tank.
The caveat is that fancy guppy strains have been heavily inbred for appearance. This has reduced their hardiness compared to wild-type or feeder guppies. If you keep losing fancy guppies and cannot figure out why, this is often the reason. Feeder guppies are typically more robust, less colorful, and considerably less expensive.
Breeding Frequency: Every 3-5 weeks, 5-25 fry per batch
Endler’s are closely related to guppies but smaller, more streamlined, and with a slightly different color pattern style. Males are neon and active; females are silver-tan and plain. The smaller batch sizes (5-25 fry versus up to 100 for guppies) make population management somewhat easier in smaller tanks.
One important note: Endler’s and guppies will hybridize freely. If you mix the two species, you will get fertile hybrids that look like a mix of both. Some keepers enjoy this; others who want to preserve pure Endler’s strains should keep them separately. Wild-caught Endler’s are nearly extinct due to habitat destruction, so the aquarium lines are what we have.
3. Platy
Scientific Name: Xiphophorus maculatus
Difficulty Level: Easy
Temperament: Peaceful
Adult Size: 2 inches (5 cm)
Minimum Tank Size: 20 gallons (76 L)
Temperature: 64-77°F (18-25°C)
pH: 7.0-8.2
Breeding Frequency: Every 4-6 weeks, 20-50 fry per batch
Platies are arguably the most beginner-compatible livebearer. They tolerate a wide temperature range (down to 64°F/18°C), prefer the slightly alkaline water that most municipal tap water provides naturally, and are peaceful with virtually everything similarly sized. The wagtail, tuxedo, salt-and-pepper, and rainbow color forms give plenty of variety without needing multiple species.
They produce slightly less waste than mollies, making them appropriate for smaller tanks. Still, a 20-gallon (76 L) is the right starting point for a small group with the understanding that it will need to handle population growth.
4. Molly
Scientific Name: Poecilia sp.
Difficulty Level: Easy with caveats
Temperament: Peaceful
Adult Size: 5 inches (13 cm)
Minimum Tank Size: 30 gallons (114 L)
Temperature: 68-82°F (20-28°C)
pH: 7.0-8.0
Breeding Frequency: Every 30-45 days, 10-60 fry per batch
Mollies have a reputation for hardiness that is partially undeserved. They are hardy when kept in appropriate water conditions. In soft, acidic water, they are significantly more prone to disease, particularly velvet and bacterial infections. Mollies evolved in hard, alkaline, often slightly brackish coastal waters. The aquarium versions tolerate fresh water fine, but they do best with harder water and a pH above 7.5.
The larger size (up to 5 inches/13 cm for common mollies; sailfin mollies can reach 6 inches/15 cm) means they produce considerably more waste than guppies or Endler’s. A 30-gallon (114 L) is the minimum for a small group, and filtration needs to be sized appropriately. Do not put mollies in a 10-gallon (38 L) and expect success.
The saltwater adaptation is real and interesting. Some hobbyists successfully transfer mollies to saltwater or brackish reef setups where they function as algae control. Acclimate slowly over several weeks, not all at once.
5. Swordtail
Scientific Name: Xiphophorus helleri
Difficulty Level: Easy
Temperament: Peaceful (males can be territorial toward each other)
Adult Size: 4 inches (10 cm)
Minimum Tank Size: 20 gallons (76 L) for a small group; 40 gallons (151 L) recommended
Temperature: 64-82°F (18-28°C)
pH: 7.0-8.3
Breeding Frequency: Every 4-6 weeks, 20-80 fry per batch
Swordtails are underused in the hobby. The red swordtail in a planted tank is a genuinely striking fish. Males can be aggressive toward each other (especially in tight quarters), so keep only one male per tank in smaller setups or provide plenty of visual breaks in larger tanks. Swordtails jump. A tight-fitting lid is not optional. The males especially jump when chasing females or competing with other males.
They produce an enormous number of fry. Eighty fry from a single female is not unusual. Plan accordingly. All-male swordtail tanks work well and eliminate the fry problem entirely.
Tank Setup
A cycled, established tank is the starting requirement for all livebearers. “Easy fish” does not mean “add to an uncycled tank.” Ammonia spikes kill livebearers as reliably as any other fish. Run the nitrogen cycle first; add fish after.
Most livebearers prefer the top half of the water column. They are not bottom-dwellers, which means substrate choice matters less for them directly. However, substrate matters for water quality management. Gravel or sand both work fine. Dense planting gives fry hiding spots and makes population management more organic (fry that hide in plants may survive even without a separate grow-out tank).
Filtration should be sized for at least twice the tank volume, and the outlet should not create strong current that small fish like guppies and Endler’s struggle to swim against. A sponge filter works for smaller setups; a hang-on-back or canister with a spray bar works better for larger tanks with mollies and swordtails.
A lid with minimal gaps is important for swordtails specifically and useful for all livebearers. They are not as prone to jumping as some fish, but they do jump.
Feeding
Livebearers are omnivores and will eat essentially anything you offer. A high-quality flake or micro-pellet makes a solid base diet. Supplement with frozen bloodworms, brine shrimp, and daphnia a few times per week to encourage better health and coloration. Mollies especially benefit from some plant matter in their diet; algae wafers or blanched vegetables work well.
For very small fish like Endler’s, break up larger flakes before feeding. Endler’s mouths are tiny and they struggle with standard-sized flakes.
Feed once or twice daily in amounts the fish consume within 2 to 3 minutes. Remove uneaten food to prevent water quality issues.
Tank Mates
Most livebearers are excellent community fish. They pair well with similarly-sized schooling fish like tetras, danios, rasboras, corydoras, and otocinclus. Peaceful gouramis work well with platies, mollies, and swordtails in appropriately sized tanks.
Avoid aggressive cichlids, large predatory fish, and anything that will eat a 2-inch (5 cm) fish whole. Angelfish will eat guppies. Standard cichlids will eat everything. Pufferfish will not leave any livebearer alone. These are not subjective observations; they are reliable outcomes.
Male bettas with livebearers is a judgment call. Female bettas work fine. Male bettas often leave platies and mollies alone but may harass and fin-nip fancy guppies or Endler’s. The long fins on a fancy guppy male look like a betta rival to some individuals. Watch carefully if you attempt this combination.
Breeding
If you keep both sexes, they will breed without any intervention. No special water changes, conditioning food, or breeding tank setup is required. The female carries the developing young internally for 4 to 6 weeks and then delivers live fry.
To maximize fry survival, set up a densely planted tank so fry can hide immediately after birth, or move the visibly pregnant female to a separate small tank before delivery. A gravid spot (dark area near the anal fin) darkens and enlarges as delivery approaches. Remove the female from the fry tank after delivery, as she and other adults will eat the fry.
Feed fry crushed flake food or baby brine shrimp until they are large enough to accept adult food, typically around 3 to 4 weeks of age.
FAQs
Which livebearer is best for a beginner?
Platies are the most forgiving starting point. They tolerate a wide temperature range, prefer the slightly alkaline water most tap water provides naturally, are peaceful with virtually everything, and breed at a manageable rate. Guppies (wild-type or feeder strains) are equally hardy. Start with one sex if you do not want to deal with fry.
Why do my mollies keep dying?
The most common cause is soft, acidic water. Mollies need hard, alkaline water (pH 7.5-8.0) to stay healthy long-term. In soft, acidic water they become susceptible to velvet, bacterial infections, and “molly disease” (a general decline). Check your water hardness and pH. If your tap water is soft and acidic, consider adding crushed coral to the filter or using a buffer to raise pH and hardness.
How do I stop livebearers from breeding?
Keep only males or only females. This is the only reliable method. Keeping a predator in the tank to eat fry works partially but leads to constant stress and is not a sustainable or humane approach.
Can I keep livebearers in a 10-gallon tank?
A 10-gallon (38 L) works for a small group of guppies or Endler’s if you keep one sex only. Mixed-sex livebearers in a 10-gallon will overcrowd within months. Platies, mollies, and swordtails need 20 to 30 gallons (76-114 L) minimum.
Do livebearers eat their fry?
Yes. The female will eat her own fry immediately after delivering them if they are accessible. A densely planted tank gives fry immediate hiding spots that improve survival rates significantly. Moving the female to a separate tank before delivery and returning her after is the most reliable way to save fry.
Closing Thoughts
Livebearers are some of the best fish in the hobby. Hardy, colorful, active, and available in enough varieties to occupy a hobbyist for years. The beginner-friendly reputation is accurate. But “forgiving” is not the same as “maintenance-free.” Water quality still matters. Tank size still matters. And the population math will catch up with you if you do not plan for it from day one.
Go in with a clear plan for fry management and a properly cycled tank, and livebearers will reward you with one of the easiest and most active setups you can run.
Mark’s Pick
For a beginner wanting livebearers without the population headache, I recommend an all-male guppy tank. Pick 6 to 8 males from different color strains, put them in a planted 20-gallon (76 L), and you get all the activity and color with zero fry management. It is genuinely one of the best-looking and lowest-drama setups you can build. Platies are my second recommendation for anyone who wants a mixed community that includes both sexes, as long as they have a plan for the fry.
Where to Buy Livebearers
Livebearers are available at most fish stores, but quality varies considerably by source. Online specialty retailers often have healthier stock with more variety in color forms and strains, and they ship directly from their own holding systems.
Flip Aquatics – Quality livebearers, reliable shipping, good variety across guppies, endlers, and other livebearers
Dan’s Fish – Healthy fish, good selection of freshwater species including livebearers
Danios are one of those fish groups I’ve always had a soft spot for. they’re fast, hardy, and the group contains a lot more variety than most hobbyists realize. Most people know zebra danios, but there are 9 species worth keeping and each has its own personality and requirements. After 25+ years in the hobby, here are my honest notes on the whole group.
Danios are one of those fish groups that punch above their weight. The common zebra danio is practically bulletproof. it tolerates a wide temperature range, adapts to most water conditions, and its active schooling behavior makes it a useful dither fish for shy or nervous tankmates. But the group goes well beyond zebras: pearl danios, giant danios, leopard danios, and the stunning celestial pearl danio all have their own appeal. After 25 years in the hobby, I still think danios are underrated by intermediate hobbyists who’ve moved past the beginner stage. Here are 9 types worth knowing.
What Are Danio Fish?
Danio fish are some of the most important fish in the aquarium hobby as well as in the scientific world. The most popular species of danio to come across is the common danio (Danio rerio), also known as zebrafish. However, the genus of Danio contains almost 30 different species with 9 of them making their way into the homes of freshwater enthusiasts!
Danio fish are considered to be some of the easiest fish to keep in the home aquarium. Their hardiness and quick reproduction rates have also made them the perfect candidate for use as a model organism for gene sequencing. Specifically, Danio rerio has been used to study drug development, regenerative properties, and other bioengineering practices.
Some of these studies have been taken advantage of by the aquarium industry, creating fluorescent varieties of danio called GloFish. These fish have been genetically prioritized to express neon colors of red, green, yellow, and more. Once these genes are expressed, they will continue to be passed onto later generations of danio, meaning that there is no cruel practice involved. Sadly though, there are many breeders that dye their fish for brighter and more appealing colorations.
Top 9 Types of Danios Best Suited For Aquariums
In the freshwater aquarium hobby, danios are seen as beginner fish. They don’t require a lot of room to thrive and can bring a ton of activity to the top portions of the tank. Though common zebra danios are the most popular fish species available, there are actually 8 other varieties that can bring new life to a tropical setup.
We have a video just for you from our Aquarium Store Depot YouTube Channel. We go into more detail in our blow post below. If you enjoy our content, please subscribe as we post new videos each week! Let’s start with the first on the list!
Sometimes wrongly referred to as galaxy rasboras, celestial pearl danios belong to the Danio genus along with the other fish species on this list. These fish are a recent addition to the aquarium hobby, almost causing them to become endangered shortly after their discovery in 2006. Their spotted trout-like appearance has made them a favorite, yet expensive, staple to the planted aquarium.
Celestial pearl danios come from very specific ecosystems at high altitudes in Hopong, Burma. They can be found in large groups, which needs to be replicated in the aquarium setting by keeping at least 6 members at all times; ideally, these fish should be kept in large groups starting with 20 individuals.
Celestial pearl danios can be slightly more challenging to keep as they are not very hardy fish and succumb to imperfect or irregular water conditions. They also do better in cooler water temperatures, making them incompatible with other species.
2. Zebra Danios
Scientific Name: Danio rerio
Difficulty Level: Easy
Temperament: Peaceful
Adult Fish Size: 3 inches
Minimum Tank Size: 10 gallons
Diet: Omnivorous
Origin: Pakistan, India, Bangladesh, Nepal, and Myanmar
Temperature: 64-75°F
pH: 6.5-7.5
Difficulty to breed: Easy
Planted tank suitability: Common
Zebra danios are arguably the most popular and available fish on this list. These are incredibly active fish that earn their name from the horizontal black and yellowish-silver stripes that run from their heads to their tails.
In the wild, the Zebra danio fish are found in a wide range of ecosystems from stagnant waters to fast-moving mountain streams. Most of these environments have cooler water temperatures than typical tropical fish, which will need to be replicated in the aquarium.
The zebra danio is a schooling fish and will need to be kept in groups of at least 6 or more. Due to their activity and tendency to stay towards the top of the tank, schools can quickly become overwhelming for other fish as well as for other danios. Because of this, it’s recommended to keep smaller schools with other species that stay toward the bottom of the aquarium.
3. Gold Longfin Danio
Scientific Name: Danio rerio
Difficulty Level: Easy
Temperament: Peaceful
Adult Size: 3 inches
Minimum Tank Size: 10 gallons
Diet: Omnivorous
Origin: India
Temperature: 64-75°F
pH: 6.5-7.5
Difficulty to breed: Easy
Planted tank suitability: Common
The gold longfin danio (video source) is a more colorful variation of the common Danio rerio. These types of danios naturally occur in the Ganges region in Eastern India, though the aquarium hobby has enhanced their coloration and finnage.
The gold longfin danio is named after its bright yellow body with white stripes. Compared to other species, they also have noticeably longer fins. In terms of care requirements, they have the same needs as regular Danio rerio fish.
Though similar in name to the gold longfin danio, the gold ring Burmese danio (video source) is a species all of its own. Instead, these unique fish are named after the leopard-like black spots that cover their pale yellow body. They are especially identifiable by their opaque white abdomen.
https://youtu.be/gT0X7RLFCpc
Gold ring danios have the same behaviors and care requirements as zebra danios, but are slightly smaller. Though an inch difference might not seem like a lot, these fish are that much more susceptible to bullying and strong water currents. Still, the best tank mates for gold ring danios will be other types of danio and slow-moving fish species.
5. Glowlight Danio
Glowlight Danio Near Gravel” class=”wp-image-557066″/>
Scientific Name: Celestichthys choprae
Difficulty Level: Easy
Temperament: Peaceful
Adult Size: 1.5 inches
Minimum Tank Size: 10 gallons
Diet: Omnivorous
Origin: Myanmar
Temperature: 64-75°F
pH: 6.5-7.5
Difficulty to breed: Easy
Planted tank suitability: Common
Not to be confused with GloFish danios, glowlight danios are very unique fish. They’re not even true danios and belong to the Celestichthys genus instead!
These fish are extremely colorful with a yellow-based body with vertical blue stripes and a pink stripe leading to their tail. They are also much smaller than the other types of danios on this list, but one of the more expensive varieties.
Glowlight danios are very tight schoolers and will thrive in large groups. They are more likely to venture to lower portions of the other tank than other species, so it’s important to keep their activity levels in mind when stocking.
6. Pearl Danio
Scientific Name: Brachydanio albolineatus
Difficulty Level: Easy
Temperament: Peaceful
Adult Size: 2 inches
Minimum Tank Size: 10 gallons
Diet: Omnivorous
Origin: Myanmar, Sumatra
Temperature: 73-77°F
pH: 6.5-7.5
Difficulty to breed: Easy
Planted tank suitability: Common
The pearl danio, also known as the blue danio or turquoise danio, is a plain iridescent fish. While they may not be the most colorful species on this list, their simplicity catches the eye in a well-planted aquarium.
Pearl danios have the same care requirements and behaviors as other danios and will do best when kept in small groups. It is important to note that pearl danios need a slightly higher water temperatures than other types of danios that can tolerate cold climates.
7. Leopard Danio
Scientific Name: Danio frankei
Difficulty Level: Easy
Temperament: Peaceful
Adult Size: 3 inches
Minimum Tank Size: 10 gallons
Diet: Omnivorous
Origin: India
Temperature: 64-75°F
pH: 6.5-7.5
Difficulty to breed: Easy
Planted tank suitability: Common
The leopard danio is very close in appearance to the gold ring Burmese danio, though they’re not related. Leopard danios have slightly more streamlined bodies and much smaller bluish-black spots on a light yellow body. Some of these spots transfer onto the fins.
Unlike other danios, the leopard danio fish occurs in slow-moving or stagnant waters. However, they appreciate some water flow in the aquarium setting. Like the others, they appreciate being in small groups in vegetative setups.
8. Giant Danio
Giant Danio Fish in Aquarium” class=”wp-image-557080″/>
Scientific Name: Danio aequipinnatus
Difficulty Level: Easy
Temperament: Peaceful
Adult Size: 4 inches
Minimum Tank Size: 30 gallons
Diet: Omnivorous
Origin: India, Nepal
Temperature: 72-75°F
pH: 6.0-7.0
Difficulty to breed: Easy
Planted tank suitability: Common
Though called giants, giant danios are only about an inch bigger than other species of this fish. However, this potential size is enough to make their minimum tank size a little bigger than the others to allow for growing room and space to swim. They also prefer slightly warmer water temperatures and a lower pH.
These aquarium fish are plain in color, but beautiful upon a closer look. They have pale bodies with highlights of light blue. Paired with their activity level, they can create contrast against a planted background in a large group.
9. GloFish Danio
Scientific Name: Danio rerio
Difficulty Level: Easy
Temperament: Peaceful
Adult Size: 2.5 inches
Minimum Tank Size: 10 gallons
Diet: Omnivorous
Origin: Captive-bred
Temperature: 64-75°F
pH: 6.5-7.5
Difficulty to breed: Not permissible
Planted tank suitability: Common
GloFish are highly fluorescent types of danio. This trait has been inherited through the generations and patented by the GloFish company, making it illegal to breed them. However, they are widely available in most aquarium stores and can make a fun and unique addition to a blacklight freshwater setup.
It is important to purchase only GloFish (certified danio fish as others could be cruelly dyed with artificial colors. GloFish danio colors include Starfire Red®, Electric Green®, Sunburst Orange®, Cosmic Blue®, and Galactic Purple®.
Danio Tank Setup
The best thing about danios is that they will thrive in most tank setups, anything from a simple 10 gallon tank with colorful decorations to a 100 gallon system with the rarest freshwater plants. As long as water parameters stay stable and in their preferred range, these fish will thrive.
Substrate & Decorations
Danio fish can be kept on gravel or sand. They do not regularly venture towards the bottom of the tank, which nearly eliminates the threat of long fins getting tugged or bodies getting scratched. If you find that your fish is laying towards the bottom of the aquarium, check water parameters immediately as this could be a sign that something is wrong.
Otherwise, danios do not need an elaborate setup. They will do well in a barebones aquarium with simple decorations. If you really want to treat your fish though, provide easy floating plants that they can pick at for food and hide in at the surface of the water.
A fully planted setup will make these simple and peaceful fish shine even more.
Lighting & Filtration
Lighting will largely depend on the types of plants being kept in the aquarium. Danios do not need any specific lighting, though GloFish will glow best under a blacklight; don’t be tricked into buying a special aquarium blacklight as any one will work.
An important thing to remember is that these fish stay towards the top of the aquarium. If using a high-intensity light for red and foreground plants, make sure to provide your fish with some coverage that they can escape to if the light becomes too much.
Though danios aren’t the messiest fish, they can start to create large amounts of waste when kept in big groups. It is always recommended to have a filter that is rated for at least twice the size of the aquarium, with bigger being better. In most cases, you can’t overdo good filtration for danios as they’ll appreciate the extra water flow. A simple power filter should do the trick for a danio tank.
Danio fish are considered a coldwater species. They can tolerate significantly colder water temperatures than typical tropical fish. However, most of these fish have been bred in the aquarium industry and have acclimated to average water conditions.
When buying your danio, it is best to ask what temperature they are being kept at and match those parameters.
Do Danios Need A Heater?
Being a coldwater fish, danios do not necessarily need a heater. If ambient room temperature constantly stays in the same range as the preferred one of your danio, then you don’t need a heater.
However, a heater is always recommended for any tank setup. This is because temperatures can easily fluctuate throughout the day enough to cause stress on your fish. For that reason, danios should always have a heater to keep temperatures constant rather than to raise the temperature.
How To Care For Danio Fish
Danio care is simple and straightfoward. Once the tank is cycled and the fish are safely acclimated, there’s little to worry about going wrong. The biggest concern will be keeping these active aquarium fish fed and choosing the right tank mates.
Aquarium Maintenance
Danio aquarium maintenance is no different from any other fish though the frequency will depend on the parameters of your system. This usually means a 20-25% water change every time nitrates creep over 50 ppm. For most hobbyists, this is every week or every other week depending on the bioload and size of the aquarium.
Along with water changes, the substrate should be vaccuumed regularly to keep detritus from building up.
Danio Behavior & Feeding
No matter which species of danio you choose, your danio fish will be the most active in the whole aquarium. These fish love to swim towards the surface of the water, searching for food and following the rest of the school. Most species of danio are very tight schoolers and will form groups that change direction all at once.
If you find that your danios are not schooling, try adding more plants or more danios. It is possible that your fish are trying to hide due to lack of coverage or safety in numbers. To help your fish be more active, make sure to feed regularly. More activity means a higher metabolism that needs to be kept up with.
In the wild, danios are mainly insectovores; this is part of the reason they stay right under the surface of the water to catch any bugs that might land. In the aquarium setting, they have adapted to an omnivorous diet and will accept most frozen, freeze-dried, and live foods. They will especially enjoy bloodworms and mosquito larvae.
The staple of their diet should be a high-quality fish flake food or pellet; flakes will stay on the surface while pellets will sink out of reach of your fish. To meet their vegetation needs, you may provide algae flakes and pellets or offer blanched vegetables from time to time. A good staple food to buy is Xtreme Aquatic Foods Nano.
Xtreme Aquatics Nano formula is specially designed for smaller fish and contained a well balance mix of raw ingredients. It is a great staple food for your nano fish.
Most danios are plain in color. While they can bring a lot of activity to the tank, they’re not usually the centerpiece of the system. Instead, their simple colors can be used to accent other aquarium fish.
Some of the best danio tank mates will prefer cooler temperatures and stay away from the upper portions of the tank. Some ideal species would be:
Danios can also safely be kept with most invertebrates and can even be paired with dwarf crayfish as they both stay at the extreme ends of the tank.
How Many Danios Should Be Kept Together?
No matter which species of danio you choose, you will need to keep them in a school. Danios are schooling fish and should never be kept by themselves.
Ideally, at least 6 danios should be kept together at all times. From there, tank size will determine the maximum number possible.
Tank Mates To Avoid
There aren’t many tank mates you should avoid in a danio tank. The biggest concern will be having your fish eaten by something that has a bigger mouth.
Danios are some of the easiest freshwater fish to breed and are a perfect challenge for beginners. As long as water parameters are stable, diet is high-quality, and a male and female are available, then these fish will spawn in your freshwater aquarium without any additional effort.
Danios are egg scatterers and will not take care of their young. Once the eggs have been fertilized, they are likely to be eaten by other fish. To increase the odds of eggs surviving, remove the eggs or install an eggcrate that blocks the other fish from getting to them.
The eggs will hatch after a day or two and the fry will be free-swimming. At this point, the fry can also be removed for greater chances of success. Feed small foods, like baby brine shrimp, regularly until they’re able to accept a larger variety.
Final Thoughts
Danio fish are shrugged off as an easy beginner fish that doesn’t add much to the aquarium. Most hobbyists forget that there are many different types of danio available that don’t need any extra care! It’s just a matter of picking out which one you like best.
📘 Want to learn more? This article is part of our complete Freshwater Fish Guide. your ultimate resource for freshwater species, care tips, tank setup, and more.
Black brush algae. BBA. is the algae I hate dealing with most. Unlike green algae that you can wipe off glass, BBA latches onto plants, hardscape, and equipment and doesn’t let go. In 25 years of keeping tanks, I’ve learned that BBA almost always signals a CO2 or flow problem. Inconsistent CO2 injection is probably the number one cause in planted tanks. when CO2 fluctuates, BBA moves in fast. Low or dead-zone flow is another common culprit. The good news is that once you identify the root cause and address it, BBA growth stops and existing patches can be treated with Excel or a diluted bleach dip. This article walks through exactly how to do that.
What Is It?
Audouinella, also known as the black beard or black brush algae (BBA), are stubborn algae species from the red algae family. An infestation of this common fish tank villain looks just like a black or dark green scruffy beard, so it’s pretty obvious where its common name comes from. BBA is quite similar to Staghorn algae in appearance but grows in a denser, darker tuft.
Black beard algae is a natural component of fresh and saltwater environments, so it is not harmful in itself. It doesn’t look great, however, and it can affect plants by blocking out their access to light.
This form of red algae starts out as tiny dark tufts but grows quickly if it isn’t checked early. It attaches itself to plants, rocks, driftwood, aquarium decorations, and even gravel substrate. In other words, this stuff grows almost anywhere!
What Causes BBA?
Black beard algae are usually introduced to your fish tank from other aquariums. This could be on contaminated plants, or pretty much any object from another tank.
Black beard algae reproduce by spores. The algae spores are tiny, so it is easy to spread them in the water that new fish and livestock are delivered in.
There are certain conditions that allow these algae to get out of control, however. Here’s a quick summary of the most common causes of serious black beard algae growth:
Fluctuating CO2 levels
Unhealthy Plants
Too much light
Excess fish waste and leftover food
Elevated nitrate and phosphate levels
Poor filtration and inadequate water circulation
How To Control Black Algae In Fish Tanks
Now that you know more about what black beard algae is, you’re probably itching to know how to get rid of it. Rest assured, that’s what this article is all about, so let’s take a deep dive into some of the best treatment methods!
Biological Control (The Clean-Up Crew)
This is my favorite method of black beard algae control, even if it isn’t the most effective. Why is it my favorite? Because I love algae eaters!
Unfortunately, most animals do not eat black beard algae as their main food source. That means that biological control can be very helpful in the long run, but probably won’t bring fast results.
BBA isn’t the ideal food source for most common aquarium animals, especially if they have access to better food sources like prepared fish food. There are a few species that do eat this type of algae, however, so let’s meet them now!
Siamese algae eater – Crossocheilus langei
The Siamese algae eater (video source) is probably the most popular choice of fish for controlling black beard algae. Siamese algae eaters grow to about 6 inches in length, so they are a good choice for freshwater aquariums of at least 30 gallons or larger.
Panda garra – Garra flavatra
Panda garra fish are a great little species that reach a size of about 3.5 inches. These bottom feeding fish are reported to feed on black algae from time to time. They prefer tanks with good water flow and at least 20 gallons of water volume.
Florida flagfish – Jordanella floridae
The Florida flag fish is a colorful fish species that looks great in tanks of 15 gallons or more. These omnivorous fish feed on a wide range of food sources, including pesky brush algae!
While they won’t completely get rid of black beard algae from your tank, they can do a great job of stopping this algae’s growth.
Hillstream loach – Sewellia lineolata
The hillstream loach is another awesome algae eater that might help keep black brush algae growth under control. These fascinating algae-eating fish need well-oxygenated, flowing water in tanks that hold 20 gallons or more.
Molly fish – Poecilia sphenops/ latipinna
It’s a bit of an open secret, but good old mollies can also be great for controlling black beard algae!
It might not be their first choice, however, so don’t be surprised to see them completely ignore the stuff if you feed them a lot of prepared foods like flakes.
When it comes to keeping a healthy planted aquarium, Amano Shrimp are the best. These hard-working crustaceans will dutifully wipe your plants and rockwork clean of algae. Their appetite for different types of algae that can’t be matched by other shrimp breeds!
Fish like the Siamese algae eater aren’t the only animals that can be useful to get rid of black beard algae growth.
Amano shrimps are great little algae-eating inverts that can be kept in tanks as small as 5 gallons. Amano shrimp are especially great for planted tanks!
Ramshorn snails – Planorbarius duryi
Ramshorn snails are probably the ultimate low-maintenance algae eaters. Unfortunately, these notorious invertebrates tend to find their way into aquariums on live plants and breed out of control. That being said, they are great for cleaning up scraps and generally improving the health of your aquarium.
Care
There’s one last thing to mention before we move on to the most effective methods to remove black beard algae.
Different algae eaters have different care needs, so please make sure your freshwater tank and water parameters will create a healthy environment before bringing any of these species home.
Physical Removal
Sometimes the most obvious solutions are the best solutions. Unfortunately, this is easier said than done when trying to get rid of black beard algae!
If the BBA in your tank is growing on a removable hardscape feature like a rock, or ornament like plastic plants or decorations, scrubbing with a stiff bristle brush or wire brush can be helpful.
Removing black beard algae is safer outside of the tank so that the fragments do not collect in the aquarium water. For any removal in the tank, it is always best to switch off your filter and powerheads to avoid distributing fragments.
If your BBA is growing on aquatic plants, physical removal will be a little more brutal. This stuff is tough, so a quick wipe-down is not going to be much help. Badly affected leaves will need to be removed. Remember to remove these leaves and plant matter from your aquarium.
Black beard algae reproduce by spores, so you’ll probably never remove them all. Physical removal is a great first step toward eradication, but you’ll probably want to proceed directly towards the next treatment methods to finish the job.
Chemical Treatments
Black beard algae often respond very well to chemical treatments. Of course, safety is very important when using chemicals, especially if you keep live plants and animals in your aquarium. Read on to learn two trusted methods!
How To Get Rid of It With Hydrogen Peroxide
Hydrogen peroxide (H2O2) is a compound of hydrogen and oxygen that can be very effective for getting rid of stubborn black beard algae in your aquarium. It is a liquid that is usually available from local drug stores and chemists at a very low cost.
Let’s take a look at some of the ways to use this chemical to treat black beard algae.
Hydrogen peroxide bath
Preparing an H2O2 bath is a great option for plants, ornaments, and hardscape features that you can remove from your tank. You will know you have been successful when the black beard algae begin to turn grey or pinkish.
Dosing hydrogen peroxide
One good method to rid your aquarium of black beard algae is to simply add hydrogen peroxide to the water column. Start by turning off your filter, and your aquarium lighting.
Next, you’ll want to measure out 3 teaspoons of 3% hydrogen peroxide for every ten gallons of water in your aquarium. Add this to the tank and allow it to soak for about an hour before switching the lights and filter back on.
Spot Treatments
You can also apply the hydrogen peroxide directly where you need it using a syringe or a pipette. You can do this under the water, just remember to switch off your filter and lighting.
You can also use this method after draining the tank enough to expose the algae to air, or after removing the affected plant or object from the tank. A small paintbrush can be very useful for applying the hydrogen peroxide, but you can also use a syringe or an eyedropper.
If you are using this method on aquatic plants outside of the water, make sure you rinse the hydrogen peroxide off after 5 minutes at most.
How To Get Rid of It With Liquid Carbon
Liquid carbon is another great chemical treatment for black beard algae. One of the most popular products on the market is Flourish Excel, but there are other products with the same active ingredients too.
Liquid carbon can be used with the same techniques as described for hydrogen peroxide. It is not sensitive to light like H2O2, but you’ll still want to turn off your filter.
Many aquarists have had success by going above the recommended dose (overdosing), but this can be very risky for your livestock. If you do choose to go this route, keep a close eye on your pets and be ready to move them or perform a large water change to dilute the concentration.
Spot treatments are generally a safer and more effective method because they allow you to maximize the effect of the liquid carbon where you need it most. If you have a lot of black beard algae in your aquarium, try spot dosing small areas every week, rather than blasting the whole tank at once.
Using Natural Treatments
Another new product to the market is Green Water Labs Algae Control. This product is all natural and safe to use in planted aquariums. It is designed to be used for those using fertilizers and experiencing algae issues such as black beard algae. This formula is also safe to use with snails and shrimp. It has a very straight forward dosing schedule. I would recommend it if you feel uncomfortable going to the CO2 supplement route.
After reading about these (relatively) safe chemical methods of remove black beard algae, it’s worth taking note of the following safety information:
Remember, black beard algae is mostly a cosmetic issue, so don’t go overboard on treatment at first, you can always try again in a few days!
Liquid carbon products are not designed for use as algaecides. They can be effective, but using them this way is very much at your own risk.
Some live plants do not respond well to liquid carbon. Anacharis, Vallisneria, and Japanese moss balls are all sensitive plants that can be negatively affected under high concentrations.
Liquid carbon is harmful to fish and animals in high concentrations.
Liquid carbon is toxic to humans and pets, so take precautions when using these products.
Heat Treatment for It in Aquariums
Heat treatment can be a very effective method to remove black beard algae. It does not involve any chemicals, and it’s pretty much free, but there is an obvious downside to this technique.
Heat will also kill your live plants and animals, so it is only really an option for hardscapes and decorations that can be removed from your aquarium. Alternatively, you could also move your plants and animals into another tank temporarily during the process.
You do not need to boil the water, although this will be effective on rocks and driftwood. Plastic ornaments and decorations can melt, however, so use caution.
How To Prevent
Prevention is always better than cure, so it’s really important to avoid this problem from the start. If you’ve already dealt with a black beard algae problem, you’ll also want to prevent it from coming back!
Read this section for a more in-depth look at how to avoid introducing black algae, as well as how to prevent it from growing out of control.
Avoid Introduction
Black beard algae are usually introduced to fish tanks from other aquariums and water sources. Aquatic plants are a very common culprit, so always take the time to inspect and treat new plants before introducing them to your tank.
Sometimes this is not enough, so I always suggest growing tissue culture plants that have been grown under sterile lab conditions. Online retailers like Buceplant stock a great range of these aquatic plants!
Buce Plant offers a wide variety of aquatic plants for sale. With one of the largest selections in the US, you will find what you need here. They are also a great source for freshwater shrimp!
Try not to add any of the water your fish were packaged in by taking the time to slowly acclimate them to your tank water. Never dump a bag full of foreign water into your fish tank! You can totally prevent this way of introduction by properly quarantining your fish.
Maintain Good Water Quality
Black beard algae tend to thrive in poor water quality. High nitrate and phosphate levels in particular are thought to contribute to this problem.
Your first line of defense is regular aquarium maintenance. This means partial water changes at least twice a month and sucking up as much waste with your gravel vacuum as possible. Let’s take a closer look at how to maintain your aquarium to prevent black algae growth.
Your source water could also be a problem. The best way to remove that issue is to either purchase an RO/RODI filter or use distilled water. Whichever you chose, you will need to remineralizer the water with aquarium buffer.
Testing
There’s a lot more going on in our aquariums than meets the eye. Water chemistry is a huge part of maintaining a healthy tank, so you must be able to measure and monitor your water parameters.
A liquid test kit that can monitor phosphate and nitrate levels will be very important in your fight against black beard algae. Knowing what your levels are will help you figure out just how much water you need to change out, and how often you need to do it.
Removing water and waste particles
Decaying waste at the bottom of the tank releases nutrients that feed the brush algae in your aquarium.
Use a gravel vacuum to suck up this waste while you siphon old water out of the tank. Trimming your aquarium plants before a water change is great because you’ll be able to suck out any trimmings that are floating around in the tank.
Filter maintenance
Filter maintenance will not be necessary every time you perform aquarium maintenance.
It is best to follow the manufacturer’s instructions on maintenance regarding your specific model. If your filter sounds different or is not creating as much flow as it should, you might need to rinse out the filtration media.
Remember, the filtration media of a cycled aquarium is home to a thriving population of tiny beneficial bacteria that break down waste in your tank. These little guys should be treated with the care they deserve!
To avoid killing these bacteria, only rinse out your filter media in water that you have just removed from the tank. Tap water that has not been conditioned should not be used.
Adding new water
It’s usually a good idea to prepare new water before you perform a water change to speed up the process. This involves bringing the tap water up to the same temperature as your tank and treating it with a water conditioner to neutralize harmful chemicals.
As I mentioned before, your source water can become a contributor to black algae. Consider getting your city’s tap water report or purchase a TDS meter to see the condition of your water. If your water is high in phosphates and nitrates, it may make sense to switch to distilled or RO water.
Maintain Healthy Plant Growth
For the most part, brush algae do not grow on strong, healthy aquarium plants. The needs of different plants vary depending on their species, but all live plants need good lighting, access to nutrients, and CO2. Providing these in the right balance is the secret to vigorous plant growth.
Black beard algae can grow in a wide range of light conditions, so dimming the lights isn’t necessarily the best option. Providing the minimum amount of light needed to promote healthy plant growth is a good general rule for keeping algae at bay, however. Making sure your plants have sufficient good quality light is a better bet than trying to prevent brush algae growth with low light.
The estimative index (EI) method has proved to be very effective in minimizing this problem in aquarium plants. This method involves fertilizing plants liberally and then performing a large water change every week to ‘reset’ their levels.
This means live plants are never limited in their access to essential macro and micronutrients, but at the same time, you are taking care to prevent these nutrients from building up to dangerous levels.
Even healthy leaves die back when they reach the end of their lifespan, so stay on top of pruning and trimming your aquarium plants. This will promote healthy new regrowth and prevent plant matter from decaying in your fish tank.
Stable CO2 Levels
While increasing CO2 levels may be one of the best ways to achieve healthy plant growth, it is important to keep the levels consistent. Fluctuating CO2 levels appear to favor the growth and development of black beard algae.
Running a pressurized CO2 injection system with good circulation and a drop checker is the best way to avoid inconsistent levels. Calibrate your system to maintain CO2 levels between 20 and 30 ppm to maintain optimum plant growth and keep pesky brush algae to a minimum.
The highest end offering by CO2Art. This package includes everything you need to perform consistent and the highest quality CO2 injection in the industry!
Increasing or stabilizing the carbon dioxide levels in your tank probably won’t kill off the existing brush algae, but it will certainly help to prevent it from growing back after successful treatment.
The combination of proper CO2 usage, fertilizers, and lots of plants will lead to lush plant growth that will choke out nuisance algae like BBA.
Avoid Overstocking and Overfeeding
Black beard algae thrive in high-nutrient environments. Apart from decaying plant matter, the major sources of these nutrients are fish waste and uneaten food.
This is a much bigger problem in tanks that have too many fish, and are given too much food. Increasing your filtration capacity and water change schedule can be very helpful, but it is best to keep your bioload down by stocking and feeding your tank conservatively.
Filtration and Circulation
Adequate filtration is really important for maintaining healthy fish tanks in general. They filter out waste particles and provide a cozy home for the beneficial bacteria that maintain the nitrogen cycle.
It is wise to invest in the best quality filtration your budget allows for, and don’t be shy to run more than one filter on your tank either. Adding some phosphate-absorbing media to your filter is a great way to reduce the phosphate levels in your tank.
We know that fluctuating carbon dioxide levels in the water promote black beard algae, so it makes sense to provide enough circulation to spread this gas evenly through the water column. You can run a small powerhead or wavemaker in your tank if your aquarium filtration system does not create enough water flow.
FAQs
How do I get rid of it in my aquarium?
Controlling black beard algae in your aquarium can be tough. Figuring out the cause of the problem, making some changes, and then killing the algae with careful chemical treatments is the best course of action to solve this problem.
Is It Harmful To Fish?
Black beard algae are not harmful to your fish. Some types of fish, like Siamese algae eaters, will even feed on BBA.
Why does my aquarium have it?
If you have black beard algae in your aquarium, it was probably introduced with live plants or animals from another fish tank. If the conditions are right, these algae can grow and multiply quite quickly.
Do snails eat it?
Some types of snails have been reported to feed on black beard algae. Ramshorn snails in particular can be very effective at controlling black algae. The only downside to these snails is that they have a habit of multiplying fast!
What kills it?
Apart from fish species like the Siamese algae eater that feed on black beard algae, the best way to kill it is to dose or spot treat with hydrogen peroxide or liquid carbon dioxide products like Seachem Excel.
Final Thoughts
In conclusion, black beard algae is a tough but manageable problem that most aquarium owners will face at one time or another. Don’t lose heart if you find this fuzzy growth in your tank, however. Simply follow the steps in this article to beat this nuisance algae in your aquarium and prevent it from coming back!
Have you managed to get rid of black algae in your tanks? Let us know about your experiences in the comments below!
🌿 Want to learn more? This article is part of our complete Planted Tank & Aquascaping Guide. your ultimate resource for aquarium plants, aquascaping styles, substrates, and more.
Yes. bettas absolutely need a heater, and I say this as someone who’s kept bettas for over 25 years. I’ve seen the damage that temperature swings and cold water do to bettas that are kept without one. They’re tropical fish from Southeast Asia, and room temperature in most homes is simply too cold and too inconsistent. This guide explains exactly why and what to get.
Yes. bettas need a heater. This is one of those questions where the answer is clear but gets muddied by the way bettas are marketed and sold. The image of a betta thriving in a small unheated bowl is a pet industry myth that causes real harm. Bettas are tropical fish from Southeast Asia and need water temperature consistently between 76 and 82°F. In most homes, that means a heater is non-negotiable unless you live somewhere that stays warm year-round. The small preset heaters bundled with betta kits are often inadequate. I recommend a properly sized adjustable heater so you can dial in the exact temperature. This guide covers what to look for and how to set it up right.
The most popular, ornamental, tropical fish in the aquarium world is the Betta fish. Originating from Southeast Asia, Betta fish are commonly found in countries of Malaysia, Cambodia, and Thailand.
The Answer
The answer is pretty straightforward. Bettas thrive in a temperature range of no less than 72 – 82 degrees Fahrenheit. Anything below or above this temperature range can turn your fish too lethargic or sluggish. Therefore, a heating system is imperative to keep your Betta fish happy.
Now that I’ve given you a quick review about whether Betta fish need a heater, let’s just jump to the basics and discuss further. I have a video above from our YouTube Channel that goes over the topic if you want to follow along. If you like our content, be sure to subscribe as we have new videos every week.
What are the requirements for a Betta Tank?
Betta fish are territorial and highly aggressive. They have problematic behaviors where the males can even fight one another to death. Females, however, are less aggressive.
If you’re planning to build a community tank, avoid keeping bright, colorful fish with your Betta as they will most likely be killed. Go for plain, simple fish for your Betta community tank.
Tank Size
If you’re planning to keep one fish per tank, it’s suggested to get a 5-gallon tank. Any type of tank would do as long as it’s 5 gallon. Be it a betta fish bowl, 3 gallon wine glass-shaped aquarium, or other shaped betta tanks. The key is to keep it at least 3 gallons.
However, if you plan to house more than one fish in your tank, you need a larger tank. For example, to house 5 bettas, the tank size would be 25 to 30 gallons.
Placement of the tank
The water temperature matters a lot when it comes to Betta fish, and so does the placement of the tank.
Betta fish belongs to the tropical areas that receive a lot of sunlight. However, they don’t do well in areas where the tank receives direct sunlight throughout the day. That’s because the rays of the Sun increase the water temperature to the point they go into temperature shock and begin to act erratic, which is unhealthy for Betta. The abnormal increase in water temperature makes Bettas disoriented and it starts swimming in absurd patterns or worst of all. stops swimming altogether.
The ideal place for your Betta fish tank would be inside, near a door or outside of direct sunlight.
Tip: Never place your Betta tank on a wall opposite mirrors. The male Bettas would think they have another male in the tank and act territorial and aggressive for no reason.
Tank Toys
Betta fish loves a colorful environment. Thus, it’s shame to keep them in a tank full of water only.
I suggest putting an aquarium background on the back of your aquarium to provide your betta with a bright or dark background. One great toy to use with a Bettas are ping pongs. Check out the video below (video source). They can even be trained to play water basketball!
Also, your betta tank should entertain your fish. For this, you can place a few river rocks on top of each other to provide them with a fun hiding space. Betta plants and colored gravels would also add to the beauty of your fish tank. Indian almond leaves also work great.
Water Conditioner
Would you want your kids to drink tap water? Absolutely not!
Similarly, in most areas, the water from your taps won’t suit your betta to live. Because it has some chemicals like Chlorine, Ammonia, and Nitrates that are harmful to your fish. To cater to this problem, a water neutralizer is essential to make your water safe for the fish.
I suggest filling a container with water and leaving it overnight. Add a high-quality water conditioner like seachem prime to the water and add it to your fish tank.
Bettas are tropical fish that originate from tropical climates of South-East Asia. Despite being hardy and low-maintenance pets, bettas need proper attention and care for a healthy lifestyle.
Water Temperature
I cannot emphasize enough the importance of maintaining water temperature for your bettas.
Bettas need water temperature that ranges between 72 to 82 degrees Fahrenheit. Anything below this range will cause your bettas to be lethargic and sluggish. And if the temperature exceeds or lowers too far from the range, you might wake up one day to die, floating betta. Therefore, it’s essential to install a heating system in your fish tank.
Filtration System
Installing a filtration system in your aquarium might not be essential, but a smart choice to keep the tank water clean.
Just make sure to provide a steady water flow in the tank as bettas prefer less water movement in the tank. I suggest going for filters designed for small tanks or adjusting the filters’ settings to restrict the water flow.
The best filters for a betta fish are ones with lower flow. This means sponge filters ideal. However, power filters can work if the flow can be lowered and if the intake can be covered with a sponge.
Canister filters are going to be more ideal in planted tanks. All-in-one tanks are also have adequate filters in their tanks.
Food
Bettas are carnivorous top-feeders that enjoy wholesome food. Due to their carnivorous nature, bettas require a healthy diet, rich in protein. However, like much other fish, they enjoy variety in their food.
You can feed your bettas pellet food and live food, including blood worms or brine shrimp. I suggest handling bloodworms with tweezers to avoid mosquito bites. The reason I suggest variety in betta fish food is constipation. Bettas can get easily constipated if given the same food every day. In such conditions, where constipation and other diseases such as swim bladder disease is involved. If you select high quality foods you can avoid this.
One staple to try is Fluval’s bug bites. It’s made of solider fly and has the roughage needed to keep bladder issues in check. Use multiple foods to balance our your Betta’s diet.
As mentioned earlier, live food is a good option. However, frozen food is the best choice for your bettas as they are free from parasites and are designed to meet the nutritional requirements of your bettas.
It’s essential to invest in high-quality frozen food to keep your bettas healthy and maintain their vibrancy.
Do Betta Fish Need A Heater
Yes, Betta fish need an aquarium heater to keep the water warm and temperature maintained.
Many novice aquarists believe the apparatus like an aquarium heater has advanced features, and so they are reluctant to invest in heaters. However, that’s not the case. Think of a heater as an oven. Just set the temperature to 76 – 82 degrees Fahrenheit on your heater, submerge it in water, and it into the wall. And you’re all set to go.
Now the question is that bugs betta breeders and keepers big time. If I live in a warm climate, why do I need a heater for the aquarium water?
Of course, you do.
No amount of warm water and climate can guarantee temperature fluctuations without the aid of a heater. Even in warm climates, the water temperature can go down during the night and abnormally increase during the day, causing temperature shock.
To keep your betta healthy, the best thing you can ever do is to minimize the chances of temperature shock by installing heaters to ensure the temperature will stay within the safe range. Therefore, it is imperative to get a tank large enough to accommodate a mini heater suitable for a 2-5 gallon tank.
However, the problem with mini heaters is their inability to take into consideration the actual temperature of the water inside the tank. Due to this, the tank water can get too warm or too cold, adversely affecting the health of your bettas. To administer this problem, small adjustable heaters do a great job of considering the actual water temperature.
To keep your heaters working properly is also advisable to use a thermometer which makes sure the heater is working perfectly. You can get a variety of thin, small, and cheap thermometers to insert on the side of your aquarium to display the tank temperature.
Also, to avoid temperature fluctuations, it is important to make sure the room temperature is not different from the tank temperature. Thus, cover your aquarium with a lid or glass cover to lower the rate of water evaporation and ensure that the air above the tank remains warm and moist.
There are two main reasons to maintain the water temperature for your betta tanks.
Betta’s immune system becomes highly compromised as it gets too stressed out due to temperature fluctuations. This opens room for bacterial infections and other diseases to enter the Betta’s body
Bettas are accustomed to living in a tank with water temperatures ranging between 72 to 80 degrees Fahrenheit. If the temperature goes too low or high, it affects the betta’s immune system and energy levels. Your betta, at its worst, can become unresponsive and lethargic, and eventually might die.
What’s A Good Product?
There is a myriad of brands in the market, selling various types of heaters. And this might confuse the betta owners.
Therefore, I’ll list the three best heaters for betta’s tank.
First of all, remember that the unit of measurement for aquarium heaters is always in watts. So, a great rule of thumb while deciding on a heater is 5 watts per gallon of water. Also, make sure the heater is installed properly to avoid inconvenience.
If, after research, you’re still not sure which one to buy, I suggest visiting the store and asking the manager to help you choose the right one.
Types of Heating Systems
Based on requirements, there are two types of heating systems.
Internal heating systems
External heating systems
To understand which one works the best for your tank, I recommend asking your local pet store or betta breeders to give you recommendations.
Note: Proper water circulation is necessary to keep the water temperature maintained. Without proper circulation, your tank water will have cold or hot spots, which are harmful to your bettas.
Internal Heating Systems
The most common type of heat source in a betta tank is internal heating systems. These heaters consist of a glass tube, ranging from 4 inches to 12 inches in length. Some practical heaters have a built-in thermostat and some have a thermostat attached outside the tank to control multiple heating systems.
External Heating Systems
External heating systems are commonly available offline and online. There are various models, including the one that fits under the tank and heats the water from below, while others just connect to the filtering systems.
Here are three of my best-recommended heaters for your Betta tanks.
Finnex has achieved what we as hobbyist have asked for decades. A reliable heater that won’t fail. Japanese components. Receives our top recommendation.
A very reliable heater that solves most of your tank problems. This is a fully-submersible heater, allowing you to install it right where you need it.
The corrosion-resistant Titanium body will not rot or corrode even after years of use. it’s cheaper than the BRS Titanium element and reasonable to keep if you plan on keep more expensive betta breeds.
This German-made, exceptional aquarium heater stands the test of time with its simple and safe temperature recalibration, temperature control accuracy, and precise temperature adjustment for up to 93.2 degrees Fahrenheit.
The only downside to this heater is its big, bulky, old-school lab-grade glass design.
An amazing heater for your Betta aquarium with cutting-edge PTC technology. However, they come in smaller wattage sizes. Therefore, for a large tank, you need multiple units. It’s also very expensive. It’s best for tanks where your Betta will be in a prized aquascape.
FAQs
Can They Survive With A Warm Tank?
Yes, Betta fish can survive with a heater. It’s a requirement to install a heater in Betta’s tank as they require temperatures ranging from 72 to 82 degrees Fahrenheit.
How Can I Keep Them Warm Without A System?
You can keep your Bettas warm without a heater. However, it’s not advisable as temperature fluctuations can even kill your pet fish.
Still, there are a few ways to keep them warm without installing a heater.
– Use a heating mat – Cover the tank properly – Use strong tank lights – Add insulation layers – Thermometer to monitor the water temperature of betta’s tank
How Do I Know They Are Cold?
Here are some of the symptoms of cold temperature shock in your bettas.
– Restless, erratic swimming – Resting at the bottom of the tank – Lethargic behavior – Rapid breathing – Staying at the surface
What Is The Coolest Temperature A They Can Live In?
The ideal temperature range for your betta is 72- 82 degrees Fahrenheit. Anything above or below these ranges is detrimental to your tropical fish. Therefore, I recommend maintaining the temperature below 75 degrees Fahrenheit but it shouldn’t fall below 70 degrees at any cost.
Final Thoughts
Bettas are popular among many aquarists in the aquarium trade. They are hardy, low-maintenance, and easy to keep. However, a few things about Bettas should be taken into consideration, including, the amount of fish you’re going to keep, the size of your rank, tank toys to fend off boredom, and most importantly, keeping the water warm with the help of a heater.
📘 Want to learn more? This article is part of our complete Betta Fish Guide. your ultimate resource for betta care, types, tank setup, feeding, tank mates, and more.
Fancy guppies from pet stores are genetically fragile. Decades of inbreeding for color have produced fish that die from diseases wild guppies shrug off. The gap between a well-bred guppy and a mass-produced one is the difference between a fish that thrives for years and one that dies in weeks.
Where you buy your guppies matters more than how you keep them.
Guppies get written off as beginner fish, and while that’s fair. They’re genuinely forgiving. The variety within the species is something most hobbyists underestimate. Fancy guppies have been selectively bred for decades into dozens of distinct tail shapes and color patterns: delta tails, veil tails, sword tails, mosaic patterns, cobra patterns, and more. Serious guppy breeders treat this like a competitive show hobby, and the results are impressive. Even if you’re not getting into breeding, knowing the different types helps you pick what you actually want instead of grabbing whatever the store happens to have. Here are 21 guppy varieties worth knowing.
What People Get Wrong About Guppies
Guppies get labeled as beginner fish and then get kept in conditions that no beginner fish should have to tolerate. The assumption that livebearers don’t need water quality is wrong. Ammonia, nitrite, and high nitrates hit guppies hard, especially fancy varieties. A stable, cycled tank with regular water changes is not optional for long-term success with guppies.
The second major mistake is the male-to-female ratio. Most people who buy guppies grab a few of each and mix them together. The result is that males relentlessly pursue females. Females die young from stress and exhaustion. The correct ratio is two to three females per male, minimum. Keep all males if you don’t want the ratio issue (and no breeding).
Third: fin-nipping tank mates destroy fancy guppies fast. Those long, flowing tails are not compatible with tiger barbs, serpae tetras, or any known nipper. The damage is permanent and opens the door to infections.
What Is a Guppy Fish?
Guppies are small fresh and brackish water fish from the Poeciliidae family. There are many popular aquarium fish in this group, including mollies, plays, and swordtails. They are livebearers, which means they do not lay eggs but rather give birth to live free-swimming fry.
Here is a YouTube from my YouTube channel to get you started. I’ll go into more in detail in this post. If you like videos like this, please make sure to likeand subscribe!
Read on to learn all about guppies, their care, and the different types that you can keep and breed!
What Makes Them Such Great Pets?
Guppies are probably the best beginners fish in the hobby, but that doesn’t mean they aren’t excellent for experienced fishkeepers too.
Guppies are adaptable to a variety of natural habitats in their native distribution. They prefer slow-moving or still waters and are most at home in pools of streams and rivers or ponds and swamps. These fish are mostly found in freshwater although they have been recorded in brackish water too.
Guppy fish have also established populations all over the world after being released into the wild to control mosquito larvae. They also populate local waterways when they are released from fish tanks or escape from ponds. Who knows, there could even be some wild guppies near your home!
The History Of Guppy Keeping
The guppy was first sent to Europe from the Caribbean island of Trinidad. The name of the man responsible for introducing this fish to the hobby was Robert John Lechmere Guppy, and the year was 1866. The fish was officially named Giradinus guppyi1.
He was not the first European to discover the fish, however, that honor goes to a German man named Julius Gollmer who found these fish in the wild many years before. Guppies have been kept for over 150 years, and they are just as popular as ever!
The International Guppy Associations
Fancy guppies are bred and kept all over the world. International associations have been created to bring hobbyists together and attempt to standardize the hobby. The International Fancy Guppy Association (IGFA) is one of the best examples.
IGFA was founded in 1965 and has developed show standards for the various breeds of fancy guppy. They are also a great resource for keepers who would like to learn more about the fascinating world of guppy breeding.
The IKGH is another very important international association that was formed in 1981. They have been active in the guppy breeding hobby ever since, holding regular shows and competitions all over the world.
3 Types by Species
There are many wild guppy fish species, but the three most commonly kept types are listed below.
1. Micropoecilia picta
Common name: Scarlet livebearer, swamp guppy, painted guppy
Adult size: 1.2 inches
Origin: South America, Caribbean
Temperament: Peaceful
Water type: Fresh/brackish
Minimum tank size: 15 gallons
The scarlet livebearer is a brackish water species that is found in the Caribbean and Countries like Brazil and Guyana. They are also known as swamp guppies or painted guppies.
They have red or orange overall color but are also boldly marked with various other colors. Females swamp guppies are larger than males. They are a hard water species and they are at home in slightly brackish water.
2. Poecilia wingei
Common name: Endler’s livebearer, Endler’s guppy
Size: 1-1.8 inches
Origin: Venezuela
Temperament: Peaceful
Water type: Fresh/brackish
Minimum tank size: 10 gallons
Endler’s livebearer is an awesome nano guppy species from Venezuela in South America. Endler guppies reach a maximum size of about 1.8 inches. The males are much smaller and more colorful than the females.
3. Poecilia reticulata
Common name: Common guppy, fancy guppy
Size: 1.5-2.5 inches
Origin: South America, Caribbean
Temperament: Peaceful
Water type: Fresh/brackish
Minimum tank size: 10 gallons
The common guppy is one of the most popular aquarium fish on the planet. These fish are available in a huge variety of breeds known as fancy guppies.
They are native to the northeastern parts of South America and the Caribbean islands. They grow to about 2.5 inches in length, with females growing larger than males.
21 Types by Variety
Now that you know a little more about guppies and their history, it’s time to learn about some of the amazing fancy guppy varieties out there in the hobby. I’ll provide a brief explanation of the most important features of each type.
Before we get started, here are a few important terms to know:
Dorsal fin: The fin on the back of a fish. The shape and length of this fin are important for identifying many of the fancy guppy breeds.
Pectoral fin: The pectoral fin is located on the side of a fish’s body, just behind its head. There is a pectoral fin on either side of the body.
Caudal fin: Caudal fin is the technical name for a fish’s tailfin. Tail shape and tail patterns vary pretty extensively between the different guppy types.
Now that we’re all up to speed on the fancy fishy words, let’s jump right in and meet some fancy guppies!
1. Fantail
The fantail guppy is a very common breed that is easy to find. The males have large, beautiful caudal fins that are about as long as the fish’s body! The standard for the breed is a long, triangular tail with straight edges.
The dorsal fin is also a distinctive feature of this breed. It should sweep back to about the first third of the tail.
2. Delta Tail
The delta tail guppy (video source) is also known as the triangle tail guppy. They are very similar to the fantail guppies but the outer edge of their tail is slightly convex (rounded outwards). Delta tail guppies come in all sorts of different colors and patterns.
3. Lyretail
Lyretail guppies have very interesting tail shapes. In case you were wondering, a lyre is an ancient U-shaped musical instrument, and that’s where these fish get their name.
This tail shape is similar to the double swordtail, but the extensions curve outwards slightly, instead of being straight and parallel.
4. Roundtail
Round tail guppies (video source) have a circular tail fin with a diameter about half the length of their body. Their dorsal fin is pretty long and has a rounded end. The round tail guppy breed is available in a huge range of different colors and patterns, so there’s a round tail to suit any fishkeeper’s eye!
5. Half-moon Tail
https://youtu.be/Ub1VsZY-0Q0
The half-moon tail guppy (video source) is similar to the round tail but has a larger, fuller caudal fin. The tail is semicircular, starting at 90 degrees (right angles) to the fish’s body.
The tail is not quite as long as the body but is even taller than the fish is long! The dorsal fin on halfmoon tail guppies is also large and overlaps the tail a little.
6. Spear Tail
The spear tail guppy is another interesting fancy guppy breed. These fish have rounded tails that form a point in the middle, just like a spear tip.
The dorsal fin shape of this breed is also a great feature. It starts at nearly 90 degrees to the body and sweeps back to about a third of the length of the tail fin.
7. Pin Tail
The pintail or needle tail guppy (video source) has a small circular tail shape with a sharp point extending from the middle. It is very similar to the spear tail guppy in this respect, but the pointed caudal fin is even more prominent in this breed. The dorsal fin is also quite long and sharply pointed, creating a bold and dramatic-looking fancy guppy.
8. Tuxedo
Tuxedo guppies (video source) are very elegant little fish, just as their name suggests! This popular breed was first developed in Germany.
The tail half of their body is black or another solid color. The tail and dorsal fin will also be a different color to the dark half of the body, but without any spots or patterning.
There are a few different varieties of the swordtail fancy guppy breed. The swordtail breed of the fancy guppy should not be confused with the swordtail fish (Xiphophorus hellerii) which grows much larger.
Double swordtail guppies have both the top and bottom of their tail fins elongated to form a sword shape. They can also be found in top or bottom swordtail forms where only one end of the tail is pointed. The middle section of the tail should not be colored, and this really makes the ‘swords’ stand out.
Cobra guppies come in a variety of colors, but it is their markings that set them apart. These amazing fancy guppies have a combination of reticulated markings and often have darker vertical bars too. The markings on their tails are often bolder than those on their bodies.
11. Lace
Lace guppies have incredibly intricate markings on their body and fins. They are similar to cobra guppies but lack the vertical bars on their body. Lace guppies are available in various colors, including red, gold, black, and many others.
12. Mosaic Tail
Mosaic tail guppies have amazing markings on their tails and dorsal fins. The markings are similar to those of the lace guppy, only much bolder. The tail coloration of this breed becomes darker and more intense from the start of the fin to the back.
13. Albino
Albino guppies lack pigment, which makes them pinkish-white overall. This makes for a tropical fish that really stands out in the aquarium.
Their eyes are also a pinkish color, which differentiates them from other white guppies. Albino guppies can have some color though, they often show some red, yellow, or blue markings on their bodies and fins.
14. Japanese Blue
Japanese blue guppies (video source) have a metallic dark blue to sky blue color on the tail half of their bodies. The head is often golden or reddish in this breed. The Japanese blue swordtail guppy is a particularly popular tail shape form of this breed.
15. Green
Green guppies are one of the best color schemes if you ask me. They are relatively rare, but available in many different patterns and tail shape types.
16. Yellow
Yellow (video source) is a very cheerful color, and a bunch of sunshine-colored guppies can make for a great display. Yellow guppies are available in various breeds including yellow tuxedos, and yellow cobra guppies.
17. Half Black Green
The half-black green guppy has a black back half of its body and a green front. There are many different half-black color combinations, but green is one of the rarest forms.
This fancy guppy fish breed is named after another popular fish. Like their larger namesake, koi guppies have a combination of white, red, and black colors.
19. Panda
The panda guppy (video source) is mostly black/blue and white in color. The tail half of the fish be dark while the front half is a silvery color. These fish have dark pectoral fins and dark eyes too.
Dragon guppies have one of the most dramatic color schemes of all the breeds. These fish are known for their fiery red fins with a half-black guppy body.
21. Dumbo Ear
Dumbo ear guppies (video source) have huge pectoral fins that look almost like the ears of an elephant! Even though their name sounds kind of goofy, these fish take finnage to the extreme and they are incredibly graceful and beautiful to watch.
Other Notable Types
Just in case you’re interested in even more types of guppies, here’s a list of some other popular types that you can look for!
Color types
Half black purple guppy
Half black blue guppy
Half black yellow guppy
Half black pastel guppy
Blue guppy
Red guppy
black guppy
Neon blue guppy
Purple guppy
Bronze guppy
Glass guppies
Tail types
Flag tail guppy
Fire tail guppy
Leopard tail guppy
Grass tail guppy
EXPERT TAKE | MARK VALDERRAMA
I’ve watched guppies go from the most bulletproof fish in the hobby to some of the most fragile, and the reason is commercial breeding. Mass-produced guppies from big box stores have been through so many generations of inbreeding that their immune systems are compromised. Quality-bred guppies from reputable breeders or specialty suppliers are genuinely different fish. In 25 years of working with these fish and running fish stores, the single biggest factor in guppy success is source quality, not tank conditions.
TIER BREAKDOWN
Beginner-Friendly Varieties: Feeder Guppy, Common Fancy Guppy, Delta Tail, Fan Tail Intermediate (require more attention to water quality and sourcing): Moscow Blue, Cobra, Snakeskin, Tuxedo Advanced / Breeder-Level: Show-grade Ribbontail, Halfmoon Guppy, Dumbo Ear (large pectoral fins prone to damage), Endler’s Guppy pure strains (hybridization risk)
Variety
Difficulty
Max Size
Min Tank
Best For
Common Fancy Guppy
Beginner
2 in (5 cm)
10 gal (38 L)
First fish, community tanks
Delta Tail Guppy
Beginner
2 in (5 cm)
10 gal (38 L)
Display community tanks
Moscow Blue Guppy
Intermediate
2 in (5 cm)
10 gal (38 L)
Dedicated guppy tank
Cobra / Snakeskin Guppy
Intermediate
2 in (5 cm)
10 gal (38 L)
Species tanks, breeders
Ribbontail Guppy
Advanced
2 in (5 cm)
20 gal (76 L)
Show breeders only
Endler’s Livebearer
Beginner
1.4 in (3.5 cm)
10 gal (38 L)
Nano tanks, planted setups
Tuxedo Guppy
Intermediate
2 in (5 cm)
10 gal (38 L)
Dedicated guppy display
Dumbo Ear Guppy
Advanced
2 in (5 cm)
20 gal (76 L)
Species-only tank
Keeping and Caring
After looking at all the amazing types of guppies in this article, you might have already chosen a favorite and be thinking of adding them to your collection. Read this section to learn the basics of caring for these fantastic fish!
Tank Setup
Guppies is kept in a tank as small as 10 gallons. Such a small tank would only be appropriate for a small group of male fish, however.
The last thing you want is for these fish to start breeding and overpopulating a small tank, so I would suggest going up to a 20-gallon or larger if you plan on keeping a mixed group.
Filtration
Adequate filtration is really important for keeping tropical fish healthy, and guppies are no exception. There are many makes and models available, and any type that is rated for your aquarium size or larger will do.
You don’t need the most expensive filter to maintain healthy guppies, but I would recommend running a slightly oversized model. An even better choice is to run two filters. Not only will this provide you with a safety net should one fail, but it will also allow for the increased bioload once your fish begin breeding. A power filter is the best combo of filtration capacity and budget when it comes to guppies.
Heating
Guppies are hardy fish that are comfortable in temperatures down to the lower 70s (Fahrenheit). Pregnant female guppies have been reported to be more susceptible to ich at lower temperatures, however, so maintaining breeding fish at 78-80°F is advised. Using an aquarium heater will make this much easier!
Guppies do not have any special lighting needs. Standard fluorescent or LED lighting will suit them just fine. You will only need to look into high-quality lighting if you wish to grow a lot of live plants.
Provide your guppies with a regular light period of 6 to 8 hours a day. Using a timer will make keeping regular timing much easier.
Live Plants
Guppies thrive in planted aquariums and the cover that plants create provides a great place for guppy fry to hang out. Plants are also very useful for increasing oxygen levels and taking up nitrates from the water column.
Although guppies will nip at decaying plant material and eat microorganisms from your plants, they do not damage live plants. Guppies prefer hard, alkaline water, so your choice of plants is slightly more limited.
Here are a few easy plants that you can grow in your aquarium:
Guppies are not fussy when it comes to ornaments and decorations. They are confident and active little fish that do not hide out too much. Choose your decorations based on the style or theme of the aquarium you are putting together, and don’t be afraid to use your creativity!
Remember though, only use aquarium-safe decorations and make sure you wash them carefully before adding them to the tank.
How To Care
Guppies are very easy fish to care for, but there are still some important things you should know before bringing them home. Read on for more information.
Tank Maintenance
Perform a partial water change at least every second week in your guppy tank to keep nitrate levels down. If your tank is heavily stocked, or you’re feeding the tank frequently because you have a lot of fry, you might want to increase this to once or even twice a week. Remember to use a water conditioner if you are using tap water in your aquarium.
The only way to know whether you’re doing enough tank maintenance is to measure your water parameters regularly. Pick up a liquid or strip test kit for this purpose.
Be very careful when performing water changes if you have a lot of fry in the aquarium. I suggest carefully inspecting the water you take out of the tank just in case any fry get sucked up!
Apart from regular water changes, all you really need to do is clean your glass with an algae scraper when necessary and follow the recommended maintenance schedule for your filter.
Important Water Parameters
Water temperature: 72-80°F
pH: 7-8
Hardness: 143. 536 ppm
Nitrate: Less than 20 ppm
Nitrite: 0 ppm
Ammonia: 0 ppm
Feeding
Guppies are naturally omnivorous and the modern domestic guppy is not fussy about diet at all. A high-quality flake food is a perfect everyday food source for these fish.
For a more balanced diet, I recommend supplementing their diet with an unprocessed food source like bloodworms, daphnia, or brine shrimp. These are available frozen so they are very easy to use. A small amount of these once or twice a week will improve your fish’s health and condition.
One of the best things about guppies is their peaceful nature. They are confident little fish that are always active and visible in the aquarium. They get along great with many other tropical freshwater fish.
The most important factor to consider when picking guppy tankmates is their water parameter compatibility. Guppies thrive in hard, alkaline water, so their tank mates should be comfortable in the same environment.
Let’s take a look at some good guppy tank mates, and some species to avoid.
Guppies are hardy fish, so they are not especially prone to any problems. As a rule, the best way to prevent health issues is to minimize stress. Let’s take a look at some of the best ways to prevent guppy illness:
Perform regular aquarium maintenance for great water quality
Avoid overfeeding your fish
Avoid overstocking your aquarium
Maintain appropriate water parameters
Avoid aggressive tank mates
Unfortunately, poor health and disease can happen even when you’re doing everything right. Here are some of the most common guppy health issues to look out for:
Breeding guppies is extremely easy, so this is a great species to get started with if you’ve never bred tropical fish before. Guppies are livebearers, which means that female guppies give birth to live baby fry. Each female guppy can give birth every month, which means you’re guppy population can grow very quickly!
Female guppies can breed after just 2- 3 months, although it is better to let them grow a little older before they start breeding. Such a short generation time makes guppies an amazing species for breeding projects.
Sexing
Sexing guppies is very easy because adults are sexually dimorphic. This means there are clear physical differences between the sexes that are easy to spot. Let’s take a closer look at some of these guppy sex differences:
Body size
Overall size is probably the most obvious difference between male and female guppies. Adult females are significantly larger than males.
Body shape
Female guppies have a much more rounded body shape than males, especially when they are pregnant. Males have a very slender build.
Finnage
Male guppies have much larger fins in comparison with their body size. Their fins are much more heavily patterned and colored too.
The anal fin of male guppies is modified into a structure known as the gonopodium. It is narrow and elongated in comparison to the triangular anal fin of the female.
Color
Male guppies are much more boldly marked and colorful than females in general.
Pregnant female guppies do have a unique marking that easily identifies them from males, however. Look out for a dark triangular marking on the belly, just in front of the anal fin. This marking is known as the gravid spot and will confirm that the fish is a pregnant female.
Behavior
Female guppies spend most of their time foraging while males spend a lot of time swimming around the females, trying to get their attention.
Caring for fry
Guppy fry are easy to care for. The fact that they are born live means that you don’t have to worry about egg predation from the other fish in the tank. Unfortunately, adult guppies have no problem eating guppy fry, so it is best to separate them to increase the survival rate of the babies.
Catching all the tiny fry to move them to a separate tank is not going to be easy. Moving a pregnant female over to your fry tank is a much better option! You can go ahead and move the mother fish back into the main tank once she has given birth.
Another great option, which is less stressful on the pregnant female is to add a breeder box to your tank. If you’re not too worried about some of the babies being snacked on, simply growing some floating plants in the tank will provide them with a place to hide out until they are big enough to swim out in the open. I’ve found that water wisteria works great for this, but Java moss will work just as well or even better.
Guppy fry are tiny but hardy little fish. They is fed the same flake food as the adults, but you’re going to want to crush it up for them. You can use a pepper grinder for this or simply crush the flakes in the palm of your hand.
Preventing Breeding
While breeding guppies may be a fun and fascinating hobby, it is important to have a plan for the fry! The only reliable way to prevent guppies from breeding is to keep only male or only female fish.
Mature females are often already pregnant when you bring them home, so males are a safer bet. When buying female guppies for a breeding project, look for females without very swollen bellies and obvious gravid spots.
Where to Buy
Most local pet stores will sell mutt guppies, and sometimes also a selection of different breeds. For specific breeds, you need to order online or contact local clubs and breeders.
MARK’S PICK
Moscow Blue Guppy. The color on a quality male is a deep, metallic blue that covers the entire body, not just the tail. They’re not the easiest guppy to find in great quality, but when you get a well-bred line they’re genuinely impressive fish. I’d source from a specialty breeder rather than a store for this variety specifically.
AVOID IF
You plan to mix fancy male guppies with fin-nipping species like tiger barbs or serpae tetras (the fins will be destroyed within days). You want to keep just males and females together without a plan: guppies breed constantly and females under constant pursuit will die early from stress. You’re expecting cheap store-bought guppies to perform like quality-bred fish (they won’t: source matters enormously). You want to keep show-quality varieties like ribbontails in a community tank (they need a species-only setup to protect those fins). You aren’t prepared to deal with fry: guppies reproduce fast and a 10-gallon can be overrun within months.
FAQS
How many types are there?
There are an amazing number of different guppy types available in the hobby. There are 12 officially recognized tail types alone and combined with the various colors and patterns, the number becomes almost infinite!
Can different types live together?
Different types of guppies is kept together without any problems. Fancy guppies will breed freely together, so don’t mix them if you’re planning on breeding specific types.
How many should be kept together?
Guppies should be kept in groups of at least 3 or more. If you are keeping both males and females, keep at least 2 or 3 females for every male. This will give the females a break from all the attention.
How many times a day should I feed them?
Guppies is fed just once a day. These fish will spend much of their time foraging in the aquarium for algae and other food sources. Guppy fry will benefit from more frequent feeding, however.
What is their lifespan?
Healthy guppies will live for 1-3 years in captivity. There are reports of them living as long as five years, however.
Closing Thoughts
Guppies are one of the most genuinely diverse fish groups in the hobby. The variety in tail shape and color pattern is real, not marketing. If you’ve only ever kept common store guppies, you haven’t seen what this fish can actually look like when sourced from a quality breeder.
For beginners, a small group of fancy males in a 10-gallon (38 L) planted tank is one of the most rewarding and low-maintenance setups in freshwater. For experienced keepers, working with a specific variety or strain and breeding them selectively is a legitimate long-term project that serious hobbyists dedicate years to.
Where you source matters. I recommend Flip Aquatics (use promo code ASDFLIPPROMO) or Dan’s Fish for quality-bred fish that will actually live up to what guppies should be.
Endlers are smaller, hardier, and less inbred than fancy guppies. They are also relentless breeders that will overrun a tank in months. Pure strains are increasingly hard to find because they hybridize with guppies constantly.
Endlers breed faster than you can rehome them. Have a plan before you start.
The biggest challenge with Endlers Livebearers to A is not keeping them alive. It is managing how fast they multiply.
The Endlers Livebearers to A breeds constantly and lives 3 to 5 years. You need a plan for fry before you buy your first pair, or your tank will be overrun within months.
Livebearers teach you more about population management than any textbook ever will.
When it comes to choosing a fish for your tank, there are endless possibilities. However, one of the best options for starters is the Endler’s livebearer. These little beauties are vibrant and easy to care for, making them an excellent choice for anyone just getting started with keeping fish. In this guide, we’ll go over the complete care guide.
Pure Endlers are getting harder to find because hybridization with guppies is everywhere. What the store calls an Endler might not be one.
What Most Care Guides Get Wrong About Endlers Livebearers. A Complete
The most common mistake I see with endlers livebearers. A completes is keeping too few. Guides will say “minimum 6” and leave it at that. In reality, these fish behave completely differently in a proper group of 8 to 10 or more. Keeping just 3 or 4 often leads to stress, hiding, and fin nipping that wouldn’t happen in a larger school. Another thing most guides miss is how much lighting and decor affect this species. Endlers Livebearers. A Completes look washed out under bright white LEDs on a light substrate. Dim the lights, add some tannins, use a dark background, and you’ll see colors you didn’t know they had. I’ve also noticed that many care sheets recommend overly broad water parameters. Yes, endlers livebearers. A completes are adaptable. But “adaptable” doesn’t mean they’ll thrive in just anything.
The Reality of Keeping Endlers Livebearers to A
Breeding is not optional. It is automatic. If you have males and females, you will have fry within weeks. Most new owners are not prepared for the population explosion. You need a plan, whether that is a grow-out tank, selling to a local store, or keeping predators that naturally control numbers.
Water hardness matters more than people realize. Livebearers come from hard, alkaline water. Keeping them in soft, acidic conditions leads to chronic health problems, fin clamping, and shortened lifespans. If your tap water is soft, livebearers are not ideal unless you buffer the water.
Male aggression is constant. Males chase females relentlessly. Without a ratio of at least two females per male, the females get stressed, stop eating, and weaken. Overcrowding males does not solve this. It makes it worse.
Biggest Mistake New Owners Make
Buying one male and one female thinking it will be manageable. Within three months you have 30 to 50 fish in a tank designed for 10. Always plan for breeding output before you buy your first pair.
Expert Take (Mark Valderrama, AquariumStoreDepot)
If you are keeping livebearers, you are a breeder whether you planned to be or not. Accept it early and have a plan for the fry. That single decision prevents 90% of livebearer problems.
ASD Difficulty Rating: Tier 1 – Beginner
Endler’s livebearers are tiny, colorful nano fish perfect for planted nano tanks. They breed prolifically and are extremely hardy. Suitable for beginners who can manage the fry population.
Authentic Endlers originate from the Campoma and Buena Vista lagoons in northeastern Venezuela. These areas are very unique in their formation as they were originally categorized as having brackish water conditions. This was the result of a sandbar being formed over time which created a division from the nearby ocean. As freshwater runoff and rain filled the lagoon, it slowly became less and less brackish until it became fully freshwater.
Upon the discovery of Endlers in the wild, this water was notably warm and hard with algae covering most surfaces; this is different from the habitats of other related species that enjoy cooler waters instead.
Right now, this ecosystem is threatened by runoff from a nearby waste facility. The status of wild populations of Poecilia wingei is currently unknown and undocumented by the IUCN Red List of Threatened Species1, though it is believed that numbers are dwindling. It is also believed that Endlers have spread to nearby areas of Venezuela, which brings some hope to their remaining populations.
Interestingly, Endlers were originally discovered in 1937 by Franklyn F. Bond and then later discovered in 1975 by John Endler.
Are They a Type of Guppy?
Taxonomically, Endlers livebearers are their own species, Poecilia wingei, and guppies are their own species, Poecilia reticulata. There has been a lot of debate about how closely these two species are related and if they are actually one and the same. In fact, Endlers were originally discovered in the same ecosystems as wild guppies, though they were not found to interbreed even though hybridization is possible.
Recent findings suggest that Endlers are undoubtedly a species of their own separate from Poecilia reticulata and another closely related guppy, Poecilia obscura. There have also been attempts to group these three guppies in their own subgenus called Acanthophacelus.
For now, the debate carries on about exactly how these species are related.
What Do Endlers Livebearers Look Like?
When placed next to a typical freshwater guppy, it’s clear to see how Endlers is the same species.
Endlers grow to be about 1 inch at their absolute biggest. They have slim bodies with a round stomach and rounded tail. These fish display sexual dimorphism like regular guppies, which makes the males easy to identify from the females.
Standard Endlers livebearer females are very plain in color. They are brownish-green in coloration with a white abdominal cavity. Endlers livebearer males are much more desirable due to their smaller bodies yet bright colorations. Males have orange streaks down the sides of their bodies that continue onto the margins of their tapered fins. Patterning across the body is random with overlays of black, yellow, and sometimes blue or white. The base color is similar to that of the female.
However, breeding Endlers livebearers has become a specialization in order to achieve the best colors and patterns possible. Because wild populations aren’t accessible, almost every Endlers livebearer fish available in the hobby is the result of selective breeding. From this, a few different varieties have been made popular.
Varieties
The original types of Endlers livebearer guppy are those that were collected when wild populations could still be found. These guppies are known as the Campoma guppy and many of the Endlers available today are descendants from this line.
Other varieties have also been bred from this line:
El Silverado Endler’s Livebearer (Poecilia wingei var. ‘El Silverado’). Male El Silverado’s have nearly metallic bodies with a large silver patch accented by orange, black, and green markings.
El Tigre Endler’s Livebearer (Poecilia wingei var. ‘El Tigre’). Male El Tigre’s have a nearly black base color. Along the sides of their body are alternating yellow, green, orange, and darker grey striping.
Yellow Tiger Endler’s Livebearer (Poecilia wingei var. ‘Yellow Tiger’). Male Yellow Tiger’s are very ornate with unique black and yellow patterning covering the majority of their body. In contrast, females are plain and standard colors.
In order to preserve the natural colors found in wild populations, Endlers have been bred with common guppies. In the aquarium hobby, these fish are referred to as a ‘Class K’ Endler. Fish that is traced originating from Venezuela are known as a ‘Class N’ Endler.
One of the truest variations of Endlers is the Red Flame Endler’s Livebearer. These peaceful fish have splashes of green, orange, black, and white and represent the standard appearance of this species.
Size
As mentioned before, female Endlers livebearers only grow to be about 1 inch. Male endler’s livebearers can range anywhere from 0.5-1.0 inches and are significantly smaller than their mates. This is in comparison to the common guppy which can grow up to 2.0 inches.
As we’ll discuss, these mature sizes make them the perfect candidates for nano aquariums, but their high activity levels will need to be considered. The small size of the endlers livebearer also makes them more susceptible to getting caught up in aquarium filtration, like filters and powerheads.
How Long Do They Live?
On top of being small, Endlers do not live long, unfortunately. Most fish only live to be 1-3 years old. It is also believed that female Endlers may have shorter lifespans if they regularly spawn. Luckily, an Endlers livebearer population can sustain itself once established.
Temperament and Activity Level
Endlers livebearers are very active swimmers that will stay towards the top and middle sections of the aquarium; they may venture down to the lower portions of the tank from time to time but you’ll most often find them waiting to be fed at the surface.
In terms of temperament and activity level, these freshwater fish are identical to guppies. They’re constantly moving, looking for something to eat or a female to chase. Because of this, it’s important to keep a high female to male ratio to keep fish from getting stressed out.
Otherwise, these the Endler’s livebearer will show their brightest colors when happy and healthy.
What Are Good Tank Mates?
Endlers livebearers are the perfect community freshwater fish. They don’t bother anyone but themselves and can add beautiful accents of color to an otherwise boring stocking.
In general, male and female Endlers livebearers is kept with any fish that is labeled as community-friendly. However, these fish are highly active which could easily stress out other fish sharing the same areas of the tank.
That being said, some of the best Endlers fish tank mates are:
Betta fish are okay. While males can chase and try to pick at Endlers, they are faster than guppies and mollies so they are okay in larger tanks.
How Many Should Be Kept Together?
Endlers are schooling fish. They are naturally bold and curious on their own but they are most comfortable in a group setting.
At the same time, you will need to keep a high ratio between male and female Endler’s livebearers to prevent harassment. I recommend you have three females for every one male Endler. The starting number of fish should be around three or four and should be increased depending on tank size.
If male Endlers ever outnumber female Endlers, you may have a problem with bullying and/or overpopulation.
Least Compatible Fish
Just as common guppies are fed as feeder fish to bigger prey, Endlers will also be seen as prey to some aggressive species.
A good rule of thumb is to avoid freshwater fish that would be able to fit an Endler in their mouth. Though fast, Endlers make a good snack, especially if they’re annoying another larger fish by being too active.
Surprisingly, another bad tank mate for Endlers is the common guppy. This isn’t because these two fish won’t get along, but it’s because they’ll get along too well. Guppies and Endlers have been known to hybridize and produce fertile offspring. While this isn’t a problem as long as those fish stay in contained systems, authentic Endler lineages is lost in the process.
If you don’t mind losing the true appearance of the guppy or Endler guppy, then this combination is possible. Otherwise, one or the other should be chosen.
These fish stay at the top of the tank while the shrimp stay at the bottom. There is little to no chance that an Endler guppy can fit a shrimp into their mouths, though they may pick at any smaller fry that are in the aquarium.
Otherwise, Endler’s livebearers are completely invert-safe and is kept with snails and microcrabs. Some larger crabs and crayfish could see your Endler guppies as a meal, though they may be too fast to catch.
What Do They Eat?
Endlers livebearers are omnivores with extremely small mouths. They aren’t picky eaters and will even enjoy grazing on some of the available algae throughout the tank, but will display their best colors when provided with a well-varied and high-quality diet.
For the most part, these fish will do just fine on a high-protein freshwater fish flake food or pellet food like Xtreme Aquatics Nano. Flakes are more preferred for beginners as they is easily broken up for easier feeding.
Xtreme Aquatics Nano formula is specially designed for smaller fish and contained a well balance mix of raw ingredients. It is a great staple food for your nano fish.
Otherwise, Endler’s livebearers may be given a variety of live and frozen foods. They’ll especially love an assortment of worms, like bloodworms and Tubifex worms, as well as brine shrimp. They may also be given blanched vegetables from time to time as long as they can easily be digested by your fish.
How Much and How Often to Feed
Chances are that you’ll be greeted at the top of the tank by a group of hungry Endlers any time you go to open the aquarium hood. These fish are always willing to eat! But keep in mind, the more you feed, the more waste they will make.
Endler’s livebearers are very small yet very active fish. This means that they can’t eat a lot at one time, but they need energy throughout the day to keep them going. It’s recommended to feed manageable portions two to three times throughout the day. This schedule will keep them fed without introducing too much waste into the aquarium.
If the tank is mature and stocked with live plants, then these peaceful fish can get some of their nutrition from the microflora that’s already available. They’ll especially like picking at algae growing on guppy grass (Najas guadalupensis).
Setting Up Your Tank
Being a hardy community fish, Endler’s livebearers is kept in most tank setups. However, these fish look their best when the tank is set up around them to accent their colors and movements. If keeping some of the higher-end varieties, then you’ll especially want to show them off!
Tank Size
Most sites will say that a 10 gallon fish tank will happily house a small school of Endlers livebearers. While this is true, the top of the tank will likely be overwhelmed by their activity. It’s better to give them a slightly larger tank, like a 20 gallon long, where they have more surface area to fill.
Having a bigger tank also allows for more tank mates, though many hobbyists like to keep active livebearers together. At some point, it can become a little silly to have 100 Endlers in a 100 gallon fish tank!
Filtration
Endler’s livebearers are small, but they have a fast metabolism. This means that they will quickly process foods and fill the tank with waste. Because hobbyists have a large group of them, this can add up and can cause problematic water parameters, especially if the tank is fully stocked.
These fish can tolerate higher water flows and will even enjoy fighting against a strong current. However, an overly strong water flow can easily push these small fish around. Hang on the back and canister filters need to be baffled to keep your fish from getting hurt.
The better alternative to an external filter is an internal sponge filter. Not only do sponge filters keep the water clean and oxygenated, but they are also completely safe for more delicate fish, like Endlers.
Because many Endler’s livebearers are kept together at once, it is recommended to go with a bigger filter than what is recommended. Remember, waste can add up very quickly!
Water Parameters
Endlers livebearers are very hardy fish and will adapt to most water conditions as long as they don’t change too quickly. Making sure Ammonia and Nitrite are zero and nitrates are low are common things to check and monitor with a test kit. You can enhance your filtration and perform water changes and tank maintenance to maintain great parameters.
Unlike some other livebearers, Endler guppies actually prefer warmer and harder water. Water temperature should stay between 64°F. 82°F with 78°F being the most optimal for the success of other species. Most aquarium-bred Endlers have adapted to live in 1-12 dKH water hardness and a near-neutral pH of 7.0.
For the most part, these fish will forgive minor fluctuations in water parameters, making them a great and easy choice for beginners. Still, it is recommended to properly quarantine and acclimate new fish before adding them to the aquarium to reduce the risk of shock and transfer of disease.
Breeding
Not only are Endlers livebearers incredibly hardy, but they’re also some of the easiest fish to breed in the aquarium hobby (video by The Dave). So much so that you’ll actually have problems getting them to stop breeding rather than to start.
Male Endlers are very easy to tell apart from females. At least three females should be kept per male at all times. If you don’t want to end up with a hundred baby Endlers in your aquarium, only buy males or females. Do not combine them because they will breed.
Otherwise, breeding is a matter of when rather than how. Good water parameters, a high-quality diet, and a natural tank setting will all help your fish feel comfortable enough to reproduce.
When your fish are happy, you will notice the males flashing and displaying their fins to females, occasionally chasing after them too; note that males can become overly eager, damaging fins and even killing females in extreme cases. For the most part, this isn’t anything to worry about, though aggression should be monitored.
Once successful, females will have an average brood of about 15 baby fish; as a type of livebearer, Endlers do not lay eggs and fish are free-swimming once born. Adult females can reproduce again after about a month after spawning.
Fry is given small foods, like baby brine shrimp. To increase the odds of baby fish living to adulthood, remove them from the tank and place them into another system until they can’t be eaten; it is unlikely for adults to eat their young, but it’s possible if fish are underfed.
After about 2 months, the fry will be ready to reproduce on their own.
Is the Endlers Livebearers. A Complete Right for You?
Before you add a endlers livebearers. A complete to your tank, it’s worth asking whether this species actually fits your setup and your goals. Here’s a quick breakdown to help you decide.
This species is a good fit if:
You have a large enough tank to manage territories. Cramped conditions amplify aggression.
You’re comfortable managing aggression through stocking ratios, line of sight breaks, and tank layout.
You can commit to regular water changes. These fish produce more waste than many smaller species.
You’re not planning a peaceful community tank. Endlers Livebearers. A Completes need tank mates that can hold their own.
You enjoy watching active, interactive fish. Cichlids have personality that smaller species simply don’t match.
You have backup plans. Sometimes a particular fish just doesn’t work out, and you need a way to rehome it.
You’re feeding a varied, high-quality diet. Color and health depend on nutrition.
If most of those points line up with your setup, the endlers livebearers. A complete is worth serious consideration. If several don’t, it’s better to choose a species that matches your tank now rather than trying to make it work.
How the Endlers Livebearers. A Complete Compares to Similar Species
Want color and activity without breeding headaches? Get all males. Want a self-sustaining colony? Get a proper male-to-female ratio and a grow-out tank.
Choosing between similar species is tricky. Here’s how the endlers livebearers. A complete stacks up against some common alternatives.
The endlers livebearers. A complete occupies a specific niche in the aquarium hobby, and direct comparisons really depend on what you’re looking for. In my experience, the most common question people ask is whether they should choose the endlers livebearers. A complete or something similar that’s more widely available. The answer comes down to three things: tank size, water parameters, and what other fish you’re keeping. If your setup matches what the endlers livebearers. A complete needs, it’s hard to beat. If not, there are alternatives worth exploring.
Final Thoughts
Endlers livebearers are the perfect addition to community tanks lacking in color. These fish are small yet highly active and very forgiving when it comes to beginner’s mistakes. Though they’re recommended for smaller tanks, we recommend giving more space for them to swim and explore.
Plus, it’s better to have more room than not enough when your fish start to reproduce!
Most goldfish tank mate advice on the internet is wrong. Not slightly off, fundamentally wrong. People throw neon tetras, guppies, and bettas into a goldfish tank and wonder why something dies within weeks. The answer is always the same: temperature. Goldfish are cold-water fish. They thrive between 65–72°F (18–22°C). Most tropical fish need 76–82°F (24–28°C). There is no middle ground that works for both.
Goldfish aren’t the problem. Putting them in the wrong tank is.
There’s also the bioload issue. Goldfish produce more waste per inch than almost any other common aquarium fish. Any tank mate you add has to survive in that high-nutrient environment, and your filtration has to handle even more pressure. Skip that calculation and the tank crashes. This guide covers the 11 species that genuinely work, and explains exactly why everything else doesn’t.
What People Get Wrong
The most common mistake is treating goldfish like a community fish. They’re not. Goldfish are large, cold-water, heavy-waste producers that happen to be sold in the same aisle as tropical community fish. That proximity creates the illusion of compatibility.
Here’s what actually happens when you mix goldfish with tropicals: you set the heater to 76°F (24°C) as a compromise, the goldfish runs chronically too warm and becomes stressed, the tropical fish generate additional bioload, ammonia spikes faster than your filter can handle, and within a month you’re doing emergency water changes and wondering what went wrong. The goldfish didn’t fail you, the stocking decision did.
The second mistake is ignoring fin-nipping. Fancy goldfish have long, flowing fins that are irresistible targets for nippy species like tiger barbs or serpae tetras. A fancy goldfish cannot outswim a barb. It will get shredded.
The third mistake is underestimating tank size. A single common goldfish needs a minimum 30 gallons (114 L) to thrive long-term. Add tank mates and that number goes up fast.
The Biggest Mistake
Putting goldfish in a tropical community tank is the most common goldfish-keeping error I see. I managed fish stores for years and this scenario played out constantly, someone sets up a 29-gallon (110 L) community tank, adds a couple of fancy goldfish, runs the heater at 78°F (26°C) for the tetras, and wonders why the goldfish looks lethargic within weeks. Chronic heat stress weakens the immune system. The goldfish gets ich or bacterial infections. The tropical fish start dying from ammonia spikes because goldfish waste overwhelms the filter. The whole tank collapses over 6–8 weeks, slowly enough that people blame bad luck instead of bad stocking.
The Reality of Keeping Goldfish With Tank Mates
A goldfish community tank is a genuine commitment. Goldfish produce two to three times the waste of a comparably-sized tropical fish. Weekly 25–30% water changes are not optional, they’re the baseline. I’d run a filter rated for double the tank volume on any goldfish setup, that’s not a suggestion, it’s what I’ve done in every goldfish tank I’ve maintained. Under-filtering a goldfish tank is the fastest way to lose fish.
Fancy goldfish are slow, clumsy swimmers. They can’t compete for food against faster fish. If you’re adding zebra danios or rosy barbs, you need to target-feed your goldfish to make sure they’re actually eating. Feeding time with goldfish and active tank mates requires a plan, drop the flakes and walk away and your fancy goldfish goes hungry.
When the setup is right (cold water, heavy filtration, correct tank mates) a goldfish community tank is one of the most visually striking cold-water setups you can build. The problem is most people never get the setup right.
Choosing Goldfish Tank Mates – What You Need To Know
When it comes to choosing goldfish tank mates, their needs come first. Goldfish are the centerpiece. Every stocking decision supports that.
Temperament
Tank mates must not nip fins or bully goldfish. Goldfish are not aggressive, but they will eat anything that fits in their mouth. Avoid anything territorial, nippy, or small enough to be swallowed.
Size
Tank mates need to be large enough not to be eaten and small enough not to out-compete goldfish for food. Fancy goldfish breeds are slow. Any fast, aggressive feeder will starve them out.
Competition
Every animal in the tank needs fair access to food. Target-feed slow fancy breeds if you add fast species.
Parameters & Setup
Every tank mate must be comfortable in goldfish conditions:
Temperature: 65–72°F (18–22°C): this is the filter. Everything else is secondary.
pH: 7.0–7.4, moderate hardness
Tank size: minimum 30 gallons (114 L) for one goldfish; more for community setups
Water flow: gentle: fancy goldfish struggle in strong current
Author Note: Temperature is the single biggest limiter for goldfish tank mates. Any species that needs 76°F+ (24°C+) is incompatible. Don’t compromise on this. The fish pays the price, not the water.
11 of the Best Goldfish Tank Mates
Every species below is cold-water tolerant, peaceful enough to coexist with slow-moving fancy breeds, and hardy enough to handle goldfish-level bioload. Read the notes on each: some require specific conditions or suit slim-bodied goldfish better than fancy varieties.
Expert Take
After 25+ years in this hobby, I’ve seen goldfish kept with small tetras end exactly the way you’d expect, the tetras didn’t last. Goldfish tank mates work in theory and fail in practice more often than almost any combination in the hobby. Goldfish are cold-water, heavy waste producers that need powerful filtration and clean water. They’re also omnivores that will eat anything that fits in their mouth. And they’re slow, so any fish that nips fins will target them. Most ‘compatible’ suggestions online ignore one or more of these constraints. — Mark Valderrama, AquariumStoreDepot
Quick-Reference Comparison Table
Species
Adult Size
Min Tank
Ease
Compatibility
Other Types
6-8 inches
20 gallons
7/10
High
Japanese Rice Fish
1.5 inches
Varies
9/10
High
Dojo Loach
Up to 12 inches
55 gallons
9/10
High
White Cloud Mountain Minnows
1.5 inches
10 gallons
9/10
High
Bristlenose pleco
4-5 inches
15 gallons
7/10
High
Hillstream Loach
2-2.5 inches
20 gallons
7/10
High
Rosy Barbs
2.5-3.5 inches
25 gallons
9/10
High
Variatus Platy
2-2.8 inches
15 gallons
9/10
High
Hoplo Catfish
6 inches
30 gallons
9/10
High
Zebra Danio
1.5-2 inches
10 gallons
9/10
High
Mystery Snails
2 inches
5 gallons
9/10
High
1. OtherTypes
Scientific Name: Carassius auratus
Adult Size: 6-8 inches
Water Temperature: 65-72°F
Minimum tank size: 20 gallons
Care Level: Moderate
Diet: Omnivorous
Origin: China and surrounding Asian countries
Swimming Level: Midwater
This might seem like an obvious choice, but it’s important to note that different breeds of goldfish aren’t always compatible with other fish species and even other goldfish.
There are many amazing goldfish breeds, and they fall into two categories to make things a little easier:
Fancy Breeds
Fancy goldfish are some of the most colorful and ornamental fish breeds in the aquarium hobby. They often have long, flowing fins and strange body features like telescopic eyes and missing dorsal fins.
These slow-moving goldfish are tough to find tank mates for because they’re clumsy and can struggle to get to the food before other fish do. They are often uncomfortable in flowing water because they are poor swimmers. On the plus side, these fish are super peaceful and no threat to their tankmates.
The following breeds are all known as fancy goldfish:
Goldfish are not particularly fast fish, but the wild types and other slim-bodied goldfish are stronger swimmers that can even catch other small fish sometimes! These goldfish are less likely to be outcompeted for food by faster tankmates.
Keep fancy goldfish with similar fancy breeds. Keep common and slim-bodied goldfish with other slim-bodied breeds. Mixing the two categories is asking for trouble at feeding time.
2. Japanese Rice Fish
Ease: 9/10: One of the safest choices for this tank setup.
The Japanese rice fish, or Medaka fish as it is also known, is a great nano cold-water fish that can live with goldfish. These schooling fish are available in a variety of colors, including silver, golden, and orange.
Japanese rice fish are hardy and make ideal fancy goldfish tank mates. Even though they are small enough to be eaten by hungry goldfish, they are way too fast to be caught.
3. Dojo Loach
Ease: 9/10: One of the safest choices for this tank setup.
Scientific Name: Misgurnus anguillicaudatus
Adult Size: Up to 12 inches
Compatible with: Most goldfish breeds
Water Temperature: 64-74°F
Minimum tank size: 55 gallons
Care Level: Easy
Diet: Carnivorous
Origin: Eastern & Central Asia
Swimming Level: Bottom
Dojo loaches make great goldfish tank mates because they are peaceful and enjoy the same water parameters. These guys get pretty large, however, so you’ll need a tank of at least 55 gallons to give them enough swimming space.
Dojo loaches are also known as weather loaches. They are bottom dwellers that are happy to feed on the same food sources as your goldfish, which makes them very easy to care for.
4. White Cloud Mountain Minnows
Ease: 9/10: One of the safest choices for this tank setup.
Scientific Name: Tanichthys albonubes
Adult Size: 1.5 inches
Compatible with: Fancy goldfish breeds
Water Temperature: 57-71°F
Minimum tank size: 10 gallons
Care Level: Easy
Diet: Carnivorous
Origin: China
Swimming Level: Middle
White cloud mountain minnows are very popular tank mates for goldfish. These peaceful freshwater fish are also comfortable in relatively cold water. They come in some beautiful varieties, including golden and long-finned forms.
White cloud mountain minnows are colorful fish that grow to just 1.5 inches or so, which means it is possible for a full-grown goldfish to swallow them whole. It is safer to keep them with slow-moving fancy goldfish that are too clumsy to catch them.
5. Bristlenose pleco
Ease: 7/10: Good choice with a few conditions to watch.
Scientific Name: Ancistrus sp.
Adult Size: 4-5 inches
Compatible with: Fast-moving goldfish breeds
Water Temperature: 70-78°F
Minimum tank size: 15 gallons
Care Level: Moderate
Diet: Herbivorous
Origin: Argentina
Swimming Level: Bottom
The bristlenose pleco is a sucker fish that can make a good goldfish tank mate for more experienced keepers. These interesting fish require plenty of driftwood to graze on as well as some hiding places to feel secure.
Bristlenose plecos prefer 70–78°F (21–26°C), which barely overlaps with goldfish’s ideal range of 65–72°F (18–22°C). This pairing works only if you settle on 70–72°F (21–22°C) and hold it steady. Run them warmer and the goldfish suffers. Run them cooler and the pleco becomes lethargic. It’s a narrow window, which is why this one earns a 7/10 and not higher.
Hard Rule: Never mix goldfish with tropical fish. Goldfish need 65–72°F (18–22°C) and tropical fish need 76–82°F (24–28°C). Keeping them at a compromise temperature stresses both. One will die faster than you expect.
6. Hillstream Loach
Ease: 7/10: Good choice with a few conditions to watch.
These fish need good water flow and oxygenation to replicate their natural environment. You could use an internal filter or a small powerhead to create an area in the tank with good flow, but this will mean avoiding weak swimming fancy goldfish breeds.
7. Rosy Barbs
Ease: 9/10: One of the safest choices for this tank setup.
Scientific Name: Pethia conchonius
Adult Size: 2.5-3.5 inches
Compatible with: Fast-moving goldfish breeds
Water Temperature: 61-75°F
Minimum tank size: 25 gallons
Care Level: Easy
Diet: Omnivorous
Origin: Bangladesh, Pakistan, Nepal, India
Swimming Level: Middle
Rosy barbs, like goldfish, are part of the Cyprinid family. These social fish get nippy and territorial if kept in small numbers. Keep a group of at least 8 to 10 rosy barb fish to ensure they remain peaceful.
8. Variatus Platy
Ease: 9/10: One of the safest choices for this tank setup.
Scientific Name: Xiphophorus variatus
Adult Size: 2-2.8 inches
Compatible with: Fast-moving goldfish breeds
Water Temperature: 68-79°F
Minimum tank size: 15 gallons
Care Level: Easy
Diet: Omnivorous
Origin: Mexico
Swimming Level: bottom, middle, and top
The variatus or variable platy fish is another colorful freshwater fish that makes a great tank mate for goldfish. They enjoy cooler water temperatures and they are both peaceful and very easy to keep.
Platys are livebearers, which means they will produce plenty of fry if you keep both males and females in the same tank. The fry will be eaten by the goldfish, which is good for keeping the population down, but not great if you want your platies to multiply!
9. Hoplo Catfish
Ease: 9/10: One of the safest choices for this tank setup.
The hoplo catfish (video source) is a very hardy and peaceful nocturnal catfish. They are perfectly safe to keep with goldfish, but they can eat small fish like white cloud minnows or rice fish.
Hoplo catfish love to dig through the substrate, so keep them over fine sand, and expect them to rearrange the floor somewhat. These fish should be kept in a group of at least 5 and be sure to provide some hiding places like driftwood or caves.
10. Zebra Danio
Ease: 9/10: One of the safest choices for this tank setup.
Scientific Name: Brachydanio rerio
Adult Size: 1.5-2 inches
Compatible with: Fancy goldfish breeds
Water Temperature: 64-77°F
Minimum tank size: 10 gallons
Care Level: Easy
Diet: Carnivorous
Origin: India
Swimming Level: middle and top
Zebra danios are a great little schooling fish species that also do well in cooler temperatures. These peaceful fish can make good goldfish tank mates, even though they are technically small enough to be eaten. Danios are speedy and lively fish, so this isn’t a problem, but keeping them with slower goldfish is the safest bet.
11. Mystery Snails
Ease: 9/10: One of the safest choices for this tank setup.
Scientific Name: Pomacea bridgesii
Adult Size: 2 inches
Compatible with: All goldfish breeds
Water Temperature: 68-84°F
Minimum tank size: 5 gallons
Care Level: Easy
Diet: Eats algae
Origin: Brazil, Peru, Paraguay, Bolivia
Swimming Level: Bottom
Mystery snails make excellent tankmates for goldfish. These colorful aquarium snails look great and help to keep your tank clean by eating leftover food scraps. They are hard-working creatures and can even help to keep your glass and substrate clean by feeding on algae!
Unfortunately, young specimens and other freshwater snails will not be safe from a hungry and curious goldfish. Mystery snails can grow to over two inches, however, which is too big to be on your goldfishes menu!
Companions To Avoid
Now that you know eleven of the best goldfish tank mates, let’s run through a few species that you should avoid.
Tropical Fish
Goldfish are coldwater fish that do not occur in tropical regions. They prefer to live in a temperature range between about 65°F and 72°F. Any tropical fish that needs warmer water temperatures will not make a suitable tank mate. Common examples that get mixed with goldfish by mistake:
Goldfish should never be kept with aggressive tank mates. Long goldfish fins are prime targets for fin-nipping fish, and fancy breeds are not strong enough to defend themselves against bullies. In the aquarium hobby, there are a few ‘prime suspects’ to watch out for like:
Goldfish are omnivorous, which means they feed on both plant and animal matter. Inverts like cherry shrimp and bamboo shrimp are definitely on the menu, so you can expect a hungry goldfish to see them as a tasty snack.
They might survive fine with plenty of hiding spaces, but it’s not worth the risk. Even slow-moving fancy goldfish are likely to eat freshwater aquarium shrimp eventually.
Community Tank Setup
Now that you know more about suitable goldfish tank mates, let’s take a look at how to set up your own peaceful goldfish community aquarium!
Introducing Tankmates
While all the species in this list have been proven to get along great with goldfish, it’s important to understand that fish can have individual personalities and their behavior is complex.
Make sure you have some sort of backup plan in place in case there’s any unexpected conflict. It’s also a good idea to quarantine any goldfish tank mate for at least 2 weeks before introducing it to your aquarium.
Tank Size
The size of your goldfish community aquarium will depend on the number and type of fish you keep. A single goldfish needs a tank of 20 gallons at the very least, and this should be increased by a further 20 gallons for every additional goldfish you keep.
White cloud mountain minnows, for example, are nano fish that is kept in aquariums as small as 10 gallons, so adding a small school will not have a big effect on the bioload of your goldfish tank. The dojo/weather loach on the other hand is a large fish that should be kept in a tank of at least 55 gallons.
Heating
Goldfish prefer cooler water temperatures than tropical fish so they can often be kept in an unheated aquarium. Naturally, this will depend on the temperature in your home, office, or wherever you keep your goldfish tank.
Author Note: If the room temperature range varies between 65°F and 72°F, you will not need a heater to keep goldfish. You will need to heat or cool the water if the temperature rises or falls below these values, however..
The temperature preferences of the 10 goldfish tank mates in this list all vary, but they do overlap with the goldfish’s preferred parameters by at least a few degrees in each case. Running a heater can make it a lot easier to keep your aquarium temperature dialed into that ‘happy medium’.
Filtration & Aquarium Maintenance
Goldfishes create a large bioload in the aquarium, and adding tank mates will put even more pressure on your filtration system. This means excellent filtration is necessary to maintain great water quality.
Goldfish are not the strongest swimmers, and the fancy breeds in particular will not enjoy a strong water current. A good-quality canister filter is a great option for your goldfish tank, especially if fitted with a spray bar to minimize the water flow and oxygenate the water.
Supplementing this with a hang-on back, or sponge filter is a good way to increase your filtration capacity and can also be seen as a great ‘insurance policy’ in case either filter fails.
Your filtration system will keep your aquarium water looking beautiful while working to convert the ammonia in fish waste and uneaten food into nitrates. These nitrate levels should be monitored regularly using your test kit. At high levels, nitrates become toxic to your fish, so work out a partial water change schedule that keeps your nitrate levels to 20 ppm or less.
Live Plants
Growing live plants in your aquarium has a number of great benefits for your goldfish- and they look great too! Unfortunately, goldfish are notorious for eating aquarium plants, so you need to choose your species carefully. Here are a few goldfish-friendly plants that you can grow in your tank:
Keep in mind that even if your goldfish doesn’t eat your plants, they can uproot them. Plants that do not need to be planted in substrate or float will work best with goldfish.
Substrate & Decorations
A layer of aquarium sand or gravel on the bottom of your tank can create a more natural habitat for your fish to forage on. Many goldfish tanks are successfully run without any substrate at all, however. This is a great way to keep your aquarium spotless and clean, but it does not create a very natural environment.
Adding decorations and hardscape features like rocks and driftwood is a great way to add structure to your tank and provide your goldfish and their tank mates with a more natural home. Goldfish with long, flowing fins are vulnerable to tears and damage from sharp objects, so make sure that everything in your aquarium has smooth, rounded edges to avoid any injuries.
Where To Buy
Most of the species on this list are available at well-stocked local fish stores. For online orders with reliable livestock guarantees, these are the two sources I recommend:
Flip Aquatics: excellent selection of cold-water and community fish, strong live arrival guarantee
Dan’s Fish: reliable source for white cloud minnows, dojo loaches, and other cold-water species
White cloud mountain minnows and dojo loaches are the most commonly available species on this list. Japanese rice fish and hoplo catfish may require an online order or a specialist retailer.
Mark’s Pick: Other goldfish. A single-species goldfish tank is healthier, easier to maintain, and more visually striking than any mixed setup. If you want tank mates, white cloud mountain minnows are the only consistently safe choice, same temperature range, fast enough to avoid being eaten, and hardy.
FAQs
Can goldfish live with tropical fish?
No. Goldfish need 65–72°F (18–22°C) and tropical fish need 76–82°F (24–28°C). There is no stable compromise temperature that works for both. One group will be chronically stressed, and stressed fish get sick and die sooner. Keep goldfish with cold-water species only.
What is the safest goldfish tank mate?
White cloud mountain minnows are the safest choice. They thrive at 57–71°F (14–22°C), are fast enough to avoid being eaten, peaceful, and hardy enough to handle goldfish bioload. They work with both fancy and slim-bodied varieties. If you can only pick one tank mate, this is it.
How many goldfish tank mates can I add?
That depends entirely on your filtration capacity and tank size. For every goldfish, plan at least 20 gallons (76 L) of water. Adding tank mates means adding bioload, increase your filtration accordingly. Don’t stock to the limit. Goldfish waste output is high enough that you want headroom in your filter capacity at all times.
Can fancy goldfish live with common goldfish?
It’s not recommended. Common goldfish are faster swimmers and more aggressive feeders. Fancy goldfish with telescopic eyes or missing dorsal fins are at a disadvantage at feeding time and more vulnerable to fin-nipping. Keep fancy breeds together and slim-bodied breeds together for the best results.
Do goldfish eat their tank mates?
Yes, if the tank mate fits in their mouth. Goldfish are omnivores with no restraint about eating small fish, fry, shrimp, or snails. White cloud minnows and Japanese rice fish survive because they’re fast enough to stay out of reach. Any slow-moving nano fish will get eaten. Shrimp will get eaten regardless of speed.
Can I keep goldfish with snails?
Large mystery snails (2+ inches / 5 cm) are generally safe because they’re too big to be swallowed. Smaller snails (pond snails, nerites, ramshorns) will be eaten. Even mystery snails are at risk when they’re juveniles. Add them at full adult size if possible.
Who Is This Setup Right For?
Good Fit If:
You want a cool-water setup and are committed to proper goldfish husbandry (large tank, powerful filtration, regular water changes)
You’re adding white cloud mountain minnows as the only tank mate species
You have a pond-style setup where temperature and bioload can be managed at scale
You’re keeping fancy goldfish varieties with other similar-sized goldfish
Avoid If:
You want to mix goldfish with tropical fish: the temperature requirements are incompatible
You have small, delicate fish: goldfish will eat anything they can fit in their mouth
You have a lightly filtered tank: goldfish produce enormous waste that overwhelms community systems
You want to add shrimp or snails: goldfish will eat them
Final Thoughts
Goldfish are easy to mishouse and genuinely rewarding when housed correctly. The cold-water requirement isn’t a limitation, it’s a filter. Once you commit to it, the compatible species list gets clear fast: white cloud mountain minnows, dojo loaches, rosy barbs, zebra danios, and other goldfish. That’s a short list, but it’s a good one.
The tank mate question matters less than the tank setup question. Get the filtration right, get the water changes consistent, and pick cold-water species. Do those three things and a goldfish community tank will run cleanly for years.
Do you keep companion fish with your goldfish? Drop a comment below, I’d like to hear what combinations have actually worked for you.
📘 Want to learn more? This article is part of our complete Freshwater Fish Guide. Your ultimate resource for freshwater species, care tips, tank setup, and more.
Molly Fish are sold as beginner fish but they are not. They need hard, alkaline water, real filtration, and more space than most people give them. In soft, acidic water they get sick constantly. In the right water, they are bulletproof.
Mollies are not hard to keep. They are hard to keep in the wrong water.
Mollies are not hard to keep. They are hard to keep in the wrong water.
The biggest challenge with Molly Fish is not keeping them alive. It is managing how fast they multiply.
The Molly Fish breeds constantly and lives 3 to 5 years. You need a plan for fry before you buy your first pair, or your tank will be overrun within months.
Livebearers teach you more about population management than any textbook ever will.
ASD Difficulty Rating: Tier 1 – Beginner
Molly fish are adaptable livebearers suitable for community tanks from 20 gallons. They prefer slightly hard, alkaline water and can even acclimate to brackish conditions. Hardy and easy to breed.
Mollies are one of the most underappreciated livebearers. They get lumped in with guppies and platies as beginner fish, which is fair, but there’s something that sets them apart: they’re one of the few freshwater fish that can genuinely tolerate brackish water and even light saltwater. I’ve seen mollies kept successfully in reef sumps. They also do noticeably better with a little aquarium salt and harder water than most fishkeepers bother with. Skip the salt and keep them in soft, acidic water and you’ll eventually see the shimmy disease that mollies are famous for. A wobbling, shimmying behavior that signals stress or illness. Get the conditions right and they’re virtually bulletproof. Here’s the full care guide.
What Most Care Guides Get Wrong About Molly Fish
The most common mistake I see with molly fishs is keeping too few. Guides will say “minimum 6” and leave it at that. In reality, these fish behave completely differently in a proper group of 8 to 10 or more. Keeping just 3 or 4 often leads to stress, hiding, and fin nipping that wouldn’t happen in a larger school. Another thing most guides miss is how much lighting and decor affect this species. Molly Fishs look washed out under bright white LEDs on a light substrate. Dim the lights, add some tannins, use a dark background, and you’ll see colors you didn’t know they had. I’ve also noticed that many care sheets recommend overly broad water parameters. Yes, molly fishs are adaptable. But “adaptable” doesn’t mean they’ll thrive in just anything. In my experience, keeping them closer to their natural soft, slightly acidic conditions brings out the best color and longevity.
The Reality of Keeping Molly Fish
Breeding is not optional. It is automatic. If you have males and females, you will have fry within weeks. Most new owners are not prepared for the population explosion. You need a plan, whether that is a grow-out tank, selling to a local store, or keeping predators that naturally control numbers.
Water hardness matters more than people realize. Livebearers come from hard, alkaline water. Keeping them in soft, acidic conditions leads to chronic health problems, fin clamping, and shortened lifespans. If your tap water is soft, livebearers are not ideal unless you buffer the water.
Male aggression is constant. Males chase females relentlessly. Without a ratio of at least two females per male, the females get stressed, stop eating, and weaken. Overcrowding males does not solve this. It makes it worse.
Biggest Mistake New Owners Make
Buying one male and one female thinking it will be manageable. Within three months you have 30 to 50 fish in a tank designed for 10. Always plan for breeding output before you buy your first pair.
Expert Take (Mark Valderrama, AquariumStoreDepot)
If you are keeping livebearers, you are a breeder whether you planned to be or not. Accept it early and have a plan for the fry. That single decision prevents 90% of livebearer problems.
Brief Overview Of The Molly Fish
Scientific Name
Poecilia sphenops, P. Latipinna, P. Velifera, etc.
Common Names
Molly, molly fish, sailfin molly, shortfin molly, balloon molly, etc.
Family
Poeciliidae
Origin
United States of America, Mexico, Colombia, Venezuela, etc.
Diet
Omnivorous
Care Level
Moderate
Activity
High
Lifespan
2 – 5 years
Temperament
Peaceful/ semi-aggressive
Tank Level
Midwater
Minimum Tank Size
15 gallons
Temperature Range
72 ° to 82 °F
Water Hardness
15 – 30dH
pH Range
7.0 to 8.5
Filtration/Water Flow
Low to Moderate
Water Type
Freshwater
Breeding
Live bearer
Difficulty to Breed
Easy
Compatibility
Community tanks
OK, for Planted Tanks?
Mostly, may eat soft plants
Classification
Taxonomic Rank
Classification
Common Name
Molly Fish
Scientific Name
Poecilia sphenops / P. Latipinna
Order
Cyprinodontiformes
Family
Poeciliidae
Genus
Poecilia
Species
P. Sphenops
Molly Fish Origins and Habitat
The popular molly fish of the aquarium hobby are native to the North and South American countries of the United States, Mexico, Colombia, and Venezuela. They have also been introduced to some Caribbean islands and East Asian countries.
In nature, the molly fish lives in a huge variety of different habitats. Mollies are euryhaline, which means they can live in varying salinity.
They are most often found in freshwater environments, temporarily moving into brackish water in coastal areas. They are also occasionally found living and breeding in pure saltwater too, which is really amazing!
What Do They Look Like?
Molly fish are so variable in shape, color, and markings, that it’s tough to describe just what they look like! I’ll go into a little more detail on the various species and breeds in the next section, but speaking, mollies are solidly built mid-sized aquarium fish.
One very noticeable feature is the unusually thick base (peduncle) to their tails. On the opposite end, their heads are sharply pointed in profile when viewed from the side. The head is wide across when viewed from above, with their mouths positioned right in front of their faces.
They also have very big eyes, and their lower jaw sticks out a little further than the top. These are the features that are most obvious in all mollies.
Species
There are about 40 species in the Poecilia genus, including other well-known livebearerssuch as the common guppy. A handful of common molly species are popular in the aquarium trade, and they have been bred with each other to produce hybrids and various color morphs.
Let’s take a look at some of the more common molly fish types:
Sailfin Molly – Poecilia latipinna
Sailfin mollies have huge dorsal fins that they can lift up to look just like a sail. This is a natural body feature that the males use to impress the females. These beautiful fish are scientifically known as Poecilia latipinna.
Sailfin mollies are relatively small, reaching a maximum length of about 5 inches. This species actually occurs naturally in the United States, living wild as far north as North Carolina.
Shortfin Molly/ Black – Poecilia sphenops
The shortfin or black molly is one of the most common types of molly. Black mollies are smaller than the sailfin, reaching a maximum size of less than 5 inches.
In the wild, they are naturally silvery with some color on their fins. The black molly fish is the most popular color breed of this species.
Giant Sailfin- Poecilia velifera
The giant sailfin molly fish is the largest of the common species. These Mexican fish can reach a length of 7 inches in the aquarium. They have a huge dorsal fin like the regular sailfin but is told apart by having more fin rays (18-19), and round spots on this fin.
Varieties
The various molly species are able to interbreed, and aquarists have crossed them to create an amazing array of different varieties. Selective breeding has refined the results, creating fish with different body shapes, finnage, colors, and patterns.
Here are a few of the most popular molly types:
White Molly Fish
White mollies are a pure, bright silvery color. They should not be confused with albinos which have more yellowish color and pink eyes.
Golden Molly Fish
Mollies are also available in amazing golden-orange colors. They is uniformly golden colored or flecked with black like the gold dust molly. Specimens that are partially golden and partially white are known as creamsicle mollies.
Dalmatian Molly Fish
Dalmation mollies are whitish fish that are covered in fine black spots, just like dalmatian dogs. The blotching is quite variable, and these fish are sometimes known as marbled, or salt-and-pepper mollies.
Lyretail Molly
Lyretail molly fish have elongated rays at the top and bottom of their tail fins. Lyretail mollies are available in all the different colors varieties, which makes them great for aquarists who want that extra bit of flair in their aquarium.
Balloon Molly
Balloon molly fish come in a variety of colors, including black, white, golden, and marbled. What sets balloon mollies apart is their rounded bodies, almost like an inflated balloon! This is not a natural feature, however, but rather a trait that has been selectively bred for.
Size
Molly fish vary in size depending on their species, variety, and gender. Adult mollies vary from a little over 3 inches, right up to about 7 inches in length. Females are larger than males, but this is not always the case.
How Long Do They Live?
The typical molly fish lifespan is from two to five years. This depends on a variety of factors, though, including their level of care, diet, and genetics.
Temperament and Activity Level
Mollies are active and confident fish that are always busy and lively. They are peaceful community fish, but here are a few scenarios in which mollies is semi-aggressive. We have a video from our YouTube Channel that goes into detail about their care and temperature. Check it out below.
Mollies are very peaceful with the other species of fish in the tank, especially if they are kept in a group. Males is a little aggressive with one another when competing to breed, however. They will also harass the females pretty relentlessly, which is normal behavior for the species.
If you don’t mind your fish breeding, the ideal stocking rate is a ratio of one male to two or three females. This will take some of the pressure off the females.
They can also be quite competitive with each other around mealtimes. As long as each fish is getting enough to eat, this isn’t too much of a concern though.
What Are Good Tank Mates
Mollies are great fish for a carefully planned hard water community tank. They are highly versatile and these fish thrive in many different setups provided they are happy with the water parameters.
Choosing the right tank mates for your molly fish is very important too, of course, so read on to learn about some great options.
Best Tank MatesFor Companions
Ember Tetra” class=”wp-image-547290″/>
The first thing to note is that all tankmates should be comfortable in the same hard water conditions that your mollies prefer. Mollies is kept in anything from fresh to saltwater, so I’ve grouped these tank mates according to the type of water they live in.
Mollies are euryhaline fish, but most other species are not, so never mix other freshwater fish with saltwater tank mates or vice versa.
Molly fish are one of the few fish in our hobby than is converted over to a saltwater aquarium. There are steps on how to do this (more on this later). They make great algae eaters, but they are small in comparison to many saltwater fish and may be bullied. Here are a few possible candidates.
Avoid very small and shy fish that are easily intimidated
What Do They Eat?
Mollies are omnivorous fish that eat both plant and animal matter. Sailfin mollies in particular need plenty of plant material in their diet. They are not fussy eaters and actually do a great job of cleaning up scraps and uneaten food in the aquarium.
Let’s take a look at some of the best food sources for these fish.
Mollies love to eat biofilm, and surface scum. They are also known to eat other types of algae like green algae, black beard algae (BBA), hair algae, brown algae, and blue-green algae. This makes them valuable members of your clean-up crew!
How Much and How Often to Feed Them
One of the most common mistakes in the fishkeeping hobby is overfeeding. But how do you know how much food your fish need?
Mollies don’t waste time when there’s food around, so if they haven’t finished everything after 2 minutes or so, you can assume you’ve given them too much food.
Sure, they might finish the leftovers later, but what about the food that gets sucked into the filter, settles in the gravel, and otherwise goes to waste? Well, this leftover food rot and results in poor water quality.
That’s why it is best to feed small amounts 2 or 3 times a day, rather than a large amount just once a day.
Setting Up Your Tank
Setting up a great aquarium for mollies is easy because these fish are very adaptable. Nevertheless, there are some important things to know before putting a tank together. Read on for more details.
Tank Size
Molly fish is kept in tanks as small as 15 gallons, and sometimes even less. In such a small tank, you could keep up to four mollies if you have good water filtration and perform regular aquarium maintenance. A 20 gallon long is a good candidate to start with.
A larger tank would be a better bet, however, especially if you plan on keeping a bigger school or other species of community fish.
Plants
Mollies thrive in planted aquariums. Beware though, mollies are omnivorous fish and they have been known to feed on delicate, soft-leaved plants. Tougher species like these plans below will do well with Molly fish:
A mix of tall plants like Vallisneria in the background with Java ferns in the midground and some anubias nana petite in the foreground could make a tough and simple but beautiful planted aquascape for these fish.
Substrate
Substrate type is not critical when it comes to keeping mollies. Any aquarium-safe sand or gravel will work just fine. If your water is not naturally hard and alkaline, it is a good idea to incorporate some crushed coral into the substrate.
Decor
Molly fish are not particular about the decorations in their tanks so you can use your creativity to put together an aquarium that suits your eye.
Adding some driftwood and rocks is a great way to create a more natural tank environment, but there’s nothing wrong with putting in some aquarium-safe ornaments and decorations too.
Mollies are known as hardy fish. So much so that experienced keepers use them to cycle new fresh and saltwater aquariums.
Nevertheless, maintaining high water quality is very important if you care about keeping your fish in good health for the long run. Maintaining great water quality for your mollies relies primarily on good filtration and aquarium maintenance.
Read on to learn more about these, and other important water quality factors.
Filtration
A good filtration system means the difference between a sparking, pristine aquarium, and a toxic and dangerous environment for your fish. Aquarium filters work by literally filtering out particles in the water, a process known as mechanical filtration.
You might not know how much more is happening behind the scenes though!
Microscopic life forms known as beneficial bacteria take up position and colonize the sponge and other media in the aquarium filter. These beneficial bacteria make their living by feeding on some pretty toxic chemical compounds (like ammonia) that enter the water through fish waste and uneaten food. This process is known as biological filtration and is very important for your fish.
Mollies are adaptable to a fairly wide range of water temperatures from about 70°F to a little over 80°F. This means they is kept in unheated aquariums in many cases.
I would recommend using a heater to keep the water temperature stable in the middle of that range because they are comfortable in tropical climates with warmer water.
Mollies can live in fresh, brackish, or even saltwater. In a freshwater aquarium, they must be kept in hard or at least fairly hard water for their long-term health and survival. The alkalinity should be basic, i.e. Above 7.2.
Even though they have a reputation as hardy fish, mollies are not immune to the effects of ammonia and nitrite in the water. Aim for the following levels:
Nitrate (NO3): Less than 20 parts per million
Nitrite (NO2): Zero parts per million
Ammonia (NH3): Zero parts per million
Salt
One of the biggest debates around molly fish care is their salt requirements. Many fish keepers will tell you that you need to add salt to the aquarium to keep these fish happy, but this is not necessarily true.
The salt these fish require does not necessarily need to be regular aquarium salt (NaCl), even though they are highly tolerant of various salinities. Calcium and magnesium, i.e. The elements responsible for hardening water are essential, however.
Mixing crushed coral into your substrate or using a product like Seachem Equilibrium is a great way to increase water hardness if your tap water isn’t quite hard enough for mollies.
Acclimating To Saltwater
You may have heard that some aquarists keep mollies in saltwater. As strange as this sounds, it’s absolutely true! Properly acclimated mollies make awesome saltwater fish because they are so affordable and do a great job of eating certain kinds of algae. The video above from Everyday Aquarist goes through the process. I’ll explain more below.
You shouldn’t pick up a couple of mollies from the pet store and drop them straight into a reef tank. Mollies are highly adaptable, but if the change in salinity is too rapid, they could go into osmotic shock.
The most successful techniques involve slowly replacing the freshwater with salt water over a period of one to two days. This gentle acclimation will be a lot less stressful for the fish. Just be sure to provide the fish with an airstone during this process if they are in a bucket or small tank for acclimation.
Slow acclimation is achieved by siphoning saltwater in from a tank or bucket and allowing the excess to overflow. The saltwater needs to be introduced very slowly, so a drip rather than a flow is recommended. An accudrip acclimator is used to make the setup easier.
Most of us know that fish and shrimp are sensitive creatures, who don’t do well with sudden changes. The Accudrip Acclimator is here to help adjust your aquatic creatures to new tanks and conditions
Use a refractometer to measure and monitor the salinity of the water. Specific gravity should not go above 1.025.
Aquarium Maintenance
Regular aquarium maintenance is vitally important for keeping healthy molly fish. A weekly partial water change is recommended to keep nitrate levels down, and this is a good time to give the tank a general clean as well.
Remember to treat your tap water with a water conditioner before adding it to the tank. If your aquarium filter media needs to be rinsed out, use tank water that will not harm the hard-working colonies of beneficial bacteria.
Testing
Testing your water parameters regularly is absolutely vital if you wish to keep healthy mollies in the long run. Pick up a master test kit that is used to measure the following parameters:
These are the most important parameters to keep an eye on if you are keeping mollies as freshwater fish, but if you are keeping them in brackish or saltwater, you’ll need a hydrometer to measure specific gravity too.
Breeding
It is very easy to breed mollies. These fish are livebearers, which means the females give birth to live fry instead of laying eggs. If you have adult male and female mollies in your tank, and they are happy in their environment, they will breed freely.
Sexing Mollies
Successfully breeding molly fish requires having both males and females. But how do you tell the difference?
Fortunately, sexing these fish is easy once they are old enough to show differences in gender. This takes at least a few months with mollies.
Let’s take a look at some of the most noticeable gender differences:
Male mollies are smaller and more colorful than females
Male mollies have a larger dorsal fin than females
Female mollies have a well-developed anal fin, whereas the anal fin of males is modified into a narrow, elongated structure known as a gonopodium
Male mollies will spend a lot of time trying to entice the females. They will chase and swim around them
A pregnant female molly will develop a large, rounded belly with a characteristic gravid spot just in front of the anal fin. This spot will be very difficult to see on a black molly fish
Raising & Protecting Fry
Molly fry are very small and vulnerable to being eaten by the other fish (including mollies) in the tank. Ideally, the pregnant female should be moved to a separate breeding tank before giving birth.
Alternatively, you can use a breeding box in your aquarium to keep the baby fish safe until they are too big to be swallowed. The fry is fed a diet of baby brine shrimp or flake food that is crushed up into a powder form.
Preventing Breeding
Female molly fish are pregnant for about 2 months, and can give birth to over 50 fry! This means the population of fish in your tank can rise pretty dramatically if you allow it.
The best way to prevent breeding is to keep only female fish. Pregnant females can store sperm for a few broods after mating, so separating adult mollies will not stop the female from producing fry right away.
Health And Disease
Naturally, you want your molly fish to live a long healthy life, so what are the problems to look out for? Read on to learn more about the health and wellness of these popular aquarium fish.
Evaluating Their Health
Evaluating your fish’s health requires careful observation. Start by looking at the fish’s physical appearance. Try to answer the following questions:
Do the eyes look swollen or unhealthy?
Are the fins torn or clamped against the body?
Does the fish have very long stringy white feces?
Is the fish covered in white spots or any tiny parasites?
Is the fish very thin, or heavily swollen (skip this for balloon molly fish!)
If the fish looks physically healthy, there are still behavioral warning signs to look out for.
Is the fish breathing rapidly?
Is the fish having trouble swimming or just shimmying at the top of the tank?
Is the fish flashing and scratching its body against the substrate?
Is the fish floating or sinking?
Is the fish avoiding food?
If you answer yes to any of these questions, there is most likely a problem with the fish. You can go through these questions before picking out your fish from the pet store, or just for monitoring your fish at home.
Common Health Issues
Mollies are most likely to suffer health problems when their tank conditions are not suitable. This is the result of soft water, poor water quality, or a lack of space in a crowded tank.
Mollies are bred in brackish waters, and the shock of being put into freshwater at the pet store or in your home is another potential problem. These are all causes of stress for your fish, and stress puts them at high risk of common freshwater diseases and disorders like:
Mollies are common and easy to find down at your local pet store. They are affordable fish, although you can expect the price to vary depending on breed and color pattern.
They are also available online of course, which is great for aquarists who don’t have a good local fish store nearby.
FAQS
Are they easy to care for?
Molly fish are moderately easy to care for which makes them a good choice for beginner aquarists who are willing to do some planning. They will thrive if you can provide them with the water parameters and quality they need.
How many mollies should be kept together?
Mollies are social fish that should be kept in groups of at least four fish. You should always keep more female mollies than males, so a group of three females and one male would be the lowest recommended number.
Do mollies need a heater?
Mollies are thought of as tropical fish, but if you look at their natural distribution, you’ll see that this isn’t strictly true.
They is kept in an unheated aquarium if the water in your tank stays consistently within their preferred range of 70-82°F. Using a heater will protect the fish against any cold snaps, and keep the conditions more stable, however.
Can they live in tap water?
Molly fish is kept in tap water that is naturally hard and alkaline. You should always treat tap water with a water conditioner to neutralize chemicals like chlorine and chloramine, however.
Can mollies live with Betta?
It is possible to keep mollies and bettas together, but they are not ideal tank mates. Even though mollies are peaceful fish, they do occasionally nip at fish with large flowing fins.
Hard Rule: Mollies need hard, alkaline water (pH 7.5–8.5, GH 15–25 dGH). Soft, acidic water causes disease, color fade, and early death – no matter how clean the rest of your parameters look.
Is the Molly Fish Right for You?
Before you add a molly fish to your tank, it’s worth asking whether this species actually fits your setup and your goals. Here’s a quick breakdown to help you decide.
This species is a good fit if:
You have a large enough tank to manage territories. Cramped conditions amplify aggression.
You’re comfortable managing aggression through stocking ratios, line of sight breaks, and tank layout.
You can commit to regular water changes. These fish produce more waste than many smaller species.
You’re not planning a peaceful community tank. Molly Fishs need tank mates that can hold their own.
You enjoy watching active, interactive fish. Cichlids have personality that smaller species simply don’t match.
You have backup plans. Sometimes a particular fish just doesn’t work out, and you need a way to rehome it.
You’re feeding a varied, high-quality diet. Color and health depend on nutrition.
If most of those points line up with your setup, the molly fish is worth serious consideration. If several don’t, it’s better to choose a species that matches your tank now rather than trying to make it work.
Avoid If:
You keep soft-water species like discus, apistogrammas, or South American tetras in the same tank
You have no plan for constant fry – mollies breed relentlessly without separation
Your tap water is naturally soft and acidic and you are unwilling to buffer it
You want a low-maintenance livebearer – mollies need consistently high water quality
How the Molly Fish Compares to Similar Species
Want color and activity without breeding headaches? Get all males. Want a self-sustaining colony? Get a proper male-to-female ratio and a grow-out tank.
Choosing between similar species is tricky. Here’s how the molly fish stacks up against some common alternatives.
The molly fish occupies a specific niche in the aquarium hobby, and direct comparisons really depend on what you’re looking for. In my experience, the most common question people ask is whether they should choose the molly fish or something similar that’s more widely available. The answer comes down to three things: tank size, water parameters, and what other fish you’re keeping. If your setup matches what the molly fish needs, it’s hard to beat. If not, there are alternatives worth exploring.
Final Thoughts
Mollies are hands-down one of the best fish in the hobby. They look great, they’re adaptable, and they’re great for eating algae too! I hope this article has cleared up some of the confusion for you and helps you keep your molly fish happy and healthy.
Do you keep mollies? Tell us about your experiences with these amazing fish in the comments below!
Ammonia spikes have ended more fishkeeping journeys than almost anything else, and I’ve fielded countless questions about it over the years. Early in my own hobby days I lost fish to ammonia before I understood the nitrogen cycle. it’s a hard lesson. The good news is that once you know what drives ammonia up and how to bring it down fast, it becomes a manageable problem rather than a mystery.
Ammonia is the number one killer in home aquariums. particularly in new tanks that haven’t finished cycling. I’ve seen it wipe out entire stocks of fish in tanks that looked perfectly fine to the eye. The tricky thing about ammonia is that you can’t see it or smell it at aquarium concentrations, so regular testing is the only way to catch it before damage is done. When I get ammonia readings in a tank, my first move is always Seachem Prime to detoxify it temporarily, followed by a water change and a hard look at what’s driving it. overfeeding, overstocking, an uncycled tank, or a dead animal decomposing somewhere. This guide covers 6 practical ways to bring ammonia down and keep it there.
The Nitrogen Cycle
The first rule to having a fish tank is allowing it to cycle. But what does it mean for a fish tank to cycle and why does it matter so much?
Unfortunately, many beginner hobbyists skip fundamental steps in understanding the aquarium nitrogen cycle; they’re told to come back to their local pet store for water testing in a couple of weeks when they’ll be given the thumbs up to add their first fish to the aquarium even if the fish tank isn’t fully cycled. Too many times, this results in suffering and dead fish as well as disappointed hobbyists.
What Is The Nitrogen Cycle?
There is a great video that really explains the nitrogen cycle in a fun and entertaining way by Girl Talks Fish below that I’ll embed for you. I’ll go more into my boring details below
The nitrogen cycle is very easy to understand but requires some patience.
In simple terms, the nitrogen cycle prepares your aquarium for dealing with fish waste and other organics in the water through processes completed by beneficial bacteria. These beneficial bacteria need to grow and populate the aquarium over the course of several weeks until there are enough to convert toxic ammonia to nitrite to less toxic nitrate.
In more biological and chemical terms, this looks a little more complex. Ammonia (NH3) and ammonium (NH4) are converted to (NO2) by nitrifying bacteria. Different nitrifying bacteria then convert this nitrite into nitrate (NO3).
In the aquarium setting, the nitrogen cycle will always start with ammonia. If more ammonia enters the system than your population of beneficial bacteria can handle, then your aquarium will go through a cycle or a mini-cycle.
Why Is It Dangerous?
Ammonia poisoning is when high levels of ammonia start to burn the internal and external organs of fish and invertebrates. This can result in lethargy, difficulty breathing, loss of appetite, and inflammation.
Before we dive into how ammonia enters the fish tank, we need to understand why we need to avoid excess levels at all costs.
It’s important to keep in mind that ammonia is present in the aquarium at all times due to leftover food and fish waste being processed. However, levels can quickly become dangerous whenever they’re not close to 0 ppm.
If large amounts of ammonia are present in the aquarium, ammonia poisoning can set in almost immediately. If low amounts of ammonia are present in the fish tank over a longer period of time, then it’s still possible for your fish to experience chronic ammonia poisoning.
The problem is that high amounts of ammonia will translate into high amounts of nitrite, another deadly compound at high levels. At this point, fish may experience nitrite poisoning.
Nitrite is very similar to oxygen in its chemical structure. Therefore, it is able to enter the bloodstream and connect to hemoglobin where oxygen would otherwise. This quite literally makes the fish suffocate from the inside out, making for a very painful death.
Similarly, nitrite poisoning will either be immediate or witnessed over the course of a few days depending on water quality. Symptoms are also very similar, which means it’s necessary to test water parameters for a sure diagnosis.
Ammonia In The Aquarium
For an established fish tank, ammonia is a bad thing to have. It can quickly cause ammonia poisoning, killing fish and invertebrates by burning internal and external organs. When cycling a fish tank, ammonia becomes the food needed for bacteria to grow and populate. We have a video below form our YouTube channel for reference. We go over more details in the blog. Be sure to subscribe if you like our videos!
There are many different ways to purposely or mistakingly introduce ammonia into the aquarium:
New fish tank
New livestock additions
Dead organic matter
Overfeeding
Overstocking
1. New Aquarium
When starting up an aquarium, you may experience a phenomenon known as new tank syndrome. This is the build-up of harmful nutrients and compounds in the aquarium that can kill fish and deter bacterial growth in extreme cases. The reason for the new tank syndrome is that the aquarium hasn’t had time to establish a healthy population of beneficial bacteria.
As mentioned before, beneficial bacteria make the conversion of ammonia to nitrite to nitrate possible. If this cycle isn’t allowed to be fully completed, then bacteria will struggle to detoxify these compounds, making for unsafe water conditions.
However, even if your aquarium is fully cycled, there’s still a chance that it experiences new tank syndrome. This could be due to a weak cycle or overstocking the aquarium too quickly. Both of these circumstances would lead to ammonia entering the aquarium too quickly, overloading the present bacteria populations.
As a result, a mini-cyle is likely to occur where there are abnormal levels of ammonia and nitrite. This can be very dangerous as it can lead to ammonia poisoning and nitrite poisoning.
2. New Livestock Additions
Any time a new fish or invertebrate is introduced into the aquarium, ammonia levels will rise. Depending on the stability of the system, this increase in ammonia shouldn’t be seen in tests as beneficial bacteria will quickly adapt to the new influx.
The problem happens when beginner hobbyists are eager to stock their new fish tank to the brim as soon as the nitrogen cycle is completed.
New livestock additions should be spaced out over the course of weeks or months to give beneficial bacteria populations enough time to adapt to the increased ammonia levels. Adding too much at once is a sure way to cause a mini-cycle, greatly increasing the chances of losing all of your new livestock!
3. Dead Organic Matter
Things die in the aquarium all the time: fish, snails, crabs, and aquarium plants. It’s bound to happen, but it might take some time to notice or you might not be able to reach what’s left before it starts to decompose.
As decaying organic matter starts to decompose, ammonia is created. While most fish tanks are able to handle these small amounts of ammonia entering the system, it’s always recommended to remove what you can to prevent an ammonia spike from happening.
However, sometimes you just don’t notice that one of your fish or invertebrates is missing and the breakdown process has already started. Or, the carcass may be so far in the back of the fish tank that you just can’t reach it no matter how hard you try.
Leaving the dead matter in the fish tank will raise ammonia levels, though not terribly if the system is stable. This is also why a cleanup crew, like saltwater hermit crabs or shrimp, are especially helpful to take care of dead fish and invertebrates before they start to decompose.
4. Overfeeding
Overfeeding is one of the most common reasons for an ammonia spike in a new fish tank. Fish do not need as much food as we think they do and they often end up overfed.
Fish food is naturally high in unwanted organics, like phosphate, which can quickly cause algae in the aquarium. However, as uneaten fish food is left to rot at the bottom of the tank, it will also start to release ammonia just like other decaying organic matter. Not to mention that overfeeding will result in much more fish waste entering the water as well, also increasing ammonia levels.
In general, fish should only be fed as much as they can eat in a couple of minutes. All uneaten fish food should be removed after.
5. Overstocking
New livestock additions can overwhelm a biological filter; by the biological filter, we mean the beneficial bacteria that live in the filtration system and other surface areas of the fish tank that make the nitrogen cycle possible. This is why overstocking a tank can be so dangerous.
Beneficial bacteria can only handle a certain amount of ammonia and nitrite. If levels exceed this rate, then both ammonia and nitrite levels will accumulate. This can easily become the situation if too many fish are put into the aquarium.
This is also the reason why goldfish need such a large aquarium. These fish are incredibly messy; they are messy eaters and leave a lot of uneaten food, which then results in a lot of fish waste. Because of this, a large filtration system is needed to allow for the most surface area for beneficial bacteria to grow.
6 Ways To Lower It In Aquariums
High ammonia levels in the fish tank should be considered an emergency. The longer your fish and invertebrates are exposed to ammonia, the better the chances of them dying. You need to act fast without making too many changes at once.
Of course, the best way to remove ammonia from the aquarium is by preventing it in the first place.
Make sure your fish tank is completely cycled. Test water parameters frequently and only add fish when there are no signs of ammonia or nitrite.
Add fish slowly. Do not overload the system and allow beneficial bacteria populations to grow over time as more and more fish are added.
Do not overstock. Understand the ratio of ammonia being produced to aquarium water volume. Beneficial bacteria can only concert so much ammonia at one given time.
Do not overfeed. Though we love to give our fish and invertebrates the best life possible, too much fish waste and uneaten food can lead to a deadly ammonia spike. Remove excess food.
Perform regular fish tank maintenance.
Otherwise, there are ways to remove ammonia from the fish tank through water changes, increased biological filtration, bacteria supplements, and chemical media.
1.Water Changes
The best way to quickly get rid of ammonia from a fish tank is by doing a succession of water changes over the course of a few days. Though this won’t solve the underlying problem causing ammonia to be high, water changes will help keep ammonia levels lower and safer for fish.
If you find ammonia in your fish tank, don’t panic. Instead, set up a plan over the next few days to do water changes. You don’t want to change out all the water at once as this can create instability in the fish tank and changing parameters that stress out your fish even more.
Instead, start with a 50% water change. If using tap water, make sure that there is no ammonia in the water as this will only increase the ammonia level. For extra precaution, use a water conditioner that detoxifies ammonia and other harmful compounds, like SeaChem Prime.
Continue to do 25-50% water changes over the next few days until the ammonia level reaches 0 ppm. At that point, you will need to identify the cause of the ammonia spike, be it a mini-cyle, a dead fish, or too much uneaten food, and treat accordingly.
2. Increased Biological Filtration
If it isn’t an emergency, then the best way to remove ammonia from a fish tank naturally is to allow beneficial bacteria to do their thing. This is known as biological filtration, which can be increased by increasing the surface area in the aquarium; this is different from chemical or mechanical filtration.
Specific biological filtration media has also been created to facilitate bacterial growth and lower ammonia levels. This works by creating porous media, similar to live rock, that creates more surface area.
The majority of beneficial bacteria live in the filtration systems of our fish tanks. However, they also live in the nooks and crannies of live rock and other aquarium decorations.
Some of these products include:
SeaChem Matrix. This product grows aerobic and anaerobic bacteria to control ammonia, nitrite, and nitrate levels. One liter provides >~700 m2 surface area and can be used in freshwater and saltwater setups.
Biohome Ultimate. Meant for saltwater and freshwater hang on the back, canister, and sump filtration systems, Biohome Ultimate media influences both aerobic and anaerobic bacteria growth with added trace elements, like iron and manganese.
MarinePure. MarinePure is meant specifically for direct use in saltwater fish tanks to reduce ammonia, nitrite, and nitrate levels. It can be used under the substrate or in areas of high flow, including the filtration system.
Biological filtration media is a great and minimally invasive addition for buffering surface area in a hang on the back, canister, or sump filtration system. Still, this media will take some time to populate by bacteria and will not immediately lower ammonia levels.
3. Add Beneficial Rock (AKA Live or Dry Rock)
Porous rock is a great way to add biological capacity to your aquarium. I’ll cover both the saltwater and freshwater side below.
Adding Live/Dry Rock To The Saltwater Aquarium
Live rock is the foundation for any saltwater fish tank setup. Not only does it provide food and shelter for fish and invertebrates, but it houses a plethora of bacterial life that is essential for facilitating the nitrogen cycle.
One way to jumpstart a nitrogen cycle in a saltwater fish tank is to add live rock. There are two reasons for this.
One, live rock will already have beneficial bacteria present on it when added to your tank. This means that you’ll start with a population that can seed the rest of the fish tank. The other reason is that there is bound to be some die-off when transferring the live rock between fish tanks. This die-off will contribute to ammonia levels, starting and supporting a nitrogen cycle.
But how does live rock help with lowering ammonia levels?
In the same way, adding live rock to an established aquarium can introduce more beneficial bacteria that will start to process ammonia and nitrite. There may still be some die-off, but the already established bacteria should be able to handle the sudden influx; if concerned about die-off, quarantine the rocks in a separate system with the same parameters.
As a result, the beneficial bacteria population is immediately expanded, increasing conversion rates and lowering ammonia levels.
Live rock can be expensive though, and there’s always the possibility of unintentionally adding hitchhikers at the same time. Luckily, dry rock is widely available and very easy to add to the saltwater fish tank. For quality dry rock, check out Real Reef Rock. Be careful of going 100% dry rock as this can result in an outbreak of dinos in your tank.
The idea behind adding dry rock instead of live rock is to increase surface area. Though this dry rock won’t come with established bacteria, it gives more space for the already-existing bacteria to populate. This will take more time to lower ammonia levels than would live rock but can be a great way to increase biological filtration on a budget.
Adding Porous Dry Rock To The Freshwater Aquarium
In the same way, dry rock, like lava rock, can be added to the freshwater fish tank to get rid of ammonia. However, it’s not common to see live lava rock for sale at your freshwater aquarium store; for this, you may need to reach out to fellow hobbyists or a specialty fish store.
There is some discussion about the efficacy of lava rock being good for lowering ammonia levels in the aquarium. It’s a porous rock, but some hobbyists have seen little to no effect and worry about what the rock might be made from. Lava rock can also be sharp, which can easily injure fish and invertebrates.
Adding live or dry lava rock will either help seed a fish tank with more beneficial bacteria or provide more space for bacteria to grow, ultimately lowering ammonia levels. How effective and safe this rock is to use is up for question, though.
If you want a completely safe and effective way for controlling ammonia levels in your freshwater fish tank, then a more effective method is to add live plants.
Freshwater Aquaraium Plants
Live aquarium plants are biological filters in themselves. Plants use many nutrients and compounds in their physiological processes, including harmful ammonia and nitrite. They will also help take up some nitrate, which can reduce the need for frequent water changes.
Freshwater aquarium plants require macronutrients: nitrogen, phosphorus, and potassium. Nitrogen may be taken up in the form of ammonium, ammonia, nitrite, or nitrate. Because of this, as well as for the exchange of aesthetic and fish tank oxygenation, many hobbyists use plants to improve water quality and to lower the ammonia level.
So much so that more experienced hobbyists even use freshwater aquatic plants to undergo a fish-safe nitrogen cycle, called a ghost cycle. A ghost cycle is when the fish tank undergoes the nitrogen cycle with little to no observation of changing parameters. This can make ammonia not show up on an ammonia test kit even if it is present in the aquarium.
A ghost cycle can be pretty difficult to accomplish; there is a constant balance between adding more ammonia to sustain the plants while understanding how many plants are needed to reduce ammonia levels.
4. Upgrading Your Filtration System
Whether you’re changing from one fish tank to another or switching from a hang on the back filter to a full sump system, upgrading your filtration system can help your tank handle ammonia levels. Remember, the increased surface area will allow more space for bacteria, thus increasing ammonia to nitrite to nitrate conversion.
Not only does a larger filtration system give more space for bacteria, but it also allows for additional equipment that can further help balance water quality. More refined equipment, such as refugiums and protein skimmers, may be added to help uptake nutrients. Extra space can also be used for more biological filtration to increase surface area even more. For freshwater tanks, you can look into a high quality canister filter.
When upgrading a fish tank, be sure to hang on to any filtration media used, especially biological filtration. Like live rock, aquarium filter media holds a plethora of bacteria that can be used to almost immediately cycle a new aquarium. There is still a chance that a mini-cycle occurs, but with slow stocking and water quality monitoring, it is rare to see high ammonia levels, if at all.
5. Bacteria Supplements
Bacteria supplements are very useful for hobbyists struggling with water parameters or that need to quickly cycle an aquarium. While they’re great at what they do, they should not be mistaken for the answer in a bottle to all your tropical fish tank’s problems.
Bacteria supplements are one way of introducing the necessary bacteria into the aquarium to convert ammonia to nitrate. They have been used to facilitate the nitrogen cycle in new tanks and can help stabilize systems with too much ammonia; bacteria supplements should never be seen as an ammonia remover.
Though bacteria supplements might seem like the answer to your problem, they don’t treat the underlying cause of a high ammonia level. This is why experienced hobbyists strongly recommend beginners go through the full stages of the aquarium cycle to understand how ammonia moves through the aquarium.
If struggling with elevated ammonia levels, some recommended bacteria supplements are:
FritzZyme TurboStart. This freshwater bacteria supplement is designed to immediately reduce ammonia and nitrite levels to prevent fish death. It can be used to jumpstart an aquarium cycle or to save a fish tank suffering an ammonia spike. As the bacteria in this supplement are living, their shelf life is limited to four months.
Instant Ocean Bio-Spira. A saltwater bacteria supplement, Bio-Spira contains nitrococcus, nitrosomonas, nitrosospira, and nitrospira bacteria to reduce ammonia and nitrite levels. Bio-Spira is shelf-stable but should be used almost immediately.
Fritz Turbo Start is known in the industry as the fastest acting nitrifying bacteria you can purchase. This 700 version is specialized for freshwater tank and has my highest recommendation
Lastly, chemical media may be used to help reduce ammonia levels in saltwater or freshwater aquarium. However, this should be the last option for beginner hobbyists as, again, chemical media will not solve the reason for the high ammonia level.
Chemical media can be a simple and inexpensive method for quickly removing ammonia from a fish tank though in case of an emergency. Simply place the media in an area of high water flow and replace it as directed.
Here are some of the best chemical media products available to quickly reduce ammonia levels:
Zeolite. Zeolite, specifically from Marineland, removes ammonia as well as other toxins in the aquarium water, including chloramine. It is best used in freshwater aquariums and will last about a month.
SeaChem Purigen. Purigen polishes water of ammonia, nitrite, and nitrate for the freshwater and saltwater fish tank. It changes color when depleted, but can easily be recharged.
Fluval Ammonia Remover. This product specifically targets and reduces ammonia through natural ion exchange. Fluval Ammonia Remover is designed to work best in freshwater aquariums.
Unfortunately, many beginner hobbyists experience an ammonia spike in their aquariums due to impatience and poor understanding of the nitrogen cycle. The growth of beneficial bacteria and conversion of ammonia to nitrite to nitrate can take a long time and we get the hurry!
However, it’s better to end up with a stinky, empty fish tank than to come home to a bunch of dead fish. Allow your aquarium to fully cycle but know how to lower your ammonia level in case of an emergency.
🐟 Want to learn more? This article is part of our complete Aquarium Care Guide. your ultimate resource for water chemistry, maintenance, feeding, disease prevention, and everything you need for a healthy tank.


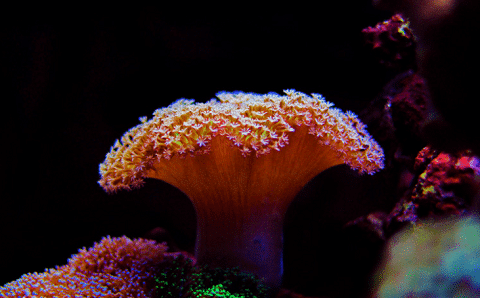
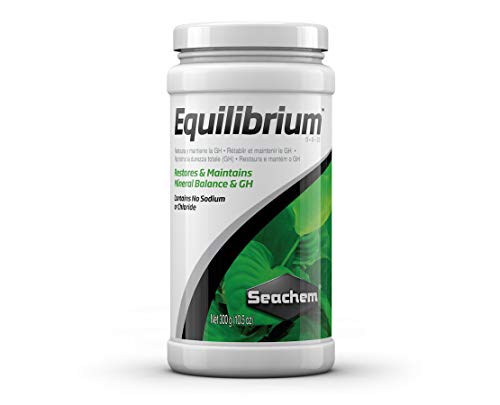
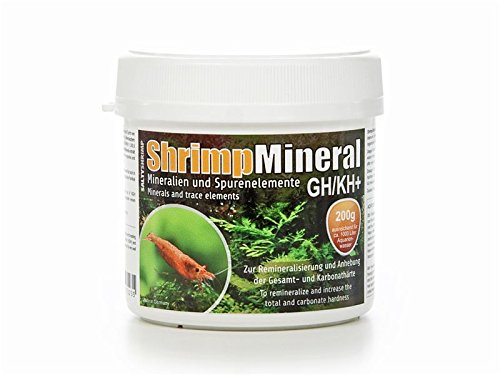
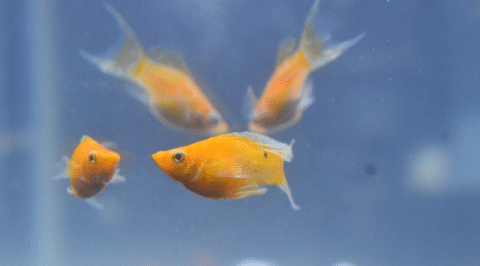

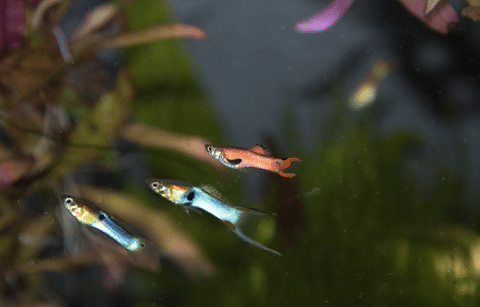
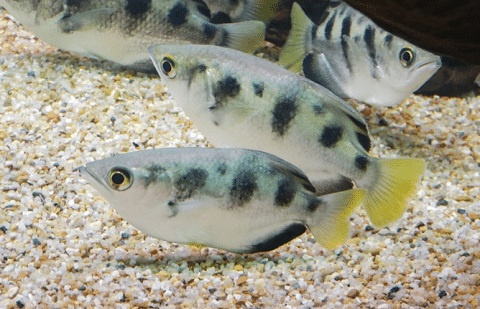
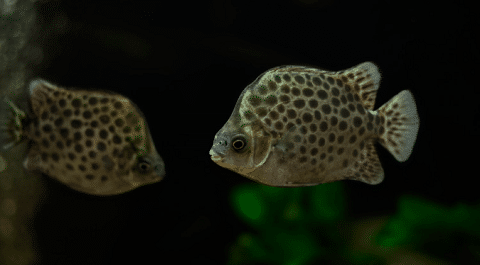
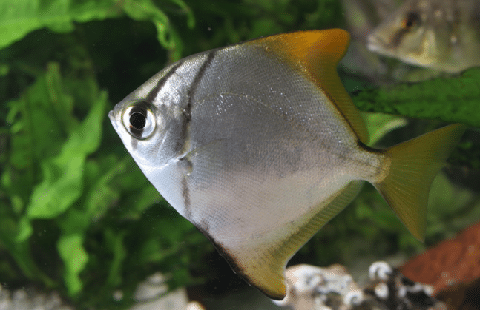
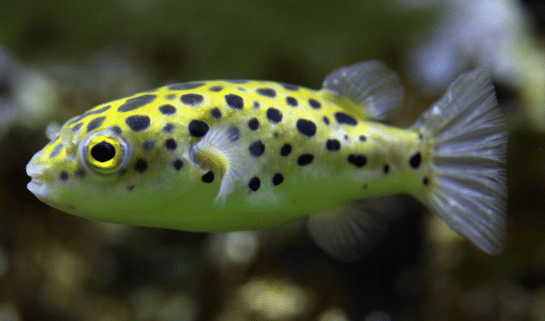

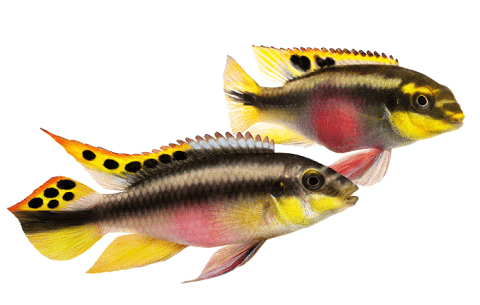


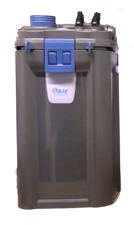
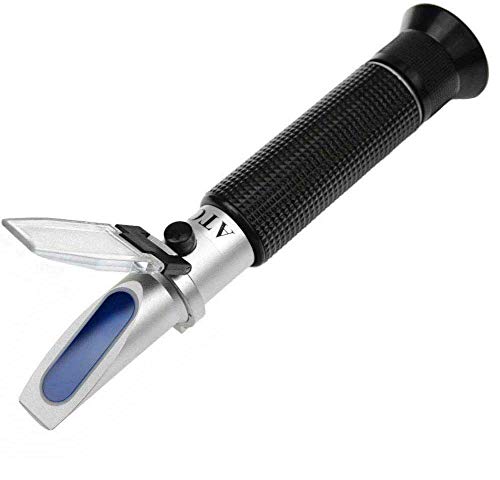
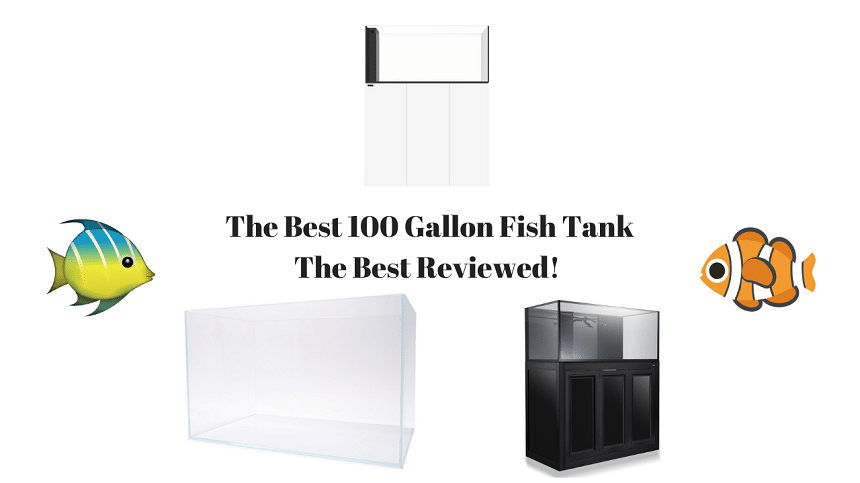
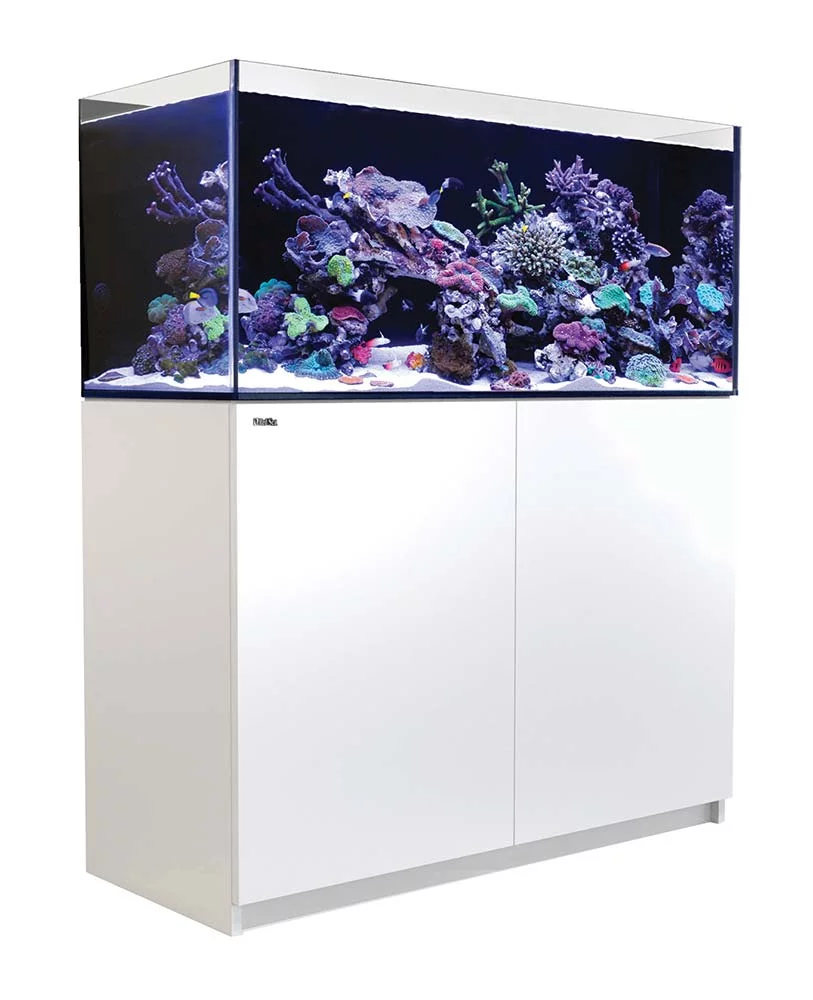

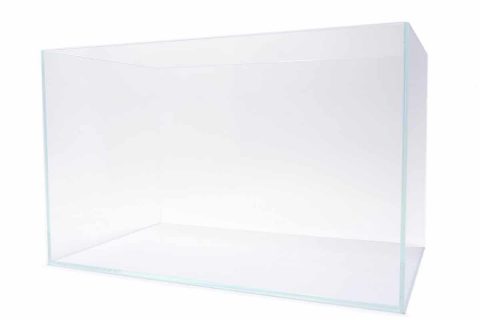
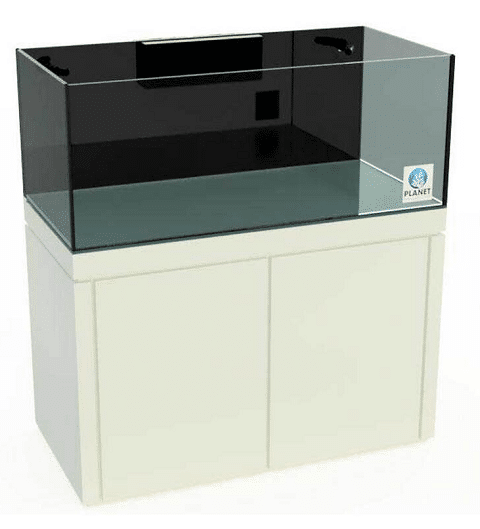


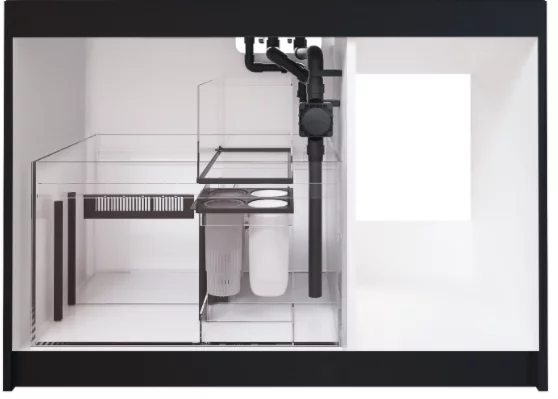


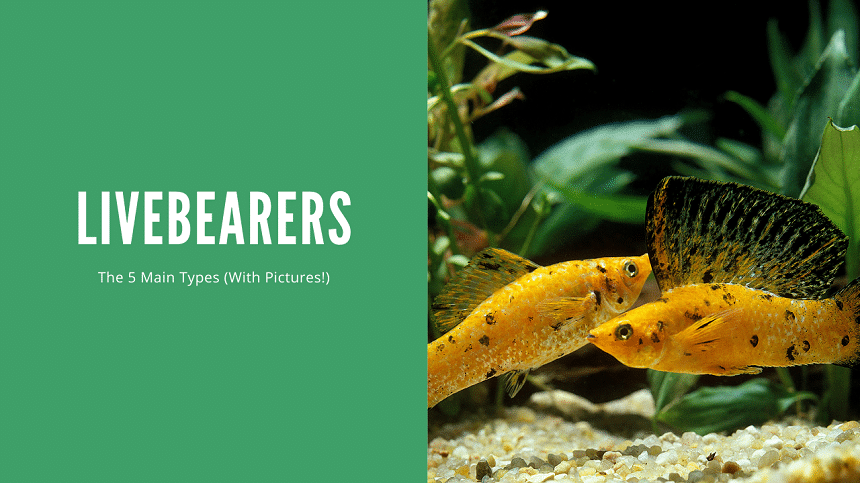
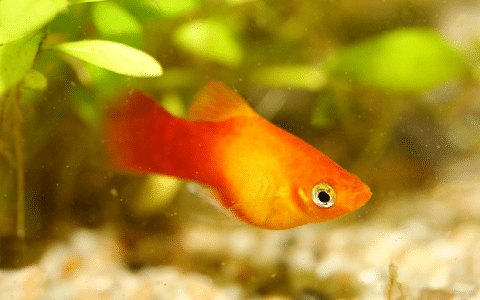
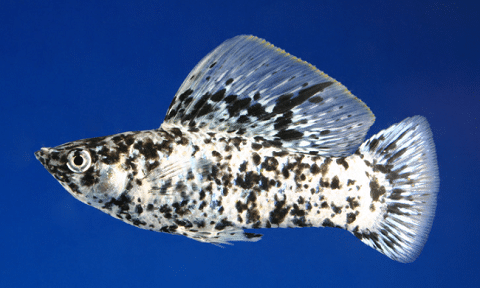
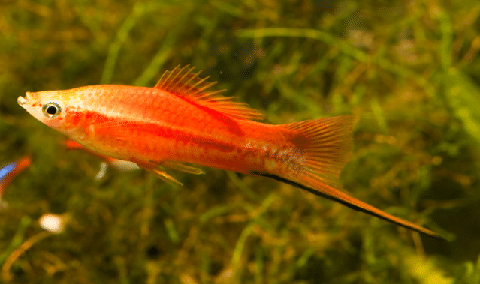

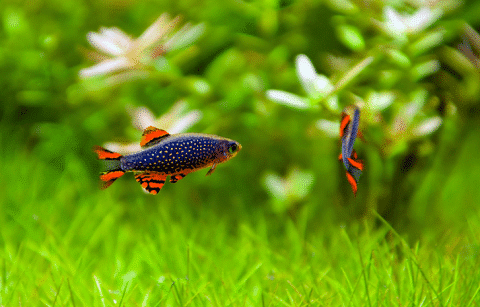
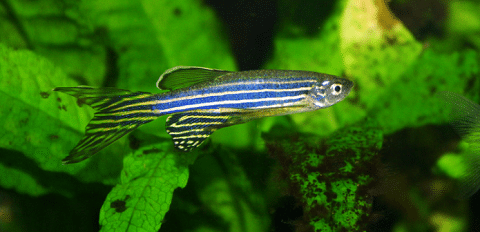

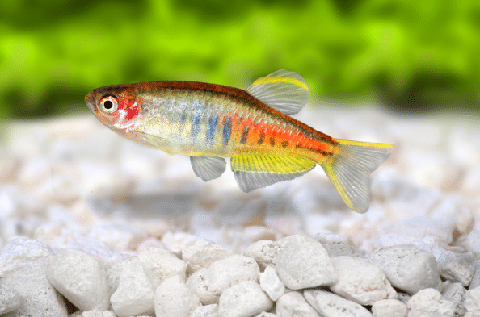 Glowlight Danio Near Gravel” class=”wp-image-557066″/>
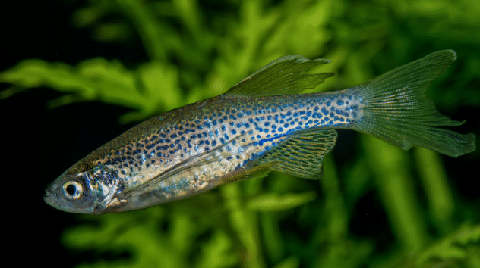
 Giant Danio Fish in Aquarium” class=”wp-image-557080″/>
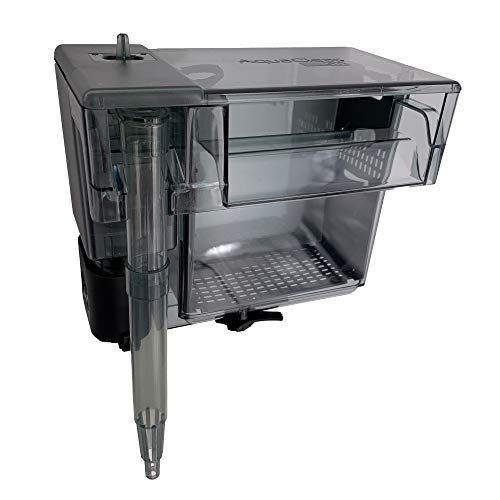

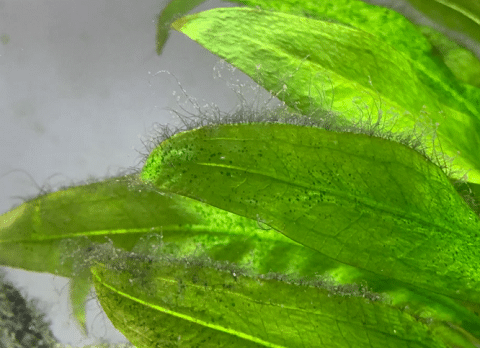


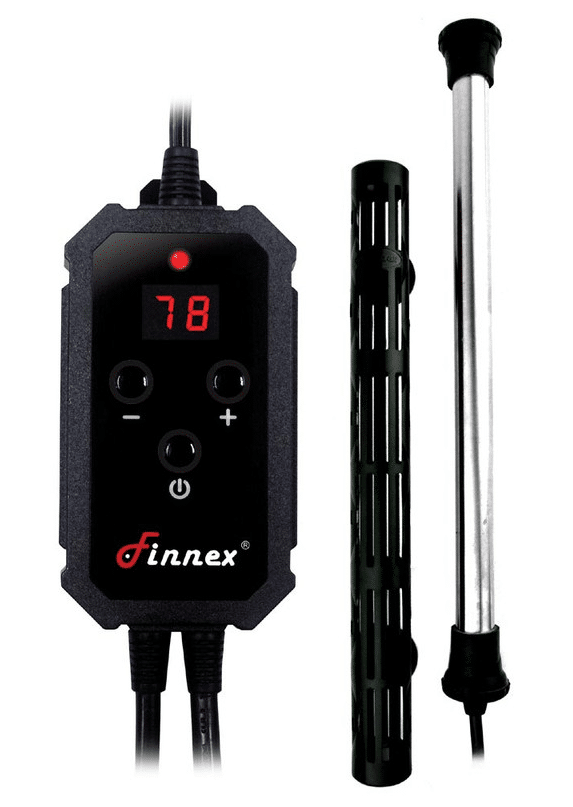
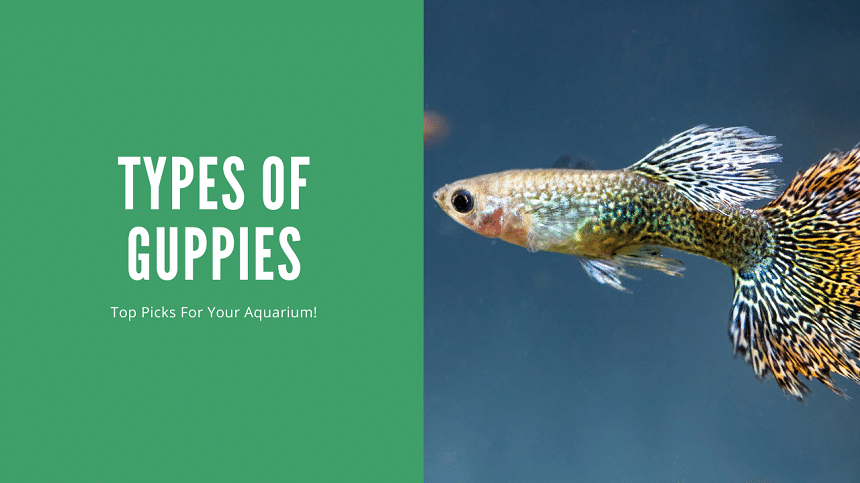
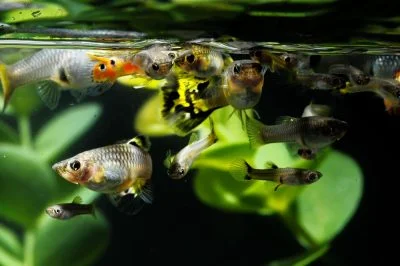

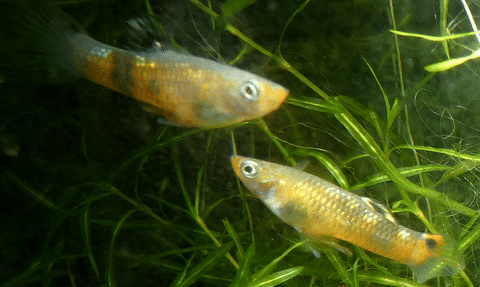


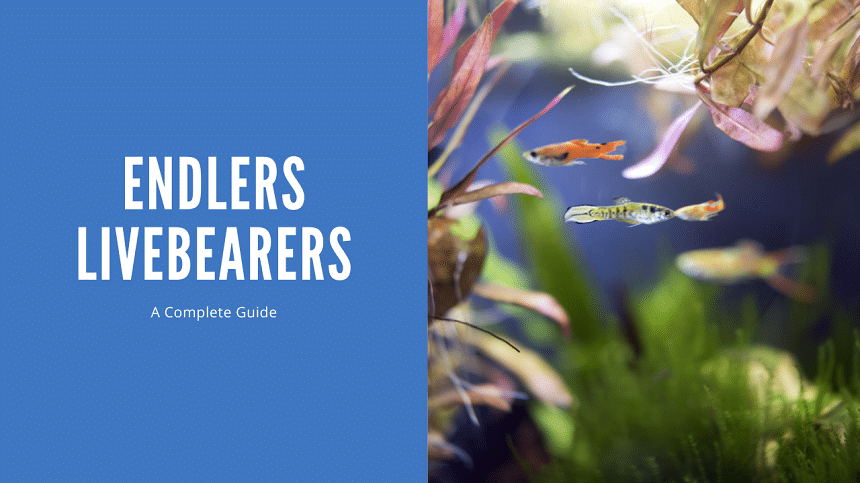


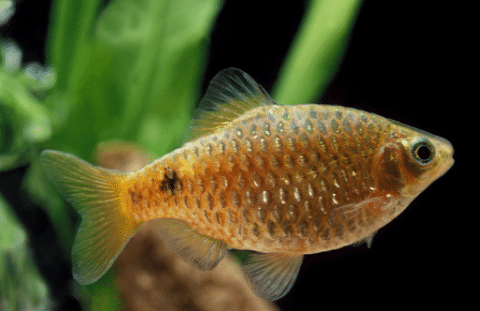
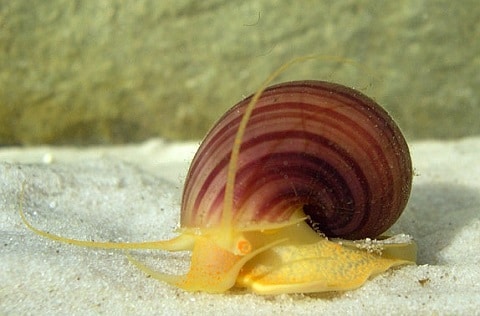
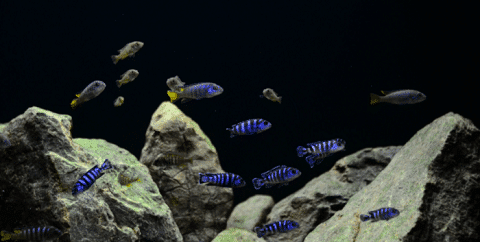

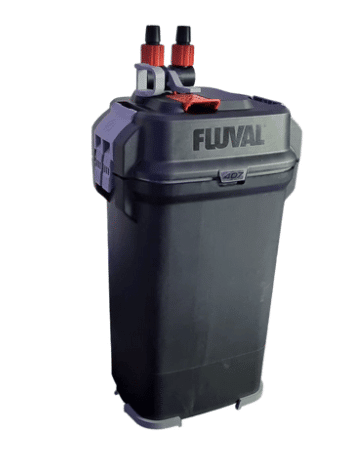

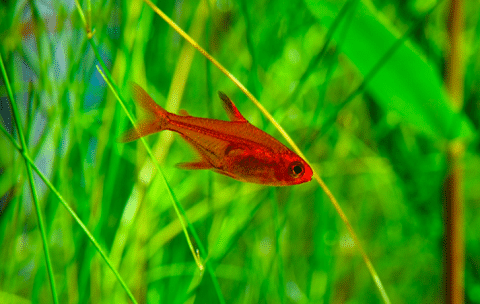 Ember Tetra” class=”wp-image-547290″/>