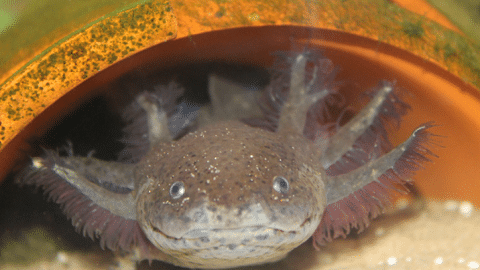
After keeping these for years, asterina starfish are the most divisive hitchhiker in the reef hobby. Some are harmless detritivores. Some eat coral. You will not know which type you have until you see damage.
Watch asterina starfish carefully. Most are harmless. The ones that are not will eat your corals.
Watch asterina starfish carefully. Most are harmless. The ones that are not will eat your corals.
What Are Asterina Starfish?
Asterina starfish is the common description and parent genus for about 15 different species of marine starfish. These starfish, also less commonly known as bat stars, is found in many ecosystems throughout the world, including the Atlantic, Indian, and Pacific Oceans.
In fact, species of asterina have been found around coral reefs with temperatures below 50° F and at varying depths. Most of these starfish is found in shallower reef conditions though they have been observed at depths as deep as 150 meters1.
In the reef aquarium, all species of Asterina are categorized as asterina regardless of their true classification. There are too many superficial similarities between these species to differentiate between the exact type.
In general, these starfish are less than a half-inch wide and have an asymmetrical appearance with missing and uneven legs, which is much different than the typical 5-point radial symmetry displayed by echinoderms.
Most asterina starfish are similar in appearance otherwise. They are largely white or tan in coloration but may have brown or red shading or markings. However, it seems that coloration gives some insight into the behavior of the starfish; some species have been known to be more destructive than others which can make it difficult for hobbyists to decide whether or not to keep this pest in their reef tanks.
The problem with asterina starfish is that they are naturally good members of the cleanup crew despite their appetite for corals. At the same time, hobbyists have had many problems with them destroying coral colonies and overpopulating the tank in a matter of weeks.
How Did They Get In Your Aquarium?
Asterina starfish are a common saltwater hitchhikers. This means that they are introduced into the aquarium by way of something added to the tank, like live rock, coral frags, or used substrate.
As adults, asterina starfish are small and difficult to spot on their own. Add in the fact that they are able to regenerate from a very small piece of flesh and it is very easy to miss an incoming asterina starfish infestation.
How Do They Reproduce?
Like many echinoderms, asterina starfish reproduce through fissiparous reproduction. This process allows them to detach a given leg, which then grows into an entirely new starfish. As you can probably guess, this can quickly lead to an asterina infestation within the aquarium.
In addition to fissiparous reproduction, some species of asterina are also hermaphroditic. They also have the ability to sexually reproduce through egg production.
Are They Good Or Bad?
There is a lot of debate about asterina starfish in the saltwater aquarium hobby. No matter who you ask, these sea stars are known as pests regardless of the benefits they can bring to the marine ecosystem. This is largely due to their rapid reproduction rates, which is unappealing to some hobbyists even though there are many benefits to having a sustainable asterina population.
There is no clear answer as to if asterina starfish are good or bad. Most aquarists welcome them into their reef aquariums as active members of the cleanup crew, but can quickly learn to hate them if there are any signs of damage to corals.
It has always been a question about whether or not these starfish clean up after already dying corals, or if they take the first step towards eating them due to their natural diet.
It is largely believed that darker colored starfish and ones with red or brown markings are much more likely to eat corals than those that are almost entirely white, regardless of if decay has set in or not. Hobbyists have gone as far as holding controlled experiments to test this hypothesis, which resulted in some definite findings.
One experiment, in particular, demonstrated asterina starfish actively crawling over and grazing on a colony of zoanthids. At the same time, they have been seen eating coralline algae, other stubborn algae species, and even cyanobacteria.
Should You Remove Them, From Your Aquarium?
Again, there is no right answer to this question until it’s too late.
The truth is that asterina starfish are likely to make their way into your tank if you’re keeping corals. It can take considerable time and effort to remove every asterina star you see afterward, but removal may be the best option if you have a reef tank filled with expensive zoanthids and soft corals.
As mentioned before, it’s largely believed that the color and species of asterina starfish play into the likelihood of corals being eaten. If you find that you have a dark-colored variety of starfish, then it’s probably better to be safe than sorry. However, if your stars lack markings and have light coloring, then they is a great addition to the cleanup crew by eating algae and detritus while keeping coralline algae in check.
How To Remove Them From Your Aquarium
If you don’t want to take the risk of asterina stars eating your coral, then you’ll need to know how to remove them. The best way to prevent asterina species from entering your system is by catching them before they have the chance to get comfortable. Luckily, there are a few other ways, including several livestock options, that you can deal with an asterina starfish infestation.
Prevention
The best way to stop any pest from taking over your saltwater reef aquarium is by stopping the problem before it happens.
There are a few ways that asterina stars might enter your system. The most common ways are through the introduction of live rock, coral frags, or used filter media. If you’re sourcing materials from a fellow hobbyist, then it is worth knowing if they have asterina starfish in their aquarium. This can help you be better prepared before accidentally transferring a new pest into your system.
Regardless, live rock and coral frags is observed for asterina species through a quarantine process. Corals frags can even be dipped into a coral dip, like Coral RX Pro Dip or Bayer BioAdvanced Insect Killer, for extra precaution. Keep in mind that these solutions may not affect asterina starfish eggs and may leave some adults as well.
Steps is taken to stop these pests from entering your tank. If one happens to get past this process, remember that they have the ability to reproduce asexually at very fast rates; one asterina star can turn into a whole population in a matter of days.
Reduce nutrients and wastes
Asterina starfish are scavengers and opportunistic feeders. They graze on algae, biofilm, and their favorite corals, zoanthids.
As a pest, these invertebrates rely on what is already present in the aquarium to thrive. This means that population growth directly correlates to the resources readily available in the reef tank; a large amount of algae will result in a large number of asterinas.
Though reducing nutrients and wastes isn’t the best option if your aquarium is relatively stable otherwise, it’s a possible solution for at least slowing the growth of the asterina population.
Manual Removal
If you already have asterina starfish in your aquarium, then your tank will probably never be rid of them. However, you can greatly reduce population numbers through regular manual removal.
Manual removal is simple, though additional maintenance. The best tactic is to wait until the lights go out on the reef tank and then remove every tiny starfish you see. These sea stars is humanely euthanized with a coral dip or other solution.
Never try to kill these starfish while they’re still in the aquarium! Any fragments leftover from a dead asterina starfish still has the possibility of recovering into a new starfish.
Otherwise, simply remove them as you find them. Some hobbyists like to transfer them from the main display to the sump, though they can always find their way back up to the aquarium.
What Eats Them?
Luckily, there are a few species that will eat asterina starfish.
It’s important to remember that adding livestock to solve a pest problem is not a temporary solution; your new addition should feel comfortable in its new home long after the pests are gone!
As we’ll see, some of these livestock is challenging to keep due to their dependence on asterina starfish as their main food source. For some hobbyists, these challenges definitely outweigh the risk of having their soft corals eaten though.
Harlequin Shrimp (Hymenocera elegans)
Scientific name: Hymenocera elegans
Maximum size: 2 inches
Minimum tank size: 10 gallons
Origin: Indo-Pacific
Reef-safe: Yes
Harlequin shrimp are the most recommended natural solution for an asterina starfish infestation. These small shrimp have very appealing patterning with pastel blue, pink, and purple spots on top of a creamy base color. They also don’t require much space as long as dietary needs are met. It is the preferred method of many reefers, including longtime YouTube influencer Rotter Tube Reef – who’s video is showed above.
The unique thing about the harlequin shrimp is that they’re one of the few species of shrimp that is truly reef-safe. Instead of algae and other organics, their diet consists of only echinoderms, like asterina starfish. In a matter of weeks, harlequin shrimp will eradicate an asterina problem. After that, a bigger problem arises.
Once all asterina stars have been eaten, your shrimp will be left without any food. At this point, hobbyists need to start supplementing feedings or rehome the shrimp to another hobbyist with an asterina problem.
If you want to keep your harlequin shrimp, then there are a few options for keeping them fed. One of these options is to set up a system solely dedicated to raising asterina starfish. This system does not need to be complex and is similar to a refugium setting.
Another option is to regularly buy echinoderms, like chocolate chip starfish (Protoreaster nodosus) and Linckia sp. (orange linckia, red linckia, and blue linckia). Chocolate chip stars are much more available and hardier than Linckia sp., making them the better option for easier feedings and long-term success.
These starfish is fed all at once or by one leg at a time, though the latter isn’t for the faint of heart; the only advantage to feeding leg by leg is that the starfish will have time to rejuvenate a new one by the next feeding, reducing future costs.
Harlequin shrimp are expert hunters. They will work together to flip a starfish on its back and start to eat its tube feet. They will slowly but surely work their way towards the fleshy center of the starfish.
Luckily, it can take up to a month for a harlequin shrimp to eat an entire starfish before having to buy another.
Bumblebee Shrimp (Gnathophyllum americanum)
Scientific name: Gnathophyllum americanum
Maximum size: 1 inch
Minimum tank size: 10 gallons
Origin: Indo-Pacific
Reef-safe: Yes
The bumblebee shrimp, also known as the striped harlequin shrimp, is one of the most affordable options for long-term asterina control, but also one of the hardest to maintain due to water parameters.
These shrimp are named after their alternating black, white, and yellow stripes that line their body. Bumblebee shrimp are very similar to harlequin shrimp in diet and behavior but are more accepting of other foods outside of echinoderms.
Bumblebee shrimp will actively hunt and eat asterina starfish in the tank. However, bumblebees will also eat algae, waste, and any leftover food they happen to come across. This is beneficial for hobbyists that plan on keeping their shrimps after all asterinas have been dealt with but might interfere with the efficacy of eliminating the pests.
If deciding between a harlequin and bumblebee shrimp, consider how immediate your problem is. Harlequin shrimp will eliminate all starfish within a couple of weeks while bumblebees might take a little longer and is better at population control rather than total eradication.
After the asterinas are gone, also consider how you will continue to feed your shrimp. Bumblebees are easier in the long run, though harlequins are much faster at solving the immediate problem.
Bongo Shrimp (Phyllognathia ceratophthalma)
Scientific name: Phyllognathia ceratophthalma
Maximum size: 1 inch
Minimum tank size: 10 gallons
Origin: Indo-Pacific
Reef-safe: Yes
The bongo shrimp is rarely seen in the aquarium hobby but has become a popular solution for asterina starfish infestations. Though these shrimp is harder to find than harlequins, they’re cheaper and much more suited for smaller home aquariums.
Bongo shrimp are small shrimp that rely only on echinoderms for food. They have a white body covered in bright orange and blue markings.
Bongo shrimp are extremely shy and do not do well in tanks with large, active fish. Because of this, hobbyists keep them in nano and pico tanks with docile fish that have no interest in eating them; even then, these shrimp are likely to hide in the shadows of the rockwork.
It is believed that bongo shrimp favor brittle starfish (Ophiuroidea class) more than asterina starfish, but they will still greatly help to reduce populations.
Final Thoughts
Asterina starfish are a common pest in the aquarium world that you’re likely to find in your own reef tank one day. For the most part, these tiny starfish are nothing to worry about. However, some species of asterina starfish can begin to munch on zoanthids and other soft corals without any notice. Their ability to quickly reproduce can also cause an infestation in no time.
Luckily, there are a few ways to control and even completely eliminate all threats of an asterina starfish infestation through prevention, nutrient and waste reduction, and manual removal as well as several natural coral predators.
📘 Want to learn more? This article is part of our complete Saltwater Fish & Reef Guide. Your ultimate resource for marine fish, coral care, reef setup, and more.
Corydoras catfish are my go-to recommendation for anyone asking what to keep on the bottom of a freshwater community tank. After 25 years in this hobby I’ve kept multiple cory species, and they consistently earn their place. Peaceful, hardy, entertaining to watch as they scoot along the substrate, and compatible with a huge range of tankmates. Two things I always flag before anyone buys: corys need to be kept in groups of at least six of the same species (mixed species groups don’t cut it socially), and they need soft, fine substrate to protect their barbels. Sharp gravel will damage those sensitive whiskers over time, and that’s one of the most common preventable cory health problems I see. This guide covers the 10 most popular species to help you find the right fit.
Six different corys is six lonely fish. Six of the same cory is a functioning social group.
What Most Care Guides Get Wrong About 10 Most Popular Cory Catfish Types for Community Tanks
The most common mistake I see with 10 most popular cory catfish types for community tankss is keeping too few. Guides will say “minimum 6” and leave it at that. In reality, these fish behave completely differently in a proper group of 8 to 10 or more. Keeping just 3 or 4 often leads to stress, hiding, and fin nipping that wouldn’t happen in a larger school. Another thing most guides miss is how much lighting and decor affect this species. 10 Most Popular Cory Catfish Types for Community Tankss look washed out under bright white LEDs on a light substrate. Dim the lights, add some tannins, use a dark background, and you’ll see colors you didn’t know they had. I’ve also noticed that many care sheets recommend overly broad water parameters. Yes, 10 most popular cory catfish types for community tankss are adaptable.
What Are Cory Catfish?
Cory catfish are small freshwater fish from the Corydoras genus. These shoaling fish are native to South America where an amazing 160+ species are known- with many more probably waiting to be described. They range in size from an inch or so to over 4 inches in length and are solidly built with armor-like scales.
Cory cats aren’t very colorful, but they are very entertaining to watch as they forage around in the tank, periodically shooting up to the surface to take a breath of air. They love to hang out in groups and should always be kept in schools in the aquarium.
Interestingly, the first ray of their pectoral fins forms a strong, sharp spine that may be tipped in toxic venom. This is probably an adaptation to make predators think twice about eating them. They are not aggressive at all, but it is best to not handle these fish with bare hands.
10 Best Cory Catfish Types
Now that you know a little more about these fish, it’s time to jump right in and get to know the 10 most popular types of cory catfish that you can keep. For each corydoras fish species, I’ll be providing the most important stats that you need to know, like:
Scientific Name
Difficulty Level
Temperament
Adult Size
Minimum Tank Size
Diet
Origin
Temperature
pH
Difficulty to breed
Planted tank suitability
We have a video below from our YouTube channel. We go into more blog detail below. If you like our video, be sure to subscribe as we post videos every week!
The pygmy cory is the perfect species for nano aquariums. These silvery schoolers have a prominent black line along their sides, from their eyes to their tails. Pygmy cories are extremely peaceful, and even a little shy around bigger, more boisterous fish.
Keep them with other small fish species to bring out the best in them. A group of at least 5 or more will look great and allow them to show their natural schooling behavior.
2. Longfin Panda
Scientific Name: Corydoras panda
Difficulty Level: Easy
Temperament: Peaceful
Adult Size: 2.5 inches
Minimum Tank Size: 10 – 20 gallons
Diet: Feed frozen, live, and dried foods
Origin: Peru
Temperature: 72-77°F
pH: 6-7.4
Difficulty to breed: Moderate
Planted tank suitability: Yes
The longfin (video source) is a great variety of the regular panda cory. These schooling fish are an awesome choice for community aquariums.
The long and flowing caudal fin definitely adds to their appeal. Panda corydoras are very social and peaceful fish that love to hang out in a group, so be sure to order at least 5 of them to really enjoy their natural behavior.
These albino corydoras catfish are a pure white version of the bronze cory catfish (Corydoras aeneus). Their pinkish-white coloration makes them really stand out, especially with good lighting and a dark background and substrate.
Albino bronze corys are solidly built little cory catfish that get a little larger than most other types of corydoras. They are a great choice for a peaceful community setup with other similarly sized tropical fish.
The panda cory is one of the most popular species in the hobby. These schooling fish are very recognizable with the black markings on their face, tail, and dorsal fin.
Panda cories bred in the aquarium trade are adapted to water temperatures in the mid-70s, but in the wild, they can survive in cooler water temperatures down to the upper 60s (Fahrenheit).
The habrosus cory is commonly known as the salt and pepper cory. This nano fish species is very similar to the pygmy corydoras but is a little more boldly marked. Another good way to tell them apart is to look at the dark line down their sides – in this species, the line is broken.
Like Corydoras pygmaeus, these schooling cories are active swimmers that spend most of their time in the midwater of the aquarium. I suggest keeping at least 5 of these nano schoolers, but go for 10 or more if you have the room!
The paleatus, or pepper cory catfish, is a great species of cory for beginners. These affordable fish are commonly known as the peppered corydoras because of their finely blotched pattern.
Peppered cory catfish should be kept in a small group to bring out the best in their personalities.
7. Sterba’s
Scientific Name: Corydoras sterbai
Difficulty Level: Easy
Temperament: Peaceful
Adult Size: 2.5 inches
Minimum Tank Size: 15 gallons
Diet: Feed frozen, live, and dried foods
Origin: Bolivia & Brazil
Temperature: 70-77° F
pH: 6.2-7.8
Difficulty to breed: Moderate
Planted tank suitability: Yes
The Sterba’s cory is one of my favorite corydoras of all. These stunning little cory catfish are very peaceful and look amazing in a tropical community aquarium.
Sterba’s cory is a pretty dark species, that is heavily marked with black lines and silver dots. Their most distinctive feature is probably the golden yellow color of their pectoral and pelvic fins.
8. Simillis Corydoras
Scientific Name: Corydoras similis
Difficulty Level: Easy
Temperament: Peaceful
Adult Size: 2 inches
Minimum Tank Size: 20 gallons
Diet: Feed frozen, live, and dried foods
Origin: Brazil
Temperature: 72-79°F
pH: 6-8
Difficulty to breed: Moderate
Planted tank suitability: Yes
The similis cory (video source) is one of the best-looking species out there. They have a finely spotted body, with a darker area near the tail.
These cory catfish types are a great choice for a blackwater amazon biotope, but they will be very happy in a regular planted setup too.
9. Adolfo Cory-Cat
Scientific Name: Corydoras aldolfoi
Difficulty Level: Easy
Temperament: Peaceful
Adult Size: 2.5 inches
Minimum Tank Size: 30 gallons
Diet: Feed frozen, live, and dried foods
Origin: Brazil
Temperature: 72-79°F
pH: 5.8-7
Difficulty to breed: Moderate
Planted tank suitability: Yes
Corydoras catfish (video source) are not really known for bright colors, but the adolfo cory is certainly one of the bolder species! These fish are silvery-white with black markings and have a distinctive orange mark on their backs. They are most at home in acidic stained water.
10. False Julii-Cory
Scientific Name: Corydoras trilineatus
Difficulty Level: Easy
Temperament: Peaceful
Adult Size: 2 inches
Minimum Tank Size: 30 gallons
Diet: Feed frozen, live, and dried foods
Origin: Brazil, Colombia, Peru, Suriname
Temperature: 72-79°F
pH: 5.8-7
Difficulty to breed: Moderate
Planted tank suitability: Yes
The false julii cory catfish gets its name because it looks a lot like the regular julii corydoras catfish (Corydoras julii). They are striking little fish with silvery bodies covered in interesting plack patterns.
They are an active species that will entertain you with plenty of antics if kept in a nice school of at least 6.
Other Species
There are a huge number of different corydoras species. In fact, with more than 160 types of cory catfish, they form the largest genus of freshwater fish in the world!
Here’s a list of other common corydoras you might come across in pet stores and the aquarium trade.
Julii cory – Corydoras julii
Bandit cory – Corydoras metae
Three stripe cory – Corydoras trilineatus
Leopard cory – Corydoras leopardus
Skunk cory – Corydoras arcuatus
Dwarf corydoras – Corydoras hastatus
Orange laser cory – Corydoras aeneus
Agassizi cory – Corydoras agassizi
Tank Setup
Setting up a great tank for cory catfish is easy. The nano species like pygmy corydoras can thrive in tanks as small as 10 gallons, but many of the larger species will do much better in community tanks of at least 30 gallons or so. As with all aquarium fish, the bigger the tank the better!
Let’s take a look at how to set up your aquarium for cory catfish.
Substrate & Decorations
Choosing the right substrate is more important for keeping cories than you might think! These cory catfish have fine whisker-like structures around their mouths that are known as barbels. These barbels are used to forage for food in the substrate, but they can be easily damaged on sharp gravel.
This is known as barbel erosion and its causes are not universally agreed on. Fine sand is the best substrate choice because this is what the fish are able to dig through without hurting themselves.
A layer of just half an inch or less is ideal because it will allow the fish to search right down to the bottom of the tank and consume any uneaten food.
Live Plants
Growing some floating plants and epiphytes in the tank can enhance the look of your aquarium while improving water quality and oxygenation. The following species are easy to grow and don’t need any special lighting or equipment:
Most types of cory catfish prefer low lighting, but they will also be very happy in a well-lit planted tank, especially if the plants provide some shade. They will also enjoy some hides and caves in the form of ornaments or carefully arranged hardscapes.
Cory catfish need great water quality, so a good quality water filtration system is essential. Many breeders make use of simple sponge filters, but a canister, hang-on back, or internal power filter is a more aesthetically pleasing option for a beautiful display tank.
Any filter you select should provide excellent mechanical and biological filtration. Choose a model that matches your aquarium tank size and is able to process the volume of water about 5 times every hour.
How To Take Care Of Your Pet
Cory catfish are simple to care for, which is one of the reasons they are so popular in the fish-keeping hobby. With the right tank setup, good maintenance, and a high-quality diet, these fish can provide you with years of enjoyment in a tropical community tank.
Read on to learn more about caring for these fun little bottom feeders!
Aquarium Maintenance
Regular aquarium maintenance is especially important when keeping cory catfish. These fish do not tolerate poor water quality well and can be affected by serious conditions like barbel erosion in a neglected tank.
Stay on top of your maintenance by performing a simple water change each week. Make sure to clean the substrate thoroughly with your gravel vacuum, because this is where your cory catfish forage and hang out.
You’ll need an aquarium test kit to monitor the water parameters in your tank. The test results should always read zero parts ammonia and nitrites in a fully cycled aquarium. Nitrates will build up naturally in any stocked aquarium but should be kept to below 20 parts per million.
Behavior & Feeding
Most cory catfish are bottom dwellers that spend their time digging through the substrate or resting on the sand. They can be very active too and often enjoy swimming up and down the tank at high speed. They are very social creatures and just love shoaling together.
The nano species like habrosas and pygmy corys are a little different. They are more active swimmers and will spend their time schooling in the midwater levels of the tank.
Cory catfish are omnivorous and will eat just about any food source you provide. Unfortunately, some inexperienced fishkeepers make the mistake of not feeding them at all. While they do make an awesome part of the clean-up crew, this doesn’t mean they don’t need a high-quality diet.
Cory catfish can be bred at home with a little planning and preparation. You’ll need a separate breeding tank of about ten gallons or so with a simple sponge filter for the best results. You should put in a spawning mop of synthetic wool or a live plant like java moss where the females can deposit their eggs.
A group of 2 females and four males is a good bet and they should be well-conditioned after moving them into the breeding tank. The males are a little smaller than the females and have more pointed fins. Feeding them a high-quality diet including plenty of live/frozen food will get the fish ready to spawn.
Frequent water changes are necessary and replacing the old water with slightly cooler water will often trigger spawning. The spawning behavior is interesting to watch, with the pair forming a T-shape. The eggs are laid on the spawning mop or even just the aquarium glass.
Remove the adults once eggs have been laid. They should hatch after about 5 days and will need to be fed a diet of micro worms once they reach the free-swimming stage.
Tankmates
All types of cory catfish are the perfect fish for community tanks because they are just so peaceful. Most species can be kept with adult shrimp, but you can expect juvenile shrimp to be snacked on.
Cory catfish should only be kept with other small fish that won’t bully them, or try to eat them. They can be kept with other bottom-dwelling species, but take care not to overstock your tank with bottom-feeders. Let’s take a look at some other fish that can be kept with corydoras:
Corydoras are such popular fish that you can find them at most pet shops and aquarium stores. There are some great online retailers like Flipaquatics that have made a name for themselves by selling high-quality stock and making the delivery process super easy and safe for the fish too.
FAQs
How many species are there?
According to some reputable sources like FishBase, there are at least 166 types of cory catfish in the wild. There are probably many more species too that are not yet known to science!
How many species of Corydoras are there?
According to some reputable sources like FishBase, there are at least 166 types of cory catfish in the wild. There are probably many more species too that are not yet known to science!
How many Corydoras should be kept together?
Corydoras catfish are social fish that love to hang out in groups. In nature they can often be found in huge shoals, so the more you can keep without overstocking your tank, the better.
Is 4 of these enough?
Ideally, you should keep at least 6 cory catfish of the same species together. They will survive just fine in a group of 4 but you might not see them performing all their natural behaviors. They are a natural schooling species.
What is the biggest size?
The banded cory (Scleromystax barbatus) is the largest of all the cory catfish types. They might not be a true corydoras species, but they used to be considered a member of the same genus. These beautiful fish can grow to 4 inches in length and have awesome markings.
Are they good for beginners?
Cory catfish are great fish for beginners. They are reasonably priced, easy to find at most pet stores and work great as a community fish in many modern aquariums.
Expert Take
Corydoras are one of my favorite fish to recommend because they consistently reward keepers who actually meet their needs. The species matters less than people think. The group size matters more. A school of 8 in the right setup will be more active, healthy, and visible than any species kept as a trio. — Mark Valderrama, AquariumStoreDepot
ASD Difficulty Rating: Tier 1 – Beginner. Most corydoras species are beginner-friendly with standard water parameters. Group size and soft substrate are the keys to success.
Hard Rule: Corydoras must be kept in groups of 6 or more, preferably with their own species. A pair or trio will hide, stop foraging, and deteriorate over months. Group size is non-negotiable.
The Reality of Keeping Corydoras
Corydoras are deceptively active when kept in appropriate numbers. A school of 8 in a clean, planted tank is constantly moving, foraging, and investigating the substrate. A pair in an empty tank just sits in a corner looking miserable. The difference is entirely about group size and setup. They are also sensitive to sharp gravel. Their barbels will erode on rough substrate, which you may not notice until they stop foraging.
Is the 10 Most Popular Cory Catfish Types for Community Tanks Right for You?
Before you add a 10 most popular cory catfish types for community tanks to your tank, it’s worth asking whether this species actually fits your setup and your goals. Here’s a quick breakdown to help you decide.
This species is a good fit if:
You have a large enough tank to manage territories. Cramped conditions amplify aggression.
You’re comfortable managing aggression through stocking ratios, line of sight breaks, and tank layout.
You can commit to regular water changes. These fish produce more waste than many smaller species.
You’re not planning a peaceful community tank. 10 Most Popular Cory Catfish Types for Community Tankss need tank mates that can hold their own.
You enjoy watching active, interactive fish. Cichlids have personality that smaller species simply don’t match.
You have backup plans. Sometimes a particular fish just doesn’t work out, and you need a way to rehome it.
You’re feeding a varied, high-quality diet. Color and health depend on nutrition.
If most of those points line up with your setup, the 10 most popular cory catfish types for community tanks is worth serious consideration. If several don’t, it’s better to choose a species that matches your tank now rather than trying to make it work.
Avoid If:
You want to keep just one or two corydoras. They need groups of 6+ to thrive
You have sharp gravel or coarse substrate that will damage their barbels over time
You expect them to fully clean a tank’s waste. They are foragers, not vacuums
You keep aggressive tank mates that chase or outcompete them for food at the bottom
How the 10 Most Popular Cory Catfish Types for Community Tanks Compares to Similar Species
Choosing between similar species can be tricky. Here’s how the 10 most popular cory catfish types for community tanks stacks up against some common alternatives.
The 10 most popular cory catfish types for community tanks occupies a specific niche in the aquarium hobby, and direct comparisons really depend on what you’re looking for. In my experience, the most common question people ask is whether they should choose the 10 most popular cory catfish types for community tanks or something similar that’s more widely available. The answer usually comes down to three things: tank size, water parameters, and what other fish you’re keeping. If your setup matches what the 10 most popular cory catfish types for community tanks needs, it’s hard to beat. If not, there are usually alternatives worth exploring.
Final Thoughts
Cory catfish are amazing pets for tropical freshwater aquariums. They stay small, are sweet-natured, and help to clean up uneaten food from their messy tank mates! Choosing the perfect species can be tough with all the options, but the ten fish in this list are all worth considering for your aquarium.
What are your favorite types of cory catfish? Let me know in the comments below!
After 25 years in this hobby, I’ve kept my share of aggressive freshwater fish. Ornery pea puffers that terrorize tanks way above their weight class, cichlids that rearrange decor overnight, and oscars that will eat anything they can fit in their mouth. These are some of the most captivating fish in the freshwater hobby, but they’re also among the most commonly mistreated. People buy them because they look impressive, then stick them in a community tank and wonder why things go sideways fast.
Here’s the thing most guides won’t tell you: “aggressive” is not one thing. A Jack Dempsey and a Wolf Cichlid are both called aggressive, but one can work in a species community with careful planning, and the other belongs alone in a 200-gallon tank. The label is almost useless without context. What actually matters is the category of aggression: manageable territory defense, predatory feeding behavior, or pure species-level dominance that makes cohabitation almost impossible.
In this guide I’m covering 15 aggressive freshwater species with honest context on space requirements, tankmate risks, and what makes each one tick. Plus 4 species you should avoid entirely.
EXPERT TAKE | MARK VALDERRAMA
The number one mistake I see with aggressive fish: people treat aggression as a fixed personality trait instead of a context-dependent behavior. A Texas Cichlid in a 75-gallon with good territory breaks is very different from that same fish crammed into a 55-gallon with no visual barriers. Tank size and layout reduce aggression more than any stocking choice. Get the environment right first, then worry about tankmates. And if you’re looking at an Oscar or a Flowerhorn: those are not community fish. They never were. Give them their own tank and they’ll reward you with 10+ years of personality you won’t find anywhere else in the hobby.
What Are Aggressive Freshwater Fish?
An aggressive fish is any species that can cause harm to other fish in the tank through fighting, chasing, territory defense, or predation. Some of it comes down to individual personality, but certain species are reliably aggressive regardless of the individual.
The standard hobbyist labels are peaceful, semi-aggressive, and aggressive. But the line between categories is blurry, and “semi-aggressive” in particular gets misused constantly. Here’s a more useful way to think about it:
Peaceful fish don’t attack, chase, or eat other similar-sized fish
Semi-aggressive fish will attack and bully under specific circumstances: overcrowding, breeding, wrong tankmate choice, or insufficient territory
Aggressive fish are reliably likely to fight, harass, eat, or kill other fish regardless of conditions
Should-be-alone fish are a fourth category nobody talks about: species like Wolf Cichlids, Red-Tail Catfish, and Arowanas that aren’t just aggressive but genuinely incompatible with almost any tankmate at adult size
Semi-aggressive is a spectrum. That’s the part people miss.
TIER BREAKDOWN
Beginner-accessible (with planning): Jack Dempsey, Texas Cichlid, Convict Cichlid, Pea Puffer, Red Devil Cichlid Intermediate: Oscar, Flowerhorn, Jaguar Cichlid, Freshwater Stingray, Snakehead, Green Terror Advanced / Species-only tanks: Wolf Cichlid, Silver Arowana, Red-Tail Catfish, Vampire Tetra, Black Wolf Fish
15 Aggressive Freshwater Fish for Aquariums
For each species I’m including the key stats you need, plus honest context on what ownership actually looks like.
1. Wolf Cichlid
Scientific Name: Parachromis dovii
Difficulty Level: Advanced
Temperament: Aggressive
Adult Size: 24–28 inches (61–71 cm)
Minimum Tank Size: 200 gallons (757 L)
Diet: Carnivorous; cichlid pellets, frozen foods
Origin: Costa Rica, Honduras, Nicaragua
Temperature: 75–81°F (24–27°C)
pH: 6.8–7.6
Difficulty to Breed: Advanced
Planted Tank: No
The Wolf Cichlid is the apex of Central American cichlid aggression. These fish are partially piscivorous and are always watching their owners with an intelligence that makes them fascinating to keep. But they need to be alone or with an equally matched companion in a massive tank. This is a species-only fish for experienced keepers only.
2. Jaguar Cichlid
Scientific Name: Parachromis managuensis
Difficulty Level: Moderate
Temperament: Aggressive
Adult Size: 10–16 inches (25–41 cm)
Minimum Tank Size: 100 gallons (379 L)
Diet: Carnivorous; cichlid pellets, frozen foods
Origin: Costa Rica, Honduras, Nicaragua
Temperature: 73–81°F (23–27°C)
pH: 7.0–8.5
Difficulty to Breed: Moderate
Planted Tank: No
Jaguar cichlids have powerful jaws and sharp teeth to match their spotted patterning. They’re a smaller relative of the Wolf Cichlid but every bit as aggressive. Some keepers successfully house them with other large cichlids that can hold their own, but the tank needs to be big enough to divide into clear territories.
3. Red Devil Cichlid
Scientific Name: Amphilophus labiatus
Difficulty Level: Moderate
Temperament: Aggressive
Adult Size: 12–15 inches (30–38 cm)
Minimum Tank Size: 55 gallons (208 L)
Diet: Omnivorous; cichlid pellets, vegetables, live and frozen foods
Origin: Nicaragua
Temperature: 75–79°F (24–26°C)
pH: 6.0–8.0
Difficulty to Breed: Moderate
Planted Tank: No
The Red Devil earns its name. Mean to its own species, mean to tankmates, and known for rearranging everything in its tank. The bigger the tank, the more manageable the aggression. A single Red Devil in a well-decorated 75-gallon is a completely different experience from one crammed into the minimum 55-gallon.
4. Silver Arowana
Scientific Name: Osteoglossum bicirrhosum
Difficulty Level: Advanced
Temperament: Aggressive
Adult Size: 28–32 inches (71–81 cm)
Minimum Tank Size: 200 gallons (757 L)
Diet: Carnivorous; pellets, frozen and live foods
Origin: Brazil, Peru, Ecuador, Guyana, Colombia
Temperature: 68–86°F (20–30°C)
pH: 6.0–7.5
Difficulty to Breed: Advanced
Planted Tank: No
The Silver Arowana is a true monster fish that very few aquarists have the space to keep responsibly. They grow to nearly 3 feet, jump like their lives depend on it, and will eat anything small enough to fit in their mouth. A secure lid and a massive open tank are non-negotiable. Don’t buy a juvenile Arowana without a plan for the adult.
5. Texas Cichlid
Scientific Name: Herichthys cyanoguttatus
Difficulty Level: Moderate
Temperament: Aggressive
Adult Size: 10–12 inches (25–30 cm)
Minimum Tank Size: 75 gallons (284 L)
Diet: Omnivorous; pellets, frozen and live foods, vegetables
Origin: USA and Mexico
Temperature: 70–75°F (21–24°C)
pH: 6.5–7.5
Difficulty to Breed: Advanced
Planted Tank: No
The only cichlid native to the United States, and one of the best entry points into the aggressive cichlid world. Not fussy about food, hardy in a range of conditions, and stunning with their iridescent blue-black speckled bodies. Males are larger and more aggressive than females, but in the right setup a Texas Cichlid is one of the more manageable species on this list.
6. Oscar
Scientific Name: Astronotus ocellatus
Difficulty Level: Moderate
Temperament: Aggressive
Adult Size: 10–14 inches (25–36 cm)
Minimum Tank Size: 75 gallons (284 L) for one; 125+ gallons for a pair
Diet: Omnivorous; pellets, live and frozen foods
Origin: South America
Temperature: 68–82°F (20–28°C)
pH: 6.0–7.5
Difficulty to Breed: Moderate
Planted Tank: No
Oscars are not community fish. I want to be direct about that because the hobby has a long history of selling juvenile Oscars to community tank keepers who don’t realize what they’re getting into. An Oscar will eat anything it can fit in its mouth. It will rearrange your entire aquascape. It will recognize you, beg for food, and live for up to 20 years. Give an Oscar its own space and it becomes one of the most rewarding fish in the hobby. Try to community-tank it and you’ll lose fish.
7. Jack Dempsey
Scientific Name: Rocio octofasciata
Difficulty Level: Easy
Temperament: Semi-aggressive
Adult Size: 6–8 inches (15–20 cm)
Minimum Tank Size: 55 gallons (208 L)
Diet: Omnivorous; pellets, live and frozen food, vegetables
Origin: Honduras, Guatemala, Belize, Mexico
Temperature: 68–86°F (20–30°C)
pH: 6.5–8.0
Difficulty to Breed: Moderate
Planted Tank: Floating plants and epiphytes
Named after a famous American boxer, though they don’t always live up to the reputation. A single Jack Dempsey can actually be kept in a community with careful planning. In groups, they become very aggressive toward each other once mature. One of the better starting points for hobbyists who want to move into cichlid keeping without diving straight into monster fish territory.
8. Red Tail Catfish
Scientific Name: Phractocephalus hemioliopterus
Difficulty Level: Advanced
Temperament: Semi-aggressive
Adult Size: 3–4 feet (91–122 cm)
Minimum Tank Size: 1,500–2,000 gallons (5,678–7,571 L)
Diet: Omnivorous
Origin: South America
Temperature: 70–79°F (21–26°C)
pH: 6.0–7.5
Difficulty to Breed: Advanced
Planted Tank: Yes (will be ignored)
Most Red Tail Catfish never end up in the right home. They’ve been recorded at over 80 lbs and nearly 4.5 feet long. The minimum tank size requirement alone disqualifies most hobbyists. They aren’t aggressive toward other species in the way cichlids are, but they grow massive and will eat anything smaller than they are. One in a tank. Period.
9. Vampire Tetra (Payara)
Scientific Name: Hydrolycus scomberoides
Difficulty Level: Advanced
Temperament: Semi-aggressive
Adult Size: 10–12 inches (25–30 cm)
Minimum Tank Size: 250 gallons (946 L)
Diet: Carnivorous; live fish
Origin: Brazil, Peru, Ecuador, Bolivia
Temperature: 75–82°F (24–28°C)
pH: 6.0–8.0
Difficulty to Breed: Advanced
Planted Tank: No
The Vampire Tetra is a streamlined predator built for fast-moving water. Young fish school, but adults become solitary. They feed on surprisingly large prey thanks to huge canine-like fangs, and they jump. A secure lid and strong filtration are essential. Tankmate choices are nearly impossible at adult size since anything smaller becomes a meal.
10. Black Wolf Fish
Scientific Name: Hoplias curupira
Difficulty Level: Advanced
Temperament: Aggressive
Adult Size: 12–18 inches (30–46 cm)
Minimum Tank Size: 120 gallons (454 L)
Diet: Carnivorous; live and frozen fish, large invertebrates
Origin: South America
Temperature: 72–82°F (22–28°C)
pH: 5.5–7.5
Difficulty to Breed: Advanced
Planted Tank: No
The Black Wolf Fish is an ambush predator with the temperament to match. It will attack and consume tankmates, including fish nearly its own size. Solitary keeper. This is a fish for dedicated predator-tank enthusiasts who understand what they’re signing up for.
Diet: Omnivorous; cichlid pellets, live and frozen foods
Origin: Hybrid; does not occur naturally
Temperature: 78–85°F (26–29°C)
pH: 7.0–8.0
Difficulty to Breed: Moderate
Planted Tank: No
Flowerhorns are a man-made hybrid known for their distinctive nuchal hump and intense personality. They bond with their owners in a way that few fish do. They’re also completely incompatible with nearly every other fish. A Flowerhorn is a one-fish tank. Embrace that and you’ll have one of the most interactive fish in the freshwater hobby.
12. Pea Puffer
Scientific Name: Carinotetraodon travancoricus
Difficulty Level: Easy–Moderate
Temperament: Aggressive
Adult Size: 1 inch (2.5 cm)
Minimum Tank Size: 10 gallons (38 L) for one; 20 gallons for a group
Diet: Carnivorous; frozen foods, live invertebrates, snails
Origin: India
Temperature: 74–82°F (23–28°C)
pH: 7.0–8.0
Difficulty to Breed: Moderate
Planted Tank: Yes
Tiny fish. Predator brain. Pea Puffers punch way above their weight class and will harass or nip at fish much larger than themselves. They’re best kept in species-only tanks or with very carefully chosen, fast-moving tankmates. Their personality and hunting behavior make them endlessly entertaining to watch.
13. Freshwater Stingray
Scientific Name: Potamotrygon motoro (most common species)
Difficulty Level: Advanced
Temperament: Passive but dangerous
Adult Size: 12–18 inch disc diameter (30–46 cm)
Minimum Tank Size: 125 gallons (473 L)
Diet: Carnivorous; live and frozen invertebrates, fish
Origin: South America
Temperature: 75–82°F (24–28°C)
pH: 6.0–7.5
Difficulty to Breed: Advanced
Planted Tank: Soft substrate required
Stingrays aren’t aggressive in the hunting-and-attacking sense. They’re a self-defense danger. Step on one or corner one and the venomous spine on the tail becomes a medical emergency. They need fine sand substrate, pristine water quality, and careful handling protocols. Fascinating fish for very experienced keepers with the right setup.
14. Green Terror Cichlid
Scientific Name: Andinoacara rivulatus
Difficulty Level: Moderate
Temperament: Aggressive
Adult Size: 10–12 inches (25–30 cm)
Minimum Tank Size: 75 gallons (284 L)
Diet: Omnivorous; cichlid pellets, live and frozen foods
Origin: Ecuador, Peru
Temperature: 72–80°F (22–27°C)
pH: 6.5–8.0
Difficulty to Breed: Moderate
Planted Tank: No
Green Terrors live up to the name during breeding. At other times they’re manageable with the right tankmates: large catfish, other similarly-sized cichlids, or robust schooling fish that are fast enough to avoid harassment. The male’s iridescent green and orange coloration is stunning and makes this one of the most visually impressive mid-sized cichlids available.
15. Snakehead
Scientific Name: Channa spp.
Difficulty Level: Advanced
Temperament: Aggressive
Adult Size: Varies by species; 12–36 inches (30–91 cm)
Minimum Tank Size: 100+ gallons (379+ L)
Diet: Carnivorous; live and frozen fish, large invertebrates
Origin: Asia, Africa
Temperature: Varies by species; 60–82°F (16–28°C)
pH: 6.0–7.5
Difficulty to Breed: Advanced
Planted Tank: No
Snakeheads are air-breathers, obligate predators, and escape artists. They can survive out of water for extended periods, which makes a secure lid mandatory. Note: several Snakehead species are illegal to own in many US states due to their invasive potential. Always check your local regulations before purchasing.
Quick Comparison: All 15 Species at a Glance
Species
Difficulty
Max Size
Min Tank
Notes
Wolf Cichlid
Advanced
28 in (71 cm)
200 gal
Species-only; highly intelligent
Jaguar Cichlid
Moderate
16 in (41 cm)
100 gal
Can work with large cichlids in big tanks
Red Devil
Moderate
15 in (38 cm)
75 gal
Rearranges decor; aggressive to own species
Silver Arowana
Advanced
32 in (81 cm)
200 gal
Jumper; needs secure lid; eats small tankmates
Texas Cichlid
Moderate
12 in (30 cm)
75 gal
Best entry-level aggressive cichlid
Oscar
Moderate
14 in (36 cm)
75 gal
Not a community fish; long lifespan up to 20 years
Jack Dempsey
Easy
8 in (20 cm)
55 gal
More manageable solo; groups become aggressive
Red Tail Catfish
Advanced
4 ft (122 cm)
1,500+ gal
Most buyers can’t provide adequate space
Vampire Tetra
Advanced
12 in (30 cm)
250 gal
Near-impossible to house with other fish at adulthood
Black Wolf Fish
Advanced
18 in (46 cm)
120 gal
Ambush predator; solitary only
Flowerhorn
Moderate
16 in (41 cm)
75 gal
One-fish tank; remarkable owner interaction
Pea Puffer
Easy–Moderate
1 in (2.5 cm)
10 gal
Aggression out of proportion to body size
Freshwater Stingray
Advanced
18 in disc (46 cm)
125 gal
Defensive danger, not aggressive; pristine water required
Green Terror
Moderate
12 in (30 cm)
75 gal
Manageable outside breeding; stunning coloration
Snakehead
Advanced
Up to 36 in (91 cm)
100+ gal
Check legality in your state first
MARK’S PICK
For most hobbyists making their first move into aggressive fish, the Texas Cichlid is the right call. It’s hardy, forgiving of water parameter fluctuations, not fussy about food, and the aggression is manageable in a properly sized tank with good territory breaks. You get real cichlid personality without the space requirements of the monster fish on this list. Once you’ve kept a Texas Cichlid successfully for a year, you have the foundation to step up to an Oscar or Jaguar Cichlid. That’s the natural progression.
4 Aggressive Fish to Avoid
These four species show up in stores and online. They should stay there. Not because they aren’t interesting fish, but because virtually no home aquarist can provide what they actually need.
1. Red-Bellied Piranha
Piranhas can be kept in home aquariums and many fishkeepers do it successfully. But here’s the honest truth: they’re often disappointing. Surprisingly shy and skittish, prone to attacking each other, and messy eaters. Add that they’re illegal in many US states and you have a fish that makes sense for very dedicated keepers only. Don’t chase the Hollywood version of this fish.
2. Goliath Tigerfish
Six feet long. 100 lbs. Apex river predator from the Congo. No home aquarium can house a Goliath Tigerfish at adult size. This is a fish that belongs in the wild or in a major public aquarium facility. Full stop.
3. Alligator Gar
Alligator Gar are sold as juveniles and the buyer often has no idea they’ll be looking at a 6 or 7 foot fish within a few years. These are prehistoric animals that deserve massive natural waterways, not a home tank. If you see one for sale and don’t own a public aquarium, keep walking.
4. Paroon Shark
A catfish from Southeast Asia that can reach 10 feet. Skittish, prone to crashing into tank walls and injuring itself, and a voracious predator of anything smaller. There is no reasonable home aquarium scenario for an adult Paroon Shark.
AVOID IF
Don’t buy an aggressive or monster fish if: you have a community tank you’re unwilling to restructure; your tank is under 75 gallons; you’re not prepared for a fish that may live 15+ years; you want a fish that plays well with everything; or you’re buying on impulse because the juvenile looks cool in the store. Every fish on the “4 to avoid” list was purchased by someone who didn’t read to this section first.
Why Do Fish Get Aggressive?
Aggressive freshwater fish aren’t evil. Their behavior makes complete sense in the wild. Understanding the cause tells you how to manage it in the tank.
Predation
Big fish eat smaller fish. It’s biology, not attitude. A fish with a large mouth and a carnivorous diet will view anything small enough as a potential meal regardless of how long they’ve coexisted. This is especially relevant when fish grow: a tankmate that was “fine” with a 4-inch Oscar won’t be fine with a 12-inch one.
Territoriality
Territory defense is the most commonly misunderstood aggression type. In nature, a territory is finite space claimed for a reason: shelter, food, breeding site. When a competitor enters that space, the fish drives it out. In an aquarium, the competitor has nowhere to go. The solution is almost always more tank size and more visual barriers, not a different fish.
Dominance
Schooling species sometimes develop a pecking order. The dominant individuals enforce their status through aggression. Without enough tank space or enough group members to spread the harassment around, the low-ranking fish take constant damage. Proper group size and tank size are the fixes, not removal of the dominant fish.
Breeding
Breeding aggression is one of the most dramatic behavioral shifts in the hobby. Cichlids in particular go from manageable to dangerous once they pair up and start defending eggs or fry. Other fish in the tank have no way to get far enough out of the way. This is why angelfish and guppies fail. It’s why a previously calm cichlid pair suddenly kills every other fish in the tank. Plan your stocking around what happens when your fish breed, not just what happens when they’re juveniles.
Self-Defense
Some fish are dangerous not because they’re aggressive hunters but because they’re defended. A freshwater stingray is not a predator hunting your fish. But step on one or corner it and the venomous spine becomes a serious injury risk to you and anything nearby.
Tank Setup for Aggressive Species
Tank Size
Most of these fish are sold as juveniles and grow fast. A fish that looks manageable in a 40-gallon store tank at 3 inches may need 200 gallons at adult size. Buy for the adult, not the juvenile. Large tanks are also heavy: plan for ground floor or basement placement for anything over 150 gallons.
Territory Management
This is the single most effective tool for reducing aggression and nobody talks about it enough. Visual barriers: rocks, driftwood, dividers, dense planting where applicable. If a fish can’t see its tankmate, it can’t feel threatened by it. Breaking line of sight dramatically reduces chasing and fighting in territorial species.
Substrate and Decor
Large cichlids rearrange everything. Keep hardscape simple and don’t stack heavy rocks that could collapse. Sand substrate is practical because waste is easy to vacuum off the surface. Many monster fish keepers use bare bottom tanks for the same reason.
Filtration
Aggressive fish eat heavily and produce heavy waste. Oversized external canister filters, sump systems, or pond-rated filters are the standard approach. Keep equipment outside the tank when possible. Titanium heaters with guards are worth the investment in tanks with large, powerful fish that might damage equipment.
Feeding
Carnivorous species need high-quality, high-protein diets. Large carnivore pellets as a staple, supplemented with frozen shrimp, fish fillets, and shellfish. Live invertebrates like earthworms and crickets are natural and nutritious supplements. Skip feeder fish: they introduce parasites and disease risks that aren’t worth it. And be careful when feeding species with sharp teeth. When feeding time comes, some of these fish get excited enough to misjudge where the food ends and your hand begins.
Where to Buy Aggressive Freshwater Fish
Your local fish store is often the best starting point. Many aggressive species appear periodically, and a good store can place special orders if you’re after something specific. For rarer species and more reliable livestock, I’d also look at online specialists.
Flip Aquatics carries a strong selection of cichlids and predator species with quality guarantees. Dan’s Fish is another solid online source for less common species that your local store may not carry regularly.
FAQs
What semi-aggressive fish can work in a community tank?
Tiger barbs, red tail sharks, rainbow sharks, convict cichlids, and jewel cichlids are all semi-aggressive but can work in carefully planned community setups with appropriate tankmates and sufficient tank size. The key is pairing them with fish that are too fast to catch, too large to threaten, or occupy completely different tank zones.
What’s the difference between a predator and an aggressive fish?
A predator hunts and eats other animals: fish, invertebrates, sometimes frogs or insects. An aggressive fish fights for territory, dominance, or during breeding but may not be interested in eating its tankmates. Many fish are both: Oscar cichlids are territorial AND will eat anything small enough. Understanding which behavior is driving the problem tells you how to solve it.
Why did my fish suddenly become aggressive?
Most commonly: sexual maturity, the onset of breeding season, or a shift in tank hierarchy from adding or removing fish. Many cichlids are relatively peaceful as juveniles and become genuinely dangerous once they reach breeding condition. This is not abnormal. It’s the fish doing what evolution built it to do.
Can tank size reduce aggression?
Yes, dramatically. This is the most consistently underrated tool for managing aggressive fish. More space means larger territories, more hiding spots, more distance between fish. A Texas Cichlid in a 120-gallon tank with good decor is a very different animal from one in a 55-gallon bare tank. Always go bigger than the minimum when keeping aggressive species.
Are flowerhorns community fish?
No. Flowerhorns are one-fish tanks. Their aggression is not conditional or context-dependent: it’s a fixed trait. They’re incredible fish that interact with their owners in genuinely unusual ways, but they do not cohabitate with other fish successfully in the long run. Embrace the species-only setup and you’ll get a fish with genuine personality. Fight it and you’ll lose other fish.
Closing Thoughts
Aggressive freshwater fish aren’t for everyone, and they shouldn’t be. These are demanding fish that require real commitment to space, filtration, feeding, and in many cases a willingness to say goodbye to the community tank concept entirely. But for the right keeper, there’s nothing more rewarding. An Oscar that greets you at the feeding end of the tank. A Flowerhorn that follows your hand across the glass. A Wolf Cichlid that watches you with an intelligence that doesn’t feel like a fish at all.
The hobby gets more interesting the deeper you go. These fish are proof of that.
For quality aggressive species and cichlids with good livestock guarantees, check out Flip Aquatics and Dan’s Fish.
📚 Want to learn more? This article is part of our complete Freshwater Fish Guide, your ultimate resource for freshwater species, care tips, tank setup, and more.
If you’re like me, then one of your favorite things to do is sit back and watch your reef tank filled with beautiful fish swimming around. Among the many different types of fishes that can be kept in a reef tank, lyretail anthias (Pseudanthias squamipinnis) are perhaps some of the most colorful and striking. Lyretail anthias require a fair bit of care, but if you’re up for it they are definitely worth keeping. In this article I’ll provide a complete guide on how to take care of lyretail anthias so that you can enjoy them in your reef tank for years to come.
These aren’t fish you set up and forget. They’re demanding, they eat constantly, and they will show you every water quality problem your tank has. But when they’re thriving in a mature reef, there’s nothing quite like watching a school of them dart and hover in open water. That image is worth earning.
Expert Take (Mark Valderrama, AquariumStoreDepot)
Lyretail anthias are one of the most rewarding reef fish I’ve worked with, but I’ve also watched hobbyists burn through them in weeks. The feeding schedule is the whole game. If you can’t commit to multiple daily feedings in a mature, established reef, pick a different fish. For those who can manage it, these are stunning animals that will outcompete anything else in the tank for pure visual impact.
ASD Difficulty Rating: Advanced
Lyretail anthias demand a fully cycled, mature reef with stable parameters, a robust live food ecosystem, and multiple daily feedings. Not for new saltwater hobbyists.
Most hobbyists underestimate the feeding commitment. Lyretail anthias are not “set up and leave” reef fish. They have high metabolisms and need to eat multiple times a day. In the wild, they’re constantly picking planktonic organisms from the water column. Replicating that in captivity takes real effort, and failing to do so is the fastest way to lose these fish. Don’t buy lyretail anthias unless you can feed them at least twice a day, every single day.
The second mistake is adding them to immature systems. These fish do fine in stable, established tanks but will stress and decline in anything newly set up. Aim for a system that has been running at least six months to a year before considering them.
The Hard Rule
Never add lyretail anthias to a tank under 125 gallons (473 liters). Full stop. They need open water column space, and the harem group dynamics require room for multiple individuals to establish territories without constant fighting. A tank that’s too small creates chronic stress, suppresses immune function, and kills them slowly.
Origins And Habitat
The lyretail anthias goes by many names but is pretty easy to identify.
Contrary to popular belief, these fish are not true anthias species belonging to the Anthias genus. Instead, they belong to the Pseudanthias genus. As a fish species of Pseudanthias, these medium-sized fish have very bright colors that bring great contrast to the aquarium setting.
Lyretail anthias are native to the Indo-West Pacific Ocean. They can be found throughout the Red Sea as well as off the coasts of Japan, Australia, and South Africa. There, these fish form huge harems in clear tropical waters consisting of one male and up to 10 females. They depend on coral reefs for protection and food, mainly zooplankton.
Though these peaceful fish can be found throughout many ecosystems, there is little physical difference between populations.
Hermaphroditism And Sexual Dimorphism
Lyretail anthias demonstrate protogynous hermaphroditism, much like clownfish. This is the evolutionary ability for the fish to change from female to male depending on internal and external environmental factors.
Protogynous hermaphroditism is designed to increase reproduction rates and is especially successful in harem communities. Lyretails like to stay in large aggregations of about 10 females for every one male. When this male leaves or dies, a female will undergo the transition to male to fill this space and to optimize reproduction rates.
On top of this, lyretails display sexual dimorphism. Simply put, this is when male and female individuals of the same species differ in appearance. For the lyretail anthias, this difference is significant.
Male lyretail anthias grow considerably larger than females, maxing out at about 6 inches (15 cm) while females typically stay under 3 inches (7.6 cm). The bigger difference is in color.
Female lyretail anthias are sherbet-colored with a yellowy-pink body and bright yellow underbelly. The eyes have hints of purple which are further accented by the purple streak that runs along their cheeks.
Male lyretail anthias are much more ornate. These fish are dark purplish-red with contrasting red fins. Like females, they have a bright red streak that runs along their cheeks. They also have an identifiable elongated dorsal spine and some extension to the rest of their fins.
In the case of a missing male, females have the ability to transition into a male in under a month. If a female harem has been established without a male, the most dominant female will make the transition in about 170 to 280 days.
Lyretail Anthias Tank Requirements
Though beautiful fish, lyretails aren’t the easiest fish to keep in the aquarium. This is largely due to their spatial and dietary needs. Still, the lyretail anthias is considered to be one of the easier Pseudanthias species to maintain.
Lyretails live above the reef and need open swimming space. In the tank setting, hobbyists also need additional space to comfortably keep large numbers of these fish together. Because of this, they need at least a 125 gallon aquarium (473 liters).
Though these fish will look their best against a natural backdrop of coral, this isn’t always necessary. One of the important factors to remember when keeping these fish is that they are active zooplankton feeders, constantly searching for floating foods.
A reef aquarium setting will naturally help to maintain populations of microorganisms so that they don’t need to be manually supplemented as often.
Are They Hardy?
Though lyretails aren’t necessarily sensitive to water parameters, they do best when conditions are maintained and stable. These fish will show their brightest colors with minimal nitrates and phosphates in a reef tank setting.
Lyretail anthias are generally hardy, though they should only be kept in matured and established systems.
Reality Of Keeping Lyretail Anthias
Here’s what daily life with lyretail anthias actually looks like: you’re feeding twice, ideally three times a day. Frozen mysis, frozen brine, copepods from a refugium or pod culture. These fish are always on the move, always hunting the water column, and they’ll make your feeding schedule non-negotiable.
In a mature reef with a refugium cranking out pods, they’ll thrive with less intervention. In a tank without that natural food source, you’re doing the work manually. Both approaches can work, but only if you’re consistent. A week of inconsistent feeding will show up on the fish as dulled color and reduced activity. Two weeks and you may start losing individuals.
On the positive side: they’re absolutely stunning to watch as a group. The male displays to the females, the females interact with each other, and the whole school moves through the tank with a kind of orchestrated energy that’s hard to describe. If you’ve put in the work to build a mature reef, these fish are the reward.
Temperament
Lyretail anthias are active fish. They will usually stay at the top of or in front of the live rock, swimming loosely in their harem.
In general, these fish keep to themselves if conditions are met. Male lyretail anthias can become territorial at times, though they won’t inflict injury on another fish.
It is also common to see females picking at each other, especially if there is no male present in the tank. At that point, the biggest and brightest females may work out which one will assume the position of male in the group.
Are They Aggressive?
The lyretail anthias is regarded as one of the more aggressive species within the Pseudanthias genus. They are slightly sensitive to imperfections in saltwater tank conditions and parameters, which can affect their individual behaviors.
Lyretails are constantly searching for food. If food supplies run low, these fish will become aggressive toward other fish who might compete for resources. This is especially true for smaller and slower-moving species.
In the same way, lyretails can become aggressive if space is limited. Though the males are mostly regarded as being territorial, the females will chase after other fish if they feel cramped.
Are They Reef-Safe?
Yes. Lyretail anthias are one of the best fish to have in a reef tank setting. These fish are close to being completely reef-safe and won’t bother munching on any sessile invertebrates within the tank display.
Lyretails are only concerned with food that is free-floating in the water column and won’t pick at the rocks like other foragers. These fish can be safely kept with soft corals, large polyp stony (LPS) corals, and small polyp stony (SPS) corals without concern.
Though there is usually no risk with keeping lyretail anthias in a reef setup, it’s always possible for an individual fish to start picking at coral unexpectedly.
Tankmates
Not only are lyretail anthias reef-safe, but they’re also a great community fish overall. Space and dietary strains can cause individual fish to become more aggressive, but they can usually be kept with an assortment of fish.
To help prevent issues with aggression, allow lyretails their own space within the aquarium. These fish will mainly stay at the top of or in front of the rockwork. Avoid other smaller fish that like to stay in the same areas for extended periods of time.
How Many Can Be Kept Together?
It’s generally agreed that lyretail anthias will do well in groups of at least 4 or more in the home aquarium. More is better, though this pushes the tank size needed. Lyretail anthias are social fish that like to be in small groups. In the wild, they can be seen in larger groups with one male surrounded by several females.
Most hobbyists pick up a group of all-female lyretail anthias and allow them to pick a male among themselves. It’s best to either pick all small juvenile females or a group of females where one is noticeably larger. Immediately adding a male to the tank can cause rejection and increased aggression between individuals.
Though these fish are a shoaling species, they actually do fine on their own in the aquarium. Many reefers have had luck keeping only one lyretail anthias by itself in a full reef tank setting. There have been no noticeable differences in behavior and the fish remains present and active.
Most times, a single fish will transition to a male when kept alone.
Can They Be Kept With Other Anthias Species?
Depending on tank size, you will be able to keep multiple species of anthias fish together. The trick to getting these combinations to work is by choosing species that aren’t too similar in appearance or behavior. Similar to other species, lyretails will become aggressive to similar-looking fish that aren’t in their harem.
There are many different kinds of anthias in the aquarium hobby, both true ones and Pseudanthias. The problem is that one is more beautiful than the next, making it difficult to pick and choose. Pick species that can tell each other apart, like:
Some hobbyists have seen aggression between males of each species, though there is usually no cause for concern. If keeping multiple species of anthias together, the tank should be much larger than the minimum 125 gallons (473 liters).
Diet
The hardest part of owning lyretail anthias is keeping them fed. These are very active fish with high metabolisms that need to be fed regularly. This is also in addition to their need for small planktonic foods, similar to their natural diet in the wild.
Luckily, most hobbyists have had success getting their lyretails to accept a wide variety of aquarium foods. For best coloration, provide a varied diet.
Lyretail anthias are carnivores. They need a good assortment of meaty foods to meet their dietary demands. This should include a selection of live, frozen, and freeze-dried options, like brine shrimp, mysis shrimp, and black worms.
If you’re struggling with getting your fish to eat larger foods, try feeding copepods or a specialized food, like Reef Frenzy by Larry’s Reef Services (LRS).
Not all lyretails will readily accept flake or pellet food at first, and some may never accept anything other than their preferred foods. However, if your lyretail anthias do accept other foods, high-quality flake foods can serve as a staple in the diet.
To ensure that your fish are always happy and healthy, provide feedings 2 to 3 times a day. They do better in a reef aquarium with lots of fauna in the tank such as copepods and zooplankton. You can supplement plankton with foods like Benereef, which contains planktivore content that lyretail anthias love.
Should You Get Lyretail Anthias?
Good Fit If:
You have a mature, established reef system that has been running at least 6 to 12 months
Your tank is 125 gallons (473 liters) or larger with open swimming space in the water column
You can commit to feeding 2 to 3 times daily without exception
You have a refugium or pod culture to supplement natural food supply
You want a schooling species that adds dramatic movement and color
Avoid If:
Your tank is under 125 gallons (473 liters)
Your system is newer than 6 months old
You travel frequently or can’t maintain a consistent feeding schedule
You’re new to saltwater aquariums
You’re not prepared to quarantine before adding to the display
Common Diseases
Though lyretails are hardy fish, they can succumb to common aquarium illnesses rather quickly. Most anthias available in stores are affected by one ailment or another. Because of this, it’s definitely recommended to quarantine before adding them to the main display.
One of the most common marine diseases your lyretail anthias are likely to encounter is Uronema, usually Uronema marinum. This is a free-living ciliate parasite that uses the host for living, feeding, and reproducing.
Though most life stages are fulfilled while actively infecting the fish, the parasite can enter the water column and affect other organisms. It can survive on bacteria and detritus within the system indefinitely, meaning that it will survive through fallow periods.
Uronema is very quick to kill and should not be ignored. Unfortunately, its symptoms can be difficult to diagnose, which can take up valuable treatment time. The main symptoms are red bumps and abrasions that eventually grow into large, open sores. Discoloration, flashing, loss of appetite, and heavy breathing also follow.
Unfortunately, many hobbyists opt to euthanize their fish once this parasite has displayed itself in the home aquarium. Usually, the fish is too far gone and it’s better to sacrifice one to save the whole. However, if you manage to catch it early enough and have the proper quarantine setup and medications, there is still some hope.
The best course of treatment is a 5-minute freshwater dip and a dose of metronidazole every 48 hours for 10 to 14 days. For best results, feed medicated food with a binder like Seachem Focus and Seachem MetroPlex.
Introducing this parasite into the main display will cause it to live in the aquarium indefinitely. The best way to prevent it from devastating your tank is by quarantining.
Where To Buy
You can find lyretail anthias at well-stocked local fish stores or online from reputable marine fish suppliers. I recommend buying from sellers who can confirm the fish are eating in-store before you purchase.
Flip Aquatics – A reliable source for quality marine fish with good acclimation practices
Dan’s Fish – Another solid online option for saltwater livestock
Final Thoughts
The lyretail anthias is a beautiful saltwater fish built for the reef aquarium. In the wild, these fish form harems and feed on planktonic organisms within the water column. That diet can prove to be difficult for some hobbyists, though lyretails usually adapt well to aquarium foods and conditions once they’re settled in.
One of the major diseases to watch out for is Uronema, though they are very hardy after being properly acclimated. If you have the tank size, the feeding commitment, and a mature reef system, lyretail anthias will reward you with some of the most dynamic and visually striking behavior in the saltwater hobby.
Rasboras are one of those fish families I keep coming back to after 25 years in this hobby. They’re diverse, peaceful, and ideally suited to the planted nano tanks that have become so popular. The harlequin rasbora is the most iconic. a lot of hobbyists’ first schooling fish. but the family includes chili rasboras, lambchop rasboras, galaxy rasboras (celestial pearl danios), and more, each bringing something distinct to a planted setup. One thing I always mention to people getting started with rasboras: most prefer softer, slightly acidic water. Many will adapt to neutral conditions, but they genuinely thrive when the parameters reflect their natural blackwater habitat. This guide covers 11 of the best species worth considering.
What Are Rasboras?
Rasboras are freshwater fish from the Cyprinidae family. That family might sound familiar because it is the same group that includes other well-known aquarium fish like barbs, goldfish, and koi.
Many of the tiny species were originally placed in the Rasbora genus, butscientists have since split them up into a few different groups. Most of the species in the aquarium trade are from South and Southeast Asia where they live in streams, ponds, and lakes.
Rasboras are some of the smallest fish species known, and most aquarium species grow to just an inch or two in length. These fish are awesome in nano aquariums, and their peaceful temperaments and great colors have made them firm favorites among fishkeepers all over the world!
11 Best Types Of Rasboras For Aquariums
Now that you know a little bit more about rasboras, it’s time to meet 11 great species that you can keep! Below is a video from our YouTube channel. We go into more detail in the blog post below. If you enjoy our content, please make sure to subscribe!
I’ve included the most important information to help you choose the best species for your tank. Take note of the following stats for each species:
Minimum Tank Size: 10 gallons (20 gallons recommended)
Diet: Carnivorous, provide micropellets/flakes, live and frozen food
Origin: Southeast Asia
Temperature: 70-82°F
pH: 5.5-7.5
Difficulty to breed: Moderate
Planted tank suitability: Yes
The Harlequin rasbora is an amazing schooling fish for community fish tanks. These fish have awesome black triangular markings on their sides, which contrasts with their golden orange color.
Harlequin rasboras are one of the most popular aquarium species sold today because they are so peaceful and easy to care for. Keep a group of 8 or more to see the natural schooling behavior of these neat little fish.
Diet: Omnivorous, feed micro pellets, and live/frozen food
Origin: Myanmar
Temperature: 68-75°F
pH: 7.5-8
Difficulty to breed: Moderate
Planted tank suitability: Yes
The dwarf emerald rasbora (video source) is an awesome nano fish for cool water aquariums. They look very similar to galaxy rasboras/ celestial pearl danios and are actually pretty closely related. These tiny fish are really peaceful and don’t get much over an inch in size.
They are can be shy by nature but will be most comfortable and active in a well-planted aquarium. A group of 6 or more dwarf emerald rasboras would be great in a species-only nano tank, but they can also be kept with other peaceful fish of a similar size.
Diet: Carnivorous, provide micropellets/flakes, live and frozen food
Origin: Borneo
Temperature: 68-82°F
pH: 4-7
Difficulty to breed: Moderate
Planted tank suitability: Yes
Chili rasboras (video source) are one of the smallest fish species in the fishkeeping hobby and are also known as the mosquito rasbora. For such a small species, these little guys are really adaptable to different conditions, but they do need excellent water quality to thrive.
Chili rasbora fish do best when kept on their own but they can be kept with other small species that won’t out-compete them for food.
The blue variety of the axelrodi rasbora (video source) is true schooling fish that should be kept in large groups of 20 or more to really shine.
These tiny fish don’t always accept prepared foods, so be sure to keep a supply of live or frozen foods like daphnia or grindal worms to keep them well-fed.
Diet: Carnivorous, provide micropellets/flakes, live and frozen food
Origin: Southeast Asia
Temperature: 68-82°F
pH: 4-6.5
Difficulty to breed: Moderate
Planted tank suitability: Yes
The spotted, or dwarf rasbora (video source) is another tiny species that is just perfect for a planted nano tank. This colorful fish has a bright red gill cover and three black spots on its orange body.
The ideal tank mates for dwarf rasboras are shrimp, snails, and other peaceful nano fish. Keep at least ten of these social schooling fish to keep them confident and active.
6. Merah
Scientific Name: Boraras merah
Difficulty Level: Easy
Temperament: Peaceful
Adult Size: 0.75 inches
Minimum Tank Size: 10 gallons
Diet: Carnivorous, provide micropellets/flakes, live and frozen food
Origin: Borneo
Temperature: 68-82°F
pH: 4-6.5
Difficulty to breed: Moderate
Planted tank suitability: Yes
The merah rasbora (video source) is another diminutive species for all the nano fish lovers out there! They are also known as the phoenix rasbora.
This species is very similar to the chili rasbora but is generally less colorful. Like other rasboras, these fish do best in groups because they prefer to school together.
Diet: Carnivorous, provide micropellets/flakes, live and frozen food
Origin: Southeast Asia
Temperature: 70-82°F
pH: 5.5-7.5
Difficulty to breed: Moderate
Planted tank suitability: Yes
The black harlequin rasbora is a dark variant of the standard harlequin rasbora. This popular species has been a favorite amongst aquarists for over a century, and it’s easy to see why!
Black harlequin rasboras have the same care needs as the regular species.
Diet: Carnivorous, provide micropellets/flakes, live and frozen food
Origin: Vietnam, Cambodia, Thailand
Temperature: 68-82°F
pH: 6-7
Difficulty to breed: Moderate
Planted tank suitability: Yes
The exclamation point rasbora (video source) is another incredible nano fish from the Boraras genus. If the word Boraras sounds strangely familiar, that’s because this name is an anagram of the word rasbora.
The exclamation point is one of the smaller rasbora species that you would come across at just half an inch or so in length. It gets its name from the combination of a line and a dot on the fish’s body, which make a perfect exclamation point!
10. Emerald Eye
Scientific Name: Brevibora dorsiocellata
Difficulty Level: Easy
Temperament: Peaceful
Adult Size: 1.5 inches
Minimum Tank Size: 10 gallons
Diet: Carnivorous, provide micropellets/flakes, live and frozen food
Origin: Thailand, Sumatra, Malaysia,
Temperature: 68-77°F
pH: 5-7.5
Difficulty to breed: Moderate
Planted tank suitability: Yes
The emerald eye rasbora is a great-looking schooling fish. These fish have beautiful iridescent green markings from their eyes right down to their tails.
These small rasboras are very peaceful and stay small, making them an ideal choice for a soft water community setup.
11. Scissortail
Scissortail Rasbora in Planted Tank” class=”wp-image-552942″/>
Scientific Name: Rasbora trilineata
Difficulty Level: Easy
Temperament: Peaceful
Adult Size: 6 inches
Minimum Tank Size: 55 gallons
Diet: Carnivorous, provide micropellets/flakes, live and frozen food
Origin: Southeast Asia
Temperature: 73-77°F
pH: 6.5-7.5
Difficulty to breed: Moderate
Planted tank suitability: Yes
The scissortail rasbora grows to a size of 6 inches, making it a giant of the rasbora world! Scissortail rasboras get their name from the interesting way they twitch their caudal fin.
Like the other rasboras, these schooling fish do best in groups. Scissortail rasboras are a large and active species, so naturally, they need a fairly large tank to have enough room.
Other Species
Just in case 11 species wasn’t enough, here are a few more bonus rasboras that you can look out for!
Rasboras make great nano fish for small aquariums. Even though they may be tiny, they tend to be very active fish, so a minimum tank size of about 10 gallons is recommended for most of the smaller species.
Substrate & Decor
Sand or gravel makes a fine substrate for most rasboras, although a complete aqua soil is often a better choice for planted tanks because rasboras do best in aquariums with abundant aquatic plant growth.
Adding some driftwood and plenty of live plants will help these fish feel more at home in the aquarium. Plants like Java ferns, cryptocorynes, and amazon swords are great choices because they are easy to grow and don’t need powerful lighting.
Specialized lighting is not necessary for your rasbora aquarium. While bright light is great for a planted tank, it’s not necessarily the best choice for these fish.
Most rasboras prefer fairly dim lighting in the aquarium. Growing some red root floaters or other species of floating plants is a good idea because it helps maintain the dim light these fish prefer.
Rasboras are small fish that prefer still or slow-flowing water. A simple sponge filter will provide adequate filtration for most species.
For a more compact and aesthetic option, a hang-on back or internal power filter can also be used. Just be sure to set up a prefilter sponge over the intake to prevent any tiny fish from getting sucked in.
Whichever filter you prefer, make sure it is capable of excellent mechanical and biological filtration, especially if you are keeping your rasboras in a nano aquarium.
Care
Now that you know how to set up a great home for your fish, it’s time to learn how to keep them healthy. Rasboras are pretty easy to care for if you can maintain good water quality and feed them a quality diet. Choosing the right tankmates is also very important since these fish are so small.
Read on to learn about all of these things and more!
Aquarium maintenance
Most rasboras require great water quality, and that’s why regular aquarium maintenance is so important. This might not be everyone’s idea of a good time, but it’s really not such a bad deal.
Get into the habit of performing a partial water change every week, especially if you keep a nano aquarium. You can use your test kit to monitor the nitrate levels- that way you’ll know if you’re changing enough water.
Use a gravel vacuum to suck out any solid waste particles from the substrate and give your aquarium glass a good clean with your algae scraper. Once you’re done, you can sit back and admire a beautiful tank with happy rasboras for the rest of the week!
Behavior & Feeding
Most species of rasboras available in the aquarium trade are considered micro predators. In their natural freshwater habitats, they feed on tiny crustaceans and other invertebrates.
In the home aquarium, these fish prefer to feed on frozen and live foods like brine shrimp and daphnia. Most species will feed on dried foods like fish flakes and tropical granules, however. A good food to try is Xtreme Aquatic Foods Nano formula.
Xtreme Aquatics Nano formula is specially designed for smaller fish and contained a well balance mix of raw ingredients. It is a great staple food for your nano fish.
Breeding rasboras is not very difficult. In fact, healthy adult fish will breed freely in many home aquariums. These fish produce eggs on a regular basis, so don’t be too surprised if you see some tiny fry in your tank!
Rasboras aren’t that big on eating eggs, but there are no guarantees that the eggs will be left to hatch. Fortunately, the eggs hatch after just a day or so, and the fry begin swimming 2 or 3 days after that. They will have the best chance of survival if your tank is heavily planted, and contains only rasboras.
Setting up a small breeding tank will give you a much higher success rate. A small tank with a sponge filter, some floating plants, and some broadleaved plants is ideal for this purpose. Place a conditioned pair into the tank and, with some luck, the female will lay some eggs on the underside of a leaf.
After the pair have finished breeding, they should be moved back to their regular display tank. The fry grow very fast but must be fed on tiny food like infusoria until they are able to progress to baby brine shrimp.
Tankmates
Rasboras make great fish for community tanks because they are so peaceful. Most rasbora species will get along perfectly with similarly sized community nano fish, as long as they all enjoy the same water parameters.
Some of the different rasbora species are very common in the aquarium trade. Your local fish store probably sells a few popular species, and it’s always worth asking if they can track down something they don’t have in stock.
These days the greatest selection of species can be found online. Quality retailers like Flipaquatics.com are worth checking out because they stock a wide range of great nano fish.
FAQs
Will different they school together?
Rasboras are peaceful, social fish that will enjoy schooling with other, similar-sized species. It is best to keep at least 6 individuals of each species in your aquarium, even though your different rasboras will probably school together.
Is a rasbora a tetra?
Rasboras and tetras are both small schooling fish, but they are not actually related. Most tetras come from South America, while rasboras come from South and Southeast Asia.
What type of fish is a rasbora?
Rasboras are freshwater fish from the cyprinid family. They are mostly very small schooling fish that feed on tiny organisms.
What is the smallest?
The exclamation point rasbora (Boraras urophthalmoides) is the smallest rasbora species you are likely to find in the aquarium hobby. There is an even smaller species, however. The closely related Boraras micros maxes out at just half an inch long!
Can different types live together?
You can keep different species of rasboras in the same tank. Make sure that the different rasboras enjoy the same water parameters like pH and temperature, however.
The different Boraras species are closely related and might hybridize together. Avoid keeping them in the same tank, especially if you plan on breeding your fish.
Final Thoughts
Rasboras are probably the best nano schooling fish in the aquarium hobby. These fish are small, peaceful, colorful, and pretty easy to care for. If you’re looking for a fish to put into a planted nano tank, look no further!
Which is your favorite rasbora species? Let me know in the comments below!
📘 Want to learn more? This article is part of our complete Freshwater Fish Guide. your ultimate resource for freshwater species, care tips, tank setup, and more.
The Coral Beauty Angelfish is the dwarf angel most reefers feel comfortable buying. It has the word “reef safe” attached to it more than almost any other angelfish. That reputation is mostly deserved, and also the most dangerous thing about it.
“Reef safe with caution” is not a green light. It is a warning dressed up as reassurance.
Some Coral Beauties (Centropyge bispinosa) spend years in a reef tank without touching a single coral. Others demolish a zoanthid colony within a week of being added. You cannot reliably predict which one you’re getting. That’s not a flaw in the fish — it’s the defining reality of owning one. If you go in knowing that, you’ll make better decisions. If you go in assuming it’ll probably be fine, the corals pay the price.
That said, this is still one of the best dwarf angelfish available. The coloration — deep purple-blue with streaks of orange and gold — is legitimately striking. It adapts well to captivity, accepts prepared foods readily, and has a personality that fills a tank. For the right setup, with the right expectations, the Coral Beauty is hard to beat.
Key Takeaways
“Reef safe with caution” means exactly that. Most individuals are fine; a minority will nip corals. There is no way to guarantee which one you have until it’s in your tank.
Hunger is the trigger for coral nipping. A well-fed Coral Beauty is far less likely to nip. Keep feedings frequent and diet varied.
Minimum tank size is 70 gallons for a single specimen. A 55-gallon will not give this fish enough territory and swimming space long-term.
One Coral Beauty per tank. Two will fight unless the system is 125 gallons or larger with dense rockwork.
Add this fish last. It will establish territory aggressively if other fish are introduced after it.
Captive-bred specimens (Biota is the main source) are significantly healthier, hardier, and better adapted to aquarium foods than wild-caught fish.
Expert Take (Mark Valderrama, AquariumStoreDepot)
The Coral Beauty is the dwarf angel I recommend most often to hobbyists who want angelfish color without the full commitment of a large Pomacanthid. It does better in reef tanks than almost any other angel. But I’ve also seen it go sideways fast. The fish that seemed totally reef-safe for six months suddenly decided the Euphyllia was a snack. My advice: keep them well-fed, add them last, and watch behavior closely for the first month. If you see any nipping behavior, act fast. Don’t wait and hope it stops on its own.
ASD Difficulty Rating: Intermediate
The Coral Beauty is forgiving of minor water fluctuations but demands a mature, stable system, a varied diet fed consistently, and careful stocking decisions. The reef compatibility question adds a layer of real risk that makes this fish inappropriate for beginners with mixed reef tanks.
4 inches (10 cm) in home aquarium; up to 6 inches (15 cm) in the wild
Min Tank Size
70 gallons (265 L)
Temperature
72–78°F (22–26°C)
pH
8.1–8.4
Salinity
1.023–1.025 (SG) / 33–35 ppt
Hardness
8–12 dKH
Lifespan
10–15 years in captivity with proper care
Reef Safe
With caution — individual variation is significant
Captive Bred Available
Yes (Biota)
Classification
Order
Perciformes
Family
Pomacanthidae
Subfamily
Centropygeinae
Genus
Centropyge
Species
C. bispinosa (Gunther, 1860)
The genus Centropyge contains the dwarf angelfish, a group characterized by their smaller size relative to the large Pomacanthid angels. Centropyge bispinosa is one of the most widespread species in this group, found across a broad Indo-Pacific range. The name “bispinosa” refers to the two prominent spines on the preopercle (cheek area), a shared characteristic of all angelfish.
Origins and Natural Habitat
The Coral Beauty is one of the most geographically widespread dwarf angelfish in the world. Its range spans the entire Indo-Pacific, from the eastern coast of Africa through the Indian Ocean, across to the central Pacific and as far east as the Pitcairn Islands. This broad distribution is part of why the species shows so much individual variation in color intensity and behavior.
In the wild, Coral Beauties inhabit shallow reef environments, typically at depths of 6 to 98 feet (2 to 30 m). They favor areas with dense coral rubble, ledges, and sheltered lagoon slopes where algae growth is abundant. These fish are not open-water swimmers. They are secretive grazers that hug the reef structure, picking at algae-covered rock surfaces throughout the day.
Wild populations are often found in loose harems — one male with several females — distributed across established reef territories. This natural social structure is one reason keeping two specimens in most home aquariums does not work: the territory simply isn’t large enough to support two individuals without constant conflict.
The species has also been observed at the Chagos Archipelago, the Philippines, Indonesia, Australia’s Great Barrier Reef, and throughout Micronesia. Fish from different collection areas sometimes show noticeably different color patterns, with some specimens being predominantly purple-blue and others showing heavier orange and yellow patterning.
Appearance and Identification
The Coral Beauty earns its name. The body is deep purple-blue with vertical bars of rich orange and gold across the flanks. The belly is usually the most vivid, displaying the brightest yellow-orange tones. The fins often carry iridescent blue margins, and some individuals show light blue accenting around the face and eye. The overall effect is genuinely striking, especially under reef lighting.
Color intensity varies significantly between specimens. Fish from the Coral Sea and Australia tend toward deeper purple tones, while Philippines-sourced fish often show more orange. Captive-bred specimens from Biota consistently display vibrant, stable coloration that sometimes exceeds what you’d see in wild-caught fish.
Male vs. Female
Coral Beauties are protogynous hermaphrodites, meaning females can transition to males when social conditions require it. In practice, sexing them in a home aquarium is difficult. Males tend to be larger and may show slightly more intense coloration on the dorsal area, but there is no reliable visual distinction that works consistently. In a harem, the largest and most dominant fish is typically male.
Average Size and Lifespan
In a home aquarium, Coral Beauties typically reach 4 inches (10 cm). The 6-inch (15 cm) maximum size sometimes listed in older sources refers to wild specimens; aquarium fish rarely approach that length. At 4 inches, they’re compact enough to work in a 70-gallon system without crowding the tank, but don’t confuse small body size with low space requirements. These fish need territory.
Lifespan with good care is 10 to 15 years. That’s a meaningful commitment. The fish you buy today may still be in your tank when your tank is a decade old. Water quality, diet consistency, and disease management over that full span are what determine whether a Coral Beauty thrives or merely survives.
Care Guide
Tank Size
The minimum tank size for a single Coral Beauty is 70 gallons (265 L). A 55-gallon is too small for long-term success. These fish roam and graze constantly. In a cramped tank, that behavior turns into stress, aggression toward tank mates, and a higher chance of reef nipping as the fish searches for resources.
If you plan to keep a Coral Beauty with other dwarf angelfish, a 125-gallon (473 L) minimum is required, and even then, success is not guaranteed.
Water Parameters
Parameter
Target Range
Temperature
72–78°F (22–26°C)
Salinity
1.023–1.025 SG / 33–35 ppt
pH
8.1–8.4
Alkalinity
8–12 dKH
Ammonia / Nitrite
0 ppm
Nitrate
Below 20 ppm (ideally under 10 ppm in reef tanks)
Phosphate
Below 0.05 ppm in reef tanks
Calcium
380–450 ppm (for reef systems)
Stability matters more than hitting exact numbers. A Coral Beauty that experiences frequent temperature swings or salinity fluctuations is a stressed Coral Beauty — and a stressed fish is more likely to nip corals. The marine hobby mantra of “keep it stable” applies doubly here.
Filtration and Water Flow
These fish need excellent filtration. The tank should be fully cycled and mature, ideally running for at least six months before adding a Coral Beauty. A well-established biological filter and diverse microfauna on the rock surfaces gives the fish natural grazing opportunities that keep it occupied and reduces the likelihood of reef nipping.
Water flow should be moderate. Strong random-pattern flow (from wavemakers) is ideal for reef systems housing this species. Avoid dead spots, as poor flow leads to nutrient accumulation and algae blooms that can alter the fish’s grazing behavior unpredictably.
Lighting
Coral Beauties adapt to a wide range of reef lighting. Standard reef-quality LED or T5 lighting works well. The fish does not have specific lighting requirements, but if the tank also houses light-demanding corals, the lighting needs should be set by the corals, not the fish.
Plants and Decorations
Live rock is essential. This is not a negotiable element for this species. The Coral Beauty spends the majority of its waking hours grazing rock surfaces for algae, detritus, and small invertebrates. A minimum of 80 to 100 lbs (36 to 45 kg) of quality live rock in a 70-gallon system gives the fish enough grazing surface to stay occupied and healthy.
Dense rockwork with multiple hiding places reduces stress and territorial aggression. Caves, overhangs, and crevices are all used actively by this species. Open swimming space between rock structures is also important — these fish cruise the mid-water between grazing sessions.
Substrate
A sand bed of 1 to 3 inches (2.5 to 7.5 cm) of aragonite sand is standard for reef systems housing this species. Deep sand beds can be used if the overall system supports them. The Coral Beauty doesn’t dig or interact much with the substrate; the sand bed’s purpose is primarily system stability and biological filtration support.
Tank Mates
Best Tank Mates
The Coral Beauty does well in a mixed reef community with fish that occupy different niches and don’t compete directly for territory. Good options include:
Tangs and surgeonfish — active open-water swimmers that don’t challenge the angel’s rock territory
Blennies — small, non-competitive, and typically ignored
Gobies — peaceful, often ignored entirely unless a goby occupies a cave the angel wants
Wrasses — active swimmers with different territory preferences; generally compatible
Clownfish — hold their own and are rarely bothered by Coral Beauties
Chromis and small damselfish — usually coexist peacefully in larger systems
Tank Mates to Avoid
Other dwarf angelfish — unless the tank is 125 gallons or larger, two Centropyge species will fight. This includes Flame Angels, Bicolor Angels, and other Coral Beauties.
Aggressive large angelfish — larger Pomacanthids will bully or injure the Coral Beauty
Overly aggressive damselfish — some damsels will harass a newly introduced Coral Beauty relentlessly
Small invertebrates in reef tanks — cleaner shrimp are generally left alone, but ornamental shrimp and small decorative invertebrates carry some risk
Can You Keep a Coral Beauty with a Flame Angel?
This is the question that comes up constantly. The short answer: not in most home tanks.
Both the Coral Beauty (Centropyge bispinosa) and the Flame Angel (Centropyge loricula) are dwarf angels that compete for the same territories and resources. In tanks under 100 gallons, mixing them reliably produces aggression. In a 125-gallon or larger system with dense rockwork, it can work if both fish are added simultaneously so neither has an established territory advantage. Even then, monitor closely. Some pairs settle in; others don’t.
Choosing between the two: if reef compatibility is the priority, the Coral Beauty has a slightly better track record in mixed reef systems. If you want the more visually bold fish for a FOWLR, the Flame Angel’s red-orange coloration is hard to compete with.
Food and Diet
Feeding this fish correctly is the single biggest variable in reef compatibility. A hungry Coral Beauty nips. A well-fed Coral Beauty, consistently offered a varied diet multiple times per day, is far more likely to leave corals alone.
In the wild, Coral Beauties graze almost continuously throughout the day. They pick algae, small invertebrates, and detritus from rock surfaces in constant small meals. Replicating that feeding pattern in captivity is the goal. Two or three substantial feedings per day is the baseline. If you can manage four smaller feedings, even better.
Target diet:
Algae-based foods — spirulina-enriched flakes or pellets, dried seaweed sheets (nori) clipped to the glass, algae wafers
Angelfish-specific preparations — formulas containing sponge matter are important for long-term health; sponge is a significant component of the wild diet
Live foods occasionally — live blackworms or copepods can be useful for fish that are slow to accept prepared foods
A Coral Beauty that refuses dry foods is not uncommon with wild-caught specimens. Captive-bred fish from Biota typically accept prepared foods from the start, which is one of the practical advantages of buying captive-bred.
Reef Safety: The Real Story
This is the section that actually matters for most people considering a Coral Beauty.
“Reef safe with caution” gets repeated so often that it has lost most of its meaning. Here is what it actually describes:
The majority of Coral Beauties in reef tanks do not nip corals. Estimates from experienced reefers and industry sources suggest something like 70 to 80 percent of individuals are genuinely low-risk in a well-maintained reef. That sounds reassuring until you remember that 20 to 30 percent are not — and you won’t know which category your fish falls into until it’s in the tank.
Corals most at risk:
Zoanthids and palythoas — high risk; polyp tissue is a natural food source for many angelfish
LPS corals — moderate risk; fleshy polyps like Euphyllia, Lobophyllia, and Trachyphyllia can be targeted
Clam mantles — moderate risk; Tridacna clams are sometimes nipped
SPS corals and leather corals — lower risk, though not zero
The trigger for nipping is almost always hunger. A well-fed Coral Beauty is far less likely to nip. This is the one lever you have to reduce the risk, and it works. Feed frequently, feed varied, and make sure the fish is getting sponge-based nutrition. An underfed fish will supplement its diet from the tank. That’s not aggression — that’s survival behavior.
If you observe any nipping within the first month, address it immediately. Increase feeding frequency, add more algae-based food, and watch closely. If behavior continues, the fish needs to be removed before the damage mounts.
Breeding and Reproduction
Breeding Difficulty
Successfully breeding Coral Beauties in a home aquarium is extremely difficult and has not been achieved reliably by hobbyists. Commercial captive breeding does occur, most notably at Biota’s facility in Palau, but requires large outdoor systems and controlled conditions not practical for home setups.
Natural Reproductive Biology
In the wild, Coral Beauties are protogynous hermaphrodites. All fish begin life as females. The dominant female in a harem group can transition to male if the existing male is lost. Spawning occurs at dusk, with the male and female rising together in the water column to release eggs and sperm simultaneously. Fertilized eggs are pelagic, drifting with currents until hatching.
Captive Breeding Progress
Biota Palau Marine Life Nursery is the main commercial source of captive-bred Coral Beauties. Their process uses outdoor 100-gallon systems in natural conditions near the fish’s native range, with aeration and regular water changes in place of conventional filtration. Larvae are microscopic at hatching and require continuous access to cultured phytoplankton and rotifers. Over several months, fry develop adult coloration and graduate to progressively larger live foods before being transitioned to prepared diets.
Captive-bred Coral Beauties from Biota are meaningfully different from wild-caught fish. They accept aquarium foods readily, are free of wild-caught parasites, and are generally hardier through the acclimation period. If you can source a captive-bred specimen, that’s the one to buy.
Home Aquarium Spawning
While some hobbyists have observed spawning behavior from established pairs in large display tanks, raising the larvae through the pelagic stage at home has not been accomplished successfully. The larvae require live phytoplankton at a scale and consistency beyond what most home systems can provide. This is not a DIY breeding project with current hobbyist technology.
Common Health Issues
Marine Ich (Cryptocaryon irritans)
Coral Beauties are susceptible to marine ich, one of the most common diseases in saltwater aquariums. Symptoms include white spots on the body and fins, flashing against rocks or substrate, and labored breathing as gill infestation progresses. The Coral Beauty is not unusually sensitive to ich compared to other marine fish, but it can succumb quickly once a heavy infestation develops.
Treatment requires quarantine. In a reef tank, most chemical treatments cannot be used safely. Hyposalinity treatment in a dedicated hospital tank is the standard approach for marine ich. Copper-based medications can be used in a fish-only hospital tank but should be dosed conservatively — dwarf angelfish can be more sensitive to copper than many other species. Monitor copper levels carefully with a reliable test kit.
Marine Velvet (Amyloodinium ocellatum)
Marine velvet moves faster and is more lethal than ich. Early signs are a dusty or velvety appearance on the skin, rapid breathing, and clamped fins. By the time visible symptoms appear, the fish is already in serious distress. Immediate quarantine and treatment are required. Copper or chloroquine phosphate are effective treatments in a hospital tank.
Wild-caught Coral Beauties should go through quarantine before entering any display tank. Captive-bred fish still benefit from a quarantine period to confirm health status before joining established tank inhabitants.
Head and Lateral Line Erosion (HLLE)
HLLE presents as pitting and discoloration along the lateral line and around the head. In Coral Beauties, this often appears as faded or gray patches on the face. The condition is associated with nutritional deficiencies (particularly lack of vitamins A and C), activated carbon use, and high nitrates. Improving diet quality, switching to carbon alternatives, and maintaining pristine water chemistry can halt progression and sometimes allow recovery.
Common Mistakes to Avoid
Assuming “reef safe with caution” means safe — it means there is individual variation and real risk. Go in with that understanding, not with optimism.
Under-feeding — this is the most direct cause of coral nipping. Feed more than you think you need to. Multiple feedings per day is the standard, not a luxury.
Adding to a new tank — Coral Beauties need an established, mature system with active algae growth on rock surfaces. A new tank doesn’t have the microbiome or grazing surface this species needs.
Keeping two in a tank under 125 gallons — this reliably produces aggression and injury. One per tank is the default rule.
Adding this fish first — the Coral Beauty will establish territory aggressively. Add it last or near last in your stocking sequence.
Choosing wild-caught over captive-bred to save money — the price difference between wild-caught and captive-bred Coral Beauties is smaller than you might expect, and the survival rate and food acceptance of captive-bred fish is substantially better.
Skipping quarantine — wild-caught fish often carry external parasites. Introducing them directly to a reef tank makes treatment nearly impossible.
Should You Get a Coral Beauty?
Good fit if:
You have a 70-gallon or larger, established (6+ months old) reef or FOWLR tank
You feed the tank consistently and can commit to multiple daily feedings
Your coral collection leans toward SPS and soft corals rather than zoanthids and LPS
You want strong color and an active personality in the tank
You can source a captive-bred specimen
You understand and accept that “reef safe with caution” is a real qualifier, not a marketing phrase
Avoid if:
Your tank is under 70 gallons
Your reef has an extensive zoanthid or LPS collection you’re not willing to risk
You travel frequently and can’t maintain consistent feeding schedules
You already have another dwarf angel in the tank (unless 125+ gallons)
Your tank is new or unstable — this fish needs an established system
You’re a beginner setting up your first reef tank
Where to Buy
Sourcing a healthy Coral Beauty from a reputable supplier makes a significant difference in long-term success. Two sources I recommend:
Flip Aquatics — carries quality marine fish with good health guarantees. Check availability for captive-bred specimens when possible.
Dan’s Fish — another reliable source for healthy marine livestock with solid seller transparency.
When buying, look for a fish that is actively grazing the tank walls or rocks at the store, eating offered food, and showing no signs of clamped fins, white spots, or HLLE. A Coral Beauty that is hiding and not eating at the point of sale is already stressed and a higher risk purchase.
Frequently Asked Questions
Are Coral Beauty Angelfish reef safe?
Coral Beauty Angelfish are reef safe with caution — meaning the majority of individuals do well in reef tanks, but a meaningful minority will nip at LPS coral polyps, zoanthids, and clam mantles. The risk increases significantly if the fish is underfed. Consistent, varied feeding greatly reduces the likelihood of coral nipping, but it cannot eliminate individual behavioral variation.
How big do Coral Beauty Angelfish get?
In a home aquarium, Coral Beauties typically reach 4 inches (10 cm). They can reach up to 6 inches (15 cm) in the wild, but home aquarium specimens rarely approach that size. Their compact body size makes them suitable for a 70-gallon tank, though the 55-gallon minimum listed in older sources is too small for long-term success.
Can you keep two Coral Beauty Angelfish together?
Generally, no. Coral Beauties are territorial toward their own species, and two fish in a standard-size tank will fight. In systems 125 gallons or larger with dense rockwork and simultaneous introduction, some hobbyists have success keeping a pair. But one specimen per tank is the reliable, low-stress approach.
What do Coral Beauty Angelfish eat?
Coral Beauties are omnivores that graze on algae and small invertebrates in the wild. In captivity, offer spirulina-enriched flakes or pellets, dried seaweed (nori) on a clip, frozen mysis and brine shrimp, and high-quality angelfish preparations that include sponge matter. Feed two to three times daily, mimicking their constant natural grazing behavior. Sponge-based angelfish formulas are important for long-term health.
How long do Coral Beauty Angelfish live?
With proper care — stable water parameters, a varied and consistent diet, and a low-stress environment — Coral Beauties live 10 to 15 years in captivity. The fish you buy today is a long-term commitment. Cutting corners on diet or water quality shortens that lifespan significantly.
Should I buy a captive-bred or wild-caught Coral Beauty?
Captive-bred every time, if you can find one. Biota is the primary commercial source of captive-bred Coral Beauties. These fish accept aquarium foods more readily, arrive free of wild parasites, and generally have a higher survival rate through the acclimation period. The price premium over wild-caught is usually modest and well worth it.
What corals are most at risk with a Coral Beauty?
Zoanthids and palythoas are the highest risk, followed by LPS corals with fleshy polyps (Euphyllia, Lobophyllia, Trachyphyllia) and Tridacna clam mantles. SPS corals and leather corals carry lower but non-zero risk. If your reef is built around a large zoanthid or LPS collection, weigh that risk carefully before adding this fish.
Does the Coral Beauty eat hair algae?
Coral Beauties do graze algae, but they’re selective grazers, not algae-control tools. They may eat some hair algae, but they can’t be relied on to solve an algae problem. And their requirement for a large, mature system makes them a poor choice as an algae-control purchase. If hair algae is the goal, other options work better without the space and reef-risk tradeoffs.
Closing Thoughts
The Coral Beauty Angelfish is genuinely one of the best dwarf angelfish available for saltwater aquariums. The coloration is exceptional, the personality fills a tank, and it adapts well to captivity. In the right setup, it’s a fish that rewards the investment for a decade or more.
But the reef safety question is real, not theoretical. Go in knowing that this fish may nip corals no matter what you do. Feed it well, add it last, watch it closely in the first month, and have a removal plan if things go sideways. That’s not pessimism — it’s the kind of preparation that makes the difference between a success story and an expensive lesson.
The Coral Beauty is not a beginner fish for mixed reef tanks. In the right hands, it’s one of the most rewarding fish in the saltwater hobby. Know what you’re getting into, and it’ll earn its place in the tank.
References
Froese, R. and D. Pauly, eds. (2024). Centropyge bispinosa. FishBase. Retrieved from fishbase.org
Pyle, R. et al. (2010). Centropyge bispinosa. The IUCN Red List of Threatened Species. doi:10.2305/IUCN.UK.2010-4.RLTS.T165921A6162175.en
Most nano protein skimmers are underpowered junk. That’s the reality nobody tells you before you spend $80 on a skimmer that produces barely any foam and sits in your tank chamber looking busy while your water chemistry slowly drifts. I’ve been in this hobby for over 25 years and sold equipment through my aquarium stores for most of that time. I’ve watched hobbyists buy the wrong skimmer over and over, usually because the box rating says “up to 30 gallons” and they believe it.
Nano skimming is harder than sump skimming. The margin for error is smaller, the equipment is more temperamental, and the wrong choice will cost you corals.
This list covers the skimmers I actually trust in small systems. If it’s on here, it earned its spot through proven performance, not flashy marketing.
What People Get Wrong About Nano Skimmers
The biggest misconception is that any skimmer is better than no skimmer. That’s not true. A poorly performing nano skimmer that produces wet, watery skimmate instead of dark, concentrated foam gives you a false sense of security. You think your tank is being skimmed. It isn’t, not effectively. Meanwhile, dissolved organics build up, your nitrates climb, your alkalinity gets harder to hold stable, and if you’re keeping corals, you start seeing bleaching and poor polyp extension before you understand why.
The second mistake: buying based on tank rating alone. A skimmer rated for 30 gallons in a sump will not perform the same in an all-in-one chamber where the water level constantly fluctuates and the footprint is severely restricted. Nano skimmers need to handle variable water depth and tight spaces. Most can’t do both well.
The Biggest Mistake Nano Reef Owners Make
Going cheap on the skimmer to spend more on lighting. I get it. Lights are sexy. A skimmer sitting in the back chamber is invisible. But your corals will tell the difference. Unstable organic levels crash tanks. I’ve seen it happen after thousands of dollars in coral investment. The skimmer is the foundation of your chemical stability in a small reef. Don’t treat it as an afterthought.
EXPERT TAKE | MARK VALDERRAMA
After 25 years in this hobby and time managing aquarium stores, the pattern I see is clear: most reef crashes in nano systems trace back to skimmer failures or skimmer neglect. The Tunze 9001 is the one piece of equipment I’ve recommended more than any other for sub-40 gallon reef systems. It’s not glamorous, but it works, and it keeps working. That consistency is worth more than any fancy feature list on a cheaper unit.
How I Selected These Nano Skimmers
I use three non-negotiable criteria for this list:
Reliability
Nano protein skimmers should last for years without constant babysitting. For a skimmer this size, that comes down to pump quality. The pump is the heart of the unit. If it fails, the whole skimmer fails, and in a nano reef, there’s no backup. I only list skimmers where I have confidence the pump holds up through years of salt exposure.
Brand Name
I avoid generic marketplace brands. Not because they can’t occasionally produce a decent skimmer, but because you have no service support, no warranty you can actually enforce, and no track record to evaluate. Brands like Tunze, Innovative Marine, and CoralVue have been in the saltwater hobby long enough to prove themselves. If a smaller brand makes the list, they’ve earned it through something the big names don’t offer.
Footprint
These are nano skimmers. They go in tight spaces: all-in-one chambers, internal corners of rimless builds, small sump compartments. If the footprint is too large to fit in the majority of nano systems, it doesn’t make the list. Period.
WHY THIS RANKING
These skimmers are ranked on a combination of real-world reliability, skimmate quality at nano water volumes, footprint practicality for all-in-one and AIO-adjacent builds, and brand service record. Price is a consideration but never the deciding factor. A skimmer that fails at 18 months is never good value, regardless of what it cost upfront.
The Nano Protein Skimmer Candidates
Nano protein skimmers are becoming more popular as more hobbyists try to keep smaller reef tanks. There are more models being released each year. However, the same trusted brand names show up time and time again at this size. Below is a list of the nano skimmers I’ve reviewed.
Tunze developed the Comline DOC 9001 and then left it alone, because it didn’t need to change. This skimmer has been the benchmark for nano reef performance for well over a decade. That kind of longevity doesn’t happen by accident. It happens because the unit is built right from the start: a reliable pump, a tight design, and a magnetic mount system that actually handles the variable water levels you get in all-in-one tanks.
The Tunze 9001 is rated for tanks up to 37 gallons and is designed to be as close to set-and-forget as a nano skimmer gets. You mount it, adjust for water depth, and empty the collection cup when it fills. That’s it. Yes, it’s finicky if your water level swings significantly, but the magnetic mount makes those adjustments quick and tool-free.
If it fits your budget, this is the one to buy. Not because it’s the flashiest option, but because it will still be running reliably in five years when cheaper units have long since failed.
The Innovative Marine BioSkim DC is the Tunze’s closest competition in the all-in-one category. It’s DC powered, energy efficient, and at 4 inches wide it fits in nearly every AIO chamber on the market. Rated for tanks up to 34 gallons.
Innovative Marine learned from their earlier Ghost skimmer, which wasn’t great. The BioSkim produces significantly more foam and performs much more consistently. If the Tunze is out of your budget, this is where to go next. It’s not quite at the Tunze’s reliability level over the long term, but it’s close, and it’s notably cheaper.
The Aquatic Life 115 Mini is the cheapest skimmer on this list and also one of the smallest. A 3.25-inch footprint fits in virtually any AIO chamber. The tradeoff is skimmate production: this is not a high-output skimmer. For lightly stocked nano tanks without heavy coral loading, it’s fine. For a serious reef build, step up to the BioSkim or Tunze.
The IceCap K1 Nano packs a 2.7 x 3.2 inch footprint and runs on IceCap’s DCair 200 pump. It fits in small AIO systems like the Nuvo 10 and Pro Fusion 20. The build quality is better than you’d expect for the price, with an adjustable dial and bubble cage design that mimics larger in-sump skimmers.
It’s slightly cheaper than the Tunze but doesn’t have the long-term reliability track record. For hobbyists who want more performance than the Aquatic Life budget option but don’t want to pay Tunze prices, this is a solid middle ground.
The Aquamaxx HOB 1.5 is the power option on this list. It runs a modified SICCE pump and is rated to 90 gallons, which means it’s genuinely overpowered for a nano system. That’s not a bad thing if aggressive skimming is your priority and you’re running a heavily stocked or coral-loaded small tank.
The tradeoff is aesthetics. This skimmer hangs on the back of your AIO, which disrupts the clean flush look these systems are designed for. If you can live with that, you get the most powerful skimming available in the nano format.
The ReefGlass Nano is the smallest skimmer on this list, built from Pyrex glass and made in the USA. It’s the only air-driven skimmer I’ll recommend to readers. Every other woodstone skimmer you’ll find at a chain store is unreliable junk. This one is different. The Pyrex construction and proprietary woodstone design actually produces consistent bubbles without the degradation issues that plague cheap airstone skimmers.
It’s best suited for pico tanks and builds under 20 gallons. Reef Glass claims 30-gallon capability, but in practice, I’d keep expectations to 20 gallons and under. You need an aquarium air pump to run it, which adds to the cost and the clutter.
Aquamaxx listened to their customers. The HOB 1.5 was too big for most AIO systems, and the WS-1 wasn’t much better. The NF-1 Nano solves both problems: same SICCE pump family, 4-inch footprint, fits in most all-in-one chambers. It outperforms other nano skimmers in its price range on raw skimmate production.
One known issue: the intake clogs with salt creep faster than the competition. You’re cleaning this one more often than the Tunze or BioSkim. If you’re committed to regular maintenance, that’s a minor inconvenience. If you prefer a set-it-and-forget-it experience, lean toward the Tunze instead.
Pros
SICCE pump performance
In-sump build quality
Strong skimmate production
Cons
Intake clogs with salt creep
Requires more frequent cleaning
BUY OR SKIP?
Buy if: You run a nano reef tank (any size under 40 gallons) and keep corals, have a heavily loaded fish-only tank where organics build up between water changes, or you’re running an all-in-one system and want reliable chemical stability without constant intervention. Skip if: You run a lightly stocked fish-only freshwater tank (skimmers are saltwater equipment), or your nano reef is very lightly stocked with infrequent water changes as your only maintenance strategy and you’re comfortable with that approach.
MARK’S TOP PICK
The Tunze Comline DOC 9001 is the top pick, and it’s not close. Twenty-plus years of watching equipment come and go has taught me that reliability is worth paying for. The Tunze will be running when cheaper skimmers are already in the trash. If your budget genuinely can’t stretch to the Tunze, the Innovative Marine BioSkim NANO is the next best option for AIO setups.
Popular Types to Avoid
Now that I’ve covered the good options, let’s talk about what to stay away from. At this size, it’s genuinely easy to select a skimmer that won’t work well. Here are the types I skip every time:
1. Fluval SP
Popular because of the Fluval EVO XIII’s popularity, not because it performs well. The SP’s main problem is persistent micro-bubbles. Bubbles entering the display chamber irritate fish, stress corals, and annoy everyone. This isn’t a minor quirk you tune out of, it’s a design limitation. Avoid it.
2. Seaclone
A classic chain pet store recommendation based on shelf availability, not performance. The Seaclone runs on an old-school venturi pump, overstates its tank capacity, and underperforms compared to everything else on this list. The Tunze Comline is actually cheaper and does the job better. There’s no reason to buy a Seaclone in 2026.
3. Generic Airstone Skimmers
The airstone (woodstone) skimmers you find at chain stores produce inconsistent foam, degrade quickly, and won’t fit in most AIO systems. The only exception is the ReefGlass, which is engineered properly and worth its price for pico applications. Every other woodstone skimmer you’ll find at a chain store: skip it.
WHAT MOST PEOPLE MISS
The nano skimmer that most hobbyists overlook is the AquaMaxx HOB 1.5 for heavily loaded tanks. Everyone assumes hang-on-back means compromise, but for a serious nano reef with high bioload, the SICCE pump in this unit delivers more skimmate per day than any internal skimmer on this list. The aesthetics tradeoff is real, but so is the performance gap. If your tank is packed with livestock and corals, this is actually the smarter choice over the Tunze at that specific application.
What Is a Nano Protein Skimmer?
A nano protein skimmer is a skimmer designed for aquariums 40 gallons and under. Standard protein skimmers are built for larger tanks or aquarium sumps and won’t fit in a small system’s footprint. Nano skimmers are specifically designed with slim profiles to install internally or inside an all-in-one chamber without taking up the space you need for other equipment.
How To Install a Nano Protein Skimmer
Installation differs from traditional protein skimmers. Nano skimmers go into an all-in-one chamber and need adjustment to accommodate the water level in that specific chamber. You won’t get the visual confirmation of watching foam rise through a neck like you do with sump skimmers. Instead, you set the dial or adjust the magnetic mount, give it a few days to break in, then fine-tune based on skimmate consistency.
Here’s a visual from Tunze showing assembly and installation for their 9001:
Should You Get a Nano Protein Skimmer?
Good fit if:
You keep corals in any nano reef setup
Your tank is heavily stocked relative to its size
You want longer intervals between water changes
You’re running a mixed reef with high bioload
Avoid if:
You run a freshwater tank (skimmers are saltwater equipment)
Your nano reef has very light stocking and you do weekly water changes consistently
Your budget forces you toward a skimmer rated well below your actual tank volume
FAQs
Should I Run a Skimmer on a Nano Tank?
Yes, if you’re keeping corals or have a heavily stocked system. A quality nano skimmer adds chemical stability that water changes alone don’t provide consistently. If your tank is lightly stocked fish-only with weekly water changes, you can manage without one, but the safety margin a skimmer provides is real and worth it for most reef applications.
What Is the Smallest Nano Protein Skimmer Available?
The ReefGlass Nano. It’s built from Pyrex glass and made in the USA. Nothing else at this footprint size is worth recommending.
Do You Need a Protein Skimmer for a Nano Tank?
No, it’s not mandatory. Plenty of successful nano reefs run without skimmers, relying on regular water changes and careful stocking. But it’s added insurance, especially in a small water volume where parameter swings happen faster. For coral-heavy builds, I strongly recommend it.
Do I Need a Sump to Run a Nano Skimmer?
No. Most nano skimmers on this list install directly in an all-in-one chamber or internally in the display. The AquaMaxx HOB 1.5 hangs on the back and doesn’t require a sump at all. You have options regardless of your system setup.
How Often Do I Need to Empty the Collection Cup?
It depends on your bioload and the skimmer’s output. For a moderately stocked nano reef, expect to empty the cup every 1 to 2 weeks for most of these units. Higher-output skimmers like the AquaMaxx HOB 1.5 will fill faster in loaded systems. Check it weekly until you know your tank’s baseline.
Closing Thoughts
The right nano protein skimmer for your reef depends on your system, your stocking level, and your budget. If you can stretch to the Tunze Comline DOC 9001, do it. You’ll spend less time troubleshooting and more time enjoying the tank. If you’re budget-constrained, the Innovative Marine BioSkim NANO is a genuine second choice for AIO systems, and the IceCap K1 is a solid middle-ground option.
What I’d tell anyone standing in front of these options: don’t cut corners on the skimmer to save money for something else. In a nano reef, your water chemistry stability depends on it. Buy it right the first time.
For livestock to stock your nano reef, check out Flip Aquatics and Dan’s Fish, two of the most reliable online fish retailers in the hobby.
Want to learn more? This article is part of our complete Aquarium Equipment & Gear Guide, your ultimate resource for filters, heaters, lights, pumps, tanks, and more.
Most beginners assume every aquarium needs a heater. but some of the best fish in the hobby actually prefer cool water, and a few will suffer if kept too warm. After 25 years in this hobby, I’ve seen countless coldwater fish kept in heated tropical tanks because it’s “convenient.” Short-term they look fine. Long-term they’re stressed, their immune systems are compromised, and they live a fraction of their potential lifespan. In this guide I’m covering 20 coldwater aquarium fish I’d genuinely recommend, with honest notes on the temperature range each species actually needs to thrive. not just survive.
What Most Care Guides Get Wrong About 20 Great Coldwater Aquarium Fish (No Heater Required)
The most common mistake I see with 20 great coldwater aquarium fish (no heater required)s is keeping too few. Guides will say “minimum 6” and leave it at that. In reality, these fish behave completely differently in a proper group of 8 to 10 or more. Keeping just 3 or 4 often leads to stress, hiding, and fin nipping that wouldn’t happen in a larger school. Another thing most guides miss is how much lighting and decor affect this species. 20 Great Coldwater Aquarium Fish (No Heater Required)s look washed out under bright white LEDs on a light substrate. Dim the lights, add some tannins, use a dark background, and you’ll see colors you didn’t know they had. I’ve also noticed that many care sheets recommend overly broad water parameters. Yes, 20 great coldwater aquarium fish (no heater required)s are adaptable. But “adaptable” doesn’t mean they’ll thrive in just anything.
What Is A Coldwater Aquarium Fish?
Cold water aquarium fish can survive in temperatures of 70°F or lower. They are species that come from the subtropical and temperate parts of the world where the water isn’t always warm.
Unlike most tropical fish, cold-water fish do not need a heater to survive in the home aquarium. These fish are at home in the same temperatures that most people are, so the natural room temperature of your home is usually fine for them.
The Advantages
Keeping coldwater fish can have some real benefits for aquarists and the fish themselves. Let’s take a look at some of the reasons you might choose to keep cold-water fish over tropical species.
You Don’t Need A Heater
Not needing a heater to keep the water temperature in the comfortable range has a few benefits that you might not realize.
Firstly, you don’t need to buy an aquarium heater or pay for the energy they use. In this hobby, every cent counts right? You can also think of this as a more eco-friendly option.
Heaters can be unsightly too, so you’re also able to create a more natural-looking aquarium, and reduce the amount of hardware and electrical cords you need to hide.
It Can Be Safer
Power interruptions are a fact of life for many people. With an unheated tank, you don’t need to panic when the power goes out.
Even when the lights stay on, aquarium heaters can still malfunction. This is another thing you don’t have to worry about with an unheated tank.
Less Cleaning
Algae thrive in warm water, and this can be a real challenge in planted tropical fish tanks. Coldwater can be a real blessing in heavily planted aquariums and aquascapes because the plants and glass are less likely to be covered.
15 Best Tanks
Now that you know what a cold-water fish is, it’s time to get to know some of the best species for your aquarium. I’ll be listing some important stats for each species, so you can make sure you’re making the right choice. These are:
The fish’s scientific name
Its size when fully grown
How easy it is to care for
The minimum suitable tank size
The fish’s temperament
What the fish eats
Where it comes from
The water temperature the fish prefers
It’s swimming level in the aquarium
So let’s meet them now! You can see our YouTube Video below from our channel and also follow along in our blog post:
The Japanese ricefishor Medaka fish is a great coldwater species for nano tanks. They get their name because they are often found living wild in rice paddies.
The wild type is not the most colorful fish out there, but they are amazing to watch. A golden variety, as well as some genetically modified glowing varieties, have also been developed if you’re looking for more color. These tiny schooling fish will be happiest if kept in groups of 8 or more.
The bloodfin tetra is a great schooling fish for unheated aquariums. Their blood-red fins give these silvery fish a striking look in the aquarium.
They are very hardy fish that are adaptable to a wide range of water temperatures, which means you don’t have to worry if it gets a little warmer than usual. These long-lived tetras regularly survive for over 5 years, especially if kept in groups of 6 or more.
Diet: Carnivore, feed dried, live, and frozen foods
Origin: China
Water Temperature: 58-72°F
Swimming Level: Midwater
White cloud mountain minnows are one of the best cold-water fish in the aquarium hobby. These schooling fish get their name from the White cloud mountain in China1, where they can be found living wild.
These peaceful fish are available in some awesome varieties including gold and long-finned types. They prefer cooler water temperatures and are easy to care for. The white cloud mountain minnow is a great choice for a community tank if kept with other peaceful fish.
Mark’s Experience: White Cloud Mountain Minnows
White clouds are easy mode, and I mean that as the highest compliment. I’ve kept them and the thing most guides get wrong is recommending a heater. These fish genuinely do better at room temperature. In my tanks, 65–68°F is their sweet spot. Heating them up to tropical temperatures actually stresses them and shortens their lifespan. If you have an unheated room-temperature tank and you want a fish that will thrive rather than just survive, white cloud mountain minnows are my top pick.
Diet: Omnivore, feed sinking dried foods, live and frozen supplements
Origin: Peru
Water Temperature: 68-77°F
Swimming Level: Bottom
Panda corydoras get their name from their bold black and white markings and black eyestripe. These adorable catfish are great for cold water aquariums, even though commercially bred individuals are less fussy about water temperatures than wild-caught fish.
Panda cory catfish are very peaceful and social bottom feeders that will be most confident in a school of 6 or more.
Diet: Omnivores, feed dried, live, and frozen foods
Origin: South America and the Caribbean
Water Temperature: 63-82°F
Swimming Level: All levels
Guppies are one of the most popular pet fish on the planet. They are very adaptable and do just as well as cold-water fish as they do in a community tank with tropical fish. These peaceful fish have been bred to display an amazing variety of colors.
Guppies are livebearers, which means they give birth to live fry instead of laying eggs. It is best to keep only one sex if you don’t want these fish to multiply in your aquarium.
Diet: Omnivores, feed dried, live, and frozen foods
Origin: Venezuela, South America
Water Temperature: 64-84°F
Swimming Level: All levels
Endler’s livebearers are another awesome nano species for coldwater aquariums. These tiny fish look very similar to guppies, but they stay much smaller at under 2 inches in length. They are not cold-water fish specifically, but they are very hardy and will do great in an unheated tank in a warm home.
The bristle nose pleco is an unusual fish that is very useful for eating algae. Most people assume these fish can only be kept in tropical aquariums, but they are comfortable in most unheated aquariums and many aquarists have even managed to keep them with goldfish.
Bristlenose plecos are vegetarian fish that need plenty of driftwood to graze on. They are such efficient algae eaters that you’ll need to supplement their diet with spirulina wafers and veggies to keep them well fed. The pleco pictured above is the Albino breed.
The dojo loach is a great coldwater fish species for larger aquariums. Some aquarists even keep these interesting loach fish in outdoor ponds with Koi.
The dojo loach is also known as the weather loach because they become more active when the barometric pressure changes. These interesting fish can reach up to 12 inches in length, which means they should be kept in a freshwater aquarium that holds at least 55 gallons.
9. Rosy Barb
https://youtu.be/HJmNdqwZE_Y
Scientific Name: Pethia conchonius
Adult Size: 3 inches
Care Level: Easy
Minimum Tank Size: 25 gallons
Temperament: Peaceful
Diet: Omnivore, feed dried, live, and frozen foods
Origin: India, Nepal, Bangladesh, Pakistan
Water Temperature: 60-75°F
Swimming Level: Midwater
Rosy barbs are another great species for unheated tanks. These beautiful fish have large, highly reflective scales and come in some amazing varieties like the long-fins and neons (video source).
They are social cyprinids that like to swim in larger schools, so pick up a group of 10 or more if possible. These schooling fish are easy to care for, but not the best choice for planted tanks because they tend to nibble on leaves.
10. Gold Barb
Gold Tetra in Aquarium” class=”wp-image-552736″/>
Scientific Name: Barbodes semifasciolatus
Adult Size: 2.5-3 inches
Care Level: Peaceful
Minimum Tank Size: 20 gallons
Temperament: Semi-aggressive
Diet: Omnivore, feed dried, frozen, and live foods
Origin: China, Vietnam, Taiwan
Water Temperature: 61-75°F
Swimming Level: Bottom, midwater
Gold barbs are a great choice for cold water tanks with lower water temperatures. These social fish are also known as the Chinese barb fish and they should be kept in a school of at least 8.
Although wild gold barbs are greenish, the fish in the aquarium trade have been bred to have an amazing golden body color with dark blotches and reddish eyes and fins. A cool albino form is also available from time to time.
11. Axolotl
Scientific Name: Ambystoma mexicanum
Adult Size: 6-12 inches
Care Level: Moderate
Minimum Tank Size: 15 gallons
Temperament: Semi-aggressive
Diet: Carnivore, feed pellets, frozen or live food
Origin: Mexico
Water Temperature: 57-68°F
Swimming Level: Bottom
The axolotl is also known as the Mexican walking fish, but did you know that these amazing animals are not really fish at all? Axolotls are actually amphibians, just like frogs and salamanders! These creatures make amazing and unusual pets for freshwater aquariums.
Axolotls spend their whole lives underwater and do best when kept on their own. This is because they have a tendency to eat nano fish or even each other! They need cool water and are more active in low lighting because they are nocturnal.
12. Fancy Goldfish
Scientific Name: Carassius auratus
Adult Size: 6-8 inches
Care Level: Moderate
Minimum Tank Size: 20 gallons
Temperament: Peaceful
Diet: Omnivore, feed dried, live, and frozen foods
Origin: China and Eastern Asia
Water Temperature: 65-72°F
Swimming Level: Midwater
Goldfish are more than just feeder fish. The fancy goldfish is one of the best cold-water fish and one of the most popular pets in the world!
These fish are available in a huge range of different breeds, including amazing fish like orandas, ranchus, and bubble-eyes. Fancy goldfish can reach over 8 inches in length, and they need a larger tank than you might think, so don’t be tempted to set them up in a goldfish bowl from your local fish store.
Mark’s Experience: Fancy Goldfish
I’ve kept both common goldfish and the hardier fancy varieties (orandas and ryukins specifically). The biggest mistake I see new keepers make is underestimating space requirements. A common goldfish needs 30+ gallons and will outgrow a 10-gallon in months. Even fancy varieties need more room than their small size at purchase implies. The other non-negotiable in my tanks: double filtration. Goldfish are heavy bioload producers, so I run two filters on every goldfish tank. Get that right and they’re surprisingly easy to keep.
13. Sunset Variatus
Scientific Name: Xiphophorus variatus
Adult Size: 2-2.8 inches
Care Level: Easy
Minimum Tank Size: 15 gallons
Temperament: Peaceful
Diet: Omnivore, feed dried, live, and frozen foods
Origin: Mexico
Water Temperature: 68-79°F
Swimming Level: All levels
The sunset variatus is another great little livebearer for a cold water tank. This morph of the variable platy has amazing red and yellow colors, just like the sky at sunset. Sunset variatus prefer higher pH water conditions, just like many other livebearers.
Diet: Omnivore, feed dried, live, and frozen foods
Origin: Myanmar, Thailand
Water Temperature: 68-78°F
Swimming Level: Midwater
The celestial pearl danio is an awesome nano fish species that looks amazing in a heavily planted tank. These fish are also known as galaxy rasboras or just CPDs for short.
They are fairly timid fish that prefer cooler water temperatures. Celestial pearl danios can be kept with other fish, provided their tank mates are peaceful and stay small.
15. Zebra Danio
Scientific Name: Brachydanio rerio
Adult Size: 1.5-2 inches
Care Level: Easy
Minimum Tank Size: 10 gallons
Temperament: Peaceful
Diet: Carnivore, feed dried, live, and frozen foods
Origin: India
Water Temperature: 70-82°F
Swimming Level: Top, Midwater
The zebra danio is another great cold-water fish that is really underrated in the aquarium hobby. Zebra danios are peaceful and hardy fish that are easy to care for. Zebra danios are fast swimming, active danio fish that are amazing in community tanks and get along with many fish.
Mark’s Experience: Zebra Danios
I’ve kept zebra danios and one thing I always tell people: they need more space than the standard advice suggests. These fish are built for speed and they move constantly, in every direction. That frenetic energy can stress slower or more timid tankmates. I run them in a 20-gallon long minimum, not a 10-gallon, and the extra horizontal swimming room makes a noticeable difference in how settled the whole tank looks. For an unheated setup, a longer footprint is your friend.
16. Paradise
Scientific Name: Macropodus opercularis
Adult Size: 3 inches
Care Level: Easy
Minimum Tank Size: 20 gallons
Temperament: Semi-aggressive
Diet: Carnivore, feed dried, live, and frozen foods
Origin: South and East Asia
Water Temperature: 50-71°F
Swimming Level: Top, Midwater
The paradise fish is also known as the paradise gourami or the Chinese fighting fish. These beautiful fish are related to betta fish and have all the colors of a tropical species, but are happy in an unheated tank.
Paradise fish have a reputation for being aggressive fish and do best in a species-only tank. Keep a single male and 2 or more females if you plan on keeping a group of these feisty fish.
17. Mosquito
Scientific Name: Gambusia affinis
Adult Size: 1.5-2.5 inches
Care Level: Easy
Minimum Tank Size: 5 gallons
Temperament: Semi-aggressive
Diet: Omnivore, feed dried, live, and frozen foods
Origin: USA and Mexico
Water Temperature: 50-84°F
Swimming Level: All levels
The mosquito fish is a small fish species that is usually kept outdoors in ponds as a mosquito larvae control. They can actually make a really fascinating cold water pet fish, however.
One thing to note is that mosquito fish can be pretty aggressive and are known to nip the fins of their tank mates. They are very hardy fish and make an interesting choice for an unheated nano tank.
18. Asian Stone Catfish
Scientific Name: Hara jerdoni
Adult Size: 1.2 inches
Care Level: Moderate
Minimum Tank Size: 10 gallons
Temperament: Peaceful
Diet: Carnivore, feed live and frozen foods
Origin: Bangladesh, India
Water Temperature: 64-75°F
Swimming Level: Bottom
The Asian stone catfish (video source) is a unique little nocturnal fish for unheated aquariums. They are not super active fish and make a great choice for a nano tank.
The Asian stone catfish can also be kept in a community tank as long as its tank mates are also small and peaceful. Feeding them at night is recommended because they are clumsy and the other fish can easily out-compete them for slow sinking food like frozen brine shrimp.
19. Rosy Red Minnows
https://youtu.be/JFi6xF2fVkI
Scientific Name: Pimephales promelas
Adult Size: 3 inches
Care Level: Easy
Minimum Tank Size: 15 gallons
Temperament: Peaceful
Diet: Omnivore, feed dried, live, and frozen foods
Origin: Canada, USA, Mexico
Water Temperature: 50-78°F
Swimming Level: Midwater
Rosy red minnows are more often used as bait and feeder fish than kept as pets. That’s a shame because they are great-looking fish that are perfect for cold water tanks! Rosy red minnows can be kept in a huge range of water temperatures and are even good for ponds outdoors.
20. Pygmy Sunfish
Scientific Name: Elassoma evergladei
Adult Size: 1.4 inches
Care Level: Moderate
Minimum Tank Size: 10 gallons
Temperament: Peaceful, shy
Diet: Carnivore, feed live and frozen food
Origin: USA
Water Temperature: 50-72°F
Swimming Level: Bottom, midwater
The pygmy sunfish (picture source) is a cute little fish that is native to the Southeastern United States. The breeding males have stunning iridescent blue and black colors.
Pygmy sunfish are not usually seen in fish stores, although they do great in unheated aquariums. These tiny fish are actually more popular with fish keepers over in Europe than in their native North America.
ASD Coldwater Fish Scorecard
After 25 years keeping and studying these fish, here’s how I rate all 20 species across four dimensions: ease of care, visual appeal, community safety, and availability from quality suppliers.
Species
Ease (0-3)
Visual (0-3)
Community (0-2)
Availability (0-2)
ASD Score
White Cloud Mountain Minnow
3
2
2
2
9/10 ⭐
Guppy
3
3
2
2
10/10 🏆
Panda Corydoras
3
3
2
2
10/10 🏆
Endler’s Livebearer
3
3
2
1
9/10
Bloodfin Tetra
3
2
2
1
8/10
Rosy Red Minnow
3
2
2
1
8/10
Zebra Danio
3
2
1
2
8/10
Fancy Goldfish
2
3
1
2
8/10
Bristlenose Pleco
2
2
2
2
8/10
Rosy Barb
2
3
1
2
8/10
Sunset Variatus
2
3
2
1
8/10
Celestial Pearl Danio
2
3
1
1
7/10
Common Goldfish
2
2
1
2
7/10
Gold Barb
2
3
1
1
7/10
Dojo Loach
2
2
2
1
7/10
Asian Stone Catfish
2
2
2
1
7/10
Japanese Rice Fish
2
1
2
1
6/10
Paradise Fish
1
3
0
1
5/10
Mosquito Fish
2
1
0
2
5/10
Axolotl
1
3
0
1
5/10
Pygmy Sunfish
1
3
1
0
5/10
ASD Coldwater Fish Scorecard: Mark Valderrama, 25+ years fishkeeping experience
Scoring: Ease (0–3) + Visual (0–3) + Community (0–2) + Availability (0–2) = 10 max. Ratings based on Mark Valderrama’s 25+ years of direct fishkeeping experience and community observations.
Coldwater Tank Setup
Setting up a coldwater tank is just the same as setting up a tropical tank, only you won’t be using a heater. If you live in a tropical climate, however, you might need to take some steps to manage the water temperatures.
Managing Your Tank In Warm Climates
When summer comes along and temperatures in the house begin to rise, keeping your cool water fish comfortable can be tough! Here’s a list of 6 great tips on keeping your fish cool:
1. Monitor the temperature
The most important tool for managing the temperature in your cold water aquarium is a thermometer. A cost-effective solution is to use a simple glass thermometer and keep an eye on it whenever it feels a little warm in your home.
An even better option is to use a digital thermometer with a programmable alarm. This way, you can set the device to alert you when the water temperature rises beyond a certain point. Pretty smart!
2. Use minimal equipment
Knowing the actual temperature in your tank is one thing, but what can you do to keep the temperature in the safe range for your fish?
The first thing to do is switch off or remove any unnecessary equipment in the tank. Things like lights and powerheads give off small amounts of heat and can be switched off temporarily without any harm.
It’s not only the hardware inside your tank that can warm up the water, however. Computers, televisions, refrigerators, and all sorts of appliances can warm up the air around your aquarium.
3. Choose the right lighting
You might not realize it, but some aquarium lights produce plenty of heat. Not all types of aquarium lighting produce the same amount of heat, however.
Switch to LED lighting if your lights are creating heat. This is the best option for keeping your coldwater fish comfortable.
4. Turn on the AC
The temperature of the water in your aquarium is directly affected by the temperature of the air in the room. You can keep your aquarium water temperature down by keeping the room cool with air conditioning. This might not be the most energy-efficient method, but it is very effective! Another alternative is using a mobile AC system.
Not all areas of your home have the same temperature. The north side of your house will usually be cooler than the south if you live in America, Europe, or anywhere north of the equator.
Heat always rises, so the coolest part of your home will usually be downstairs or in the basement. Direct sunlight can heat the water in your tank, even if the air temperature is cool. Never set up an aquarium where it will receive direct sunlight.
6. Cool the water
You will need to cool down the water in your tank if you’ve followed all the tips above, and the water temperature is still rising too much.
The best way to do this is to use an aquarium chiller. These devices are not cheap, but they are very effective because they refrigerate the water. Aquarium chillers can be programmed to maintain a stable, constant temperature of your choice.
A less reliable, but much cheaper option is to run an airstone and an aquarium fan on the water surface. This works best in a tank with no hood. A mesh screen might be necessary though because many fish species can jump out of their tank.
Whichever method you use, make sure you change the temperature gradually to avoid stressing your fish.
Filtration
All aquariums should have good quality filtration to keep the water quality safe, and the tank looking beautiful. Coldwater tanks are no exception, and you can use the same varieties of aquarium filters as you would in a tropical setup.
An air-powered sponge filter is a great option because they do not create any heat and actually help to cool the water slightly. An external canister filter will provide superior filtration, however, and has the added benefit of not cluttering up the tank.
Tank Maintenance
Regular tank maintenance is really important for keeping your coldwater fish healthy and happy. A nice clean tank also looks great, so you can enjoy watching your fish even more. Here’s what you’ll need to do:
Testing
Being able to test your water parameters is really important for maintaining your fish tank. Firstly, testing will show you the pH and hardness of your water, which is very important for most species.
Testing for ammonia and nitrite will also allow you to determine whether your aquarium is cycled or not, and whether it’s safe to start introducing fish to a new tank.
Lastly, regular testing for nitrate levels is necessary to work out the perfect maintenance schedule for your tank.
Aquarium test kits are super easy to use, just make sure you buy a kit that can measure the following parameters:
In a healthy, cycled aquarium, beneficial bacteria break down harmful chemicals known as ammonia and nitrite into nitrate. Nitrate is a lot less toxic, but in large concentrations, this compound can still be dangerous.
Growing plenty of live plants can help to lower the level of nitrates in your tank, but the best way is to physically remove them by replacing some of the water. Use your test kit to measure the nitrate in your water. Ideally, you should try to keep the nitrate levels below 20 parts per million.
The process of performing a partial water change is simple. Start by preparing some fresh water. Use a water conditioner to neutralize any chemicals and allow the water to reach the same temperature as your tank water. You will need the same amount of water as you plan on removing.
Next, suck out water from the bottom of the tank with your gravel vacuum and into a bucket or drain. This will remove all the waste particles that have settled on the substrate.
All you have to do now is add the new water to the tank. Pour it in slowly to avoid stirring up the substrate and uprooting any plants.
Other Maintenance Tasks
You’ll also want to clean the algae off your aquarium glass from time to time. You can do this whenever necessary, but I suggest doing this just before your water change. That way you can suck up any loose algae!
You’ll also need to rinse out your aquarium filter media from time to time. There are colonies of beneficial bacteria that live in the filter media of a cycled freshwater aquarium. They are sensitive to tap water, so remember to clean your filter media in the water you have removed from the tank.
Setting Up A Coldwater Community Tank
You can set up an awesome unheated community tank, even though the options are a little more limited. Read on for some handy tips to help you stock your cold water tank.
Choosing Tank Mates
Choosing the right tank mates is essential to ensure that all your pets get along in the aquarium. The most important factors when selecting tank mates are:
Temperature compatibility
Other parameters like pH and hardness
Size and aggression levels
Live Plants
Coldwater aquariums are not only for fish. You can also grow a variety of awesome live plants in an unheated tank. The following beginner live plant species are all great options:
Malaysian trumpet snails – Minimum temperature 65°F
Japanese trapdoor snail – Minimum temperature 68°F
Shrimp and snails are great because they help to keep your aquarium clean. Shrimp don’t always make the best tank mates for community tanks, however. Some cold-water species like paradise fish will probably see your shrimp as a tasty snack!
Where To Buy
You can usually find the more popular coldwater species at your local fish stores. Another great place to shop aquarium fish is online, especially if you’re looking for specific fish species.
FAQs
Can a cold water tank be too cold?
All fish species have an ideal temperature range where they are most comfortable. If the water in your tank gets too cold, your fish will be under stress and might not survive.
Do you need a heater for cold water tanks?
Coldwater fish only need a heater in very cold environments. In cold climates, an aquarium in an uninsulated building might need a heater during the winter. Cold is a relative term of course, so it really depends on how cold your home is and what kind of fish you keep.
Can you have a tank without a heater?
You can definitely have a fish tank without a heater. The temperature of the water in your tank will vary with the temperature in your home, so the type of fish you can keep will be limited.
You’ll probably need to keep coldwater fish in an unheated aquarium unless you live in a tropical climate or like to keep your home really warm.
Can you keep cold water types in a tank?
Cold water fish are not only good for ponds. Even the common goldfish is considered to be a coldwater fish, and they do great in fish tanks!
Can they survive in coldwater?
Some pet fish do really well in cold water while some will not survive. It really depends on the species of fish you keep and what kind of environment they are adapted to survive in.
What About Koi?
Koi carp are an amazing coldwater fish, however, they require a large pond and their care are beyond the scope of this blog post. I felt it was best to cover them separate to not confuse readers. If you want to learn more about Koi, check out koi care articles.
Expert Take
I see more failed coldwater setups than heated ones, because people underestimate what “no heater” actually means. It does not mean no temperature management. It means keeping the tank in a space that stays at 60–72°F (16–22°C) year-round. In most homes, that is harder than just adding a heater. — Mark Valderrama, AquariumStoreDepot
ASD Difficulty Rating: Tier 2 – Intermediate. Coldwater tanks require stable cool temperatures that many homes cannot provide without active cooling. Simpler in some ways, more demanding in others.
Hard Rule: Coldwater fish require stable temperatures of 60–72°F (16–22°C). If your home exceeds 75°F (24°C) during summer, a chiller or climate-controlled space is required. Not optional.
The Reality of Keeping Coldwater Aquariums
Coldwater tanks require active temperature management in most homes, especially in summer. A fan across the water surface can reduce temperature by 2–4°F (1–2°C), but extended heat waves require more. This is the constraint that catches most beginners off-guard when they choose a “no-heater setup” for simplicity.
Is the 20 Great Coldwater Aquarium Fish (No Heater Required) Right for You?
Before you add a 20 great coldwater aquarium fish (no heater required) to your tank, it’s worth asking whether this species actually fits your setup and your goals. Here’s a quick breakdown to help you decide.
This species is a good fit if:
You have a large enough tank to manage territories. Cramped conditions amplify aggression.
You’re comfortable managing aggression through stocking ratios, line of sight breaks, and tank layout.
You can commit to regular water changes. These fish produce more waste than many smaller species.
You’re not planning a peaceful community tank. 20 Great Coldwater Aquarium Fish (No Heater Required)s need tank mates that can hold their own.
You enjoy watching active, interactive fish. Cichlids have personality that smaller species simply don’t match.
You have backup plans. Sometimes a particular fish just doesn’t work out, and you need a way to rehome it.
You’re feeding a varied, high-quality diet. Color and health depend on nutrition.
If most of those points line up with your setup, the 20 great coldwater aquarium fish (no heater required) is worth serious consideration. If several don’t, it’s better to choose a species that matches your tank now rather than trying to make it work.
Avoid If:
Your home stays above 75°F (24°C) for extended periods without a way to cool the tank
You want to combine coldwater species with tropical fish that need 78°F+ water
You want a completely hands-off, maintenance-free setup. Temperature monitoring is still required
You live in a warm climate without air conditioning or basement access
How the 20 Great Coldwater Aquarium Fish (No Heater Required) Compares to Similar Species
Choosing between similar species can be tricky. Here’s how the 20 great coldwater aquarium fish (no heater required) stacks up against some common alternatives.
The 20 great coldwater aquarium fish (no heater required) occupies a specific niche in the aquarium hobby, and direct comparisons really depend on what you’re looking for. In my experience, the most common question people ask is whether they should choose the 20 great coldwater aquarium fish (no heater required) or something similar that’s more widely available. The answer usually comes down to three things: tank size, water parameters, and what other fish you’re keeping. If your setup matches what the 20 great coldwater aquarium fish (no heater required) needs, it’s hard to beat. If not, there are usually alternatives worth exploring.
Final Thoughts
Cold water aquarium fish are underrated in the hobby. Many of them are super easy to care for and make awesome pets. If you’re looking to start up a new tank, maybe you should think about ditching the heater and stocking some of the fish on this list!
What’s your favorite cold water fish species? Let me know below!
After 25+ years in this hobby, the biggest mistake I see when fish get sick is treating the wrong thing. People reach for antibiotics when the problem is parasitic, or use anti-parasitics when it’s actually a bacterial infection. The diagnosis step matters more than the medication choice. That said, having the right antibiotics on hand before you need them is critical. these illnesses can progress fast, and waiting for a shipment while a fish is deteriorating is a bad position to be in. Kanaplex is my go-to for bacterial infections, and I’ve used Furan-2 for gram-negative bacterial issues. Here’s what you need to know about how fish antibiotics work and when to actually use them.
How Do Antibiotics For Fish Work?
To understand when to treat with antibiotics, we need to first understand how fish antibiotics work.
It’s important to realize that fish antibiotics do not magically cure fish of their ailments. Instead, fish antibiotics decrease the growth of bacteria populations until the immune system of the fish is able to recover and naturally build resistance.
Simply put, fish antibiotics interfere with the physiological and reproductive abilities of bacteria, slowing or stopping growth and spread. In the aquarium setting, there are two main types of bacterial infections you need to be aware of: gram-positive bacteria and gram-negative bacteria.
Gram-Positive Bacteria vs. Gram-Negative Bacteria
Differentiating between bacteria can be complicated, but it’s necessary for accurate diagnosis and treatment. In short, the difference between gram-positive bacteria and gram-negative bacteria is their cell wall composition.
Gram-positive bacteria have a thin cell wall surrounded by an outer membrane. Gram-positive bacterial infections are less common in the aquarium setting and usually consist of Streptococcus spp..
Gram-negative bacteria lack an outer membrane but have thick polymer layers instead. Most aquatic bacterial infections arise from gram-negative bacteria, like Aeromonas spp., Flavobacterium spp., Vibrio spp., and Pseudomonas spp..
The most definitive way to tell gram-positive bacteria apart from gram-negative bacteria is by performing a gram stain, hence the name. Gram-positive bacteria will stain blue while gram-negative bacteria will stain pink.
As most hobbyists aren’t able to perform such a test, only physical symptoms can be observed for diagnosis. Gram-negative infections are typically more aggressive and deadly to fish.
Identifying Bacterial Infections
A bacterial infection can be difficult to diagnose. They often happen alongside other diseases and infections with similar symptoms, especially fungal infections. However, bacterial infections are much more common than true fungal infections as bacteria readily live in aquarium water, waiting to affect a compromised pet fish.
The most common symptoms of a bacterial infection are:
Infection is largely caused by injury alongside poor water conditions and/or malnourishment. It is possible for your fish to fight off infection if water quality is good and diet is maintained, though sometimes even the strongest pet fish can succumb to harmful bacteria.
It is near impossible to differentiate between gram-positive bacteria and gram-negative bacteria without a gram stain. Since gram-negative bacterial infections are much more common (in freshwater), most hobbyists use a fish medication that will target those bacteria first. In marine fish, gram-negative is more common.
Treating Your Aquatic Pets
Knowing what to treat is equally as important as correctly treating. Fish antibiotics have exact directions and the treatment schedule needs to be followed carefully.
How do these antibiotics move from the water into your fish, though?
How To Give To Your Pets
The best way to give fish antibiotics is through treated food. This lets the medicine be administered in more direct, higher doses and saves some damage to nitrifying bacteria. A problem arises when your pet fish refuses to eat though, making this method impossible.
Most fish antibiotics can be dosed directly into the aquarium. From there, these medicines need to be incorporated into the body of the fish, but how? This involves some physiology.
Fish experience osmoregulation1. Osmosis is the process of a solvent moving from an area of low concentration to an area of high concentration across a semipermeable membrane in order to create a balance between the internal and external environments. Osmoregulation differs between freshwater and saltwater life. Here’s a video from Its AumSum Time. The explains the difference between freshwater and saltwater fish.
Freshwater fish are hypertonic, meaning that their internal environment has more salt than their external environment. Because of this, water flows in through the gills and is absorbed by the body.
On the other hand, saltwater fish are hypotonic, meaning that their internal environment has less salt than their external environment. Because of this, water wants to leave their body. In order to compensate for this loss, saltwater fish need to actively drink water and conserve it by sending some to their digestive tract.
In the aquarium setting, this is an advantage to saltwater species. Because saltwater fish actively take water into their bodies, soluble antibiotics are much more likely to immediately enter the internal bloodstream in the marine environment. Still, freshwater fish can be given soluble antibiotics, though feeding them is much more effective.
In general, there are two ways to administer fish antibiotics for both freshwater and saltwater fish. If your fish is suffering from an external infection, then bath treatments are recommended, though they can sometimes be ineffective. If your fish is showing signs of internal infection, then food treatment is the best route.
Bath Treatments
Bath treatments are the preferred choice of treatment for external infections when the fish is refusing to eat or there are other limitations.
Bath treatments are best when there is no access to a quarantine system that allows for fish antibiotics to be directly dosed into the aquarium. This could be due to sensitive corals and invertebrates or where there is large biological filtration that could be affected.
The problem with bath treatments is that very little medicine actually enters the bloodstream of the fish. In addition, the constant transferring of the fish can be stressful and cause injury; if the fish dies during this transfer, then there was probably little hope for it in the first place.
Antibiotic-Treated Food
The best treatment for bacterial infections is through food mixed with fish antibiotics. This requires a binding factor, like Seachem Focus, so that the fish antibiotics do not leak out of the food.
This method allows the medication to be administered in large doses. However, it requires that the fish is still actively eating, which means that the infection has not yet compromised the fish to a large extent. Still, appetite can sometimes be increased through garlic or live food methods.
Injection
Lastly, injection is a possible course of treatment, though many hobbyists do not have this option available to them.
An injection is the best and most effective method of treating infections in large and expensive fish, like oscars or koi, but is often unattainable for the average hobbyist.
The 9 Best
Depending on the type and severity of the infection, different fish antibiotics will be more effective. Most of these fish antibiotics can be used in freshwater, brackish, and saltwater systems though it is recommended to read all instructions closely. We have a video just for you from our YouTube channel. We go into more detail in the blog post below. Please subscribe if you enjoy our content.
1. Thomas Labs Cephalexin (Keflex)
Thomas Labs Cephalexin offers two grades of fish antibiotics: Thomas Labs Fish Flex and Fish Flex Forte. Though this antibiotic is labeled as ornamental fish antibiotics, hobbyists have actually found it to be most effective against invertebrate bacterial infections, especially those found in anemones.
This is a very broad fish antibiotics and needs to be administered in a quarantine system or bath for 5-10 days.
2. Thomas Labs Ciprofloxacin
Again, Thomas Labs offers two grades of this antibiotic: Thomas Labs Fish Flox and Fish Flox Forte.
Ciprofloxacin is much more effective as a fish antibiotic than cephalexin, though this product is regularly used to treat anemones and other invertebrates as well. Specifically, this medicine can be dosed in a bath or in a quarantine tank for gram-negative bacterial infections over the course of 5-7 days.
3. Thomas Labs Amoxicillin
Amoxicillin is a very popular antibiotic for other animals and human use. However, amoxicillin isn’t commonly used in the aquarium as a viable course of fish antibiotics. Regardless, Thomas Labs carries Thomas Laboratories Amoxicillin Fish Mox and Fish Mox Forte.
If for anything, amoxicillin is one of the few fish antibiotics, alongside penicillin and ampicillin, used for treating gram-positive bacterial infections. These fish antibiotics should not be used with invertebrates and should be administered in a quarantine tank or bath treatment for 5 days. Still, hobbyists prefer other fish antibiotics first.
Can You Use Amoxicillin In The Aquarium?
Never use antibiotics intended for human consumption in the aquarium and vice versa. Medications should always be dosed seriously and carefully. Aquarium brands have specific formulas for making ornamental fish drugs that are not for human use.
While aquarium brand amoxicillin can be used in the aquarium, hobbyists usually prefer other options first. Amoxicillin is very popular for treating other animals and humans but is generally useless in the aquarium setting. One of the only ailments hobbyists have found amoxicillin to be useful for is treating fungal infections in the eyes.
4. Nitrofuracin Green Powder
Nitrofuracin Green Powder is one of the most popular aquarium antibiotics. It is also used as a healing agent to use in quarantine tanks. This product contains methylene blue, in addition to nitrofurazone and sulfathiazole sodium, which will kill nitrifying bacteria. Nitrofuracin Green Powder is especially useful for healing cuts and abrasions while dealing with the infection.
Many hobbyists consider Nitrofuracin Green Powder to be a quicker and more effective alternative to API Furan-2. Nitrofuracin Green Powder should be dosed for at least 10 consecutive days.
5. Seachem KanaPlex + Seachem MetroPlex + API Furan-2
Seachem KanaPlex, MetroPlex, and API Furan-2 are very common fish antibiotics to dose together. These three medications can be incredibly effective at combatting a variety of infections.
Seachem Kanaplex is a 7-day kanamycin-based medicine recommended for:
MetroPlex should be dosed at the same time, though can be administered up to 3 weeks on its own. This antibiotic is made from metronidazole and is meant to treat protozoan parasites and anaerobic bacterial diseases (Cryptocaryon, Hexamita, Ichthyophthirius). Mainly, MetroPlex is used for ich, hole in the head/head and lateral line erosion (Hexamita spp./Spironucleus vortens), and velvet.
API Furan-2 targets both gram-positive and gram-negative bacteria through a 7-day nitrofurazone-based treatment. This antibiotic specifically treats for:
This combination of fish medications can cover a wide range of infections as long as the treatment is carried out in full.
6. Seachem SulfaPlex + NeoPlex
Seachem SulfpaPlex and NeoPlex can be used together at the same time or separately depending on the illness.
SulfaPlex is a general sulfathiazole-based antibiotic meant to treat bacterial, fungal, and protozoan-related illnesses. Though this product can be used in both freshwater and saltwater settings, it is most effective to travel across gills in saltwater.
Specifically, SulfaPlex can be used to treat:
Fin rot
Hemorraghic septicemia(Aeromonas hydrophilia)
Fur coat syndrome
Mouth rot
Fungus
NeoPlex is another broad neomycin sulfate-based treatment for external infections, like fin rot, bacterial lesions, bloat, and mouth rot. Most hobbyists describe it as having the same effects as topical Neosporin.
Both of these medicines should be used for at least 7 days but can be dosed for up to 3 weeks on their own.
7. API Triple Sulfa
API Triple Sulfa is one of the safer fish antibiotics treatments to use in the aquarium as it won’t completely kill all nitrifying bacteria. Still, filter media should be removed before dosing for best results.
Sulfa medications are thought to be somewhat outdated. Many hobbyists have found some resistance to these treatments and opt for stronger alternatives, like Furan-2. However, API Triple Sulfa has the benefit of being gentle on the display tank ecosystem if need be.
API Triple Sulfa can treat gram-negative bacteria, like those that cause:
Hemorrhagic septicemia (Aeromonas hydrophilia)
Bacterial gill disease
Fin rot
Cottonmouth diseases
Body slime
Cloudy Eyes
Treatment should last 10 days.
8. Enrofloxacin
Enrofloxacin is one of the most modern ways to treat bacterial infections in fish2, though it is still best administered in a quarantine tank or through 5-hour baths. Though effective, this medicine can be difficult to find; it is most commonly found as Baytril from Bayer Pharmaceuticals.
This is a fast-acting fluoroquinolone antibiotic that can help treat gram-negative and gram-positive infections.
9. AAP Spectrogram
As of 2021, AAP Spectrogram has become difficult to find fish antibiotics; this is likely in direct response to heightened pharmaceutical regulations during the Covid-19 pandemic.
If you come across AAP Spectrogram, it can be very useful for treating both gram-negative and gram-positive bacterial infections. This fish medicine is a combination of KanaPlex and Furan-2 (kanamycin/nitrofurazone), but much easier to use and more effective. It can be used to treat most infections besides parasitic ones.
Which Are Safe?
All medications that are labeled for aquarium use are safe for the aquarium. However, it is possible to overdose on some medications so it’s important to follow directions closely.
There is one thing you should avoid though, and that’s ‘natural’ medications.
Avoiding ‘Natural’ Products And Medications
While many reputable aquarium brands offer great products to their consumers, some brands take advantage of branding treatments. Some of the latest trends in the aquarium hobby have arisen from ‘natural’ fish antibiotics and medications which end up hurting fish more than helping them. Some of these organic alternatives include tannins and natural oils.
Tannins can be very beneficial to aquatic systems and can lead to healthy fish, however, they don’t exactly help with bacterial infections. Research has found that tannins are only effective at combatting bacteria at very high concentrations3, much more than is reasonable for any tank size. Tannic acid is also a blood coagulant with can decrease healing rates.
Natural oils, like those found in MelaFix and PimaFix, are also detrimental to the health of your fish. Though these oils might look and smell medicinal, they have been linked to swim bladder damage and have been found to be nearly ineffective at low concentrations. Similarly, aloe vera also inhibits your fish’s ability to exchange oxygen and increases available sugars for bacteria to feed on.
Though it might seem like a good idea to stay as natural as possible when it comes to treating fish diseases, it is usually safer and easier to use tried and true fish antibiotics.
Can You Give Your Fish Over-The-Counter Human Types?
Fish should never be given medications intended for human consumption. Though the chemical makeup may be similar between medicines, factors like dosages, solubilities, and efficacy cannot be known.
It is true that some fish antibiotics have become difficult to find recently. Though you may not be able to get the antibiotics of your choice, there are many alternatives for each treatment from reputable aquariums brands like API and Seachem. This makes treating your fish safe, fast, and easy.
Can Humans Take Fish Meds?
Also no! You should never be using an antibiotic you haven’t been personally prescribed. Not only does this put your own health at risk, but it can also make it difficult for other hobbyists to obtain these fish antibiotics in the future, like AAP Spectrogram.
In case of a medical emergency, consult your primary doctor.
Where To Buy
It’s actually getting more challenging these days to purchase fish antibiotics as regulations get tougher from states (and the food and drug administration). Supplies have also gotten tighter. Here are a few places you can likely find the fish med you are looking for.
Chain Pet Stores and Local Stores
These are usually your defaults when you are in a hurry for a fish medication and you can’t wait even on 2 day shipping. The problem that you run into with either is the limited availability. You will usually find Seachem medications at both stores, but hours will be limited. Sometimes you can get to a chain pet store like a Petco later at night as they tend to stay open later than local fish stores.
Amazon
Another default choice for fish antibiotics is because of availability and speed of shipping. Again, the brand limitation can be an issue. Thomas Labs fish antibiotic medication isn’t always available here. There is another choice if you are looking for Thomas Lab medications.
Chewy
Chewy surprisedly has a number of Thomas Lab fish meds available. They ship slower than amazon through. They also have generic Thomas Lab medications under the name Aqua-Mox that is available.
National Fish Pharmacy
This is a great choice when looking for Nitrofuracin Green Powder. They sell in bulk sizes and shipping is slow. This is a good choice if you are building a fish pharmacy for emergencies.
There’s a lot more to fish antibiotics than you might have thought. Identifying a bacterial infection in your fish can be difficult, but treatment doesn’t need to be complicated.
First, understand the difference between gram-positive and gram-negative infections. Then choose a course of fish antibiotics and a method for administering them. Keep up with water changes and water parameters and keep your fish eating.
Within no time, the infection should start to heal and your fish will get back to normal
The 20 gallon is the sweet spot for hobbyists stepping up from a nano. it opens up far more fish options than a 10 gallon while still being manageable in terms of maintenance and space. I’ve set up 20 gallon tanks as community tanks, species tanks, and planted setups, and it’s a size I recommend constantly for beginners who want more creative flexibility. The 20 gallon long (as opposed to the tall) is particularly good for most fish since it offers more horizontal swimming space. something I always point out when helping people decide between configurations.
Today, we’ll be talking about the best 20-gallon aquariums for you and what fish to get. Let’s start by discussing criteria!
Mark’s Expert Take
The 20-gallon is the sweet spot for beginner aquarists and I said that to every new hobbyist who walked into my stores. You get enough water volume to buffer early mistakes and enough footprint to do a real community stocking. The one choice that matters most: 20-long vs. 20-high. The 20-long (30×12 in / 76×30 cm) wins for almost every fish because of horizontal swimming space. I steered beginners toward the 20-long almost every time. The 20-high (24×12 in / 61×30 cm) has its place for vertical species like angelfish at juvenile size or rope fish, but that’s a short list. If you’re not sure which to buy, get the long.
, Mark Valderrama, AquariumStoreDepot • 25+ years fishkeeping • former aquarium store owner
What Is The Best 20 Gallon Aquarium (Our Criteria)
I used to own a 20 gallon long aquarium. It was one of those 30 inch long standard tanks you purchase at the chain pet store. Nowadays, the options are plenty. There’s an aquarium, aquarium kit, or fully decked out system for every taste and budget – but what really makes one preferable over another? Here is how I determined my favorite choice! You can also check out our video above from our YouTube Channel.
Aquarium Layout
The rimless aquarium is a style that’s gaining popularity for its sleek design. At this size, it’s purchased at an affordable price. I want to provide multiple purchase opens and setups for you to consider.
Filtration
Several of these aquariums are all in one tanks complete with a 3 stage filtration system. For kits, I want to make sure I find a glass aquarium kit with a decent starter filter that you won’t outgrow or will fall apart on you. If it is a basic fish tank, I want to make sure it’s the right dimensions to allow for multiple filter setups.
There’s a new trend in the fishkeeping world – a fish tank kit with everything included! These kits come complete with three-stage filtration systems – often times with the system built into the fish tank! Tanks made this way make it so you’ll never have to buy another filter again. Other kits may include a power filter or internal filter. I’m looking to list packages that have solid equipment so you start out on the right foot.
Lighting
Some of these aquariums will come with lighting systems. If they do, I want to lean on systems that can support low light aquarium plants if they are designed for freshwater tanks or soft corals if they are designed for saltwater.
I want to lean on systems that can support at minimum low light aquarium plants if they are designed for freshwater tanks. For saltwater tanks, they need to be the correct spectrum and have enough par to support soft corals and easy to care for LPS corals.
Price
Price is always a considerations when it comes to building your dream aquarium. The most basic of glass tank are available for as little at $50, but high-end models will set you back more than that! This article aims at helping those who want an affordable and durable setup with great features while still being able stay within their budget constraints. An aquarium kit may also help with costs as they’re cheaper than buying all the equipment separately.
Why One 20-Gallon Tank Beats Another: What I Actually Look At
20-Long vs. 20-High footprint , The 30×12 in long footprint gives fish room to swim in a natural horizontal pattern. The 24×12 in high forces most mid-water fish into vertical pacing. This single spec changes the whole keeping experience.
Filtration rated for real turnover , A minimum of 150 GPH for a 20-gallon. Kits that ship with undersized 80-100 GPH filters will struggle with bioload the moment you add a full stocking. I look for 150 GPH or higher, ideally with a proper multi-stage media chamber.
Heater reliability and thermostat accuracy , Cheap preset heaters run 2-4°F hot and can’t be adjusted. For species that care about temperature (which is most of them), a dial-adjustable heater is worth the extra $15-20. I’ve had preset heaters cook fish. It’s not worth the savings.
Glass thickness and lid design , Thin glass on discount tanks flexes under full water pressure and the seals fail faster. Plastic hinged lids crack within a year in humid environments. A sliding glass lid or frameless top is worth the investment.
Equipment quality included in kits , Most big-box starter kits bundle a tank with cheap generic equipment. The better kits (Aqueon, UNS, Waterbox) include branded filters and heaters that actually perform. Cheap kit equipment often needs to be replaced within 6 months.
The 20 Gallon Aquarium Candidates
Below is the list of 20 gallon fish tanks that made the cut. They are from various price ranges and cover both freshwater and saltwater tanks. I’ll go over each one in detail.
You want the 20-long specifically for schools of tetras, rasboras, danios, or corydoras
You have space for 30×12 in (76×30 cm) on a sturdy stand
You want room to plant without a major planted tank budget
You’re stepping up from a 5- or 10-gallon and want more stocking flexibility
Skip the 20-Gallon If…
You’re starting saltwater , a 40-60 gallon breeder is a far better first reef
You’re buying a 20-high for active mid-water swimmers (wrong footprint)
You’re determined to keep species that need 30+ gallons (cichlids, larger plecos, goldfish)
You want a beginner tank but can’t commit to weekly water changes
The 7 Best (2023 Reviews)
So, you’ve seen the list. Now it’s time for some fish tank knowledge! Let me show ya each one below and tell ya what makes them special in their own unique way…
Mark’s Top Pick for Most Beginners
A bare UNS 60U paired with a quality hang-on-back filter (Aquaclear 50 or Seachem Tidal 55) and an adjustable heater (Aqueon Pro 100W). Here’s why: the all-in-one kit filters that ship with most 20-gallon sets are underpowered. Buying the glass and equipment separately costs roughly the same once you upgrade, but you start with components that’ll last years, not months. The UNS 60U is rimless, low-iron glass, and sized identically to a standard 20-gallon long so finding a stand is easy. The Aquaclear 50 moves 200 GPH, takes any media you want, and runs for a decade without issues. That’s the setup I’d point a beginner toward today.
Runner-up all-in-one: Aqueon 20 Gallon Kit for those who want a single-purchase solution and don’t want to spec equipment separately. Better filtration than most kit competitors at this price.
The UNS 60U is a great 20 gallon glass tank. It has the same dimensions as a traditional 20 gallon fish tank, but is rimless. UNS is well known in the planted fish tank community for building high quality rimless aquariums. These aquariums are well built and are actually cheaper than other rimless tanks you may find online.
This aquarium is very popular among the aquascaping community. There are plently of videos online of builds that will get your inspiration going. Here is a great example of wjhdrew’s fish tank below:
Because this aquarium is the same dimensions as a rimmed 20 gallon fish tank, it should be easier to find a cabinet, or you can purchase your own. Just make sure the surface the aquarium is sitting on has support all around it. Many discount cabinets will have large gaps, which won’t work with a rimless fish tank.
It’s a great brand and a great fish tank if you want a rimless fish tank. It’s on the pricey side if you are comparing it to a rimmed fish tank, but beauty and looks does have a price!
The Waterbox 20 Cube offers a great looking cubed fish tank with all the bells and whistles to get you started. It’s an all-in-one fish tank with a built in filtration system. The filtration systems comes with a filter sock, which is a type of mechanical filtration that is superior to most other filtration systems in this aquarium size. The socks are replaceable or washable and can be more maintenance then foam. Waterbox also includes bio-balls, carbon, and a filter sponge to round out the system.
The system is more designed for saltwater systems, but this fish tank can also be a great freshwater planted tank. It comes with a black background versus a frosted or clear background that you will see with many planted style scapes. While this might take away from the landscape look, you can balance it out by using more colorful nano fish that stand out when setting these up.
For saltwater tanks, this cube is a perfect glass tank. it has great dimensions for building up rock scape for corals and the footprint means the AI Prime a perfect light for this system. Most reefs will end up using the filter sock and opt-in for a protein skimmer for added filtration. It’s great that this system can function with either setup.
This is a great value for a cubed rimless given all the features offered for this fish tank. The price is high for a lot of hobbyists, but the next option offers another great value at a lower price.
The Aqueon aquarium starter kit is an excellent budget option for those who want to get started with fish keeping. This because they offer a multitude of equipment in one package, most or which performs well and remove any guesswork about what you need when starting out
This package includes everything you need to get started with fishkeeping, including a standard fish tank and hood, a fish net, fish food, and tap water conditioner. You save money by purchasing the complete set over buying each item separately! I believe this kit is one of the best 20 gallon glass aquariums because it has a better quality equipment than other kits including the Marina led aquarium kit, Tetra whisper 20, and generic brand kits.
The main difference between the Aqueon kit and the other competitors is the power filter. The Aqueon filter is a 3 stage filtration system that can tell you when it needs to be replaced, so there is no guesswork when to do maintenance. The hood is good for fish only tanks, but not good for planted tanks.
The main separator between Aqueon’s offering and the others is the power filter. Aqueon’s filter is a true 3 stage filter and as a feature that tells you when you should change the filter cartridges. The hood is good, though not ideal for planted tanks. The water heater is decently made. I’ve personally used these heaters for either a hospital tank or quarantine tank and never had an issue, but the preset heater bit too hot if you want to keep your temperature lower than 78 degrees Fahrenheit (26 Celsius).
This package is perfect for those who want an easy and stress-free experience when selecting their fish tank kit. This is the best 20 gallon fish tank kit to buy if you want cheap, yet good equipment to start.
Red sea offers the best nano reef tank available starting at 20 gallons. It offers all the benefits of your classic red sea reefer, but in the small footprint of a 20 gallon fish tank.
It offers ultra-clear glass with bevealed edges at the top and bottom for the best viewing experience you can get. The water pump provided offers 240 gallons per hour, which puts this at the 10 times turn over level you want for many desirable corals in the hobby. It’s designed to be adjusted to ensure there aren’t any dead spots in your aquarium.
The filtration system is powered by a micron filter bad and a protein skimmer can be detached from the fish tank. This is the only nano reef tank package I have seen that offers a protein skimmer out of the box – and the protein skimmer is actually pretty good. You also get a media shelf to place any chemical or biological media you want. The system also comes with an auto-top off system that has a has a built in reservoir that supply 3 days worth of freshwater.
The led lighting system is designed for reef tanks. The kit comes with a ReefLED 50, which Red Sea’s competitor to the AI Prime and AI LED lighting units. It’s a great light for corals. The light is powered by the ReefBeat App, which connects all your red sea devices together.
This is bar none the best nano reef tank you can buy today, but it comes with a big price. As the most expensive tank kit on this list, it’s not for everyone. However, this is a premium quality fish tank kit for reef setups. If you are looking for a high quality setup with the guess work taken out of it, look no further!
Innovative marine is the originator of the modern all in one nano aquariums you see in the saltwater tank hobby. This Fusion Pro 20 is their latest line of aquariums and really comes in offering premium features. This extraordinary fish tank kit comes with a mesh lid and micro glass cleaner to keep your favorite dweller from jumping out, plus it has an algae scrapper for removing unwanted algae.
The Innovative Mighty Jet DC water pump is a great option for any nano reef tank. It’s got adjustable flow rates so you can customize it to your needs, no matter what type of corals are going into the aquarium!
Innovative is a company that has been making stellar aquariums for years. Their products are worth every penny and they’re one of our favorite brands!
Want something really unique? Try Glofish. This aquarium is a kit that is specially designed for Glofish in mind.
What are Glofish? Glofish are a specialized type of fish that have a fluorescent glow to them. These fish aren’t injected like the old painted glass fish we used to see 20 years ago. These fish are specially bred. Their colors are hereditary traits that are passed down from generation to generation. Their breeding has helped us understand cellular disease and development1.
What you get here is a 20 gallon fish tank, a Aqueon power filter, a specialized LED lighting system and hood, artificial plants, rocks, and gravel that all show well in fluorescent lighting.
There are many Glofish fish species available these days including:
The price isn’t too shabby with everything that’s included here. If you want something unique, then this Glofish fish tank kit might just be what you need!
The Aqueon 20 gallon long is a great glass tank for getting length at a cheap price. While the price may seem great at first impression, it can actually end up costing more than an Aqueon glass kit to build out your system – not that there’s anything wrong doing this!
I included the links to go purchase this if you want. It’s an affordable 20 gallon fish tank and will last a long time. It’s just not my first choice, as I prefer to work with rimless aquariums these days or all-in-one systems for smaller aquariums. If you want a rimless or an all in one system, consider the other aquariums on this list.
Pros
Cheap
Long format
Easy to find
Cons
Not ideal for aquascaping
Rimmed aquarium
Best For – Freshwater Tanks
What Fish Can I Get For This Size of Tank?
Nano fish are the best choice for new aquarium keepers. They’re small, colorful and adorable! Some common nano fish species options include:
Nano reef tanks are great-looking and challenging tanks to keep. You need to be mindful when selecting freshwater fish species that will get along in a small tank like this. Here are a few options:
The clownfish and the damselfish are the two riskiest fish species of the bunch. Clownfish are iffy trying to pair at this size as a non-paired couple will fight it out until one of them submits. With the damselfish, their aggression is too much for many on this list. If you are going to attempt a damselfish and clownfish, it’s best to pair them together as the clownfish and damsel can work through their aggression – while most other fish will be harassed to death.
Setup Guide
Setting up a 20 gallon fish tank can be stressful if it is the first time for you. Luckily, it’s easier than you think if you are guided.
I go for planted tanks or reef tanks. Here is a good video from Shawn Hineidi that shows a simple aquascape that can be installed in a 20 gallon fish tank. Check it out below:
To start building your own aquarium from scratch, you will need the following:
Filter
Heater (if going with tropical fish or marine fish)
Lighting
Decorations
Live Plants or Corals
Aquarium Filtration for The Tanks
There are a ton of options when it comes to 20 gallon fish tanks. If you want to go with a canister filter, I would recommend the OASE Biomaster 350. This is the smaller version of the Biomaster 600. It’s great for a 20 gallon fish tank. If you are looking for a pro level 20 gallon planted tank, you might want to consider upgrading to the 600 model.
You can try power filters, which are a great choice. My go to for power filters are Hagen Aquaclears. In my mind, the aquaclear is the best power filter you can purchase in the hobby.
You want to have a quality heater in order to keep your tank temperatures stable. it’s important to consider a brand like Eheim when shopping around. The heaters that come with OASE filters and controllers are also excellent choices – you’ll have no problem getting the job done!
Hooking up your heater to a controller is the best way for added safety. Inkbird has great controllers with wifi capability, and they even have an app on you phone that you can download that will send you alerts.
The range of led light options is as vast and diverse, from basic to advanced. You have the option of two great choices at this size whether you want to go with a freshwater planted tank or a saltwater reef tank.
The freshwater Serene RGB Pros have a variety of led light features that will help you grow your favorite live plants. They come with an easy-to control and adjustable controller, making this led light perfect for anyone looking to add some lushness into their aquarium!
For saltwater aquariums, the AI Prime is the best led light you can purchase for nano reef tanks. With the AI Prime, you can grow just about anything short of hardcore SPS corals. They work amazing for Zoas – a very popular beginner coral that’s great in Nano reef tanks! This led light is good for 24×24 footprints. You may have to plan a different led light if you go with a 20 gallon long. For 20 gallon longs, I would recommend the Current USA IC Pros.
The AI Prime is a great overall all light for Zoas. It contains the correct, PAR, spectrum, and spread needed to get you going with growing your own Zoa colony!
Driftwood make a solid decorative piece for 20 gallon aquariums, but you can use any type of decoration that suits your needs. Some people prefer driftwood with low tannins and others like those made from manzanita. Manzanita are reasonably placed and easy to place in an aquarium.
For saltwater tanks, I would recommend purchasing live rock at your local fish store. These are so small you really don’t need much to get started! A couple pounds is plenty – 7-10 lbs should do it for starters. Fill the rest of the aquarium up with dry rock.
Live Plants or Corals
If you’re just getting started with keeping fish, it’s best to start off by adding some beginner plants. There are many different types that will thrive in a 20 gallon tank and they can make fish’s home look more appealing too! Some great options include:
All of these live plants feeds off the aquarium water column, so you can glue them to driftwood. If your looking for a high-quality live plant seller consider buying from an online retailer like Buce Plant
Buce Plant offers a wide variety of aquatic plants for sale. With one of the largest selections in the US, you’ll find what you need here. They are also a great source for freshwater shrimp!
Undersized filtration , Generic 20-gallon kits often ship with 80-100 GPH hang-on filters. At a standard 20-gallon stocking, you’ll see ammonia spikes within weeks. You need 150 GPH minimum. Most budget kits fall short.
Preset heaters that run hot , Cheap preset heaters are calibrated to hold 78°F (26°C) but regularly read 2-4°F higher. That’s the difference between a thriving community tank and dead neon tetras. Spend $20 more on an adjustable heater.
Plastic hinged lids that crack , The hinges on budget tank hoods crack within a year under normal humidity. When the lid warps or cracks, fish jump and evaporation accelerates. A proper glass slide top or a rimless tank with a mesh cover is worth it.
Thin glass with weaker silicone seams , Discount tanks use thinner glass (often 4mm vs. 6mm on better brands) and basic silicone. The seams can weep or fail within a few years. It’s not common, but it happens and it’s a mess.
Lighting that won’t grow plants , Budget LED strips included in starter kits rarely put out enough PAR to support anything beyond java moss. If you want live plants, plan on upgrading the light or buying separately from the start.
FAQs
What Fish Are Good In A 20-Gallon Tank?
Guppies, rasboras and danios all make excellent choices for aquariums of this size. Small tetras are another great addition if you want something with more color! Corydoras catfish can’t be beat either- they’re easy to care for and require very little maintenance once established in their tank or pond surroundings. A betta sonority is also a great option.
On the saltwater side, nano reef fish like firefish gobies, clown goby, clownfish, or an azure damsel would work. Aggression is a major factor with tanks these small. Clownfish and azure damsels will be too aggressive for timid fish like fishfish.
How many can this size of tank support?
The smaller the fish, the more you’ll want to house them in a tank of their own. 10-16 small schooling freshwater fish can live together with proper filtration and decoration (or even better: live plants) for company!
Is This Size of Tank Good?
A 20 gallon tank is a great first timer’s fish tank if it is setup as a freshwater aquarium and the filtration system is of good quality. It’s sizable enough to build a good filtration system and not as maintenance heavy as a 40 or 55 gallon tank.
On the saltwater side, a 20 gallon tank is considered at the moderate end of a nano reef tank. These tanks can be a challenge to maintain and keep stable. A 40 or 60 gallon breeder are the best first time saltwater tanks to start with.
Is This Size of Tank Hard To Maintain?
No. The ease of maintenance for a 20 gallon tank is one reason it’s so popular. You can keep your stocking reasonable while still having enough space to grow plants without worrying about maintenance issues that come with larger tanks- which means you won’t be spending as much time monitoring water quality or trimming plants!
If you plan on a heavily planted tank, the trimming and water changes and add up to a lot of maintenance time for many aquarists.
Is This Tank Big?
20 gallon tanks aren’t that big in size. The 20 gallon tank is a great size for home or office use. The standard dimensions of this type are 24″ x 13″, and they can easily be found in most stores! The 20 gallon tank is a great size for home or office use. It’s not too big, but it can hold enough water and fish to make your space feel more complete!
How much would a tank this size cost?
A basic 20-gallon tank will be about $20-$25 per gallon or $400-$500 to set up for a freshwater glass tank. For a saltwater tank, expect to pay $40-$60 per gallon or $800-$1200. You can definitely pay less than what I’m suggesting, however, keep in my the ranges I throw out are for higher-quality setups not discount store kits which tend to have low-quality equipment that won’t last. A glass tank will also be cheaper than an acrylic tank in most cases.
Closing Thoughts
The 20-gallon long is where most serious hobbyists started, and there’s a reason it’s still the default recommendation after 25 years in this hobby. It’s not glamorous. It’s not the flashiest tank on the shelf. But it gives you enough volume to build real biological stability, enough footprint to stock a proper school, and enough flexibility to grow as a fishkeeper without outgrowing the tank in six months.
If you’re debating between a 10-gallon starter and a 20-gallon, get the 20-long. The extra water volume forgives beginner mistakes that a 10-gallon won’t. If you’re debating between a 20-high and a 20-long, get the long. Most fish never needed the height. They needed the horizontal space you weren’t giving them.
Don’t get talked into a fancy all-in-one kit if the filtration specs don’t hold up. Buy the glass. Buy real equipment. The tank you set up right the first time is the one you’ll still enjoy three years from now.
🔧 Want to learn more? This article is part of our complete Aquarium Equipment & Gear Guide. your ultimate resource for filters, heaters, lights, pumps, tanks, and more.
Red aquarium plants have always been one of my favorite ways to add contrast and depth to a planted tank. When I set up my 65-gallon community planted tank, I made sure to include reds throughout to create that pop against the greens. The challenge with red plants is that they demand more light and often stronger nutrients than green plants, and I’ve learned through trial and error exactly what they need to thrive. This guide covers my top picks and the key things you need to know to actually keep them vibrant. not just alive.
Why Grow Red Aquarium Plants?
We got a video for you from our YouTube Channel you can check out all about Red Plants. We go into more detail in the blog post below. Sub to our YouTube channel for more content as we post new videos every week.
If you’ve ever seen an aquascape aquarium with bright and colorful red plants in it, you’ll know what all the fuss is about. Of course, bright green plants are beautiful too, but there’s something special about dramatic rosy foliage that really catches the eye.
Growing healthy red plants can be a little bit challenging for beginners, but with the right equipment and know-how, it is a fascinating side of the planted tank hobby that any aquarist can succeed at!
10 Best Red Aquarium Plants
In a hurry? Check out red plants sold at Buce Plant!
Here we go folks, it’s time to introduce 10 amazing red aquarium plants that you can use in your own aquascape! For each plant, I’ll be providing important information like:
Ludwigia natans ‘Super Red’ is a great plant to start out with. This fast-growing stem plant for freshwater aquariums is an easy plant to care for but will develop its best color with proper lighting and CO2 injection.
It is a tall, narrow plant when grown singly, but being soft and delicate, it shows great movement when a few stems are planted together in groups.
Tank Placement: Foreground, Mid ground, Background
Origin: South America
pH: 5-7
Care level: Moderate
Lighting: Medium-High
CO2 requirement: Yes
Propagation: Rooted cuttings
Alternanthera reineckii is a very popular aquarium plant that is commonly referred to as AR for short. It is a beautiful but fragile plant that is available in many amazing varieties. AR ‘Mini’ is a relatively compact and slow-growing stem plant with amazing color.
Being a slow-growing plant, it can be prone to algae growth on its broad leaf surfaces. Give this plant stable water parameters and regular tank maintenance and it will provide you with incredible foliage and color.
AR ‘Rosanervig’ is a taller variety that makes a great midground plant for larger aquariums. It can even be used as an effective background in small tanks. This gorgeous plant has reddish-green foliage with brilliant pink veins.
Rotala rotundifolia ‘Red’is an easy-to-grow stem plant that can add amazing color to your aquarium. This fast-growing aquatic plant produces its best colors when nitrogen is limited in the tank. It is easy to trim and propagate, which makes it an excellent choice for aquascaping.
Rotala macranda ‘Mini’ is a spectacular but challenging aquatic plant for more experienced aquarists. These stem plants grow quickly with the right care, but need intense lighting and the correct nutrient balance to thrive.
This plant also needs limited nitrates to develop its red coloration, just like the previous species. Furthermore, it also needs acidic, soft water and increased carbon dioxide (CO2) levels. Are you ready for the challenge of growing this striking plant?
6. Nymphaea zenkeri – Tiger Lotus
Size: 4-30 inches
Tank Placement: Floating plant, midground
Origin: Africa
pH: 6-7.5
Care level: Easy
Lighting: Moderate
CO2 requirement: Recommended
Propagation: Root side shoots
The red tiger lotus (video source from Tropica) is a bold aquatic aquarium plant that can be used as a centerpiece plant for the mid-ground. This hardy plant species is almost a combination of a stem plant and a floating plant in that it grow its root system in the substrate while producing large, flat, floating leaves on the water surface.
The Red tiger lotus plant is easy to grow but will show its best red color if provided with high-intensity lighting system, additional carbon dioxide, and enough nutrients.
This Ludwigia species is very popular for its two-tone foliage. Each amazing leaf is green above and red below. It makes a fine background plant for small aquariums or can be used in the midground of larger tanks.
This colorful AR variety is popular for its deep red stems and pink to red young growth. The undersides of the leaves are often a striking purple color.
It is a pretty undemanding plant that has a moderate growth rate under bright lighting. This is an excellent plant for dutch style planted aquarium, providing intense color.
AR ‘Roseafolia Mini’ is a small plant that has a big presence in any planted fish tank. Its stems and foliage can be seen in a variety of reddish hues from pink, through red, to purple with intense lighting.
This versatile plant is a great size for the midground of most aquaria, and can even be trimmed down to create a lush red carpet effect in a large aquarium.
Unlike the other plants in this list, the red root floater is not rooted in the substrate. In fact, these stunning plants float at the water’s surface just like water lilies. Their tiny roots trail down into the water creating an enchanting underwater scene.
As the name suggests, these popular floating aquarium plants are best known for their bright red roots. The leaves themselves will also be a beautiful red shade if grown under bright light.
Tank setup
Now that you’ve learned about ten great plants that you can grow in your fish tank, let’s take a closer look at what you’ll need to grow healthy red aquarium plants.
Substrate
You should select a nutrient rich substrate for most popular aquatic plants that are rooted. The exceptions, of course, are floating plants like the red root floater and some epiphytes.
Aquasoils are a soil-based nutrient rich substrate designed specifically for planted tanks. There are many great options on the market, including popular varieties like:
Providing strong enough light intensity is the number one requirement for vibrant red aquarium plants. Many plants will grow quite happily in low light but remain green or just lack that wow factor that we want from the red plant species.
It is important to remember that light intensity diminishes quickly with depth. This means that low-growing plants will be getting a lot less light than taller plants. For this reason, deeper aquariums will also need stronger lighting, even if they hold the same volume of water.
A PAR level of about 100 umols measured at the bottom of the tank is a good value to aim for. This will bring out great color in most of the red aquatic plants
The Light Spectrum
When considering the needs of an aquatic plant, not just any bright light will do.
Lighting that is turned up in the blue and red spectrum is ideal, but only so much as to maintain a natural and visually pleasing look. The red spectrum not only makes red aquarium plants appear redder but also helps them develop their color.
When selecting a filtration system, opt for a model that provides a good flow and a high water turnover. A turnover rate of 5 times the volume of your aquarium per hour is a good place to start.
You can use an internal power filter or a hang-on back design to filter your aquarium, but external filters are best for creating beautiful display tanks. This is because canister filters are housed outside of the aquarium, so you won’t have to hide any hardware. OASE makes the best canister filters on the market. They are the top choice for planted aquarium owners today.
Maintaining healthy aquatic plants of any color requires an understanding of the basics of plant care. Put simply, plants need:
Light
Water
Carbon dioxide
Nutrients
That’s not all that aquatic plants need, however. You should also provide the following:
A suitable rich substrate
The correct temperature range
Suitable parameters like water hardness and pH
Healthy water flow
Good plant spacing and trimming
With this in mind, let’s take a look at the specifics you need to know for growing red plants in particular.
Growing With CO2 Supplementation
Carbon dioxide is absolutely necessary for healthy plant growth, and red plants species are no exception. Although this gas is present in all aquariums, you will need to provide an increased concentration to really see your plants flourish.
The fact is, your aquarium plants simply can’t make use of bright light without elevated CO2 levels. In fact, intense light without CO2 will probably just grow you a whole lot of algae!
CO2 Injection Systems
CO2 supplementation might be the secret ingredient for amazing plant growth, but this gas has a dark side too. It is lethal in high concentrations (above 30ppm), which is a huge problem if you keep any fish or live animals in your aquarium.
Fortunately, there are some amazing products and systems available to the modern hobbyist that make running CO2 safely pretty simple. An example of a great CO2 system includes the following components:
The highest end offering by CO2Art. This package includes everything you need to perform consistent and the highest quality CO2 injection in the industry!
Using this kind of setup, you can set your injection system to provide dissolved carbon dioxide levels between 15 and 30ppm exactly when the plants need it.
Since plants need light to use CO2, you’ll want to set your timer to fire up an hour or two before the lights go on, and then switch off at the same time as the lights go out.
Maintaining Good Water Quality
Creating an amazing underwater garden requires regular maintenance. Here’s what you’ll need to do to keep your red plants healthy and looking great:
Vacuum your gravel and carpet plants with a gravel vacuum to remove physical waste and uneaten fish food
Keep your glass clean with an algae scraper
Trim plants that are growing too large and shading out other plants. Use a sharp pair of aquascaping scissors for this task
Remove all trimmings and dead plant material from the tank
Rinse out your filter media or replace cartridges when necessary
Perform a weekly water changes. Start with about 25%, but measure your nitrate levels to fine-tune your routine
Testing
A good test kit is an essential tool for maintaining a healthy aquarium and one of the best purchases you will ever make. A test kit allows you to determine whether your tank is cycled, measure the parameters of your tap water, and monitor the nitrate levels in your aquarium.
Supplements And Feeding
Your aquarium plants require regular feeding of aquarium fertilizers to keep up with the demands of growth under high light and increased CO2 levels.
A product like APT Zero from the 2Hr Aquarist is an ideal all-in-one solution for amazing growth for a planted fish tank. This formula lacks nitrate, which is great for keeping nitrogen levels down and boosting red colors while minimizing algae growth.
APT zero offers a the great supplementation of APT Complete, but want to control nitrate loads with dosing. For heavily planted dutch style tanks, go with APT Estimative Index
Many red plants look their best and develop their most intense coloration in a low nitrogen environment. That’s why reducing the nitrates in the water through regular water changes can be so important.
This technique does not work for all red plants, however, but species like Rotalarotundifolia certainly do respond best to low nitrate levels. It is not realistic to maintain zero nitrates in the long term, especially if you keep fish. Of course, plants need some nitrogen to grow, so a prolonged absence of this important element will stunt and even kill plants.
It is feasible to aim for nitrate levels below 5ppm, however, especially as a temporary method to bring out the best colors for a photo shoot for example.
Pests and other problems
The most common issues with red plants are poor color, and we know this is often a result of incorrect light, CO2 supplementation, and nutrient levels. Let’s take a look at some of the problems you may encounter.
Unwelcome Guests
Pests like snails and planaria are often introduced to aquariums as stow-aways on new aquarium plants. These animals don’t typically affect the plants themselves, but can be a major headache for other reasons. The best way to avoid introducing these pests is to grow tissue culture plants that are produced in sterile conditions.
Hungry Herbivores
Some common aquarium fish will feast on your red plants too. The following species are the usual suspects:
Aquarium plants can die back pretty alarmingly when they are moved into different environments. This phenomenon is known as melting, and it is very common.
Often, the plants you buy were grown emersed (out of water), and being submerged underwater is a huge shock. The plant responds by getting rid of its old air-loving leaves and replacing them with new ones that are ready for life underwater. Most plants will bounce back pretty quickly, and all you need to do is remove all the dead, brown or dying leaves before it rots in your fish tank.
Another potential cause for melt is unstable parameters and poor water quality. Keeping up with regular aquarium maintenance is the best way to avoid this problem.
Algae
Algae often thrive under the intense lighting needed to create a vibrant red aquarium plant. Balancing your light, nutrients, and carbon dioxide (CO2) is the best way to manage this problem, but there are some other options too.
One of the best ways to combat algae is to have plenty of healthy, fast-growing plants to outcompete this common aquarium villain. If your planted aquarium is still young and growing, there are some other options too.
Algae-eating aquarium animals can do an awesome job of keeping your tank clean, and what’s more, they are amazing creatures in their own right! Fish like Otocinclus catfish, and inverts like Amano shrimp and nerite snails are the first species that come to mind, but check out my article on aquarium algae eaters for even more great options.
If you prefer to keep plants only, there are some great products available for managing the algae in your tank. The APT Fix algae treatment is ideal for spot treating any algae in the tank before it can grow into a headache.
Your local fish store is always worth checking out for aquarium plants. Always make certain, however, that the plants are correctly labeled.
For the most part, the best place to shop for a wide variety of red plants is online. Buceplant.com is one of the most trusted online aquarium plant retailers, and they stock an amazing range of the best red aquarium plants for your fish tank.
FAQs
Do you need CO2 for these types of Tank plants?
Not all red aquarium plants need injected CO2 to grow in the home aquarium. However, all of them will benefit from increased carbon dioxide, with faster and more robust growth.
Do they need more light?
Yes, most red aquarium plants need high lighting to look their best. There are always exceptions, but most species will require high, or at least moderate light to look their best.
How do you keep these a vibrant color?
To keep red aquarium plants red you will need to provide them sufficient light, nutrients, and carbon dioxide. Some plants also respond to very low nitrate levels by turning red.
What does red-light do for Tank greenery?
Red light can make red plants look even redder. The red part of the light spectrum helps plants grow tall and even is also known to stimulate flowering. On the other hand, too much red light can look unnatural, and even cause increased algae growth.
Do they need iron?
Red aquatic plants certainly need iron to grow healthy. Iron is one of the trace elements that all plants need, however, and it does not increase the red color in plants.
Final Thoughts
Red aquatic plants are often that X-factor that makes a good aquascape greatSure, they are an eye catching plant and can be a little needier than a green plant, but the results are worth it!
Do you love red plants as much as I do? If so, share your favorite red plant below. Happy aquascaping!
🌿 Want to learn more? This article is part of our complete Planted Tank & Aquascaping Guide. your ultimate resource for aquarium plants, aquascaping styles, substrates, and more.
The list of beginner-friendly saltwater fish is shorter than most people expect. That’s not a bad thing. It means you can build a beautiful, thriving reef without touching anything risky. I’ve kept saltwater tanks for over 25 years, including a 125-gallon reef I still run today. The most common mistake I see is not bad water chemistry. It’s buying the wrong fish first.
People walk into a fish store and fall for a powder blue tang or a mandarin dragonet and assume that if it’s on the shelf, it’s fair game for a new tank. It’s not. The fish store will sell it to you. That doesn’t mean you should buy it. Here’s the short list of species that will actually give you a fighting chance, and three that will cost you livestock and money before you’re ready.
Expert Take | Mark Valderrama, AquariumStoreDepot
After 25 years in this hobby and running a saltwater tank myself, my rule is simple: wait until your tank is at least 6 months old before adding anything beyond the basics. A new tank is not a stable system. Give it time, and the fish you want will do far better when you finally add them.
Before You Buy: The Tank Readiness Test
A saltwater tank needs to be fully cycled before any fish go in. Cycling takes 4 to 6 weeks minimum and cannot be rushed. Beyond that, a tank under 6 months old is still establishing its biological balance. Most of the fish on this list will tolerate a new tank fine. A few won’t. I’ll note which ones are more sensitive.
The new parameter you’re managing in saltwater is salinity. Keep it at 1.024 to 1.026 specific gravity (35 ppt). Evaporation concentrates salt, so you’ll top off with freshwater, not saltwater. An auto top-off (ATO) unit takes the guesswork out of this. Start with one and save yourself headaches.
Tank size matters more in saltwater than freshwater. A 40-gallon breeder is a solid starting point. A 60-gallon gives you more stability and more livestock options without the complexity of a large system. I don’t recommend starting smaller than 40 gallons unless you’re committed to very limited stocking and very consistent maintenance.
Avoid If…
Your tank is less than 6 months old and you’re eyeing sensitive species
You haven’t established a stable nitrogen cycle
You don’t have a quarantine tank ready for new arrivals
Your budget doesn’t include a refractometer, a quality skimmer, and live rock
You’re starting with a tank under 30 gallons
The Real Beginner Picks (And Why These Made the List)
Most beginner lists include 15 or 20 species. I’m giving you the honest short list: fish that are genuinely forgiving, widely available as captive-bred, reef safe, and won’t destroy your stocking plan once they establish territory.
Tier 2 (6+ Months Tank Age): Banggai cardinalfish, chalk bass, coral beauty angelfish, azure damselfish. Need a more established system or have specific stocking considerations.
Tier 3 (Experience Required): Yellow tang, yellow coris wrasse. Not impossible for beginners, but need larger tanks and more attention to nutrition and acclimation.
1. Ocellaris Clownfish (False Percula)
Scientific Name: Amphiprion ocellaris
Size: 3 to 4 inches (7.5 to 10 cm)
Tank Size: 20 gallons (76 L) minimum
Origin: Indo-Pacific
Captive Bred: Widely available
The ocellaris clownfish is the most beginner-friendly saltwater fish in the trade, and it earned that reputation legitimately. Tank-raised specimens are tough. They eat frozen food from day one, tolerate a wider range of parameters than wild-caught fish, and don’t need an anemone to thrive. The anemone pairing is optional and is not a beginner project.
There are dozens of captive-bred color morphs available now. Stick with standard ocellaris for your first tank. Once you understand the hobby, the specialty morphs are a fun next step. Add a bonded pair rather than two individuals, and do it early in the stocking process to minimize territory disputes.
Mark’s Pick
Ocellaris clownfish are my first recommendation for every saltwater beginner. Full stop. They’re the most forgiving fish in the marine trade, and tank-raised specimens are genuinely different from wild-caught. If you can only have one fish, this is it.
2. Royal Gramma
Scientific Name: Gramma loreto
Size: 3 inches (7.5 cm)
Tank Size: 30 gallons (114 L) minimum
Origin: Western Atlantic
Captive Bred: Rare but available
The royal gramma is half purple, half yellow, and costs under $20 at most shops. It’s reef safe, peaceful with dissimilar fish, and eats prepared foods readily. One caveat: royal grammas are territorial toward similar-looking fish. Don’t add a royal gramma and a dottyback to the same tank and expect peace. Add it first, establish its territory, and the rest of your stocking will go in without issue.
3. Banggai Cardinalfish
Scientific Name: Pterapogon kauderni
Size: 3 inches (7.5 cm)
Tank Size: 30 gallons (114 L) minimum
Origin: Banggai Islands, Indonesia
Captive Bred: Widely available
Banggai cardinalfish are slow-moving, deliberate, and nearly bulletproof once acclimated. They’re mouthbrooders and have been bred successfully in home aquariums, which makes them an interesting long-term project for beginners who get hooked. Keep a single fish or a mated pair. Multiples without a pair bond will fight.
4. Firefish Goby
Scientific Name: Nemateleotris magnifica
Size: 3 inches (7.5 cm)
Tank Size: 10 gallons (38 L) minimum
Origin: Indo-Pacific
Captive Bred: Available
Firefish are visually striking and peaceful, but they’re jumpers. A tight-fitting lid is not optional. They’ll bolt out of an open top when stressed. Keep this in mind from day one. They’re also shy at first and need rockwork to retreat to. Once comfortable, they’re consistently out in the open and one of the most active small fish you can keep.
5. Yellow Watchman Goby
Scientific Name: Cryptocentrus cinctus
Size: 4 inches (10 cm)
Tank Size: 20 gallons (76 L) minimum
Origin: Western Pacific
Captive Bred: Available
The yellow watchman goby is a great bottom-level presence. It spends most of its time near the substrate, excavating burrows and rearranging sand. Pair it with a tiger pistol shrimp (Alpheus bellulus) and you get one of the most interesting symbiotic behaviors in the hobby. The shrimp digs. The goby guards. They share a burrow and look out for each other. It’s genuinely entertaining to watch.
6. Tailspot Blenny
Scientific Name: Ecsenius stigmatura
Size: 2.5 inches (6 cm)
Tank Size: 10 gallons (38 L) minimum
Origin: Philippines
Captive Bred: Available
The tailspot blenny is underrated. Reef safe, algae-grazing, peaceful, and full of personality. It perches on rocks and corals, watches the tank, and adds activity to the mid-level of the aquarium. A better choice than many blenny species because it stays small and doesn’t nip at corals. It’s my go-to recommendation for filling the blenny slot in a beginner reef.
7. Chalk Bass
Scientific Name: Serranus tortugarum
Size: 3 inches (7.5 cm)
Tank Size: 30 gallons (76 L) minimum
Origin: Western Atlantic
Captive Bred: Available
The chalk bass is not a flashy fish. Blue-white body, red-striped dorsal, understated. What it offers is rock-solid hardiness, reef compatibility, and interesting group behavior. You can keep small groups together, which is rare for bass-type fish. They’re shy initially but settle in quickly. If you want something a little different from the standard clownfish-gramma-goby trifecta, chalk bass are worth considering.
8. Azure Damselfish
Scientific Name: Chrysiptera hemicyanea
Size: 3 inches (7.5 cm)
Tank Size: 30 gallons (114 L) minimum
Origin: Indo-Pacific
Captive Bred: Available
Damsels need a separate conversation. Most damselfish are a trap: incredibly hardy, cheap, and beautiful, but aggressive enough to wreck your stocking plan once they’ve claimed territory. The azure damsel is the least aggressive of the commonly available damsels, but “least aggressive” is relative. Don’t stock it with slow-moving, timid fish. Don’t add it first and expect to add peaceful fish after. It works best in tanks with other active, assertive species that can hold their own.
Three-spot and yellowtail damsels are even more aggressive and I don’t recommend them for community tanks at all.
9. Coral Beauty Angelfish
Scientific Name: Centropyge bispinosa
Size: 4 inches (10 cm)
Tank Size: 70 gallons (265 L) minimum
Origin: Indo-Pacific
Captive Bred: Available
The coral beauty is one of the few dwarf angels I’d recommend to a beginner, but only in tanks 70 gallons or larger. It needs grazing space and algae on the rockwork. It’s been labeled reef safe with caution, meaning most don’t nip corals, but individual fish sometimes do. Tank-bred specimens are significantly more reliable than wild-caught and acclimate far better to prepared foods. Get tank-raised if you can find them.
10. Yellow Tang (Tank-Raised)
Scientific Name: Zebrasoma flavescens
Size: 8 inches (20 cm)
Tank Size: 125 gallons (473 L) minimum
Origin: Pacific Ocean
Captive Bred: Now widely available
The yellow tang is an active, personality-driven fish that needs real estate. A 125-gallon tank with open swimming space is the minimum I’d recommend. Tank-raised yellow tangs have changed the accessibility of this species significantly. They eat prepared foods, acclimate well, and are far hardier than wild-caught. They’re grazers that need algae and nori regularly. Skip this fish if your tank is under 100 gallons.
Three Species Beginners Should Leave at the Store
The fish store will have these. The signage will say they’re beautiful. They are. That’s not the problem.
1. Hippo Tang (Blue Tang)
Scientific Name: Paracanthurus hepatus
Size: 12 inches (30 cm)
Tank Size: 180 gallons (680 L) minimum
People buy hippo tangs because of the Pixar film and because they’re sold as juveniles the size of a silver dollar. Within a year, they need 6 feet of linear swimming space. They’re also prone to ich and lateral line erosion when stressed. A hippo tang in a 75-gallon tank is not thriving. It’s declining slowly. This is one of the most commonly mistreated fish in the saltwater hobby.
2. Mandarin Dragonet
Scientific Name: Synchiropus splendidus
Size: 3 inches (7.5 cm)
Tank Size: 30 gallons (114 L), mature system required
The mandarin dragonet is arguably the most beautiful marine fish in the trade. It’s also one of the hardest to keep alive. Wild-caught mandarins eat only live copepods and amphipods. That means your tank needs a mature, dense copepod population at all times, or you need a separate refugium producing them continuously. Captive-trained mandarins that accept frozen food exist but are rare and more expensive. This is not a fish for a tank under 12 months old.
3. Copperband Butterflyfish
Scientific Name: Chelmon rostratus
Size: 8 inches (20 cm)
Tank Size: 125 gallons (473 L) minimum
The copperband butterfly is sold as an Aiptasia (pest anemone) controller. It sometimes eats Aiptasia. It also often starves, because its primary diet in the wild is small invertebrates that it picks out of crevices with its elongated snout. They rarely adapt to prepared foods and tend to decline in tanks without a significant live rock community and careful target feeding. Even experienced hobbyists lose these fish.
Beginner vs. Expert Species Comparison
Fish
Tank Size
Reef Safe
Captive Bred
Beginner Verdict
Ocellaris Clownfish
20 gal (76 L)
Yes
Widely
Start here
Royal Gramma
30 gal (114 L)
Yes
Rare
Excellent choice
Banggai Cardinal
30 gal (114 L)
Yes
Widely
Excellent choice
Firefish Goby
10 gal (38 L)
Yes
Yes
Lid required
Yellow Watchman Goby
20 gal (76 L)
Yes
Yes
Excellent choice
Azure Damselfish
30 gal (114 L)
Yes
Yes
Watch aggression
Yellow Tang
125 gal (473 L)
Yes
Yes
Large tank only
Hippo Tang
180 gal (680 L)
Yes
Yes
Avoid for beginners
Mandarin Dragonet
30 gal (114 L)
Yes
Rare
Expert only
Copperband Butterfly
125 gal (473 L)
With caution
Rare
Avoid for beginners
What People Get Wrong About Saltwater for Beginners
The biggest misconception is that any fish sold at the store is suitable for a new tank. It isn’t. The second biggest misconception is that damsels are the ideal beginner fish because they’re hardy. Hardy, yes. Ideal, no. I’ve seen three-spot damsels terrorize everything in a 75-gallon tank. They claim territory and they don’t share. By the time you want to add nicer fish, the damsel has already decided the tank belongs to it.
The third mistake is not running a quarantine tank. Ich is endemic in the saltwater trade. A fish that looks healthy at the store can crash your entire display tank within two weeks. A simple 20-gallon quarantine with a heater and filter costs very little compared to replacing a full stocking list.
Should You Start a Saltwater Tank?
Good fit if:
You’ve kept freshwater tanks successfully and want the next challenge
You have a budget for quality equipment (skimmer, RO/DI water, live rock)
You can commit to consistent water changes and parameter testing
You’re starting with a 40-gallon tank or larger
You’re patient: saltwater tanks reward patience more than freshwater
Avoid if:
You’re hoping to set it up and check on it once a week
Your budget is tight and you can’t absorb the cost of losing livestock
You’re starting with a tank under 30 gallons and want a variety of fish
You want to buy the fish first and figure out the tank later
FAQs
What is the easiest saltwater fish to keep?
The tank-raised ocellaris clownfish is the easiest saltwater fish to keep. It accepts frozen food readily, tolerates a wider range of parameters than most marine fish, and doesn’t need an anemone to thrive. It’s forgiving of beginner mistakes in a way that few saltwater fish are.
How long should a saltwater tank cycle before adding fish?
Minimum 4 to 6 weeks for cycling. Beyond that, I recommend waiting until the tank is at least 3 to 6 months old before adding sensitive species. A mature tank is a stable tank, and stability is what saltwater fish need.
Are damsels good beginner saltwater fish?
Most damsels are too aggressive for a community reef. They’re hardy, yes, but that hardiness comes packaged with serious territorial aggression. The azure damsel is the least problematic option. Three-spot, yellowtail, and domino damsels cause problems in most tanks. If you want a hardy beginner fish, start with a tank-raised clownfish instead.
Do I need a quarantine tank for saltwater fish?
Yes. Saltwater fish are highly susceptible to ich and other parasites. A quarantine tank lets you treat new arrivals before they go into your display, preventing a full tank crash. A basic 20-gallon setup with a heater and sponge filter is all you need.
What tank size is best for a beginner saltwater setup?
A 40-gallon breeder or 60-gallon tank is ideal. Both hold enough water volume to buffer against parameter swings, fit standard equipment, and allow a reasonable stocking list. Smaller tanks are possible but require more consistent maintenance and offer fewer stocking options.
Closing Thoughts
Saltwater is one of the most rewarding things you can do in this hobby. The fish are stunning, the ecosystems are complex, and when it all comes together, there’s nothing quite like it. But the hobby has real stakes. Wrong fish choices early on don’t just cost you the fish. They cost you the stocking plan you wanted to build.
Start with tank-raised clownfish, a royal gramma, a firefish, and a watchman goby. Let the tank mature. Add the harder species later, when you understand how your system responds to change. That’s not the slow path. That’s the path that actually works.
If you’re ready to stock up, both Flip Aquatics and Dan’s Fish are reliable sources for healthy, well-conditioned marine fish shipped directly to your door.
🐠
Before you go — free aquarium tips!
Get Mark's weekly fish & reef guides. No fluff, no spam — just real hobby experience from 25+ years in the tank.

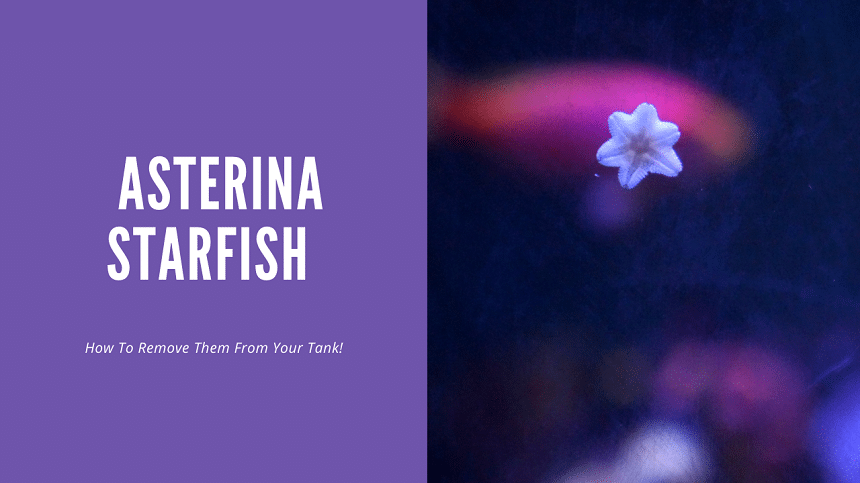


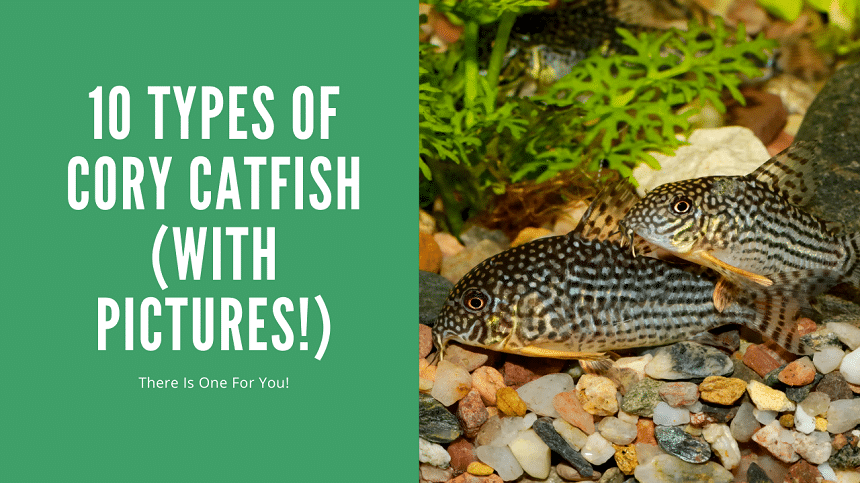
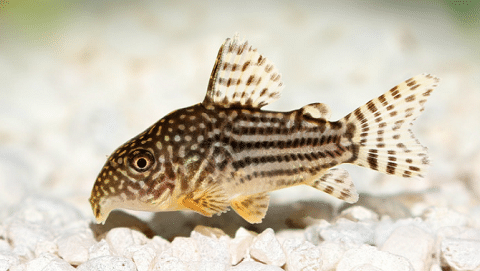
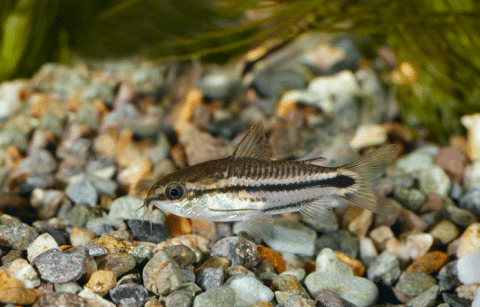
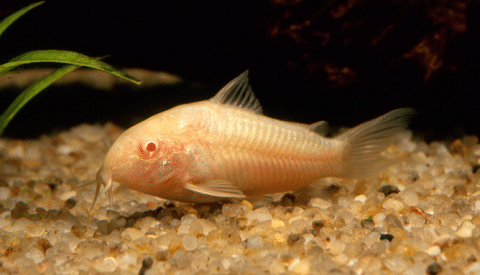

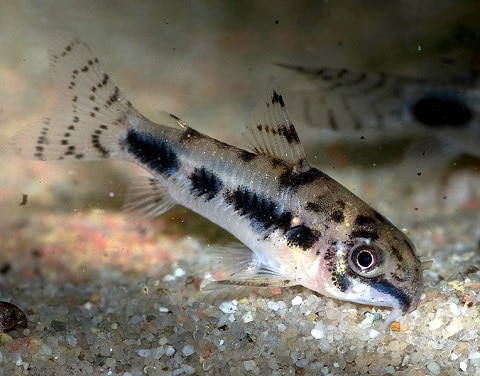

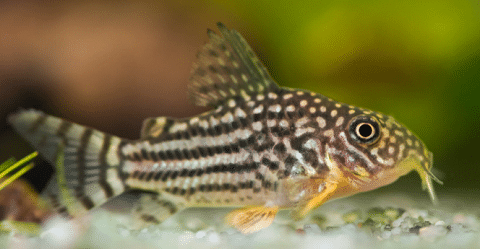
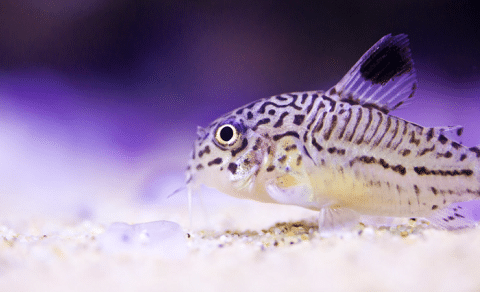


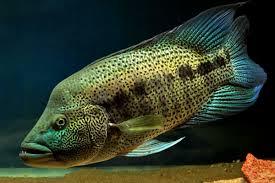
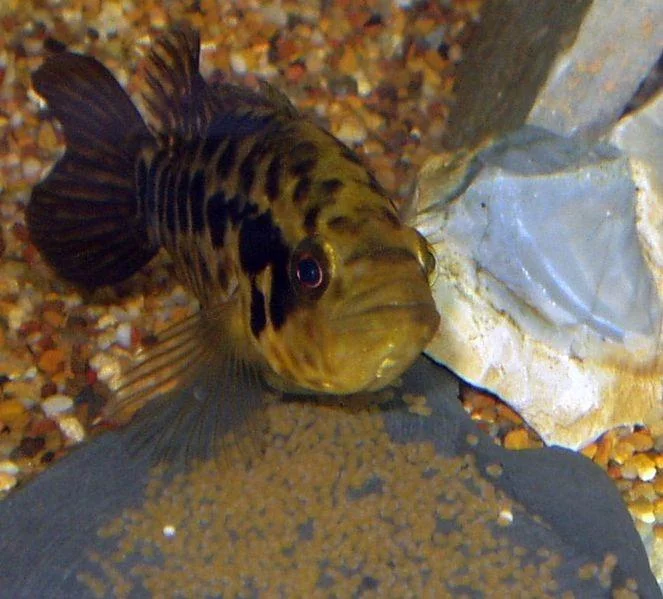
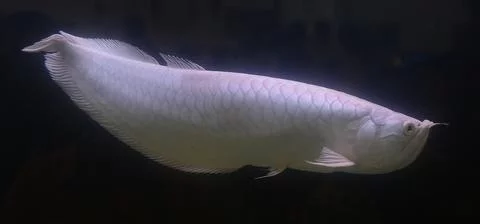
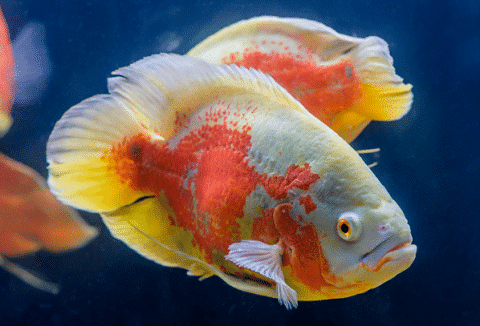

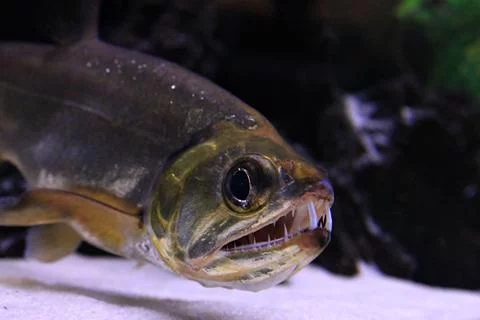
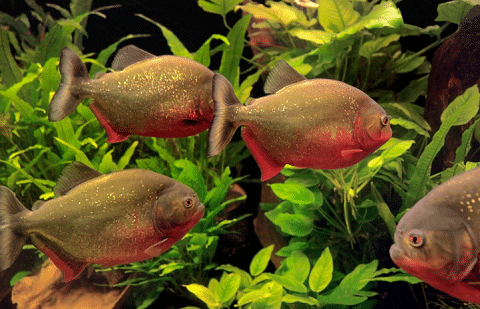


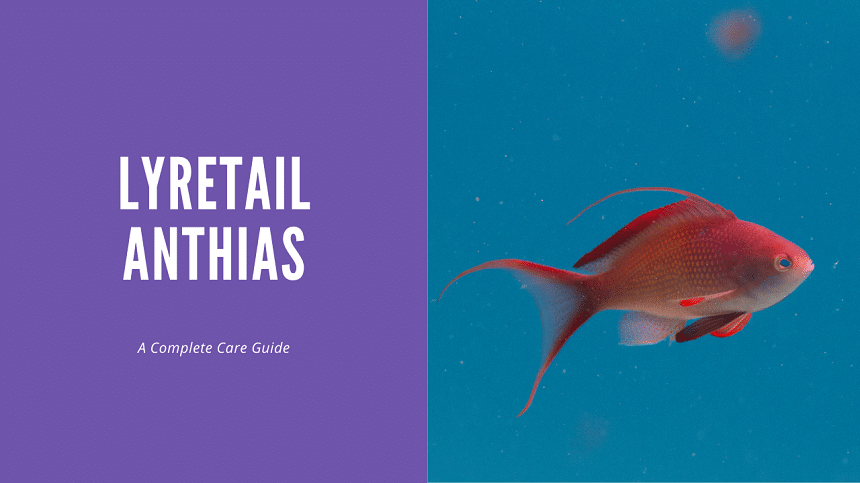
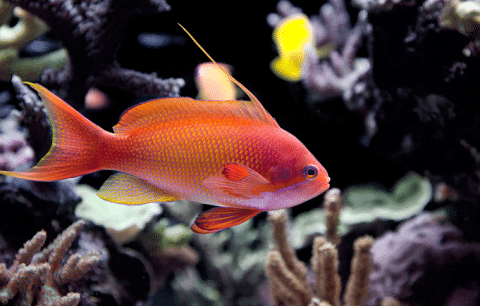
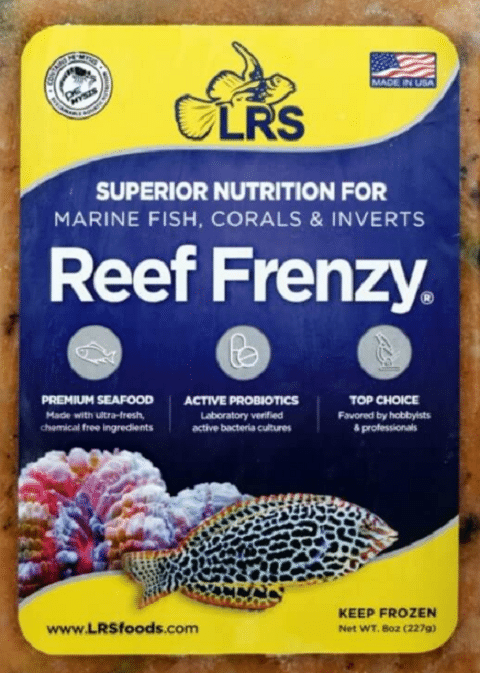

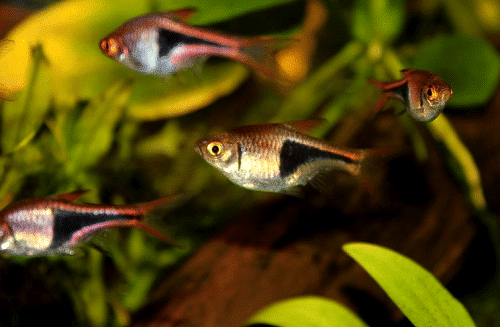
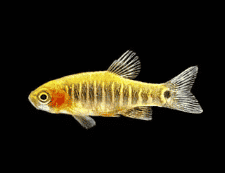
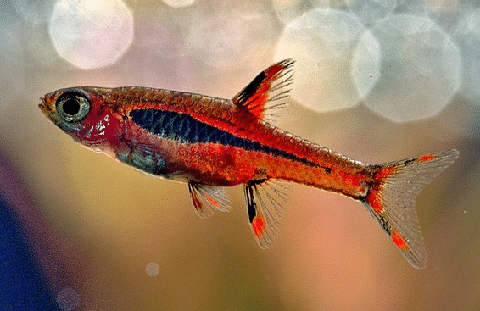
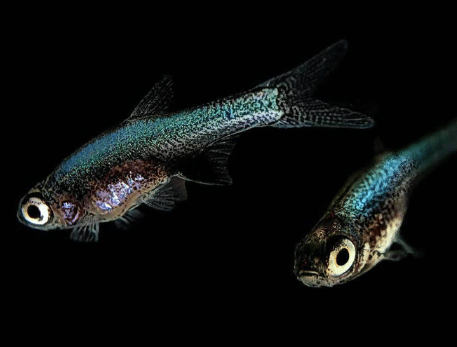


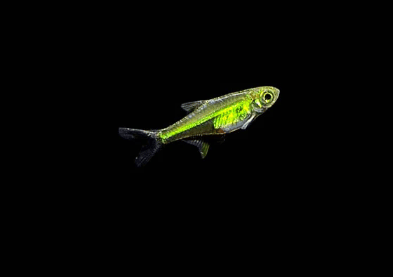
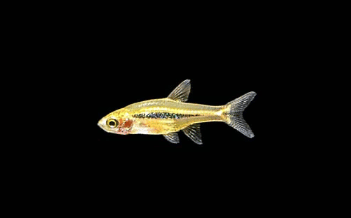
 Scissortail Rasbora in Planted Tank” class=”wp-image-552942″/>
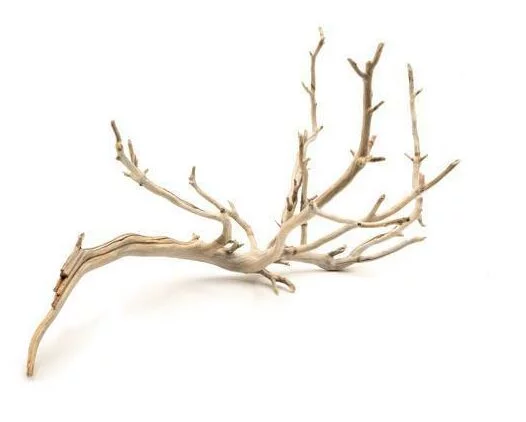


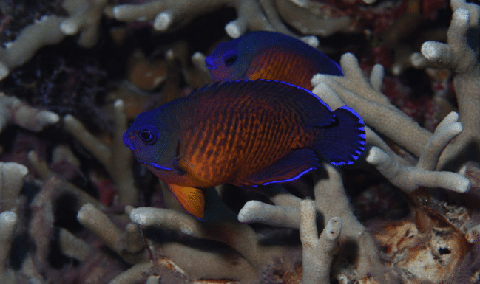


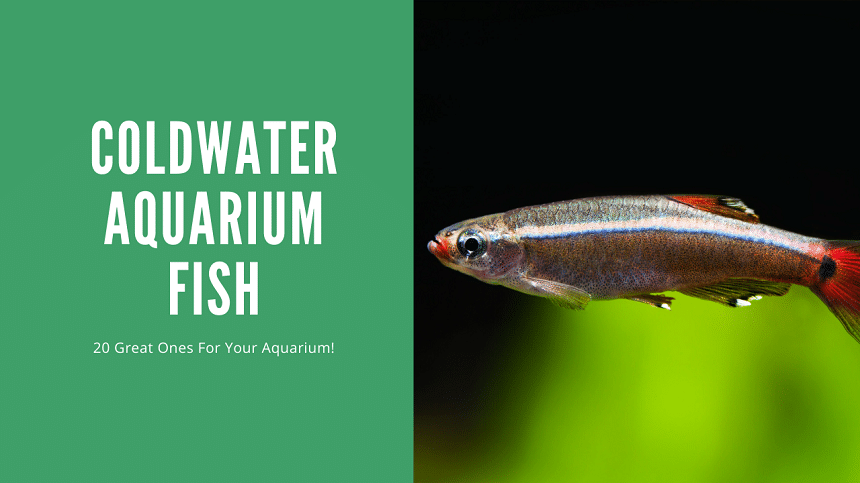


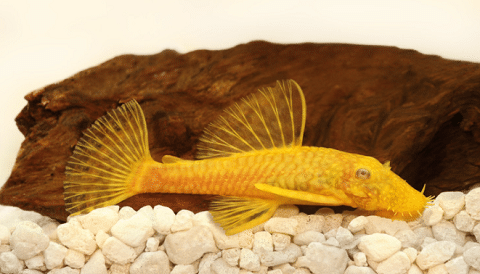
 Gold Tetra in Aquarium” class=”wp-image-552736″/>