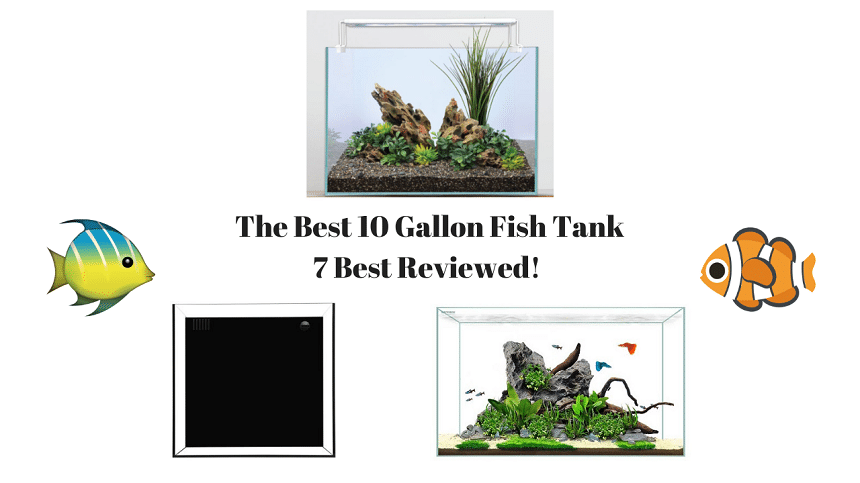
The 10 gallon is probably the most popular beginner tank size in the hobby. it’s widely available, affordable, and gives you just enough room to create something interesting. I’ve owned 10 gallon tanks at various points over 25 years and have watched the quality of all-in-one kits improve dramatically. They work great for bettas, small community setups, shrimp, and easy planted tanks. The main thing to know is that not all 10 gallon tanks are equal. filtration quality and build durability vary a lot between the budget options and the better kits.
Mark’s Expert Take
The 10-gallon is the most popular tank size I sold in 25 years of retail, and it’s also the most commonly returned. That’s not a coincidence. It’s enough room to build something meaningful, but small enough that mistakes compound fast. A cycled 10-gallon with a proper stocking plan is a great beginner tank. An uncycled 10-gallon stuffed with fish from a big-box store is a death sentence. I’ve seen both versions hundreds of times. The tank is not the problem. The setup and stocking decisions are.
Mark Valderrama, AquariumStoreDepot.com | 25+ years in the hobby
What Is The Best 10 Gallon Aquarium (Our Criteria)
I’ve owned 10 gallon aquariums and see the evolution in the industry. There are simple aquariums and fully decked out all in one systems. Here is what I used to determine the best.
Why Ranking #1 Matters for a 10-Gallon Tank
Not all 10-gallon tanks are built the same. Here’s what I weigh when separating the best from the rest:
- Glass vs. acrylic clarity: Glass stays crystal clear for years. Acrylic scratches easily and yellows over time.
- Included filtration quality: Does the kit filter actually cycle properly, or is it a cartridge trap that locks you into expensive media replacements?
- Heater wattage: A 10-gallon needs 50 to 100 watts. Undersized heaters fail to hold temp when ambient drops.
- Lid gap: Small fish are escape artists. Bettas especially. A lid with large gaps around cables is an accident waiting to happen.
- Build quality: Rimless tanks at this size should still have clean seams and thick enough glass not to bow under water pressure.
- Customer support and warranty: Leaks happen. Companies that stand behind their product are worth the price premium.
Why Ranking #1 Matters for a 10-Gallon Tank
Not all 10-gallon tanks are built the same. Here’s what I weigh when separating the best from the rest:
- Glass vs. acrylic clarity, Glass stays crystal clear for years. Acrylic scratches easily and yellows over time.
- Included filtration quality, Does the kit filter actually cycle properly, or is it a cartridge trap that locks you into expensive media replacements?
- Heater wattage, A 10-gallon needs 50 to 100 watts. Undersized heaters fail to hold temp when ambient drops.
- Lid gap, Small fish are escape artists. Bettas especially. A lid with large gaps around cables is an accident waiting to happen.
- Build quality, Rimless tanks at this size should still have clean seams and thick enough glass not to bow under water pressure.
- Customer support and warranty, Leaks happen. Companies that stand behind their product are worth the price premium.
Aquarium Layout
Everyone wants a rimless aquarium. I’m primarily going to be looking at this style of fish tank because you can rimless tanks at this size at an affordable price. It’s way too easy to point out a discount fish tank kit. You didn’t come here for that, you came here for high quality and style.
Filtration
Several of these aquariums are going to be all in one tanks compete with a 3 stage filtration system. For kits, I want to make sure I find a glass aquarium kit with a decent starter filter that you won’t outgrow or will fall apart on you. If it is a basic fish tank, I want to make sure it’s the right dimensions to allow for multiple filter setups.
Lighting
Some of these aquariums will come with lighting systems. If they do, I want to lean on systems that can support low light aquarium plants if they are designed for freshwater tanks or soft corals if they are designed for saltwater.
Price
Price is always a factor in any aquarium build. I’m looking at a price of aquariums here from high end to the most basic. If it’s priced high, I want to make sure it has premium features like being rimless or including a good light. If it is priced low, I want to make the aquarium will last.
Buy or Skip?
Buy a quality 10-gallon if you’re setting up:
- A betta tank (10 gallons is the real minimum, not 5)
- A small community with nano fish, shrimp, or a single pair of dwarf cichlids
- A planted tank where you want clean lines without a heavy footprint
- A quarantine or grow-out tank that pulls double duty
Skip the all-in-one kit if it has:
- A cartridge-only filter (you’ll spend more on media than the tank cost)
- A cheap plastic heater with no thermostat
- A light barely bright enough to support Java moss
- No customer support worth calling
Upgrade the filtration on any all-in-one kit that uses cartridge-only filtration. It’s the single most important change you can make.
The 10 Gallon Aquarium Candidates
Below is the list of aquariums that made the cut. They are from various price ranges and cover both freshwater and saltwater tanks. I’ll go over each one in detail.
In a hurry? I recommend Serene Aquariums!
| Picture | Name | Features | Link |
|---|---|---|---|
|
Editor’s Choice
|
Serene Aquarium |
|
Click For Best PriceBuy On Amazon |
|
Best Value
|
Waterbox 10 CLEAR Mini |
|
Click For Best Price |
|
Budget Option
|
Aqueon 10 Gallon Aquarium Kit |
|
Buy On AmazonBuy On Chewy |
 |
Water Box Nano |
|
Click For Best PriceBuy On Amazon |
 |
Fusion Pro 10 |
|
Click For Best PriceBuy On Amazon |
 |
Dennerle 10G Shrimp Tank |
|
Click For Best PriceBuy On Amazon |
 |
Aqueon 10 Gallon Tank |
|
Buy On PetcoBuy On Amazon |
The 7 Best (2023 Reviews)
You have seen the list, now it’s time to learn more about each fish tank. Let’s look at each one below.
1. Serene Aquariums
Mark’s Top Pick
Serene Aquarium
This is the tank I’d put in front of any first-time aquascaper. The frosted background hides cords and equipment clutter, the rimless design looks clean from every angle, and it ships with dragonstone rock so you’re not starting from zero. The included light handles low to medium light plants without complaint. You’ll still want to add a quality sponge filter or small canister, but the tank itself is built right. No flex, no cheap seams, and the glass clarity holds up over time. It’s the upgrade beginners don’t know they need until they’ve used one.

Serene Aquarium
The perfect first time aquascaper tank. Comes with dragonstone rock. Just add filtration and plants!
Current USA’s Serene aquariums are a new entrant into rimless aquariums, but it’s one of the best freshwater focused kits you can buy today. What I love the most about this aquarium is they design it so you can have a low maintenance tank. It comes with a frosted background that is backlit. This is a feature you don’t get with any fish tank manufacturer. In fact, to get similar, you would have to purchase a background and lighting system from ADA, which is as much as this tank! The frosted background is the perfect color for freshwater aquascapes.
The light that comes with this aquarium is Current USA’s Serene line. While it is not the Pro RBG light, it is still good enough to grow lots of low light plants. The Serene light has a ton of features. See the video below from Current USA to see some of the features below.
This is a rimless aquarium with a very good price. You get a 13 gallon fish tank (yes, it’s slightly better than 10 gallons, but I felt it’s close enough to be on this list), the Serene light, a frost background, and you even get some decorations. This aquarium is a stand-alone tank that is a better quality offering than some of the all-in-one aquariums you will see like the Waterbox or Innovative Marine. It is also designed for freshwater aquascaping versus reef tanks.
Current USA has several aquascaping packages to choose from. The one I linked to is the dragonstone package. They also have a Manzanita and a planted package. You can chose these other packages and get the aquascaped look without live plants.
The main cons with this package is the price. It is on the pricey side, but there also is a nice 15% offer you can get from me to help with the price (use offer code ASD15).It is also missing a filtration unit. I would either use a canister filter or opt with OASE’s Bioplus Thermo. It’s a great buy and highly recommended!
Best For, Freshwater Tanks, Aquascapes
- Comes with light
- Frosted background
- Comes with decor
- Expensive
- Light is best for low light plants
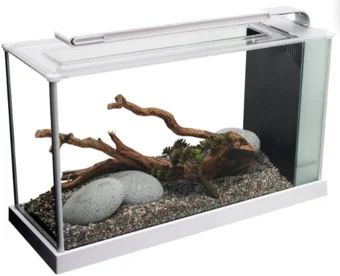
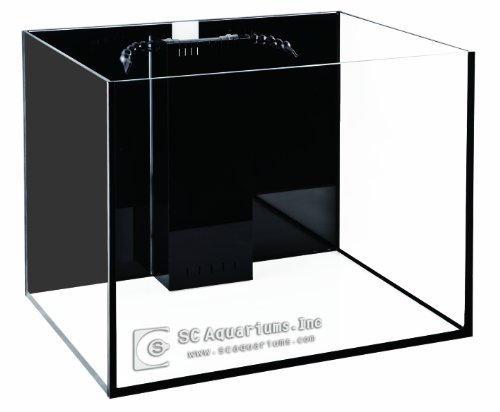
2. Waterbox 10 CLEAR Mini

Waterbox 10 Mini
The Waterbox 10 Mini offers a great rimless tank at a great price. Perfect for a mini aquascape!
When you are looking for a rimless aquarium only, the Waterbox 10 Mini offers an excellent price to get into a high clarity fish tank. Waterbox is really putting in efforts to penetrate the freshwater hobby with this well priced package. They are well known for their great all in one aquariums that comes with aquarium sumps and easy to install plumbing.
The CLEAR aquarium is roughly the same dimensions as your standard 10 gallon tank. The straight edged silicone gives the glass aquarium a seamless look. You won’t see ugly silicone on the edges of your aquarium or a plastic rim. The aquarium comes with a self leveling mat, so you do not need to purchase your own. Waterbox also offers cabinets, though they pretty expensive. The Serene offers more equipment, a background, and decorations, but the CLEAR is cheaper and gives you the freedom to buy your own gear.
In looking at the Clear aquarium, I like the design and simplicity. I prefer this name brand over similar offerings I’ve found on Amazon, and the customer support with Waterbox is pretty responsive in my opinion.
If you are looking for a pure rimless aquarium with a great brand behind it, this is the aquarium to get. It is more expensive as a traditional rimmed tank, but it looks a lot better and well suited for planted tanks.
- Rimless
- Good price
- Quality brand
- Tank only
- No background
Best For, Freshwater Tanks, Aquascapes
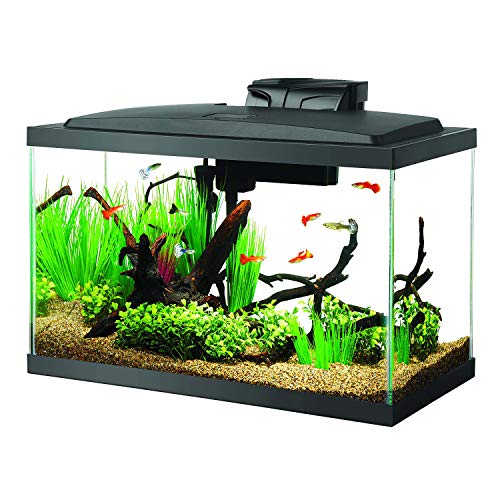
3. Aqueon 10 Gallon Aquarium Kit
It would be really easy for me to place Aqueon’s standard 10 gallon tank as the budget pick here, but I felt Aqueon’s aquarium starter kit is a great budget option. This is because Aqueon takes the guesswork away from select equipment and most of the equipment they offer in the package is pretty good.
The package comes with the standard fish tank, a hood with standard LED light, Aqueon’s power filter, a heater, a fish net, themometer, water conditioner, and some sample fish food. You save a bit of money purchasing this package over buying everything separately. I feel the overall quality of the package is better than most other 10 gallon glass aquarium kits, including the Marina led aquarium kit, Tetra’s, and generic brand competitors.
The main separator between Aqueon’s offering and the others is the power filter. Aqueon’s filter is a true 3 stage filter and as a feature that tells you when you should change the filter cartridge. The hood is good, though not ideal for planted tanks. The heater is decent in quality. I’ve personally used these heaters for quarantine tanks and never had an issue. The main thing I don’t like about the preset heater is that you can’t adjust it, it is designed to keep temperatures at 78 degrees.
Overall, this is a great fish only starter package if you are looking for good equipment and stress free selection.
- Complete kit
- Good price
- Quality brand
- Rimmed tank
- Okay heater
Best For, Freshwater Tanks
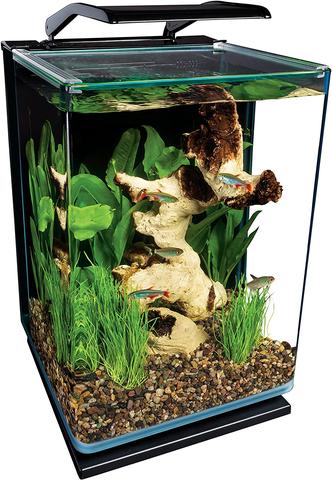
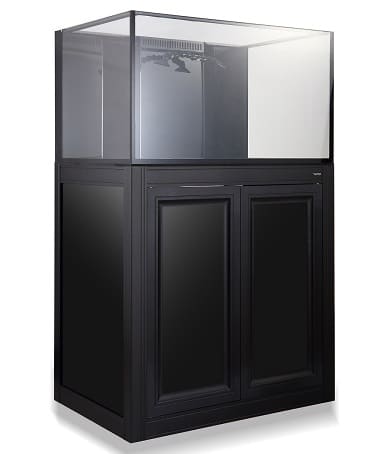
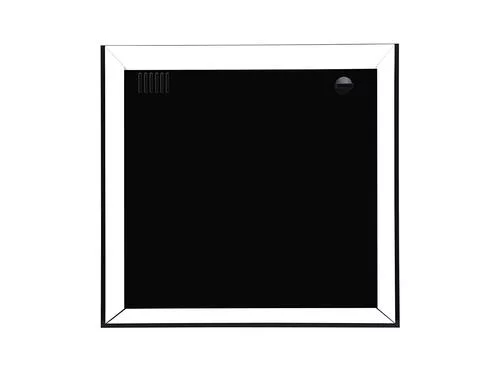
4. Water Box Nano
Waterbox Nano
A classy rimless nano reef tank that won’t break the bank! Great design with a well design all in one chamber
Are you looking for a nano reef tank? If so, The Water Box Nano is an excellent choice at the 10 gallon aquarium size. This all-in-one fish tank offers a built in filtration system, return pump, black background, and rimless style aquarium.
The cubed dimensions of this aquarium allow for more aquascaping space then a regular 10 gallon. The built in filtration unit is large enough to house an auto top off system and aquarium heater. In my personal experience with dealing with this tank, they are prefer for softy nano reef setups. The filtration is basic enough for them and a simple lighting fixture is all you need.
There are a few things here that could be improved. The return pump isn’t that great and the price is on the higher end. However, if you want a better return pump, you can opt for the next option below.
- Great all in one filter
- Rimless
- Built for nano reefs
- Okay return pump
- Expensive
Best For, Nano Reef Tanks
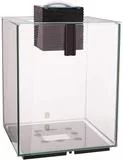
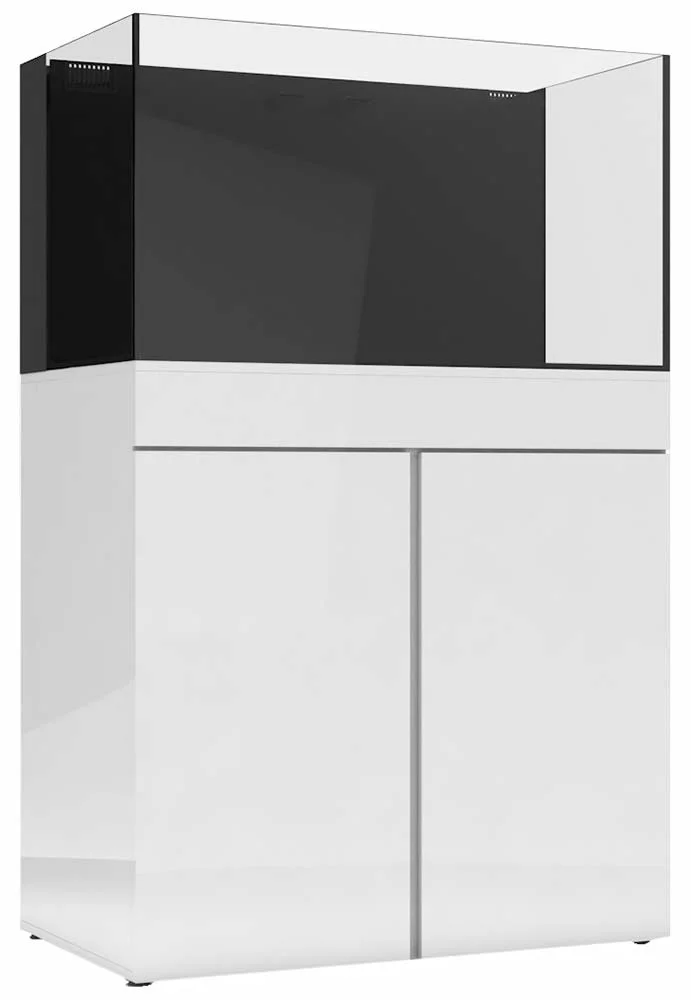
5. Innovative Marine Fusion Pro 10
Fusion Pro 10
A great all in one tank designed for saltwater. Comes with a high quality DC return pump
Innovative marine is the originator of the modern all in one nano aquariums you see in the saltwater tank hobby. This Fusion Mini is their latest line of aquariums and really comes in offering premium features. It comes with a mesh lid and micro glass cleaner to keep your fish from jumping and algae a breeze to scrape. It has superior features, build quality, and a higher price compared to the Waterbox.
The return pump included is Innovative’s Might Jet DC pump. This DC pump is one of the best DC pumps you can put into a nano reef tank. With its adjustable features, you can adjust the flow to suit whatever corals you plan to keep.
This package is what I call a premium package and commands a premium price. It’s the most expensive fish tank on this list. If you are looking or the best nano reef tank at this size, this is the aquarium to purchase. My personal recommendation is purchase this over the Waterbox if you want more than soft corals. I’ve worked on LPS and mixed reef tanks from this line and seen plenty of successful setups.
- Manufacturer designs upgrades for tank
- Rimless
- Built for nano reefs
- Expensive
Best For, Nano Reef Tanks
6. Dennerle Shrimp Aquarium
Dennerle 10G Shrimp Tank
A great shrimp tank package. One of the few shrimp tanks equipped with a power filter!
Looking for a freshwater shrimp tank? If so, this 10 gallon tank by Dennerle is a great option for a larger shrimp tank. This is aquarium is built for the purpose of keeping shrimp. Starting with the Eckfilter internal filter, this gentle filter can keep your fish tank clean while keeping your shrimp safe. The filter is simple, making it easy to clean and maintain. It also comes with a LED light with a color output of 6500K. While it is not the best-planted tank LED, it is adequate for low-light plants.
The aquarium itself is a rimless tank that is a bit wider than your standard ten-gallon aquarium. This allows you to play with the depth space and give your shrimp more space to run around in. The aquarium is built as a curved corner glass tank. Keep this in mind as this can give an odd look when looking at the corners.
My affiliate partner, Flip Aquatics loves these tanks for his customers. It offers a simple yet effective setup. This is a great tank if you are looking for a shrimp-only tank. If you are looking to build a community tank that includes freshwater shrimp, consider the Serene instead. They are more expensive to set up over the Dennerle, but you get a higher-quality glass tank and the option of installing better filtration.
Overall, the Dennerle, with its Eckfilter and LED lights great option for shrimps and offers a great overall value for everything it comes with. It has the functionality, is built for shrimps, and has better looks than rimmed glass aquariums. It’s a great first shrimp tank.
- Built for freshwater shrimp
- Gentle filter
- Good price
- Not good for community tanks
- Expensive
Best For, Freshwater Shrimp Tanks
What Cheap Plastic Starter Kits Get Wrong
I’ve seen the inside of enough fish stores to know what kills beginner fish. It’s not the fish. It’s the kit. Here’s what budget plastic starter kits consistently miss:
- Undersized filtration, A filter rated for 10 gallons on the box is usually rated for 10 gallons of empty water, not a tank with fish, substrate, and decoration displacing volume.
- Cheap heaters with no thermostat accuracy, These run hot or cold, not the temperature printed on the dial. I’ve seen them swing 5 degrees off and cook fish.
- Cartridge filter lock-in, The business model is the replacement cartridge. You toss the beneficial bacteria colony every time you swap the cartridge. That’s a nitrogen cycle reset in a box.
- Weak lid design, Gaps around the filter intake and heater cord are a betta escape route. Small fish jump. Assume they will.
- Light bars that can’t grow anything, Low-output strip lights look fine in the store and won’t keep a java fern alive under water.
What Cheap Plastic Starter Kits Get Wrong
I’ve seen the inside of enough fish stores to know what kills beginner fish. It’s not the fish. It’s the kit. Here’s what budget plastic starter kits consistently miss:
- Undersized filtration: A filter rated for 10 gallons on the box is rated for 10 gallons of empty water, not a tank with fish, substrate, and decoration displacing volume.
- Cheap heaters with no thermostat accuracy: These run hot or cold, not the temperature printed on the dial. I’ve seen them swing 5 degrees off and cook fish.
- Cartridge filter lock-in: The business model is the replacement cartridge. You toss the beneficial bacteria colony every time you swap the cartridge. That’s a nitrogen cycle reset in a box.
- Weak lid design: Gaps around the filter intake and heater cord are a betta escape route. Small fish jump. Assume they will.
- Light bars that can’t grow anything: Low-output strip lights look fine in the store and won’t keep a java fern alive under water.
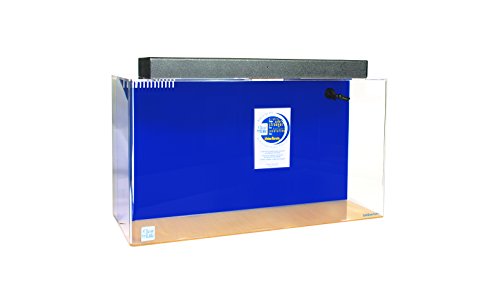
7. Aqueon Ten-Gallon Aquarium
I left this aquarium for last. This is the aquarium you will typically see when you go to Petco or Petsmart’s dollar-per-gallon sale. While the price may be great at first impression, you can actually end up spending more than the Aqueon glass aquarium kit to build out a suitable system.
I included the links to go purchase this if you want. It’s cheap and Aqueon aquariums should last a long time. It is longer than most all-in-one aquariums (20” L x 10” W x 12” H).
It’s just not my first choice for building out a good-looking display tank. If you are looking for a classy rimless tank or want to do a premium setup, consider going with the other tanks on the list.
That’s not to say you can’t build a great-looking setup with this over the Serene tank. I’ve built plenty of great 10 gallon setups using these tanks from aqueon including community fish and betta fish tanks.
- Cheap
- Easy to Find
- Standard Dimensions
- Rimmed Tank
- Bare bones
Best For, Freshwater Tanks
What Fish Can I Get For A 10 Gallon Fish Tank?
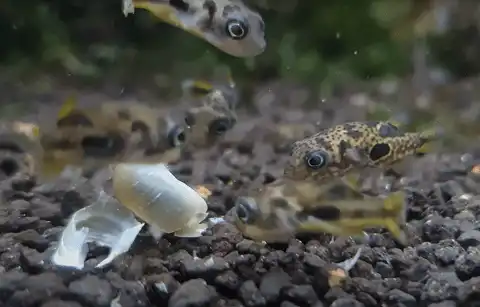
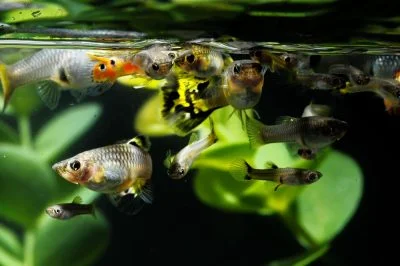
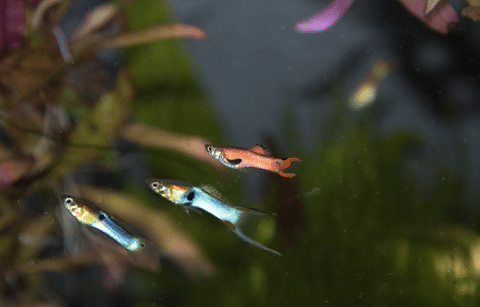
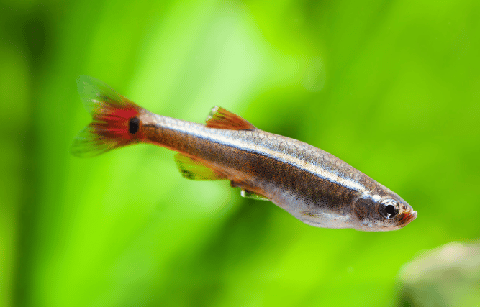
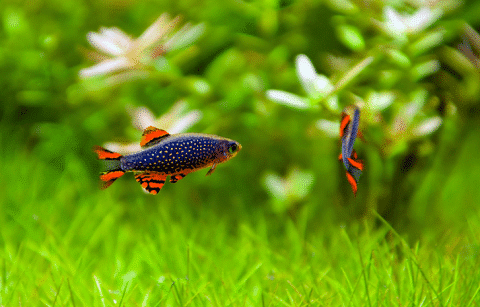
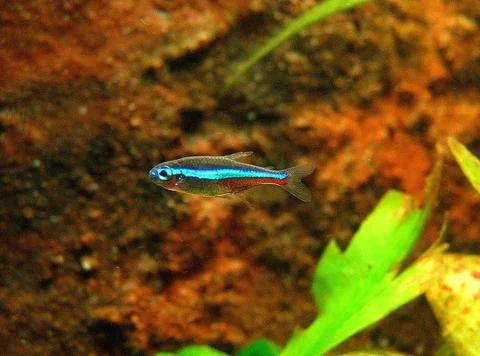
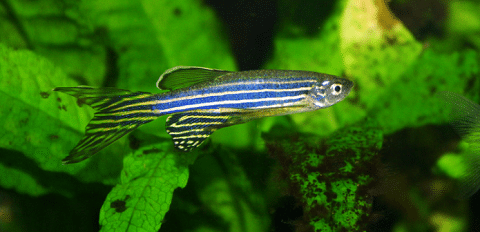
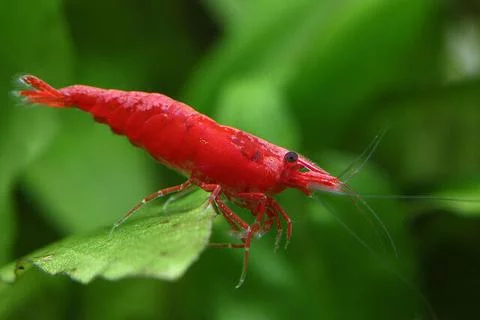
A common question when purchasing an aquarium at this size is what type of fish species can you put in these tanks. The preferred options would be nano fish like the following:
- Guppy fish
- Rasboras
- Danios (White Cloud Minnows are great cold water fish)
- Small Tetras
- Freshwater Pea Puffers
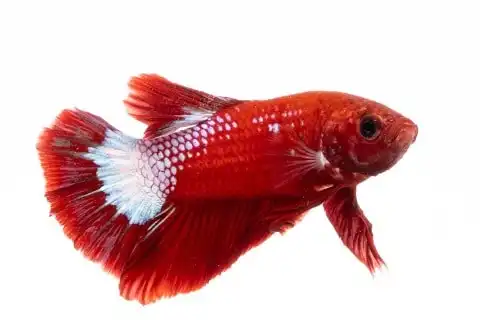
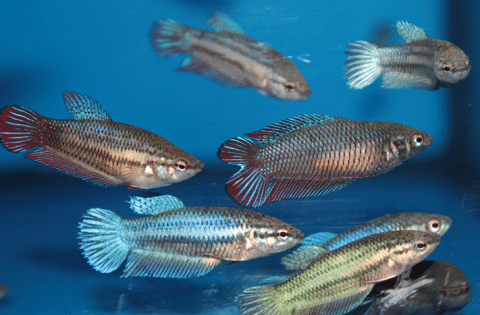
If you want the most stunning fish you can buy at 10 gallon aquariums, I would recommend a betta fish. The link below is from Glass Aqua, which favors Plakat Betta fish. These types of betta are the best to purchase for larger tanks because they are more active, hardy, and can compete for fish food from other fish tank mates.

Betta Fish
Use Coupon Code ASDFISH at Checkout
Betta Fish are a top beautiful varieties of freshwater fish available in the hobby. Easy to care for with plenty of varieties!
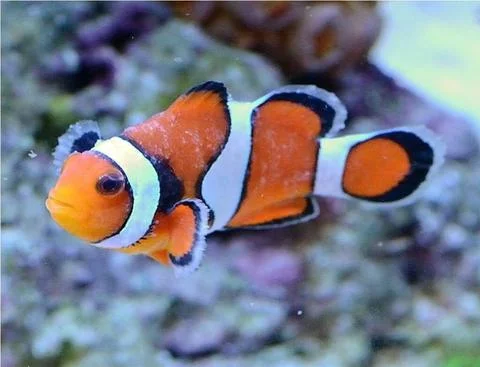
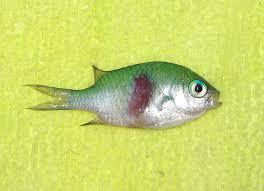
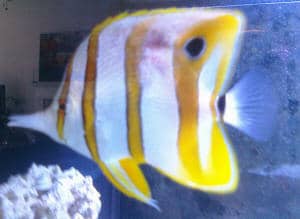
If you are looking at a nano reef tank, your options are going to be limited. The best fish to buy at 10 gallons would be:
- Firefish Gobies
- Clown Goby
- Single Azure Damsel
Check out my full list of the best fish for 10 gallon tanks here.
How to Setup a 10 Gallon Fish Tank
Setting up a 10 gallon fish tank can be stressful if it is the first time for you. Luckily, it’s easier than you think if you are guided. For those of you who are video inclined, I provided a video below from Waterbox that explains their process of setting up their mini aquariums. I’ll go in more detail below.
Assuming you building everything with just an aquarium to start, you will need the follow to setup:
- Filter
- Heater (if going with tropical fish or marine fish)
- Lighting
- Decorations
- Live Plants or Corals
Aquarium Filtration for 10 Gallon Fish Tanks
There are a ton of options for 10 gallon fish tanks. If you want to go with a canister filter, I would recommend the OASE Filtosmart 100. This is a mini version of their Biomaster Thermo, but small enough not to be over kill for this size.
You can try power filters, which are a great choice. My go to for power filters are Hagen Aquaclears. They do not display very well in rimless aquariums though.
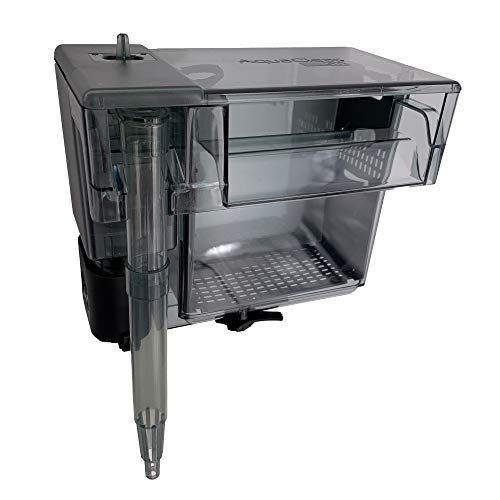
Hagen AquaClear
The Best Aquarium Power Filter
The worlds best selling and most reliable power filter on the market. Unchanged for years because it’s so reliable and versatile
For rimless aquarium options, I would consider an OASE BioPlus Internal Filter or Filtosmart 100. Either filtration system will get the job done.
Aquarium Heaters for 10 Gallon Aquariums
You want to have a quality heater in order to keep your tank temperatures stable. Consider a high quality brand like Eheim when shopping around. The heaters that come with OASE filters are also excellent choices. You can hook up your heater to a heater controller for added safety. Inkbird has a great line of controllers that have wifi capability. The controller comes with an app that you can download on your phone that sends you alerts.

Inkbird Heater Controller
Protect your investment with this heater controller. An excellent choice for small tanks. WiFi models now available!
Aquarium Lighting for 10 Gallon Aquariums
Lighting can be basic or advanced depending on what you are looking for. The great thing is at this size there are two great choice depending on whether you go freshwater or saltwater. More options are led lighting systems.
For freshwater, the Serene RGB Pros are a great value and will grow just about any freshwater plant available in the hobby. It comes with a great controller and adjustable features
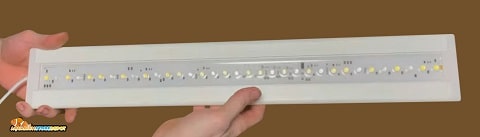
Serene RGB Pro LED
Current USA’s offering into aquascaping is an incredible value. Spectrum, spread, easy to program and great PAR output.
For saltwater aquariums, the AI Prime is the best light you can purchase for nano reef tanks. Just buy this light and you can grow just about anything short of hardcore SPS corals. They work amazing for Zoas, a very popular beginner coral.
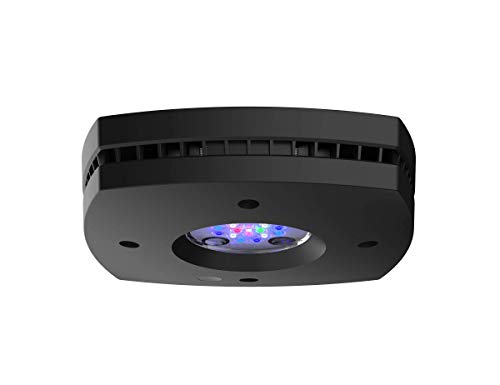
AquaIllumination AI Prime
The AI Prime is a great overall all light for Zoas. It contains the correct, PAR, spectrum, and spread needed to get you going with growing your own Zoa colony!
Decorations for 10 Gallon Aquariums
For a 10 gallon aquarium. I prefer to go with a solid piece of driftwood and decorate from there. Manzanita driftwood offers a great value, has low tannins, and has a reasonable price. You can also use plastic plants or silk plants if you want to use artificial plants as decorations.
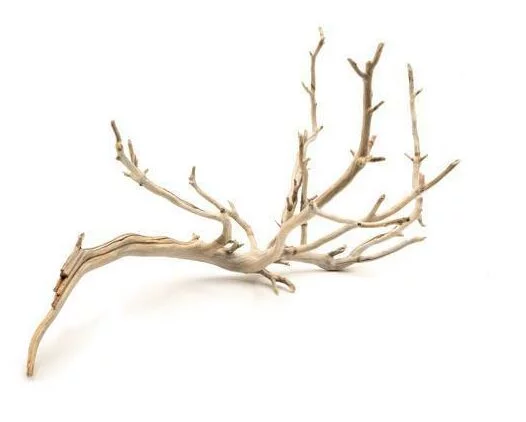
Manzanita Driftwood
Editor’s Choice
Manzanita offers it all. Great shape, low tannins, quick to water log and reasonably priced. It’s the ultimate driftwood!
For saltwater tanks, I would consider purchase live rock at your local fish store. These tanks are so small you really don’t need much to get started. A 5 to 7 pound rock is all you need. Fill the rest up with dry rock.
Live Plants or Corals for 10 Gallon Fish Tanks
Beginner plants are the best plants to add for a 10 gallon fish tank. The following are great plants you can add to your tropical fish tank:
All the plants above feed off the aquarium water column, so you can glue them to driftwood. If you are looking for a quality live plant seller, considering buying from an online retailer like Buce Plant.
Buce Plant
Buce Plant offers a wide variety of aquatic plants for sale. With one of the largest selections in the US, you will find what you need here. They are also a great source for freshwater shrimp!
FAQs
What Fish Are Good In A 10 Gallon Tank?
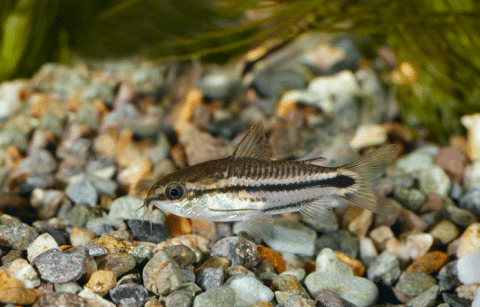
On the freshwater side, nano fish like guppies, rasboras, danios, small tetras, and corydoras catfish all make excellent choices. A single male betta is also a great choice.
On the saltwater side, nano reef fish like firefish gobies, clown goby, or an azure damsel would work. Note for a 10 gallon tank, you will likely only be able to house 1 or 2 saltwater fish depending on the aggression levels of the fish. Clownfish are generally too large for 10 gallon fish tanks
How many fish can a 10 gallon tank support?
If the fish are small schooling fish, 4-6 small freshwater fish can be housed in a 10 gallon tank with proper filtration and shelter from decorations (or even better live plants)
Is A 10 Gallon Tank Good?
A 10 gallon tank is a great first timer’s fish tank if it is setup as a freshwater aquarium and the filtration system is of good quality. While not as stable as a 20 or 40 gallon tank, you can still enjoy success with this size tank.
On the saltwater side, a 10 gallon tank is considered at the low end of a nano reef tank. These tanks can be a challenge to maintain and keep stable.
Is A 10 Gallon Tank Hard To Maintain?
Definitely not. A 10 gallon tank will have one of the lowest maintenance commitments due to its size. You sacrifice stability for maintenance time with small tanks. As long as you keep your stocking reasonable and
Is A 10 gallon Fish Tank Big?
10 gallon tanks aren’t that big in size. The standard dimensions of a 10 gallon tank is 20″ x 10″ x 12″. Most rimless and all in one aquariums will actually be built with shorter lengths to accommodate a smaller footprint on a desk or countertop. You shouldn’t have any trouble finding a place for it in your home or office.
How much would a 10 gallon tank cost?
A basic 10 gallon tank will be about $20-$25 per gallon or $200-$250 to setup for a freshwater tank. For a saltwater tank, expect to pay $40-$60 per gallon or $400-$600. You can definitely pay less than what I’m suggesting, however, keep in mind the ranges I throw out are for higher quality setups not discount store kits which tend to have low quality equipment that will not last.
Closing Thoughts
The 10-gallon is forgiving enough to learn on and small enough to actually manage. Give it a proper nitrogen cycle, don’t overstock it, and it’ll run itself week to week with a water change and a quick wipe of the glass. I’ve seen beautifully planted 10-gallon tanks that outshine much larger setups. The tank size isn’t a limitation. The decisions you make inside it are.
Pick the right tank for what you’re building, upgrade the filtration if your kit came with cartridge-only, and cycle before you stock. Do those three things and you’re ahead of 80% of beginners I’ve watched struggle in store.
Questions? Drop them in the comments below and I’ll answer. Thanks for reading.
🔧 Want to learn more? This article is part of our complete Aquarium Equipment & Gear Guide. your ultimate resource for filters, heaters, lights, pumps, tanks, and more.