Generic selectors

Exact matches only

Search in title

Search in content

Post Type Selectors

Tag: Fishkeeping

  • 5 Best 125 Gallon Aquariums – From Someone Who Actually Runs One

    5 Best 125 Gallon Aquariums – From Someone Who Actually Runs One

    I run a 125 gallon reef tank myself, so this is a size I know intimately. At 125 gallons, you’re making a serious commitment. the tank, stand, filtration, lighting, and livestock all add up quickly, and the weight alone (over 1,200 lbs fully loaded) means floor reinforcement is something you need to actually think about. The upside is that a 125 gallon gives you the stability and display space to do something truly spectacular. This guide covers the best 125 gallon aquarium options I’d recommend and everything you need to consider before committing to this size.

    Our Criteria (How They Made The Cut)

    Before I go through a list, I like to explain my criteria for selection first. Here is what I focused on when I made this list:

    • Features – Aquariums of this size usually are going to be more than just the aquarium. I like all in one systems as it eliminates a lot of guesswork
    • Build – I look for aquariums that have a good manufacturing process. If they are rimless, they should have a solid warranty and reputation. If they aren’t, they should have proper braces and quality reviews
    • Dimensions – A 125 gallon tank can be 4 or 6 feet. I prefer to include both on this list so you can make the decision to what fits you fit. Generally, the shorter format will have better dimensions for scaping and will be cheaper with equipment due to lighting and pump costs. The longer format will generally be better for fish.

    The 125 Gallon Aquarium Candidates

    In A Hurry? I recommend Red Sea Reefers for Saltwater and UNS Aquariums for Freshwater!

    PictureNameTypeLink
    Editor’s Choice!
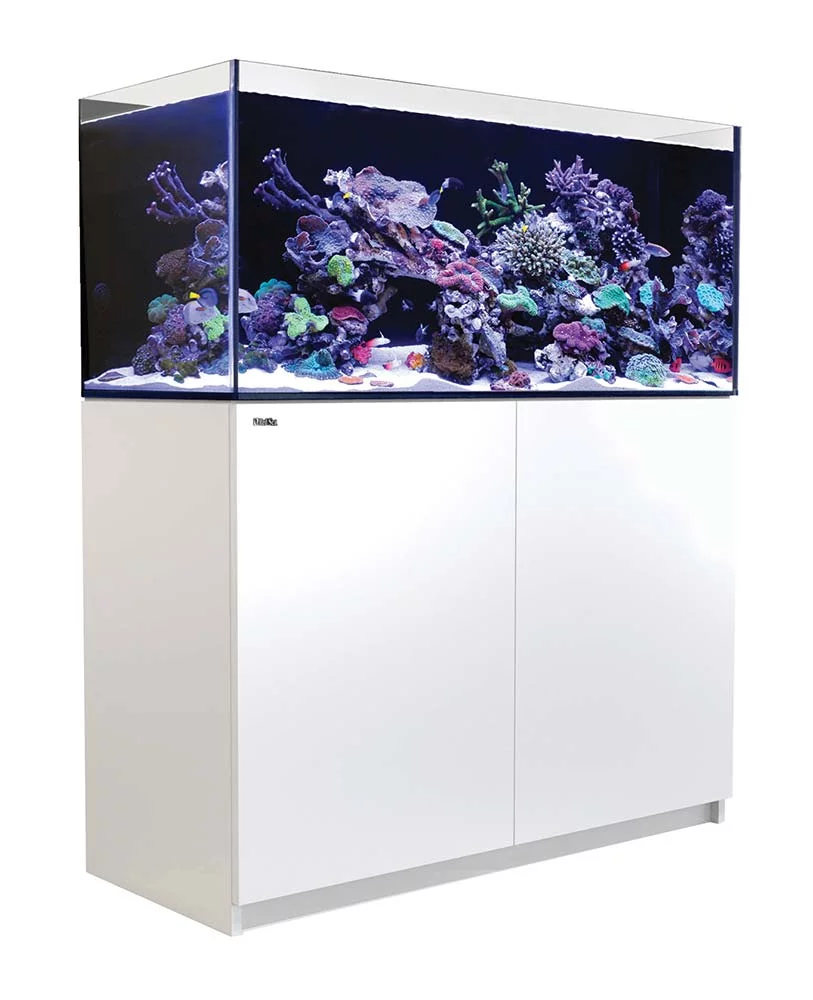
    Red Sea Reefer 425 XL
    Red Sea Reefer 425 XL
    • Reef Ready
    • All In One
    • Saltwater
    Click For Best Price
    Budget Option
    SC Aquariums 120
    SC Aquariums 120
    • Reef Ready
    • Euro Braced
    • Great Dimensions
    Buy On Amazon
    UNS 120U UNS 120U
    • Rimless
    • Best For Freshwater
    Click For Best Price
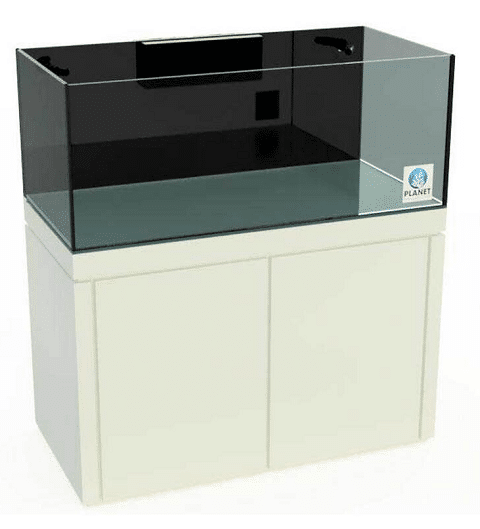
    Planet Aquariums 125 Planet Aquariums 125
    • Rimless
    • Made in the USA
    Click For Best Price
    Top Fin 125 Ensemble Top Fin 125 Ensemble
    • Cheap
    • Best For Freshwater
    Buy On PetSmart

    Top 5 Picks (2023)

    Let’s look at each aquarium and see why they made the cut!

    1. Red Sea Reefer 425 XL

    Editor’s Choice
    Red Sea Reefer 425 XL

    The newest generation Red Sea Reefers offer a great all in one system for anyone looking for a saltwater aquarium

    Click For Best Price

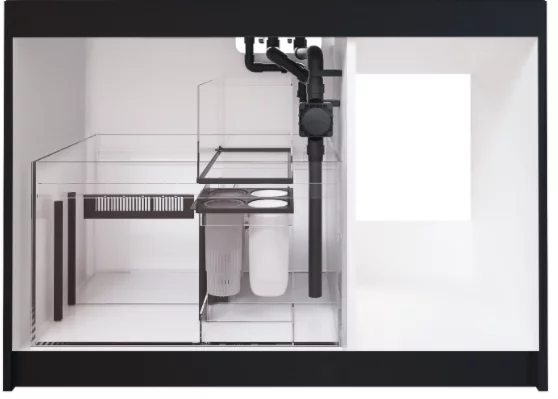
    The Red Sea Reefer 425XL is an excellent top of line rimless aquarium that comes with a sump and overflow. It is the aquarium that started up the ready to run craze in the saltwater tank hobby. It is designed to run as a reef tank. Red Sea really prides itself with their manufacturing process, which you can see below.

    This 425 XL model is wider than the standard reefer models, giving you more space for scaping. The piping is already assembled for you and requires no gluing. The sump design is also very efficient.
    Red-Sea-Reefer-Sump

    What I like is they place the ATO reservoir at the top of the sump. This saves space and gives you ample room on the opposite side of the cabinet to mount your gear and store your equipment. Anyone who has owned a high level reef tank knows how gadget crazy we can get and how obsessed we can get about mounting equipment for that cool look.

    Red Sea Reefers are expensive, but they look great and have everything you need to get started on the right foot.

    Pros and Cons

    Pros
    • Great Brand
    • ATO Container saves space
    • Easy to assemble
    Cons
    • Price
    • Designed for reef tanks only

    2. SC Aquariums 120

    SC Aquariums 120

    The SCA while not a 125 gallon is the perfect dimensions for a 4 foot long tank. 24 inches high and wide gives it plenty of space for scaping and fish

    Buy On Amazon

    SC Aquariums is well know in the reefing circles as a bang for the buck ready to run aquarium. They offer low iron aquariums, which are more clear than traditional braced tanks and they come with an overflow and plumbing kit to get you started. They are usually priced significantly cheaper than big brands like Red Sea and Waterbox.

    This variant in the link is just the aquarium. You can also purchase the stand and sump as a package from SC. The sump is a rimless three stage sump and the cabinet is equivalent to Marineland’s Monterey Stands.

    SC Aquariums is a small business and the owner Steve takes customer service seriously. You will feel you are dealing with a person versus a company when purchasing from SC. They have a nice personal touch to their customer service. There is also a facebook community of owners you can connect with.

    Overall, this is a great budget option if you are looking for a ready to run aquarium. Many reefers have used these tanks and have killer reef tanks. You can’t go wrong with them!

    Pros and Cons

    Pros
    • Cheap for a reef safe tank
    • Good reputation in industry
    • Good customer service
    Cons
    • Not rimless
    • Cabinet only available in black

    3. UNS 120U

    UNS 120U

    The UNS 120 is a premium rimless aquarium that is designed for freshwater aquascapers

    Click For Best Price

    If you are looking to create a large aquascape aquarium, look no further than UNS. UNS aquariums are some of the best pure rimless aquariums you can purchase today. They have a world class manufacturing process with 45 degree precision cut mitered edges for their glass that are put together with high-grade silicone. The glass is low iron with 91% Diamant glass. This glass is used in commercial applications like office buildings and restaurants.

    This particular model is a 4 foot aquarium that is nearly 24 inches tall and wide. This is the perfect width and height for aquascaping and gives plenty of space for a large number of schooling fish or for larger fish like Angelfish to be part of the aquascape. The clear background also gives it better aesthetics for a planted tank over a reef ready system that will often come with a black background.

    It’s not best to picture this tank if you are looking for a saltwater setup and the price can be up there. However, if you are looking for a large aquascape tank, this is the one to buy.

    Pros and Cons

    Pros
    • Get quality
    • Clear background
    Cons
    • Expensive
    • Best for freshwater

    4. Planet

    Planet Aquariums 125 Premium Reef

    Plant Aquarium stands are a prebuilt tanks that include a sump and overflow. Made in the USA!

    Click For Best Price

    If you go to a local fish store, you may see these type of aquariums. These are manufactured by Planet Aquariums and they often work with local fish stores to provide high quality reef ready tanks. Recently, they have been selling online due to the pandemic. They are made in the USA and offer multiple color options on their cabinets.

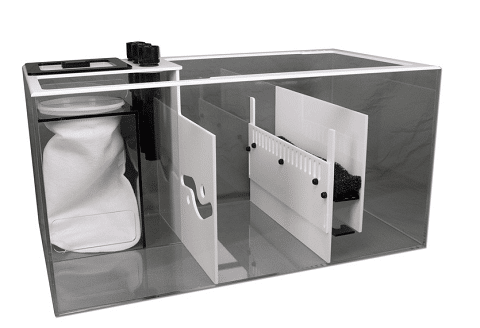
    This is a rimless tank with a slim overflow design that has a bean animal drain. The sump is one of the best offered in a reef ready package. The Tideline sump is a high end arcylic aquarium sump with a lot of cool factor designed in it. They are designed for 7″ filter socks and can adjust for water height and is a 3 stage sump.
    Tideline Sump

    The overall package that you get by going with a Planet Aquarium is a really great value. However, it’s still out of the range of many reefers given it’s a high end offering. It’s really nice you can order them online now though. It really gets the sales pressure off when you don’t have to walk into a local fish store to purchase one.

    Pros and Cons

    Pros
    • Lots of cabinet options
    • Slim overflow design
    • Made in the USA
    Cons
    • Expensive
    • Slow shipping time

    5. Top Fin

    Top Fin 125 Ensemble

    This 125 is PetSmart’s value offering. It is one of the best deals you can get buying new at this size.

    Click For Best Price

    If you are shopping for an entry level 125 gallon tank, this offering by Top Fin might be what you are looking for. This is one of the cheapest tank setups you can purchase at this size. It is a 6 foot long tank that offers plenty of space for larger fish.

    The cabinet, when it is setup with the correct filter, is a good value with this package. I don’t like how there is a shelf in the middle because it limits space for larger canister filters or a sump. You usually want your storage inside the cabinet not outside. While it’s a nice aesthetic touch, it’s not a practical one for a fish tank.

    The price can’t be beat and you can pick it up locally. The cabinet is not the best though. It is made of particle board, which is not a good long-term decision if you run a sump or have a saltwater tank. I’m not a fan of rimmed tanks for something this large as well. For the price and how easy it is to pick up locally, it’s a setup to consider if you are on a budget at this size.

    Pros and Cons

    Pros
    • Great price
    • 6 foot long tank
    • Easy to find locally
    Cons
    • Rimmed Tank
    • Low cabinet quality
    • Limited space in cabinet

    Buying Guide

    What Do You Want?

    Figuring out what type of fish you want in your 125 gallon tank will narrow down how much you will spend and what type of equipment you will need to run and maintain it. Let go through several options. Do you have a particular fish or setup that fancies you? A goldfish vs. a saltwater tang have totally different needs and requirements. The same with freshwater vs. a saltwater tank or planted vs non-planted tanks. Go to places like forums, visit an aquarium club, or check out Pinterest and for inspiration on what you are looking for an go from there. I’ll outline a few things below to help out as well.

    Budget Concerns

    Budget is always a factor when it comes to keeping an aquarium. The budget differences in this size, however, are greater than 2 and 4 foot long tanks. Going from a fish only to a aquascape or reef tank adds a lot more investment to your setup and maintenance costs. Expect to spend about $45 per gallon for a reef tank and about $10 – $30 per gallon for a freshwater tank. You can go less if you buy a used tank or make your own stand (or even have one made for you by a carpenter or friend). Fish only systems will cost the least while planted tanks and reef tanks will cost the most.

    Equipment Investment

    When you get to aquariums over 100 gallons, you usually start looking at higher end filtration systems to run your tank regardless if your goal is fish only, a planted tank, or reef tank. This has to do with the amount of bioload these tanks will be handling.

    For a freshwater tank, you will want to consider a canister filter. These filters will have a large amount of media capacity and will keep your tank more stable than other systems. You also won’t be placing large hang on back filters on the aquarium and adding ugly pieces of equipment, which become more noticeable at this size.

    For a saltwater tank, you will want to consider an aquarium sump. The good thing with these aquariums is even if you get a standard rimmed tank, they are easy to drill. If you decide to drill the tank, you can purchase an overflow. You can also install a hang-on overflow, though a drilled overflow are generally more reliable.

    Aquarium lighting will also become a factor. As a 6 foot format, you will likely need 3 light fixtures if you get a pendant style system or find a lighting system that has a 72″ option – which is usually hard to find. If you are looking for a 72″ option, Current USA offers a great option for both freshwater and saltwater tanks.

    Best Value
    Serene RGB Pro LED

    Current USA’s offering into aquascaping is an incredible value. Spectrum, spread, easy to program and great PAR output.

    Click For Best Price Buy On Amazon

    Maintenance

    A 125 gallon aquarium is going to be one of the more maintenance intensive aquariums you can purchase. The water changes are larger, the amount of glass you need to clean is more, and if you do a planted tank you will be pruning more. For saltwater tanks, you get into other investments like dosing pumps, which may be required to maintain LPS and SPS corals if that is the route you want to go.

    Maintenance costs will also go up with a 125 gallon tank. If you run a saltwater tank, you will be using more salt and more RODI water to run it. A freshwater tank will be much cheaper in the long run and will generally take less time to maintenance. Keep this in mind when figuring out how much maintenance you can commit to.

    Different Types

    Rimless vs Rimmed
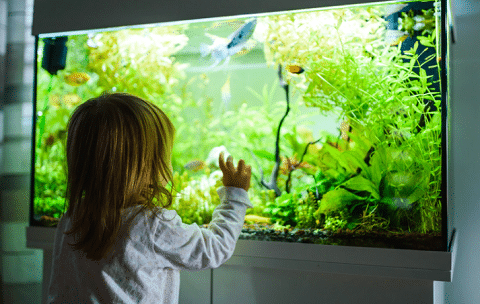
    Rimmed Tank With Kids

    Rimless vs rimmed tanks becomes a big consideration at this size. A 125 gallon tank is a sizable footprint. Not only do rimmed tanks have a plastic rim that can distract from the aesthetics of the aquarium, but the glass matters more at this size given the thickness.

    Traditional rimmed tanks use a standard glass, which has a greenish hue to it. A rimless tank will usually be made of low iron glass, which will be more transparent and look cleaner as a display tank. Rimless tanks as a result, will be more expensive than traditionally braced tanks.

    It is up to you to decide if you want to want to spend the extra for the clarity and look. At this size, I feel it’s worth the extra price. The hue is noticeable when you get to 4 and 6 foot long tanks.

    Glass vs Acrylic

    Acrylic Panels

    Another consideration will be glass vs acrylic. There are pros and cons to both:

    • Glass is very difficult to scratch
    • Acrylic is much lighter
    • An acrylic tank will have the best clarity of any tank type
    • Glass are offered in rimless formats. Acrylic tanks have bracing
    • Glass can crack, acrylic is difficult to break
    • Acrylic is easier to drill than glass

    You will notice on this list that I did not put an acrylic tank. The reason why is the ones available online are pretty standard tanks. Usually when it comes to acrylic, you will need to special order one from a local fish store or have one custom made to get one that is reef ready or of high quality. If you want acrylic, seeing a dealer would be my recommendation.

    4 foot or 6 foot format

    6 Foot Long Tank

    A 125 gallon can be purchased in a 4 foot or 6 foot long format. The 4 foot format is typically going to be 120 gallons, but it is close enough in my mind to include this in the discussion. There are advantages to both sides that I will list below:

    • The 4 foot format will have 24 x 24 height and width, the ideal dimensions for aquascaping
    • A 4 foot tank will generally be cheaper to setup due to needing to purchase less lighting fixtures and substrate
    • There are more options to purchase reef ready and ready to run aquariums in a 4 foot format over a 6 foot long tank
    • The 6 foot format is longer, which gives you more options for fish and spreads out space for more territorial fish
    • You can place a larger sump in a 6 foot long tank as a 48 inch sump works great
    • You will have more room to store storage in a 6 foot long tank

    If you are purchasing a 125 gallon tank primarily for fish, I would recommend that you purchase the 6 foot format. If your goals are a reef tank or a great looking freshwater aquascape, consider the 120 gallon 4 foot format.

    Best Options

    Let’s discuss what are the best setups for a 125 gallon aquarium. It’s a size that isn’t for everyone, but for those who are looking at this size, we can discuss what types of aquarium setups suit this size best.

    Aquascape

    An Aquascape Aquarium at 125 gallon is an incredible display tank. It is typically not seen at the 6 foot format as many aquascape will cap out around 4 feet in length. However, for those looking at this length, you can build a beautiful scape and your fish options really open up. Angelfish and Discus Fish are ideal for a tank of this size.

    African Cichlid Tanks

    African Cichlids are territorial and need space. The length of a 125 gallon lends well to curbing aggression. African Cichlid tanks do not need to be high, so the shorter height works well for this setup.

    Predator Tanks

    A freshwater predator with fish like Oscars can be housed in a 125 gallon tank. You don’t need a fancy setup with predators so going with a standard rimmed 125 works really well. Keep in mind the total size of the fish you get. You will not be able to keep many as they get large and are also territorial. These are also really good tanks if you have a very aggressive fish like a wolf cichlid that is best off housed alone and you can’t afford to provide it enough space to curb it’s aggression. Usually lack of space and territory enhances an already aggressive fish.

    Reef Tank

    A 125 gallon tank is an entry level aquarium at the 6 foot size for a reef tank. It really opens up the fish possibilities when you jump into a 6 foot long tank. Tangs and many angelfish become a possibility. You can be more liberal with more territorial fish given the size and the size of fish you can purchase. While not as deep and wide as a 180 gallon tank, you still have plenty of room to scape your tank and have plenty of corals at multiple levels. It’s usually better to go with a bit more height if you are planning more SPS Corals. The height for a 125 lends better to softy, LPS, and mixed reef tanks.

    FAQs

    How Big Is This Type of Tank?

    A 125 gallon tank will usually have a 6 foot long length or a 4 foot format. When filled up, they can easily weigh over 1400 lbs. They should be placed in an area that can support its weight, preferably on the first floor or a basement. You should also have an outlet dedicated to it and a good breaker box with 15 or 20 amp circuit breaker. A 20 amp is preferable if you are going to run a high end reef tank.

    What Are The Dimensions?

    A standard 125 gallon aquarium will have the dimensions of 72″ x 18″ x 21″ (LWH). If you purchase a 125 gallon in a 4 foot format the dimensions will be 48″ x 24″ x 24″. If purchased in a cube format the dimensions will be 36″ x 24″ x 36″. This cube format is 134 gallons.

    How Many Fish Can I Put In A Tank This Size?

    The number of fish you can put in a 125 gallon will depend on your setup and what type of fish you want to keep. For freshwater tanks, I would recommend checking out aqadvisor and running through their calculator. I don’t feel their saltwater tool is that great though. For saltwater it does depend on the fish, but generally 1 inch for every 5 gallons is the rule of thumb for saltwater. This is about 25 inches of fish which will get you about 5-6 fish that average 5 inches in length.

    You can go higher with saltwater, but it you usually run into aggression issues as saltwater fish as a whole are more territorial. Most saltwater fish keeper mix in corals to make up for the lack of fish population.

    What Size Sump Is Necessary For This Size Tank?

    You have plenty of options with a 125 fish tank regarding a sump. Most aquarium sumps you can buy will be at 36 inches and should fit in your cabinet. 48 inch sumps are hard to come across, however, if you make a DIY sump a 55 gallon aquarium is a perfect sump in a 125 gallon tank. It is 4 feet long and holds plenty of water. It’s my usual go to when it comes to this size.

    What Size Heater Is Necessary?

    Based on the info I provided in my best aquarium heater article, 375 watts is what you will need. It is best to run two heaters for this size and to pair it will a quality heater controller or aquarium controller to prevent failure.

    Closing Thoughts

    You’ve done your homework and you know what you want, but the sheer size of a 125 gallon aquarium can be intimidating. I hope I helped steer you in the right direction on planning for this investment by providing some helpful tips. Leave a comment below to share how I have been able to assist with your fish tank setup as well as any questions or concerns that arise during your research process! Thanks for reading!


    🔧 Want to learn more? This article is part of our complete Aquarium Equipment & Gear Guide. your ultimate resource for filters, heaters, lights, pumps, tanks, and more.
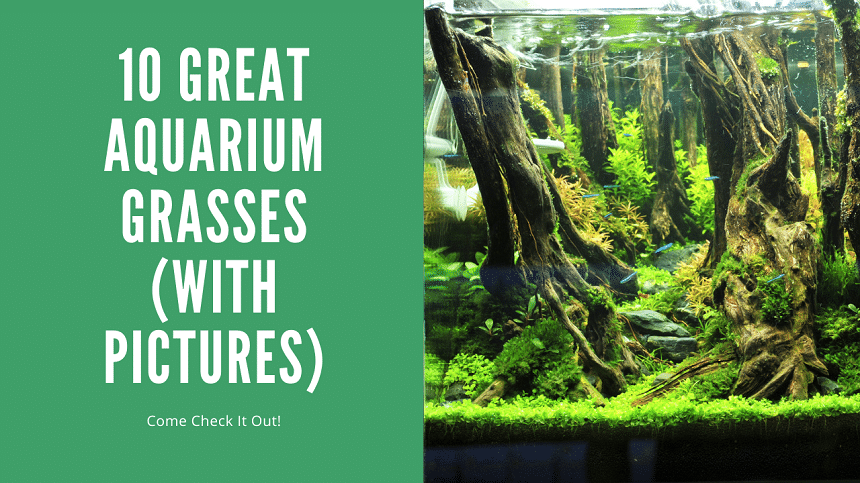
  • 10 Best Aquarium Grass Species – Carpet & Foreground Plant Guide

    10 Best Aquarium Grass Species – Carpet & Foreground Plant Guide

    This plant will grow in almost anything. But if you want it to actually look good, you need to understand what it wants. The gap between alive and thriving is lighting, nutrients, and consistency.

    Any plant stays alive. Making it look good takes understanding.

    Any plant stays alive. Making it look good takes understanding.

    A lush grass carpet is one of the most striking things you can achieve in a planted aquarium. I’ve attempted it multiple times over my 25 years in the hobby and I can tell you the species choice and setup make all the difference. Some aquarium grasses are genuinely beginner-friendly, while others demand CO2, high light, and careful trimming to stay dense. This guide covers the best grass species I’ve grown and the honest care requirements for each so you can pick the right one for your setup.

    The Benefits

    Like all aquatic plants, aquarium grass plants provide a huge range of benefits to your aquarium pets. Firstly, carpeting plants create an awesome habitat that bottom-dwelling fish love to explore and hide in.

    Aquarium plants also oxygenate the water and use up excess nutrients and nitrates from uneaten food and fish waste. In this way, they can prevent algae growth by out-competing the algae for nutrients.

    Apart from the benefits for the health of your tropical fish, a green bushy carpet at the bottom of the tank just looks amazing and adds that wow factor to any aquarium layout.

    Aquascaping With Them

    Aquarium grass and carpeting plants form the cornerstone of many of the most incredible freshwater aquascapes. You’ll find these plants in everything from picturesque, minimalist Iwagumi style layouts to wild-looking nature aquariums, and even carefully ordered Dutch-style planted tanks.

    Carpeting plants are super useful for the foreground of your tank because they tend to stay low and is gradually replaced by taller plants towards the back of the layout. Some species grow taller and make interesting specimen plants for the midground of your tank, especially when grown in tight clumps.

    Other plants like the Vallisneria grow really tall and make awesome background plants. These plants create that densely planted jungle feel and is very handy for hiding hardware like heaters and airlines.

    10 Best Aquarium Grass Species

    With the huge range of aquatic plants available in the hobby, picking out the right aquarium plant species for your tank is pretty tricky. That’s why I’ve put together this list of my top 10 favorite aquarium grass plants to make your life a lot easier. For each species, I’ll provide vital information like:

    • Scientific Name
    • Skill Level
    • Size
    • Lighting
    • Tank Placement
    • Growth Rate
    • CO2 Requirement

    Check out the video below from our YouTube Channel. We go over this in more detail in our blog post below. If you like our content, be sure to subscribe, as we have new videos we publish every week.

    So let’s get started!

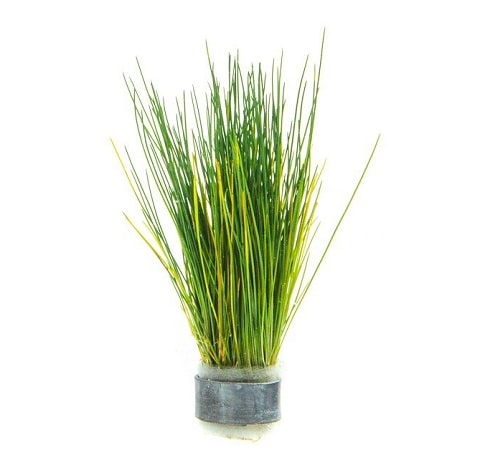
    1. Dwarf Hairgrass

    Easy To Grow Carpet!
    Dwarf Hairgrass

    Dwarf hairgrass is an easy to grow carpet that is great for beginners. Purchase tissue culture plants to ensure pest free plants!

    Click For Best Price Buy On Glass Aqua
    • Scientific Name: Eleocharis pusilla
    • Skill Level: Easy
    • Size: 2-3 Inches
    • Lighting: Moderate
    • Tank Placement: Carpet, Foreground, Midground
    • Growth Rate: Moderate
    • CO2 Requirement: Yes

    Dwarf Hairgrass is the first plant that comes to mind when discussing aquarium grass plants and that’s why it’s the first species on my list! This Australasian plant is easy to grow under moderate light and looks amazing as a carpet in minimalistic aquascapes like Iwagumi.

    Dwarf Hairgrass grows best in an aquarium soil substrate but can also work great in fine gravel or sand substrate enriched with root tabs. It is possible to plant Dwarf Hairgrass in a low-tech setup without CO2 but to achieve a dense carpet, you’re going to want a controlled supply of this important gas.

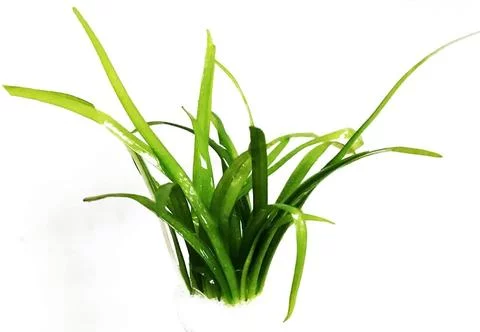
    2. Dwarf Sagittaria

    • Scientific Name: Sagittaria subulata
    • Skill Level: Easy
    • Size: 4-12 Inches
    • Lighting: Moderate-high
    • Tank Placement: Carpet, Foreground, Midground, Background
    • Growth Rate: Moderate/Fast
    • CO2 Requirement: No, recommended

    Dwarf sag is a marsh plant from the Americas that looks amazing in freshwater aquariums. It is not a true grass but with its long narrow leaves, this plant makes a fantastic specimen plant or even a lush carpet option.

    , this popular aquarium plant grows to about 6 inches and is perfect for the midground in most tanks. Dwarf Sagittaria likes high lighting and will grow best with added CO2.

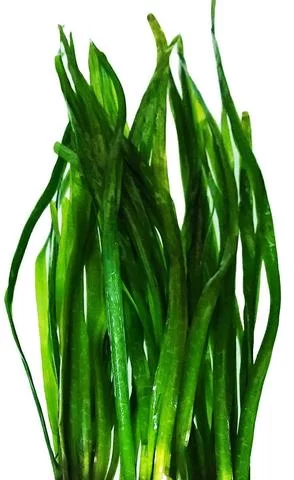
    3. Vals Nana

    • Scientific Name: Vallisneria nana
    • Skill Level: Moderate
    • Size: 12-20 inches
    • Lighting: Moderate-High
    • Tank Placement: Background
    • Growth Rate: Fast
    • CO2 Requirement: Recommended

    Vals Nana is a great grass plant for the background of your aquarium. This plant grows fast, and is not suitable for trimming into a lawn, but should rather be used to get a tall, wild grass-type look.

    Vals nana looks similar to Hairgrass will grow taller and can make a very effective green backdrop to a nature-style aquascape.

    4. Eleocharis Belem

    Eleocharis Belem

    Shorter than dwarf grass and with a curly shape, this aquarium grass offers good looks with less maintenance than other grass

    Click For Best Price Buy On Glass Aqua
    • Scientific Name: Eleocharis sp.
    • Skill Level: Easy
    • Size: 2-3 inches
    • Lighting: Moderate
    • Tank Placement: Carpet, Foreground
    • Growth Rate: Moderate
    • CO2 Requirement: Recommended

    This popular Hairgrass form is similar to the well-known Dwarf Hairgrass. This aquatic plant differs in its slightly more curly leaf shape and smaller size. Eleocharis Belem makes a wonderful carpet, especially if you provide it with good light and added CO2.

    5. Narrow-leaf Micro Sword

    Micro Amazon Sword

    A mid-ground plant that is fast growing and easy to grow

    Click For Best Price Buy On Amazon
    • Scientific Name: Lilaeopsis mauritiana
    • Skill Level: Easy
    • Size: 1-2.5 inches
    • Lighting: Moderate-High
    • Tank Placement: Foreground
    • Growth Rate: Slow
    • CO2 Requirement: Recommended

    Narrow-leaf Micro Sword is a tropical aquarium plant from the island of Mauritius. This aquatic plant grows slowly and stays small, between 2 and 4 inches in height.

    This makes it a great low-maintenance carpet plant. Good quality light and injected CO2 will help these plants grow faster.

    6. Pygmy Chain Sword

    Pygmy Chain Sword

    A low growing grass light that produces red hues in CO2 and fertilizer powered tanks.

    Click For Best Price Buy On Glass Aqua
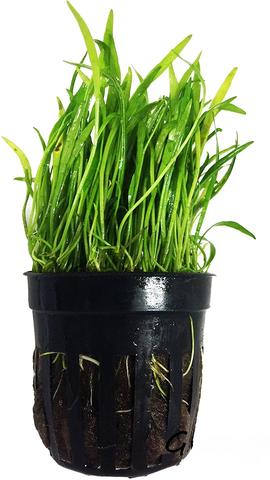
    • Scientific Name: Helanthium tenellum
    • Skill Level: Easy
    • Size: 3-4 inches
    • Lighting: Moderate
    • Tank Placement: Carpet, Foreground, Midground
    • Growth Rate: Moderate
    • CO2 Requirement: No

    This low-growing, easy plant from the Americas was previously thought to be a species of Echinodorus. The narrow-leaf variety looks very much like a grass plant, and there is a slightly larger broad-leaved variety available as well.

    Under high light, with fertilizer and CO2, the grass-like narrow-leaved form can take on a unique deep red tone that really stands out. These plants are also known as Dwarf Chain Swords.

    7. Dwarf Four-leaf Clover

    Marsilea Hirsuta

    A round leaf plant that can grow as a carpeting plant. Best grown with CO2 and stronger lighting

    Click For Best Price Buy On Glass Aqua
    • Scientific Name: Marsilea hirsuta
    • Skill Level: Easy
    • Size: 1 inch
    • Lighting: Moderate-High
    • Tank Placement: Carpet, Midground, Foreground
    • Growth Rate: Slow-Moderate
    • CO2 Requirement: No, recommended

    Dwarf water clover has round leaves and might not look much like grass when you take a close look at it. It makes an awesome bright green carpet for the floor of the planted tank though. This plant is easy to grow and works well in a smaller tank.

    If you want that really short, lawn look, however, you’re going to need good light and injected CO2. Under lower light, this aquatic plant grow a bit tall and thin.

    8. Glosso

    Glossostigma Elatinoideas

    A beautiful carpeting plant that is best suited for advanced aquascapers. Grows fast and requires CO2

    Click For Best Price Buy On Glass Aqua
    • Scientific Name: Glossostigma elatinoides
    • Skill Level: Moderate-Advanced
    • Size: 1-2 inches
    • Lighting: High
    • Tank Placement: Carpet, Foreground
    • Growth Rate: Fast
    • CO2 Requirement: Yes

    This beautiful lawn plant from New Zealand is quite a challenge to grow but is an awesome plant for experienced aquarists. It needs a lot of light and access to CO2 to keep it growing low and tight. In the wrong conditions, Glossostima plants tend to grow tall and thin, which isn’t a great look.

    9. Dwarf Baby Tears

    Baby Tears

    One of the easier carpeting plants available for planted tanks.

    Click For Best Price Buy On Amazon
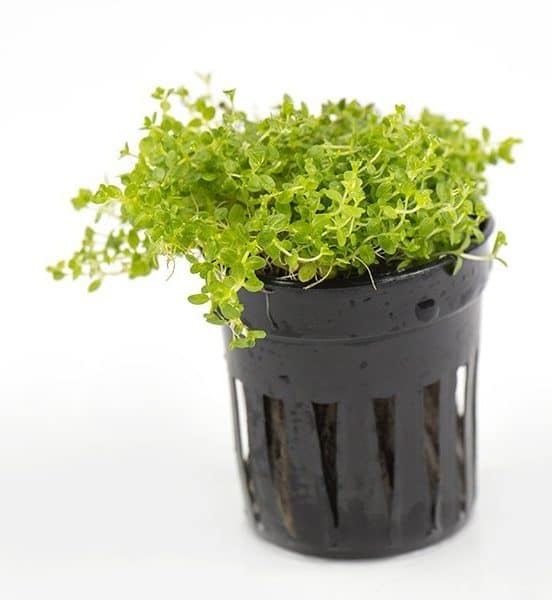
    • Scientific Name: Hemianthus callitrichoides
    • Skill Level: Moderate-Advanced
    • Size: 1-2 inches
    • Lighting: High
    • Tank Placement: Carpet, Foreground, Midground
    • Growth Rate: Moderate-Fast
    • CO2 Requirement: Yes

    Dwarf Baby Tears is a Cuban plant that is very popular with experienced aquarists who want a very short, tight carpet. Dwarf Baby Tears is tricky for beginners because they need high lighting, CO2, good nutrients, and water flow to stay healthy.

    Regular trimming is also necessary to keep the lower parts of the plant healthy. Dwarf Baby Tears is probably the ultimate carpet plant, are you ready for the challenge?

    10. Monte Carlo

    Monte Carlo Tissue Culture – UNS

    Tissue culture plants are grown in labs and are completely pest free and have great shelf lives

    Click For Best Price Buy On Amazon
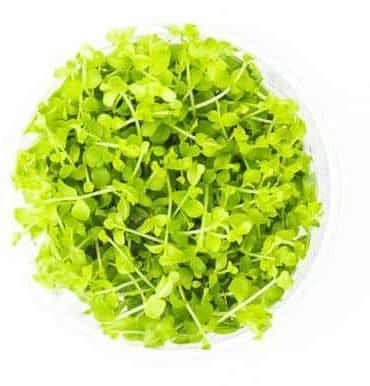
    • Scientific Name: Micranthemum tweediei
    • Skill Level: Easy-Moderate
    • Size: 1-2 inches
    • Lighting: Moderate
    • Tank Placement: Carpet, Foreground, Midground
    • Growth Rate: Moderate-Fast
    • CO2 Requirement: Yes

    MicranthemumMonte Carlo’ is a popular Argentinian aquarium plant that looks similar to the previous species, but is a more hardy plant. These bright green carpet plants stay low and spread into a lovely green lawn if you provide them with enough light and CO2.

    It is even possible to grow Monte Carlo plants over rocks and other features in the aquarium as their root system doesn’t necessarily need access to soil.

    Tank Setup

    If you want to grow grass carpet plants in your aquarium, you’ll want to make sure you’re set up for success from the start. Let’s take a look at what you’ll need!

    Lighting

    A good light source is one of the most important keys to success when it comes to growing aquarium grass plants. Although most of the species on this list could technically survive under low light, they will not thrive in these conditions. If you want to grow a dense, short carpet of living plants, high light is the best way to go.

    Medium light is also a good option for many plants, especially if you are OK with taller, thinner plants with a slower growth rate. LED and fluorescent lamps are both great options, but whatever light intensity you choose to run, make sure you pick one with a Kelvin rating of 5500-6500.

    Substrate

    Almost all aquarium grass and carpet plants need substrate to grow. Some plants like Java Moss and Monte Carlo is grown to look like grass if attached to the hardscape though.

    A nutrient-rich plant substrate is the best way to go. I would advise starting out with a good-quality aquarium soil. If you prefer to use an inert substrate like pool filter sand, it is possible to feed the plant’s roots with fertilizer tabs.

    CO2 Injection

    Along with light, water, and nutrients, Carbon dioxide is essential for all plants to live and grow. This gas occurs naturally in your aquarium water, but for many plants, the levels are just too low for healthy growth.

    Pretty much all aquarium plants grow best with increases CO2 levels, so if you want to get more serious about growing aquatic carpet plants, I would definitely suggest setting up a pressurized CO2 injection system.

    It’s not that you can’t grow a carpet without CO2, it just gets very difficult to get good results because the plants will not spread and cover the bottom in the way you want.

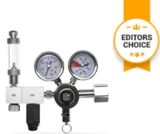
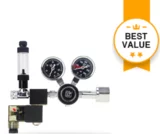
    Carbon dioxide is poisonous to your livestock at concentrations of over 30 ppm so make sure you set up a bubble counter and a drop checker to get your levels right and keep them running stable every day. If you are in the market for a quality CO2 system, I recommend the CO2Art brand.

    The Ultimate CO2 Kit
    CO2Art Pro Elite Series Bundle

    Use Offer Code ASD10%Off

    The highest end offering by CO2Art. This package includes everything you need to perform consistent and the highest quality CO2 injection in the industry!

    Click For Best Price

    Your aquarium plant will only be able to use Carbon dioxide while the lights are on, so make sure to set your injection system on a timer that starts up about 2 hours before your lights go on, and then shuts off again at the same time as your lights go off. The early start is to allow the gas to build up to the right concentrations so the plants are ready to grow as soon as the lights come on.

    Filtration & Water Quality

    A good quality filter is one of the most important pieces of hardware in any type of aquarium. Not only do filters keep the water in your tank looking great, but they are also vital for maintaining great water quality.

    The filter media in a mature cycled aquarium houses special beneficial bacteria that turn the harmful toxins in fish waste into nitrates. This keeps your fish healthy and creates an excellent natural source of nutrients for your plants!

    For a tank with a serious grass carpet, I recommend a top quality canister filter. Canister filters have the media capacity to handle the increase bioload of plant waste for large planted tanks and aquascapes.

    Tank Mates

    Grass and carpet plants provide a great natural habitat that bottom-dwelling fish love to explore. Most tropical fish make perfect tankmates for these plants, as long as they enjoy the same water temperature and parameters. There are a few types of fish that will not get along peacefully with your plants though, so here’s a short list of fish to avoid:

    • Silver Dollars
    • Goldfish
    • Oscars and other large cichlids
    • Buenos Aires Tetras

    The best fish for grass and really any type of planted tank are going to be nano fish. These small fish do well in planted tanks because they like to school, they are peaceful, and will not eat your plants. Several examples of these fish would be:

    How To Grow

    Turning a small pot full of aquarium grass plants into a dense carpet at the bottom of the tank is difficult if you don’t know a few tricks. Read on how to learn the secrets to success!

    The Dry Start Method

    Some of the small aquarium grass plants will be much easier to grow using the dry start method, especially if you plan on growing a carpet. The dry start method involves setting up your aquarium, complete with substrate and hardscape, but then only adding enough water to saturate the soil.

    The plants are then planted and allowed to grow and develop healthy root systems until they are firmly attached rooted in the substrate. This can make life a whole lot easier because tiny plants tend to wash loose and drift around in tanks that are already filled with water. Here is a video by JJ Aquariums for a visual.

    This technique is recommended for growing beautiful carpets and works really well with tiny plants like Dwarf Baby Tears, Monte Carlo, Dwarf Four-leaf Clover, and Dwarf Hair Grass. One very important point to remember is that not all plants will survive a dry start. Some aquarium plants like Vallisneria can only be grown submerged under the water.

    Spacing & Propagation

    Planting on a grid is the best way to grow a carpet of aquarium grass plants, without spending a ton of money on enough plants to cover up the bottom of the tank. To do this, separate your tissue culture plants into as many sections as possible. Each section should be a complete plant with some healthy leaves and roots.

    Plant each one out at equal distances from its neighbor. A distance of about 0.5-1 inches will work, but obviously, the closer the spacing, the faster the plants will fill in. Use your aquascaping tweezers or pincettes to gently push each plant into the substrate, leaving a little bit above the soil surface.

    Aquarium grass plants are very easy to propagate because they spread laterally. Trimming the plants often speeds up their spread, and with the right light, access to nutrients, and CO2, you can get really good results. You can take cuttings at any time to replant elsewhere in your tank, just make sure they have some roots and leaves.

    Fertilization

    Fertilizer is a big deal when it comes to growing aquarium grasses. Because of their faster growing nature, they tend to consume nutrients fast and will need supplementation.. You will want an aquarium fertilizer designed for planted tanks. Not all fertilizers are designed for planted tanks and aquascapes as some tend to be newbie friendly.

    If you are attempting a carpet, you will want to go with a fertilizer like APT Complete. This fertilizer is designed for aquascapers and serious planted tank enthusiasts. It’s an all-in-one fertilizer, so the guesswork is taken out for you.

    Editor’s Choice!
    APT Complete

    Editor’s Choice

    Made by an aquascaper for aquascapers. This is the best all around aquarium plant fertilizer on the market. Marco and micronutrients in one bottle!

    Use Coupon Code ASDComplete for 10% off your order!

    Click For Best Price Buy On Amazon

    Trimming

    Regular trimming is very important for maintaining a neat and even carpet at the bottom of the tank. Some plants that stay compact won’t need much attention, apart from keeping them to the areas where you want them.

    Taller plants like dwarf hair grass can benefit from trimming especially while it is still spreading to cover the floor. Trimming these plants actually stimulates them to put their energy into spreading out laterally, rather than growing tall.

    Trimming aquarium grass plants evenly is pretty tricky with a regular pair of scissors. I recommend a sharp pair of curved or double-curved aquascaping scissors for the evenest results.

    Be sure to turn off your filter while trimming and allow the trimmings to float to the surface where you can collect them with a small fine mesh net. You can also siphon out any trimmings that may be drifting in the water.

    Tank Maintenance

    Regular aquarium maintenance is vital for growing healthy aquarium grass and carpeting plants. This means performing regular partial water changes, testing your water parameters, and removing algae when necessary.

    Vacuuming is one part of tank maintenance that is especially important when growing this kind of plant. Unfortunately, uneaten food and waste tend to fall and settle around the root zone of carpeting plants.

    If this kind of waste collects and causes nutrient levels to rise too high, ammonia spikes can occur, creating a dangerous situation for your pets. To prevent this, make sure you suck up as much waste from the plants as possible with your gravel vacuum when removing water for a water change.

    Pests And Other Problems

    Pests like snails often find their way into home aquariums on new plants. The best way to avoid introducing pests to your aquarium is definitely to use tissue culture plants.

    One of the most common problems we see with grass carpet plants is tall, thin growth, and a stubborn refusal to spread! This is typical of light and carbon dioxide deficiency, so consider upgrading to a more high-tech setup, or choose a plant species with lower light needs to get more bushy growth.

    Hair algae is an issue in planted tanks with too much light and nutrients, but not enough CO2. Sometimes a simple fix is to decrease your photoperiod (day length) or add a clean-up crew like Amano shrimp and Otocinclus catfish.

    Where To Buy

    Aquarium grass plants are popular and pretty easy to find at most good fish stores and through online fish stores. When it comes to buying aquarium grass plants, I definitely suggest starting out with tissue culture specimens that are produced by a sterile process.

    FAQS

    Which is good for a tank?

    Choosing a grass plant for your aquarium is all about your goals for the look of your aquascape, and the kind of equipment you have. Any of the 10 species in this list will work great in your planted tank.

    Can I grow it in my fish tank?

    Absolutely you can grow grass in your fish tank. Not just any old grass will do though, you will need to plant an aquatic plant like one of the species described in this article.

    How long does it take to grow?

    Growing speed varies depending on which type of water plants you grow. Regardless of the species though, each type will have a ‘sweet spot’ where the lighting, CO2 levels, and nutrients are perfect for optimum growth.

    Can you put fake plants in a tank?

    Plastic plants are a quick and easy way to green up aquariums. There are pros and cons to this option, but whatever ornament you choose to use in your fish tank, always be sure that it is aquarium safe.

    How do I grow it in my fish tank?

    To grow aquatic grass plants, you will need light, nutrients, substrate, and water with the right temperature and parameters. Read through this article to learn everything you need to know about how to grow your own aquarium grass plants.

    Final Thoughts

    A beautiful aquascape is not complete without some grass and carpet plants. Apart from the obvious aesthetic benefits, these plants are also great for your fish and really satisfying to grow. Use the information in this guide to start growing your very own underwater grass plants. Happy growing!


    🌿 Want to learn more? This article is part of our complete Planted Tank & Aquascaping Guide. Your ultimate resource for aquarium plants, aquascaping styles, substrates, and more.
  • 7 Best Internal Aquarium Filters – Reviewed & Tested

    7 Best Internal Aquarium Filters – Reviewed & Tested

    Most people treat internal filters like a fallback option. They grab one when they can’t fit a hang-on-back, toss it in, and hope for the best. That’s a mistake. A properly matched internal filter handles quarantine tanks, breeding setups, and nano builds better than any HOB on the market. The problem is that most people buy too small, ignore flow rate, and then wonder why ammonia keeps creeping up. I’ve used internal filters in my own setups for years, and the difference between a good one and a cheap undersized one is the difference between a stable tank and a dead one.

    An undersized internal filter doesn’t just underperform. It fails your fish.

    EXPERT TAKE | MARK VALDERRAMA

    After 25 years in the hobby and running fish stores, I’ve seen more tanks crash from undersized internal filters than from any water chemistry mistake. Flow rate is the number you need to check first. Your filter should turn over the tank volume at minimum 4 times per hour. Most budget internal filters are rated for double the tank size they can actually handle cleanly. Buy for your actual bioload, not the box claim.

    The Top Picks

    Editor’s Choice

    OASE BioPlus

    • 3 Stages
    • Integrated heater
    Best Value

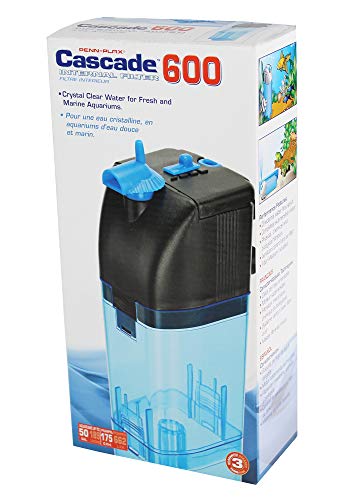
    Penn-Plax Cascade

    • 3 Stage
    • Large media capacity
    Budget Option

    Tetra Filter

    • 3 Stage
    • Cheap

    WHY THIS RANKING

    Every filter here was ranked on four criteria: actual flow rate vs. claimed rate, filtration stage quality, ease of maintenance, and real-world longevity. Brand reputation alone doesn’t earn a spot. I’ve seen budget brands outlast premium ones in quarantine setups, and I’ve seen “reliable” brands fail within months. Rankings reflect performance across all four criteria, not just price point or popularity.

    What People Get Wrong About Internal Filters

    The biggest misconception is that internal filters are just for nano tanks. They’re not. I run a Fluval U-series in my quarantine setup at all times, regardless of what else is running. The second misconception is that “rated for X gallons” means anything useful. Filter manufacturers rate their products for lightly stocked tanks with ideal conditions. If you have gravel, decorations, and actual fish, cut that rating by 30 to 40 percent and shop accordingly.

    The third mistake: people focus entirely on mechanical filtration and ignore biological capacity. Biological filtration is what actually keeps ammonia in check. A filter with excellent mechanical filtration but minimal biological media will still let ammonia spike in a stocked tank. Check the biological media volume, not just the flow rate.

    The Biggest Mistake People Make

    Buying a filter sized for the water volume instead of the bioload. A 20-gallon tank with a single betta needs very different filtration than a 20-gallon tank with a school of tiger barbs and a bristlenose pleco. I’ve watched people buy the exact right filter for their tank size and still crash their cycle because the fish they stocked were high-waste producers. Know your bioload. Then size up one tier from there.

    The Candidates (The Line Up)

    Here are the 7 filters I reviewed. All brand-name products from manufacturers I’ve used across multiple setups. I’ll go deeper on each one below.

    Picture Name Type Link
    Editor’s Choice!

    OASE BioPlus Internal Filter

    OASE BioPlus Internal Filter

    • 3 Stage
    • Integrated Heater
    • Corner Fit
    Buy On PetcoBuy On Amazon
    Best Value

    Penn-Plax Cascade Internal Filter

    Penn-Plax Cascade Internal Filter

    • 3 Stage
    • Large media capacity
    Buy On ChewyBuy On Amazon
    Budget Option

    Whisper Internal Filter

    Whisper Internal Filter

    • 3 Stage
    • Cheap
    Buy On ChewyBuy On Amazon
    MarineLand Magnum Polishing Filter

    MarineLand Magnum Polishing Filter

    • Diatom Filter
    • Powerful
    Buy On ChewyBuy On Amazon
    Aqueon Quietflow Internal Filter

    Aqueon Quietflow Internal Filter

    • 3 Stage
    • Works for shrimp and fry
    Buy On ChewyBuy On Amazon
    Fluval U3

    Fluval U3

    • 3 Stage
    • Powerful
    Buy On ChewyBuy On Amazon
    SICCE Shark

    SICCE Shark

    • 3 Stage
    • Reliable
    Buy On Amazon

    The 7 Best Internal Aquarium Filters Reviewed

    Here’s the in-depth breakdown on each filter. I’ve used products from most of these brands across multiple tank setups, including quarantine tanks, breeding setups, and display tanks where visual profile matters.

    1. OASE BioPlus

    Editor’s Choice
    OASE Bioplus Thermo
    OASE Bioplus Thermo

    The Best Internal Filter

    The OASE Bioplus is an internal version of the Biomaster Therm. It’s the only internal filter I trust in aquascapes

    Buy On AmazonBuy On Petco

    If you’ve seen my best canister filter post, you know how much I love the OASE Biomaster Thermo. OASE took that same engineering philosophy and packed it into an internal filter. The result is the BioPlus, and it’s genuinely impressive.

    Three-stage filtration, filter foam and activated carbon foam, with the option to swap in a 30 ppi fine foam for a polishing stage. The outlets skim the surface to prevent scum buildup. Flow is adjustable with a dial. The filter keeps running during media swaps, which matters more than people realize when you’re maintaining a cycled tank.

    The standout feature: it houses an OASE Heat Up heater inside the unit. That keeps the heater out of sight, away from your fish, and makes for an absolutely clean visual profile. It’s corner-fitted, so it sits out of sight in aquascapes. I saw this thing running at Aquashella and it almost made me reconsider using a power filter in my display tanks. The price is real, but it’s the best-looking internal filter made.

    Pros
    • Integrated heater
    • Removable mechanical filter chamber
    • Durable German engineering
    Cons
    • Expensive
    • Harder to find at local fish stores

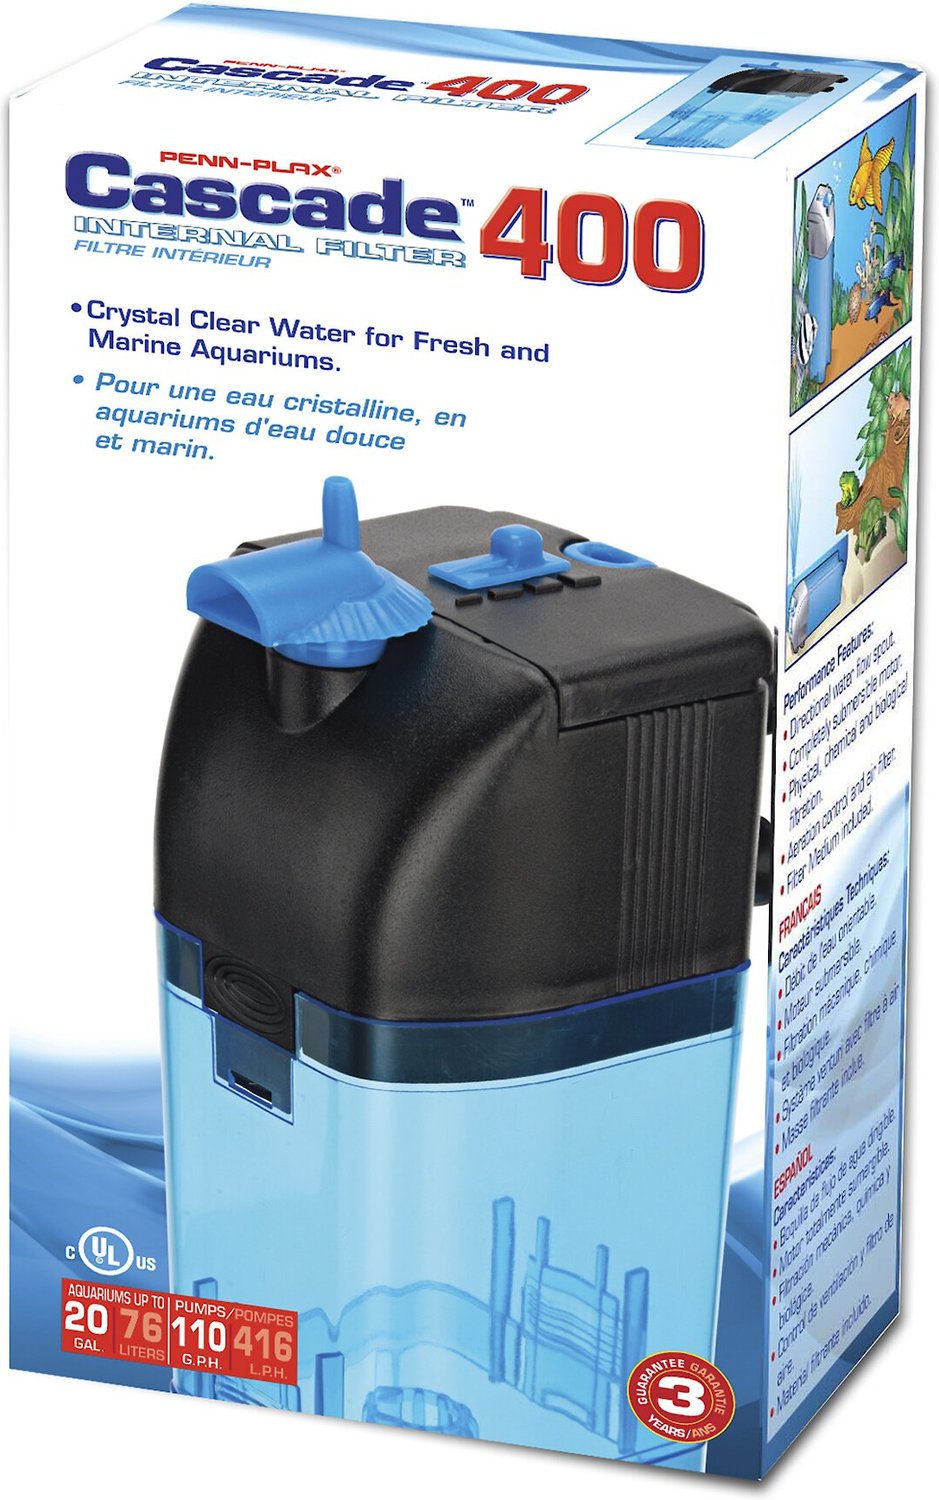
    2. Penn-Plax Cascade

    Best Value
    Penn-Plax Cascade Internal Filter
    Penn-Plax Cascade Internal Filter

    This 3 stage internal filter offers one of the largest media capacities for an internal filter

    Buy On ChewyBuy On Amazon

    Penn-Plax built the most utilitarian filter on this list. Designed to function like a mini internal canister, it holds more media than any other filter in this category. Everything sits in contained chambers, so you can put exactly what you want in each one: ceramic rings, additional bio media, chemical filtration. That level of customization in an internal filter is rare.

    It mounts vertically or horizontally, which makes it genuinely useful for shallow aquariums, paludariums, and turtle tanks. Direction flow nozzle lets you point the output where you need it. Venturi outlet or spray bar for surface agitation if you need oxygen injection. Flow regulator on top for output control.

    Choose the Penn-Plax if you want maximum flexibility and media volume at a fair price. Choose the OASE if the visual profile and integrated heater matter more to you.

    Pros
    • 3 stage
    • Large capacity
    • Excellent price
    Cons
    • Bulky visual profile
    • Not ideal for display aquascapes

    3. Tetra Whisper

    Budget Option
    Tetra Whisper Internal Filter
    Tetra Whisper Internal Filter

    Tetra’s 3 stage internal filter offering is a great budget option for those looking for value.

    Buy On PetcoBuy On Amazon

    I’m generally not a Tetra filter fan. But this one earns its spot. For a tight budget in a small tank, the Whisper internal delivers three-stage filtration at a price point that makes it an easy first filter for beginners.

    The traditional bio-bag is here, but there’s also a permanent biological filter section Tetra calls a bio-scrubber. That biological component is what saves this filter from being just another cartridge-based throwaway. It’s very quiet. Instructions are genuinely terrible, so if you pick this one up, find a setup guide before you start.

    The mounting system is the weak point. Clip-mount only, which locks you to the top of the tank. Not usable for shallow setups. And long-term, replacement cartridges add up. Budget price now, higher maintenance cost over time.

    Pros
    • 3 stage
    • Cheap entry price
    • Air driven
    Cons
    • Cartridge-based (ongoing cost)
    • Clip mount only, not suitable for shallow setups

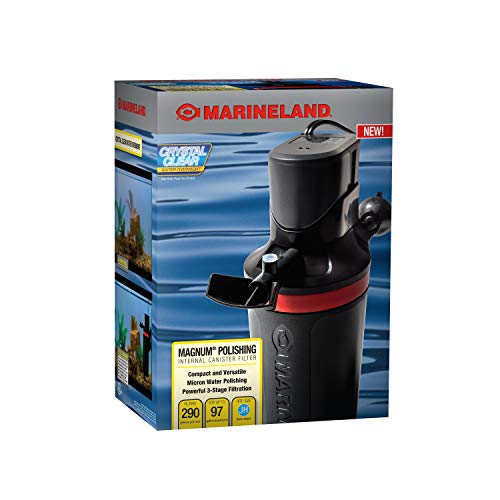
    4. Marineland Magnum Polishing

    The Magnum is a specialty tool, not an everyday filter. It’s a diatom-capable internal polishing filter, which means it can pull microscopic particles out of your water column that a standard filter misses entirely. After a substrate stir, after treating for disease, or after any event that clouds your water, the Magnum clears it fast. It’s the filter I reach for when I need crystal clear water quickly, not the filter I’d run 24/7 as a tank’s primary filtration.

    Pros
    • Diatom polishing capability
    • Powerful flow rate
    • Great for water clarity emergencies
    Cons
    • Specialty use, not primary filtration
    • Higher price for what it does

    5. Aqueon Quietflow Internal

    Aqueon built this one specifically for shrimp and fry, and it shows. The intake is designed so small animals don’t get sucked in, which is the one thing most internal filters get completely wrong for delicate livestock. If you’re running a breeding tank or a shrimp colony, this filter addresses the problem directly. Flow is gentle enough that it won’t stress out cherry shrimp or newly hatched fry.

    Pros
    • Safe intake for shrimp and fry
    • 3 stage filtration
    • Quiet operation
    Cons
    • Limited to smaller tanks
    • Not enough flow for heavily stocked setups

    6. Fluval U3

    Fluval’s U-series internal filters are the ones I keep running in my own quarantine tanks. The U3 specifically hits a sweet spot: enough flow for tanks up to 40 gallons (150 L), three-stage filtration with decent media volume, and Fluval’s reliable pump engineering. Maintenance is straightforward. The media baskets are accessible without a fight. I’ve had U-series filters running without issues for years in my own facility, which is the kind of track record that matters more than spec sheet numbers.

    Pros
    • Reliable long-term performance
    • Easy maintenance
    • Good flow for mid-size tanks
    Cons
    • Not the most media capacity for the size
    • Pricier than Penn-Plax for comparable volume

    7. SICCE Shark

    The SICCE Shark doesn’t get talked about enough. SICCE is an Italian manufacturer with a strong reputation in the European aquarium market, and this filter reflects that build quality. The pump is quiet and reliable. Three-stage filtration, adjustable flow, solid media capacity for its size. If you’re building out a tank and want a filter that just runs without demanding attention, the SICCE Shark belongs on your shortlist.

    Pros
    • Reliable European build quality
    • 3 stage filtration
    • Quiet pump
    Cons
    • Less widely available
    • Replacement parts harder to source locally

    BUY OR SKIP?

    Buy if: You’re running a quarantine tank, breeding setup, nano tank, or aquascape where an external filter is impractical or too powerful. Internal filters shine in these specific contexts. Skip if: You have a heavily stocked tank over 40 gallons (150 L) and expect your filtration to do the heavy lifting on its own. Internal filters work, but for high-bioload setups, they need to be paired with something stronger or sized up significantly from the tank’s rated volume.

    Should You Buy an Internal Filter?

    Good Fit If:

    • You’re setting up a quarantine or hospital tank and need reliable filtration fast
    • Your tank is under 20 gallons (75 L) and flow rate from a HOB would be too aggressive
    • You’re running a shrimp tank or fry tank where intake safety matters
    • You want a clean visual profile in an aquascape and don’t want equipment showing
    • You need a secondary filter to boost an existing system

    Avoid If:

    • You have a heavily stocked tank over 40 gallons (150 L) with high-waste fish
    • You want maximum biological filtration capacity without spending a premium
    • You plan to never think about your filter (internal filters need more frequent maintenance than canisters)

    MARK’S TOP PICK

    The OASE BioPlus is the clear winner if budget is not the primary constraint. Nothing else in this category combines filtration quality, integrated heating, and visual profile the way it does. For a display aquascape or a tank where presentation matters, it’s the only internal filter I’d recommend without hesitation. If you need flexibility and media volume at a lower price, the Penn-Plax Cascade is the pick. For quarantine setups specifically, I reach for the Fluval U-series every time.

    WHAT MOST PEOPLE MISS

    Biological media volume is more important than mechanical filtration in most internal filters. Everyone reads the flow rate, but the actual surface area available for beneficial bacteria colonies is what determines whether your filter handles your bioload or just pushes water around. A filter with 150 GPH but minimal bio media loses to a 100 GPH filter with packed ceramic rings in a moderately stocked tank. Read the media specs, not just the flow numbers.

    Closing Thoughts

    Internal filters aren’t a compromise. Used correctly, they’re exactly the right tool. The key is matching the filter to the actual purpose: quarantine tanks, breeding setups, nano builds, and aquascapes where external equipment isn’t practical. Size up from what the box says is appropriate, pay attention to biological media capacity, and don’t expect one small internal filter to carry a heavily stocked 40-gallon tank on its own.

    My top pick is the OASE BioPlus for anyone who wants the best. The Penn-Plax Cascade for best value. The Fluval U-series for proven long-term reliability in real working setups. Any of these will serve you well if you use them where they belong.

    For fish and supplies, I regularly point people toward Flip Aquatics and Dan’s Fish for healthy, well-acclimated livestock and quality gear. Good filtration protects your investment in good fish.

  • Fish For A 5 Gallon Tank – 10+ Great Choices (With Pictures)

    Fish For A 5 Gallon Tank – 10+ Great Choices (With Pictures)

    Five-gallon tanks are tricky because the stocking options are genuinely limited, and I see a lot of bad advice online suggesting fish that have no business being in that small a space. I’ve set up 5-gallon tanks myself for bettas and nano fish, and done right they can look absolutely stunning. The key is respecting the volume and sticking to species actually suited for it.

    A 5-gallon tank does not equal easy. It equals less forgiving. Parameters swing faster, ammonia spikes happen faster, and recovery time for mistakes is minimal. This is why I usually recommend these tanks to hobbyists who have already cycled a tank and understand water chemistry, not beginners who want a low-commitment setup.

    Expert Take | Mark Valderrama, AquariumStoreDepot

    I’ve kept 5-gallon tanks myself, and the ones that look genuinely beautiful have one thing in common: they were built around a single species concept. A male betta in a planted 5-gallon is a showpiece. A school of 10 chili rasboras against dark substrate and stem plants is one of the most visually striking things in the hobby at any tank size. Where people go wrong is trying to stock these tanks like a community aquarium. You can’t. Pick one concept, build the tank around it, and keep up with weekly water changes. That’s the formula.

    Key Takeaways

    • A 5-gallon tank is not a beginner tank. Small water volume means faster parameter swings and less margin for error. Weekly water changes are non-negotiable.
    • Stick to one species concept per setup. A male betta alone, a school of nano fish, or an invertebrate colony. Mixing species in a 5-gallon rarely works well.
    • Guppies, neon tetras, and goldfish do not belong in a 5-gallon tank long-term. These are common recommendations that are wrong.
    • Chili rasboras, ember tetras, scarlet badis, and pea puffers are genuinely suited for this size. The betta is the most popular choice for good reason.
    • Filtration and a heater are required for most species on this list. There are no shortcuts on equipment in a 5-gallon.

    How to Think About Stocking a 5-Gallon Tank

    ASD 5-Gallon Stocking Tiers

    Tier 1 (Best choice for most people): Single male betta. One fish, manageable bioload, massive personality, and genuinely beautiful in a planted 5-gallon. This is the benchmark. Everything else on this list is for people who want something different from a betta.

    Tier 2 (Excellent for experienced nano keepers): A species-only school of true nano fish: chili rasboras (10 to 12), ember tetras (8 to 10), or celestial pearl danios (6 to 8). Requires a well-cycled, planted tank and consistent maintenance.

    Tier 3 (Invertebrate colony): Cherry shrimp, amano shrimp, or a combination shrimp tank. Low bioload, fascinating behavior, excellent for planted setups. Not fish, but worth including because a 5-gallon shrimp colony is one of the most rewarding setups at this scale.

    The 13 Best Fish and Invertebrates for a 5-Gallon Tank

    1. Betta Fish

    Mark’s Pick: Best Fish for a 5-Gallon Tank

    The betta is my top recommendation for a 5-gallon tank, and not just because it’s popular. A male betta in a well-planted 5-gallon with a heater and gentle filtration is genuinely one of the most visually rewarding setups in freshwater fishkeeping. The personality, the finnage, the daily interaction. It’s the full package at a small scale. Keep one male, no other fish, and build the environment around him. You’ll get a fish that recognizes you at the glass and flares at his own reflection for entertainment. Use code ASDFISH at Flip Aquatics for a discount on quality betta stock.

    • Scientific Name: Betta splendens
    • Adult Size: 2.5 to 3 inches (6 to 7.5 cm)
    • Care Level: Moderate
    • Temperament: Aggressive toward other bettas; generally peaceful with no tank mates
    • Diet: Carnivorous. Feed live or frozen foods, quality pellets
    • Origin: Thailand, Vietnam, Cambodia
    • Temperature: 75 to 80°F (24 to 27°C)
    • Swimming Level: Midwater and top

    Betta fish are the most popular fish for nano tanks for good reason. These beautiful fish come in dozens of varieties with different color patterns and fin shapes. You should keep only one male per tank as males are highly aggressive toward each other. Bettas have big personalities, recognize their owners, and can even learn simple behaviors like jumping for food. A 5-gallon is the minimum tank size. A heater and a gentle filter are required.

    2. Guppy (Males Only, Trio)

    Guppy Fish
    • Scientific Name: Poecilia reticulata
    • Adult Size: 2 inches (5 cm)
    • Care Level: Easy
    • Temperament: Peaceful
    • Diet: Omnivore
    • Origin: Caribbean and northeastern South America
    • Temperature: 63 to 82°F (17 to 28°C)
    • Swimming Level: Midwater and top

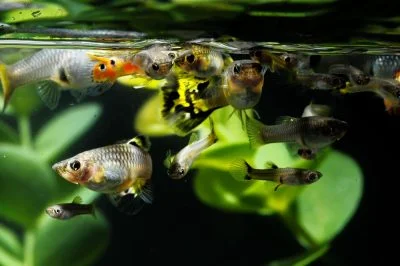
    Guppies can work in a 5-gallon, but only as a trio of males without females. If you keep males and females together, you will have a breeding population within weeks and a severely overstocked tank shortly after. Three males in a well-maintained 5-gallon, no females, is a reasonable setup with a lot of color movement. The males are smaller and significantly more colorful than females.

    3. Chili Rasbora

    • Scientific Name: Boraras brigittae
    • Adult Size: 0.8 inch (2 cm)
    • Care Level: Easy
    • Temperament: Peaceful
    • Diet: Carnivore. Live or frozen micro-foods, quality micro pellets
    • Origin: Southeast Asia (Borneo)
    • Temperature: 68 to 82°F (20 to 28°C)
    • Swimming Level: Midwater

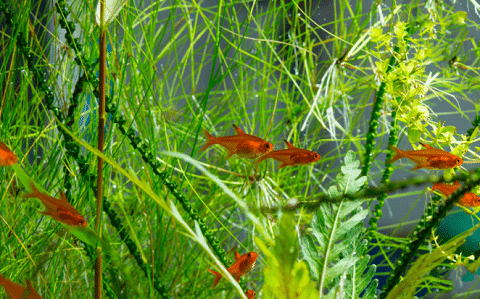
    Chili rasboras are one of the smallest fish in the hobby at under 1 inch (2.5 cm). In a planted 5-gallon with dark substrate, a school of 10 to 12 chili rasboras is one of the most visually striking nano setups you can build. They are peaceful enough to coexist with shrimp and snails. Keep them in a species-only setup as they struggle to compete for food with larger fish. No heater required in most homes.

    4. White Cloud Mountain Minnow

    White Cloud Minnow
    • Scientific Name: Tanichthys albonubes
    • Adult Size: 1.5 inches (4 cm)
    • Care Level: Easy
    • Temperament: Peaceful
    • Diet: Omnivore
    • Origin: China
    • Temperature: 58 to 72°F (14 to 22°C)
    • Swimming Level: Midwater

    White cloud minnows are beautiful, cold-tolerant fish that work in a 5-gallon without a heater. They prefer cooler water than most tropical species (58 to 72°F / 14 to 22°C), which actually makes them a better choice than bettas for rooms that run cool. Keep a small group of four. These fish look better in a group than alone.

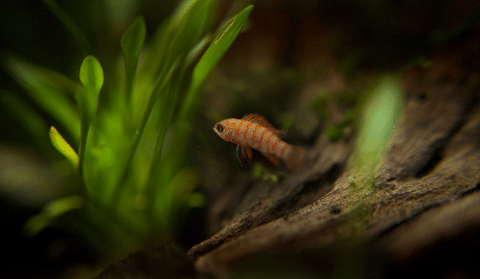
    5. Scarlet Badis

    Scarlet Badis
    • Scientific Name: Dario dario
    • Adult Size: 0.5 to 0.75 inches (1.2 to 2 cm)
    • Care Level: Moderate to advanced
    • Temperament: Semi-aggressive (males territorial with each other)
    • Diet: Carnivore. Needs live or frozen micro-foods. Rarely accepts dry food.
    • Origin: India
    • Temperature: 64 to 79°F (18 to 26°C)
    • Swimming Level: Bottom and midwater

    Scarlet badis are tiny fish with exceptional color. The males are among the most vibrantly colored fish available at this size. The catch: they will rarely eat dry food. You need to be prepared to feed live or frozen micro-foods (micro worms, baby brine shrimp, daphnia) consistently. They are also shy and poor competitors, so keep them in a species-only setup with one male and a group of females.

    6. Dwarf Pea Puffer

    • Scientific Name: Carinotetraodon travancoricus
    • Adult Size: 1 inch (2.5 cm)
    • Care Level: Moderate
    • Temperament: Aggressive. Species-only tank required.
    • Diet: Carnivore. Live and frozen foods. Snails for beak maintenance.
    • Origin: India
    • Temperature: 72 to 82°F (22 to 28°C)
    • Swimming Level: Midwater

    Dwarf pea puffers are tiny fish with a predator brain. They will attack anything they perceive as competition or prey, which means no tank mates. One pea puffer in a planted 5-gallon is an excellent single-species setup. They need live and frozen foods (brine shrimp, bloodworms, micro-worms, and snails to keep their beaks worn down). Their curiosity and intelligence make them one of the most engaging fish in the hobby at this scale.

    7. Celestial Pearl Danio

    • Scientific Name: Celestichthys margaritatus
    • Adult Size: 0.75 inch (2 cm)
    • Care Level: Moderate
    • Temperament: Peaceful (males can be territorial with each other)
    • Diet: Omnivore
    • Origin: Myanmar
    • Temperature: 68 to 78°F (20 to 26°C)
    • Swimming Level: Midwater

    Celestial pearl danios are stunning. Pearl-spotted bodies with red-orange fins. In a planted 5-gallon, a group of 6 to 8 looks genuinely remarkable. They are shy, so dense plant cover is important for natural behavior and color expression. Males are territorial with each other, so provide enough visual breaks in the planting. Safe with shrimp.

    8. Cherry Shrimp

    • Scientific Name: Neocaridina heteropoda
    • Adult Size: 1.5 inches (4 cm)
    • Care Level: Easy
    • Temperament: Peaceful
    • Diet: Omnivore. Biofilm, algae, shrimp pellets.
    • Origin: Taiwan
    • Temperature: 65 to 85°F (18 to 29°C)
    • Swimming Level: Bottom

    Cherry shrimp are an excellent alternative to fish for a 5-gallon tank. Start with 10 to 15 shrimp in a planted setup and they will breed and establish a self-sustaining colony. Keep them in a shrimp-only tank. Most fish will prey on them, including fish typically considered peaceful. A shrimp colony in a planted 5-gallon with dark substrate is genuinely beautiful and low maintenance once established.

    9. Amano Shrimp

    • Scientific Name: Caridina multidentata
    • Adult Size: 2.5 inches (6 cm)
    • Care Level: Moderate
    • Temperament: Peaceful
    • Diet: Omnivore. Excellent algae eater.
    • Origin: East Asia
    • Temperature: 65 to 85°F (18 to 29°C)
    • Swimming Level: Bottom

    Amano shrimp are the best algae-eating shrimp available. They are more durable than cherry shrimp and do excellent work in planted tanks. In a 5-gallon, 3 to 5 Amano shrimp can coexist with a male betta (usually), though individual betta temperaments vary and some will hunt shrimp. Introduce the shrimp before the betta and provide dense planting for refuge.

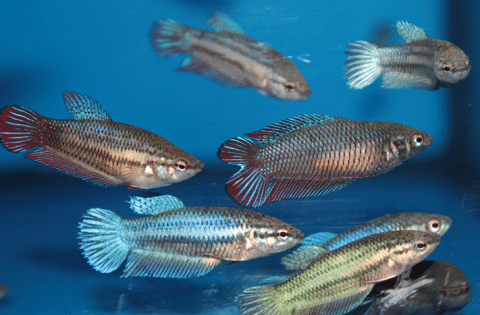
    10. Female Betta (Single)

    Female Betta

    Female bettas are less aggressive than males and can be kept alone in a 5-gallon as a quieter alternative. Less dramatic fins and colors than the males, but still a good-looking fish with genuine personality. Do not attempt a female sorority in a 5-gallon. The minimum for a sorority is a 20-gallon long, and even then it requires careful management.

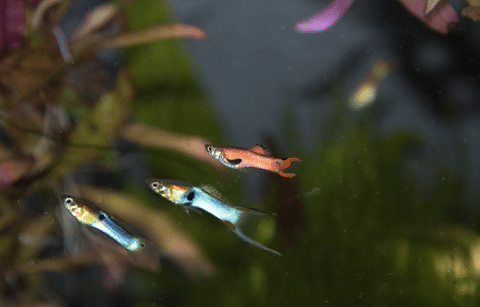
    11. Endler’s Livebearer (Males Only)

    Endler's Livebearer
    • Scientific Name: Poecilia wingei
    • Adult Size: 0.75 to 1.25 inches (2 to 3 cm)
    • Care Level: Easy
    • Temperament: Peaceful
    • Diet: Omnivore
    • Origin: Venezuela
    • Temperature: 75 to 86°F (24 to 30°C)
    • Swimming Level: Midwater and top

    Endler’s livebearers look like small, vivid guppies and are one of the best-colored nano fish available. Males only in a 5-gallon. If you add females, breeding will quickly overstock the tank. A group of 4 to 5 males in a planted 5-gallon is active, colorful, and low maintenance.

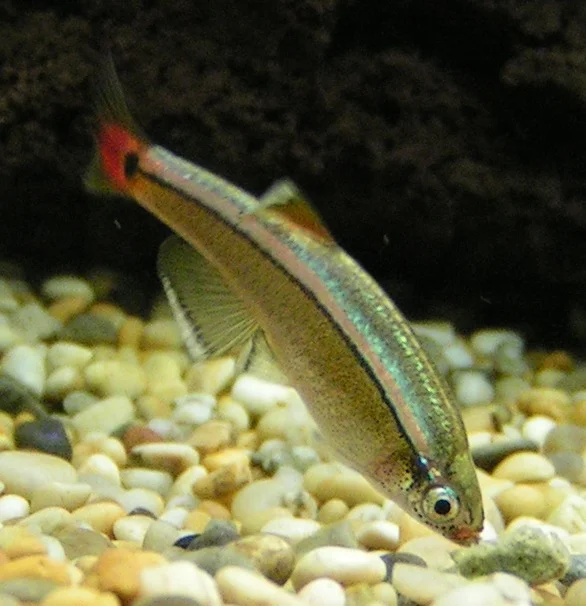
    12. Ember Tetra

    Ember Tetra
    • Scientific Name: Hyphessobrycon amandae
    • Adult Size: 0.8 inches (2 cm)
    • Care Level: Easy
    • Temperament: Peaceful
    • Diet: Omnivore
    • Origin: Brazil
    • Temperature: 68 to 82°F (20 to 28°C)
    • Swimming Level: Midwater

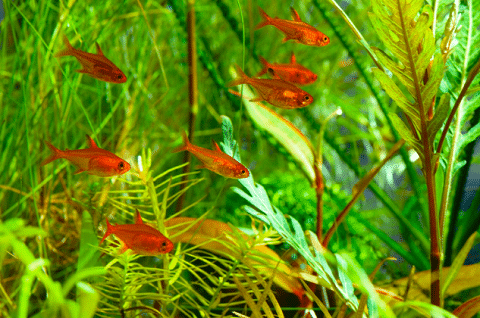
    Ember tetras are small, orange-red, and peaceful. In a planted 5-gallon, a school of 8 to 10 ember tetras is visually striking and bioload-appropriate. They prefer planted tanks where they feel more comfortable and color up better. A dark substrate and soft lighting bring out their best coloration.

    13. Emerald Dwarf Rasbora

    Emerald Dwarf Rasbora
    • Scientific Name: Microrasbora erythromicron
    • Adult Size: 0.8 inches (2 cm)
    • Care Level: Moderate
    • Temperament: Peaceful (males can be territorial)
    • Diet: Omnivore
    • Origin: Myanmar
    • Temperature: 68 to 75°F (20 to 24°C)
    • Swimming Level: Bottom and midwater

    The emerald dwarf rasbora is an amazing nano fish species with turquoise body banding and orange-red fins. They need higher pH water (7.0 to 7.5) and appreciate a densely planted tank. They are shy, so live plants are important for natural behavior. A group of 6 to 8 works well in a 5-gallon planted setup.

    What Does NOT Work in a 5-Gallon Tank

    Avoid These in a 5-Gallon Tank

    • Goldfish. Goldfish are cold water fish that grow to 6 to 12 inches (15 to 30 cm) and produce enormous waste. A single goldfish in a 5-gallon is inadequate on every metric. This is one of the most common and most damaging beginner mistakes.
    • Neon tetras (school). Neon tetras need a minimum school of 8 to 10 fish to be comfortable, and they need a mature, stable tank. A 5-gallon with 10 neon tetras is overcrowded and produces more ammonia than most filtration systems can handle properly. Neons belong in a 10-gallon minimum.
    • Guppies with females. A trio of males only works. Any female added will trigger breeding and you will have dozens of fry within weeks.
    • Corydoras catfish. Corydoras are schooling fish that need a group of 5 to 6 minimum. That is too many fish for a 5-gallon bioload. They belong in a 20-gallon+.
    • Any fish over 1.5 inches (4 cm) in groups. The bioload math does not work. At this tank size, larger fish in groups exhaust the system rapidly.

    Choosing Your 5-Gallon Concept: Side-by-Side Comparison

    Species Group Size Heater Required Shrimp Safe Difficulty Best For
    Betta (male) 1 Yes Sometimes Moderate Most hobbyists
    Chili rasbora 10 to 12 No (cool room ok) Yes Easy Planted nano builds
    Ember tetra 8 to 10 Yes Yes Easy Planted community look
    Pea puffer 1 Yes No Moderate Personality fish keepers
    Cherry shrimp colony 10 to 20 No Shrimp only Easy Low-maintenance planted
    Scarlet badis 1 male + 2-3 females Yes Yes Advanced Experienced nano keepers

    How to Set Up a 5-Gallon Tank

    Filtration

    A filter is required. No exceptions. In a 5-gallon tank, ammonia builds fast. Your options are a hang-on-back filter sized for the tank (look for low-flow models with adjustable output), a small internal power filter, or a sponge filter powered by an air pump. The sponge filter is my preference for nano tanks: gentle flow, easy to clean, and provides surface area for beneficial bacteria. Use a pre-filter sponge on any intake to prevent small fish and shrimp from being pulled in.

    Heating

    For tropical species (bettas, chili rasboras, ember tetras, pea puffers), a small 25-watt adjustable heater is essential. Temperature swings in a 5-gallon happen fast. A heater maintains the stability your fish need. Always pair with a thermometer. The Fluval Spec V is a solid all-in-one option if you want the tank, light, and filtration in one package.

    Plants and Substrate

    Live plants are strongly recommended in a 5-gallon. They absorb ammonia and nitrates, provide hiding cover that reduces stress, and dramatically improve the visual quality of the tank. Good low-maintenance options for a 5-gallon: java fern, anubias nana, java moss, and bucephalandra. None of these require CO2 injection or high-output lighting.

    Dark substrate (dark gravel or black sand) makes nano fish and shrimp look their best. It also reduces stress in naturally shy species like chili rasboras and scarlet badis.

    Aquarium Maintenance in a 5-Gallon: The Hard Truth

    Weekly water changes are not optional in a 5-gallon tank. This is the single biggest factor in keeping fish healthy at this scale. Change 20 to 30% of the tank volume every week. Vacuum the substrate during water changes to remove waste buildup. Match the temperature of the replacement water to the tank before adding it, and treat with a water conditioner to neutralize chlorine and chloramine.

    Test your water weekly for ammonia, nitrite, and nitrate. Both ammonia and nitrite should read zero in a properly cycled tank. Nitrate should stay below 20 ppm with weekly water changes. If ammonia or nitrite are reading above zero, you have a problem that needs to be addressed immediately. In a 5-gallon, these numbers can rise to dangerous levels within 24 to 48 hours.

    Where to Buy Fish for Your 5-Gallon

    Most of the fish on this list are easy to find at local aquarium stores, but true nano fish like chili rasboras and scarlet badis can be harder to track down. These are my recommended online sources:

    FAQ

    How many fish can you keep in a 5-gallon tank?

    It depends entirely on the species. One male betta is the right number for that species. Ten chili rasboras works well. For schooling nano fish like ember tetras, 8 to 10 is appropriate. The old inch-per-gallon rule is not a reliable guide. Focus on bioload and adult size, not fish count.

    Can you keep 2 fish in a 5-gallon aquarium?

    For most species, the answer is no. Two fish creates a community dynamic that 5 gallons cannot support well. The exception is male-only livebearers (2 to 3 males of endlers or guppies). Bettas and pea puffers are always solo in a 5-gallon.

    Is a 5-gallon tank big enough for a betta?

    Yes. A 5-gallon is a perfectly good betta tank. It’s significantly better than the small cups or 1-gallon bowls bettas are often sold in. A heater, a gentle filter, and live plants make a 5-gallon an excellent home for a single male betta.

    What else can live in a 5-gallon besides fish?

    Cherry shrimp, amano shrimp, and freshwater snails (nerite snails, mystery snails) all work well. A 5-gallon shrimp colony with a few nerite snails and dense planting is one of the most low-maintenance setups you can build at this scale.

    Do I really need weekly water changes in a 5-gallon?

    Yes. Weekly water changes are the most important maintenance task in a nano tank. The smaller the water volume, the faster water quality degrades. Skipping water changes in a 5-gallon leads to ammonia and nitrate buildup that will stress or kill your fish faster than in larger tanks. There is no workaround for this.

    Final Thoughts

    A 5-gallon tank done right is one of the most satisfying setups in the hobby. The key word is done right. Pick one species concept, build the environment around that species, and commit to the maintenance schedule. A male betta in a planted 5-gallon, a school of chili rasboras against dark substrate, or a shrimp colony in a lush planted setup. All three are genuinely beautiful. All three require respect for the constraints of the tank size.

    What does not work is treating a 5-gallon like a small community tank. The volume is too limited for that. Choose your concept, do it well, and the tank will reward you for it.

    Where to Find 5-Gallon Nano Fish

    True nano fish can be hard to find locally. These suppliers reliably stock the species on this list:

    • Flip Aquatics – Quality livestock with a 30-day guarantee. Good source for bettas, chili rasboras, ember tetras, and shrimp. Use code ASDFISH for a discount.
    • Dan’s Fish – Reliable for nano fish and specialty invertebrates that can be hard to find locally.
  • Koi Betta: The Ultimate Guide to the Marble Betta’s 6 Types

    Koi Betta: The Ultimate Guide to the Marble Betta’s 6 Types

    Koi Bettas are bred for their marbled color patterns, and those patterns change. Constantly. The fish you buy is not the fish you will have in six months. If you want a specific look, koi bettas are the wrong choice.

    Koi bettas are a lesson in letting go of expectations. The fish decides what it looks like.

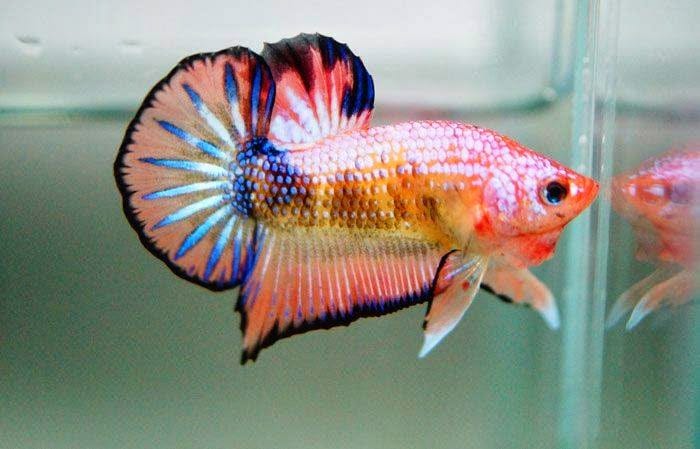
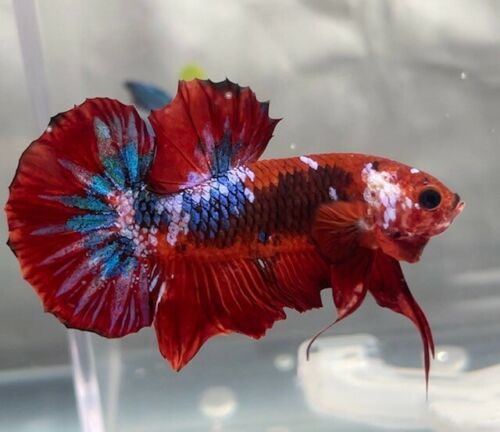
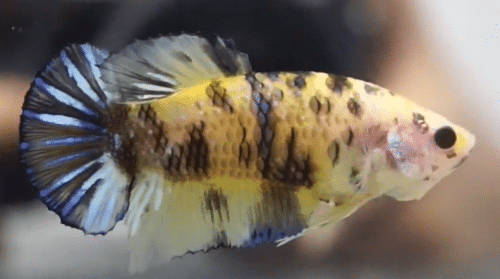
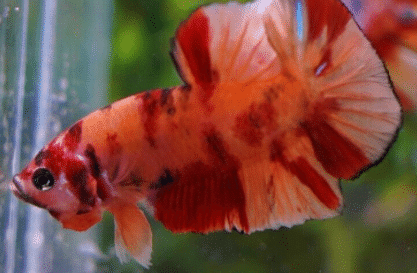
    Koi bettas are genuinely one of the most fascinating fish you can keep. Not just because of their stunning multicolored patterns, but because those patterns can change over time. What most guides don’t mention is that koi bettas are actually marble bettas carrying a genetic quirk called the “jumping gene,” or transposon, that causes pigment cells to shift position as the fish matures. A betta that looks mostly white with orange patches when you buy it might develop deep black marbling over the next year. I’ve watched this happen firsthand and it never stops being interesting. Their care requirements are identical to other betta varieties. Heated filtered tank, quality diet, plenty of hiding spots. But the genetics make them a uniquely rewarding fish to observe long-term. Here are the 6 main types and what sets each apart.

    Species Overview

    The Koi Betta is a fancy variety of your traditional betta fish. What really means them stand out is their coloration.

    Scientific NameBetta splendens
    Common Name (Species)Koi Betta, Marble Betta
    FamilyOsphronemidae
    OriginAsia
    DietOmnivore
    Care LevelEasy
    ActivityActive, social
    SizeUp to 3 inches
    Lifespan2-3 years
    TemperamentPeaceful
    Tank LevelAll Areas
    Minimum Tank Size5 Gallons
    Temperature Range70. 80 Degrees F
    pH Range7 pH
    Filtration/Flow RateClam to Moderate
    Water TypeFreshwater
    BreedingEgg-layers, easy to breed
    CompatibilityPeaceful community species
    Ok For Planted Tanks?Yes

    Origins And Habitat

    Koi Bettas originated from Orville Gulley, a Betta breeder. Both an unusual and intriguing story surrounds these fish. He originally started breeding them in peanut butter jars while in prison!

    The Marble Betta was born from a failed attempt at trying to create the first butterfly black betta. It was discovered that it had the marble gene and after examining this new discovery, Gully submitted some of these new Betta variants to the International Betta Congress, well-known hobbyists, and book authors who have written about Betta fish.

    The Marble Betta became a recognized Betta breed and took on the commercial moniker “Koi Betta” as a trading name since the Betta’s colors and shine resemble that of Koi fish.

    There are no Koi Bettas in the wild as a result of their origins. They are the result of a genetic mutation. The mutation is a jumping gene, a DNA sequence that can change its position within the genome. As a result, the colors of the Koi Betta can change over time as they age.

    Appearance (What Do Koi Betta Fish Look Like?)

    The Koi Betta is a Palkat Betta variety so their shape exhibits a Palkat, however it’s their colors that really stand out. The best way to explain how they look like is to go over all the various varieties of koi bettas.

    Types

    There are 6 types of koi bettas you will see store online or in specialty stores. They are the following:

    • Fancy
    • Galaxy
    • Candy
    • Tiger
    • Nemo Palkat
    • Samurai

    Fancy

    Fancy Marble Plakat Betta

    A Fancy Marble Betta is a fish that exhibits at minimum 3 difference colors

    Galaxy

    Galaxy Koi Betta

    A Galaxy Koi Betta is the most common type you will find. They get the name Galaxy from their iridescent scaling that shimmer when they are moving

    Candy

    Candy Koi Betta Fish

    Candy Koi Bettas are characterized by their black, red, blue or yellow colors. The name comes from looking like a candy treat. Personally, I like to call them ice cream bettas because they remind of sorbert and ice cream bars.

    Tiger

    Tiger Koi Betta

    A tiger betta has a striking yellow body with black or blue colors to compliment it.

    Nemo

    Nemo Koi Betta

    The nemo betta is a marble with orange red and blacks they are the second most popular koi betta you will find

    Samurai

    Samurai Koi Betta

    A Samurai Koi Betta is the rarest of them all. It has the desired dragon scaling with the marble. They come in a variety of colors.

    Note that there is combined varieties in the trade. It’s not uncommon to find a Candy Galaxy Betta has an example. You will also find fancy tail type varieties. Crowntails and halfmoons tend to be the most common. The fancier the fins, the more delicate your betta will be so keep this in mind.

    How Big Can They Get?

    Koi bettas are no different than traditional bettas when it comes to size. They can grow up to 3 inches in length.

    Lifespan

    Just like other Betta fish, the koi betta will have an average lifespan of 2-3 years. Optimal water conditions, low stress, and great nutrition will extend lifespan and quality of life.

    Temperament And Activity Level

    Most Koi Betta fall into the Plakat Betta variety. These betta fish are closer to natural bettas in the wild. As a result, they are more lively and athletic to their fancy finned brothers and sisters. This also makes them more aggressive than the fancy style varieties. This opens them up to larger aquariums and community tanks as they are able to hold their own with more active fish species.

    What Are Good Tank Mates For Them?

    When looking for good tanks mates for your Koi Betta, it is no different than any other betta. You are looking for tank mates that are peaceful, keep to themselves, and enjoy a planted tank setup.

    Good Tank Mates (Species and Inverts)

    The following are excellent choices for your Koi Betta:

    Species To Avoid

    You want to avoid any fish that is semi-aggressive to aggressive. Any fish that can fit your bettas head in its mouth should also be avoided. Examples of fish to avoid would be:

    • Cichlids
    • Aggresive barbs like tiger barbs
    • Fish with long colorful fins

    What Do They Eat?

    There is no specialized diet for a Koi Betta. They are no different than a traditional betta. The same hierarchy is involved with frozen>pellet>flake food. Fish can get bored of eating the same food though. Let’s look at what you can feed your Koi Betta.

    What To Feed Them

    I don’t work with flake food even with bettas. I work with pellet betta fish food at minimum and my go to is Northfin. If I’m going for freeze dried,I prefer feeding my bettas blackworms and soaking with VitaChem to provide extra nutrients for my Betta’s immune system.

    If you are looking for live foods, check with your local fish stores. You might get lucky and find one that offers live blackworms. These are great for bettas. Bloodworms are more available, but blackworms are simply fantastic if you can find them.

    You can order live blackworms online in bulk if you are extra brave with having worms shipped to you 😅. Brine shrimp can also work, but lack the nutrient punch that blackworms provide for these freshwater fish.

    Your Betta is also an algae eater, so they will also accept algae wafers.

    How To Set Up A Suitable Tank (Tank Requirements)

    Here’s what you need to keep in mind when setting up your koi bettas’ fish tanks. We also included a video from our YouTube channel for more visuals. Please sure to subscribe to our channel if you like our content. We post new videos every week.

    What Is A Proper Tank Size?

    It would be best to have a new tank of at least 2.5 to 5 gallons for your koi betta fish. Please do not make the mistake of putting these long finned fish in a small bowl, like children’s films and comics; this will stress them out and decrease their lifespan significantly, and they already have a short lifespan.

    Heater

    Koi bettas originate in warm Southeast Asian regions such as Thailand and Indonesia. As such, it’s important to provide a submersible heater in their tank that will allow the water to remain between 76 and 80 degrees F.

    Be careful not to let the temperature get too high. This might cause your koi bettas to age faster. On the other hand, if the temperature is too low, your fish are at greater risk of infections.

    So what do you do? Choose a heater that comes with a thermostat. That way, you don’t have to worry about upsetting the balance.

    Decor

    The decor you choose for your koi betta should be smooth to not hurt your fish. If you’re thinking of installing artificial plants, go for those made of silk. Also, consider installing some tunnels and caves for your koi bettas to hide in.

    Live Aquarium Plants

    The natural habitat of koi betta fish is heavily vegetated. As such, you should provide many plants which your fish can use as hiding or sleeping spots. This is particularly important if you put them in a community tank.

    Substrates

    Gravel and sand are the best substrate choices for koi bettas. However, it would help if you aimed to provide a substrate that promotes the growth of your chosen live plants like an active soil.

    Lighting

    The koi bettas follow a similar schedule as humans; they sleep at night and wake up during the day. Therefore, when it comes to the lighting conditions, you don’t need to put extra effort into creating artificial light for your tank. All you need to do is turn off the lights before heading off to bed.

    Tank Position

    You must be careful with where you place your koi bettas’ tank. If it’s too close to the window, the tank will heat up or cool down too quickly (depending on the season). For the same reasons, avoid putting your koi bettas near sources of heat, such as radiators.

    Additionally, place the tank on a flat and stable surface.

    Water Quality And Tank Conditions

    Water quality is very important for your Koi to be healthy and avoid common fish diseases. Let’s dive into it more below.

    Which Filters Are Most Suitable For This Type of Fish?

    Koi betta fish need gentle filters in their aquarium to emulate their natural habitat. A sponge filter can work great, but may not provide enough filtration in a full planted setup. Adjustable filters are best as this allows for optimal current creation. Power filters is adjusted for lower flow and you can place a sponge on the intake to prevent the filter from suck the fins of your Betta.

    Whatever you do, though, don’t skip out on the filter; it keeps the aquarium water clean and prevents the buildup of toxic waste.

    Water Conditions. Parameters

    To successfully sustain a Betta fish ecosystem, you must keep certain parameters in check. Here’s what you should know:

    Water Temperature

    For Koi Bettas, the ideal water temperature should be around 76 to 80 degrees Fahrenheit. The waters in Vietnam and Indonesia are mainly warm with neutral and slightly acidic conditions. And, to allow the fish to rest and feed on, make sure you change the water at least twice a month and keep some live plants around.

    Water Hardness And pH Range

    Koi betta fishes are used to living in soft water conditions. For pH, you should keep it slightly acidic from 6.0 to 8.0 in the aquarium.

    Not only that, you need to ensure that they can swim up to the aquarium surface to take in oxygen. Koi bettas have respiratory organs using which they can convert oxygen from the air into energy. And so, if the oxygen saturation within the tank is low, they should be able to swim to the surface to obtain it.

    Breeding

    Breeding Betta Fish is a separate post in itself. If you’re looking to breed healthy Marble Bettas, be ready for a slow and nerve-wracking journey. These fishes are easy to breed, but if you want a specific color pattern or variation, you’re going to have to be very selective of the partners selected for the Koi Betta.

    To keep this all in one article, I’m going to supply this great video from Ale’s GuppiLine. I’ll provide some bullet points below to summarize

    The video above covers breeding in general. With Koi Bettas, ss their genes are said to be codominant, pairing them with solid fishes will rarely spawn fishes with unique marble patterns. Almost nine out of 10 times, you are likely to get solid-colored offspring.

    Similarly, if you cross breed two Marble Bettas, it doesn’t necessarily mean your breeding pair will produce a tank full of marble offspring. In fact, the possibilities are endless. Crossing marble genes with one another will give you a range of fry from dark or light solid colors to marbles and sometimes even butterflies.

    When a male koi betta fish is ready to mate, he will start to build bubble nests (a healthy male will also do this sometimes, even when not in mating mode). The male might get aggressive towards a female koi betta fish when she tries to approach his bubble nest.

    How to Distinguish between Male and Female

    How can you tell the gender of your betta fish? For starters, looking at the fins is one way of differentiating male betta from females.

    Female betta fish tend to have smaller fins (by which we mean thinner and sometimes shorter fins) than their male counterparts. However, the fins of females can also be of the same size in length, but male bettas will always have bulkier ventral fins.

    Moreover, the physique of the female betta fish is more streamlined than the male koi betta. You can also look for an egg spot (white lump) which adult female betta fish develop near their ventral fins. Don’t be alarmed if your female Betta doesn’t have one; it simply suggests that they are still very young.

    Furthermore, the body color of male betta fish is comparatively brighter than that of females. Male koi betta have larger heads than females, and they have a curved shape which makes their body appear bulky as opposed to the streamlined look of females.

    Where To Buy

    You will probably find koi bettas listed as an exotic type at your local pet stores. If not, you is able to order them online.

    However, these beautiful fish really deserve to be seen upfront before you purchase them, so we’d suggest finding pet stores where you can do that or a what you see is what you get (WYSIWYG) vendor. You can click on the link below to view WYSWIYG Betta Fish available, which includes Koi Bettas!

    WYSIWYG Available!
    Betta Fish

    Use Coupon Code ASDFISH at Checkout

    Betta Fish are one of the most beautiful varieties of freshwater fish available in the hobby. Easy to care for with plenty of varieties!

    Buy Premium Varieties Buy On Petco Online

    Koi Bettas are one of the more expensive types of Betta Fish. They can go up to $65 apiece, with the lowest price being around $30. The price is even higher if you opt for a breeder quality male.

    Closing Thoughts

    The current popularity of bettas is undeniable. Their wide array of color options and their distinct behavioral traits truly set them apart, as does their hardy build. But the ease of caring for these beautiful fish is what makes them so special. If you are looking for a general overview of Bettas, check out this article.

    Got any questions about Koi Bettas? Leave a comment below and let’s start a conversation!


    📘 Want to learn more? This article is part of our complete Betta Fish Guide. Your ultimate resource for betta care, types, tank setup, feeding, tank mates, and more.
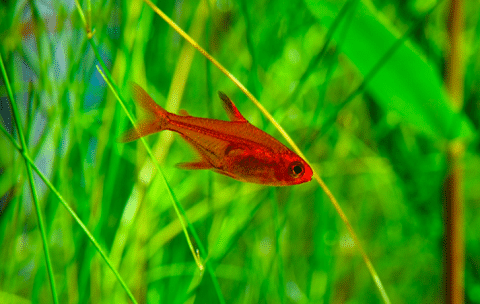
  • 9 Best Bottom Feeder Fish for Freshwater Aquariums (And What They Actually Need)

    9 Best Bottom Feeder Fish for Freshwater Aquariums (And What They Actually Need)

    Bottom feeder fish are some of the most useful additions you can make to a freshwater community tank, and I’ve kept most of the popular species over the years. The biggest misconception I run into is that they’ll “clean the tank” on their own. They won’t. They’re excellent at their specific jobs, but they still need proper feeding, appropriate tank mates, and the right substrate to thrive.

    Bottom feeders don’t clean your tank. They compete for bottom space, and most of them will starve if you don’t target-feed them.

    EXPERT TAKE | MARK VALDERRAMA

    After 25 years keeping fish and time running fish stores, the thing I see most often is people buying corydoras or a pleco as an afterthought, a “cleanup crew” that they think will handle whatever falls to the bottom. Then they’re surprised when the cories are skinny, pale, and hiding in the corners. Corydoras need dedicated sinking food dropped to them at feeding time, ideally after the lights dim so mid-water and surface fish have moved on. The bottom layer is a real zone of the tank that needs its own stocking plan. Don’t treat it like an afterthought.

    Quick Comparison Table

    Species Difficulty Max Size Min Tank Key Trait
    Corydoras Beginner 1-3 in (2.5-7.5 cm) 10-20 gal (38-75 L) Sand substrate required, school of 6+
    Bristlenose Pleco Beginner 5 in (13 cm) 20 gal (75 L) Algae eater, driftwood required
    Otocinclus Intermediate 2 in (5 cm) 10 gal (38 L) mature Needs established tank, algae eater
    Kuhli Loach Intermediate 4 in (10 cm) 20 gal (75 L) Nocturnal, fine sand only, group of 5+
    Clown Loach Intermediate 12 in (30 cm) 100 gal (378 L) Gets large, needs group, eats snails
    Clown Pleco Intermediate 3.5 in (9 cm) 20 gal (75 L) Needs driftwood, heavy waste producer
    Dojo Loach Beginner 10 in (25 cm) 55 gal (208 L) Cold water, needs space, escapes tanks
    Panda Garra Intermediate 3 in (7.5 cm) 20 gal (75 L) High flow, rock dweller, biofilm eater
    Freshwater Shrimp Beginner-Intermediate 1.5-2 in (4-5 cm) 10 gal (38 L) Vulnerable to most fish, shrimp-only tank ideal

    TIER BREAKDOWN

    Beginner: Corydoras, Bristlenose Pleco, Dojo Loach (in cold-water tanks), Freshwater Shrimp (in shrimp-only tanks)
    Intermediate: Otocinclus, Kuhli Loach, Clown Loach, Clown Pleco, Panda Garra, Siamese Algae Eater, Yoyo Loach
    Advanced: Hillstream Loach (high flow, cool, specialized), Synodontis Petricola (African cichlid tank chemistry)

    Key Takeaways

    • Bottom feeders need dedicated target feeding. They do not survive on leftovers from other fish alone. Drop sinking pellets or wafers directly to the substrate at feeding time.
    • Substrate type matters as much as tank size. Corydoras and kuhli loaches need fine sand. Sharp gravel damages their barbels and stresses them chronically.
    • Overcrowding the bottom layer is a common mistake. Multiple species competing for the same zone creates stress and territorial conflict, especially with plecos.
    • The “cleanup crew” myth is one of the most persistent problems in this hobby. Otocinclus eat algae, not detritus. Corydoras eat sinking food, not fish waste. Neither replaces a water change.
    • Clown loaches grow to 12 inches (30 cm) and need 100+ gallon (378 L) tanks at adult size. Most are sold as juveniles in 3-inch (7.5 cm) form.
    • Common plecos grow to 24 inches (61 cm). They’re not appropriate for most home tanks despite being the most commonly sold pleco.

    The 9 Best Bottom Feeder Fish for Freshwater Aquariums

    1. Corydoras Catfish

    Panda Cory Catfish
    • Scientific Name: Corydoras spp.
    • Adult Size: 1-3 inches (2.5-7.5 cm) depending on species
    • Care Level: Beginner
    • Temperament: Peaceful
    • Minimum Tank Size: 10 gallons (38 L) for dwarf species; 20+ gallons (75 L) for others
    • Diet: Omnivorous; sinking pellets, wafers, frozen foods
    • Temperature: 72-82°F (22-28°C)
    • Substrate: Fine sand or smooth gravel only

    Corydoras are the benchmark bottom feeder for freshwater community tanks. They’re peaceful, active during the day, and interesting to watch in a group. The key requirement that most beginner guides skip: fine sand substrate. Corydoras use their sensitive barbels to sift through substrate looking for food. Sharp gravel wears down those barbels, which leads to infection and death. Sand is not optional. It’s the substrate they need.

    Keep them in groups of 6 or more. A lone cory is a stressed cory. They’re naturally shoaling fish and show their best behavior in numbers. Feed them directly with sinking wafers or pellets at the end of the day, after mid-water fish have had their fill. They’ll find what makes it to the bottom, but relying on trickle-down feeding isn’t enough.

    There are over 170 described species of corydoras. Sterbai and panda cories are the most popular. Pygmy and dwarf cories fit nano tanks. Bronze and peppered cories are the classic beginner options.

    2. Otocinclus Catfish

    Otocinclus Catfish
    • Scientific Name: Otocinclus spp.
    • Adult Size: 1.5-2 inches (4-5 cm)
    • Care Level: Intermediate
    • Temperament: Peaceful
    • Minimum Tank Size: 10+ gallons (38 L), mature tank required
    • Diet: Algae, biofilm, supplemental vegetables and wafers
    • Temperature: 70-78°F (21-26°C)

    Otos are excellent algae eaters, particularly for glass and plant surfaces. They eat soft green algae and biofilm, the kind that builds up on tank glass and plant leaves. They don’t eat black beard algae, brown algae crust, or staghorn. Know what you’re getting before you buy.

    The problem with otos is that they arrive from the wild already stressed. Most are wild-caught, not tank-bred. They come in hungry, sometimes already parasitized, and need an established tank with a healthy biofilm layer to feed on. Adding otos to a new tank kills them. Give them a mature system, soft green algae on the glass, and supplement with zucchini or algae wafers. Once acclimated, they’re long-lived and useful. The first few weeks are the critical period.

    3. Dojo Loach (Weather Loach)

    Dojo Loach
    • Scientific Name: Misgurnus anguillicaudatus
    • Adult Size: 10 inches (25 cm)
    • Care Level: Beginner
    • Temperament: Peaceful
    • Minimum Tank Size: 55+ gallons (208 L)
    • Diet: Omnivorous; sinking pellets, wafers, frozen foods
    • Temperature: 50-75°F (10-24°C)
    • Note: Cold water species, incompatible with most tropical setups

    Dojo loaches are cold-water fish from Asia, often called weather loaches because they become noticeably more active when barometric pressure drops before a storm. In a tropical tank at 78°F (26°C), they suffer. They need cooler water in the 59-72°F (15-22°C) range, which makes them appropriate for goldfish tanks and unheated room-temperature setups rather than tropical community tanks.

    They grow to 10 inches (25 cm) and need a tight-fitting lid. Dojo loaches are escape artists. They can squeeze through surprisingly small gaps and will jump from uncovered tanks. Sand substrate is strongly preferred.

    4. Bristlenose Pleco

    Bristlenose Pleco
    • Scientific Name: Ancistrus cirrhosus
    • Adult Size: 4-5 inches (10-13 cm)
    • Care Level: Beginner
    • Temperament: Peaceful toward other species; territorial toward own species
    • Minimum Tank Size: 20 gallons (75 L)
    • Diet: Algae, vegetables, occasional sinking protein wafers
    • Temperature: 73-81°F (23-27°C)

    The bristlenose pleco is the correct pleco for most home tanks. It maxes out at 5 inches (13 cm), unlike the common pleco that reaches 18-24 inches (46-61 cm). It eats algae off glass, driftwood, and decorations. It needs driftwood in the tank, both as a dietary supplement and as territory. Without wood, bristlenoses become more aggressive and can develop digestive issues.

    One bristlenose per tank is the rule for most setups. Two adult bristlenoses in a 20-gallon (75 L) will fight. They’re heavy waste producers for their size, so don’t be fooled by their compact form when sizing filtration. Feed them algae wafers and blanched vegetables, not just tank algae.

    5. Clown Pleco

    • Scientific Name: Panaqolus maccus
    • Adult Size: 3.5 inches (9 cm)
    • Care Level: Intermediate
    • Temperament: Peaceful
    • Minimum Tank Size: 20+ gallons (75 L)
    • Diet: Wood, vegetables, algae wafers, occasional frozen food
    • Temperature: 73-82°F (23-28°C)

    The clown pleco is a wood-eating pleco. This isn’t optional care advice. Wood is a core dietary component for this species. Without driftwood to rasp on, clown plecos develop digestive problems. Add multiple pieces of driftwood and watch them spend hours rasping the surface. They’re smaller than bristlenoses but produce a comparable amount of waste relative to tank volume. Good filtration is necessary.

    6. Freshwater Shrimp

    Cherry Shrimp
    • Scientific Name: Neocaridina spp. and Caridina spp.
    • Adult Size: 1-2 inches (2.5-5 cm)
    • Care Level: Beginner to Intermediate
    • Temperament: Peaceful
    • Minimum Tank Size: 5+ gallons (19 L); 10-20 gallons (38-75 L) recommended
    • Diet: Algae, biofilm, shrimp pellets, blanched vegetables
    • Temperature: 65-78°F (18-26°C)

    Freshwater shrimp are excellent bottom-level cleaners, consuming algae, biofilm, and decaying plant matter continuously. Cherry shrimp (Neocaridina davidi) are the most beginner-friendly. Caridina shrimp, including crystal reds and blue bolts, require softer, more acidic water and are intermediate-level.

    The critical issue with shrimp in community tanks: most fish eat them. Corydoras are generally safe shrimp tank mates. Bettas, gouramis, cichlids, and anything with a larger mouth will pick off shrimp consistently. If you want shrimp to thrive rather than just serve as expensive fish food, a shrimp-specific tank is the practical solution. In species-only setups, they reproduce freely and become genuinely self-sustaining.

    7. Kuhli Loach

    Kuhli Loach in Aquarium
    • Scientific Name: Pangio kuhlii
    • Adult Size: 4 inches (10 cm)
    • Care Level: Intermediate
    • Temperament: Peaceful
    • Minimum Tank Size: 20+ gallons (75 L)
    • Diet: Omnivorous; sinking pellets, wafers, frozen foods
    • Temperature: 73-86°F (23-30°C)
    • Substrate: Fine sand required

    Kuhli loaches are nocturnal, eel-shaped bottom dwellers from Southeast Asia. During the day, they hide in caves, under driftwood, or buried in sand. At night, they emerge and work the substrate systematically. They’re more interesting at night than during the day, which surprises owners who expect visible activity.

    Keep them in groups of 5 or more. A lone kuhli loach rarely comes out of hiding. A group creates activity and makes them bolder. Fine sand substrate is essential because they’ll burrow into it, particularly under flat stones and decorations. They’re escape risks, so a tight lid matters. Sinking pellets dropped at lights-out ensure they’re actually getting fed rather than competing with daytime fish for food.

    8. Panda Garra

    • Scientific Name: Garra flavatra
    • Adult Size: 3 inches (7.5 cm)
    • Care Level: Intermediate
    • Temperament: Peaceful
    • Minimum Tank Size: 20+ gallons (75 L)
    • Diet: Biofilm, algae, wafers, occasional frozen food
    • Temperature: 70-77°F (21-25°C)

    Panda garras are relatively new to the hobby but quickly established themselves as interesting, distinctive bottom dwellers. They have bold black and white patterning and spend their time rasping algae and biofilm off rocks. They need higher flow than most community tanks provide. They come from fast-moving streams in Myanmar and are adapted to well-oxygenated, moving water. A powerhead or wavemaker can help replicate those conditions in a standard aquarium.

    9. Clown Loach

    Clown Loach in Aquarium
    • Scientific Name: Chromobotia macracanthus
    • Adult Size: 10-12 inches (25-30 cm)
    • Care Level: Intermediate
    • Temperament: Peaceful
    • Minimum Tank Size: 100+ gallons (378 L) at adult size
    • Diet: Carnivorous; sinking pellets, frozen foods, snails
    • Temperature: 75-86°F (24-30°C)

    Clown loaches are sold as 2-3 inch (5-7.5 cm) juveniles in most stores. They grow to 12 inches (30 cm) and are among the longest-lived freshwater fish in the hobby, regularly reaching 20+ years. That 100-gallon (378 L) minimum is the adult requirement, not the starting point.

    They’re excellent snail eaters, social fish that need groups of 4 or more, and genuinely entertaining to watch with their sideways resting behavior (which alarms new keepers who think they’re dying but is completely normal). The long-term commitment is the primary consideration. A clown loach purchased today is a multi-decade relationship with a large carnivorous fish.

    Bottom Feeders to Avoid for Most Tanks

    Common Pleco

    Common Pleco in Aquarium

    The most commonly sold pleco grows to 18-24 inches (46-61 cm) and needs a very large tank. It’s sold by chain pet stores constantly as a small, manageable algae eater. It is not manageable in most home tanks. It outgrows a 55-gallon (208 L) setup within a few years. It produces more waste than most fish three times its size. Avoid it unless you’re building a very large display tank specifically around a common pleco.

    Chinese Algae Eater

    Chinese Algae Eater

    Chinese algae eaters grow to 10+ inches (25 cm) and become progressively more aggressive as they mature. Adults regularly attach to and scrape the slime coats off other fish, including large fish they share a tank with. They’re labeled as beginner algae eaters but become problem fish at adult size. There are better options for algae control.

    Tiger Shovelnose Catfish

    Sold as juveniles at 4 inches (10 cm). Grows to over 36 inches (91 cm) and will eat anything that fits in its large mouth. Entirely inappropriate for home tanks unless you have a 250-gallon (946 L)+ custom setup and are experienced with predatory South American catfish. Its appeal at 4 inches (10 cm) does not reflect what you’re committing to long-term.

    Substrate: Why It Matters for Bottom Feeders

    Bottom-layer fish interact directly with substrate in ways that mid-water and surface fish don’t. The substrate choice affects every bottom-dwelling species in your tank.

    Fine sand (pool filter sand or play sand): Best for corydoras, kuhli loaches, dojo loaches. Won’t damage barbels. Allows natural burrowing behavior. Easier to clean detritus from the surface.

    Smooth small gravel (2-3 mm): Acceptable for bristlenose and clown plecos. Not ideal for barbeled species.

    Sharp gravel or coarse substrate: Damages corydoras barbels over time. Causes stress and infection in loach species. Avoid for any bottom-dwelling species with sensitive appendages.

    Bare bottom: Acceptable for temporary setups but removes natural burrowing behavior and foraging stimulation for bottom feeders.

    How to Actually Feed Your Bottom Feeders

    The single most important practical tip for bottom feeder success: target-feed them. Don’t assume they’ll get what falls from above. Here’s how to do it right.

    Drop sinking wafers or pellets directly to the substrate when feeding. Do this after the lights have dimmed for nocturnal species like kuhli loaches. Add feeding spots near hiding places and caves where bottom feeders congregate. Remove uneaten food after a few hours to avoid water quality issues.

    For algae eaters (otos, bristlenoses, clown plecos): supplement with blanched zucchini, cucumber, or spinach. Clip these to the glass at substrate level with a vegetable clip and remove after 24 hours.

    A bottom feeder that’s actually well-fed is active, full-bodied, and holds its color. A bottom feeder that’s starving is pale, thin through the midsection, and inactive. The difference is visible within weeks.

    The Overcrowding Problem

    Most aquarists think about vertical stocking in terms of a simple rule: surface fish, mid-water fish, bottom fish, one of each layer. What they don’t account for is that the bottom layer has just as much capacity for conflict as any other part of the tank.

    Two adult bristlenose plecos in a 20-gallon (75 L) will fight. A corydoras school and a large clown pleco in a 30-gallon (113 L) will compete for sinking food. A kuhli loach group and a panda garra in a small tank will both hide constantly from each other’s movement.

    Plan the bottom layer like its own community. Choose species with different substrate zones and different dietary needs. Corydoras sift sand in open areas. Loaches tunnel under cover. Plecos claim specific pieces of driftwood. Give each species its space and its food source, and the bottom layer becomes genuinely interesting to watch.

    AVOID IF

    You want a “cleanup crew” that won’t need separate feeding. You’re adding a common pleco to a tank under 100 gallons (378 L) as a permanent resident. You have sharp gravel substrate and are planning to add corydoras or loaches. You want otocinclus catfish in a tank that’s been running under 8 weeks. You’re stocking multiple large plecos in the same tank without a plan for territorial management.

    MARK’S PICK

    For a community tank bottom layer: corydoras, every time. They’re active during the day, they school beautifully on fine sand, and a group of 8-10 in a 30-gallon (113 L) is genuinely engaging to watch. Add a bristlenose pleco for algae control and you have a complete bottom layer with species that won’t conflict. For something more unusual: kuhli loaches in a group of 8 or more in a well-planted, fine-sand setup. You won’t see them as much during the day, but at lights-out they become the most active fish in the tank.

    Should You Add Bottom Feeders?

    Good fit if:

    • You have fine sand substrate and want active, visible bottom feeders during the day (corydoras)
    • You have algae on your glass and surfaces and want an effective, size-appropriate eater (bristlenose pleco for most tanks; otos for planted nano tanks)
    • You want nocturnal activity and unusual behavior (kuhli loach group in a heavily planted setup)
    • You have a large community tank with a snail problem (clown loach, yoyo loach)

    Avoid if:

    • You want fish that “clean the tank” without dedicated feeding
    • You have sharp gravel and don’t plan to change it
    • Your tank is under 8 weeks old and you want otocinclus
    • You want shrimp in a tank with any fish larger than a nano species

    Where to Buy

    For corydoras, bristlenose plecos, and kuhli loaches, most local fish stores carry reliable stock. For specialty species like panda garras, hillstream loaches, and less common loach species, online retailers are more consistent.

    Flip Aquatics is one of the best sources for healthy corydoras, plecos, and loach species with excellent stock condition. Dan’s Fish is another strong option for variety and quality.

    FAQ

    Do bottom feeder fish really clean the tank?

    No. Bottom feeders consume specific food types, not fish waste or ammonia. Otocinclus eat soft algae on surfaces. Corydoras eat sinking food and small particles. Neither replaces filtration or water changes. You still need to target-feed bottom feeders separately from your other fish.

    What substrate do corydoras need?

    Fine sand or very smooth, small-grain gravel. Corydoras have sensitive barbels they use to sift through substrate. Sharp or coarse gravel damages those barbels over time, which causes infection and shortens their lifespan. Pool filter sand or play sand is the best option.

    Why are my kuhli loaches always hiding?

    Most likely because they’re kept alone or in too small a group. Kuhli loaches are nocturnal and naturally shy, but a group of 6 or more is significantly more active and bolder than a single loach or a pair. They also need hiding spots and fine sand to feel secure enough to come out.

    How big do clown loaches really get?

    Up to 12 inches (30 cm) in well-maintained tanks, with some specimens reaching that size over 10-20 years. Most stores sell them at 2-3 inches (5-7.5 cm). They need 100+ gallons (378 L) at adult size and live 20+ years. This is a long-term commitment that most impulse buyers aren’t prepared for.

    Can I keep shrimp with other bottom feeders?

    Corydoras and otocinclus are generally safe with adult shrimp. Most other bottom feeders, including loaches, plecos when hungry, and catfish, will eat shrimp given the opportunity. Shrimp are safest in species-only tanks or with extremely small, passive tank mates.

    Why are my otocinclus dying?

    Most likely because the tank is new or not established enough. Otocinclus are wild-caught and arrive in poor condition. They need a mature tank with established biofilm and algae growth. Adding them to a new tank, or a heavily cleaned tank with no algae, gives them nothing to eat. Supplement with blanched zucchini immediately after adding them and maintain a mature, established system.

    Closing Thoughts

    The bottom of your tank is a real zone with real stocking requirements. The species that work best there, corydoras on sand, a single bristlenose on driftwood, a group of kuhli loaches in a planted setup, are genuinely interesting to keep when you give them what they actually need. The ones that fail are usually failing because of substrate problems, insufficient group size, or the assumption that they’ll feed themselves.

    Get the substrate right. Feed them directly. Keep social species in proper groups. That’s the whole recipe. The bottom layer is one of the most rewarding zones in a community tank when it’s set up properly.

    Looking for quality bottom feeders? Flip Aquatics carries healthy corydoras, plecos, and loach species with excellent condition. Dan’s Fish is another reliable source for specialty and less common bottom-dwelling species.

  • Ember Tetra Care Guide: The Perfect Nano Fish for Planted Tanks

    Ember Tetra Care Guide: The Perfect Nano Fish for Planted Tanks

    Table of Contents

    The ember tetra is the definitive nano tank fish. In the right setup with dark substrate, tannins, and proper lighting, they glow like embers in a fire. In a bare, bright tank with hard water, they look like nothing. Setup is everything with this species.

    Ember tetras in the wrong tank are invisible. In the right tank, they are on fire.

    What Most Care Guides Get Wrong About Ember Tetra The Perfect Nano Fish for Planted Tanks

    The most common mistake I see with ember tetra the perfect nano fish for planted tankss is keeping too few. Guides will say “minimum 6” and leave it at that. In reality, these fish behave completely differently in a proper group of 8 to 10 or more. Keeping just 3 or 4 often leads to stress, hiding, and fin nipping that wouldn’t happen in a larger school. Another thing most guides miss is how much lighting and decor affect this species. Ember Tetra The Perfect Nano Fish for Planted Tankss look washed out under bright white LEDs on a light substrate. Dim the lights, add some tannins, use a dark background, and you’ll see colors you didn’t know they had. I’ve also noticed that many care sheets recommend overly broad water parameters. Yes, ember tetra the perfect nano fish for planted tankss are adaptable.

    The Reality of Keeping Ember Tetra

    They look terrible at the fish store. Ember tetras in a bare store tank under bright lights look pale and washed out. This is the number one reason people walk past them. In a planted tank with dark substrate and moderate lighting, they develop an intense orange-red glow that transforms the entire tank. Do not judge this fish by its store appearance.

    Group size matters more than tank size. You can keep embers in a 10-gallon, but the real key is school size. Six is the minimum, but 10 to 15 is where the magic happens. In large groups they school tightly, display brighter color, and exhibit natural foraging behavior that makes them genuinely engaging to watch.

    They are not as fragile as they look. Their tiny size makes people assume they are delicate. They are not. Ember tetras tolerate a reasonable range of water parameters and are hardier than most fish their size. The main thing that kills them is poor acclimation and ammonia spikes in uncycled tanks.

    Biggest Mistake New Owners Make

    Buying 4 or 5 and sticking them in an uncycled tank. They need a mature tank and a proper school. Anything less and you get pale, stressed fish that hide constantly.

    Expert Take (Mark Valderrama, AquariumStoreDepot)
    After 25+ years in this hobby, the ember tetra is still my top recommendation for anyone setting up a planted nano tank. No other fish at this size delivers this combination of color, behavior, and ease of care.

    Species Overview

    Scientific Name Hyphessobrycon Amandae
    Common Names Fire Tetra, Amanda’s, Dwarf Reds, Reds
    Family Characidae
    Origin Brazil
    Diet Omnivore
    Care Level Easy
    Activity Very Active
    Lifespan 2 – 4 Years
    Temperament Peaceful
    Tank Level Midwater
    Minimum Tank Size 10 gallons
    Temperature Range 72 ° to 80 °F
    Water Hardness 4 to 8 dkH
    pH Range 6.5 to 7.5
    Filtration/Water Flow Low
    Water Type Freshwater
    Breeding Egg layer
    Difficulty to Breed Easy
    Compatibility Community tanks
    OK, for Planted Tanks? Yes

    Classification

    Order Characiformes
    Family Characidae
    Genus Hyphessobrycon
    Species H. Amandae (Gery & Uj, 1987)
    ASD Difficulty Rating: Beginner | 3/10
    Ember tetras are easy to keep but need a species-appropriate setup to thrive. Group size and tank environment matter more than water parameters.

    Origins and Habitat

    The Ember Tetra was discovered fairly recently in 1987. It was named after Heiko Bleher’s mother, Amanda Bleher1.

    But don’t be fooled.  Heiko Bleher didn’t actually stumble upon this species himself.  Instead, he is known for his work with other South American fish. 

    Now back to the Ember Tetra.  These fish come from Brazil, where they mostly reside in the Araguaia River basin.  Its slow-moving waters contain plant materials that decompose, creating an acidic environment. 

    These stained waters are called ‘blackwater.’ This dark color makes it easier for Ember Tetras to hide.  

    As shoaling fish, Ember Tetras live in groups.  However, they are not to be confused with schooling fish.  

    Unlike schooling fish, a group of Ember Tetras doesn’t swim in the same direction.  They just stay close together.    

    Ember Tetras are peaceful and can coexist with many other types of wild fish.  Some of those fish include:

    • Other Tetras
    • Pygmy Rasbora
    • Pleco Catfish  

    By the early 1900s, Ember Tetras had found their way into freshwater fish tanks.  Since then, they have become a top choice for aquarium enthusiasts.  

    And that’s understandable when you consider the Ember Tetra’s beautiful appearance.  Plus, they are easy to care for.         

    What Does they Look Like?

    Ember Tetra

    Most Ember Tetras are orange, but some have a reddish-orange glow.  In either case, the Ember Tetra’s iridescent scales make this fish shimmer and stand out in an aquarium.     

    Usually, their fins are a bit darker than the rest of their body.  Their bodies are thicker in the front and thin out towards the back.   

    How Big are They?

    These freshwater fish are tiny, making them the perfect size for a nano tank. You can expect your Ember Tetras to be about ¾ to 1 inch long.

    How Long Do They Live?

    With proper care, aquarium Ember Tetras live about 2-4 years. Although some fishkeepers have claimed this species can live for 10 years, that claim has not been proven and is likely inaccurate.   

    Their short life span is one disadvantage of keeping this otherwise fantastic fish.  But you helps your Ember Tetras live as long as possible by giving them:

    • The ideal tank environment
    • A high-quality diet
    • Interactions with other fish

    Later in this article, we will talk more about those important aspects of Ember Tetra care.  

    Ember Tetra Care Guide

    Ember Tetra are peaceful fish, making them a great addition to community tanks.  You can also keep them in a species-specific tank.

    Whether you choose the former or the latter option, Ember Tetras need to live in a group.  The size of the group depends on how big your tank is, but aim for a minimum of 10-15 fish.

    Because they are so easygoing, the males are unlikely to show aggression towards each other.  That makes it easy to put together a group of Ember Tetras.  

    Although they don’t cause trouble, Ember Tetras are active little fish.  They are always swimming around and aren’t afraid to explore their surroundings.  

    While swimming about, they will likely stick to the middle of the tank.  When they want a break, they will seek refuge in the tank’s plants.  That’s why you need to add some to your aquarium.  More on that later.  

    And those plants aren’t just a resting spot.  Ember Tetras also have a great time racing through them as they swim after each other.  You will definitely be entertained by these fish!       

    What People Get Wrong

    The most common mistake is keeping ember tetras in too small a group. A group of 5 or 6 will hide constantly, show faded coloration, and fail to display the confident schooling behavior that makes this fish so appealing. Groups of 10 or more show completely different behavior , active, front-and-center, and visually stunning in a planted tank.

    The second issue is tank mates. Ember tetras are tiny , 0.8 inches (2 cm) fully grown. Any fish that fits them in its mouth is a threat. Even fish marketed as “peaceful” can pick off ember tetras if there is a significant size difference. They belong in a species-appropriate setup: nano fish only, calm water, and similar-sized community fish like chili rasboras, pygmy corydoras, or small livebearers.

    Third: bright overhead lighting and bare substrate wash out their color. Ember tetras show their best orange-red color against dark substrate with floating plants or a densely planted background. The tank setup determines whether they look like spectacular show fish or washed-out orange dots.

    What Are Good Tank Mates for Them?

    Pencilfish

    Although Ember Tetras are fine in a species-specific tank, their bright colors and gentle disposition make them an excellent choice for a community tank.  

    You just have to choose the right tank mates.  When selecting those tank mates, keep the following pointers in mind:

    • Avoid aggressive fish.  Instead, choose fish that have a friendly nature.  
    • Big fish might eat your tiny Ember Tetras.  That’s why you need to avoid any species that are larger than Ember Tetras.   
    • Ember Tetras are middle-dwellers, so it’s a good idea to select bottom and/or top dwellers for their tank mates.  

    Best Tank Mates

    Now that we’ve given you some general guidelines, here are some specific ideas for tank mates:

    And if you are looking for some non-fish mates, nerite snails and other small snails are great options.  Many nano fish are compatible with these fish.

    Least Compatible Fish

    Oscar Cichlids in Aquarium

    Here are a few examples of fish you definitely want to keep out of an Ember Tetra tank:

    What Do They Eat?

    It’s not hard to find foods that Ember Tetras will gobble up.  The hardest part of feeding this fish is making sure the food is small enough for these tiny creatures to consume.

    With that in mind, you need to break up the food into small pieces.  This will help your Ember Tetras eat the food more easily, which prevents other fish from stealing it.  

    Some options include: 

    • Micropellets
    • Crushed up flakes
    • Frozen foods    

    And don’t get upset if you catch your fish nibbling on a tank plant.  They are just enjoying a little snack and won’t consume enough of the plant to harm it.  A good staple food to consider is Xtreme Aquatic Foods Nano. It’s specially designed for small freshwater fish.

    Great For Nano Fish


    Xtreme Aquatic Foods Nano

    Xtreme Aquatics Nano formula is specially designed for smaller fish and contained a well balance mix of raw ingredients. It is a great staple food for your nano fish.


    Buy On Amazon

    Give Them Live Foods

    Wild Ember Tetras live on a diet of plants and very small prey, such as worms, invertebrates, and zooplankton.  

    Keeping this natural diet in mind, it would be great if you could incorporate some live foods into your Ember Tetras’ meals.  

    Those foods will add some variety to their diet, which ensures all of their nutritional needs are met.      

    Furthermore, they will also help prevent digestive issues that is caused by consuming too much processed food.   

    Here are some live foods you can give your Ember Tetra:

    • Daphnia
    • Tubifex worms
    • Baby brine shrimp
    • Blood worms
    • Insect larvae
    • Grindal worms
    • Microworms

    You can also find these foods in frozen food form if you shop around locally.

    How Much and How Often to Feed Them

    You should feed your Ember Tetras about 2-4 times each day.  At every meal, carefully avoid overfeeding.

    How can you tell if you are feeding the right foods in the right amounts?  It’s not hard to find out.  

    All you have to do is observe your fish.  Are they brightly colored?  Are they active?  Do they do be at ease?

    If you can answer yes to those questions, your Ember Tetras’ diet is meeting their needs.  But if their color begins to fade or they aren’t acting quite right, their diet should be tweaked.    

    Setting Up Your Tank

    Ember Tetra School

    When creating the ideal environment for your fish, you need to keep their natural habitat in mind.  Your goal is to get as close to this habitat as possible.  

    But what exactly does that look like?  That’s what we are going to cover in this section.  Read on to learn more.  

    Tank Size

    Before we talk about the tank’s environment, we need to discuss the tank’s size.  It’s important to choose the right size because Ember Tetras require space for swimming around.  

    The right size depends on how big the group is.  If you have 5-8 fish, the tank should be at least 10 gallons.    

    For every fish beyond the number 8, increase the tank size by one gallon.  Once you hit the 20-25 fish range, you will need a 20-25 gallon tank.  

    Here’s a quick tip.  Maximize swimming space by getting a long tank, rather than a tall one.

    Tank Setup

    After you choose the right size you need to set up the tank.  The tank should include plants, substrate, and decor.  Read on to learn more.  

    Plants

    Ember Tetra in Planted Tank

    Ember Tetras need plants.  The total amount depends on how large the tank is and how many fish you have.  

    You certainly don’t want to crowd your fish.  Instead, give them just enough plants to help them feel secure.  

    This will prevent stress.  And when your fish are stress-free, they will stay healthy and beautiful.

    Furthermore, when the tank has the right amount of plants, your Ember Tetra will have a blast swimming through them.  Your fish can also use them as resting spots.      

    As an added bonus, the plants also house bacteria that your little fish can eat, adding extra nutrition to their diet.  

    Some great plants to use are:

    Floating plants work really well with these fish too. They provide another place for them to hide.

    Substrate

    You can use enriched active soil or mud for substrate.  Whichever one you choose, it’s best to go with a dark color.  This dark tone will make your gorgeous Ember Tetras really stand out!  

    Decor

    The tank’s finishing touches should include rocks and wood.  Ember tetras are great fish to use in planted aquascapes like Iwagumi and Dutch aquascapes. If you have serious interest in those styles of planted tanks, check out the links.


    Traditional Seiryu Stone

    A go to classic. Highly recommended for Iwagumi aquascapes


    Buy On Buce Plant


    Buy On Glass Aqua

    Water Quality

    Okay, now you know what to put in the tank.  Great!  Next, you need to learn how to maintain ideal water conditions.  

    Let’s get started. 

    Filtration

    Wild Ember Tetras live in slow-moving waters, so it’s necessary to replicate this in your aquarium.  

    That is done by installing a sponge filter.  The filter will keep the water clean while also generating the appropriate water flow.    If you need better filtration because you are using a lot of plants, you can consider putting a sponge on the intake and lowering the flow.

    Water Parameters

    These tiny little freshwater fish can’t handle change very well.  That’s why consistency is key when caring for Ember Tetras.  Avoid large fluctuations by keeping a close eye on the tank’s water temperature and pH.  

    Here are the water parameters to aim for:

    • Water Temperature: 72-80 degrees Fahrenheit  
    • pH:  5.5 – 6.7 
    • KH: 4 – 8
    Hard Rule: Keep ember tetras in groups of at least 10. Under 8, they hide, lose their bold orange color, and spend most of their time at the back of the tank. They come alive in numbers. A group of 15 to 20 in a planted nano tank is one of the best-looking setups in the freshwater hobby.

    As you can see, Ember Tetras prefer acidic water.  You reduces pH by adding driftwood or Indian almond leaves to the tank.     

    Aquarium Maintenance

    Although Ember Tetras are very easy to care for, they are sensitive and require regular tank maintenance.  If you fall behind, they might end up with health problems.        

    Test Tank Conditions

    It’s a good idea to get a test kit and test the water about 1-2 times per week.  Taking this step will help you maintain ideal water conditions, allowing your Ember Tetras to thrive.       

    Breeding

    Breeding Ember Tetras is fairly easy.  In fact, some of your fish might breed on their own, without any work on your part.  

    However, the parents and other fish are likely to eat the fry.  That’s why it’s best to work through a process that involves your oversight.  Let’s talk about that right now.  If you prefer a video, you can check out the one below by MaFishGuy Aquarium Information.

    Sexing

    First, you will need to select a male and female to place in a separate breeding tank.  Although sexing Ember Tetras is a bit challenging for newbies, don’t let that intimidate you.  

    Just look at the shape and color of the fish.  Females are rounder and males are brighter.   

    Getting Your Fish Ready to Breed

    Ember Tetras are ready to breed when they are about 4-6 months old.  After you’ve picked out a male and female, place them in a separate breeding tank, away from the other fish.  

    The breeding tank’s water conditions should be pretty close to the regular tank’s conditions, with the temperature and pH being on the higher end of the optimal range.

    Get your fish in tip-top shape for breeding by feeding larval brine shrimp every day for two weeks.        

    The Breeding Process

    When the fish are ready to breed, the male will start chasing and nipping the female.  Once the female is carrying eggs, her abdomen will grow larger.  

    This species doesn’t lay its eggs in any particular location.  That means your Ember Tetra’s eggs will sink to the bottom of the tank.  

    If you put mesh fabric or an egg crate in the tank, these barriers will keep the parents from getting to the eggs.  

    Caring for Fry

    After the eggs have been laid, the parents might try to eat them.  Prevent this by removing them from the tank immediately after the female lays the eggs.  

    The eggs will hatch in approximately 2-3 days, giving you about 100 fry. 

    After they hatch, start feeding infusoria.  When they are a week old, give them baby brine shrimp and small worms.  Eventually, you can start feeding crushed fish flakes.   

    Health and Disease

    Thankfully, Ember Tetras don’t typically have a lot of health problems.  While hardy, that doesn’t mean these fish are invincible.  

    If you want to keep them healthy they need high-quality food, the right water conditions, and social interactions with other tetras.

    Evaluating Your Ember Tetras’ Health

    How can you tell if your Ember Tetras are healthy?  Just take a look at their appearance.  If your fish are brightly colored, they are in great shape!

    On the other hand, a pale fish that acts abnormally isn’t doing too well.  This sick fish is quite vulnerable to attacks and should be removed from the tank.  

    Common Their Health Issues

    Here are the health issues and fish diseases that Ember Tetras are most likely to have:

    • White Spot Disease – This appears as white spots and is caused by stress or poor care.  Prevent this disease by maintaining ideal water conditions.  If the disease occurs, there are products to treat it.    
    • Fungal and Bacterial Infections – These infections is fatal.  Be sure to address the issue immediately!  Signs include rotting fins and cloudy masses.   
    • Impaction – Too much dry food can block the digestive system.  Prevent impaction by including wet food in the diet or soaking dry foods before feeding.      

    Where to Buy

    Many fish stores sell Ember Tetras, making them easy to find.  You will pay about $2 per fish.  Some online fish stores will also sell them. It may make sense to purchase them online if you cannot find a quality local fish store in your area.

    Frequently Asked Questions

    How many can I put in a 10-gallon tank?

    No more than 5-8. Anything above that number may overcrowd the tank. If you want more than 8 fish, you will need a larger tank.

    How many should be in a school?

    Your group of Ember Tetras should consist of at least 10-15 fish. If you want a larger group, be sure to choose a tank that’s big enough to fit them all.

    Do they like currents?

    Wild Ember Tetras live in slow-moving water. Keep this in mind when choosing a filter.

    How long do Neon and this type live?

    The average lifespan is about 2-4 years, provided the fish are properly cared for. This requires feeding the right diet, maintaining optimal tank conditions, and allowing them to live in a group.

    Will they nip a betta?

    Sometimes an Ember Tetra might try to nip a betta or any other fish with long fins. However, they aren’t known to normally exhibit this behavior.

    Is the Ember Tetra The Perfect Nano Fish for Planted Tanks Right for You?

    Before you add a ember tetra the perfect nano fish for planted tanks to your tank, it’s worth asking whether this species actually fits your setup and your goals. Here’s a quick breakdown to help you decide.

    This species is a good fit if:

    • You have a large enough tank to manage territories. Cramped conditions amplify aggression.
    • You’re comfortable managing aggression through stocking ratios, line of sight breaks, and tank layout.
    • You can commit to regular water changes. These fish produce more waste than many smaller species.
    • You’re not planning a peaceful community tank. Ember Tetra The Perfect Nano Fish for Planted Tankss need tank mates that can hold their own.
    • You enjoy watching active, interactive fish. Cichlids have personality that smaller species simply don’t match.
    • You have backup plans. Sometimes a particular fish just doesn’t work out, and you need a way to rehome it.
    • You’re feeding a varied, high-quality diet. Color and health depend on nutrition.

    If most of those points line up with your setup, the ember tetra the perfect nano fish for planted tanks is worth serious consideration. If several don’t, it’s better to choose a species that matches your tank now rather than trying to make it work.

    Avoid If:

    • You keep a bare or brightly lit tank – ember tetras need dark substrate and floating plants to show full orange color; bare setups produce dull, pale fish
    • You keep a group of 5 or fewer – small groups produce anxious fish that hover rather than school
    • You want immediately impactful color – ember tetras build full coloration over weeks in the right setup conditions

    What It Is Actually Like Living With Ember Tetra

    A school of 10+ ember tetras in a densely planted tank creates one of the most visually satisfying displays in the hobby. They move through plant stems like little orange sparks drifting through a forest.

    They occupy the middle water column and rarely venture to the surface or bottom. This makes them perfect tank mates for surface dwellers and bottom feeders.

    Their color changes throughout the day. First thing in the morning they are pale, and by afternoon under full lighting they glow their brightest orange-red.

    They are peaceful to the point of being easy targets. Fast or aggressive tank mates will stress them out and fade their color. Keep the tank calm.

    How the Ember Tetra The Perfect Nano Fish for Planted Tanks Compares to Similar Species

    Choosing between similar species is tricky. Here’s how the ember tetra the perfect nano fish for planted tanks stacks up against some common alternatives.

    Ember Tetra The Perfect Nano Fish for Planted Tanks vs. Glowlight Tetra: Both are warm-toned community tetras, but they fill slightly different roles. The ember tetra the perfect nano fish for planted tanks is smaller and can work in nano tanks as small as 10 gallons, while the glowlight tetra is a bit larger and does best in 15+ gallon setups. Color-wise, they complement each other well and is kept together in a mid-sized planted tank. Check out our Glowlight Tetra care guide for a detailed breakdown.

    Ember Tetra The Perfect Nano Fish for Planted Tanks vs. Flame Tetra: Both species occupy a similar niche in community tanks, but they differ in temperament, coloration, and ideal water conditions. The ember tetra the perfect nano fish for planted tanks is a solid choice for hobbyists who want reliable schooling behavior and easy care, while the flame tetra brings a slightly different look and energy to the tank. In my experience, the deciding factor usually comes down to which aesthetic you prefer and what other species are already in the tank. Check out our Flame Tetra care guide for a detailed breakdown.

    Closing Thoughts

    To sum it all up, Ember Tetras are great fish to keep.  They are easy to care for and get along well with many different types of fish.  Plus, their stunning colors will make your aquarium look amazing!

    As long as you continue providing great care, your Ember Tetras will light up the tank.  And that’s why so many aquarium hobbyists love this species.  

    Check out our tetra tier list video where we rank the most popular tetras in the hobby, including the ember tetra:


    This article is part of our Tetras: Complete A-Z Species Directory. Visit the hub page to explore care guides for all tetra species we cover.
  • The Ultimate Guide to Fishless Cycling – Step-by-Step From a 25-Year Hobbyist

    The Ultimate Guide to Fishless Cycling – Step-by-Step From a 25-Year Hobbyist

    Fishless cycling is the method I recommend to every new hobbyist, and it’s how I set up tanks myself. The old way. adding a few “hardy” fish and hoping for the best. works, but it puts fish through unnecessary stress during the most toxic phase of a new tank. With fishless cycling you get a fully established tank before a single fish goes in, and that makes all the difference in long-term success.

    The nitrogen cycle is the single most important concept in fishkeeping. get it right before you add fish, and you avoid the most common cause of fish death in new tanks. Fishless cycling lets you establish your beneficial bacteria colony without exposing any fish to toxic ammonia and nitrite spikes, and it’s the method I recommend to every new hobbyist I talk to. I’ve cycled more tanks than I can count over 25 years, and in this guide I break down the process step by step so you can do it confidently and not rush it.

    Why Do We Cycle?

    The first question we should start with is why do we do a cycle anyway? And, what exactly is a cycle? Many newcomers may think you can just put a fish in a tank on day one and everything should work out well. Unfortunately, this can lead to some pretty sad results.

    Biology is the major reason why we need to cycle. It all starts with the nitrogen cycle. Until you have a complete cycle, your aquarium is prone to building up toxic levels of nutrients that can harm, stress, and even kill your fish!

    You want the best for your prized pets, so knowing how the nitrogen cycle works should be the first point of reference we need to understand.

    The Nitrogen Cycle

    There is a great video that really explains the nitrogen cycle in a fun and entertaining way by Girl Talks Fish below that I’ll embed for you. I’ll go more into my boring details below:

    There are 4 stages to the nitrogen cycle that occurs in our aquariums. They are:

    • Stage 1 – Ammonia is excreted as a fish waste product or from decaying matter
    • Stage 2 – Nitrosomonas bacteria convert ammonia to nitrite
    • Stage 3 – Nitrobacter bacteria convert nitrite to nitrate
    • Stage 4 – Plants use nitrates as fertilizer

    I’ll go into further details in a future article. The main thing to take away is if your ecosystem cannot get to at least stage 3 with stability, you will have major uses with fish and invert health in your aquarium. We cycle our aquariums in order to build a balanced ecosystem, one that is suitable for our fish to live in.

    How Does A Fishless Cycle Work?

    Fishless cycling works by using an ammonia source with a combination of beneficial bacteria. As the ammonia is added, the bacteria will consume the ammonia and convert it down to nitrate. Eventually, we get to the point where the aquarium has enough bacteria to handle livestock additions.

    In the old days of aquariums (like when I started 😅), it was an acceptable practice to use hardy fish to cycle an aquarium. Oftentimes, these poor sacrificial fish would either not make it, or they would be eaten by the larger display fish the aquarium owner really wanted to keep.

    In saltwater aquariums, the fish people would use for cycles would be damselfish. The hardy little fish would usually survive a cycle but would turn into terrors in a community tank since they are very territorial and are best added last. Check out our video from our YouTube channel for an overview. We go into more detail in our blog post further down. Subscribe if you like our content!

    To avoid fish mortality and unwanted aggression to future tank mates, hobbyists worked to develop more humane and effective techniques to cycle a fish tank. Not only were these new methods humane, but they also were a lot faster than the old methods. It’s all based on the use of nitrifying bacteria.

    What is Nitrifying Bacteria?

    As mentioned in the nitrogen cycle stages, Nitrosomonas and Nitrospira bacteria are the workhorses for turning ammonia into nitrate. These two types of bacteria make all life possible in your aquarium. Without them, the fish tank would get overwhelmed with toxic chemical levels and nothing could live in it.

    Nitrifying bacteria can come from many sources these days. Here are a few common ways of introducing them.

    • Bacteria in a bottle products
    • Introducing any livestock to the tank
    • Live Rock and Live Sand (for saltwater tanks)
    • Live plants (for planted tanks)

    I will go through each way in this article. There are pros and cons to each one and you should choose the one that works best for your situation. As for me, I like bacteria in a bottle. There are many good products these days like Fritz Turbo Start for freshwater tanks and BioSpira for saltwater tanks.

    My Pick For Freshwater Bacteria
    Fritz Turbo Start 700 Freshwater

    Fritz Turbo Start is known in the industry as the fastest acting nitrifying bacteria you can purchase. This 700 version is specialized for freshwater tank and has my highest recommendation

    Buy On Amazon Click For Best Price

    Necessary Equipment

    You actually do not need much to perform a fishless cycle. Depending on what method you use you will need the following:

    • A fish tank
    • An aquarium filter
    • A heater (for tropical tanks)
    • Liquid ammonia OR some other sort of ammonia source
    • Bacteria in a bottle or seeded filtration media (depending on what method you choose)

    Before we talk about methods, let’s discuss the advantages of a fishless cycle vs. a traditional cycle.

    Fishless Cycle vs. Traditional cycle

    Fishless cycling has several advantages over a traditional cycle. Here is a quick list:

    • Fishless cycling is more humane and reduces/eliminates livestock fatalities
    • Cycling with ammonia and bacteria in a bottle is disease-free
    • Fishless cycling is more aggressive and as a result cycles faster than a traditional cycle
    • You will not have any undesirable fish left over after the cycle

    Traditional cycling seems simple at first, but it can actually lead to a number of problems. You will have fish that are stressed and they could get sick as a result, leading to further complications. It’s better to be in control of the entire cycle by fishless cycling in order to start out your fish tank cycled and disease-free.

    Traditional cycling also takes far longer. A typical traditional cycle can take 30 – 45 days, while a fishless cycle can be completed in as little as 7 days and sometimes even quicker! There are way more advantages than disadvantages to using a fishless cycling method over a traditional one, so it’s no wonder nearly everyone these days starts with them.

    Now that we know why fishless cycling is best for us, let’s figure out what cycling method we will use.

    How to fishless cycle

    There are actually several methods you can use when it comes to performing a fishless cycle. Each one has its pros and cons. These methods are:

    • Cycling with ammonia
    • Cycling with fish food
    • The shrimp method
    • Cycling with live plants
    • Cycling with live rock & live sand
    • Cycling by seeding your tank with bacteria

    Each one of these methods will work to cycle your tank, oftentimes much faster than the traditional method. Many of these methods are “sterile” meaning they will not introduce diseases to your aquarium. Let’s dive into each method to learn more!

    1. Using Ammonia

    Cycling with pure ammonia is one of the most popular ways of cycling a new tank without fish. Not just any household ammonia will do though, because these often contain other ingredients that could do a lot of harm.

    For Fishless Cycling
    Dr. Tim s Aquatics Ammonium Chloride

    Ammonia into a tank?!? Sounds crazy doesn’t it. It’s what all the cool kids use to cycle their tanks these days.

    Buy On Amazon Click For Best Price

    For this cycling process, we want to use ammonium chloride. My go-to product for this method is Dr. Tim’s Ammonium Chloride. To use the ammonia method you would need to perform the following steps:

    • Step 1 – Add bacteria in a bottle
    • Step 2 – Add ammonium chloride until you read 2PPM
    • Step 3 – Wait 24 hours
    • Step 4 – Test ammonia and nitrite levels
    • Step 5 – If you are at 0 ammonia and 0 nitrites, add ammonia until you are at 2PPM again
    • Step 6 – Wait 24 hours
    • Step 7 – Test ammonia and nitrite, add ammonia until you are at 2PPM again
    • Step 8 – Wait 24 hours
    • Step 9 – If no ammonia and nitrites, test for nitrates, if high, do a water change to lower levels
    • Step 10 – Time to add fish

    For ammonia and nitrite level testing, a simple API test kit should work and will help you get the job done

    Pros of the Ammonia Approach

    • Easy to do and proven products available
    • Easy to test
    • Completely “sterile” – a great way to start off your tank disease-free
    • No mess method

    Cons of the Ammonia Approach

    • Expensive to do (especially for larger tanks and saltwater)
    • It may take longer than other methods

    2. Using Fish Food To Cycle The Aquarium

    Flake Food

    Using fish food as a cycling method is also a popular alternative in a new tank. This can be done with a combination of flake or pellet food and bacteria in a bottle. All you do is feed the aquarium every day with food and monitor your ammonia levels.

    It’s less of an exact science than the ammonia chloride method, but you can use the fish food you were planning to use from the start. Depending on your budget, you’ll find this a very affordable alternative for individuals who are looking to save a few dollars.

    Pros of Fish Food Approach

    • Cheap
    • You will need the fish food for when you get fish
    • It will get you used to feeding your fish

    Cons of Fish Food Approach

    • Messy
    • Not an exact science
    • It may take some trial and error to get right

    3. The Dead Shrimp Method

    The shrimp method cycling process was originally popularized by Melev’s reef as a safe way of cycling a tank. It involves purchasing a jumbo shrimp at your local supermarket and putting it inside your tank for several days in order to create an ammonia spike.

    Because the shrimp decays in your tank, it creates the opportunity for beneficial bacteria to populate. Due to the total organic chemistry, the dead shrimp method produces more ammonia than the fish feed procedure.

    This method does not require bacteria in a bottle but can be sped up with it. You should leave the shrimp in your tank for at least 2-3 days.

    For a nice video overview, check out this video by Blue Damsel as she explains how she cycled her tank with a shrimp.

    Pros of Shrimp Method

    • Doesn’t require bacteria in a bottle
    • Cheap
    • Only requires one introduction of ammonia

    Cons of Shrimp Method

    • Smelly
    • Can take longer than other methods

    4. Cycling With Live Plants

    Live Plants in Aquarium

    This is an aquascaper’s favorite here for the freshwater aquarium. Cycling with live plants is natural, effective, and kills two birds with one stone. You cycle your new tank, build a great setup, and your tank is ready for lots of fish when the cycle is done.

    There are two ways to do this cycling, you can perform a dry start or you can do a flood/underwater start. Depending on the plants you are planning, a dry start can be the best way to get this done.

    I recommend you start by using an active soil. This soil will introduce the necessary ammonia, which your plants and bacteria will consume.

    Let’s talk about steps:

    • Step 1 – Use an active substrate like Tropical Aquasoil
    • Step 2 – Plant your aquarium plants
    • Step 3 – Fill tank or grow dry if using the dry start method
    • Step 4 – Add bacteria in a bottle to accelerate the cycle process
    • Step 5 – Test every 24 hours to monitor ammonia and nitrite levels
    • Step 6 – Do not add any fish until you read 0 ammonia and nitrite levels for two straight tests
    • Step 7 – Add fish, starting with algae eaters first, then other fish 2-3 weeks later

    By using bacteria in a bottle, you can usually get to Step 7 in about a week sometimes longer.

    Pros of Live Plants Method

    • Works best for aquascapes and planted tanks
    • A healthy way to build a natural tank
    • Fast

    Cons of Live Plants Method

    • Expensive
    • Not ideal for certain fish setups
    • Algae blooms

    5. Cycling With Live Rock & Live Sand (Saltwater Aquariums Only)

    One of the best ways of cycling a marine or reef tank is to use live rock and sand. Of course, ‘live’ rock and sand are not really alive, but rather home to all sorts of bacteria and organisms that have colonized it in nature, or after being seeded in an established aquarium.

    Live rock usually has a very rough and intricate texture, with loads of holes and crevices for life forms to attach themselves. Healthy live rock or sand that has been handled correctly will introduce the beneficial nitrifying bacteria to your tank that maintain your water quality. The other organisms that live in the live rock and substrate will also produce some ammonia which helps in maintaining the cycle.

    Ocean Direct
    Maricultures Florida Live Rock

    An old school solution. Once cured, Dinos tend not to be an issue because of the great biodiversity contained in this rock.

    Click For Best Price

    Let’s talk about the steps:

    • Step 1 – Set up your aquarium, complete with filter, heater, thermometer, and all other necessary hardware. Add water of the correct salinity
    • Step 2 – Let your filter and heater run for a day or so and the water warm up to the right temperature
    • Step 3 – Get your live rock and sand. Use cured live rock that has been kept wet
    • Step 4 – Inspect the live rock or substrate for any unwanted organisms and remove them, but do not sterilize the seeding materials
    • Step 4 – Sprinkle live sand into the floor of the tank and add your live rock
    • Step 5 – Provide an ammonia source like some fish food to help sustain the nitrifying bacteria
    • Step 6 – After a few days, test the water, if you read 0 parts nitrite and ammonia, and some nitrates, your tank is cycled
    • Step 7 – Add fish

    If Ammonia and nitrite are present, your tank is still cycling. This often happens as a result of some of the organisms and bacteria dying off after being move to a new environment. Do a partial water change and retest the water in a few days.

    If you are still reading ammonia and nitrites, it is possible that your live rock was not cured, or the organisms died before getting to your tank. If that is the case, you might need to use one of the other fishless cycle techniques like the ammonia or dead shrimp method.

    Pros of cycling with live rock & live sand

    • The best way to introduce a healthy balanced community of bacteria and micro fauna to a reef tank
    • Very fast results if you have healthy live materials
    • Live rock is home to other beneficial organisms

    Cons of cycling with live rock & live sand

    • Potential to introduce unwanted animals
    • Live rock is expensive
    • If live rock is not handled correctly, bacteria and micro-organisms may not survive

    6. Seeding your tank with beneficial bacteria from an existing system

    Beneficial Bacteria from Existing Filter

    Seeding your new tank with beneficial bacteria from a mature aquarium is the ultimate shortcut to jump-starting the nitrogen cycle in a new aquarium. This is essentially what we are doing by adding live plants or live rock to a new aquarium because they are already home to the bacteria we need.

    In the home aquarium, the most important colony of beneficial bacteria lives in and on your filters media. The filters media is the sponge, foam, floss, or other material that the water flows through or over. These bacteria will colonize the filter quite quickly if they are present on the live rock for example, but there is an even faster way.

    It is possible to seed your filter media directly if you have a mature tank or a friend that does and is willing to help you out. The trick is to make sure your new tank has the same water parameters as the tank where you will be getting your nitrifying bacteria.

    Let’s talk about the steps:

    • Step 1 – Set up your aquarium, complete with all hardware, gravel, decorations, etc., and fill with water. Make sure to use a water conditioner
    • Step 2- Allow your filter to run for a day or so and the heater to warm your water to a stable temperature
    • Step 3 – Add a small piece of filter media from a mature tank to the media compartment of your new filter. You should not remove the new filter media, but rather use both together
    • Step 4 – Add some ammonia to the water in the form of fish food for example
    • Step 4- Test your water. Your ammonia and nitrite levels should read 0 after a week and nitrates should be present
    • Strep 5- Add fish

    Alternative method

    • Step 1 – Set up an extra filter in one of your other tanks or in a friend’s established tank a few weeks before setting up the rest of your new aquarium.
    • Step 2 – Move the now seeded filter over from the established tank over to your new tank once it has been colonized by nitrifying bacteria
    • Step 3 – Add an ammonia source, either from a bottle or from fish food
    • Step 4 – Test your water after a few days. You should note that ammonia and nitrites read 0, but nitrates are present.
    • Step 5 – Add fish

    Pros of seeding from an existing system

    • The fastest way to cycle a new tank. This method can be instant, but take a few days to confirm this by testing to be safe
    • Easy
    • Cost-effective

    Cons of seeding from an existing system

    • Getting hold of some mature filter media can be tricky if you don’t have other tanks or friends in the hobby
    • Possible introduction of disease if the tank getting media from is infected

    The Final Test

    After choosing the fishless cycling method and following the recommended steps, it’s time to find out whether your new tank has cycled successfully! This can be a pretty nerve-wracking time, because you’ve been patient, and you’re probably itching to start adding livestock to your aquarium.

    No matter which method you’ve used, you’re going to need to test the water to know if your tank is cycled. This means you need a test kit that can measure ammonia levels, nitrites, and nitrates. You can use liquid or strip test kits from your local fish store, and follow the instructions on the package. The API Freshwater Master Test Kit is a great option to test all major parameters.

    If after following all the steps of your chosen cycling technique and doing 2 water tests, you measure 0 ammonia, 0 nitrites, and some nitrates, you’ve been successful, and your tank is cycled! The presence of nitrates tells you that both the important types of bacteria you need are thriving in your tank.

    One thing that is very important to note is that nitrates are also toxic to fish, just less so than ammonia and nitrites. I’m sorry to spring this on you so late in the article but hang in there, we’re nearly done!

    The way to manage nitrates is simply to perform regular water changes. Basically, you need to remove enough aquarium water, as often as necessary, to keep your nitrate levels to below 20ppm.

    Can I Add Fish Now?

    Congratulations on completing the fishless cycling process, at this point, you can start to add your first fish!

    Although your tank now has established bacteria colonies, there are only enough of them to fully manage the ammonia level that has been available to them. Adding fish is going to increase the bio-load and the available ammonia levels in your aquarium water pretty quickly, so ideally you want to introduce the fish in stages to avoid overloading the system.

    Let’s imagine you plan on keeping a school of 20 tetras and a clean-up crew and algae eaters in your new tank. Unless you have plenty of live plants in your tank to help in taking up ammonia and nitrates, adding them all at once could cause an ammonia spike that your bacteria aren’t able to manage.

    <a href=Ember Tetra” class=”wp-image-547290″/>

    To avoid this, you could add 6 tetras to start and keep an eye on your nitrates. Perform a weekly water change to keep your nitrate level to below 20ppm and give your bacteria a chance to develop further. Introduce more fish in stages to allow the nitrifying bacteria colonies to grow. Growing live plants is also hugely helpful, because they take nitrates out of the tank water, and turn them into healthy new leaves.

    In some planted aquascapes, fish all added in 2 large stages. However, note that these setups are loaded with lots of plants and lots of filtration. This is an advanced techique that requires research if you want to do this.

    Depending on the type of fish you are looking for, I have many guides. You can check them out below:

    FAQS

    How long does it take to cycle a fishless cycle?

    Depending on the method you use, a fishless cycle will usually take anything from a few days to about 6 weeks before ammonia and nitrite levels drop off. If you’re starting from scratch with something like the fish flakes method, and with all new equipment and sterile gravel, the process can take over a month. If you seed your filter with mature media, the cycle can be instantly ready.

    Should I do a water change first?

    Since cycling is about allowing changes in water chemistry to happen, it would make sense to not interfere while this is happening. If however, your ammonia levels spike too high during your fishless cycle, it’s a good idea to perform a partial water change.

    This is because high ammonia levels can actually slow or stop the cycle. Only a partial water change is necessary though because you do need to have ammonia present for the cycle to happen.

    Is this necessary?

    Fishless cycling is absolutely necessary for the health and well-being of your future pets. Although it does take some patience, safely cycling your tank is the key to success when keeping fish and other live animals.

    Remember, starting up an aquarium is a long-term project, so try not to rush this important first stage. You could use the time while you’re cycling your tank to track down the fish you want and do all the research about their needs and care.

    What are the advantages of this?

    The major advantage of fishless cycling is that it does not stress or kill any fish unnecessarily. Apart from the obvious ethical side to this, it also prevents you from losing money by replacing livestock. Using fish to cycle your tank often leaves you with the problem of what to do with that unwanted fish once the tank is cycled.

    Do I need to add ammonia?

    Yes, the nitrogen cycle does need some form of ammonia to get started and grow your bacteria levels. Avoid using general-purpose household ammonia for this because it often has added chemicals that can affect the process.

    It is best to use a purpose-made product like Dr. Tim’s Ammonium Chloride to add ammonia in its pure form or use something like fish food or a dead shrimp to add this compound to the aquarium water.

    Final Thoughts

    After reading this article, I hope you have a better understanding of why cycling is so important and how to do it safely without the help of hardy fish. I know it can be tough to stay patient when setting up a new tank, but once you understand why we cycle, and the obvious benefits of having a healthy fishless cycled aquarium, the waiting gets a lot easier!


    🐟 Want to learn more? This article is part of our complete Aquarium Care Guide. your ultimate resource for water chemistry, maintenance, feeding, disease prevention, and everything you need for a healthy tank.

  • Nano Fish: 21 Amazing Species for Small Aquariums (Expert Picks)

    Nano Fish: 21 Amazing Species for Small Aquariums (Expert Picks)

    Nano fish are one of my favorite topics to talk about, and I say that after 25+ years in this hobby. I’ve set up countless tanks, from sprawling 125-gallon reef systems down to tiny desktop tanks, and there’s something genuinely special about a well-executed nano aquarium. The challenge is picking the right fish. Small tanks are unforgiving on water quality, so you need species that stay small, tolerate stable conditions, and actually thrive rather than just survive.

    Here’s what most people get wrong: nano does not mean easy. A 5-gallon tank is harder to maintain than a 55-gallon. Temperature swings faster. Ammonia spikes faster. A single dead fish can crash the whole system. If you’re new to the hobby, a 10-gallon is your floor, not your ceiling. Start there.

    In this guide I’m sharing 21 nano fish I’d personally recommend, along with the honest details on what makes each one work (or not) in a small tank.

    EXPERT TAKE | MARK VALDERRAMA

    After 25+ years in the hobby and time managing fish stores, I can tell you the most common nano fish mistake I see is treating “small” as synonymous with “forgiving.” It’s not. Chili rasboras and celestial pearl danios are fragile species that need mature, well-established tanks. If you’re cycling a new tank, start with ember tetras or endlers instead. The gorgeous species on this list reward patience, not shortcuts.

    Going Nano

    The most obvious reason to get into nano aquariums is space. Once the aquarium bug bites, a lot of us want just one more tank. Aquariums are big, heavy, and can be expensive, but they don’t have to be.

    In the aquarium hobby, nano simply means small. There aren’t any strict rules about what counts as nano, but generally a nano species grows about 2 inches (5 cm) or less. Nano tanks run about 20 gallons (76 L) or less. The smaller the aquarium, the more sensitive the system is to changes in water quality. That’s not a beginner-friendly trait.

    What People Get Wrong About Nano Fish

    The label “nano fish” gets misread as “easy fish.” It’s not. Species like chili rasboras and celestial pearl danios are actually demanding. They need soft, slightly acidic water, established biological filtration, and stable parameters. Dump them in a new tank and you’ll lose them.

    Green neon tetras are not neon tetras with a color swap. They’re a softer-water species that fades, refuses to school properly, and dies slowly in hard tap water. Know what’s coming out of your tap before you buy them.

    And nano tanks require more water changes, not fewer. Small water volume means waste concentrates fast. Weekly partial water changes of 20 to 30 percent are non-negotiable.

    TIER BREAKDOWN

    Beginner: Endlers livebearers, ember tetras, pygmy corydoras, celestial pearl danio (in established tanks only), guppies (nano strains)
    Intermediate: Chili rasboras, green neon tetras, clown killifish, sparkling gourami, pea puffer (species-only), neon tetras
    Advanced: Scarlet badis (feeding challenges), exclamation point rasbora, strawberry rasbora (extremely soft water requirements)

    21 Best Nano Fish For Your Freshwater Tank

    All 21 species on this list stay under 2 inches (5 cm) and do genuinely well in nano setups. For each species I cover size, care level, temperament, and minimum tank size so you can match the fish to the tank you actually have.

    1. Neon Tetra

    Neon tetras are the classic nano fish and they earn that reputation. A school of 10 or more in a planted tank with dark substrate looks like something out of a nature documentary. Maximum size is 1.5 inches (3.8 cm). They prefer soft, slightly acidic water (pH 6.0 to 7.0) and do best at 72 to 78 degrees F (22 to 26 degrees C). Minimum tank: 10 gallons (38 L). School size matters here. Six is the bare minimum. Ten is the sweet spot.

    2. Chili Rasbora

    Chili rasboras are the most visually striking nano fish you can keep, and they’re also one of the more demanding. Maximum size is 0.7 inches (1.8 cm). These fish need soft, acidic water (pH 4.0 to 7.0), heavily planted tanks, mature biological filtration, and calm tankmates. They do not tolerate ammonia spikes, pH swings, or loud, active fish. Minimum tank: 5 gallons (19 L), but 10 gallons (38 L) is better for a proper school of 10 to 15. Not a beginner fish, regardless of what the packaging says.

    3. Ember Tetra

    Ember tetras are the chili rasbora’s more forgiving cousin. They hit 0.8 inches (2 cm), tolerate a wider pH range (5.5 to 7.5), and are genuinely one of the easier nano fish for newer hobbyists. The orange-red coloration pops in planted tanks with dark substrate and dim lighting. Minimum tank: 10 gallons (38 L). Keep 8 to 12 for confident schooling behavior.

    4. Celestial Pearl Danio

    The celestial pearl danio looks like someone hand-painted it. White spots on a dark body, orange fins with black markings. Maximum size is 1 inch (2.5 cm). The care requirement people miss: these fish come from small, shallow, densely vegetated pools in Myanmar with very stable parameters. They don’t handle parameter swings well. Mature tank is a real requirement, not a suggestion. Minimum tank: 10 gallons (38 L). Pairs well with other peaceful nano species.

    5. Green Neon Tetra

    Green neon tetras look like neon tetras at first glance but they’re a different species entirely with different requirements. Maximum size is 1.25 inches (3.2 cm). The big difference: green neons need softer, more acidic water (pH 5.5 to 6.5) than standard neons. In hard tap water they fade, become stressed, and die slowly. If your tap water is alkaline and hard, stick with standard neon tetras. If you have soft water, green neons reward you with brilliant coloration. Minimum tank: 10 gallons (38 L).

    6. Endlers Livebearer

    Endlers are the hardiest nano fish on this list. They tolerate a wide range of water conditions, breed readily, and bring non-stop activity to a small tank. Males top out at 1 inch (2.5 cm) and are brilliantly colored. One warning: they breed fast. Keep males only if you don’t want a population explosion. Minimum tank: 5 gallons (19 L). Genuinely beginner-friendly.

    7. Pygmy Corydoras

    Pygmy corydoras are the best bottom dweller for nano tanks. They grow to 1 inch (2.5 cm) and school in open water as well as on the substrate, which is unusual for corys. Keep them in groups of 6 or more. They’re peaceful, won’t disturb plants, and are hardier than most nano species. pH 6.0 to 7.5 suits them well. Minimum tank: 10 gallons (38 L).

    8. Clown Killifish

    Clown killifish are surface dwellers, which means they use a part of the tank most nano fish ignore. They grow to 1.4 inches (3.5 cm) and have striking vertical banding with a lyretail. They need floating plants or a low water flow surface to feel comfortable. Don’t pair them with fin-nipping species. Minimum tank: 5 gallons (19 L), though 10 gallons (38 L) gives you room to keep a proper group of 6 to 8.

    9. Sparkling Gourami

    Sparkling gouramis are underrated. They grow to 1.5 inches (3.8 cm), make audible clicking sounds during breeding (you can actually hear them), and have iridescent spotting that catches light beautifully. They need calm, well-planted tanks with gentle filtration. Strong flow stresses them. Minimum tank: 10 gallons (38 L).

    10. Pea Puffer

    Pea puffers are the most personality-packed fish on this list. They’re predators in a 1-inch (2.5 cm) body. They hunt snails, will nip fins on passive fish, and each one has a distinct personality. Keep them in species-only setups or with very fast, non-territorial tankmates. They need a varied diet: frozen bloodworms, snails, and daphnia. Do not keep with slow, long-finned fish. Minimum tank: 5 gallons (19 L) per fish, plus 3 gallons (11 L) for each additional puffer.

    11. Scarlet Badis

    Scarlet badis males are brilliantly colored, tiny (0.8 inches / 2 cm), and territorial. They’re also picky eaters. Most will refuse dry food and need live or frozen micro-prey: baby brine shrimp, daphnia, micro worms. If you’re not prepared to source live or frozen food regularly, skip this species. Minimum tank: 10 gallons (38 L) with dense planting to break territories.

    12. Otocinclus

    Otocinclus are the safest algae eaters for nano planted tanks. They grow to 1.5 inches (3.8 cm), never disturb plants, and work in schools of 4 to 6. The catch: they’re sensitive to water quality and need well-established tanks with an existing algae base when you first add them. They will starve in a new, clean tank. Minimum tank: 10 gallons (38 L).

    13. Galaxy Rasbora (Microdevario kubotai)

    Not to be confused with celestial pearl danios, galaxy rasboras are a true nano rasbora that grows to 0.8 inches (2 cm). Neon green-yellow coloration, peaceful temperament, and active schooling behavior make them excellent in planted tanks. They prefer soft, slightly acidic water. Minimum tank: 10 gallons (38 L). Keep 10 or more for the full schooling effect.

    14. Boraras Brigittae (Chili Rasbora’s Cousin)

    Boraras brigittae is very similar to the chili rasbora in size and requirements. Males turn brilliant red when comfortable. These fish need the same careful setup: soft acidic water, mature filtration, calm tankmates, and dense planting. They’re peaceful and work well with other Boraras species. Minimum tank: 10 gallons (38 L).

    15. Norman’s Lampeye Killifish

    Norman’s lampeye killifish are underused in the hobby. They grow to 1.4 inches (3.5 cm), school actively in the upper water column, and their iridescent eyes glow under aquarium lighting. They’re peaceful, easy to breed, and tolerant of a wide pH range (6.0 to 7.5). Minimum tank: 10 gallons (38 L). A good alternative to tetras for hobbyists who want something less common.

    16. Exclamation Point Rasbora

    The exclamation point rasbora (Boraras urophthalmoides) is one of the smallest schooling fish available at 0.6 inches (1.5 cm). They need soft, acidic water and are sensitive to parameter swings. Not a beginner fish. Best kept in a species-only or minimalist nano setup. Minimum tank: 5 gallons (19 L) with 10 or more fish for proper schooling.

    17. Dwarf Rasbora (Boraras maculatus)

    Dwarf rasboras top out at 1 inch (2.5 cm) and are peaceful, easy to school, and beautiful in planted tanks with dark substrate. They’re more forgiving than chili rasboras but still prefer soft, slightly acidic water. Good choice for hobbyists who want the Boraras look with a bit more hardiness. Minimum tank: 10 gallons (38 L).

    18. White Cloud Mountain Minnow

    White clouds are cold water fish, not tropical. That’s the part people get wrong. They prefer 60 to 72 degrees F (16 to 22 degrees C) and actually do better without a heater in temperate climates. They’re hardy, peaceful, and school actively. Do not keep with tropical fish that need 78 degrees F (26 degrees C). Minimum tank: 10 gallons (38 L). Great choice for unheated tanks or cool rooms.

    19. Least Killifish

    The least killifish (Heterandria formosa) is one of the smallest vertebrates in North America at 1.3 inches (3.3 cm) for females. They’re livebearers that produce fry slowly and steadily rather than in large drops. Hardy, peaceful, and interesting to observe. Minimum tank: 5 gallons (19 L). Works well in a planted nano with other peaceful species.

    20. Rosy Loach

    Rosy loaches are a newer addition to the hobby and a great one. They grow to 1 inch (2.5 cm), have subtle rosy-orange coloration, and forage constantly on the substrate without disturbing plants. They do best in groups of 10 or more. pH range is 6.5 to 7.5. Minimum tank: 10 gallons (38 L). A bottom dweller that works where pygmy corydoras also work.

    21. Thai Micro Crab

    Technically not a fish, but worth including. Thai micro crabs (Limnopilos naiyanetri) are fully aquatic, grow to 0.4 inches (1 cm), and are fascinating to observe. They’re filter feeders that sit in plants and catch particles from the water. They’re fragile and need stable, established tanks. Keep with tiny, peaceful species only. Minimum tank: 5 gallons (19 L).

    MARK’S PICK

    Ember tetras. They give you the color and schooling behavior of the more demanding nano species without the soft-water requirement or the fragility. Set up a 10-gallon (38 L) with dark substrate, floating plants, and 12 ember tetras and you’ve got a tank that turns heads. It’s the best entry point for nano fish that actually performs under real-world conditions.

    Nano Fish Comparison Table

    Species Difficulty Max Size Min Tank Key Trait
    Neon Tetra Beginner 1.5 in (3.8 cm) 10 gal (38 L) Classic schooler, needs 10+
    Chili Rasbora Intermediate 0.7 in (1.8 cm) 10 gal (38 L) Fragile, mature tank required
    Ember Tetra Beginner 0.8 in (2 cm) 10 gal (38 L) Forgiving, great color
    Celestial Pearl Danio Intermediate 1 in (2.5 cm) 10 gal (38 L) Gorgeous, needs stable water
    Green Neon Tetra Intermediate 1.25 in (3.2 cm) 10 gal (38 L) Soft water only, not beginner
    Endlers Livebearer Beginner 1 in (2.5 cm) 5 gal (19 L) Hardiest nano, breeds fast
    Pygmy Corydoras Beginner 1 in (2.5 cm) 10 gal (38 L) Best nano bottom dweller
    Clown Killifish Intermediate 1.4 in (3.5 cm) 5 gal (19 L) Surface dweller, unique niche
    Pea Puffer Intermediate 1 in (2.5 cm) 5 gal (19 L) Predator brain, species-only
    Scarlet Badis Advanced 0.8 in (2 cm) 10 gal (38 L) Picky eater, live food required
    White Cloud Minnow Beginner 1.5 in (3.8 cm) 10 gal (38 L) Cold water, no heater needed

    Should You Get Nano Fish?

    Good fit if:

    • You have limited space and want an active, visually striking aquarium under 20 gallons (76 L)
    • You’re willing to do weekly water changes and monitor parameters consistently
    • You already have a cycled, established tank (especially for chili rasboras, green neon tetras, or celestial pearl danios)
    • You want a low-bioload setup with lots of personality and color

    Avoid if:

    • You’re brand new to the hobby and looking for a “set it and forget it” tank
    • You have hard, alkaline tap water and want soft-water species like chili rasboras or green neon tetras
    • You can’t commit to weekly maintenance (small tanks don’t forgive neglect)
    • You want a mix of pea puffers with community fish (they don’t mix)

    AVOID IF

    You’re setting up your first tank and want to skip the learning curve. Nano tanks don’t give you margin for error. If you’re just starting out, a 20-gallon (76 L) community tank with hardy fish like platies, zebra danios, or peppered corys will teach you water chemistry without the risk of crashing a delicate nano setup. Get the fundamentals right first, then go nano.

    Nano Tank Setup Tips

    A good nano tank needs a few things working together:

    • Filtration: A sponge filter is ideal for nano tanks. It provides gentle flow, biological filtration, and won’t suck up tiny fish or fry.
    • Plants: Dense planting is critical for species like chili rasboras, clown killifish, and sparkling gouramis. Java moss, hornwort, and floating plants are your best friends.
    • Substrate: Dark substrate makes small, colorful fish pop. It also reduces reflective stress in sensitive species.
    • Water changes: 20 to 30 percent weekly minimum. No exceptions in a nano tank.
    • Cycling: Never skip the nitrogen cycle. At minimum, 4 to 6 weeks before adding sensitive species.

    Closing Thoughts

    Nano fish done right are one of the most rewarding setups in the hobby. Done wrong, they’re a source of frustration. The key is matching your experience level and water chemistry to the fish you choose. Start with ember tetras or endlers if you’re newer. Work up to chili rasboras or celestial pearl danios once you have a mature, stable tank.

    For the best selection of nano fish, check out Flip Aquatics and Dan’s Fish. Both carry quality livestock with knowledgeable staff who can help you pick the right species for your setup.

    References

    • Froese, R. and D. Pauly. Editors. FishBase. www.fishbase.org
    • Seriously Fish. Species profiles for nano species. www.seriouslyfish.com
    • Practical Fishkeeping Magazine. Nano fish guides and tank setup resources.
  • Harlequin Rasbora Care Guide: The Classic Schooling Fish for Community Tanks

    Harlequin Rasbora Care Guide: The Classic Schooling Fish for Community Tanks

    ASD Difficulty Rating: Tier 1 – Beginner

    Harlequin rasboras are one of the most reliable beginner schooling fish. They are hardy, peaceful, and tolerate a range of water parameters. A group of 8+ in a planted tank with soft tank mates is the ideal setup.

    Hard Rule

    Keep harlequin rasboras in groups of 8 or more. In groups of 6 or fewer, the schooling breaks down and fish become shy and reclusive. The natural active schooling behavior only emerges in groups of 8+.

    Expert Take

    Harlequin rasboras are one of the most underappreciated schooling fish in the hobby. Easy to care for, peaceful, and genuinely beautiful in the right setup – but they need to be kept in groups of 10 or more to show what they can actually do. A school of 15 harlequin rasboras in a planted tank is one of the most satisfying sights in freshwater fishkeeping. Five in a 20-gallon is just mediocre fish. — Mark Valderrama, AquariumStoreDepot

    Table of Contents

    The Harlequin Rasbora is one of the most popular freshwater fish for a reason, but popularity does not mean it is indestructible. It needs soft, slightly acidic water and a group of at least eight to school properly. Keep three in hard, alkaline water and you get stressed, pale fish that hide instead of school. The difference between a good setup and a bad one is obvious with this species.

    Everyone’s kept harlequin rasboras. Almost nobody has kept enough of them.

    What Most Care Guides Get Wrong About Harlequin Rasbora The Classic Schooling Fish for Community Tanks

    The most common mistake I see with harlequin rasbora the classic schooling fish for community tankss is keeping too few. Guides will say “minimum 6” and leave it at that. In reality, these fish behave completely differently in a proper group of 8 to 10 or more. Keeping just 3 or 4 often leads to stress, hiding, and fin nipping that wouldn’t happen in a larger school. Another thing most guides miss is how much lighting and decor affect this species. Harlequin Rasbora The Classic Schooling Fish for Community Tankss look washed out under bright white LEDs on a light substrate. Dim the lights, add some tannins, use a dark background, and you’ll see colors you didn’t know they had. I’ve also noticed that many care sheets recommend overly broad water parameters. Yes, harlequin rasbora the classic schooling fish for community tankss are adaptable.

    Frequently Asked Questions

    How many harlequin rasboras should be kept together?

    Harlequin rasboras should be kept in groups of at least eight, with twelve or more being ideal. They are true schooling fish that display their most natural behavior, best coloring, and lowest stress levels in larger groups. A school of twelve in a planted tank is a stunning sight.

    Are harlequin rasboras good community fish?

    Harlequin rasboras are among the best community fish available. They are peaceful, hardy, and compatible with a wide range of tank mates including tetras, corydoras, gouramis, and shrimp. Their calm temperament makes them suitable for nearly any peaceful community tank.

    How big do harlequin rasboras get?

    Harlequin rasboras reach about 1.75 to 2 inches in length. Their moderate size makes them suitable for tanks of 20 gallons or larger when kept in a proper school. Despite their small size, they are robust and hardy fish.

    Can harlequin rasboras live with bettas?

    Harlequin rasboras are one of the most recommended tank mates for bettas. They are fast enough to avoid aggression, stay in the mid-water level, and their muted coloring does not trigger territorial responses from most bettas. A 20-gallon or larger planted tank works best for this combination.

    How long do harlequin rasboras live?

    With proper care, harlequin rasboras typically live 5 to 8 years in captivity. They are hardy fish that tolerate a reasonable range of water conditions. Stable parameters, a varied diet, and a stress-free school environment are the keys to longevity.

    Species Of Overview

    Scientific Name Trigonostigma heteromorpha
    Common Names Harlequin Rasbora, lamb chop rasbora
    Family Cyprinidae
    Origin South and Southeast Asia
    Diet Omnivore (they aren’t picky eaters)
    Care Level Easy to Care For
    Activity Calm, friendly and active 
    Lifespan 5 to 8 years 
    Temperament Peaceful
    Tank Level Midwater
    Minimum Tank Size 10 gallons
    Temperature Range 71 ° to 80 °F
    Water Hardness 6 to 8 dkH
    pH Range 6.0 to 7.8, with 6.5 being the optimum 
    Filtration/Water Flow Moderate
    Water Type Freshwater
    Breeding Egg spawners
    Difficulty to Breed Very Difficult to Breed
    Compatibility Community tanks
    OK, for Planted Tanks? Yes

    Classification

    Order Cypriniformes
    Family Danionidae
    Genus Trigonostigma
    Species T. Heteromorpha (Duncker, 1904)

    Everyone wants these colorful fish in their aquarium because of its cheerful disposition and glistening patterns. Fortunately, this is a beginner-level tropical fish so it isn’t too difficult to keep it healthy.

    Behaviour: What to Expect 

    The first principle of keeping this fish healthy is to understand its basic features and behavioral patterns.

    Harlequin Rasboras are a peaceful fish. They aren’t wily creatures that will drive the other fish crazy around the aquarium. 

    Depending on the company they are kept with, you will see the behavior of these fishes change accordingly. If you pair them with aggressive fish, they will become reclusive. They will find a corner in the aquarium and stay in hiding most of the time. These fishes become somewhat nervous around will exhibit boisterous energy. 

    However, if you keep them with friendly company, they will flourish. These shoaling fish like to stay in the middle of the community tank with their gang when they feel safe. 

    If they are found near the surface of the water or its substrate, there’s something wrong. 

    Sometimes Rasbora becomes timid if new fish are introduced in the aquarium. So it would help if you kept an eye on them after introducing new fish in their tank. If your Rasboras don’t come out of hiding, then the new fish isn’t good company for them. However, there is nothing to worry about if they do come out of hiding. It’s natural for them to take their time before they trust the new fish.  

    But don’t be reluctant about introducing new fish into their tank. If there are plenty of fish around to school with, Harlequins are at their best behavior. The more fish in the school, the better. 

    If they are in a big school, you might see some of them nibbling at each other occasionally but that is nothing to be concerned about – this behavior is quite playful and typical from time to time. 

    However, you might see one or two Rasboras become slightly aggressive is when they are spawning. The pregnant rasbora females need a secure place for their eggs, so that they might become vigilant towards other fish coming too close to their spawning area. 

    However, this behavior is rare because it is tough to breed Rasboras in the first place. And in any case, if you want to breed Rasboras, transfer them into a separate breeding tank to increase chances of success. 

    What Do They Look Like?

    How Do Harlequin Rasboras Look Like

    Harlequin rasboras look orange but that’s only a gradient on their silver body. The orange hue runs down from dorsal fins and fades away around the mid-region. A little bit of the orange gradient runs from its tail too, but just as well, it fades off beautifully into the rest of the colors. 

    Their tall mid-section tapers near the mouth and the tail. In the rear part (abdominal region) of the Rasbora’s body, there is a dark black triangular patch characteristic of their uniqueness. 

    Rasboras generally grow around 2 inches in length. They might grow to become slightly bigger than that if you are keeping them in ideal conditions and larger aquariums. 

    One curious thing about them is that their fins change in hue depending on their tank’s conditions and mood. Their fins turn darker in color if their water is unclean or if they are under stress. And if the fish contracts any disease, their fins will always be the first part of their body to show signs on it. 

    Male and female rasboras are similar in size and description. However, the black patch is slightly bigger on the male. Also, males seem to be a bit more orange than the females. The females have more of a golden hue on their entire bodies. And if you see that the belly of a female harlequin rasbora is turning bright, it means there are eggs in its little pouch. 

    The appearance of the harlequin rasbora will not seem too extraordinary to you. Still, since you’re reading this article, we’ll assume that you have seen a school of harlequin rasbora swim together. 

    Rasboras are shoaling fish that are at their best when they’re together with their bunch. When a school of harlequin rasboras swim together, the features of their body display cool colors and patterns by corresponding in a peculiar manner that is truly impressive to behold. 

    Natural Habitat of Harlequins 

    Harlequin rasbora (Trigonostigma Heteromorpha) are freshwater fish from tropical habitats like rivers, swamp forests, and streams. There are many variables involved here but water chemistry, tank water temperature, and pH value stay the same throughout all of these habitats. 

    Swamps generally have soil substrates that are full of water, but riverbeds are pretty sandy. So you see, there are quite some differences here. The common denominator in both these habitats are aquatic plants. Harlequins like plants very much; when they become timid, they hide behind plants to feel safe.  

    Harlequin Rasbora Care Guide

    These small freshwater fish are accustomed to living in shallow water with an abundance of plant life.

    In their natural habitat, the pH of the water is pretty low. However, the harlequins that you will find in the market have been bred in higher pH. 

    If you got your Rasboras from the store, ask them in which pH these fish were bred. Generally, commercially bred Rasbora stay healthiest if kept in a pH range of 6.8 to 7.8. 

    The alkalinity of water should be around 6 to 8 dkH for store-bought Rasbora. If the alkalinity falls or drops, your fish will become weak due to an inability to get rid of metabolic wastes.  

    The temperature of the water should be 71 to 80 degrees Farenheit. If the temperature goes above this level, oxygen solubility of the water will decrease and your fish will become lethargic.  

    So the water plays the most critical role in keeping the fish healthy. Make sure always to keep the water conditions at an optimum level. Here’s what you need to do.

    Tank Size

    You can keep harlequin rasboras in a 10-gallon tank. Bigger tanks are always better, because these are shoaling fish that don’t like to isolate or stay dormant. So whatever you do, make sure that you don’t go with anything smaller than 10 gallons. 

    One rule of thumb is to get a pair of harlequin rasbora for every 2 gallons of water. That way, you get to keep 10 in a 10-gallon tank.

    However, we would strongly suggest you get a bigger tank because the fish will thrive better in a bigger space where they can swim more freely. 

    Tank Preparation

    This is the main deal. If you get a decent tank but set it up incorrectly, the health of your Rasbora will still keep deteriorating. 

    Make A Substrate: Create a soft substrate at the bottom of the tank. Use soil, sand, or gravel to mimic the riverbed or the swampy substrates. 

    The substrate is just to create the same atmosphere as the fish had in their natural habitat. These fish aren’t bottom-dwellers, so you’ll rarely see them poke around near the bottom but you still have to create a suitable habitat for them with the substrate. 

    Add Plants: Put some nice, aquatic plants in the tank so that your harlequin rasbora can go into hiding if they feel stressed or threatened in any way. You can also add rocks and other ornamental artifacts in the aquarium to make the tank atmosphere aesthetically pleasing. 

    Control Water Parameters: Use a heater to control the temperature of water against the changing temperatures outside. Stick a thermometer onto the tank and keep an eye on it to check the temperature of the water from time to time.  

    Setting Up A Breeding Tank For the Harlequin Rasbora

    It isn’t easy to breed a rasbora in a regular community tank at home because they need very specific conditions for successful fertilization to occur. 

    You need to transfer the breedable Harlequins to a separate tank and create the perfect breeding conditions. 

    Put soft water in the tank, aim to stay within 1.5 to 2.5 dkH of their preferred hardness of 7. The temperature should be 71 to 80 degrees Fahrenheit. Then put in their favorite plants – Cryptocoryne. This plant has broad leaves that are perfect for them to hide behind while they’re spawning. 

    Keep the breeding tank in low light, because bright lights make Rasboras somewhat nervous.

    If the tank conditions aren’t perfect, then the fish won’t be fully fertile. So learn how to make soft water and how to adjust the pH of water before you attempt this. 

    For more information on the intricate details of the actual breeding process, watch this video from Mark’s Aquatics

    The Reality of Keeping Harlequin Rasboras

    Harlequin rasboras are mid-water fish that stay in motion. A healthy school moves together with loose but constant synchrony – not tight formation like neons, but cohesive enough that the orange flash of a large group ripples visually. This behavior only happens with the right group size and the right tank.

    They are sensitive to water conditions in the sense that they show it immediately. Pale color, fins held close, and reduced schooling behavior are early warning signs of stress. Poor water quality is the most common cause. Weekly water changes and a mature filter are the baseline.

    Feeding is simple. They eat anything that fits in their mouth and are not picky about food type. High-quality flake with occasional frozen daphnia or brine shrimp keeps them healthy and improves coloration.

    id=”right-for-you”>Is the Harlequin Rasbora The Classic Schooling Fish for Community Tanks Right for You?

    Before you add a harlequin rasbora the classic schooling fish for community tanks to your tank, it’s worth asking whether this species actually fits your setup and your goals. Here’s a quick breakdown to help you decide.

    This species is a good fit if:

    • You have a large enough tank to manage territories. Cramped conditions amplify aggression.
    • You’re comfortable managing aggression through stocking ratios, line of sight breaks, and tank layout.
    • You can commit to regular water changes. These fish produce more waste than many smaller species.
    • You’re not planning a peaceful community tank. Harlequin Rasbora The Classic Schooling Fish for Community Tankss need tank mates that can hold their own.
    • You enjoy watching active, interactive fish. Cichlids have personality that smaller species simply don’t match.
    • You have backup plans. Sometimes a particular fish just doesn’t work out, and you need a way to rehome it.
    • You’re feeding a varied, high-quality diet. Color and health depend on nutrition.

    If most of those points line up with your setup, the harlequin rasbora the classic schooling fish for community tanks is worth serious consideration. If several don’t, it’s better to choose a species that matches your tank now rather than trying to make it work.

    Avoid If:

    • You cannot keep a group of 8+ – small groups produce pale, anxious fish that hide rather than school
    • You keep large, aggressive fish that will eat or bully them – they are small and peaceful
    • You want a species that thrives in hard, alkaline water – they need soft, slightly acidic conditions long-term

    Tank Mates 

    Rasboras are schooling fish, so they like to swim around with a lot of tank mates. Don’t keep them on their own because they will become shy and reclusive. While they look to be around many types of fish, you still will need to be meticulous when choosing their company. It will help if they are kept in the company of fish with which they can be cheerful and active but never fall prey.

    Good Tank Mates

    The good news is that plenty of magnificently colored peace-loving fish can be kept with schools of Harlequin Rasboras. Here are just a few fish and inverts that work well: 

    Bad Tank Mates

    Any fish that is twice the size of your Harlequin Rasboras shouldn’t be kept in the same tank with it. They say it’s better to be safe than sorry. So you should keep your fish safe in the tank to avoid feeling stressed out about them during the day. Some of the fish that you should definitely avoid are:

    Note: Some Betta fish lovers will argue that Betta fish is too slow a swimmer to ever harm the Harlequin Rasbora. However, this can still be a mixed bag. For one, a school of Rasbora can feed quickly and leave a Betta with very little to eat. There are also more athletic Bettas like Plakats that can potentially harass your Rasbora school. The Betta and the Rasbora will likely come close if they live in a tank together – especially if the tank is small. So if you want to protect your rasboras, we suggest you to not take chances with a Betta fish. 

    What Do They Eat?

    Thankfully, harlequin rasboras aren’t fussy eaters. They are omnivorous, so they will eat pretty much anything starting with zooplankton, worms, crustaceans, and small insects that are edible. All you have to do is make sure that the food isn’t toxic for them. 

    Since you want your rasboras to be healthy, take some out to condition them to a healthy, all-inclusive harlequin rasbora diet by introducing a variety of foods to them in tiny amounts. Do note that they have tiny mouths, so it’s better to not give them anything that isn’t bite-sized. 

    When they first come to live in your aquarium they will be a bit shy, so you need to draw them out by giving them proper foods. Start off with herbivore fish foods such as Algae Wafers and Spirulina. Give them good quality fish food, a range of greens like blanched spinach, water lettuce, and then slowly introduce them to live food and frozen food. A good staple food to try is Xtreme Aquatics Nano formula

    Great For Nano Fish


    Xtreme Aquatic Foods Nano

    Xtreme Aquatics Nano formula is specially designed for smaller fish and contained a well balance mix of raw ingredients. It is a great staple food for your nano fish.


    Buy On Amazon

    Rasboras are particularly found of Daphnia, shrimp, blackworms, and bloodworms. They will eat these meaty options live and frozen. When you give them live food, they will become overly enthusiastic and chase it around for a bit before eating it – it’s quite adorable to watch, really. 

    Diseases That Affect The Rasboras

    Rasboras are hardy fish from the streams, rivers and swamps, so they don’t get sick easily. Here are some of the diseases that might inflict suffering on your beloved fish. 

    Fungal Infections

    This is the most common disease that Harlequin Rasboras get. If left untreated it starts to damage vital organs like liver, brain, lungs, etc. 

    Cause: Ichthyosporidium, Exophiala sp., and Flavobacterium columnare

    Signs: Patches on the gills and skin, slimy layer on the surface of their skin, and skin turning brown.

    Treatment: Isolate the infected fish from its tank mates, add aquarium salt in water, get rid of chlorine from the tank water, increase the water temperature to 77 Fahrenheit, and try an over the counter medication like API Fungus Cure.

    Ich/White Spot Disease  

    This persistent disease is another widespread one for rasboras. External parasites will cling onto the fish’s body and cause white spots to appear on its skin and gills.

    Cause: Ichthyophthirius Multifiliis (an Ectoparasite), contact with other infected fish, sudden shifts in the water temperature of the aquarium, decorative plants that have parasitic cysts on them.     

    Signs: Crystals formation on the body, skin becoming slimy, asthmatic breathing, itching against rough surfaces, and hiding for days on end.    

    Treatment: Bring the water temperature up to 71.8 to 86 degrees Fahrenheit, or try an over the counter medication like Ich-X

    Columnaris 

    This disease is highly contagious, but it only affects freshwater fish. 

    Cause: Low oxygen levels in the tank, and temperature of 80 Fahrenheit degrees.

    Signs: Ulcerations on the skin, visible accumulation of mucus in its gills, and dorsal fin, noticeably long periods of time gone without eating.  

    Treatment: Stabilize the water temperature, and consult the vet for antibiotics or try an antibiotic like API’s Furan-2

    Dropsy 

    This is basically kidney failure. Water and other fluids accumulate in the body and cause swelling in the abdomen. 

    Cause: Aeromonas bacteria, water with excess ammonia and nitrites

    Signs: Irregular swimming, gills losing color, scales standing out, stringy faeces, and bloating belly. 

    Treatment: See the freshwater disease link posted above.

    Fin and Tail Rotting 

    The tissues of the tail and fins start rotting outwards in. The rotting might start from a wound that your fish already has, and it also may happen because of unclean water. 

    Cause: Dirty water, overfeeding, low-nutrition food, and high levels of stress. 

    Signs: It starts with inflammation of the fins. Then the fins start to lose color and eventually start becoming very fragile. 

    Treatment: Clean the water, optimize the temperature and pH of the water in the tank. Use a medication like SeaChem KanaPlex.

    Conclusion 

    To watch your Harlequin Rasboras live their best life, make sure you keep them with friendly tank mates. Remember to give them proper sustenance, remove any excess leftover from their waters, and do remember to clean the entire tank every 2 to 3 weeks. May your beautiful Harlequin Rasboras live long and keep many more of your guests in awe! 

    We hope you didn’t have any trouble following our instructions about proper Harlequin Rasbora care. With a little bit of mindfulness, you can keep your fish very active and healthy. Best of luck! 

    Meta: Learn Harlequin Rasbora care, and give your beautiful rasboras their best life.

    How the Harlequin Rasbora The Classic Schooling Fish for Community Tanks Compares to Similar Species

    Choosing between similar species can be tricky. Here’s how the harlequin rasbora the classic schooling fish for community tanks stacks up against some common alternatives.

    The harlequin rasbora the classic schooling fish for community tanks occupies a specific niche in the aquarium hobby, and direct comparisons really depend on what you’re looking for. In my experience, the most common question people ask is whether they should choose the harlequin rasbora the classic schooling fish for community tanks or something similar that’s more widely available. The answer usually comes down to three things: tank size, water parameters, and what other fish you’re keeping. If your setup matches what the harlequin rasbora the classic schooling fish for community tanks needs, it’s hard to beat. If not, there are usually alternatives worth exploring.

    Closing Thoughts

    The harlequin rasbora is one of the best schooling fish you can put in a community planted tank. They are not demanding, they do not fin-nip, and they look spectacular in groups. The only mistake is buying too few. Get 10 or more, set up a planted tank with dark substrate, and watch them do what they do best.

    Check out our rasbora video where we cover the most popular rasboras in the hobby:

    This guide is part of our Rasboras & Danios: Complete Species Directory. Visit the hub page to explore care guides for all popular rasbora and danio species.

  • Best CO2 System for Planted Aquariums – Reviewed After Real-World Testing

    Best CO2 System for Planted Aquariums – Reviewed After Real-World Testing

    Adding CO2 to a planted tank is the single biggest upgrade I’ve made in my own setups, and the difference in plant growth is night and day. I’ve run both pressurized CO2 and DIY systems over the years, and I can tell you from experience which setups are worth the investment and which ones will frustrate you. A good CO2 system paired with proper lighting transforms an ordinary planted tank into something truly special.

    Mark’s Expert Take

    CO2 injection is the single biggest upgrade for a planted tank – and the single easiest way to kill your fish if you do it wrong. A solenoid on a timer is not optional. Running CO2 overnight with lights off drops pH so fast it can crash a tank by morning. I’ve seen it happen. A drop checker is useful, but it doesn’t replace a pH controller for serious setups. The regulator is where people cut corners and regret it. Buy quality once or replace budget gear twice.

    Understanding the Role of CO2 in Nature

    Most majority of plants available for sale in our hobby are marsh plants. These plants have the ability to grow either submerged or above the water. Many of these plants would actually prefer to grow above the water! The main reason why is CO2.

    Gas diffusion in water is 1,000s of times slower in water compared to our air above the water. This means it is much easier for plants to breath in the CO2 in our atmosphere versus taking it in completely submerged in water. In fact, many of these plants in nature will seek higher ground by growing on rocks. Knowing that you can actually grow plants above water in one reason why advanced aquarists will do “dry starts” in planted tanks to establish plants and then fill with water for an easier start.

    There is a downside if the plant matures out of the the water. Aquatic plants adapt in the water so they can work with the slower gas diffusion. Plants maturing out of the water will be thicker and heavier. In water, they will be more spread out and lighter. Here’s something most hobbyists don’t know: aquaculture farms will actually grow their aquatic plants emerged. It fuels faster growth and cuts CO2 injection costs. CO2 is plenty in our atmosphere, but we need to work harder to get better conditions in the water.

    CO2 Levels For Aquatic Plants In The Wild 

    The truth is most natural environments where our aquatic plants grow are evaluated in CO2. Many of our plants naturally grow in springs or river banks. These areas get flooded in CO2 as it cannot gas off leaving to extended periods of high CO2 levels. At its peak, we are taking about levels as high as 50 ppm of CO2. A non-CO2 injected aquarium will only have at most 3 ppm of CO2. That is a world’s amount of difference!

    Plants can obtain the CO2 that they need in other ways, but the process is very energy intensive and not as efficient. We also have to keep in mind that around 50% of our plant dry mass is carbon! An aquatic plant will use nearly 10 times more carbon than any other macro or micro nutrient in your water. 

    Take a second to think about that. Many companies try to sell you on fertilizers and substrates, but the golden ticket to killer growth is CO2! This is why we really need to take CO2 injection seriously if we want to create a show stopping aquascape.

    How Much Does It Cost To Set This Up?

    You will need three critical parts for a proper CO2 system:

    • CO2 Regulator
    • Diffusor
    • CO2 tank

    Of all three components, the CO2 regulator is the most important of the bunch. If you go low quality on the CO2 regulator you make have missing features like a bubble counter or needle valves that are not precise. The check valve may also not be reliable.

    On average it will cost you about $200 to setup a proper CO2 system in a 40G tank. To maintain levels, it will cost about $5 a month to refill your tank with CO2. If CO2 injection is too much for your budget, it would be best to consider aquarium plants that will thrive without CO2 injections. These low tech plants will include ones like Java Fern, Pearl Weed, and Dwarf Sagitt.

    Short on time? I recommend the CO2 Art Pro-Elite Series CO2 Regulator Make sure to use my coupon code ASD10%Off when checking out!

    The list below are CO2 system parts for you to consider. I will weigh in with the pros and cons of each part. There is a complete I will show you later in the post that has great valve. There is a complete readily available on the market from Fluval, but it’s so undersized and the replacement CO2 cans are so expensive I can’t recommended it. All of these components when put together will competently manage CO2 levels in your planted tank. 

    How We Ranked These Systems

    Not all CO2 systems are built the same. Here’s exactly what separated the top picks from the rest:

    1. Regulator build quality – Dual-stage vs. single-stage is the most important difference. Dual-stage maintains consistent output pressure as the cylinder depletes. Single-stage drops off and can cause CO2 fluctuations or the dreaded end-of-tank dump.
    2. Solenoid reliability – A solenoid that fails open is a fish killer. The solenoids on CO2 Art regulators have a proven track record across thousands of tanks. Budget solenoids are a gamble you don’t want to take.
    3. Needle valve precision – A quality needle valve lets you dial in 1-2 bubbles per second with confidence. A cheap needle valve jumps around and makes consistent dosing nearly impossible.
    4. Diffuser efficiency – Inline diffusers outperform in-tank ceramic diffusers for CO2 absorption rates. Less waste, more plant uptake.
    5. Cylinder compatibility – Some regulators only work with standard CGA-320 tanks. Know what you’re buying before you order.
    6. Safety record – End-of-tank dump is a real risk with single-stage regulators. When the cylinder gets low, output pressure spikes. A dual-stage regulator eliminates this risk by design.
    Image Name Type Link
    Editor’s Choice!

    CO2 Art Pro-Elite Series CO2 Regulator

    CO2 Art Pro-Elite Series CO2 Regulator

    CO2 Regulator

    Click For Best Price
    Best Value

    CO2 Art Pro-SE CO2 Regulator

    CO2 Art Pro-SE CO2 Regulator

    Co2 Regulator

    Click For Best Price
    Budget Option

    FZone Aquarium CO2 Regulator

    FZone Aquarium CO2 Regulator

    CO2 Regulator

    Buy On Amazon
    NilocG Aquatics CO2 Regulator NilocG Aquatics CO2 Regulator

    CO2 Regulator

    Buy On Amazon
    CO2 Art Diffusor CO2 Art Diffusor

    Diffusor

    Click For Best Price
    Sera Flore CO2 Reactor Sera Flore CO2 Reactor

    Diffusor

    Buy On Amazon
    Mr. Aqua Turbo Diffusor Mr. Aqua Turbo Diffusor

    Diffusor

    Buy On Amazon
    Coldbreak 5lb CO2 Tank Coldbreak 5lb CO2 Tank

    CO2 Tank

    Buy On Amazon

    Should You Buy a CO2 System?

    Buy pressurized CO2 if:

    • You’re running a high-light planted tank (anything over 50 PAR at the substrate)
    • You want carpeting plants, stem plants, or demanding species like Rotala, Hairgrass, or Hemianthus
    • You’re building a serious aquascape and want the plant growth to match the effort
    • You’ve already been fighting algae in a high-light tank – CO2 often fixes the real problem

    Skip pressurized CO2 if:

    • You have a low-light tank with easy species like Java Fern, Anubias, or Crypts – liquid carbon (Flourish Excel) is enough and far safer
    • You’re a beginner who hasn’t mastered the basics of filtration and water changes yet – CO2 adds complexity before you’re ready for it
    • Your tank has shrimp as the primary livestock – shrimp are more sensitive to CO2 swings than fish
    • You can’t commit to the daily monitoring, at least while you’re dialing the system in

    The Best CO2 System Reviews

    Let’s go into detailed review of each component below.

    1. Art Pro-Elite Series Regulator – The Best Regulator

    Editor’s Choice


    CO2 Art PRO-SE Series

    Best CO2 Regulator

    Professional level CO2 Regulator for top level aquascapers and reef tank owners. Backed by a 10 year warranty


    Click For Best Price

    Let’s start of the list with the best of the best. If you are a looking to do a professional level planted tank or large planted system this is the CO2 regulator to buy. CO2 Art is a private company based in Las Vegas. The top of the line Pro-Elite Series comes with a 10 year warranty with a maximum working pressure of 80PSI.

    This series is so well received it has the endorsement of George Farmer – one of the most renowned aquascapers on YouTube, and that was the last generation he endorsed. This regulator is the newest generation built for aquariums up to 1000 gallons in size. It has a fully customized solenoid block with a high precision needle valve, check valve, and a bubble counter. 

    The craftsmanship on this CO2 regulator is world class. CO2 Art backs up their product with a industry leading lifetime technical support and access to their support portal. You will never be alone when running your CO2 system again!

    World class systems come with a high price tag. This is the most expensive CO2 regulator on our list. That is the cons I can think of! It’s an amazing product and worth every penny. See Full Review.

    You can also use my code ASD10%Off and get 10% off your purchase!

    Pros

    • 10 year warranty
    • Incredible craftsmanship
    • Awesome support

    Cons

    • Expensive

    2. Art Pro-Elite Series Regulator – The Best Value Regulator

    Best Value


    CO2 Art Pro-Elite

    Best Value

    A budget friendly version of the SE series. This has the quality of CO2 art with a great price. Highly recommended!


    Click For Best Price

    The CO2 Art Elite Series is a great regulator. However, it’s expensive. Fortunately, CO2 art sells a budget friendly regulator called the Pro-SE Series. This unit has the ability to work with pressure up to 40 PSI. You get all the benefits of CO2 art’s awesome technical support at a lower price with this unit. You do not skip out on quality by getting their lower priced model. I would say this regulator will handle the majority of planted aquarium enthusiasts’ needs. The bubble counter and needle valve are extremely accurate due to its precision craftsmanship. 

    The main thing you sacrifice by going with the Pro-SE Series is the warranty. CO2 Art offers a 5 year warranty on this system. Nevertheless, a 5 year warranty is going to be better than the vast majority of CO2 regulators on the market!

    Make sure to use my code ASD10%Off purchasing from CO2art!

    Pros

    • Cheaper than elite series
    • Incredible craftsmanship
    • Awesome support

    Cons

    • 5 year vs 10 year warranty

    3. FZone Aquarium Regulator – The Best Budget Regulator


    FZONE CO2 Regulator

    Budget Option

    A great budget option with proven results. FZone is a top selling Regulator fort those looking for value


    Buy On Amazon

    The FZone CO2 Regulator is a comprehensive CO2 regulator that is available at a reasonable price for aquarists. It is surprisingly high quality given it’s price point. This is coming from a person who is used to seeing high quality CO2 regulators command prices over $200. This regulator also has the advantage of being DC powered, which means it will draw less electricity to operate and is easier to accommodate in the event of a power outage. This package also comes with a bubble counter – which will allow you check the flow of your CO2 using a high precision needle valve. This CO2 regulator offers the same features that you expect with higher priced regulators and FZone also offers a Triple Stage Regulator. The bubble counter also has a check valve feature.

    It will not fit paintball tanks standard, but the accessory to accommodate them is not that expensive. It also only offers a 1 year warranty. However, given it’s features and price it’s a good choice to consider.

    Pros

    • Dual Gauges
    • DC Powered
    • Reasonable Price

    Cons

    • Will not fit paintball tanks
    • 1 year warranty

    4. NilocG Aquatics Regulator – Small But Mighty


    NilocG Aquatics Aquarium Co2 Regulator

    The NilocG Regulator is great for people who do not have space for a traditional regulator and CO2 tank setup


    Buy On Amazon

    The NilocG CO2 Regulator offers a good choice for those with limited space or who want to use a paintball tank instead of a standard CO2 tank.It is an all aluminum construction that is high quality. It lacks a few features of the others like a bubble counter, but it’s the size that is the main selling point here. The needle valve is fairly accurate. It’s a better consideration than the Fluval kits for those will smaller tanks.

    Pros

    • Size
    • Aluminum construction – won’t rust
    • Fits paintball tanks out of the box

    Cons

    • Expensive for size
    • No bubble counter
    • No check valve

    5. Art Inline Diffuser – The Best Diffuser


    CO2Art Inline Diffuser

    Best CO2 Diffusor

    The CO2 Diffusor is a high quality inline diffusor that works great with canister filters


    Click For Best Price

    When it comes to a diffusors on a CO2 system. There are three choices we have in our systems. There are standard diffusors, which are what we mostly see. They are cheap, need to be maintained often, have to be kept inside the display tank, and some are not as reliable as they should be.

    This brings us to the next type of diffusion method, which is an inline atomizer. This are fitted inline with a filter like a Canister Filter and are less effected by flow inside the display tank. They produce an very fine mist, which makes the bubbles less noticeable in the tank. This Diffuser by CO2Art is the best choice if you want to use one. It is a high quality atomizer that will only need to be cleaned every 2-4 months and will provide service for a lifetime. They can handle a large amount of pressure and can service larger tanks. The construction is great like all CO2 Art products. See the video below for more details.

    Pros

    • Heavy duty built
    • Works in-line with filter or pump
    • No large bubbles in tank

    Cons

    • Requires higher pressure from your regulator
    • Expensive

    6. Sera Flore Reactor – Eliminate Mist


    Sera Flore Active CO2 Reactor

    Works externally or interally. A great option for those looking for a CO2 reactor


    Buy On Amazon

    At the premium level of diffusion for CO2, we have CO2 reactors. These reactors capture CO2 and keeps it running in its chamber until full dissolution is achieved. This is great tool for those of us who want a bubble free, mist free display tank. They are more effective than diffusors or atomizers, but require a bit more touch to get right. You also have to purchase the correct size to handle your load.

    This CO2 Reactor From Sera Flore is a great selection for a CO2 reactor. They can work externally or internally, which make them a great option for those with Aquarium Sumps.

    Pros

    • Bubble and mist free CO2 dissolution
    • Most effective dissolution method
    • Well built

    Cons

    • Requires higher GPH to operate correctly
    • Expensive

    7. Mr. Aqua Turbo Diffuser – Easy Solution for Sumped Tanks


    Mr. Aqua Turbo Diffuser 400

    A great hidden and silent option for those with aquarium sumps


    Buy On Amazon

    The Mr. Aqua Turbo Diffuser is a great choice for those of us with Aquarium Sumps. It’s a modified powerhead that goes internally in your aquarium and works to dissolve CO2. What I like about it is that it is simple and effective. It’s a separate piece of equipment, so it makes it easier to unplug and maintain instead of taking out your plumbing with an inline reactor. Cleaning is just easier and dummy proof in my mind and easier to replace if it breaks.

    It is ugly to place inside your display tank, especially with that giant printed text logo. I prefer to keep everything out of the display tank for aesthetic purposes. This simple piece of equipment fits the bill.

    Pros

    • Stand alone equipment
    • Easy to service and clean
    • Can work in a sump

    Cons

    • Expensive for what it is
    • Looks ugly inside a tank

    8. Coldbreak Tank – Cheap Tank


    Coldbreak CO2 Tank

    A quality and value priced CO2 tank that is quick and easy to purchase online


    Buy On Amazon

    The beermaking hobby has definitely made CO2 gear cheaper and easier to find. This CO2 Tank from Coldbreak is a high quality CO2 tank for a very reasonable price. It’s easy to order from Amazon and is quickly delivered. Once you have one of these on hand, it’s easy to exchange your CO2 tank from a local welding shop or brewery. Make sure any tank you get has hydrostatic stamps. This means they have been tested and get re-tested every 5 years.

    Pros

    • Reasonable price
    • Durable and sturdy 
    • Easy and convenient to order

    Cons

    • Cheaper to buy secondhand if you can find it

    Additional Equipment to Consider

    I have supplied a list of recommended equipment that is reasonably priced that will get you going with great success. There are other pieces of equipment you may want to consider that are theoretically optional, but recommended.

    The first would be a timer. The reason for this is to save on CO2 and to properly dial in your system when your plants need it. With a timer, you will want to set your CO2 system to turn on 2 hours before your lights come on and turn off 1 hour before your lights go off. Having a timer makes this dummy proof and easy to implement. In general, most tanks will have CO2 turned on for about 8 hours per day.

    You do not need a fancy timer or a controller to achieve this. A simple Mechanical Timer will do the job reliably.

    The next piece of equipment would be a Drop Checker. This drop checker will monitor your CO2 levels and let you know if you are over or under dosing CO2. This particular Drop Checker works like a Seachem Ammonia Alert badge in that it is easy to read and easy to use. This is a standard on how to monitor your CO2 levels. There is a more advanced method of monitoring your pH drops when your CO2 system is off, but that to me is a more advanced topic. You can also look for warning signs from your livestock. Livestock that are in CO2 levels that are too high will show signs of stress. These signs will include lowered activity, erratic behavior, inverts like snails going above the water line, and fish moving towards areas of high flow. You want to aim for keeping your CO2 levels from 20 – 35ppm. A drop checker will turn green at 30ppm indicating that you are in the “sweet spot” of CO2 saturation.

    Stainless Steel Skimmer

    The final piece of equipment would be a surface skimmer. This Stainless Steel Surface Skimmer fits the bill with it’s clean design and function. Surface skimmers increase gas exchange and will keep your water surface clean. The improved gas exchange from the skimmer will help optimize your CO2 levels. It’s a reasonable investment to make considering that they are so invaluable to a top notch planted tank.

    How To Setup For A Planted Tank

    Setting up a CO2 System can seem like an intimating affair, but the equipment recommended here will make installation easier than you think. Once you have installed your system, you will want to aim to have your CO2 system operating at 30-40 PSI. This video by ADU Aquascaping will help visualize a standard installation of most CO2 systems you will purchase.

    Want A Done For You Kit? – A High End Option

    Do you want a kit that have everything you would to operate a CO2 system? Let me take the guesswork out of your purchase by introducing to you the CO2 Art CO2 System. This is the best value for a high quality CO2 system that you will find!

    Premium Pick


    Pro-SE Complete Bundle

    Premium Pick

    Everything you need to get started. A professional level CO2 system.


    Click For Best Price

    With this kit, you get a Pro-SE regulator, inline diffusor, drop checker and fluid, and CO2 resistant tubing. All you need is a CO2 tank and you are set to go. This is a great package for top of the line equipment at a great price. Click the button below to get the best price from CO2 Art directly. Make sure to use my coupon code ASD10%Off when checking out!

    What DIY Yeast CO2 and Cheap Regulators Miss

    Before spending money on a pressurized system, some hobbyists try DIY yeast CO2 bottles or pick up the cheapest single-stage regulator they can find. Here’s why both approaches create problems:

    DIY Yeast CO2

    DIY yeast systems produce CO2, but they can’t hold a consistent output. Yeast activity spikes for a day or two, then tapers off as the colony exhausts the sugar. You end up with CO2 fluctuations that stress plants without giving them what they need consistently. There’s also no solenoid – CO2 runs overnight, drops pH while you sleep, and you find out in the morning when something’s wrong.

    Cheap Single-Stage Regulators

    Single-stage regulators work fine when the cylinder is full. The problem is what happens as the cylinder empties. Output pressure drops as gas depletes, and then – right near the end of the tank – pressure spikes. This is the regulator dump effect. CO2 floods the tank in a surge, pH crashes, and fish suffocate. It doesn’t happen every time, but it happens enough to be a real risk. Dual-stage regulators eliminate this by maintaining constant output regardless of cylinder pressure.

    The other thing cheap regulators miss: needle valve precision. If you can’t dial in 1-2 bubbles per second reliably, you can’t control your CO2 levels. You’re always guessing.

    My Top Pick

    The CO2 Art Pro-Elite Series is my top recommendation – not because of the brand, but because of the dual-stage design and the 10-year warranty. Most CO2 systems fail at the solenoid or the needle valve. CO2 Art’s engineering solves both. I’ve directed customers to this regulator for years and haven’t had a single complaint about regulator dump or solenoid failure. Use code ASD10%Off for 10% off at checkout.

    FAQS

    Does This Harm Fish?

    Yes, it can – if levels get too high for too long. This is why you must monitor your levels. Looks for the warning signs I mentioned earlier.

    Do They Need Carbon Dioxide?

    As I have mentioned earlier in the article, many of our aquarium plants in the wild are used to higher levels of CO2 then what is in a non-CO2 injected tank. As a result, many plants available in the trade will not grow to their full potential if CO2 injection is not supplied. CO2 levels at an optimum level will not only make your plants grow faster, but it will impact their coloration, health, and form. The comparisons between a non-CO2 tank and one that is injected are worlds apart. If you are serious about building a great looking aquascape, CO2 is a must consideration. It’s actually more important than substrate.

    Can A Low Light Plant Benefit from this?

    Absolutely! CO2 is such a critical health component to an aquarium plant. Low Light Aquarium Plants + low powered lights + CO2 setup is actually a great way to have slower but healthy growth in your aquascape. Can’t complain about less pruning :). 

    How Do I Give My Aquarium Plants Carbon Dioxide?

    You can give your aquarium plants CO2 either with a supplementary product like Seachem Excel or by injecting CO2 with a CO2 system. A CO2 system is considered the best way to reliability deliver CO2 to plants and keep levels stable.

    Closing Thoughts

    CO2 done right transforms a planted tank. CO2 done wrong ends it overnight. The regulator quality is what separates those two outcomes. Spend the money on a dual-stage regulator with a reliable solenoid, put it on a timer, and monitor your levels while you dial the system in. After that, it becomes one of the most hands-off parts of your setup.

    I’ve run pressurized CO2 on multiple tanks over the years and I wouldn’t go back. The plant growth difference is real, and once the system is calibrated, it practically runs itself. If you’re serious about planted tanks, CO2 is not optional – it’s the foundation everything else is built on.

    Questions? Drop them in the comments below.


    🌿 Want to learn more? This article is part of our complete Planted Tank & Aquascaping Guide. your ultimate resource for aquarium plants, aquascaping styles, substrates, and more.
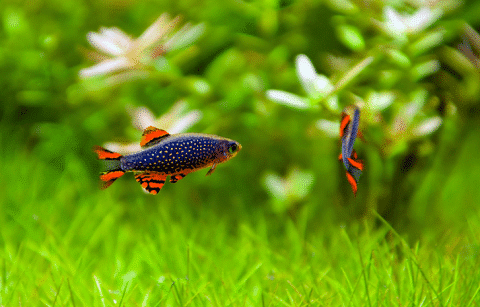
    References

  • Convict Cichlid Care – A Complete Guide

    Convict Cichlid Care – A Complete Guide

    Convict cichlids are one of the most personality-packed fish I’ve kept in 25 years in the hobby. They’re tough, opinionated, and genuinely entertaining to watch. Honestly, I’d pick a convict over most “beginner” fish any day of the week. Especially when a pair forms and starts breeding. I’ve seen them successfully defend a corner of a 55-gallon tank from fish twice their size, which tells you everything about their temperament. If you want a cichlid that’s easy to keep but never boring, this is a great choice.

    The cichlid that breeds whether you want it to or not.

    What Most Care Guides Get Wrong About Convict Cichlid

    The biggest misconception I see repeated everywhere is that convict cichlids are great beginner community fish. They are not. They are great beginner cichlids, but that is a completely different thing. A pair of convicts in breeding mode will terrorize every other fish in a 55-gallon tank. I have watched a 3-inch female convict chase a 6-inch severum into a corner and keep it there for days. The other myth is that they need a 30-gallon minimum. Technically you can keep a single convict in a 30, but a breeding pair needs 55 gallons minimum to give tank mates any chance of survival.

    The Reality of Keeping Convict Cichlid

    Convicts are bulletproof when it comes to water parameters. That part of their beginner reputation is earned. But everything else about keeping them requires planning.

    Breeding is inevitable. If you have a male and a female, they will breed. There is no “if.” They will spawn on rocks, on driftwood, on the glass, on the filter intake. Then they will do it again three weeks later. You need a plan for fry before you buy a pair, not after.

    Aggression escalates during breeding. A pair guarding fry will attack anything that moves. Fish twice their size get chased. Tank mates get pinned in corners. In a small tank, this can result in dead fish. You need enough space for other fish to escape, and you need tank mates tough enough to take the pressure.

    They redecorate constantly. Convicts dig. They move substrate, excavate under rocks, and rearrange your tank to suit their nesting preferences. Lightweight decorations get toppled. Plants near their territory get uprooted. Accept it or choose a different fish.

    Population control is your responsibility. A single pair can produce 200+ fry every few weeks. If you do not cull, separate, or rehome fry, your tank will be overrun within months. Local fish stores may not want common convict fry. Have a plan.

    Biggest Mistake New Convict Cichlid Owners Make

    Buying a pair without a plan for fry. It sounds simple, but this is the mistake that overwhelms more convict owners than anything else. You buy two fish, they breed within weeks, and suddenly you have 50 to 100 fry with no idea what to do with them. Three weeks later, there are 100 more. The breeding never stops. Have a fry plan before you buy convicts, or buy only one sex.
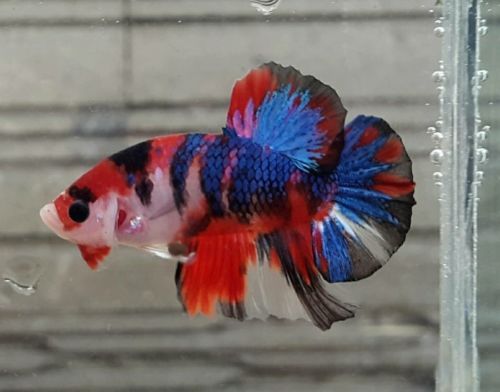
    Expert Take (Mark Valderrama, AquariumStoreDepot)

    Convict cichlids are the best fish in the hobby for witnessing real parental behavior. The way both parents defend their fry, herd them around the tank, and share guard duty is genuinely remarkable. But that same parental instinct is what makes them dangerous in a community tank. If you want the breeding experience, set up a dedicated convict tank and enjoy the show. If you want a community fish, look elsewhere.
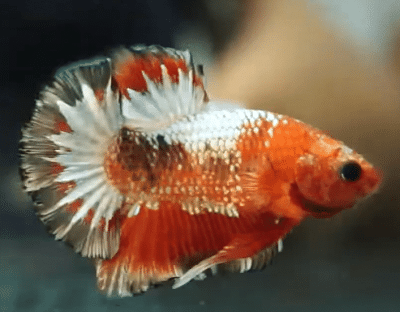
    ASD Difficulty Rating: Tier 1/2 – Beginner-Intermediate

    Convict cichlids are easy to keep but relentless breeders. A pair will spawn every 4-6 weeks and defend fry with extreme aggression. Managing the breeding cycle is the main challenge – the fish itself is hardy and adaptable.
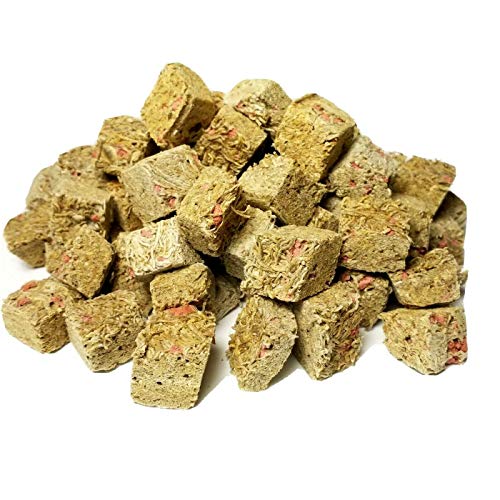
    Table of Contents

    Convict cichlids breed whether you want them to or not. Once they pair off, they will attack everything in the tank to protect their fry, and they will keep spawning every few weeks until your tank is overrun. They are tough, aggressive, and prolific. I have seen beginners buy two convicts and end up with 200 within six months. If you are not prepared for that, you are not prepared for convicts. The cichlid that breeds whether you want it to or not.

    The Reality of Keeping Convict Cichlid Care

    The aggression reputation is earned but misunderstood. Convict Cichlid Care is not randomly violent. It is territorial, and territory disputes in a poorly planned tank look like chaos.

    Group size controls behavior. Keep too few and you get a bully. Keep enough and aggression spreads out. There is a threshold, and missing it ruins the tank.

    Most problems are stocking problems. The fish is not the issue. The tank plan is the issue.

    Biggest Mistake New Convict Cichlid Care Owners Make

    Keeping too few. A small group of Convict Cichlid Care creates a hierarchy where the bottom fish gets destroyed. The solution is not fewer fish. It is more fish to spread aggression.

    Expert Take

    Stock heavily, filter aggressively, and provide sight breaks throughout the tank. Convict Cichlid Care is manageable when you control the environment. Let the environment control itself and this fish exposes every weakness.

    Brief Overview

    Scientific NameAmatitlania nigrofasciata
    Common NamesConvict Cichlid, Zebra Cichlid
    FamilyCichlidae
    OriginSouth America
    DietOmnivore
    Care LevelEasy
    ActivityVery Active
    Lifespan8 to 10 Years
    TemperamentAggressive
    Tank LevelMidwater
    Minimum Tank Size30 gallons
    Temperature Range74°F. 84°F
    Water Hardness9 – 20 dkH
    pH Range6.5 to 8.0
    Filtration/Water FlowModerate
    Water TypeFreshwater
    BreedingEgg layer
    Difficulty to BreedEasy
    CompatibilityCan live in community tanks with certain tank mates that can stand up to the convict cichlid’s aggressive nature.
    OK, for Planted Tanks?With caution

    Classification

    Taxonomic RankClassification
    Common NameConvict Cichlid
    Scientific NameAmatitlania nigrofasciata
    OrderCichliformes
    FamilyCichlidae
    GenusAmatitlania
    SpeciesA. Nigrofasciata

    Origin and Habitat

    As a freshwater fish, the convict cichlid resides in Central American rivers and streams.  This species is found in Honduras, Guatemala, and El Salvador1

    The convict cichlid’s natural habitat consists of gently flowing water and sandy substrate.  Its rivers and streams contain rocks and driftwood, giving these fish discreet places to hide.    

    Appearance and Size

    Want to know why this fish is called convict?  Just take a look at its black stripes.  This pattern looks like a prison uniform.

    The exact number of stripes, or bars, depends on the particular fish, but most have about eight or nine.   

    Although the convict cichlid is white with black bars, other colors include plain white, pink, and gold.  Some of these relatively rare varieties lack the stripes that these fish are known for.      

    For most fish species, the male is more colorful.  But that’s not the case for convict cichlids.  Instead, it’s the female convict cichlid that has more color. 

    When the female matures, an orange mark appears on her side.  When the male Convict Cichlid matures, a nuchal hump is seen on his head.    

    The convict cichlid is on the smaller side, with an average length of 4-5 inches.  However, some males can grow up to 6 inches long. 

    Average Cost

    It’s not hard to find a convict cichlid for sale.  This fish is very popular and easy to breed, motivating fish stores, online stores, and breeders to sell the convict cichlid.

    And that’s good news for you because it keeps the price pretty affordable.  You will probably only pay about $5-$12 per fish if you find the locally.      

    Ease of Care

    The convict cichlid is super easy to take care of, making it a beginner-friendly fish.  Maintaining the proper water conditions, creating the right environment, and feeding your convict cichlid are simple, straightforward tasks.     

    In addition, this species is easy to breed.  It’s just a matter of putting a male and female convict cichlid together, giving them the right environment, and providing plenty of space.  If you do that, you will likely have fry in no time! 

    Feeding Requirements

    Speaking, a convict cichlid’s diet should mostly consist of pellets.  But you will also want to include foods that wild convict cichlids consume.

    As omnivores, this fish eats insects, mosquito larvae, and plants.  That’s why it’s a good idea to supplement your aquarium convict cichlid’s diet with live foods and blanched vegetables. Roughage is key to avoiding the dreaded Malawi Bloat that types many cichlids.

    Some examples include:

    • Blood Worms
    • Black Worms
    • Daphnia
    • Brine Shrimp
    • Tubifex Worms
    • Lettuce 
    • Broccoli
    • Carrots

    Although fresh foods are always best, frozen worms and shrimp are also fine.  And don’t be afraid to throw some insects and mosquito larvae into your convict cichlid’s diet.  If you can manage to get these foods, your fish will love them! 

    As far as pellets go, look for a cichlid-specific option.  And whatever you do, don’t settle for anything less than high-quality food. 

    Cheap pellets will save you money, but they will only end up hurting your fishy friends in the long run. That’s because poor quality food leads to poor health. An example of a high quality Cichlid food would be Ron’s Cichlid Food.

    Great Balanced Food
    Ron's Cichlid Food

    Ron is an African Cichlid breeder with over 25 years in experience who created a line of food that is well balanced. A great option when you can’t use frozen foods.

    Buy On Amazon

    If you prioritize high-quality food, your cichlid fish will thrive.  Plus, they will look amazing in your tank. You can’t ask for more than that!

    Besides choosing the right food, you must also decide when to feed your fish.  It’s easier to feed once per day, but it’s probably better to feed several smaller meals throughout the day.  About 2-3 meals will do.

    These smaller portion sizes will prevent tank water pollution, which helps to keep water conditions just right.  And that will further contribute to the health and appearance of your convict cichlid. 

    Temperament

    Convict Cichlid Swimming

    The convict cichlid is an aggressive fish, always ready to defend their territory.  Their combative nature increases during times of breeding as they protect their spawning areas. 

    All that being said, they are still a delight for fish owners.  As long as you can keep their aggression at bay, their personality will keep you entertained.    

    Fortunately, you can prevent fish fights from occurring.  All you have to do is make sure each convict cichlid has enough space. 

    And if you will be keeping your fish in a community tank, just be sure to place them with compatible tank mates.  We will talk more about that later in this article.

    You should also give your fish plenty of hiding places, such as rocks, plants, and driftwood.  These hideaways provide some much-needed privacy, which helps to keep the peace. 

    When there is peace in your tank, you can enjoy observing your convict cichlid’s activities.  These activities may include digging, rearranging plants, and checking out the rest of the tank.      

    All that activity is what makes them so fun to watch!

    Tank Requirements

    If you want your fish to thrive, you need to create an environment that matches their natural habitat as closely as possible. 

    In this section, we are going to talk about how you can do that in your convict cichlid’s aquarium.

    Make Sure the Tank is Large Enough   

    Remember, the convict cichlid needs lots of space.  Forcing this aggressive species to share a small tank with other fish is just asking for trouble!

    But how big should the tank be?

    Here are some general guidelines:

    • Some experts recommend 30 gallons per convict cichlid
    • Others say 30-50 gallons is large enough for a pair of convicts
    • If you have a breeding pair, you will need at least a 50-gallon tank.

    If you want to play it safe, it is a good idea to choose a tank size that’s larger than what you think is necessary.  This is probably better than trying to get by with the bare minimum.      

    Create the Right Conditions

    Convict Cichlid

    The Convict Cichlid is a very hardy fish, meaning they can survive conditions that don’t perfectly match their natural habitat.  But surviving isn’t thriving.  To make sure your fish are as healthy and attractive as possible, you need to get the tank’s conditions just right. 

    That involves maintaining the proper pH and temperature range.  This species requires these conditions:

    • PH: 6.5-8
    • Water Temperature: 74 -84 degrees

    Keeping the water on the warmer side is important because this fish comes from South American rivers and streams.  So, if your tank’s water doesn’t stay within the optimal range, you will want to look into getting an aquarium heater

    Choose the Right Substrate   

    Convict cichlid fish have a tendency to dig, making it vital to choose the right substrate.  Something soft, like sand, will allow your fishy friends to dig away without getting scratched. 

    When choosing between light and dark substrate, it all comes down to personal preference and your budget.  lighter substrates will be cheaper than darker options.  However, your beautiful fish will stand out even more against a dark substrate.  

    Is the Convict Cichlid Right for You?

    Before you commit to this species, here’s an honest assessment of whether it fits your setup and experience level.

    • Great if you want to observe breeding behavior. Convicts are prolific breeders and incredible parents. Watching them raise fry is one of the best experiences in the hobby.
    • Perfect for keepers who want personality over color. They’re not the prettiest cichlid, but they make up for it with attitude and intelligence.
    • Not ideal for peaceful community tanks. If you want a calm, harmonious setup with tetras and corydoras, look elsewhere.
    • Good for beginners who are ready for aggression management. They’re hardy and forgiving on water parameters, but you need to be prepared to deal with territorial behavior.
    • Skip if you don’t have a plan for fry. A breeding pair can produce hundreds of babies every few weeks. If you can’t rehome them, you’ll be overrun fast.
    • Excellent choice if you have a species-only tank. A pair in a well-decorated 55-gallon is endlessly entertaining without the stress of managing tank mate aggression.

    Provide Hiding Places

    Logs, driftwood, rocks, and plants make great hiding spots for fish.  Adding these elements to your tank gives your cichlid fish plenty of privacy, which helps prevent aggressive behaviors. 

    Look for tough plants that won’t be easily disturbed by digging.  By the way, we should probably mention that your convict cichlid will likely rearrange the plants. Plants that do not need to be planted in soil make the most sense. In our experience, these plants work best with Convicts:

    These fish definitely have their own ideas about things!  But that’s partly why they are so amusing. 

    Generate a Gentle Flow

    Wild convict cichlids live in gently flowing water.  You can mimic this by installing a powerhead that generates a gentle flow.      

    Choose a Good Filter System

    What happens when your fish start digging?  If you guessed a mess, you are right! 

    That’s why you must choose a good filter system that can keep up with that mess.  This becomes especially important if you plan on breeding your fish, as the new fry will increase the tank’s bio-load.

    Your best bet is a filter that filters at least twice your tank’s volume per hour.  Some convict keepers use filters that filter 10-15 times the tank volume per hour. A filter with a large amount of media capacity is best like a canister filter.

    Convict cichlid breeders need to take extra measures to keep the fry from being sucked into the filter. A quick fix is to buy and install a filter sponge. 

    How To Breed

    When it comes to breeding convict cichlids it is summed with a simple statement – convict cichlids are prolific, making this fish incredibly easy to breed.  There are just a few breeding tips to keep in mind. You can also check out this video by Blake’s Aquatics if you prefer a video explanation.

    For starters, the water should be around 84 degrees.  So, keep an eye on the temperature to make sure it’s conducive to breeding. 

    Secondly, the female convict cichlid naturally gravitate towards rocky overhangs to lay their eggs.  Turning a clay pot upside down or stacking flat rocks provides a similar laying space for your female fish.  

    Thirdly (and this is very important to remember!) convict cichlids are extremely protective of their eggs.  If your convict cichlids are forced to breed in a community tank, they will view the other fish as threats and attack them.     

    That’s why your breeding pair should be kept in a separate tank from all other fish, convicts or otherwise.

    Also, the breeding tank should be large enough to house fry.  At a minimum, this requires a 50-gallon tank. 

    Breeding and Raising Fry

    Convict cichlids are ready to breed when they are about 4-7 months old.  After the female convict cichlid lays the eggs, the male fertilizes them.  Once the eggs have been laid, the breeding pair is on their guard, ready to defend their eggs from any threats. 

    The eggs will hatch in 3-5 days, resulting in about 30 new fry.  After the eggs hatch, the parents care for the fry.  For the first 5 days, the fry remain in the yolk sac. After that, they start swimming around. 

    Once the fry are about a week old, it’s time to start feeding them.  Some food options include baby brine shrimp, fry flakes, and infusoria. 

    Fry should be fed about 3 times per day. It doesn’t take long for the male and female to be ready to breed again.  They will reenter the breeding mode about 10-14 days after the fry are born. 

    At this time, the breeding pair becomes aggressive towards the fry.  To keep them safe, move the fry to a nursery tank, about 5-10 gallons large.   

    Eventually, the fry will outgrow that tank.  The next step is to place them in a rearing tank, about 20-30 gallons large.

    Important Note

    Before moving on, we want to point out that convict cichlids have a great reputation for being excellent parents. The male and female will do whatever it takes to protect the fry while providing food and shelter. 

    That being said, the father becomes a threat when the fry start swimming.  If any signs of aggression appear, the male Convict Cichlid should be removed from the tank.      

    FAQS

    How many can live together in one tank?

    That depends on how large the tank is. Some experts recommend keeping one convict cichlid per 30 gallons, while others say it’s okay to keep a pair in a 30-gallon tank.

    Although a convict cichlid can live by itself, sharing the tank (as long as it’s big enough) with another convict can prevent stress. 

    Just keep in mind, as the number of fish increase so does the risk of fights.  That’s why it’s probably wise for beginners to limit their convict cichlids to one or two.

    Also, it’s not a good idea to put two male convict cichlids together as this will likely result in displays of aggression.        

    And for those with more than two convict cichlids, it’s best to maintain a ratio of 3 females to one male. 

    Can they live with other fish?

    Due to the convict cichlid’s aggressive and territorial nature, putting this fish in a community tank is risky. For that reason, beginners should probably keep their convict cichlids in a separate tank, away from other types of fish.

    But for those with more experience, their convict cichlids can live in community tanks.  However, you can’t choose just any tank mates.  You have to carefully select certain fish that are most compatible with convict cichlids. 

    That would not include fish that are smaller or less assertive than your cichlid fish.  Instead, you should pick tank mates that are larger and able to hold their own.  

    Some good tank mates include:

    If your convict cichlid will live with tank mates, be sure to buy a large tank that’s at least 50 gallons.  Depending on how many fish you have, you will need a tank that’s even bigger than that.   

    But no matter how experienced you are, how big the tank is, or what other types of fish you have, never ever keep a breeding pair in a community tank.  It just won’t end well!

    That’s because this aggressive species becomes even more combative during breeding time. 

    How long does it take for them to grow to full size?

    That depends on the fish, but most convict cichlids take about 2-3 years to reach full size. 

    How many fry do they have?

    The average number of fry is about 30. 

    How long do they live in captivity?

    With the proper care, aquarium convict cichlids can live for 8-10 years. Keep in mind, this is just an average. Your own fishy friends might live longer or shorter.

    How the Convict Cichlid Compares to Similar Species

    If you’re considering a convict cichlid, you’ve probably also looked at the firemouth cichlid. Both are Central American cichlids with strong personalities and manageable care requirements, but they’re quite different in practice. Firemouths are more bark than bite. They flare their gill plates to look intimidating but rarely follow through with real aggression. Convicts, on the other hand, will absolutely back up their threats. A breeding pair of convicts is significantly more aggressive than a breeding pair of firemouths, which makes firemouths a better choice if you want a Central American cichlid in a mixed tank. However, convicts are hardier, breed more readily, and have more engaging parental behavior. If you want to watch fish raise their young, convicts are the better pick.

    The kribensis cichlid is another common comparison, especially for beginners wanting a breeding project. Kribs are smaller, less aggressive, and work much better in community tanks. But their breeding behavior, while interesting, isn’t as dramatic or involved as what convicts offer. Convicts are the full show. Aggressive defense, fry herding, and cooperative parenting that you simply don’t see at the same level with kribs.

    What It Is Actually Like Living With Convict Cichlid

    Living with convicts means accepting that you are not in charge of the tank. They are. The pair picks a spot, claims it, and defends it against everything. You watch other fish learn where the borders are and stay on the right side of them. It is like watching a tiny territorial dispute play out in real time, every day, and it never gets old.

    The parenting is the real show. Both parents guard the eggs, fanning them constantly. When the fry hatch and become free-swimming, the parents herd them around the tank like a school of tiny grey dots, and any fish that comes too close gets hit. Hard. Watching a three-inch convict body-slam a fish twice its size for getting too close to fry is something you do not forget.

    The fry situation escalates fast. First spawn, you are excited. Second spawn, you are looking for homes. Third spawn, you are searching online for “what to do with too many convict fry.” This is the reality nobody warns you about. Convicts are prolific beyond what most people are prepared to handle. If you do not have a culling strategy or a local fish store willing to take them, you will be overwhelmed within three months.

    In Conclusion

    Convicts do not ask permission to breed. They just do it, and your tank pays the price.

    By this point, you are probably convinced that the convict cichlid is a great fish to keep, especially if you are brand new to this hobby.  They are super easy to care for, a blast to watch, and a beauty to behold. And when you provide great care, you will be able to enjoy your fish for a long time. 

    Do you have any experience with Convict Cichlids? If so, leave a comment below and let’s start a conversation. Thanks for reading!