Most fish can’t live with an axolotl. Not because axolotls are aggressive, they’re not. Because axolotls need water cold enough to kill most aquarium fish. We’re talking 60–68°F (16–20°C). That’s not “cool” water. That’s cold. Add in the fact that axolotls have long, feathery external gills that every curious fish in the tank will want to nip, and you’ve got one of the least forgiving community setups in the freshwater hobby.
This isn’t a community tank article. It’s a “very short list of things that won’t kill your axolotl” article.
After 25 years in this hobby and time working at and managing fish stores, I’ve watched plenty of keepers try to make axolotl community tanks work. They ended badly, fin-nipped gills, stressed animals, impaction, secondary infection. An axolotl does best alone. But if you’re committed to tank mates, here’s what actually works, what doesn’t, and why.
Understanding Your Axolotl
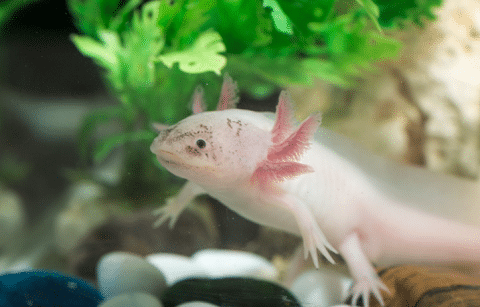
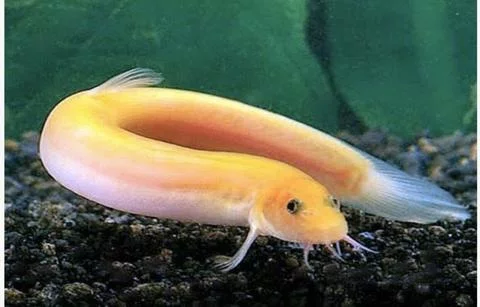
An axolotl is not a fish. It’s a fully aquatic salamander, a neotenic amphibian that stays in its larval form its entire life. It patrols the bottom slowly, hunting by smell and water movement. It is nocturnal. It prefers dim light. And it will absolutely attempt to eat anything that moves and fits in its mouth.
Axolotls are not aggressive the way cichlids are aggressive. They’re opportunistic ambush predators. They don’t chase. They wait, they lunge, and they vacuum-seal their mouths around prey. The problem is that their “prey” instinct doesn’t distinguish between a feeder worm and a $15 fish you just added to the tank.
Their external gills (those flowing, feathery plumes) are one of their most beautiful and most vulnerable features. Nipping damage doesn’t heal cleanly. It opens the door to bacterial infection and can become fatal quickly.
What People Get Wrong
The biggest misconception I see: people look up “cold water fish” and think anything on that list is fair game for an axolotl tank. It’s not.
Goldfish are the most common mistake. They’re cold-water fish, yes. But goldfish are fin-nippers with enough size to seriously damage axolotl gills. They also produce enormous amounts of waste, and axolotls are already messy enough on their own. Even fancy goldfish, which are slower, pose a choking hazard and still nip. I’ve seen goldfish gill damage in customer axolotls more times than I can count, it’s one of the most preventable injuries in the hobby.
The second mistake: adding shrimp as “cleanup crew.” Ghost shrimp and Amano shrimp are just expensive axolotl snacks. Axolotls can smell shrimp through dense plant cover. They will find them. They will eat them. Budget that in if you want to try it.
Third mistake: thinking guppies work because they’re “tough fish.” Guppies actually prefer water in the 74–82°F (23–28°C) range. Axolotl tanks run 60–68°F (16–20°C). That temperature gap will stress guppies and suppress their immune system. They’ll become disease vectors before long.
Biggest Mistake
Adding tank mates when you only have one tank. That’s it. That’s the mistake. When things go wrong (and they will) there’s nowhere to put the fish while you deal with the problem. A stressed axolotl with chewed gills sits in the same water as the fish that are still nipping, because there’s no way to separate them fast enough.
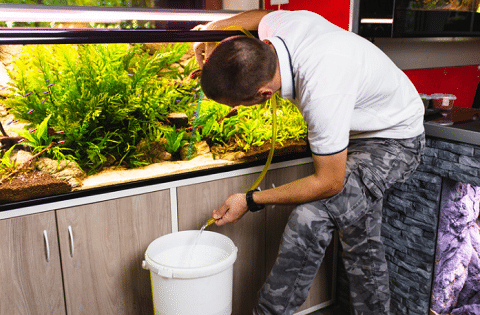
Before you add any tank mates, have a quarantine or backup tank set up and running. Not “I’ll borrow a bucket.” A cycled, temperature-stable tank. This is not optional. It’s the difference between a minor incident and a dead axolotl.
Why Some Fish Aren’t Suitable
Four factors rule out the vast majority of freshwater fish:
Water temperature: Axolotls need 60–68°F (16–20°C). Tropical fish need 74°F (23°C) and above. These ranges do not overlap. Any tropical fish added to an axolotl tank will be chronically stressed, immunocompromised, and prone to disease.
Temperament: Aggressive or territorial fish will attack the axolotl. Highly active swimmers will stress it. Even peaceful, fast fish become a problem if they’re curious about those gills.
Health risks: Cory Catfish have sharp pectoral and dorsal fin spines that puncture the axolotl’s mouth and throat if swallowed. Small snails become choking hazards. Some species carry parasites and pathogens that transfer easily in a shared tank.
Direct competition: Bottom-dwelling fish compete directly with the axolotl for food. Axolotls are slow eaters. Fast bottom feeders will clean up every pellet before the axolotl gets to it.
How to Set Up a Community Aquarium
Aquarium Setup
The minimum for one adult axolotl is 20 gallons (75 L). If you’re adding tank mates, start at 40 gallons (150 L) minimum, 55 gallons (208 L) preferred. More water volume means more stable temperatures, more territory, and more space for tank mates to escape if the axolotl lunges.
For two axolotls plus tank mates, don’t go below 55 gallons (208 L). Bigger is always better with this species. The cost of the setup is real, but it’s the price of doing this right.
Substrate
Fine sand is the only substrate I’d recommend for axolotl tanks. Axolotls dig. They also accidentally ingest substrate when feeding. Gravel causes impaction. Sand passes through safely.
Any tank mate you consider must be able to survive (and thrive) in axolotl water. These are non-negotiable:
Temperature: 59–68°F (15–20°C). Ideal: 60–64°F (16–18°C). Above 72°F (22°C) is dangerous for axolotls.
pH: 6.5–8.0. Ideal: 7.4–7.6.
GH: 125–250 ppm (7–14 dGH)
KH: 53–143 ppm (3–8 dKH)
Ammonia (NH3): 0 ppm
Nitrite (NO2-): 0 ppm
Nitrate (NO3-): <60 ppm
You’ll need an aquarium chiller in most homes, especially during summer. Don’t rely on ambient room temperature. It won’t stay cold enough.
Filtration
Use a sponge filter or a gentle HOB with a baffle. Axolotls need good filtration: they’re messy eaters, but strong flow stresses them. Any tank mate you add should also be fine with low-flow, cool-water conditions.
Decor
Load the tank with hiding spots, driftwood, rocks, caves, and dense planting. Axolotls hide from bright light. Tank mates need refuge from the axolotl. Everyone benefits from more cover.
Lighting
Keep it dim. Axolotls have no eyelids. Bright light is stressful to them. If any of your tank mates require bright light, this isn’t the right setup.
Top Axolotl Tank Mates
This is a short list. That’s intentional. There are only a handful of species that consistently work in an axolotl tank, and even those come with caveats.
Quick-Reference Comparison Table
Species
Adult Size
Min Tank
Ease
Compatibility
Other Axolotls
Up to 12 in (30 cm)
55 gal (208 L)
6/10
Medium
White Cloud Mountain Minnows
1.5 in (4 cm)
40 gal (150 L)
7/10
Medium
Zebra Danios
2 in (5 cm)
40 gal (150 L)
6/10
Medium-Low
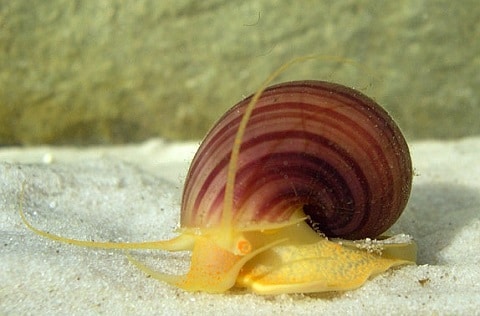
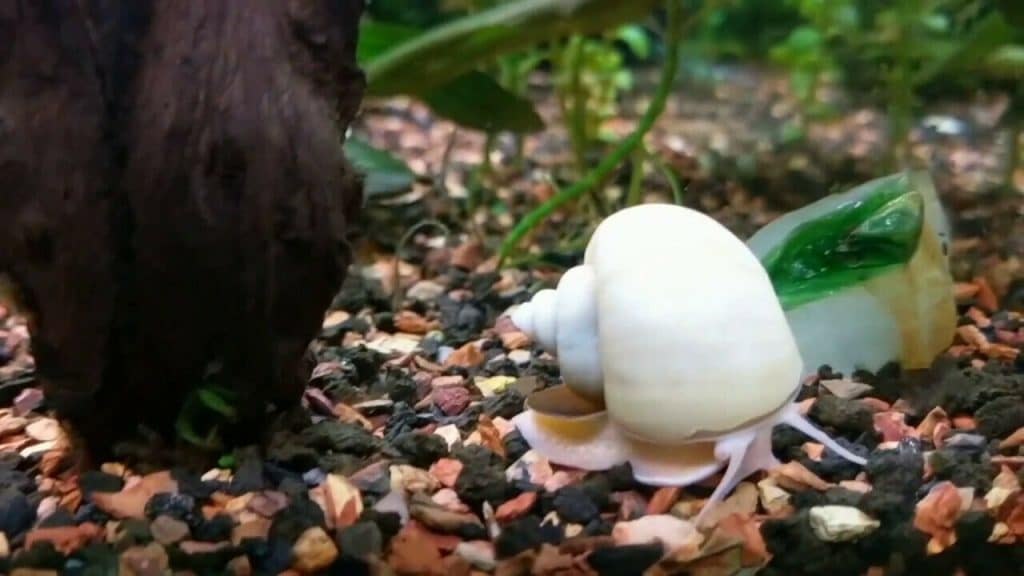
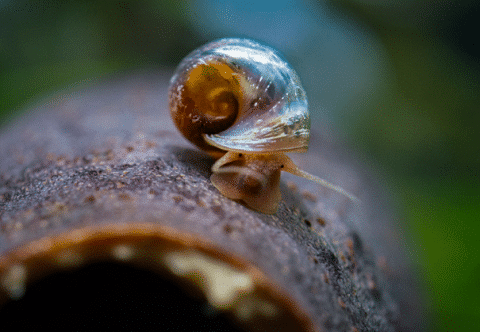
Apple Snails (adults only)
3 in (7.5 cm)
20 gal (75 L)
9/10
High
Expert Take
After 25+ years in this hobby (including years managing aquarium stores where axolotls were a steady seller) I’ve fielded this question hundreds of times. The honest answer about axolotl tank mates is that the safest choice is no tank mates. Axolotls are slow-moving animals with flowing external gills that invite nipping, and they will attempt to eat anything that moves and fits in their mouth. After years of seeing keeper after keeper try to make it work with fish, my position hasn’t changed: a solo axolotl in a well-maintained cold tank is the right setup. Tank mates add risk with almost no benefit to the axolotl itself. If you’re going to try it anyway, the species list below is as good as it gets, and it’s a short list on purpose. — Mark Valderrama, AquariumStoreDepot
1. Other Axolotls
The safest “tank mate” for an axolotl is another axolotl, with important conditions. Adults of similar size coexist reasonably well. A male and female together will breed, so be ready for up to 1,500 eggs. Same-gender pairs reduce that problem.
Never keep a juvenile with a fully grown adult. Juvenile axolotls display cannibalistic behavior, missing limbs are a common outcome. Adults may eat larvae outright. Size-matched adults only.
Even with size-matched adults, watch for recurring aggression. If one axolotl is consistently bullying the other, separate them. One axolotl per tank is the lowest-stress option.
2. White Cloud Mountain Minnows
Ease: 7/10: Best fish option available, with limitations.
White Cloud Mountain Minnows are the best fish option for an axolotl tank, and that’s not a high bar, but it’s a real one. They thrive in 60–72°F (16–22°C), matching the axolotl’s temperature range closely. They’re fast enough that a healthy adult minnow can usually escape a slow-moving axolotl lunge.
No spines, no hard shells, if they do get eaten, they won’t injure the axolotl. Keep a school of at least 6 to reduce individual stress. Even so, expect attrition. Some will get caught off guard at night when the axolotl is most active. If the minnow population is dropping steadily, remove them before the axolotl develops a taste for hunting them.
Choose White Cloud Minnows if you want the lowest-risk fish option that actually matches the axolotl’s cold water requirements.
3. Zebra Danios
Ease: 6/10: Faster than minnows but more boisterous, watch closely.
Zebra Danios tolerate water down to around 65°F (18°C), which puts them at the upper edge of the axolotl’s range. They’re extremely fast, probably the hardest fish for an axolotl to catch. They school tightly and stay in the midwater column, which helps them avoid the bottom-dwelling axolotl.
The downside: danios are energetic, active swimmers. Their movement can stress a slow-moving axolotl, especially in smaller tanks. They can also be nippy in cramped conditions. In a large tank (55+ gallons / 208+ L) with plenty of space, this is manageable. In a 20-gallon (75 L), it’s a problem.
Choose Zebra Danios if you have a large tank and want a fish that is nearly impossible for the axolotl to catch. Choose White Clouds instead if you want calmer cohabitation.
4. Apple Snails (Adults Only)
Ease: 9/10: The safest non-axolotl option available.
Adult apple snails are too large for an axolotl to eat and don’t pose any risk to the axolotl’s gills. They’re the lowest-drama tank mate option. They’ll cruise the glass and substrate, cleaning up algae and leftover food.
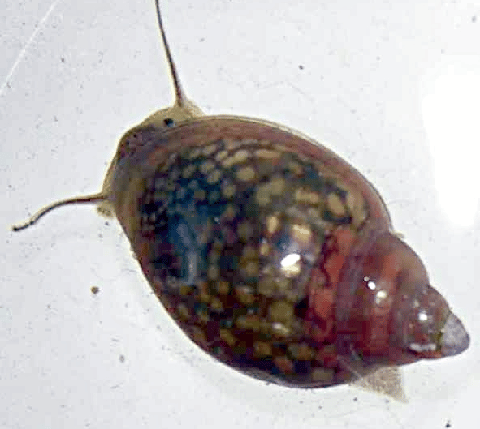
Size matters. Adult apple snails (2–3 inches (5–7.5 cm)) are safe. Juvenile apple snails, bladder snails, and ramshorn snails are not. Small snails are swallowed and cause impaction. Even worse, small snails with hard shells can’t be digested and will block the axolotl’s gut. This can be fatal.
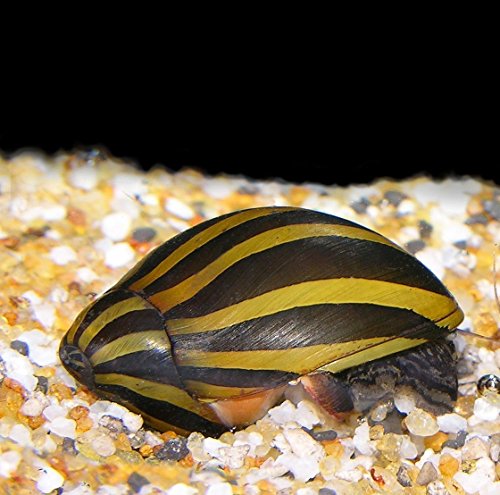
Avoid any snail species that climbs on other tank inhabitants, some trumpet and nerite snails will attach to the axolotl and rasp its slime coat. Adult apple snails don’t do this.
Choose Apple Snails if you want a tank mate that requires zero monitoring and provides actual benefit (cleanup crew). This is the one I’d actually recommend without hesitation.
Hard Rule: Never add any fish or invertebrate that nips, has hard spines, or can’t survive below 68°F (20°C). The axolotl’s external gills are not a novelty feature, they are its respiratory system. Gill damage from fin-nippers causes bacterial infection and can kill the animal. No exceptions.
5. Can More Species Work?
No. That’s the honest answer.
Some keepers report success with hillstream loaches (cold-water bottom feeders with flattened bodies) but hillstream loaches need very high flow, the opposite of what axolotls require. That single conflict kills the idea. Celestial pearl danios tolerate cooler water and are small enough to avoid conflict, but they’re fragile and will be eaten. The list above is the list. It exists for a reason.
If you’re asking whether a fish not on that list can work with your axolotl, the answer is no. Tropical fish (no. Bottom dwellers) no. Anything with spines or a shell small enough to swallow, absolutely not. Stop at the list above.
Fish You Should Avoid
This isn’t an exhaustive list, there are hundreds of fish you shouldn’t keep with axolotls. These are the ones that come up most often because they seem like they might work but don’t.
1. Goldfish
Cold-water fish, yes. Good tank mate, no. Goldfish grow large enough to harass axolotls, they nip fins and gills consistently, and they produce more waste than almost any other common aquarium fish. You’re already dealing with an axolotl’s waste load, adding goldfish doubles or triples your filtration problem.
Fancy fancy goldfish are sometimes suggested because they’re slow. They’re still a choking hazard when small, they still nip, and they still produce enormous waste. Don’t do it.
2. Cory Catfish
Cory Catfish are peaceful, great community fish, just not with axolotls. Their sharp pectoral and dorsal fin spines will puncture the axolotl’s mouth and digestive tract if swallowed. They also occupy the same bottom territory, creating direct feeding competition. Keep cories in a separate tank.
3. Otocinclus Catfish
Otocinclus catfish have the same spine problem as cories. On top of that, they need high flow, the opposite of an axolotl’s slow-current environment. Two incompatibilities, zero benefit.
4. Shrimp
Freshwater shrimp (ghost shrimp, Amano shrimp, cherry shrimp) are live food to an axolotl. Full stop. Some keepers add them intentionally as enrichment and treat feeding. If that’s your intention, fine. If you want them as a permanent cleanup crew, save your money. They’ll be gone within days.
Ghost shrimp and Amano shrimp won’t even make it a full week in most axolotl tanks. Axolotls can smell them. Dense plant cover doesn’t stop that.
Reality of Keeping This Setup
Axolotls don’t need companions. They need cold water and stability.
Here’s what daily life with an axolotl community tank actually looks like:
Your axolotl will spend most of its day sitting still on the bottom. It comes alive at night. That’s when the hunting happens. If you’re adding White Cloud Minnows or Zebra Danios, you will see fewer fish each week until you either find a sustainable population balance or the axolotl runs out of prey. Some keepers actively replenish the minnow school every few months and accept this as part of the setup. There’s nothing wrong with that approach if it’s intentional.
Temperature management is the biggest ongoing challenge. Room temperature in summer will kill an axolotl. A chiller is not a luxury for axolotl keepers, it’s essential equipment. Budget $150–400 for a quality chiller and don’t skip it.
Water quality degrades faster in axolotl tanks than in most other freshwater setups. Axolotls are messy eaters. They leave food scraps. They produce a lot of waste relative to their size. Add fish, and you add more waste, more stress on the biofilter, and more frequent water changes. Expect 25–30% weekly water changes minimum.
The axolotl itself is easy to stress. Loud vibrations, bright lights, high flow, and overcrowding all cause stress responses, loss of appetite, floating, fungal infections. If your tank mates are causing any of these behaviors, remove them immediately. Not “monitor for a few days.” Remove them. In my experience, axolotl keepers who hesitate at this step almost always regret it, stress compounds fast in a cold tank, and gill damage shows up overnight.
Should You Set Up an Axolotl Community Tank?
Good Fit If:
You already keep a successful solo axolotl and want to try a carefully chosen addition
Your tank is 40+ gallons (150+ L) with stable temperatures at 60–68°F (16–20°C) year-round
You have a backup tank ready if the community setup doesn’t work out
You’re specifically interested in adult apple snails, the safest option with the most upside
You want White Cloud Minnows and understand you’ll likely lose some over time
Avoid If:
You want tropical fish, the temperature is lethal to them and it will never work
You don’t have a chiller, without one, you can’t maintain axolotl temperatures reliably
You want an active, colorful community tank, an axolotl tank will never be that
You’re not prepared for fish losses, some attrition is inevitable in this setup
You don’t have a backup tank ready for quick removal if needed
Mark’s Pick: Adult apple snails, full stop. They’re too big to eat, they clean the tank, they don’t nip, and they don’t need the axolotl to ignore them to survive. If you want fish, White Cloud Mountain Minnows in a school of 8–10 in a 40+ gallon (150+ L) tank give you the best realistic shot at a stable cohabitation. Monitor weekly. Have a plan for removal.
FAQ
Can axolotls live with other axolotls?
Yes, with conditions. Keep adults of similar size together only, never juveniles with adults, and never size-mismatched animals. Juvenile axolotls are cannibalistic and will bite limbs off each other. A male and female pair will breed, producing up to 1,500 eggs. Same-gender pairs avoid that. If aggression persists, separate them, one axolotl per tank is the lowest-stress option.
Can axolotls live with angelfish?
No. Angelfish are tropical fish that need water above 75°F (24°C). Axolotls need water below 68°F (20°C). These two temperature ranges are incompatible, one animal will always be suffering. Angelfish are also fin-nippers, which makes them doubly unsuitable for an axolotl tank.
Will axolotls eat their tank mates?
Yes, if they can catch them. Axolotls are ambush predators, they vacuum-seal their mouths around anything that moves and fits. Small, slow, or resting fish are at risk, especially at night when axolotls are most active. This is not a behavioral problem you can train away. It’s instinct.
Can fish live with axolotls safely?
Some cold-water species can coexist with axolotls, but never without risk. White Cloud Mountain Minnows are the most reliable fish option. Zebra Danios work in larger tanks. Every other setup carries significant risk of axolotl gill damage, impaction from swallowed fish, disease introduction, or fish losses. Always have a backup tank ready.
Can axolotls live with turtles?
No. Turtles are aggressive, unpredictable, and will injure or kill an axolotl. They have completely different habitat requirements. This combination doesn’t work under any circumstances.
Do guppies work as axolotl tank mates?
No, this is a common mistake. Guppies thrive at 74–82°F (23–28°C). Axolotls need water below 68°F (20°C). At axolotl temperatures, guppies are chronically cold-stressed, immunocompromised, and prone to disease. They’ll get sick before the axolotl eats them, and a sick fish in the tank is a disease vector for the axolotl. Don’t do it.
Final Thoughts
The axolotl community tank question always comes back to the same answer: the axolotl is better off alone. It doesn’t need tank mates. It doesn’t socialize the way fish do. It’s a slow, solitary ambush predator built for cold, still water, not a community tank.
Adult apple snails are the one addition I’d recommend without hesitation. White Cloud Mountain Minnows work if you’re prepared for attrition. Everything else on the internet is wishful thinking.
If you’re new to axolotls: keep it solo for the first six months. Get your temperature locked in, your water quality stable, and your axolotl thriving before you introduce anything else. After that, the short list above is your entire option set. It’s short for a reason, and the axolotl doesn’t care that you want more choices.
Have a question about a specific species or your setup? Drop it in the comments below.
Recommended Video
References
Duellman, W.E. & Trueb, L. (1994). Biology of Amphibians. Johns Hopkins University Press.
Voss, S.R., et al. (2013). Origin of amphibian and fish limbless mutants. Genetics, 193(4), 1–8.
Serrano-Saiz, E. (2010). Axolotl biology and husbandry. Lab Animal, 39(3), 282–288.
Axolotls need cold water. Not room temperature. Cold. Below 68 degrees Fahrenheit or they stress, stop eating, and get sick. The number one killer is warm water in uncontrolled rooms during summer.
If you cannot keep your tank below 68 degrees year-round, you cannot keep an axolotl.
If you cannot keep your tank below 68 degrees year-round, you cannot keep an axolotl.
Where Do They Come From?
Axolotls is found in lakes around Mexico City. These critters are critically endangered due to pollution and illegal trafficking. One of the lakes you can still expect to see an axolotl or two is Lake Xochimilco.
Axolotls are unusual amphibians that remain in their larval form even after they mature. This means the adults stay aquatic and keep their gills instead of taking to land like most other amphibians do. Be careful not to confuse an axolotl with the larval stage of a tiger salamander (a closely related salamander species).
Why Are Axolotls Special?
These critters have an amazing ability to fully regenerate missing limbs. For this reason, axolotls are being monitored in many labs to satisfy the curiosity of scientists. Along with lost limbs, they can also regrow other body parts such as the eyes, and even regenerate their spinal cords. This makes them very interesting due to the potential use this ability holds has in human medicine.
How Do They Breed?
Axolotls are egg-layers. The male and female will participate in a mating ritual when ready to breed. To start the courting process, the adult Axolotl male will nudge the hindquarters of the female to see if she is receptive to his advances. The video by Jules Askalotl provides an visual overview of the breeding process.
Once he establishes her willingness to participate, he’ll place himself in front of her and start to lead her around the aquarium. He’ll always make sure that his tail is touching her nose. As he leads her forward, he’ll deposit a packet of sperm known as a spermatophore.
The male will then lead the female over this packet until it lines up with her cloaca (vent or sexual organ). She then absorbs the sperm into her reproductive tract to fertilize her eggs. This process is referred to as indirect fertilization.
Over the next hour, the male will continue leading the female over several packets of sperm until the breeding process is complete. Once done, remove the male to allow the female some peace before the egg-laying starts.
The female will only lay her eggs around 12 to 72 hours later. Your Axolotl may lay up to 1500 eggs on the decor provided, so be prepared. Once the process is complete, make sure to either remove the eggs or the adults. These animals aren’t against eating their own eggs.
It’s also best to remove the breeding pair from community setups with other fish. Some fish will get stressed out by the erratic movements of the adult Axolotl pair during breeding.
What to Do When the Eggs Hatch
Axolotl eggs incubate for around 15 days before hatching if kept at 72 degrees Fahrenheit (22°C). The hatching will be delayed for a few days more in cooler water.
For optimal larvae growth, make sure to keep the water in the upper-temperature limit. It is also essential to keep the water quality pristine. Axolotl larvae kept in poor water conditions have very poor survival and growth rates.
This means that once the eggs start hatching, you’ll have your hands full with tank maintenance. You will need to do partial water changes every few days to keep the water clean while your baby Axolotls are growing. This is especially important if you have lots of them in one setup.
If you kept all your eggs in one place, you will need to separate your babies into several 20 gallon tanks once they are big enough to be moved. Make sure to not keep more than 100 babies in one place. It is possible to keep up to 200 young axolotls in one aquarium, but this may lead to several unnecessary injuries and even fatalities.
Aquariums with fewer offspring in them have fewer problems such as damaged fins or lost limbs and gills.
Feeding Requirements
Newly hatched Axolotls won’t start feeding immediately after hatching. They only need live foods around 48-72 hours after hatching. In the period between hatching and their first feeding, they will be sustained by the remaining egg yolk in their bellies. The yolk will be visible through the skin as a cream-colored mass.
During this time the young also won’t be moving. Don’t throw them out by accident because they seemed dead. Not moving is completely normal at this stage. You’ll see them start to wiggle around 2 to 3 days after they were born, this is your cue to start feeding them.
Baby axolotls aren’t the easiest to feed. These youngsters require small, live food items in large quantities to keep them sustained. Until the Axolotl larvae grow their front legs, they will also only respond to moving live foods.
Without their legs moving around is a bit challenging for them. This means that they won’t actively try to find food. Make sure to deposit the food in front of them to make sure they are eating. If you fail to provide the right food, they may start to eat each other.
Fortunately, unlike frogs, young Axolotls grow their front legs first. Until they reach this milestone, however, feed easily accessible live food such as newly hatched brine shrimp and daphnia. Once their front legs are developed, they will also have developed a sense of smell. This means it’s time to start introducing dead food items.
You can offer dead food items earlier, but you’ll need to use tweezers and wiggle them around to mimic the movement of live foods to entice your baby Axolotls to eat. This is time-consuming, especially if you need to feed 1500 baby Axolotls. Rather stick to newly hatched brine shrimp and other foods that can wiggle around like daphnia.
What to Feed
Until a baby Axolotl grows its front limbs, you will be limited to only a few live food items. Here are some great snacks for your young pet:
Newly hatched brine shrimp
Daphnia
Microworms
Freshly chopped up blackworms (they wiggle for a long time after chopping)
Once the baby Axolotl developed its front legs, it will become more mobile and start to actively hunt. At this point, you can start to introduce some dead food items along with fast-moving live food. Here are a few options:
Once the baby axolotl grows its hind legs, it is fed exactly the same as an adult with the exception of the frequency in feeding. Baby axolotls need a lot of food to grow. To keep them healthy, you will need to feed them at least twice a day.
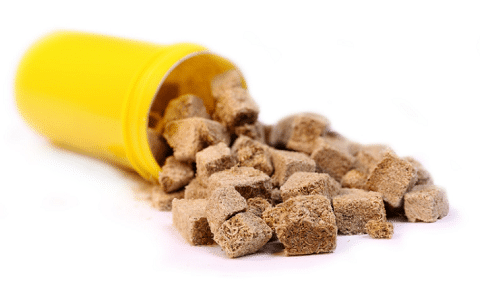
Once these little amphibians have all their legs, you can also start to introduce foods such as Axolotl pellets to their diet. Also, make sure to feed a variety of live and dead food for optimal health and growth. If you can’t find pellet food specifically for Axolotls, you can try feeding others specifically meant for carnivorous fish.
When feeding your baby Axolotls, make sure not to overfeed. If that happens, the uneaten food will start to rot and affect your water quality. Make sure to remove any uneaten food. Next time feed just enough to make sure they can eat all of it in 5 minutes tops. If it’s not eaten, remove it.
Tank Setup
Just like adult Axolotls, babies also need a proper setup to stay healthy. Here’s what you need to know to set up a tank for axolotl babies (Egg picture source).
Tank Size
The minimum tank size requirement for Axolotl larvae is also 20 gallons. Unlike an adult that requires the whole 20 gallons to itself, you can keep up to 200 newly hatched axolotls in the same tank which isn’t that much of a cost.
Keeping that many larvae together, however, is not advised. It’s better to stick to around 100 baby Axolotls together in a tank. This lower number helps to avoid unnecessary death and lost legs.
Once the larvae develop their front legs, you’ll need to divide the colonies into smaller ones yet again. This means that you’ll need several 20-gallon tanks or a super large aquarium. Keep in mind that bigger is always better. More water means fresh water for longer periods between water changes.
For the breeding tank, use a 20-gallon tank. This leaves just enough space to prevent the female from refusing to participate in the mating ritual.
You can keep the eggs in a 10-gallon tank altogether until they hatch. After that, make sure to divide the larvae into smaller communities or transfer them to a larger aquarium.
Water Parameters
Baby Axolotls are a bit more sensitive to water parameters than adults. For this reason, you need to be more vigilant when it comes to aquarium maintenance. Since you’re keeping several larvae in the same tank, you’ll also need to do more water changes to keep the water clean.
Skipping a water change can lead to water quality problems which in turn causes deaths. Also, make sure to treat any water before you put it into your tank. Tap water contains chemicals such as heavy metals and chlorine that will cause deaths.
Here are the water parameters for keeping your Axolotl larvae healthy:
Water temperature: Keep the water temperature in the range of 59 to 73 degrees Fahrenheit (15 – 23°C). The ideal temperature for larvae is between 70-72°F (21-22°C).
pH: Keep the pH in the range of 6.5 to 8.0. The ideal pH for baby axolotl is 7.4 – 7.6.
GH: 125-250ppm (7-14deg)
kH: 53-143ppm (3-8deg)
Ammonia (NH3): 0 ppm
Nitrite (NO2-): 0 ppm
Nitrate (NO3-): <60 ppm
Water Temperature
A baby Axolotl does well in the same temperature range as the adults. For optimal growth, however, you want to keep this baby in slightly warmer water. 72 degrees Fahrenheit (22°C) is a good start for hatching eggs and growing out newly hatched larvae.
As your baby axolotl grows, you can slowly lower the temperature to between 60 and 64°F (16 – 18°C). This will allow the baby to slowly adapt instead of getting a shock.
Make sure to put an accurate thermometer in your tank to monitor water temperature changes. If the aquarium water is too warm, your baby axolotl will become stressed., you will require a water chiller if the water gets too hot too often or for prolonged periods of time.
In an emergency, you can add frozen cubes of Axolotl-safe water to your aquarium to help cool it down. In the rare event where it gets too cold, simply add an aquarium heater to get it up to the right temperature.
Substrate
The best substrate for Axolotl youngsters is sand. Sand provides some grip on the bottom of the aquarium as well as enrichment. Just like adult axolotls, the youngsters also like to dig through the substrate.
Sand is also safe if accidentally swallowed due to the very small size of the particles. Any kind of gravel should be avoided in larval tanks since it can cause injury and severe health problems.
Setting up a bare bottom aquarium is also possible. This will make cleaning much easier since you can simply suck up any solid waste during a water change.
Tank Decor
It’s always a good idea to have some decor in your tank. A completely empty tank will cause stress to your Axolotl larvae. Aquarium decorations you can consider include the following.
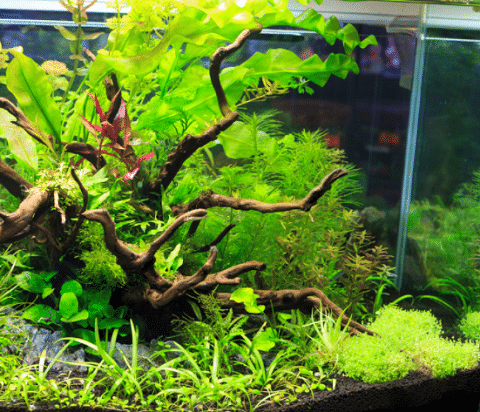
Plants
Plants are great in Axolotl tanks. They provide cover as well as enrichment. Keep in mind that the plants need to grow well in minimal lighting. Low light plants are the best candidates for an Axolotl tank.
Axolotls are nocturnal. For this reason, they have quite poor eyesight and prefer a dark environment. If the lighting in your tank is too strong, your axolotls will always be hiding from it.
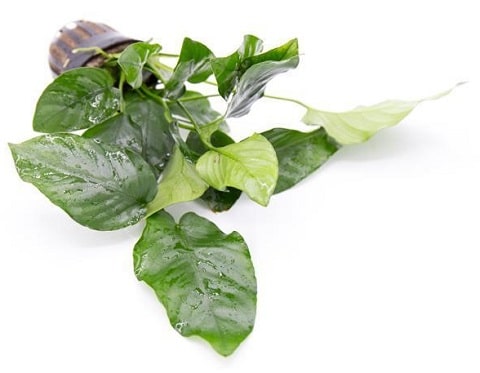
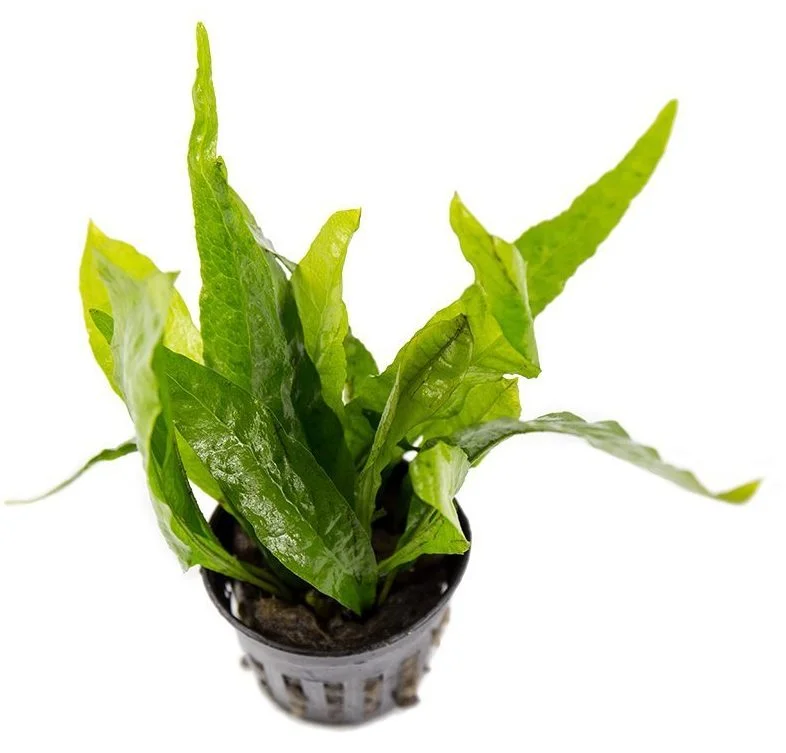
It is also best to pick floating plants or those that prefer to grow on other ornaments like Anubias Nana or Java Fern. Axolotls dig a lot. This means that they will disturb and dig up any plants in the substrate.
Driftwood
Driftwood makes excellent places for an Axolotl to hide in and explore. It will also provide a surface for some kinds of plants to grow on. Driftwood also looks great when used on its own.
Hides
It’s very important to provide your Axolotl youngsters with places to hide. You can do this by adding ceramic pipes or other structures to your setup. This is even more important in tanks with lights. Axolotls have very sensitive eye lids and need to escape to a dark corner when the lights are on.
Rocks
Rocks are also an excellent addition to your breeding setup. A large flat rock is ideal for your Axolotls to breed on. Rocks can also be stacked and used to create shelters and hiding spots for the young. If done right, you don’t need anything else in your tank. Rocks make excellent decorations and can also be used to grow some kinds of plants.
Filtration Needs
Baby Axolotls need slow-moving water in their tank. For this reason, you can’t just put any filtration system in there. They also need a strong filtration system due to being such messy creatures, so it’s important that your filter can circulate a large amount of water in a short amount of time.
The best filters for baby Axolotls are sponge filters. These filters can circulate water quite quickly without creating a lot of flow.
Biofoam filters are quite popular for Axolotl setups. These sponge filters will help to clean the water while allowing beneficial bacteria to grow in the filter media. The bacteria in turn will help to keep your water parameters stable.
Baby Axolotls are quite sensitive to parameter changes so it’s best to make sure the tank is properly cycled before breeding with your adults.
FAQs
Why are my baby axolotls dying?
The most common reason for premature death is infections. Infections can happen due to poor water quality or overcrowding. Make sure to do daily water changes and separate your young into tanks of 100 Axolotls each.
How often should I feed them?
Baby Axolotls have voracious appetites. For this reason, it’s best to feed them once or twice a day.
What do they eat?
Baby Axolotls eat small live foods. You can try newly hatched brine shrimps, daphnia, chopped blackworms, and microworms.
How do I identify their gender?
The easiest way to identify gender is to check the cloaca (the opening or vent by the tail). The male Axolotl has a very prominent cloaca that protrudes slightly from the belly. The female has a much smaller cloaca that sits almost or even completely flat against the belly.
Final Thoughts
Now that you know a bit more about breeding Axolotls and caring for the young, you should have minimal problems doing it yourself. Just remember to set up a decent breeding tank with a proper filtration system and once the young hatch, don’t feed them immediately.
If you have any other questions, don’t hesitate to comment below.
Discus are the fish I call the King of the aquarium. And for good reason. I’ve kept discus in dedicated setups and they’re unlike anything else in freshwater. The challenge is real: they demand pristine water, specific temperatures, and more patience than most fish require. But when you get the conditions right, there’s nothing more impressive in a planted tank.
The Discus Fish. To many who are fans of this fish, they are often called the Kings of the Aquarium. The are large, striking, and very beautiful freshwater fish. They are also to many considered a very difficult fish to keep. It is our dream fish and the one we wish we could have, but intimated by what others have said about proper Discus Fish Care.
Today’s blog post is all about Discus Fish Care. My goal here is to really break down Discus Fish care into critical key concepts. If these concepts are followed, you will have much better success than the average Aquarium Discus Fish keeper. I want to make you well informed and armed with the knowledge to become successful and happy with your Discus Aquarium.
ASD Difficulty Rating: Tier 3 – Advanced
Discus demand stable temperatures of 82-86 degrees F (28-30 degrees C), very soft acidic water, and multiple water changes per week. They are the most demanding commonly kept freshwater fish – not suitable for beginners under any circumstances.
Key Takeaways
Discus fish have very specific requirements compared to most tropical fish – with temperature and pH being the biggest standout
They are very peaceful fish that can be easily bullied
They require longer aquariums and high-quality diets
Example tankmates include neon tetras and cory catfish
Clean water is a must for them. Frequent water changes and high-end filters are a must!
Discus are the most demanding freshwater fish in the hobby. They need pristine water, elevated temperatures, and a level of consistency that most hobbyists are not prepared to deliver. One missed water change and they stop eating. Inconsistent parameters and they get hole in the head. I have kept discus for over 20 years and I still treat every water change like it matters, because with discus, it does. If your maintenance routine is not rock solid, this fish will punish you for it.
The Reality of Keeping Discus Fish Care
Water parameters are not suggestions. Discus Fish Care reacts to instability. A swing of even 1-2 degrees or 0.5 pH will trigger stress, disease, or death.
Tank maturity matters. New tanks kill this species. The tank needs to be established for months before introducing Discus Fish Care.
Diet precision is critical. Overfeeding or wrong food causes bloat and internal damage. Small, varied meals are the standard.
Biggest Mistake New Discus Fish Care Owners Make
Adding Discus Fish Care to an immature tank. New setups have unstable parameters, and this species punishes instability with disease and death. Cycle the tank fully and let it mature before adding this fish.
Expert Take (Mark Valderrama, AquariumStoreDepot)
Mature tank, stable parameters, small frequent meals. Discus Fish Care rewards precision and punishes shortcuts. If you are not willing to test water weekly, pick a hardier species.
A Quick Overview
Scientific Name
Symphysodon discus
Common Names
Discus Fish, Discus, Pompadour fish
Family
Cichlidae
Origin
South America, Amazon river
Diet
Omnivore
Care Level
Advanced
Activity
Slow to Moderate
Lifespan
10-15 years
Temperament
Peaceful
Tank Level
Middle
Minimum Tank Size
75 gallon
Temperature Range
82°-89°F (28°-32°C)
Water Hardness
1 to 4 dKH
pH Range
6.0. 6.5 (for most varieties)
Filtration/Water Flow
Low
Water Type
Freshwater
Breeding
Egg-layer
Difficulty to Breed
Moderately difficult
Compatibility
Limited, Best as a species-only tank
OK, for Planted Tanks?
Yes, but requires low nutrient water
History
Discus fish originate from the Amazon River. There original homes were around submerged tree roots and branches. This water was very clean and calm. The Discus Fish is a member of the cichlidae family. The cichlidae family is the largest group of freshwater fishes. However, Discus do not share the characteristics of many other Cichlids. Discus are very peaceful by nature while many Cichlids are aggressive and built for speed.
The first Discus was identified in the early 1800s by Johann Natterer1. Natterer was instrumental in the identification of many animal species in the Amazon. His name is associated with several animals such as the Natterer’s bat.
The fish Discus to be imported happened around 1921. The shipping handling method for these fish at the time where not very good. Many died during the shipping process due to stress. It wasn’t until the mid 1930s that Discus started getting bred in captivity. These happened when the first Discus Fish were imported to the United States and Dwight Winter became the first person to successfully breed Discus in capacity.
As breeding techniques advanced and shipping improved, we started to see more varieties of Discus. Between the 1970s and 80s Discuss breeders started to create more colorful and vibrant varieties of Discus, like the Powder Blue Discus shown below.
Discus Fish Care – The Keys To SuccessKeeping Discus
Discus to many are considered very challenging to keep (video from our YouTube Channel). They are more difficult to keep then the average freshwater tropical fish, but not impossible. It is a matter of getting all the care elements dialed in so you have a stable tank. Discus Fish require a high investment. They need bigger tanks and higher quality equipment to provide the best environment for them. Let’s break down the keys to success for Discus Fish. They are:
Adult Discus are large fish. They can grow up to 6 to 8 inches long, they also grow height wise as well due to their dish shape. Like most Cichlids, they are territorial to their own kind, so they need space to thrive and and a natural looking environment to curb their aggression.
The best tank to start a Discus Tank with would be a 75 gallon aquarium. Some people say a 55 gallon aquarium is okay, but I prefer the 75 gallon because it is both wider and taller. These are both factors we want to keep in mind when it comes to the taller disc shapes of these fish.
For a 75 gallon aquarium, we are looking to house 6 adult sized discus fish. Some people will start these tanks up with 10-12 younger discus and allow them to grow. Eventually, they will reduce their numbers to 6, with two being males. Reducing the male population reduces the aggressiveness. A 75 gallon aquarium is not an aquarium you can easily order online.
My suggestion would be to either purchase the aquarium from a petstore when they go on sale or attempt to purchase a cheap used tank from a hobbyist or classified ad. Marineland is a good brand to purchase a first time Discus Aquarium. They are well built and have black silicone instead of clear.
Tank Filtration
DIscus require very clean water. Their natural environment has clean water and the average home aquarium does not provide the quality water or filtration they need. Many hardcore discus keepers will sort this out with daily or every other day water changes. These water changes are very large – usually 50% or more. We can do the same thing here, but if you to build a foundation of proper equipment that can help keep your levels down you won’t be a slave to water changes.
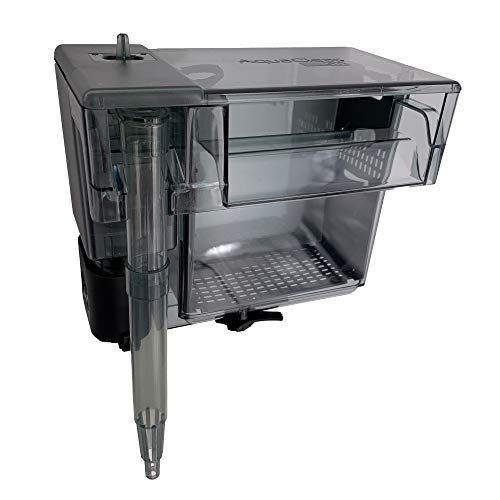
Our first option is a Power Filter like a Hagen Aquaclear. The aquaclear always makes it into our fish tanks if one is looking for a hang on the back filter. It will do a great job for you and will work trouble free for years.
Our next option is a premium piece of equipment like a Canister Filter. Again, our focus on Discus tanks is very clean water. A Canister filter is ideal for this as we can stuff these with premium level biomedia like Biohome Ultimate Filter Media. This media is one of the best out there in the market and has the ability to reduce nitrates in the aquarium. We are going to pair this media inside the best canister filter on the market today, the OASE Biomaster Thermo. This canister filter comes with a heater bay to place your heater and with a ton of media space.
This is a premium option, but let’s keep in mind that Discus are a premium level fish. These fish are not cheap and they demand proper equipment and maintenance. Let’s set ourselves up for success by getting high end equipment.
Source Water
Discus Fish need very clean water. I will say this over and over again in this blog post to drive in the point. It is one of the most critical factors to your success. Sometimes, the source water of your tap water is not going to be good enough for your Discus Fish.
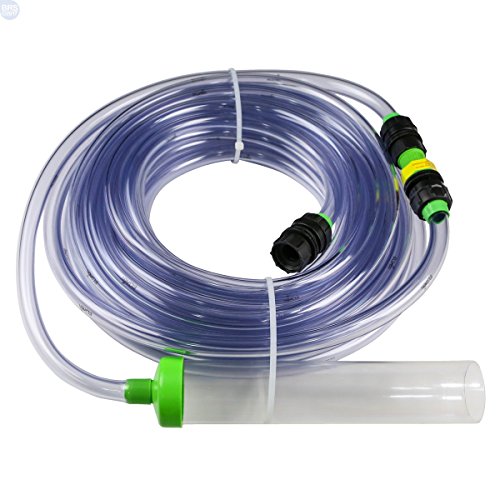
It’s going to depend on your city’s water report. I would suggest you get a city water report and get the readings of levels in your tank to determine if an RODI Unit is going to be needed. The main thing we are going to need to look for are high nitrates. If you have high nitrates coming out of your tap water, you need to consider an RODI Unit or RO Unit. RO water becomes a major purchase when it comes to breeding or raising Discus fry.
The RODI unit shown above is an example of a good unit that will get the job done. If you are going to use RO or RODI water, you will want to use a trace element supplement. Seachem’s Discus Trace is just the supplement to use. Distilled water can also work in a pinch, but given the tank size needed for these fish, it’s usually not a good long term choice.
For those of us using tap water, it is very important to age your tap water for 24 hours then treat it with a declorinator like Seachem Prime. You can further prep with a heater and airstone or submersible pump. The preference is aged tap water + prime if your source water is good enough.
I know not everyone’s tap water is going to be adequate. If you cannot obtain your city’s water report, I would suggest getting an RO unit. Nearly all units designed for aquariums will be an RODI unit. For Discus, you can remove the DI stage to save on the resin as long as your TDS output is within 50-100.
Temperature
Next to clean water, temperature is the second big factor to Discus Fish care success. Discuss thrive on temperatures from 85 to 86 degrees. That is a lot warmer than most tropical fish that likes 78 degrees. What will usually happen with Discus under lower temperatures is that they will not fare well under typical tropical fish temperatures.
We want higher temperatures for a Discus fish for multiple reasons. Warmer water keeps our Discus active. It increases their metabolism and produce a more colorful fish. Many Discus are also keep at higher temperatures.
Imported Discus from Germany and Malaysia will often keep their temperatures higher. You will also want to see what temperatures the Discus you are looking to buy are kept at as you need to accumulate. The main issue you will deal with higher temperatures is bacterial infections. If you have an outbreak, they are tougher to deal with at higher temperatures because the bacteria will produce faster.
We want to use the Best Aquarium Heater we can get our hands on. For a Discus aquarium, the Eheim Jager heaters are the best heaters to go with. It would also be wise to get an aquarium heater controller like an Ink Bird to ensure you have temperatures that are accurate and fail proof.
Tank Aeration
With higher temperatures and larger fish we will be dealing with oxygen issues in our aquarium. Also, Discus Fish prefer calm waters so we cannot use a Wave Maker for our setup. We are going to want to use a proper Aquarium Air Pump to provide a high amount of oxygen to our Discus tank.
Since we are dealing with larger tanks with Discus, a powerful air pump is in order. The Tetra Whisper AP series is the ideal aquarium air pump for Discus tanks. It is powerful and can handle the needs of these large fish while not making you lose your mind with their noise.
Tank Decorations
From what we know about the history of Discus Fish, they lived near submerged tree roots and branches. The best decor for Discus is going to be Driftwood. However, we need to be very careful in our handling and selection of driftwood. We want a wood that will not alter the pH of our tank and we want something that is not going to rot away and leech nutrients all over the place.
Manzanita wood is probably the best wood to use for a Discus tank. It is clean and looks the part for their natural environment. Sandblasted Manzanita is what we want to look for. There are large showpieces you can purchase from the link above. These large sizes will show better in a large Discus tank.
Prepping the wood for the aquarium is a major process we must undergo for our Discus. Prepping driftwood for aquarium usage requires us to boil it for 10 to 15 minutes. This is to clean the rock of decaying, dead material and to remove tannins. Tannins being released from driftwood will dark the water of your aquarium giving it a tea-colored look. Below is a video by Long Island Fish Guy showing the process.
The main challenge with boiling a large piece of driftwood is you cannot fit it in a pot. To work through this there are two approaches. One is to boil in parts that you can dip into a cooking pot. Another is to put the wood in a bathtub or outside and pour the boiling water on the wood. Be very careful if you have to do this as you can hurt yourself.
Tank Substrate
Discus keepers fall into two camps. Those who want to do a bare bottom tank and those who want the look of a natural substrate. There are pros and cons to both.
For a bare bottom tank, we are working to create a very clean tank. The bare bottom approach is the preferred approach for breeders and those raising Discus fry. You can do a bare bottom tank for adult discus. For many, they will feel that the look of a bare bottom is odd. Painting the bottom of the aquarium white will help with the look. Other hobbyists have used aquarium safe tile to decorate their bottoms.
A discus tank with a natural substrate will provide a natural aesthic look. The problem you run into with a substrate is waste accumulation and dealing with potential nutrient issues. The best way to work with a substrate is to use it for aesthic purposes only.
We aren’t going to make an active substrate and we want a thin substrate similar to what I suggested with my prior Goldfish Tank post. We want no more than a half inch for our substrate. This will limit our ability for using rooted Aquarium Plants, but we will see later on that rooted plants are not the best for Discus Tanks.
The easiest substrate to maintain for a Discus tank is sand. We also have to consider the colors of our Discus. Discus fish are bright in color so a dark color would make them look darker. A lighter substrate will make our Discus look more bright. Light substrate is what we are going to want.
A sandy grain size substrate like the one pictured above from Caribseais what we are looking for. Again, we only want a half inch of substrate. This substrate is also pH neutral – something we will desire as most Discus for keeping purposes will need acidic water to neutral. This range of pH is 6.8 – 7.6 for most Discus varieties. If we are breeding discus, pH needs is different. But, the best practice for breeding Discus is bare bottom.
Diet
Discus are big and colorful fish. They are demanding when it comes to diet as they need a varied and balance diet in order to keep their immune systems and colors healthy. Discus also require to be feed multiple times a day. They also have small mouths for their size and are slow eaters.
When it comes to food, the smaller is better. We want a mix of bloodworms, blackworms, and vibra bites. The delivery method is important as well. I have mentioned in past posts the amazing nutritional value of blackworms in the past. Blackworms would be my go to here. Freeze Dried Blackwormswith a vitamin boost like Vita-Chem is a great mix.
For feeding worm food like black worms a feeding cone can useful for keeping the food in place. Discus are slow eaters so this keeps the food in one place so your Discus can eat while keeping your tank clean. The video below by Canadian Aqua Farm shows a feeding cone in action.
Tank Mates
Finding tank mates for a Discus Fish tank is the challenge. Because we are going to keep our Discus in hotter waters, this is going to hard on many tropical fish. Also Discus are slow feeders so an aggressive feeder is going to out compete and stress our Discus.
Aquarium fish like barbs are going to be bad tank mates due to how aggressive and active they are. Angelfish and Rams should also be avoided. We will also want to be careful about adding too many schooling fish like tetras who as a group can out compete our discus for food.
When we think about good tank mates, Cardinal Tetras and Corys come to mind. It is doable, but my recommendation is to make your Discus the centerpiece of your aquarium. Start with a dominant Discus Tank first then consider adding tank mates if you really want to.
Live Plants for Them
A planted tank with Discuss is one of the most challenging setups you can attempt in the freshwater hobby. You are working against multiple factors when trying to add plants with Discus.
The first is the temperature. Because Discus do better in warm weathers, many plants will struggle to thrive at 85-86 degrees. The second factor working against is the lack of nutrients. Remember when I said that Discus Fish like clean water? Clean water means low nutrients. Low nutrients means that plants are going to have a hard time getting the food they need and we cannot use an active substrate.
Active substrate like the ADA Aquasoil I recommend in our Best Planted Tank Substrate post will cause higher nutrient levels in the tank. Great for rooted and carpeting plants, but bad for Discus.
So what does this leave us with? We just eliminated a number of possible aquarium plants from the list. We are going to want live plants that can not only tolerate the higher temperatures of our Discus tank, but also will still grow in a low nutrient environment. We also want plants that can tolerate a non CO2 injected environment as we want to ensure we have a rich amount of oxygen available with our higher temperatures.
This leaves us with the hardiest of live plants, preferably ones that are column feeders versus root feeders. These will will do well without CO2 These plants are:
When planning a planted Discus Tank, we will need to keep in mind spacing. We will want our plants either attached to our driftwood or in the background of our aquarium. We want to keep the rest of the aquarium open for our Discus to swim and not feel crapped.
We want to avoid densely planted tanks. Lastly, our fish population decreases in a planted setup. For a 100 gallon fish tank, we would drop down to 5 to 6 Adult Discus. We do this because our substrate become an issue with waste with a planted tank. We want to keep our tanks very clean for Discus, so our best approach here is to reduce our aquarium fish population.
Another thing to keep in mind is that Planted tanks are not good for raising fry or breeding. If you are looking to breed, the best practice are bare bottom tanks.
Different Types
There are tons of breeds of Discus. They are all long-lived, get large, and is breed under the right conditions. We have two types of Discus in our hobby:
Wild Discus
Domestic Discus
Wild
The wild discus are the original Discus where our domestics come from. The Blue Green wild discus is where most of our Domestic Discus come from.
The Heckel Discus is one of the most sought after wild Discus. They are found in the Rio Negro. They are one of the most demanding Discus to keep in the aquarium due to their pH requirements. They prefer a pH closer to 4.0, which is a challenge for many aquarium keepers.
All wild Discus are imported and difficult to keep in comparison to domestically bred Discus who are used to aquarium environments. Wild caught Discus are best kept to the experts and Discus enthusiast.
Domestic (Captive Bred)
There are more than 1000 types of Discus Fish available in the market, day by day count is increasing because of cross breeding and demand on market. And this video below shows the diversity of Discus fish. One thing to keep in mind is that Discus with a yellow coloring have difficulty maintaining their color.
I’ll go over the various discuss types in another post to keep this one short. Check out the visual below by Knock Out Aquatics to see how varied Discus get!
How To Select Them
Discus are very sensitive fish. They require careful selection when choosing a quality store to purchase from an a healthy specimen. Here are a few things to look for:
Round shape – look for deformities
Clear eyes – no nicks or cloudy eyes
Good color – poor color indicates stress or poor diet
Fins – Look for straight fins. Watch out for bent or clamped fins
Body mass – Your Discus should look thick. Do not purchase a thin Discus
Good appetite – Your Discus should actively eat when fed
Swimming activity – The Discus should be swimming in the open not in a corner
How To Quarantine Them
While I believe you should quarantine all fish, I know most people will not. Discus fish are a premium fish and require quarantine into to thrive. The quarantine process takes 8 weeks and involves frequent water changes – as often as every day!
In the second week, Discus experts would recommend prophylatic treatment with Prazipro or Levamisole to treat for internal parasites. Internal parasites are very common with Discus and is a mild treatment2.
You would stop treatment in the 6th weeks and do a 2 week observation period. You should not use antibiotics or external parasite treatments unless you see signs of disease. To learn more about diseases check out this fish disease article. Some commmon factors that cause health issues would be:
Chemical poisoning – from poor water conditions
Dissolved gases – from low oxygen or high CO2 levels
Poor tank hygiene
Nutritional deficiencies
Gill flukes, parasites — which is why we quarantine!
Bacterial infections
Your quarantine tank should be bare bottom with a cycled filter. It should be away from your display and you should use a separate net for it. Given the time involved of quarantine, do not plan on traveling or vacationing during this time. Know your schedule and plan ahead!
Breeding
This is a separate post in itself, so I’ll keep it brief. There are two methods for breeding Discus fish – artificial and natural.
Artifical Breeding
This involved removing the eggs after they have been fertilized. Fry are hatched and fed slime when they are initially born. As they grow, they are transitioned to baby brine shrimp and commercial foods. This is a common method of breeding for commercial Discus breeders. PVC is used as a surface to lay eggs and collect them. It is efficient and more profitable from a business perspective
Natural Breeding
Natural Discuss breeding allows for the eggs to be tended by the parents. The fry hatch and are free to swim in the aquarium. The fry will eat their parent’s slime coat when they are born. They eventually will be transitioned to baby shrimp and commercial food.
This is considered one of the most fulfilling experiences in our hobby. The parents take takes tending to their babies. They fish fry receive antibodies from their parent’s slime coats. As a result, they can develop a stronger immune system.
Where To Buy
Discus fish are one of the more difficult fish to purchase. You will want to purchase them from a high quality local fish store if you are looking to buy locally. If you do not have a good local fish store, you can purchase high quality specimens at tradeshows.
A more recent development has been the emergence of What You See Is What You Get (WYSIWYG) online fish stores. Most are small specialty fish stores. When looking at one, make sure they offer a arrive live guarantee and a warranty of at least 7 days.
Additional Resources (Books To Read)
There are many books out there that go beyond the scope of this blog post. However, not all are created equal. There are two books I recommend when it comes to Discus care.
The Discus World book is a good casual dive into the world of Discus keeping and breeding. It is informational enough to get you beyond what I have covered here, yet friendly enough for a beginner to pick up.
First published in 1989, this book is an update with a full color edition. Written by Alastair Agutter, who has been an authority on aquariums since 1967
The Discus Book is the book to purchase if you want a comprehensive guide on Discus. This book is written by Alastair Agutter. Alastair has been involved in the aquarium hobby since 1967. He is a veteran in the industry. He offers a no sales approach to proper care. It’s a refreshing perspective to read as our aquarium hobby evolves into a gadget first approach. He’s all about the biological and science. It’s a must read if you want to get serious about Discus!
What It Is Actually Like Living With Discus Fish Care
Discus Fish Care is a fish that makes you a better fishkeeper. You learn to test water, maintain consistency, and pay attention to subtle changes.
When thriving, Discus Fish Care displays colors and behaviors that no hardy fish matches. The reward is real.
When stressed, the signs are immediate. Clamped fins, faded color, hiding. You learn to read this fish or you lose it.
Hard Rule
Discus need 82-86 degrees F (28-30 degrees C) and 2-3 water changes per week. Drop below 80 degrees F or skip water changes and you will see disease and color loss – not gradually, but quickly.
Closing Thoughts
Discus do not forgive sloppy water changes. They just stop eating.
Discus fish are the known as the king of the aquarium. They are beautiful but difficult to keep. If you are up to the challenge, they is one of the most rewarding experiences in our hobby. I hope I showed you what Discus fish can offer you as a pet by reading this post. If you have any questions, leave a comment below. Thank you for reading.
Tetras are the backbone of most freshwater community tanks. including mine. In my 65-gallon community setup I’ve kept multiple tetra species simultaneously, and after 25 years in this hobby I still find them endlessly varied and interesting. Most people know the neon tetra, but the tetra family spans hundreds of species. from beginner-friendly staples to specialty fish that can command real prices. The one thing I tell every beginner: tetras are schooling fish, and they need proper group sizes to thrive. A lone tetra or a pair isn’t just aesthetically wrong. it’s genuinely stressful for the fish. This guide covers 21 types worth knowing, with my honest take on which ones are best for different tank setups.
What People Get Wrong About Tetras
The number one mistake: buying three or four tetras for a community tank and calling it done. Tetras kept in small numbers are chronically stressed. They lose color, they hide, and they die faster than they should. This is not a fish quality problem. It’s a numbers problem. Six is survivable. Ten is where you see them thrive.
The second mistake is mixing species without knowing their behavior. Serpae tetras and black skirt tetras nip fins. Put either in a tank with a betta or an angelfish and the long fins get destroyed. It’s not random aggression. It’s predictable. Know your species before you stock.
Third: assuming all tetras are equally easy. Most are forgiving, but rummy nose and cardinal tetras are genuinely sensitive to water quality. They’ll signal problems in your tank before your other fish even notice. That’s actually useful if you pay attention.
What Are Tetras?
Tetra fish are small freshwater schooling fish that are technically known as characiforms. Most types of tetras will reach a maximum size of between one and two inches long, although some, like the Congo tetra, can grow to over 3 inches.
Most of the tetras are from South America, but there are also great species from Africa. There is a huge variety of different tetra species in the aquarium hobby, with new species still being introduced from time to time.
Why Do They Make Such Great Aquarium Fish?
Tetras are beautiful fish. Most species have awesome colors and markings and some types of tetras also have interesting fin shapes. Looks are not all these tiny fish have going for them though, personality is just as important!
Tetra fish are a generally super peaceful species, that get along with just about any other tropical freshwater aquarium fish that isn’t big enough to eat them.
They also tend to be very hardy fish and easy to care for, although unfortunately, some tetras have lost their natural hardiness due to overbreeding.
21 Best Types of Tetras For Freshwater Aquariums
Now that you know a little more about tetra fish in general, it’s time to meet some of the best Tetra types for your aquarium. For each species, I’ll be providing you with some essential information like:
Here is a video from our YouTube channel you can also follow. If you like our content, be sure to subscribe. We post new videos every week! We go into more detail in the blog post below.
The Neon Tetra is a classic aquarium fish that has been popular aquarium fish for generations. These fish ‘wow’ everyone that sees them with their amazing colors. Neon Tetras are a schooling species and love to hang out together, so make sure you keep at least 8 of them in the same tank.
Cardinal Tetras might look very similar to the regular Neon Tetra but they are actually a completely different species. Cardinal Tetras also tend to be a little more difficult to find than regular neons. These schooling fish have even more color than Neon Tetras but the Cardinal Tetra grows a little larger.
3. Green Neon
Scientific Name: Paracheirodon simulans
Difficulty Level: Moderate
Temperament: Peaceful
Adult Size: 0.75-1 inch
Minimum Tank Size: 10 gallons
Diet: Mostly carnivorous
Origin: Brazil
Temperature: 76-90+°F
pH: 3-6.5
Difficulty to breed: Moderate
Planted tanks: Yes
The Green Neon Tetra (Video Source) is another great species from the Neon Tetra group. Green Neon Tetras have a bright blue stripe running from head to the base of the tail which really makes them stand out in the tank. These fish are ideal for a heavily planted tank, as long as their tank mates are also very small and equally easy-going.
Black Neon Tetras are a great alternative to the more common Neon Tetra. This species of tetra is widely available and a very peaceful community fish for heavily planted aquariums. Like most other tetras, these fish should not be kept with shrimps.
If you think this fish looks a little familiar, that’s because it is actually the leucistic form of the regular Neon Tetra.
Both fish have the same care requirements, but the Gold Neon Tetra offers a completely different look. Gold Neon Tetras still have the neon stripe down the side of the body but a much lighter overall color.
6. Congo
Scientific Name: Phenacogrammus interruptus
Difficulty Level: Moderate
Temperament: Peaceful
Adult Size: 2.5-3.5 inches
Minimum Tank Size: 30 gallon
Diet: Omnivorous
Origin: Democratic Republic of Congo
Temperature: 73-82°F
pH: 6-7.5
Difficulty to breed: Advanced
Planted tanks: Yes
Although all the other tetra species on my list are from South America, the Congo Tetra (Phenacogrammus interruptus) just goes to show that Africa has some great tropical fish too! Congo Tetras have amazing colors, an interesting caudal fin, and a long, flowing dorsal fin.
Congo Tetras are large and very active, and they should only be kept in large groups and in tanks that have excellent water quality.
The Bloodfin Tetra (Aphyocharax anisitsi) is a very attractive fish, with sleek lines and a bright red tail fin. They are an easy tetra to care for and they do well with most tankmates in a tropical community aquarium. To be safe, just don’t keep them with slow-moving fish with long fins.
The Rummy Nose Tetra is a silvery fish with a black and white barred tail and a bright red face. They are a close shoaling species, so make sure you keep at least 10 to see them perform their natural behaviors.
The Rummy Nose Tetra makes a great community tank mate. It is best to keep them with other very peaceful types of tetras and community fish that will not bully smaller fish or outcompete them for food.
9. Black Skirt
Scientific Name: Gymnocorymbus ternetzi
Difficulty Level: Easy
Temperament: Peaceful
Adult Size: 2.5 inches
Minimum Tank Size: 20 gallons
Diet: Omnivorous
Origin: Argentina, Brazil, Bolivia
Temperature: 68-78°F
pH: 6-7
Difficulty to breed: Moderate
Planted tanks: Optional
Black Skirt Tetras are active fish that do great in community aquariums, especially if kept in a large group to prevent aggressive behavior. These fish are also known as the Black Widow Tetra.
It’s true that they are not the most colorful tetras, but they are still a fun and easy species to keep. There are also awesome varieties of Black Skirt Tetras available with longer fins or gold-colored bodies.
10. Black Phantom
Black Phantom Tetra” class=”wp-image-549585″/>
Scientific Name: Hyphessobrycon megalopterus
Difficulty Level: Easy
Temperament: Peaceful
Adult Size: 1.5 inches
Minimum Tank Size: 20 gallons
Diet: Omnivorous
Origin: Bolivia & Brazil
Temperature: 68-82°F
pH: 5-7
Difficulty to breed: Easy
Planted tanks: Yes
The Black Phantom Tetra has a really bold look with its long black dorsal fin and dark body with a black marking just behind the gill covers. Like all tetras, these fish will do best in groups of at least 8 to 10 or so because this helps them feel more comfortable.
Black Phantom Tetras are very peaceful and easy to care for, making them a great choice for community tanks. Just be sure to avoid keeping them with shrimps or large aggressive tankmates to stay on the safe side.
The Ember Tetra (Hyphessobrycon amandae) is a nano freshwater fish species that can do well in pretty small aquariums. They are very peaceful fish that should only be kept with other small, non-aggressive species. Ember Tetras are schooling fish from South America that look amazing in a heavily planted aquarium.
The Ruby Tetra is quite similar in appearance to the Ember Tetra, but a lot less common (Video Source). What really sets these fish apart is their white fins, black tail spot, and awesome red eyes. Ruby Tetras are very small fish that are ideal for small aquariums in the 15-gallon range.
13. Bleeding Blue
Scientific Name: Hyphessobrycon margitae
Difficulty Level: Easy
Temperament: Peaceful
Adult Size: 2 inches
Minimum Tank Size: 15 gallons
Diet: Omnivorous
Origin: Peru
Temperature: 70-82°F
pH: 5-8
Difficulty to breed: Moderate
Planted tanks: Yes
The Bleeding Blue Tetra (Video Source) is a less common relative of the Black Neon Tetra. These fish are larger tetras, and their amazing colors will make them stand out in any community aquarium.
Bleeding Blue Tetras are perfect for heavily planted aquariums but should not be kept with shrimps because they naturally feed on small invertebrates.
14. Purple
Scientific Name: Hyphessobrycon metae
Difficulty Level: Easy
Temperament: Peaceful
Adult Size: 1.5 inches
Minimum Tank Size: 20 gallons
Diet: Omnivorous
Origin: Colombia & Venezuela
Temperature: 68-82°F
pH: 4-7
Difficulty to breed: Moderate
Planted tanks: Yes
The Purple Tetra is another awesome relative of the more common Black Neon Tetra (video source). These beautiful fish can be difficult to find, but make a perfect addition to any tropical community tank with other fish that are equally non-aggressive.
15. Golden Silver Tip
Scientific Name: Hasemania nana
Difficulty Level: Easy
Temperament: Peaceful, Semi-aggressive
Adult Size: 1.5-2 inches
Minimum Tank Size: 20 gallons
Diet: Omnivorous
Origin: Brazil
Temperature: 74-82°F
pH: 6-8
Difficulty to breed: Easy
Planted tanks: Optional
This awesome variety of the regular Silvertip Tetra has a shining gold body that looks incredible in an aquarium with a dark background (video source).
Like regular Silvertip Tetras, you should only keep these schooling fish in a large group. Without a group to encourage their normal behaviors they may have a tendency to bully other fish and nip their fins.
16. Toucan
Scientific Name: Tucanoichthys tucano
Difficulty Level: Moderate
Temperament: Peaceful
Adult Size: 0.5-0.75 inches
Minimum Tank Size: 10 gallons
Diet: Carnivorous
Origin: Brazil
Temperature: 68-82°F
pH: 4-6.5
Difficulty to breed: Moderate
Planted tanks: Optional
The Toucan Tetra is a great nano fish for tropical freshwater tanks. They have almost clear to golden bodies with a broad black stripe from head to tail and rosy-red cheeks (video source).
These tiny tetras are still a rare species in the aquarium hobby but are awesome tankmates for other nano fish like Otocinclus catfish and rasboras.
17. Orange Von Rio
Scientific Name: Hyphessobrycon flammeus
Difficulty Level: Easy
Temperament: Peaceful
Adult Size: 1 inch
Minimum Tank Size: 15 gallons
Diet: Omnivorous
Origin: Brazil
Temperature: 68-79°F
pH: 5.5-7.5
Difficulty to breed: Moderate
Planted tanks: Yes
This fish is actually just an amazing orange strain of the popular Flame Tetra. These adaptable fish are easy to care for and make a great centerpiece fish with their eye-catching looks.
The Orange Von Rio Tetra is a very peaceful fish species that are perfect for community tanks, especially if they have other small, peaceful tankmates and live plants.
Blue Tetras are still a pretty rare species but are amazing for larger community tanks. These guys can get a little feisty around feeding time, so make sure their tank mates are fast swimming and do not have long, soft fins.
19. Red Eye
Scientific Name: Moenkhausia sanctaefilomenae
Difficulty Level: Easy
Temperament: Peaceful
Adult Size: 2.5 inches
Minimum Tank Size: 29 gallon
Diet: Omnivorous
Origin: Paraguay, Brazil, Argentina
Temperature: 72-79°F
pH: 6-8
Difficulty to breed: Moderate
Planted tanks: Yes
Red-eye Tetras can be identified by their shiny silver bodies, red eyes, and a black spot on their caudal fin (tail fin). It is important to keep them in a group of at least 8 fish to prevent fighting and fin nipping.
They are pretty big for tetras at over 2 inches in length and they are also very busy fish that swim actively in the aquarium. This means these guys need a bigger setup than the other species on this list.
20. GloFish
Scientific Name: Gymnocorymbus ternetzi
Difficulty Level: Easy
Temperament: Peaceful
Adult Size: 2.5 inches
Minimum Tank Size: 20 gallons
Diet: Omnivorous
Origin: Argentina, Brazil, Bolivia
Temperature: 68-78°F
pH: 6-7
Difficulty to breed: Moderate
Planted tanks: Optional
The Glofish Tetra is a genetically modified version of the peaceful Black Skirt Tetra. Glofish are pretty controversial, and many aquarists either love them or hate them. One thing is for certain though, they do have incredible colors.
Glofish Tetras are pretty misunderstood in the hobby. These fish are not injected to give them these fluorescent colors, and they can be bred to produce equally colorful offspring.
21. Buenos Aires
Buenos Aires Tetra” class=”wp-image-549600″/>
Scientific Name: Hyphessobrycon anisitsi
Difficulty Level: Easy
Temperament: Semi-aggressive
Adult Size: 2 inches
Minimum Tank Size: 20 gallons
Diet: Omnivorous
Origin: Uraguay, Paraguay, Brazil, Argentina
Temperature: 64-82°F
pH: 5.5-8.5
Difficulty to breed: Moderate
Planted tanks: Not recommended
The Buenos Aires Tetra is a great-looking fish with a silvery body and bright orange fins. These are large, active tetras, that can reach a little over 2 inches in length.
Buenos Aires Tetras have a bit of a reputation for eating aquarium plants, so they are not the best choice for carefully aquascaped aquariums. These fish are also not ideal for community tanks with smaller, slow-moving tank mates.
Additional Species
In case you’re still curious about even more types of tetra species, here are a few more that you might find swimming around at your local aquarium stores:
Now that you’ve been introduced to some amazing tetra species for your aquarium, it’s time to learn how to care for them. Let’s start by looking at how to put together an awesome aquarium for your fish.
Aquarium Size
Most tetras are very small fish that don’t need a huge tank to be happy. They are active swimmers though, so they do need a decent amount of swimming space. The smallest species, like Ember Tetras, can be kept in tanks as small as 10 gallons. The majority of tetra species will do best in an aquarium size of 20 gallons or larger, however.
Tetras are great fish for community tanks with other types of tetras or similarly sized tropical freshwater fish. If you want to set up a great community tank, make sure you provide enough room for the other fish too!
Substrate
The substrate is the sand or gravel that you put at the bottom of the tank. Some fish keepers prefer not to use any substrate at all, but I would recommend using aquarium gravel to create a more natural look in your tank. The color you use is not that important, but a darker substrate tend to bring out the colors in your fish better.
If you don’t want to work with an active aqua soil, but still want some of the advantages of one, you can try a product like CaribSea Eco Complete. It’s a beginner friendly inert substrate that will absorb aquarium fertilizers well.
Many tetras prefer pretty dim lighting, so you don’t need anything too powerful or expensive to keep these fish happy. Unless you plan on growing a lot of live plants, a standard aquarium light will do just fine. For planted tanks, consider a light designed for them.
Filtration
An aquarium filter is a piece of hardware that aquarists use to keep the water in the fish tank clean and healthy. Filters do some very important things like:
Mechanical filtration
Mechanical filtration is the actual physical removal of waste particles from the water. Essentially, aquarium filters suck water through a sponge-like material and these solid particles get trapped, leaving clean water to flow through the other side.
Biological filtration
This is the incredibly important type of filtration where beneficial bacteria that live in your aquarium filter work to convert dangerous ammonia and nitrites into nitrate, which is safer for your fish.
Chemical filtration
Many modern aquarium filters now offer a third type of filtration that removes toxins from the water. Often these filters use a material known as activated carbon that attracts and absorbs certain harmful particles.
There are many different types of filters available, so it can be tough to choose the best one for your tank. A great starting point for a tetra tank or community setup would be a simple hang-on-back or internal power filter.
Water parameters are the conditions of your tank water. Different fish species prefer different parameters, so it’s important to look up the preferred conditions for each type of fish you keep.
The water you use in your aquarium will have certain qualities before you add it to the tank, and will also change over time, so it’s important to be able to test your water.
Testing your water parameters is easy with a test kit. There are a few different types of these test kits, ranging from dry strips that you dip in the water, to liquids that you add drops of your aquarium water to. If water chemistry isn’t your favorite subject, don’t worry, they are very easy to use.
Although each different tetra species has its own range of preferred parameters, let’s take a look at a generalized set of conditions that will work for most tetras:
Temperature: 76°F
pH: Most tetras do best in slightly acidic water, so a pH of between 6 and 6.5 is ideal.
Ammonia: 0ppm. Ammonia is a toxic substance produced in fish waste. In a cycled aquarium, testing should show no ammonia.
Nitrite: 0ppm. Nitrite is a toxic substance produced in fish waste. In a cycled aquarium, testing should show no nitrite.
Nitrate: 1-20 ppm.
Live Plants
Growing live plants in your aquarium is a subject all on its own, but it’s easier than you might think! Live plants provide many awesome benefits to your fish like:
Creating structure and hiding places
Providing a more natural habitat
Providing a growing surface for natural foods
Oxygenating the water
Removing nitrates from the water
Most tetras do great in planted tanks, and I would recommend the following species for beginners because they are easy, tough, and grow well in low light.
If you have bright lighting, growing some floating plants like Amazon Frogbit can create some shady spots. This can help make your fish more comfortable and bring out their natural behaviors.
Unlike other tetras, the Buenos Aires Tetra has a bit of a reputation as a plant-eater. This is one tetra species I would not recommend for planted tanks unless you don’t mind them taking a bite here and there.
Decorations
Natural decorations are the best to purchase to simulate their natural environment. Try purchasing decorations like aquarium driftwood and rocks. For driftwood, easy to use manzanita or spiderwood work very well and shape well for attaching plants to it.
For rocks, consider rocks like dragon stone or Seiryu stone. These rocks are great to use for aquascaping styles like Iwagumi.
EXPERT TAKE | MARK VALDERRAMA
After 25 years in this hobby and time managing fish stores, I’ve sold thousands of tetras and watched countless tanks fail for the same reason: people buy two or three and wonder why they look stressed and washed out. Tetras need a school. A group of six is the bare minimum, eight is better, and twelve in a well-planted tank is where you really see what these fish can do. Get the group size right and the colors and behavior follow. Skip it and you’ll be disappointed.
TIER BREAKDOWN
Beginner: Neon Tetra, Black Skirt Tetra, Buenos Aires Tetra, Serpae Tetra, Glowlight Tetra Intermediate: Cardinal Tetra, Ember Tetra, Black Phantom Tetra, Penguin Tetra, Colombian Tetra, Diamond Tetra Advanced: Rummy Nose Tetra (water quality sensitive), Emperor Tetra, Congo Tetra (needs space), Green Neon Tetra (soft acidic water required)
Species
Difficulty
Max Size
Min Tank
Best For
Neon Tetra
Beginner
1.5 in (3.8 cm)
15 gal (57 L)
First tank, community
Cardinal Tetra
Intermediate
2 in (5 cm)
20 gal (76 L)
Planted South American setups
Rummy Nose Tetra
Intermediate
2 in (5 cm)
20 gal (76 L)
Display tanks, experienced keepers
Black Skirt Tetra
Beginner
2.5 in (6.4 cm)
20 gal (76 L)
Community tanks, robust setups
Congo Tetra
Intermediate
3.5 in (9 cm)
40 gal (150 L)
Large planted community
Ember Tetra
Intermediate
0.8 in (2 cm)
10 gal (38 L)
Nano planted tanks
Diamond Tetra
Intermediate
2.4 in (6 cm)
20 gal (76 L)
Community, underrated display fish
Serpae Tetra
Beginner
1.75 in (4.5 cm)
20 gal (76 L)
Robust community (watch fin nipping)
How To Care For Them
Tetras are low-maintenance fish that are really easy to care for. That’s why many tetra species make such great fish for beginners. Let’s go through some of the basics of tetra care:
Aquarium maintenance
To keep your fish healthy and looking their best, regular aquarium maintenance is necessary. The most important thing you can do is to perform regular partial water changes.
This means regularly removing a certain proportion of the water and replacing it with fresh new water. A good starting point would be a 25% weekly water change.
Apart from your water changes, you’ll need to rinse out your filter media when it becomes clogged up and clean any algae that may build up on the glass or other surfaces on your tank.
Behavior
In their natural habitat, tetras are schooling and shoaling fish. This means they live in large groups of their own species out in the wild. You may even find groups of tetras schooling with other tetra species.
Tetras on their own or in very small groups will be stressed and nervous, and not comfortable enough to behave in their natural ways. Although tetras are peaceful fish species, some types may even become aggressive, so you should always keep your tetras in a good size group of the same species.
In most cases, the minimum group size for tetras is 8-10 of the same species, but you can go even bigger than that!
Tank Mates
If you plan on setting up a community tank, it’s important to know which species make ideal tank mates and which don’t. Tetras are small fish, so make sure their tank mates aren’t big enough to swallow them!
Tetras themselves are often partially or completely carnivorous, so avoid keeping them with fry or small shrimps that they may feed on. Here’s a short list of possible fish species that you can keep with your tetras:
Most tetra species are omnivorous which means they need both plant and animal matter in their diets. As a general day-to-day food, flakes or micropellets are a fine choice to keep your tetras well fed. Instead of choosing the cheapest variety available, make sure you pick up a high-quality, balanced product like Xtreme Aquatic Foods.
Xtreme Aquatics Nano formula is specially designed for smaller fish and contained a well balance mix of raw ingredients. It is a great staple food for your nano fish.
While this food source is a good staple diet, you should always supplement their diet with natural foods as this will bring out the best color and behavior in your fish. You can provide natural foods in either live or frozen form.
Let’s take a look at some great natural foods that you can provide:
Many tetras are easy to breed, and sometimes they don’t need any help at all. To encourage your tetras to breed, be sure to provide them with high-quality natural foods and excellent water quality. If you have a large, mature aquarium, you might wake up one day to find tiny new fish swimming around!
Usually, however, the problem with breeding tetras is that they tend to eat their eggs and fry, so you need to take some steps to get them to breed in the first place, and then to keep the eggs and babies safe.
To do this, you will need to set up a specific breeding tank. A small tank of just a few gallons, and with no substrate is usually used for this. A clump of java moss in the tank will give the female a place to lay her eggs.
Add an egg-carrying female to the tank and then two days later, a male. Perform a large water change in the evening with cooler water, this imitates the start of the rainy season. After the water change, cover up the tank to keep it in complete darkness until the following day.
Remove the cover and switch on the lights, this often stimulates the pair to spawn. If the fish lay eggs, move them back to their regular tank and congratulate yourself on breeding your tetras!
Where to Buy
Tetras are some of the most common aquarium fish in the hobby and are usually pretty easy to find at your local fish store. My favorite online store for tetras is definitely Flipaquatics.
These guys stock an awesome range of tetra species and take amazing care of their fish, even offering a 100% live arrival guarantee on certain deliveries! They also quarantine all their livestock!
MARK’S PICK
Cardinal Tetra. It’s bigger than the neon, hardier in warm water (75-82°F), and when you put 12 or more in a planted tank they move like a single organism. That red stripe running the full length of the body is one of the most striking things in freshwater. If I’m setting up a South American community, cardinals go in first.
AVOID IF
You want to keep just 2 or 3 fish (tetras school or they stress). You have a brand new tank under 4 weeks old (new tank syndrome hits tetras hard). You’re planning to pair serpae or black skirt tetras with long-finned fish like bettas or angelfish (fin nipping is predictable, not random). You want fish that survive neglect: tetras are forgiving of beginner mistakes but they punish dirty, unstable, or overstocked tanks. Rummy nose and cardinal tetras in particular will crash quickly in poor water conditions.
FAQS
How many of them should be kept together?
Tetras are schooling and shoaling fish that need to be kept in groups to feel comfortable in your tank. I would recommend keeping a group of at least 8 tetras of the same species.
Are they easy to care for?
Most tetras are very easy to care for, and that makes them great beginner fish. Tetras will thrive as long as they are kept in a stable, heated aquarium, with good filtration and the right water parameters.
Do they need a heater?
Most tetras are tropical fish that need water temperatures between about 68 and 76°F, depending on their species, of course. If you live in a tropical area where the water naturally stays in this range, a heater will not be necessary.
I recommend using a heater in all cases, however, just because it makes it so much easier to maintain stable conditions.
What is the best kind?
If you ask 10 different people this question, you could get 10 different answers! The best type of tetra for any fishkeeper is the one that most appeals to them, and the one that they can provide the right care for.
What is the most common?
The regular Neon Tetra is the most common tetra available. This is not surprising though because these awesome fish look great, are very peaceful, and are also very easy to care for.
What is the most peaceful?
Most tetras tend to be pretty peaceful. The most popular tetras like cardinal, neon, and rummy nose tetras are some of the most peace fish you can purchase in the hobby.
Closing Thoughts
Tetras are not complicated fish. But they do have non-negotiable requirements: school size, stable water, and compatible tank mates. Get those right and you’ve got a display that makes people stop and look. Get them wrong and you’ve got stressed, pale fish that die in three months.
Start with neons, cardinals, or glowlights if you’re newer to the hobby. They’re forgiving and beautiful. When you’re ready to push further, rummy nose tetras in a mature planted tank are one of the best displays in freshwater. Diamond tetras are underrated and deserve more attention.
For sourcing, I recommend Flip Aquatics (use promo code ASDFLIPPROMO at checkout) or Dan’s Fish. Both quarantine their livestock and give you a much healthier starting point than a chain pet store.
Flowerhorns are the most aggressively territorial freshwater fish most hobbyists will ever keep. They do not tolerate tank mates. They rearrange your tank daily. They will bite your hand during water changes and mean it. A flowerhorn demands a tank built entirely around its existence, and if you try to compromise on that, something in your tank is going to die. I have seen experienced keepers underestimate these fish, and the result is always the same.
A flowerhorn does not share a tank. It allows you to share its tank.
What Most Care Guides Get Wrong About Flowerhorn Cichlid
The most persistent myth about flowerhorns is that bigger is always better when it comes to their nuchal hump (the kok). I’ve seen keepers pump their fish full of questionable supplements and hormones trying to grow the biggest head possible, and it often shortens the fish’s life. A healthy flowerhorn with a moderate hump will outlive an overfed, hormone-treated one every time. The other misconception is that flowerhorns are impossible to keep with other fish. While they’re aggressive, I’ve seen experienced keepers maintain them successfully with large, tough tank mates in 150+ gallon setups. It’s not easy, but it’s not impossible either.
What It Is Actually Like Living With Flowerhorn Cichlid Care
Flowerhorn Cichlid Care watches you. When you walk past the tank, it tracks your movement. This is not a passive decoration. It is an aware, reactive animal.
Feeding time is intense. Flowerhorn Cichlid Care strikes hard and fast. Smaller foods disappear in one motion.
Tank maintenance takes longer than with community fish. The waste output is significant, and skipping a water change shows within days.
Other fish in the tank exist on Flowerhorn Cichlid Care’s terms. If it decides a tank mate is in the wrong spot, that tank mate moves or gets hit.
Hard Rule
Flowerhorn cichlids are not community fish. They will kill tank mates in virtually any configuration – smaller fish are eaten, similar-sized fish are attacked. A dedicated species tank is not optional for this fish.
Flowerhorns are the most aggressive cichlid most hobbyists will ever encounter. They will kill tank mates, rearrange your tank daily, and demand a setup built entirely around them. This is not a community fish. This is not even a fish you keep with other cichlids. A flowerhorn gets its own tank, period. If that is not what you signed up for, walk away now. This is not a fish you own. It is a fish that owns the tank.
The Reality of Keeping Flowerhorn Cichlid
Flowerhorns are interactive, intelligent, and visually spectacular. They are also the most destructive freshwater fish you will keep. Here is the reality.
Solo tank only. This is not a suggestion. Flowerhorns will attack and kill virtually any tank mate you put with them. Some experienced keepers have success with large, tough companions in 150+ gallon tanks, but the default should always be a species-only setup. One fish, one tank.
They destroy everything. Heaters get knocked off. Decorations get moved. Plants get shredded. Substrate gets rearranged into hills and valleys. You will learn to use heavy, stable equipment and accept that your aquascape belongs to the flowerhorn, not to you.
The kok is not everything. The nuchal hump size is partly genetic, partly diet, partly water quality. Supplements and hormones marketed to grow bigger koks often shorten the fish’s life. A healthy flowerhorn with moderate head growth will outlive an overfed, hormone-treated one every time. Do not chase the kok at the expense of the fish.
They bond with their owner. Flowerhorns learn to recognize the person who feeds them. They follow you across the room, beg for food, and display aggression toward strangers. This is a fish with a genuine relationship with its keeper, and that bond is a big part of why people keep them despite the aggression.
Biggest Mistake New Flowerhorn Cichlid Owners Make
Trying to keep them with other fish. It does not matter how big your tank is or how tough you think your other fish are. The default outcome of adding tank mates to a flowerhorn tank is injuries and death. Some people get lucky for a while, but eventually the flowerhorn decides it wants the other fish gone, and it has the size and aggression to make that happen. Accept the solo lifestyle or do not get a flowerhorn.
Expert Take (Mark Valderrama, AquariumStoreDepot)
Flowerhorns are the most interactive freshwater fish in the hobby. Nothing else comes close to the bond between a flowerhorn and its keeper. They greet you, they beg, they display, they have genuine moods. The trade-off is that they need their own tank, heavy-duty equipment, and an owner who respects their aggression instead of trying to work around it. If you want a pet fish in the truest sense of the word, this is it.
The Reality of Keeping Flowerhorn Cichlid Care
Size is the first reality check. Flowerhorn Cichlid Care grows fast and grows large. A tank that fits today will not fit in six months.
Aggression is not optional. This fish is territorial by nature. Tank mates are selected around this fact or they become food.
Filtration needs are extreme. Large predatory cichlids produce massive waste loads. Underfilter this tank and water quality crashes fast.
Biggest Mistake New Flowerhorn Cichlid Care Owners Make
Putting Flowerhorn Cichlid Care in a tank that is too small. This fish grows fast and gets aggressive in tight spaces. Start with the final tank size from day one or do not start at all.
Expert Take
Flowerhorn Cichlid Care is a commitment fish. Start with a 75 gallon minimum, run heavy filtration, and stock only tank mates that hold their own. Half measures do not work with predatory cichlids.
ASD Difficulty Rating: Tier 2 – Intermediate
Flowerhorn cichlids are hybrid fish bred for their distinctive humps and colors. They are large (10-12 inches/25-30 cm), aggressive predators that must be kept alone or with similarly large, robust cichlids. A single-species tank is the standard.
Flowerhorn Cichlids (video source) are manmade freshwater fish that were first bred by fish keepers in Thailand, Malaysia, and Taiwan. That means this aquatic animal does not naturally occur in the wild. The closest wild relatives to this hybrid fish, are African Cichlids.
They first appeared in the market in 1996 and have been rising in popularity since. These large Cichlids also have quite an impressive lifespan adding to their popularity.
Unfortunately, some Flowerhorns have been illegally released into the wild. They can now be found in a few wild habitats around the world where they’ve become an invasive species.
Flowerhorn fish is a result of selectively breeding different African Cichlid species. The idea of breeding these fish was based on the earliest manmade fish called the Blood Parrot.
Interbreeding Cichlids gives them the same unique head and body shape as the parent species. Fortunately, this process is fairly simple since Cichlids will spawn with just about any fish of the opposite sex as long as it’s another Cichlid species.
A few of the naturally occurring species that were used to create Flowerhorn strains are Red Devil (Amphilophus labiatus), Redheaded Cichlid (Paraneetroplus synspilus), Midas Cichlid (Amphilophus citrinellus), Red Terror (Cichlasoma festae), and Trimac (Cichlasoma trimaculatum). Parrot fish also played a role, but nobody seems to know (or aren’t telling us) exactly to what degree any of these species were involved.
There were originally only five strains of Flowerhorns. These were referred to as Luohans. These strains include the golden-based group such as Faders and Golden Trimax as well as the Golden Monkey, Kamfa, and Zhen Zhu varieties. These are sometimes referred to as Cichlid fish breeds, but in reality, they are only hybrids and not full breeds.
Other strains have also since been developed. Some of the most popular Flowerhorns are currently Golden Monkey, Red Dragon Flowerhorn, and Thai Silk.
What Do Flowerhorn Cichlids Look Like?
A Flowerhorn Cichlid is a large fish with a unique body shape and nuchal hump also called a Kok. The nuchal hump is the large protrusion on top of your fish’s head that gives them an easily recognizable silhouette. The size can vary from massive nuchal humps on males to nonexistent on females. The size can also change depending on the situation the fish finds itself in.
Both the dorsal and anal fins start about two-thirds of the way back on the body and stretch all the way to the base of the tail. The dorsal fin matches the bulk of the anal fin and ends in a fleshy, braid-like protrusion. The dorsal and anal fins also dwarf the caudal fin.
The tail fin, on the other hand, is round and much thinner than the other fins but the shape may vary. The pectoral fins are quite short and often almost see-through.
Flowerhorns also have quite a lumpy ‘chin’ area that extends right to the ventral fins. This feature is much more prominent in males.
Male Flowerhorns also have more brightly colored, pearlized scales. The female Flowerhorn will be an inch or two smaller than the male.
The unusual patterns of Flowerhorns evolve and change as the juvenile fish grow into adulthood. Once this critter reaches mature size, the patterns are set. This means that you may not know what you’re getting if you choose a juvenile fish. Most will end up with horizontal black stripes, however.
The eyes of these aquatic pets are quite prominent. The King Kamfa variety have white or yellow eyes.
How Big Can They Get?
Flowerhorn Cichlids are a large fish species. These aquarium fish can grow to about 12 to 16 inches (30.4-40.6cm) depending on the variant. It’s important to know the average size of your adult. The size will affect everything from Flowerhorn Cichlid care, tank mates, and even the aquarium setup.
How Long Do They Live?
Flowerhorns can live around 10 to 12 years. For this reason, it is quite important that you’re ready for a long-term commitment. The lifespan of your fish can drastically vary depending on the care you provide.
If your fish is constantly exposed to poor water quality or set up in an unsuitable aquarium, you can expect a sickly, short-lived fish.
What Do They Eat?
Flowerhorn Cichlids are omnivorous. This means that you’ll need to feed meaty treats like brine shrimp, bloodworms, mosquito larvae, as well as some greens to keep your fish healthy. The best way to do this is to feed a healthy pellet-based diet for omnivorous fish with some added treats.
Feeding a Flowerhorn Cichlid is fairly easy as long as you get the balance right. Due to these fish being so large, they have quite a big apatite. These freshwater fish will quite happily feed on just about anything that ends up in the tank.
If you’re unsure which meaty treats your fish can eat, consider adding the following foods:
Brine shrimp
Shrimp
Bloodworms
Mosquito larvae
Earthworms
Other aquatic worms
Fish fillet
Dried crickets
Dried grasshoppers
Krill
What you feed will depend on the size of your fish. Small treats like brine shrimps are for small fish. Bigger fish can have bigger snacks like earthworms.
For greens, you can consider adding the following vegetables:
Boiled peas (No shells)
Zucchini
Shredded lettuce
Cucumber
Give Them Live Foods
To keep your fish in tip-top shape, it is best to feed both live and frozen foods. Live foods, like mosquito larvae, will provide your fish with some entertainment. Hunting these creatures will also appeal to the foraging instincts of your Flowerhorn Cichlid.
How Much and How Often to Feed Them
It is best to feed your Flowerhorn Cichlid just enough to finish the food within five minutes after feeding. If you notice any food left at the end of five minutes, consider reducing the amount fed.
Any food that is allowed to settle to the bottom of the tank will just stay there to rot. This reduces your water quality and will lead to ammonia spikes if you’re not careful.
On the other hand, if your fish isn’t fed enough, it will start to dig up plants, chew on the leaves and break the stems. To reduce this destructive behavior, make sure to feed your fish regularly.
Adult fish need to be fed around two to three times a day. Young fish need five to 10 feedings to help them grow. If your fish aren’t interested in every feeding, reduce the number of feeding per day.
Their Temperament and Behavior
Flowerhorn Cichlids have a reputation for being quite aggressive. For this reason, they don’t do so well in community tanks with other fish. If you keep these fish with other species, you can expect fights to break out quite often. Even when kept in tanks with others of their kind, their aggressive nature will often lead to fighting.
Funny enough, Flowerhorns do prefer to swim in pairs. Keeping a male and female together in the tank will often reduce aggression and lower the stress levels in the aquarium.
It is possible to add in a few tank mates for your Flowerhorns if you do some careful planning. It’s an idea to keep them with peaceful fish of a similar size.
These Cichlids also won’t just stay in one layer of the tank. You can expect to see your fish moving up and down the water column as they, please. They will also claim territories in the aquarium which can lead to fighting. This is why it is very important to have enough space if you’re planning on having more than one Flowerhorn Cichlid in the tank.
If you’re planning a planted aquarium, you’ll also need to do some planning. These fish aren’t the best when it comes to living plants. They will often dig up the plants and even eat them. To avoid this, make sure to feed your fish correctly and plant unpalatable specimens that don’t require the substrate to thrive in your tank.
Tank Mates
Flowerhorn Cichlid tank mates aren’t easy to find. , these fish don’t do so well in a tank set up with other aquarium fish. Their aggressive nature and territorial tendencies will get in the way.
Fortunately, there are a few suitable tank mates out there. It will also help to select a large tank to reduce possible aggressive behavior. Before you select tank mates, keep the following guidelines in mind:
Avoid other species of aggressive fish. Choosing fish with peaceful dispositions is best.
Avoid slow-moving fish. Any species that gets selected must be able to escape any conflict.
Avoid shrimp and snails, they will definitely only serve as a great snack for your fish.
Avoid fish that are significantly smaller than your Flowerhorns. They will end up as snacks and targets for aggression rather than Flowerhorn tank mates.
Any tank mate you select must be big enough to hold its own and be fast enough to swim away when the need arises.
If you’re still considering getting some friends for your fish, keep the lists below in mind.
Best Tank Mates for Them
It can get quite frustrating to select some fishy friends for your giant terrors. To make it a bit easier, consider the following species:
Despite being a manmade fish, the Flowerhorn Cichlid is quite hardy and fairly easy to care for. If keeping fish is new to you, you shouldn’t have any problems, but having some experience is better. New fish keepers are often put off by the required tank size as well.
Flowerhorns are big fish. They are also quite aggressive and messy. This can complicate things when it comes to keeping other fish with your Flowerhorn. You’ll also need to do regular maintenance to keep the tank clean and the water conditions perfect.
Tank Requirements
Flowerhorns need quite big aquariums to satisfy their territorial needs. You will also need some decorations in your tank setup to keep them out of trouble.
Unfortunately, it’s impossible to know exactly what these fish prefer in terms of habitat since they were bred in captivity. In other fish species, you may set up the aquarium with plants or lots of rocks to mimic the natural habitat of that specific freshwater fish. In this case, your guess is as good as mine when it comes to tank decorations.
Despite not having a natural habitat, you can still create a stunning home for your pet. Here’s what you need to know.
Tank Size
To keep your fish healthy and stress-free, you will need at least a 75-gallon tank. These are very messy fish so if you can go bigger, go for it. Bigger tanks will prevent sudden changes in water parameters due to rotting fish waste and uneaten food.
If you’re thinking of keeping a breeding pair in the same tank, make sure to allocate at least 150 gallons to these fish. The bigger the tank, the less likely it will be for them to show aggression due to territorial battles. If you want a tank with different Cichlid species or other fish in it, make sure to give them a tank with a minimum volume of 215 gallons to prevent aggression.
Tank Setup
Setting up a Flowerhorn tank is really quite simple. After you’ve selected the tank you want, you will need to add a few things to create a suitable environment for your fish. Here are a few decor ideas to think about.
Plants
A Flowerhorn Cichlid does well in a tank with some added plants. Unfortunately, they do will dig up plants from the substrate. It’s best to keep them in tanks with plants that prefer to grow on other objects like driftwood and rocks with their roots exposed.
If possible, also select plants that aren’t the most palatable. Flowerhorns are omnivores and will nibble on your plants from time to time. A few live plants you can consider are Anubias Nana and Java Fern. Be prepared for some casualties, however, since these big fish will damage some of your plants.
By now you probably noticed that Flowerhorns love to dig around in the substrate. For this reason, it is very important to choose something safe to put at the bottom of your tank.
The best substrate will be sand or large tiles without any sharp edges. Sand allows the fish to dig to its heart’s content without the risk of injury. Avoid coarse gravel. The substrate is often ingested during digging which may lead to impaction if the grains are too large.
Some aquarium enthusiasts prefer to have a bare bottom tank. Bare tanks are very easy to clean and also completely remove the likelihood of impaction due to substrate ingestion.
Decor
To create a bit more structure in the tank, you can add large heavy rocks or driftwood to your tank. Just make sure that the items you add are large and heavy enough to not be knocked over by your fish. If you can, secure any decorations to the bottom of the tank.
Water Quality and Filtration
Flowerhorns prefer clean water in their tanks. They are quite sensitive to pollutants which means regular water changes are necessary to keep them healthy. It is also best to have a moderate flow in the tank to circulate oxygen and remove toxins.
Filtration
Flowerhorns are very messy. For this reason, they need a strong filtration system to help maintain the correct water parameters. Your filter should produce a moderate flow to circulate water around the aquarium.
A canister filter is an excellent choice when it comes to these Cichlids. It will create the correct flow while removing any solids from the water. It will also help to remove toxins by allowing beneficial bacteria to grow in the filter media. The Fluval FX Series is designed for large fish like Flowerhorns.
Despite being quite hardy fish, you will still need to keep an eye on the water conditions to keep them healthy. Here’s a quick breakdown of the parameters for Flowerhorn Cichlids:
Water Temperature: 75-86°F (24-30°c)
pH: 6.5-7.8
GH: 161-358ppm (9-20 dGH)
kH: 54-107ppm (3-6 dKH)
Ammonia (NH3): 0 ppm
Nitrite (NO2-): 0 ppm
Nitrate (NO3-): <20 ppm
Aquarium Maintenance
Since Flowerhorns are such slobs, it is very important to do regular aquarium maintenance. You should do weekly water changes and replace at least 20% of the aquarium water. On top of that, you can do monthly water changes of up to 70% of the total volume of water.
Doing these water changes will remove solid waste and excess nitrates in the water. Nitrates may not be dangerous in small quantities, but they will become toxic in large amounts.
Testing Tank Conditions
To keep your fish health excellent, make sure to do weekly water tests. To achieve this you will need a water test kit. The ideal kit will test all the water parameters except for the temperature in your tank. For that, you will need a thermometer.
Breeding
Breeding these fish is very difficult. Fertile specimens are extremely rare in this hybrid breed. A fish keeper also needs to wait for around 8-10 months or even longer before they can test breed their male and up to 2 years for a female. For this reason, it becomes very frustrating trying to breed these Cichlids.
If you still insist on breeding them, you’ll need a breeding tank and some knowledge.
Sexing
Male and female Flowerhorns are quite easy to tell apart. Males are around one to two inches bigger than females. They are also more brightly colored.
You can also expect a V-shaped vent on the male where the female has a U-shaped vent. The most prominent difference is the nuchal hump. Males will have massive nuchal humps while a female has no hump or just a very small protrusion.
It is difficult to sex juveniles so make sure to buy from an experienced breeder to be sure.
Getting Your Fish Ready to Breed
You don’t need to do anything special to prepare your fish for breeding. Simply place them in a breeding tank with a similar size to their normal tank. If the male is too aggressive, use a divider that allows water flow between the male and female. This should encourage breeding as soon as the divider is removed.
Your breeding tank will function as both a spawning tank as well as a fry tank.
The Breeding Process
During the breeding process (video source), the female Flowerhorn will lay around 900 eggs on a smooth surface somewhere in the tank. The male will then swim over and fertilize the eggs.
Once fertilization has taken place you can remove the female. The male Flowerhorn will care for the eggs until they hatch. Once the fry hatched, you can also remove the male.
Caring For Fry
Caring for the fry is quite simple. It is best to feed the fry with live food like brine shrimps to help them grow. You will need to do this 5 to 10 times per day to keep up with their ferocious appetite and nutrient needs.
Once they turn 6 months old, you should be able to sex your offspring and separate them into different grow-out tanks.
Health And Disease
You’ll be happy to know that Flowerhorns aren’t susceptible to any particular disease. Unfortunately, there are still a few things you should be aware of. Let’s take a look at your Cichlid’s health.
Evaluating Their Health
It’s very important to keep an eye on these amazing creatures. Fortunately, it’s quite obvious when your pet isn’t feeling so well. Look out for the following red flags:
Reduced apatite
Obvious sores on the body
Reduced activity level
Change in normal behavior
Common Health Issues
These Cichlids are amazingly healthy pets. This doesn’t mean they are completely immune against diseases, however. Here are a few health issues you should be aware of:
Mechanical health issues
Due to these fish being so aggressive, you can expect a few injuries every now and then. These shouldn’t be a huge problem unless they affect the fish’s ability to swim. Injuries can also happen during the exploration of the tank and while digging through the substrate.
Avoid these issues by checking the tank for any sharp objects and providing a large enough aquarium to avoid conflict.
Ich
Ich shows up as white spots on the body and gills of your aquatic pet. Make sure to treat this disease immediately to prevent serious complications. To understand ich better, take a look at this article.
Hole-in-the-head disease
This disease looks like holes in the nuchal hump of your fish. Fortunately, it is curable, but some scarring will remain. Treat this problem by doing daily water changes and removing any activated carbon in your tank until the water conditions improve.
Where to Buy
Flowerhorn Cichlids are quite popular. They is found in almost any aquarium shop around the world. Unfortunately, these hybrid species are not cheap to obtain. The average price they go for is around $35 for just one fish. To get the best of the best, you will need to venture to an online fish store, connect with breeders locally, or at tradeshows.
FAQS
How much do they cost?
On average, the Flowerhorn costs around $35 per fish. If you buy a juvenile, the costs is slightly lower.
How big do they get?
Flowerhorns can grow to around 12 to 16 inches (30.4-40.6cm) depending on the strain.
When do they get their hump?
Flowerhorns only grow humps under the right conditions. Most juveniles should start to develop their characteristic appearance at around 6 months old.
Can they live with African Cichlids?
Yes, but there is always the risk of conflict. Make sure the tank is big enough if you want to attempt this.
Is the Flowerhorn Cichlid Right for You?
Before you commit to this species, here’s an honest assessment of whether it fits your setup and experience level.
Perfect if you want a pet fish, not just an aquarium. Flowerhorns recognize their owners, beg for food, and develop distinct personalities that rival any pet.
Not for small tank keepers. You need 75 gallons minimum for a single flowerhorn, and bigger is always better with these fish.
Great if you enjoy a species-only setup. Most flowerhorns do best as the sole fish in their tank, so if you like the idea of one showpiece fish, this is your species.
Skip if you’re on a tight budget. Between the large tank, heavy filtration, and high-protein diet, flowerhorns are expensive to maintain compared to most freshwater fish.
Ideal for keepers who want interaction. These fish will play with you through the glass, follow you around the room, and learn feeding routines within days.
Not suitable for community setups. Unless you have 150+ gallons and experience managing aggressive cichlids, plan on keeping them alone.
How the Flowerhorn Cichlid Compares to Similar Species
Flowerhorns are often compared to oscars, and it’s an understandable comparison. Both are large, personable cichlids that become genuine pets. But they’re different fish in practice. Oscars are messy eaters that need excellent filtration but are less aggressive toward tank mates of similar size. Flowerhorns take aggression to another level. An oscar will chase a tank mate; a flowerhorn will kill one. Oscars also grow slightly larger (up to 14 inches vs. 12 for most flowerhorns) and are less expensive to acquire. If you want a big, interactive pet fish and plan to keep it with other large cichlids, the oscar is the safer choice. If you want a single showpiece fish with maximum visual impact and don’t mind a solo setup, the flowerhorn is hard to beat.
The red devil cichlid is one of the parent species used in flowerhorn breeding, so the comparison is natural. Red devils are pure species with their own charm. They’re slightly less flashy but arguably more authentic. They share the flowerhorn’s aggression and need for space, but they lack the exaggerated nuchal hump that makes flowerhorns so distinctive. Red devils can also be kept in pairs for breeding, which is something flowerhorns (as hybrids) can’t do as reliably.
What It Is Actually Like Living With Flowerhorn Cichlid
Living with a flowerhorn is the closest thing to keeping a pet that also wants to fight you. You walk into the room and the fish follows you, pressing against the glass, flaring, displaying. You put your finger near the tank and it charges. You reach in for maintenance and it bites you. Not a nip. A bite with intent. You learn to respect the fish, and in return, it gives you a level of interaction that no other freshwater species can match.
The tank will never look the way you set it up. Substrate gets piled into mounds. Decorations get shoved into corners. Heaters get knocked sideways. You stop fighting it and start securing equipment with suction cups rated for industrial use. The flowerhorn wins every decorating argument. Every single time.
Feeding is a performance. The fish sees the food container and goes into a frenzy. It slams into the surface, grabs pellets with force, and makes a mess. Visitors are either fascinated or slightly alarmed. The flowerhorn does not care either way. It is the undisputed center of attention in whatever room it occupies, and it knows it.
Closing Thoughts
A flowerhorn does not coexist. It dominates or it destroys.
Flowerhorn fish is very popular in the aquarium trade. They are fairly easy to keep as long as you do regular tank maintenance to keep the water quality pristine. It is also important to monitor the water temperature to keep them healthy.
Rainbow Sharks are territorial bottom dwellers that get more aggressive with age. The cute juvenile at the pet store becomes a tank bully within months.
Rainbow sharks are not sharks. They are territorial bottom dwellers with an attitude problem.
Rainbow sharks are not sharks. They are territorial bottom dwellers with an attitude problem.
The Rainbow Shark looks ordinary in a store and transforms in a proper tank. After keeping rainbowfish for decades, I know the difference between a washed-out store specimen and a fully colored adult is staggering. This guide covers exactly what you need to bring out its best.
Store rainbowfish look nothing like properly kept adults. The transformation takes patience.
Keeping Rainbow Shark long-term requires consistent water quality, proper diet, and a tank that meets their specific needs. This is not a set-and-forget species.
When kept right, the Rainbow Shark is one of those fish that makes the entire hobby worth it.
Let’s get started!
What Most Care Guides Get Wrong About Rainbow Shark What to Know Before Adding One to Your Tank
The biggest mistake I see with rainbow shark what to know before adding one to your tanks is underestimating their aggression. Guides will label them “semi-aggressive” and move on. In practice, that label doesn’t tell you much. Tank layout, stocking density, and territory management all play a huge role in whether these fish coexist or constantly fight. Tank size is another area where most guides get it wrong. The minimum listed on most care sheets is exactly that, a minimum. For long-term success, especially if you’re keeping a group, I always recommend going at least one size up from whatever the guide suggests. Finally, diet gets oversimplified. Pellets alone won’t cut it. In my 25+ years keeping fish, I’ve found that variety in diet directly affects color, growth, and overall vitality. Include frozen foods, quality pellets, and occasional vegetable matter for the best results.
The Reality of Keeping Rainbow Shark
This species has specific needs most generic guides skip. The Rainbow Shark does not thrive in average community conditions. It needs targeted water parameters, the right diet, and compatible tank mates. Half-measures lead to chronic stress and shortened lifespans.
Observation is your best tool. Watch this fish daily. Changes in color, activity level, or feeding response tell you more about water quality and health than any test kit alone.
Long-term success requires consistency. Regular maintenance, stable parameters, and a consistent feeding schedule are the foundation of keeping the Rainbow Shark healthy for years.
Biggest Mistake New Owners Make
Treating this fish like a generic community species. The Rainbow Shark has specific requirements that differ from the typical tropical fish setup. Ignoring those differences leads to problems within the first few months.
Expert Take
After 25 years of keeping Rainbow Shark, the single most important factor is consistency. Stable parameters, regular feeding, and a maintenance schedule you actually follow matter more than any piece of equipment.
Brief Overview of Rainbow Sharks
Scientific Name
Epalzeorhynchos frenatum
Common Names
Ruby shark, Red-finned shark, rainbow sharkminnow, green fringelip labeo, whitefin shark, and whitetail sharkminnow.
Family
Cyprinidae
Origin
Mekong, Chao Phraya, Xe Bangfai, and Maeklong in Indochina
Diet
Omnivore
Care Level
Moderate
Activity
High/ very active
Lifespan
5 to 8 years (approx.)
Temperament
Aggressive / Dominant
Tank Level
Bottom
Minimum Tank Size
Min. 50 gallons
Temperature Range
72 ° F to 80 °F
Water Hardness
5 to 11 dH
pH Range
6. 8
Filtration/Water Flow
Fast (mimicking the river basins)
Water Type
Freshwater
Breeding
Egg-layer
Difficulty to Breed
Difficult to breed
Compatibility
Moderate (get along with freshwater fish of the same size)
OK, for Planted Tanks?
Yes, especially for hard-leaved vegetation
Classification
Order
Cypriniformes
Family
Cyprinidae
Genus
Epalzeorhynchos
Species
E. Frenatum (Fowler, 1934)
Origin and Natural Habitat
Rainbow shark (Epalzeorhynchos frenatum) is nothing like true sharks; they are freshwater fish, live peacefully with their kin, and feed on algae and plankton. However, they were named after the mighty sharks because of the upright dorsal fin that strikes a close resemblance to sharks while swimming.
The rainbow sharks originated from Southeast Asia, particularly Thailand, and are now commonly found in the freshwater basins of Mekong, Chao, Phraya, Xe Bangfai, and Maeklong.
Unfortunately, the habitat destruction in the wild resulted in the decreased population of rainbow sharks. However, in nature, they are bottom dwellers and mostly live in sandy substrates.
Even though rainbow fish is a peaceful breed, it gets territorial and might give a tough time to their smaller tank mates. Therefore, it’s a good idea to keep a few fish in the aquarium, that is closer to their own size. Also, rainbow sharks are a little high-maintenance and might pose a challenge to novice fish keepers.
So, choose wisely!
What Do They Look Like?
As I mentioned before, Rainbow sharks are commonly known as red-finned sharks, which earned their name because of the dorsal fin.
And if you see them swimming, you might mistake them for baby ocean sharks for once!
However, rainbow sharks are small and have elongated and slender backs with flat stomachs. Their fins, as the name suggests, are bright red with somewhat orangish hues. The bright red-orangish fins pop out against their dull grey bodies.
The dorsal fins of rainbow sharks comprise 11 branched rays with a prolonged fin tail. Like ocean sharks, the rainbow shark’s face is flat, but the snout is somewhat rounded along with an elongated body that tapers off at the tail.
What’s the difference between the males and females?
Before stating the differences here, I’d like to emphasize that male rainbow sharks are very dominant and aggressive toward their gender. Therefore, I always recommend keeping rainbow sharks carefully; one male in a tank is enough!
Coming back to the variations, there’s not much to name their gender, especially for juvenile rainbow sharks. To clearly reveal the gender, it’s always best to wait until the sharks grow completely and reach adulthood.
An adult rainbow shark has a thin body with bright red-colored fins and black lines on its tailfins. Comparatively, female rainbow sharks possess faded coloration with more pronounced bellies and the black, grey lines on the tailfins are absent in females.
How Big Can They Get?
After about 2 years, rainbow shark reaches its full potential size, which is approximately 6 inches in length. In some rare cases, the rainbow shark might grow as long as 8 inches. However, they only get that large in bigger tanks.
In any case, due to their size and active behavior, large aquarium tanks are a necessity for rainbow sharks.
Interestingly, both male and female red-tail sharks are almost the same size in all varieties, and they sexually mature when they are four inches in length.
How Long Do They Live?
Under favorable conditions, rainbow sharks have proven to live for approximately 5-8 years in captivity. However, few claims suggest they live longer in nature.
The lifespan of rainbow sharks depends on:
Overall tank and water environment
Diet rich in vegetable and protein matter
Perfect sandy substrate for bottom-dwelling
Temperament and Activity Level
One thing that I genuinely love about the Rainbow shark breed is its agile and lively nature (video source).
Also, since they are bottom dwellers, they enjoy their time in the water grazing for food.
Therefore, many aquarists discourage tanks or aquariums for the rainbow shark as the confined space might trigger their aggressive side. As a result, they might attack smaller sharks and ultimately kill them.
Nonetheless, if you want to keep a group in home aquariums, make sure to install a large tank.
Mature ones are territorial
Juvenile rainbow sharks are social and get along with other fish pretty well.
But as soon as they reach adulthood, they become standoffish and solitary, asserting dominance in the presence of other fish.
To cater to this, I advise making tunnels, caves, and crevices for hiding. Also, it’s advisable to plant dense and healthy vegetation for the well-being of other fish and thriving a healthy community that involves fewer accidents.
What are Good Tank Mates for Them?
Well, if you ask me, I’d say, no mates are always better!
You might argue that they get along with true loaches and plecos really well.
Yes, I agree!
But in the wild only. In captivity, the rainbow sharks are quite aggressive and territorial. And like I mentioned before, they are bottom-dwellers; they don’t enjoy the company of other scavengers.
And this brings me to the conclusion that bottom dwelling tank mates should always be avoided for Rainbow sharks.
However, if you’re still adamant, I advise you to introduce your red-fin shark to a pre-occupied tank with only a few fish to reduce the likeliness of harassment.
Red-fin sharks are compatible with upper and middle tank dwellers, including.
The fact that rainbow sharks are omnivorous makes them voracious eaters. Also, they are not finicky and enjoy plants and prey.
The feeding habits in their native habitat rely on decaying plants, plankton, algae, insects, larvae, worms, and much more.
However, in captivity, since we target good coloration and a healthy lifespan, it’s best to include high-quality vegetable and protein matter.
For exquisite coloration and luster, I recommend feeding plants to the fish, such as lettuce, cucumber, cabbage, etc.
Also, they are bottom-dwellers, so make sure you get sinking pellets so they don’t miss out on some good nutritional diet.
Juveniles should munch on a protein-rich diet (brine shrimp, worms, and live food) to remain healthy and become brighter and stronger as they age.
However, since rainbow sharks are scavengers, they sometimes might overeat, which results in some illnesses. Therefore, it’s best to start feeding once a day to understand their pattern and adjust the diet accordingly.
Normally 2 feeding sessions a day comprising 5 minutes of feeding works the best for rainbow sharks.
Below is the list of recommended food you should incorporate into the diet of your rainbow shark.
Vegetables (peas, cucumber, zucchini, lettuce, and spinach)
Albino
The most common and popular variation of Rainbow sharks is the Albino variant.
The Albino rainbow shark possesses white abdomens with bright red eyes and fins that make them stand out in the tank. Though the variety is extremely rare, it is fondly loved by aquarists.
Albinos are very active, bottom-dwellers that feed on biofilm, plankton, and other organisms in the freshwater. Juvenile Albinos are sociable and amicable. However, as they age, they become more distant and aloof. Hence, they don’t get along with fish of their own kind including Flying Foxes, and Siamese bottom feeders.
If you’re planning on keeping your Albinos in a small tank, think again!
Albino rainbow shark is known to be a very active jumper, so it demands large tanks with ample water flow and decent filtration. I also recommend installing protective aquarium lids, just so you don’t have to deal with accidents.
As long as the diet of Albinos is, get your fresh veggies ready, as Zucchini, Cucumber, and other high-quality vegetable and protein matter (brine shrimps, frozen bloodworms) are ideal for Albino Rainbow Sharks.
Personally, I would recommend Albino Rainbow shark to experienced fish keepers because:
High-maintenance
Slightly aggressive
Breeding
Let me be very honest here.
If you’re raising rainbow sharks for the purpose of breeding, it’s time to move on!
That’s because the chances of breeding rainbow sharks, especially in captivity, are close to none.
Firstly, in their juvenile years, it’s impossible to distinguish between males and females. Secondly, rainbow sharks are so dominant and aggressive that they barely allow other fish to share the tank.
Therefore, there are few successful results of breeding rainbow sharks in aquariums (video source).
In nature, it’s a different story.
Rainbow sharks or Ruby sharks, like mentioned earlier, reach their sexual maturity as soon as they are 4 inches. The females lay eggs and males fertilize them later.
The ideal breeding months of Rainbow sharks are October and November. Thereafter the male fertilizes the eggs and the eggs are then transferred to a separate tank until the fry appears after a week.
The fry depends on high-quality protein so that they develop vibrant red fins and a healthy luster.
Care
Luckily, you don’t need to care much about the rainbow shark as it enjoys its own company and eats whatever is accessible to them.
However, if you are someone who believes in the healthy nurturing of their pet fish, the tank size, balanced, and water quality of the aquarium should be your top priority.
Tank Size
While keeping the rainbow shark, know that we don’t start small here.
That being said, 50 gallons tank size is the bare minimum, that too for one rainbow shark.
If you’re planning on keeping multiple rainbow sharks, be sure to provide substantial tank space.
Also, the length of your tank should at least be four feet long and 18 inches wide, considering a single fish.
Since rainbow shark is an active jumper and avid swimmer, it’s best to keep the tank big and wide so that your adorable red-finned pets can get the most of their lives.
Water Parameters
An interesting factor that keeps most aquarists from raising rainbow sharks is their fondness for their natural environment.
It’s almost impossible to recreate the natural conditions for rainbow sharks to reduce their aggression and dominance.
However, all we can do is try!
Rainbow sharks originally come from Southeast Asia’s freshwater basins where the water temperature ranges between 72°F to 82°F.
Therefore, the optimal water temperature for the rainbow shark falls somewhere between 77°F.
So, I suggest maintaining the water temperatures of your tank between 72°F to 82°F with the help of a premium heater that sets the temperature effectively.
Also, in the wild, these sharks enjoy river water that flows at a higher speed.
Therefore, maintain the water movement of the tank between moderate or fast to mimic their natural habitat.
Water pH and Hardness
Water pH and hardness are essential to maintain for keeping rainbow sharks calm and stress-free.
The ideal pH level ranges between 6 to 8 pH while the water hardness should be no less or more than 5 to 11 dH.
Substrate and Water Flow
Being a freshwater fish, the rainbow shark loves sandy bases. Also, many aquarists believe that’s a plus point because the sand is easy to clean and seldom collects food and other fish food waste that may be harmful to your fish.
Besides sand, you may opt for round gravels that are not too edgy or sharp to avoid potential injuries.
Additionally, as I mentioned before, the water flow should also be maintained to entertain your rainbow shark. I recommend installing small jets and air-stones to control the constant water pressure and flow.
If your tank houses more than one rainbow shark and is over 125 gallons, you can make use of controllable wavemakers, including EcoTech, IceCap, and several others.
Aquascape Decors
If you want to keep Rainbow sharks as your pet, I cannot stop stressing enough about recreating their natural habitat as they get quite upset in plain captivity.
The river basins in Thailand are filled with hiding places and natural vegetation. Therefore, you should consider freshening up the aquarium experience.
The sandy substrates help their scales from damaging when they are scavenging at the bottom and the hiding places give them plenty of space to spend their time in solitude.
I recommend setting up a tank with driftwood, boulders and pebbles, caves, and rock formation with lots of other decorations to keep your red-finned shark busy and happy.
Aquatic plants with hard foilage are also an excellent option to change their game. Since they are omnivorous, they like to munch on plants and green algae. Therefore, aquarists suggest keeping hard-leaved plants in the aquariums.
Also, the plants and decorations reduce the chances of conflicts between the different fishes. Nevertheless, if your tank houses just one rainbow shark, the decors and plantations are pretty straightforward.
Furthermore, it helps them to have a peaceful corner for themselves to feel safe and secure. When they feel unharmed, they are pleasant and lively.
If you ask me, I’d say lighting isn’t a requirement for rainbow sharks. However, it’s always best to follow a natural day and night cycle to offer them their natural lifestyle.
Also, stronger illumination help algae to develop in your tank, which allows easier grazing for your rainbow minnow.
However, sometimes the bright lightings might get a little overwhelming for your sharks. Therefore, I recommend installing LED lights that are more economical and programmable.
Proper Filtration
The rainbow shark demands exceptional water quality, tank size, and proper sanitization and filtration.
Rainbow sharks cannot stand low oxygen levels and toxins such as nitrates, nitrite, and Ammonia. So, a filter would be essential for raising a healthy rainbow shark.
For filters, I recommend investing in a canister filter better than the HOB.
That’s because the ideal range of rainbow shark filters should be 360GPH and above, and the canister filter will provide just that.
If you have small sharks in your aquarium tank, fret not!
Canister filters is easily adjusted and provide the perfect volume for your tank.
Diseases
In terms of diseases and other illnesses, rainbow sharks are pretty hardy. But like any other freshwater fish species, they sometimes catch illnesses that are common and can easily be treated.
If you notice your rainbow fish swimming queerly, you might mistake it with the fun behavior.
However, it’s much more than that!
The swim bladder disease is a serious medical condition when a fish cannot swim properly and have difficulty controlling their ability to swim or float.
Symptoms
Standing on the head
Swimming upside down
Distended belly
Loss of appetite
Curved back
Floating on the sides
Causes
The major cause of swim bladder disease is the compression or squeezing of the swim bladder by overeating, gulping air, or constipation.
Some other causes also include.
Bacterial infection
Cysts
Egg bound, in females
Parasites
Fatty liver tissues
Constipation
If you have spent much time looking after aquarium fish, you might have noticed stingy feces, hanging from the fish.
That’s the major symptom of constipation.
When that occurs, wait for a few days and it should be gone on its own. But in severe cases, feeding a balanced diet that includes peas, brine shrimp along salt baths should help alleviate the symptoms.
Symptoms
Stingy and hanging feces
Bloating
Laziness
Causes
Lack of fiber
FAQs
Will they eat other fish?
In wild, no!
However, things rainbow sharks are semi-aggressive when they are kept in captivity and might attack other small fish or fish of their own kind.
Therefore, it’s best to stick with one or a maximum of two fish, provided that there is ample space in the tank and other decors.
Which fish can live with them?
You can keep fish that are upper and middle-tank dwellers and possess a powerful personality that can defend back.
Rainbowfish
Barbs
Indian Loach
Gouramis
Clown Loach
Snails
How aggressive are they?
Albino Rainbow sharks are of the same kind as normal rainbow sharks. Therefore, they show aggression and dominance towards other smaller fish and fish that are too shy to fight back.
How big of a tank dothey need?
Rainbow sharks need ample space and time to adjust to their tanks. Therefore, keeping the tank as big as at least 50 gallons would suffice the needs of your rainbow shark.
That being said, the tank size should also increase when the number of fish increases.
Are they aggressive?
Yes, rainbow shark (Ruby shark) is pretty aggressive and shows some serious behavioral problems. Therefore, a novice fish hobbyist can hardly keep up with them.
Not only they are aggressive but demanding as well. The tank size, the decors, the vegetation, pH, and Oxygen levels should fall under the recommended range to keep your rainbow shark happy.
ASD Difficulty Rating: Tier 2 – Intermediate — Rainbow sharks are territorial and aggressive toward similar-looking fish. One per tank is the rule.
Hard Rule: Keep only one rainbow shark per tank. Two rainbow sharks in the same aquarium means constant aggression, chronic stress, and likely death for the subordinate fish.
Is the Rainbow Shark What to Know Before Adding One to Your Tank Right for You?
Before you add a rainbow shark what to know before adding one to your tank to your tank, it’s worth asking whether this species actually fits your setup and your goals. Here’s a quick breakdown to help you decide.
This species is a good fit if:
You have a large enough tank to manage territories. Cramped conditions amplify aggression.
You’re comfortable managing aggression through stocking ratios, line of sight breaks, and tank layout.
You can commit to regular water changes. These fish produce more waste than many smaller species.
You’re not planning a peaceful community tank. Rainbow Shark What to Know Before Adding One to Your Tanks need tank mates that can hold their own.
You enjoy watching active, interactive fish. Cichlids have personality that smaller species simply don’t match.
You have backup plans. Sometimes a particular fish just doesn’t work out, and you need a way to rehome it.
You’re feeding a varied, high-quality diet. Color and health depend on nutrition.
If most of those points line up with your setup, the rainbow shark what to know before adding one to your tank is worth serious consideration. If several don’t, it’s better to choose a species that matches your tank now rather than trying to make it work.
Avoid If:
You want to keep multiple shark-like fish together – rainbow sharks do not tolerate them
Your tank is under 55 gallons (208 L) – territory becomes compressed and aggression increases
You keep other bottom-dwelling territory-holders like red-tail sharks or large loaches
You want a peaceful community fish – rainbow sharks actively patrol and defend their space
How the Rainbow Shark What to Know Before Adding One to Your Tank Compares to Similar Species
Want an easy community fish? This is not it. Want a species that rewards dedicated care? The Rainbow Shark delivers if you put in the work.
Choosing between similar species is tricky. Here’s how the rainbow shark what to know before adding one to your tank stacks up against some common alternatives.
The rainbow shark what to know before adding one to your tank occupies a specific niche in the aquarium hobby, and direct comparisons really depend on what you’re looking for. In my experience, the most common question people ask is whether they should choose the rainbow shark what to know before adding one to your tank or something similar that’s more widely available. The answer comes down to three things: tank size, water parameters, and what other fish you’re keeping. If your setup matches what the rainbow shark what to know before adding one to your tank needs, it’s hard to beat. If not, there are alternatives worth exploring.
Final Thoughts
Rainbow shark is a beautiful freshwater aquarium fish that adds grace to your home. However, if you cannot afford a bigger tank, I suggest you keep looking for other better and smaller alternatives like nano fish.
One thing that I would strongly advise is recreating the natural environment within the tank with the recommended decors and aquascape.
Also, a happy rainbow shark is mellow and decent. So, make sure to gear up all the essentials before you bring one home.
Axolotls need cold water. Not room temperature. Cold. Below 68 degrees Fahrenheit or they stress, stop eating, and get sick. The number one killer is warm water in uncontrolled rooms during summer.
If you cannot keep your tank below 68 degrees year-round, you cannot keep an axolotl.
If you cannot keep your tank below 68 degrees year-round, you cannot keep an axolotl.
The single most important thing to get right in an axolotl tank setup is temperature. And it’s also the most commonly overlooked. Axolotls need water between 60 and 68°F. At 70°F and above, they become stressed, stop eating, and become vulnerable to bacterial infections. In most homes, especially in summer, that means you need an aquarium chiller. It’s an extra cost that surprises a lot of new axolotl keepers who assumed a heater was the only temperature equipment they needed. Beyond temperature, the other non-negotiables are fine sand substrate (axolotls will swallow gravel and get intestinal impactions), gentle filtration with low flow (they stress in strong currents), and nothing sharp or abrasive near those external gills. Get those right and the rest is straightforward. Here’s the complete tank setup guide.
Before we get started, however, let’s make sure you know a little about this awesome amphibian.
What Most Care Guides Get Wrong About Axolotl Tank Setup (Temperature Is Everything)
The biggest mistake I see with axolotl tank setup (temperature is everything)s is underestimating their aggression. Guides will label them “semi-aggressive” and move on. In practice, that label doesn’t tell you much. Tank layout, stocking density, and territory management all play a huge role in whether these fish coexist or constantly fight. Tank size is another area where most guides get it wrong. The minimum listed on most care sheets is exactly that, a minimum. For long-term success, especially if you’re keeping a group, I always recommend going at least one size up from whatever the guide suggests. Finally, diet gets oversimplified. Pellets alone won’t cut it. In my 25+ years keeping fish, I’ve found that variety in diet directly affects color, growth, and overall vitality. Include frozen foods, quality pellets, and occasional vegetable matter for the best results.
Species Overview
Scientific Name
Ambystoma mexicanum
Common Names
Axolotl, Mexican walking fish, Mexican salamander, or Mexican axolotl
Family
Ambystomatidae
Origin
Originally found in several lakes, such as Lake Xochimilco underlying Mexico City
Diet
Carnivore
Care Level
Intermediate
Activity
Low
Lifespan
10-15 years
Temperament
Peaceful
Tank Level
Bottom
Minimum Tank Size
20 gallons
Temperature Range
59 – 73°F (15 – 23°C)
Water Hardness
125-250ppm (7-14deg)
pH Range
6.5 – 8.0
Filtration/Water Flow
Low
Water Type
Freshwater
Breeding
Egg-layer
Difficulty to Breed
Intermediate
Compatibility
Species-only tank or community tank
OK, for Planted Tanks?
Yes, but known to uproot plants
Classification
Order
Urodela
Family
Ambystomatidae
Genus
Ambystoma
Species
A. Mexicanum (Shaw & Nodder, 1798)
Axolotl Tank Setup Guide
Ambystoma mexicanum, commonly referred to as the axolotl, Mexican walking fish, Mexican salamander, or Mexican axolotl, are salamanders that stay in their larval stage.
This means that axolotls will never morph into their adult forms and are thus known as neotenic salamanders. This, however, means that an axolotl will never take to land and thus needs to be housed in a fully aquatic tank setup.
Lifespan
Axolotls are only for those who are ready for a long-term commitment. If cared for properly, these critters will bless you with up to 15 years of cuteness.
Make sure you choose a healthy axolotl to start off with. It can become quite challenging to nurse them back to health.
The stress of moving house won’t help either. This means that a sick axolotl is more likely to get sicker due to stress. Healthy axolotls will handle rehoming much better.
Appearance
Adult axolotls are dark brown with black speckling. Since they remain aquatic, you can expect to see dark gills extending from both sides of the head.
It is also possible to find other color morphs such as albinos and specimens with both white and brown markings. In albinos or white varieties, you can expect the feathery gills to be a pink color (like the one pictured above).
Mexican walking fish have pretty long tails, while their legs and feet are small in comparison. There is a fin along the spine that extends from the tip of the tail all the way to the back of the head. You can expect to see another lower fin that extends from between the hind legs all the way to the tip of the tail.
Axolotls should always be kept in water due to their permeable skin. If left outside of the water for even a short amount of time, your axolotl will dehydrate and die.
Permeable skin also makes axolotls vulnerable to chemicals in the water. For this reason, you need to make sure only tap water treated with a water conditioner is added to the tank.
Amazingly, these animals can regrow their limbs. Mexican walking fish scientific studies have become quite popular for this particular reason. Everyone would like to know exactly how they do it and if it’s possible to replicate the process for human use.
Average Size
Mexican walking fish may be bigger than you first imagined. The average size of these exotic critters is around 9 inches (23cm).
They can get to about 12 inches (30cm), however, so make sure your tank is big enough to accommodate the size of your fully grown adult axolotls. Many keepers will tell you bigger tanks are always better to house axolotls.
Temperament And Behavior
Ambystoma mexicanum are very peaceful pets. They do very well in community setups with other aquarium fish.
The slow nature of an axolotl makes them relatively safe to have around small fish and other aquatic creatures like shrimps. Pet axolotls prefer to keep to themselves most of the time, even when you have more than one of them in the same tank.
If you have a brightly lit tank, you may never see your axolotl. These critters are nocturnal and very sensitive to bright light. For this reason, they will hide in dark areas of the tank while the lights are on.
During times when the lights are off, the axolotl is seen digging and sifting through the substrate. This is entertaining for them and appeals to their natural foraging behavior.
Health Considerations
Axolotls are very sensitive creatures. To keep them healthy, you will need to set up an axolotl-friendly tank.
When doing this, keep in mind their behavior, sensitivity, and also how much waste they produce.
For these reasons, axolotls need a tank with good filtration but no extreme currents. The most common signs of distress in axolotls include holding the gills more forward than usual, refusing to eat, and hiding a lot.
Stressed axolotls are also more prone to bacterial infections. If you see any injuries on your pet, make sure to get veterinary advice to solve the problem as quickly as possible.
Diet
Axolotls are highly carnivorous creatures. Fortunately, it’s fairly simple to feed these little wonders.
Feeding axolotls starts with gathering the right foods. They prefer meaty treats like aquatic insects or brine shrimp. What exactly they snack on will also depend on the size of your axolotl so don’t be surprised if brine shrimps just don’t cut it anymore.
If you’re worried about providing the right axolotl feed, consider getting some commercial fish food. Sinking pellets for carnivorous creatures are specifically designed to contain all the nutrients your pet needs to stay healthy. The food from Invert Aquatics below is a great choice.
Ultimately, what axolotls feed on will depend on what you provide. It’s best to feed a variety of fresh and frozen foods for optimal health.
In addition to the above-mentioned foods, you can also try feeding live mosquito larva, bloodworms, chopped earthworms, strips of meat, or even raw fish. Just you need to feed appropriate amounts to avoid uneaten food spoiling your water quality.
Handling
Handling axolotls should be done with care. If you can avoid it, don’t touch your pet. Instead, use a fine mesh net to catch and relocate your axolotl.
The net will prevent any unnecessary injuries and make it much easier to catch your axolotls when you need to.
TankSetup
Now that you know a little more about the aquatic animal known as an axolotl, you can start thinking about what you’ll need to create the perfect habitat. Axolotls aren’t very picky about how their tanks look as long as you pay attention to a few critical needs (video source).
Here’s what you need to know.
The Tank
Axolotls don’t need much when it comes to tanks. They is placed in just about any tank as long as it has enough floor space and has a minimum capacity of around 20 gallons. The main Axolotl cost is upfront with the tank, equipment, and animal. Maintenance cost is pretty reasonable.
Beginner pet owners may be incorrectly informed on the care of an axolotl. Some pet stores suggest an axolotl tank with as little as 10 gallons capacity. While these tanks can house younger axolotls just fine, it’s not ideal for fully grown adults.
Axolotls create a lot of waste. If the tank is too small, the water parameters will fluctuate quite drastically. This will affect the health of your axolotl in the long run.
It’s always better to go bigger for this exact reason. Bigger tanks have more water in them which means changes in the water parameters will happen slower. This makes it easier to keep your pet axolotl healthy.
You can start off with a small 10-gallon tank for your young axolotls, but keep in mind you’ll soon have to upgrade. If you can go up to 40 gallons from the start, your axolotl will stand a better chance of staying healthy for its entire life.
Substrate Considerations
Most axolotl keepers often create their axolotl tank with a bare bottom. This makes it easy to keep the tank clean, but might affect the health of your pet.
Leaving the tank bare will simplify doing water changes. You can simply suck up any waste at the bottom of the tank without worrying about the substrate. There’s also less chance of anaerobic bacteria causing problems in your axolotl tank.
Unfortunately, bare bottom tanks can cause some stress in your axolotl. They don’t like slipping on the bottom of the tank and may develop sores on the toes due to the effort they exert to hold on.
They also need something to keep them occupied to prevent boredom. Having a bare bottom tank prevents natural foraging behavior such as digging.
Sand is the best substrate for axolotl tanks. Fine sand will prevent slipping and provide endless entertainment. Axolotls love to dig and sift through sand to mimic natural foraging behaviors.
If your pet accidentally eats some of the sand, the particles are also small enough to pass through the digestive system without any problems.
It’s best to avoid any fine gravel. These particles are small enough to be swallowed but too big to pass through the digestive system. This can cause problems such as impaction that will lead to the death of your beloved pet.
Coarse gravel should also be avoided. Even if the particles are big enough not to be swallowed, they will irritate the sensitive skin of your axolotl and cause injuries.
Tank Decorations
Axolotl care includes providing enrichment as well as escapes. By adding tank decorations you can do just that. Here are a few things you should consider adding to your axolotl tank.
Driftwood
Driftwood without any sharp edges is great for axolotl tanks. You can create interesting aquascapes as well as some perfect places to hide.
Driftwood can also be used to grow plants like java fern and anubias nana. These plants prefer to grow attached to objects like driftwood with their roots exposed to the water.
Rocks
It’s always a good idea to add a few rocks to your axolotl tank. River rocks is stacked to create caves and tunnels for your axolotl to hide in and swim through.
Cichlid rocks are an excellent addition as well. These are fake rocks with holes in them specifically made to provide shelter.
Plants
Live plants are a great choice for an axolotl tank. These creatures produce a lot of waste that is turned into nutrients with the help of the beneficial bacteria in your tank.
These nutrients make excellent plant fertilizer. This means that live plants will remove excess nutrients in the water which in turn improves water quality. Low light plants are ideal given the nocturnal nature of these animals.
Plants are also soft and flexible which means your axolotl can swim in between them without the potential of getting snagged or otherwise injured. Axolotls can also use them as shelter when the need arises.
It’s best to stick to plants like java ferns that prefer to grow on other ornaments instead of in the substrate. Axolotls have a habit of digging up plants that are rooted in the substrate.
Fake plants are an option for axolotl tanks, but they aren’t ideal. They will have sharp edges that can injure your axolotl. They also don’t bring any benefits to the tank.
Hides
If your tank doesn’t already have enough hiding spots, then you can consider getting a hide. These are especially important in tanks with extra lighting in planted aquariums.
A hide will create a nice dark hiding spot for your axolotl to relax while the aquarium lights are on. Axolotls are quite sensitive to light so they will appreciate this little getaway.
Hides is just about anything from an aquarium castle with little holes, to ceramic pipes strategically placed around the tank. Just make sure that whatever hide you choose has no sharp edges that can injure your beloved pet axolotl.
Filtration System
Axolotls are known to produce large amounts of waste quite quickly. For this reason, it is very important to have a strong filtration system.
Unfortunately, this is quite tricky since an axolotl prefers a filtered tank with a relatively low flow compared to most aquarium critters. The next challenge is providing adequate aeration at the same time. Canister filters are excellent as they can work in lower water levels and won’t make the noise a power filter will make with water splashing from the outflow.
You can also utilize an internal filter, but you will want to consider oversizing given the waste production of these animals.
These not-so-small amphibians are quite clumsy swimmers. If the flow in your filtered aquarium is too strong, your axolotl will quickly become exhausted fighting against the current. This exhaustion will lead to stress and ultimately illness and early death.
If you’re unsure if your tank has too much flow, observe your axolotl. Most axolotls will hold their gills more forward than usual when stressed by the flow in your aquarium.
Sponge filters are an excellent choice for axolotl tanks. Despite how effectively they filter waste, they still create a relatively low flow compared to many other filters and pumps available on the market. Sponge filters also increase aeration and oxygen levels which takes care of both problems in one go.
Lighting
Amphibian enthusiasts will tell you that axolotls do just fine without any lighting in their tanks. In fact, they even prefer tanks without any aquarium lights. Axolotls are nocturnal animals, and this means they will be most active in the dark or in the dim lighting provided by the room’s external lighting.
If planted tank lights are required in your aquarium for growing living plants, it is very important to make sure your axolotl has a dark hiding spot to get away from it all. Axolotls don’t have great eyesight, but their eyes are very sensitive to bright light.
You will notice your axolotl only emerging once the lights in your tank go out. To minimize the time your axolotl needs to hide, make sure to choose plants with low light requirements such as anubias nana, cryptocorynes, and java fern.
Water Parameters
Axolotls aren’t too picky when it comes to their water parameters. As long as you stay in the tolerated range, you should have minimal problems.
This doesn’t mean you can skip on doing tank maintenance, however. Aquarium water can go from good to terrible fairly quickly.
If you have some experience in the aquarium hobby, you will know how important it is to test your water regularly. To do this you will need an aquarium water test kit.
This water test kit should give you an idea of what your water parameters look like with the exception of temperature. You’ll need a thermometer to check that.
If you’re wondering what normal axolotl water parameters are, take a look below:
Water temperature: The acceptable range for water temperature is 59 to 73 degrees Fahrenheit (15 – 23°C). The ideal temperature for this species, however, is between 60 and 64 degrees Fahrenheit (16 – 18°C).
pH: The acceptable range for pH is 6.5 to 8.0. The ideal pH for your axolotl tank will be 7.4 – 7.6.
Try to keep the temperature within the temperature range provided. If the tank water constantly warms up to beyond the acceptable range, you might need an aquarium chiller.
The warmer the water, the more stressed your axolotl will become. Warmer water contains less oxygen than cooler water. Axolotls require lots of oxygen to stay healthy which means better aeration is required. If the axolotl just can’t adapt to the change or the aeration isn’t sufficient, it will become stressed and die.
In an emergency, cool the water by adding ice cubes made from fish-safe, treated water. In the case of the water being too cold, simply install an aquarium heater to regulate the temperature.
Make sure to install a thermometer to keep an eye on the temperature in your tank.
Tank Mates
Not all creatures do well as tank mates for axolotls. Some fish will nip at their feathery gills. Axolotls are also nocturnal which means they can easily ambush sleeping fish for a quick meal. If you’re still wondering what to place in the tank with your walking fish, take a look at the following suggestions.
Suitable Tank Mates
Other Axolotls (Best choice as long as they have enough space and are of equal size)
Cory catfish and otocinclus catfish may seem harmless to your axolotl. Unfortunately, these fish do have spines on their dorsal and pectoral fins which can cause fatal injuries to your axolotl if it attempts to eat one of them.
Cycling The Tank
It is very important to prepare your axolotl’s tank at least one month before your new buddy arrives. This allows good bacteria to grow in your tank which in turn stabilizes the water parameters.
These bacteria are responsible for breaking down ammonia which is produced by uneaten food particles as well as axolotl waste. Ammonia is a toxic substance if left untreated.
After being broken down by the bacteria it will be turned into nitrites and then nitrates. Nitrites are still toxic, but the ultimate product, nitrates, is relatively harmless.
If your tank is maintained properly, you should never have spikes in ammonia and nitrites as long as your aquarium is properly cycled beforehand.
Tank Maintenance
Axolotl care starts with proper aquarium maintenance. You will need to do 20% water changes weekly to control the water quality in the tank. A gravel vacuum will come in handy here for siphoning waste from the bottom of the tank.
Before adding new water to the tank, however, make sure it is treated with a water conditioner. Conditioning tap water removes any harmful chemicals such as chlorine from the water.
Your axolotls will spend their entire lives in this tank, so make sure they have the healthiest environment possible.
Keeping Multiples in Your Tank
If you plan on keeping more than one axolotl, start with a minimum tank size of 55 gallons. For every additional axolotl after that add another 10 gallons.
This will allow for the appropriate amount of water to prevent ammonia spikes, prevent aggression, and ultimately unnecessary deaths. Experienced keepers take interest in breeding Axolotls. I have a separate article for that if you are interested here.
FAQS
What size tank do they need?
An axolotl requires a minimum tank size of around 20 gallons. This allows for steady water parameters without any sudden spikes in ammonia and nitrite due to waste production.
Do they need special tanks?
No, Axolotls are fine in just about any tank. Aquariums with more floor space are ideal, however, since axolotls spend a lot of time moving around on the bottom of the tank.
What fish can live in the same tank with them?
Fish such as guppies and white cloud minnows make excellent companions for axolotls. You can also place other peaceful community fish with axolotls with the exception of cory catfish and otocinclus catfish.
Can they live with other animals?
Yes, axolotls are peaceful creatures which means they do well when kept with other non-aggressive. You can pair axolotls with peaceful community fish as well as invertebrates like snails.
Do they need sand in their tank?
Yes, sand allows the axolotl some grip on the bottom of the tank. It also allows them to carry out their natural behaviors such as digging and sifting through the substrate.
Expert Take
The single biggest mistake I see with axolotl setups is temperature. People run the tank warm, treat them like tropical fish, and wonder why the axolotl stops eating, develops stress fungus, and slowly declines. Axolotls are not tropical animals. They need 60–68°F (16–20°C), and that requires active cooling in most homes. — Mark Valderrama, AquariumStoreDepot
ASD Difficulty Rating: Tier 2 – Intermediate — Axolotl tanks require cool water, heavy filtration with low flow, and a specific diet. More demanding than most beginners expect.
Hard Rule: Axolotl tanks must be kept at 60–68°F (16–20°C). Temperatures above 72°F (22°C) for extended periods cause heat stress, appetite loss, and increased susceptibility to bacterial infections.
The Reality of Keeping Keeping Axolotls
Keeping axolotls at the right temperature in most homes requires either a chiller, a cool basement, or a reliably air-conditioned room. They also produce heavy ammonia and need strong filtration with minimal surface current. Strong flow damages their external gills. Feeding live or frozen food adds to the routine. This is not a “fill it up and leave it” pet.
Is the Axolotl Tank Setup (Temperature Is Everything) Right for You?
Before you add a axolotl tank setup (temperature is everything) to your tank, it’s worth asking whether this species actually fits your setup and your goals. Here’s a quick breakdown to help you decide.
This species is a good fit if:
You have a large enough tank to manage territories. Cramped conditions amplify aggression.
You’re comfortable managing aggression through stocking ratios, line of sight breaks, and tank layout.
You can commit to regular water changes. These fish produce more waste than many smaller species.
You’re not planning a peaceful community tank. Axolotl Tank Setup (Temperature Is Everything)s need tank mates that can hold their own.
You enjoy watching active, interactive fish. Cichlids have personality that smaller species simply don’t match.
You have backup plans. Sometimes a particular fish just doesn’t work out, and you need a way to rehome it.
You’re feeding a varied, high-quality diet. Color and health depend on nutrition.
If most of those points line up with your setup, the axolotl tank setup (temperature is everything) is worth serious consideration. If several don’t, it’s better to choose a species that matches your tank now rather than trying to make it work.
Avoid If:
Your home stays above 72°F (22°C) in summer and you have no way to cool the tank
You want a truly low-maintenance aquatic pet with minimal daily attention
You plan to keep axolotls with fish: they will eat small fish, and large fish will bite their external gills
You want an active, visible daytime animal (axolotls are mostly sedentary and nocturnal)
How the Axolotl Tank Setup (Temperature Is Everything) Compares to Similar Species
Choosing between similar species is tricky. Here’s how the axolotl tank setup (temperature is everything) stacks up against some common alternatives.
The axolotl tank setup (temperature is everything) occupies a specific niche in the aquarium hobby, and direct comparisons really depend on what you’re looking for. In my experience, the most common question people ask is whether they should choose the axolotl tank setup (temperature is everything) or something similar that’s more widely available. The answer comes down to three things: tank size, water parameters, and what other fish you’re keeping. If your setup matches what the axolotl tank setup (temperature is everything) needs, it’s hard to beat. If not, there are alternatives worth exploring.
Final Thoughts
Now that you know a bit more about setting up an axolotl tank you should have no problems designing your own. Just remember to set up a decent filtration system and provide lots of hiding places for your axolotl to relax in.
If you have any questions, don’t hesitate to comment below.
Water changes are the single most impactful maintenance task in the hobby. nothing else comes close for keeping fish healthy long-term. After 25 years of keeping freshwater and saltwater tanks, my water change routine is dialed in and I can tell you exactly how much to change, how often, and what mistakes to avoid. I still see experienced hobbyists making errors with water change technique that stress their fish unnecessarily, so this guide covers the full process the right way.
What Is An Aquarium Water Change?
Changing water is the process of taking ‘dirty’ aquarium water out of your tank and replacing it with ‘clean’ water. This is something that all fish keepers and planted tank enthusiasts should do on a regular basis. Sure, it takes a little effort, but it’s a very important regular maintenance action to keep your fish healthy and your tank clean.
The 4 Benefits Of Doing This
If you aren’t already convinced, take a look at these important reasons for changing out the water in your aquarium:
1. Safer For Your Fish
Changing the water removes harmful toxins from your fish tank that cause poor water quality. This makes your aquarium a much safer and healthier home for your pets.
2. Reduced Algae
The toxins that build up in your aquarium water are a major cause of algae blooms. Performing regular partial water changes is one of the best ways to remove algae, and keep your water (and your glass) crystal clear.
3. Reset Nutrient Levels
If you grow aquatic plants in your freshwater aquarium, feeding them with supplements and fertilizers is a great way to promote the best growth and performance from them. Without testing for these nutrients, it’s hard to know exactly where the levels are, or if they are too high. Performing a water change is the easiest way of reducing the nutrients and trace elements to prevent them from building up.
4. A Clean Substrate
Fish waste and uneaten food tend to build up on the bottom of the tank and in your aquarium plants. Sucking water out of your freshwater tank is the best way to pull solid waste particles and sediment out of your aquarium.
The Nitrogen Cycle
Water chemistry is a huge part of keeping a healthy, clean fish tank. If you find chemistry more frightening than fascinating, this side of the hobby can be pretty intimidating. The good news is that you don’t have to be a chemist to get the basics down.
There are some fundamentals that will really help you understand why water gets unsafe for your fish after a while. So it’s time to get just a little technical and learn these principles.
Basically, a fish tank is a closed system, so all the food you put into it either gets excreted by your fish as poop or sinks to the bottom and rots there. As it rots, it produces a nitrogen compound known as ammonia. Ammonia is toxic to your fish, but fortunately, the hardworking bacteria in your filter convert this subsetance into nitrite (also toxic), and then into nitrates.
Nitrates are not toxic to your fish in low concentrations, but they do build up over time and the best way to lower the levels is to literally remove them from the tank by changing the water. Once you understand this process, it’s easy to see why you need to do water changes!
If you’d like to know more about the nitrogen cycle, go ahead and check out my article on the aquarium cycle for a more in-depth look.
Water Change Schedules
Now that you understand the benefit of removing old aquarium water from your tank and adding new water, the obvious questions are:
When should you change the water?
How much water should You change?
Let’s take a look at the answers to these important questions:
Frequency
The main aim of the water change is to reduce nitrate levels in the water. The levels of this chemical compound are really what tell us when we need to change the aquarium water. As a general rule, nitrate levels of 15 parts per million(ppm) and below are considered safe for your fish, so that’s where we want to keep them.
But how do we know when the nitrate levels get too high?
Testing
The only way to know what your nitrate levels are is to test your water parameters. Luckily, this is really easy to do and all you need is a liquid or strip test kit. Use your test kit to test your water every week for ammonia, nitrites, and nitrates. If your tank is cycled, you should read :
Ammonia: 0 ppm
Nitrite: 0 ppm
Nitrate: 1+ppm
When your nitrate level reaches 25+ ppm it’s time for your water change!
Volume
So you’ve tested your water and your nitrates are on the high side of healthy. You know it’s time for a water change, but just how much do you need to replace?
Let’s say, for example, you measure nitrates at 20 ppm and you want to get that down to a safer level of 10 ppm. If we assume (and it’s a fair enough assumption) that the nitrate is spread out pretty evenly in your tank’s water, all you need to do is take out half the water and replace it to get to that 10ppm level. Taking out half the water in your tank is also known as a 50% water change.
Factors Affecting Frequency And Volume
In practice, the amount of water you need to change, and how often you need to change it, will vary from tank to tank. It’s really all about how fast the nitrate levels build up in the aquarium water. Let’s take a look at what affects the rate of nitrate build-up in your fish tank water.
Stocking Levels
The more fish you have, the more waste (poop) they are going to produce. This means that if you want to have a lot of fish in your tank, you’re going to need to do more water changes than if you had fewer fish in a tank of the same size.
Another factor that can have an effect is the type of fish you have. A few fish species, like goldfish and plecos, for example, are known to produce more waste than other small fish. Many nano fish like tetras are light on a bioload. Shrimp and snails are very light on a stocking level.
Feeding
Fish food is another source of nitrates for your tank. If you’re putting too much food in your aquarium, and your fish don’t eat all of it, it’s going to rot and produce more nitrate.
Plant Density
It’s not only animals that have an effect on the nitrate levels in your tank. Live plants in freshwater tanks use nitrates and can help to reduce the levels in your aquarium water.
At the same time, plants will produce ammonia, and therefore nitrate, if they decay in your aquarium. In this way, plants can either decrease or increase nitrate levels in the fish tank water. In many aquascapes, plants will produce the most ammonia in the aquarium.
Dirty Filter Media
Dirty, clogged filter media can also be a source of nitrates in your aquarium. You need to rinse out the sponges in your water filter from time to time, but remember, the good bacteria that live in them are very important. Rinse out your filter media in the water you have taken out of the aquarium to keep them healthy.
Instructions
There are 3 main steps for successful aquarium water changing. Now that you know why water changes are so important, it’s time to get your hands wet!
What You’ll Need
Before we move on to the actual changing, here’s a list of things you’ll need for a simple water change using buckets:
A bucket for preparing new water
A bucket for removing old water(alternatively run the water straight into the yard through a window/door)
An aquarium gravel vacuum water changer
Water conditioner
Aquarium fish bag/colander (optional)
Thermometer (optional)
Towels
1. Preparing
You should never just put any old water into your tank without preparing it first. The same amount of water that you will be taking out of your tank will have to be replaced, so figure out how much water you’re going to take out before you prepare new water.
Let’s take a look at how to prepare water:
Temperature
To avoid shocking your fish or other animals with a sudden change in water temperature, try to get the new water as close as possible to the same temperature as the aquarium water you’re going to take out. This is more important when you perform a water changes, and won’t make much difference if you’re only changing 10%.
If you have a mixer tap/faucet, this will make your life a lot easier. Using a spare water heater is also very effective.
Another simple method is to run cold water into a bucket and then add boiling water until it has reached the right temperature. Be very careful with boiling water and never pour it on your thermometer.
Dechlorinator/Conditioner
Tap water usually contains chlorine and chloramine, which are both toxic to your fish, plants, and the beneficial bacteria that keep the nitrogen cycle running in your tank. For this reason, aquarists need a way to neutralize these chemicals before this water can be safely added to the aquarium.
The good news is that this is easy to do and there are a few different products that can be used like API Tap Water Conditioner or Seachem Prime. These products are known as water conditioners and they neutralize a couple of other harmful chemicals and heavy metals too.
Unless you are using RO (Reverse osmosis) or RODI (for saltwater) water, I would definitely recommend using a water conditioner to be on the safe side, even if you’re running well water in your tanks.
You can condition your prepared water before you add it to your aquarium, or if you’re using a running water system or pumping it into your tank, you can also add your conditioner during or just after the change.
Saltwater
Reef and other saltwater tanks need water changes just like freshwater aquariums do. The major difference between fresh and saltwater aquariums is, of course, that you need to get the salinity of your water correct.
Make sure you mix in reef salt to the right concentration and use your refractometer to measure your salinity before adding new water to your tank. Bear in mind that as water evaporates, the salinity will increase, so top up your tank with fresh water to keep it full. Using tap water is not advised for saltwater aquariums.
2. Siphoning Your Tank
Now that your new water is prepared, it’s time to take some of the old, dirty water out. It is possible to remove water with a jug, but you’ll be leaving a whole lot of waste and sediment in the water. Using a pump to push water out of your tank is another option, but again you’re wasting a great chance to remove debris and give your tank a deep cleaning.
The solution is to siphon the old water out of your tank! But what is siphoning, and how do you do it? Read on for some handy tips.
Siphoning
Siphoning is a really cool way of moving water any distance without having to physically carry it or pump it. If you’ve never seen a siphon in action before, prepare to be amazed. The secret? Gravity!
To siphon water, all you need is a flexible hose and a tank that is above ground level. Even though the water in the hose has to travel uphill in a pipe initially to get over the rim, gravity will still pull the water out of the tank.
There is a catch though, this will only work if the end of the pipe (where the water flows out) is lower than the start of the pipe(inside your aquarium).
How To Start A Siphon
To get the siphon started, you need to get water to the point where it has filled the tube past the highest point, and then it will flow. Let’s look at a few ways to do this:
Suck On The Pipe
This is an old-school but messy way to siphon water out of your tank. Although many people still use this method, it is not advised because you can easily get some dirty tank water in your mouth when doing this.
Fish tank water isn’t necessarily dangerous, but it can contain bacteria and other stuff that could be harmful, so never risk swallowing it. If you do get water in your mouth, spit it out, and rinse out your mouth with clean water or mouthwash.
Use A Squeeze Bulb
There are gravel vacuums available that incorporate a squeeze pump on their hoses. By squeezing the bulb, a vacuum is created and the siphon can begin. This is a much easier and cleaner way for beginners to siphon their tanks.
Fill The Tube
You can get a siphon started without a pump if you put the entire hose into the water and block one end of it with your finger. Next, remove the hose end of your gravel vac and lower that end of the pipe to below water level before releasing your finger.
An easier method is to fill the vacuum end of the hose with tank water and invert it so that the water begins to run through the hose. Before all the water has left the hose and drained into the bucket, drop the open end of the vacuum back into the water. If you’re quick enough, the siphon will continue to run.
The easiest way to remove water from your tank is to use the Python Water Changer. This gravel siphon system connects to your tap and starts the siphon up water with its gravel tube when you open the faucet.
The beauty of this system is that the water from your aquarium drains directly into the sink. This limits spills and mess while saving your back from the strain of carrying heavy buckets.
This is a great system for aquarists with larger tanks. You will have to have a tap nearby for it to work, however.
Gravel Cleaning
The reason that siphoning is so helpful when changing water is that it allows you to suck up physical waste particles on/in your substrate and in the tank water (video source). You can also use the vacuum to disturb the gravel to loosen any particles that are trapped within it. If you have carpet plants and stem plants in your tanks, you can also disturb these gently to release fish waste and mulm.
A great tip is to pinch or fold the hose to control the flow and suction strength of the siphon. This technique is very useful, especially if you’re sucking up too much of your substrate or draining your tank too fast.
3. Refilling Your Tank
Once you have prepared your tap water, conditioned it, and gotten the temperature right, it’s time to add it to the tank.
It’s very important to add new water to the tank slowly. Obviously, you don’t want to spill any water or stress your fish with a sudden powerful current, but the other reason is to avoid disturbing the substrate, especially if you have a carefully arranged tank, or have aquatic plants that can be uprooted.
How To Avoid Disturbing The Substrate:
Pour the water very slowly
Pouring the water onto a fish bag on the surface, or through a colander/strainer will help to break up the flow of the water
Pour onto the water surface with a sprinkler-type fitting
Pour over hardscape features
Add water in bags
Even if you’re very careful, you can easily stir up your substrate a little while changing the water. This will make your water a little cloudy. Don’t worry if this happens, your tank will clear up overnight and look amazing the next day.
Safety Tips
Although changing water is a safe and easy thing to do, this is a great time to remind you of a few important safety tips when working with aquariums:
Water is heavy- Be careful not to overload the surface where you keep your tank.
Glass is brittle, and broken glass is sharp- If you have a glass aquarium, be very careful never to strike the glass with anything. Be very careful, or rather avoid resting the bucket on the edge of your aquarium glass, especially if you have a rimless aquarium.
Water and electricity don’t mix well-Turn off your filter and heater while working in your aquarium.
Take it easy- If you’re using a bucket, take it slow, don’t hurt your back!
FAQS
How often should you do this?
Unfortunately, there is no set timing that will work for all aquarists because each individual tank is different. Once a week, or once every two weeks is good to start out with, and you can adjust your schedule as you find out what works best for you and your tank.
Can you change too much of the volume in an aquarium?
Unless you have some sort of emergency, changing more than 50% of your tank water is not advised because it can be pretty stressful for your fish. As long as the water you are putting in is conditioned, and the same as your tank’s temperature, you could technically do larger changes, however.
What is the best way to do this?
There are many ways to change the water in a fish tank and different methods will work better for different aquariums. If you have a small aquarium, using a bucket and a gravel vacuum is a cheap and easy method if you have a strong back. If you have larger tanks, using a python and a pump might be a better solution.
How often do you do this for a saltwater fish tank?
Performing a water change every week, or every second week is generally recommended for your saltwater or reef aquarium. Just like for freshwater tanks, the volume, and frequency of your changes will depend on a few factors like bioload and feeding amount. Some reef tanks can also get to the point where they do not need frequent water changes or any water changes and can function off dosing supplementation.
Can I completely empty and refill my fish tank?
No, changing all of the water in your aquarium in one go is a bad idea because it will be very stressful for your fish. It will also be harmful to your beneficial bacteria colonies and could disrupt the nitrogen cycle in your tank.
Final Thoughts
Let’s face it, keeping a healthy fish tank does require you to roll up your sleeves every now and then. Performing routine water changes is the number one most important regular maintenance action that you can do.
After reading this article, you’ll have a much better idea of when and how to change the water in your aquarium. Happy water changing!
🐟 Want to learn more? This article is part of our complete Aquarium Care Guide. your ultimate resource for water chemistry, maintenance, feeding, disease prevention, and everything you need for a healthy tank.
Clownfish are the entry point to the saltwater hobby for most people, and that’s a good thing. They’re hardy, adaptable, and genuinely interesting to watch. But there are things the hobby gets wrong about them constantly. First, not all clownfish are the same. The ocellaris and percula look nearly identical, but the percula has thicker black borders and brighter orange. Designer clownfish are not “genetically modified” as some people claim; they’re selectively bred, and tank-raised fish are almost always a better choice than wild-caught for any clownfish purchase. Second, the maroon clownfish is not a community fish. It’s aggressive and it will dominate your tank. A lot of hobbyists learn that one the hard way. And third, anemones are not required. Your tank-raised clownfish may never host one. That’s normal. Don’t stress over it.
There are dozens of clownfish species and designer variants, and they are not all the same. Some are peaceful, some are aggressive, and some grow larger than most people expect.
Not all clownfish are Nemo. Some are territorial bullies that will own your tank.
Key Takeaways
There are 30 recognized clownfish species in the Amphiprioninae subfamily, with many more designer variants created through selective breeding.
Ocellaris and percula look nearly identical. The percula has thicker black borders, a darker orange, and slightly higher price. For a 10-gallon community reef, the difference is mostly cosmetic.
Tank-raised clownfish are superior in almost every way: healthier, better adapted to prepared foods, easier to acclimate, and not depleting wild reef populations.
Maroon clownfish are the most aggressive species in this family. A single maroon will dominate tanks under 55 gallons (208 L).
Anemones are optional. Many tank-raised clownfish never host one. That’s normal behavior, not a problem to fix.
Designer clownfish (black ice, DaVinci, Wyoming white, Picasso) are tank-raised, ethically produced, and perfectly healthy fish. They are selectively bred color morphs, not genetically modified.
Clownfish are sequential hermaphrodites. All start as males. The dominant fish becomes female and is always the largest in the pair.
Introduction to Clownfish
Clownfish belong to the Amphiprioninae subfamily within the family Pomacentridae. There are 30 recognized species and one genus (Premnas) reserved for the maroon clownfish. The most commonly seen in the aquarium trade are the ocellaris, percula, tomato, clarkii, maroon, and pink skunk. Designer variants extend that list significantly with selectively bred color morphs that have become a major segment of the captive-bred marine fish market.
All clownfish are sequential hermaphrodites. They’re born male. The dominant individual in a group becomes female. That female is always the largest fish in the pair, which is why the female in an established pair visibly outgrows her mate over time. If the female is removed from the tank, the dominant male will transition to female. This biology is what made the movie premise work: in a natural group, the death of the female would have resulted in the largest male becoming female, not a search for a new mate.
The relationship with anemones is one of the most misunderstood aspects of clownfish keeping. Clownfish evolved alongside anemones and benefit from their protection. But many tank-raised clownfish have never encountered an anemone and may ignore one completely, or host unusual substitute objects like powerhead intakes, wave makers, or even duncan coral. Don’t force the relationship. If it happens, great. If it doesn’t, your clownfish is fine.
Avoid These Combinations
Maroon clownfish in tanks under 55 gallons (208 L) with passive or small tank mates
Two different clownfish species in the same tank (they will fight)
Wild-caught clownfish when tank-raised are available (tank-raised are always the better choice)
Clownfish with anemones in new tanks (anemones need at minimum 6 months of tank maturity and stable parameters)
Tomato clownfish in community reefs with passive species like firefish or small gobies
ASD Clownfish Selection Guide
Best for Beginners and Community Reefs: Ocellaris, Percula. These are the most peaceful, most adaptable, and most widely available. Fit tanks as small as 10 gallons (38 L). Tank-raised specimens are widely available and should always be the first choice.
Intermediate (More Personality, More Aggression): Clarkii, Pink Skunk, Saddleback. Hardy species with wider anemone compatibility. The clarkii is more assertive than ocellaris but manageable in a 30-gallon (114 L)+ system with appropriate tank mates.
Advanced (Aggression Management Required): Maroon, Tomato. These species need more space, more careful stocking decisions, and experienced hobbyists who understand how to manage territorial fish. Not for community reef tanks with passive species.
Types of Clownfish
1. Ocellaris Clownfish (False Percula)
Scientific Name: Amphiprion ocellaris
Size: 3 to 4 inches (7.5 to 10 cm)
Origin: Eastern Indian Ocean, Western Pacific
Min Tank Size: 10 gallons (38 L)
Tank Bred: Widely available
ASD Tier: Beginner
Mark’s Pick
The ocellaris is the one I recommend to nearly everyone starting in saltwater. It’s peaceful, hardy, works in small tanks, eats everything, and is one of the most widely tank-raised fish in the hobby. If you want your first clownfish to thrive, start here. The percula is equally good, but ocellaris tank-raised options are more abundant and often less expensive.
The ocellaris is the most widely kept clownfish in the hobby and the species that most people picture when they think of clownfish: bright orange with three white bars outlined in black. Tank-raised specimens are available from almost every source and are reliably healthy, eating prepared foods from day one. They’re peaceful with most tank mates, compatible with a wide range of host anemones, and adaptable to FO, FOWLR, and full reef setups.
At 3 to 4 inches (7.5 to 10 cm) they fit a 10-gallon (38 L) as a pair. They establish a small territory and stay there, which makes them excellent for nano reefs. A bonded pair will breed readily in captivity, spawning on flat rock surfaces near their territory. The fry are difficult to raise but it’s a fascinating behavior to observe.
2. True Percula Clownfish
Scientific Name: Amphiprion percula
Size: 3 to 4 inches (7.5 to 10 cm)
Origin: Western Pacific, Great Barrier Reef, Melanesia
Min Tank Size: 10 gallons (38 L)
Tank Bred: Widely available
ASD Tier: Beginner
The true percula and the ocellaris are often sold interchangeably, and for most practical purposes in a home reef, they are. The distinguishing features are visible up close: the percula has thicker, more prominent black borders around its white bars and a slightly richer, darker orange body. The percula also has 10 dorsal fin spines versus 11 in the ocellaris, though you won’t be counting those in a fish store.
Care requirements are essentially identical. The percula may host anemones slightly more readily than tank-raised ocellaris, and it tends to command a higher price. Both are excellent beginner fish. If you’re choosing between the two, let availability and price guide you rather than any meaningful difference in behavior or hardiness.
3. Maroon Clownfish
Scientific Name: Premnas biaculeatus
Size: 4 to 6 inches (10 to 15 cm) females; males stay smaller
Origin: Indo-Pacific
Min Tank Size: 30 gallons (114 L), 55 gallons (208 L) preferred
Tank Bred: Available
ASD Tier: Advanced
The maroon is the largest and most aggressive clownfish species. It belongs to its own genus, Premnas, which separates it taxonomically from all other clownfish. The female grows to 6 inches (15 cm) and will dominate any tank she’s in. Maroon clownfish are not a community fish. Period. They will intimidate, harass, and sometimes kill other fish that venture near their territory, especially other clownfish species.
In a dedicated system or a large tank with robust, similarly assertive tank mates, the maroon is stunning. The gold stripe morph is one of the most visually striking clownfish available. But buy one knowing exactly what it is. This fish defines the tank. Everything else gets stocked around it.
4. Tomato Clownfish
Scientific Name: Amphiprion frenatus
Size: 3 to 5 inches (7.5 to 13 cm)
Origin: Western Pacific
Min Tank Size: 30 gallons (114 L)
Tank Bred: Available
ASD Tier: Intermediate to Advanced
The tomato clownfish is red-orange with a single white bar behind the head. Juveniles have two or three bars that fade as the fish matures. It’s one of the hardiest clownfish available and adapts to a wide range of water conditions. The downside is temperament. Tomato clownfish are significantly more aggressive than ocellaris or percula, particularly females. In a 30-gallon (114 L) community reef, a dominant female tomato will harass smaller or passive fish. Put it in a tank where other fish can hold their own.
5. Clarkii Clownfish
Scientific Name: Amphiprion clarkii
Size: 3 to 5 inches (7.5 to 13 cm)
Origin: Indo-Pacific, Persian Gulf
Min Tank Size: 30 gallons (114 L)
Tank Bred: Available
ASD Tier: Intermediate
The clarkii is one of the most anemone-compatible clownfish species, hosting a wider range of anemone species than almost any other. It’s a larger, more assertive fish than the ocellaris but not as aggressively territorial as the maroon or tomato. Coloration varies significantly: most are orange-yellow with three white bars, but regional color forms range from nearly all black to very pale yellow. Hardy and adaptable to most marine setups. A good choice for hobbyists who want a clownfish with a more noticeable presence in a larger reef.
6. Pink Skunk Clownfish
Scientific Name: Amphiprion perideraion
Size: 3 to 4 inches (7.5 to 10 cm)
Origin: Eastern Indian Ocean, Western Pacific
Min Tank Size: 20 gallons (76 L)
Tank Bred: Available
ASD Tier: Beginner to Intermediate
The pink skunk has a distinctive pale pink-peach coloration with a single white stripe running along the dorsal ridge rather than full bars. It’s one of the more peaceful clownfish species and less commonly seen in stores than ocellaris or percula. It pairs well with Heteractis magnifica anemones in reef setups. In a community tank with other peaceful fish, the pink skunk is an excellent choice. Its color is more subtle than the standard orange-white clownfish pattern, which some reefers appreciate for its uniqueness.
7. Saddleback Clownfish
Scientific Name: Amphiprion polymnus
Size: 3 to 5 inches (7.5 to 13 cm)
Origin: Western Pacific
Min Tank Size: 30 gallons (114 L)
Tank Bred: Available in limited quantities
ASD Tier: Intermediate
The saddleback gets its name from the distinctive white marking that sits like a saddle across the back portion of its dark body. It’s less commonly available than other species but is hardy and adaptable when sourced from a quality supplier. The saddleback is more associated with bubble-tip anemones and Stichodactyla anemones in the wild. It’s moderately aggressive, between the peaceful ocellaris and the assertive tomato. A good mid-range choice for experienced hobbyists who want something less commonly seen in home reefs.
8. Ocellaris Color Morphs and Designer Clownfish
Parent Species: Amphiprion ocellaris
Size: Same as standard ocellaris, 3 to 4 inches (7.5 to 10 cm)
Tank Bred: Yes, exclusively
ASD Tier: Beginner (care requirements identical to standard ocellaris)
Designer clownfish are selectively bred color morphs of the ocellaris (and occasionally percula). They are not wild fish, not genetically modified, and not inferior in health to standard specimens. They’re the result of breeding programs run by professional aquaculture facilities that select for specific color and pattern traits over multiple generations. Common designer variants include:
Picasso: Irregular, asymmetric white patterning. Highly variable, no two are identical.
Wyoming White: Almost entirely white with minimal orange, sometimes with faint color near the face.
Black Ice: Dark body with white patterns. The black coloration replaces the orange.
DaVinci: Complex, painterly white patterning across a standard orange base.
Platinum: Nearly all white with minimal orange, often confused with Wyoming White but from different breeding lines.
Snowflake: White bars spread and connect in irregular snowflake patterns. Common entry-level designer.
Designer clownfish are always tank-raised, always ethically produced, and always a better choice than wild-caught from an environmental standpoint. Care requirements are identical to the standard ocellaris. They command a premium price, which reflects the breeding program costs and the uniqueness of individual pattern variation, not any difference in care demand.
9. Fire Clownfish
Scientific Name: Amphiprion melanopus
Size: 4 to 5 inches (10 to 13 cm)
Origin: Central and Western Pacific
Min Tank Size: 30 gallons (114 L)
Tank Bred: Available
ASD Tier: Intermediate
The fire clownfish is a rich, deep red-orange with a single white bar behind the head and dark coloration around the fins. Often confused with the tomato clownfish, the fire clownfish has a darker body and slightly different distribution range. It’s moderately aggressive, similar to the tomato. Best kept in a tank with fish of comparable assertiveness. It will host bubble-tip anemones readily in reef setups.
10. Cinnamon Clownfish
Scientific Name: Amphiprion melanopus
Size: 3 to 5 inches (7.5 to 13 cm)
Origin: Pacific Ocean
Min Tank Size: 30 gallons (114 L)
Tank Bred: Limited availability
ASD Tier: Intermediate
The cinnamon clownfish shares significant overlap with the fire clownfish in both appearance and taxonomy. It has a warm reddish-brown body with a single white head bar, black edges on the fins, and an aggressive territorial disposition. Not commonly available but worth seeking out for reefers who want something less frequently seen. Temperament is similar to the tomato and fire clownfish, requiring appropriate tank mates.
11. Sebae Clownfish
Scientific Name: Amphiprion sebae
Size: 4 to 6 inches (10 to 15 cm)
Origin: Indian Ocean
Min Tank Size: 30 gallons (114 L)
Tank Bred: Rarely
ASD Tier: Intermediate to Advanced
The sebae clownfish is a large, dark-bodied species with two white bars, a yellow tail, and orange highlights around the face. It’s less commonly available than other species and most specimens sold are wild-caught. Wild sebae clownfish have a mixed track record in captivity. They form natural partnerships with Stichodactyla mertensii anemones and can be aggressive in the aquarium. If available as a tank-raised specimen, worth considering for an experienced reefer with a large system. Wild-caught specimens require more careful acclimation and feeding patience.
12. Gold Stripe Maroon Clownfish
Scientific Name: Premnas biaculeatus
Size: 4 to 6 inches (10 to 15 cm)
Origin: Western Pacific
Min Tank Size: 55 gallons (208 L)
Tank Bred: Available
ASD Tier: Advanced
The gold stripe maroon is a color variant of the standard maroon clownfish where the white bars are replaced by bright yellow-gold stripes. It’s visually one of the most striking clownfish available. The aggression levels are identical to the standard maroon. This fish will dominate any tank it’s in. In a large system with appropriate tank mates, it’s a spectacular centerpiece fish. Don’t keep it in a community reef unless you’ve planned the stocking carefully around its territorial needs.
13. Skunk Clownfish
Scientific Name: Amphiprion akallopisos
Size: 3 to 4 inches (7.5 to 10 cm)
Origin: Eastern Indian Ocean, Western Pacific
Min Tank Size: 20 gallons (76 L)
Tank Bred: Available
ASD Tier: Beginner to Intermediate
The skunk clownfish is one of the most peaceful species in the family, more passive even than the ocellaris. It has a pale orange-peach body with a single dorsal stripe. It’s less commonly available in stores but is hardy and compatible with most peaceful reef tank mates. Well-suited to systems where a more low-key clownfish presence is preferred. It pairs readily with Heteractis magnifica anemones.
14. Orange-Fin Anemonefish
Scientific Name: Amphiprion chrysopterus
Size: 5 to 6 inches (13 to 15 cm)
Origin: Pacific Ocean
Min Tank Size: 30 gallons (114 L)
Tank Bred: Limited
ASD Tier: Intermediate
One of the larger species in the genus, the orange-fin anemonefish has a dark body with two white bars and distinctive orange-yellow fins. It’s closely related to the clarkii and shares its wide anemone compatibility. Less aggressive than the maroon or tomato, more assertive than the ocellaris. Available periodically from quality marine suppliers.
15. Barrier Reef Clownfish
Scientific Name: Amphiprion akindynos
Size: 3 to 5 inches (7.5 to 13 cm)
Origin: Western Pacific (Australia, Coral Sea)
Min Tank Size: 30 gallons (114 L)
Tank Bred: Rarely available
ASD Tier: Intermediate
The Barrier Reef clownfish looks similar to the clarkii but has a slightly different color pattern and distribution range concentrated around Australia’s reef systems. It’s one of the more rarely seen species in the trade. Hardy when obtained from a quality source, it’s a solid choice for experienced hobbyists who want a less common clownfish without the extreme care demands of some rarer species.
Clownfish Comparison Table
Species
Size
Min Tank
Aggression
Tank-Raised
Difficulty
Ocellaris
3-4 in (7.5-10 cm)
10 gal (38 L)
Low
Widely available
Beginner
True Percula
3-4 in (7.5-10 cm)
10 gal (38 L)
Low
Widely available
Beginner
Tomato
3-5 in (7.5-13 cm)
30 gal (114 L)
High
Available
Intermediate-Adv
Maroon
4-6 in (10-15 cm)
55 gal (208 L)
Very High
Available
Advanced
Clarkii
3-5 in (7.5-13 cm)
30 gal (114 L)
Moderate
Available
Intermediate
Pink Skunk
3-4 in (7.5-10 cm)
20 gal (76 L)
Low
Limited
Beginner-Int
Designer (Ocellaris morphs)
3-4 in (7.5-10 cm)
10 gal (38 L)
Low
Yes (exclusively)
Beginner
Saddleback
3-5 in (7.5-13 cm)
30 gal (114 L)
Moderate
Limited
Intermediate
Gold Stripe Maroon
4-6 in (10-15 cm)
55 gal (208 L)
Very High
Available
Advanced
Tank Requirements and Care
Most clownfish species are hardy and adapt to a range of water conditions. They work in fish-only (FO), fish-only with live rock (FOWLR), and full reef setups. The minimum tank size for a pair of ocellaris or percula is 10 gallons (38 L), though a 20-gallon (76 L) gives more swimming room and easier water stability. Larger, more aggressive species like the maroon and tomato need 30 gallons (114 L) minimum, with 55 gallons (208 L) preferred.
Water parameters should be kept at: temperature 74 to 78 degrees Fahrenheit (23 to 26 degrees Celsius), salinity 1.023 to 1.025 specific gravity, pH 8.1 to 8.4. Clownfish tolerate mild fluctuations better than most marine fish, which contributes to their reputation as beginner-friendly. That said, consistency is still the goal.
Clownfish establish territory and don’t venture far from the area they claim. A pair will stay near their hosting spot (anemone, coral, powerhead, or other structure) and defend it against fish that get too close. This makes them predictable and easy to observe. Feeding time is one of the most entertaining parts of keeping clownfish. They learn to recognize feeding schedules and will come to the front of the glass in anticipation.
FAQs
What is the difference between ocellaris and percula clownfish?
The percula has thicker black borders around its white bars and a slightly richer, darker orange body. It also has 10 dorsal fin spines versus 11 in the ocellaris. In a home reef, the practical difference is minimal. Both have similar care requirements and temperament. Price and availability often favor the ocellaris.
Do clownfish need an anemone?
No. Many tank-raised clownfish never host an anemone and live healthy, full lives without one. If you want to add an anemone, wait until your tank has been running for at least 6 months, parameters are completely stable, and you understand the anemone’s specific care requirements. Anemones are not beginner additions. The clownfish will be fine without one.
Are designer clownfish healthy?
Yes. Designer clownfish are tank-raised through selective breeding programs. They’re not genetically modified and not inferior in health to standard color variants. They can be slightly more expensive due to the breeding program costs and the uniqueness of individual patterns, but their care requirements, hardiness, and lifespan are identical to standard ocellaris.
How long do clownfish live?
In captivity, 3 to 5 years is typical but 10 or more years is possible with good care. They’re one of the more long-lived marine fish at their size, and tank-raised specimens tend to do better than wild-caught over the long term. Consistent water quality and appropriate diet are the biggest factors in longevity.
Can I keep two different clownfish species together?
Generally no. Different clownfish species will usually fight. Keep one species per tank. If you want two clownfish, buy a bonded pair of the same species or introduce two juveniles of the same species simultaneously so they can pair up naturally. Mixing species almost always ends in conflict.
Wild-caught vs. tank-raised: which should I buy?
Tank-raised, every time. Tank-raised clownfish are adapted to aquarium life, eating prepared foods from day one, healthier on arrival, less stressed by the captive environment, and not contributing to wild reef collection pressure. When tank-raised is available, there is no meaningful reason to choose wild-caught.
Closing Thoughts
Clownfish are one of the best entries into the saltwater hobby and for good reason. The ocellaris and percula are genuinely forgiving fish that will thrive in a well-maintained setup, stay in one spot so you always know where they are, and bring more personality to a 10-gallon (38 L) tank than most fish bring to tanks ten times that size.
Buy tank-raised when you can. Know the aggression level of the species you’re choosing. Don’t stress over the anemone. And if you want something unique, designer clownfish are worth every penny of the premium when you see an exceptional Picasso or Black Ice specimen in person.
For availability and quality sourcing, check Flip Aquatics and Dan’s Fish. Both carry a range of clownfish species and designer variants and will tell you whether a specimen is eating before it ships.
📘 Want to learn more? This article is part of our complete Saltwater Fish & Reef Guide. Your ultimate resource for marine fish, coral care, reef setup, and more.
The Dojo Loach is a coldwater species that does not belong in a heated tropical tank. Keep it above 75F long term and it will have a shortened, stressed life. This fish needs cool water, a sand substrate for burrowing, and a secure lid because it will find every gap. Ignore the temperature requirement and you are setting this fish up to fail.
The dojo loach is a coldwater fish with a tropical fish price tag, and that mismatch kills thousands every year.
What Most Care Guides Get Wrong About Dojo Loach The ‘Weather Fish’ That’s Bigger Than You Think
The most common mistake I see with dojo loach the ‘weather fish’ that’s bigger than you thinks is keeping too few. Guides will say “minimum 6” and leave it at that. In reality, these fish behave completely differently in a proper group of 8 to 10 or more. Keeping just 3 or 4 often leads to stress, hiding, and fin nipping that wouldn’t happen in a larger school. Another thing most guides miss is how much lighting and decor affect this species. Dojo Loach The ‘Weather Fish’ That’s Bigger Than You Thinks look washed out under bright white LEDs on a light substrate. Dim the lights, add some tannins, use a dark background, and you’ll see colors you didn’t know they had. I’ve also noticed that many care sheets recommend overly broad water parameters. Yes, dojo loach the ‘weather fish’ that’s bigger than you thinks are adaptable.
The Reality of Keeping Dojo Loach
The dojo loach grows to 10 to 12 inches and lives 10 to 15 years. It is a coldwater fish, not a tropical fish. The ideal temperature range is 65 to 75F, and keeping it above 78F long term stresses its immune system and shortens its lifespan. If your tank runs at 80F for your tropicals, the dojo loach does not belong in it.
They are escape artists. If there is any gap in your tank lid, a dojo loach will find it. They climb filter intakes, squeeze through feeding holes, and wedge themselves into airline tubing. A tight-fitting lid is not optional. It is the difference between finding your fish in the tank or on the floor.
The bioload is significant. A 12-inch dojo loach produces waste comparable to a small cichlid. Heavy filtration and frequent water changes are necessary, not suggestions. Understocking the tank relative to the loach’s eventual adult size is the only way to maintain water quality.
Biggest Mistake New Owners Make
Keeping them in tropical setups at 78 to 82F. The dojo loach is a temperate species that thrives in cooler water. Long-term exposure to tropical temperatures weakens their immune system and leads to chronic health problems. If you want a loach for your heated tank, pick a different species.
Expert Take
The dojo loach is one of the most personable fish in the hobby, but it belongs in a coolwater or subtropical setup, not a heated tropical tank. A 55-gallon minimum with a tight lid, sand substrate, and temperatures between 65 and 72F gives you a fish that will interact with you for over a decade. They eat from your hand, respond to your presence, and have more personality than most fish twice their price.
Species Overview
Scientific Name
Misgurnus anguillicaudatus
Common Names
Dojo Loach, Weather Loach, Japanese Weather Loach, Weatherfish, Pond Loach, Oriental Loach, Dojo Fish
Family
Cobitidae
Origin
Central & Eastern Asia from Siberia to Vietnam. Introduced widely
Diet
Carnivore
Care Level
Easy
Activity
Moderate
Lifespan
7-10 years
Temperament
Peaceful
Tank Level
Bottom
Minimum Tank Size
55 gallons
Temperature Range
59°. 77°F
Water Hardness
1. 12 dKH
pH Range
6 – 8
Filtration/Water Flow
Low
Water Type
Freshwater
Breeding
Egg-layer
Difficulty to Breed
Difficult to breed
Compatibility
Species-only tank or community tank
OK, for Planted Tanks?
Yes, but known to uproot plants
Classification
Order
Cypriniformes
Family
Cobitidae
Genus
Misgurnus
Species
M. Anguillicaudatus (Cantor, 1842)
Origins and Habitat
The Dojo Loach is a fish species with a pretty wide distribution. They are native to the countries of:
Russia
China
Japan
Korea
Vietnam
Today, the Dojo Loach has an even wider distribution because it has been introduced to many countries outside of its natural range. Sometimes these fish escape when kept in ponds, and sometimes people release them into local waterways.
As a result, you can find these fish swimming wild in parts of Europe, The USA, and Australia. Their natural habitat is ponds, swamps, and shallow streams with a soft, muddy substrate.
What Do They Look Like?
The Dojo Loach is a long, eel-like fish. They have a small, rounded tail and a similar-sized dorsal fin that is set quite far back.
Like other loaches, the Weatherfish has 1o little whiskers around its mouth. These structures are actually called barbels and they help the fish to find food.
Varieties
Their color varies a lot and they can be plain, striped, or marked in spots and blotches. In the aquarium hobby, interesting albino and golden color morphs are also available.
Golden Dojo Loach
Gold Dojo Loaches are a really cool color morph that has a plain, golden yellow body color, usually with dark eyes.
Albino Dojo Loach
Albino Dojo Loaches can be a little lighter in color than the gold dojos and have red eyes.
Size
Dojo Loaches are medium-sized fish that usually grow to about 6 inches long in the home aquarium. They can grow to double this size in the wild, however. If you can provide them with a nice big aquarium and great water quality, you might just be surprised at how big they grow!
How Long Do They Live?
The Dojo Loach is a pretty long-lived fish that will usually survive for 7-10 years in the aquarium. Of course, the better its living environment, the longer your pet is likely to live, so make sure you read the sections about the diet and tank set up for these awesome fish.
Dojo Loach Care Guide
One of the reasons that Dojo Loaches are so popular is that they are friendly fish with great personalities. In case you’ve been wondering about why the Dojo Loach is also known as a Weather loach, this next fact will amaze you.
These fascinating fish can predict changes in weather. They don’t use satellite imagery or any fancy technology for this, rather the barometric pressure changes that happen before a storm causes their activity levels to spike.
So if you see your Weatherfish spring into action and start getting restless, it is time to shut the windows and get ready for some rain. Apart from this, Dojo Loaches can be pretty inactive fish.
They love hanging out at the bottom of the tank and hiding in caves or under rocks and driftwood. They also enjoy digging through the substrate and you’ll often find just their little faces sticking up out of the sand.
What Are Good Tank Mates?
The first tank mate to get for your Weather Loach is definitely a few more Weather Loaches! These fish are most comfortable in groups and will be more bold and active with a few friends around. That doesn’t mean you can’t keep them in a community tank other species as well though.
Before we get onto a few specific ideas, here are a few general pointers for choosing Dojo Loach tank mates:
These fish require cooler water, so it’s important that you select tankmates that enjoy lower water temperatures
Choose similar fish that are not known for aggression or fin nipping
Avoid large predatory fish
Try to choose some mid and topwater tank mates to avoid overcrowding the bottom of the tank
Best Tank Mates for Them
Now that you know what to look out for, here are a couple of great species that I would recommend:
Unfortunately, warm-water tropical fish will not be good tankmates, unless they are comfortable in temperatures of below about 77°F. Here are a few examples of fish that are not recommended:
There are too many reports of Dojo Loaches attacking Goldfish to ignore. While keeping them together with Common Goldfish is probably perfectly safe, less agile fancy Goldfish should probably be avoided.
Invertebrates
These bottom dwellers feed on invertebrates like snails, crustaceans, and insect larvae. This means that they are not good tank mates for shrimp and snails.
In fact, Weather Loaches is handy for controlling pest snail populations in freshwater aquariums. Although larger shrimps like Amanos will probably hold their own against Weather Loaches, I wouldn’t recommend taking the risk.
What Do They Eat?
In nature, Dojo Loaches are carnivores. They hunt the bottom of swamps and streams for small invertebrates like worms and insect larvae, snails, and small crustaceans. They would also certainly take fish larvae and eggs.
Let’s take a look at how to provide them with a healthy diet:
Prepared Foods
As far as processed foods are concerned, bottom feeder tablets or sinking pellets are the best options for these fish. They will eat flake food but they don’t usually feed from the water surface.
It’s really fun to watch these fish feed. Once the tablet has reached the bottom of the tank (or sometimes even before), they will smell the food and begin searching the bottom of the tank. Once found, the feeding frenzy begins as they playfully wrestle each other, taking turns feeding on the shrinking pellet.
Another reason that this fish species can be so fun to keep is that, with a little patience, they will happily eat right out of your hand if they like the food you are providing.
Live & Frozen Foods
Feeding frozen and live foods is a great way to provide your Dojo Loaches with a natural food source. If you have other schooling fish in the tank like minnows or danios, your loaches will not get much before it’s all eaten though.
One way to limit this competition is to feed enough for all of your fish to get a good helping. Alternatively, you can add your live/frozen foods just after your other fish have had their fill of the pellets or tropical flakes they usually feed on.
Some great live/frozen foods that you can feed your Dojo Loaches include:
If feeding sinking foods like bottom feeder tablets, you can feed these fish every day or every second day. It really depends on the amount of food you are providing, as well as the number and size of your fish.
In order to prevent overfeeding, make sure you aren’t feeding more than your fish can eat in one go. Uneaten food in the tank will cause nasty ammonia spikes and reduced water quality.
TankSetup
If you want your Dojo Loach to live the longest, healthiest life possible, you’ll need to create an awesome tank where it can feel right at home. Here’s how:
Tank Size
When it comes to choosing the best tank size for aquarium fish, you must consider both the size of the fish and their habits. In the case of the adult Weather Loach, you’re going to need a tank of at least 55 gallons.
When you first get your dojos, they is just a few inches long, but then they still have plenty of growing to do! A mature Dojo Loach can reach nearly a foot long.
These fish don’t spend a whole lot of time swimming in the open water, so a tank with a large footprint is ideal so give them plenty of room to explore the bottom.
Don’t Forget the Lid/Hood
You will not think it by looking at them, but loach species are great jumpers. Sadly, these fish will jump out of aquariums without lids, and usually, this ends in tragedy. For this reason, dojos should only be housed in aquariums with tight-fitting lids. If you are considering a rimless aquarium, purchase a glass lid from the manufacturer or store you purchase from.
Plants
Growing live plants in your aquarium is pretty much always a great benefit for your fish. Sometimes, however, the fish aren’t so good for the plants, and this can be the case with the Dojo Loach.
These fish are natural-born diggers, and they just love to crawl through the roots of plants. Unfortunately, this often disturbs the plants and sometimes uproots them completely.
While dojo loaches aren’t a great choice for carefully designed aquascapes, you definitely can keep them in planted tanks. I would suggest growing epiphytes that grow attached to driftwood, floating plants, or leaving stem and rosette plants in their pots.
Pond Loaches are bottom dwellers that love to dig and explore the bottom of the tank. They have sensitive whiskers called barbels, and their bodies are not covered in protective scales. This means that they can easily hurt themselves in a sharp, coarse substrate.
In their natural habitat, these fish prefer mud and soft sand, but the best aquarium substrates for them is definitely fine sand or rounded gravel.
Apart from burying themselves in the substrate, Weather Loaches also love to hang out in caves and other hiding places. You can make up your own hiding places by stacking rocks or driftwood carefully, just make sure you arrange your hardscape securely to prevent any accidents during tank maintenance.
If you prefer ready-made options, you can always pick up some aquarium ornaments like artificial caves, castles, or sunken ships.
Water Quality
When it comes to aquarium husbandry, maintaining great water quality is the most important factor for success. Let’s take a look at how to keep your aquarium clean and healthy:
Filtration
A good quality filter is essential for keeping your tank clean and safe for your pets. When it comes to Dojo loaches, any type of filter is fine, although these fish do not enjoy very strong water flow.
One important tip is to go ahead and cover up your filter intake to be on the safe side because loaches love to hide, and often find their way inside filters.
Water Parameters
One of the most important things to remember is that Dojo Loaches aren’t tropical fish, so you probably will not need to run a heater to keep your water temperature in the right range. Be aware that if you live in a tropical area, the water temperatures in your tank might rise to warmer than 77°F even without a heater.
Apart from their temperature needs, Weather Loaches are very hardy fish that will do well in most setups. They are happy in slightly acidic to slightly alkaline water, with a range of hardness values.
Aquarium Maintenance
You will need to perform regular partial water changes to keep your aquarium water safe and healthy for your pets. Although Dojo Loaches are not very sensitive to water conditions, they definitely deserve the best conditions that you can provide for them.
Water changes are a pretty easy and straightforward job that you can do every week or two. If you’re not sure about how to change the water in your tank, go ahead and check out this article for all you need to know!
Test Tank Conditions
Even with a great quality filter and regular maintenance, the only way to know how good your water parameters are is to test. Your local fish store can test your water for you, but I would definitely recommend picking up a test kit.
Testing your water is easy, and this way, you’ll be able to pick up any problems before they turn into a headache! The most important parameters to test for are:
Ammonia
Nitrite
Nitrate
pH
Breeding
Few aquarists have managed to breed this fish species in the home aquarium. That being said, it does happen and many fry have been successfully raised this way. The greatest challenge is that this often seems to happen out of the blue, so it is unknown exactly what triggers breeding and how to create these conditions in the tank. I supplied the video above from FishyBusiness. I’ll explain in text below.
Sexing
The most visible difference between male and female loaches is the size and shape of their pectoral fins. These fins are located just behind the fish’s gills.
In the male, they are larger and more triangular in shape when looked at from above. The female’s pectoral fins will be rounder in profile and a little smaller.
Getting Your Fish Ready to Breed
It is not known exactly what makes Dojo Loaches get into the mood to breed in the aquarium. Many fish are stimulated to breed by a change in barometric pressure, water temperature, and current that mimics a change in the seasons.
When it comes to Weather Loaches, there are no guarantees though, so your best chance is probably just to provide your fish with a great home with perfect parameters and a high-quality diet that includes live/frozen foods like Tubifex worms or black worms.
Health and Disease
Dojo Loaches are usually very hardy, low-maintenance fish for cool water aquariums. They do pick up issues from time to time though, so let’s take a look at how to identify and avoid health problems.
Evaluating Their Health
Whether you’re picking out a new pet at the fish store, or just keeping an eye on the health of the fish in your tank, there are some important things to look out for.
A healthy Dojo Loach will spend a lot of its time hiding out in the substrate or under the hardscape of your aquarium. This is normal behavior, so don’t worry if they seem a little inactive. Around feeding time they should get a lot more lively, however.
Signs of poor health to look out for are:
Clamped fins that are held tight against the fishes sides
Floating caused by swim bladder issues
Worn barbels that could indicate infection or damage from a sharp substrate
White spots or patches on the skin that caused by parasites and fungal infections
Swollen external gills
Common Health Issues
Although Dojo Loaches are very hardy aquarium bottom feeders, these are the issues that they are most likely to have:
Skin infections
Ich
Swim bladder disease
Weather Loaches don’t have any scales which means their skin is very sensitive to damage. These fish love to dig, so avoid keeping them in a tank with a sharp substrate that could injure their skin and barrels, leaving them vulnerable to infections.
The best way to avoid illness is to make sure you keep your water quality high by running good filtration and performing regular water changes. Keeping Weather Loaches in water that is too warm will also stress your fish, which can lead to infections and other health issues.
Where to Buy
Dojo Loaches are common fish in the aquarium trade, and you can usually find them at your local fish store or online. I recommend checking out Flipaquatics because they keep great quality stock and back it up with a 100% live arrival guarantee to take the stress out of online shopping. They also stock the amazing golden form when available and quarantine all their fish!
Dojo Loaches hunt for small invertebrates like worms and crustaceans. In the aquarium, they can be fed sinking pellets and tablets as well as frozen foods like bloodworms.
Are they Hardy?
Dojo Loaches are one of the hardiest aquarium fish out there, and many people even keep them outdoors in ponds. This isn’t recommended though because these fish have escaped ponds and gotten into local waterways where they are invasive.
What size tank do they need?
Dojo Loaches grow to over 10 inches in length. A minimum tank size of about 55 gallons is recommended for keeping adults.
What fish can go with them?
The best fish to keep with Dojo Loaches are other peaceful fish like Danios and White Cloud Minnows that also prefer a cooler water temperature.
Recommended Video
Check out our loach tier list video where we rank all the popular loach species for home aquariums:
ASD Difficulty Rating: Tier 1/2 – Beginner to Intermediate , Dojo loaches are hardy but need cool water and a secure lid. They are not tropical fish and will suffer in warm tanks.
Hard Rule: Dojo loaches need cool water , 65–75°F (18–24°C). Standard tropical temperatures cause chronic stress, suppressed immunity, and early death.
Is the Dojo Loach The ‘Weather Fish’ That’s Bigger Than You Think Right for You?
Before you add a dojo loach the ‘weather fish’ that’s bigger than you think to your tank, it’s worth asking whether this species actually fits your setup and your goals. Here’s a quick breakdown to help you decide.
This species is a good fit if:
You can keep a proper school. A minimum of 6, but 8 to 10 or more is where you’ll see the best behavior.
You have a tank that’s at least 55 gallons. Schooling fish need swimming room.
You want a species that works well in a community setup with other peaceful fish.
You’re willing to maintain stable water conditions. Consistency matters more than perfection.
You enjoy watching natural schooling behavior, because a tight, coordinated school is one of the most satisfying things in the hobby.
You can provide a varied diet beyond just flake food.
If most of those points line up with your setup, the dojo loach the ‘weather fish’ that’s bigger than you think is worth serious consideration. If several don’t, it’s better to choose a species that matches your tank now rather than trying to make it work.
Avoid If:
You run a tropical tank at 78°F+ – dojo loaches cannot tolerate tropical temperatures long-term
Your tank has no secure lid – dojo loaches are escape artists that can squeeze through tiny gaps
You keep nano fish under 2 inches (5 cm) that dojo loaches may accidentally harm or stress
You want a fish that stays cleanly on the bottom – dojos actively swim throughout the water column
How the Dojo Loach The ‘Weather Fish’ That’s Bigger Than You Think Compares to Similar Species
Choosing between similar species can be tricky. Here’s how the dojo loach the ‘weather fish’ that’s bigger than you think stacks up against some common alternatives.
The dojo loach the ‘weather fish’ that’s bigger than you think occupies a specific niche in the aquarium hobby, and direct comparisons really depend on what you’re looking for. In my experience, the most common question people ask is whether they should choose the dojo loach the ‘weather fish’ that’s bigger than you think or something similar that’s more widely available. The answer usually comes down to three things: tank size, water parameters, and what other fish you’re keeping. If your setup matches what the dojo loach the ‘weather fish’ that’s bigger than you think needs, it’s hard to beat. If not, there are usually alternatives worth exploring.
What It Is Actually Like Living With Dojo Loach
Dojo loaches are the golden retrievers of fishkeeping. They follow your finger along the glass. They eat from your hand within weeks of purchase. They rest with their heads propped on decorations, watching the room with an awareness that most fish lack entirely.
The weather prediction reputation is real. Before storms or barometric pressure drops, dojo loaches become hyperactive, swimming frantically and gulping air at the surface. It is not reliable enough to replace a barometer, but it is consistent enough that experienced keepers notice the pattern.
They bury themselves. You will look in the tank and count one fewer loach than you own. Then you notice a nose poking out of the sand. This is normal and they need soft substrate deep enough to accommodate the behavior. Gravel does not work.
Closing Thoughts
Dojo Loaches deserve a spot in just about any unheated freshwater aquarium. These funny freshwater fish are easy to care for and very entertaining to watch as they explore the lower levels of the tank. You can use the information in this guide to help you provide your Weather Loach with the best care.
The Estimative Index is one of those fertilization methods that completely changed how I think about dosing planted tanks. Developed by Tom Barr, EI takes the guesswork out of fertilization by overdosing nutrients slightly each week and doing a large water change to reset. it’s elegant in its simplicity and brutally effective in practice. I’ve run EI in my own high-tech tanks and found it far more reliable than trying to dial in exact dosing for each individual nutrient. If you’re running CO2 and serious about plant growth, this method is worth understanding.
What Is The Estimative Index Method?
The Estimative Index (EI) was developed by Tom Barr in the mid-1990s1. The index (dosing rates) was developed through experimentation and the beauty of the system is that it is proportional to aquarium water volume, so you can apply the index to any planted aquarium size.
This technique provides an excellent general starting point, but it can also be customized to suit the characteristics of your setup. Essentially, this method of plant fertilizing involves overdosing all the nutrients your plants need on a consistent basis and then performing large weekly water changes to reset the parameters.
By doing this you will not need to test nutrient values because your values will stay in a relatively stable range, week after week.
Benefits of This Method
The system is designed to remove the need to rely on a test kit, which can be inaccurate anyway unless you have expensive calibrated equipment. In a nutshell, the goal of the system is to provide your plants with complete nutrition, at repeatable and consistent levels.
The EI system works on the assumption that algae growth is not triggered by high nutrient levels, but more often from an imbalance of CO2. This may sound like an odd statement until you consider that one of the best ways to out-compete algae growth is to have vigorous competition from healthy aquatic plants.
Supplying more nutrients prevents the development of plant deficiencies so naturally, it makes sense to boost your plant performance as much as possible.
Who Is it For?
The Estimative Index method is especially useful for high-light tanks that are heavily planted. This applies in particular to high-tech setups that have stable levels of CO2 from injection systems that match the lighting period of the tank.
Without the high energy conditions created by high lighting and added CO2, increased nutrient levels will not be as effective. Still, it is possible to use the principles of EI in low light tanks, but the strength and frequency of the dosing will need to be decreased
EI is not necessary for aquarists who just keep a few low-light plants in their fish tanks and are happy with the results they achieve. Instead, this is a system for growers with a high light tank that want to get the most out of their plants. That means achieving the fastest growth and the best color, all while seriously reducing algae growth.
Although this system does have some pretty substantial start-up costs, the raw materials will last a long time, saving you plenty of money in the long run when compared with dosing liquid fertilizers at similar concentrations.
EI And Fish Safety
The method appears to be perfectly safe for fish since nitrates are kept around the standard 20ppm mark and CO2 levels are maintained at or below the safe level of 30ppm. Performing large, regular water changes is very important, however, to reset the tank to reduce excess nutrient levels and manage the ammonia introduced by decaying plant parts and fish waste.
Dosing
The reason why the EI dosing levels are so scaleable is that they are proportional to water volume, rather than measured in a set value like milligrams or ounces. The dosages are described in parts per million(ppm) per week and are estimated to cover the maximum potential nutrient uptake rates for aquarium plants.
I understand this might be getting a little complicated at this point, so read on for a breakdown of exactly what these terms mean.
How Is PPM Calculated?
Ppm is a simple way of describing a concentration. For example, 1 milligram of a powder mixed with 1 liter of aquarium water creates a concentration of 1 part per million, pretty simple right?
What Is Nutrient Uptake?
Nutrient uptake is a very important concept to understand when discussing the EI Method. Nutrient uptake is simply the amount of nutrients a plant can take out(uptake) from the aquarium water column in a defined period.
Let’s take a look at an example to help explain this concept:
You have one healthy aquarium plant in your tank and you dose a certain nutrient to a concentration of 20 ppm. The next day, you measure the concentration of the same nutrient and find that the concentration has dropped to 15ppm.
You are now able to calculate the plant’s nutrient uptake rate and it can be described as 5 ppm per day. Since ppm is a ratio, this measured nutrient uptake rate will apply to your plant in your specific tank size.
What Affects Nutrient Uptake Rate?
Different plant species have different potential growth rates. Fast-growing stem plants have a much higher nutrient uptake rate than slow-growing epiphytes for example.
As light intensity increases, photosynthesis increases, placing more demand on the plant’s nutrient stores to produce sugars.
As with light, carbon dioxide availability is essential for the process of photosynthesis to occur. Both must be in balance, and therefore, high light will create an increased demand for CO2.
Plant mass and size- The larger a plant, the greater its nutrient uptake potential will be.
The Goal Of EI Nutrient Dosing
The goal of EI nutrient dosing is to guarantee that your plants are never deficient in any of the nutrients that they need. In other words, the plant’s maximum nutrient uptake levels are always available in the aquarium water.
The recommended dose concentrations are designed to match the maximum amount that plants can potentially use in a very high light planted aquarium. This doesn’t mean that they will necessarily use all of these nutrients in the water column, it just means that there is no benefit in adding any more.
Another great benefit of EI dosing is the prevention of algae blooms. If you dose consistently, your healthy plants will out-compete algae, now that’s a win-win!
Recommended Dosage Rates
The ideal nutrient levels that you will try to maintain in the water column when using the EI method are as follows:
Carbon Dioxide (CO2): 20-30ppm per week
Nitrate (NO3): 20 ppm per week
Potassium (K): 10-30 ppm per week
Phosphate (PO4): 1-2 ppm per week
Magnesium (Mg): 10 ppm per week
Iron (Fe): 0.5 ppm per week
These uptake rates were measured under the maximum level of light intensity that plants can use for photosynthesis. What this means is that whether you have moderate light, or high-intensity lighting, the dose rates above will always provide enough nutrients to your plants.
The fact that your planted aquarium probably has a lower intensity of light and your plant’s actual nutrient uptake rate is lower does not matter.
What You Need To Use This Method
A major difference between using regular liquid solutions and root tabs, and using the EI method is the consistency of the nutrients. In this case, you will be using each nutrient in its pure dry powdered form. It is up to you to mix them up or dose them individually at the right concentrations.
Purchasing the chemicals is pretty expensive, particularly because you will need a few of them to get started properly. If you do the math though, and you’re serious about maintaining a heavily planted aquarium, you’ll actually be saving a lot of money in the long run.
Macro-nutrients For Plant Growth
Macronutrients are the substances needed by plants in relatively high concentrations. Here’s what they are called and what they do for your plants:
Potassium Nitrate
This compound is a source of Potassium and nitrogen for your plants. Nitrogen is vital for chlorophyll production and photosynthesis. It promotes the health and growth of the above-ground parts of the plant.
Potassium is essential for the transport of substances within the plant as well as for the process of photosynthesis. It maintains a plant’s resilience and strengthens it at a cellular level.
Potassium Phosphate
Phosphorus is vital for healthy root development in plants and helps plants to store energy. It is also necessary for successful photosynthesis and to promote vigor and resilience in plants.
Magnesium Sulfate
Magnesium and sulfur are secondary macronutrients which means that they are needed in lower quantities than nitrogen, phosphorus, and potassium(NPK). They are still essential in the planted aquarium for healthy growth though.
Magnesium is the most important component of chlorophyll, and without it, photosynthesis would not be possible. Sulfur is also necessary for chlorophyll formation and allows plants to make use of nitrogen.
Magnesium sulfate is an optional macro for the EI method, but is useful if you have very soft water as it can be effective in boosting GH. It is also a good idea to dose magnesium sulfate if you use reverse osmosis(RO) water.
Micro-nutrients For Plant Growth
Micronutrients are trace elements that are also essential for healthy plants but needed in much smaller amounts than macronutrients. The most important trace elements are:
Iron
Zinc
Manganese
Molybdenum
Copper
You can use Plantex CSM+B as your source of trace elements or use a liquid product like Seachem Flourish.
Apart from a collection of dry fertilizer powders, you need very little equipment to use the EI method. The dry fertilizers themselves will need to be measured pretty accurately. A set of small measuring spoons and a scale will come in handy for this, although you can get by using just a teaspoon.
You can dose the dry fertilizers directly into the water column, or if you prefer, you can also mix them into a liquid solution. If you prefer to make liquid solutions, some small bottles and a funnel will come in handy. For large aquarium, it could make sense to investing in a dosing system.
Aquarium Lighting
The dosage values that are recommended for the EI method were developed for plants grown under very high light. While you will get the best results in high light tanks, you don’t need to have extremely high light.
Low light tanks, however, will not benefit from this system if you are adding way more nutrients than the plants can use due to limited photosynthesis potential.
CO2 Injection
To achieve optimum plant growth by using the EI method, you will need to run a carbon dioxide injection system in your tank. You should aim for a CO2 concentration of no more than 30ppm to ensure the safety of your livestock.
The most reliable way to achieve stable levels is to use pressurized CO2 with a drop checker and a bubble counter. A diffuser will be necessary to make this vital gas easily available to your plants.
CO2 is only used by your plants during photosynthesis, and this means that your system should only run while your lights are on. It does take a little while for the gas to build up to optimum levels though, so the best thing to do is run your pressurized injection system on a separate timer that starts up about 2 hours before the lights go on, and then shuts off when the lights go out.
Filtration For The Planted Aquarium
In a planted aquarium with high light and excess nutrients in the water column, excellent filtration becomes very important. This is because the filter is not only necessary for processing uneaten fish food and fish waste as in a traditional fish tank.
In such a high-energy planted aquarium, the plant material can also be a source of ammonia. Wet/dry filters and canister filters tend to be the best options for this type of setup. OASE Biomasters are great filters to consider.
For the EI system to be effective, you will need a carbonate hardness of at least 3-5 °KH and a general hardness of about the same. This usually is not a problem if using tap water, but if you use reverse osmosis(RO) water in your tanks, or your area has naturally soft water, you will need to remineralize the water.
How To Dose With This Method
One of the major differences between the EI method and other feeding routines is the high frequency of application. This is a hands-on approach that requires you to dose daily and dose consistently.
If you cannot commit to dose daily, 2-3 times a week is also acceptable though. The idea is that your plants do much better with a constant supply of nutrients, rather than the occasional boost.
A typical EI routine consists of dosing macro-nutrients, and micro-nutrients (trace elements) on alternate days for 6 days, then performing a water change on the 7th day.
As an example, an EI schedule could look like this:
Monday: Dose macronutrients
Tuesday: Dose micronutrients (trace elements)
Wednesday: Dose macros
Thursday: Dose micros
Friday: Dose macros
Saturday: Dose Micros
Sunday: Perform 50% water change and dose a GH booster if using reverse osmosis (RO) water
It is important to dose your macros and micros on separate days because when added together, the chemicals can interact in ways that make them unusable for your plants.
Water Changes
The usual advice is to perform a 50% weekly water change but you can also increase this up to 75% if you prefer. In a healthy and very large tank, you can even decrease your water changes to twice or even once a month. Ideally though, you want to follow a routine that is repeatable and reliably shows results.
How To Perform A Water Change
For aquarists, water changes are just a fact of life. A 50% weekly water change might sound a little extreme, but they are necessary to ‘reset’ your nutrient concentrations. Under the high energy growth conditions associated with high lighting and CO2 injection, high levels of ammonia (and therefore nitrates) are produced.
When performing your weekly water change, be sure to turn off your equipment like filters and heaters. You can use this opportunity to vacuum the substrate and carpet plants to remove any physical waste in the tank. This is also a great time to trim your plants and siphon out all the trimmings so that they do not rot in your tank.
When the time comes to refill, try to make sure that the water you add to the tank is as close as possible to the temperature of the water still in the tank. This will minimize any temperature shock on your livestock. You should also condition your tap water to neutralize any harmful chemicals it might contain.
EI vs PPS
Now that you know what the EI system is and what it is used for, you may be wondering if there are other systems that can be used. You might have heard of another popular fertilizing technique called the Perpetual Preservation System, but the two are really very different.
While the EI method intentionally overdoses by providing the maximum possible amount of nutrients that a plant can use, the PPS system attempts to dial in the numbers and limit any excess nutrients in the water column.
Essentially, EI is designed to maximize plant growth and accepts that major water changes will be necessary to reset the water parameters and maintain a consistent nutrient level.
PPS is not an attempt to create maximum plant growth, but rather to establish a system that is self-sustaining and does not require water changes.
EI Aquarium Calculator
While it is possible to calculate your dosages yourself, it is much easier to use this dedicated online EI calculator. Go ahead and play around with this calculator to help you understand the sort of amounts of each nutrient you will need to add on a daily and weekly basis for your aquarium size.
FAQs
What is EI?
Estimated Index is a fertilization system developed by Tom Barr in the 1990s that is designed to promote maximum plant growth in aquarium plants. The idea is to provide the maximum nutrient levels that the plants can potentially use, and maintain these levels continuously.
How do I use dry fertilizer in my aquarium?
Once you have measured the amount of dry fertilizer that you need to dose for the day, you can simply dissolve it in some tank water and then add it to your planted aquarium. You can even add the powder directly to the water.
What is a perpetual preservation system?
The perpetual preservation system(PPS) is a fertilizing system for the planted aquarium that attempts to minimize excess nutrients in the water column and make it possible to maintain a healthy tank that does not need water changes.
What are macronutrients in aquarium plants?
Macronutrients are the nutrients like nitrogen, phosphorus, and potassium that plants need in the largest amounts.
Final Thoughts
If you’re looking for the ultimate manual control over the plant growth in your aquarium, while preventing the dreaded algae bloom, the EI system is just what you’re looking for. This is a very hands-on method that is not suited to the casual aquarist or someone looking for a low-maintenance aquarium.
If you have the time and the passion and want to grow your fully planted tank to its full potential, this is definitely a great solution for you!
🌿 Want to learn more? This article is part of our complete Planted Tank & Aquascaping Guide. your ultimate resource for aquarium plants, aquascaping styles, substrates, and more.
Aquarium snails get a bad reputation that’s often undeserved. some are genuinely excellent additions to a tank as part of a cleanup crew, while others are hitchhiker pests that reproduce fast enough to take over if you’re not careful. After 25 years in the hobby I’ve kept most of the popular species and dealt with the problem ones too, so I can give you a clear picture of which snails are worth adding intentionally and which you should avoid or remove. This guide covers 7 species worth keeping and 4 to steer clear of.
Good Vs. Bad?
What makes a good and a bad aquarium snail? Well, there are good and bad sides to most of the snails in the aquarium hobby. Many aquarists think of snails as fascinating pets that can be both beautiful and useful in the aquarium. Others don’t like them at all, especially when they find their way into the tank by accident and seem to take over!
Let’s take a look at some of the pros and cons of keeping these tank cleaners in your aquarium.
Pros
1. Snails do an excellent job of cleaning up leftover fish food and waste in the tank. They are the captains of the clean-up crew!
2. Snails eat algae- freshwater snails can help to keep your tank’s glass, plants, ornaments, and substrate looking clean and beautiful.
3. Some snails burrow into the substrate. Digging through the substrate releases trapped gas and also takes nutrients down to where plants need them. Snails can also clean the surface layer of the substrate to keep your tank looking great.
Cons
1. When snails breed out of control, they can actually add to the bioload of your aquarium, causing your tank to become overstocked and go out of balance.
2. It’s pretty rare, but some freshwater snails will feed on living plants.
3. A huge overpopulation of snails can look bad, and they can stick to the glass and leave snail eggs all over the tank too.
As long as you manage the cons, just about any aquarium snail can be a ‘good’ snail. That being said, certain species of snails do make much better choices than others.
The 7 BestFreshwaterAquarium SnailSpecies
There is quite a variety of snails available in the hobby at the moment, so choosing the right species for your tank can be a bit of a challenge.
In this article, I’m introducing the most popular types of freshwater aquarium snails and providing you with the most important information about them like:
Although there are several species of snails available in the aquarium trade, these are the best species for planted tanks in particular. I consider these 7 types of snails to be the best options for most aquariums though, and they are great as species for community tanks as well. Below is a video from our YouTube channel. We go into further detail below. If you like our content, subscribe to us! You can use this information to help you decide which type of snail is best for your aquarium.
Let’s jump right in and meet these slow-moving aquatic friends!
Horned nerite snails are fascinating aquarium snails that come in a variety of colors and patterns. They are easily identified by the projections (horns) on the shell.
The color of their shells is pretty variable but often they have a cool black and yellow striped look. These snails eat algae and are great scavengers for freshwater aquariums.
Like other popular aquarium snails from the Neritidae family, these animals live in freshwater but need brackish water to breed. These peaceful snails are perfect for aquascapes because they do not eat live plants.
Origin: South Africa, Mozambique, Tanzania, Kenya, Somalia
Temperature: 65-85°F
pH: 6.5-8.5
Tank size: 5+ gallons
Zebra nerite snails are one of the best aquatic snails for your planted aquarium. These animals look amazing and get their name from their beautiful striped shells.
It’s not only their looks that make them so great though, but they are also amazing algae eaters!
Nerite snails cannot breed in freshwater and rely on brackish water to reproduce. For this reason, you’ll never have to worry about this species overpopulating your freshwater aquarium.
Like the zebra nerite, tiger nerites won’t bother live plants or breed in your tank. These snails have a really cool golden orange shell with rows of interesting black markings.
They do occasionally lay eggs, but these aren’t going to hatch in a freshwater tank. Nerite snails are excellent algae eaters and they do a fantastic job of keeping the tank clean.
4. Malaysian Trumpet
Scientific Name: Melanoides tuberculata
Size: 1 inch
Origin: Southeast Asia
Temperature: 72-86°F
pH: 6.5-7.5
Tank size: 3+ gallons
Malaysian Trumpet Snails are a species that many fishkeepers think of as pest snails. If you look at some of their benefits, however, it’s clear that there’s more to these crawling creatures!
They are burrowing snails that are great for managing the substrate at the bottom of your tank. All that burrowing prevents the build-up of toxic gases and helps to work nutrients into the soil which actually benefits the plants.
These animals aren’t for everyone though. Malaysian trumpet snails breed fast, are ultra-tough, and can be very difficult to remove, so think carefully before introducing them to your tank.
5. Mystery
Scientific Name: Pomacea bridgesii
Size: 2 inches
Origin: Brazil, Bolivia, Paraguay, Peru
Temperature: 68-82°F
pH: 7.6-8.4
Tank size: 5+ gallons
Mystery Snails are awesome cleaners that will eat any leftover food in the aquarium. They are large snails but are super peaceful and work great in shrimp tanks. Mystery snails are also known as Gold Inca snails.
Mystery snails can be bred in the aquarium, but unlike other types of snails, their eggs must be laid outside of the water. This requirement, together with the fact that you need a male and female to breed, means they are easy to control and won’t multiply unless you make it possible.
Rabbit snailslook kind of like a jumbo Malaysian trumpet snail. The head of this species resembles a rabbit’s head, and that’s where they get their name.
There are several species of rabbit snails available. These big snails come in a few cool color morphs and won’t multiply like trumpet snails. Although it isn’t usually a problem, rabbit snails have been reported to feed on some aquarium plants like Java Ferns.
These snails are great for cleaning up the tank and also keep the substrate healthy by burrowing. Because they grow pretty big, these snails are best for larger fish tanks of 30 gallons or more.
7. Ivory
Scientific Name: Pomacea bridgesii
Size: 2 inches
Origin: Brazil, Bolivia, Paraguay, Peru
Temperature: 68-82°F
pH: 7.6-8.4
Tank size: 5+ gallons
If you like Mystery Snails, but want something a little more exotic for your planted tank, the Ivory Snail might be the perfect option for you. These awesome-looking snails are the same species as the regular Mystery Snail but have been bred to have pure cream-white shells and pale white bodies with pink and orange markings.
Ivory Snails also have all the same great benefits for your tank as the regular Mystery Snail. These active snails will search your tank for algae and uneaten fish food and are completely peaceful with their tankmates.
The 4 To Avoid
The species in this list tend to be those unwanted snails that aquarists try to get rid of. They do have their positive sides, so I’m not calling them straight-up villains here.
Instead, you are recommended to be very cautious about adding them to your tank and rather try out some of the other snails listed above. You see our video below if you want to see these snails in action. Please subscribe to our YouTube channel if you like content like this.
1. Bladder
Scientific Name: Physa acuta
Size: 1/2 inch
Origin: Uncertain
Temperature: 64-84°F
pH: 7-8
Tank size: 3+ gallons
Bladder snails (video source) are a freshwater snail species that many aquarists have in their tanks. However, these snails aren’t usually added to fish tanks by choice!
These distinctive-looking snails have the ability to breed fast, and since they are hermaphroditic, you only need one to start a colony. Bladder Snails don’t dig and they breathe air from the surface, although they spend most of their time cruising around on surfaces in your tank.
They feed on algae, waste, and uneaten food but do not damage plants. They will feed on damaged or dead plant matter, however.
2. Ramshorn
Scientific Name: Planorbarius duryi
Size: 1 inch
Origin: USA
Temperature: 60-80°F
pH: 7.0-7.5
Tank size: 5+ gallons
Ramshorn snails often find their way into aquariums accidentally on new plants. They are one of the most common pest snails in the aquarium trade.
Ramshorn snails are very peaceful but breed freely, which can be pretty annoying if you never planned on having them in the first place. Ramshorn snails are hard workers in freshwater aquariums, however, and have awesome multicolored spiraled shells.
They are not fussy about food and are happy to scavenge and feed on uneaten fish food. They will also eat algae but do not feed on live plants. They are known for eating black beard algae.
3. Assassin
Scientific Name: Clea helena
Size: 1-2 inches
Origin: Thailand, Indonesia, Malaysia
Temperature: 75-80°F
pH: 7-8
Tank size: 29+ gallons
Assassin Snails are the cannibals of the snail world. These carnivorous mollusks feed on other snails, so most aquarists keep them to help control the population of pest snails in their tanks.
For that purpose, they are great, but if you like your snails, avoid introducing assassins to your tank! Although it is rare, they will sometimes feed on freshwater shrimps in the aquarium as well.
Usually, however, they will only feed on dead or dying shrimps, and even dead fish. If you don’t have other snails, you can still keep this species if you provide them with a high protein sinking food like bloodworms.
4. Apple
Scientific Name: Pomecea canaliculata
Size: 2-3 inches
Origin: Brazil, Paraguay, Uruguay, Bolivia, and Argentina
Temperature: 65-82°F
pH: 7-8
Tank size: 10+ gallons
Apple snails (image source) have crawled onto this list of snails to avoid for two reasons, they have a habit of eating live plants and they are invasive.
To be fair, apple snails can make an interesting pet in tanks without any live plants, but they should be kept far away from your aquascapes.
Apple snails have escaped captivity and become invasive in many parts of Asia and the Southeast of the USA. They will probably invade other parts of the world if they are allowed to, so please remember to be responsible and never release them (or any other aquarium plant or animal) into the wild.
How To Care
Most types of snails are really easy to care for and will thrive in your fish tank without any extra effort from you. They will do best in a healthy and stable environment though, so here’s some basic information on how to provide them with a great home.
How To Set Up Your Tank
Aquarium and pond snails can be kept in just about any tank size, although the larger species obviously need more space. Assassin snails, for example, will do best in larger tanks with more stable conditions.
Good filtration is very important for keeping healthy aquariums. Although many snail species can survive in lower water quality conditions, running a good quality filter will keep the water looking and smelling pristine. Filtration is also super important if you plan on keeping other animals like shrimp and fish.
To keep the water temperature stable in your aquarium, you will need to install an aquariumheater. Make sure you set your heater to a temperature that your species of snail is comfortable in. A thermometer is also very useful because it allows you to monitor the water temperature in your tank.
Some types of snails, like nerites, for example, will often crawl out of the water and can easily escape your fish tank. Make sure you have a secure lid/hood over your tank to prevent them from escaping and getting lost or hurt.
What To Feed Them
Most aquarium snails will live happily in your aquarium without needing to be fed specifically. Here’s what they eat:
Uneaten fish food
Dead plant matter
Soft algae
Fish waste
This makes keeping your snails happy and well-fed really easy. If you don’t have enough of those food sources available to your snails, you can also feed them some bottom feeder tablets, or even some blanched green vegetables.
Providing an extra food source is definitely recommended if you keep a lot of algae-eating snails like nerites and they run out of food. If this happens, it is even possible to grow algae for them to eat.
Where To Get Them
Many fishkeeping stores have a few of the more common snails available for sale. For a great variety of cool aquarium snail species from an online fish store, I would suggest checking out Flipaquatics. The team at Flipaquatics takes great care of their stock to ensure your new pets arrive in perfect shape.
How To Avoid Introducing Nuisance Varieties To Your Aquarium
Snails often find their way into aquariums, whether we introduce them intentionally or not! It is easy to prevent this from happening though, so let’s start by looking at how they sneak in.
How Can They Get Into Your Tank?
The first thing to note is that snails can get into your aquarium as adults, or as eggs. Any time you add something to your aquarium that has been in another aquarium, you run the risk of adding snails.
This includes the tanks at your local fish store or even your friends’ tanks. Adding things to your tank from wild sources like ditches, lakes, or rivers is also a risk.
Snails and their eggs are usually attached to new plants, ornaments, gravel, or basically anything from another tank. Snails are really tough as well, so even if an object has been outside of a tank for some time, the snails can still survive.
Another way that snails can arrive is when you introduce new fish to your tank. Sometimes a little gravel gets scooped up and bagged along with your new fish, and sometimes a snail or two can be part of the deal.
Tips To Keep Them Out
Adding new plants is one of the most common ways that pest snails are introduced to fish tanks. Before adding a new plant to your aquarium, check it thoroughly and rinse it off, removing any snails or eggs you might see.
Next, prepare a bleach dip consisting of 1 part bleach to about 20 parts water. Dip soft plants in the solution for no more than a minute and firm plants for up to two minutes. Afterward, rinse the plants off carefully with conditioned water before planting them out.
A much easier way to safely add new plants is to buy tissue culture specimens. These are plants that are carefully grown under special lab conditions to ensure that they are pest-free. They are not always easy to find, so check out online retailers like Buceplant for a great range.
Buce Plant offers a wide variety of aquatic plants for sale. With one of the largest selections in the US, you will find what you need here. They are also a great source for freshwater shrimp!
Before starting an all-out war with the snails in your tank, remember the great benefits they provide. Often, it’s best to keep them around but keep the numbers down to a reasonable level.
Managing the snail population in your tank can be surprisingly easy if you understand this one simple truth about snails: the more food they have, the more they will breed! So how do you reduce the amount of food available to the snails?
Reducing Their Food Supply
Well, start by making sure you are not overfeeding your fish. If there’s limited food for the snails, their numbers will stay stable.
It is very important to maintain good water quality in your tank by performing regular water changes and tank maintenance. This is the best way to keep the nutrient levels low in the water.
Another great way to reduce the nutrients in your aquarium is to grow fast-growing aquarium plants that will soak up excess nutrients and turn them into healthy new leaves!
Physical Removal
Here’s a great tip for actively managing the snail numbers in your tank: you can bait them with algae wafers or even a piece of lettuce or some other leafy green.
Set the bait into a small dish on the bottom of the tank, and weigh it down so that the snails can access it. Leave the dish in the tank overnight, and remove it the next morning when it is crawling with snails!
Introduce Assasin Species
Introducing another species of freshwater aquarium snail to your tank might seem like a terrible way to reduce your pest snail population. Assassin snails are one kind of animal that can really help though because they eat other snails.
Fish That Will Eat Them
Whether you want to keep your pet snails safe from hungry fish, or are looking for a way to remove unwanted pests from your aquarium, knowing which species of fish eat snails is very useful! The following fish species are notorious snail-eaters that can help remove pest snails from your tank.
For the snail-lovers out there, it can be devastating to see your pets eaten by their tank mates. Fortunately, most peaceful community fish will get along fine with snails, as long as they prefer the same water parameters.
Smaller nano fish are usually a safer bet than larger fish, and shrimp are also great tank mates. Fish have a mind of their own of course, and there are no 100% guarantees, but as long as you avoid the fish listed above, your snails should be safe.
FAQS
Are they good for your fish tank?
Snails provide a bunch of great benefits for your tank. Apart from the few species that feed on plants, snails are usually a hardworking member of your clean-up crew.
How big do they get?
The maximum size of aquarium snails varies hugely, depending on their species. Bladder snails, for example, only measure about 1/2 an inch across, while mystery snails can reach golf ball size!
Can you have a tank of just them without any fish?
Sure, if you’re interested in keeping snails only, there’s nothing wrong with that. You can add a few live plants and a basic filter and you will have a very interesting invert tank.
How do I know what kind I have?
Most of the common aquarium snails are pretty easy to identify once they have reached full size. The color, markings, and shape of the shell, as well as the color and form of the body, are the best way to identify these creatures.
How long do they live?
The lifespan of aquarium snails varies, depending on their species and how healthy their water parameters are. You can expect most types of aquarium snails to live at least 1 to 3 years.
Final Thoughts
Love them or hate them, aquarium snails are something that most aquarists and fishkeepers will come across sooner or later. Some might be pests, but many of them are very cool additions to community tanks and planted aquariums.
Whether you’re looking to add new snails to your tank or get rid of them, I hope this guide helps you out! Please comment below if you have any questions.
📘 Want to learn more? This article is part of our complete Freshwater Fish Guide. your ultimate resource for freshwater species, care tips, tank setup, and more.
🐟 Want to learn more? This article is part of our complete Aquarium Care Guide. your ultimate resource for water chemistry, maintenance, feeding, disease prevention, and everything you need for a healthy tank.
🐠
Before you go — free aquarium tips!
Get Mark's weekly fish & reef guides. No fluff, no spam — just real hobby experience from 25+ years in the tank.


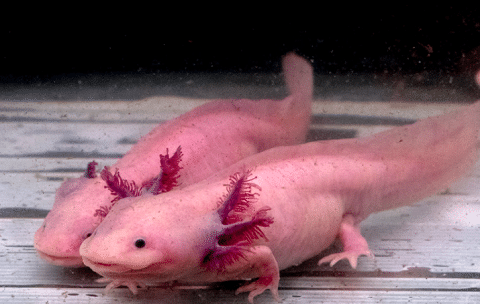

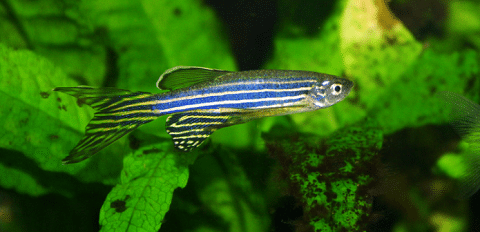
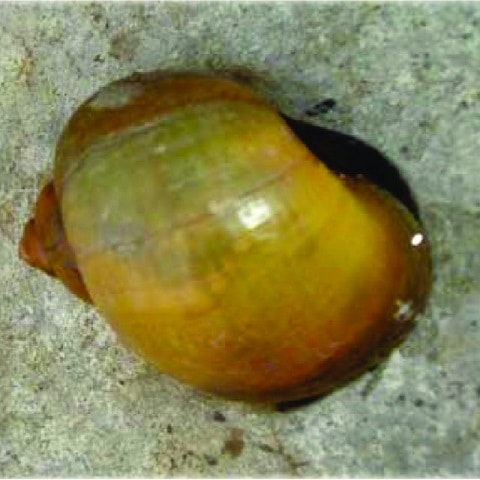
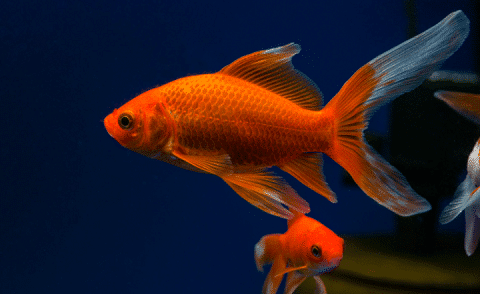
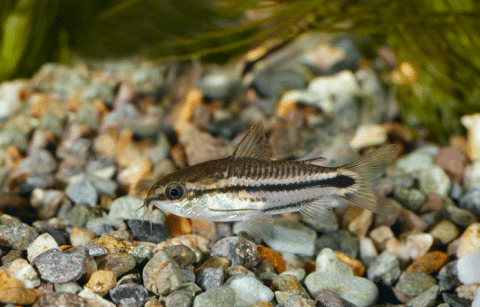
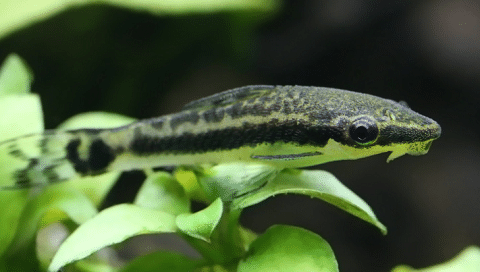

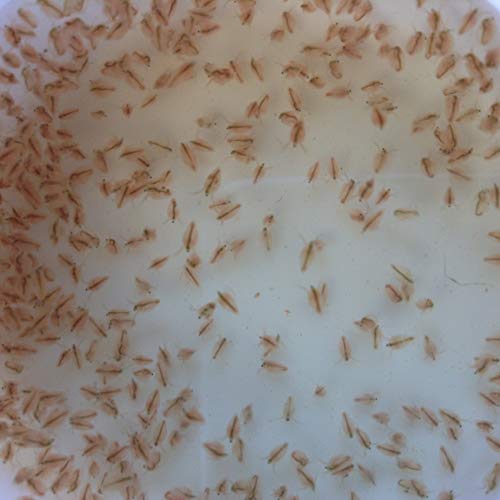


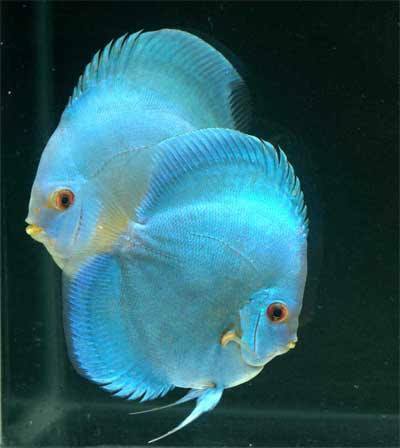

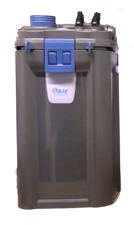

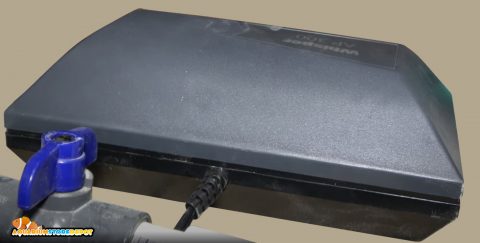
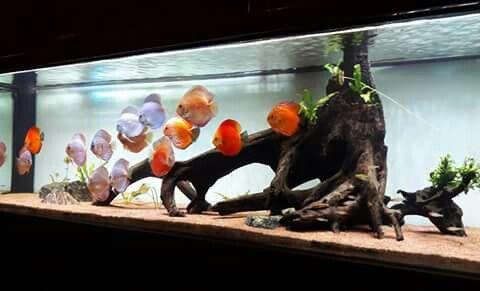
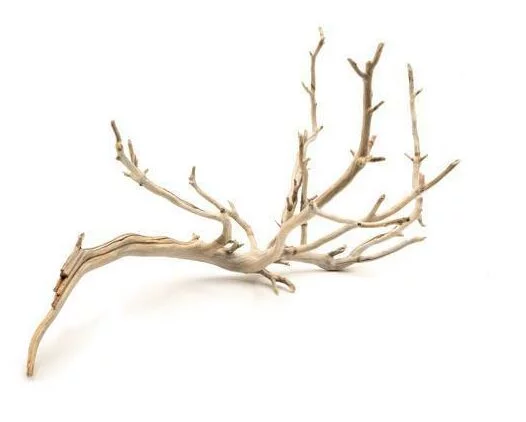


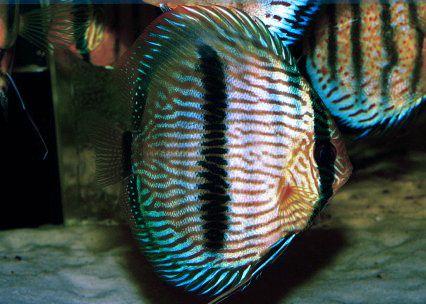


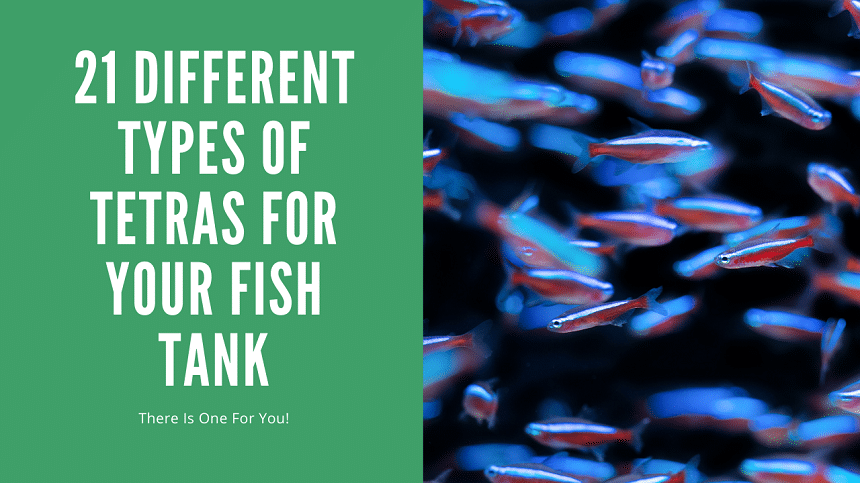
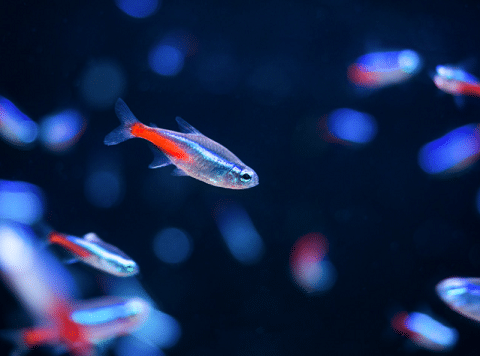
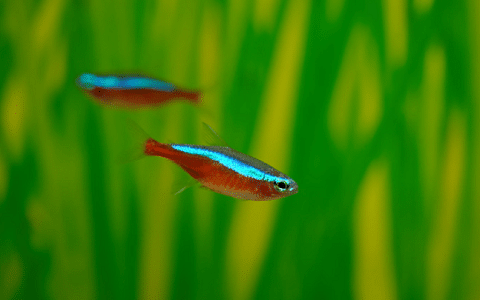


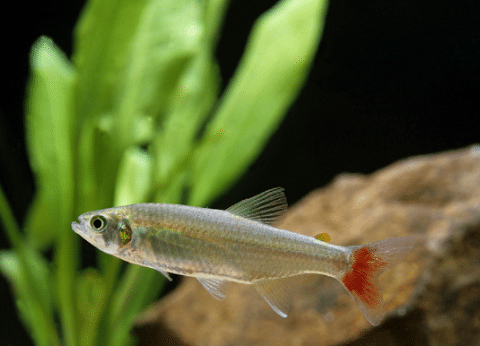
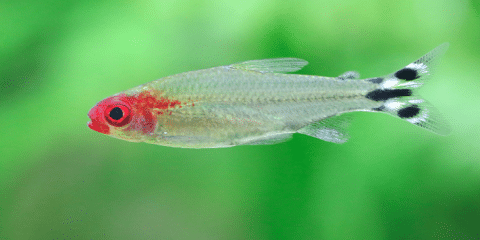
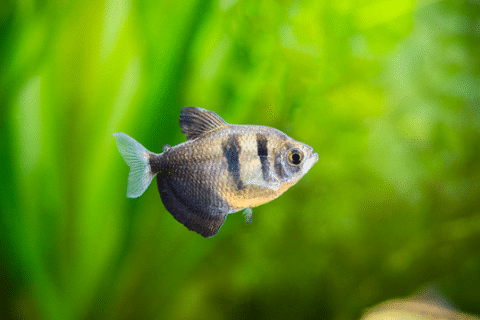
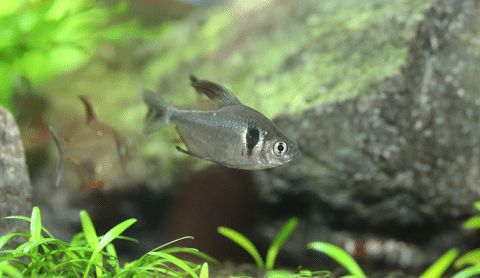 Black Phantom Tetra” class=”wp-image-549585″/>
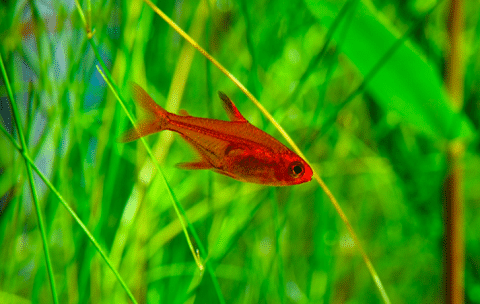


 Buenos Aires Tetra” class=”wp-image-549600″/>